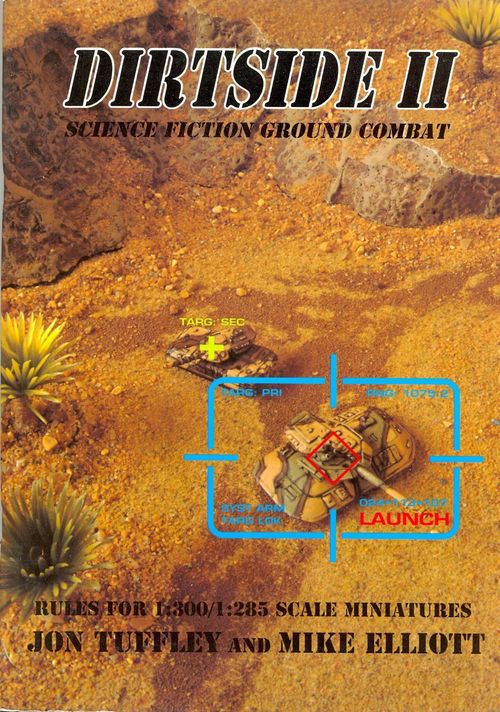
Dirtside II
Dirtside II Rulebook
Table of Contents
Table of Contents
- CHAPTER 1: INTRODUCTION
- CHAPTER 2: FORCES AND TECHNOLOGY
- CHAPTER 3: VEHICLE DESIGN
- VEHICLE SIZE CLASSES
- WEAPON SIZE CLASSES
- DIRECT FIRE WEAPONS SYSTEMS
- VEHICLE POWER-PLANT SYSTEMS
- VEHICLE ARMOUR
- VEHICLE SIGNATURES AND STEALTH LEVELS
- SYSTEM QUALITIES AND LEVELS
- ARCS OF FIRE
- WEAPONS FIT LIMITATIONS
- INFANTRY AND CARGO TRANSPORT
- ARTILLERY VEHICLE DESIGN
- INFANTRY FORCES
- RIVERINE CRAFT
- RIVERINE CRAFT DESIGN
- AIRBORNE VEHICLES
- AIR VEHICLE DESIGN
- AEROSPACE WEAPONS
- COMBAT WALKERS
- COMBAT WALKER DESIGN
- WALKER ARCS OF FIRE
- "OVERSIZED" VEHICLES
- "MODULAR" OVERSIZE VEHICLES
- FIRING AT MODULAR VEHICLES
- CLASSIFYING VEHICLE MODELS
- CAPACITY REQUIREMENTS FOR VEHICLE WEAPONS AND SYSTEMS
- CHAPTER 4: SEQUENCE OF PLAY
- SEQUENCE OF PLAY – PRELIMINARIES
- ENCOUNTER BATTLES
- ATTACK/DEFENCE BATTLES
- DEPLOYMENT PHASE
- SEQUENCE OF PLAY – THE GAME TURN
- UNIT ACTIVATIONS: COMBAT SEQUENCE
- "CYBERTANKS" – ACTIVATION
- THE "TURN END PHASE"
- TARGET PRIORITY
- AREA DEFENCE SYSTEMS
- AREA DEFENCE SYSTEMS AGAINST GROUND TARGETS
- OPPORTUNITY FIRE
- HIDDEN UNITS
- COVER AND CONCEALMENT
- "DUG-IN" UNITS
- EFFECTS OF WOODS
- CHAPTER 5: CONFIDENCE AND REACTION
- UNIT QUALITY AND LEADERSHIP RATING
- CONFIDENCE LEVELS
- EFFECTS OF CONFIDENCE LEVELS
- CONFIDENCE TESTS
- REACTION TESTS
- TAKING CONFIDENCE TESTS
- CONFIDENCE AND REACTION TESTS: CIRCUMSTANCES AND THREAT LEVELS
- PANIC
- UNIT LEADERS – LOSS AND REPLACEMENT
- UNIT INTEGRITY
- REGROUPING
- "UNDER FIRE" MARKERS
- LOSS OF COMMAND UNIT
- RALLYING UNITS
- CHAPTER 6: MOVEMENT
- CHAPTER 7: FIRE COMBAT
- DIRECT FIRE
- STAGE 1: HIT RESOLUTION
- WEAPON RANGE TABLE
- STAGE 2: DAMAGE RESOLUTION
- DAMAGE EFFECTS
- SLAM SYSTEMS – MULTIPLE TARGETS
- GUIDED MISSILE SYSTEM (GMS) FIRE
- INTERCEPTION BY AREA DEFENCE SYSTEMS
- MISSILE HITS AND POINT-DEFENCE SYSTEMS
- ANGLE OF ATTACK
- MULTIPLE MOUNT WEAPONS
- "POP-UP" ATTACKS
- REPAIRING SYSTEMS FAILURES
- CHAPTER 8: INFANTRY COMBAT
- INFANTRY FIREFIGHTS
- INFANTRY CLOSE-ASSAULT
- COMBINED ACTIVATIONS FOR CLOSE-ASSAULT
- OVERRUNS AND FOLLOW-THROUGH ATTACKS
- ANTI-PERSONNEL SUPPORT WEAPONS (APSWs)
- ANTI-PERSONNEL FRAGMENTATION CHARGES (APFCs)
- INFANTRY ANTI-VEHICLE ROCKETS (IAVRs)
- VEHICLE WEAPONS FIRE AGAINST INFANTRY
- INFANTRY WEAPONS FIRE AGAINST VEHICLES
- INFANTRY TRANSPORT
- CASUALTIES TO MOUNTED INFANTRY
- FIRING INFANTRY FROM TRANSPORT
- CHAPTER 9: ARTILLERY
- CHAPTER 10: AEROSPACE OPERATIONS
- CHAPTER 11: ADDITIONAL AND OPTIONAL RULES
- SMOKE AND OBSCURATION
- MINEFIELDS
- LAYING MINES
- CLEARING MINES
- ABANDONED VEHICLES (OPTIONAL RULE)
- BACKUP SYSTEMS
- ENGINEERING UNITS
- FORTIFICATIONS
- BUILDINGS AND URBAN AREAS
- COMBAT IN URBAN AREAS
- ARTILLERY FIRE AGAINST URBAN AREAS
- NUCLEAR MUNITIONS
- BIOCHEM MUNITION EFFECTS
- CASEVAC
- WEATHER CONDITIONS (OPTIONAL RULE)
- EXOTIC ENVIRONMENTS
- ALIEN RACES IN DIRTSIDE II
- CHAPTER 12: SCENARIOS AND BACKGROUNDS
- CHAPTER 13: APPENDICES
CHAPTER 1: INTRODUCTION
INTRODUCTION
DIRTSIDE II is a rules system for playing combined-arms ground combat games with miniatures, in a science-fiction setting. The rules themselves are written as a "generic" system, intended for use within virtually any SF background or setting that the players desire. This book is a development of the original DIRTSIDE rules first published several years ago, and during this rewrite we have tried to remain true to the concepts and ideas that made the first edition liked and well-accepted by many SF gamers. On the other hand, we decided early on that a major revision of the actual mechanisms of play was required to make the game flow faster, and to allow battles with larger sized forces; thus although these rules bear little resemblance to the first DIRTSIDE in terms of game mechanics, we hope that we have kept enough of the "flavour" of the original game that this new edition will appeal to 'old hands' and newcomers alike.
Basically, this is a game about armoured warfare – that is, battles using tanks and mechanised Infantry. As such, it is really an extrapolation of present-day warfare into a future setting, which is the way combat is usually presented in most SF films and books. We have tried to recreate the style of battles from the kind of SF combat literature listed in the bibliography; books like David Drake's "Hammer's Slammers", Robert Heinlein's classic "Starship Troopers", Gordon Dickson's "Dorsai" series and so on. Thus DIRTSIDE II reflects the 'popular' view of SF combat – troopers in powered armour suits, huge hovertanks, lasers and railguns. No-one knows what warfare will REALLY be like in the next fifty years, let alone the next two or three centuries – in all probability it will be as different from today's actions as the Gulf War was from the Boer War. Perhaps tanks and Infantry will survive in some form, perhaps they won't; here we assume they will, because a game terrain full of nicely-painted figures and AFVs is much more fun than an empty battlefield with a couple of robot drones flying over it!
DESIGNERS' NOTES
When we first embarked on re-writing DIRTSIDE for this new version, we had to set a number of basic goals: 1) the system had to be as generic as we could make it, without leaving too many gaping holes that the players would have to fill in themselves; 2) it had to be simple and flowing in play, without the need for endless reference back to charts and tables, and 3) it had to be able to cope with large forces (up to, say, Battalion sized) while still remaining playable in a reasonable space of time. Above all this, the game had to be FUN!
That is what we set out to achieve; we think that we've managed to get pretty close, but we won't know for sure until YOU try it out and tell us what you think!
Looking at point 1), writing a truly generic game is a bit of a minefield for any designer. So often, games claim to be generic but then fall into the trap of tying their own background so tightly into the fabric of the rules that trying to use them in any other setting requires a major hatchet-job. Having already provided a fairly well-developed (though optional) background for our 'FULL THRUST' Starship Combat rules, it was a great temptation to expand on this timeline to the extent that it "took over" DIRTSIDE II and made it just another background-specific rulebook with the word "generic" thrown in a few times to confuse people. We sincerely hope that, in the end, we've avoided doing that – as with FULL THRUST, the background IS there in the appendices, but it is presented purely as an option for you to use if you wish; the design and points cost systems will enable you to classify and use virtually any equipment that you wish, and combined with the notes on unit organisations should allow almost any desired "future history" to be used as a game setting.
Of course, some compromises have to be made somewhere – a good example being naming the weapon systems. Just because we've called one system a "High Energy Laser" doesn't mean that you can't call it something else entirely if that fits your own background better!
As to goal 2), it was obvious that the mechanisms of the first-edition DIRTSIDE were somewhat slow and cumbersome, and something much "slicker" was needed for the rewrite. After a great deal of thought and testing, we came up with a combination of concepts which, although individually not original, have not (to the best of our knowledge) been used together in a single game before.
The end result is the system used here – heavy on the hardware (all the polyhedral dice so beloved of the dungeon-bashers, plus that fancy set of coloured counters that you've been looking at and wondering what the hell it was doing in a miniatures game!) but WITHOUT the need to constantly look up results in myriads of charts and reference sheets; basically the dice and the counter chits take care of all the variables, leaving you free to get on with your tactics. At first sight, some of the mechanisms may seem unusual – probably because they ARE unusual for a game of this sort – but spend a few minutes reading through the rules and examples; we think you'll be as surprised as we (initially) were at just how well and easily they work!
Now to point 3); this really grew naturally from the second goal, in that if you make the system simple and fast-playing then it naturally becomes easier to handle larger forces. The rules function well for forces of up to roughly battalion-level (up to, say, ten to twelve platoon-sized 'units' per side), and will handle more if time, space and players allow. The most practical size of game is probably 'short battalion', which is referred to in the unit organisation notes as a "Combat Group" – the equivalent of, say, a couple of Companies plus extra support elements.
Finally, but certainly the most important: MAKING IT FUN. There is little point in writing what may be technically the best rules system in the known world, if it does not grab players' imaginations and make them actually want to get the toys out on the table. We put a lot of thought into this right from the start, and eventually came up with a set of mechanisms that we liked: the sequence of play ensures that both (or all) players are ACTIVELY involved throughout the turn (no sitting back for half an hour or more while your opponent makes his move and blows away half your forces, without you being able to lift a finger to protect them). In addition, the "opposed rolls" used in much of the fire-combat mechanism actually give you the feeling of being able to "defend" your units against the incoming fire. Most of the basic rules are logical extensions of just a few very simple principles, and thus are easy to pick up and remember in the heat of battle. Above all, don't forget that ANY rules system is no more than a framework for your own ideas – nothing in this book is cast in tablets of stone, and you should feel free to add, delete and modify as much or as little as you wish (provided, of course, that you agree it with your opponents first).
Read the rules through, then use them as you will – just remember to enjoy it!
USING THIS RULEBOOK
When writing this rulebook, we have tried to cover all the major topics and rules in sufficient detail that most events occurring in the game will be covered in some form. In order to do this, most of the sections not only give you the RULES to cover certain situations but also contain notes and discussions on WHY the rules work as they do.
The entire book should be read through once; when this is done and you have grasped the basic principles behind the rules then all you should need are quick reminders of the most important points – these are highlighted in BOLD type throughout the rule book for ease of reference.
Once you have played a couple of basic games and got used to the systems the Vehicle Record Cards for your forces should be all you need for play.
DICE TYPES AND CONVENTIONS
DIRTSIDE II departs from the entirely D6-based system of the original DIRTSIDE and makes use of a range of "polyhedral" dice from four-sided through to twelve-sided – thus giving five different dice types, commonly referred to as D4, D6, D8, D10 and D12 according to their respective numbers of faces.
While this selection of dice may be unusual at first to some new players, anyone who has had any involvement with the Roleplaying side of gaming should be familiar with them and will almost certainly have access to a full set of such dice; in any case, they are readily (and inexpensively) available from virtually any games shop or mail-order supplier, either individually or as sets.
As a bare minimum you will require one full set of the five dice to play DIRTSIDE II; at many times during play, however, it will be necessary for both players to roll dice simultaneously – hence it will be much simpler and quicker if each player involved has his or her own set of dice (when a full set costs about as much as a couple of tanks for your army, it is not that big an outlay). If you can also provide a small "pool" of extra dice for use in certain circumstances then so much the better.
Whenever the rules call for a die roll to be made, the TYPE of die to be used will be specified. When a rule tells you to use "+1 Die Type", this does NOT mean rolling the die and adding 1 to the score – what it means is that you should select the NEXT DIE TYPE UP, eg: if the usual die for that roll would be a D6, then "+1 Die Type" indicates that a D8 is rolled instead. Similarly, if "-1 Die Type" is called for then use the next LOWER die (eg: a D6 drops to a D4).
In very general terms, any factor (weapon accuracy, unit quality etc.) that is of BELOW AVERAGE status will use a D6 as its normal die type; those that rank AVERAGE will use a D8, and those ABOVE AVERAGE a D10. Circumstances that increase the chance of success will RAISE the die type by 1, while adverse circumstances will reduce it by 1.
Although there are certain exceptions to this general principle (these are clearly specified when they occur) once you have got used to the concept of using the different die types then you are well on the way to grasping the basic mechanisms of play.
THE COUNTER SHEETS
With this book, you will have two sheets of die-cut counters (also referred to in the rules as 'markers', or 'chits'). Carefully punch out all the counters, sort them into types and store them safely – small grip-top plastic bags or a segmented storage tray are the best ways.
The BLACK counters, which are normally referred to as the DAMAGE CHITS, should be placed in a mug, jar or similar opaque container from which they may be easily drawn at random during play; this is the "pot", and all Damage Effects are resolved by drawing one or more of the black chits from it when required. Always remember to replace chits in the pot after resolving each individual attack or other situation, and stir them about now and then to ensure a fully random drawing!
All the other counters on the sheets are MARKERS for use in play; they are designed to indicate the status and condition of units on the table, and to perform other game functions to effectively remove the need for written record-keeping during the game. Most other rules require some measure of written notes and record sheets to keep track of the condition of your various units – we have tried to eliminate this as much as possible by using the counters and markers, as in our opinion written records not only slow the game down but can also be easily (and perhaps sometimes deliberately!) overlooked in the heat of the battle.
The markers are designed to actually be placed on the table next to the units and elements they affect, thus showing at a glance the exact status of any given unit. While it is true that this allows your opponent to see the condition of your units, it does work both ways, and we feel that this is a small price for the ease of play that the markers allow.
Being aware of the fact that some players may prefer NOT to actually see the markers placed on the table (perhaps for aesthetic reasons), we suggest that if preferred players may use a FORCE STATUS SHEET, which can simply be a sheet of paper with a 'box' ruled on it for each unit in the player's force. The relevant markers for each unit are then placed in the box relating to that unit, rather than on the table itself. This method still dispenses with the need to make any written records, but does also remove the immediate visual link between the markers and the models they affect.
While we would recommend the 'markers on table' method, please feel free to use the Status Sheet method if you are happier with it.
GAME SCALES AND DEFINITIONS
The game is designed for play with 1:300/1:285 scale miniatures (1:300 being the UK standard, 1:285 the USA, although both scales are so close as to be effectively the same thing); this scale is also known as 6mm. An alternative model scale is 1:200, which will work equally well – very few SF models are made in this scale, but the wealth of "modern" ranges allow good conversion potential. At the extremes, the ultra-tiny 2mm models may be used (just use the Modern/WWII ranges – in 2mm you can hardly tell the difference!!) or you could potentially go as large as 15mm if table space and budget allows!
For the intended 1:300 scale, we recommend using a ground scale of 1" (or 25mm) on the table equals 100 metres. All distances in the rules are given to this ground scale, so if you wish to use something else then you will have to convert all ranges, movement etc. accordingly. At 1" = 100m, a good-sized game may be fought on a table around 6' x 4', though a lot of the early playtesting was done on tables as small as 4' x 2' and still worked well with smallish forces. If you have a very large area available, feel free to use 1" = 50m (thus doubling ranges and moves).
Each individual model represents one real vehicle (an ELEMENT) and each Infantry figure represents one man – Infantry are always based in teams of between two and five figures on a small base, each such team being classed as a single Element.
[As a note to readers unfamiliar with some of the conventions of miniatures gaming, the "groundscale" and "model scale" are two different things; if the groundscale (and thus ranges etc.) were to be the same as the model scale, ie 1:300, then even the lightest weaponry would be able to fire from one end of the table to the other. Thus it is necessary to distort the relationship between model size and terrain to achieve a playable system – this is why a single building can actually represent a group of structures, and a couple of trees can represent a whole wood.]
The other scale that needs some explanation is TIMESCALE. This is the amount of "game time" that a full turn is assumed to last. In DIRTSIDE II, the Timescale is fairly loose, and in most cases irrelevant to normal play; most real combat consists of sudden bursts of frantic firefight, separated by long periods of movement, scouting, observation and general inactivity. Thus although a game turn might contain only a few seconds' worth of actual fire combat, the full turn may safely be assumed to occupy several minutes of elapsed time – in fact if it is necessary to determine how long a battle has lasted in game terms (eg: if it is part of a campaign) then treat each full turn as being equivalent to 15 minutes; hence a four-turn game would represent a battle lasting about an hour of campaign time, which could be an important factor if either side is trying to bring reserve forces up to the battlefield.
LINE OF SIGHT AND LINE OF FIRE
Some rules systems provide lengthy mechanisms, charts and formulae to determine whether lines of sight are blocked by intervening terrain, especially where the observer and the target are themselves at differing height levels. All that we feel is required, however, is a reasonable attitude and a bit of common sense! If you can stretch the tape-measure in a straight line between the two elements without the tape touching an intervening obstacle, then there is a clear line of sight (and hence line of fire, if within range). As the relationship between model size and terrain scale is distorted anyway (see notes on scales and definitions), any more detailed method is actually pretty abstract and not all that relevant to play in the majority of cases. If you REALLY want to work it all out mathematically in every case then feel free to do so!
Lines of sight/fire are blocked by raised ground, buildings and woods, unless the observer/firer is on terrain high enough that he may see over the obstacle. Smoke and other obscuration agents will also block sight and firing.
The MAXIMUM distance that any ground-based line of sight or line of fire can be traced is 60"; this is defined as the maximum acquisition range of any sensor system in play (one very good reason for this is that 60", or 6000 metres in the recommended groundscale, is actually not far off being horizon distance on a roughly Earth-sized world, as seen from the turret of an average AFV!).
VTOL craft in low mode (NOE or terrain following) may be hidden by obstructions in the same way as other elements; take the straight line from the height of the actual model on its stand, which in most cases should be a fairly good approximation of the 'real' scale altitude. All airborne Aerospace craft, and VTOLs in high mode, are assumed to actually be flying considerably higher than the model's actual stand height, and are generally visible from anywhere on the table (unless there is a particular VERY tall terrain feature in the way) – conversely, such aircraft can also SEE anything on the table themselves, and thus potentially attack it.
[As with some other cases in the rules, if you really do have a dispute that is not resolvable by discussion then simply roll a die or flip a coin! If an umpire is available then his decision must be final.]
THE COUNTERS, CHITS AND MARKERS
The full set of counters (2 sheets) consists of the following:
A) THE DAMAGE CHITS (BLACK counters):
- The NUMERICAL damage chits (100 in total – 50 RED, 25 YELLOW, 25 GREEN) (actual values are a mix of 0, 1, 2 and 3)
- "BOOM" chits – catastrophic hits. (Quantity 5).
- MOBILITY hits – immobilises vehicles. (Quantity 7).
- SYSTEMS DOWN – TARGET vehicle affected. (Quantity 5).
- SYSTEMS DOWN – FIRING vehicle affected. (Quantity 2).
B) THE COMMAND AND CONFIDENCE MARKERS:
- COMMAND MARKERS – Colour indicates Unit Quality, Number indicates Leadership rating. (66 in total – 18 GREEN, 18 ORANGE, 30 BLUE)
- CONFIDENCE LEVEL MARKERS – Grey counters, Letters indicate Confidence Level. (74 in total – 18 "CO", 18 "ST", 14 "SH", 12 "BR", 12 "RO")
C) THE PLAY MARKERS:
- PANIC markers (Quantity 7).
- "RUINED BUILDING" markers (Quantity 14).
- DAMAGED vehicle markers (Quantity 28).
- IMMOBILISED vehicle markers (Quantity 14).
- "SYSTEMS DOWN" markers (Quantity 14).
- LETTERED MARKERS for hidden unit identification etc. (Quantity 24).
- "DUMMY" markers (Quantity 18).
- OBJECTIVE markers (14 in total – 7 x "1", 4 x "2", 3 x "3" values).
- "DUG-IN" unit markers (Quantity 18).
- HIGH MODE markers – for VTOL units (Quantity 10).
- UNDER FIRE markers (Quantity 21).
- IMPACT POINT markers – for Artillery Fire (Quantity 7).
- MINEFIELD (conventional) markers – also used for Artillery Ammunition (Mine rounds). (Quantity 12).
- "JUMPING" MINES markers (Quantity 6).
- ACTIVE SENSORS markers for AREA DEFENCE SYSTEMS (Quantity 10).
- EVASIVE MOVEMENT markers (Quantity 7).
- ABANDONED VEHICLE markers (Quantity 14).
- GUIDED MISSILE markers – to indicate Missiles in flight (Quantity 11).
D) THE ARTILLERY AMMUNITION MARKERS:
- HEF – HIGH EXPLOSIVE FRAGMENTATION rounds (Quantity 14).
- MAK – MULTIPLE ARMOUR KILLER rounds (Quantity 10).
- SMOKE rounds (Quantity 14).
- BIOCHEM rounds (Quantity 7).
- NUCLEAR ("NUKE") rounds (Quantity 7).
CHAPTER 2: FORCES AND TECHNOLOGY
COMMAND, CONTROL AND COMMUNICATIONS
One of the primary assumptions we have made in DIRTSIDE II is that whatever happens to the rest of Military technology (in terms of weapons, propulsion systems etc), that one field that is certain to advance faster than any other is that of information technology. Computers and electronics already run a lot of the 20th century high-tech battlefield, and as each new generation of processing equipment is developed you can be sure that the Military are going to be among the first people to use it!
Information-gathering on its own, however, is not enough. In fact, the recent developments in the Gulf have shown that giving a commander access to TOO MUCH information is almost as bad as too little – no human mind can cope with the massive input and sort out the relevant bits from the garbage. What we are assuming for the future setting of this game is that sufficient advances have been made in the field of supercomputers and artificial intelligence that a commander is assisted by a multitude of electronic "aides" that can actually make decisions about which information he NEEDS to know at any particular moment. The command computers will access vast amounts of incoming data from sensors of all kinds (airborne remotes, satellites, cameras on virtually every vehicle and trooper's helmet etc.) and provide the officer with a continually-updated visual or holographic simulation of what is happening on the battlefield; he then makes the tactical decisions for each unit or formation, and these are relayed back down the electronic links to the individual unit commanders and the men on the ground. This effective bypassing of the traditional chain of command (ie: Battalion CO to Company CO, then to Platoon leader and finally to Squad leaders) will mean a much quicker and more fluid response to orders, and will also lead to a more flexible unit organisation – while Companies, Battalions and Regiments will still exist for administrative purposes, in action their constituent units will be intermixed to provide the best force for each particular situation.
To achieve this, of course, we also have to assume a few other things such as relatively unjammable communications links (think tight-beam communicators, Lasers/Masers, phased-neutrino etc.), lots of throw-away drones (when the enemy shoots the first one down, just pop up a couple more up...) and so on – but is this really any harder to accept than the technology you see every night on the news reports?
In most Combat Groups (ie: the group of forces under the player's command on the table) there will be a Command unit of several vehicles and/or Infantry teams; this unit (and in particular a specific Command Vehicle or team) acts as a focus for all the data transfers up and down the command links, thus playing a very important part in the battle. The Command Vehicle does NOT, however, carry the overall force Commander himself – he is much more likely to be safely dug-in in a bunker well back from the battlefront, or even in an orbiting starship in some cases. Hence the loss of the command vehicle (or even the entire command unit) to enemy action, while it is obviously a serious and disruptive blow, is not totally catastrophic; it will cause temporary confusion while communications links are re-established and routed through backup channels, and will have a definite detrimental effect on the overall confidence levels of the force – the troops will be able to continue with the battle, but at somewhat reduced efficiency.
So, we have a situation where a single overall commander is able to direct the flow of his battlefield force almost as the player of the game moves his miniature tanks. The one thing that the technology will NOT be able to overcome (in any civilised human army, anyhow) is the perennial problem of the individual soldier's will to fight. Barring the use of drug-induced mind control over his troops (or totally robotic forces...) no army will be able to guarantee that every trooper is going to do exactly as his officers tell him – to good old Private Funk, it will still seem a much better idea to stay safely hidden in the bottom of his foxhole than to get up and charge the enemy emplacement as his Sergeant is telling him to!
Such natural reactions, and their results on the fighting efficiency of the unit, are covered by the rules concerning unit quality, confidence levels and confidence tests – quick, simple procedures whether whether or not a unit will actually carry out the orders it has been given. Technology has given the Commander easy and efficient ways to tell his troops what to do – but whether they will do it is another matter entirely!
OVERVIEW OF WEAPON SYSTEMS TECHNOLOGY
The various types of weapons used in the rules are mainly extrapolations of current trends in armament development, combined with some of the more popular concepts from SF literature and films. In keeping with the generic nature of the rules, players should feel free to add or delete systems as they wish, to conform to whatever background they wish to use. Most of the weapons described are suitable for near to mid-future settings, and are in keeping with the (optional) background supplied in the appendices.
The continued evolution of the high velocity tank guns used in the late 20th century has led to this type of weapon reaching the limit of its potential, though such guns remain in common use – usually with binary liquid propellants and very sophisticated targeting systems. An offshoot of this development has brought an increasing trend for Hyper Velocity weapons, using either reaction-propelled rounds (the Hyper Kinetic Penetrator) or the electromagnetic "Railgun" principle (the Mass Driver Cannon).
Small calibre rapid fire cannons are still in very common usage as defensive and support weapons, particularly on MICVs and scout vehicles. Conventional Autocannons use caseless rounds or liquid propellants, while "Gauss Autocannons" (small calibre Mass Drivers) are a popular and reliable alternative with higher-tech forces.
Energy weapons have developed to the point where a vehicle mounted Laser with enough punch to be an effective tank killer is now practical, given a suitable power source. Lasers are, for obvious reasons, the most accurate weapon system available – once you have acquired the target then you've hit it! Despite this, Lasers still have enough disadvantages in combat use (such as their massive power requirement, relative vulnerability to chaff, smoke or aerosols etc.) that they have failed to replace many of the other weapons except for specialised uses.
There is another system that is normally classed as an "Energy Weapon", though in fact this is not really an accurate designation; this is the Direct Fire Fusion Gun, which fires a "bolt" of particles energised to a plasma state. The weapon is frighteningly effective, particularly at short ranges (before the plasma "bolt" begins to spread and diffuse some of its energy to surrounding air molecules). However, it is also a very complex system using very advanced and costly ammunition – one "round" for the gun is a cartridge containing the fuel slug, laser ignition system and an ultra-fast discharge power cell to "zap" the fuel into plasma and maintain the magnetic containment field that directs the bolt down the barrel of the weapon.
Guided Missile Systems, already highly developed by the close of the 20th century, have been further refined into compact user-friendly packages using very advanced smart guidance systems. Despite great developments is point-defence systems and countermeasures technology, these high velocity anti-vehicle missiles are still in widespread use in both vehicle and Infantry carried systems.
Finally in the Direct Fire arsenal is the SLAM (Salvo-LAunched Missile) system. SLAM packs fire clusters of small unguided rockets to saturate targets that are in direct line of sight of the firing vehicle, and can be devastatingly effective against both Infantry and armour.
Area Fire weapons (ie: Artillery) still fulfil their traditional roles of mass area bombardment, smoke laying and the like; Multiple Rocket Launcher systems are very much in favour with their capability to deliver a high volume of fire in a short time, though rocket-assisted conventional Artillery and Mass Driver howitzers can come very close to this with the use of magazine-fed autoloaders. Artillery-delivered tank killers and mine-dispersing rounds are commonly used, and there are always the "nastier" forms of munition (mini-nukes and biochem agents) to use if the situation warrants them.
While most vehicle mounted main weapons are capable of some kind of anti-personnel fire, the most effective way of engaging Infantry from a vehicle is still an automatic weapon such as a conventional Machinegun, Minigun or Automatic Grenade Launcher. Weapons of this type are generally referred to as APSWs (Anti-Personnel Support Weapons).
A secondary form of anti-personnel weapon is the APFC (Anti Personnel Fragmentation Charge), which is a "belt" of shrapnel/flechette charges fixed around the hull of some combat vehicles; these charges are designed to fire outwards to deter enemy Infantry from getting too close to the vehicle.
To redress the balance somewhat, Infantry themselves may be equipped with GMS launchers for anti-vehicle fire, though these are still relatively bulky and only issued to specialist teams; for the "humble Grunt", his anti-armour weaponry is the Infantry Anti-Vehicle Rocket (IAVR) – a small, disposable tube-launched rocket similar in most respects to the LAW (light Antitank Weapon) of the 20th century. IAVRs are compact, cheap and reasonably effective at their short range, giving the ordinary Rifleman at least a chance of taking out an AFV that happens to get too close.
FORCE ORGANISATIONS AND ORDERS OF BATTLE
A player in DIRTSIDE II takes on the role of the commander of a force generally referred to as a COMBAT GROUP. Combat Groups are ad-hoc formations created for specific missions or duties, and are formed from a selection of smaller "units", as detailed below.
The basic building-block of any force is a platoon-sized formation known throughout the rules as a UNIT. Such units consist of a number of individual ELEMENTS, each element being a single vehicle or team of Infantry. units may be referred to as "platoons", "troops", "lances" or any other term that fits the background in use. A typical Armoured Unit would consist of between 3 and 5 tanks, although more or less may be used according to each player's specific organisation and preference; in game terms, a unit with few elements cannot easily absorb losses and remain functional, but an unit of many elements will lack flexibility in use – the choice is up to you. For Mechanised Infantry, a typical unit would have 3-5 APCs or MICVs, each with one or two embarked Infantry elements.
In 20th century terms, a number of platoon-sized units would then be combined into a Company, with several Companies then forming a Battalion or Battlegroup. In DIRTSIDE II, the assumptions we have made about the increased efficiency and flexibility of Command, Control and Communications (C-Cubed) mean that the concept of the "Company" has fallen into disuse – if it survives at all in your preferred background then it will be a purely administrative structure with little bearing on combat actions. Instead, commanders will select whatever individual units that they need (or that are available to them) to accomplish a specific mission; these component units are formed into a COMBAT GROUP, which may be of any size up to what would previously have been known as a Battalion – in other words, a player's force may consist of anything from just a couple of platoon-size units up to ten or twelve such units.
[Note: the counter-sheets provided with this rulebook should allow two players to each field forces of roughly 10-12 individual units as a maximum – ie: perhaps 40-50 vehicles or elements per force; games with larger forces are certainly possible, particularly with multiple players, but will require extra counters to be made or purchased. Additional sets of counter sheets are available direct from GZG; please send an SSAE for further information.]
As a very generalised example, a typical COMBAT GROUP for a medium-sized game might be:
1 unit (Troop) of 4 HEAVY BATTLE TANKS
2 units (Troops) each of 4 MEDIUM BATTLE TANKS
3 or 4 units (Platoons) each of 4 APCs or MICVs, each vehicle carrying 1 or 2 teams of Infantry
1 unit (Battery) of 3 ARTILLERY VEHICLES
1 Command unit of a Command Vehicle, an Area-Defence Vehicle and (say) 2 Missile Vehicles
Onto this basic formation could be added any mix of other units and supporting arms, such as a unit of 3 or 4 Transport VTOLs and embarked airmobile Infantry, specialist Engineering elements, Riverine craft etc. etc., to tailor the force to fit the particular mission that is being undertaken.
The whole point of this section is to give you guidelines for organising your forces, without going too much into specifics. To maintain the flexible and generic nature of DIRTSIDE II we have deliberately not laid down any hard-and-fast rules on the organisation of your armies, and you should feel free to experiment with as many different force compositions and styles as you wish. Just remember that most options will have their minus points as well as their apparent advantages! The key factor in any force organisation is the UNIT, as this is integral to the functioning of the Game Sequence; outside this, you are free to do virtually what you want (provided, of course, that (i) it is consistent with whatever background you are setting the game in, and (ii) that your opponents are happy with it!).
CHAPTER 3: VEHICLE DESIGN
VEHICLE SIZE CLASSES
Throughout the rules, vehicle elements are referred to by their SIZE CLASS; this is generally from Class 1 (VERY SMALL) through to Class 5 (VERY LARGE), although rules options are discussed for "Oversize" (ie: larger than class 5) vehicles if desired.
The available Size Classes are listed below, along with some notes as to the kinds of vehicles that fall into each Class:
Class 1 (VERY SMALL): Very light scout vehicles, 'jeeps', fast attack 'dunebuggies' etc.
Class 2 (SMALL): Light scout tanks, small APCs, small armoured cars etc.
Class 3 (MEDIUM): Most Main Battle Tanks, heavier APCs and MICVs, Medium Artillery etc.
Class 4 (LARGE): Heavy tanks, larger APCs, big Artillery pieces etc.
Class 5 (VERY LARGE): Superheavy tanks and similar very big combat vehicles.
The Size Class of a vehicle determines how much (and what kind of) equipment, weapons and cargo it can carry, and also indicates the BASIC SIGNATURE of the vehicle (equal to the Size Class, eg: a MEDIUM vehicle has a Basic Signature of 3) which determines how easy the vehicle is to hit when fired at.
To determine how much CAPACITY a vehicle has for carrying weapons and other systems (and for transporting Infantry etc.), simply multiply the vehicle's Size Class by FIVE; thus a class 4 (LARGE) vehicle would have 4 x 5 = 20 Capacity points available.
WEAPON SIZE CLASSES
Weapon types are defined by Size Classes in much the same way as vehicle sizes; weapons are generally available in sizes 1 (Smallest) to 5 (Largest), though not every different kind of system will be available in all sizes – for example, an RFAC is available in sizes 1 or 2 only, while an HKP only comes in classes 3 to 5. Full details of the possible sizes for each weapon type are given in the sections describing the weapon systems.
The Size Class of a weapon system determines its effective ranges, the damage it can inflict and how much space the system takes up when mounting it in a vehicle.
DIRECT FIRE WEAPONS SYSTEMS
Direct Fire weapons are those which require a clear line-of-sight to the target, and are primarily used against "point" targets (ie: single vehicles) rather than against area targets. A number of systems are described below, but players are free to develop their own additional systems if they wish.
1) RAPID-FIRE AUTOCANNONS (RFACs):
These are "conventional" small-calibre shell-firing cannons, differing from their late 20th century counterparts only in their use of caseless rounds or liquid/binary propellants in place of the earlier cased ammunition. Many RFACs are multi-barrel "gatling" types, and most use electric drives for improved reliability and rate of fire. The RFAC still fulfils its traditional role as an anti-personnel or light anti-armour weapon on APCs, MICVs and scout vehicles, or as a secondary weapon on larger AFVs.
The RFAC is available in size classes 1 and 2 only, these very approximately corresponding to 20-25mm and 30-40mm calibres respectively. As their external power requirement is minimal, they may be used on vehicles with any type of power plant.
2) HIGH VELOCITY CANNONS (HVCs):
The HVC is the final development of the conventional high velocity tank gun, generally a large-calibre weapon firing superdense saboted rounds; most are fin-stabilised smoothbores, and use liquid propellants. The HVC still provides a relatively cheap option for main armament on tanks and other heavy AFVs; its simplicity and general reliability ensures it a long future in service, particularly with forces that cannot afford to support the more advanced systems.
HVCs are available in size classes 3 to 5; power requirements are small, so the system may be fitted to any vehicle within the usual size restrictions.
3) HYPER-KINETIC PENETRATORS (HKPs):
The HKP is probably the ultimate chemically-propelled anti-armour gun. Unlike the HVC, an HKP system uses a relatively small-calibre (but VERY long) barrel to develop hyper-velocities for its superdense long-rod penetrator rounds. Early models use liquid propellants, while the more advanced types actually use a very small plasma reaction to propel the round. The rate-of-fire of an HKP is not as high as that of a Mass-Driver, but the HKP is somewhat more versatile as it does not require the huge electrical input of the large electromagnetic weapons. Its one major failing is its inability to fire an effective explosive round, thus making it of little use against dispersed targets such as Infantry (a problem also shared by the MDC).
HKPs are available in size classes 3 to 5, and may be fitted to any vehicle subject to size restrictions.
4) MASS-DRIVER CANNONS (MDCs):
MDC is the term applied to all weapons which fire a kinetic-energy projectile by electromagnetic acceleration rather than chemical reaction. They are also commonly know as "Gauss Guns" and "Railguns". In common usage, MDCs of size classes 1 or 2 are referred to as "Gauss Autocannons" while those of sizes 3 to 5 are called Mass Drivers or Railguns. All MDCs are very small calibre weapons with a very high rate of fire, using solid slugs propelled at incredibly high velocities. Like the HKP, their small calibre precludes the use of practical explosive rounds – however their very high rate of fire makes them capable of limited anti-personnel use through sheer machine-gun-like density of fire.
MDCs are available in all size classes (1-5), but owing to their very high power requirements they are only usable on vehicles with suitable power plant systems (see Vehicle Power Plants).
5) HIGH-ENERGY LASERS (HELs):
Combat Lasers project a very short but very high-intensity pulse of coherent light energy, causing damage to the target by the sudden massive overpressure and explosive vaporisation effects as the beam's energy is released at the point of impact. HELs are, of course, extremely accurate (once the firecontrol sensors have acquired the target, a hit is virtually automatic) and their effective range is limited only by that of the acquisition system in use – although some attenuation of the beam occurs due to atmospheric ionisation, over the few kilometres at which the target can be seen and engaged this effect is negligible. Smoke, chaff, specialised aerosols and similar countermeasures are all effective in disrupting incoming Laser fire, but of course they all rely on advanced sensors to tell the victim he has been targeted in time to deploy the countermeasure!
A more passive form of laser defence is Ablative Armour, which "soaks up" much of the beam's energy as the ablative coating boils away without harming the main armour underneath. Ablative coatings are expensive, however, and are not widely used due to the relatively small number of laser-armed opponents that the average army is likely to encounter; the cost of HEL systems, coupled with their relatively poor armour penetration in comparison with other weapons, means that laser-armed vehicles are quite rare sights on the battlefield.
When engaging "hard" (armoured) targets, HELs use a single very high energy pulse; when they need to engage Infantry or other dispersed targets a lower power setting enables the weapon to "sweep" an area with rapid-fire bursts of much lower intensity. Such area fire does, however, have a much shorter effective range as the lower-energy beam is much more susceptible to the effects of atmospheric attenuation.
HELs are available in all size classes (1-5), but as with MDCs their very high power input requirements limit their use to vehicles which have suitable power plants.
6) DIRECT FIRE FUSION GUNS (DFFGs):
The DFFG is one of the most deadly anti-armour weapons available, despite having a relatively short effective range (due to the diffusion and energy loss of the plasma bolt once it leaves the magnetic containment of the weapon barrel). Each round of DFFG ammunition is self-contained, consisting of the hydrogen fuel charge, a flash laser ignition system to heat the fuel to plasma state, and the power supply that holds the plasma in containment until fusion occurs, when the bolt is released down the magnetically screened barrel. At short ranges, the penetrative ability and damage potential of the bolt is extremely high – even the most heavily armoured target is unlikely to withstand a close-range hit from a DFFG. As range increases, the bolt begins to spread and lose energy to the surrounding air, causing some spectacular visual effects but severely lessening its destructive potential at longer ranges. Anti-Infantry potential is good, as the plasma bolt will cause significant explosive and fragmentation effects when it strikes any solid object (including an area of ground).
DFFGs are available in all size classes (1-5), and may be fitted to any vehicle subject to normal size limitations (as the ammunition for a DFFG carries its own power source, the required external input is fairly small).
7) GUIDED MISSILE SYSTEMS (GMS):
The Guided Missiles used in DIRTSIDE II are a further refinement of the systems developed in the late 20th century; they are faster than their predecessors (though still much slower than a cannon projectile), and virtually all of them are the "fire and forget" type – operator guidance (either by wire or radio/optical link) is no longer necessary. Advanced semi-intelligent seeker heads have given missiles their own target identification and discrimination capabilities, and many are able to use terrain-following flight to minimise the effects of countermeasures. Nevertheless, the major disadvantage of the GMS is still its susceptibility to the great advances made in countermeasures – both active (point-defence) and passive (jamming). It is relatively simple for a properly equipped vehicle to either confuse or actually shoot down an incoming missile, and this has led to a trend away from using missiles as primary tank-killing weapons. They are, however, still in very widespread use as both vehicle and infantry-carried weapons, the latter type providing dismounted Infantry with sufficient punch to take out armour at reasonable ranges. The GMS is still a cost-effective and usable system, but does not dominate the battlefield as it did in the late 20th – early 21st centuries.
GMSs are available in size classes 1 and 2, which are denoted as GMS/L (Light) and GMS/H (Heavy) respectively. Infantry may only carry GMS/Ls, while vehicles may be equipped with L or H versions subject to normal size restrictions.
[Note that vehicles may be equipped with multiple missile systems if size restrictions permit; in this case each separate "system" represents the ability to fire one missile per turn, so a vehicle with 3 x GMS/L systems could salvo-fire up to 3 separate missiles per turn – but only all at the same target.]
8) SALVO-LAUNCHED MISSILE PACKS (SLAM):
The SLAM system operates in much the same way as the rocket pods often mounted on present-day attack aircraft; the pack contains many small unguided rockets that are fired in clusters, saturating the target with multiple hits. As the range increases, the cluster of projectiles spreads out, lessening the chance of hitting any one target but increasing the area bombarded – thus hits may also be scored on elements close to the one actually targeted. The large number of rockets fired and their high speed will overload the capabilities of point-defence systems, and as they are unguided they cannot be 'spoofed' by ECM or Stealth systems; this makes the SLAM pack a very effective weapon against even high-tech enemies.
SLAM packages are available in size classes 3 to 5, and may be fitted to any vehicle subject to normal size restrictions.
VEHICLE POWER-PLANT SYSTEMS
There are three basic types of Power unit available for vehicles:
1) CHEMICAL-FUELLED ENGINES (CFEs): These are "conventional" motors/generators, either internal-combustion engines or gas turbine types, driving the vehicle either directly (mechanical transmission) or via an electrical or hydraulic transmission. CFEs are cheap, effective and well proven; they run on oil or alcohol based fuels, or synthetic equivalents.
CFEs are perfectly adequate to power most types of wheeled or tracked vehicles, and for the smaller GEVs; however, they are unable to provide the large surplus of electrical power needed to operate the larger Laser or Railgun weapons systems.
2) HYDROMAGNETIC TURBINES (HMTs): Power generators using an advanced version of the 'fuel cell' principle to provide electricity for both propulsion and weapons fire. Ample power is available for ground vehicles and all but the very largest GEVs, and enough surplus energy to support medium/large HELs and MDCs.
3) FUSION GENERATION PLANTS (FGPs): Small, compact Fusion generators are the most advanced and expensive type of vehicle power system, but they are the only type that can provide the massive amount of energy required for the biggest GEVs, Grav-driven vehicles and the largest power-consuming weapons.
The type of power plant used in a vehicle will affect the MOBILITY TYPE and the WEAPONS FIT that it can have, as follows:
If the vehicle is fitted with a CFE power system, it may use any of the following Mobility Types: any WHEELED or TRACKED mobility, SLOW GEV for up to size class 3 (Medium) vehicles only, or FAST GEV for up to size class 2 (Small) vehicles only.
With an HMT system, a vehicle may use any WHEELED or TRACKED mobility type, SLOW GEV if it is no larger than size class 4 (Large), and FAST GEV up to size class 3 (Medium) only.
FGP may be used to drive ANY mobility type, in any size class of vehicle. FGPs MUST be used in all GRAV, 'WALKER' or 'Oversize' vehicles.
For weaponry, the 'non-power-consuming' weapon types (RFACs, HVCs, HKPs, DFFGs, SLAMs etc.) may be fitted to vehicles with any type of power plant subject to normal size restrictions as laid down in the vehicle design rules. The weapons that require external power input (HELs and MDCs) are restricted as follows:
A CFE-driven vehicle may only be fitted with HEL or MDC systems up to TWO SIZE CLASSES LOWER than the vehicle's own size class; thus a Large (class 4) vehicle with a CFE engine could only mount a HEL or MDC of size 2 or smaller.
HMT-powered vehicles may support HEL or MDC weapons of up to ONE SIZE CLASS LOWER than the vehicle size (eg: maximum of a class-3 weapon on a size 4 vehicle).
Finally, FGP systems may power ANY weapon subject to the normal size limitations.
VEHICLE ARMOUR
AFV armour is assumed to be various forms of high-tech laminates and composites, superdense semi-collapsed materials, synthetics and aligned-crystal alloys. Such armours give reasonable protection against the very powerful weaponry in use. During the design procedure, each vehicle type is assigned an ARMOUR VALUE, which is a numerical rating from 0 (very thin, basically a 'soft-skin' vehicle) to a maximum of 7 (ultra-heavy armour used only on "oversize" vehicles).
NO VEHICLE MAY CARRY AN ARMOUR RATING HIGHER THAN ITS BASIC SIZE CLASS; thus a size 4 vehicle could only be fitted with a MAXIMUM of Armour 4.
[This indicates that Armour 5 is the maximum for any "normal" combat vehicle; Armour ratings 6 and 7 are only possible if you are designing "oversize" vehicles, using the notes on P.15.]
The Armour Rating actually indicates the armour used on the FRONT surfaces of the vehicle; the SIDES, TOP and REAR are assumed to have a value of 1 LESS than the frontal armour.
Eg: a vehicle with an Armour Rating of 5 would have armour 5 on the front, but only armour 4 on sides, top and rear.
Note that there is no Armour Value less than 0; a basically 'unarmoured' truck would have armour 0 all round.
OPEN-TOPPED vehicles count as Armour 0 against all ARTILLERY and SLAM fire, regardless of what other armour they have.
There are two kinds of "special" armour that may also be fitted if desired during the design procedure; these are ABLATIVE and REACTIVE.
ABLATIVE armour is a special coating that vapourises when hit by LASER (HEL) fire, absorbing much of the energy of the beam. It can be added on top of any normal Armour Value, and does not alter the effects of the armour against any weapons except a HEL; when attacked by Laser fire the effects of the Ablative armour are as covered in the Damage Validity chart.
A vehicle fitted with Ablative Armour is denoted by putting an "A" suffix to its basic Armour Value, eg: armour value 3A.
REACTIVE armour consists of explosive blocks or panels on the vehicle hull and turret which explode outwards when hit, disrupting the penetrative power of incoming shaped-charge rounds. As such warheads are generally used only by Guided Missiles and a very few other weapons (most use kinetic-energy penetrators which are basically unaffected by the Reactive armour) the use of Reactive armour has declined somewhat since its introduction in the late 20th century, though it is still in use by some armies. As with Ablative, the effects of reactive armour are factored-in to the Damage Validity details for the weapons that are affected by it. A vehicle so fitted is denoted by an "R" after its basic armour value, eg: 4R.
[Note that due to the physical incompatibility of the two systems, it is not possible to fit Ablative AND Reactive armour to the same vehicle!]
VEHICLE SIGNATURES AND STEALTH LEVELS
All vehicle elements have a BASIC SIGNATURE which is equal to their SIZE CLASS; this represents how easy they are for enemy sensors and Fire-Controls to spot and lock-on to, and thus in game terms affects the "TARGET" Die Type that is rolled to 'defend' the vehicle when it is fired at (by any Direct Fire systems except Guided Missiles, which are defended against by the vehicle's ECM systems).
It is possible to ALTER (ie: reduce) a vehicle's "effective" signature by fitting it with STEALTH capabilities. STEALTH covers a wide variety of methods, both physical (radar-absorbing paint, heat-emission masking etc.) and electronic, which render the vehicle more difficult for the enemy to see and 'acquire' as a target. Even traditional camouflage paint can be considered as "Stealth" masking against the old Mk.1 Eyeball sensor!
STEALTH capabilities are bought in terms of LEVELS, each level costed according to the size of the vehicle; for every STEALTH LEVEL fitted, the EFFECTIVE SIGNATURE of the vehicle goes DOWN by 1. Thus a class 4 vehicle with TWO levels of Stealth would have a "basic" signature of 4, but an "effective" signature of 2.
SYSTEM QUALITIES AND LEVELS
SYSTEM QUALITY refers to the level of sophistication and ability of the various Electronics and Sensor packages with which elements are equipped.
The different types of SYSTEMS comprise:
FIRE CONTROL SYSTEMS: The package of sensors and computer modules that assist the Gunner of a vehicle in controlling Direct Fire weaponry.
ELECTRONIC COUNTER MEASURES (ECM): Systems designed to jam the guidance of incoming Missiles.
GUIDANCE SYSTEMS: The sensor and guidance package of a Missile Launcher (GMS), that determines how well the missiles can seek their targets and avoid enemy ECM.
POINT- AND AREA-DEFENCE SYSTEMS (PDS and ADS): Sophisticated sensor suites linked to fast-reaction weapons, used for defence against incoming missiles (and in the case of ADS, as an Anti-Air weapon as well).
Each SYSTEM used on an element is rated as one of three QUALITY LEVELS: BASIC, ENHANCED or SUPERIOR.
BASIC systems are exactly what they sound like – the simplest and cheapest form of the System, with relatively limited abilities;
ENHANCED systems are better than Basic, costing more but having a better chance of doing their job successfully;
SUPERIOR are the top-line, state-of-the-art systems – the most complex and expensive, but also the most effective.
For example, a vehicle with a BASIC Fire Control System uses a D6 as its normal Die Type for Direct Fire shots; one with an ENHANCED system would use a D8, and a SUPERIOR FireCon would use a D10. The general rule is the better the system, the 'bigger' die type it uses.
SPECIAL NOTE: each individual vehicle or other element needs only ONE of each system; thus even if it has multiple weapons, one Fire Control system will cover them all. Multiple GMS Launchers, however, DO have multiple guidance systems as these are integral to the Launchers.
ARCS OF FIRE
Weapons that are mounted in TURRETS have an all-round (360°) Arc of Fire, unless some specific feature of the particular vehicle design makes this impossible (for example, some multi-turreted designs available in model form have obvious limitations to the traverse of some or all turrets) – in such cases a 180° Arc is suggested for restricted-traverse turrets, 90° each side of the turret's normal facing.
FIXED MOUNTS have much more limited Fire Arcs; a vehicle-mounted weapon in a Fixed Mount may only fire through a 30° Arc, ie: 15° either side of the vehicle centre-line. Targets outside this arc may not be engaged without physically turning the vehicle, which counts as MOVEMENT; as Fixed Mount weapons may ONLY be fired BEFORE moving, it follows that such weapons may only fire in the direction they are pointing at the end of their previous activation.
OPTION: If preferred, the Fixed Mount fire arc may be the same as the "FRONT" arc used in the 'Angle of Attack' rule on P.32, ie: the arc bounded by lines extended through diagonal corners of the model. This method gives a wider arc for most models, but has the advantage of not requiring an arc of fire template to be made or used – in the end, it is up to you.
FIXED MOUNT WEAPON: 30° FIRE ARC. FULL TRAVERSE TURRET: 360° FIRE ARC. RESTRICTED TRAVERSE TURRET: 180° FIRE ARC.
WEAPONS FIT LIMITATIONS
The size and number of weapons that a vehicle may be fitted with is determined by its Size Class, and by the type of mounts (ie: fixed or turreted) that are chosen for the weapons.
When equipping a vehicle with weapons, select the LARGEST (or "Primary") weapon to be fitted first; if it is to be in a FIXED MOUNT (ie: like a Tank Destroyer or Assault Gun), the amount of CAPACITY that the weapon takes up is equal to TWICE the weapon's SIZE CLASS; if it is to be in a TURRET, it takes up THREE TIMES its SIZE CLASS. Example: a class 3 weapon (of whatever type) fills 6 points of Capacity if in a Fixed Mount, or 9 points if in a Turret.
[This capacity includes the gun mechanism, crew space, ammunition storage etc; turreted guns take up more capacity due to the internal space required in the hull for the turret mechanism and so on.]
Note that this refers to DIRECT FIRE WEAPONS ONLY (including SLAM packs); other weapons such as Guided Missile Systems, Point Defence, etc. all occupy fixed amounts of capacity as listed in the systems table on P.16, regardless of whether they are turret-mounted or not.
When further weapons are added to a vehicle that already has a Turreted main weapon (including adding extra barrels of the same weapon type to make a multiple mount), all the additional weapons only occupy TWICE their class in terms of capacity – the extra bulk of the turret has already been accounted for in the primary weapon. Thus to put (say) a TWIN-MOUNT class 3 gun system in a turret would use up 9 capacity points for the first barrel, but only 6 for the additional one – a total of 15 points capacity for the twin-mount.
NO VEHICLE MAY BE FITTED WITH MORE WEAPON SYSTEMS THAN ITS BASIC SIZE CLASS; thus a class-3 vehicle could carry no more than THREE weapons systems. Multiple mounts count every barrel towards this limit, and a Point-defence System counts towards the total as well. The only weapon NOT counted in this total is a single APSW, as below:
ALL MILITARY VEHICLES ARE FITTED WITH ONE "FREE" APSW, CAPABLE OF ALL-ROUND FIRE; THIS WEAPON DOES NOT COUNT TOWARDS ANY WEAPONS FIT LIMITATIONS, OR TAKE UP ANY CAPACITY. [This is assumed to be a Machinegun or equivalent, on an external remote mounting. Additional APSWs may be fitted if desired, but any such extras each occupy ONE capacity point and DO count towards total weapons fit limitations.]
NOTE: it is RECOMMENDED that players limit the MAXIMUM SIZE of any single weapon system on a vehicle to ONE CLASS LARGER than the vehicle's own Size Class; thus a class-3 vehicle could not carry any single weapon larger than class 4. This is not an absolute ruling however, and players may (if all agree) experiment with fitting ANY gun size into whatever vehicle will hold it, within the limits of the Capacity points – it IS possible therefore to put a Fixed-Mount class 5 gun on a class 2 hull, but only just; there will not be any capacity left for any other systems at all.
Examples:
1) A LARGE vehicle (class 4) will have 20 Capacity points. If we wish it to carry a turreted class-4 main gun (of whatever type), that will use 4 x 3 = 12 points of capacity, leaving 8 for other systems. We could then add a second class-4 barrel to make a twin-mount, but that would cost the full 8 points we have left and not leave room for anything else. We therefore decide to add a class 2 secondary weapon (perhaps an MDC/2) which, although mounted on the turret, only uses 4 capacity (the turret has already been accounted for) and leaves us 4 points over to use for defensive and other systems.
2) A MEDIUM (class 3) vehicle has 15 capacity points. If we wish to build a "Tank Destroyer" with a large fixed gun, we could fit a single class-4 weapon in a Fixed Mount at a capacity cost of 8; this leaves us 7 points over. Deciding that a fully-traversable secondary weapon would be a good idea, we mount a class-2 gun (maybe an RFAC-2) in a turret, at a cost of 6 capacity points – as we did not fit a turret for the main weapon, the extra capacity MUST be allowed for on the secondary weapon. The ONE point thus left over could be used for an extra APSW (to supplement the one fitted "free"), or for any other capacity-1 item.
INFANTRY AND CARGO TRANSPORT
Vehicles that are designed to carry Troops or cargo must have a certain amount of their internal CAPACITY points dedicated to such accommodation. The capacity requirements are as follows:
Carrying ONE Infantry element (LINE or MILITIA troops) takes 4 points of capacity;
ONE element of POWERED INFANTRY takes up 8 points of capacity;
one "LOAD" of CARGO takes 4 points of capacity (eg: Artillery Ammunition);
any smaller vehicle takes up 8 x the Size of that vehicle (eg: carrying a SMALL vehicle takes 16 points of capacity).
a Command/Communications centre takes 8 points of capacity.
Example: To build an MICV (Mechanised Infantry Combat Vehicle, which is basically an APC with sufficient armament to hold its own in combat), we could choose a MEDIUM (class-3) hull, giving us 15 capacity points. Assuming we wish it to carry TWO elements of Line Infantry, these will require a total of 8 points of capacity, leaving 7 points over. We can then fit a turreted class-2 weapon (probably an RFAC-2 or MDC-2) at a capacity cost of 6 (with one point spare), or alternatively a class-1 turreted gun at 3 points and a Heavy Missile System at 4 points capacity.
ARTILLERY VEHICLE DESIGN
Artillery vehicles are designed in the same way as any other ground vehicle, with the following notes and limitations: [REFER TO P.37 FOR DETAILS OF ARTILLERY WEAPON TYPES.]
i) Artillery Weapons have SIZE CLASSES as follows:
LIGHT ARTILLERY weapon (RAM MORTAR) = class 2.
MEDIUM ARTILLERY weapon (RAM Guns, smaller MRLs) = class 4.
HEAVY ARTILLERY weapon (MD Guns, large MRLs, HARs) = class 6*
* though outside the normal 1-5 class range, class 6 weapons use exactly the same calculations in all cases; they are available ONLY as Artillery – no class 6 Direct Fire weapons are permitted.
ii) The capacity (and points cost) of an Artillery weapon INCLUDES its Fire Control (as Level of FireCon is not relevant to Artillery fire), and the space for ammunition storage. ALL ARTILLERY WEAPON MOUNTS TAKE UP CAPACITY EQUAL TO 3 x CLASS.
(Eg: a class 6 (Heavy) Artillery piece would need 3 x 6 = 18 capacity, so could just fit on a class 4 vehicle with a couple of capacity points over for basic defences.)
iii) Artillery Arc-of-Fire is assumed to be the FRONT 180° Arc; mounts are taken as limited traverse, or else the rounds are steerable in flight (eg: Heavy Artillery Rockets).
iv) Artillery weapons are generally only fitted to specialised Artillery vehicles, though it IS possible to mount them on other AFVs in addition to Direct Fire weapons if sufficient capacity is available; such a 'hybrid' vehicle could then act as either a normal combat vehicle OR as an Artillery piece as desired, but would have to follow all the relevant rules for each type.
v) COUNTER-BATTERY RADAR (CBR) takes up 14 capacity points; it is normally mounted on a separate vehicle, but could possibly be carried by an Artillery vehicle itself if sufficient capacity was available.
vi) Although the vast majority of Artillery pieces are Self-Propelled (ie: mounted on vehicle chassis), it IS possible to use TOWED Artillery if desired. An Artillery weapon on a towed carriage has a Size Class (for Signature purposes) of one LOWER than the class of weapon (eg: a towed MEDIUM ARTILLERY piece would be a size 3 element), and requires a "tractor" of an equal class or larger to move it around. Limbering/unlimbering a towed piece to prepare for firing or movement takes a full activation.
When costing towed Artillery in points, only the cost of the weapon system itself is paid for – the carriage costs nothing (though the Tractor vehicle must be costed as a normal vehicle); the tractor is assumed to carry all the "ready" ammunition for the gun.
Towed Artillery counts as a softskinned target, ie: Armour rating 0.
INFANTRY FORCES
There are a number of different types of INFANTRY (or non-vehicular) elements available; the basic types are:
MILITIA INFANTRY: this category covers very lightly-equipped troops, probably with basic and/or obsolescent weaponry. Although we use the term "Militia", this also covers second-line and reserve forces, irregular troops, rebels/guerrillas and so on. Though often poorly equipped, this type of Infantry will NOT necessarily be poor soldiers – in some units, many may be of Regular or even Veteran status – their abilities should be determined in accordance with the 'history' of the unit and the scenario being played.
LINE INFANTRY: the bulk of most first-line Infantry forces; troops equipped with modern weaponry and combat armour, but still relying on "battle taxi" APCs or MICVs for transport. As with the Militia type, the Line Infantry category defines only the level of equipment of the troops, NOT their training or status.
POWERED INFANTRY: the high-tech troopers in full suits of Powered Combat Armour; these suits enable the men to move far faster and further than their 'unpowered' counterparts, protect them much more against enemy fire and allow them to carry far heavier weaponry. The Powered Infantry are the 'shock troops' of the battlefield, able to act independently of transport vehicles if necessary and to fight in the most hostile environments -their psychological effect alone (especially against lighter Infantry types) is of considerable value. In general, most Powered Infantry units will be of Regular or Veteran status rather than Greens – the majority of armies take only seasoned fighters to undergo the extra training necessary to become Powered troopers.
CAVALRY: the idea of using Cavalry (ie: troops on riding animals) in an SF environment is not as strange as it may first sound. Horses or other beasts can be transported to colony worlds as frozen embryos, require minimal maintenance, reproduce themselves and need only organic fuels. Additionally, they can traverse certain types of terrain that are otherwise impassable to all but airborne units. For many small settlements and rural colonies with limited resources and technological base, the use of animals for transport of troops and supplies may well be a very attractive and cost-effective proposition. The use of Cavalry under these rules generally assumes horses or horse-like creatures with single riders, but there is absolutely no reason why you should not experiment with more 'exotic' ideas (Power-Armoured troops riding genetically-modified elephants...?).
It is assumed that in most cases Cavalry units will fight more as Mounted Dragoons, using their animals for transport only and fighting as dismounted Infantry (Militia or Line types) – however if you REALLY want to do a mounted charge into close-assault then feel free to try it!
All Infantry elements represent TEAMS of men on a single base. A given Team may consist of from two to five men; the following are the different types of team available, any of which may be made up from any of the above-mentioned kinds of troops and equipment:
A RIFLE TEAM is the 'basic' Infantry element; it consists of four or five troopers equipped with Personal Arms ("rifles") and (usually) IAVRs. Most such teams will also contain a light team-support weapon (an LMG or GPMG equivalent), but this is NOT considered a separate weapon for firepower purposes – its effect is factored into the overall "personal arms" firepower of the team.
An APSW TEAM is a two or three-man element carrying an Anti-Personnel Support Weapon (eg: a heavy MG, automatic grenade launcher or equivalent); the weapon team can only carry Close-defence personal weapons in addition to the APSW.
An ASSAULT TEAM is a four or five man team (like a Rifle Team), but armed with specialised Close-Assault weapons – they may NOT fire in Ranged Firefight combat, but get a bonus over normal teams in Close-Assault combat. [Note Assault teams are available as MILITIA or LINE types only – Powered troops already have the increased combat capability.]
A FIRE DESIGNATION TEAM is a two or three man team dedicated to observing and designating for Artillery fire support. They carry only close-defence weapons in addition to their designator and sensor equipment.
An ANTI-ARMOUR TEAM is two or three men carrying a GMS/L system for anti-tank use; they carry only close-defence weapons in addition.
A LOCAL AIR DEFENCE TEAM consists of two or three men with a LAD system (such as a light AA Missile launcher), plus close-defence weapons.
An ENGINEER TEAM consists of anything from two to five men with demolitions, mine-clearing and other specialist combat engineering equipment, plus close-defence weapons.
Note that RIFLE TEAM Personal Arms and APSWs are the only weapons that can perform ranged fire during an INFANTRY FIREFIGHT; all other teams have only close-defence weapons (machine pistols, SMG equivalents etc.) for personal arms, which may be used in Close Assault combat but NOT in ranged firefights.
RIVERINE CRAFT
The term RIVERINE CRAFT covers vessels built for coastal, river and other "brown-water" operations, usually in support of land forces. They are 'conventional' boats, hydrofoils (usually with retractable foils to permit operation in very shallow water), Surface-Effect craft using a "rigid sidewall" (RSW) Air Cushion, and even small submersible craft. Riverine craft will be more likely to be used by lower-tech forces, as the advent of better GEVs and then Grav vehicles will tend to make them redundant for many missions; however a 'boat' of whatever sort is still a low-cost and fairly efficient form of transport in areas with suitable waterways available.
RIVERINE CRAFT DESIGN
Watercraft are designed and costed using exactly the same procedures as for ground vehicle elements. There are a few different limitations imposed on watercraft design, as follows:
i) Riverine craft may not carry Armour rating more than TWO LOWER than their size class – thus a class 4 (LARGE) vessel could only have up to Armour 2. Vessels of size 1 and 2 can only be Armour 0 (softskinned).
ii) No vessel may mount a WEAPON of a class more than ONE LOWER than their size class – eg: a class 3 (MEDIUM) watercraft could only mount class 1 or 2 weapons (however, it could still mount up to 3 such weapons – the NUMBER limitation remains as normal). Size 1 vessels MAY mount a single class 1 weapon.
iii) Watercraft require Power Plants as normal, with usual limitations on certain weapon types according to power available. For mobility, any Power Plant type is sufficient for conventional boats and hydrofoils, but RSW Air Cushion craft have the same size/power limits as GEVs.
Some of the larger watercraft types that players may wish to use (eg: Landing Craft and big Fire-Support Monitors) will require the OVER-SIZE VEHICLE rules discussed on P.15.
AIRBORNE VEHICLES
Flight-capable vehicles are divided into two groups; VTOLs and AEROSPACE CRAFT.
VTOLs are flying combat vehicles that may hover, land/take-off on table, operate at NOE (Nap-Of-Earth, or 'terrain following' height) and so on. The category covers conventional Helicopters, "Jetcopters", some WIG (Wing In Ground-effect) craft and 'pure' vectored-thrust VTOLs which stay airborne through simple brute thrust alone. VTOL craft are the equivalents of 20th century battlefield helicopters, and perform many of the same missions – troop transport and airmobile assault, tank hunting, Casevac of wounded etc.
AEROSPACE CRAFT covers high-speed ground attack fighters (mostly capable of operations in atmosphere and in low-orbit), interceptors and such. Interface landing craft (from little squad-size assault boats up to huge Dropships carrying an Armoured Squadron or more) are also classed as AEROSPACE CRAFT, but for their design and use see INTERFACE LANDINGS on P.43.
AIR VEHICLE DESIGN
Both VTOL craft and Aerospace craft are designed in basically the same way as ground elements, with the following provisions:
i) For CAPACITY (to fit weaponry, ordnance and other cargo), VTOL craft and Aerospace craft all have the same as ground elements (ie: 5 x Size Class).
ii) For Power Plants, ALL air vehicles must pay the costs for FGPs (this does not necessarily mean that they use Fusion power, but covers the fact that they need much more powerful and costly engines than ground vehicles). Note also the special costs for air mobility types in the points lists, which are additional to the Power Plant costs.
iii) Direct Fire weaponry on Air vehicles is more limited than on ground elements. VTOLs may employ small turrets (usually chin-mounts) that may hold APSWs or class 1 weapons only; other VTOL weapons (and ALL Direct Fire weapons on ground-attack Aerospace craft) must be in fixed mounts, firing forward. Additionally, NO WEAPON OVER CLASS 3 may be fitted to any Air Vehicle.
iv) For DFO (DEAD-FALL ORDNANCE) on Aerospace craft, one AMMUNITION MARKER (ie: the ability to make one attack on a Beaten Zone) takes up 4 capacity points.
v) Armour ratings on Air vehicles are limited to MAXIMUMS of Armour 2 for VTOL craft, and Armour 3 for Aerospace craft; additionally, no air vehicle may carry Armour heavier than 1 LOWER than their Size Class. Thus a size 3 VTOL could only carry Armour 2, but a size 4 or 5 VTOL would ALSO be limited to Armour 2 maximum. [For Air vehicles, the "armour" rating does not simply indicate thickness of armour carried but also the general "survivability" of the airframe.]
AEROSPACE WEAPONS
Aerospace craft may carry Direct Fire weapons and Guided Missiles which function in the same way as their ground-fired counterparts. They may also carry DEAD-FALL ORDNANCE (DFO), which are Cluster Bombs (or Submunition Dispensers) available in the same types (MAK and HEF) as normal Artillery munitions.
Each aircraft may carry one or more "ORDNANCE LOADS", each such Load representing the Ordnance dropped on one attack pass (though multiple Loads may be dropped simultaneously on the same target point if desired).
To record the Loads carried on each aircraft, use some of the Artillery Ammunition markers, either kept off-table or placed with the aircraft model as desired. One Ammunition marker represents one Ordnance Load of the relevant type, and is expended when the Load is dropped.
COMBAT WALKERS
The Combat Walker is a very specialised type of fighting vehicle: this is the huge "Mecha" so popular in Japanese SF and now well-known to gamers the world over thanks to several systems dedicated entirely to them. While the actual rationale behind building and using them is tenuous to say the least (if you are going to stand thirty metres tall on the modern battlefield, you may as well paint TARGET on yourself in neon letters...), the fact remains that the idea of the "big tin Samurai" striding across the table is great fun!
Walkers are thus included here entirely as an optional rule; if you like them and wish to create that kind of battle, then use them freely – if you hate the things then just leave them out. Be warned, however, that even if you do use them they are NOT the all-powerful kings of the battlefield – they are just another type of AFV, and will get KO'd just as quickly as anything else (or possibly quicker; as they say, "the bigger they are – the easier they are to Nuke from orbit...").
COMBAT WALKER DESIGN
Walker vehicles come in three basic types: the true Combat Walker (effectively a Tank on Legs), Infantry Walkers (small Mecha, 3-4 metres tall and used like a very heavy powersuit) and Transport Walkers (big multi-legged troops carriers, as used in certain popular SF films...).
All Walker vehicles are designed using the same basic system as any other vehicle; the size class limitations are:
Combat Walkers and Transport Walkers may be class 4 or 5 (VERY big ones may be class 6 or 7 if oversize vehicles are being permitted);
Infantry Walkers are all class 1 vehicles.
When fitting weaponry to Walkers, normal size and capacity limitations apply; the only variation is that ALL weapon mounts cost as for FIXED MOUNTS (ie: 2 x Class) in terms of capacity, yet have a special ARC OF FIRE as noted below.
Maximum Armour ratings are as per normal vehicles, ie: equal to Size class.
SIGNATURES of Walkers are ONE HIGHER than normal for their size class, due to their height and overall size – thus a class 4 Walker has a BASIC signature of 5. Stealth systems can reduce this signature if used, and are highly recommended if you want your Mecha to survive very long! [Note that this gives a class 5 Walker a Signature of 6 – if no Stealth is used, refer to section on Oversize vehicles for rules on firing at elements with signatures greater than 5.]
DAMAGE to Walkers is treated the same as for any other vehicle – Mobility hits simply indicate Leg damage, and so on. A Walker with a leg blown off is as immobilised as a tank missing a track.
An example of a typical Combat Walker design might be:
Class 5 (VERY LARGE) vehicle; WALKER mobility; FGP Power; Armour 5. (Capacity = 25).
Armament: DFFG/4 x 2 (one in each "arm", but counts as twin-mount) [capacity = 16]; SLAM/3 (shoulder-mount) [capacity = 6]; ENHANCED PDS [capacity = 3]; APSW x 1 ("free", no capacity).
Other systems: SUPERIOR FireCon, ENHANCED ECM, Stealth-1 (Basic Signature 6, Effective Signature 5).
WALKER ARCS OF FIRE
Though Walker weapons are treated as "FIXED MOUNTS" for capacity and design purposes, they actually have much more flexibility than a normal vehicle Fixed Mount due to the much higher mobility and agility of the Mecha design.
All weapons mounted on Walker vehicles may fire through a 180° arc, as in the restricted traverse turret arc shown on P.11.
In addition, all weapons of the SAME TYPE AND CLASS on a Walker may be counted as a "multiple mount", even if actually positioned in different "limbs".
Walkers may also fire their weapons either before OR after movement, as Turreted vehicles can – they are not limited in the same way as normal Fixed-Mount vehicles.
"OVERSIZED" VEHICLES
The basic design and combat systems allow only for vehicles up to VERY LARGE size (class 5), as this should cover most models and types that players will wish to use. The limits cannot be expanded to cover "OVERSIZE" vehicles of classes 6, 7 and even larger. These represent the REALLY huge vehicles that sometimes crop up in SF literature, virtually "mobile fortresses" bristling with arrays of heavy weaponry.
If you wish to construct and use such Oversize vehicles, use the following rules and notes as guidelines:
i) The Vehicle Design system can be used as it stands for class 6 and 7 vehicles; they will have CAPACITIES of 30 and 35 respectively, and follow the normal rules for weapons fits etc.
ii) There are no weapon classes larger than 5 available (Oversize vehicles may just carry more of them), but Armour ratings of 6 or 7 ARE permissible.
iii) Oversize vehicles may, if desired, be fitted with more than one FIRE CONTROL system (class 6 may carry 2, class 7 up to 3). Each additional FireCon over the normal one allows the vehicle to fire an extra weapons system (at a different target) in one Combat Action – thus it may engage multiple different targets with different weapons mounts in one activation. Each additional FireCon occupies no Capacity, but costs the normal points value.
iv) Oversize vehicles have signatures of 6 or 7 according to class; as the normal list of signature/die type does not go above signature 5 (= D4), a special rule is required:
When firing at a vehicle with Signature 6, count all shots as being one range band closer than they really are (eg: LONG range is counted as MEDIUM); for Signature 7 or greater, count ranges as TWO bands closer – ie: ALL shots are counted as CLOSE range. Size 6 and 7 vehicles always use a D4 as their basic target die type.
v) STEALTH abilities may be purchased for Oversize vehicles at the usual costs, to reduce their effective signatures if desired.
vi) Oversize vehicles may in general use whatever mobility type is desired, but players may if they wish apply some extra limitations on movement – some terrain types may be deemed impassable to class 6 or 7 vehicles due to their sheer weight and bulk. Such limitations must be agreed before the game.
[Note that the ideas and rules above are merely suggestions – space precludes a fuller discussion of the possibilities of Oversize vehicles, but players are free to modify the rules as they wish to fit whatever vehicle types they want to create.]
"MODULAR" OVERSIZE VEHICLES
In addition to the Oversize classes 6 and 7 described above, the following notes will allow players to design EVEN BIGGER vehicles if they wish! This is specifically to cover such machines as the giant "CYBERTANKS" of military SF (eg: Keith Laumer's BOLO series and the like) – huge mobile arsenals grinding forward on massive treads, invulnerable to all but the biggest weaponry and directed by their own onboard Artificial Intelligence.
The way to construct such vehicles for use in DIRTSIDE II is to treat each one not as a single vehicle, but as a series of "MODULES" linked together. Each Module is constructed and costed separately under the normal design rules, and may be of any size from class 1 to class 7 (oversize).
To give an example, the classic type of Cybertank that most players will be familiar with might consist of SIX modules – a front hull module of (say) class 5, a rear hull module of class 5, and four "tread" modules (one at each corner), each of size 4.
Each Module will be designed according to the usual rules, with a few limitations:
i) The only permissible Mobility Type is Tracked (Fast or Slow as desired) – no other form of propulsion is practical for something this size! The total size of all the Tread modules is counted when determining mobility cost – so the example above would have the mobility costs of a "class 16" vehicle (4 x class 4 modules).
ii) The Multiple FireCon rule suggested for class 6/7 vehicles may also be used for Modular designs; up to a maximum of FOUR systems may be fitted to the entire vehicle.
iii) Weapons and systems may only be fitted to the Main Hull modules (front and rear in the example above); the "tread" modules may not carry weapons. The TOTAL capacity of the main modules may be treated as one figure for the purpose of weapons fit, thus the example vehicle would have a capacity of 50; the weapons may be distributed as desired between the main modules, regardless of individual module capacities.
iv) NO Stealth abilities are available for Modular vehicles (they are too damned big to hide, even electronically); all Oversize Modular vehicles always use a D4 as their target die.
v) The Armour rating on any module may not exceed 7; the "tread" modules may carry Armour up to ONE LEVEL HIGHER than their size class, and the Main modules up to TWO LEVELS higher. (Thus the example vehicle could have Armour 7 on its main modules, and Armour 5 on its Tread modules.)
FIRING AT MODULAR VEHICLES
When attacking Modular Oversize vehicles, ALL shots are counted as CLOSE range due to the huge size of the target; in addition, the target vehicle NEVER gets to roll a Secondary die, whatever the circumstances – just its basic D4 in all cases.
If a modular vehicle is caught in an Artillery Beaten Zone, draw chits separately for EACH module of the vehicle.
When hit by Direct Fire at MEDIUM or LONG ranges (this is the TRUE range, not the "always Close" range used to determine hits), the particular MODULE that is hit should be resolved at random (for the typical 6-module vehicle described above, roll a D6 to see which module is hit). If the shot is actually at CLOSE range, then the firing player may CHOOSE which module is hit by the shot.
It will be necessary to make up a simple "control card" for each modular vehicle, with a box on it for each module – damage markers affecting each module are placed on this card as required. Markers that affect the entire vehicle may be placed on-table as normal.
Destruction of one tread module will reduce the vehicle to half movement; loss of two or more will immobilise it. The catastrophic destruction ("BOOM") of any module will completely disable the vehicle.
[Note that the ideas and rules above are merely suggestions – space precludes a fuller discussion of the possibilities of Oversize vehicles, but players are free to modify the rules as they wish to fit whatever vehicle types they want to create.]
CLASSIFYING VEHICLE MODELS
We have already mentioned that DIRTSIDE II allows you to take virtually ANY miniature, from any manufacturer, and define its capabilities for use in the game. There are two basic sections to this procedure – the DESIGN stage and the COSTING stage. The former consists of deciding what equipment and capabilities you wish the vehicle to have, and working through a simple procedure, i) to determine what that vehicle will actually fit in that vehicle size, and ii) to set the statistics that the vehicle will use in the game. The latter (Costing) stage is to determine the POINTS COST of the vehicle or element, and is actually OPTIONAL. It is not strictly necessary to know how much an element "costs", if you prefer a force organisation that is based around certain unit sizes and types of vehicle; the Points Value only really becomes important if you and your opponent need a relative measure of the 'value' of your forces, for instance if you are playing a "competitive" game and desire exact force balancing.
If you wish to use the Costing procedure, it may of course be worked out at the same time as the vehicle is "designed".
Full points cost lists are included in the appendices, on P.52.
The first part of DESIGNING is to choose the model you are using, and have a good look at it. In most cases it will be obvious from the model what basic mobility type it will have (does it have tracks, wheels, a hover-skirt etc?); the exact mobility type chosen will also depend on the model's size and desired function – a small tracked tank intended for recce use would probably be given FAST TRACKED mobility, while a very big, lumbering "monster" tank would likely be SLOW TRACKED (though there is no real reason why you could not make the latter vehicle FAST, you would just pay more for it if you are costing it out).
This brings up the question of SIZE CLASS for the vehicle; this should be decided by a combination of what you want the vehicle to do or carry, and a common-sense appraisal of the size of the actual model. We are deliberately NOT going to lay down dimensions and formulae for exactly what constitutes, say, a VERY SMALL, MEDIUM or VERY LARGE vehicle – manufacturers' model ranges (even in nominally the same scale) differ so widely in their sizing that to do so would be pointless. Let us just say that if your opponent puts out a half-inch long scout car on the table and tries to tell you it is a Class 5 (VERY LARGE) tank, you should gently point out the error of his ways.....
Having decided the SIZE and MOBILITY of your vehicle, you now need to choose exactly what weapons, equipment and systems it will carry. Once again, apply common sense when looking at the model itself: if it has a long-barrelled gun and a multi-tube launcher on the turret, you might give it (say) an MDC or HKP main gun and a SLAM pack as a secondary weapon. The actual Class of weapons will be determined from the limitations imposed by the vehicle Size Class chosen. When fitting systems such as Fire Control, ECM and so on, bear in mind the use the vehicle will be put to (eg: don't put Superior ECM on a cargo truck that is never meant to be fired at!) and also consider the technology level of the overall force you are building.
The best way to explain the Design system is to give you a working example; consider the tank shown in the photo on the front cover of this rulebook (the big one within the targeting reticule). The actual model is a DEIMOS/SO Heavy Tank from CM DESIGNS (catalogue no. FWT-12).
The hull of the model measures about 35mm long by 20mm wide; looking at it in relation to other items in the CMD range (and other 1:300 SF miniatures in general) the DEIMOS could most reasonably be classed as a LARGE (Class 4) vehicle. For MOBILITY, the model could pass equally well for a GEV (hover) or GRAV tank; say we are designing vehicles for a medium-tech army, so decide on SLOW GEV as a reasonable Mobility Type.
Adding the POWER PLANT type next, for a SLOW GEV of size 4 we need at least a Hydromagnetic Turbine (HMT) – a chemical-fuelled engine will simply not have enough power to lift the tank. If the background allows for it to be available, a better choice for this sort of vehicle would be a Fusion plant (FGP) as this would allow for MDC or HEL weaponry to be used; assuming it is available, we decide to go for the FGP to allow more freedom in weapons fit.
Now we can ARMOUR the vehicle; as it is a Battle Tank, it makes sense to go for the heaviest allowable, which is the same as the vehicle size class – thus we fit ARMOUR RATING 4. The extra cost of Ablative or Reactive armour is not deemed worthwhile at this point.
Then comes the fun bit – putting the guns on! Obviously the model has a TURRET, with a single main gun mounted in it. We have 20 capacity points to play with (size 4 vehicle, times 5), so we could go for a class -5 weapon in the turret, using up 15 of the capacity; however there is also a boxy bit on the turret side that looks as if it should hold a GMS, and an obvious point-defence system on the turret roof. After deliberation, we decide to fit a class-4 Mass Driver (MDC-4) as the Main Gun (occupying 4 x 3 = 12 points capacity), a GMS/H taking a further 4 points, and an ENHANCED Point-Defence System (PDS) that uses 3 capacity points. The final 1 capacity point is spent on an APFC system round the hull.
[There are obviously a lot of other options we could have chosen for this particular model, but the ones we have gone for give you a fairly well-balanced offensive/defensive capability for such a vehicle.]
Finally, we must decide on the levels of SYSTEMS to be added: FIRECONTROL for the gun, GUIDANCE for the Missile system, ECM and STEALTH abilities for protection. Not wanting to go over the top, and bearing in mind that we will have to "pay" for everything when we do the actual points costing, a reasonable level would be SUPERIOR FireControl, ENHANCED Guidance and ECM, and ONE level of STEALTH (to reduce the effective Signature from 4 to 3).
So, we have the specifications for our DEIMOS tank:
LARGE vehicle (class 4), SLOW GEV Mobility, FGP Power Plant, Armour 4.
Turret Mounted Armament: 1 x MDC-4 with SUPERIOR FireCon; 1 x GMS/H with ENHANCED Guidance; 1 x APSW.
Other systems: APFC, ENHANCED ECM, STEALTH-1 (Basic Signature 4, Effective Signature 3).
Using the points costs on P.52, the DEIMOS has a value of 356 points.
CAPACITY REQUIREMENTS FOR VEHICLE WEAPONS AND SYSTEMS
ALL DIRECT FIRE WEAPONS: Class x 2 if in FIXED MOUNT (or secondary to a turret-mount Primary weapon); Class x 3 if PRIMARY TURRET-MOUNT WEAPON.
GUIDED MISSILE SYSTEMS: GMS/L = 2; GMS/H = 4
POINT DEFENCE SYSTEM (PDS): BASIC = 2; ENHANCED = 3; SUPERIOR = 4
AREA DEFENCE SYSTEM (ADS): BASIC = 10; ENHANCED = 15; SUPERIOR = 20
LOCAL AIR DEFENCE (LAD) SYSTEM: 2
ANTI-PERSONNEL SUPPORT WEAPON (APSW): 1 (initial "free" APSW = 0)
ANTI-PERSONNEL FRAGMENTATION CHARGES (APFC): 1
INFANTRY TEAM TRANSPORT: Line/Militia = 4; Powered = 8
CARGO LOAD TRANSPORT: 4 per load
SMALLER VEHICLE TRANSPORT: 8 x Size Class of carried vehicle
COMMAND/COMMUNICATIONS SYSTEMS: 8
ARTILLERY WEAPONS: Class x 3
COUNTER BATTERY RADAR: 14
CHAPTER 4: SEQUENCE OF PLAY
SEQUENCE OF PLAY – PRELIMINARIES
Before the game starts, the terrain must be set up either in accordance with the scenario to be played or otherwise to the satisfaction of the players; a good method is that one player lays out the terrain, and the other then decides which end of the table he would prefer to play from.
Players may either use a scenario of their choice, which will usually specify things like force dispositions, objectives and so on, or may prefer to play a simple ENCOUNTER or ATTACK/DEFENCE battle. The different set-up procedures for these types of game are detailed below.
The next step is to imagine the length of the playing area being divided into equal thirds. The third adjoining each player's baseline (his "home" table edge) is termed that player's REAR AREA, and the middle third of the table is termed the MAIN BATTLE AREA. This division of the playing area affects how the players may place the OBJECTIVE MARKERS.
The OBJECTIVE MARKERS are counters that define locations on the table which are of value to one or both sides, and thus will be key points of the fighting. In effect, they represent the initial briefing given to the Force Commander before the battle (eg: "Take and hold the Crossroads, and Hills 301 and 305"). Objective markers are placed on the table FACE-DOWN; they are said to be 'taken' by a player when one of his units moves over them (NOT an Air unit, unless it also drops troops on the objective!), although the marker remains in place and can be 're-taken' by the opposition later in the game.
Whenever a player 'takes' an objective he may examine the marker to check its VALUE, replacing it face-down again once he has looked at it.
A typical table ready for play, showing the three "areas" as described above: PLAYER A REAR AREA, MAIN BATTLE AREA, PLAYER B REAR AREA, divided by PLAYER A BASELINE and PLAYER B BASELINE.
ENCOUNTER BATTLES
These are the simplest form of game; both forces will enter the table from their baselines at the start of the game, and fight a mobile battle for possession of the Objectives on the table.
Once the terrain is set up and baselines chosen, the players must agree how many OBJECTIVE MARKERS will be used (between 3 and 6 per player is recommended). Place ALL the objective markers from the counter sheet face down; each player now picks the required number of markers at random. The player may look at the values of the markers he has picked, but does not get to see those of his opponent. Each player then places all the markers he drew on the table, face down, on locations that he wishes to designate as Objectives for the game. One player may NOT place two markers on one location, though he MAY place one of his markers on the same location as one of his opponent's (thus creating a VERY high value objective sought after by both sides). Other than this exception, all markers must be placed at least 6" apart.
Each player must place at least HALF (rounded down if necessary) of his markers in his own REAR AREA, and the remainder in the MAIN BATTLE AREA of the table.
The game then begins. At any point during the game, either player may declare "GAME END" if he currently holds MORE THAN HALF of the TOTAL number of Objective markers on the table, including at least ONE marker in his opponent's Rear Area. When this is declared, all objective markers on the table are turned face up and the actual VALUES of the markers held by each player are totalled; the player with the highest total is the winner of the game.
ATTACK/DEFENCE BATTLES
As with Encounter battles, the players should decide how many Objective markers are to be used. In this case, however, the DEFENDING player draws ALL the markers to be used, and places them as he wishes subject to the following limitations: at least ONE objective marker must be placed in the Defender's Rear Area, and at least HALF (rounded down) in the Main Battle Area.
At the start of the game, ALL the objectives are considered 'held' by the DEFENDER, and the Attacker must 'take' units over them (this will usually mean displacing their current occupants!). The ATTACKER may declare GAME END at any time, if he thinks he has taken enough objective markers to give him a victory; the winner is then determined in the same way as for the Encounter battle.
DEPLOYMENT PHASE
Once all Objective markers have been placed, each player must deploy his forces on the table. In an Encounter battle, both players deploy (alternately unit-by-unit if desired) not more than 6" in from their own baselines. For an Attack/Defence battle, the DEFENDING player deploys first, placing his forces as he wishes in the Main Battle Area and his own Rear Area; he may NOT place units in the Attacker's Rear Area, but may if he wishes use the 'hidden units' rules below. The Attacker must then deploy within 6" of his baseline, as for an Encounter battle.
[If playing a specific scenario, different deployment instructions may be given to fit the scenario; in this case, any special rules are followed in preference to the general ones given above.]
SEQUENCE OF PLAY – THE GAME TURN
One of the central mechanisms of the DIRTSIDE II system is the turn sequence. While most other games use either a simultaneous or an alternate move sequence, consisting of several steps that must be followed by both players in a set order, we instead use a system we have called the INTEGRATED GAME SEQUENCE. This functions by each player taking turn to move, fire and/or make other actions with any ONE platoon-sized UNIT of his choice, following which the opposing player may act with another unit, and so on until all desired units on both sides have had their turn to do something. This completes one full GAME TURN. The key to this system is that when a player decides to do something with any particular Unit,(this is termed as ACTIVATING the unit), that unit gets to perform ALL of the actions it wishes to do for that turn at that one point, and in effectively any order the player wishes - the unit may move, then fire; fire, then move; or conduct any other combination of permissible actions. Once a unit has performed all the actions the player wishes, its COMMAND MARKER is inverted to show that it has used up its ACTIVATION for that turn; a unit with an inverted Command Marker may perform NO further actions in that Game Turn.
[NOTE that at no time is a Unit forced to make any actions, unless it is as a result of adverse Confidence levels; in the Turn, each player may activate all, some or none of his forces.]
A player may elect to PASS on an activation (ie: to forego his right to activate a unit, and thus force his opponent to activate two units in succession) ONLY if at that time he has fewer UNACTIVATED units (with face-up Command Markers) than his opponent does.
This illustrates a (simplified) example of the TURN SEQUENCE: The Defending player has two units, A and B. The Attacking player has three units, X, Y and Z (unit Z being a pair of VTOL Gunships, which follow the same Activation sequence as the ground units). As the Defender has fewer units, he may choose who Activates first - in this case he decides to take the first chance himself; he activates unit A, and fires it at unit Y. The Attacker then takes his turn, and chooses to activate unit X - firing it at B, and moving as well. For his next activation, the defender uses unit B to return fire against X. The Attacker now activates Y, moving it towards the hill on which unit A is positioned; the Defender now has no units left to activate, so the Attacker may follow straight on and activate Z (moving up the VTOLs) to complete the Turn.
Once both players have activated all the units that they wish to, a brief TURN END PHASE occurs during which all Command Markers are turned face-up again in readiness for the next Turn.
The player with the SMALLER number of units on the table has the choice of whether to have the first activation of each turn, or to make his opponent activate first; this can be decided differently for each turn if desired. [OPTION: if preferred, the first activation of each turn can be decided randomly by die roll.]
The use of the INTEGRATED GAME SEQUENCE ensures the full involvement of all players at all times in the game, and requires them to make continual tactical decisions about the exact order in which they will activate their individual units - for instance, if a unit is particularly threatened, do you activate it immediately to get it out of trouble (thus perhaps doing exactly what your opponent wants you to do!), or do you instead activate another unit that will maybe cause him some problems in return and make HIM re-think his plans?
Players are encouraged not to view each Game Turn as a separate period of time, but to think of the alternating sequence of activations as an on-going, fluid representation of the ebb and flow of the battle.
UNIT ACTIVATIONS: COMBAT SEQUENCE
When a UNIT is ACTIVATED during the Game Turn, it follows this COMBAT SEQUENCE:
Each element in the unit may take any of the following options:
MOVE, THEN PERFORM A COMBAT ACTION *;
PERFORM A COMBAT ACTION, THEN MOVE;
PERFORM A COMBAT ACTION ONLY;
MOVE ONLY; or
DO NOTHING.
* SPECIAL NOTE: this option is NOT possible for vehicles that wish to fire FIXED-MOUNT weapons as their Combat Action; Fixed Mounts may ONLY be fired BEFORE (or instead of) moving.
Different elements in the unit may choose different options; it is not necessary for all elements to do the same thing. ALL actions must, however, be completed within the unit's Activation - elements that choose to do nothing may NOT then make actions later in the Game Turn.
The following list shows the available COMBAT ACTIONS that an element may perform, provided it is suitably equipped and circumstances do not otherwise inhibit the action desired:
Perform DIRECT FIRE, or engage in an INFANTRY FIREFIGHT;
Act as an OBSERVER to call in INDIRECT FIRE;
Perform a CLOSE ASSAULT;
ACTIVATE or DEACTIVATE Area Defence Sensors (Active sensors permit the element to engage Aerial targets during the Game Turn).
Note that any element may only fire ONE weapon system per Combat Action; Multiple mount weapons of the same type and class may count as one system for this (eg: a vehicle with twin MDC/4 barrels in its turret MAY fire them both together, but only at the same target. If it instead had a single MDC/4 and a secondary MDC/2, these would have to be counted as different weapons and only one or the other could be fired in one Combat Action).
[SPECIAL NOTE: A unit that is ATTACKED by CLOSE ASSAULT must immediately INVERT its own Command Marker, if it is not inverted already - thus a unit that is Close-Assaulted loses its chance to have an activation of its own in that turn if it has not been activated already prior to the assault.]
Once the whole unit has performed all its desired actions and thus finished its COMBAT SEQUENCE, invert the Command Marker and then remove any UNDER FIRE markers that the unit has been affected by. THIS COMPLETES THE ACTIVATION OF THAT UNIT, and play passes to the opposing player.
The Activation sequence detailed above is followed by all Ground combat units, and by VTOL units; the sequence used by AEROSPACE units is rather different, as shown on P.41.
"CYBERTANKS" – ACTIVATION
A CYBERTANK is any vehicle that is controlled completely by an onboard Artificial Intelligence (AI). While such a vehicle can potentially be of any size class, the typical Cybertanks of SF novels and games are normally huge vehicles that must be designed using the Modular Vehicle rules on P.15.
A Cybertank is considered a "unit" in its own right; and may be activated as for any other unit at any point in the turn. It does NOT require a Confidence Level marker (as it never suffers from Confidence problems or needs to take any tests), but it should have a Command marker (a VETERAN "1") simply to use as an indicator of when it has been activated.
Cybertanks can, of course, be very powerful units; they are immune to the problems of confidence and reaction, and always do as they are ordered. For this reason, their use in most games should be strictly controlled to prevent serious imbalances of play occurring; a very effective scenario can, however, be composed around a small group of Cyber vehicles against a much larger "conventional" force (this idea can be particularly useful for solo play).
THE "TURN END PHASE"
When both (or all) players have conducted the Activations for all desired units, this completes the Game Turn. The TURN END PHASE simply consists of ALL inverted Command Markers being turned face-up in readiness for the next Game Turn to start.
TARGET PRIORITY
This is an important rule, but (it must be admitted) one that will probably cause the most disputes between players. It concerns the selection of target unit(s) for an activated unit to fire at, if there is a choice presented to the player.
It is almost impossible to put down a watertight set of rules for this, as every situation will be different and must be judged on its own merits. All we can say is that it is important for ALL players to treat this in the SPIRIT of the rules, rather than the "letter" of them. If some Anorak-clad Rules Lawyer tries to exploit every situation to his own ends, then the best response (short of flooring him, of course, which we would NOT recommend...) is not to play any more games with him!
The basis of the TARGET PRIORITY rule is that: ANY UNIT WILL ALWAYS ENGAGE THE ENEMY UNIT THAT IS SEEN AS THE GREATEST THREAT TO THE FIRING UNIT ITSELF.
This needs considerable amplification, so we can add the following to the general principle:
i) Units will generally engage an already-activated enemy unit rather than one that has not yet activated for that turn. [A unit that has already moved and/or fired has drawn attention to itself.]
ii) Units will normally engage enemies closer to them rather than ones further away, unless the nearer enemy poses less of a threat to the firer (eg: closer Infantry COULD be ignored in favour of a more distant AFV target, but NOT if the infantry have a GMS with them!).
iii) Units will normally engage an enemy that is in the open, rather than one concealed or in cover, again unless the exposed element does not pose an immediate threat.
Hopefully you will by now appreciate why it is impossible to actually legislate about Target Priority. Every individual situation must be assessed on its merits, and a reasonable decision reached. As with other rules, any real dispute can always be settled by an impartial umpire or by a die roll/flipped coin.
AREA DEFENCE SYSTEMS
An AREA DEFENCE SYSTEM (ADS) is multi-role automatic gun system with a very comprehensive Sensor suite that permits it to engage both Airborne targets and missiles in flight. While it is similar in many ways to the much smaller PDS (Point-Defence System), an ADS is able to protect not only the vehicle it is fitted to, but also other friendly elements within a certain distance of the ADS vehicle.
An ADS may ONLY be fired when it has an ACTIVE SENSORS marker; this marker may be placed in any Activation of the ADS vehicle, and may then remain in place until the player wishes to De-activate the Sensors in a subsequent activation turn.
While it has Active Sensors, the ADS may be used against ANY valid target, as many times in a turn as necessary - there is no limit to the number of separate attacks it may defend against in any one turn, though it may engage any individual target only once per turn (eg: if a unit of VTOLs is over the table and in range of the ADS, the system may fire on them only ONCE - when the VTOL unit itself is activated). In effect, consider the ADS to use OPPORTUNITY FIRE - firing during opposing units' activations - but without the limitation of losing its own activation turn for doing so.
The penalty that an ADS pays for having its Sensors active is that while it has the active marker, it is emitting so many detectable signals that it will attract fire from anything that can see it!
When Active, an ADS vehicle has its EFFECTIVE SIGNATURE INCREASED BY ONE, and any ECM it carries is ineffective (ie: it counts as having NO ECM). Any STEALTH the ADS vehicle has is also rendered ineffective, thus the Effective Signature is one higher than the vehicle's BASIC signature, irrespective of any Stealth Levels.
When defending against Missiles, the area protected by the ADS vehicle is a 24" diameter circle - any friendly unit within 12" of the ADS (and in line of sight of the ADS) may benefit from the system's protective fire if attacked.
[For details on the rules concerning ADS fire against Missiles refer to the section on P.31.]
For ADS fire against Air vehicles, the maximum range is 36" (subject to line of sight limitations). For details on ADS fire against Air vehicles refer to the AIR DEFENCE section on P.42.
AREA DEFENCE SYSTEMS AGAINST GROUND TARGETS
ADS vehicles MAY fire at ground targets if they do NOT currently have their sensors active for defence use; in this case they may engage with direct fire during their own activation turn, as for any normal ground vehicle.
Any ADS, when firing at ground targets, is counted as an RFAC/2 for all Range Band, hit and damage resolution purposes.
OPPORTUNITY FIRE
While his OPPONENT is moving the elements of a Unit he is currently activating, a player may declare that he wishes to perform OPPORTUNITY FIRE against the unit being moved. This may be carried out with any unit that has NOT yet used its activation for that turn, and that is able to engage the moving unit with direct-fire weaponry. When opportunity fire is declared, the opposing player must pause in moving his elements while the player who wishes to fire at them does so and resolves all subsequent effects; should this fire result in the moving unit having to take a Confidence Test, this is done immediately and any results applied. If applicable, the opposing player may then complete his unit's activation. The unit that performs the Opportunity Fire has its Command Marker inverted immediately after the fire is resolved; thus the Opportunity Fire counts as that unit's activation for that turn - it may not perform ANY other actions, EVEN IF ONLY SOME ELEMENTS OF THE UNIT ACTUALLY FIRED.
HIDDEN UNITS
When playing an Attack/Defence game (or any other scenario that warrants it), a DEFENDING player may elect to deploy some of his forces in concealed positions. Such units are NOT placed on the table during the deployment phase, but instead are represented by "Hidden Unit" markers placed face-down on the table in the location occupied by the actual unit. The Hidden Unit markers (green counters marked with single letters, of which there are 24 supplied) may be supplemented by up to half their number of "Dummy" markers; one 'real' marker is used per UNIT that is to start the game in concealment, and must be placed in positions in which elements could reasonably be considered to be concealed from enemy reconnaissance (such as at the edges of woods, within groups of buildings etc.). The placement of the marker represents the approximate centre of the actual unit's deployment area - when the models are finally placed on the table they should be suitably spaced around the marker's location, within the limits for Unit Integrity. Any DUMMY markers are also placed in suitable locations, to confuse the attacking player.
[The basis behind the use of Hidden Units is that the enemy's drone and/or satellite surveillance of the defending positions is good enough to determine the presence of enemy units in most cases, but not enough to identify them if they have had enough time to spend on camouflage (both physically and electronically); the dummy markers represent the defenders' use of Decoys and other 'red herrings' to further reduce the accuracy of the Attackers' intelligence systems.]
Hidden Unit markers are revealed either when the owning player first wishes to Activate that unit, or the first time that an attacking element obtains a clear line-of-sight for its sensors to the 'hidden' marker. Dummy markers are removed from play when thus revealed, while 'real' markers are replaced by the models they represent.
[NOTE that at NO time may any unit enter a 'hidden' state while the game is in progress; once a unit has been located for the first time, the Command/Control AIs won't forget about it again!]
COVER AND CONCEALMENT
Infantry and vehicle elements may adopt 'covered' positions behind hilltops, ridgelines, in wood edges and so on; such positions count as the element being in SOFT COVER (a vehicle "hull down" has the same effect). The element in the cover may fire and perform other combat actions normally, but receives defensive bonuses when being fired at. To qualify for the benefits of the cover, the element must be in physical contact with the feature that it is claiming cover behind or within.
"DUG-IN" UNITS
Digging-in is a more effective form of Cover and Concealment, requiring the provision of defensive positions such as hull-down emplacements for tanks and AFVs, trenches or foxholes for Infantry etc. A unit that is declared to be DUG-IN is indicated with a dug-in marker from the counter sheet; should the unit then move from that position it loses the benefit of the defenceworks; the marker is left in place on the table in the original location, however, and may be re-occupied later by either player's forces. Units occupying Dug-in positions benefit from various defensive bonuses as specified in the combat sections of the rules.
Dug-in positions may only be used by DEFENDING forces that start the game deployed into such positions, unless a force is equipped with specialist ENGINEERING elements to create defensive works during the game; rules for these are given in the Combat Engineering section on P.45.
Example of the Effects of Woods: The two vehicles are counted as being on the EDGE of the wood, so they can fire out (and be fired at). The Infantry elements are INSIDE the wood, so cannot fire out or be fired on - the only things that can attack them are Artillery fire and other Infantry in Close Assault.
EFFECTS OF WOODS
Wooded areas on the table block lines of sight and fire, and can also offer concealment to elements. Woods are defined as LIGHT or DENSE for unit movement purposes, but for all other game functions both types of Woods are treated the same way.
Any element or unit that occupies a Wooded area must be declared to be either WITHIN the wood (if its Mobility type allows this), or on the EDGE of the wood. To be counted as on the EDGE of a wood, the elements must be in contact with the defined fringe of the wood area (it is useful if woods are depicted on the table by a cloth or paper area dotted with model trees, rather than just using the trees alone - this gives a clearly delineated "edge" to the wood).
Elements which are on the edge of a wood may fire normally at targets outside the wood, and themselves count as being in SOFT COVER when fired at. Elements that are actually WITHIN the wood may neither fire, nor be fired on by, direct fire weapons or Infantry arms; they may only be engaged in Close Assault by Infantry that are also inside the wood, or attacked by Artillery targeted on the wood itself.
CHAPTER 5: CONFIDENCE AND REACTION
UNIT QUALITY AND LEADERSHIP RATING
Each platoon-sized UNIT in a player's Combat Group has two important characteristics - its UNIT QUALITY and the LEADERSHIP RATING of the unit commander. The Unit Quality is rated as one of three levels: GREEN (new and/or inexperienced troops), REGULAR (average line troops with some combat experience and reasonable training) or VETERAN (highly experienced and motivated troops). The Leadership Rating is a measure of how good the commander of that unit is at his job, and how he is liked/respected by his troops. Leaders are rated as 1, 2 or 3; a grade 1 leader is a man that so inspires his men that they would follow him through hell and back, a grade 2 leader is an all-round 'average' officer and finally a grade 3 is more likely to get shot by his own men than by the enemy!
Throughout the game, the unit is marked with a counter that is referred to in the rules as a COMMAND MARKER (see notes on the counter sheets). The COLOUR of the Command marker denotes the Unit Quality - ORANGE for VETERANS, BLUE for REGULARS and (not surprisingly) GREEN for GREENS, while the NUMBER on the marker indicates the Leadership Rating. Thus, for example, a Regular unit with an average commander would have a BLUE "2" command marker. Looking at some of the extremes, a Veteran unit that had lost its officer and had him replaced by some hopeless case just out of training might be rated ORANGE "3", as the troops would not trust the new commander as far as they could throw him; on the other hand, a raw unit of new recruits could be spurred on to great things by a really charismatic and competent leader - this would be a case for a GREEN "1".
The Command Marker remains with the unit at all times (unless you prefer to put all the markers on a Force Status Sheet); it serves as a reminder of the die type and values used in all confidence and reaction tests for the unit, and is also inverted each turn to indicate when a unit has been activated for that turn. The only times that a Command Marker will be changed for another are i) if the unit commander is lost, when a marker with a worse Leadership Rating may have to be used to indicate a less-experienced assistant taking over, and ii) if two or more depleted units are merged under the rules for 'regrouping'.
There are a number of ways in which you can determine the Quality and Leadership of a given Unit prior to the game. If the unit is used through a series of games (or even a full campaign), then it will build up its own 'history' and carry its characteristics over from game to game (perhaps modified upwards as the unit gains experience and battle honours, or downwards if it requires a large influx of "FNGs" to replace combat losses between battles).
When starting a unit from scratch, or just determining values for a one-off game, the simplest way is to put a selection of Command markers face-down and draw them at random - either drawing in turn for each unit, or else drawing a number of markers and then assigning them to various units as desired. The 'mix' of markers provided on the countersheets is biased towards 'average' units, so if you draw at random from the whole set of markers then you should end up with a balanced force of largely Regular troops with smaller proportions of Veterans and Greens. If the particular scenario or background warrants it, feel free to bias the mix of markers further in any desired direction - for example, if drawing markers for a very high-quality mercenary force you might agree to pick from a mix of mainly veterans with average/good leaders, with just a few regular and green markers thrown in for that bit of uncertainty (even the best forces need raw recruits at some point to replace casualties). On the other hand, if you are generating a Planetary Defence Militia then you would probably use mostly Green markers, plus a few Regulars.
Another valid option that you might like to consider is to allow players to "buy" Command Markers, either out of their overall points value allocations (if you are using them) or by rolling some dice each way to give them a pool of "command points" to buy their unit qualities; a possible rate would be rolling (say) 1D8 per two units in the force, adding all the points and then buying quality at the rate of 1 point for Green, 2 for Regular and 3 for Veteran, plus 1 for a grade 3 leader, 2 for a 2 and 3 for a grade 1. This is just a suggestion, to be tried if you wish.
Finally of course, you can simply lay down the unit qualities and Leaderships when writing the scenario, making them fit in with the storyline behind the engagement.
CONFIDENCE LEVELS
In addition to the Command Marker, each UNIT also has at all times a marker that indicates its current CONFIDENCE LEVEL. This is the state of the Unit's morale at any given time, and will fluctuate up or down depending on the Unit's fortunes during the battle.
The Confidence Level Markers are the GREY counters with WHITE letters on them - there are five different kinds, for the five Confidence Levels used in the game:
CO = Confident (morale high, 'ready for anything')
ST = Steady (morale holding, generally still willing to fight)
SH = Shaken (distinctly worried and reluctant to take risks)
BR = Broken (morale almost gone, no longer willing to fight)
RO = Routed (panicked and running away!)
In general, most units will start a game with a CO (Confident) marker; however this is not necessarily the case, and a few units (perhaps drawn at random) might start at ST (Steady). If the scenario warrants it, there may well be cases where units could start at SH (Shaken) or even lower - for instance, if they were the demoralised defenders of a position that had already been under attack for some time with no hope of relief forces. For a one-off game it is suggested that players mix just a few ST markers with the CO ones, and draw at random for each unit they have.
A unit's CL marker may change as the result of a CONFIDENCE TEST (see below); failure to achieve the necessary score in the test will cause the unit's Confidence to drop by one or more levels. Eg: a unit with a current CL of "ST" fails a test and drops ONE level of Confidence - replace the ST marker with an SH (Shaken) one; if the test was failed badly enough for a 2-level drop all at once, then the unit would drop to Broken and get a BR marker in place of the ST.
There are certain circumstances where the unit's CL can actually RISE (eg: a Shaken unit could return to Steady). These cases are detailed below, and in the section on "rallying".
EFFECTS OF CONFIDENCE LEVELS
The following table gives the effects that different Confidence levels have on the actions of units;
[Note that while Infantry units are mounted in APCs or MICVs, they are treated as "Armour" units; when they DISMOUNT from their vehicles, then the whole UNIT is counted as Dismounted Infantry. Troops in "soft" transport (such as ordinary trucks) are treated as Dismounted at all times for Confidence puposes.]
CONFIDENCE LEVEL / EFFECT ON DISMOUNTED INFANTRY / EFFECT ON ARMOUR:
CONFIDENT (CO) — Unit will act normally at all times. / Unit will act normally at all times.
STEADY (ST) — Unit will act normally at all times. / Unit will act normally at all times.
SHAKEN (SH) — Successful REACTION TEST is required for unit to LEAVE COVER, or advance towards enemy. / Unit will act normally at all times.
BROKEN (BR) — IF in OPEN, must withdraw to nearest cover. May not Close-Assault; if Close-Assaulted, will drop to ROUTED (RO) automatically. / Unit may no longer advance towards enemy. If in open, must withdraw to nearest cover.
ROUTED (RO) — Unit is unable to continue in combat; withdraws towards baseline, may not fire. / Unit must withdraw towards baseline, but may return fire if attacked.
In any cases where specific circumstances make it impossible to carry out any of the requirements listed here, the actions of the unit should be determined to the satisfaction of both players. ROUTED units that for any reason cannot withdraw will in most cases try to surrender to the nearest enemy unit (eg: if effectively surrounded).
CONFIDENCE TESTS
A CONFIDENCE TEST is a simple, quick procedure involving a single die roll, which is made as soon as a Unit is placed in any of the circumstances detailed on the list below. Note that each circumstance described has a "THREAT LEVEL" assigned to it, which indicates just how serious the occurrence is to the unit's confidence.
When a Confidence Test is called for, simply take the unit's LEADERSHIP RATING (the NUMBER on its Command Marker) and ADD this to the THREAT LEVEL that applies in this case. This total is the score that must be EXCEEDED to pass the confidence test safely.
The player testing then rolls 1 die, the DIE TYPE being determined by the QUALITY of the Unit (as indicated by the colour of its Command Marker):
VETERAN troops roll a D10;
REGULARS roll a D8;
GREENS roll a D6.
IF the die roll is HIGHER than the score needed, the test is passed successfully and the unit's Confidence is unaffected; if the roll is EQUAL TO or LESS THAN the score needed, the unit's Confidence drops by ONE level. If the number rolled is only HALF OR LESS of the required score, then the unit's Confidence drops by TWO levels.
Example: a unit has a current CL of ST (Steady); it is a Regular ("Blue") unit with Average ("2") leadership. The unit has just taken casualties, which requires it to test confidence with a Threat Level of +1. Adding the Leadership to the Threat Level gives a total of 3; as it is a Regular unit, the player rolls a D8. If he is lucky enough to roll 4 or more (thus exceeding the required score of 3) then the unit's confidence will remain unchanged at ST. If he rolled 2 or 3, the unit's CL would drop by ONE level to SH (Shaken). If he was VERY unlucky and rolled a 1, this would be less than half the required score of 3, and the CL would drop by TWO levels to BR (Broken).
REACTION TESTS
A REACTION TEST is in most ways similar to the Confidence test, except that failing the test does NOT actually reduce the unit's CL. The Reaction test is taken whenever a unit is ordered to do something that its troops may or may not have the nerve to carry out - such as entering into Close Assault with enemy troops, or leaving cover while under enemy fire. Reaction test circumstances (as described in the table) are assigned Threat Levels in the same way as the circumstances for Confidence tests, and the test is taken in exactly the same manner.
If the required score is EXCEEDED by the die roll, then the unit WILL carry out whatever action forced the test to be made; if the roll is EQUAL TO or LOWER than the required score then the troops will NOT carry out the action - they have decided it is much safer to continue to skulk in cover and pretend they have not heard the order to advance.... No change is made to the CL marker however, and the unit may again be ordered to carry out the same action next turn (in which case they have to test again, and may pass or fail in the same way).
TAKING CONFIDENCE TESTS
Confidence Tests are taken immediately following the occurrence of whatever event requires the test to be taken; for instance, if casualties suffered by a unit require a Confidence Test then it will be resolved there and then, as soon as the casualties have been inflicted. This may well result in a given unit having to take more than one test in a Game Turn - this is fully acceptable, and may cause the unit to lose several Levels of confidence in the one Turn (eg: if it is fired on by more than one enemy unit in the turn, in different enemy activations). The effects of a Confidence Test are applied immediately; eg: if a unit that had not yet used its activation had to take a test due to enemy action and lost Confidence Levels as a result, it might then NOT be able to carry out whatever action the owning player had intended it to do in its activation for that turn.
CONFIDENCE AND REACTION TESTS: CIRCUMSTANCES AND THREAT LEVELS
The list below gives the most common circumstances under which units are required to take either CONFIDENCE or REACTION TESTS, and the relevant THREAT LEVELS used to resolve the tests; where tests are required in other (less common) circumstances, these are detailed in the relevant rules sections and the Threat Levels given.
THREAT LEVELS ARE NOT CUMULATIVE; use the highest Threat Level that applies in any given combination of circumstances.
[Players should also consider using a Reaction test to settle any disputes that may arise about whether a unit can carry out a desired action, provided this possibility is not abused!]
A CONFIDENCE TEST should be taken when any of the following apply:
A UNIT has suffered its FIRST element damaged or destroyed in this battle: THREAT LEVEL +1
Unit suffers 25% or greater casualties (elements damaged or destroyed) in ONE ATTACK: THREAT LEVEL +1
Unit has taken TOTAL casualties of 50% or more in the battle so far: THREAT LEVEL +2
The UNIT LEADER element is DESTROYED: THREAT LEVEL +3
Under ARTILLERY or AIR ATTACK (Dismounted Infantry units ONLY): THREAT LEVEL +0
Attacking or Defending in CLOSE ASSAULT: Refer to Close Assault rules.
REACTION TESTS are required as follows:
Dismounted Infantry at SHAKEN, trying to advance: THREAT LEVEL +1
Dismounted Infantry UNDER FIRE, when attempting to move: THREAT LEVEL +1
Vehicles UNDER FIRE when attempting to move: THREAT LEVEL +1
Unit ordered to CLOSE ASSAULT, or attacked in CLOSE ASSAULT: Refer to Close Assault rules.
PANIC
PANIC is a special type of reaction that affects only GREEN (inexperienced) units; it is NOT linked to their current level of Confidence, but represents the tendency of such units to temporarily "freeze" under the shock of first contact with the enemy.
When a GREEN unit FIRST comes under attack in the game (either fired on or Close-Assaulted), it must immediately take a Reaction test at a Threat Level of +2; if it FAILS the test, the unit will PANIC, and receives a "Panic" marker to indicate this state.
A unit with a PANIC marker may not do anything until it uses an Activation to remove the marker - in other words, it must lose its next activation to recover from the Panic state.
Once it has got over the shock of first contact with the enemy, a unit is no longer at risk from Panic reactions.
[OPTION: at the players' discretion, the PANIC rule may be extended to cover not just GREEN units, but also any other units that start the game with (for any reason) a poor Confidence Level; for example, a Regular unit with a starting CL of SHAKEN might be subject to risk of PANIC on first contact with the enemy.]
UNIT LEADERS – LOSS AND REPLACEMENT
Each platoon-sized UNIT must have one of its elements designated as the Unit Leader (platoon Commander). The designated element (which may be a vehicle or an infantry team) should NOT be marked openly, but should have its identity recorded in secret; if the elements have some sort of ID markings or numbers then the identity of the Leader may be written down, but probably the best way is to stick a very small self-adhesive spot or label on the UNDERSIDE of the model or team base. [A very good source of such labels is the sheet of tiny numbers and letters that comes with every blank Videocassette.]
The reason for the secrecy is to hide the identity of the Command element from your opponent, thus preventing an immediate concentration of fire on the leader in a desperate attempt to kill him. [Most real armies go to considerable lengths to 'disguise' the nature of command elements for this very reason.]
If the Leader of a unit SHOULD be lost to enemy fire during the game, the unit must immediately make a confidence test at a Threat Level of +3; in addition, the player must (again in secret) designate one of the surviving elements to take over from his dead superior and assume command of what remains of the unit. At this point, roll a D6; if the score is 1-3 then the Assistant Leader will have a Leadership rating of ONE WORSE than the original commander. If the roll is 4 or 5, the Leadership rating will remain the same, and if it is 6 then the Leadership will actually IMPROVE by one.
Example: if a unit loses a grade 2 Leader, a roll of 1-3 will mean the assistant leader is a grade 3 (one level worse); a 4 or 5 will indicate he is the same (grade 2) and a 6 will put the unit one level better off with a grade 1 assistant - in this case, the troops probably disliked their Commander but have more respect for his second-in-command!
[Note that Leadership Ratings cannot go below (better than) 1 or above (worse than) 3 - if this is indicated then the rating simply remains unchanged.]
UNIT INTEGRITY
The UNIT INTEGRITY DISTANCE is the maximum separation between elements in a given unit that is allowed for the unit to function effectively. If any element exceeds the Integrity distance from the nearest other element of the unit, the unit is said to be DISORGANISED and must be brought back within integrity limits at the earliest possible opportunity. While a unit is DISORGANISED it may not move unless the move brings it back to integrity.
The Integrity distances for various unit types are:
VEHICLE units (including VTOLs): 3" between elements.
INFANTRY units (when dismounted): 2" between elements.
[Note that if two or three infantry elements form a "squad", eg: the occupants of a single APC or MICV, these elements should remain in base-to-base contact at all times as well as being within the normal integrity distance of the other squads in the unit.]
When Mechanised Infantry units are mounted in their transports, they are treated as Vehicle units; if the infantry dismount, the transport may if desired move up to 10" away from the troops and still be counted as within integrity. If the Infantry and their vehicles have to be sub-divided for any reason, then give the separated elements their own Command and Confidence markers (the same levels as the original unit) and treat them as an independent unit. If and when a split unit recombines, the Confidence level of the whole unit becomes the LOWER of the two current individual levels (if different).
The only other time when elements can be outside the normal integrity limits WITHOUT the unit being Disorganised is when destroyed or disabled (eg: immobilised) elements are "left behind" as the unit moves on; provided the remaining functional elements close ranks to keep within integrity distances of each other, the isolated elements do not cause the unit to be Disorganised.
REGROUPING
It is possible to COMBINE two (or more) depleted UNITS into one "new" unit during the game, if a player so wishes. This is known as REGROUPING.
The remaining elements of one unit must be moved (during their activation) in to the Unit Integrity distance of the unit with which they wish to regroup. The latter unit must NOT have already been activated this turn; if it has, then the actual regrouping must wait until the next turn.
The Regrouping uses up the activation of the unit being joined, so its Command marker is inverted. It also uses up all the remainder of the activation of the unit that has moved into contact - they may not perform any Combat Action in addition to their movement.
Once the necessary activations have been expended, the two former units are considered grouped into one new unit. The new unit has the Leadership of the BETTER of the two former unit leaders, the Quality of the LARGER of the two units (in terms of NUMBER of elements in each) and an "average" of the two Confidence Levels (rounded up if necessary).
For example: The remnants (2 elements) of a VETERAN 2 unit, current CL=BROKEN, are joined by 3 surviving elements of a REGULAR 3 unit, CL=STEADY; the "new" (combined) unit of five elements will be rated REGULAR 2 (the Quality of the larger unit, and the better of the two Leaderships), and have a CL of SHAKEN (the "average" between ST and BR).
"UNDER FIRE" MARKERS
The "explosion" markers on the counter sheet are UNDER FIRE markers, used to indicate when a unit has been attacked by something that may inhibit its will to move, emerge from cover, or take various other actions.
Under Fire markers are placed on INFANTRY Units that are attacked by Infantry Ranged Fire, Infantry Close Assault, all types of Artillery or Aerospace craft weaponry, and anti-personnel fire from vehicles. VEHICLE units do NOT receive Under Fire markers simply for being fired on, but DO get one if they actually suffer an element destroyed or damaged during the attack.
The main function of Under Fire markers is to inhibit movement; any unit that has such a marker must take and pass a REACTION test before it may MOVE, at a threat level of +1 for Infantry units (when dismounted) or +0 for vehicles and Infantry still in vehicle transport. The unit's ACTIVATION must be announced BEFORE this test is taken - if the unit fails the test and then does nothing, this still counts as the player's activation attempt.
[Any other functions of the Under Fire markers are described in the rules that they affect.]
LOSS OF COMMAND UNIT
If the overall COMMAND UNIT (or the designated COMMAND VEHICLE within the Command Unit) is destroyed or disabled, this causes serious disruption in the player's entire force. ALL units under the player's command immediately DROP ONE LEVEL OF CONFIDENCE, and for the remainder of the CURRENT game turn no unit may be given a change of orders; in other words, though units may continue with their current activities they may NOT initiate any new offensives (if already advancing, they may continue to do so, but if stationary and/or defending they may not change to, say, advancing).
In the following Game Turn units may again act normally, as communications links are assumed to have been re-established through backup channels to higher-level Command units off-table, the Confidence Level drops are, however, permanent - wihtout an on-table Command unit no attempts at Rallying may be made.
RALLYING UNITS
If a unit is suffering from lowered Confidence, it is possible for the player (via the overall Command Unit) to attempt to RALLY the unit - that is, to increase its Confidence Level. Such an attempt counts as the ACTIVATION for the unit that is being RALLIED; thus the Command Unit may try to rally more than one other unit in one turn if that is desired.
A Rallying Test is similar to a normal Confidence test, and the unit rolls the usual die type for its Unit Quality; the score that must be exceeded is the SUM of the LEADERSHIP VALUES of both the unit testing and the Command Unit; if the score rolled exceeds this total then the Unit's Confidence rises by ONE LEVEL.
Example: a "Regular 2" unit is currently at BROKEN (BR); the player attempts to rally it, using the overall Command Unit (a "Veteran 1"). Adding the Leadership values of both units gives 3, and a D8 is rolled as the unit being rallied is of "Regular" quality. If the number rolled is 4 or higher (thus exceeding the required score), the unit will have its Confidence Level raised to SHAKEN (SH). Whether the test succeeds or fails, the unit being tested for has used up its Activation for that turn - its Command marker is inverted and it may do nothing else.
CHAPTER 6: MOVEMENT
MOVEMENT
Each element (vehicle or infantry) in the game has a MOBILITY TYPE, which defines the type of propulsion/suspension it uses. The list below covers most of the mobility types that will be required, though others may be added if desired. [For the MOBILITY TYPES of specialised vehicles such as VTOLs, RIVERINE CRAFT and COMBAT WALKERS, refer to the relevant special rules sections.]
LINE or MILITIA INFANTRY: ordinary 'leg' infantry teams in fabric battledress or light body armour. BASE MOVEMENT FACTOR = 2.
POWERED INFANTRY: troops in full power-assisted combat armour suits. BASE MOVEMENT FACTOR = 6.
CAVALRY: troops mounted on horses or other riding animals. BASE MOVEMENT FACTOR = 4.
LOW MOBILITY WHEELED VEHICLES: trucks, civilian vehicles etc. with very limited off-road performance. BASE MOVEMENT FACTOR = 10.
HIGH MOBILITY WHEELED VEHICLES: military wheeled combat vehicles with good off-road capability. BASE MOVEMENT FACTOR = 10.
SLOW TRACKED VEHICLES: heavy or cumbersome tanks and other tracked AFVs. BASE MOVEMENT FACTOR = 8.
FAST TRACKED VEHICLES: high-speed, agile tracked AFVs such as light scout vehicles and some smaller tanks or MICVs. BASE MOVEMENT FACTOR = 12.
SLOW GEVs (GROUND EFFECT VEHICLES): larger Hovertanks and less-manoeuvrable hover AFVs. BASE MOVEMENT FACTOR = 12.
FAST GEVs: high-speed hover vehicles - scout and strike GEVs. BASE MOVEMENT FACTOR = 15.
GRAV VEHICLES: all vehicles using "Grav" or "Mag-Rep" drive systems, travelling a few metres off the surface. BASE MOVEMENT FACTOR = 15.
Note that each mobility type listed above is given a number known as its BASE MOVEMENT FACTOR.
This factor represents the distance (in inches) that the element may move per turn, if it is moving over NORMAL terrain. Different mobility types react differently in various kinds of terrain; for a given mobility type, a particular type of terrain may be defined as EASY, NORMAL, POOR, DIFFICULT or IMPASSABLE.
Movement Example: The Tank is a SLOW TRACKED vehicle, with a Base Movement factor of 8. It first moves 4" along the ROAD, which counts as EASY an thus costs it 2 factors (2" per factor); turning off the road, it moves 2" across the OPEN ground which uses another 2 factors (NORMAL terrain at 1" per factor), then enters the ROUGH area which costs 2 factors per 1" moved (POOR going) - with 4 factors left for this move, the Tank can thus move 2" into the ROUGH.
EASY terrain allows an element to move much faster than normal; the element may travel 2" for every 1 movement factor expended in such terrain (eg: GEVs class navigable water as EASY, so a FAST GEV could move up to 30" - twice its base movement factor - if it spent its entire turn on a lake or wide river). IMPORTANT NOTE: elements may only count terrain as EASY and claim the doubled normal movement IF they are in a "travel mode" - that is, they are NOT deployed for action and do not intend to fire, observe or otherwise engage the enemy (they must also not have an Under Fire marker placed on them). Should any of these conditions not be met, the element must treat the terrain as NORMAL for movement purposes - ie: it may only move at its base movement rate.
NORMAL terrain is the 'default value' - elements in NORMAL terrain for their mobility type may move up to 1" per movement factor (eg: a FAST TRACKED vehicle on open, clear terrain could move up to 12", equal to its base movement factor).
POOR terrain indicates areas that cause some problems for certain mobility types; elements in terrain that they count as POOR have to expend 2 movement factors for every 1" of movement (eg: tracked vehicles count rough/broken ground as POOR going, so a SLOW TRACKED vehicle could travel only 4" in such terrain with its movement factor of 8).
DIFFICULT terrain is ground that severely limits movement of a given mobility type; elements trying to traverse areas classed as DIFFICULT to them must use 3 movement factors to move 1" (eg: a LOW MOBILITY WHEELED vehicle crossing a cultivated area, which it counts as DIFFICULT, could move only 3" with its movement factor of 10 - 1" per three factors, and the final factor being lost).
Finally, IMPASSABLE terrain is just what it says - a mobility type that classes a particular terrain as IMPASSABLE cannot move through such terrain. The only exception to this is that elements which count woods as impassable MAY if desired be moved into the EDGE of a wooded area, which represents them taking cover just at the edge of the treeline. They may NOT under any circumstances actually move within the woods - if they move at all it must be straight out of the wood edge at the same point they entered it, right back into terrain that is passable to them.
It should be noted that the actual speeds represented by the movement rates in the game are in fact only a very small fraction of the theoretical 'maximum' speeds of the elements concerned. All movement should be considered to be "combat movement", with the vehicles moving tactically from one covered position to another, spotting for the enemy etc., as well as having to negotiate all the myriad minor obstacles and obstructions that even a stretch of seemingly open, flat ground is in reality dotted with. To get the idea, look at almost any area of supposedly 'open' countryside - even in moorland areas - and try to imagine driving a tank across it flat-out in a straight line....!
TERRAIN TYPES
The list given here details a wide selection of typical terrain that would be found on Earth or a reasonably terrestrial planet; there are notes given in the appendices for those players who wish to set their games in more 'exotic' environments.
ROADS: undamaged, solid roads and highways; includes dirt-tracks if they are stable and in good order.
OPEN, CLEAR: flat desert, plains, grassland etc. with only minimal obstacles to inhibit movement; provides good, firm going.
LIGHT SCRUB: rougher grassland, tundra etc., dotted with occasional bushes, trees and rocks.
ROUGH/BROKEN: rocks, gullies, thick scrub etc., making the going tricky for most vehicles.
CULTIVATED: farming land, a mix of fields divided by hedges, walls, ditches etc; includes paddyfields and similar plantations (due to the groundscale in use, it is much more effective to classify farmland as an overall terrain type than to try and represent each individual hedge and ditch as a separate terrain feature to be crossed).
URBAN AREAS: built-up zones, residential or industrial (includes small towns and villages, but excludes isolated single buildings and farms).*
HILLS: moderate slopes, mountain foothills and general rolling terrain.
MOUNTAINOUS: very steep and/or difficult slopes, impassable ravines, very rough and broken ground.
SWAMP/MARSH: areas of boggy or unstable ground, can include bayous, soft sand, deep snow etc.
OPEN WATER: wide rivers, estuaries, lakes and calm coastal waters. Rivers count as Open Water if they are defined as being wide enough to be easily navigable by waterborne craft.
RIVERS AND STREAMS: narrower watercourses that provide obstacles (usually due to steep banks) but are not wide enough for effective navigation.
LIGHT/OPEN WOODS: fairly sparse forest or woodland, with trees well-spaced and not too much undergrowth to hinder movement.
DENSE WOODS/JUNGLE: thick forestation or tropical/subtropical jungle, with very dense undergrowth; trees closely packed, very difficult going even for men on foot.
* The movement restrictions placed on units in Urban Areas represent the difficulty in manoeuvring large combat vehicles in town/city streets; hence most normal roads running through urban areas do NOT negate the restrictions on urban movement. If, however, there is a road defined as a MAJOR HIGHWAY running straight through an urban area, than elements may use this as a travel route subject to the normal restrictions for ROAD movement (look at this as travelling through a city on a main motorway or ring-road, as opposed to trying to pick your way through the centre at rush-hour...)
TERRAIN EFFECTS ON MOBILITY
Having defined what each type of terrain is, we can now combine that with the different mobility types and show exactly how the various types of element are affected by the terrain they cross:
INFANTRY (Powered, Line and Militia) and CAVALRY: EASY = Roads NORMAL = Open, Light Scrub, Rough, Cultivated, Urban, Hills, Light Woods POOR = Mountainous, Swamp, Dense Woods, (plus Open Water – POWERED Infantry only) DIFFICULT = Rivers/Streams (crossing only) IMPASSABLE = Open Water (except POWERED Infantry)
LOW-MOBILITY WHEELED: EASY = Roads NORMAL = (none) POOR = Open, Urban, Hills DIFFICULT = Light Scrub, Cultivated, Rivers/Streams (crossing only at designated Ford - otherwise impassable) IMPASSABLE = Rough, Mountains, Swamp, all Woods, Open Water (unless amphibious, when POOR)
HIGH-MOBILITY WHEELED: EASY = Roads NORMAL = Open POOR = Light Scrub, Cultivated, Urban, Hills DIFFICULT = Rough, Swamp, Rivers/Streams (crossing only) IMPASSABLE = Mountains, all Woods, Open Water (unless amphibious, when POOR)
TRACKED (Fast and Slow): EASY = Roads NORMAL = Open, Light Scrub POOR = Rough, Cultivated, Urban, Hills DIFFICULT = Mountains, Light Woods, Rivers/Streams (crossing) IMPASSABLE = Swamp, Dense Woods, Open Water (unless amphibious, when POOR)
GEV (Ground Effect Vehicle), Fast or Slow: EASY = Roads, Open, Open Water NORMAL = Swamp POOR = Light Scrub, Hills DIFFICULT = Urban, Cultivated, Rough, Rivers/Streams (crossing) IMPASSABLE = Mountains, all Woods
GRAV: EASY = Roads, Open, Open Water, Rivers/Streams (crossing only) NORMAL = Light Scrub, Rough, Cultivated, Swamp POOR = Urban, Hills DIFFICULT = Mountains IMPASSABLE = all Woods
EVASIVE MOVEMENT
"Evasive" Movement is a special type of movement that is ONLY available to FAST GEV and GRAV Mobility Types; it consists of the vehicle moving very fast while 'jinking' from side to side and generally making itself as difficult a target as possible for enemy fire-control systems. A unit of suitable vehicles may be said to be EVADING if i) they are travelling in terrain that they class as either EASY or NORMAL going, and are using AT LEAST 75% of their full Movement Factors; ii) all elements in the unit are making the same movement (either ALL elements are Evading, or none can).
When a player declares that a unit is Evading, it is marked with an EVASIVE MOVEMENT marker (which is then left in place until the unit's next activation in the next Game Turn); such a unit gains the bonus of rolling a Secondary Die against all Direct fire attacks made on it while the Evasive marker is in place, but suffers the penalty that it may NOT fire itself - the vehicle crews are too busy hanging on to their seats, and their breakfasts...!
AIRBORNE VEHICLE MOVEMENT
The movement of AEROSPACE craft is covered in the section on the Activation of those units (P.41).
VTOL craft, on the other hand, act in many ways like normal ground elements - they are organised into similar Units, and are ACTIVATED as any other unit in the normal sequence of the turn. VTOLs may be in one of three states on the table: in LOW MODE, HIGH MODE or GROUNDED; switching between modes takes up half of the element's movement for that activation (thus it takes a VTOL half its move to land or take off, or to go from high flight to Nap-of-Earth or vice-versa. Coming straight from High Mode to Grounded would take the whole movement for that activation). Note that it is not necessary for every element of a VTOL unit to be in the same mode - it is quite permissible for part of a unit to land (eg: to unload troops) while the remainder hover in Low Mode to provide fire cover.
VTOLs in HIGH MODE are marked with a HIGH MODE counter; if the whole unit are in the same mode then only the one marker need be used, but if some elements are in a different mode then each one in High Mode should be given an individual marker. VTOLs without High Mode markers are assumed to be in Low Mode or landed (if the model is removable from its stand to indicate that it is grounded, so much the better; if they are fixed to the stands it is recommended that a small 'cloud' of cotton-wool "dust" is placed around a grounded VTOL to indicate this).
The Base Movement Factors for typical VTOL craft are as follows:
TRANSPORT VTOLs and CONVENTIONAL HELICOPTERS: 24
ATTACK/GUNSHIP or SCOUT VTOLs: 30
When in HIGH MODE, all VTOL craft count all movement as EASY, ie: they may move at TWICE their Base Movement factor (in inches). VTOLs in LOW MODE also count movement over most terrain types as EASY, unless they are flying in 'close' terrain such as areas with lots of hills, forests, buildings etc. - in this case the count movement as NORMAL. VTOLs need never move any further than they wish to; they may hover in one spot if desired.
WALKER VEHICLE MOVEMENT
Walking machines are very good over nearly all terrain -this is one of the few justifiable reasons for building them! Walkers are treated as follows for Mobility purposes:
INFANTRY WALKERS are treated exactly as for POWERED INFANTRY;
COMBAT WALKERS and TRANSPORT WALKERS have a special "WALKER" mobility type, and each has a different BASE MOVEMENT FACTOR:
Combat Walkers have a Base Movement Factor of 12, Transport Walkers 8.
Walker Mobility treats all terrain types as NORMAL except for: MOUNTAINS, SWAMP and WOODS (light or dense), all of which count as POOR, and URBAN which counts as DIFFICULT.
Combat Walkers (NOT Transport) may also cross OPEN WATER at POOR rate - wading or walking on the bottom, thus they may NOT fire.
In addition, Combat Walkers (but not Transport Walkers) may also make a special RUN move, which enables them to treat NORMAL terrain as EASY (ie: move at double rate). While RUNNING, however, the Mecha may NOT fire.
RIVERINE MOVEMENT
Boats and other watercraft are activated exactly as for any other Unit in play (in most cases a Gunboat or similar vessel will probably be counted as a 'unit' in its own right, although landing craft, assault boats and such may well be grouped into more conventional unit structures).
The Base Movement factors for typical watercraft are as follows:
Gunboats and Patrol boats: 12
Monitors, landing craft, civilian vessels: 8
Small 'assault boats': 15
Hydrofoil or Rigid Side Wall Air Cushion vessels count Open Water as EASY for movement purposes, and other navigable water as NORMAL. All other watercraft count all navigable water as NORMAL. Landing craft and assault boats may be 'beached' for unloading; other vessels must stand off while troops wade or swim, unless they can tie up at a suitable dock or riverbank.
CHAPTER 7: FIRE COMBAT
DIRECT FIRE
The action of one element attacking a target that is in clear line of sight, using a ranged weapon, is termed DIRECT FIRE. When a player decides that a unit will use part or all of its Activation to perform direct fire, he must nominate the target unit or units, designate individual target elements for each of his firing elements and then resolve the effects of each attack.
It is most important that the player designates the intended targets for all the elements he wishes to fire BEFORE any of the shots are resolved; for example, if he were firing three elements of the activated unit at an enemy unit which also consisted of three elements, he might choose to say "all shots at the central element", or could choose one shot at each of the three potential targets (or any combination, including using some shots against elements in other target units if desired). Having declared his intentions, he MUST then stick to it - if he fires all three shots at one target element and kills it with the first shot, then the other two shots are wasted; the player CANNOT re-designate them on to other targets.
To resolve a direct-fire shot, we must first determine whether or not the target has been hit; if this is achieved then the effects of the hit must be found and applied to the target.
STAGE 1: HIT RESOLUTION
To find out if the shot hits, an OPPOSED DIE ROLL is made. This means that both the player that is firing and the player that owns the intended target element will roll one (or sometimes two) dice; the simple rule for reading the result is this:
IF THE FIRER'S DIE ROLL EXCEEDS THE TARGET'S DIE ROLL, THEN A HIT IS SCORED.
The variables that affect the chance of a hit are all taken care of by the choice of exactly which TYPE of die each player rolls.
FIRER'S DIE TYPE: The die used by the FIRING player depends on two main factors: the level of the firing element's FIRE CONTROL systems, and the RANGE BAND in which the shot occurs (ie: whether the range to the target falls in the CLOSE, MEDIUM or LONG band for the type of weapon firing).
Measure the range between firer and target, and check the Record Card for the firing vehicle to see what range band applies. Check also what level of Fire Control apparatus is being used (BASIC, ENHANCED or SUPERIOR). The die types used for each Firecon type are:
BASIC = D6; ENHANCED = D8; SUPERIOR = D10.
These types apply if the shot is at MEDIUM range; if it is a CLOSE range shot, then INCREASE the die type by 1, and if a LONG range shot then DECREASE it by 1. The simple chart below shows the combinations of Firecon and Range that are possible, but it should not be necessary to refer to this chart in play - there are spaces on the vehicle Data Card to note the relevant die types for each weapon at each range, and in any case the system should prove easy to memorise after a few turns.
RANGE BAND (FIRE CONTROL TYPE / CLOSE / MEDIUM / LONG):
BASIC: D8 / D6 / D4
ENHANCED: D10 / D8 / D6
SUPERIOR: D12 / D10 / D8
The only other modification to be made to the Firer's die type concerns whether the firing vehicle or element either has or intends to MOVE as well as fire during this activation; if the firer has or will use MORE THAN HALF OF ITS BASE MOVEMENT FACTOR during this activation, then the firer's die type must be REDUCED by 1 (eg: a firer with ENH Firecon, firing at close range but also moving more than half its movement allowance, would use a D8 instead of its normal D10).
[NOTE: this reduction due to movement means that a firer with BASIC firecon actually cannot fire a LONG range shot and still move over half its allowance, as reducing a D4 by 1 drops it off the 'end' of the dice scale.]
The procedure detailed above will determine what type of die the FIRER will roll for any given set of circumstances; although quite lengthy
WEAPON RANGE TABLE
WEAPON SYSTEM and CLASS / CLOSE RANGE / MEDIUM RANGE / LONG RANGE:
HIGH-ENERGY LASER (HEL): ALL CLASSES (1-5) — 60" / - / -
RAPID-FIRE AUTOCANNON (RFAC): RFAC/1 — 8" / 12" / 16" RFAC/2 — 12" / 18" / 24"
HIGH-VELOCITY CANNON (HVC): HVC/3 — 16" / 24" / 32" HVC/4 — 18" / 27" / 36" HVC/5 — 20" / 30" / 40"
HYPER-KINETIC PENETRATOR (HKP): HKP/3 — 18" / 30" / 42" HKP/4 — 24" / 36" / 48" HKP/5 — 30" / 42" / 54"
MASS-DRIVER CANNON (MDC): MDC/1 — 8" / 16" / 24" MDC/2 — 12" / 24" / 36" MDC/3 — 24" / 36" / 48" MDC/4 — 30" / 42" / 54" MDC/5 — 36" / 48" / 60"
DIRECT-FIRE FUSION GUN (DFFG): DFFG/1 — 4" / 8" / 12" DFFG/2 — 6" / 12" / 18" DFFG/3 — 8" / 16" / 24" DFFG/4 — 10" / 20" / 30" DFFG/5 — 12" / 24" / 36"
SALVO-LAUNCHED MISSILES (SLAM): ALL CLASSES (3-5) — 12" / 24" / 36"
GUIDED MISSILE SYSTEMS (GMS): GMS/L — Maximum effective range = 36" GMS/H — Maximum effective range = 48"
INFANTRY ANTI-VEHICLE ROCKET (IAVR): Maximum effective range = 4"
ANTI-PERSONNEL SUPPORT WEAPON (APSW): Maximum effective range = 12"
to describe, the mechanics are actually VERY simple and will become second-nature very quickly when you try a couple of examples out.
TARGET'S DIE TYPE: The die (or sometimes dice) rolled by the player owning the TARGET element is determined according to the EFFECTIVE SIGNATURE of the target, and whether or not the target is in any kind of special position or circumstances.
The target's PRIMARY die selection is based on its Signature; note this is the target's EFFECTIVE signature, including any modifications for any STEALTH characteristics put into the element at the design stage.
EFFECTIVE TARGET SIGNATURE:
1 = D12
2 = D10
3 = D8
4 = D6
5 = D4
This gives the main (primary) die that is rolled by the Target player to 'defend' his element against the attack roll of the firing player. In certain circumstances, the target player may ALSO (simultaneously) roll ANOTHER (secondary) die, if any of the following apply to the target element at the time of the shot:
Target is "turret down": Secondary die = D12
Target is "hull down" or is "Dug in" to a prepared position = D10
Target is "evading" (has EVASIVE MOVE counter) = D8
Target is "in soft cover", or is being engaged by opportunity fire or executing a "pop-up" manoeuvre = D6
If any of the above apply, the target player may roll a secondary die of the relevant type in addition to his primary (Signature-based) die [note that if two or more secondary die circumstances apply, then only the one secondary die is used - the highest one that applies]. If the target player rolls two dice, they are both rolled together and his score is taken as that of the HIGHEST DIE ROLL (he does NOT add the two rolls together).
Having determined the types of dice to roll, both players make their rolls simultaneously; if the FIRER'S score is LESS than or EQUAL TO the TARGET's score, then the shot misses. If the Firer's score is GREATER than the Target's (highest) score then the shot is a HIT, and you proceed to the DAMAGE RESOLUTION stage.
STAGE 2: DAMAGE RESOLUTION
Once a hit has been scored on the target, the effects of the hit are determined by drawing one or more DAMAGE CHITS (the black counters) from the 'pot'.
THE NUMBER OF CHITS DRAWN FOR EACH HIT IS EQUAL TO THE SIZE CLASS OF THE WEAPON FIRING.
eg: if a class-3 weapon (say an HKP/3) scores a hit, the firing player will draw THREE chits from the damage pot. The number of chits drawn per hit can thus vary from 1 to 5, for weapon sizes 1-5.
The type of weapon firing (and some other factors such as range, for certain weapons) will determine which COLOURS of the damage chits are valid, ie: which ones cause actual damage - all chits drawn which are non-valid for that particular shot are ignored. The VALID chits for each weapon type are as shown below (this information should be entered on the individual Vehicle Record Cards to avoid the necessity of referring back to this chart during play):
WEAPON SYSTEM / VALID DAMAGE CHITS:
HEL (High Energy Laser) — Against ABLATIVE ARMOUR: GREEN chits only at any range. Against all other armour types: RED chits only at any range. Against INFANTRY targets: YELLOW chits only, at any range.
RFAC (Rapid-Fire AutoCannon) and HVC (High Velocity Cannon) — At CLOSE range: RED and YELLOW chits only. At MEDIUM range: RED chits only. At LONG range: GREEN chits only. Against INFANTRY targets (any range): YELLOW chits only.
HKP (Hyper-Kinetic Penetrator) and MDC (Mass Driver Cannon) — At CLOSE range: ALL chits. At MEDIUM range: RED and YELLOW chits only. At LONG range: RED chits only. Against INFANTRY targets (MDCs only): YELLOW chits only. [HKPs are NOT effective against Infantry targets.]
DFFG (Direct-Fire Fusion Gun) — At CLOSE range: ALL chits count DOUBLE VALUE. At MEDIUM range: ALL chits (at face values). At LONG range: ALL chits, but at HALF VALUE. Against INFANTRY targets (any range): RED chits only.
IAVR (Infantry Anti-Vehicle Rocket), GMS (Guided Missile System) and SLAM (Salvo LAunched Missiles) — Against REACTIVE ARMOUR: RED chits only at any range. Against all other armour: RED and YELLOW chits, any range. Against INFANTRY targets (SLAMs only): YELLOW chits only. Target has APFC (IAVR fire only): YELLOW chits only. [IAVRs and GMSs have NO EFFECT against Infantry targets.]
ARTILLERY BOMBARDMENT TYPES:
HEF (High Explosive Fragmentation) — Against INFANTRY targets: RED and YELLOW chits only (unless DUG-IN, when RED ONLY). Against VEHICLE targets: YELLOW chits only (unless DUG-IN, when INEFFECTIVE).
MAK (Multiple Armour Killer) — Against INFANTRY targets: YELLOW chits only (unless DUG-IN, when INEFFECTIVE). Against VEHICLE targets: RED and YELLOW chits only (unless DUG-IN, when RED ONLY).
NOTE: the "SPECIAL" damage chits in the pot (the MOBILITY, SYSTEMS DOWN and "BOOM" chits) are ALWAYS valid when drawn against VEHICLE targets, and NEVER valid (ie: they are ignored) when drawn against INFANTRY targets.
Having drawn your chits and checked which ones are actually valid for that hit, total up all the VALID NUMERICAL CHITS you have drawn; if the total is LESS than the target's ARMOUR VALUE then the shot has NO EFFECT (unless a 'special' chit has also been drawn - see below).
If the total is EQUAL to the target's ARMOUR VALUE, then the target is DAMAGED; it receives a DMG marker and is subject to the restrictions described in Damage Effects below.
If the total is HIGHER than the target's ARMOUR VALUE, then the target is KNOCKED-OUT (ie: effectively destroyed for the purposes of that battle).
DAMAGE EFFECTS
A KNOCKED-OUT target is effectively out of play; it has been rendered ineffective as a combat element. The model should be left on the table, but marked by a suitable visual means such as a plume of cotton-wool 'smoke', or alternatively tipping the model over or removing its turret if it has one (we have not provided knocked-out vehicle counters, as a little bit of 'smoke' looks so much more graphic!).
A DAMAGED vehicle can only move at up to HALF SPEED (ie: its Base Movement Factor is halved), and when it fires all RANGE BANDS are treated as the next furthest band - ie: Close shots are counted as Medium, Medium as Long and Long range shots become impossible.
If a SYSTEMS DOWN - TARGET chit is drawn, the target has had its vital sensors and electronics put out of action; mark the vehicle with a "systems down" counter. The vehicle may still move, but may not fire or take any other action (it is possible for a vehicle to 'recover' from a Systems Down result - see sections on Repairs and System Backups).
If a MOBILITY ("M") chit is drawn, the vehicle is IMMOBILISED - the shot has blown a track, holed the hover-skirt, totalled the engine or powerplant etc. The vehicle may NOT move again under its own power, but IF the crew decide not to abandon it then it may still fight from its stationary position. Mark the vehicle with an IMM counter.
If one of the "BOOM" chits is drawn, then this is a CATASTROPHIC CRITICAL HIT - the target explodes spectacularly and is totally destroyed, irrespective of size, armour class or anything else. This represents the 'freak' hit, the shell that finds a lucky weak spot and detonates the magazine etc.
If a SYSTEMS DOWN - FIRER (F) chit is drawn, then the FIRING VEHICLE suffers an immediate SYSTEMS FAILURE. The shot causes no damage, because it is assumed never to have been fired - basically, the gunner pressed the button and everything went phut (anyone with a computer will recognise the feeling...!).
The firing vehicle is marked with a SYSTEMS DOWN counter; until it can recover from the problem it may not make any Combat Actions.
NOTE that if any of the 'special' chits are drawn (against vehicle targets) then their effects are applied irrespective of the total of numerical damage chits drawn; a vehicle can be unaffected by actual numerical damage but still be immobilised by an M chit being drawn. Obviously, if a target IS knocked-out by the numerical chit value then there is no need to record any further special damage!
EXAMPLE: If a target vehicle with Armour Value 4 on its front face was hit by an HKP/3 round fired from MEDIUM range, the firer would draw THREE chits from the pot; let us assume that he draws a RED 3, a GREEN 1 and a YELLOW 2. The GREEN chit would be invalid (HKPs at Medium range count only REDs and YELLOWs); the total of the VALID chits would be 5, which exceeds the ARMOUR of 4 - thus the vehicle is penetrated and KNOCKED-OUT.
If, as an alternative, the chits drawn were a YELLOW 3, a RED 1 and "M", then the target would be DAMAGED by the numerical total of valid chits (= 4) being EQUAL to its Armour, but also would be IMMOBILISED by the "M" being drawn. In this case, the vehicle would be marked with both a DMG and an IMM counter.
As a final (and somewhat extreme) example, if a class 1 weapon (of any type) fired at a vehicle with Armour Rating 5, and drew a "BOOM" chit, then it would have achieved a VERY lucky kill - that's the way it sometimes goes!
IMPORTANT NOTE: as soon as each shot has been resolved, return all damage chits to the pot before drawing for the next hit. Note also that any INVALID chits that are drawn are ignored in that they do not contribute towards damage effects, but they DO count as chits drawn - you DON'T replace them and draw again!
SLAM SYSTEMS – MULTIPLE TARGETS
The SLAM (SALVO LAUNCHED MISSILE) system is the only Direct-Fire weapon that is actually able to hit more than one point target with a single "shot".
If a SLAM is fired at CLOSE range, it may hit ONLY the target it is aimed at;
if fired at MEDIUM range, it may ALSO hit any other element within 1" of the target element (ie: it can potentially hit anything in a 2" diameter circle centred on the target element);
at LONG range it may hit anything within 2" of the target (ie: any element in a 4" diameter circle).
In all cases, the hit on the actual target is resolved normally for a Direct-Fire shot. If the shot MISSES, then no other targets may be hit - the salvo has missed the intended zone completely. If the target element is HIT, then a simple D6 roll is made for any other elements within the "danger area" around the target - if at MEDIUM range, then each such element is also hit on a score of 5 or 6; if at LONG range, on a 6 only.
Each element hit, whether the intended target or an "extra" hit, is resolved in the normal way (ie: with Damage Chits equal to the SLAM pack class).
GUIDED MISSILE SYSTEM (GMS) FIRE
The fire of GMSs is handled in a slightly different way to that of other Direct Fire weapons; this is because the missiles are 'slower' (relatively speaking) than other projectiles, and also use guidance systems and sensors - these differences make Guided Missiles vulnerable to both AREA/POINT-DEFENCE systems (which can shoot them down), and to ECM (Electronic Counter-Measures) systems which can confuse and jam their guidance packages.
When an activated unit wishes to fire Missiles from some or all of its elements, the Missile Markers are used to indicate each individual missile and to designate its target; thus if three firing elements launch one missile each, and all three are targeted on one enemy element, place THREE missile markers in front of the target element. If there is an AREA-DEFENCE element within range of the TARGET of the missiles, it may immediately attempt to intercept some or all of them; any that get through then face the target's ECM and POINT-DEFENCE, if it has any.
INTERCEPTION BY AREA DEFENCE SYSTEMS
Area Defence Systems (ADS) can be used to defend ANY friendly element which is within 12" of the ADS vehicle, provided a clear line-of-sight exists between the two elements. For an ADS to function, it must have its Sensors ACTIVE, which is indicated by an ACTIVE SENSOR marker being placed on the ADS element (activating sensors - and deactivating them - counts as a Combat Action for the element, as described in the Turn Sequence rules).
Whenever a friendly element within 12" of an ACTIVE ADS vehicle comes under Missile attack, the ADS may attempt to intercept one or more of the missiles. To do this, the player with the ADS makes opposed rolls against the missile-firing player for each missile he is trying to shoot down; he must first declare how many of the missiles he is going to try and stop, then chooses his die type accordingly:
The Die Type used is a D6 for a BASIC ADS, D8 for an ENHANCED ADS and a D10 for a SUPERIOR ADS.
This type is then REDUCED by ONE for every extra missile above the first one, that the ADS is trying to target; thus an ENHANCED ADS could roll a D8 against just one missile, a D6 against each of two, or a D4 against each of three. The maximum number of missiles an ENHANCED ADS could engage per attack is therefore three.
The Missiles' owner rolls a die type according to the Guidance of the missiles: D6 for Basic, D8 for Enhanced or D10 for Superior. One opposed roll is made per missile fired at, and for each time that the ADS player's roll exceeds that of the missile's player, that missile is shot down.
IMPORTANT NOTE: the use of ADS systems is permitted at ANY time that an element within range of the ADS is attacked during the turn, regardless of whether the ADS vehicle and its Unit have had their activation for that turn or not. The ADS MUST, however, have their sensors ACTIVE at the time of use, either from a combat action this turn or from a previous turn; an ADS without an Active Sensors marker by it may NOT fire (except in ground-fire mode). A single Active ADS may be used more than once in a turn, against different missile attacks and/or air attacks; however it may only be used ONCE against any SINGLE attack on a unit within its range (to clarify this with an example, if three elements of a unit are attacked by missile fire at once from an unit of enemy launchers, the ADS may be used ONCE against as many of the total number of missiles as it is able to engage (eg: up to 3 for an Enhanced ADS); later in the same turn, however, the ADS - if still ACTIVE - may be used again in the case of another separate missile attack).
MISSILE HITS AND POINT-DEFENCE SYSTEMS
For those missiles that get through any Area-Defence fire, we must now resolve whether they are stopped by the target's ECM and/or Point Defence systems (PDS); this is done in basically the same way as any direct-fire hit procedure, with an opposed roll per missile.
The Missile player uses the same die type as he did against the Area Defence, ie: a D6, D8 or D10 depending on the level of the missile's guidance systems. The target player uses a PRIMARY DIE according to his vehicle's ECM rating: D4 for 'none', D6 for Basic, D8 Enhanced and D10 Superior.
If the target vehicle also has a Point-Defence System, he also gets to roll a SECONDARY die based on the level of PDS (D6, D8 or D10).
The opposed rolls are made as for Direct-Fire shots; if the missile roll exceeds the target roll (or the higher of his two dice where applicable) then the missile has hit the target, if not then it has been either jammed by ECM or shot down by the PDS.
The EFFECTS of missile hits are determined exactly as for direct fire attacks. A GMS/L hit draws THREE Damage chits, while a GMS/H draws FIVE chits. Damage chit validity is listed on the validity table, remembering to apply the modified validity if the target vehicle is equipped with Reactive armour.
Example of Area Defence System in use against incoming Missile attacks. Vehicles A and B are under Missile fire; as the ADS vehicle C currently has its Sensors Active (as indicated by the marker), it can attempt to intercept the missiles aimed at A, which is within 12" of the ADS. Vehicle B, however, is more than 12" away - it is thus outside the range of the ADS, and the missile aimed at it cannot be fired on by C.
ANGLE OF ATTACK
As vehicles can have different armour values on different faces, it will often be necessary to determine which face of the vehicle is actually hit by fire. Lines extrapolated through diagonally-opposite corners of the model, as shown in the diagram, give four possible arcs through which the vehicle may be fired at; all fire coming from attackers within the FRONT arc will strike the frontal armour, while that from side or rear will hit accordingly.
Attacks from AIRBORNE vehicles and INDIRECT FIRE will always hit the TOP armour, irrespective of which direction the fire comes from.
Possible Angles of Attack: FRONT, SIDE, SIDE, REAR — as described above.
MULTIPLE MOUNT WEAPONS
A Multiple Mount consists of two (or more) weapons of the SAME TYPE AND CLASS, eg: a twin-barrel turret with two HKP/3s. Both (or all) guns in a multiple mount may fire together, but ONLY at the same target.
When a player fires an element with a multiple mount, he rolls an EXTRA fire die for each extra barrel or weapon; each extra die is the same type as the Fire Die for the first barrel (eg: if the Firer's Die was a D8 for a particular shot, if firing a double-gun mount he would roll TWO D8s together).
ANY of the Fire dice that exceed the target's die roll score hits - thus if BOTH dice of a twin-gun shot exceeded the target's roll then TWO hits would be scored, and two separate sets of Damage Chits would be drawn.
"POP-UP" ATTACKS
The "Pop-Up" is a specialised form of attack that is only available to VTOL units. The unit must start its activation in LOW MODE, usually hidden by a terrain feature or other obstacle; it then executes the pop-up by rising vertically to clear the obstruction, acquiring and engaging a target with Direct Fire weaponry, then dropping back behind the cover before much effective fire can be brought to bear on it in return. The only opposing elements that may fire on a unit executing a pop-up attack are those that can (and wish to) use the OPPORTUNITY FIRE rule to do so; in addition, the unit making the pop-up gets the bonus of a Secondary Die roll when attacked by such Opportunity Fire.
The unit making the pop-up suffers no penalty on its own attacks - its crews are ready to take advantage of every second spent above cover, while the enemy are taken by surprise.
REPAIRING SYSTEMS FAILURES
When a vehicle has suffered a SYSTEMS DOWN result (either as Target or Firer), it IS possible for it to 'recover' from the damage - the crew get to work with the chewing gum and baling twine and try to get things working again (that is if they have the nerve to stay in a partially disabled vehicle...).
During any activation AFTER the one in which the damage was inflicted, the player may roll a D6 for the vehicle, provided its crew have not abandoned it; on a roll of 6, the SYSTEMS DOWN marker is removed and the vehicle may function normally again. If the roll is failed, it may be attempted again on the next activation.
[See section on BACKUP SYSTEMS for improved repair chances.]
DIRECT FIRE EXAMPLE:
A vehicle armed with an HKP/3 (ENHANCED FireCon) is firing at an enemy tank that is 26" away. The Target vehicle is a LARGE (class 4) tank, without any Stealth abilities - so it has a Signature of 4. In addition, the Target is in SOFT COVER on the edge of a Wooded area.
The RANGE BAND is MEDIUM (between 18" and 30" for an HKP/3), so this gives the Firer a Die Type of D8.
The Target's Die Type is given by its Signature of 4 - the Die is a D6; the SOFT COVER gives the Target a SECONDARY DIE, also a D6.
Both players roll their dice at the same time: the Firer rolls a 7 on his D8, while the Target player scores 2 and 6 on his two D6; as the Firer's score exceeds BOTH of the Target's rolls, the shot is a HIT.
To resolve Damage, the Firing player now draws his chits from the pot; as he is firing a class 3 weapon, he draws 3 chits. At MEDIUM range, an HKP counts RED and YELLOW chits; the player draws a GREEN 2 (which is not valid), a YELLOW 3 and a RED 1. The total of VALID chits is thus 4, which against the Target's Armour of 4 is enough to DAMAGE the vehicle. The Target Tank is marked with a DMG counter.
CHAPTER 8: INFANTRY COMBAT
INFANTRY FIREFIGHTS
An Infantry Firefight is Ranged combat by an Infantry unit against an opposing unit, using personal combat arms ("rifles") and support weapons. When such a unit wishes to fire its weapons during its Activation, the following procedure is used:
Fire is conducted by one UNIT against one (or more) Target units; each element of the firing unit has its fire resolved on an individual basis against a designated element within the target unit or units, which must be within range of the Infantry weapons being used; the ranges are:
MILITIA Infantry Personal Arms (basic/obsolescent weapons): 4"
LINE Infantry Personal Arms ('modern' Combat Rifles): 6"
POWERED Infantry Personal Arms ('heavy rifles'): 8"
APSWs (Anti-Personnel Support Weapons): 12"
[Note that elements which carry only close-range 'defensive' weapons, such as Observer teams, Engineers, Special-Weapons crews (eg: GMS teams) and such may NOT take part in Infantry Firefights.]
Before any fire is resolved, the entire UNIT firing must check for FIRE EFFECTIVENESS; this determines whether enough of the troops in the unit will actually aim their weapons and try to hit the enemy, or whether most of them will simply loose off a few rounds in roughly the right direction so as to keep their NCOs happy!
To determine FIRE EFFECTIVENESS, roll the Basic Die Type for the unit's Quality, ie: a D6 for a GREEN unit, D8 for REGULAR or D10 for VETERAN. If the unit currently has an UNDER FIRE marker, then REDUCE the die type by ONE (eg: Regulars UNDER FIRE would roll a D6).
The result of the die roll is as follows:
Score is LESS THAN the unit's LEADERSHIP number: Fire is INEFFECTIVE; no actual casualties will be inflicted on the target unit, but it DOES receive an UNDER FIRE marker
Score is EQUAL to the Leadership number, but LESS THAN DOUBLE that number: Fire is PARTIALLY EFFECTIVE; HALF* the elements in the firing unit may draw chits for fire effect; the target unit receives an UNDER FIRE marker.
Score is DOUBLE or MORE THAN DOUBLE the Leadership number: Fire is FULLY EFFECTIVE; ALL elements firing may draw chits for fire effect; the target unit receives an UNDER FIRE marker.
* For PARTIALLY EFFECTIVE fire, HALF (rounded up if necessary) of the elements of the firing unit that are IN RANGE and otherwise able to fire may do so; elements that are out of range or in other ways ineligible to fire may NOT be counted towards the half "not firing". APSW teams may always be counted as in the 'firing' half if desired, as historical experience has proved that such weapon crews are in fact much more likely to get at least SOME response from their men.
EXAMPLE: a unit of REGULARS with leadership "2" attempts to fire. Assuming they are NOT currently 'UNDER FIRE' themselves, they will roll a D8. If the score is 1 or 2, their fire will be INEFFECTIVE; if it is 2 or 3, the fire will be PARTIALLY EFFECTIVE, and if 4 or greater it will be FULLY EFFECTIVE.
[Note that a unit with Leadership "1" will be unable to get an 'INEFFECTIVE' fire result - it is assumed that the best leaders will always be able to get at least SOME response from their men.]
Once you have determined which (if any) of the unit's elements may actually fire effectively, each such element designates its target and draws some of the black DAMAGE CHITS from the "pot":
POWERED INFANTRY rifle teams and APSW teams draw THREE chits each;
ALL OTHER INFANTRY rifle teams draw TWO chits each.
The VALIDITY of the chits drawn is read as follows:
If Target element is IN THE OPEN: RED and YELLOW chits are valid;
If target is in SOFT COVER: RED chits only are valid;
If target is DUG IN, or in URBAN AREA: YELLOW chits only are valid.
[As noted in the Vehicle Damage rules, the "special" damage chits are IGNORED when firing on Infantry; count ONLY the valid colours of Numerical chits drawn.]
Total-up the valid chits drawn by each single element firing (DO NOT total chits from DIFFERENT element's drawings); if the total equals or exceeds the required number to kill the target element as listed below, the target is removed from play:
A MILITIA element is destroyed by a total of 3 valid damage points;
a LINE infantry element is destroyed by a total of 4 valid damage points;
a POWERED infantry element is destroyed by a total of 5 valid damage points.
[NOTE that these effects kill one element or 'team' of figures, regardless of the actual number of men in the element; a 'kill' will affect a two-man special weapon team in the same way as a five-man rifle fireteam. If this seems a little abstract, consider that it is not actually killing every man in the team - it is causing sufficient casualties that the team is no longer an effective combat entity; the survivors, if any, will be too busy caring for their wounded squad-mates to take much further part in the fighting.]
INFANTRY RANGED FIREFIGHT - EXAMPLE: Unit A, with four elements of Line Infantry (three Rifle Teams A1 - A3, and an APSW Team A4) are engaging unit B in a Firefight. Elements B1 and B2 are Rifle Teams of POWERED infantry (so need 5 valid points to kill), and B3 is a Medium vehicle with Armour 3.
Having passed his FIRE EFFECTIVENESS check against his unit's Quality and Confidence and determined that ALL of the elements may fire for effect, the player activating unit A decides that Teams A1 and A4 will fire at the enemy team B1, Team A2 at B2, and that Team A3 will use an IAVR against the vehicle (B3).
Against B1, the player draws two chits (for A1) and then three chits (for A4's APSW). The first draw gives him a RED 2 and a GREEN 1; as only RED and YELLOW chits are valid against troops in the open, the valid 2 is insufficient to kill the Powered element B1. Drawing for the APSW team A4 gives a YELLOW 2, a YELLOW 3 and a RED 1 - a valid score of 6, ample to kill B1.
Against B2, element A2 draws two chits and gets a GREEN 3 and a RED 1 - not enough, so B2 escapes unscathed.
Finally A3 draws 2 chits for its IAVR shot against vehicle B3, getting a YELLOW 3 and a GREEN 1 - the 3 is valid, and is enough to DAMAGE but not kill the vehicle.
INFANTRY CLOSE-ASSAULT
Close-Assault actions differ from ranged Firefights in that they are carried out at close quarters, and are usually much more decisive in their outcome. A lot of Infantry ranged fire is simply intended to keep the enemy suppressed, and often does not result in many actual casualties; Close-Assaults, however, are the real 'in your face' Infantry battles - the final charge against the enemy strongpoint with grenades and bayonet!
The outcome of a Close Assault is very often more a function of psychology than firepower. Do the attackers actually have the nerve to make the final charge, and if they do will the defenders stand and receive it or decide it is healthier for them to promptly 'bug out'? Close Assaults are all about the holding and taking of ground and positions, and as such will usually be made against a defending unit that is occupying some sort of important tactical location - a wood edge, hilltop position or similar - that they are reluctant to give up. Short of levelling it with Artillery (which is, of course, a valid option) the most effective way of taking the position is to send in the Grunts.
Bearing in mind the comments above, the mechanism for Infantry Close Assault makes considerable use of the REACTION and CONFIDENCE TEST systems for both sides involved.
One CLOSE ASSAULT may be made by a Unit during its activation, counting as its Combat Action. The 'target' of the assault must be one enemy unit holding a single position or location. Either or both sides involved may be 'supported' by vehicles that are indigenous to the units in the assault (eg: a mechanised infantry unit making a close-assault could be supported by its own APCs or MICVs, even though the infantry would be making a dismounted assault.)
Firstly, the ATTACKER (ie: the player who is making the assault) must announce his intention BEFORE he moves the activated unit. He then immediately makes a REACTION test, at a THREAT LEVEL of 0 if the unit is currently at CO (CONFIDENT), +1 if at ST (STEADY), or +3 if at SH (SHAKEN). Units with a current Confidence Level of BROKEN or ROUTED may NOT attempt Close-Assaults.
If the Reaction test is PASSED successfully, then the assault may proceed; if it is failed, the unit may still move normally but may not make another combat action that activation. Once it has passed the test, the unit may make a DOUBLE LENGTH move (using twice its normal Movement Factor, but still paying normal costs for the terrain it is in); provided this movement brings the unit to within 2" of the enemy position, the assault may take place.
The DEFENDER (the player whose unit is being assaulted) must now make a CONFIDENCE TEST, at a THREAT LEVEL of +3 if assaulted by POWERED infantry or +2 by other troops. If this test is passed, the Defender may stand firm and receive the assault; if it is failed, the unit loses Confidence levels accordingly and must withdraw immediately from the position by 2" or half their basic movement in the terrain, whichever is greater.
Should the defender withdraw (he may elect to do so voluntarily if desired, irrespective of the Confidence test result), the attacker immediately occupies the vacated position and his activation ends. He may, if he wishes, pursue the retreating enemy on his NEXT activation [NOTE: see optional rule on OVERRUNS AND FOLLOW-THROUGH ATTACKS].
If the defending unit stands to face the assault, the actual Close Assault is resolved by the following method:
Each element involved in the Close Assault nominates a target and draws chits, in the same way as for an Infantry Firefight. Note that NO Fire Effectiveness roll is required - ALL elements involved will fight. In Close Assault BOTH sides are considered to be firing "simultaneously" (even if the defender has already been activated earlier in the turn); thus any elements on either side that are killed in the exchange of fire may still have the chance to fire themselves, before being removed.
The numbers of chits drawn are:
MILITIA and LINE teams (Rifle or any Specialist team NOT using its special system): 2 chits.
POWERED teams, APSWs and ASSAULT teams: 3 chits.
[It will be easier if one player resolves all his firing first, but without actually removing enemy casualties - just mark them temporarily (eg: by tipping them over or turning them round) and then allow the opposing unit, including any "dead" elements, to resolve all their fire.]
As Close Assault combat is more deadly than ranged firefights, Damage Validity for Close Assault is as follows:
Against elements in the OPEN (usually the attackers): ALL (numerical) chits are valid;
against elements in SOFT COVER: RED and YELLOW chits valid;
against elements that are DUG-IN: RED chits only are valid.
The scores needed to kill enemy elements are the same as for Firefights. As an alternative to firing at opposing Infantry, elements that have IAVRs may instead choose to engage any VEHICLES that are involved in the Close Assault (such as APCs or MICVs assaulting in support of their Infantry); this follows the usual IAVR rules.
Vehicles involved in Close Assaults (on either side) may fire with APSWs at enemy Infantry, OR may fire at any opposing vehicles in the Assault AS IF THEY CARRIED IAVRs (ie: drawing 2 chits and using the IAVR damage validities); this simplification avoids the necessity to resolve a lot of very close-range direct fire shots, which would slow the Assault process down tremendously.
After this exchange of fire and casualties, the DEFENDER must now take another CONFIDENCE test, at a Threat level of +1 if he has suffered less than 50% casualties in the first stage of the assault, or +3 if he has taken 50% casualties or more. If he fails the test, he must fall back from the position as described earlier and the attacker has 'won' the assault; if the Defender PASSES the test, then the ATTACKER must take the same test (at the same threat levels, depending on his own casualties in the assault); if HE should fail, he must fall back from the assault (by 2" or half his movement if greater) and must lose Confidence levels as applicable. Should the Attacker pass this test, a second 'round' of combat is fought out, exactly as for the first round except that this time the Defender may NOT count as being in Soft Cover or Dug-in; it is assumed that by this time the attackers are in among the defenders and slugging it out hand-to-hand.
If there is STILL no conclusive result (ie: neither side falls back, either by choice or by failing a test) then the assault continues to yet another combat round - this will be most rare, however, the majority of actions being over in one or two rounds of fighting.
Note that the entire action is fought out at one go, even if it goes to multiple rounds of combat; any Close Assault is resolved completely within ONE Game Turn, and never lasts over to the next turn.
[Any unit that falls back from a Close-Assault, whether Attacker or Defender, receives an UNDER FIRE Marker.]
COMBINED ACTIVATIONS FOR CLOSE-ASSAULT
The mounting of a Close Assault attack is the only time in normal play where TWO (or more) units may actually be activated SIMULTANEOUSLY.
If a player has two or more units near enough to a single enemy unit's position that both can carry out Close Assaults, and he wishes both (or all) of these units to make a COMBINED Assault on the one enemy unit, this IS permissible. Each of the units attacking must make their Reaction tests separately; if one or more fail their tests, the player may at his discretion abort the Assault, or continue with just the units that passed their tests.
The Close Assault is played through just as for a one-on-one attack, but at each step that tests are required each involved unit tests separately. If at any point PART of the attacking force falls back due to a test result, the player must again decide whether to break off altogether or continue - if he continues after one of his units has withdrawn, the remaining unit(s) must add an extra +1 to the Threat Level of any further tests they make in this Assault.
OVERRUNS AND FOLLOW-THROUGH ATTACKS
If a Close Assault action ends with the Defending unit withdrawing (or destroyed), the Attacking player may choose to use a special option - the FOLLOW-THROUGH move. Instead of occupying the recently-vacated enemy position, he may overrun it and then attempt to continue moving his victorious unit(s).
To make a Follow-Through move, the player must immediately make a Reaction test for his unit (or units) that have just won the Assault. The Threat level is +1 if the defending units were completely destroyed, or +2 if they pulled back. If the player passes this test, he may then immediately make an EXTRA FULL ACTIVATION with that unit, including movement (which MUST take it through the captured position and on towards the nearest Objective) and a Combat Action if desired.
Such a Follow-Through activation may of course bring the unit into contact with any retreating enemy defenders again; the attacking player has the option of bypassing them (firing at them if he wishes) or of engaging them in yet another Close Assault.
ANTI-PERSONNEL SUPPORT WEAPONS (APSWs)
An APSW is basically any weapon, designed specifically for anti-infantry fire, that is heavier than normal Infantry Personal Arms. The term is used to cover such weapons as conventional Medium or Heavy Machine Guns, Automatic Grenade Launchers, Gauss MGs and multi-barrel "Miniguns", all of which have the same general purpose and effect - that of putting down a LOT of fire against dispersed infantry targets.
For simplicity in play, all APSWs are assumed to have the same overall effects, and a maximum effective range of 12". They are fired in the same way as Infantry Firefight weapons, whether they are mounted on vehicles or carried by a specialist infantry team; the only difference is that when vehicle-mounted they do NOT need to dice for FIRE EFFECTIVENESS, which they have to if they are part of an Infantry unit.
Firing an APSW from a vehicle counts as the vehicle's Combat Action; it may NOT also fire another weapon during the same activation.
ANTI-PERSONNEL FRAGMENTATION CHARGES (APFCs)
Many vehicles use a 'belt' of APFCs around the hull, for close-in defence against hostile infantry (especially in Urban operations, where troops on foot can get dangerously close to unsupported Armour). APFCs are small flechette or shrapnel charges, firing outward to kill any Infantry foolish enough to get too near. The charges are detonated by automatic sensors, and are only used when the vehicle is operating without its own supporting infantry - although there are IFF devices in use, most troops don't trust them to keep working at the vital time!
An active APFC system will fire whenever an infantry element comes within 1" of the vehicle; simply draw TWO chits per infantry element within the 1" effect radius, and apply chit validity and results as for Infantry Firefights. For ease of play it is assumed that the charges are selectively fired in small groups, thus there are sufficient charges to fire any number of times during the game.
The other use of APFCs is to serve as a close-in defence against the small IAVRs, or "buzzbombs", used by infantry for light anti-tank weapons. The effects of APFCs on IAVR attacks are detailed in the rules for IAVR fire.
INFANTRY ANTI-VEHICLE ROCKETS (IAVRs)
The IAVR, commonly known to both Infantry and Tankers as the "Buzzbomb", is a small, disposable anti-armour launcher carried by nearly all Infantry rifle teams as a secondary weapon. During its activation, any Infantry team equipped with IAVRs may fire one at a vehicle target within range, INSTEAD of firing the team's Personal Arms. The maximum range of an IAVR is 4", and the fire procedure used is as follows:
At any range up to the 4" maximum, the FIRER of the IAVR simply draws 2 chits from the pot; Damage validity is as shown on the Weapon Damage Tables, ie: if the target has REACTIVE ARMOUR, validity is RED chits only; if it has (active) APFCs, YELLOW chits only; if the target has neither (just normal armour), RED and YELLOW chits are valid. All "special" damage chits ARE counted in IAVR fire.
IAVR launchers are very compact and lightweight, and each rifleman in a team will normally carry at least one; thus the team is assumed to have sufficient to last the whole game [note that only ONE can be fired per element per activation].
VEHICLE WEAPONS FIRE AGAINST INFANTRY
The primary anti-infantry weapon used by most vehicles is an APSW (Anti-Personnel Support Weapon), but there may also be times where a vehicle wishes to fire its 'main' direct-fire armament against an Infantry target; this IS possible for most direct-fire weapons, but with some exceptions it is generally not very effective - such weapons are optimised for the job of killing armour, not for shooting at dispersed groups of men.
When a player wishes to carry out such fire, follow the procedure outlined below for the type of weapon that is being used; note that NO die-rolls are required, simply draw chits for effect as specified (a "hit" on the approximate area the infantry target is occupying is assumed to be automatic, thus it just remains to determine if casualties are caused).
HELs (all classes): Maximum anti-personnel fire range is 36"; for all classes of HEL, draw 2 chits per shot against a single target element.
RFACs, MDCs and HVCs: Maximum anti-personnel range is MEDIUM range band for weapon class; draw 2 chits per shot against a single target element, regardless of weapon class.
HKPs, GMSs, IAVRs: These are NOT effective against Infantry targets.
DFFGs: Maximum anti-personnel range is MEDIUM range for weapon class; draw THREE chits per shot against a single target element, regardless of weapon size.
SLAMs: Infantry elements may only be targeted by SLAM fire at CLOSE range; against a single target element, draw chits equal to weapon class (eg: 4 chits for a SLAM/4).
At MEDIUM and LONG ranges, infantry cannot be fired on directly – they are too dispersed to accurately target at these ranges. However, infantry elements can be hit as secondary targets if caught in the danger zone around a targeted vehicle. Roll to see if they are actually hit as secondary targets (using a D6 roll as for other secondary targets); if so, then draw chits equal to weapon class as for CLOSE range.
(Note that in all the above cases, the Damage Validity and points totals necessary to kill infantry elements are the same as for INFANTRY FIREFIGHTS.)
INFANTRY WEAPONS FIRE AGAINST VEHICLES
In general, Infantry Personal Arms and APSWs will be INEFFECTIVE against armoured vehicle targets. The only exception is when the target vehicle has an Armour Value of 0 - ie: it is a "softskinned" vehicle (trucks, jeeps etc.); in this case, it may be fired on by Infantry weapons and APSWs exactly as if it were an Infantry element target. Damage Chit validity in this case is the same as for Infantry Firefights, and the vehicle is treated like a Powered Infantry element for damage resistance - that is, it takes 5 damage points to kill the vehicle. Note that in these attacks, any SPECIAL damage chits drawn ARE valid, so the vehicle will suffer any special damage that is indicated by the chits drawn.
INFANTRY TRANSPORT
Infantry elements (and in some cases light vehicles as well) may be transported in ground or air vehicles that have the cargo capacity for them. For all ground transport vehicles, and VTOL/Aerospace transports that are GROUNDED, loading and unloading Infantry or other vehicles takes HALF of the MOVEMENT FACTOR for both the transport AND the troops being unloaded. Thus an APC, for instance, could move half its allowance and then unload its troops, or alternatively could unload before moving - in which case both the vehicle and the troops could then move half their respective allowances after the men had disembarked. Any number of elements carried may be loaded or unloaded in the same half move.
VTOL transports may HOVER in Low Mode to disembark troops (not vehicles); this represents the infantry either abseiling down ropes, or simply jumping if they are in Powered armour! This takes the same half-move as other unloading, BUT only ONE element may be unloaded from each transport per half-move (so to drop two teams, a VTOL must hover for the entire activation).
For landing troops and equipment from Interface transports, or Direct Insertion, refer to the rules on Interface Landings and Drop Troops.
CASUALTIES TO MOUNTED INFANTRY
When Infantry elements are mounted in transport vehicles, they can of course suffer casualties if the carrying vehicle is damaged or destroyed.
If a troop-carrying vehicle is IMMOBILISED or gets a SYSTEMS DOWN result, any infantry on board are unharmed - they may dismount as normal.
If the vehicle receives a DAMAGED result, roll a D6 for each infantry element in the vehicle - on a roll of 1-5 the element survives (and may either dismount or remain in the vehicle), on a 6 it is lost.
Should the vehicle be DISABLED (ie: knocked-out), again a D6 is rolled per element - they are lost on a roll of 3-6; if the vehicle received a "BOOM" result (a catastrophic hit) then ALL elements on board are automatically killed.
Elements carried in a VTOL or Aerospace craft that crashes are automatic casualties.
FIRING INFANTRY FROM TRANSPORT
Infantry elements that are mounted in trucks, VTOLs and similar carriers may NOT fire while mounted, but those in APCs and MICVs may fire if they wish (from hatches or special firing ports).
Such fire is inaccurate at best, especially if the vehicle is moving, and is thus ALWAYS counted as "Ineffective" fire - ie: it causes no casualties, but DOES put an "Under Fire" marker on the unit fired at.
CHAPTER 9: ARTILLERY
TYPES OF ARTILLERY BATTERIES
ARTILLERY is a general term used here to describe the guns and launchers that perform Indirect Support Fire against area (rather than 'point') targets. All Artillery elements must be organised into units like any other ground forces, an Artillery Unit normally being referred to as a BATTERY; Batteries generally consist of from two to four guns or launchers.
The available types of Artillery are:
RAM (Rocket-Assisted Munition) MORTARS: High-trajectory smoothbore weapons similar to "conventional" mortars, but using rocket-boosted shells for extra range and power. May be mounted on vehicles, towed or even man-packed. RAM Mortars are classed as LIGHT ARTILLERY.
TUBE ARTILLERY: this covers traditional guns and howitzers (usually with rocket-assisted munitions), plus more advanced types such as Mass-Driver Artillery. RAM Field Guns and Howitzers are classed as MEDIUM ARTILLERY, while Mass-Driver types are HEAVY ARTILLERY (due to their far higher rates of fire, they can deliver more ordnance in a given time).
MULTIPLE ROCKET LAUNCHERS (MRLs): these are launchers for clusters of Artillery Rockets, which may be fired either singly (for Harrassing fire) or ripple-fired in salvo for Effective bombardments. Smaller MRLs count as MEDIUM ARTILLERY while larger types are HEAVY ARTILLERY.
HEAVY ARTILLERY ROCKETS (HARs): single very large rockets with multiple warheads, each rocket having the effect of a full Artillery bombardment. They count as HEAVY ARTILLERY.
LOCATION OF ARTILLERY BATTERIES
Artillery may either be located ON TABLE or OFF TABLE.
ON TABLE batteries are treated like any other combat Units, except that (like other elements with FIXED MOUNT weapons) they may NOT use the option of moving BEFORE firing; they MAY fire and then move, which represents the "shoot and scoot" tactic used to foil enemy counter-battery fire. In general, the only type of Artillery used on-table will be RAM Mortar batteries attached to the Combat Group - however there is nothing to stop other Artillery types from being employed on-table if desired (or if the scenario requires this).
ALL ARTILLERY, REGARDLESS OF TYPE, IS ASSUMED TO BE SUFFICIENTLY LONG-RANGED THAT IT CAN FIRE ON ANY POINT ON THE TABLE. This includes even Light Artillery (RAM Mortars).
OFF TABLE batteries are assumed to be located some distance behind the player's baseline; the models are placed either just on the table edge, or just off it (whichever is more convenient). Off-Table batteries will be slightly less flexible in their response to calls for fire support, as described in REQUESTING ARTILLERY FIRE. All types of Artillery, including RAM Mortars, may be located off table - they are still assumed to be able to hit anywhere on the table.
Off table Batteries may NOT be engaged by Direct Fire of any kind, but ARE vulnerable to enemy COUNTER-BATTERY fire. Batteries located off-table may still be "moved" to reduce the risk of Counter-Battery attacks on them, but they may NOT move in the same activation that they fire. [To indicate "moving" an off-table battery, simply move the models sideways a few inches - this represents the battery changing its firing positions, and means that it may not then fire until the next activation.]
ARTILLERY MUNITION TYPES
The following different types of Munitions are generally available for Artillery units to fire (on Effective Fire missions), provided Ammunition markers of the relevant type(s) have been "bought". Certain munitions are NOT available to some kinds of Artillery, and such exceptions are noted where they occur.
HIGH EXPLOSIVE FRAGMENTATION (HEF) ROUNDS:
These are the basic explosive rounds, available to ALL Artillery types; they comprise submunition dispensers which scatter a multitude of small bomblets over the beaten zone, with devastating effect against Infantry targets. Though HEF rounds can have some effect against vehicles (particularly lighter types), they are generally considered an anti-personnel munition.
MULTIPLE ARMOUR KILLER (MAK) ROUNDS:
MAK shells are submunition devices like the HEF rounds, but instead of anti-personnel bomblets they dispense a cloud of kinetic penetrators that are very effective against most vehicles except the most heavily armoured ones. A MAK bombardment has a certain level of effect against Infantry as well as vehicles, but is primarily used as an anti-armour munition. All types of Artillery may employ MAK rounds.
DISPERSED MINE ROUNDS (DMR):
These shells deliver a large number of mixed antipersonnel and anti-vehicle minelets, thus creating an "instant minefield"; the effects of this are covered in the section on Mines. DMR fire may be employed by all Artillery types EXCEPT Light (RAM Mortar) batteries.
SMOKE ROUNDS:
These are Obscuration shells that create a "smoke" cloud from the point of impact (the "smoke" is chemically-produced and contains various agents that inhibit sensors other than just optical devices). The full effects are described in the rules for Smoke and Obscuration. Smoke rounds may be fired by all Artillery types EXCEPT for HEAVY ARTILLERY ROCKETS (HAR).
NUCLEAR ("NUKE") and BIOCHEM ROUNDS:
These "nasty" munition types are still regarded as Terror Weapons, and though some forces will persist in treating them as just another valid tactical option their use is normally followed by swift diplomatic and moral condemnation! They ARE available, however, so they have been included here for completeness - their game use should be strictly limited, and then only with the full agreement of ALL players involved (and if it can be fully justified by the scenario and background used). The full effects of these munitions are given in the relevant rules section (P.47). The ONLY Artillery types that may fire Nukes and Biochems are HEAVY ARTILLERY and HEAVY ROCKET ARTILLERY batteries. Each firing of Biochems represents enough rounds to saturate the beaten zone with the bioagents, but each Nuke firing actually represents only ONE shell - that, however, is usually enough!
[NOTE that firing a single Nuke round is counted as the Combat Action for the entire Battery.]
ARTILLERY FIRE MISSIONS
There are two main types of fire mission that Artillery units may undertake: HARRASSING FIRE and EFFECTIVE FIRE.
HARRASSING FIRE consists of intermittent firing at random intervals, and is designed not to cause casualties but to make the enemy keep their heads down. It is very economical on ammunition, but has a profound psychological effect on the units it is targeted on - they know that the opposition has 'ranged' on them, and that at any moment the sporadic shelling could turn into a terrifying "fire for effect". In game terms, the only effects on units in the beaten zone are i) they receive an UNDER FIRE marker, and ii) they must take a Confidence Test for being under Artillery attack. No chits are drawn for casualties.
The advantage of Harrassing fire for the FIRER is that it does NOT consume Artillery Ammunition markers, as the expenditure of rounds is quite low. Harrassing Fire missions are always assumed to be using OPEN SHEAF beaten-zone patterns, the overall size of the zone depending on the number of weapons in the firing Battery. Since no casualties are possible (in reality of course there is always SOME chance of a kill, but for game terms it is so unlikely as to be ignored) it does not actually matter what type of rounds the Artillery is firing - they are generally assumed to be HEF.
[The battery may continue to fire harrassing missions, even when it has no Ammunition markers of any kind left; it is assumed that each gun has a few odd rounds in reserve for such eventualities.]
NOTE that Harrassing Fire missions may NOT be carried out by HEAVY ARTILLERY ROCKET (HAR) batteries; they may be used by all other battery types however.
EFFECTIVE FIRE is when the old gunners' maxim of "don't tap it, thump it!" comes into play. For an Effective Fire mission, all guns or launchers in the battery will fire continuously at their maximum rate, pouring as much destruction as they can into the beaten zone.
Every time that the battery fires an Effective mission as a Combat Action, it expends one Ammunition marker of the relevant type; if it runs out of a particular kind of marker it may no longer fire that kind as an Effective Fire mission until resupplied.
All elements caught in the beaten zone of an Effective Fire mission must draw chits for the effects, as described under ARTILLERY FIRE EFFECT.
Effective Fire missions may use either an OPEN or CONVERGED SHEAF, as the firing player wishes.
Effective Fire may be carried out by ANY type of Artillery battery, including HEAVY ARTILLERY ROCKETS.
BEATEN ZONES FOR ARTILLERY FIRE
The area of ground hit by Artillery fire is termed the "BEATEN ZONE"; all individual elements caught within that zone are potential targets for the effects of the fire.
The actual size and shape of the Beaten Zone for a particular fire mission depends on two factors: the NUMBER of Artillery elements firing, and whether the mission is firing an OPEN SHEAF or a CONVERGED SHEAF.
A CONVERGED SHEAF mission is where ALL the guns or launchers in the firing Battery target the SAME point-of-impact, this obviously gives a VERY high concentration of fire over a relatively small area, and causes very severe casualties.
An OPEN SHEAF firing, on the other hand, is where each gun or launcher adjusts its fire so that the effect of the battery is spread over a much larger Beaten Zone (thus hopefully affecting more individual elements in the zone), but the fire concentration on any one point is obviously less.
For a Converged Sheaf, ONE Impact Marker is placed at the point of aim; the Beaten Zone for the fire mission will be a circle centred on this marker, the diameter of the circle being 4" - thus any element that is within 2" of the Impact marker will be affected by the fire.
For an OPEN Sheaf mission, the shape of the Beaten Zone is an elongated ellipsoid (like a rectangle with curved ends); it is actually two 4" diameter circles joined by a straight area, as shown in the diagram. The area is defined by placing TWO Impact Markers, one at the centre of each 4" circle; the distance BETWEEN the two markers depends on the number of individual weapons in the firing Battery - it should be 4" for every extra gun/launcher above the first (so for a two-gun battery the markers would be 4' apart, for 3 guns 8", for 4 guns 12" etc.). The 'long' axis of the beaten Zone may be aligned in either of two ways - it may be PARALLEL to the Line of Fire (ie: the direction from the firing battery to the target zone), or may be PERPENDICULAR to it. The Beaten Zone may NOT be set at any OTHER angle to the line of fire.
[Note that the Beaten Zone sizes do NOT vary with the type of Artillery firing (Light, Medium or Heavy); these differences are accounted for in the Damage Effects.]
Artillery Fire Beaten Zone examples: The circular zone is the area covered by a CONVERGED SHEAF mission, while the elongated zone is that for an OPEN SHEAF of TWO weapons firing; if THREE guns fired then the two markers would be 8" apart instead of 4", and for FOUR guns it would be 12". The complete shaded area is the Beaten Zone.
REQUESTING ARTILLERY FIRE
Artillery Fire Support from a Battery attached to the Combat Group (whether the battery is on or off-table) may be requested at any time by the following elements:
Any UNIT COMMAND element (eg: a Platoon or Troop Commander), or a Specialised Observer Team (an Infantry element or vehicle-mounted observer).
To request fire, the observer or commander must be in clear line-of-sight to the intended target point, and within maximum Sensor range (60" under normal conditions). Requesting the fire counts as the COMBAT ACTION for that ELEMENT, although other elements of the unit may perform other actions.
When the fire request is made, the activating player immediately rolls a die: the Die Type is determined according to the element observing for the fire - if it a Specialist Observer roll a D12; if a Unit Commander then roll a D10 if his Leadership is 1, a D8 for Leadership 2 or a D6 for leadership 3. For ON-TABLE Batteries, a score of 4 or greater is required for the call for fire to be successful; for OFF-TABLE Artillery the score needed is 6 or more (failure indicates the observer has been unable to get the battery to respond, has given it the wrong co-ordinates, the battery is preoccupied with other things etc).
If this die roll is successful, the player immediately places on the table either ONE or TWO "IMPACT" markers (the white counters with the "target reticules") - One to indicate a CONVERGED SHEAF bombardment, or two to mark the zone for an OPEN SHEAF. The marker(s) are placed on the intended target point(s) as described in the section on BEATEN ZONES.
When the marker(s) are placed on the table, the player should also place an Artillery Ammunition counter FACE-DOWN near the Impact marker; this commits him to using a particular Munition type, though of course the opposing player will not know what type it is until the fire actually arrives. If the firing player is using just HARRASSING FIRE, for which no Ammunition marker is expended, he should use one of the "DUMMY" markers from the counter-sheet so as not to give his intentions away to his opponent.
ARTILLERY FIRE RESOLUTION
When an observing element successfully calls for Artillery fire and places the appropriate Impact marker(s) on the desired point of aim, the fire does NOT arrive immediately. The player completes the activation of the "observing" unit, then play switches to his opponent as normal. Once the opposing player has made an activation, the player who called in the Artillery MUST then use his turn to activate the Artillery Battery and resolve the Fire Mission.
[Should the player, for any reason, decide he must try to CANCEL the fire mission then he must make the same test as he had to for requesting the fire; failure to roll a sufficient score means the cancellation does not get through and the fire arrives as planned, while success means the fire is cancelled - however this still counts as the player's activation turn, and the Artillery Battery is treated as if it had activated; its Command Marker is inverted and it can do nothing more that Game Turn.]
Obviously, this sequence gives the opposing player a chance, if he wishes, to activate any unit in danger from the Artillery mission (provided of course that it has not already used its activation that turn) and possibly move it to safety before the fire arrives. This is actually quite justifiable - it is very hard to target Artillery accurately onto a mobile target unit (largely due to the delay between calling for fire and its arrival), and if the threat of the impending attack forces the player to (say) pull a unit back out of position, then the Artillery has done part of its job anyway - by making your opponent react in the way YOU want him to, hopefully to the detriment of his own plans!
[Consider, if you like, that the placing of the Impact marker represents either the laser designation of the target area or the arrival of the first few ranging shots, both of which are detectable by the unit under attack and will give them at least a little warning of the incoming barrage. What they (and the player controlling them) CANNOT know is whether the actual bombardment is going to be Effective or just Harrassing fire, and what munitions are coming over - a few smoke shells, or a tactical Nuke??]
Example of Artillery Fire hits: All vehicles in unit A are caught within the Beaten Zone (shaded area), so all are subject to attack. Only element B1 of unit B is within the Zone, so B1 is attacked; ALL of unit B is, however, considered to be "Under Fire" and will receive a marker indicating this IF B1 is damaged or destroyed by the fire. Note that if B was an INFANTRY unit, it would receive an UNDER FIRE marker whether casualties were caused or not.
ARTILLERY FIRE DAMAGE EFFECTS
All elements, vehicle and infantry, that are caught within the Beaten Zone of a fire mission are potentially affected by it. With HARRASSING FIRE, there is no other effect than placing UNDER FIRE markers on the units (a UNIT is deemed to be affected if ANY of its elements are caught in the Beaten Zone) and requiring a Confidence Test; Smoke and DMR (Mine) missions also do not have immediate effects other than those specified in the relevant rules, and Nuke/Biochem munitions have special effects that again are described in their particular sections.
The majority of EFFECTIVE fire missions will be using HEF or MAK munitions; for these, all elements in the Beaten Zone draw a number of chits as specified below.
Each LIGHT Artillery element firing is worth 1 CHIT per VEHICLE target element, or 2 CHITS per INFANTRY target element.
Each MEDIUM Artillery element causes 2 CHITS to be drawn per VEHICLE or 3 CHITS per INFANTRY element.
Each HEAVY Artillery element is worth 3 CHITS per VEHICLE or 4 CHITS per INFANTRY element.
If the mission is an OPEN SHEAF, then each element in the Beaten Zone is only drawn for ONCE, as each part of the Zone is only being bombarded by ONE Artillery piece. If it is a CONVERGED SHEAF, each element draws chits AS MANY TIMES AS THERE ARE WEAPONS in the firing Battery.
Example: If a Battery of three Light Artillery pieces is firing an OPEN SHEAF, every VEHICLE caught by the fire draws ONE chit for damage effects, and every INFANTRY element draws TWO chits. If the same Battery fired a CONVERGED SHEAF, each VEHICLE caught in the (smaller) Zone would draw THREE individual chits, and each INFANTRY element THREE PAIRS of chits, to represent it being hit by the concentrated fire of the three guns.
[NOTE that for the Converged Sheaf mission, each target element would draw the chits as 3 individual chits (or pairs), and count results of each draw accordingly - it would NOT draw 3 (or 6) chits at once and total them all up.]
The Damage Chit Validities are as shown in the table on P.29; elements get advantages for being Dug-In, but NOT for just being in Soft Cover. [VEHICLES when Dug-in are IMMUNE to HEF fire, while Infantry dug-in are immune to MAK effects.]
The points required to damage/destroy a vehicle are as per Direct Fire (ie: based on the vehicle's Armour rating), while the points to kill Infantry elements are the same as for Infantry Firefights - ie: 3 for Militia, 4 for Line and 5 for Powered. All "special" damage chits ARE valid if drawn against VEHICLES, but are ignored when drawn against Infantry.
AMMUNITION SUPPLY AND RESUPPLY
Ammunition markers may be "bought" for each Artillery Battery when organising your forces, using the points costs given in the POINTS VALUE LISTINGS (P.52).
Note that the actual costs per marker are PER ELEMENT in the Battery, so a three-gun Battery will pay 3 x the given points per marker.
A Battery may have up to THREE ammunition markers representing the rounds carried in the Gun vehicles themselves; additional ammunition markers must be carried in units of transport vehicles accompanying the Battery; these transport vehicles need not be represented by models for Off-Table batteries, but for On-Table Artillery then actual models should be used (the transport vehicles will be organised into separate units if on-table, and transferring their ammunition loads to the Battery will count as their Combat Action). The Artillery Battery itself may neither move nor fire in the turn it resupplies with ammunition.
One "load" of cargo for a transport vehicle requires a capacity of 4; this load (in ammunition terms) represents a "one gun share" of one ammo marker - in other words, a three-gun Battery requires 12 capacity points (three "loads") to carry ONE ammo marker for the whole Battery.
For Off-table batteries, simply stack any additional ammunition markers purchased near the Battery. Up to three of these may be "loaded" on board the Gun vehicles at any time, but doing so uses the Activation of the Battery - thus they may neither move nor fire in the turn they resupply with ammunition.
Note that this system for ammunition resupply is somewhat abstract and simplified; in particular it does not take account of the different types of Artillery (Light, Medium or Heavy). If you REALLY want to play a Quartermaster rather than a General, then by all means add some extra detail into the system!
COUNTER-BATTERY FIRE
Whenever an Artillery Battery fires from a particular location, it is possible that an opposing Artillery unit equipped with COUNTER-BATTERY capability will manage to locate the Battery firing, with enough accuracy that it can return fire on them.
If a Battery is equipped with a Counter-Battery Radar (CBR) vehicle, then that Battery may be Activated at any time (subject to normal rules) to perform a Counter-Battery mission in place of a normal Fire Mission.
Counter-Battery fire may only be attempted against an enemy Artillery unit that has already performed a Fire Mission (of any type) in the current game Turn. It requires no observer or target designation step, as the CBR element with the Battery is directing the fire. The player must roll a die, according to the Quality of the CBR system - D6 for BASIC, D8 for ENHANCED and D10 for SUPERIOR. If he scores 6 or more, the opposing Battery has been located and he may immediately place an Impact marker (or markers) on it, followed by the resolution of whatever type of fire mission he chooses to use - the mission arrives immediately, being resolved as the Battery's activation for that turn.
Counter-Battery fire may be employed against On or Off-table batteries, and in both cases is resolved exactly as for a normal Artillery mission.
Note: if a battery moves directly after firing ("Shoot and Scoot"), then NO Counter-Battery fire may be attempted against it. If, on the other hand, it fires from the SAME position (without moving) for TWO or more activations, then INCREASE by one the Die Type used for the Counter-Battery roll.
ORTILLERY
"Ortillery" is the term used for ORBITAL ARTILLERY: fire-support from spacecraft, satellites or gun-platforms in orbit. Such fire is accurate enough to be used for bombardment during the battle. However, its potential for error and its use in very close proximity to friendly troops is not recommended!
In most respects, Ortillery fire is treated in just the same way as ordinary Artillery - it is simply another form of off-table Battery (but not, of course, vulnerable to Counter-Battery fire!). The major difference is that, after the placement of the Impact markers on the designated aim point the fire CAN deviate from this intended target.
When the fire mission arrives (ie: the orbiting "Battery" is activated), roll a D12 - using the "clockface" method, this determines which direction the fire will deviate in. Now roll a D6 and a D8 together: if the score on the D6 is higher than (or equal to) the D8, then the fire does not deviate at all - it hits the intended aim point. If the D8 roll is higher than the D6, then the DIFFERENCE between the two rolls is the number of inches the fire deviates; move the Impact marker(s) the required number of inches in the relevant direction before resolving the fire mission.
[If desired, players may use this or a similar "deviation" system for normal Artillery fire as well as for Ortillery - generally, however, we assume that normal Artillery fire is sufficiently accurate not to worry too much about fire deviation.]
Other aspects of Ortillery support may be considered if players wish, that are outside the scope of this book to cover fully - these can include limited availability of Ortillery as the ship/satellite moves round its orbit (perhaps available only on every fourth Game Turn or so?), other types of Orbital fire such as Particle beams or very big Lasers and so on. There are a whole lot of things you can add in if you so desire - hopefully we can cover some of them in future publications.
CHAPTER 10: AEROSPACE OPERATIONS
AEROSPACE CRAFT ORGANISATION
Unlike VTOLs, which operate as a specialist form of "ground" vehicle and are grouped into normal UNITS of several elements, AEROSPACE CRAFT (in particular Ground-Attack fighters, the type most commonly used over the battlefield) will often operate as SINGLE CRAFT, or at most in "flights" of two craft.
Each individual Aircraft is treated as a "unit" in its own right, even if two or more are operating together. The aircraft has a Command Marker (which functions slightly differently from ground unit markers, as explained below), but does NOT require a Confidence Level marker.
The Command Marker given to an Aerospace Craft denotes the "quality" of the pilot and crew by its COLOUR, as for normal units - GREEN for poorly trained or inexperienced "Turkeys", BLUE for the average combat pilot, and ORANGE for the real hotshot Saviour-of-the-Universe Jet Jockeys!
The NUMBER on the Command Marker does not represent Leadership, but more the "nerve" and morale of the pilot (which is NOT the same thing as his training and experience level); it is a measure of how likely he is to, say, break off an attack run if faced with a lot of AA fire - or will he plough on through it and get that target at all costs?
When an Aerospace craft has to take a Reaction test, the number/colour of the Command marker is used exactly as for other units.
AEROSPACE UNIT ACTIVATION SEQUENCE
A player may ACTIVATE an Aerospace craft (or a group of two or more, operating together) at any point in the Game Turn, in the same way that he would Activate a ground unit. Because Aerospace units are VERY fast-moving in relation to ground vehicles, they do not follow the normal movement rules; instead, their Activation consists of a fast 'pass' across the battlefield, delivery of their ordnance to the target area and then leaving the table in the same pass.
When activating such a unit, follow this sequence:
i) Place the Aerospace Craft at the point at which they are to enter the table, and move them along the desired 'flight path' until they reach the point at which they are to attack their targets; during this movement, they may be fired on by any opposing Air Defence elements which have ACTIVE Air Defence Sensors and are in range of the flight path.
ii) Once over their target, the Aerospace craft may be fired on by any 'local' defensive systems of the unit(s) they are attacking. If they survive this fire, the Aerospace craft may then make their attacks (either DIRECT FIRE of missiles, guns etc., or delivering Area Effect ordnance).
iii) Following their attacks, the craft are moved along their flight path until they exit the table edge (during this movement, they may be fired on by any 'Active' Air Defence elements that did not choose to fire during the crafts' approach to their targets).
[In the case of Aerospace units that wish to LAND on-table, the actual landing takes place instead of the attacks in step (ii); 'local' defensive systems may, if in range, attack the craft as they are landing.
This completes the ACTIVATION of the Aerospace Unit.
AIR VEHICLE WEAPON EFFECTS
Both VTOLs and Aerospace craft can carry Direct Fire weapons and Guided Missiles; Aerospace craft can also carry Dead Fall Ordnance (DFO) loads. Most Air attacks are resolved using the same mechanisms as ground combat, with the following limitations:
i) All air vehicles may only fire Direct Fire weapons at targets straight ahead of the aircraft, ie: actually on the line of flight (except for chin turret mounts on VTOLs, which may fire through a 180° forward arc). Range bands are the same as for ground-fired equivalents.
ii) Missiles may be fired at targets within the normal FIXED MOUNT fire arc, ie: a 30° forward arc. The same is as for ground-fired equivalents. [Note that each Guided Missile System fitted to an Air vehicle is a complete Launcher and supply of missiles (as used on ground vehicles), and NOT just a single missile on a pylon - thus each system can launch one missile per activation, and the missile supply is assumed sufficient for the game duration.]
iii) DFO attacks may be aimed at a target point between 4" and 8" ahead of the aircraft, along the line of flight. Such attacks have a Beaten Zone 4" in diameter, the same as a Converged Sheaf Artillery attack. One impact point marker is used to indicate the centre of the Zone.
An air vehicle may make ONE attack per activation, so on one pass an Aerospace craft may either use direct fire or missiles against a single element, or make one DFO drop on a single target Zone.
DEADFALL ORDNANCE ATTACK RESOLUTION
When a DFO attack is delivered by an Aerospace craft, its effect is resolved in basically the same way as an Artillery mission. The Beaten Zone is a 4" diameter circle, so all elements within 2" of the impact marker are potential targets.
When attacking with HEF or MAK ordnance (the usual options), each ORDNANCE LOAD dropped draws TWO chits per target element; thus if an aircraft expends two Loads on one pass, each element in the Zone draws a total of FOUR chits.
The validities of Damage Chits, and their effects, are exactly as for Artillery attacks of the relevant type.
The aircraft expends one Ordnance marker per Load dropped.
[Note that, if required, Aerospace craft may be used to deliver NUKE or BIOCHEM ordnance; in these cases the Zones and effects are exactly as for Artillery-delivered attacks using these munitions.]
AIR DEFENCE
AIR DEFENCE fire is the method used to attack Aerospace units, and VTOL units in High Mode (VTOLs in Low Mode can be fired on by ordinary ground units using Direct Fire).
AIR DEFENCE consists of "Local" Air Defence weapons (Infantry elements and vehicles carrying Light Anti-Air weapons), and the "Zone" Air Defence cover provided by AREA DEFENCE SYSTEM (ADS) vehicles.
The Air Defence fire described here refers mainly to Aerospace craft (particularly ground-attack missions; VTOLs in High Mode are fired at using basically the same system, but with the following provisions:
i) VTOLs test Reaction to Air Defence fire as complete units, as opposed to the individual tests used for Aerospace craft.
ii) VTOL units that get an "abort" result do not have to leave the table; instead they lose a Confidence Level and have to drop to Low Mode. They are unable to return to High Mode while still within range and sight of any Active ADS vehicle.
[Note that vehicle-mounted Point Defence Systems may NOT engage aircraft - they are purely anti-missile weapons.]
LOCAL Air Defence (LAD) may only be used by a particular unit against air attacks directed at that unit itself (ie: in self-defence); ZONE Air Defence (ZAD) may fire at ANY air vehicle within range and line of sight, regardless of who is being attacked.
All Air Defence fire is made in a similar way to OPPORTUNITY FIRE, ie: it is done during the activation of the attacking Aircraft rather than that of the unit under air attack. Unlike normal Opportunity Fire, Air Defence fire does NOT cause the firing unit to lose its own activation chance; it may also be carried out by a unit that has already been activated that turn.
Local Air Defence fire has a maximum range of 12" - it may engage any air vehicle attacking the unit, provided that the aircraft is within 12" of the LAD element firing (thus an aircraft attacking with long-ranged weapons such as Missiles may well be able to fire from a stand-off position where it is out of reach of the LAD fire, but one making a DFO strike run must be within LAD range to launch).
Zone Air Defence has a 36" range, and this range may be measured from ANY point on the aircraft's flight path across the table (or to the current position of a VTOL unit).
As soon as a player announces that he is making Zone Air Defence fire against an opponent's aircraft, the player with the aircraft must immediately make a Reaction test for the pilot. This test is made in the normal way, and uses a Threat level of +1. If the pilot PASSES the test, he may continue his attack - if he FAILS he must break off the attack run and immediately exit the table. An aircraft aborts in this way, the Air Defence fire against it is not resolved - the pilot has detected a "lock-on" from an anti-aircraft system and decided it would be healthier elsewhere!
[An aircraft that aborts its attack may, if desired, return to try again during the next game turn.]
If the pilot presses on with the attack, any Air Defence fire against his aircraft must be resolved before he launches his weapons. [Note that each ADS vehicle may only fire on ONE aircraft of a GROUP of craft operating together, but for the Reaction test mentioned above ALL aircraft in the group must test even if just one is being fired on.]
Each Zone Air Defence vehicle resolves its attack SEPARATELY, in the following way:
The ADS player rolls a die, based on the Quality of the ADS: a D6 for BASIC ADS, D8 for ENHANCED and D10 for SUPERIOR.
The Aircraft player rolls a die based on his aircraft's Command marker - a D6 for a GREEN marker, D8 for a BLUE, D10 for ORANGE, modified UP one die type for a grade 1 pilot and DOWN one for a grade 3. (Thus an "ORANGE 1" pilot uses a D12, but a "GREEN 3" uses a D4.)
If the Aircraft is equipped with ECM, it gets a SECONDARY die roll based on the quality of ECM used (BASIC = D6, ENHANCED = D8, SUPERIOR = D10). This functions in the same way as the Secondary die in direct fire, ie: the HIGHER of the two die scores is used.
If the ADS roll EQUALS the Aircraft's roll, then the pilot must ABORT his attack as above, but the aircraft is undamaged - it may return next game turn.
If the ADS roll EXCEEDS the Aircraft's roll, then the Aircraft is hit and possibly damaged: Draw 2 Damage Chits for a Basic ADS, 3 for Enhanced or 4 for Superior; ALL chits are valid except Special damage chits, which are ignored.
If the total of damage points on the chits drawn is LESS THAN the ARMOUR RATING of the aircraft, the craft is undamaged but must still abort for that turn.
If the total damage EQUALS the ARMOUR RATING, the aircraft is DAMAGED and must abort; in this case it is NOT able to make further passes in the game, but must "limp" back to base.
If the total damage points EXCEEDS the ARMOUR RATING (which, as already noted, actually represents its overall "survivability"), then the aircraft is SHOT DOWN - it crashes and is destroyed.
An aircraft that survives any Zone Air Defence fire and still continues its attack must then run the gauntlet of any LOCAL AIR DEFENCE weapons used by the TARGET UNIT. No Reaction test is needed in this case - simply go straight to the fire resolution below:
The aircraft player makes a roll exactly as for ZAD above (including a Secondary roll for ECM if applicable);
The LAD player makes a roll based on the NUMBER of LAD elements in the unit under attack - for one element with a LAD weapon, he rolls a D6; the Die Type increases by one for every additional LAD weapon fired (eg: a unit firing 3 LAD systems at one attacking aircraft would roll D6 + 2 types = D10).
[Note that if two or more aircraft (operating together) are attacking one unit, the player under attack must decide how to divide his LAD weapons - each may only fire at ONE of the aircraft.]
The results of the rolls are calculated as for ZAD fire effects, except that only TWO Chits are drawn (as for a BASIC ADS) regardless of the actual number of LADs firing. The Chits drawn are compared with the Armour Rating as above, thus causing the attacking aircraft to do one of the following: complete its attack, abort mission, abort with damage or crash.
If the aircraft survives everything that the Air Defences throw at it, proceed to the attack resolution steps.
INTERFACE LANDINGS
Troops and vehicles may be landed from orbit in Interface Craft (Dropships and Assault Landers). It is not really necessary (or worthwhile) to go through a lengthy design procedure for such craft, as they will probably only be used for one turn in the game. Use the following notes for guidance:
i) DROPSHIPS are the BIG Interface craft, used to carry Heavy Armour and support vehicles; each Dropship can carry between two and five complete UNITS, depending on the size of the ship and the element types in the units. The units may be unloaded in the activation FOLLOWING the one in which the Dropship lands.
ii) ASSAULT LANDERS are smaller craft, carrying from a couple of elements up to one complete unit. These elements may unload in the SAME activation that the lander touches down.
Whether or not the Interface landers are at risk from AA fire on the way down must be determined by the scenario; in most cases the potential cost of losing a whole Dropship full of Armour will mean that such a landing will only be attempted once the defences have been subdued. If, however, an "opposed" landing IS tried, roll a D6 for each Lander coming in - the score for it to be lost should be determined according to the scenario, perhaps 6 if facing light defences or 5,6 if against heavy resistance.
Bringing in ANY NUMBER of Dropships and/or Assault Landers counts as just ONE ACTIVATION for the player; as noted above, elements in Assault Landers may be unloaded and placed on the table immediately, while those in Dropships must be unloaded in following activations - unloading ONE Dropship counts as a full activation turn.
Interface craft may land anywhere on-table, provided they are at least 12" away from the nearest (visible) enemy forces.
When "paying" for Interface transport capability in the Points Cost system, points are paid as a percentage of the cost of each element that is to be Interface-landed, rather than paying costs for the landers themselves.
DROP TROOPS
Certain specially-equipped elements (known as DROP TROOPS) may be "directly inserted" to the battle area by either parachute/parajet from high-flying transports, or in ballistic entry capsules from an orbiting ship.
If dropped from within atmosphere, Line or Powered Infantry may be used; only Powered troops may drop directly from orbit. Only infantry and Very Light (class 1) vehicles and equipment may be paradropped, and the only type of non-infantry element that may be orbitally dropped is the Infantry Walker (see P.XX).
To simulate the semi-random nature of the drop, take one of the LETTERED MARKERS to represent each UNIT of Drop Troops; now actually "drop" these markers from at least three feet above the table (they should bounce nicely!) - where they end up is the centre of the drop zone for that unit. Any markers that bounce off-table represent units either killed by AA fire on the way down, or else missing the drop area completely. Either way they are "lost" for the purposes of the game.
The actual models for the units are now put on the table, each Unit being scattered around its drop zone marker so that no element is LESS than 4" from any other - thus the unit begins out of Unit Integrity, and its first activation on-table must be to move its elements into integrity distance before it can do anything else.
If a drop zone marker ends up in WOODS, SWAMP or MOUNTAIN terrain, roll a D6 for each element of that unit - on a roll of 5 or 6, it is lost on landing. In URBAN terrain, Infantry elements are lost on rolls of 4+ and vehicle/equipment elements are ALL lost automatically. All elements landing in OPEN WATER are lost completely, except for POWERED INFANTRY and INFANTRY WALKERS who may wade ashore.
When "paying" points costs for Drop Troops and equipment, these are calculated as a percentage of the cost of the equivalent 'normal' element.
CHAPTER 11: ADDITIONAL AND OPTIONAL RULES
SMOKE AND OBSCURATION
SMOKE effects are produced by Artillery firing Smoke Rounds, by vehicle-mounted Smoke Dischargers or by fires (burning woods or buildings). The main effect of smoke is to block line of sight and line of fire, and thus inhibit both Direct Fire and target observation for Artillery. All smoke clouds are assumed to be "hot" smoke, either from a fire or from chemical agents in artificially-produced smoke, and thus are opaque to IR and most other sensors as well as basic optics.
The "smoke" markers on the counter-sheet are intended to act as Ammunition markers for Artillery Smoke Missions; to actually represent the smoke clouds on the table we recommend the small "balls" of cotton wool that can be purchased in mixed bags of various colours. When smoke is required on the table, put out a line of these balls, to the required length in inches; SMOKE CLOUDS ALWAYS EXTEND DOWNWIND FROM THEIR POINT OF ORIGIN.
[Wind direction should be determined at the start of the game; simply designate a particular table edge as 12 o'clock, roll a D12 and use "clockface" directions. The wind direction, once determined, will remain the same throughout the game unless dictated otherwise be the scenario.]
Fires in built-up areas and woods are started by either Artillery fire (of any kind), or by any fire of HEL or DFFG weapons at the area.
When smoke is produced by a fire, the cloud will extend 6" downwind and will remain in place for the rest of the game unless extinguished (a forest or building fire will burn happily for a LONG time if not seen to!). The only way such a fire may be EXTINGUISHED during the game is by an ENGINEERING unit; if such a unit is moved into contact with the burning area, and then spends a FULL ACTIVATION on fire-fighting, the fire is assumed to be out at the end of the unit's activation.
[it is assumed the unit uses high-tech firefighting systems such as fuel-air explosive devices, to "snuff out" the fire. There will be little left standing afterwards, however!]
When smoke is delivered by Artillery, a "smoke" marker is placed as the Ammunition counter (provided the battery has one available). The mission is fired as for a Converged Sheaf, ie: with a single impact marker; the smoke starts from this marker, and extends downwind for 2" x the number of Artillery elements in the firing battery (thus a three-gun Battery would produce a 6" long cloud). For the turn in which it is fired, the smoke cloud remains at full strength; in each subsequent turn (during the TURN END PHASE), remove 2" of the smoke from the UPWIND end until all of the cloud is gone.
The final method of smoke-laying is from the small dischargers fitted to all military vehicles. As with the single "free" APSW, ALL vehicles are automatically assumed to have smoke dischargers; they need not be paid for in points, or included in the vehicle Design stage.
For simplicity, the dischargers are assumed to be able to fire as many times as required - the number of times they will be used in most games is probably quite small, and it is not worth keeping ammunition records for them.
A vehicle may decide to fire its smoke dischargers during any activation, in place of a Combat Action (the vehicle may NOT fire a weapon as well); the effect of this is to place a single "ball" of cotton-wool 'smoke' immediately in front of the firing vehicle; this small cloud lasts until the END of the vehicle's NEXT activation, unless the vehicle drives through it or otherwise moves away from it (in which case the cloud is removed immediately). Smoke from vehicle dischargers is not quite as effective as other smoke types - it inhibits some fire, but does not block everything (you know that the vehicle is there somewhere in the small cloud!). Such smoke renders completely ineffective all Laser (HEL) and Missile (GMS) fire, and makes all other direct-fire weapons count the range to the obscured vehicle as ONE BAND GREATER than it actually is.
MINEFIELDS
Minefields may be laid in three different ways: they may be already set up by DEFENDING forces before the game, they can be laid during the battle by a specialised Automatic Minelayer vehicle, or may be delivered by Artillery firing DMR (Dispersed Mine Rounds).
There are two different types of MINES available - Conventional mines and "Jumping" mines; all mines may attack ground elements (including GEV and Grav vehicles) that pass over them, but JUMPING mines also have the ability to attack LOW-MODE flying craft such as VTOLs - basically the mines detect an overflying craft and fires itself into the air by a small rocket charge, right in the aircraft's path.
Minefield locations are indicated by the relevant type of MINE marker from the counter-sheet; if the minefield is laid during the game (by Artillery or Minelayer) then the counter is placed face-up, but if it is laid before the game it should initially be placed face-down until an element moves into it for the first time in the game (in this case, players may agree that a number of the DUMMY counters may also be used to confuse the attacker about the exact location of the real minefields).
All minefields, however laid or delivered, are assumed to be circular areas 4" in diameter centred on the MINE marker; thus any element moving within 2" of the marker is said to have entered the minefield.
Any element (Infantry, Vehicle or VTOL in the case of Jumping Mines) entering a minefield must immediately draw TWO damage chits. Infantry elements take damage as if under HEF Artillery attack. Vehicles take damage as per direct fire attacks, with RED/YELLOW chits being valid; the mines of course attack the BOTTOM armour, which in all cases is assumed to be ONE LEVEL LOWER than the SIDE armour (ie: TWO levels lower than the basic (front) armour rating). A vehicle DAMAGED by a Mine attack is actually IMMOBILISED; all "special" damage chits are valid against vehicles. VTOLs overflying Jumping Mines are attacked as for vehicles, but against their full basic armour rating - VTOL craft EXPECT to be shot at from underneath, so carry some of their thickest armour there!
Elements that spend more than one turn in a minefield must draw chits for EACH activation that they are in the field, unless they do not move at all and take no combat actions either.
LAYING MINES
Only conventional minefields may be laid by Minelayer vehicles or Artillery; Jumping mines must be carefully emplaced by hand, so may only be laid in advance of the battle by specialist engineers - such a job is outside the timescale of the game.
When an Artillery battery fires a DMR mission, simply place one mine marker at the point the fire impacts; for the sake of simplicity all mine impacts are assumed to be of the same density, regardless of the method of delivery. Placing one Mine marker constitutes the entire Combat Action of the Artillery battery, irrespective of the number and type of guns/launchers in the battery.
An Artillery-delivered Minefield becomes active immediately; any elements caught in the mined zone are attacked at the start of their next activation, IF they attempt to move or carry out any other action.
A specialised Minelaying vehicle may place a mine marker immediately BEHIND itself as a Combat Action during any activation (this represents the vehicle 'spraying' mines over a circular area from special launching racks). The minefield does NOT become active until the vehicle that laid it has moved more than 2" away from the marker. Laying a single minefield in this way exhausts the vehicle's supply of mines (it takes a lot to seed a 400m diameter area), so it cannot lay another field until it has been resupplied with another mine marker in the same way as Artillery ammunition resupply.
CLEARING MINES
Mine clearance is assumed to use various sophisticated electronic and/or explosive means to disable or destroy the mines over a wide area; thus rather than clearing a narrow path through a mined area the clearance (if successful) will deactivate the entire minefield.
Clearing minefields may be done by Combat Engineer units, either on foot or in a specialised engineering vehicle; in either case the engineering unit must be moved up so that at least one of its elements is within 2" of the mine marker (the element will NOT be attacked by the mines). The unit now rolls a die; the Die Type is determined by the number of elements of the engineer unit that are within 2" of the mine - if only one, use a D6; for every extra element within 2" increase the die type by one. On a roll of 6 or greater, the minefield is deactivated and the marker is removed from the table. If the roll fails, the unit may (if it wishes) remain in place and attempt the clearance again in its next activation. Making a clearance attempt counts as the Combat Action for those elements; if the unit attempts more than one minefield at once, the elements of the unit must of course be divided between the different minefields - each individual engineer element may contribute to only ONE clearance attempt per activation.
The only other way of disposing of a minefield is to hit it with Artillery; any mine marker that falls within the beaten zone of an EFFECTIVE FIRE Artillery mission (of any type except Smoke, or other Mines) is automatically removed from play.
ABANDONED VEHICLES (OPTIONAL RULE)
When a vehicle is DAMAGED, IMMOBILISED or suffers a SYSTEMS DOWN result, there is a good chance that the crew will decide that it is no longer worth staying in the vehicle and waiting to get hit again!
The reaction of abandoning a damaged vehicle is not actually linked to either the quality of the crew or their unit leadership - a veteran crew are just as likely to bail out through common sense and experience as a green crew through fear.
If players wish to use this (optional) rule, then whenever a vehicle receives any kind of damage result that does not totally disable it, roll a D6; a score of 1 - 3 indicates that the crew have decided to bail out, rendering the vehicle inoperative as a combat element for the rest of the game. When this occurs, mark the vehicle with an ABANDONED VEHICLE counter (the green tank and "running man" graphic).
The major point of using this rule is if a linked Campaign of games are being played, and vehicle recovery is possible after the battle.
BACKUP SYSTEMS
During the Vehicle Design procedure, it is possible to "buy" BACKUP (or multiple-redundant) SYSTEMS for any vehicle. These function as follows:
At any time that the vehicle receives a SYSTEMS DOWN result (either as target or firer), there is a BETTER chance of 'recovery' from this damage if the vehicle has Backup Systems available. WITHOUT Backups, the normal score needed to remove a Systems Down marker is 6 on a D6 roll; if the vehicle HAS Backup Systems, then a roll of 3+ on a D6 is enough to get the systems back on-line and remove the marker.
The Backup Systems CAN be used more than once in a game, should a particular vehicle be unlucky enough to receive two Systems Down results at different times!
ENGINEERING UNITS
Combat Engineering teams and/or vehicles are organised into units like any other; a typical such unit might have two or three Armoured Engineering Vehicles (AEVs) with digging and recovery equipment, plus perhaps a Minelayer vehicle and/or a Bridgelayer. Engineering units attached to primarily Infantry forces are more likely to use Engineer teams on foot, with transport provided by normal APCs or trucks - though at least one AEV would normally be attached for APC recovery.
Engineering units may perform a variety of tasks before, during or after the battle. The use of Engineers to create defensive positions before the battle, and to recover disabled vehicles afterwards, really comes into the realm of Campaign games - they have little bearing on the actual battle itself.
Where the Engineer units ARE used in the game itself is in areas like bridging obstacles, laying and clearing minefields, fighting fires, demolitions etc. Fire Fighting and Minefield work are covered under the relevant sections (Smoke, P.XX and Mines, P.XX); some other engineering functions are detailed below:
BRIDGING: if a Bridgelayer vehicle is included in an Engineer unit, it may be used to cross any suitable obstacle (streams, smaller rivers, narrower ravines or other gaps). Laying the bridge takes a full Activation of the laying vehicle, as does recovering it after use. While the bridge is in use, it may carry the weight of any vehicle equal or less than the class of the Bridgelayer itself (ie: a class 4 Bridgelayer can carry a bridge that will support up to class 4 vehicles crossing it).
DEMOLITIONS: if any engineering element is moved into contact with a building, fortification, bridge or even a vehicle and spends its Combat Action there, the building or other item may be considered DEMOLISHED (or a vehicle Destroyed) - if a structure, mark it with a RUINED BUILDING marker. Note that dismounted Engineer teams CANNOT carry out Demolitions if the have an UNDER FIRE marker.
COMBAT REPAIRS: if an AEV spends a complete activation in contact with a DAMAGED, IMMOBILISED or SYSTEMS DOWN vehicle, the player may roll a D6: on a roll of 4 or higher, the damage effect marker(s) may be removed and the vehicle is considered REPAIRED and able to function normally again. If such a vehicle has been "left behind" by its own unit due to its damage, it must either rejoin its own unit as quickly as possible, or (if its own unit is destroyed or simply out of reach) can REGROUP with another nearby unit (see P.24). [Note that an ABANDONED vehicle, even if repaired, cannot rejoin the battle as it has no crew!]
CREATING HASTY DEFENCES: an Engineering unit with suitably equipped AEVs can, by using a full activation of the entire unit, create a DUG-IN position that can then be occupied by any other Armour or Infantry unit. This represents the AEVs using Dozer blades, digging charges and such to create "instant" foxholes, trenches and 'tank scrapes' to permit a unit to claim the benefits of being "Dug-In" (see P.20).
FORTIFICATIONS
Fixed fortifications and weapons emplacements can play a part in an Attack/Defence battle or any similar scenario. In general, such structures should be treated as immobile vehicles, and smaller ones (pillboxes, bunkers etc.) may be designed using the vehicle construction rules.
Larger fortifications may mount any weaponry desired, though of course everything should be "paid for" (at normal costs) if using Points values.
The rules for firing at buildings apply equally to fire at fortifications, though of course defended military structures will have much higher Armour ratings than civilian buildings.
The possibilities for types and styles of fortified buildings are almost endless, and obviously we cannot detail them here - if such structures and installations play a part in your games, you will have to provide your own specifications and any special rules that are required.
BUILDINGS AND URBAN AREAS
When structures are used on the table, they must be defined as either of two basic types: ISOLATED BUILDINGS, or URBAN AREAS.
ISOLATED BUILDINGS represent single constructions or small groups of buildings - small farms, military installations (Command or Medical posts etc.), tiny rural villages and the like. Such buildings do not impede movement, though the models used do block line of sight (ie: elements can be "hidden" behind the building models).
Elements that are in direct contact with the building model are deemed to be in SOFT COVER, even if they are not concealed by the building.
Isolated Buildings may be fired at as if normal targets - for direct fire, the firer treats all range bands as if CLOSE (provided it is within overall range limits), and the opposing player uses a D4 for the building's "target die" in all cases. No Secondary Die is ever used. Buildings hit by Artillery draw damage chits as if they were vehicle targets, with the same validities.
Buildings require Armour ratings to resolve damage - these can be decided between the players at the start of the game, but some suggested guidelines are:
Most civilian buildings (farms, dwellings etc.): Armour 3
Industrial Installations, Factories, Warehouses etc: Armour 5
Military installations: Armour 6 or 7
[The reasoning behind the relatively high Armour ratings is not the inherent strength of a structure, but the amount of punishment it can take in relation to a much smaller vehicle element.]
When a building is DESTROYED (ie: draws enough Damage Points to exceed its Armour Rating), mark it with a RUINED BUILDING counter. Special damage chits do not count against buildings EXCEPT for the "BOOM" chits, which destroy any structure.
RUINED buildings no longer block line of sight, although elements in direct contact with the ruins may still claim Cover in them.
URBAN AREAS represent large zones of densely-packed buildings - towns and cities, and big industrial complexes. They are treated as a separate TERRAIN TYPE for movement purposes, as they can severely restrict the mobility of most vehicles.
For Combat purposes, Urban Areas are treated very much like WOODS; units can be defined as being either on the EDGE of an Urban Area, or actually INSIDE the area, with exactly the same limitations on fire effects as for Woods (see P.20).
The major difference between Urban Areas and Woods is that vehicles MAY move inside Urban Areas (albeit only slowly), whereas most vehicle types are prohibited from entering Wooded areas, except to take cover in the wood edge.
COMBAT IN URBAN AREAS
Any combat between units in an Urban Area is treated as a Close Assault action, and is fought out using the Close Assault (and if necessary Combined Close Assault) rules on PP.34/35.
No Direct Fire Combat or Infantry Ranged Firefights are permitted inside Urban Areas; as all vehicles are basically equivalent in Close Assault (regardless of size or weaponry), this makes Urban Areas VERY dangerous places for bigger vehicles - which is just as it should be!
ARTILLERY FIRE AGAINST URBAN AREAS
As an Urban Area represents a very large number of buildings close together, and the actual model buildings used are only symbolic, when such an area is attacked by Artillery it is treated differently from attacks on Isolated Buildings. Instead of drawing damage chits for the buildings, the following system is used:
Only CONVERGED SHEAF, EFFECTIVE FIRE missions with HEF rounds (or Nukes, if you want to be REALLY silly...) will have any real effect on Urban Areas; other fire simply knocks down a building here and there and upsets the local population.
When such an effective mission is fired at an Urban Area, simply place a RUINED BUILDING marker at the point of impact. This indicates that enough of the immediate area has been rubbled to impede movement.
Once the marker is placed, NO vehicle may move within 2" of the marker; Infantry may move as normal, and if they wish may occupy the rubbled area and treat it as a Dug-In position (put a Dug-In marker by the Infantry unit while in the rubble, but remove it if they move - it represents the troops taking advantage of the rubble, not occupying prepared positions).
If a rubbled area blocks a main highway through an Urban Area, the benefit of the highway is lost - units must leave the road and move at the Urban terrain rates, with vehicle units having to detour all the way round the rubbled area.
[Nuking a town or city will reduce the WHOLE area to an impassable, rubbled ruin - but then you probably guessed that didn't you....?]
NUCLEAR MUNITIONS
As discussed in the Artillery rules, the use of NUKES is an option that is not to be taken lightly. Whether you allow their use in the game at all is a matter that requires the full agreement of all players, and justification in the scenario being played.
The kind of Nuclear weapons we are talking about here are small, "Battlefield Tactical" types - probably much less devastating that those already in use today - but firing one will still cause MASSIVE havoc across the table.
When a Nuke round is delivered to an impact point, it has a total Beaten Zone EIGHTEEN INCHES in diameter. The INNER ZONE, within 2" of the impact marker, is completely vaporised - everything within this area is immediately and totally destroyed, regardless of what it is. There is then a MIDDLE ZONE, out to 5" from the counter, where all infantry are automatically killed (even Powered troops) and all vehicles must draw FIVE damage chits (ALL chit colours are valid!). Finally there is the OUTER ZONE, up to the limit of 9" from the impact point, in which all Infantry AND vehicles must draw THREE chits each, again with ALL colours valid except for Dug-In elements, which count only REDs and YELLOWs.
Immediately after the explosion, ALL units belonging to the player under the Nuclear attack must make a Confidence test at a Threat level of +4 if within direct line of sight of the blast, or at +2 otherwise. Additionally, all the units of the player who FIRED the Nuke must also test, at a threat level of +2. The tests are taken at these levels ONLY when the FIRST Nuke is fired in the game, but if any more are then used ALL units on BOTH sides must test again at a threat level of +1.
[EVERYONE on the table will get distinctly uncomfortable when the Nukes start flying - if players use them repeatedly many of the units on both sides will start to suffer severe confidence losses.]
After the damage due to detonation is resolved, the impact marker is removed but the NUKE counter (the Radiation symbol) is left in its place, marking the Ground Zero point of the blast. For the rest of the game, NO element may approach closer than 2" from the marker, as this area is a VERY "hot" crater. In addition, only fully-sealed vehicles and Powered Infantry may approach within 6" of the marker - this area is impassable to all unsuited infantry and non-NBC protected vehicles due to the radiation levels.
BIOCHEM MUNITION EFFECTS
Biochemical warheads in the game are treated as "non-persistent agents"; that is, they do their (unpleasant) job and then quickly disperse. While they are not quite as disruptive to game balance as Nuclear munitions, they are still only to be used where they can be justified.
Biochem rounds are always fired as an OPEN SHEAF mission, and the agents affect the complete beaten zone. The usefulness of Biochems depends largely on surprise - after they are first used in a battle, the troops will be taking countermeasures (ie: they will have their masks and "Noddy Suits" on, vehicles will be sealed and overpressured etc). Thus the most effective Biochem strike will be the first one used in that game; in this first attack, all LINE and MILITIA units in the Beaten Zone have THREE chits drawn against them, with ALL colours valid (Dug-In elements get NO bonus against Biochem attacks). Open or non-NBC-protected vehicles are counted as LINE INFANTRY elements for this - it is the CREW that are affected, not the hardware. Powered Infantry and sealed vehicles are NOT affected. Note that the agents are assumed to be "heavy" chemicals that are not significantly affected by wind.
On this first use of Biochem munitions, ALL units of the player being ATTACKED must make Confidence tests at Threat level +3, and ALL of the FIRER'S units must test at +1.
In any subsequent uses of Biochems (by either side) in that game, the effects are reduced to TWO chits per Line, Militia or unprotected vehicle element, with only RED chits valid, and ONLY the units caught in the actual attack need make Confidence tests (at the normal threat level for being under Artillery attack).
Immediately after the effects of a Biochem strike are resolved, the marker(s) are removed from the table - the agents are assumed to have degraded and/or dispersed, and there are no lasting effects in the zone.
CASEVAC
CASEVAC ("Casualty Evacuation") operations are provided by specialised units of vehicles or VTOLs. If such a unit is available, the knowledge that casualties can be quickly extracted from the battlefront and returned to Medical facilities (on- or off-table) is a great psychological boost to the troops on the ground.
To avoid over-complicating things, if you wish to include CASEVAC (or C-VAC) into the game the following (rather abstract) system is suggested:
Once any unit has suffered casualties in the battle, it is assumed it will have a number of wounded personnel to be evacuated. These are presumed to be carried with the unit until a CASEVAC element can reach them. Casevac vehicles or VTOLs operate as single elements, and can move freely around the battlefield subject to normal movement restrictions for their type; they may NOT attack the enemy - most are unarmed anyway. They do not need Command or Confidence markers, and for convenience are moved in the TURN END PHASE. When a casevac element is moved in contact with a unit that has suffered casualties, it is assumed to collect the wounded; the unit may immediately make a REACTION test (Threat Level +0) - if it passes this, it GAINS one Confidence Level (the evacuation of the wounded has had a beneficial effect on the troops' morale).
Each Casevac element may make only ONE such "pickup" before returning to the nearest Aid Station - if such a facility is present on-table then it may drop its wounded there and immediately return to pickup missions; if there are no medical stations provided on-table then the Casevac must leave the table by the baseline and spend one whole turn off-table before returning for another pickup.
[Casevacs CAN be fired on, but a player who does so will be considered a Jolly Poor Sport and will have to buy all the post-game drinks in the bar.....]
WEATHER CONDITIONS (OPTIONAL RULE)
Fighting in adverse weather conditions is obviously more difficult (usually for both sides) than in good weather. If players wish to simulate combat in poor conditions, the suggestions below will give some idea of the limitations that can be imposed - the exact rules used can be varied to suit the scenario and location of the battle (especially if it is set off-Earth, perhaps on some colony world with extremes of climate?).
RAINY conditions cause most terrain types to become one grade worse (eg: POOR becomes DIFFICULT) for wheeled and tracked vehicles, and for all troops on foot. If the rain is deemed heavy enough it will also restrict maximum Sensor range (say to half normal, ie: 30") and make all direct fire treat its range band as if it were one greater than it actually is. FALLING SNOW will have similar effects, but can also (if sufficiently heavy) cut Sensor range down even less - say to 18"? - and make many types of terrain completely impassable to ground vehicles. Heavy rain or snow may also prevent Aerospace craft from flying.
VERY HIGH WINDS (especially on non-terran worlds) may be so strong that only Powered troops and vehicles can stand against it - unsuited Infantry must remain in their vehicles. Such winds may also make Riverine movement and Air missions impossible.
There are many other possibilities for weather effects that can be explored if you wish - dust and sandstorms in desert areas, fog and mist, etc. The best way of dealing with any weather effects is to write them into specific scenarios.
NIGHT FIGHTING can be worked out on a similar basis to adverse weather conditions, but don't forget that most modern forces are very well equipped for Night operations; with the provision of advanced Sensors, image-intensification and the like, night fighting is far less difficult or restricted than it used to be.
EXOTIC ENVIRONMENTS
Games set on other worlds (and even ones set in certain parts of this planet, eg: Antarctica) may well have terrain and conditions different from battles in Earth's temperate zones. Icefields, very hot/volcanic areas, high or low gravity, vacuum environments - all can be looked at for variety in game settings.
To go into detail on all such environments would take up half this book, so all we can really give you here are the briefest guidelines to get your own imaginations working - after all, that should be half the fun!
When you start to look at the effects of a given environment, many of the limitations become obvious. For example, GEVs and any conventional aircraft or helicopters can't function on vacuum worlds! Extremes of temperature and/or gravity will mean all Infantry will have to be Power Suited, and hostile/poisonous atmospheres will similarly require all troops and vehicles to be fully sealed at all times.
"Exotic" scenarios can often be used to 'balance' games between otherwise incompatible forces, and in any case they can be an enjoyable change from the basic style of game.
Don't forget the possibilities of native flora and fauna - a few dangerous plants (acting like Biochem agents on any unprotected troops?) and some randomly-roaming wildlife on the battlefield can add all sorts of twists to the game!
ALIEN RACES IN DIRTSIDE II
Most of the rationale behind the game is based on human-vs.-human conflicts, but the framework of the rules will function equally well for human/alien or even alien/alien games. A full and detailed treatment of the subject of alien races is outside the scope of this book, hopefully it is something we can explore more deeply in a future supplement. If you wish to include alien forces in your battles, then try to ensure that they use sufficiently different technology and force compositions that they have a different 'feel' to the human armies - for example, have a human force of low to mid-tech vehicles and equipment up against an alien invader with all Grav vehicles and energy weaponry - or even vice-versa!
A more complex question than the technology of the alien forces is their psychology - if they react to combat conditions and stress in exactly the same way as human troops, then they are little more than the traditional Hollywood "man in a rubber suit" type of alien. What is really needed is to give each alien race its own unique variations in terms of confidence, leadership etc. - perhaps they revere their unit leaders like gods, and the death of one will send the rest of the unit into a kill-crazed frenzy? Alternatively, maybe the sight of a retreating enemy unit triggers the same kind of berserker bloodlust and uncontrollable charge? As with the ideas for backgrounds and scenarios, SF literature and films are teeming with things bug-eyed and squirmy that can be developed into suitable game forces. If you come up with any particularly good ones, please send them to the publishers - we may well use them when we come to do the supplement!
CHAPTER 12: SCENARIOS AND BACKGROUNDS
THE SCENARIOS
Given below are two possible battle scenarios (plus some extra outline ideas for players to develop themselves) to give a bit of variation to the straightforward 'attack/defence' or 'encounter battle' type of game. These are obviously only a few suggestions, and players should always seek to design their own challenging scenarios - there is plenty of inspiration to be had in SF films and literature.
A word about the scenarios presented here: they are deliberately non-specific with regard to the forces (and often the terrain) to be used, as they are intended to be modified as you wish to fit in with the models, background etc. that you are using for the game. In addition, they are NOT necessarily 'balanced' scenarios! The force mixes can be juggled around to suit certain points values if this is important to you or your opponents, but we would suggest that a far more exciting game can often be had using apparently unequal forces - if you feel it strictly necessary for each side to have an equal chance of "winning", then simply alter the objectives and victory conditions to suit the relative strengths and weaknesses of each force.
SCENARIO 1: BORDER RAID
This scenario represents a typical 'hit and run' raid by a small mobile strike force against a defended border post. The situation is set during an uneasy truce between two neighbouring states, Catatonia and New Harmony, on the 'balkanised' colony world of Segonis III (though the same action could equally well be set on Earth, or any other settled world). Along the disputed border between the two warring states, Catatonia has established a number of small, defended border posts to try and prevent large-scale incursions by New Harmony forces. This move is seen by the government of New Harmony as hostile action, and they decide to mount a series of raids in retaliation.
TERRAIN SET-UP:
One short table edge should be designated as the border; this edge will be the attacking (New Harmony) forces baseline. The main feature of the terrain will be the border post, which should be a grouping of military buildings similar to a small firebase; this should be located in either the Main Battle Area or the Defender's Rear Area, to the agreement of both players. The terrain around the post should be reasonably close and broken; there should be a road or track crossing the table from the 'border' edge to the opposite edge.
OPPOSING FORCES:
CATATONIA: The defending force should consist of no more than 6 platoon-strength units, most of which will be infantry. They may have one battery of artillery in support, either within the border post firebase itself (a very good reason for attacking it...) or alternatively as an off-table asset. Some tactical aerospace support may be employed if both players agree.
A suitable basic force could be:
2 platoons 'leg' infantry (line or militia)
1 platoon mechanised infantry (line)
1 troop Main Battle Tanks
1 artillery battery
1 command unit
NEW HARMONY: the raiding force should be highly mobile and consist of at least as many units as the defending forces, up to a maximum of twice that number (the relationship between force strengths can be adjusted to take into account quality and tech differences between the forces in use).
Suggested basic forces:
2 troops Main Battle Tanks
1 troop Heavy Battle Tanks
4 platoons mechanised infantry (line) - or substitute 1 Power infantry platoon for 2 line platoons.
1 artillery battery (off-table asset)
1 command unit
OBJECTIVES:
Three objective markers should be drawn and used; one must be placed in the border post itself. Before he is able to declare Game End, the attacking (New Harmony) player must withdraw at least half his own units off his own 'border' baseline.
SCENARIO 2: SPACEPORT DEFENCE
The capture of a major spaceport is a classic prelude to full-scale planetary invasion; the possession of suitable landing facilities is almost essential for the insertion on-world of significantly large forces for an extended campaign. In this scenario, a high-mobility Interface Assault Combat Group is tasked with taking control of the main port facilities on a fairly well-settled colony planet.
TERRAIN SET-UP:
The table for this game represents, of course, the spaceport complex. Like 20th century airports, spaceports are very dispersed affairs by their very nature - so an extensive port area covering several kilometres of groundscale is not unreasonable. The port set-up should occupy most (if not all) of the table, and where possible should include at least a selection of the following features:
An administration building or complex
A communications and flight control centre
At least one passenger terminal, possibly linked to the admin. building
At least one cargo handling facility
Several spacecraft dispersal bays, landing pads or blast pits; bear in mind that larger starships are not usually capable of atmospheric interface operations, so most facilities will cater for interface shuttles and smaller starcraft only. A few 1:300 scale spacecraft models parked in some of the bays will look really effective!
A transit system of some kind (eg: a monorail link) to connect the port to the nearest city, and possibly also linking installations within the port itself (passengers won't fancy a 4-kilometre hike from the terminal to the blast pads!)
Finally, if you have room, include some buildings just outside the port perimeter near the main gates, to represent the 'startown' - all the cheap bars, hotels and other 'places of entertainment' that spring up wherever starship crews are dirtside with money in their pockets....
OPPOSING FORCES:
PORT DEFENCE: The strength of the defending forces rather depends on whether they are expecting an attack; a good idea would be to have only a small force of port security troops on hand at the start of the game, but have a reasonable level of reinforcements on call from the local military base - these can arrive at either a preset or random (die-rolled) time after the start of the battle.
A suitable spaceport security detachment could be:
3 platoons of 'leg' infantry (probably militia); only one team per platoon would carry a GMS/L, and only up to 50% of the teams in total would be equipped with IAVRs.
1 zone air defence troop
1 command unit
The reinforcements could consist of:
2 troops of Main Battle Tanks
2 platoons of mechanised infantry in MICVs
1 troop of missile vehicles
If you prefer to allow random arrival of the reinforcements, roll a D6 at the start of each turn; add one to the die roll for each turn elapsed since the start of the game. On a score of 6 or more, the reinforcements arrive at the table edge nearest the port main entrance gates.
ASSAULT FORCES:
The aim of the attacking force should be to isolate the defenders and take them out piecemeal, before they can concentrate their forces and organise themselves (and certainly before the reinforcements arrive!). A suitable assault group would be:
4 platoons of Powered infantry
2 troops of fast, light AFVs
2 platoons of line infantry in small APCs (probably only 1 team per vehicle)
1 or 2 flights of ground-attack fighters for close support
If suitable models are available, the attacking player may deploy his interface landers in the first move and unload their troops. The Power infantry may, if desired, be designated as Jump Troops who are deployed to the surface individually (like paratroops) - in this case their initial drop locations should be randomised and they will need to regroup (as per Drop Troop Rules on P.43) before commencing offensive operations.
OBJECTIVES:
An agreed number of objective markers should be placed for this scenario, on key areas: eg at least two of the spacecraft dispersal bays or pads, the admin and control centres and the main gate (to delay the arrival of the reinforcements). The whole table area is designated as the Main Battle Area; neither player has a 'rear area', as both forces will be spread around the table.
FURTHER SCENARIO IDEAS
These are just a few simple outlines that players may wish to develop into full scenarios; they are presented here mainly to get your imagination working!
"HOLD THE BRIDGE": A small force of defenders must defend and hold a vital river crossing point until supporting troops can arrive (or until a retreating unit can cross the table and escape over the bridge). The attackers could be airborne troops dropped into the defenders' rear areas.
"DEFENCE OF HILL 301": A depleted, undersupplied and possibly demoralised combat group must hold a vital strategic hill against an enemy consisting mainly of hordes of infantry (with very little heavy weapon support). Command says help is on its way, but WHEN? (Does this one sound familiar....?)
"CONVOY": A nice simple one; a convoy of supply trucks, escorted by a small armed force, must be moved (safely) from one end of the table to the other. The opposing force must ambush the convoy and either destroy or capture it, depending on what it is carrying.
So, there you go. Get writing!
POSSIBLE BACKGROUNDS
It is perfectly possible to play DIRTSIDE II battles without having to worry about any kind of background setting at all. For example, if one player has a force of mainly hover vehicles with energy weapons, and a friend has some tracked and wheeled vehicles with long kinetic cannons - and maybe a walker or two - they can simply set up any scenario they like and play a one-off game. What they call their forces, and how these two protagonists got into conflict in the first place, is pretty much irrelevant to the enjoyment of this game.
Many players, however, will want to go into things a bit deeper than this. Having a 'believable' background in which to set your games and campaigns adds a lot of interest to the whole process; battles are no longer just one-off encounters, but can begin to play a part in the much larger scheme of political and military events that shape and develop the "future history" of the desired background.
To set about designing you own game background consider the possible types of wars. Just watch the news reports for a few weeks, read a few books on military history and you'll see that wars come in many shapes and sizes. Here is a list of examples:
CROSS-BORDER RAIDING: eg: Viking attacks on 10th century England.
INTERNAL REBELLION: one side is composed of unorganised militia or rebels, eg: a coup in a 'banana republic'.
CIVIL WAR: both sides are using organised armies (and probably the same equipment), eg: the American Civil War.
GUERRILLA WAR: one side has masses of high technology, while the other has little but manpower and thus relies on traditional guerrilla tactics, eg: the Vietnam War.
POLICE ACTION: a 'big' power moves in on a 'little' power to depose what it sees as an 'unfriendly' government, eg: the US intervention in Grenada.
PUNITIVE ACTIONS: retaliation against cross-border raids and/or terrorism etc, eg: British actions in Afghanistan in the 19th century.
FULL SCALE INVASION: major military action aimed at physical takeover of a state or region, eg: German invasion of Poland in 1939, or the Gulf War.
It is a relatively simple matter to translate any of these historical examples into a Science Fiction setting - in fact this has been done by nearly every major SF writer and filmmaker you could name!
Bear in mind also that there may well be more than one political unit (country, state, colony etc) on a single planet, rather than the whole world being run by just one power. A planet is a very big place, and it is pretty certain that once a few habitable ones are discovered then there will be no shortage of different countries and/or groups wanting to stake their claims to bits of each. The term used for a planet which is divided into more than one political unit is a "balkanised" world.
Of course, it may not only be actual states and major powers that field military forces; megacorporations and other commercial concerns will probably be only too ready to resort to military means, whether to protect their own interests, damage those of their rivals or simply keep restive worker populations in check....
Hopefully these ideas will get you on the way to designing a setting for your games that reflects the way YOU like your SF, rather than the way that some games manufacturers tell you it is going to be!
CAMPAIGN GAMES
CAMPAIGNS, in Wargame terms, are usually played as a series of "linked" games following the course of a much larger Military operation (such as the invasion of a state, or even of a whole planet!). A complete system for Campaign gaming could fill this book, so we are just going to give you a few ideas to start you off in the right direction. There are several good books on "historical" wargames that cover Campaigns in some detail, and these are all excellent reference material - even in a far future setting many of the logistics and other problems that beset Commanders engaged in extended operations will still apply.
To run a successful Campaign game, or any other series of linked battles, you will need to consider factors outside the basic front-line fighting units of your army. Any force needs its Logistics "Tail", and in Mechanised Warfare the number of supply, fuel, maintenance and other backup units often far outweighs the actual "teeth" end of the fighting force.
The provision and use of such logistic support is a vital part of any series of games; a Combat force might win a given battle, but unless it can then be resupplied with fuel and ammunition, have its wounded treated and its crews fed and rested, it will surely lose the next one! In Game terms, if such support is not provided (or simply cannot be got to the troops in time), their Confidence and combat efficiency will suffer VERY greatly in the next and subsequent battles; a force with dry fuel tanks and empty ammo bins (not to mention hungry men) will not stand and fight for very long.
On a more positive note, the use of the Unit Quality and Confidence system in DIRTSIDE II provides the ideal mechanism by which units that perform well in battle can actually INCREASE their abilities between engagements. GREEN units that survive a couple of battles could well be classed as REGULARS (or at least have a chance of rising to such status), and could very well eventually aspire to VETERAN classification. The 'down side' is that if a unit is severely depleted in one battle and receives a load of replacement troops to return it to full combat strength, this influx of "FNGs" could well have the effect of REDUCING the overall Quality of the unit.
In between battles, forces can engage in repair and recovery of damaged vehicles (the force that wins a battle will be able to recover not only their own repairable elements, but perhaps also some of the enemy's) and bring units back up to troop strength provided sufficient resources and replacements are available to them. Reconnaissance may also be carried out to prepare for the next combat.
The ideas above are just the start; we hope to expand on the Campaign Game idea in future publications, but for now this should give you something to be going on with.
FUTURE HISTORY 2000 – 2183AD
The following section is a very condensed version of the Background developed for our FULL THRUST Starship Combat rules. It outlines the general political and military situation, and highlights a selection of the wars from the 21st and 22nd centuries that are of particular relevance to the kind of ground actions that DIRTSIDE II is designed to recreate.
This background is an option for you to use if you wish; the situation presented here will be further developed in future publications and articles, and extended to cover events after 2183.
THE BACKGROUND:
Over the years of the 21st century, the main political blocs of Earth altered greatly. The Chinese takeover of the former Russian Commonwealth in 2047 and the collapse of the US Government in 2049 (leading to the Second American Civil War of 2050-57) brought about the creation of the two major Superpowers of the new age, the Eurasian Solar Union, (a Chinese/Russian dominated Asia) and the New Anglian Confederation (the reuniting of Britain, Canada and the former USA under the British Crown).
Following the virtual destruction of Israel (by Islamic Nuclear and Biochemical terrorism) in 2027, it was a Jewish-funded organisation (the Gilderstein Foundation) that instigated a visionary research program into the possibilities of Faster Than Light travel - culminating in Mankind's first steps to the Stars in the 2060's.
By the late 21st century, the nations of Earth had started to seriously explore and colonise the nearer star systems. Despite the best efforts of the UN, however, international co-operation was shaky at best - if anything, most powers became even more Nationalistic as the chance to carve out their own niche in space presented itself.
Wars continued at regular intervals, both major and minor engagements occurring on Earth and on the newly-founded Colony Worlds.
The major powers in the 21st and 22nd centuries include:
The NEW ANGLIAN CONFEDERATION (NAC) - Britain, Canada and the USA
The EURASIAN SOLAR UNION (ESU) - China, Russia and most of Central Asia
The NEU SWABIAN LEAGUE (NSL) - Germany, Austria and other Central European States
The FEDERAL STATS EUROPA (FSE) - France, Spain, Italy and others from the failed European Community
Added to these "main players" are many other power groups - the LLAR (League of Latin-American Republics), the PAU (Pan African Union), the Indonesian Commonwealth, the Oceanic Union and many more - plus several small states and independent nations, such as The Netherlands, Free Cal-Tex, New Israel (a Colony around Epsilon Indi), Japan (technically "independant", but jealously protected by the NAC) and others.
This situation (detailed fully in the Timeline published in FULL THRUST) is rich in possible conflicts, both on and off Earth, spanning the whole of the 21st and 22nd centuries of Human history. Into this background can be woven almost any type of battle you could wish to play - from Dutch and Japanese mercenaries fighting each other on a Colony World to clashes between rival factions of Islamic fundamentalists!
To illustrate this, here are just a few of the many wars that continued to plague mankind:
2050-57: The Second Seccessionist War:
The collapse of the US Economy and assassination of President Amy Koslowski in 2049 precipitate a Second Civil War in the USA; after unsuccessful attempts to gain control, the provisional Military Government calls on British and Canadian support to quell the uprisings throughout the Union. This leads to the formation of the New Anglian Confederation.
2057-72: The War of The Americas:
In the confusion of the end of the 2nd Civil War, the League of Latin American Republics attempts to take control of California, New Mexico and Texas. A prolonged and difficult conflict between LLAR and Anglian forces results in defeat for the League and the loss of not only its foothold in the North but also all of its possessions in Central America.
2110-12: The Papua New Guinea War:
The Indonesian Commonwealth attacks Papua New Guinea, bringing it into conflict with Australia and New Zealand (Papua's major partners in the Oceanic Union). A generally low-intensity war, this is notable for the first widespread use of "Grav" propelled combat vehicles on Earth (mainly fast, light Indonesian "Gunskimmers" used for coastal and riverine actions). To-and-fro thrusts by both protagonists throughout the islands gradually grind to an indecisive halt, and the Sydney Accord finally ends the war with an Indonesian withdrawal.
2128-32: The Mercenary War:
A very scrappy and inconclusive war, named both for the large numbers of hired foreign troops used by both sides and for the action that started the conflict: an LLAR mercenary unit working for the Indonesians clashes with Anglian forces against the orders of their employers, and in a move to placate the NAC the Indonesians massacre the entire LLAR unit. In retribution the League strikes at Indonesian targets on the Colonies, and a four-year struggle between the two powers ensues. The Mercenary War ends with large reparations being paid to the LLAR, and brings about the signing of the Mercenary Charter by most major powers - formalising the existance, hiring and use of Mercenary forces.
2137-42: The First Solar War:
The Eurasian Solar Union declares war on the New Anglians due to "the hostile actions and intents of the Imperialists in space". Five years of intense warfare spans the settled worlds as the two Superpowers battle each other on planet and in space, ending in 2142 with the Anglians claiming a victory and the ESU retiring to lick its wounds and consider its next move.
2145-57: The Second Solar War:
ESU attempts to regain its possessions lost at the end of the 1st Solar War quickly escalate into another widespread conflict, this time drawing in other major powers such as the FSE, the NSL and the PAU. The war rages throughout the Inner Colonies and the Outworlds, ending this time with a compromise Treaty that leaves neither side happy.
The Timeline ends in 2183, by which time the THIRD Solar War has been grinding inconclusively back and forth for a full eighteen years. At this point, the unexplained disappearance of two United Nations Space Command Survey ships in the Outworld Rim leads to speculation that the battered and war-weary forces of Humanity are about to confront a far deadlier enemy.......
CHAPTER 13: APPENDICES
POINTS VALUE SYSTEM
To COST a vehicle in terms of points value, start with the VEHICLE SIZE POINTS (VSP) = Vehicle Size Class x 5 (ie: the same as the CAPACITY points). Thus a class 1 vehicle has a VSP of 5, class 2 = 10, class 3 = 15, class 4 = 20 and class 5 = 25.
Now add ARMOUR RATING to the vehicle. For every "level" of Armour Rating, the cost is 20% of the VSP, eg: Armour 2 costs 40% of the VSP, Armour 5 costs 100% of the VSP.
ABLATIVE or REACTIVE armour each cost an ADDITIONAL 10% of the VSP per level of armour; eg: Armour 2R costs 60% of VSP in total.
As the Armour accounts for much of the vehicle's weight, it naturally affects the calculations for Power Plants and Mobility; therefore the TOTAL of the VSP and the Armour Cost now becomes a new constant known as the BASIC VEHICLE POINTS (BVP). Power and Mobility costs are worked out using the BVP.
The desired POWER PLANT type is now added:
CFE: cost = 20% of BVP;
HMT: cost = 40% of BVP;
FGP: cost = 60% of BVP.
(Note these add to running total of costing, but do NOT alter BVP figure)
MOBILITY TYPE is now costed, once again using the BVP:
LOW-MOBILITY WHEELED: cost = 10% of BVP.
HI-MOBILITY WHEELED: cost = 30% of BVP.
SLOW TRACKED: cost = 20% of BVP.
FAST TRACKED: cost = 40% of BVP.
SLOW GEV: cost = 40% of BVP.
FAST GEV: cost = 60% of BVP.
GRAV: cost = 100% of BVP.
AMPHIBIOUS (extra cost): cost = additional 20% of BVP.
CONVENTIONAL BOAT: cost = 10% of BVP.
HYDROFOIL: cost = 40% of BVP.
RSW AIR CUSHION: cost = 40% of BVP.
VTOL/HELICOPTER/JETCOPTER: cost = 500% of BVP.
AEROSPACE CRAFT: cost = 1000% of BVP.
COMBAT WALKER: cost = 100% of BVP.
TRANSPORT WALKER: cost = 80% of BVP.
Now total-up all the figures so far calculated, to give you the points cost of the actual vehicle hull (or airframe), before adding any weapons or other systems.
EXAMPLE:
To build a medium, well-armoured, tracked hull (eg: for a main battle tank):
If we take a MEDIUM (class 3) vehicle, VSP = 15 — +15 — COST TOTAL: 15
Adding Armour 3 costs 60% of VSP = 9 — +9 — COST TOTAL: 24
[The running total of 24 now becomes the BVP]
Adding an HMT Power-Plant costs 40% of the BVP = 9.6 (rounded to 10) — +10 — COST TOTAL: 34
Adding FAST TRACKED mobility costs 40% of BVP =9.6 (rounded to 10) — +10 — COST TOTAL: 44
Total cost of mobile, armoured hull 44 points.
It is now necessary to cost all the other bits you put into the vehicle - weapons, systems, troops etc.
DIRECT-FIRE WEAPONRY:
RFAC systems: cost = 5 x Class of weapon (eg: RFAC/2 costs 5 x 2 = 10)
HVC systems: cost = 8 x Class of weapon (eg: HVC/4 costs 8 x 4 = 32)
HKP systems: cost = 10 x Class of weapon (eg: HKP/3 costs 10 x 3 = 30)
MDC systems: cost = 10 x Class of weapon (eg: MDC/5 costs 10 x 5 = 50)
HEL systems: cost = 12 x Class of weapon (eg: HEL/2 costs 12 x 2 = 24)
DFFG systems: cost = 15 x Class of weapon (eg: DFFG/4 costs 15 x 4 = 60)
SLAM systems: cost = 12 x Class of weapon (eg: SLAM/3 costs 12 x 3 = 36)
EXTRA APSWs: cost = 4 each
FIRE CONTROL SYSTEMS:
BASIC: cost = 2 x Class of largest weapon type on vehicle;
ENHANCED: cost = 4 x Class of largest weapon;
SUPERIOR: cost = 6 x Class of largest weapon.
(Eg: For a vehicle mounting a class 4 gun as its largest direct-fire weapon system, the Fire Control would cost 2 x 4 = 8 for Basic, 4 x 4 =16 for Enhanced, or 6 x 4 = 24 for Superior. Each vehicle requires only ONE Fire Control regardless of the number of weapons fitted, but the FireCon cost is always based on the LARGEST single weapon class.)
MISSILE SYSTEMS:
GMS/L: With BASIC Guidance, cost = 20; with ENH = 30; SUP = 40
GMS/H: With BASIC Guidance, cost = 30; with ENH = 45; SUP = 60
DEFENSIVE SYSTEMS:
AREA-DEFENCE SYSTEMS: cost: BASIC = 200 ENH = 300 SUP = 400
LOCAL AIR DEFENCE (LAD) weapon: cost: 75
POINT-DEFENCE SYSTEMS (PDS): cost: BASIC = 30; ENHANCED = 45; SUPERIOR = 60
ELECTRONIC COUNTER-MEASURES (ECM): cost: NONE = 0; BASIC = 15; ENH = 30; SUP = 45
APFC BELT: 5 x Vehicle Size Class (eg: APFCs on a class 4 vehicle cost 5 x 4 = 20)
STEALTH SYSTEMS: 20 x Vehicle Size Class per LEVEL (eg: to reduce the effective signature of a class 4 vehicle to 3 (= 1 Stealth Level) costs 20 x 4 = 80)
ARTILLERY:
ARTILLERY OBSERVER ELEMENTS:
With Infantry Team: Team cost + 50
In vehicle: Vehicle cost + 50
ARTILLERY WEAPONS:
LIGHT ARTILLERY: system = 50
MEDIUM ARTILLERY: system = 100
HEAVY ARTILLERY: system = 200
ARTILLERY AMMUNITION MARKERS (cost PER MARKER, for BATTERY):
HEF or MAK:
LIGHT ARTILLERY: 20 x No. of weapons in Battery
MEDIUM ARTILLERY: 30 x No. of weapons in Battery
HEAVY ARTILLERY: 40 x No. of weapons in Battery
SMOKE ROUNDS: 10 x No. of weapons in Battery
MINES (DMR): 100 per marker
BIOCHEM ROUNDS: 200 per marker
NUCLEAR ROUNDS: 1000 per marker
COUNTER-BATTERY RADAR: cost: BASIC = 150, ENH = 200, SUP = 250
ORTILLERY BATTERIES: AS FOR EQUIVALENT "NORMAL" BATTERY
AIR WEAPONS:
DFO PODS (HEF or MAK): 30 per LOAD ( = per marker)
All other Air Weapon costs as for ground-fired equivalents.
MINES:
PRE-LAID MINEFIELD: CONVENTIONAL = 80, JUMPING = 150
MINELAYER AMMUNITION LOAD: (1 marker): 100
MINELAYER SYSTEMS COST: 100
BACKUP SYSTEMS: + 30% of TOTAL COST OF ALL VEHICLE SYSTEMS (ie: FIRECON, ECM, STEALTH and GUIDANCE as applicable)
INTERFACE LANDING capability: + 25% of TOTAL POINTS COST of each element transported.
DROP TROOP capability: + 50% of TOTAL POINTS COST of each element dropped.
CASEVAC ELEMENTS:
WHEELED or TRACKED ambulance vehicle (complete): 50
Per GEV or GRAV ambulance (complete): 75
Per VTOL (inc. Helicopters): 100
ON-TABLE MEDICAL POST: STATIC = 100; MOBILE (on vehicle) = 150
COMMAND/CONTROL CENTRE (in vehicle): 100
COMMAND/CONTROL CENTRE (emplaced): 75
ENGINEERING VEHICLE EQUIPMENT:
REPAIR/RECOVERY PACKAGE (for AEV): 75 x CLASS OF VEHICLE
BRIDGE SYSTEM (for Bridgelayer): 50 x CLASS OF BRIDGE (ie: size capacity)
GENERAL ENGINEERING PACKAGE
Includes Digging capability, Demolitions, Firefighting: 100 (flat rate for any vehicle class)
INFANTRY POINTS COSTS:
BASIC ELEMENT COSTS:
MILITIA troops: RIFLE TEAM (4-5 men) = 15 points
LINE troops: RIFLE TEAM (4-5 men) = 20 points
POWER troops: RIFLE TEAM (4-5 men) = 40 points
ASSAULT TEAM: (no ranged fire ability, but extra value in Close Assault): no additional cost - same as Rifle Team
SPECIALIST ELEMENTS: (2-3 men with Close Defence weapons) same cost as Rifle Team, PLUS specialist equipment cost as below:
GMS/L: Cost as for vehicle-mount GMS/L
APSW: 10 points
Engineering Equipment: 50 points
LAD system: 75 points
Artillery Observer: 50 points
CAVALRY: (riding animals) cost additional 50% of basic element points
SOME TYPICAL VEHICLE EXAMPLES
While a lot of the fun is designing your own vehicles to fit the models you either have or wish to use, just to get you under way we have provided below a few examples of typical common vehicle types. If you wish, you can of course modify these basic examples to suit your own forces by simply substituting different Mobilities, Weapons and such rather than starting from scratch.
1) MEDIUM BATTLE TANK (Tracked):
MEDIUM vehicle (class 3), FAST TRACKED mobility, HMT power, Armour 3.
1 x HKP/3 in Turret with SUPERIOR FireCon; 1 x RFAC/1 as secondary weapon; ENHANCED PDS; 1 x APSW.
ENHANCED ECM.
Basic/Effective Signature 3 (D8). POINTS VALUE 172.
2) LIGHT MICV (GEV):
SMALL vehicle (class 2), FAST GEV mobility, HMT power, Armour 2.
1 x MDC/2 in Turret with ENHANCED FireCon; 1 x APSW.
BASIC ECM, capacity for 1 Infantry Team.
Basic/Effective Signature 2 (D10). POINTS VALUE 71 (plus cost of Infantry carried).
3) HEAVY HOVER TANK:
LARGE vehicle (class 4), SLOW GEV mobility, FGP power, Armour 4.
1 x MDC/4 in Turret with SUPERIOR FireCon; 1 x GMS/H (ENHANCED guidance); ENHANCED PDS; 1 x APSW.
APFC, ENHANCED ECM, STEALTH-1.
Basic Signature 4, Effective Signature 3 (D8). POINTS VALUE 356.
4) ASSAULT TRANSPORT VTOL:
MEDIUM vehicle (class 3), VTOL mobility, FGP power, Armour 2.
1 x RFAC/1 in Chin Turret with ENHANCED FireCon; 1 x APSW.
ENHANCED ECM, capacity for 2 Infantry Teams.
Basic/Effective Signature 3 (D8). POINTS VALUE 178 (plus cost of Infantry carried).
5) MEDIUM WHEELED APC:
MEDIUM vehicle (class 3), HI-MOB. WHEELED mobility (plus AMPHIBIOUS capability), CFE power, Armour 3.
1 x MDC/1 in Turret with ENHANCED FireCon; 1 x APSW.
BASIC ECM, capacity for 2 Infantry Teams.
Basic/Effective Signature 3 (D8). POINTS VALUE 70 (plus cost of Infantry carried).
6) MEDIUM ARTILLERY VEHICLE (Tracked):
MEDIUM vehicle (class 3), SLOW TRACKED mobility, CFE power, Armour 3.
1 x RAM Howitzer (Medium Artillery), BASIC PDS, 1 x APSW.
APFC, ENHANCED ECM.
Basic/Effective Signature 3 (D8). POINTS VALUE 209 (plus cost of Ammunition).
7) AREA-DEFENCE VEHICLE (Tracked):
MEDIUM vehicle (class 3), SLOW TRACKED mobility, CFE power, Armour 3.
1 x ENHANCED ADS, 1 x APSW.
SUPERIOR ECM, BACKUP SYSTEMS.
Basic/Effective Signature 3 (D8). POINTS VALUE 393.
8) GROUND-ATTACK AEROSPACE FIGHTER:
MEDIUM vehicle (class 3), AEROSPACE mobility, FGP power, Armour 2.
Capacity for 3 external Ordnance Loads (DFO pods); 1 x APSW.
ENHANCED ECM.
Basic/Effective Signature 3 (D8). POINTS VALUE 274 (plus cost of Ordnance Loads).
EXAMPLES OF COMPLETE UNITS
(using some of the vehicles given above):
HEAVY ARMOUR TROOP: 4 Heavy Hover Tanks as in (3) above; total points cost for unit = 1424 POINTS.
MECHANISED INFANTRY PLATOON: 4 Wheeled APCs as in (5) above; three of the APCs each carry two RIFLE TEAMS (organised as one SQUAD of two teams) of LINE INFANTRY, while the fourth APC carries one APSW TEAM and one GMS/L TEAM (with ENHANCED missile system).
Total points cost for unit = 280 for vehicles plus 200 for Infantry (LINE troops) carried, = 480 POINTS for whole unit.
MEDIUM ARTILLERY BATTERY: 3 Self-Propelled Artillery vehicles as in (6) above, plus one Area Defence vehicle as in (7) above; points cost for unit = 1020 POINTS (plus 210 for typical basic ammunition load of 1 x HEF, 1 x MAK and 1 x SMOKE).
[Additional elements such as a Counter-Battery Radar vehicle and/or extra ammunition transports could be added to this unit if desired.]
TERRAIN AVAILABILITY AND MODELLING
As with all miniatures wargames, DIRTSIDE II will be most enjoyable when played on an attractive table-top terrain layout such as that shown in the photographs in this book.
At its simplest, terrain can be formed just by placing a cloth, sheet or blanket of a suitable colour on the table and then putting other items (folded cloths, books etc) under the main cloth to form hills and features. Alternatively a cloth or rigid board may be painted in the desired 'ground' colour and hills, ridges etc represented by contours cut from wood, foam or similar.
The ultimate home-made terrain is of course a fully-sculpted layout that can be fashioned in wood, plaster, expanded polystyrene or a combination of all these; rather than try to go into all the details of how to make something along these lines, we suggest you check out the many good books on landscape modelling that are published for the model railway hobby. Always remember, however, that you are making a layout for playing a game on rather than just a diorama to be looked at; features must be movable (or the whole system based on "geomorphic" boards or modules that can be fitted together in as wide a variety of ways as possible), hills should have stepped 'contours' that models can be placed on rather than having actual slopes, and so on. A good terrain is one that looks attractive, but also aids play rather than hindering it just for the sake of aesthetics.
An alternative to making your own terrain layout is to purchase one of the many good commercial 'modular' or 'integral' systems. Although such terrain does not appear cheap at first glance, when you consider the investment of time and materials costs involved in making your own layout then buying a commercial one becomes a lot more attractive. Most of the available systems are made from high-density polystyrene foam covered in grass (or sand) effect 'flock', which makes them light to transport while being surprisingly durable if looked after.
The other main type of modular foam terrain is the square-block system that will probably be familiar to all of you that have ever been to a Wargames convention or show in the UK. Flock-covered foam blocks are available in either 12" or 24" square, either plain or sculpted with a huge variety of surface features; packs of assorted-sized contours are produced which may be stacked to give variable hill heights.
Once you have your basic terrain (of whatever sort), you will need a few accessories to dress it up with. Roads and rivers are often already incorporated into the commercial terrains (the GEO-HEX tiles are double-sided in some sets, plain on one side and with a road/track on the other), but as an alternative they can be simply made from suitably coloured cloth, felt or card. For trees and vegetation there are wide ranges of "Earth-type" species available from both wargames and model railway suppliers, but an often-overlooked source of some very 'alien' growths is the local pet shop! Look in the Aquarium section, and you will find a huge selection of plastic plants intended for tropical fish tanks; these are usually in lurid colours, and many of them will pull apart to give you huge numbers of individual pieces that can be made into excellent alien trees and plants.
Finally, you will probably need some 'man-made' features for your terrain - buildings, bunkers, bridges etc. There is a huge selection of suitable model buildings currently available, most of them being cast in resin.
MODEL AVAILABILITY
In the recommended 1:300/1:285 scale, there is now a vast selection of suitable models of SF vehicles, infantry, air support, Combat Walkers and much more on the market. As DIRTSIDE II allows you to classify ANY item or vehicle that you wish to use, you can take miniatures from almost any mix of manufacturers to form your armies. The ranges and makes listed below are just a selection of what is available - check your local games shop and the specialist wargaming press for latest releases.
BIBLIOGRAPHY
The books listed below are merely a small sample of the vast quantity of "Combat SF" available. They are included here because all of them have relevance to the kind of battles and forces that DIRTSIDE II seeks to portray.
John Dalmas - THE REGIMENT
Gordon Dickson - The DORSAI series - (TACTICS OF MISTAKE, SOLDIER ASK NOT, DORSAI and others); COMBAT SF.
David Drake - The HAMMERS SLAMMERS series: (HAMMERS SLAMMERS, COUNTING THE COST, AT ANY PRICE, ROLLING HOT, THE WARRIOR); SPACE INFANTRY (ED.); THE MILITARY DIMENSION; CROSS THE STARS.
Roland Green - PEACE COMPANY
Joe Haldeman - THE FOREVER WAR; SUPERTANKS (ED.); BODY ARMOR 2000 (ED.).
Robert Heinlein - STARSHIP TROOPERS.
William Keith and Andrew Keith - THE FIFTH FOREIGN LEGION series - (MARCH OR DIE, HONOR AND FIDELITY, COHORT OF THE DAMNED).
David Langford - WAR IN 2080 (Non-Fiction).
Keith Laumer - BOLO (and THE COMPLEAT BOLO).
Ralph Peters - THE WAR IN 2020.
Jerry Pournelle - THE MERCENARY.
GLOSSARY OF TERMS
ADS — Area Defence System
APC — Armoured Personnel Carrier
APFC — Anti-Personnel Fragmentation Charges
APL — Assistant Platoon Leader
APSW — Anti-Personnel Support Weapon
BMF — Base Movement Factor
BR — Broken (Confidence Level)
BVP — Basic Vehicle Points
Casevac — Casualty Evacuation (aka Medevac)
CBR — Counter Battery Radar
CFE — Chemical Fuelled Engine
CL — Confidence Level
CO — Confident (Confidence Level)
DFFG — Direct-Fire Fusion Gun
DFO — Dead Fall Ordnance (aircraft weaponry)
DMR — Dispersed Mine Round (artillery round)
ECM — Electronic Counter Measures
FGP — Fusion Generation Plant
FireCon — Fire Control
FNG — F***ing New Guy
HEF — High Explosive Fragmentation (artillery round)
GEV — Ground Effect Vehicle (hover vehicle)
GMS — Guided Missile System
Grav — Anti-Gravity drive system (also Mag-Rep)
HAR — Heavy Artillery Rocket
HBT — Heavy Battle Tank
HEL — High-Energy Laser
HKP — Hyper-Kinetic Penetrator
HMT — Hydromagnetic Turbine
HVC — High Velocity Cannon
IAVR — Infantry Anti-Vehicle Rocket (aka "Buzzbomb")
ICV — Infantry Combat Vehicle (also MICV)
LAD — Local Air Defence
Mag-Rep — Magnetic Repulsion drive - similar to Grav
MAK — Multiple Armour Killer (artillery round)
MBT — Main (or Medium) Battle Tank
MDC — Mass Driver Cannon
MICV — Mechanised Infantry Combat Vehicle
MRL — Multiple Rocket Launcher
NOE — Nap Of Earth
PDS — Point Defence System
RAM — Rocket Assisted Munitions
RFAC — Rapid-Fire AutoCannon
RO — Routed (Confidence Level)
RSW — Rigid Side Wall (air cushion watercraft)
SH — Shaken (Confidence Level)
SLAM — Salvo LAunched Missiles
ST — Steady (Confidence Level)
VSP — Vehicle Size Points
VTOL — Vertical Take Off and Landing
ZAD — Zone Air Defence
THE RECORD CARDS
The use of a RECORD CARD for every different TYPE of vehicle (or Aircraft, boat etc.) in your forces is one of the keys to making DIRTSIDE II fast and easy to play.
Each Record Card carries virtually all the data necessary to use that particular type of AFV in the game, INCLUDING all the ranges, Die Types and even Damage Validities for its weapons. This means that while the game is in progress, each player simply keeps the cards in front of him for those vehicles he is using - the vast majority of situations that occur in the game can then be handled simply by looking at the relevant card rather than having to flick through the rulebook or hunt through tables on a Reference Sheet.
Players should try to build up a "library" of cards for the vehicles they design; the cards are sized to fit in an ordinary Index Card box. Once this is done, for any battle simply take out the relevant cards for the different types of vehicle in each player's force (an average game force probably will not have more than half-a-dozen different TYPES of vehicles involved per side).
[The Record card has been designed to be as general as possible, while still having space for all the important bits of information for most "normal" vehicle types. As the design system in DIRTSIDE II is so vast and the range of models available is so vast, there may well be a few times where the data spaces on the card have to be modified or relabelled to cope with a particularly unusual vehicle.]
A full page of blank Record Cards is provided for you to photocopy (permission is granted to do this for personal use only); most modern photocopiers should be able to reproduce them directly onto thin card rather than paper, which is of course much better. We suggest that you get a few copied up onto different colours of card, to colour-code either the general types of vehicles or the different forces you have.
[PACKS OF PRINTED AND TRIMMED RECORD CARDS WILL SOON BE AVAILABLE FROM GZG - contact us for details and prices.]
RECORD CARD EXAMPLE:
Filling out the Record cards should be self-explanatory in most areas once you know the rules of play, but to give you an example the card below is completed for the same "DEIMOS" Heavy Hover Tank that we used in the DESIGN example on P.16.
Note that wherever a "D" is printed on the card, this is a prompt to insert the DIE TYPE used for that particular system, range etc.
The Weapon Data lines have all the necessary spaces for Type, Mount (eg: Turret or Fixed), ranges, normal Die Types and Chit validities for direct-fire weapons; in the case of weapons that do not need all this information simply use the spaces for what IS relevant (as for the GMS/H in the example, which just needs one "maximum" range band rather than separate Close, Medium and Long ranges).
Anything not specifically covered on the card (such as Infantry carried, in the case of an APC or MICV, and a reminder about the "free" APSW fitted to ALL vehicles) should be entered in the "Other Equipment and Notes" box at the bottom of the card.
Example DIRTSIDE II Record Card, filled out for the DEIMOS/SO Heavy GEV Tank: SIZE CLASS Large, BASIC SIGNATURE 4, MOBILITY TYPE Slow GEV, STEALTH LEVEL 1, BASIC MOVE 12, EFFECTIVE TARGET DIE D8, POINTS VALUE 356. FIRECON Superior, ECM Enhanced (D8), ARMOUR FRONT 4, SIDE 3. Weapon data: MDC/4, Turret mount, Close range up to 30" (D12, ALL valid hits), Medium range up to 42" (D10, R/4), Long range up to 54" (D8, RED valid). GMS/H (ENH), Turret mount, maximum range 48" (D8, R/4). PDS (ENH), D8. OTHER EQUIPMENT AND NOTES: APFC, 1 APSW.