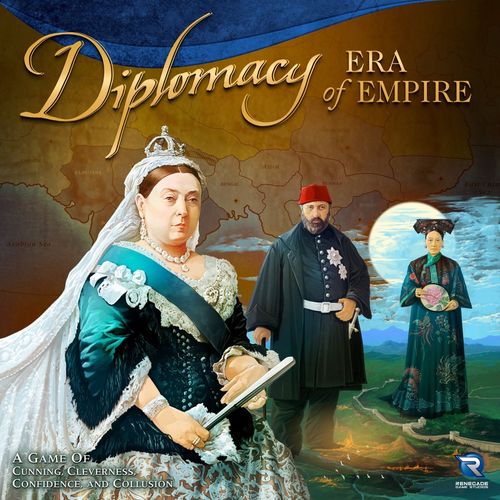
Diplomacy: Era of Empire
Diplomacy: Era of Empire Rulebook
Table of Contents
Table of Contents
Introduction
The game begins with the world situation in 1870, with each player taking the role of one of the seven Great Powers involved in the struggle during this era: Britain, France, Russia, Turkey, China, Japan, and the Netherlands. Although this game is best played with seven players, rules for two to six players are also included.
During the 19th Century, the world was in a state of flux with national boundaries constantly changing. No single map can adequately portray the world's geography during this entire time period, so the mapboard is representative of the era rather than a depiction of any one point in time.
Provinces with special strategic, economic, or military importance are termed Supply Centers and are marked by stars on the map. Ownership of these provinces is the aim of the game, since victory at the end of the game goes to the player with the highest number of Supply Centers. Each player will have their own set of problems to overcome in the race to victory.
Players maneuver their forces over the mapboard in order to expand their empires, but although military strategy is important, skillful diplomacy, negotiation of alliances, crucial timing, and a good sense of character judgment (watching for the inevitable backstab) are all essential for victory. So take up the challenge of the 19th Century and join in the race to establish your own empire!
Experienced Diplomacy players will find the game mechanics familiar, but please take note of the map differences and Winter Phase rules. There are two new rules: Conscription and Conversion.
New gamers should not be overwhelmed by the length of this rulebook. Much of the material contained is strategic explanations for the game. The Quick Start Rules included provide a helpful guide to begin play. These rules do not have to be memorized and are only used as a reference to be consulted when questions arise during a game.
Object of the Game
A game of Era of Empire can end in any of the following ways, chosen by the players before the game begins:
- Control 22 Supply Centers: Solo victory. If no player reaches 22 Supply Centers, then: Draw Including All Survivors (DIAS): All players who still own at least one Supply Center agree to share equally in a draw. Note: A draw may be agreed to at any time during the game.
OR
- Turn Limit: Game ends after a predetermined number of turns (e.g., after Fall 1877) and the winner is the player with the most Supply Centers. Tied players share in victory.
OR
- Time Limit: Game ends after a predetermined number of hours (e.g., 4 hours, 8 hours) and the winner is the player with the most Supply Centers. Tied players share in victory.
Note: If two players gain control of 22 Supply Centers or more at the end of any Fall turn, the player with the most Supply Centers earns a solo victory. If they're tied in Supply Center count, they rejoice in their shared victory.
Game Components
The game contains the following materials:
- One mounted mapboard
- One rulebook
- One conference map pad with twenty conference maps
- Seven sets of Army and Fleet units
- One Quick Start Rules sheet
- Seven sets of double-sided Supply Center control markers
Map
The map depicts this part of the world roughly as it was in the second half of the 19th Century. Only named land and sea spaces (called "provinces") can be entered. The color scheme for each Power on the map does not necessarily denote full historical ownership; these changes have been made for gameplay purposes. The starting locations for each Power are listed in the "Initial Setup" section of the rules. Some provinces have been shifted or enlarged for gameplay purposes. For instance, Singapore has been made larger and Hong Kong was shifted to the island of Hainan.
Boundaries
All Powers initial area of influence are identified by color-coded provinces. The land provinces are divided by black lines. The oceans and waterways are also divided into separate provinces by black lines. All countries and provinces (land and water) are identified by name.
Types of Provinces: There are three types of provinces: inland, water, and coastal. Only Armies can move on inland provinces and only Fleets can move on water provinces. A coastal province is land that is adjacent to one or more water provinces. For example, Aden, Shanghai, and Constantinople are coastal provinces. Both Armies and Fleets can occupy coastal provinces.
Supply Centers
A total of 50 inland and coastal provinces on the game board are designated as Supply Centers. Each Supply Center is marked with a star. A Power will have as many Armies and/or Fleets as the number of Supply Centers it controlled at the end of the last Fall turn. Consequently, there will never be more than 50 Armies and Fleets (also referred to as "units") on the game board at one time. A Power gains or loses units in accordance with the number of Supply Centers it controls.
Units
Each Army unit is represented by a cavalry-shaped wooden playing piece. Each Fleet unit is represented by a ship-shaped wooden playing piece. The unit colors of each Power are indicated in the following table. If an expanding Power runs out of Army units or Fleet units, the units of an eliminated Power can be used as substitutes.
Two key rules regarding units:
- All units have the same strength. No one Army is more powerful than another. No single Fleet is stronger than another. During the game, various units will support each other to increase their strength and attack weaker adversaries.
- There can be only one unit in a province at a time. There are no exceptions to this rule.
Powers
Provinces and Units of the same color are grouped together to represent the empires of the seven Major Powers:
| Power | Color |
|---|---|
| Britain | Dark Blue |
| China | Yellow |
| France | Light Blue |
| Japan | White |
| Netherlands | Orange |
| Russia | Black |
| Turkey | Red |
Initial Setup
The standard game is designed for seven players. If fewer players are present, initial setups for two to six players are described in "Alternate Ways to Play".
Powers are selected by preference or by random drawing if players cannot agree. Each player now sets up their starting units according to the table below ("A" indicates an Army unit; "F" indicates a Fleet unit):
| Power | Starting Units |
|---|---|
| Britain | A Delhi, F Madras, A Bombay, F Aden |
| China | A Peking, F Shanghai, A Sinkiang |
| France | A Tonkin, F Annam, A Cochin |
| Japan | A Tokyo, F Kyushu, F Kyoto |
| Netherlands | A Borneo, F Java, F Sumatra |
| Russia | A Moscow, A Irkutsk, F Vladivostok, F Odessa |
| Turkey | A Angora, F Baghdad, F Constantinople |
The remaining Supply Centers are not occupied at the start of the game.
Supply Center Control Markers
The game includes a set of markers for each Power. Players can use these markers to identify which Supply Centers they control on the game board. One side shows the flag of the Power, and the other side shows the color of the units of that Power. Use whichever side is more helpful. It's recommended to use the markers on the initial Supply Centers for the starting Units.
Turn Structure
Spring four-phase turn
- Diplomatic Phase
- Order Writing Phase
- Order Resolution Phase
- Retreat and Disbanding Phase
Fall five-phase turn
- Diplomatic Phase
- Order Writing Phase
- Order Resolution Phase
- Retreat and Disbanding Phase
- Gaining and Losing Units Phase (Winter)
At the end of any Fall turn, if one Great Power controls 22 or more Supply Centers, the game ends and that player is declared the winner. If two players gain control of 22 Supply Centers or more at the end of any Fall turn, the player with the most Supply Centers earns a solo victory. If they're tied in Supply Center count, they rejoice in their shared victory.
Time Management
It's wise to set aside about four hours to play Era of Empire. No more than five minutes should be allowed for writing orders after the diplomatic negotiation period has ended. Diplomacy and other conversation shouldn't be allowed during the writing and reading of orders, between moves and retreats, during and after retreats, or during adjustments.
Newcomers should be given a half-hour (at least) introduction to the game before the other players assemble. A few moves should then be played with newcomers before the game starts so they become familiar with the rules.
Gamemaster
If an additional person who knows the game rules is available, that person could serve as the gamemaster. The gamemaster could keep time for the negotiation sessions, collect and read orders, resolve issues, and make rulings when necessary. This role should be strictly neutral.
How to Play
Overview
Each turn, the players look at the map assessing their situation and then plan their strategy for the next turn. A Diplomatic Phase follows, during which players discuss their intended moves, negotiate alliances, plan joint actions, spread rumors, attempt to disrupt other players' alliances, and so forth. Based on the results of their negotiations with the other Powers, players simultaneously write their orders (in secret) on their order sheets. All units are then moved if possible and resulting conflicts resolved. This cycle is repeated during every subsequent turn.
Each turn represents six months of time. The first turn is called a Spring turn and the next a Fall turn. After each Fall turn, every Power must reconcile the number of units it controls with the number of Supply Centers it controls. At this time, some units may be removed and new ones are built.
Each turn has a series of phases. Here are the phases in a complete two-turn year: (see Turn Structure above).
1. Diplomatic Phase
The diplomacy phases throughout the game are the key to success. The best military plans can be foiled if your neighbors disagree with your "foreign policy". Therefore, you must coerce others into seeing things your way in return for promises to them, which you may or may not keep. Negotiations last 30 minutes before the first turn and 15 minutes before each turn thereafter. Negotiations may end sooner if all players agree.
During this time, players may openly or secretly discuss plans with each other. Bargaining, alliance formation, military planning, threatening, and spreading rumors are all part of the game. Nothing discussed during this phase is binding; who to trust and how far to trust them is the name of the game.
Agreements may be made between any number of players, and players may agree to anything that is within the rules. They can support each other's military units and transport each other's units by sea.
Note: Using the map pad during diplomatic negotiations is an excellent way to keep track of locations, strategies, and alliances. Players can take pictures of the map on their phone if they want a snapshot of the present positions and negotiate away from the game board.
2. Order Writing Phase
Each player secretly writes "orders" for each of their units on a slip of paper. All players then reveal orders at the same time. Each player reads their orders while others make sure that what they hear is what is written. Alternatively, the gamemaster can collect all orders and read them for the players. A legal order must be followed. An order written by mistake, if legal, must be followed. Once the Order Writing Phase is over, no orders can be changed. Units not given orders or units given illegal orders (not written correctly or not possible within the rules) merely hold in their current location. A poorly written order that has only one meaning must be followed.
Order Dates
All orders must be dated and alternate between Spring and Fall beginning with the year 1870. For example, the first set of turn orders should be dated "Spring 1870." The second set should be dated "Fall 1870." The third set should be dated "Spring 1871," and so on. In between the Fall turn and the next year's Spring turn, a special phase commonly called Winter, orders without negotiation will be written as well (Builds/Disbands).
Order Format
Players should make a list of their units and the provinces they occupy for easy reference during diplomatic conferences. In each set of orders, the type of unit is written first ("A" or "F"), followed by the province that the unit occupies. For example, "A Moscow" or "A Mos" is short for an Army in Moscow. This is followed by the order that the unit is given. For example, "A Mos Holds" means that the Army in Moscow will hold or stay in place. The designation of "A" or "F" in orders is to remind players of their pieces. If you leave out the unit designation in an order, the order doesn't fail since there can only be one possible unit in a province.
Abbreviations
Players may refer to the abbreviations on the back cover of this rulebook for provinces when writing their orders. Provinces are shortened to the first three letters in their names if more than four letters long (e.g., Moscow is MOS, Tokyo is TOK). A sea space is shortened to the first letter of each word in its name (e.g., Sea of Japan is SoJ, Persian Gulf is PG). A number of provinces begin with the same three letters, so many of those provinces have special abbreviations. When in doubt, write it out.
Keep in mind that only one unit can be in a province (inland, water, or coastal) at a time, so there shouldn't be any confusion as to which unit is being ordered.
Types of Orders
Each turn, each Power can order all, some, or none of its units to do any of the following:
- Hold
- Move
- Support
- Convoy
Note: Only Fleets can be ordered to convoy.
Hold Order
You can attempt to keep a unit in place by ordering it to "hold." Not giving a unit an order is interpreted as ordering it to hold. The following is an example of a hold order:
F Constantinople Holds (or) F Con Holds
Move Order
Throughout the game, units will be ordered to move to provinces that are occupied. This is referred to as "attacking," and will be discussed throughout this section.
Writing a Move Order
A move order is written with a dash to separate the unit location and the destination. For example, an order to move from Tabriz to Baghdad would look like this:
A Tabriz-Baghdad (or) A Tab-Bag
Units may not move to islands or spaces that do not have a name. These are not game spaces.
Army Movement
An Army can be ordered to move into an adjacent inland or coastal province. Armies can't be ordered to move into a water province. Since no two units can occupy the same province at the same time, an Army that is ordered to move to an adjacent province can end up not moving at all (because of the positions or orders of other units). See the following sections for more examples of movement.
Note: An Army can move across water provinces from one coastal province to another via one or more Fleets. This is called a "convoy" and is explained in the Convoy Order rules.
Army Movement Example: An Army in Delhi could move to Punjab, Rajputana, Nagpur, Lucknow, or Nepal.
Fleet Movement
A Fleet can be ordered to move to an adjacent water province or coastal province. Fleets can't be ordered to move to an inland province. A Fleet may not advance from one coastal province to another adjacent coastal province if that movement is not along the coastline. Thus, the possible orders for a Fleet in Rangoon are into Bengal, Bay of Bengal, Malaya, and the Andaman Sea. The Fleet in Rangoon can't be ordered to move to Bangkok because, although those provinces are adjacent along an inland boundary, they aren't adjacent along the coastline. Similarly, if a Fleet is on an island, it may move into an adjacent water province (e.g., from Kyushu it is possible to attack into the Yellow Sea, the Upper Pacific Ocean, or into Kyoto.).
Fleet Movement Example: A Fleet in Rangoon could move to Bengal, Bay of Bengal, Malaya, or the Andaman Sea.
Fleet Movement on an Island Example: From Kyushu it is possible to attack into the Yellow Sea, the Upper Pacific Ocean, or into Kyoto.
Specific Movement Clarifications
There are a few features of the map that require clarification because they affect the movement of units.
- Straits: Land movement is allowed between certain provinces separated by a narrow stretch of water. This is indicated by an arrow connecting the two provinces concerned (e.g., an Army or Fleet unit may move directly from Kyushu to Kyoto). No Fleet is required to convoy an Army across a strait.
- Impassable Areas: The area between Nepal and Tibet is impassable; movement is not allowed between these two provinces due to obstruction by the Himalayan Mountains. Areas of the board that do not have names are also considered impassable.
- Suez Canal: The Red Sea and Suez Canal divide Egypt into two parts on the map, but it is still only one province. An Army can move from Egypt to either Sudan, Mecca, or Syria. A Fleet can move to Sudan, Mecca, Syria, the Mediterranean Sea, or the Red Sea. A Fleet may move from the Red Sea to Egypt, then on the next turn, move from Egypt to the Mediterranean Sea via the Suez Canal.
- Cebu: The province of Cebu is a single space with both water and land that is treated like a coastal province, so both Armies and Fleets may enter. Units may move to and from Cebu and Davao and Manila. Fleets in water provinces adjacent to Cebu may convoy an Army to Cebu.
Standoffs
The following common situations involve forces of equal strength trying to occupy the same province at the same time. These situations are called standoffs, also commonly referred to as a "bounce". These rules apply when one or more Powers are involved.
- Units of equal strength trying to occupy the same province cause all those units to remain in their original provinces. If two or more units are ordered to the same province, none of them can move. (This is also true of equally supported units, which will be explained in the Support Order section.)
- A standoff doesn't dislodge a unit already in the province where the standoff took place. If two units (or forces of equal strength) attack the same province, thus standing each other off, a unit already in that province isn't dislodged.
- One unit not moving can stop a unit or series of units from moving. If a unit is ordered to hold or is prevented from moving, any other units ordered into its province cannot move.
- Units can't trade places without the use of a convoy. If two units are each ordered to the province that the other occupies, neither can move.
- Three or more units can rotate provinces during a turn provided none directly trade places.
If the Russian Army in Irkutsk is ordered to Mongolia (A Irk - Mon) and the Chinese Army in Peking is ordered to Mongolia (A Pek - Mon), neither unit will move, and Mongolia will remain vacant.
Three or more units can rotate provinces during a turn provided none directly trade places. All orders would succeed as no one unit directly trades places with another (China: A PA - Cor, F Cor - YS; Japan: F YS - PA).
There is a British Army in Rajputana. The British player told Turkey that they would move out of Rajputana, but they lied and ordered the Army to hold instead (A Raj Hold). The Turkish player ordered their Army from Karachi to Rajputana (A Kar - Raj) and their Fleet from Persia to Karachi (F Per - Kar). The result is that nothing moves.
Units can't trade places without the use of a convoy. The French Fleet in Sarawak ordered to Borneo (F Sar - Bor) will standoff with the Dutch Army in Borneo ordered to Sarawak (A Bor - Sar).
Support Order
Note: This is the most critical and complex section of the rules. The "support" and "cutting support" rules must be understood in order to resolve most orders.
The support order instructs a unit not to move and to instead give support to an adjacent space. This is written as "Support" or "S" for short. You may support your own units or those of another Power. Each unit can only support one other unit per turn. Both Armies and Fleets can provide support to another Army or Fleet. Support can be offensive (supporting an attacking move order) or defensive (supporting a hold, support, or convoy order). By supporting each other, attacking or defending units gain increased strength. For example, a unit holding with two supports has the strength of three: itself plus two supporters. Support can be given without consent and can't be refused! This can cause some unexpected situations in the game that make it more interesting.
The following are two examples of support orders:
(1) You can give support to a unit that is not moving and wants to hold in a certain land or sea space. The unit and the land or water province into which support is given must immediately follow the support order (e.g., S A Luc means that support is given to an Army in Lucknow).
(2) A unit can support another unit that is attempting to move from one space to another. The unit and its initial space are listed followed by the space you are supporting the unit into (e.g., if a unit in Karachi wishes to support a unit in Persia attacking Afghanistan, the order is A Kar S A Per - Afg).
A unit moves with its own strength combined with all of its valid supports. It can complete its move unless it's opposed by a unit that is supported equally well or better. One unit supporting another provides a combined strength of two and will defeat an opponent's unsupported unit. Likewise, a unit with two supporting units (strength of 3) will defeat an opponent's unit with only one support (strength of 2).
Note: A unit cannot support another unit in a space to hold if the second unit is attempting to move out of that space, just in case the attempted move fails (e.g., A Per - Afg, A Kar S A Per). This support order is not valid since "A Per" was ordered to move.
To give support into a particular space, a unit must be capable of moving into that same space by itself (not via convoy). Therefore, a unit must be adjacent to the land or sea space into which it intends to give support. Army units cannot support into water provinces and Fleet units cannot support into inland provinces (they both may support into coastal provinces).
A unit does not have to be adjacent to the unit it is supporting (in the case of support being given to a unit that is moving) but must be adjacent to the space that the supported unit is moving into (e.g., a French Fleet in the Gulf of Siam can support a Dutch Fleet in the Andaman Sea attacking Malaya; the order is F GoS S F AnS - Mal).
A unit not ordered to move can be supported by a support order that only mentions its province. A unit that is ordered to hold, convoy, support, or not ordered at all can receive support in holding its position. A unit ordered to move can only be supported by a support order that matches the move the unit is trying to make.
The Turkish Army in Karachi supports the Army in Persia to Afghanistan (A Per - Afg, A Kar S A Per - Afg). The Russian Army holding in Afghanistan will be dislodged (A Afg Hold).
A French Fleet in the Gulf of Siam can support a Dutch Fleet in the Andaman Sea attacking Malaya (France: F GoS S F AnS - Mal; Netherlands: F AnS - Mal).
A strength two attack by Turkey (A Tab - Shi, A Bag S A Tab - Shi) has a standoff with a strength two defense by Britain (A Shi Hold, F PG S Shi).
Dislodgement in Standoffs
A dislodged unit can still cause a standoff in a province different from the one that dislodged it. When two or more equally supported units are ordered to the same province, neither can move - even if one of them is dislodged from a province other than the one that is the target of the standoff during the same turn.
But, a dislodged unit, even with support, has no effect on the province that dislodged it. If two units are ordered to the same province and one of them is dislodged by a unit coming from that province, the other attacking unit can move. This situation doesn't result in a standoff since the dislodged unit has no effect on the province that dislodged it.
Cutting Support
Support can be "cut". This will cause the support order to fail and the support is not given.
Support is cut if the unit giving support is attacked from any province except the one where its support is being given. The support is cut whether this attack on the supporting unit succeeds or not.
Support is also cut if the unit giving support is dislodged. If a unit ordered to support another unit is dislodged by an attack from any province (including the province into which it's giving support), then the support is cut and the unit that was supposed to receive support doesn't receive it.
A unit being dislodged by an attack from one province can still cut support in another province. Just as a unit being dislodged by one province can still cause a standoff in another, a unit still manages to cut support even if it's dislodged. Just make sure that the dislodgment isn't coming from the province where the unit is giving support. (Remember this rule: A dislodged unit, even with support, has no effect on the province that dislodged it.)
Note: In complicated situations, it helps to first determine what support, if any, is cut. Once this is determined, it's easier to resolve orders.
The support from the Army in Yunnan (A Chu - Can, A Yun S A Chu - Can) is cut by an attack from Tonkin (A Ton - Yun). Note that it was enough to attack the Army giving support to cut that support. It wasn't necessary to dislodge the supporting unit to cut support.
The French army in Canton (A Can - Yun) can't cut support for an attack on itself from China (A Chu-Can, A Yun S A Chu - Can). The Army in Canton is dislodged.
Even though the Turkish Army in Afghanistan is dislodged by a British attack (A Kag - Afg, A Kam S A Kag - Afg), it's still able to cut the support of the British Army in Punjab (A Afg - Pun). This prevents the British Army in Rajputana from entering Karachi (A Raj - Kar, A Pun S A Raj - Kar).
Convoy Order
The convoy order instructs a Fleet unit in a water province to convoy an Army unit from any province on the coast (or island) adjacent to that water province to any other coastal province (or island) adjacent to that water province. The Army unit and its initial and final destination must follow the convoy order (e.g., a Fleet in the Red Sea can convoy an Army from Egypt to Aden; the order is F RS C A Egy - Ade, A Egy - Ade). Just as "S" indicates support, the letter "C" is used to indicate convoy.
A Fleet unit can only convoy one Army per turn. A Fleet in a coastal province may not convoy an Army unit. A Fleet which is convoying can perform no other orders that turn. It remains where it is and does not move. The convoyed Army unit must end its move on a land space - it may not remain at sea.
Note: A Fleet can't convoy a Fleet and "support" can't be transported from an Army via a convoy to another unit.
An Army can be convoyed by any number of Fleets across a number of adjacent water provinces, as long as each water province contains a Fleet with orders to transport that Army. The Army unit's orders would be to attack the desired province and each Fleet must have orders to convoy that Army unit (e.g., a Dutch Army in Java can attack Formosa: A Jav - For and Fleet units in the Java Sea, Gulf of Siam, South China Sea, and East China Sea should each have the order C A Jav - For).
A Fleet in the Red Sea can convoy an Army from Egypt to Aden; the order is F RS C A Egy - Ade, A Egy - Ade.
A Dutch Army in Java can attack Formosa: A Jav - For and Fleet units in the Java Sea, Gulf of Siam, South China Sea, and East China Sea should each have the order C A Jav - For.
A convoy that causes the attacking Army to enter a standoff at its destination results in that Army remaining in its original province: If a convoyed Army arrives at its destination province and is unable to stay there because of a standoff with another unit(s), then that convoyed Army must remain in its original coastal province. (It could still be forced out of its original province by a successful attack there.) An Army can be supported into its destination province to help avoid a standoff.
Dislodgment of a Fleet in a convoy causes the convoy to fail. If a Fleet ordered to convoy is dislodged during the turn, the Army to be convoyed remains in its original province and has no effect on the province to which it was ordered. An attack on a convoying Fleet which doesn't dislodge it doesn't affect the convoy.
For example: A Dutch Army in Sumatra attacks Rangoon and a Dutch Fleet in the Andaman Sea convoys the Army; the orders are A Sum - Ran, F AnS C A Sum - Ran. This is prevented by a British Fleet in the Bay of Bengal attacking the Fleet in the Andaman Sea with support from a Fleet in the East Indian Ocean; the orders are F BoB - AnS, F EIO S F BoB - AS. The result is the British Fleet entering the Andaman Sea and the Dutch Fleet retreating. The Dutch Army stays in Sumatra.
A convoy can be disrupted if a fleet in the convoy is dislodged (Netherlands: A Sum - Ran, F AnS C A Sum - Ran; Britain: F BoB - AnS, F EIO S F BoB - AS). The result is the British Fleet entering the Andaman Sea and the Dutch Fleet retreating. The Dutch Army stays in Sumatra and has no effect on Rangoon.
3. Order Resolution Phase
After all orders have been revealed and read, the players (or an assigned gamemaster) must resolve all of the conflicts. Resolution will result in successful moves, failed moves, standoffs, retreats, and disbands. The units on the game board are moved and removed as described in the next two phases of play.
When resolving orders, it's helpful to remember the following rules:
- Only one unit, an Army or a Fleet, is allowed in a particular space at one time.
- Any order that cannot be interpreted by the Gamemaster and/or other players, or an order that is impossible (such "Army Delhi - Moon" or "Fleet Tokyo - Moscow") is ignored entirely.
- Each unit in the game (both Army and Fleet units) has a strength of one.
- A force may consist of a single unit or it may consist of a single unit plus all the units that are supporting this piece, either in attack or defense.
- If two units or equal forces each have orders to attack the space that the other occupies, neither may move (e.g., Turkey: F RS - GoA, Britain: F GoA - RS).
- If two or more equal forces are ordered to attack the same space, none of them may enter that space (e.g., China: A Yun - Ton, A May S A Yun - Ton; France: A Ann - Ton, A Cam S A Ann - Ton).
- If one force successfully attacks into a province, while a second force enters the first force's original province, no standoff occurs, since the first unit is leaving at the same time the second unit is entering (e.g., Russia: A Tas - Afg; Turkey: A Afg - Per). Both orders succeed.
- When unequal forces come into conflict the largest force will always win. Thus, when two units come into conflict, simply count up the number of supporting units each has (not counting units whose support is cut) and the unit with the stronger force wins.
- When a player has submitted multiple different orders for the same unit, the first order written is executed.
- A unit without an order will hold and can receive support.
- A poorly written order that has only one meaning must be followed.
Two or more equal forces ordered to attack the same space will standoff. The Chinese army with support (A Yun - Ton, A May S A Yun - Ton) will bounce the French army with support (A Ann - Ton, A Cam S A Ann - Ton).
Movement is simultaneous. The Turkish army leaves the province (A Afg - Per) at the same time the Russian army enters the province (A Tas - Afg). Both moves are successful.
4. Retreat and Disbanding Phase
Any dislodged (defeated) units make their retreat after all Orders are resolved. These retreats are written down (just like orders) and revealed immediately. No diplomacy or discussion takes place prior to writing retreat orders - all Powers are on their own.
A dislodged unit must retreat to an adjacent province that it could ordinarily move to if unopposed by other units. Sometimes, a retreat is made deeper into enemy territory.
A unit can't retreat to:
- a province that is occupied;
- the province from which the attacker came; or
- a province that was left vacant by a standoff during the same turn
If there is no available province to retreat to, the dislodged unit is immediately disbanded and removed from the game board.
Writing Retreats
If there is only one player with retreat orders, they can write their retreat(s) and resolve the orders immediately. If two or more players have units that must retreat, the retreat locations are immediately (and without discussion) written down by the players concerned. The written retreats are then simultaneously revealed. Retreats can't be convoyed or supported. Each player should write down the location of the dislodged unit and the location to which it's retreating.
Disbandment
If two or more units are ordered to retreat to the same province, they all must be disbanded. If a player fails to order a retreat when necessary, the unit is disbanded. A unit can always voluntarily disband instead of retreating.
Note: If a unit is disbanded, but the player still controls the same amount of Supply Centers at the end of a Fall Turn, the player may rebuild a unit during the Winter Phase.
5. Gaining and Losing Units Phase (Winter Phase, After Fall Turn)
Provinces on the map that are marked with stars are termed Supply Centers. They have important economic or military significance and are capable of "maintaining" an Army or Fleet. Thus, each Power may only have as many units on the board as Supply Centers that it controls. If a Power gains or loses Supply Centers, it will gain or lose units accordingly.
Controlling Supply Centers
After each Fall turn, players check to see how many Supply Centers they control. A Power gains control of a Supply Center when one of its units occupies that Supply Center province after a Fall turn has been played and completed.
Once a Power gains control of a Supply Center, it can leave the Supply Center vacant and still keep control of it, as long as that Supply Center isn't occupied by another Power at the close of a Fall turn. A unit that moves into a Supply Center during a Spring turn and moves out of it during the Fall of the same year doesn't affect the ownership of the Supply Center. In short, a Power retains control of a Supply Center as long as, at the end of each Fall turn (including retreats), the Supply Center is either vacant or is occupied by one of its own units.
Adjusting Number of Units
After each Fall turn (including retreats, if any), all players adjust their units to match the number of Supply Centers they control.
This may result in some units being disbanded (if the player has lost Supply Centers that year) or in some units being built (if the player has gained Supply Centers that year).
As with retreats, gaining and losing units (collectively known as "adjustments") are written and revealed simultaneously without discussion or diplomacy of any kind.
Disbanding
If a Power has fewer Supply Centers than units, it must disband the excess number of units (owner's choice of which units). A player may not disband more units than required.
Building
Building - Conscription
If a Power has more Supply Centers than units, it can place new units in unoccupied Supply Centers that it still controls. A player cannot have more units in play than the number of Supply Centers they control. Note: This is a different mechanic than the base game Diplomacy, where players are limited to building only in their "home centers" (where they started the game).
For example, Turkey starts the game with Constantinople, Angora, and Baghdad. If they later take control of Tabriz and Egypt, they may also build in those Supply Centers provided they are unoccupied during the Winter Phase.
Building - Conversion
If a unit ends a Fall turn in a Supply Center, the player may write a build order that converts that Army to a Fleet or vice versa. The player must specify the unit type (Army or Fleet) and the Supply Center. Note: This is a different mechanic than the base game of Diplomacy, where players are not allowed to convert unit types once built.
For example, the British Fleet in the Red Sea captures the Sudan Supply Center at the end of a Fall turn. That player may write Army Sudan during the Winter Phase to convert that Fleet into an Army.
Converting a unit type during the Winter Phase does NOT use an available build. A player may have no builds or disbands and still convert a unit, so long as the unit occupies a Supply Center.
For example, Britain ends a Fall turn with an equal number of units and Supply Centers. They may convert their Army in Bengal to a Fleet. They may not convert their Army in Delhi to a Fleet because that violates the rule against Fleets in inland provinces.
Additional Building Rules
Only an Army unit can be built in an inland province Supply Center. When building a unit on a coastal province Supply Center, a Fleet or Army must be specified in the written build order.
A Power can decline to build a unit that it's entitled to for whatever reason (usually a diplomatic one).
If a Supply Center is occupied, then you cannot build there.
Writing Builds and Disbands
Players write down which units they will disband (if any) and what type of unit will be built in which Supply Center. These orders are written without diplomacy or discussion and revealed at the same time. Any vague or impossible build or disband orders are ignored.
If a player submits too many build or disband orders, the first orders are executed and the rest are ignored. If a player submits fewer disband orders than required, the units are disbanded automatically the same way as described in the Civil Disorder section below.
Civil Disorder
If a player leaves the game or otherwise fails to submit orders on a given Spring or Fall turn, it's assumed that their government has collapsed. Their units all hold in position, but don't support each other. If they're dislodged, they're disbanded. No new units are raised for the Power.
In the event of a Power going into civil disorder or when a Power does not order a required removal, (a) No unit on a Supply Center is to be removed unless there are no viable alternatives and (b) Unit precedence for removal starts with those furthest from an owned Supply Center, by counting absolute adjacent provinces regardless of the ability of the unit to move into them, being removed first. Fleets are removed before Armies, and then units are removed in alphabetic order of the name of the province on the map.
It's probably best, if enough players are present, to allow someone else to replace any player who leaves the game. Players should decide what policies they will follow before starting the game.
Alternate Ways to Play
If there are fewer than seven players, some players will control more than one Power at the start of the game. All pieces of the Powers controlled by a player are treated as being part of the same Major Power for all purposes. Unless otherwise specified, all rules are the same as for the seven-player game:
Two Players
- Turkey / China / Netherlands
- Britain / France / Japan
Russia is neutral and may not be entered.
Three Players
- Turkey / Japan / Netherlands
- Russia / France
- Britain / China
Four Players
- Russia
- Turkey / China
- France / Britain
- Netherlands / Japan
Five Players
- Russia / France
- Britain
- China
- Netherlands
- Japan / Turkey
Six Players
Each player takes one of the Powers except for China, whose units hold but do not support each other.
Special Setup for Seven Players - Hawes Setup
The following is a special initial setup for seven players similar to the original design by Peter Hawes.
| Power | Starting Units |
|---|---|
| Britain | A Madras, A Delhi, F Bombay, F Hong Kong, F Singapore, F Aden |
| China | A Peking, A Canton, A Sinkiang, A Shanghai |
| France | A Tonkin, F Annam, A Cochin |
| Japan | A Kyoto, F Kyushu, F Otaru, F Tokyo |
| Netherlands | F Java, A Borneo, F Sumatra |
| Russia | A Moscow, A Vladivostok, A Irkutsk, F Odessa, F Port Arthur |
| Turkey | A Angora, F Baghdad, F Constantinople |
Cutting Support on Your Own Units
An attack by a Power against one of its own units doesn't cut support. This rule is in the same spirit as the Self-Dislodgment rules. A Power can't dislodge one of its own units, nor can it cut its own support.
Special Circumstances
Impossible Orders
A unit given an impossible order results in the unit holding so it can be supported in place. For example, "A Delhi - Moon" or "F Tokyo - Moscow" are impossible moves.
Self-Dislodgement Prohibited
A Power can't dislodge or support the dislodgment of one of its own units, even if that dislodgment is unexpected. This is one time when support is refused or negated when it would otherwise be legal. However, such orders can be written for other reasons, such as creating a standoff.
The Dutch fleet fails to move into the South China Sea and the Dutch attack on Cebu may not dislodge its own unit (F Ceb - SCS, F Dav - Ceb, F LPO S F Dav - Ceb). However, this attack has prevented the Japanese attack on Cebu (F SCS H, F Mna - Ceb, F MPO S F Mna - Ceb).
The Japanese Fleet in the Sea of Japan is moving to the Yellow Sea (F SoJ - YS). The movement does not cut support of the Fleet in the Yellow Sea. The Army in Corea will dislodge the Chinese Army in Port Arthur and the Fleet in the Sea of Japan will bounce (A Cor - PA, F YS S A Cor - PA).
Self-Standoff
Although a power may not dislodge its own units, it may order two equally well-supported attacks into the same space. Neither may advance (a "self-standoff"), but the province involved, if unoccupied, cannot be used by any Power to retreat into (see the section on Retreats). A self-standoff also occurs when a Power orders two of its units each to the space the other occupies.
The Chinese player is trying to control Canton, Chungking, and Canton with two units, keeping Canton vacant. If Chungking and Shanghai are both ordered to Canton, they will standoff and Canton will remain vacant. However, if the French Army in Yunnan supports Chungking to Canton, it will succeed and Shanghai will bounce.
More than One Convoy Route
An Army convoyed using alternate convoy orders reaches its destination as long as at least one convoy route remains open. Orders can be written to permit more than one route for convoying an Army from its origin to its destination. The Army isn't prevented from moving unless all routes in the orders are disrupted.
The Army in Hong Kong has two convoy routes (A HK - Mna, F ECS C A HK - Mna, F SCS C A HK - Mna). Even though the Netherlands will dislodge the Fleet in the South China Sea (F Sar - SCS, F GoS S F Sar - SCS), the convoy via the East China Sea will succeed.
Exchanging Places via a Convoy
Two units can exchange places if either or both are convoyed. This is the exception to the earlier rule that stated, "Units can't trade places without the use of a convoy."
The moves by the Netherlands (A Sar - Ann, F SCS C Sar - Ann) and France (A Ann - Sar, F GoS C A Ann - Sar) both succeed.
Land and Convoy Routes
An Army can swap places with a unit of an adjacent province by using a convoy. A convoy route by an Army to an adjacent province is not considered unless explicitly identified by that same Power in their Fleet order. A convoy route for the Army can be specified by identifying the Army order with "via convoy". In such a case the land route is disregarded.
This prevents foreign powers from kidnapping an Army and convoying it against its will. Remember: when in doubt, write it out!
Dislodged by an Adjacent Convoy Attack
A dislodged unit can retreat to the position of the attacker when there is a convoy to an adjacent province.
The Dutch army (A Ceb H) is dislodged from Cebu by France (A Mna - Ceb, F SCS C A Mna - Ceb, A Dav S A Mna - Ceb). If the army in Manila had attacked via land to Cebu, then the Dutch army could not retreat to Manila. Since the attack is coming from the convoy in the South China Sea, the army in Cebu can legally retreat to Manila.
A Convoyed Attack Doesn't Cut Certain Supports
A convoyed Army doesn't cut the support of a unit supporting an attack against one of the Fleets necessary for the Army to convoy.
The British Fleet in the Arabian Sea successfully dislodges the Turkish Fleet in the Gulf of Aden, so the convoy from Somalia doesn't go through to cut support of the Fleet in Aden (Britain: F ArS - GoA, F Ade S ArS; Turkey: A Eri - Ade, F GoA C A Eri - Ade).
Multiple Convoy Routes with Support Cut
An Army with at least one successful convoy route will cut the support given by a unit in the destination province that is trying to support an attack on a Fleet in an alternate route of that convoy. As long as there is one successful convoy route, the landing Army does cut any support given by a unit in the destination province. (Remember the rule: "Support is cut if the unit giving support is attacked from any province other than the one where support is being given.")
Turkey wrote orders that would convoy the Army in Eritrea by either of two routes. The move from Eritrea fails but cuts support of the Fleet in Aden. Therefore, the Fleet in the Arabian Sea will standoff with the Fleet in the Gulf of Aden (Britain: F ArS - GoA, F Ade S ArS - GoA; Turkey: A Eri - Ade, F GoA C A Eri - Ade, F RS C A Eri - Ade).
The Fleet in Aden is dislodged by the combined strength of the Army being convoyed from Eritrea and the Army in Arabia. Since the Army coming from Eritrea can get to Aden via the Red Sea, the Fleet in Aden wasn't supporting an attack against the Fleet that ultimately convoyed the Army, so its support was cut. (Britain: F ArS - GoA, F Ade S ArS - GoA; Turkey: A Eri - Ade, F GoA C A Eri - Ade, F RS C A Eri - Ade, A Ara S A Eri - Ade).
Rules to Help You Resolve Orders
The following is a handy list of rules needed to resolve orders and game-play issues. If you're unable to resolve an issue using this list, refer to the instructions and examples within this rulebook for more detailed explanations.
- All units have the same strength.
- There can only be one unit in a province at a time.
- Units of equal strength trying to occupy the same province cause all those units to remain in their original provinces.
- A standoff doesn't dislodge a unit already in the province where the standoff took place.
- One unit not moving can stop a series of other units from moving.
- Two units can't trade places without the use of a convoy.
- Three or more units can rotate provinces during a turn provided none directly trade places.
- A unit ordered to hold, support or convoy can be supported by another unit with a hold support order that only mentions its province.
- A unit ordered to move can only be supported by a support order that matches the move the unit is trying to make.
- A dislodged unit can still cause a standoff in a province different from the one that dislodged it.
- A dislodged unit, even with support, has no effect on the province that dislodged it.
- A Power can't dislodge or support the dislodgment of its own units, even if that dislodgement is unexpected.
- Support is cut if the unit giving support is attacked from any province except the one where its support is being given.
- Support is cut if the supporting unit is dislodged.
- A unit being dislodged by an attack from one province can still cut support in another.
- An attack by a Power on one of its own units doesn't cut support.
- A dislodgment of a Fleet necessary to a convoy causes that convoy to fail.
- A convoy order that causes the convoyed Army to be in a standoff at its destination results in that Army remaining in its original province.
The Strategic Challenges
Britain
The British Empire's crown jewel is the Indian subcontinent. Britain must decide in which direction to expand: east towards Rangoon and the Malay Peninsula or west into the Punjab and Karachi. The latter option necessitates careful negotiations with both Russia and the Ottoman Turks. Britain can hold the balance of power for these two countries, but on the other hand a strong alliance between them may be unstoppable.
A real challenge for Britain lies in the east. Skillful negotiations with France and the Netherlands, and if it can be spared, an extra fleet in the Andaman Sea, can make it possible to be the primary Power in Southeast Asia. It can even be in the interests of both the French and the Dutch to have the British as a buffer in case of an attack from the other.
The British player should not be overconfident following their early successes; Britain did indeed have a vast and powerful empire on which it was boasted the sun never set. However, any empire which starts the game strong and then appears to grow alarmingly in the early turns will be watched suspiciously by the other empires.
Therefore, Britain should consolidate and be wary not to expand too aggressively or make enemies early, otherwise by mid-game it will find itself in the center of the board surrounded by unsympathetic enemies.
China
China has potential invaders on all fronts and therefore must negotiate an alliance with one or more of its neighbors early. In particular, border disputes with the French in Indochina are costly, especially if units have to be brought from the north, thus exposing that flank to attack from Russia and Japan.
China, Russia, and Japan form a deadly triangle in the intriguing battle for the Korean peninsula and surrounding provinces. The northern forces are the key to China's success. There are only a few neutral Supply Centers between the Powers to split. The units in Shanghai and Sinkiang will be needed elsewhere, but leaving these provinces vacant may invite unwelcome and perhaps permanent "visitors".
China will have to negotiate well, or it will do no better than its Manchu rulers did in stemming the wave of foreign invaders.
France
French Indochina will obviously want to expand into Hong Kong and Rangoon, forcing negotiations with the Chinese. An alliance between the two is mutually beneficial, but can each be trusted not to backstab while being adjacent?
The Malay peninsula, Formosa, and the Philippines are other areas for expansion. An aggressive French player may ally with the British for attacks on China or the Dutch East Indies. If it can be negotiated, the ownership of Malaya, thus allowing a French fleet to reach the Andaman Sea, will greatly facilitate westward expansion of the French possessions.
Japan
Although Formosa and the Philippines are tempting targets early in the game, obtaining a foothold on the mainland before China and Russia are too powerful is essential for a Japanese victory.
Control of the Yellow Sea is crucial for an invasion of Korea (or an unsuspecting China). Diplomacy with China and Russia is greatly needed, but trusting alliances are seldom seen between these three traditional enemies.
If a Sino-Russian alliance develops, Japan must find an ally in France or the Netherlands in order to gain a sphere of influence on the mainland somewhere. If this fails, an advance on the Dutch East Indies with French help is a good alternative.
Netherlands
Control of the Java Sea is of paramount importance to the Dutch. Its loss could lead to the fall of the entire East Indies.
An attempt to capture Southeast Asia results in a battle of wits, particularly if the French support the British. But once a decision has been made to one Power it should be done swiftly; otherwise, valuable time will be lost in fruitless standoffs and opportunities in the Philippines will be lost to Japan.
The major dilemma is between north-east expansion to capture the Philippines or northwest up the Malay peninsula or west into Africa. Dutch fleets around the Indian subcontinent pose a menacing threat. Other players should be wary of a Japanese-Dutch alliance sweeping westward across the map.
Note: The Netherlands Supply Center markers in this game uses the Royal Standard of the Monarch for the time period the game is set. This flag was selected to differentiate with the French flag because orientation of the markers can shift on the map.
Russia
Because of its two fronts, the Russian player must negotiate with two different sets of opponents: China and Japan in the east, Turkey and Britain in the west. The outcome of the conflicts in the east will always be in doubt, but with some clever planning (and hopefully a trusty ally) it is possible to hold their eastern flank and pick up Korea and Port Arthur. If this succeeds, Russia will do well.
In the west, Rumania and the Black Sea will always be trouble spots between Russia and Turkey. An alliance between these two is very strong, but if either of the two provinces mentioned are entered, the alliance may quickly break down.
Although Russia may focus on one theatre early in the game, it cannot afford to lose all its possessions on one side of the map.
Turkey
Historically, the Ottoman Empire was constantly under threat from an ever-expanding Russia, and that can be the case in this game, particularly if Russia allies with the British. However, a "diplomatic" carving up of the Gulf States between the two and keeping the Black Sea neutral could help form the basis of an alliance between them. Then Turkey can set about expanding South before the British grow too strong. But don't be too trusting, since a two-pronged backstab from Russia would be crippling.
The main point of British expansion can determine the outcome for Turkey. If they advance on Arabia and up through the Red Sea, Turkey can't afford to be fighting with Russia. But if Britain invades Afghanistan and Tashkent with Turkish support (and Aden is left in British hands), then an all-out expansion into Russia is possible.
Abbreviations
| Province | Abbreviation |
|---|---|
| Abyssinia | Aby |
| Aden | Ade |
| Afghanistan | Afg |
| Akita | Aki |
| Andaman Sea | AnS |
| Angora | Ang |
| Annam | Ann |
| Arabia | Ara |
| Arabian Sea | ArS |
| Armenia | Arm |
| Assam | Asm |
| Baghdad | Bag |