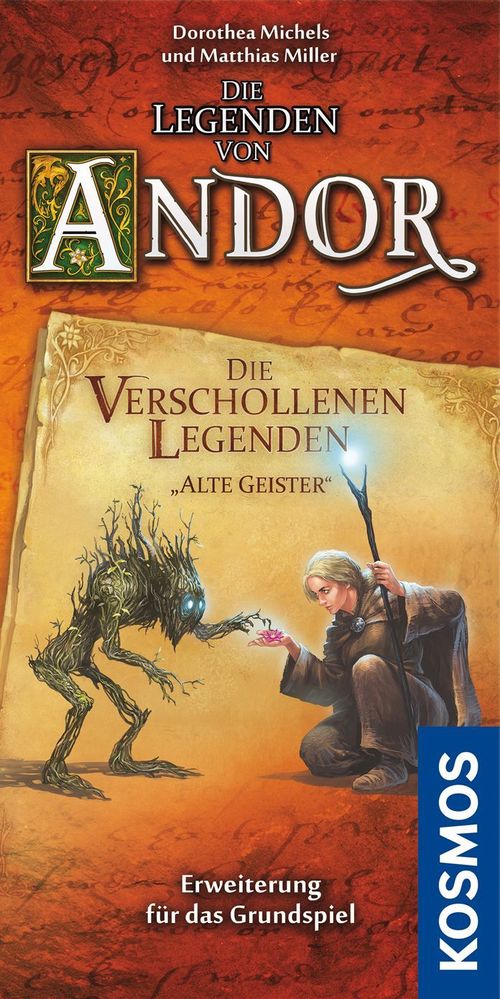
Die Legenden von Andor: Die verschollenen Legenden "Alte Geister"
Die Legenden von Andor: Die verschollenen Legenden "Alte Geister" Rulebook
Table of Contents
Table of Contents
- Vorbereitung (Preparation)
- Checkliste (Checklist card – setup)
- Spielmaterial
- Wichtige Stichworte zum Nachschlagen und Erklärung von Sonderfällen
- Die Mera-Steine (Mera stones)
- Rekas Schlange (Reka's Snake)
- Die Schätze der Tulgori (The Tulgori treasures)
- Minenanleitung (Mine instructions)
- Besondere Regelanpassungen für Ereigniskarten (Special rule adjustments for event cards)
- Die 3 Legenden – Hinweise und Sonderfälle (The 3 legends – notes and special cases)
- Legende 3 – "Die steinernen Drei" (Legend 3 – "The Three Stone Ones")
- Die Verschollenen Legenden für 5–6 Helden (The lost legends for 5–6 heroes)
- Für die "Neuen Helden" gelten zusätzlich diese Regeländerungen (Additional rule changes for the "New Heroes")
- Für die "Dunklen Helden" gelten zusätzlich diese Regeländerungen (Additional rule changes for the "Dark Heroes")
Vorbereitung (Preparation)
- Carefully punch all parts out of the four punch boards and place the playing figures into the plastic holders of the matching colours.
- Set out the playing material from the base game.
- Begin the first legend by reading aloud legend card A1 of "Die Spur des Drachen" (The Trail of the Dragon).
Notes printed in the booklet: Gilda, the landlady of the "Zum Trunkenen Troll" tavern, has no function in these legends yet. Your own creativity is called for here: perhaps you know a legend in which this figure plays a role. Invent your own legend with the Developer Guide on legenden-von-andor.de and use this new figure for it. In Legend 3 you meet 3 dwarf statues. Zor, the fourth statue, is not included. You encounter him in a bonus legend, free to download from legenden-von-andor.de from December 2018.
Checkliste (Checklist card – setup)
Setup checklist as printed on the checklist card "Die verschollenen Legenden 'Alte Geister'".
- Each player chooses a hero board with the corresponding hero figure and, in the hero's colour, receives 2 wooden discs, 1 wooden stone and the dice.
- Each player places one of their wooden discs on the sunrise space.
- Each player marks their starting values on their hero board: the wooden stone goes to 1 strength point, the second wooden disc to 7 willpower points.
- Place all creatures next to the game board.
- Set out the 3 red and the 4 black dice, and next to the creature display the red wooden stone for the strength points and the red wooden disc for the willpower points of the creatures.
- Set out the gold, the stars, the red X markers, the fog tiles and the marker rings.
- Shuffle the 3 healing herbs and place them face down.
- Place the 4 well tiles with their coloured side up on the well spaces (hexagons).
- Distribute all items on the equipment board.
Legend 1 "Die Spur des Drachen" consists of 14 cards: A1, A2, 2 x A3, A4, B, C1, C2, D, 2 x F, H, N1, N2.
Spielmaterial
Component list as printed on pages 2 and 3 of the booklet. Counts are as printed.
- 15 Kunststoffhalter für die Spielfiguren (4 olive-green, 1 red, 1 white, 2 dark grey, 3 light grey, 4 black)
- 6 Sortierbeutel (sorting bags)
- 72 große Karten (large cards):
- 68 Legendenkarten (legend cards)
- 1 Karte Checkliste "Die verschollenen Legenden 'Alte Geister'" (checklist card)
- 1 Karte "Tulgorischer Handel" (Tulgori Trade card)
- 2 Karten "Arbaks und Rietgrasblüten" (Arbaks and Reed Grass Blossoms cards)
- 15 Figuren (figures):
- 4 Arbaks, Shron, Siantari, Meres, Skuvar
- Hallgard, Tulgori
- 3 Zwergenstatuen (dwarf statues): Boord, Garah, Hadda
- 2 besondere Figuren (special figures, see page 12): Gilda, Zor
- 3 Spielplanüberleger (board overlays): "Großes Plättchen 'Lager der Tulgori' (Feld 18)", "Kleines Plättchen 'Feld 73'", "Großes Plättchen 'Feld 37'"
- 3 Schätze der Tulgori (Tulgori treasures): Die Kraft des roten Mondes (The Power of the Red Moon), Der Takuri-Spiegel (The Takuri Mirror), Der tulgorische Hüter der Zeit (The Tulgori Guardian of Time)
- 4 Kartographen (cartographers), vorderseite and rückseiten (front and back sides)
- 4 Kartographie-Marker (cartography markers)
- 1 Schlange (snake)
- 5 Mera-Steine (Mera stones), sides with values +2, +1, +3, 0, 0; reverse side
- Sand der Temm (Sand of the Temm), 2x
- Werkzeuge (tools), 4x
Wichtige Stichworte zum Nachschlagen und Erklärung von Sonderfällen
Important keywords for reference and explanation of special cases.
Die Arbaks
- A hero may not enter the space of a standing Arbak.
- If a hero enters a space adjacent to an Arbak, the hero must end their movement and immediately loses 3 willpower points. A hero may not reduce themselves to 0 willpower points by entering such a space. A hero may use 1 shield side to prevent the willpower loss. If the hero has a reed grass blossom, they may give it up and then also lose no willpower points. If a hero enters a space that is adjacent to 2 Arbaks, they lose 3 willpower points for each of the adjacent Arbaks.
- A hero who stands on a space adjacent to an Arbak, or leaves it, loses no willpower points.
- If a hero stands on the space of a lying Arbak when that Arbak is set up again, the hero must immediately give up a reed grass blossom. If they cannot, they are eliminated from the game. Their equipment and gold are placed on the space where the hero last stood.
- Important: Even if a hero is thereby removed from the group, the same legend goal must still be fulfilled as before the hero was eliminated.
- Creatures do not skip over the Arbaks. A creature that stands on the same space as or adjacent to an Arbak has 3 fewer willpower points at the start of a fight. In contrast to heroes, creatures do not lose their willpower points permanently. As soon as a creature is outside the "range" of an Arbak, it has its usual values again.
- Lying Arbaks are set up again at sunrise, as soon as their symbol comes up in the row (the small tile on the right Wardrak symbol).
Rietgrasblüten (Reed grass blossoms)
- A hero standing on the space of a reed grass blossom may collect it.
- A hero who has a reed grass blossom and enters a space adjacent to an Arbak may use the blossom to pacify the Arbak. The hero then loses no willpower points by entering the space.
- An Arbak pacified with the help of a reed grass blossom is immediately laid down and remains lying until the end of the day.
- The hero receives 1 strength point for pacifying the Arbak. A hero may use a blossom even if they cannot or do not want to take the strength point.
- A hero may forgo using the blossom and instead give up the willpower points. A hero may also give up a reed grass blossom even if they already stand on a neighbouring space.
- Example: Eara moves onto space 23, which is adjacent to the Arbak on space 24. Although she has a reed grass blossom, she does not want to pacify the Arbak, because her time stone is already on hour 7. She gives up 3 willpower points instead. After the following sunrise, Eara uses the blossom to pacify the Arbak.
- A hero who has several blossoms gives up only one blossom to pacify an Arbak.
- If a hero stands on a space that is adjacent to several Arbaks, they can pacify only 1 Arbak with 1 blossom. The hero decides which Arbak is laid down. If the hero has several blossoms, they may also pacify several Arbaks.
Die Tulgori
- A hero can move the Tulgori along with their figure. This is also possible in passing and costs the hero no additional hours.
- The Tulgori can stand on the same space as creatures, Arbaks, Maasavi and final enemies.
- If the Tulgori stand in a fight on the space of a hero taking part in the fight, they count for 2 additional strength points for the group's fighting value. In the mine, the Tulgori can also help to remove rubble.
Meres, der Hexer aus Andor (Meres, the Sorcerer from Andor)
- A hero can move Meres for 1 hour on the day track up to 4 spaces. This may also be done several times per turn (so for 2 hours Meres can move up to 8 spaces).
- Meres can stand on the same space as creatures, Arbaks, Maasavi and final enemies, or pass through these spaces.
- Meres cannot cross the bridge in the mine as long as it has not been repaired. He also cannot pass spaces with rubble. Meres does not trigger "Geheimer See" event cards. He is also not affected by fire bursts.
Das Werkzeug (The tool)
- Tool tiles are placed on the small storage spaces of the hero board.
- A falcon can carry a tool.
Die Holzstämme (The tree trunks)
- When placing tree trunks, no more than 3 tree trunks may lie on one space.
- In passing, a trunk cannot be collected.
- The trunks are placed on the strength point track of the hero board so that they fit to the left of the wooden stone that shows the strength points.
- Example: To be able to carry a 2-trunk, the hero needs at least 3 strength points.
- A hero may carry several trunks at once if all these trunks fit side by side to the left of the wooden stone.
- If a hero carrying a trunk loses a strength point and the trunk no longer fits to the left of the wooden stone on their strength point track, the tree trunk must be placed on the space where the hero currently stands. There it can later be collected by the same or another hero with enough strength points.
- The falcon cannot carry tree trunks.
Die Gegenstände der Tulgori (The Tulgori items)
- A hero who stands on a space with the Tulgori symbol can buy strength points and the items of the card "Tulgorischer Handel" for 2 gold per strength point.
- The Tulgori figure does not have to stand on the merchant space when a hero buys.
- On a space with the Tulgori symbol, only Tulgori items may be bought.
- In Legends 1 and 2, the heroes therefore receive no items from the Andor equipment board on space 18, and in Legend 3 on space 28.
- At the Andor merchants (spaces 57, 71 and space 65 on the reverse of the board), no Tulgori items may be bought.
- Tulgori items can be carried by a falcon.
- The bone helmet: The helmet is placed on the head slot of the hero board so that the side with the blue stone is visible. As soon as the hero wearing the helmet wins a fight round (or takes part in a joint fight), they receive 2 strength points and move the wooden stone on their strength point track accordingly. These additional strength points are permanent. Afterwards the hero turns the helmet over immediately, so that the side with the red stone shows. From then on, a hero wearing the bone helmet receives 2 willpower points after each won fight round. If the bone helmet is passed on, it is not turned over. With the help of the bone helmet, therefore, only once in a legend can 1 hero receive 2 strength points.
- The bone helmet gives its wearer no advantage when removing rubble. It may not be used in a fight against Maasavi or final enemies.
- The sand of the Temm: After purchase, the sand is placed on a small storage space of the hero board.
- The sand can be used in a fight round after the opponent's reaction, to turn 1 opposing die to the opposite side. In one fight round only 1 side of the tile may be used. It is allowed in one fight round to use 2 "Sand der Temm" tiles and to use 1 side of each. After the first use, the tile is turned to its reverse side. After the second use, it is returned to the card "Tulgorischer Handel".
- The "Sand der Temm" may also be used against Maasavi and final enemies. All effects of dice (e.g. "Reka's Hexenkunst" in Legend 2 or the movement of the Maasavi) are always carried out only the use of a "Sand der Temm".
Die Edelsteine (The gems)
- The numbers on the gems represent their value in gold, and can be spent at the merchants to buy strength points and items. Tulgori items may also be paid for with gems. If the heroes buy a Potion of the Witch, no gems may be used for it.
- In the first legend "Die Spur des Drachen", the gems may also be used to pay the Tulgori for their help or to buy tools.
- A hero may place a gem on any passable space on which they stand. If the gem lies adjacent to a creature, at sunrise the creature does not move along the arrow (or to the space of the "Lager der Tulgori"), but onto the space of the gem. The gem is then immediately removed from the game.
- Important: The order in which the creatures move at sunrise is always retained!
- Final enemies and Maasavi cannot be diverted by gems. In Legend 2 "Der Hexer aus Andor" it is also not possible to lure a creature away from Shron with the help of a gem if it already stands on his space.
- The rules for the gems in the mine can be found in the section "Minenanleitung" on page 7.
Die Mera-Steine (Mera stones)
- A Mera stone taken from the raft must be placed on the sunrise space. This also applies to the two stones that have the value "0".
- If another Mera stone is taken from the raft on the same day, it is not allowed to exchange the stone on the sunrise space for the new Mera stone, even if the new stone may have a higher value.
- A hero who has to give up willpower points because another Mera stone is turned over may not reduce themselves to 0 willpower points by doing so.
- Each Mera stone may be used only 1 x per day. Several stones may be used at once in one fight round.
- Mera stones may also be used when removing rubble, to increase the hero's fighting value.
- Mera stones next to the creature display increase the fighting value of creatures, Maasavi and final enemies.
Rekas Schlange (Reka's Snake)
- Reka's Snake is a large item and is placed on the corresponding storage space of the hero board.
- A hero who throws all their dice at once may add the values of 2 arbitrary dice. These die values do not have to be equal.
- A hero who has to throw their dice one after another adds the two dice thrown last.
- If Eara is in the group, she may turn one die before the snake is used.
- The snake may be used in every fight round. It is not allowed to pass it to another hero during a fight round.
- The snake cannot be combined with the Potion of the Witch or with the helmet (from the Andor equipment board).
Die Schätze der Tulgori (The Tulgori treasures)
The Tulgori treasures may be used only 1 x in each legend, and are removed from the game after use. For the "tulgorische Hüter der Zeit" each side may be used 1 x. Using a treasure is a free action option. A hero may use a treasure only as long as they have not yet ended their day.
Die Kraft des roten Mondes (The power of the red moon)
- The tile must cover 2 adjacent symbols. It is not allowed to cover only 1 symbol.
- Covered symbols, and all actions connected with them, are not carried out at sunrise.
- Example 1: "Die Kraft des roten Mondes" was placed on the symbols "event card" and "Gor". On the event card symbol lies a marker ring, which shows that the final enemy should be moved. At sunrise no event card is read out, the final enemy is not moved and all Gors stay where they are.
- Example 2: The tile lies on the symbols "Gor" and "Skral". In an earlier turn a hero used Meres' help and placed 1 Skral on the game board. At sunrise all Gors and Skrale are not moved, and the lying Skral is also not set up.
- Before the hero whose time stone lies on the rooster of the sunrise space carries out their first action, "Die Kraft des roten Mondes" is removed from the covered symbols and comes out of the game.
Der Takuri-Spiegel (The Takuri mirror)
- The mirror may also be used to swap the space with a lying creature, or with a hero who has already ended their day.
- If the swap moves a creature onto a space on which a creature already stands or lies, the displaced creature always moves along the arrow onto the adjacent space (also when a lying creature was moved).
- If a creature is placed directly onto the castle, it must be placed on a free golden shield. If a creature is moved onto the Tulgori camp (space 18), the legend is lost, regardless of whether the creature stands or lies.
- The mirror may not be used to swap the space of a hero or a creature on their space with that of a Maasavi, a final enemy, a creature on the space of the final enemy, or a creature on a golden shield of the castle.
- If a hero stands on the space of a Maasavi, they may use the mirror to leave the space without fighting the Maasavi.
- If a hero is moved to space 11 in the mine, they must turn over and read out an event card "Geheimer See".
Der tulgorische Hüter der Zeit (The Tulgori Guardian of Time)
- When a hero receives the tile, it is placed on a small storage space of their hero board so that the "5" is visible.
- If "Der tulgorische Hüter der Zeit" is passed from one hero to another, or placed on the game board, the tile is not turned over.
- The "Hüter der Zeit" may be used by a hero who has not yet ended their day at any time, including during their turn.
- Example 1: The hero moves 4 spaces and therefore moves their time stone from hour 3 to hour 7. Then they use the first side of the "Hüter" and move their time stone back to hour 5. Now the hero moves a further 2 spaces and again moves their time stone to hour 7. They immediately use the second side of the "Hüter" and move their time stone to hour 4. After that the hero moves a further 3 spaces. Then the hero ends their turn, and the next hero is up.
- The hero does not have to use both sides of the tile on one day.
- Using the "Hüter der Zeit" during the game turn does not end or interrupt the hero's turn.
- Example 2: The hero's path leads over a space on which a reed grass blossom lies. Because the hero, during their turn and the action "Laufen" (move), only moves their time stone with the help of the "Hüter der Zeit", they cannot pick up the blossom. For that they would have to end their turn and stop on the corresponding space.
- If in Legend 2 "Der Hexer aus Andor" cartography markers lie on the day track, moving the time stone back does not remove any marker.
- Example 3: Cartography markers lie on hour 6. The hero removes 1 of them when first moving their time stone and placing it on hour 5 when using the "Hüter der Zeit". Then the hero's time stone moves forward again to hour 7. Since it now crosses hour 6 again through the advance of the time stone, the hero may take another cartography marker from the day track.
Minenanleitung (Mine instructions)
Die Edelsteine (The gems in the mine)
- The gems in the mine do not have the diverting function described in the section "Die Edelsteine" on page 5.
- As soon as a hero collects a gem, the "fire bursts" are carried out.
- If a creature stands on a space on which a gem lies, the gem immediately comes out of the game.
Die Feuerstöße (The fire bursts)
- For a fire burst, a hero throws three red dice one after another and places them on the storage spaces in front of spaces 10, 20 and 30.
- The fire burst runs along the arrows. Its range equals as many spaces as the number thrown. A hero on one of the affected spaces loses willpower points equal to the die roll. Using a shield protects them from the damage.
- Creatures are not affected by a fire burst.
- Fire bursts are stopped at rubble.
- A fire burst is always triggered when a hero collects a gem, and at every sunrise (see fire symbol).
Der Geheime See (Space 11)
- A hero who enters the Secret Lake must end their movement there and immediately read out the top event card "Geheimer See".
Das Geröll (The rubble)
- Neither heroes nor creatures may enter or pass a space with a rubble tile.
- A hero may remove rubble from an adjacent space. This counts as the action "Kämpfen" (fight). Each attempt to remove rubble costs the hero 1 hour on the day track.
- To remove rubble, the hero's fighting value must be at least as large as the number on the rubble tile. Several tiles can be removed at once if the fighting value is at least the sum of these tiles.
- Heroes may also remove rubble together.
- Removed rubble comes out of the game.
Besondere Regelanpassungen für Ereigniskarten (Special rule adjustments for event cards)
Special case golden event card No. 1 and event card "Geheimer See" No. 6: Here only the Andor equipment board is meant. No items may be taken from the card "Tulgorischer Handel".
Die 3 Legenden – Hinweise und Sonderfälle (The 3 legends – notes and special cases)
Observe for Legends 1 and 2 the notes on sorting out golden event cards on the checklist "Die verschollenen Legenden 'Alte Geister'".
In Legends 1 and 2, no creature may enter the "Lager der Tulgori" (space 18). Otherwise the legend is lost immediately. In Legend 3, space 28 does not count as the "Lager der Tulgori".
Legende 1 – "Die Spur des Drachen" (Legend 1 – "The Trail of the Dragon")
- A destroyed farmhouse can only be repaired if all required items lie on the corresponding space.
- More wood than necessary may be placed on a farmhouse.
- After a farmhouse is repaired, wood, tools, gems and the fire tile are removed from the game; gold is returned to the supply.
- A homestead can also be repaired when no farmer tile lies there yet. The legend goal is, however, only fulfilled when 1 farmer tile has been brought to every repaired homestead.
- If a creature enters the castle, the farmers are not defeated. The creature is placed as usual on a free golden shield.
- Card "F" (version "Schweres Holz" / heavy wood): The willpower points only need to be given up 1 x when the trunk is first picked up. If a hero loses a strength point so that they must put the trunk down, the hero gives up no willpower points. If this or another hero picks up the trunk again in a later turn, likewise no willpower points need to be given up.
- Card "F" (version "Brunnen" / well): If several heroes stand on the well space, it is not allowed for one of the heroes to take the willpower points of the well and another to take the additional points.
- Movement of the Arbaks: When standing Arbaks are moved at sunrise, the Arbak on the smallest space number always begins. Each Arbak is advanced 2 spaces. No spaces, creatures or heroes are skipped. If a hero stands on one of these spaces, the hero must give up a reed grass blossom. Then the Arbak is immediately laid down (even if it has only advanced 1 space). If the hero has no reed grass blossom, they are eliminated from the game. If the Arbak enters a space on which a blossom lies, the blossom comes out of the game. The Arbak is not laid down.
Legende 2 – "Der Hexer aus Andor" (Legend 2 – "The Sorcerer from Andor")
- A time stone must cross or leave the cartography markers on the day track when advancing, for a marker to be removed. If a hero's time stone lies exactly on the hour on which the cartography markers lie and the hero ends their day, placing the time stone back on the sunrise space does not count as "leaving" the hour, and no marker may be removed.
- The fight against Shron, Siantari, Skuvar and the Maasavi proceeds by the same rules as against creatures. If the fight ends without the opponent being defeated, it recovers and has its starting values again at the next attack.
- Shron:
- Shron ignores lying creatures. The space of a lying creature is treated as an empty space when he moves.
- Whether Shron can reach a creature depends on the shortest path, i.e. the one for which Shron needs the fewest steps. If several creatures are reachable for Shron, he goes to the creature that is nearest to him.
- If several creatures are equally far from Shron, he goes to the creature on the highest space number.
- Example: Shron stands together with 1 Troll on space 63. On space 45 stands 1 Gor, on space 65 stands 1 Troll. Both creatures are reachable for Shron and equally far from him. Shron moves to the Troll on space 65, because that one stands on the higher space number.
- After the victory over a creature, the heroes decide whether Shron should be moved. The heroes receive the reward for the defeated creature as usual, and the narrator also advances, regardless of whether Shron was moved or not.
- Siantari:
- Spaces with ice tiles cannot be crossed. A hero must, upon entering the space, be able to fulfil the condition of the ice tile. Otherwise they may not enter the space.
- Face-down ice tiles may not be revealed with the help of a telescope or by the special ability of a hero.
- Skuvar and the Maasavi:
Legende 3 – "Die steinernen Drei" (Legend 3 – "The Three Stone Ones")
- Space 28 does not count as the "Lager der Tulgori". Creatures move in the direction of the arrow and do not stop on space 28. The Tulgori symbol remains on space 28 for the entire legend, even if the Tulgori are moved away from this space.
- The spring on space 37 follows the same rules as a well. If a hero stands on space 37, the spring, like a well, is not refreshed at sunrise.
- Hero special abilities that refer to wells do not apply to the spring (e.g. Thorn receives no additional willpower points at the spring).
- If the heroes use Meres' help to prevent 1 creature from moving, 1 x per day, Eara / Liphardus may not apply their special ability to the black die. The die also cannot be turned with a "Sand der Temm".
- The hero who first crosses the repaired bridge receives the Casamatuc and places it on their hero board, on the area on which gold is also placed.
- A hero may use the Casamatuc as long as they have not yet ended their day.
- As soon as one or more statues are in play, at every sunrise the topmost tile of the statue card is placed on the game board. If several statues stand on the game board, one tile from each statue card is laid out.
- If Meres takes part in the fight against a statue, the statue rolls with 1 red die fewer. This die is received by a hero of the group for the duration of the fight. The red die counts as an additional die of its own. In this way, Eara / Liphardus can also have 2 dice available.
- Example: Kram has 6 willpower points and so has only 1 of his dice available in the fight. Since Meres takes part in the fight against the statue, the group decides that Kram gets the red die. Kram can now use 2 dice in the fight. He rolls these as usual, all at once. If both dice show the same value and Kram wears a helmet (from the Andor equipment board), he may add the two values.
- If the fight was successful, the card of the defeated statue comes out of the game together with all the tiles still lying on it, the statue is placed on space 80, and the narrator advances 1 space. If Meres took part in the fight against this statue (and only then!), the tiles that were laid out by this statue are also removed from the game board.
- Important: If Meres did not take part in the fight, the tiles remain on the game board until the end of the legend.
Die Verschollenen Legenden für 5–6 Helden (The lost legends for 5–6 heroes)
With the additions "Neue Helden" or "Dunkle Helden" you can also experience all legends with 5 or 6 heroes. The rules known from the additions "Neue Helden" and "Dunkle Helden" apply. In addition, the following special features apply:
- Maasavi have 5 strength points with 5 heroes and 6 with 6 heroes.
- If you play with the "Schwarzen Herold" (Black Herald), he supports only the final enemies in Legend 2 (Shron, Siantari and Skuvar) and the 3 statues in Legend 3.
- If you play with the "Trunkenen Troll" (Drunken Troll), he has no influence on Maasavi and final enemies. This applies in particular to Shron (Legend 2). The Drunken Troll may therefore exceptionally stand with the creatures in Shron's group on one space.
Für die "Neuen Helden" gelten zusätzlich diese Regeländerungen (Additional rule changes for the "New Heroes")
Kheela / Kheelan: The water spirit may enter spaces with Arbaks, ice tiles and Maasavi. In the mine it may pass spaces with rubble and cross the bridge, even if this has not yet been repaired. It may be moved with the help of the Casamatuc if it stands on the same space as the hero. It may not be moved with the help of the Takuri mirror.
Fenn / Fennah: The raven cannot reveal Mera stones on the raft, ice tiles, or cartographers.
Bragor / Rhega: If card "F" (version "Brunnen") is in play in Legend 1, Bragor may not apply his special ability to the additional willpower points. At the spring in Legend 3, Bragor cannot use his special ability.
Arbon / Talvora: The special ability to move the strength point indicator cannot be used against Maasavi and final enemies.
Hinweis (Note): If you play with heroes from both additions, decide for yourselves whether to use the creature strength tracks ("Neue Helden") or the black eye die ("Dunkle Helden") to adjust creature strength.
Für die "Dunklen Helden" gelten zusätzlich diese Regeländerungen (Additional rule changes for the "Dark Heroes")
Darh / Darhen:
- The bone golem may enter spaces with Arbaks, ice tiles and Maasavi. In the mine it may pass spaces with rubble and cross the bridge, even if this has not yet been repaired. It may be moved with the help of the Casamatuc if it stands on the same space as the hero carrying the Casamatuc. It may not be moved with the help of the Takuri mirror.
- The bone golem can only be brought into play by defeating creatures. Defeating Maasavi or statues does not bring the bone golem into play.
Drukil / Drukia: In addition to the known rules of the card "Hautwandler in Bärengestalt" (Shapeshifter in Bear Form), the following additional rule supplements apply to Drukil / Drukia:
- The bear can carry reed grass blossoms. It cannot carry other items, so also no tree trunks.
- The bear is perceived by the Arbaks as an inhabitant of the forest and is not attacked by them. The shapeshifter can therefore enter or pass an Arbak's space in bear form and also loses no willpower points on adjacent spaces. It is also not eliminated from the game if it stands on an Arbak's space. Important: This applies only to the hero in bear form!
- Even if the bear is not attacked by the Arbaks, it may use reed grass blossoms to lay down Arbaks and to gain strength points.
- If the bear stands adjacent to an Arbak at sunrise, swapping the playing figure does not count as entering the space, and the hero loses no willpower points. If the bear transforms into a human on the space of an Arbak, it must be able to give up a reed grass blossom immediately, in order not to be eliminated from the game.
- If the bear stands on a space with a Maasavi, it does not move even if it has fewer than 5 willpower points.
- 1–4 willpower points (pure instinct) / 5–9 willpower points (memory of being human):
- If the bear enters the Tulgori camp (space 18), the legend is lost immediately.
- If the bear stands on a farmer's space in Legend 1, the farmer is defeated and the legend is lost immediately.
- The bear may stand on the same space as the Tulgori, Hallgard, Meres or Reka. It cannot, however, move them.
- The bear cannot enter spaces with ice tiles, not even through movement in the direction of the nearest forest space ("Reiner Instinkt").
- 10–14 willpower points (a hero in bear form):
- The bear may enter the Tulgori camp.
- It may move farmers, the Tulgori and Hallgard along with its figure, and may now also move Meres or Reka for 1 hour on the day track up to 4 spaces.
Forn / Forr:
- In Legend 2 "Der Hexer aus Andor", Forn / Forr always starts on space 39 and not on the space that corresponds to their rank number. If there is a hero with a higher rank, Forn / Forr is placed on space 39 with that hero.
- Shron and the creatures that have joined him count as final enemies. They may enter the space of the half-skral and do not skip it.
Leander / Leane:
- With the help of the ability "Das sehende Auge" (a "1" at the top of the dice track), no Mera stones on the raft, no ice tiles and no cartographers may be revealed.
- If the group has 1 red die in the fight against a statue in Legend 3, Leander / Leane cannot use it.
- If the seer uses Reka's Snake (Legend 2), the two topmost dice on the dice track are added (and then both are taken from the dice track).