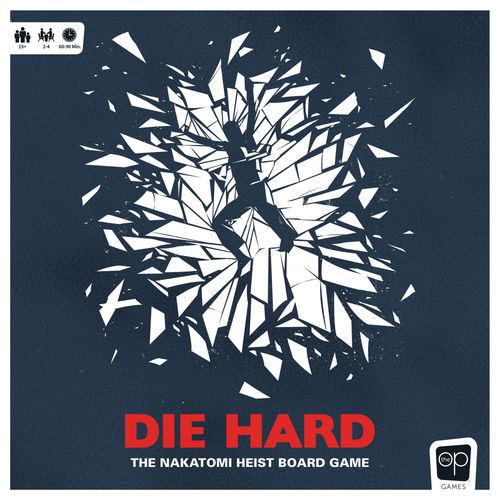
Die Hard: The Nakatomi Heist Board Game
Die Hard: The Nakatomi Heist Board Game Rulebook
Table of Contents
Table of Contents
Components
1 Double-Sided Game Board (DO NOT UNFOLD), 80 John McClane Action Cards, 40 Thief Action Cards, 25 Lock Cards, 1 John McClane Player Board, 1 Lock Tracker Card, 1 John McClane Figure, 1 Hans Gruber Figure, 7 Thief Figures, 1 Combat Die, 17 Blue Lock Cubes, 12 Red Support/Draw Blood Cubes, 1 Lead Thief Marker, 40 Objective Tokens, 16 Objective Tiles, 1 Rulebook.
Game Objectives
John McClane: In order to defeat Hans Gruber and the team of Thieves John must survive all three Acts, completing key Objectives in each Act. If he survives to the final stage and pushes Hans Gruber out the window he will save not only his wife Holly, but also the rest of the hostages to win the game.
Thieves: The goal of the Thieves to steal the $640 million. Together they must work their way through the first six levels of the lock on the Nakatomi vault, and then set charges to blow-up the roof. If they can do this before John McClane completes his Objectives, or if they can kill John McClane, they will win the game.
General Set-Up
These are the steps for basic set-up and Act I set-up. There are additional set-up instructions for Act II (see p.14) and Act III (see p.16-17)
-
Place the folded game board in the center of the table with the Act I floor plan showing.
-
Decide who will take on the role of John McClane. The rest of the players will be the Thieves. Alternatively, have each player roll the combat die. The player with the highest roll will play as John McClane.
-
Sort the John McClane Action Card deck into three Acts: Act I (text in all three boxes), Act II: (text in the grey and black boxes), and Act III (text only in the black box).
-
Shuffle the deck of Lock Cards to create a draw pile.
-
Shuffle the deck of Thief Action Cards. Each Thief player should draw a hand of three Action Cards.
-
Separate the Objective Tokens and Tiles by Act.
-
Place the Support/Draw Blood Cubes, Combat Die, extra Figures and Lock Cards into a general supply to one side of the game board.
Act I Set-Up
-
Place the Act I Objective Tiles on the game board (see p. 12-13 for more details). Place the three Ammo Tokens on the Machine Gun Objective Tile and the Shoes Token on the Shoes Objective Tile.
-
Flip the Act I Objective Tokens so that the "I" sides are face-up. Shuffle and randomly place them onto the corresponding color spaces as shown. McClane's Tokens always go on red spaces. Thieves' Tokens go on the dark grey obstacle spaces in this Act.
-
Place John McClane's Figure on his start space on the game board.
-
Place a Thief Figure on each of three green spaces on the game board.
-
Shuffle only the Act I Cards and place them in the draw pile space on the John McClane Player Board. McClane draws five cards as his starting hand.
-
Draw the top two cards from the Lock Card pile to create the first lock combination, placing the cards one on top of the next, so that all of the numbered squares are visible and adjacent to one another in a 2 x 4 grid pattern. Place a Blue Cube on the first space on the Lock Tracker Card.
Actions
Common Actions
Move: Move up to the number of spaces listed. Figures may only move to adjacent spaces, not diagonally. They may not move through other Figures. Dark grey spaces represent obstacles, and moving through them takes 2 moves, all other spaces only require 1 move. A Figure that ends movement on one of their Objective Tokens may reveal and collect that Token. If you end your movement on another team's Token, do not reveal it, leave it on the space.
- Connected yellow spaces: Yellow spaces connected by lines are considered adjacent for purposes of movement, and take 1 move to move between. Only John McClane may pass from one yellow vent space to another connected one. Any Figure may pass from one yellow stairs space (Act III) to another connected one.
Example: If the player has a Move 3 Action he can travel through 3 spaces of any hue UNLESS he wants to land or pass through a dark grey space, in which case he can only travel through 2 as the dark grey space costs 2 moves.
Shoot: Figures may shoot at targets within a straight, non-diagonal line of sight from their space, with at least one empty space between themselves and the target. To shoot, the active player must roll a value equal to or higher than the value listed on the shoot action. This value increases by 1 for each obstacle space in between the shooter and the target, including the spaces the shooter and target are on. There is no maximum range for a shoot action.
- If a Thief is successfully shot he is killed and removed from the board.
- If John McClane is successfully shot he must discard the top card from his Action Card draw pile, and the Thieves add one Token to the 'Draw Blood' Objective Tile.
Punch: Figures may only punch Figures on non-diagonally adjacent spaces. To punch, the active player must roll a value equal to or higher than the value listed next to the punch action. For each Figure on a dark gray obstacle space add 1 to the roll requirement.
- If a Thief is successfully punched he is killed and removed from the board.
- If John McClane is successfully punched he must discard the top card from his Action Card draw pile, and the Thieves add one Token to the 'Draw Blood' Objective Tile.
John McClane Actions
Sneak: The sneak action allows John McClane to move up to the number of spaces listed on the action. In addition, John may move through spaces occupied by Thieves but may not end his movement on these spaces. John may also move onto obstacle spaces using 1 movement rather than the 2 movements usually required. Lastly, when using the Sneak action John McClane may not be targeted by a Punch or Shoot action.
Shove: John can use this action to move an adjacent Thief 1 space in any non-diagonal direction. To Shove, John must roll a value equal to or higher than the value listed on the shove action. Add 1 to the die roll requirement if John or the target is on a gray obstacle space.
Recover: When John uses this action, he may take the top card of the Discard pile and add it to his hand.
Support (McClane only, Act II/III): When taking this action John McClane may talk to Sgt. Powell to add one Red Support Cube to the 'Radio' Objective Tile (max of six). As the support track on the Radio fills up, John will earn increasing bonuses to his attack rolls.
Thief Actions
Lock: For each Lock Action the Thieves may cover any one numbered space on the current Vault Lock.
Reinforcements: If the Thief players have fewer than the starting number of Thief Figures in play for the current Act they may forfeit all actions and discard the middle card to return a Thief Figure to the board on any Thief starting space. The Thieves may still use the numbers from the other two cards to place cubes on locks this turn. The maximum number of Thieves in Act I is three, in Act II it is six, and all seven Thieves and Hans Gruber appear on the board in Act III.
How to Play as John McClane
John McClane's goal is to save the hostages. To do this John must manage his stack of Action Cards carefully. If the deck of cards ever runs out John McClane has suffered a fatal blow and dies. In each Act John has a set of Objectives he must complete before racing to the exit space to move to the next Act.
John McClane's Action Cards
John has a separate deck of Action Cards for each Act. Additionally, each card he uses in an Act are passed forward to use again in the next Act. The cards that are passed forward become stronger as they progress, so an Act I card that is used in Act II will provide better actions. John's actions include Move, Sneak, Punch, Shoot, Support, Shove, and Recover (see explanations of these actions on p. 6-7). John has a Player Board to help him keep track of his cards.
When John uses an Action Card it is placed in the PLAYED CARDS section on his Player Board. At the end of each Act these cards will be shuffled in with the cards for the next Act. If John discards an unused Action Card it is placed in the DISCARD PILE section on his Player Board and not passed forward to the next act. Discarded John McClane Action Cards can only be recovered if John McClane uses a card with the Recover Action.
Drawing John McClane's Action Cards
John McClane draws a hand of five cards whenever his hand is empty. He then plays one card per turn until only two cards remain in his hand. When John has only two cards in his hand, he must discard those cards and draw a new hand of five cards. This means that John will have to make careful choices about which cards to use (and pass forward to the next Act), and which cards to leave behind.
If there are less than five cards remaining in the Draw pile John draws all of them. However, if there were two or fewer cards in the draw pile John takes a fatal hit because he is out of actions. The Thieves immediately win regardless of which Act it is.
Playing John McClane's Action Cards
All players — John and the Thieves — will simultaneously select one Action Card to play.
John will reveal his card first and complete the action(s) listed on the card corresponding to the current Act.
The actions may be completed in any order, and John may choose not to complete some or all of the listed actions. Additionally, any action may be replaced with a 'MOVE 1' action. See 'Actions' on pages 6-7 for more details.
Tips: John will need to be efficient in using his cards to make sure he completes all of his Objectives before running out of cards. Avoiding the Thieves will help John dodge attacks, which can cost him valuable cards. At the same time, only the played cards are passed forward to the next Act so John must think about what cards will help him now, as well as which cards may help him later.
Choosing an efficient path will also ensure that John does not waste any actions moving around the board. Saving shoot, punch, shove or sneak cards for the right moment will also help ensure John can get past the Thieves if they try to block his path.
How to Play as the Thieves
The Thieves share a single deck of Action Cards that not only determine the actions they'll take on their turn, but also which code segments they'll use to hack the computerized lock and program their drill for the mechanical locks of the vault.
Each Action Card has a odd number, from 1-19. In addition to the numbers, each Thief Action Card also has a list of actions that the Thieves can use. The Thieves' actions include Lock, Move, Punch, Shoot, and Reinforcements (see explanations of these actions on pages 6-7).
Each turn the team of Thieves will collectively select three Action Cards to use. The Thieves select their cards at the same time that John McClane is selecting his Action Cards, but always resolve their actions after John McClane.
The Thieves must choose their cards in silence and may not use signals to communicate about their choices, which makes the little information they can share with each other about their cards critical in their goals of stopping McClane and cracking the locks.
Selecting Three Thief Action Cards
Thief Action Cards are selected in slightly different ways depending on the number of Thief players. Regardless of the number of Thief players, all Thieves will draw back up to a hand of three cards at the end of the turn. Follow the instructions below based on the number of Thieves.
One Thief Player: If there is only one Thief player, that player takes the top card off of the Thief Action draw pile and plays it face-down without looking at it. They then draw a second card from the deck, which they look at and then play face-down with the first card. Lastly, they select any card from their hand of three cards to add to the first two, finalizing the selection of three Action Cards for this turn.
Two Thief Players: If there are two Thieves, use the 'Lead Thief' Marker to indicate which Thief chooses the actions for the turn. The Lead Thief will draw the top card from the Thief Action deck and show it to their teammate before placing it face-down on the table. Then each Thief player will silently add one Thief Action Card from their hand to the face-down card, thus forming the set of three Action Cards that will be used this turn.
Three Thief Players: If there are three Thieves, use the 'Lead Thief' Marker to indicate which Thief player is the lead for this turn. Each turn, the Lead Thief selects one card from their hand and shows it to their two teammates before placing it face-down on the table. The other two Thieves each silently add one Action Card from their hand to the card they were shown by the Lead Thief. This forms the set of three Action Cards used for the turn.
Resolving the Selected Thief Action Cards
After John McClane has completed his action(s) for the turn, the Thieves will first attempt to break through the vault locks and will then resolve their actions. To do this they reveal their three selected Thief Action Cards and place them in order from the lowest number to the highest.
The highest and lowest value cards will be used to break through the vault locks. (See 'Locks' on p.11)
The middle value card is used to determines which actions the Thieves can complete this turn.
The actions on the middle value card may be completed in any order, using any Thief Figure on the board. Different actions may be completed with different Thief Figures, but single movement actions may not be split among more than one Thief.
Example: In this hand, the numbers 1 and 9 are used on the lock, and the Thieves take the actions on the middle card.
Any action may be replaced with a 'MOVE 1' action. For example, if a punch action is available but no Thieves are adjacent to John McClane, the Thieves may instead use this action to move a Thief 1 space. The Thieves may also choose not to use an action at all.
Alternatively, all three actions on a card may be forfeited to use a 'reinforcement' action. This action allows the Thieves to add one Thief Figure to the board. See the 'reinforcements' in the 'Actions' section (p. 7) for more details.
The Lead Thief has the final say regarding how to use the available actions. The Lead Thief Token passes to the next Thief to the left at the end of the turn.
Locks
The highest and lowest value Action Cards selected by the Thieves are used to first hack into the computerized vault locks and then to program the drill for the mechanical locks. The white numbers on these cards (1, 3, 5, 7, 9) are the code numbers that can be applied to the lock — so an 11 becomes a 1, a 13 is a 3 and so on. The Thieves can use the numbers to cover two spaces on the Lock Cards that match those numbers only if those numbers appear adjacent to each other on the lock (diagonal adjacency does not count). If the two numbers do not appear next to each other, or if only one of the two numbers appears on the lock combination, then the Lead Thief may only cover one of those numbers this turn. Numbers are covered using the Blue Lock Cubes.
Example: If the lowest card revealed is a 1 and the highest is a 19, the Thieves may place Blue Cubes on the adjacent 9 and 1.
If all of the numbers on the current lock are covered then the Thieves have broken through that lock. They discard those Lock Cards and draw new ones to create a new lock, and advance the Token on the Lock Tracker Card one space. If the Thieves have remaining Lock Actions when a lock is completed, they may use those Lock Actions on the new lock. Lock status persists from each Act to the following Act; when an Act ends, leave the current lock intact with the Blue Lock Cubes on it. The Thieves will continue working on that lock when the new Act begins. As the game progresses the locks will become more complex. There are six locks that the Thieves must break through. The seventh lock can only be broken by a power outage, which the FBI will trigger when the Thieves blow up the roof. Each lock is made up of the number of Lock Cards listed below:
| Lock # | Number of Cards | Grid Size |
|---|---|---|
| 1 | 2 | 2 x 4 |
| 2 | 2 | 2 x 4 |
| 3 | 3 | 3 x 4 |
| 4 | 3 | 3 x 4 |
| 5 | 3 | 3 x 4 |
| 6 | 4 | 4 x 4 |
Lock Strategy Guide: Being efficient with the vault locks is key to a Thieves' victory. Whether playing as a solo Thief, or working with others, it is important to pay attention to which pairs of numbers will best help to open the current lock. Here are a few tips:
- A strong combination of number pairs from Action Cards, Lock Actions (found on 1 and 3 Action Cards), and Objective bonuses is the key to completing the six locks quickly.
- Look for which numbers are most common in the lock or for numbers that are adjacent to a variety of different numbers. Playing Action Cards that have common numbers increases your chances of covering two spaces instead of just one.
- Be careful not to isolate single numbers on the Lock Cards, as this will eventually force you to only cover one space on a turn.
- When using extra Lock Actions from Action Cards or Objective bonuses try to cover numbers that are most isolated, or numbers that are not already in your hand of Action Cards.
- If playing with two or three Thief players, the Lead Thief should be thoughtful in selecting which card to show to their teammate(s). The card shown can reveal a great deal.
- If it includes a number not present in the current lock this may communicate that the Lead Thief does not have any cards that can help with the lock.
- Playing a 1 or 19 guarantees that a 1 or 9 respectively will be part of the lock pair and can help signal which cards the other Thief or Thieves should play. It also gives other Thieves a chance to play a matching 1 or 19 card so that the Thieves can use the powerful actions on these cards. Playing a pair of 1's or pair of 19's is the only way these cards will be used as the Action Card.
Set-Up and Objectives for Each Act
Each of the game's three Acts has a distinct set of Objectives for both John McClane and the Thieves. These Objectives are tracked and represented by printed chipboard pieces that can serve as important story elements. As the Thieves complete their Objectives they will earn additional Lock Actions to help them break into the vault faster. As John McClane completes his actions he will be able to advance towards victory. In addition, several of John McClane's Objectives will earn him bonuses that he can use throughout the game. All Thief Objectives, with the exception of those in Act III, are optional, but the bonus Lock actions that can be earned from Objectives are key to breaking into the vault.
Moving from One Act to the Next
When John McClane has completed all of his Objectives and moved onto the 'McClane Goal' space, he leaves the floor and triggers the end of the current Act. The Thieves may resolve the final set of Action Cards they had selected for the current turn in order to complete the Lock Actions or to complete remaining Objectives to earn the associated bonuses. Thieves may no longer attack John McClane once he has left the current floor.
Act I
Act I Set-Up
Act I Set-up instructions were provided with general set-up instructions on page 5.
John McClane's Act I Objectives
John McClane must complete all Objectives before moving on to the next act, and may complete them in any order.
Find the Machine Gun: John must move to the the Objective Tokens to find the Machine Gun Token. When John finds the Machine Gun Token he collects the Objective Tile, which comes with three Ammo Tokens. At any time John may spend one Ammo Token from the machine gun to add a 'SHOOT 4+' action to his turn. More Ammo Tokens can be found in Acts II and III. There is no limit to how much ammo John can carry.
Find the Radio: John must locate the Objective Token for the Radio. Once the Token is found John collects the Radio Objective Tile which he will keep for the remainder of the game. The Radio has a 'support' track, which must be filled, from left to right, with Support Cubes to activate its ability. The Radio does not come with Support Cubes, these must be added by using the 'Support' action or by finding 'support' Objective Tokens in Acts II and III. As the Radio is filled with Tokens John will earn increasing bonuses of +1 or +2 to all of his combat die rolls.
Acquire the Shoes (that don't fit): The first time John kills a Thief place the Shoes Token onto the space where the Thief was standing. John must collect this Token to complete the Objective. Once completed turn this Tile face-down.
If John reveals the Hazard Token he must discard the top card from his Action Card draw pile.
Thief Act I Objectives
Thief Objectives are optional, but completing them will earn valuable bonus actions:
Draw Blood: This is the only Thief Objective that remains in play for the entire game. Each time the Thieves damage John with a punch or shoot action they add one Red Cube to this Objective. When the card is filled the Thieves earn two Lock Actions and then remove the cubes to reset the Objective. Reward: two Lock Actions, each time completed. Do not clear cubes from this Tile when an Act ends.
Track McClane: To complete this Objective the Thief players must have Figures standing on two different uncovered red (McClane) Objective spaces at the same time. Reward: two Lock actions. Once completed turn this Tile face-down.
Capture 3 Hostages: At the start of Act I, six green Objective Tokens were placed face-down onto the dark grey obstacle spaces on the map. To complete this Objective the Thieves must search these spaces to reveal the three Tokens that contain hiding hostages. Reward: two Lock Actions. Once completed turn this Tile face-down.
Act II
Act II Set Up
-
Remove any remaining pieces from Act I from the game board. The 'Draw Blood' Thieves Objective is carried forward to Act II along with any tracking Tokens.
-
Unfold the game board once to reveal the Act II board. The game board will still be folded in half at this point.
-
Place the Act II Objective Tiles face-up on the corresponding spaces on the edge of the game board.
- Shuffle the Act II Objective Tokens face-down. Randomly place them on the red spaces.
- Place the Broken Glass Tokens on the Objective Tile.
-
Place the John McClane Figure on the indicated start space on the game board.
-
Place a regular Thief Figure on each of the green spaces on the game board.
-
John McClane discards all cards remaining in their hand and Draw Pile. Take all the cards in the the Act I played cards pile and shuffle them with the Act II Action Cards. Then they draw a hand of five cards as a starting hand.
-
John McClane keeps the Radio, Explosives, Machine Gun, along with any remaining ammunition from Act I.
-
The Thieves carry over the Lock Cards and Lock Tokens for the lock they were working on at the end of Act I.
-
The Thieves shuffle all of their Action Cards together and draw new hands of three cards each.
John McClane's Act II Objectives
Find the Detonators and Explosives: John must move to the Objective Tokens on the board to find the Tokens with the Detonator and the Explosives. Along the way he may also discover some additional ammunition for his Machine Gun and/or support from Sgt. Powell, or he may stumble into a hazard.
Drop the Detonators and Explosives down the Elevator Shaft: Once John has found the Explosives and Detonator he must move onto the Elevator Shaft Space to drop them down to the ground floor causing a massive explosion. Once completed turn this Tile face-down.
Kill a Thief, and throw him out a window: John must notify Officer Al Powell that there is a problem in Nakatomi Plaza. To do so, he must kill any Thief and then move to a space adjacent to a window in order to throw the body down onto Al's squad car. The first Thief John kills in this Act should be placed on its side in the space in which it was killed. John must then move to that space to collect the Thief's body, placing on the Objective Tile as a reminder that he has completed this step. Lastly, John must move to any window space where he can throw the body onto Al's squad car. John earns one Support Cube for completing this Objective. Once completed turn this Tile face-down and return the Thief Figure to the supply.
Thieves Act II Objectives
Thief Objectives are optional, but provide valuable rewards.
Draw Blood: This Objective from Act I remains in play. Reward: two Lock Actions, each time completed.
Shoot the Glass: There are five window panes inside the office (designated by green-hued outlines around two adjacent spaces seperated by a solid wall) that the Thieves must shoot to complete the action. Shooting each window requires the use of a Shoot Action, but does not require a die roll — the Thieves cannot miss a large glass window. Thieves cannnot shoot the window from below or above, they must be facing it from either side with at least one space between them and the solid wall. When the Thieves shoot glass, place a Broken Glass Token on the board in the two marked adjacent spaces. Once the glass is broken it is no longer a barrier.
If John McClane is in either space adjacent to a window when it is shot, or if he steps on a space with a Broken Glass Token he discards the top card of his draw pile. Reward: three Lock Actions. Once completed turn this card face-down.
Fire the Rocket: There are two rocket launcher spaces on the Act II Board. The Thieves must move a Figure onto either of these spaces and use a 'Shoot' Action to complete the roll requirement (odd or even). Doing so on either space will successfully fire the rocket at the SWAT tank and complete this Objective. Occupying both spaces at once will make any attack roll an automatic success. Reward: two Lock Actions. Once completed turn this card face-down.
Act III
Act III Set-Up
-
Remove any remaining pieces from Act II from the game board. The 'Draw Blood' Thieves Objective is carried forward to Act III along with any tracking Tokens.
-
Unfold and turn the game board over to reveal the Act III board.
-
Place the Act III Objective Tiles face-up on the corresponding spaces on the edge of the game board.
- Place the Hostage Tile on the helipad.
- Place the Detonator Tokens on the matching Objective Tile on the game board.
-
Place the John McClane Figure on his Start space.
-
Place a regular Thief Figure on each of the green spaces, and the Hans Gruber Figure on the 'Hans START' space.
-
John McClane discards all cards in hand and in his Draw pile. Then shuffle John McClane's Act III Action Cards together with the cards played in Act II to form a draw pile. Then draw five cards.
-
John McClane keeps the Radio, Machine Gun, and any remaining ammunition from Act II.
-
The Thieves carry over the Lock Cards and Lock Tokens for the lock they were working on at the end of Act II.
-
The Thieves shuffle all of their Action Cards together and draw new hands of three cards each.
John McClane's Act III Objectives
To win, John McClane must complete all three Objectives in order.
Scare the Hostages off of the Roof: On the roof John can use a Shoot Action to fire into the air, scaring the hostages if he has a direct line of sight. He does not need to roll a die for the Shoot Action. Each time he does this he can move the Hostage Tile one space away from if there are no Thief Figures blocking the path. Once the Hostages reach any flight of stairs they will retreat back into the building and the Objective is complete. John can shoot through the Hostages, which count as two obstacle spaces. Once completed turn this Tile face-down.
Swing on the Fire Hose: After completing the rooftop Objective John must move to any labeled 'ledge' space to swing down and through the corresponding window on the 30th floor, as indicated by the matching letters. This counts as one space of movement. Once completed turn this Tile face-down.
Kill Hans Gruber: Each time John McClane successfully uses a Shoot, Punch or Shove Action on Hans Gruber, John can move Hans Gruber one space backwards (away from John) or to either side. Hans Gruber cannot be killed with a Punch or Shoot Action. Instead John must use these attacks along with Shove Actions to move him to a window space and then needs one final attack to push him through the window to win the game.
OPTIONAL: John may search the Tokens on the board for bonus ammo and Support Actions.
Thieves Act III Objectives
To win, the Thieves must complete the Open the Sixth Lock and Trigger the Roof Explosion Objectives, in that order.
Draw Blood: This Objective from Act I remains in play. Reward: two Lock Actions, each time completed.
Open the Sixth Lock: When the Thieves have opened all six locks, turn this Tile face-down.
Trigger the Roof Explosion: The Thieves must first complete all six Vault locks, before they can set the roof detonators. Once they have done so, they may activate the detonator spaces in numeric order by occupying those spaces. Once a detonator has been activated it cannot be turned off, even if the Thief moves to a different space or is killed. Each time a Thief activates a detonator, place it on the Objective Tile. If the Thieves trigger the roof explosion the FBI will cut power to the building, inadvertently opening the seventh and final vault lock and giving the Thieves access to the money. If this happens the Thieves win.
Special Act III Rules
- Hans Gruber is a special Figure controlled by the Thieves. Hans can not use 'Move' Actions, but can still use 'Shoot' and 'Punch' Actions.
- Stairs connected by lines are considered adjacent spaces for purposes of movement and 'Punch' or 'Shove' actions, but are not considered a continual line of sight or valid path for 'Shoot' Actions.
Game End
Die Hard can end in any act, but will always end in one of the three following ways.
- John McClane dies
- Thieves break into the vault
- John McClane kills Hans Gruber
If John McClane runs out of Action Cards during any Act before he completed his Objectives and reached the Exit space on that board, then he dies and the Thieves win.
If the Thieves break through all six of the Vault locks and trigger the roof explosion, then they have successfully stolen the $640 Million in bearer bonds and they have won the game.
If, in Act III, John McClane kills Hans Gruber, then John McClane will have saved the hostages, and prevented the Thieves from stealing the money. This is the only way for John McClane to win the game.