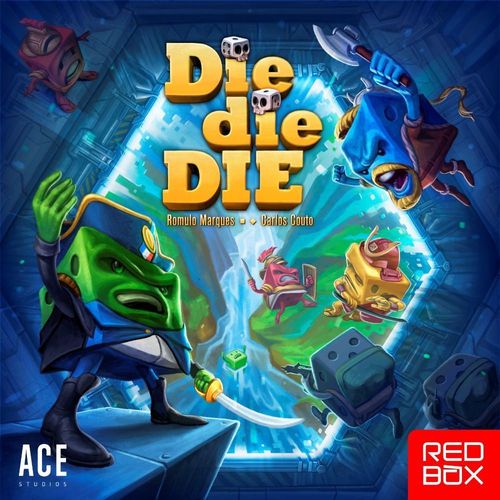
Die die DIE
Die die DIE Rulebook
Table of Contents
Table of Contents
Components
- 1 Launching platform
- 1 Arena composed of 6 pieces that fit together
- 25 Dice in 5 different colors
- 5 Character's sheets
- 1 Scoring board
- 5 Scoring pieces in 5 different colors
- 1 Era marker, 1 Quarantine marker and 1 Armistice marker
- 5 Turn order markers
- 14 Power Cards
- 4 Maps in two double-sided boards
- 3 Monuments
- 1 Rulebook
Assembling Die die DIE!
Hello! I'm Professor DIEinstein, Chief of research at the D.D.D. Labs! I'm going to show you everything you need to know in order to play Die die DIE! and help us on our research!
If you just got started, we must first assemble all the pieces of the game. Don't worry, you only have to do it once! First, carefully punch off all the cardboard pieces.
- Now, assemble the arena parts fitting the 6 ends with the same numbers.
- You can choose between different maps to play Die die DIE! Just choose one and fit it in the bottom of the arena box.
- Now, put the platform over the arena.
- And... it's done! Now you can use the spaces inside the box to store all the other components of the game. Cool, right? We are ready to play!
Game setup
Decide with the other players on which map you will play, place it on the bottom of the arena box as instructed in the assembly. If it is your 1st time playing Die, Die, Die we recommend you to use the World War scenario.
Let's show you how the game is in its simplest form using the World War scenario. During the explanation, you will find text boxes that shows other ways to play.
Each player chooses an army, a character sheet and its color dice.
Put the score board on the table. The player who most recently played a wargame is the first to play, followed by the others, clockwise. Distribute the turn markers and create a stack with the Score markers (in order of play with the first player on top). Place the Era marker in the slot "Era I".
The World War map must be played in 3 Eras. The player with most victory points at the end of the last Era is the winner of the game.
Let's start the game!
Advanced rules: Power Cards
If you want to play Die die DIE! with more tactical options and dramatic outcomes, we recommend you try out the Power Cards!
Give a Power Card to each player, draw and reveal another card and put it on the table.
Just set apart one card from the deck of Power Cards for each player, plus one. The remaining cards return to the box. Now, give a Power Card to each player and set the remaining card on the table. We will explain how to use Power Cards in page 9.
Playing an Era
Each Era in Die die DIE! is composed of three phases: Attack, Movement, and Combat.
Attack Phase
From the first player and following the order indicated by the Scoring pieces, the players alternate finger-flicking their dice into the arena. Each turn, the player can attack, shoot, and build a tower, in this order.
Player's turns: Several times in this manual we will refer to the order of Scoring pieces to establish the order in which players must play. This means, from highest to lowest score, and from top to bottom in cases of tie, since the pieces can stand on top of each other.
Finger-flicking science: Finger-flicking is serious business! You need to press a finger against your thumb to make it hit the dice. You can control the strength of your flick, but can't simply push the dice with your fingers. But remember: keep the game accessible to all! If a player is unable to finger-flick the dice, they can flick it in any way that feels comfortable.
Attacking: Take one of your dice, place it anywhere on the platform and flick it into the arena. Remember that your goal is to acquire territories and add up the highest number of victory points, which are indicated by the numbers in each territory on the map. When attacking, your dice can knock and move other dice inside the arena, but that's okay! That's how it should be.
Ooops! Did you make the dice fly out of the arena? No problem! Take it back and try flicking it again until it falls inside the arena. If your attack puts another dice out of the arena, players must flick it back into the arena immediately, following the order of the Scoring pieces.
Shot: If at the beginning of your turn to attack there is a tower of your own in the arena, you can hit the die at the top of the tower. You will not be able to do it during your first and second attacks, as you will not have built your towers yet (see "Building a Tower").
Watch out! Be careful whenever you move a dice in the arena. A slight bump may change the whole game. After moving a die, it can't be moved back where it was.
Building a tower: As soon as you get at least two dice in the arena, you'll be able to build a tower by the end of your attack and shot. To build a tower, get one of your dice in the arena and put it on top of another of your dice. If this tower is still standing by your next attack turn, you will be able to shoot from its top. Towers are also very important during the Combat and Scoring phases as we will explain later.
Following the order of the Scoring pieces, players will alternate their moves during the Attack Phase by flickering the dice into the arena, a shot from a tower and building a tower until all players have used their five dice. The Attack Phase ends and the Movement Phase begins.
Movement Phase
Following the order of the Scoring pieces, each player adjusts their dice at the territories lines.
You must place every dice and towers within the limits of a territory. If the die or tower is on the border of a territory, you must move it inside a territory without altering the number of the dice. If, for any reason, you end up with a die in the arena that doesn't have a clear result remove it from that Era.
Once every players finish their Movement Phases, we move on to the last phase of the Era.
Advanced rules: Power cards: After adjusting your dice during your movement phase, you can use the Power Cards in the following ways:
- Use the Power Card in your hand and discard it immediately after it takes effect.
- Exchange the Power card in your hand for a card on the table, activate its effect and, then, discard it.
- Place the card from your hand along with the other cards on the table, making it available to other players and move one dice or tower to an adjacent territory.
Combat Phase
That's when things get ugly: the dice will fight to establish supremacy in each territory. Every player will count their points following the order of their Scoring pieces, and advance on the Scoring board.
Who wins? Add up the total points of the dice and towers of each player in the territory. A tower is worth the value of the die on top plus 1. Example: a Tower with a die of value 6 at the top is worth 7 in combat. The player with the highest sum is the winner and takes all the victory points scored in the territory.
If the combat is tied, the players will share the territory points, rounding it up. Example: two players are tied on a 3 points territory, so each player scores 2 points. Three players tied in a territory that is worth only 1 point will score 1 point each.
Additionally, each Tower is worth 1 Victory Point, even if the player is defeated in the same territory.
Example: Dicenturions has a die worth 4 points, and Diepoleons has a die worth 2 points. Dicenturions wins the combat and scores 2 Victory Points (as indicated on the Territory) in their combat phase.
Example: Diekings has a tower worth 5 points (a die worth 4 points + 1 extra Tower point), and Samudie has a die worth 3 points and another worth 2 points, for a total of 5 points. The game is a tie, and this Territory is worth 2 points, so each player will score 1 Victory Point on their Combat phase.
Scoring: It's important to count each player's victory points following the score markers' order. Each player adds all their points (territories and towers) and move their marker on the score track. A marker may end over other adversary markers.
Dicenturion has 5 victory points and score 3 more. His scores token now lays in the top of the yellow one with 8 victory points. (Illustration caption; the score track example is shown on page 7.)
End of an Era (and the beginning of the next one)
After an Era's Combat Phase, the players pick their dice from the arena, placing them on their character sheets again. The score track now shows the player's order for the next Era, distribute the turn order markers again, following the score markers' order. Each Era follows exactly the same rules explained beforehand on this manual.
Advanced rules: If you're playing with the Power Cards: Shu[the rest of this word is garbled in the printed rulebook: a font glyph overprints it, so the source is illegible at this point] each player and leave the remaining one on the table, face up, available to all players.
Editor's note: the first word of this instruction is corrupted in the source PDF and has been left as printed. Its intended wording is not confirmed by the source.
End of game
On each map, a set of Eras must be played. In the World War map, the game ends at the end of third Era. The winner will be the player with more victory points at the end of the Eras determined by the map. In case of a tie, the player whose marker is on top of the stacked score markers is the winner.
Optional Rules
Here we suggest some rules that can turn your Die die DIE game even more explosive!
Summary Execution: Dice that end outside the map (or even outside the box!) due to flicks can't be played again. War is merciless like that!
Guerilla: On the Combat Stage the players add their dice with values 1 or 2 to your score if they win the battle. That's it, if you win a battle in a territory worth 3 points and you have a die worth 2 points, you'd win 5 points! This optional rule adds a new dimension to the Backflip Power Card and value to your lowest dice, making the tactical movements even more interesting.
Thank you for your interest on our research! Now that you already know everything about Die die DIE! I can show you our reports about the worlds we discovered and the battles we observed!
Power Cards
Power cards are optional, they add special powers that the players can use during the game. Through this manual, you already saw how they are used in game (just look at the advanced rules' boxes!) and now lets see how they work in detail:
- Dynamic Duo - Take two dice of your color and swap their places on the map. Take extra care to not move any other dice while doing that!
- Backflip - Invert one of your dies to its opposite face. A curious fact: did you know that adding the two opposite faces of a common die always equals 7? Therefore, a die showing 1 becomes 6, 2 becomes 5 and 3 becomes 4!
- Quarantine - Place the quarantine marker in a territory. Only you can move or alter dice in the quarantined territory. This is a power that works better if you're the first to play on the Movement Phase. As you pick the quarantine territory, your adversaries won't be able to adjust their dice into your territory or use their power cards to alter any dice there.
- Stout - When a combat ends in a tie, the tied players divide the points between themselves, rounding up when needed. The player who has used this card on the Movement Phase earns +1 Victory Point on each territory where they end tied with other players.
- Secret Tower - This happens exactly as Attack Phase's action "Build a tower", only that it happens on the Movement Phase.
- Fusion - Choose one of your dice to remove from the map. Distribute its value among your dice on the map. Example: a player removes a die with a value of 3 and add this value to a die on the map with value 2, ending with a die with value 5. The player could also distribute the value among two or more dice, adding, for example, 2 to one die and 1 to another one.
- Shadow Tactics - Choose one of your die. This die copies the value of another die on the same territory or on its border.
- History Repeats Itself - Choose one of the discarded Power Cards to use immediately. Then discard History Repeats Itself.
Maps
World War (3 Eras)
Recommended for 3, 4 or 5 players.
On this global battle, the dice fight for several different territories across the world.
Pirate Ship (4 Eras)
Map for 2 players.
The players are pirate captains that board each other's ships. The players must be on opposite sides of the box and can only use the two platforms in front of them to flick their dice. The map must be set so that a ship is facing each player. The Pirate Ship map is played in the following way:
- Each captain has a crew of 7 pirates, those being 3 masters (dice with the same color as the player) and 4 sailors (the players must pick a second color for their sailors). The captains take turns on the Attack Phase sending masters or sailors to the battle in any order they chose.
- The players can make towers mixing their own masters and sailors.
- A player's combat force are the total points of their masters and sailors.
- The map has just three territories: two ships and the sea between them.
- If the player wins the combat having at least one master on the territory, they win 2 victory points. If there are only sailors, they win 1 victory point.
- In the case of ties, each player wins 1 victory point if they have at least one master. Ties with only sailors don't score.
- At the Movement Phase, dice or towers that are on a rope above the sea can be moved to any ship.
- Distribute 4 Power Cards to each player. The players can use the Power Cards according to the following rules:
- On the Movement Phase, the player can use a Power Card. Used Power Cards must be placed face down on the table.
- At the start of a new Era, take all the used Power Cards from the table and place them face up, forming a line.
- The Players can choose to use a Power Card from their hands or one of the open cards on the table.
Krakatoa (3 Eras)
Recommended for 4 or 5 players.
On an unstable volcanic isle, the solDIErs fight for territories while having to deal with the Gods' whims. The map is divided in 5 different parts, marked by totems numbered 1 to 5. Once per Age, the volcano erupts. All the dice in the volcano's part are destroyed, except for the dice from those who already made the sacrifice. The Krakatoa map is played in the following way:
- During the Attack Phase, players can end falling in the volcano's caldera.
- If there are no die inside the caldera after the Attack Phase, the player with the lowest score can chose to make a sacrifice: This player may elect to take one of their dice on the arena and put it in the caldera, or pass the opportunity. If this player pass the opportunity, then the player with the second lowest score can make the sacrifice, and so on. The opportunity for the sacrifice will go through all the players in reverse score order like this, but if everybody passes, the leading player is forced to make the sacrifice. Once a die is on the caldera the game advances to the Movement Phase.
- Before the Combat Phase there's a lava spill on the map area corresponding to the value of the die in the caldera. The players must remove all their dice from this area, except for the owner of the die in the caldera.
- The die in the caldera also add points to the conquest of the volcano's top territory.
- If the value of the die inside the caldera is 6 or more, the owner of the die can chose the area for the lava spill.
- If for you're playing with the Power Cards, the die inside the caldera can be affected normally by the card powers, which may change change the area for the lava spill.
Space (3 Eras)
Recommended for 3, 4 or 5 players.
The solDIErs battles arrive on the stars! Instead of mere territories, this time the fight is for entire planets and a sinister black hole teleports dice to other planets! The Space map is played in the following way:
- If during the Attack Phase a die falls in the black hole, its value shows the destination planet. The player takes the die and rolls a new value outside the area. Then the player must place this die on the destination planet. If the black hole result is 6 or more, the player can place the die on any planet he wants. When placing the die on a planet, it doesn't matter if the die stays over a frontier, as long as at least part of it lies inside the destination planet.
Monuments
Monuments are an optional module you can use in any Die die DIE game. If you choose to play with Monuments, use the following rules:
- Play 4 Ages.
- When assembling the Power Cards for the game, add the Monuments' exclusive cards to the deck.
- Before Age I's Combat Phase, determine where the bloodiest combat is (the one with the biggest total of points). Place the pyramid on this territory. On Ages II and III, follow the same rule to place the castle and then the high-rise. If there are two or more territories with the same point totals, the player with the lowest score picks the territory.
- Through the game, the Monuments will fall and rise again, changing places on the map many times. The same monument can be in two or more territories.
- Players who win combats in territories that have Monuments standing gain an additional point per monument. Fallen monuments don't score, unless you use a Power Card that says otherwise.
Monuments Power Cards
- Rebuild - Rise up one fallen monument and score 1 point. You must put a fallen monument back on its base without changing its place.
- Archeology - You score fallen monuments. In your turn in the Combat Phase, add up monument points if you win (or tie) the combat even for fallen monuments.