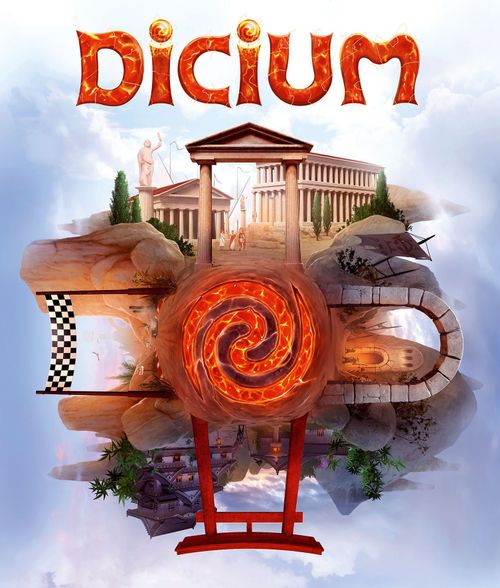
Dicium
Dicium Rulebook
Table of Contents
Table of Contents
- Crazy Cup
- Dungeon
- Civilization
- Shogun
The Concept
Dicium invites you on four very different adventures through a central game mechanic of dice combinations. While all four follow the same general rules, each one is set in a specific universe and offers a distinct playstyle.
In the first chapter, you will discover the general rules that apply to all four universes: the very essence of Dicium. With these general rules in mind, you will be able to play all the universes, focusing on their specific rules covered in separate chapters. To play your first game, you do not have to read the entire rulebook, but only the general rules and the specific rules of the chosen universe:
- CRAZY CUP is a competitive racing game for 1 to 4 players, ages 8 and up, lasting 30 to 60 minutes. Participate in a frantic race through the Grand Canyon. What devious tricks will you employ to hinder your opponents, and be the first to cross the finish line?
- DUNGEON is a cooperative adventure game for 1 to 4 players, ages 10 and up, lasting 30 to 60 minutes. Explore the dungeon with your companions in search of treasures, but beware of monsters and traps. Will you find the Goblin King's crown before he returns to the throne?
- CIVILIZATION is a competitive conquest game for 1 to 4 players, ages 12 and up, lasting 30 to 60 minutes. Become the ancient world's greatest conqueror! Explore the archipelago, establish cities, face your enemies, and build a Wonder to ensure your empire's place in history.
- SHOGUN is an asymmetrical confrontation game for 2 or 4 players, ages 12 and up, lasting 30 to 60 minutes. Ninja are sneaking into the palace to abduct the Shogun! True to their Bushido code, the samurai must defend him. Which side will you choose?
General Rules
The Dicium Dice
The Dicium dice are at the heart of the game: eleven identical dice. Each side presents two aspects: a number and a color. On your turn, you will combine the results of your rolled dice to perform up to two actions. The two aspects on each side of a die offer a large choice of number and color combinations.
The side with the Dicium symbol may be used as any number from 1 to 5, or for its green aspect. The Dicium symbol is worth any number but may never be used for another color than green.
The Player Boards
Each universe has its Game Board where most actions are performed, and a set of four Player Boards that recap the available actions and show the player's progress.
Each Game Board and Player Board is described in the specific rules of each universe. However, Player Boards have a common structure made up of the seven following information zones:
- A. Number combinations
- B. Color combinations
- C. Bonuses
- D. Active hand
- E. Storage
- F. Specific zones (two zones)
A. Number Combinations
A number combination is made up of two or more Dicium dice sides. Each combination allows you to perform a specific action. The available number combinations are the following:
- Pair: two sides showing the same number.
- Straight: sides showing consecutive numbers. The straight must always be made of all your dice and start with number 1 (1-2-3 with three dice, 1-2-3-4 with four dice, and 1-2-3-4-5 with five dice).
- Three of a kind: three sides showing the same number.
- Double pair: two pairs, each showing different numbers.
- Four of a kind: four sides showing the same number.
- Full house: three of a kind and a pair, each showing different numbers.
- Five of a kind: five sides showing the same number.
It's not mandatory to use all the sides showing the same number to form a combination. For example, if your 5 dice show the same number, you may use 2 dice to get a pair, or 3 dice to get a three of a kind, or 4 dice to get a four of a kind, or 5 dice to get a five of a kind. However, you cannot form a double pair or a full house because all your dice are showing the same number.
Remember that the Dicium symbol represents any number from 1 to 5. Therefore, rolling five Dicium sides gives you the opportunity to form any number combination you want.
B. Color Combinations
A color combination is always made up of one or more Dicium dice sides of the same color, to which you may add color bonuses. There is no combination made of different colors.
Each color combination allows you to perform a specific action. It is not mandatory to use all sides of the same color to form a color combination. However, the number of sides used modifies or improves the effect of the action.
Using a bonus is not mandatory. The number of sides used may modify the effect of an action and a bonus may sometimes be useless.
Each color bonus may be used several times during a game turn.
To use a color bonus, you must always use at least one die to form a color combination. Bonuses may never be used on their own to create a combination. However, red bonuses may be used on their own to increase the result of the Combat die.
Example: The blue bonus cannot be used because there is no die showing a blue side.
C. Bonus
During the game, you will earn bonuses represented by Bonus markers that you place in their respective slots on your Player Board. There are 8 available bonuses on each Player Board, divided into four levels (2 / 3 / 4 / 5).
You always earn a bonus:
- When forming a color combination with 2 to 5 green sides. The number of sides used determines the level of the available bonuses (from level 2 to 5).
- When using a number combination or another element in the game showing the bonus symbol. In this case, you may earn a bonus of the level of your choice.
Example: With three green sides, you may use two dice to earn one of the two available bonuses at level 2, or you may use three dice to earn one of the two available bonuses at level 3.
Once earned, a bonus is permanent and may be used immediately. There are four color bonuses and one rolling bonus:
- Rolling bonus: You may re-roll your dice a second time during your Rolling phase (see Game Turn).
- Blue bonus: You may add 1 blue side to your blue combinations (+1 blue).
- Yellow bonus: You may add 1 yellow side to your yellow combinations (+1 yellow).
- Green bonus: You may add 1 green side to your green combinations (+1 green).
- Red bonus: You may add 1 red side to your red combinations (+1 red), or increase the result of your Combat die by 1 (see Fight).
D. Active Hand
Your active hand is the number of Dicium dice you may roll each turn. You always start the game with 3 dice. During the game you may increase your active hand up to 5 dice:
- By forming a straight combination: a straight of 3 dice (1-2-3) allows you to upgrade your active hand to 4 dice, and a straight of 4 dice (1-2-3-4) to upgrade your active hand to 5 dice.
- By using a game component showing the active hand symbol.
When you upgrade your active hand, the Die marker is moved to the next slot to the right.
E. Storage
Each Dicium die used is immediately discarded. At the end of your turn, you may store up to two unused dice in your storage.
F. Specific Zones
These two zones show information related to the different universes. Their particularities are described in the specific rules of each universe.
Game Turn
A game turn consists of three successive phases, following the 2-2-2 rule: you may roll the dice 2 times, perform 2 actions, and store 2 unused dice.
Phase 1: Rolling
Take the number of Dicium dice indicated by your active hand (3, 4 or 5 dice) and roll them. Before performing any action, you may re-roll one or more dice of your choice.
Before each roll, you may decide to re-roll one or two stored dice of your choice. The dice from the storage are always part of your active hand. If your active hand is 3 dice and you have 1 stored die, you may either keep the result of that die and only roll 2 dice or take it back to roll 3 dice.
The 11 Dicium dice form a stockpile available to all players, except for the stored dice.
Warning: The dice in your storage are immediately discarded if you forget them and you roll as many dice as your active hand. Going back after a roll is not allowed.
Phase 2: Action
You perform an action by forming a number or a color combination. All the dice used to perform an action are immediately discarded. During your game turn, you may perform up to two actions. It is allowed to perform none.
Once you start your second action, the first one is considered over. For example, if the two actions you are performing this turn are moving and building, you may either move and then build, or build and then move. It is not allowed to move, build, and then move again to end your move action.
Phase 3: Storage
Before ending your turn, you may store up to two of your unused Dicium dice. Place them in your storage without modifying their results. Any other unused die is discarded.
End of Turn
When the active player ends his turn, the player to his left then becomes the active player. Follow the clockwise turn order until the end of the game.
Example of a Turn
Game turn 1: Your active hand is three dice. Last turn, you stored one die in your storage. You decide to keep the result of that die and only roll two dice for your first roll. With this result, you decide to push your luck to form a straight, which would allow you to upgrade your active hand. You keep the two rolled dice and re-roll the die from your storage. You get the 1 side, which allows you to form a straight. As your first action, you move your Die marker one space to the right. The three dice used to form the straight are discarded. Because you have used up all your dice, you cannot play a second action, nor store any die. On your next game turn, you will have four dice to roll.
Game turn 2: You receive results after rolling twice. As a first action, you use two green sides to acquire a level 2 bonus: you choose the blue bonus. As a second action, you use the blue side. Combined with the blue bonus you just earned, you now have a total of 2 blue sides to play a blue combination. Now that you have performed two actions, you decide to store the remaining die (a red side). Your turn ends.
If an opponent attacks you during his game turn, you will be able to use the stored red side to increase your defense strength (see Fight). If no one attacks you, you will be able to use this die's side on your next turn, or to re-roll it.
Fight
Whichever universe you play, you might end up in a situation where you either attack another player, or defend against another player, or fight the game itself. In any case, you will use the Combat die. You will use this die in the following three situations:
1. A Player Attacks Another Player
If he has any, the attacker decides how many Dicium dice showing a red side he wants to spend on this fight. Next, he rolls the Combat die and adds +1 to the result for each red side spent and for each red bonus. The total is the attack strength.
Then, the defender does the same. Before rolling the Combat die, he may decide to use any stored red sides he has in addition to his red bonuses. The total is the defense strength.
If the attack strength is equal to or higher than the defense strength, the attacker wins the fight. If it is lower, the defender wins.
Resolving the Shuriken attack follows the same rules (see Shogun, Ninja: Ninjutsu).
2. A Player Attacks a Monster or a Goblin
The attacker adds up the result of the Combat die, the red sides spent beforehand (+1 each), and the red bonuses (+1 each) to get his total attack strength. Each monster has its own defense strength, as indicated on its tile.
If the attack strength is equal to or higher than the defense strength of the monster, the player wins the fight. If it is lower, the monster wins.
Resolving the Fireball attack follows the same rules (see Dungeon, Magic).
3. A Player Is the Target of a Harmful Event
At some point, a player may have to defend against the effect of a card or a dice combination played by another player. The defender adds up the result of the Combat die, the red sides spent beforehand (+1 each) and the red bonuses (+1 each) to get his total defense strength.
If his defense strength is equal to or higher than 6, he ignores the effect. If it is lower, he must apply the effect.
In Any Case
- Your total attack or defense strength is always calculated by adding up the result of the Combat die, the red sides spent beforehand (+1 each), and the red bonuses (+1 each).
- You must always decide on how many red sides you want to spend on the fight before rolling the Combat die. The spent dice are immediately discarded after the fight.
- Your red bonuses are always taken into account during a fight, even if you do not spend any red sides.
The effects of a victory or defeat are explained in the specific rules of each universe.
Example: Although you have no die showing a red side, you decide to attack an opponent. You roll the Combat die and get a 3. You add your two red bonuses to this result (+2). Your attack strength is 5 (3 + 2 = 5). During his turn, your opponent stored a die showing a red side. He decides to spend it (+1) and rolls the Combat die. He rolls a 3. Then, he also adds his red bonus (+1). His defense strength is 5 (3 + 1 + 1 = 5). The spent die is discarded. As your attack strength is equal to his defense strength, you win the fight.
Advice
- Pay attention to the results of the dice: A side can be used for its number or color. During your first game, the two aspects on each side may be difficult to comprehend but you will quickly figure out that the dice's results offer a large choice of combinations.
- Upgrade your active hand: Having more dice means a wider range of available combinations.
- Optimize the use of color bonuses: Splitting a color combination into two smaller ones allows you to use the same color bonus for each of your two actions.
- Store unused dice: They allow you to anticipate your next turn. Red sides of stored dice can also be used to increase your defense strength if an opponent attacks you during his turn.
- Start with Crazy Cup to get familiar with the rules of Dicium.
Crazy Cup
For 1 to 4 players - ages 8 and up - 30 to 60 minutes.
Your dice are still rolling, but you are already taken away by a warm sandstorm. When the wind settles down, you find yourself in the middle of a sea of black hats and umbrellas in front of a stage. A man with an imposing mustache resting on a huge cigar addresses the crowd: "Ladies and Gentlemen, once again, participants will face each other in a frantic race through the Grand Canyon. This is a 'No holds barred' contest; anything goes, and the first pilot to cross the finish line will win the Crazy Cup."
Crazy Cup: Goal of the Game
Be fast and smart to win the cup! You can improve your vehicle, take shortcuts, and hinder your opponents. Let the best driver win!
CRAZY CUP is a competitive racing game that is played according to the 2-2-2 rule: 2 rolls, 2 actions, and 2 stored dice (see Game Turn).
Crazy Cup: Components
Game Board, 4 Player Boards, 30 Cheat cards, 1 Tornado tile, 4 meeples, First Player token, 8 Technology tiles, 11 Dicium dice, 1 Combat die, 4 Die markers, 32 Bonus markers.
Crazy Cup: Setup
Place the Game Board in the center of the table, with the Dicium dice, the Combat die, and Bonus markers nearby.
Each player chooses a Player Board and places his Die marker in the "3" slot of his active hand.
Each player takes a meeple of the same color as his Player Board and places it on the Start/Finish space.
Shuffle the 30 Cheat cards, then deal 3 cards face down to each player. The remaining cards form a deck, face down, next to the Game Board. Next, reveal the top 3 cards of the deck. Place the Tornado tile next to the Cheat cards deck.
Place the Technology tiles next to the Game Board. According to the number of players you will use:
- 1-2 players: 1 Technology tile of each type. Unused tiles are removed from the game.
- 3-4 players: 2 Technology tiles of each type.
Choose a first player and give him the First Player token.
You are now ready to start the Crazy Cup race.
Crazy Cup: Particularities
Moving: The Game Board represents the circuit. Each movement is performed by moving your meeple orthogonally one space after the other along the circuit. Crossing security barriers or rock walls is not allowed.
Direction of the race: At the start of the race, the player who moves first chooses which way he wants to go on the circuit (clockwise or anticlockwise). All other players will have to race that way.
During the race, you may go backwards on the circuit, for example to take a shortcut or to stop on a Garage space. However, it is not allowed to cross the Start/Finish space against the traffic.
Garage spaces: When you are on a Garage space, you may improve your color combination by 1 side of the same color (+1 blue / +1 yellow / +1 green / +1 red).
Rough Terrain spaces: The main road is the longest way to reach the finish. The Rough Terrain spaces are possible shortcuts. There are four kinds of rough terrain: ravines, volcanic terrain, cactus fields, and lakes. Each type of terrain is associated with a specific technology, which allows you to enter the space.
Technology tiles: To enter a Rough Terrain space when moving, you must discard the corresponding Technology tile. Place the tile back next to the Game Board. It is now available for purchase again. Technology tiles do not give you extra movements, they only offer you the possibility to take shortcuts when moving.
Cheat cards: They give you the opportunity to do something spectacular. A Cheat card may be played as indicated on the card. You may play as many cards as you want during your turn. Playing a Cheat card does not count as an action, even if you have to discard dice to activate the card's effect. Each Cheat card used is immediately discarded. The effects of some Cheat cards affect the Game Board, by placing the Tornado tile on it.
Driving test: If you are the target of a harmful event, you can try to avoid it. Defend by following the rules on Fight (target of a harmful event). If your defense strength is equal to or higher than 6, you passed the driving test, and you ignore the effect of the event.
If you must go back after failing a driving test, you must always follow the main road, and never go through a Rough Terrain space. However, it is not allowed to cross the Start/Finish space against the traffic.
Crazy Cup: Actions
During the Action phase, you may use the results of your dice and add potential bonuses to form the following combinations:
Color Combinations
Moving (blue): Move orthogonally 1 space for each blue side used.
Technology (yellow): Use 3 yellow sides to acquire an available Technology tile of your choice. Place it onto one of the two spaces showing the Technology symbol on your Player Board. You may only have two Technology tiles at the same time, and they may be the same.
Upgrade (green): Use 2 to 5 green sides to earn a bonus on your Player Board. The number of sides used determines the level of the available bonuses (see Bonus).
Cheat (red): Red sides may be used in two ways:
- Cheat cards: Use 3 red sides to take one of the three available face up Cheat cards, or the top Cheat card of the deck. If you take a face up card, immediately replace it with the top card of the deck. If the deck is empty, shuffle the discarded cards to create a new one. You may have as many Cheat cards in your hand as you want.
- Driving test: Add 1 to the result of your Combat die for each red side spent beforehand (+1 per red side).
Number Combinations
- Pair: Move orthogonally up to 2 spaces.
- Straight: Upgrade your active hand or earn a bonus of the level of your choice on your Player Board.
- Three of a kind: Take one of the three available face up Cheat cards, or the top Cheat card of the deck. If you take a face up card, immediately replace it with the top card of the deck. If the deck is empty, shuffle the discarded cards to create a new one. You may have as many Cheat cards in your hand as you want.
- Double pair: Move orthogonally up to 3 spaces. If you move into or cross a space occupied by one or more opponents during this move, you may choose to bump into one of them. The targeted opponent must take a driving test. If he fails, he must go back three spaces on the main road. The bump does not end your own movement.
- Four of a kind: Move orthogonally up to 5 spaces.
- Full house (Airship): Move orthogonally up to 3 spaces. You can enter Rough Terrain spaces without the required Technology tile. If you have it, you do not have to discard it.
- Five of a kind (Airship): Move orthogonally up to 5 spaces. You can enter Rough Terrain spaces without the required Technology tile. If you have it, you do not have to discard it.
Crazy Cup: End of the Game and Victory Conditions
As soon as a player stops on or crosses the Start/Finish space, play continues until it is the first player's turn again. Then, the race ends!
A player who stopped on or crossed the Start/Finish space cannot be targeted anymore by the effect of a Cheat card or combination.
The winner is the player who stopped on or crossed the Start/Finish space. If more than one player stopped on or crossed the Start/Finish space, the winner is the one who went the furthest during this last round. In case of tie, the player with the most Bonus markers on his Player Board wins. If the tie is still not resolved, all tied players win.
Crazy Cup: Advice and Clarification
- Moving backwards to move further: For example, it can be interesting to go back on the main road to take a shortcut.
- Use the garages: Even if you may move one or two spaces further, do not hesitate to stop your movement on a Garage space to be able to use its bonus for your next action.
- Stopping on a Rough Terrain space is risky: If an opponent forces you to go back, you will have to use another Technology tile or the airship to enter the Rough Terrain space again.
- Grappling Hook Cheat card: For your target to be in your lane, it has to be at least 1 space away from you, in a straight line and without any obstacle between you. The Rough Terrain spaces, rock walls, security barriers, and meeples are obstacles. When you follow your target, you move the same number of spaces and go through the exact same spaces as him. If you enter a Rough Terrain space this way, you do not have to discard a Technology tile.
Crazy Cup: Solo Game Against the Drone
The solo game is played with the same rules, except for the following:
- During setup, place your meeple and the drone (First Player token) onto the Start/Finish space.
- Before your turn starts, move the drone a number of spaces equal to your active hand (3, 4, or 5 spaces, depending on whether your active hand is of 3, 4, or 5 dice). The drone never moves through Rough Terrain spaces and does not use Cheat cards or Technology tiles. It always follows the main road.
- Consider the drone as an opponent: you can target it with Cheat cards or the Double Pair. If the drone must take a driving test, roll the Combat die. Its driving test is successful if the result is 5 or higher (instead of 6 for a game of 2 to 4 players). The drone has no bonuses for fights.
- If you receive or draw a Cheat card that has no effect in the solo game, remove it from play and replace it immediately with a new one from the deck.
Crazy Cup: Team Version for 4 Players in Teams
The team version is played with the same rules, except for the following:
- Assemble two teams of two players. The players should be placed around the table so that members of each team alternate.
- The first player of each team who moves decides which way he wants to go. His teammate must go the other way.
- You may target any opponent with Cheat cards.
The game ends immediately when a player stops or crosses the space occupied by his teammate. The winning team is the one that manages to meet first.
Crazy Cup: Version to Train Young Race Drivers
For the youngest to get used to Dicium, apply the following modifications:
- During setup, each player places his Die marker in the "5" slot of his active hand. Each player will have 5 dice from the very start of the game.
- Number combinations are not used: only color combinations can be formed. This means that you will only perform the four main actions of Crazy Cup (moving, technology, upgrade, and cheat). The numbers and the Dicium symbol are not used.
- If a Cheat card requires a pair to be played, you can play it without discarding any die.
This version simplifies the use of the dice by limiting it to the colors. All other rules remain the same.
Dungeon
For 1 to 4 players - ages 10 and up - 30 to 60 minutes.
Maybe you shouldn't have gone to sleep with the dice hidden under your pillow. When you wake up, you find yourself on an old bed of straw. You feel like your head is about to burst and your breath smells like mead. A woman with strange pointy ears yells at you: "I can't believe you accepted that stupid bet! All the people at the tavern heard you and now there is no going back, we will have to bring back the Goblin King's crown. Do you have any idea of what is waiting for us in that dungeon?"
Dungeon: Goal of the Game
Whether you are a warrior, a magician, a thief, or an elf, your skills will be tested in the exploration of the dungeon. You will have little time to scout its dark hallways where monsters and goblins lurk in the shadows. Will you find the Goblin King's crown before he returns to the throne?
DUNGEON is a cooperative adventure game that is played according to the 2-2-2 rule: 2 rolls, 2 actions, and 2 stored dice (see Game Turn).
Dungeon: Components
Game Board, 4 Player Boards, 43 Adventure cards (1 Goblin King card, 16 Discovery cards, 14 Trap cards, 12 Goblin cards), Chest board, 6 Treasure tiles, 3 Relic tiles, 4 meeples, Goblin King meeple, 11 Dicium dice, 1 Combat die, 4 Die markers, 32 Bonus markers, 9 Monster tiles, 6 Goblin tiles, 1 Portal tile.
Dungeon: Setup
Place the Game Board in the center of the table, with the Dicium dice, the Combat die, and Bonus markers nearby.
Each player chooses one of the four characters. Each has his own starting bonus: red for the warrior, yellow for the magician, green for the thief, and blue for the elf.
Each player takes the meeple and Player Board of his color. Place a Die marker in the "3" slot of your active hand and a Bonus marker in the highlighted slot of your starting bonus.
Place the 9 Monster tiles randomly, face up, onto the 9 Lair spaces. Shuffle the 6 Treasure tiles and place them, face down, onto the 6 Treasury spaces. Shuffle the 3 Relic tiles and place them, face down, onto the 3 Crypt spaces.
Place the Portal tile and the Chest board next to the Game Board.
Remove the Goblin King card from the 43 Adventure cards and place it aside. Create 3 decks with the other cards according to their colors (blue, red, and green) and shuffle each deck.
Each player receives an Adventure deck. The following chart indicates how many cards of each color are drawn to create an Adventure deck according to the number of players and the desired difficulty level (Normal / Heroic):
| Players | Blue | Red | Green | Total | Goblin stockpile |
|---|---|---|---|---|---|
| 1 player | 5 / 4 | 5 / 5 | 5 / 6 | 15 | 3 / 3 |
| 2 players | 3 / 2 | 3 / 4 | 3 / 3 | 9 | 4 / 3 |
| 3 players | 3 / 2 | 2 / 3 | 3 / 3 | 8 | 5 / 4 |
| 4 players | 3 / 2 | 2 / 3 | 2 / 2 | 7 | 5 / 4 |
Each player shuffles his Adventure deck without looking at the cards and places it, face down, in front of his Player Board.
Place the Goblin King meeple next to the Game Board, just outside the Entrance space. Next to it, form a Goblin stockpile. Adapt the number of Goblin tiles by following the chart according to the number of players and the desired difficulty level (Normal / Heroic). The remaining Goblin tiles are removed from the game.
Choose a first player and give him the Goblin King card that he places under his Adventure deck, face down. Starting with the first player, each player decides on which Portal space to place his meeple. This will be their starting positions.
You are now ready to explore the dungeon!
Dungeon: Particularities
Game turn: Each turn, in addition to the three basic phases (Rolling, Action, and Storage), there are 2 more phases:
- Before the rolling phase: Reveal the top card of your own Adventure deck and apply its effect. When the Goblin King card is revealed, the end is close (see End of the Game and Victory Conditions).
- After the rolling phase: Before playing your first action, you may move your meeple onto one of the two Portal spaces or onto the Portal tile (if it is in play). This movement is not considered an action.
Adventure cards: The effect of the revealed card varies according to its type:
- A Discovery card has an immediate effect that only applies to the active player's turn, unless the card presents one of these two symbols:
- A card with a Scroll symbol is a one-shot. Keep the card next to your Player Board. You may use one or more Scroll cards at any time during one of your turns. Discard the card after you use it.
- A card with a Magical Item symbol has a permanent effect that is immediately applied. Keep the card next to your Player Board until the end of the game.
- A Trap card has an immediate effect that only applies to the active player's turn.
- A Goblin card immediately spawns a goblin on the Game Board. Depending on the card, place the Goblin tile orthogonally 1, 2, or 3 spaces away from your meeple. A goblin may never be placed onto a space with a portal, a tile, or a meeple. If there is no available space, it does not spawn.
Except for scrolls and magical items, a revealed card is always discarded at the end of the player's turn. The discard pile is common to all players.
Goblin stockpile: When you must place a goblin onto the Game Board, take a tile from the stockpile. When you kill a goblin, place the tile back in the stockpile. During the game, if you must place a goblin onto the Game Board while the stockpile is empty, you immediately lose the game (see End of the Game and Victory Conditions).
Guard room: When you are on a Guard Room space, each of your green combinations is increased by 1 green side.
Magic door: These doors always divide two spaces and can only be crossed by using magic.
Trophy track: It indicates the current objective you must achieve to finish the quest. At the start of the game your objective is to open the nine chests in the dungeon and find the Goblin King's crown. However, the number of chests required may decrease during the game, down to a minimum of six chests.
For each Monster tile placed on the Trophy track of a player, the number of chests to open before the end of the game is reduced by 1. Consequently, the Trophy track of the player who killed the most monsters always indicates the number of chests to open for you to complete your quest.
Example: Ethan killed two monsters, Daniel none, and Emily only one. The objective is thus indicated by Ethan's Trophy track: 7 chests.
Moving: You may move your meeple to any space on the Game Board, occupied or not by a tile or a meeple. Moving does not allow you to cross walls and magic doors.
If you enter a space occupied by a Monster or Goblin tile, your movement ends immediately. Any remaining movement is lost and a fight immediately starts.
Fight: Follow the general fight rules (see Fight). Depending on the type of enemy, the effects of a victory or defeat are the following:
- A player attacks a goblin: If you win the fight, remove the Goblin tile from the Game Board and return it to the Goblin stockpile.
- A player attacks a monster: If you win the fight, remove the Monster tile from the Game Board and place it, face down, onto the first free spot of the Trophy track of your Player Board (from top to bottom). If there is no free spot anymore, remove the tile from play. In both cases, you immediately earn a bonus of the level of your choice on your Player Board.
If you lose the fight, move your meeple onto one of the two Portal spaces or onto the Portal tile (if it is in play). The Goblin or Monster tile stays on the same space.
Chest board: Each time a player opens a chest, he places the tile in the first free slot of the Chest board by following the numbers. The Treasure tiles are placed face down and the Relic tiles face up.
Dungeon: Actions
During the Action phase, you may use the results of your dice and add potential bonuses to form the following combinations:
Color Combinations
Moving (blue): Move orthogonally 1 space for each blue side used.
Magic (yellow): Yellow sides may be used in five different ways:
- Opening: Use 1 yellow side to move orthogonally 1 space across a magic door.
- Fireball: Use 2 yellow sides to launch a ranged attack on a monster or a goblin that is at least 1 space away from your meeple. You have an extra red bonus for this attack. There is no range limit to your fireball, but the target has to be in your line of sight: no tile, meeple, wall, or magic door may be between you and your target. Follow the general fight rules (see Fight). If you win the attack return the Goblin tile to its stockpile or place the Monster tile onto your Trophy track. If you miss your ranged attack, the fireball has no effect and your meeple stays on its space.
- Ghost-walk: Use 3 yellow sides to move orthogonally 1 space through a wall.
- Death's word: Use 4 yellow sides to remove a Goblin tile from the Game Board. It goes back to the Goblin stockpile.
- Portal: Use 4 yellow sides to place or move the Portal tile onto a space with no tile or meeple on it that is orthogonally up to 3 spaces away from your meeple.
Scout (green): Green sides may be used in two ways:
- Search: Use 2 to 5 green sides to earn a bonus on your Player Board. The number of sides used determines the level of the available bonuses (see Bonus).
- Pick the lock:
- Use 2 green sides to open a treasure chest located on the same space as your meeple. Take the tile and, if possible, apply its effect immediately. Then, place it, face down, on the next free slot of the Chest board. The effects of treasure chests are always optional. The treasure effects are:
- Earn a bonus of your choice on your Player Board.
- Place or move the Portal tile onto a space with no tile or meeple on it that is orthogonally up to 3 spaces away from your meeple.
- Upgrade your active hand.
- Remove a Goblin tile from the Game Board and return it to the Goblin stockpile.
- Look at one of the Relic tiles and then place it back, face down, onto the same space.
- Move orthogonally up to 3 spaces.
- Use 3 green sides to open a relic chest located on the same space as your meeple. Take the tile and place it, face up, on the next free slot of the Chest board. The color bonus of a relic is permanent and applies to all players until the end of the game. The relics are:
- +1 green side to all green combinations.
- +1 during fights.
- The crown is one of the two victory conditions. It does not give any bonus.
- Use 2 green sides to open a treasure chest located on the same space as your meeple. Take the tile and, if possible, apply its effect immediately. Then, place it, face down, on the next free slot of the Chest board. The effects of treasure chests are always optional. The treasure effects are:
Fight (red): Increase the result of the Combat die by 1 for each red side spent during the fight (+1 per red side).
Number Combinations
- Pair: Move orthogonally up to 2 spaces.
- Straight: Upgrade your active hand or earn a bonus of the level of your choice on your Player Board.
- Three of a kind: Move orthogonally up to 3 spaces. If you start a fight during this movement, you get an additional red bonus for the fight.
- Double pair: Place or move the Portal tile onto a space with no tile or meeple on it that is orthogonally up to 3 spaces away from your meeple.
- Four of a kind: Remove a Goblin tile from the Game Board and return it to the Goblin stockpile.
- Full house: Move orthogonally up to 3 spaces. When moving, you cannot enter the same space twice and you are not stopped by monsters or goblins. Immediately kill all goblins and monsters you encounter. The Goblin tiles go back to the Goblin stockpile and the Monster tiles are placed on your Trophy track.
- Five of a kind: Move your meeple to any space of the Game Board. If there is a monster or a goblin on that space, a fight immediately starts.
Dungeon: End of the Game and Victory Conditions
When the Goblin King card is revealed, the end is close. Immediately place the Goblin King meeple onto the Entrance space.
As of next turn, before each rolling phase, roll the Combat die:
- If the result is 1, 2, or 3, move the Goblin King 1 space onto the royal hallway then place a goblin tile onto a space with no tile or meeple 2 spaces away from him (orthogonally). If there is no available space, the goblin does not spawn.
- If the result is 4, 5, or 6, move the Goblin King 2 spaces onto the royal hallway. No goblin spawns.
The Goblin King always moves towards his throne. If he encounters a player's meeple, this meeple has to go back immediately to one of the two Portal spaces or to the Portal tile (if it is in play). The Goblin King may move over or stop on a Goblin tile.
If the Goblin King reaches the Throne space, the game is immediately lost! You will have to meet the two following victory conditions before it happens:
- Find the Goblin King's crown.
- Open as many chests as is indicated by the Trophy track of the player who killed the most monsters.
Examples:
- A. The Goblin King reaches his throne. You found the crown, but you only opened 6 chests. The game is lost.
- B. The Goblin King reaches his throne. You opened 7 chests, but you did not find the crown. The game is lost.
- C. You opened 7 chests and found the crown before the Goblin King got to his throne. You have won. (In these examples the Trophy track requires 7 chests.)
The game ends:
- As soon as the two victory conditions are met, you go back home victorious with stories to tell your grandchildren.
- If the Goblin stockpile is empty when you must place a goblin on the Game Board, you are overwhelmed by the green army. You will be remembered as courageous adventurers.
- As soon as the Goblin King reaches his throne, you are captured and thrown in the dungeon jail, doomed to be the Goblin King's slave for the rest of your life.
Dungeon: Advice and Clarification
- If your mind isn't clear, choose a leader: His mission will be to notify you when a new Adventure card must be revealed at the start of each turn.
- Use the portals: Moving your meeple onto the Portal tile allows you to reach unexplored hallways faster and to avoid monsters, goblins, walls, and magic doors. Before your Action phase, check if it is wise to teleport to a portal (see Dungeon: Particularities, Game turn).
- Beware of the green army: The goblins spawn faster than you may think. Place them onto accessible spaces and kill them frequently, or you will be overwhelmed by them.
- No mercy to monsters: Killing a monster gives you a free bonus and may reduce the quantity of chests necessary to complete your objective. Don't be afraid of a risky fight!
- Magical powers are limited: Even the magician has to use at least one die with a yellow side to go through a magic door. Remember: You must always use at least one die to form a color combination and use a color bonus.
Dungeon: Version to Train Young Adventurers
For the youngest to get used to Dicium, apply the following modifications:
- During setup, each player places his Die marker in the "5" slot of his active hand. Each player will have 5 dice from the very start of the game.
- Number combinations are not used: only color combinations can be formed. This means that you will only perform the four main actions of Dungeon (moving, magic, scout, and fight). The numbers and the Dicium symbol are not used.
- Add a Goblin tile to the Goblin stockpile.
This version simplifies the use of the dice by limiting it to the colors. All other rules remain the same.
Civilization
For 1 to 4 players - ages 12 and up - 30 to 60 minutes.
While you were dreaming about your next holiday, you catch yourself mechanically playing with the dice in your hand. Suddenly, a ravishing landscape of rocky isles and an astonishingly blue sea unfolds before your eyes. Phalanxes of Greek soldiers are ready for war on the seashore. Suddenly, an officer comes to you: "My Emperor, the triremes are ready to set sail and the troops are in formation. Your generals are waiting for the order!"
Civilization: Goal of the Game
Rule over Antiquity! To become the most powerful civilization, you will have to build cities, temples, and Wonders. You may also try to get all the glory by fighting your opponents and mythological monsters. But it is only with great philosophers that your civilization will enter History!
CIVILIZATION is a competitive conquest game that is played according to the 2-2-2 rule: 2 rolls, 2 actions, and 2 stored dice (see Game Turn).
Civilization: Components
Game Board, 4 Player Boards, 43 Victory Point cards, 16 Philosopher cards, 10 Common Objective cards, 10 Secret Objective cards, First Player token, 11 Dicium dice, 1 Combat die, 4 Die markers, 32 Bonus markers, 4 meeples, 48 tiles split into 4 colors (12 Hero tiles, 4 Capital tiles, 20 City tiles, 8 Temple tiles, 4 Wonder tiles), 8 Mythological Monster tiles, 3x 5 VP tiles.
Civilization: Setup
Place the Game Board in the center of the table, with the Dicium dice, the Combat die, and Bonus markers nearby.
Each player chooses a Player Board and places his Die marker in the "3" slot of his active hand.
Each player takes a meeple, the Capital tile, the 3 Hero tiles, and the 8 Building tiles (5 cities, 2 temples, and 1 Wonder) of the color of his Player Board.
Each player places the 3 Hero tiles on the designated spots of his Player Board.
Place the 5 Mythological Monster tiles, face up, on the corresponding spaces of the Game Board.
Form a deck of Victory Point (VP) cards with the Adventure cards of Dungeon, face down. These cards will only be used for their back: do not apply their effects. The number of VP cards available depends on the number of players: 24 cards for 2 players, 33 cards for 3 players, and 40 cards for 4 players. Form a separate stockpile with the remaining cards and the VP tiles.
Shuffle the 16 Philosopher cards. Form a deck, face down, next to the Game Board then reveal the top 3 cards.
Shuffle the 10 Common Objective cards. Reveal one card per player plus one (2/3/4/5 cards for 1/2/3/4 players). Place them, face up, next to the Game Board. The unused cards are removed from the game.
Shuffle the 10 Secret Objective cards. Each player draws two of them, chooses one, and discards the other. The unused cards are removed from the game.
Each player places his Capital tile and his meeple on the closest Capital spaces of the Game Board. This will be their starting position.
Choose a first player and give him the First Player token.
Alea Jacta Est!
Civilization: Particularities
Victory Point (VP) cards: When you score victory points during the game, immediately take the indicated number of VP cards from the deck. The player who takes the last card from the deck triggers the end of the game.
Regions: The Game Board is divided into 9 regions, each one made of 9 spaces.
Placement: To place a Building or Hero tile on the Game Board you must respect these three rules:
- The space must be free: No tile or opponent's meeple can be on the space. When you remove a Mythological Monster tile from the Game Board, the space becomes free.
- Regional limit: Each player may only have one tile of each type in the same region (one hero, one city, one temple, and one Wonder). As the Capital tile counts as a Hero tile, no Hero tile can be placed in his starting region.
- Availability: A tile that is already on the Game Board is no longer available.
You immediately score victory points when building: 1 VP for a city, 3 VP for a temple, 4 VP for a Wonder. Furthermore, each region occupied by at least one of your tiles (City, Temple, Wonder, Capital, or Hero) will be worth 2 VP during endgame scoring.
Moving: You may move your meeple to any space on the Game Board, except onto a space with an opponent's Capital tile.
If you move to a space occupied by an opponent's meeple or by a mythological monster, your movement ends immediately. Any remaining movement is lost, and a fight immediately starts.
Fight: Follow the general fight rules (see Fight). Depending on the type of fight, the effects of a victory or defeat are the following:
- A player attacks another player: If the attacker wins the fight, he immediately scores 2 VP. If the defender wins, nobody gets victory points.
- A player attacks a mythological monster: If the attacker wins the fight, he immediately scores 3 VP and takes the Mythological Monster tile.
In both cases, the losing player must return his meeple to his Capital tile, or to one of his Hero tiles in play if no other player's meeple is on it.
Building and Hero tiles: Every Building and Hero tile has a Water and a Land side. These sides allow you to respect the configuration of the space you place it on. Placing a tile does not change the type of terrain of the space: a Water side is always considered a Water space and a Land side is always considered a Land space.
Quarry spaces: When you are on a Quarry space, each of your green combinations is increased by 1 green side. Once a tile is placed onto a Quarry space, its bonus is no longer available.
Philosopher cards: They allow you to perform extra actions or to improve the effect of some actions. A Philosopher card may be played as indicated on the card. You may play as many cards as you want during your turn. Playing a Philosopher card does not count as an action, even if you have to discard dice to activate the card's effect. Each Philosopher card used is immediately removed from the game.
During endgame scoring, each unused Philosopher card you have is worth 2 VP.
Common Objective cards: The first player to meet the requirements of a card announces it to the other players. He may then choose to take the card or to discard it immediately to upgrade his active hand by 1 die. A Common Objective card is not replaced once taken or discarded.
During endgame scoring, each Common Objective card that you have taken is worth the VP indicated on it.
Secret Objective cards: These cards are personal objectives. You have the entire game to try to achieve this objective. During endgame scoring, if the requirements of the Secret Objective card are met, you score the VP indicated on it.
Civilization: Actions
During the Action phase, you may use the results of your dice and add potential bonuses to form the following combinations:
Color Combinations
Moving on water (blue): Move orthogonally on water, 1 space for each blue side used.
Moving on land (yellow): Move orthogonally on land, 1 space for each yellow side used.
Building (green): Green sides may be used in two ways:
- Building a city: Use 2 to 5 green sides to place a City tile on the space where your meeple is and earn a bonus on your Player Board. Immediately score 1 VP. The number of sides used determines the level of the available bonuses (see Bonus). If the bonuses are already taken, you cannot build a city, nor score any VP.
- Building a temple: Use 5 green sides to place a Temple tile on any free space of the region you are in. Immediately score 3 VP.
Fight (red): Increase the result of the Combat die by 1 for each red side spent during the fight (+1 per red side).
Number Combinations
- Pair: Move 1 space orthogonally or diagonally, on land or water.
- Straight: Upgrade your active hand or earn a bonus of the level of your choice on your Player Board.
- Three of a kind: Take one of the three available face up Philosopher cards, or the top card of the deck. If you take a face up card, immediately replace it with the top card of the deck. If the deck is empty, you do not replace it. You may have as many Philosopher cards in your hand as you want.
- Double pair: Choose any Hero tile from your Player Board and place it on any free space of the region you are in. This action immediately unlocks one of the following bonuses (until the end of the game):
- Color bonus: The type and number of the color bonus varies according to the Player Boards.
- Rolling bonus: You may re-roll your dice a second time during your Rolling phase.
- Redeploy: Before playing your first action, you may choose to move your meeple to your Capital tile, or to one of your Hero tiles in play if no other player's meeple is on it.
- Four of a kind (Zeus's wrath): An opponent of your choice is struck by Zeus's wrath. The targeted opponent may try to avoid this harmful event by following the rules for this type of fight (see Fight, target of a harmful event). If the defense strength is equal to or higher than 6, he avoids Zeus's wrath. If he is struck, you immediately score 2 VP and the targeted player returns to his Capital tile, or to one of his Hero tiles in play if no other player's meeple is on it. Zeus's wrath is not considered an attack on another player.
- Full house: Place a City tile onto any free space of the region you are in and earn a bonus of your choice on your Player Board. You immediately score 1 VP.
Reminder: for any combination played, you must always respect the rules regarding placement and moving (see Civilization: Particularities) when you place a tile or move your meeple.
Civilization: End of the Game and Victory Conditions
The end of the game is triggered when a player takes the last card from the Victory Point cards deck. Play continues until it is the first player's turn again. Then, the game ends.
If you score victory points during this last turn, take them from the extra stockpile. If it is empty, exchange five of your Victory Point cards for a 5 VP tile to replenish the stockpile.
Then, proceed to the endgame scoring. Count the victory points scored during the game and add:
- 2 VP for each region you occupy with at least one tile (Capital, Hero, City, Temple, or Wonder).
- 2 VP for each unused Philosopher card you still have.
- X VP for each Common Objective card you have.
- X VP if you achieved your secret objective.
Do not take VP cards for these additional endgame victory points.
The player with the highest score wins. In case of tie, the player who built his Wonder wins. If there still is a tie, the player who defeated the most mythological monsters wins. If the tie is still not resolved, all tied players win.
A summary of the many ways to score victory points during the game and during endgame scoring is provided on your Player Board.
Civilization: Advice
- Fighting is risky: If you lose a fight, you will have to retreat to your capital or to one of your Hero tiles in play. Place them on strategic spaces. Furthermore, they grant you bonuses when placed.
- Move adequately: In some cases, moving diagonally thanks to a pair allows you to reach your destination in one action instead of two. For example, to move to the labyrinth, you may use a pair (1 action), or use a blue combination followed by a yellow one (2 actions). In both cases you will use two dice.
- Final scoring can be decisive: Keep an eye on endgame victory points.
Civilization: Solo Game
The solo game is played with the same rules, except for the following:
- Form a deck of VP cards with all Adventure cards from Dungeon, face down.
- During setup, also take 12 Cheat cards from Crazy Cup and form a deck next to the Game Board. These cards will only be used for their back: do not apply their effects. At the end of each turn, discard a card from this deck. The game ends immediately when the last card is discarded.
- If you draw or reveal a Philosopher, Common Objective, or Secret Objective card that has no effect in the solo game, remove it from play and replace it immediately.
After endgame scoring, if you have:
- 0 to 20 VP, you are just a foot soldier.
- 21 to 25 VP, you are a champion.
- 26 to 30 VP, you are chosen by the Gods.
- 31 to 35 VP, you are a demigod.
- 36 VP or more, you are the Dicium God.
Shogun
For 2 or 4 players - ages 12 and up - 30 to 60 minutes.
You are dressing for your karate lesson when suddenly the dice fall out of your bag. You pick them up and, when looking back up, the dojo disappears and a magnificent sunset forms before your eyes. To your surprise, there is an authentic Japanese palace that looks like the Shogun's residence in front of you. The place looks calm, intriguingly so, as you sense an imminent threat. All of a sudden, the shadows of several ninja appear on the rooftops. You feel the urge to make a choice: will you run to the palace to alert the garrison or will you help the ninja in their obscure task?
Shogun: Goal of the Game
The ninja are sneaking into the palace to abduct the Shogun. It will be tricky for them to fool the guards and capture him alive.
The samurai must try to stop the ninja. Fighting will be inevitable, but they also have to light the braziers of the palace to alert the garrison.
SHOGUN is an asymmetrical confrontation game that is played according to the 2-2-2 rule: 2 rolls, 2 actions, and 2 stored dice (see Game Turn).
Shogun: Components
Game Board, 2 Ninja Player Boards, 2 Samurai Player Boards, 12 meeples, Shogun meeple, 6 Alert cards, 4 Torii tiles, 4 Garrison tiles, 6 Brazier tiles, 11 Dicium dice, 1 Combat die, 4 Die markers, 32 Bonus markers.
Shogun: Setup
Place the Game Board in the center of the table, with the Dicium dice, the Combat die, the Bonus markers, and 5 Brazier tiles nearby.
Each player chooses a side: ninja or samurai. In a four-player game, form two teams of two players. One team plays the ninja, the other plays the samurai. The players should be placed around the table so that members of each team alternate.
Each player takes a Player Board corresponding to his side (yellow or red for the samurai, blue or green for the ninja) and places his Die marker in the "3" slot of his active hand.
Each ninja places 2 Torii tiles on the assigned slots of his Player Board. Each samurai places 2 Garrison tiles on the assigned slots of his Player Board. In a two-player game, the unused Torii and Garrison tiles are removed from the game.
Take the 3 meeples of the color of your Player Board. Each ninja places 1 meeple on the Torii space of the Game Board. In a two-player game, the samurai places 1 meeple on each Garrison space. In a four-player game, each samurai places 1 meeple on a different Garrison space. Each player forms a stockpile with the remaining meeples.
Place the Shogun meeple on the Throne space on the Game Board.
Form a deck of 5 Alert cards with the Adventure cards from Dungeon, face down. These cards will only be used for their back: do not apply their effects.
Choose the first player among the ninja and be ready to fight!
Shogun: Particularities
Player Boards: The actions associated with some combinations are different if you play ninja or samurai.
Game Board: The palace of the Shogun is split into three types of areas: the throne room, the hallways, and the eight gardens. These areas are composed of different kinds of spaces:
- Throne room: Throne space, Tatami space.
- Hallways: Hallway space, Altar space, Garrison space.
- Gardens: Garden space, Brazier space, Torii space.
Altar space: Each of your green combinations is increased by 1 green side for each of your meeples on an Altar space.
Placing tiles: A Brazier tile must be placed on a Brazier space, a Torii tile on a Garden space, and a Garrison tile on a Hallway space. You cannot place two tiles on the same space.
Torii tiles: They have two sides: the Torii side and the Garden side. When you place or move a Torii tile, always place the Torii side face up.
Placing ninja and samurai: When you place a new meeple on the Game Board or when you must retreat, follow these rules:
- Ninja: on an available torii
- Torii: The meeple must be placed on the Torii space or on a Torii tile that shows its Torii side. If a Torii tile shows its Garden side, it is not considered a torii.
- Available: When no Samurai or Shogun meeple is on the torii. However, there can be more than one ninja on the same torii.
- If no torii is available, the meeple goes back to your stockpile.
- Samurai: on an available garrison
- Garrison: The meeple must be placed on a Garrison space or tile.
- Available: When no Ninja or Shogun meeple is on the garrison. However, there can be more than one samurai on the same garrison.
- If no garrison is available, the meeple goes back to your stockpile.
Doors: They are always found between two spaces. Doors block ninja's movements. Samurai and the Shogun may cross them freely.
Moving: You may move your meeples to any space of the Game Board, occupied or not by another meeple or tile, except that a Samurai meeple may never stop on a space occupied by the Shogun meeple.
If you move your meeple onto a space occupied by one or several enemy meeples, your movement ends immediately. Any remaining movement is lost and a fight immediately starts.
Fight: Follow the general fight rules (see Fight). The effects of a victory or defeat are the following:
- When a samurai attacks and wins the fight, he discards 1 Alert card. However, when a samurai defends and wins the fight, he does not discard an Alert card.
- A defeated samurai must retreat and place his meeple back on an available garrison.
- A defeated ninja must retreat and place his meeple back on an available torii.
If you move to a space occupied by more than one enemy meeple, you must fight them one by one, in the order of your choice. Each attack follows the same fight rules.
The Shogun: He is part of the samurai team. As long as the Shogun is not captured, a samurai player may use it as one of his own meeples to play his actions, with 3 exceptions. The Shogun may never:
- Stop on a space occupied by a samurai (and vice versa).
- Move to a space occupied by a Ninja meeple.
- Be used to attack or defeat a Ninja meeple.
Capturing the Shogun: There is no fight when a Ninja meeple stops on the same space as the Shogun meeple. However, the Shogun is captured. From now on, the Ninja meeple with the Shogun:
- Moves the Shogun meeple with him when moving.
- May not move to a space occupied by a Samurai meeple.
- May not be attacked: no Samurai meeple may move to the space he is on.
The Shogun meeple may be exchanged between two Ninja meeples if one of them ends his movement on the same space as the other.
As soon as the Shogun is captured, he stays so until the end of the game. The samurai cannot free him.
Shogun: Actions
During the Action phase, you may use the results of your dice and add potential bonuses to form the following combinations:
Ninja: Color Combinations
Moving (blue): Move one of your meeples orthogonally 1 space for each blue side used.
Ninjutsu (yellow): Yellow sides may be used in three ways:
- Opening: Use 2 yellow sides to move one of your meeples orthogonally 1 space across a door.
- Shuriken: Use 3 yellow sides to launch a ranged attack on a Samurai meeple located on any space of the Game Board. The fight follows the rules regarding attacks on another player (see Fight). If the attack is successful, the samurai must retreat and place his meeple on an available garrison. If you miss your ranged attack, the shuriken has no effect.
- Infiltration: Use 4 yellow sides to move one of your meeples orthogonally 1 space through a wall.
Ki (green): Use 2 to 5 green sides to earn a bonus on your Player Board. The number of sides used determines the level of the available bonuses (see Bonus).
Fight (red): Increase the result of the Combat die by 1 for each red side spent during the fight (+1 per red side).
Ninja: Number Combinations
-
Pair: Move one of your meeples orthogonally up to 2 spaces.
-
Straight: Upgrade your active hand or earn a bonus of the level of your choice on your Player Board.
-
Three of a kind: Take a Torii tile from your Player Board and place it, Torii side up, on a Garden space. You must follow these rules:
- The Garden area may not yet contain a Brazier tile.
- The Garden area may not yet contain a torii space or tile.
- The Garden space must be on the same line as the Ninja meeple of your choice, or on a line between this meeple and the Torii space.
Removing this tile from your Player Board allows you to immediately earn a bonus of the level of your choice on your Player Board.
If you run out of Torii tiles on your Player Board, you may move any Torii tile that is already in play. Place it, Torii side up, on a Garden space by following the same placement rules. However, you do not get any new bonus in this case.
-
Double pair: Take a Ninja meeple from your stockpile and place it on an available torii.
-
Four of a kind: Move one of your meeples orthogonally up to 5 spaces.
-
Full house: Move one of your meeples orthogonally up to 3 spaces. You can move across doors during this movement.
-
Move one of your meeples orthogonally up to 5 spaces. You can move across doors during this movement.
Samurai: Color Combinations
Moving (blue): Move one of your meeples orthogonally 1 space for each blue side used.
Bushido (yellow): Yellow sides may be used in three ways:
- Redeploy: Use 2 yellow sides to move one of your meeples to any available garrison.
- Brazier: Use 3 yellow sides to place a Brazier tile on a Brazier space on which you have a meeple, and discard 1 Alert card. If a Torii tile is already in this Garden area, flip it to its Garden side.
- Banzai: Use 4 yellow sides to move one of your meeples orthogonally up to 3 spaces. When moving, you cannot enter the same space twice and you are not stopped by Ninja meeples. You immediately defeat each Ninja meeple you encounter: his owner must retreat and place it back on an available torii. Discard 1 Alert card for each ninja defeated this way.
Ki (green): Use 2 to 5 green sides to earn a bonus on your Player Board. The number of sides used determines the level of the available bonuses (see Bonus).
Fight (red): Increase the result of the Combat die by 1 for each red side spent during the fight (+1 per red side).
Samurai: Number Combinations
-
Pair: Move one of your meeples orthogonally up to 2 spaces.
-
Straight: Upgrade your active hand or earn a bonus of the level of your choice on your Player Board.
-
Three of a kind: Move one of your meeples orthogonally up to 3 spaces. If you start a fight during this movement, you get an additional red bonus for the fight.
-
Double pair: Take a Garrison tile from your Player Board and place it on any Hallway space. Removing this tile from your Player Board allows you to immediately earn a bonus of the level of your choice on your Player Board.
If you run out of Garrison tiles on your Player Board, you may move any Garrison tile that is already in play to another Hallway space. However, you do not get a new bonus in this case.
-
Four of a kind: Take a Samurai meeple from your stockpile and place it on an available garrison.
-
Full house: Move one of your meeples orthogonally up to 2 spaces. If you stop on a Brazier space, place a Brazier tile on it, and discard 1 Alert card. If a Torii tile is already in this Garden area, flip it to its Garden side.
-
Five of a kind: Move one of your meeples orthogonally up to 5 spaces. If you stop on a Brazier space, place a Brazier tile on it, and discard 1 Alert card. If a Torii tile is already in this Garden area, flip it to its Garden side.
Reminder: as long as the Shogun is not captured, a samurai may use it as one of his meeples to play any action (see The Shogun).
Shogun: End of the Game and Victory Conditions
The ninja win immediately:
- If the Ninja meeple carrying the Shogun reaches the Torii space or a Torii tile showing its Torii side.
- Or if the last Samurai meeple in play is defeated and no garrison is available for him to retreat to.
The samurai win immediately:
- If the 5 Alert cards are discarded (as a reminder, a samurai discards 1 card each time he places a Brazier tile, or when he attacks a ninja and wins the fight).
- Or if the last Ninja meeple in play is defeated and no torii is available for him to retreat to.
Shogun: Advice
- Shogun is an asymmetrical game: Do not forget your opponent can play actions that are different from yours. Prepare for the unpredictable.
- Fighting is risky: In case of defeat, you will have to retreat on a torii or garrison. Place them on strategic spots. In addition to the bonuses they give you, they allow you to quickly deploy your meeples around the palace.
- At your own risk: Moving the Shogun out of the throne room is sometimes necessary but it can become dangerous.
- To introduce Shogun to a new player, let him play the ninja. Add the sixth Alert card and Brazier tile.