Diceland: Space
Diceland: Space Rulebook
Table of Contents
Table of Contents
Game Overview
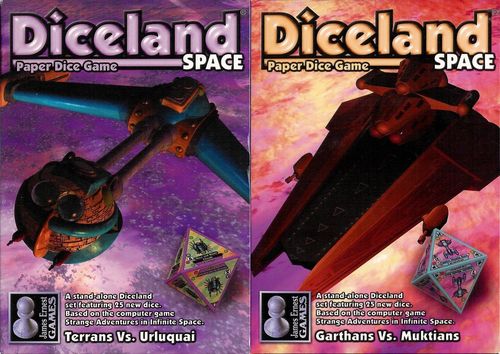
Diceland: Space is a stand-alone expansion for Diceland, and contains six teams of spaceships. There are two different boxes in the Space set, each containing 25 ships. One box contains the Terran, Urluquai, and Zorg armies. The other box contains the Garthans, Muktians, and Tan Ru. All these dice are compatible with each other, and with all other Diceland sets.
In Diceland, players take turns throwing and maneuvering their armies of paper dice. Players score points by shooting each other's dice, and the first player to score 50 points wins the game. An average game lasts about 20 minutes.
Diceland contains concepts and game mechanics which are unique even to experienced game players, so take your time in learning to understand it. This rule sheet contains the basic 2-player rules for Diceland: Space. More information about Diceland (game variants, multiplayer rules, strategy hints, design articles, artwork) is available at www.diceland.com.
About the Paper Dice
The "dice" in Diceland are paper octahedrons, 8-sided dice. Each die starts as two halves die-cut on a 5 x 7 card. The dice assemble quickly without tape or glue.
To build a die, punch both halves out of the card and pre-fold all the scores. Press each fold completely flat, so that the die won't try to spring apart once it's built.
Starting with Tab A, snap all the tabs into the corresponding slots. Do not assemble both halves and then join them together, as this will result in some interior flaps interfering with each other. Instead, put the tabs into the slots in alphabetical order. If you do this properly, tabs E and F will close at the same time.
Take care when building your dice. Although they are made of paper, these dice are durable enough for hundreds of hours of play. To protect your dice when they are not in use, you should store them in a sturdy box. You can find a carrier box that holds 27 dice at the Cheapass Games Web site, www.cheapass.com. You can also look for cardboard and plastic boxes at your favorite discount office supply or trendy closet organizer chain store.
Choosing a Table
Your playing surface will dramatically affect the quality of the game. The table should be large, level, and free of obstacles. The best surface is a cloth, vinyl, or felt-covered table. Slick surfaces are not great for Diceland. They allow the dice to slide instead of gripping the table, which makes maneuvering your dice much trickier. If you have a slick table, you might want to put down a tablecloth before you begin.
Using the Counters
We have printed 20 counters on the interior box flaps, which you can cut out if you choose. These counters can be helpful in tracking complex turns, and can also be useful for marking which ships are whose in a large or mixed-army game.
Flat counters are treated as part of the tabletop, so if a die moves onto one, it's not considered "off the table." We'll talk more about using counters for timing later on. Just be sure you don't discard the box without cutting them out!
Elements of the Die Face
- Sight Arrow: This arrow tells you which way the die can see. Sight arrows have different colors, shapes, and sizes, and some die faces have more than one arrow. If the die has a Weapon, the number in the arrow shows the strength of that Weapon. Other effects, like Commands, have blank arrows.
- Side Number: Side numbers range from 1 to 8, with Side 1 being the weakest side and 8 the strongest. When a die takes damage, it moves to the next lower side number. Some weaker dice do not have side numbers as high as 8. Instead, they have multiples of lower side numbers.
- Block: This shield icon shows the die's defense value. If the icon has a color, the die is immune to effects of that color. A colored icon without a number represents an immunity, but no Block.
- Effect Line: This text tells you a Special Effect that this die can perform. All these Effects are defined in the rules.
- Weapon Line: This text box describes the Weapon or Special Effect that's represented by the die's Sight Arrows. Special Effects are defined in the rules, but specific Weapons are not, because they are explained completely by the Sight Arrows.
- Movement and Damage Dots: The green dots show the directions in which the die can be maneuvered. The red dots show how the die will move when it takes damage.
- Name: This is the name of the die.
- Point Value (Side 1 only): This is the number of points the die is worth when it is killed. More powerful dice are worth more points. Point value is also used in army construction.
- Class and Team (Side 1 only): Class refers to the size and general abilities of the die. Some dice refer to other dice by class. Team shows the die's affiliation, such as "Terran" or "Garthan." Constructing an army with dice from a single team is a little cheaper than mixing dice from different teams.
Core Definitions
Enemies and Allies: All dice in the game are either Enemies or Allies. All the dice in your army are Allies, and all your opponent's dice are Enemies. This is true no matter what "Team" they belong to. For example, even if both players have a die from the Terran army, those two dice are not considered allies. On the other hand, dice from multiple Teams are considered allies as long as they are in the same army.
Every effect in this game, from a basic Weapon to the most complex Special Effect, is defined in terms of Enemies and Allies.
In Play, In Reserve, and In Hand: There are three places a die can be: in play, in your hand, or in reserve.
- All dice start the game in your hand. Dice in your hand are off the table and ready to be thrown. Keep these dice someplace off the table, though not necessarily in your hand!
- All dice on the table are in play.
- A die that has just been killed is on hold, or in reserve. This die is out of play, but it's not back in its owner's hand. Dice stay in reserve for one round (one turn for each player), then they return to your hand.
Before the Game
Building an Army: Before you play, you must construct an army. Some sample armies are listed at the end of these rules, but you can construct your own quite easily. Ideally, neither player knows what will be in the other's army until the game begins.
To construct your army, first decide whether you are playing with dice from a single team or with mixed teams. When you make an army of mixed teams you can include up to 30 points' worth of dice. If your army is made of dice from the same team, you can spend as much as 30 + X, where X is the size of your smallest die.
For example, if you wanted to include both Terran and Garthan ships in your army, you could spend no more than 30 points. But if your army is entirely Terran, you can spend 30 + X. In the all-Terran army, if your smallest ship is a Scout (2 points) then your maximum army size is 32. If your smallest ship is a Destroyer (15 points) you can spend up to 45. Currently the only way to do this is to build the army with 3 Destroyers!
If a single die is worth more than 30 points (in the Space set, it's the Yellow Kawangi) then you can still play with that ship, but it's the only one you can use. (We honestly don't know if the Yellow Kawangi are balanced or not; we threw them in just for fun.)
Uniqueness: You will not have to deal with uniqueness when you are playing Diceland: Space because there are no unique dice in this set. If a die were unique, you could put only one copy in your army, and there could be only one copy in play. Since the dice in Space are not unique, you can include multiple copies of any of them. To learn more about uniqueness, read the complete rules at www.diceland.com.
Who Goes First: The player whose army is the smallest, i.e., the one that has the smallest total point value, can always decide who goes first. If the point values are the same, flip a coin to determine who will go first.
Note that it may be advantageous to build a smaller army just to have control over who goes first. Consider this aspect when you construct your army.
The First Turn: Instead of taking a normal turn, the player who goes first must place one of his dice in any orientation in the exact center of the table. This is his whole turn.
Going first is an advantage in one respect, since you get to place the die however you like. The obvious disadvantage is that you can never score points on the first turn, since you don't shoot and there's nothing to shoot at.
When deciding which die to place, you might choose a die that's worth very few points, to minimize your risk, or a large ship that your opponent will have trouble destroying. When you build your army, consider what ship you will use if you have to go first.
Winning: The first player to score 50 points wins the game. You score points by "killing" enemy dice, which means attacking them with enough power to take them out of play. Dice that are "killed" return after a pause to their owner's hand, and most dice will be thrown many times in the course of a game. What matters is that each die that is killed scores points for its opponent.
On Every Turn
Each player can take one action on each turn, either throwing one die and activating it, or activating a die that's already in play. You will frequently take more actions as a result of the first one, like using a Command to activate other dice; however, everything that happens on your turn must begin with just one action.
"Throwing" dice is described below. To "activate" a die means to either maneuver it, to fire its Weapon, or use its Special Effect. All of these terms are defined below.
You do not have to take any action on your turn; you can pass. However, if your opponent also passes, you cannot immediately pass again unless you have no other option. (This rule is meant to avert a stalemate condition, but it is rarely invoked.)
Because of effects like Command and Call, you will often take several actions in the same turn, all stemming from one action.
Example: You throw a Carrier into play, whose special ability is to Call 2 Fighters. When the die lands on this face, you activate it. This allows you to throw two Fighters, one at a time. You throw the first one, and it fires its Weapon. You throw the second one, and it lands on a "Call Fighter" side. You use this to Call a third Fighter. You were able to bring out the Carrier and three Fighters all on the same turn!
In some rare cases, you might even activate the same die more than once on the same turn. For example, a die that calls a Commander might be Commanded by it, and get to act again.
When you're done with all your actions, it's your opponent's turn. Play proceeds until one player has scored 50 points.
Deep White Sea Players Take Note
The rules to Diceland have undergone one revision since the release of Deep White Sea. A die is allowed to maneuver when it lands, which was not the case in the original version. In Deep White Sea, a new die could activate its Weapon or Special Effect, but could not maneuver, when it landed.
While there have been other updates in this version (such as the definition of the word "shoot"), this is the only change that actually affects game mechanics. The new rule is retroactive to Deep White Sea, so when you play with that set we encourage you to use the updated rules.
Throwing a Die
Because this game has the physical element of dice-throwing, there are specific rules for how to throw the dice.
When you throw a die, you must release it behind your edge of the table, and at least a foot above or behind the edge. (The manual's top-view and side-view diagrams show that you throw from behind your own edge of the table, your opponent throws from behind theirs, and the die must be released outside the area within a foot of the table surface.) Even if the table is round, your "edge" of the table is still a straight line.
If you release the die anywhere inside the forbidden area, the throw is a foul. Your opponent has the option to either allow the throw, prohibit the die from shooting, or to make you take the die out of play. A die removed for this reason goes into reserve. Unless your opponent allows the throw, this kind of foul immediately ends your turn. You can't throw a different die, and you can't take any other pending actions.
Dice Off the Table: After you throw your die, any die that is not resting flat, with all three corners on the table, is considered "off the table" and must be removed from play. Dice that are leaning against other dice, leaning against an obstacle, or have a corner hanging off the edge of the table are all technically off the table. Remove them from play immediately.
Dice knocked off the table do not go into reserve, but return directly to their owner's hand.
If the die you throw goes off the table, there is no extra penalty. However, if you knock any other dice off the table, your opponent scores the point values of those dice regardless of who owns them. This can be costly, so throw carefully!
Hitting Other Dice: As long as you don't knock them off the table, it's perfectly legal to disturb other dice with the die you throw. Hitting other dice is an important element in Diceland, because you can weaken enemy positions with well-aimed throws, as well as help your own.
Examples: Your opponent's largest ship is sitting on a very powerful side. Regardless of what you throw, you will probably want to hit that ship, trying to knock it to a weaker side. Or, suppose you have a key ship that is on an inconvenient side. Instead of maneuvering it, you could hit it with a new die in an attempt to repair it and also get off a shot with the new die. There are endless variations on this situation, and it is essential for any Diceland player to spend a little time learning how to make effective (and legal!) throws.
After the Throw: When you throw a die, that die can activate immediately upon landing. This means you can maneuver, shoot the Weapon, or use the die's Special Effect.
Note: Even a die that knocked others off can still shoot!
Maneuvering a Die
To maneuver a die, choose any corner with a green dot and press down on that dot. The die will gently roll in that direction and reveal a new face. If a die is up against an obstacle, such as another die or the edge of the table, it can't legally move in that direction. Even if the die would only brush the obstacle, the move is illegal.
Shooting
When you "shoot" with a die, you are using the die's Weapon. A Weapon is any shot that has an Attack value, i.e., a number written on the Sight Arrow.
Examples of Weapons include Laser Beam, Missile Rack, Particle Vortex Cannon, etc. None of these Weapons is defined in this rule sheet, because they are all completely summarized by their Sight Arrows.
We will start by describing a die with a single Sight Arrow, then explain multiple Sight Arrows and other special cases.
Sight Arrows Determine Sight Lines
To determine what a die can "see," look at the Sight Arrow. The edge opposite that arrow is the "baseline." Imagine this baseline extending forever in both directions. The die can "see" everything that is even partially above that baseline. For example, in the manual's figure, the Maverick can see Dice 1 and 2, but not Die 3.
Shooting Range
The shape of the Sight Arrow dictates the Range of the shot. There are three types of arrows: Short Range, Long Range, and All Range.
Short-Range Arrows: This is the smallest arrow, a simple triangle with a concave base. This type of shot can only hit the closest visible target.
Enemies, not Allies, are the legal targets of Weapons, so if there is an Ally in your field of view, you will ignore it when determining the closest target.
Note that "range" has nothing to do with absolute distance, just relative distance. In other words, the closest die is always a legal target, even if it's a hundred feet away. The next closest die isn't.
When checking the distance between two dice, always measure between the closest points on the top faces. In the Maverick diagram, Die 1 is closer to the Maverick than Die 2, so the short-range Weapon will hit Die 1. Die 3 is even closer, but it's not visible and therefore it's not a legal target.
Long-Range Arrows: This arrow is a bit larger than the Short-Range arrow, and has a two-piece "pinched" bottom edge. A Long-Range shot can hit any single target it can see, not just the closest one. If the Maverick had a Long-Range shot, he could choose to hit either Die 1 or Die 2.
All-Range Arrows: This is the largest arrow and is distinguished by a long "tail." A shot with an All-Range arrow hits every visible target.
When you shoot an All-Range Weapon, you can't pick and choose from the legal targets. If you fire, you will hit every target. If the Maverick's shot were an All-Range Arrow, he would hit Die 1 and Die 2.
Remember, even an All-Range Weapon hits only Enemy dice, so you won't hit your own dice with an All-Range Attack.
Because All-Range arrows have multiple targets, it's important to time their effects correctly. Instead of hitting the targets all at once, an All-Range shot hits the closest target first, and works its way outward from there. In this way, there is no question about which target takes damage first. This only matters when hitting the targets in a different order would have a different result.
It's more often important to use this timing rule on All-Range Special Effects such as Command.
Some Special Effects use the same Sight Arrows as basic Attacks. When the text box of an effect is the same color as the Sight Arrows on a die, the arrows belong to that effect.
Multiple Sight Arrows
If a die has a Sight Arrow in every corner, it can see in all directions.
Uneven Shot Values: Sometimes when the die has three arrows, the shot value in the front is higher than the shot value in the back, as it is on the Fighter in the manual's figure (6 in front, 2 in back). The larger number takes precedence. If the target can be seen by the top arrow it will be hit for 6; otherwise it will be hit for 2. Note that all three arrows still represent the same single shot, so in this case this die will hit the closest target it can see, because it has a Short-Range shot.
In rare cases a die will have two arrows, usually representing a rear-firing Weapon. This die can see almost the entire table, with only one 60-degree blind spot. Again, these arrows represent a single shot, so if this is a Short-Range Weapon it must hit the closest target it can see.
Hit, Block, and Damage
When one die shoots another with a Weapon, you compare the Attack value of the Attacker's Weapon with the Block value of the target (the number in the shield-shaped icon).
If the Attack is equal to or greater than the Block, the target is "killed." Killing an Enemy die takes it out of play and adds the die's point value to your score.
"Killing" isn't permanent. Once killed, a die spends a turn in reserve. After that, it returns to its owner's hand, where it can be thrown again.
If the Attack is less than the Block, the target takes damage. To damage a die, find the red dot and push down. This will move the die one step, to the next lower side number. Damage is just like maneuvering, except that it uses the red dots.
Continuing to damage a die will eventually wear it down to its Side 1. On Side 1 there are no damage dots, and there is no Block value. On this side, any damage will kill the die. (Note that some smaller ships have multiple Side 1s.)
Even if the hit is significantly less than the Block, (like a hit of 1 on a Block of 20) the target still takes the same damage. The only way to avoid taking damage is to have Shield: X (a Special Effect, described below) or an immunity to the color of the shot.
Pinned Dice: If a die is unable to take damage because it is blocked by an obstacle or by the edge of the table, any damage will kill it, just as if it were on its Side 1. The die's inability to take the damage results in its being killed instead.
Color Immunity
If a character has a colored shield icon, that means it's immune to everything of that color. Attacks of that color do not damage it, and other effects of that color do not affect it. (Even friendly ones, like Command). A white shield means a die has no immunity.
Note that "immunity" doesn't make a die invisible. If Die 1 in the Maverick diagram was immune to yellow Attacks (the chaingun is yellow), the Maverick's Short-Range shot would still be unable to hit Die 2, because Die 1 is the closest target.
Immunity is the only reason that Attacks and Special Effects have colors. In Diceland: Space, projectile Weapons are yellow, lasers and heat-based Weapons are red, electrical and other strange Attacks are purple, and missiles and rockets are light blue.
Dark blue is reserved for two Special Effects called Command and Jump Ally. Commanders are immune to these effects only while they are Commanding. This particular immunity prevents a loop in which two Commanders, or a Commander and a Tender, could send out Commands forever.
One ship (the Klackar) is immune to green. We did this mainly to make the Klackar look greener; there are no green Attacks in Space. In Deep White Sea, green represents Poison.
Special Effects
Many dice have Special Effects which they can take as their action. Some of these effects, like Command, use the same kinds of Sight Arrows as Weapons. Others, like Calls, do not. All the Special Effects in Diceland: Space are listed below. For a complete list of special abilities, including all expansions, and notes on how they interact, visit the Diceland Web site, www.diceland.com.
Call: Call affects Allies. To Call means to throw a new die from your hand into play. The die can be activated when it lands. If that die can also Call, you could use it to Call a third die, and so on. (Terrans are especially adept at Calling long strings of Fighters.) You cannot Call a die that is in reserve.
Most Calls are restricted, as in "Call Urluquai Fighter" or "Call Terran." Obviously, the die you Call must match the criteria in the restriction, so when you "Call Urluquai Fighter," the die you throw must be an Urluquai and a Fighter.
Call X Fighters: When you Call multiple Fighters in one action, as you would with a Carrier, you are not required to Call the total number. Throw each Fighter one at a time, activate it, and then decide whether to throw another.
Cloak: Cloak is a continuous effect, which means that it does not require an action. It is functioning for as long as it is showing. A ship with Cloak is invisible to all effects that use Short-Range and Long-Range arrows. This includes Weapons and Special Effects. Cloaked ships can be seen by All-Range arrows.
A ship that is "invisible" doesn't count as a target at all, which means that a Short-Range Attack can see right through it and hit another target further away.
Command: Command affects Allies. A "Command All" tells all your allies to take an action. This can be very powerful once you have several dice on the table.
Some Commands are restricted, as in "Command All Fighters." In this case, the only legal targets must be Fighters and Allies. (In other words, "Command All Urluquai" doesn't let you control your opponent's Urluquai ships!)
Each die that receives a Command can take one action. It can move, shoot, or use its special ability.
Because a Command has multiple targets, you must execute the Commands in the right order, starting with the closest to the Commander. Technically, you give a numbered "Command Flag" to each die that's received a Command, then remove those flags as the Commands are executed. The counters on the box flaps are ideal for use as Command Flags, in case you actually need them.
When a die executes a Command, follow through all the effects of its action before moving on to the next die. For example, if a die is Commanded to Call, the Called die comes into play and takes its action before the next original Command is followed. If the Called die is a Commander, that die will issue a new set of Commands which will be executed before the older ones that remain!
In most cases, complex situations like this will not arise. We just want to make sure you can deal with them when they do.
Dodge: Dodge is a continuous effect, like Cloak. A ship with Dodge is invisible to all Enemy Sight Arrows, including Weapons and Special Effects, unless it is the closest visible target of those arrows. In other words, Dodging ships treat all enemy Sight Arrows as if they were Short-Range arrows. (Allies still see it normally.)
Jump: To Jump means to pick up the active die and throw it again. The die can activate again when it lands, as it could after any other throw. If the die lands on another Jump side, it can Jump again, and so on.
Jump Ally: While basic Jumps affect the active die, two ships (the Tenders) have the "Jump Ally" ability. This allows them to Jump an Allied die, picking it up and re-throwing it as described above. Jump Ally removes Command Flags, so if a die was first Commanded, but is then Jumped before executing its Command, it will activate normally when it lands, but forgets its Command Flag.
Jump and Jump Ally also remove Poison counters (an effect from Deep White Sea).
Move and Shoot: Move and Shoot is a special ability that allows a die to take two actions in a row. Specifically, it can maneuver and then fire its Weapon, in that order. It can't shoot and then move, and it can't move and then activate a non-Weapon effect.
Move and Shoot is usually found on the Cloak sides of Cloaking ships. This is a powerful combination that allows a ship to move out of Cloak and fire its Weapon on the same turn. In conjunction with a Commander, Cloaked ships can be highly effective because of the Move and Shoot ability.
Remove: Remove works on Enemies. When you Remove a die, you take it out of play and put it back into its owner's hand. You score no points; you simply remove the die from play. Only one ship in Diceland: Space, the Zorg Soma, has Remove.
Shield: Shield is a continuous effect. A die with Shield: X is immune to Weapon Attacks of size X or smaller. This is similar to color immunity. The Attacker can see the ship, but the Weapon has no effect. (Don't confuse the Shield: X ability with the shield-shaped Block icon, which is obviously on every die.)
Shoot and Move: Shoot and Move is identical to Move and Shoot, except it allows a die to fire its Weapon and then maneuver, in that order.
Sample Armies
Here is a list of armies you can build with one full set of Diceland: Space. Because the same rule sheet goes into both boxes, we are listing armies for all six teams. (The two boxes are Terrans vs. Urluquai, and Garthans vs. Muktians.)
The numbers at the end of each list (XX/YY) are the total point value of the listed army over the maximum allowable. Note that it's perfectly legal to include extra copies of any spaceship by pulling from multiple sets of Diceland: Space. Be creative and let us know what you build!
Terrans: The Terrans are the most versatile team, with nine different ships. They can field a brace of small Fighters quickly, and Command them with the inexpensive Wing Commander. Terrans also have a Destroyer, one of the heaviest ships in the game, with an amazing array of powerful shots.
- Terran Fighter Swarm: 2 Scouts, 2 Fighters, Stunt Fighter, Fighter Ace, Wing Commander, and Frigate. (27/32)
- Terran Multipurpose Fleet: 2 Scouts, 2 Fighters, Wing Commander, Corvette, Frigate, and Command Frigate. (32/32)
You can also substitute the Destroyer for 15 points worth of other ships, but leave at least one Commander!
Urluquai: The Urluquai's advanced technology has produced two Cloaking ships: the Deep Hunter and Stalker. Both ships have Move and Shoot. The Urluquai also have the Scorpion, a giant shooter which can destroy almost any ship in the game.
- Cloakers: 2 Scarabs, Stinger, Stalker, Warlord, and Deep Hunter. (30/33) (There's room for one more Scarab.)
- Maximum Firepower: Scorpion, Deep Hunter, Warlord, and Stinger. (33/35)
Zorg: The Zorg are a mysterious race with one of the game's best Fighters, the Mitra, and the split-personality Soma who has strong Weapons, plus Jump Ally and Remove. Use the Zorg Carrier, Marut, to Call all three Fighters, or clear the table with its All-Range Attacks. The complete 5-die Zorg team is (34/34).
Klackar: The Klackar are a peaceful race of space traders. Their vast wealth has produced a single known ship: the galaxy-jumping Outrider. Once you play with this powerhouse, you'll see why they don't need much help. Here are two mixed armies:
- Klackar Army 1: Outrider, Usha, and Soma. (30/30)
- Klackar Army 2: Outrider and Scorpion. (28/30) Toss in a couple of Runts just to have something to throw. (30/30)
Garthans: The Garthans are aggressive and brutal, and rely on their Carriers to deploy vast armies of Fighters. They have the smallest Fighter, the 1-point Runt, which presents an almost risk-free opportunity to knock your opponent's dice around.
- Garthan Fighter Swarm: Supercarrier, 2 Runts, 2 Slashers, 2 Vandals, and Butcher. (30/31) You can also replace the Supercarrier with a Light Carrier to make room for more Fighters, or include a third Runt if you have it.
- Garthan Heavy Army: Supercarrier, Butcher, Lancer, 2 Slashers, and Vandal. (32/32)
Muktians: The Muktians are relatively new to space, but have developed powerful and unorthodox ship designs. Use the versatile Whispers to Command a wing of red-immune Fighters, as well as the missile-spewing Farseeker.
- Fighter Wing: 2 Seekers, Mephit, Zephyr, Whisper, and Prosecutor. (27/32)
- Multipurpose Fleet: Overseer, Farseeker, Whisper, Zephyr, 2 Seekers. (31/32)
Tan Ru: The mechanical hive-brain of the Tan Ru is efficient, methodical, and oblivious to biological life. Deploy your Drones in triplicate, or just throw out the mighty Decimator. Be careful with the lop-sided Disruptor, who can clear the table in one shot, or start out barely more powerful than a Fighter. All five Tan Ru ships add up to (33/33).
Kawangi: The Yellow Kawangi have dispatched only one ship to our galaxy, so we can't know whether it's their biggest or their smallest. We can only hope it's their biggest. The Kawangi Destroyer is an army all by itself at (50/80). Because they are worth 50 points, the Kawangi can never team with anyone. They don't work well with others anyway.
Cross-Team Armies
Mixing armies allows you to combine the best attributes of several Teams: the Urluquai's Cloaking ability, the Muktian's red immunity, the Zorg's Tender, the Garthan Carriers, and so on.
When you are constructing a mixed army, you may find that you're not even sacrificing much in terms of points. If you're using Runts in an all-Garthan army, you can spend no more than 31 points anyway. Including different Teams in this army only reduces this limit by 1 point, but it allows you to add ships like the Terran Wing Commander and the Muktian Mephit.
On the other hand, when playing with larger ships, it's quite expensive to add a second Team. While you could build an army out of 3 Terran Destroyers or 3 Tan Ru Decimators (both are 15 points, for a total of 45/45), you could only include one of each of these super-heavies in a mixed army. (30/30)
Feel free to vary the army construction rules for your own games. If you allow 50+X points, you can play with two Kawangi!