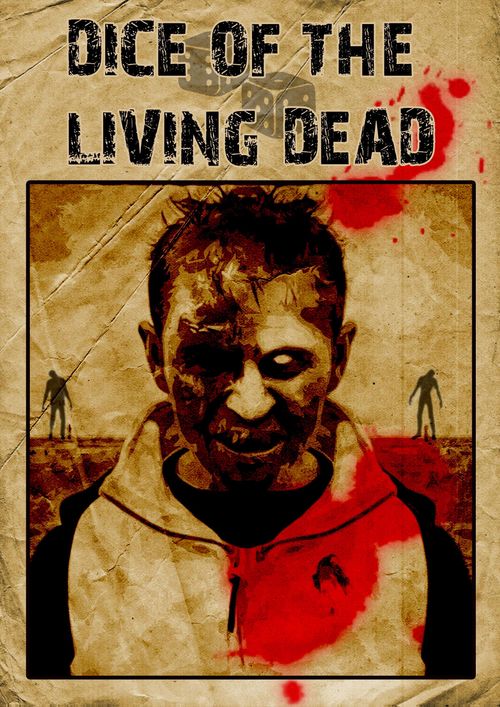
Dice of the Living Dead
Dice of the Living Dead Rulebook
Table of Contents
Table of Contents
Introduction
Dice of the Living Dead is a solo dice game that's free to print and play. All you'll need is a print of the game sheet and at least 8 normal dice.
The story
Zombies have overrun your hometown. You've grouped up with other survivors, and you now have to make your way to the outskirts of town and escape the undead menace. On your way you have to fight zombies, search for survivors, and dole out your limited supplies.
Every turn you roll dice trying to find the right balance between moving fast, but still having the time to fend of zeds. But just as every roll of the dice can help you, it also holds certain risks.
Components
In order to play you'll need the following:
- A print of the game sheet
- A pen or pencil and a die for bookkeeping.
- At least 7 normal dice, preferably in three different colours (5 white survivor dice, a red zombie die and a black scavenger die).
- A pawn to show your progress on the game sheet.
Set up
Start by placing a die with the "5" showing on the hour square. Now place your pawn at the start space and you're ready to go.
The game sheet
The primary feature of the game sheet is the progress track. It shows safe houses (green squares) and overrun parts of town (red squares). The game sheet also features four boxes used to store the different dice before resolving them.
Finally the game sheet summarises the effect of the dice rolls and also shows the event tables for each safe house location.
The dice
The game has three different kinds of dice. Or, it's all just normal, six-sided dice, but they cover different parts of the story.
Survivor dice
Every turn you roll five survivor dice – no matter how many survivors you actually have left. They can give you movement to get closer to your goal and they can give you valuable resources to fight the zombie horde, but they can also generate zombies and make you lose hours. Low numbers equal bad things happening.
The scavenger die
This die tells you what you scavenge as you search through the town. Maybe you'll find badly needed supplies, desperate survivors, or ammo to fight the zombies, but there's also a small risk of one of your party members being bitten and infected as he/she searches through the buildings.
The zombie die
The zombie die shows how many zombies you encounter during the game round. The higher you roll, the fewer zombies attack you.
In addition to this you'll get to roll fight dice during the game, and the zombies will roll zombie fight dice. They are also perfectly normal dice, and you'll find more info on fights below.
Playing the game
The game is played in a series of game rounds. You play until you make it out of the city, lose your last party member, or lose your last hour in which case darkness falls and the zombies overwhelm you. Do note that the term "hours" is not used in a literal sense – even in this game you have more than five actual hours of daylight.
Each round consists of the following elements which are explained in further detail below.
- Roll survivor dice
- Resolve scavenger dice.
- Resolve movement.
- Resolve zombie die.
- Fight zombies.
- Safe house phase (only if you reached a safe house during movement).
1. Roll survivor dice
First you roll your five survivor dice. At the same time you roll the zombie die and the scavenger die. Make sure to use dice that are easily distinguishable. The zombie die is immediately placed in the zombie dice pool to be resolved later, whereas both the survivor dice and the scavenger die may be rerolled two times for a maximum of three rolls. After the third roll all dice are frozen.
At any time between dice rolls you may freeze dice and place them in their appropriate spot on the game sheet. You may also later choose to reroll dice you've already frozen. The only exception to this is that every survivor dice showing "1" must immediately be placed in the zombie dice pool and cannot be rerolled.
The survivor dice can be used as follows:
Survivor dice
- 1 – Zombie. Place in zombie dice pool. No reroll.
- 2 – Lose one hour.
- 3 – 1 point of movement.
- 4 – 2 points of movement
- 5 – Fight.
- 6 – Fight.
Dice placed in the fight dice pool will be rolled again later, so it doesn't matter if you freeze fives or sixes. Before moving on to the next step you resolve any frozen 2's by losing an hour for each.
2. Resolve scavenger die.
Your scavenger die will be resolved according to the following table. Do note that a result of "1" is applied immediately, and the die may then be rerolled as normal.
Scavenger die
- 1 – Lurking zombie. Immediately mark one infected on the game sheet. The die may still be rerolled, but you risk another infected, of course.
- 2 – Supplies. Gain 1 supplies.
- 3 – Supplies. Gain two supplies.
- 4 – Survivors. Gain one party member.
- 5 – Ammo. Gain two ammo.
- 6 – Fight or movement. When resolving the scavenger die you may place it in either the fight dice pool or in the movement dice pool where it'll count as a movement die showing "4".
3. Resolve movement
When moving you have to move the total of your movement dice. If you have three of the same kind you gain on extra die of that kind. So a total of three fours will net you eight movement points. If you end your movement on a red square, place an additional die in the zombie dice pool. If you reach a green square (safe house) you must end your movement losing any remaining movement points.
4. Resolve zombie die
The zombie die yield the following result:
- 1 – three zombies. Lose 1 hour.
- 2 – three zombies
- 3 – two zombies
- 4 – two zombies
- 5 – one zombie
- 6 – one zombie
Place the appropriate number of dice in the zombie dice pool.
5. Fight Zombies
When fighting zombies you go through the following steps.
a – Use ammo to add fight di(c)e. Every ammo you spend gives you an additional fight dice.
b – Roll fight dice. As with survivor dice you may roll the dice a total of three times freezing any or all of the dice when you want to. The idea is to roll as high as possible, but every time you roll a "1" you immediately lose one hour fighting the zed with the exception of the first time you roll your fight dice. In other words you only risk loosing hours if you reroll any or all of the dice. If at any time during a fight you lose your last hour, you also lose the game.
c – Roll zombie fight di(c)e. The zombies fight with all the dice you placed in the zombie dice pool earlier on plus zombies generated by the red zombie die. You only roll the zombie fight dice once.
d – Infected. Before comparing results you may remove any zombie die showing "6" and gain one infected (see below). You may not do this if you already have as many infected as you have party members.
e – Compare results. You may remove zombie dice by matching with fight dice on a one for one or a one for two basis. So for instance one fight dice showing "6" can remove any one zombie die or any two zombie dice that totals up to 6 or less. But you can also sacrifice two of your fight dice to remove one zombie die – for instance a 1 and a 3 can remove a die showing 1-4.
f – Take casualties. For every zombie die remaining you lose one party member.
6. Safe house phase
If you've reached a safe house go through the following steps:
a – Reset hours. Place the hour die at "5".
b – Roll a random event (see tables on the game sheet) or pick a choice depending on the instructions.
c – Lose supplies. You must spend supplies equal to half your party members (round down). For every unit of supplies you don't have, lose one party member.
c – Infected. Roll a die for every infected marker you have and consult the table below.
Infected
- 1 – The infected turns zombie, killing one party member and infecting another. Lose two party members, keep the same amount of infected.
- 2 & 3 – The infected turns zombie, infecting a party member. Lose one party member and keep the same amount of infected.
- 4 – The infected dies. Lose one party member and one infected.
- 5 & 6 – Nothing happens.
You can have no more infected than you have party members.
Note that if you have to fight zombies as a result of safe house events, you must use ammo in order to gain fight dice. But since you are in fact in the safe house you cannot lose hours while fighting as a result of an event.
Winning or losing
If you at the end of a game turn have reached the star space and have at least one surviving party member, you win the game. This is the case even if all your survivors are infected – they just have to hope for a cure.
Note: since the star space is not a safe house, you skip the safe house phase on the turn you reach the star space. However, you still roll for each of your infected. In other words you can reach the star space only to lose your last survivors to infection.
If at any time you run out of hours and your pawn is not on a safe house square or if you lose your last party member, you lose the game.
Scoring
As an optional rule you can calculate your score after finishing the game, but it requires a bit more bookkeeping as you play. Of course, if you lose your last party member or run out of time, you score no points.
- Getting out of the city – 10 points.
- Surviving party members – 5 points each
- Remaining ammo – 2 points each
- Remaining supplies – 1 point each
- Remaining hours – 1 points each. You score hours every time you reach a safe house and also when you reach the star space.
- Zombies killed in a fight – 1 point each. You calculate this by noting down how many zombie dice you remove during the game. This includes zombies fought as a result of safe house events, but not zombie dice you've moved during combat by gaining an infected.
- Infected party members – minus 3 points each (remember that you can have no more infected than you have party members).
Acknowledgements
This game is more than inspired by the free, online game The Expedition (http://www.history.com/expedition/game/) and The D6 Shooters by Eric Herman Endres.