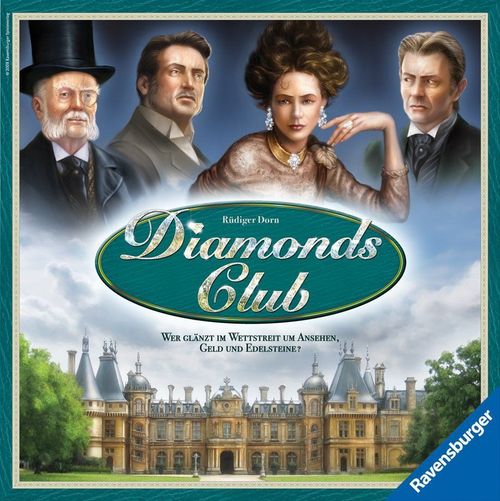
Diamonds Club
Diamonds Club Rulebook
Table of Contents
Table of Contents
Components
- 4 player boards — each shows a player's park and three development tracks (Forest, Technology, Money).
- 1 game board (made up of 4 parts) — the top shows the price tables for the landscape tiles, the middle has room for the market strips, and the bottom holds the start player track.
- 12 double-sided market strips (6 dark brown and 6 light brown).
- 2 "closed market" strips.
- 56 coins.
- 100 gems (20 each in blue, yellow, green, and red, plus 20 transparent diamonds).
- 40 playing pieces (10 each in the player colors red, white, bronze, and blue).
- 84 landscape tiles — one side shows a building (fountain, orangery, pavilion, or rose garden — 21 of each); the other side shows a forest.
- 21 animal tiles (7 each of pond, wildlife park, and aviary).
- 56 equipment tiles (16 mines, 20 mining rights, 20 ships).
- 8 bonus cards.
- 4 short rules sheets (player aids).
Object of the Game
Players buy gem mines, mining rights, and transport ships on the world market and invest in new technologies. With the gems they gain from this, they finance the building of a magnificent park. The player who at the end has the most valuable park — and therefore the most victory points — wins the game.
Setup
Each player receives:
- 1 player board
- 1 short rules sheet
- 10 playing pieces of one color
- 10 coins
- 1 blue, 1 yellow, 1 red, and 1 green gem
On the three uppermost spaces of his development tracks (spaces "2", "–", and "10"), each player places one playing piece. The remaining 7 playing pieces, the 10 coins, and the 4 gems are kept visibly in front of the player, next to his player board.
With fewer than 4 players, put the unneeded player boards and playing pieces back in the box.
Sort the market strips by frame color (light brown and dark brown) and place them ready next to the game board.
Sort the equipment tiles into 12 stacks (4 or 5 identical tiles per stack). Sort the animal tiles into the stacks Pond, Wildlife Park, and Aviary.
Sort the 4 buildings — fountain, orangery, pavilion, and rose garden — and place them above the matching price table on the game board. Each building tile has a forest printed on its back.
Put the remaining coins and gems next to the game board; they form the general supply. Place the bonus cards ready, face up, next to the game board.
The player board: it shows the player's park, on which the player must build at least the 14 light green spaces (to the left of the river). A player who has built on all 14 light green spaces of his park triggers the end of the game at the end of the current round. 3 of the 14 light green spaces are required spaces, which must be built on with the specific buildings shown on them. To the right of the river are the 3 development tracks (Forest, Technology, Money), as well as 5 dark green additional spaces, which may only be built on after the game-end has been triggered.
The price tables on the game board show the costs, in gems, of the landscape tiles Fountain, Orangery, Pavilion, Rose Garden, and Forest.
The space for the market: here the market strips are laid out anew at the start of every round (see Sequence of Play, Phase 1).
The start player track: the player whose piece is on the highest-numbered space after Phase 2 ("Buying") becomes the new start player and receives one diamond. The player who still has the most coins left over after Phase 2 also receives one diamond (see Phase 3).
Sequence of Play
At the start, a start player is determined at random. He places one of his playing pieces on the first space (0) of the start player track. Going clockwise, each other player in turn places one of his playing pieces on the next free space of the start player track, until every player has placed a piece.
Example with four players: White is the start player, followed clockwise by Bronze, Blue, and Red.
The game is played over several rounds and ends after the round in which at least one player has built on all 14 light green spaces of his park.
A round always consists of the following 5 phases:
- Laying out market strips
- Buying
- Distributing diamonds
- Acquiring gems
- Building
Phase 1: Laying Out Market Strips
The market strips are sorted by frame color (dark brown / light brown) and shuffled separately. From each color, as many strips are taken as there are players, and placed side by side on the game board (first the dark brown ones, then the light brown ones).
With two or three players, the remaining gap on the right is filled with the "closed market" strips.
Phase 2: Buying
Beginning with the start player, players take turns placing their coins, clockwise, on unoccupied spaces of the market.
The player whose turn it is places one coin on a space of his choice. If there are already coins on all four horizontally and vertically adjacent spaces, the player must place one additional coin for each occupied adjacent space.
Example: to occupy space A, a player needs only one coin; for space B he needs 2 additional coins (3 total); and for space C, 4 additional coins (5 total).
For every space a player occupies, he immediately receives all of the goods or benefits shown on it.
A player who cannot, or does not want to, place any more coins must pass. A player who has passed may not place any more coins for the rest of the round.
The "Buying" phase ends once all players have passed.
Caution: coins, gems, and all tiles that a player receives during the course of the game are always kept face up (visible) and open to inspection by all other players.
The meaning of the individual symbols on the market strips:
Equipment tile: the player takes the corresponding equipment tile (mine, mining right, or ship, with the corresponding value) and lays it face up in front of himself.
Note: with a combination of a mine, a mining right, and a ship, gems can be acquired in Phase 4.
Start player: the player moves his piece along the start player track forward by the number of top hats shown.
On some spaces for ships or mining rights, top hats are also shown. The player may take the corresponding tile and additionally move his piece 1 or 2 spaces forward. If there are already other pieces on the space he reaches, the newly added piece is placed on top of them.
If a player moves his piece past space 9, he automatically becomes the start player for Phase 3.
Animal tile: the player takes one of the "Pond," "Wildlife Park," or "Aviary" tiles and places it on a free light green space of his park.
If this causes the last light green space of the park to be occupied, the current round is still played to its conclusion (i.e. through the end of Phase 5 "Building"); the game then ends. A player who has completely filled his park's light green spaces acquires further animal tiles onto the dark green spaces.
Note: for every complete combination of all three tiles "Pond," "Wildlife Park," and "Aviary," the player scores especially many points, so it is worthwhile to collect all three tile types evenly.
Development tracks: the player moves his piece one space down the corresponding development track on his player board. On a "?" space, the player may choose any track he likes.
The meaning of the development tracks is described on the next page.
The Meaning of the Development Tracks
Forest: the player invests in the reforestation and care of his forests. This track determines how many victory points the player receives at the end of the game for each forest on his board. At the start, each forest is worth 2 victory points; this can be increased up to 6 victory points.
Technology: the player invests in better mining methods and means of transport. When the player moves his piece down this track, he receives additional gems of the same color (or even diamonds, i.e. joker gems) with every distribution of gems in Phase 4. This is explained in detail under Phase 4.
Money: the player deposits his money at the bank and earns interest. When the player moves his piece down this track by one space, he immediately receives one further coin from the general supply. He may already use this coin in the current round's Phase 2 "Buying." The values printed to the right of the track indicate how many coins the player has available for Phase 2 "Buying." At the start of the game, each player has 10 coins; this can be increased up to 14 coins.
Phase 3: Distributing Diamonds
After all players have passed in Phase 2, diamonds (= joker gems, transparent) are distributed, as follows:
1. For the most unplaced coins: the player who still has the most coins in front of him receives one diamond. In case of a tie, all players with the most coins each receive one diamond.
2. For the player(s) leading on the start player track: the player who is furthest to the right (highest number) on the start player track receives one diamond and immediately becomes the new start player.
If several players are tied on the highest number, all of these players receive one diamond each. Whichever of these players' pieces lies on top becomes the new start player.
Important: the player order for the following phases 4 "Acquiring Gems" and 5 "Building" is determined by the current placement of the playing pieces on the start player track. The start player is the player furthest to the right on the track, followed by the other players in descending numerical order — and, for pieces sharing a space, pieces lying on top before pieces lying underneath.
Example: in this case the player order is Blue, Red, White, Bronze.
Phase 4: Acquiring Gems
Beginning with the start player, players acquire gems. To obtain gems, a player needs a set of tiles consisting of one mine, one mining right, and one ship.
- Mine: indicates which color of gem the player may mine.
- Mining right: indicates the maximum number of gems that may be mined.
- Ship: indicates the maximum number of gems the player may transport.
The player receives gems equal to the lower of the two values on the mining right or the ship, in the color of the mine he used. He then returns the equipment tiles he used to their respective stacks.
Example: a player has the equipment tiles shown. Sensibly, he could take either 5 yellow gems, or 3 red gems, or 5 red and 3 yellow gems. The mining right with the value 2 can be carried over into the next round.
Depending on the space reached on his "Technology" development track, the player receives additional gems for every set of tiles he exchanges:
- For this symbol, he receives one additional gem in the color of the mine used.
- For this symbol, he receives one diamond.
Example: with the tiles shown, the player would receive 4 green gems. If his piece is on the marked space of the Technology track, he receives 5 green gems plus one diamond.
General note: in the very rare case that gems or equipment tiles are no longer sufficiently available, a suitable substitute should be used temporarily.
Of the leftover equipment tiles, the player may carry exactly one incomplete set into the next round. This can be either:
- one mine and one mining right
- one mine and one ship
- one mining right and one ship
or a single individual tile. Any further equipment tiles are returned to the general supply. Complete sets must always be exchanged during Phase 4.
Phase 5: Building
In the building phase, players beautify their parks. This brings victory points at the end of the game. Beginning with the start player, players may in turn (in the current order of the start player track) always either build one landscape tile or pass. Once a player passes, the building phase is over for him.
The building costs are shown by the price tables at the top of the game board. The player returns the gems shown to the general supply, takes the corresponding tile, and places it on any light green space on his player board.
If the player wants to build a forest, he takes a building tile — of whichever type (fountain, orangery, pavilion, or rose garden) is available — and turns it over to its back (forest) side.
After building, the player places one of his playing pieces on the space of matching color on the corresponding price table. The playing piece has the following significance:
- The player may not use this price table again this round.
- Every piece on a price table increases the price on that table, for every following player, by one gem of any kind.
Example — Player White's turn:
- White may not build the fountain again this round, since he already used that price table this round. (He could, however, build another fountain using the "any landscape tile" tile.)
- The orangery and the pavilion would cost White the same number of gems as shown on the price table.
- The rose garden would cost White the shown price plus 2 additional gems of any kind, since two opposing players' pieces already lie on this price table.
- The "any landscape tile," the 2-forest, and the 3-forest would each cost the shown price plus 1 additional gem of any kind, since one opposing player's piece already lies on each of these price tables.
Whenever a player fulfills a bonus card (see the Bonus Card Overview below) by building a building, he receives that bonus card.
If a player occupies the last of the 14 light green spaces of his park during the building phase, this building phase is still played to its conclusion; the game then ends. If a player whose park is fully occupied acquires further landscape tiles, he places them on the dark green spaces. Should a player have also built on all the dark green spaces, he may no longer acquire further tiles.
The building phase ends once all players have passed.
Important: on every player board, three "required spaces" are marked. These must be built on, during the course of the game, with the buildings shown on them. As long as a player has not built on these required spaces, he may not end the game, and he may not build on the dark green spaces.
End of Round
All players take back the coins they placed. Each player takes as many coins as needed so that afterward he has in front of him the number of coins shown by his position on the "Money" development track.
(It makes no difference whether the player still has coins left over from Phase 2 — each player always refills his supply of coins to the number shown by his "Money" development track. Coins not used do not carry over into the player's own reserve for the next round.)
Additionally, players take back all of their playing pieces from the price tables.
The new start player places his playing piece on the first space (0) of the start player track. The other players place their pieces, in seating order, one after another, on the following spaces (as described at the start of the game), going clockwise.
Then a new round begins, again with Phase 1 "Laying Out Market Strips." For this, all market strips are reshuffled. To shuffle the strips well, they should be turned face down.
End of Game and Scoring
The game ends after the round in which at least one player has occupied all 14 light green spaces of his park.
Players who have not built on their three required spaces do not count in the scoring. For every other player, all of their victory points are added up:
- The buildings (fountain, orangery, pavilion, rose garden) are each worth 4 victory points.
- Each forest is worth as many victory points as has been reached on the "Forest" development track (2 to 6 victory points).
- Each combination of "Pond, Wildlife Park, Aviary" is worth 10 victory points.
- Individual animal tiles that do not belong to a complete set of three are each worth 1 victory point.
- Bonus cards count according to their value (see the Bonus Card Overview below).
- If the bottom space of the "Technology" development track, or one of the three lowest spaces of the "Money" track, has been reached, the player receives one, two, or three victory points respectively.
(For scoring purposes, it does not matter where on the board the landscape or animal tiles are placed.)
The player with the most victory points wins. In case of a tie, whichever of these players has more gems wins. If there is still a tie, there are multiple winners.
Tip: a table following this pattern helps with totaling victory points:
| Player | Franz | Rüdiger | Sandra | Verena |
|---|---|---|---|---|
| Buildings | 44 | 16 | 28 | 12 |
| Forests | – | 36 | 2 | 36 |
| Animal tiles | – | 10 | 20 | 10 |
| Bonus cards | 12 | – | 8 | – |
| Special points from development tracks | 1 | – | – | 1 |
This table was also available as a downloadable template at www.ravensburger.de/diamondsclub.
Bonus Card Overview
Three-of-a-kind buildings (worth 3 victory points each): the player who is first to have built three fountains, three orangeries, three pavilions, or three rose gardens, respectively, takes the corresponding bonus card. It is worth 3 victory points at the end of the game.
All four buildings (worth 5 / 3 victory points): the player who is first to have built all 4 types of buildings takes the bonus card worth 5 victory points. The player who achieves this second takes the card worth 3 victory points. This can also be the first player again, if he builds all 4 buildings once more.
Five identical buildings (worth 5 / 3 victory points): the player who is first to have built 5 identical buildings (e.g. 5 pavilions) receives the bonus card worth 5 victory points. The player who achieves this second receives the card worth 3 victory points. This can also be the first player again, if he builds another 5 identical buildings. These bonus cards do not apply to forests.