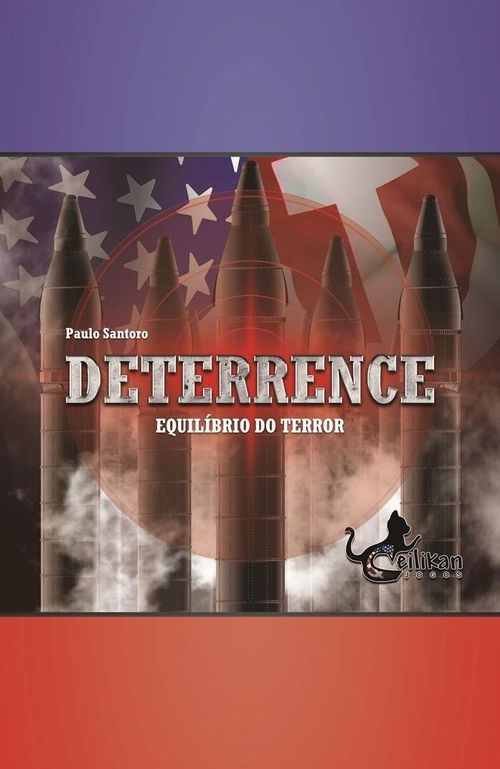
Deterrence
Deterrence Rulebook
Table of Contents
Table of Contents
Components
- 88 pieces: 25 Antimissiles, 20 Missiles, 15 Ranges (Alcances) and 23 Money (Dinheiros) tokens, plus 5 Commands (Comandos)
- 1 bag
- 1 main board
- 2 screens (escudos)
- 2 individual player boards
- 106 espionage markers
- 4 counter-espionage tokens
- 1 rulebook
Board
The board is a geographic projection of the Arctic Pole. Each side has 4 cities, and each city has 10 numbered spaces for constructions. The arrows show the direction of the nearest target for each city. The symbols that appear in each city represent special powers, which are explained later.
Missile: represents nuclear force. Missiles are the weapons used to attack or retaliate.
Antimissile: represents the neutralizers of Missiles. Each Antimissile destroys one Missile in flight, before it reaches its target.
The game represents an arms race in which the players expand their arsenals and react to the expansion of the opponent. A game ends when one of the players carries out a nuclear attack or declares a peaceful end to the Cold War. If neither player takes either of these actions, the game ends after a certain number of rounds, and the winner is the player who has preserved the most resources.
Setup
First, the players decide who will control the United States (USA) and who will control the Soviet Union (USSR). The board is then placed on the table so that the cities of the USA are on the side of the USA player. The espionage markers are placed beside the board, available to the players.
Next, each player places their individual board in front of them and protects it with their screen, so that the opponent cannot see their markings. Each player also receives 2 counter-espionage tokens.
Each city begins with 2 constructions (pieces). The main board shows which pieces must be placed in each city. The first piece shown is mandatory.
For the second piece, each player takes 3 Missiles and 3 Antimissiles, shuffles the 6 pieces and draws 1 at random for each of their four cities. The two remaining pieces are not used at this time.
All pieces must be placed standing up, with the figure facing the player, so that the opponent cannot see what each one represents. All pieces that were not placed on the board must then be shuffled into the bag.
Example (San Diego): the first piece placed is a Range. The second piece is either a Missile or an Antimissile, according to the draw made by the player.
On the individual boards, the players make marks to try to keep track of the opponent's constructions. This is espionage! Each line refers to a single construction in the opponent's city.
Therefore, the first 2 lines show some highlights (1 in the first line and 2 in the second line) relating to the 2 initial pieces. As already explained, the first is fixed and the second must be a Missile or an Antimissile. Place markers on these spaces.
Example (Washington): the Soviet player places a marker on the "Money" space in the first line of Washington, because Washington always starts the game with a Money construction. In the second line, the player places one marker on Missile and another on Antimissile, because these are always the possibilities for the second construction of each city. The other lines will be used during the game.
Range (Alcance): represents an aiming adjustment operation. Each Range allows an attack on a city, enabling the player to start an attack or a retaliation.
Command (Comando): represents a nuclear operations centre, enabling the city to start an attack or a retaliation. It counts as an Antimissile if it is in a Command Centre (Moscow or Washington).
Money (Dinheiro): represents saved resources.
Turn Order
- USSR Attack/Détente Phase
- USSR Treaties Phase
- USSR Construction Phase (mandatory)
- USA Treaties Phase
- USA Construction Phase (mandatory)
- USA Attack/Détente Phase
The Game
The USSR always begins the game.
Attack/Détente Phase (optional): In this phase, the player may initiate a nuclear attack or declare the peaceful end of the war. Both actions have requirements that must be met before they can be used, which are explained later.
Treaties Phase (optional): The player may make a treaty, depending on the weapons. To do so, remove one Missile or one Antimissile from any of their cities, show it to the opponent, and place it on the first free square of the "Treaties" space on their side of the board. There are only 4 squares for each player, so this optional action can be performed only 3 times per player during the game. Pieces that go to the Treaties never return to the cities.
The player who makes a Treaty must also tell the opponent which number of the space has been left uncovered, so that the opponent can remove the corresponding marks from their individual board. Afterwards, that space may be occupied again by the player on their normal turn.
The USSR's Treaties space.
Construction Phase (mandatory): The player draws 3 pieces at random from the bag and reveals them to the opponent, who uses 3 espionage markers to record what they saw on their individual board.
If, when drawing 3 pieces from the bag, the player draws 3 identical pieces (for example, 3 Missiles), they have the option to return all the pieces to the bag and draw again. If they keep the draw, the opponent gains an advantage, because the opponent will know with certainty which piece was chosen.
Example of the construction phase: the USSR player draws 3 pieces from the bag and gets the following constructions: Missile, Money and Command.
The player shows the 3 pieces to the opponent, who makes a temporary mark on their individual board.
The player then gathers the 3 pieces in their hands and secretly chooses one of them. They place the chosen piece on the first free space of any one of their cities on the board, and return the two rejected pieces to the table, face down.
At this point the opponent has the right to spy on one of the rejected pieces, so that they know which piece was not chosen. To complete the espionage, the opponent then marks on their individual board the other two pieces, which they did not see, because one of them is the piece chosen by the active player to be built.
The active player (USSR) secretly places Money on the first free space in Moscow.
The rejected pieces (Missile and Command in this example) are returned to the table, face down. The USA player picks one of them at random and looks at it. Say it is the Command.
Now the USA player knows that the piece in Moscow is either a Missile or Money. They record this discovery by placing two markers on the first free line in the "Moscow" column of their individual board: one in the Missile column and one in the Money column.
Espionage (attention): espionage is carried out in secret. The active player may not look at which piece the opponent spied on.
The marking is made on the first free line in the column of the city in which the opponent placed the piece. The opponent must place a marker in the column of each piece they suspect.
Important: take great care when making this marking, because a wrong espionage can lead to a mistaken decision to attack, counter-attack or declare Détente.
Note: once placed in a city, a piece may not be moved to another city until the end of the game. It can be removed from there only through the optional action of making a treaty, which applies only to Missiles and Antimissiles.
The two rejected pieces must be set aside, always face down, so that the opponent never knows for certain which piece the active player chose.
Counter-Espionage: at any time during the game, in the Espionage Phase, the active player may discard one of their counter-espionage markers to force the opponent to spy on a specific piece.
Example: the player draws a Missile, an Antimissile and a Range from the bag. They choose the Missile and place it in one of their cities. Then they spend a counter-espionage marker and show the Antimissile to the opponent, instead of letting the opponent randomly see one of the two rejected pieces.
Game Progress
The players continue to alternate turns, carrying out the rounds in the planned order.
When the bag runs out for the first time, all the pieces rejected up to that moment must be returned to it, and the game continues. When the bag runs out for the second time, the game ends (Détente).
If, in the draw of the last three pieces from the bag, they were identical, the player may make a new draw. They must proceed as follows:
- First time the bag runs out: all 3 pieces are returned to the bag, together with the pieces rejected earlier. The player draws again and chooses one piece, and the opponent spies on it. In this case, however, the 2 rejected pieces go back into the bag. The game continues normally.
- Second time the bag runs out: all 3 pieces are returned to the bag, together with the pieces rejected earlier. The player carries out their action normally, and the game ends.
Note: in the very rare case where the last 6 pieces in the bag are identical, making the normal procedure of returning them to draw again pointless, the same procedure described above is followed, but 6 pieces are returned to the bag instead of 3.
The End of the Game
A game of Deterrence ends in one of the following cases:
- A player carries out a nuclear attack;
- A player declares Détente;
- An automatic Détente occurs.
The Attack
A player may declare a nuclear attack on their turn, during their Attack/Détente Phase. Note that this phase occurs at the beginning of the USSR's turn and at the end of the USA's turn. This difference is intended to keep the balance, because the USSR starts the game.
To declare an attack, the player must fulfil the following requirements:
- Have at least 4 constructions in each of their four cities.
- Have at least a number of treaties equal to the opponent's.
If both conditions are met, the player declares the city from which the attack starts. The attack begins from this city and uses only the pieces positioned in it. The player then reveals, in order, the following pieces:
- At least one Command in the city: only cities with at least one Command piece can start a nuclear attack. Washington and Moscow are already, naturally, Command Centres and do not need a Command construction to carry out an attack. Any excess Command pieces in the city (not needed to justify the attack) must remain hidden for now, as must Money and Antimissiles.
- At least one Missile: the player decides with how many Missiles installed in the attacking city they will carry out the attack. They do not need to reveal all the Missiles available, but in that case they will not have the opportunity to use the remaining Missiles later, after the enemy's defences have been revealed.
- All Range constructions: these determine the target of the attack. The attacker may not omit any of them or choose to use a smaller number of Range pieces: all those present in the city must be exposed and counted.
Example of attack: the USSR player attacks. They confirm that they have at least four constructions in each city and at least the same number of treaties as the USA. They declare the attack from Vladivostok and reveal the following pieces:
- 1 Command: the city has permission to carry out the attack.
- 2 Ranges: the target is Omaha.
- 3 Missiles: the attack strength is equal to 3.
The city also has 2 Antimissiles, which the player keeps hidden for now. The attack of 3 Missiles from Vladivostok against Omaha has begun. To defend, the USA player reveals the Antimissiles positioned in Omaha. Unfortunately, Omaha has only 2 Antimissiles in the city, which are not enough to neutralize an attack of 3 Missiles. Therefore, Omaha is destroyed.
To determine the target, check the arrows shown on the board. The two westernmost cities of each nation point to the two easternmost cities of the opponent, and vice versa. Once each Range piece represents 1 city of distance (including the cities of the attacking player itself), we can observe, for example, that:
- If San Diego is the attacking city and has 1 Range piece, its target is Vladivostok;
- If Moscow is the attacking city and has 3 Range pieces, its target is Washington;
- If London is the attacking city and has 4 Range pieces, its target is Vladivostok.
The opponent then reveals, in the target city, all the Antimissile pieces available, including Command pieces, which count as Antimissiles when positioned in a Command Centre. Each Antimissile neutralizes one attacking Missile, but a single Missile that passes through the defensive barrier is enough to annihilate the target.
Thus, to survive, the target must have at least as many Antimissiles as there are attacking Missiles.
Important: Omaha and Omsk are "Attack Centres". When an Attack Centre launches an attack (including a retaliation), it gains a bonus of 1 Missile if it has at least 2 Missiles. Thus, an attack of 1 Missile from Omaha or Omsk is worth 1 Missile; an attack of 2 Missiles from one of these cities is worth 3 Missiles; an attack of 3 Missiles is worth 4 Missiles; an attack of 4 Missiles is worth 5 Missiles, and so on.
Attention: San Diego and Vladivostok are also "Defence Centres". When a Defence Centre is the target, it gains a bonus of 1 Antimissile if it has at least 2 Antimissiles, in the same way that Missiles in Attack Centres gain a bonus.
Example: if the USSR player attacks London, the USA player may retaliate from London or from Washington.
Retaliation
Retaliation is a counter-attack that is automatically initiated when a successful attack is carried out. The superpower that suffered the attack may retaliate EVEN if it does not have at least 4 pieces in all of its cities, and EVEN if it has not made as many treaties as its opponent.
First, the player must choose one of their cities to retaliate from. They may choose the attacked city itself, or an immediately neighbouring city.
- If they choose the attacked city itself, it does NOT need a Command piece there to retaliate.
- If they choose a neighbouring city, it needs a Command piece (except Moscow and Washington, which are Command Centres).
A retaliation may target any city of the opponent, according to the number of Range pieces in the city launching the retaliation. It is not mandatory to attack the same enemy city that launched the original attack.
After an attack and a retaliation, the game ENDS.
Examples of results:
- Example 1: the USSR attacks and destroys Omaha. The USA retaliates from Washington, targeting Warsaw, but the Antimissiles in Warsaw neutralize the Missiles. Winner: USSR (it DESTROYED the enemy city AND ALSO saved its own city from retaliation).
- Example 2: the USSR attacks from Warsaw, targeting London, but London's Antimissiles succeed in neutralizing the attacking Missiles. Winner: USA (the USSR declared the attack and did not destroy the enemy city. In this case, there is no need for the USA player to retaliate, because they are already the winner).
- Example 3: the USA attacks from London and destroys Omsk. The USSR retaliates from Omsk and destroys San Diego. Winner: USSR (the USA declared the attack, but could not save its city from the retaliation).
Result of the War
A head of state will never be forgiven for having unleashed a nuclear conflict that led to the destruction of one of their main cities, or one that has not caused any damage to the enemy.
Thus, the player who chose the path of conflict wins ONLY if they manage to DESTROY the enemy city they attacked AND ALSO are able to NEUTRALIZE any eventual retaliation, thereby saving their own city from being attacked.
Détente
Détente represents the end of the tensions of a cold war. The game ends immediately when a player declares Détente, or when the bag of pieces runs out for the second time, in which case Détente is declared automatically.
To declare Détente, the player must meet the following requirement:
- Have at least 6 construction pieces in each of their 4 cities. The number of treaties is not important for Détente.
When the game ends in Détente, the winner is the player who has the most Money in their four cities together. In case of a tie, the USSR is the winner of the conflict.
Important: London and Warsaw are Financial Centres. In a Financial Centre, the player gains a bonus of 1 Money if they have at least 2 Money pieces there, if the game ends in Détente.
Basic Strategy Tips
Espionage Is the Key to Victory
Beginner players sometimes neglect the individual board, but correctly marking your espionage is essential to succeeding at Deterrence.
Observe some of the deductions you can make from the markers on your individual board. Suppose you are playing as the USA and have the following situation on your individual board, in the Moscow column:
- Moscow has at least one Missile piece.
- Moscow has no Command, but does not need one to carry out an attack.
- If Moscow attacked now, it would be with: a) at most 3 Missiles, 2 Ranges and no Antimissile; or b) at most 2 Missiles, 2 Ranges and 1 Antimissile. Otherwise it could not attack, for lack of Range.
- If the USSR player declares an attack, it will be able to attack London with up to 3 Missiles, and in that case it has no Antimissile; or with up to 2 Missiles, and in that case it has only 1 Antimissile.
Note: this scan is low resolution and the marker captions were hard to read; the translation above follows the most likely reading of the printed text.
What should you do to guard against these possible attacks? If Moscow really does have an alarming quantity of Missiles, it has no Antimissiles! So a good idea is to choose it as the target of a future retaliation. If you can aim at Moscow, you will not have to fear it: that city either has no Missiles, or not enough to destroy you, or you have no Antimissiles to neutralize its eventual retaliation.
Using Treaties
If you think the opponent is too strong and can attack you, you can try to defuse them at any moment, if you have the option to lower weapons by making a treaty. Remember that the opponent will not have permission to attack you if they have fewer pieces than you in the Treaties space.
You can only choose a Missile or an Antimissile to remove. Obviously, a Missile that is no longer useful in that city may be a good choice. For example, if you have a city with only 1 Missile, no Range and no Command, that Missile is no longer useful there and may be a good choice.
This solution is only palliative, however. Your opponent can also make a Treaty on their next turn, and you can make this option only 3 times in the game, so you can only postpone the opponent's attack by at most 3 turns. Make the most of this time to fill the gaps in your strategy and prepare for a real nuclear attack!
Also keep in mind that if you control the USSR, having one more piece in your Treaties space is not enough, because your opponent can, in the same turn, make a Treaty, equalling the number of pieces on your side, and launch an attack.
Fear
Remember that you are seeking an imbalance in weapons, and that the more pieces are in play, the harder it will be to keep control of all the possibilities of attacks and retaliations in the game. So, if no player launches an attack until about two-thirds of the game has passed, the game will strongly tend toward a mutual deterrence, in which both players become so afraid of having the initiative to attack. Perhaps it is time to start saving Money!