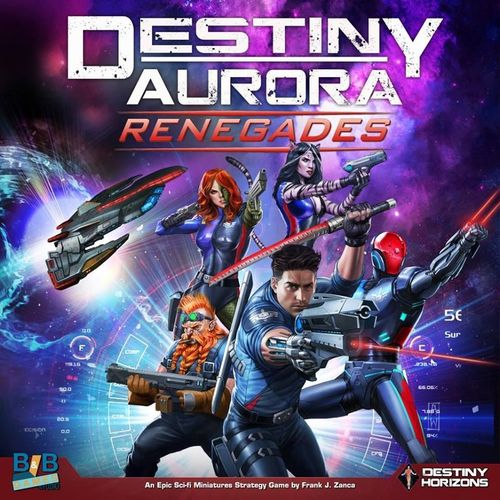
Destiny Aurora: Renegades
Destiny Aurora: Renegades Rulebook
Table of Contents
Table of Contents
- Game Contents
- Setting Up the Game
- Missions & Campaigns
- Game Play
- Space Orbital Phase
- Planet Surface Phase
- World Event Phase
- Crewmembers
- Skill Tests
- Equipment
- Injuries and Wounds
- Ships
- Combat Resolution
- Weapons and Items
- Boarding Actions
- Prisoners & Turning
- Non-Player Characters
- Bounty Cards
- Normal Play
- Campaign Play
- Buying and Selling Weapons, Items & Upgrades
- Recruiting Crewmembers
- Turning Prisoners
- Epic Endings
- Gameplay Options
- Tactical Cards
- Glossary
Game Contents
Models, Figures & Standees
Each Ship Model corresponds to a large Ship card. Other ships are represented by standees, including villainous Fighters which may be dispatched against you. 12 ships are included in the game:
- 2 Renegade Ship models
- 2 Coalition Ship models
- 3 Zurathi Fighter standees
- 3 Dregg Fighter standees
- 1 Troop Transport standee
- 1 Military Satellite standee
Character Figures - Each Character figure corresponds to a Crewmember card. At the beginning of a mission, Crewmembers are placed on their ship card in their assigned station, but later they can be dispatched to a planet to complete the mission. There they may encounter Villain Commanders and Warriors or dangerous Creatures, which are represented by standees:
- 10 Renegade Crew figures
- 10 Coalition Crew figures
- 6 Zurathi Warrior standees
- 6 Dregg Warrior standees
- 6 Ronin Android standees
- 3 Villain standees
- 10 Creature standees
- 2 Royalty standees
- 1 Mutated Cyborg standee
- 1 Monolith standee
Cards
There are several types of cards, which can affect the game or attach to individual characters. The "Game Play" section explains when and how to use each card type.
- 4 Large Ship Cards
- 20 Crewmember cards
- 13 Villain/Royalty/NPC Reference Cards
- 20 Bounty Cards
- 26 World Event Cards
- 18 Enemy Cards
- 10 Creature Cards
- 48 Weapons & Gear Cards
- 20 Starting Ships Armory
- 38 Upgrade Cards
- 16 Mission Cards
- 22 Planetary Location Cards
- 16 Orbital Location Cards
- 24 Search Items
- 19 Salvage Cards
- 15 NPC Cards
Game Boards
During play, you will use two separate game boards, one for outer space and one for the surface of the planet. Each board is made up of interlocking tiles:
- 3 Planet Surface center tiles
- 8 Planet Surface corner tiles
- 8 Planet Surface side tiles
- 1 Space Orbital center tile
- 7 Space Orbital corner tiles
- 7 Space Orbital side tiles
- 4 Docking Ports
- 4 Planets
Dice
Dice are used for attacking and defending during both ship and planetary combat, as well as for Skill Tests.
- 8 Red Dice
- 8 Black Dice
Tokens
Tokens are used to track various conditions during the game:
- 10 Unconscious Crewmember tokens
- 10 Infected/Radiation tokens
- 6 Drone tokens
- 6 NPC tokens
- 2 Fire tokens
- 8 Data tokens
- 6 Faction tokens
- 34 Search Items tokens
- 27 Salvage tokens
- 30 Energy tokens (1 denomination)
- 10 Energy tokens (5 denomination)
- 20 Damage tokens (1 denomination)
- 7 Damage tokens (5 denomination)
- 35 Wound tokens (1 denomination)
- 10 Wound tokens (5 denomination)
- 6 Stealth tokens
- 4 Stun tokens
- 6 Numbered tokens
- 8 Player Order token
- 20 Digit tokens (25 denomination)
- 15 Digit tokens (50 denomination)
- 10 Digit tokens (100 denomination)
Setting Up the Game
First, all players need to decide if you are going to play a single mission, or a longer campaign (see "Missions and Campaigns" on page xx). Then it's time to prepare for your mission!
-
Choose a Ship: Each player chooses a ship to command in the game. Each ship begins without any Upgrades, and is therefore exactly the same as the other ships except for their Faction, located at the bottom middle of the Ship card. Take the Ship card you have chosen and place it in front of you with the "Shielded" side up.
-
Recruit Your Crew: Like ships, each Crewmember is a member of a Faction, and their Faction is indicated in the top right corner of each Crewmember card. This core game includes ten Crewmembers from each Faction. At the beginning of the game, you must choose exactly five Crewmembers from your ship's Faction to join your crew.
Station Specialties: Each Crewmember specializes in a certain station onboard a ship, which is indicated next to the Crewmember's name (see "Crewmember Cards" on page 19). When choosing your starting crew, you need to fill all five stations, so you will have individual crewmembers with a specialty that matches that station. Try to pick a crew with a good mix of skills.
Commanders: On Renegade ships, the Commander is called "Captain," while on Coalition ships the Commander is called "Inspector."
Team Games: If there is more than one player per Faction, then each player in a Faction rolls one die and the highest roll chooses their first Crewmember (roll again if tied). Then the other player chooses one Crewmember, and so on, until each player has five Crewmembers.
-
Assign Crew to Stations: Each Ship card has five bubbles with the name of a station printed in the center (see "Ship Cards" on page 23). Each station can hold only one Crewmember at a time. Place one of your chosen Crewmember figures in the station you want to assign them to (usually the one they are specialized in). Place the matching Crewmember cards next to your Ship card with the blue Space Orbital side facing up.
Med Bay: Note that Med Bay is not a station. Your Medic will only go to Med Bay when they are tending to wounded or unconscious Crewmembers. Otherwise, they will be on the bridge, controlling the Communications array or another station.
You are now ready to begin playing Destiny Aurora: Renegades. Good luck and may the best crew win.
Before the game begins, all players must agree on whether to play a single mission, or a series of linked missions called a campaign, which could take several sittings.
Missions & Campaigns
Missions
A mission is a single game, in which the crews attempt to complete certain tasks or recover items that are imperative to events occurring on a galactic scale. Each mission will bestow upon the victor a reward, in the form of Galactic Digits, the currency of the Destiny Aurora universe.
Timed Missions
You may decide to limit the length of a mission by adding a limit to the total number of rounds you will play. This time limit is represented in the game by the World Event cards. Each round, you will draw one card from this deck (see "World Events" on page xx). When the last card is drawn, the players have one final turn to complete the mission, otherwise the mission ends and the game is (usually) a draw—refer to the Mission Booklet.
Normally, you will use the entire deck of World Event cards. This will give you plenty of time to complete almost any mission. However, you can make the game shorter by using a smaller number of World Event cards. Instead of placing the entire World Event deck next to the game boards, after shuffling them, randomly choose only 6 to 8 World Event cards and return the rest to the box without looking at them. If you are playing with this option, do not draw any World Event cards until the end of the first round that there is at least one Landing Party on the Planet Surface.
This reduced deck works as a timer. After the last World Event card is drawn, each player gets one final turn in Space Orbital and on the Planet Surface, finalizing any moves and actions. Then, refer to the Mission Booklet to get the story and outcome of the incomplete mission.
Campaigns
A campaign is a group of missions, played one after the other, that lead to an Epic Ending which imperils the very universe. During a campaign, players can purchase Upgrades for their Crewmembers and ships.
The Mission Booklet for this core game includes three unique campaign storylines, each with their own Epic Endings. Each Mission card shows the names of one or more campaigns at the top of the card.
If the group decides to pursue a campaign, then they must decide how many missions will make up the campaign, typically three to five missions. As you continue your story, you will draw Mission cards from the top of the Mission deck until you have completed that many missions.
Once the final mission is completed, the Epic Ending for that campaign is triggered. The two Factions with either go head-to-head, or work together to save the galaxy! The Mission Booklet further expounds on these elements.
At the beginning of the campaign, you can build a deck of Mission cards using only those cards that show the name of the campaign that you are playing. Or you can play with the full Mission deck as a kind of "super campaign," playing until you have played the required number of missions for your campaign.
The Taken Mission can be used for all 3 Campaigns.
Mission Cards
When you draw a Mission card, choose a player to read the text aloud to the group so everyone knows what all of the Mission Parameters are. Missions are worded as directives for the Renegades. Coalition crews are tasked with stopping the Renegades or working against the Renegade's Mission Parameters by completing them before the Renegades can.
After reading the card, follow any Set Up instructions shown. In the bottom right corner of the card you will find a planet symbol. The color of the planet indicates which planet on the Space Orbital board the mission will take place on. Mission cards also show the following:
- Campaign Title: One or more campaigns are listed at the top of each Mission card. If you are playing a campaign, this mission will count towards the number of missions required to complete that campaign.
- Mission Name: Each Mission card shows the name of the mission. Missions are listed in the Mission Booklet in alphabetical order.
- Story: The circumstances that led you to the planet, and what elements you're seeking in order to complete the Mission Parameters are described here.
- Set Up: If the mission requires specific map tiles, they are listed here, along with any locations where Villains and Creatures begin play.
- Special Rules & Winning Condition: Any special rules that apply to this mission as well as any specifics pertaining to the completion of the mission and winning the game are included here.
Remember: Mission cards show only basic information. For additional rules and set up, refer to the Mission Booklet. For a starter game play the Taken mission.
The Game Boards
Both boards (Planet Surface and Space Orbital) are built randomly (with some tiles specific to the mission), so each mission will play very differently. The boards show the area of space and the part of the mission planet where the action will take place. Each board is divided into a number of squares that are used to regulate movement and attacking. Squares are "adjacent" if they share a common side or meet at a corner.
Both boards may show a variety of terrain, indicated by colored outlines on the board tiles (see "Terrain Effects" on page 29).
Location Cards
Location cards are drawn in sequence to create both the Planet Surface and Space Orbital boards, so no two games will ever be completely alike. Location cards show the following:
- Name: The name of the Location card matches the associated map tile, which has the same name or number printed on the side.
- Tile Type: This tells you where to place the tile in relation to the other tiles. There are three types: Center, Side, and Corner. The Side tiles fit into the Center tile, and the Corner tiles fit into the Side tiles. In addition, there are four End Cap tiles that complete the Side tiles (though you can play a larger game by attaching additional Side tiles, if desired). Docking Port End Caps are added to the Planet Surface board, and Planet(oid) End Caps are added to the Space Orbital board.
- Description: Any story points related to the location, and whether it is an indoor or outdoor location (Giant Creatures may be limited from entering indoor locations) can be found here. Any special rules or location abilities are also explained here (use of location abilities is optional).
Giant Creatures cannot enter interior Corner locations, but they can enter interior Center and Side Tiles.
Random Locations
Sometimes, a game event, such as adding new Enemies to the board, will require you to select a random location. If this occurs, shuffle the deck of used Location cards and pull one at random. The location shown on the card is the random location you will use.
Discard the unused Location cards and shuffle the remaining Cards that make up the Planet Surface and Space Orbital boards into two separate, smaller decks to be used for choosing Random Locations.
Game Play
Destiny Aurora: Renegades is played over a series of rounds. Rounds continue until either one crew completes the Mission Parameters (based on the mission Tier chosen during setup), or until the World Event deck runs out of cards.
Each round is divided into three phases, which are played in order:
- Space Orbital Phase
- Planet Surface Phase
- World Event Phase
Once all three phases are complete, if the game hasn't ended, begin the next round.
Determining Player Order
Within each phase, the players take turns in order, determined by Crewmember Initiative. A Crewmember's Initiative value is located in the top right corner of their card (see "Crewmembers" on page 8). This Initiative may be altered in a number of ways, including Upgrade cards.
Give Player Order tokens to each player based on their Initiative, using blue for the Space Orbital Phase and red for the Planet Surface Phase. If the player order changes (due to a Crewmember joining or leaving a Landing Party, for example), rearrange the Player Order tokens.
Important: If there is a tie for Initiative, the Renegades go before the Coalition. If two members of the same Faction tie for Initiative, they decide between them which order they will take their turns.
Example: Donexia and Jayce both have an Initiative of 8. Since Donexia is a Renegade, her ship would take a turn before Jayce's ship.
During a phase, the players take turns, player by player, in descending Initiative order.
Ship Initiative
During the Space Orbital Phase, a ship's Initiative is equal to the Initiative value of the ship's Commander. If a ship does not have a Commander (i.e., no Commander is present on the ship), the ship's Initiative is equal to the Initiative value of the Crewmember situated in the Navigation station. If there is no Navigator either, then the ship has an Initiative of zero.
Landing Party Initiative
During the Planet Surface Phase, each player calculates the Initiative for their entire Landing Party by adding the Initiative values of all Crewmembers that have disembarked from their ship (see "Deployment" on page 12). If a Crewmember is defeated, reduce the Landing Party's total by their Initiative. If a Crewmember is replaced, add the newcomer's value to the total once they have disembarked.
NPC Initiative
All Non-Player Characters and Ships have their Initiative value listed on their reference cards, which is equal to the NPC level. Usually, this means that they will take their turns after all players have taken theirs. If there are multiple Villains on the board, they take their turns in the following order: Zurathi, then Dregg, followed by the Troop Transport and Military Satellite.
Space Orbital Phase
Each round begins on the Space Orbital board. During this phase, ships take turns in Initiative order. Once all ships have taken a turn, the phase ends.
Ship Turns
During a ship's turn, it gets to take two actions from the following list. Actions can be taken in any order, and the same action can be repeated except the Attack or Attempt to Turn a Prisoner actions.
- Move
- Attack (once per turn)
- Salvage
- Board an Enemy Ship
- Attempt to Turn a Prisoner (once per turn)
- Descend to the Planet Surface
- Ascend to Orbit
In addition, the ship may take any number of the following free actions at any point during their turn:
- Reassign Stations (only at the beginning of the turn)
- Scan a Salvage Token (once per token)
- Use a Ship Ability (once per turn)
- Heal or Revive Crewmembers in Med Bay (once per turn)
- Use a Tactical Card Ability
The ship is not required to use all of the actions it has available. A ship may take only one (or none) if the player chooses.
Once the ship has completed its actions, its turn is over and the next ship takes its turn.
Villain Fighters and other NPC ships will also take turns during this phase, in Initiative order (usually after all player ships have taken turns).
Example: The player controlling the Hades VI wants to attack the Destiny Aurora, but is out of range. First, he moves the Hades diagonally four squares to get in range. He then makes an attack, successfully inflicting damage on the Destiny Aurora. Normally, his turn would be over since he has taken two actions, but his Engineer can make a Tech Test to Overclock the Engines and move an additional three squares, since using a Ship Ability is a free action.
The Ship Actions
Normal Actions
Each ship is allowed to take any two of these actions during its turn:
- Move
- Attack (once per turn)
- Salvage
- Board an Enemy Ship
- Attempt to Turn a Prisoner (once per turn)
- Descend to the Planet Surface
- Ascend to Orbit
Ship Movement
Ship movement is based on the Navigation Skill value of the Crewmember currently assigned to the Navigation station (and is the acting pilot of the ship). A ship without a Navigator assigned cannot move. As long as the ship's shields are active (see "Ships" on page 23), the ship receives a +1 to its movement. For example, if Flibby was piloting a ship that still had shields, it would have a movement value of 6 (Navigation 5 +1 bonus).
Ships move forward or backward only, in a straight line, which can be along a diagonal.
A ship may change direction at any time during movement, but it must spend a point of movement in order to do so. This includes pivoting in order to attack. A ship can rotate up to 180 degrees at a cost of only one movement point.
Terrain on the Space Orbital board can affect the movement of a ship (see "Terrain Effects" on page 29). A ship may move through a square occupied by another ship without any evasion Test, but may not end its move in an occupied square. However, the ship cannot enter a square with a derelict ship.
A ship may use both of its actions during a turn to move twice.
Attack
You may only take this action once per turn.
A ship on the Space Orbital board can attack an opposing ship as long as it is within range. The range of a ship is listed on the Ship card, and is counted from the first space directly in front of the ship to the space the opposing ship occupies.
See "Combat Resolution" on page 25 for details on how to resolve an attack.
A ship may only perform one attack action per round (unless some bonus such as a Tactical card or Upgrade allows an additional attack).
Orbital Attack: If an opposing ship is on the Planet Surface board, you can attack it from the Space Orbital board if your ship is within a range of two squares of the mission planet. A ship on the surface cannot fire back at a ship in orbit (but it can still roll to resist damage—see page 28).
Salvage
If a ship is adjacent to a Salvage token, it can retrieve whatever is on the token. Flip the token over to see what your ship was able to collect.
Caution! Not all salvage is safe! Some Salvage tokens show an explosion, which may damage your ship. You may want to use a free scan action before you attempt to salvage a token (see below).
Board an Enemy Ship
Once a ship's Shields have fallen (and the Ship card is turned over), it is vulnerable to boarding. To board an opponent's ship, the two ships must be adjacent to one another on the Space Orbital board.
See "Boarding Actions" on page 32 for details on how to resolve a boarding attempt.
Note: When a ship begins a boarding action, the opposing ship is automatically "caught" in a tractor beam. Both ships cannot move except to rotate.
Attempt to Turn a Prisoner
You may only take this action once per turn.
If you have managed to capture any opposing Crewmembers, you may be able to "turn" them so that they will join your Faction. See "Prisoners and Turning" on page 34 for details on how to turn enemies into allies.
Descend to the Planet Surface
If the ship is on the Planet tile that matches the planet shown on the Mission card, it may descend to the Planet Surface. This is the only way to send out a Landing Party to pursue the Mission Parameters.
To descend, place the ship model on an unoccupied Docking Port End Cap tile of your choice. Then, deploy your Landing Party. After deployment is complete, your ship's turn ends immediately, even if you still had actions left over.
Caution! If you leave your ship on the Planet Surface, it is vulnerable to orbital attack and it can be boarded by enemy Crewmembers on the Planet Surface. Therefore, it is not wise to keep your ship docked on the surface for any extended length of time.
Deployment
Once you reach the mission planet, you can send out a Landing Party. Your Landing Party can include up to three Crewmembers that are aboard your ship. Remove the chosen Crewmembers from their stations and flip over their Crewmember cards so the red side is face up.
You now get to make a free deployment move with each member of your Landing Party, using half of their Speed value (see "Crewmember Movement" on page 14).
In the pictured example, Donexia, Nell'ha and Azur all have 4 movement. Therefore, their deployment movement is 2. Donexia and Azur can both ascend ladders on their planet surface phase turn to get out of the sunken area of the Alien Tomb tile, while Nell'ha plans on scanning the crate for a possible weapon or item.
Ascend to Orbit
If your ship is still on the Planet Surface board during your Space Orbital turn, you may have it ascend as an action. Move the ship model to the mission planet tile on the Space Orbital board.
Free Actions
A ship may take any number of these actions during its turn:
Reassign Stations
This action may only be taken at the beginning of your turn, before taking any other actions (including other free actions).
You can change which station a Crewmember is assigned to simply by moving their Crewmember figure to a different station. Each station can only hold one Crewmember at a time, but you can rearrange any number of Crewmembers with this action.
Crewmembers may also move to or from Med Bay as part of this action.
Scan a Salvage Token
This action may only be taken once per Salvage token per turn.
If a ship is adjacent to a Salvage token, a Crewmember in the Communications station may attempt to scan the salvage by making a 5+ Scan Test (see "Skill Tests" on page 21). If there is no Crewmember at the Communications station, you cannot attempt a scan.
If the Scan Test is successful, you may secretly examine the Salvage token, then return it to its square, face down.
Use a Ship Ability
You may only use one Ship Ability each turn.
The Ship card shows a number of Ship Abilities on the left side of the card. At any time during your ship's turn, you may attempt to use one of these Abilities. Most Abilities require a successful Skill Test in order to use (see page 21).
If your ship's shields are down, the effects of your Ship Abilities will change as shown on the reverse side of the Ship card (see "Ships" on page 23).
Heal or Revive Crewmembers in Med Bay
You may only take this action once each turn.
If there is a Medic in Med Bay, every Crewmember in Med Bay (including the Medic) may heal two Wounds when you take this action. Remove the healed Wound tokens from the Crewmember's card.
In addition, any unconscious Crewmembers in Med Bay are revived and are available to perform actions again.
Use a Tactical Card Ability
Tactical cards will be introduced in a future expansion. These cards allow Commanders to execute exceptional maneuvers thanks to their years of training and experience (see page 44).
Tactical Cards attach to your Commander, not to your Ship.
Planet Surface Phase
Once the Space Orbital Phase is complete, the action shifts to the surface of the mission planet. If there are no Landing Parties on the Planet Surface, skip this phase. If there are, then each Landing Party and all of the Villains and Creatures on the Planet Surface take turns in Initiative order. Once everyone has had their turn, this phase ends.
Landing Party Turns
During your turn in this phase, you get to take actions with each Crewmember that is part of your Landing Party. Your Crewmembers may take their actions in any order you choose, but you must finish taking all actions with each Crewmember before you move on to the next one.
Crewmember Actions
Each Crewmember gets to take two actions from the following list. Actions can be taken in any order, and the same action can be repeated except the Attack action.
- Move
- Attack (once per turn)
- Interact with Items or Characters
- Board a Docked Enemy Ship
- Use a Special Ability
In addition, the Crewmember may take any number of the following free actions at any point during their turn:
- Swap Weapons (only at the beginning of the turn)
- Exchange Equipment with another Crewmember (only at the beginning or end of movement)
- Go into Stealth Mode
- Elude an enemy
- Search (once per token)
- Use Attack and Defense Bonuses
- Ascend to Orbit
- Use a Tactical Card Ability
The Crewmember is not required to use all of the actions they have available. They may take only one (or none) if the player chooses. Once the Crewmember has completed all of their actions, their turn is over and the next Crewmember takes their turn. After all Crewmembers have completed their turn, the Landing Party's turn is complete and the next Landing Party begins their turn.
Villains and Creatures on the Planet Surface also take turns during this phase, based on their Initiative value (usually after the players' Landing Parties finish their turns).
Landing Party Limitations
There can only be three Crewmembers in your Landing Party at a time. You cannot add additional Crewmembers to your Landing Party if you already have three Crewmembers on the Planet Surface. You may, however, replace a Landing Party member if they are defeated or return to your ship.
Crewmember Movement
Crewmember movement is based on the Speed value on their Crewmember card.
Like ships, Crewmembers may move in straight or diagonal lines. Unlike ships, they can alter their direction at any time without penalty or spending movement points, moving forward, back, diagonally, or any combination of them.
Terrain on the Planet Surface board can affect the movement of a Crewmember (see "Terrain Effects" on page 29).
A Crewmember may move through friendly Crewmembers (of the same Faction), but may not end their move in the same square. They may not, however, move through opposing Crewmembers, Villains, or Creatures unless they have the Flight ability (see "Crewmembers" on page 19) or if they successfully elude them.
A Crewmember may use both of its actions during a turn to move twice.
Eluding
If a Crewmember is confronted by an opposing Crewmember, Villain, or Creature and they are in adjacent squares (base-to-base), the Crewmember may try to elude them. To elude an opponent, the Crewmember must successfully perform a 5+ Stealth Test (see "Skill Tests" on page xx). Only one Elude Test is required, no matter how many opponents are adjacent to them at one time. The Elude Test is a free action.
If the Elude Test succeeds, the Crewmember may continue moving and may move through the square(s) occupied by their opponents.
If the Elude Test fails, the Crewmember must immediately end their movement on the space adjacent to the enemy. The Crewmember may not move any more this turn, but they may still perform their other actions.
Crewmembers need to roll Elude Tests for all NPC's except Drones (as they are small, hovering, and have no arms).
Example: Jayce wants to move toward the other side of the building, but he needs to pass through a space adjacent to Nell'ha to do so. Therefore he needs to succeed in an elude test by rolling his stealth value of 3 die. He succeeds with a 5.
Returning to the Ship
A Crewmember can return to their own ship purely as an extension of movement. If the Crewmember's ship is docked, they can return to the ship simply by completing their movement on the space occupied by their ship. Entering an enemy ship requires a boarding action (see page 32).
Attack
Each Crewmember may only take this action once each turn.
Like ships, Crewmembers may attack their enemies when they are on the Planet Surface board. Crewmembers may only perform one attack per round, unless a bonus (such as a Special Ability, Tactical Card or Upgrade) allows them to make an additional attack.
Note: A Crewmember may attack twice if their Commander uses the "On My Command" ability, giving up one of their own actions.
There are two kinds of attacks that a Crewmember may make: ranged and melee. A Crewmember may only make a ranged attack if they are armed with a Weapon, Upgrade, or Ability that grants a ranged attack, such as an Arc-Pistol. A Melee attack may be made even without a Weapon, but they are more effective when enhanced by Melee Weapons, such as an Arc-Blade.
See "Combat Resolution" on page 25 for details on how to resolve an attack.
Ranged Attacks
When using a Ranged Weapon, the Crewmember uses the Range value printed on the Weapon card. The Crewmember's Attack Value determines how many dice are rolled.
Friendly Crewmembers do not obstruct lines of fire for ranged attacks, but opposing characters do, and terrain may have an effect on how the attack is resolved (see "Terrain Effects" on page 29).
Melee Attacks
A Melee attack may only be performed while adjacent to the target. These attacks are performed the same way as all other attacks, except for enhancements from wielded Melee Weapons, as printed on the Weapon card.
Interact with Items or Characters
In order for a Crewmember to influence an item or character, they must interact with it. Interacting can include opening containers, using a console to access data, or influence the behavior of a Non-Player Character. Each of these interactions counts as an action for the Crewmember.
Opening Containers
At the beginning of the game, nine Container tokens were placed on the Planet Surface board. Additional Container tokens may be added later as NPC Villains are defeated. A Crewmember may open a container in an adjacent space using the interact action to retrieve whatever is hidden inside. Flip the token over to see what your Crewmember has discovered.
Caution! Some containers have been booby-trapped and will explode when opened! If a booby-trap explodes, all Crewmembers (friend or foe) within two spaces must defend against the booby-trap attack. For this reason, you may want to use a free search action before you open a container (see below).
Accessing Data Consoles
Interacting with a Data Console is required to complete some missions. In order to successfully retrieve data, you must pass a 5+ Tech Test (see page 21).
Interacting with an NPC
Some Mission Parameters will require a Crewmember to interact with an important character, such as the Princess or Convict. This requires a successful 5+ Leadership Test (see page 21).
If a Crewmember successfully Interacts with an NPC of this type, the NPC will move with the Crewmember. However, an opposing Crewmember may opt to "steal" the NPC away. Both Crewmembers involved must make a Leadership Test. The one who rolls the highest number of successes (5's or 6's) on the Test wins the competition and the NPC will follow them.
Interacting with an Unconscious Crewmember
A Crewmember that has been defeated remains in play (see "Defeated and Unconscious Crewmembers" on page 23). Other Crewmembers (friend or foe) may interact with the unconscious Crewmember to pick them up and carry them. While carrying the unconscious token, the Crewmember suffers a -1 to their Speed value.
Board a Docked Enemy Ship
If an opponent's ship is on the Planet Surface board, a Crewmember may attempt a boarding action by moving onto the ship's Docking Port. It does not matter if that ship's shields have been knocked out or not.
See "Boarding Actions" on page 32 for details on how to resolve a boarding attempt.
Use a Special Ability
Some Crewmember Abilities do not provide a bonus to some other action, but rather allow that Crewmember to do something special. Using one of these Abilities counts as an action. Any Ability that does provide a bonus can be used as a free action whenever the bonus applies.
If the Ability requires a Skill Test to use (see page 21), and the Crewmember fails the required Test, they may take a different action instead.
Free Actions (Crewmembers)
A Crewmember may take any number of these actions during their turn:
Swap Weapons
This action may only be taken at the beginning of your turn, before taking any other actions (including other free actions).
A Crewmember can only use two "hands" worth of Weapons at a time (see "Using Equipment" on page 22). With this action, a Crewmember can exchange the Weapons they are currently armed with for other Weapons they may be carrying.
Exchange Equipment with Another Crewmember
This action may only be taken at the beginning or end of movement.
A Crewmember may give, take, or exchange Weapons and other items with friendly Crewmembers (of the same Faction) as long as they begin or end their movement in an adjacent square. This is a free action, but it may not be taken while moving.
Go into Stealth Mode
Sometimes, a Crewmember will find that fighting their way through is not the best strategy, when subterfuge will work just as well. When a Crewmember wants to act without alerting enemy soldiers or Creatures, they use "Stealth Mode." A Crewmember may enter Stealth Mode as a free action if they are about to enter a room or they are in Obstructed Terrain, or next to a wall inside a room. In order to enter Stealth Mode, the Crewmember must successfully make a 5+ Stealth Test (see page 21). Mark the Crewmember with a Stealth token.
While in Stealth Mode, the Crewmember may move past opposing Crewmembers, Villains, and Creatures, and their enemies cannot attack them or interact with them. However, the Crewmember must stay next to a wall or within Obstructed Terrain. If the Crewmember moves into any other kind of square, they are immediately revealed and subject to attack.
Crewmembers must make Stealth Tests before each movement.
A Crewmember may attempt their Stealth Test before entering a room. If they fail the test, they may opt not to enter the room at all, or go in with guns blazing instead…
Enemies may attempt to reveal a Crewmember in Stealth Mode by using the free Search action (see below).
If a stealthy Crewmember makes an attack, or if they are attacked by an enemy who found them with a Search Test, they lose Stealth Mode for the rest of the round.
Stealthy Crewmembers may make Search Tests and Interact actions normally while remaining in Stealth Mode.
Search
A character may use this free action to inspect an adjacent square. Normally, this will be used to search a container or to reveal an enemy in Stealth Mode:
Searching Containers
This action may only be taken once per Container token per turn.
In order to search a container, the Crewmember must pass a 5+ Search Test (see page 21). If you succeed at the test, secretly examine the back of the Container token, then return it to its space, face down. After you examine the container, you can decide if you want to Interact with it or not. However, each Crewmember may only make one Search Test per container each turn.
Reveal an Enemy
If there is an opposing character in Stealth Mode in an adjacent space, you can make a 5+ Search Test to reveal them. If you pass the test, you may attack or interact with that character normally.
Note: A Search does not count as an interact action.
Use Attack and Defense Bonuses
Characters may have an Ability or equipment that give them bonuses when they attack or defend. You may always use these Abilities as a free action every time you attack or defend.
Ascend to Orbit
If your ship is still on the Planet Surface board, you may have it ascend as a free action at any time during your Landing Party turn. Move the ship model to the mission planet End Cap tile on the Space Orbital board. You may even have your ship ascend during the same round that it descended and deployed your Landing Party (see "Deployment" on page 12).
Use a Tactical Card Ability
Tactical cards will be introduced in a future expansion. These cards allow Commanders to execute exceptional maneuvers thanks to their years of training and experience (see page 44).
World Event Phase
The World Event Phase is the final part of the round. The Coalition player with the highest Initiative (if tied, choose someone) draws the top card from the World Event deck and reads it aloud to the other players, then follows the instructions. All World Event cards are played immediately, and all results are immediate.
If NPC characters or ships are added to the board due to a World Event, place them immediately. But, they will not perform any actions until the following round. See "Enemy Cards" on page 36 for details.
If there is no World Event card to draw, the game ends at this time. Refer to the "If Time Runs Out" section of the Mission page in the Mission Book to determine the end of the story and how to divvy up the reward digits.
World Event Cards
World Events can drastically alter the conditions in the game. At the end of each round, after all ships, Crewmembers, and NPC's have taken their actions, a World Event card is drawn and its instructions followed. Each World Event card shows:
- Event Name: A title for the event.
- Keywords: The keywords illustrate where the event takes place, either on the Planet Surface or in Space Orbital, possibly followed by words that describe the event such as Natural Disaster. Some Upgrades or items may make certain Crewmembers immune to the effects of the event.
- Description: The event is described along with the consequences and effects. Events can range from the appearance of enemy ships, Creatures, or Villains to natural disasters, mutinies, and dealing with or taking prisoners. Any NPC's that are placed by a World Event follow all of the normal rules for NPC's (see page 35).
The End of the Round
Once the World Event card has been drawn and resolved, check to see if the mission has been completed. Otherwise, begin the next round with the Space Orbital Phase.
Crewmembers
The action in the game is carried out by the Crewmembers each player controls. Choosing the right Crewmembers—and using their skills and abilities effectively—is the key to victory. Your ship's efficiency is based entirely on the crew and where they're stationed on your ship. Your ship will be at its best at the start of the game, when you have all of your crew at their proper stations.
Crewmember Cards
Each Crewmember has their own card that shows all of the character's statistics, skills, and abilities.
Crewmember cards are double-sided, with the red side showing their abilities when they are on the Planet Surface and the blue side showing their abilities in space. Let's take a look at the Crewmember cards:
-
Name: The name of the character.
-
Station Specialty: This tells you which station this Crewmember is best suited for, as well as which station activates their Abilities. The different stations are: Commander (Captain or Inspector), Navigation (Pilot), Weapons, Communications (plus Medical), and Engineering. Some Crewmembers will excel in more than one station.
Example: In the case of Donexia, she is a Captain so she would take the Commander station.
-
Keywords: These are attributes of the Crewmember, such as race or gender. Keywords may affect some gameplay events. For example, Dro Tov's abilities only affect female characters, while certain upgrades can only effect humans or aliens, respectively.
-
Initiative: This value indicates the character's willpower, and determines the order of play (see "Determining Player Order" on page xx).
-
Faction Icon: This symbol shows which Faction the Crewmember is aligned with at the start of the game (this can change if the Crewmember is turned—see page 34). A Crewmember can only be assigned to a station on a ship from the same Faction. For example, Flibby is a Coalition Pilot, so she cannot fly the Cerberus, since that is a Renegade ship.
Statistics
These values define the capabilities of the Crewmember:
- Health: The number of wounds the Crewmember can take before being defeated.
- Speed: The number of squares the Crewmember can move during each movement action while on the Planet Surface.
- Defense: Some Crewmembers have a greater ability to resist damage, which adds to the results on their defense dice. For example, +1/1 Die means that they can add +1 to the result on one defense die when attacked.
- Attack: The number of dice the Crewmember uses when attacking, in both melee and ranged combat. However, no Crewmember may make a ranged attack unless armed with a ranged Weapon.
- Range: This statistic usually only appears on Villain and Creature cards, as well as Weapons. It shows the maximum number of squares away that the character can attack an opponent.
Location
Each Crewmember card is double-sided. The blue side of the card displays the Crewmember's attributes while in Space Orbital. The red side displays their abilities on the Planet Surface. The Crewmember's skills and abilities change depending on their location.
Skills
Each Crewmember has a rating in seven different skills:
- Leadership / Command: The Crewmember's charisma and decision-making prowess.
- Search / Scan / Communications: How well the Crewmember can search a room or scan an object.
- Piloting / Navigation: The ability of the Crewmember to fly a ship.
- Tech / Engineering: How well the Crewmember can operate computer systems and make repairs.
- Targeting / Weapons: The Crewmember's proficiency with a ship's weapon systems.
- Stealth: How effective the Crewmember is at sneaking around undetected.
- Medical: The ship's Medic's ability to heal another Crewmember and Crewmember's basic knowledge of medicine.
A Crewmember's rating in a skill represents how proficient the character is at each of those skills when they are performing Tests (see "Skill Tests," below): it is the number of dice the Crewmember rolls. For example, Rovanna will always fail when attempting any Medical Test (since she has 0 dice), so it's best to keep her away from the syringes. But she excels at Stealth (rolling 4 dice).
Abilities
Crewmembers are talented individuals, often with years of training and experience that has taught them some tricks in how to survive. These are depicted as Abilities on the Crewmember card.
Using an ability on the Planet Surface requires an action if the ability has any effect other than modifying a Crewmember's action (such as a bonus to attack or defense rolls). However, if a Crewmember attempts to use an Ability on the Planet Surface and they fail the required Test, the action is not lost and they may choose a different action instead, but they may only attempt to use each Ability once per turn.
Flight
Some Crewmembers have the ability to fly, allowing them to ignore most Terrain (see page 29). Flying Crewmembers may also move over enemy characters without requiring an Elude Test.
Skill Tests
Often, when a Crewmember attempts to do something, the result is automatic: it's not too hard to walk across a room, for example. In order to overcome more difficult obstacles, the Crewmember must make a Skill Test. Skill Tests are also used by Crewmembers assigned to specific stations in order to use certain ship abilities or to attack with the ship's weapons.
The Crewmember's rating in a Skill is the number of dice the Crewmember rolls when making a Test using that skill.
Unless otherwise noted, the difficulty for all Tests is 5+, which means that at least one of the Test dice rolled must be a 5 or 6. If the Test shows 6+, that means that at least one die must be a 6 (and could be higher if a bonus is allocated).
Example: Trixx attempts to heal Belle Azur using her Medic ability. Her Medical Skill is 3. So she rolls 3 die to perform the test. She rolls a 1, 4 & 6. The 6 allows her to pass the test, however the power allows her to heal Azur of 2 wounds instead of 1 since a rolled a natural 6.
Equipment
Using Equipment
Equipment, such as Weapons or other gear, is depicted on Starting Armory, Weapon, and Gear cards (see "Equipment" on page 32). Crewmembers can use equipment to improve their Skills and Abilities or to gain new ones, such as a ranged attack.
Each character only has the use of two hands, unless they have an Ability that says otherwise. Therefore, they can only physically hold two "hands" worth of Weapons at a time. This can be two one-handed Weapons, such as a pistol and a sword, or one two-handed Weapon, such as a rifle. In addition, a Crewmember may carry two pistols in their holsters plus one Melee Weapon or two-handed Weapon on their back.
Crewmembers also have a satchel that can hold three Personal Items.
If a Crewmember has reached their carry limit and wants to pick up a new item, they must first give something away to an adjacent friendly Crewmember or discard it.
Crewmembers may switch between Weapons they are carrying as long as the player announces the Weapon change before the Crewmember takes any other action on their turn.
Optional Rule: If a Crewmember needs to discard an item because they have no more space and none of their shipmates are anywhere near them, instead of discarding it they may "drop" it in an adjacent square. Place the Canister token with the item face up in the adjacent square. Any Crewmember (from either Faction) can pick it up later by interacting with it.
Using Upgrades
During a campaign, you will have a chance to upgrade your Crewmembers by purchasing Upgrade cards. Upgrades can improve a Crewmember's Skills and Abilities, or even give them all-new Abilities they never had before. Each Upgrade cards shows:
- Upgrade Type: This illustrates what aspect of the Crewmember's training has been altered.
- Keyword Effected: This shows what keyword type a Crewmember must have (if any) to receive the Upgrade.
- Description: An explanation of which Crewmember stats are affected by the Upgrade as well as any new keywords the Crewmember gains. Any Tests the Crewmember must make to apply the effects of the Upgrade are also described here.
- Digits Required: The number of Galactic Digits you need to spend to train your Crewmember in the new Upgrade (see "Shore Leave" on page 42).
Injuries and Wounds
When a Crewmember is damaged by an attack or other event, mark the Crewmember card with Wound tokens to show the damage suffered. If a Crewmember suffers Wounds equal to or greater than their Health, that Crewmember is defeated.
Defeated and Unconscious Crewmembers
When a Crewmember is defeated, their figure is removed from the board and replaced by an Unconscious Crewmember token. A defeated Crewmember cannot take any actions, and does not contribute their Initiative to their team. Also, it is assumed that they are beyond the assistance of a field medic, and must be taken to Med Bay.
Other Crewmembers may interact with an unconscious Crewmember to pick them up and carry them. While carrying an unconscious Crewmember, a character has a -1 penalty to their Speed value.
All items carried by the unconscious Crewmember are dropped in the square they occupied when they were defeated and may by picked up by any other Crewmember during their turn (friend or foe). Use a Container token to represent their items. Arc-Pistols, however, are locked and cannot be picked up by an opponent. Also, all Starting Armory cards must be returned to their original owners once the mission is complete.
Healing and Reviving Crewmembers
A Medic may be able to assist a wounded Crewmember while they are on the Planet Surface by using an Ability. However, the only way that a defeated Crewmember can be revived is if they are taken back to a ship and healed by a Medic in Med Bay.
Once the Crewmember has returned to a ship, they will recover two Health at the end of each round as long as they are in Med Bay with a Medic. This does not include the first round that the Crewmember arrived in Med Bay (they must spend an entire round in Med Bay to receive any benefit). It does not matter if the ship is in space or docked on the surface. Both friendly and opposing captive Crewmembers can be healed in this way.
At any time during the healing process, the player may choose to pull the Crewmember out of Med Bay (halting their healing until they return) to assign them to a station or to join a Landing Party (or send them to the Brig, if they are a prisoner).
Any number of Crewmembers may be in Med Bay at any given time, and there is no limit to the number of Crewmembers that can be healed each round.
If an opposing captive Crewmember is fully healed, they are automatically moved to the Brig unless they are turned (see "Turning Prisoners" on page 43).
Trixx heals Azur in the Med Bay at the tail end of a mission.
Ships
Ships are used by your Crew to journey from one planet to another, engage in battle, and dropoff and retrieve Crewmembers. Ships can land on the surface of a planet, but only if they haven't taken heavy damage.
Ship Cards
Each ship in the game is depicted on its own Ship card. The Ship card shows all of the statistics and abilities for the ship:
- Ship Abilities: This list shows the special abilities your Crewmembers can use, depending on which station they have been assigned to.
- Brig: During the course of a campaign, you may capture defeated opposing Crewmembers and place them in your ship's Brig. You may also be forced to put your Commander in the Brig if there is a mutiny on your ship.
- Med Bay: Defeated Crewmembers may be revived and wounded Crewmembers may be healed here as long as they are accompanied by a Medic.
- Ship Faction: Like Crewmembers, there are two Factions: Renegades and Coalition. A ship can only be crewed by Crewmembers from the same Faction.
- Stations: The five bubbles represent the five stations on the ship. Each station can be occupied by a single Crewmember at a time by placing the Crewmember's figure in the bubble.
- Capacity: The maximum number of Crewmembers and additional passengers you can have on board your ship at any given time (not counting any Crewmembers in the Brig).
- Range: The maximum range for the ship's Weapons.
- Shields: The amount of damage your ship can take before the shields are depleted. On the reverse side of the Ship card, the ship's hull value is shown instead.
- Ship Operations and Bonuses: This block displays the bonuses your ship receives, which are added to the Skills of Crewmembers in certain stations.
- Name and Class: The name and type of your ship.
At the beginning of the game, all ships are identical, but over the course of a campaign ships can be enhanced with various Upgrades, allowing players to customize their ship to match their playing style.
Crew Stations
Every ship has five Crewmember stations, each of which controls a different ship function. You can assign a Crewmember to a station by placing their figure in the matching bubble on your Ship card. Any Crewmember can occupy any station, but a Crewmember with the matching specialty will be the most effective at that station.
Ship Abilities
Each ship station has a matching Ability that you can use to give your ship an edge. You can only use a ship Ability if there is a Crewmember in the matching station and that Crewmember succeeds at the Skill Test described on your Ship card. You can only use one of these Abilities each round, which counts as a free action: once you have declared and made the Test Roll, you may not declare another until the following round. If your ship's shields are depleted, these Abilities will change, as listed on the reverse side of the card.
Taking Damage to a Ship
Each time a ship is hit by enemy weapons, and the hits are not negated by defense rolls (see "Combat Resolution" on page xx), the ship takes damage, which is recorded by Damage tokens. Ships take damage to the shields first, with any additional damage going to the ship's hull. If the ship's hull is depleted also, the ship suffers critical damage and it must be repaired.
Ship models accompanied by large Ship Cards cannot be destroyed.
Shields
If a ship takes damage at least equal to its shields rating, the shields are "knocked down" and the ship will start taking damage to the hull instead. Flip the card over and remove all Damage markers. The ship's abilities and bonuses will also be negatively affected.
As long as your ship's shields are still active, it receives a +1 to its movement each round.
A ship also rolls +1 attack die when firing its Weapons as long as its shields are still active.
If the shields are knocked down, they cannot be repaired during a mission. They can only be repaired during Shore Leave (see page 42).
Critical Damage
If a ship takes damage equal to its hull value (on the reverse side of the card), it is critically damaged and may no longer make any attacks. It may not add any bonuses to its movement, and no Tactical cards or Crewmember Abilities may be used. Lastly, the ship's movement value is reduced by one. These penalties all apply until at least one point of hull damage is repaired.
Only hull damage may be patched up during a mission. Once the shields are down, they can only be repaired during Shore Leave.
A critically damaged ship must either descend to the Planet Surface (to pick up its Engineer, etc.) or fly to and descend to its home planet(oid) to enact repairs (Port Saven for the Renegades or Earth for the Coalition). A ship docked at its home planet(oid) may remove 2 hull damage per round, regardless of what crew is aboard (it is assumed that the dock has a team of engineers to make repairs).
Note: A ship may only descend to its home planet(oid) if it is critically damaged or it has completed its mission!
Leaving Ships Docked on the Mission Planet
If a ship is docked on the Planet Surface board—not on its home planet(oid)—it is vulnerable to enemy attack, and will be unable to defend itself. Therefore, it is not wise to keep your ship docked on the surface for an extended length of time.
A ship that is vulnerable like this is an attractive target, so if a ship remains docked on the surface for more than one round, it is treated as the highest Initiative target on the board for all enemy actions (see "Non-Player Characters" on page xx). Unless otherwise instructed, all NPC's will head toward the docked ship!
Orbital Attack
Any opposing ships may fire down on a docked ship from Space Orbital as long as they are within a range of 2 from the mission planet. It is assumed that the enemy ship acquires a target lock on the vessel. The docked ship may not fire back, but it may roll defense dice as normal.
Boarding
In addition, the docked ship may be boarded by opposing Crewmembers, Villains, and Creatures. If the docked ship is boarded, a battle takes place on the Ship card (see "Boarding Actions" on page 32).
Combat Resolution
Violence is a sad reality for the intrepid crews of the Coalition and the Renegades. Sooner or later, combat will break out, either in Space Orbital or on the Planet Surface.
Combat between ships in space and Crewmembers on the surface follow the same process, which is broken down into five steps:
- Attacker rolls dice and applies bonuses
- Remove misses
- Defender rolls dice and applies bonuses
- Defender pairs defense dice with attack dice
- Apply damage
Ships and Crewmembers may normally only make one attack per round (unless an ability or bonus allows an additional attack). Furthermore, a ship cannot make an attack if there is no Crewmember assigned to the Weapons station.
Important: Attack bonuses and defense bonuses do not count as actions, so they can be used every time you attack or defend.
Ship Attacks and Crewmember Attacks
An attack can only be made if the weapon being used can reach the target.
Ship Combat
An orbiting ship may attack an opposing ship as long as it is within range. The range of a ship's weapons are shown on the Ship card.
Ships can only fire their weapons in the direction the ship is facing, counting in a straight line (which may be along a diagonal) from the center space directly in front of the ship or from the space directly to the left or right of that center space (thanks to having weapons mounted on the wings). As long as any of those three lines intersects any part of the opposing vessel within range, the attack can be made.
The Attack Value of the ship is equal to the Gunnery Skill of the Crewmember assigned to the Weapons station. As long as the ship's shields are operational, the ship gains a +1 bonus to its Attack Value. For example, Rovanna has a Weapons Skill of 4, so her ship will have an Attack Value of 5. Once its shields falter, this bonus no longer applies so she would only have an Attack Value of 4. Other bonuses may apply thanks to Crewmember Abilities, Salvage, and Upgrades.
A ship may shoot through squares occupied by other ships, but it may not shoot through Blocking Terrain (see "Terrain Effects" on page 29).
Ships may not make an attack without a Crewmember occupying the Weapons Station.
Crewmember Combat
Unlike ships, Crewmembers can attack in any direction (they can turn fast enough to respond to threats from anywhere). However, Crewmembers do not automatically have the ability to attack at range.
Melee Attacks
Every Crewmember may make melee attacks using their bare hands. Any attack performed while adjacent to the target may be made as a melee attack. Melee attacks are resolved the same way as all other attacks, except that they may be enhanced by melee Weapons such as swords, axes, or other wielded Weapons (see "Weapons & Items" on page 31).
Each Melee Weapon has its own bonuses printed on the card. These bonuses may increase or combine with the Crewmember's own Abilities. For example, Jayce has an Ability that adds +1 to two attack dice. The Arc-Blade adds +1 to one attack die. If Jayce uses an Arc-Blade, he may either add +1 to three dice or add +1 to one die and +2 to another. The Blade gives Jayce +1 to one rolled attack die, which can add to his Sword Master Ability.
Remember that melee attacks can only be made against an adjacent target (effectively at a range of 1).
Ranged Attacks
Crewmembers may not make a ranged attack unless they have a Weapon, Upgrade, or Ability that gives them one. When using a Weapon, the range value is printed on the Weapon card, but the Crewmember's Attack Value still determines the number of dice rolled.
Making an Attack
Before you can make an attack, you must confirm that the target is in range and in line of sight.
For range, count the number of spaces between the attacker and the target, including the space the target is in, by the shortest route. If this distance is less than or equal to the range of the attack, then the target is in range.
Line of Sight is determined by drawing an imaginary line from any corner of the attacker's square to the middle point of the target's square. The target is in line of sight as long as there is no blocking terrain between the attacker and the target. Complete rules for how terrain affects attacking can be found in "Terrain Effects" on page 29. Friendly characters do not block ranged attacks, but enemy characters do.
Once you have confirmed range and line of sight, follow these steps:
Step 1: Attacker Rolls Dice and Applies Bonuses
First, the attacker rolls a number of red dice equal to their Attack Value. For ship-to-ship combat, this will be the Gunnery Skill of the Crewmember assigned to the Weapons station (+1 if the shields are still active). For a Crewmember on the surface, it is the Crewmember's Attack Value.
After the dice are rolled, the attacker may use any attack bonuses that they benefit from to increase the values rolled. Note that a bonus that reads "+1/1 Rolled Attack Die" does not mean "add an additional die for the attack." Instead, it means that you may alter one of your rolled dice by +1.
Example: The Cerberus moves into firing range of the Destiny Aurora. The Cerberus only has 3 damage on its card and therefore still has functioning shields. Grom is at the Weapons station of the Cerberus and he has a Weapons Skill of 4, so he rolls 5 attack dice. Grom has an Ability that gives him a bonus of +1 to 1 attack die. He changes the "3" to a 4, turning a miss into a hit. The dice with the black border are all hits (4 or higher).
Step 2: Remove Misses
In order to "hit" the target, each die needs to roll a 4 or higher. Any dice that roll less than 4 (after any modifiers are applied) "miss" and are set aside.
Step 3: Defender Rolls Dice and Applies Bonuses
The defender now rolls a number of black dice equal to the number of hits rolled by the attacker. They then apply any defense bonuses that they benefit from, including any benefit for Obstructed Terrain (see "Terrain Effects" on page 29).
Example: The player that controls the Destiny Aurora rolls 4 defense dice, 1 for each hit Grom rolled.
Since Flibby is in the pilot station, she gets to use her bonus to add +1 to one defense die. She increases her 4 to a 5.
Step 4: Defender Pairs Defense Dice with Attack Dice
Next, the defender pairs up the black and red dice any way they would like—one defense die for each attack die.
Example: Flibby pairs up the dice as shown.
Attack and defense bonuses can be used every time a ship or Crewmember is involved in an attack. They do not count as actions and can be used multiple times every round.
Step 5: Apply Damage
Each attack die that is greater in value than the defense die it is paired up with inflicts one damage to the target. Mark the damage with Damage tokens if the target is a ship or Wound tokens if targeting a Crewmember, Villain, or Creature.
Example: Now that the defense dice and attack dice have been paired up, the values are compared. Only 1 of the attack dice is higher than the defense die it was paired with, so the Destiny Aurora takes only 1 damage.
Penetrating Damage
Any attack die that has a total value higher than 6 (because of attack bonuses) causes Penetrating Damage. Penetrating Damage cannot be blocked by a defense die of any value (even one with a value higher than 6). It does not count as a hit for defending purposes and the defender does not roll a die to counter it.
Example: Jayce announces a melee attack against Donexia using his arc-blade. He rolls a 2, 3, 3, 6, 6. Using his Sword Master ability, he changes the two 6's to 7's making them penetrating damage. Using the arc-blade bonus, he changes one of the 3's to a 4. The defender will only roll 1 defense die to counteract the 4. Donexia rolls a 3, but uses her defense bonus to change it to a 4, negating it. Donexia will take 2 damage from the penetrating damage.
Special Attacks
Crewmembers may have Abilities that give them unusual attacks, while some Weapon cards may allow a Crewmember to attack in unusual ways. For example, some Crewmembers may be able to make two attacks each round. The Crewmember card or Weapon card will convey the specific details of each Ability and its limitations.
Move and Attack Actions
Some Crewmembers have the Ability to move and attack using a single action. This ability allows the Crewmember to move, then move a second time as a free action, then perform an attack.
Example: Nell'ha uses her Claw Pounce ability to attack Jayce. She does 1 damage to Jayce, which triggers her ability to make a second movement and subsequent attack against the Dregg Warrior. Since it's an attack action, she does not need to make an elude test.
Grenades
Since grenades are thrown rather than fired in a straight line, grenades can ignore some terrain effects. A grenade may be thrown up to half its range value if the attacker and the target are on different elevations (see "Elevated Terrain" and "Sunken Terrain" on page xx), even if the attacker and defender are not at the edge of the higher terrain.
Unlike other Weapons, Grenades may also be thrown through a doorway, but only by a character that is in a space adjacent to the doorway. Grenades do not need line of sight, but cannot be thrown through or into walls or blocking terrain.
Example: Jayce throws one of his grenades into the armory to catch the two Dregg Warriors unaware. His attack is 5 with a range of 4 for the grenades. He is able to throw it through the sliding door. The first Dregg Warrior will take the full brunt of the damage including 2 additional attack die, bringing it to 7. The second Dregg Warrior will take explosion splash damage of a 2 die attack.
Terrain Effects
Terrain can affect movement and combat both on the Planet Surface and in Space Orbital. Terrain is indicated on the game board by a number of squares surrounded by a color outline. The effect of each type of terrain is the same on both boards, though only Obstructed and Blocking Terrain can be found on the Space Orbital board. There are seven types of terrain:
- Clear (no border)
- Obstructed (green border)
- Blocking (red border)
- Water (blue border)
- Elevated (yellow border)
- Sunken (orange border)
- Special (white border)
Clear Terrain
Clear Terrain is any part of the board that is not surrounded by a colored border, including "empty" space and open fields on the planet. There are no special rules that apply to Clear Terrain.
Obstructed Terrain
Obstructed Terrain represents any area that is difficult to move and shoot through. It is indicated by a green outline on the board.
The cost to move into Obstructed Terrain is the same as normal. But, when a ship or character leaves a square that is in Obstructed Terrain, it must spend two points of movement instead of only one, whether they are moving to another Obstructed square or into another type of terrain.
The movement of characters with the Flight Ability is not affected by Obstructed Terrain.
Obstructed Terrain can provide cover for the target of a ranged attack. If a ship or character makes a ranged attack against a target that is in Obstructed Terrain, or if the attack goes through one or more squares of Obstructed Terrain, the defender may re-roll up to two of their defense dice (of their choice). This applies even if the attacker and the target are in adjacent squares.
Obstructed Terrain does not affect melee attacks.
Note that a ship or character that is in a square at the edge of Obstructed Terrain that is shooting at a target in the open does not suffer the penalty to their attack. However, if they targeted an enemy in Obstructed Terrain, the defender would receive the terrain benefit as normal.
Blocking Terrain
Blocking Terrain is any object that physically prevents movement or ranged attacks, such as walls, pillars, mountains, and other structures that are either enclosed or stretch high into the air. Blocking Terrain is marked on the game board with a red outline. Container tokens and derelict ships both also qualify as Blocking Terrain.
Ships and characters can never enter a space that is Blocking Terrain (including characters that have the Flight Ability). Attacks can never cross or enter Blocking Terrain.
Walls & Doors
Walls and doorways act as Blocking Terrain. However, characters can use doorways to move into or out of interior locations as if the Blocking Terrain wasn't there. In addition, characters may make melee attacks through doorways.
Doorways are indicated by a yellow bar as well as doorway depiction. Single-doors may not be moved through diagonally, however, double-doors may be moved through diagonally.
Wall Damage
If a character is knocked back by an attack or other cause (i.e., Quake or Abok's ability), and cannot move the full distance due to a wall or Blocking Terrain, the character takes 1 Unavoidable Damage. If the character cannot move due to being at the edge of the map, on a Docking Port, or adjacent to another character, they do not take Wall Damage.
Water
Water terrain can only be found on the Planet Surface board. It is indicated by a blue outline. Water has the same effect on movement as Obstructed Terrain (costs two movement points to leave a Water space), but it has no effect on ranged attacks.
Elevations
The world is not a flat place. Some areas are at a higher or lower elevation. This is represented by two types of terrain with similar rules: Elevated Terrain and Sunken Terrain. Both can be found only on the Planet Surface.
Elevated Terrain
The first type of elevation terrain is called Elevated Terrain. It represents an area of the map that is at a higher elevation than the rest of the game board, and it is indicated by a yellow outline.
Sunken Terrain
The second type of elevation terrain is called Sunken Terrain. This is an area of the map that is at a lower elevation than the rest of the game board. It is marked with an orange outline.
Elevation Effects
Both types of elevation terrain restrict movement by characters that do not have the Flight Ability. A character cannot move to a different elevation (i.e., cross the boundary at the edge of an elevation terrain) unless they use a ladder, bridge, or slope, which are indicated on the board by arrows. All other edges of the elevation are treated as Blocking Terrain by characters that do not have the Flight Ability.
A non-flying character can "leap" into a lower elevation, but if they do so they take one point of Unavoidable Damage from the fall.
The edges of elevation terrain block ranged attacks just like Blocking Terrain, with a few exceptions. A character at a higher elevation can shoot at a target that is at the same elevation across an area of lower elevation (so, two characters on opposite sides of Sunken Terrain can see and fire at each other). Similarly, when a character is firing up from a lower elevation, they can shoot at a target that is standing on the edge of the precipice. If the target is further back, then the terrain blocks the attacker's view and they cannot take the shot. The same is true when firing down from a higher elevation: If the target is below the attacker, then the attacker must be on the edge in order to see the target. If they are further back, they won't be able to see their target through the ground.
Line of Sight is determined normally when shooting at another elevation, except that it is not blocked by other characters.
The character at the higher elevation has an advantage in combat against a character at a lower elevation. The higher character gets a +1/1 rolled attack die bonus when attacking a character at a lower elevation, and a +1/1 rolled defense die when defending against an attack from a lower elevation.
Melee attacks cannot be made against a target at a different elevation.
Remember: Grenades can be thrown into an area at a different elevation (see page 30).
Weapons and Items
Crewmembers would be very limited if they had to rely on their Skills and Abilities alone. For this reason, choosing the right equipment can be the difference between success and failure in your mission. Equipment is represented in the game as cards, which can be acquired during play.
Armory
Every ship is equipped with an armory where its crew can store equipment until it is needed. Each ship begins the game with the same set of equipment: three Arc-Pistols, one Arc-Blade, and one Emergency Teleportation Device. Should any of these be lost during a mission, they are automatically replaced at the beginning of the next mission.
Additional equipment may be found during the game or purchased during Shore Leave. There is no limit to the amount of equipment that can be stored in your armory.
When your ship descends to the Planet Surface, you can assign your equipment to the Crewmembers in your Landing Party however you see fit, within the limitations of what they can carry (see "Using Equipment" on page 22). Similarly, when your Crewmembers board an enemy ship, or when your ship is boarded, they can grab equipment from your armory to aid them in the fight (see "Boarding Actions" on page 32).
Equipment Cards
Each piece of equipment has its own card in the game. Search Item cards correspond to the reverse side of the Container tokens and represent stronger Weapons or artifacts your Crewmembers may discover, while Starting Armory cards begin the game in play. Each equipment card shows the following:
- Name: The name of the item.
- Bonus: Any bonus to attack, defense, or Crewmember Abilities. Some bonuses only apply against specific enemies.
- Type: The category of equipment, which could be Personal Item, Melee Weapon, or Ranged Weapon. The icon in the top right also illustrates the equipment type.
- Range: Ranged Weapon cards will show the maximum range of the Weapon.
- Ability: Any special Ability that the equipment confers to its user is described here, as well as any special restrictions on how the equipment is used.
- Energy: If the item has a limited lifespan (see below), mark it with the number of Energy tokens shown when it is acquired.
- Story Text: A description of how the equipment fits into the world of Destiny Aurora. This has no effect on game play.
- Value: This shows how many Digits the item is worth. You must pay this many Digits to purchase the item during Shore Leave. If you sell it during Shore Leave, you receive half the value in Digits, rounded to the nearest increment of 25 Digits.
- Hands Required: This indicates whether the equipment can be used in one hand, or if both hands are required (see "Using Equipment" on page 32). Unless an ability says otherwise, each character has only two hands to use.
Energy Tokens
Most items have a limited lifespan. This is represented by placing Energy tokens on the card. Each time the item is used (successfully or not), one Energy token is removed. Once the Energy tokens have been depleted, the item has expired and the card is discarded. However, if even one Energy token remains on the card, you may sell it during Shore Leave (between missions) for half its value (rounded to the nearest 25 Digits denomination), or purchase Arc Ammo to reload the Weapon or item.
Playing Hint: Your Arc-Pistol is one of the few ranged Weapons that never runs out of energy. So keep one in your holster at all times!
Boarding Actions
Boarding an enemy ship can enable you to capture enemy Crewmembers, rescue your own Crewmembers who have been taken prisoner, or even seize control of an enemy ship so you can tow it back to your home planet(oid). The attacker's ship is called the "Intruding Ship," while the defender is called the "Boarded Ship." Only one Intruding Ship can board a given ship at a time.
The player who controls the Boarded Ship may attempt to negotiate with the invading player, offering to release a prisoner (if they have one) in exchange for ending the attack and returning to their own ship. If the offer is accepted, the released prisoner is playable immediately.
The Intruding Ship may send over as many Crewmembers as desired, as long as at least one Crewmember remains on board their own ship. Each Crewmember that moves between ships counts toward the ship's two actions. Each boarding Crewmember will get a single attack, as will each defending Crewmember that leaves their station to engage the invaders. The boarded ship may engage the intruders with as many Crewmembers as desired (as a free action), however, if a Crewmember leaves their station, the ship cannot perform the related actions until the station is occupied again. All Crewmembers involved in the attack or defense of the Boarded Ship get one attack and may attack any enemy they choose. However, Boarding Crewmembers must defeat all defending Crewmembers that have engaged them before they can attack Crewmembers that are still at their stations.
Example: Jayce boards the Cerberus alone, which has two Crewmembers on board. Nell'ha abandons her station to engage Jayce. Rane remains at her post in the Navigation station, hoping to rotate the ship to face Jayce's ship, then run over to the Weapons station to open fire on the invading ship.
Crewmembers from the Boarded Ship may not cross over to the Invading Ship, unless its shields are down as well.
The connection between the ships can be broken as an action. The Invading Ship may break free automatically. In order for the Boarded Ship to break free, a Crewmember in the Engineering station must successfully perform a 6+ Tech Test. Once the ships break free, they are able to move normally. However, any invading Crewmembers must remain on the Boarded Ship, doing battle until either a connection is re-established, the Boarded Ship descends to the Planet Surface, or one side takes control of the vessel.
Boarding a Ship in Orbit
Once a ship's shields have fallen (and the Ship card is turned over), it is vulnerable to boarding. To board an opponent's ship, your ship must be in an adjacent square and the Crewmember in your Engineering Station must succeed at a 5+ Tech Test. It doesn't matter whether your own ship's shields are active or not.
The Intruding Ship traps the Boarded Ship in a tractor beam. Neither ship involved in the Boarding Action may move, except to rotate in place. The two ships may still attack each other with their weapons, assuming that the Weapons station is still occupied.
Boarding a Ship on the Surface
If a ship is docked on the Planet Surface game board, it may be boarded by opposing Crewmembers, Villains, or Creatures that move into its Docking Port space. If a ship on the surface is boarded, the battle takes place on the ship card.
If a Boarded Ship descends to the Planet Surface, Crewmembers from either side may leave the ship and move to the Planet Surface board. This may result in a player having more than three Crewmembers in their Landing Party. If this happens, the excess Crewmember(s) must either remain on the Docking Port or move to their own ship or an empty Docking Port in hopes of being rescued by their own ship. During their movement, they may not engage in combat or complete any Mission Parameters in any way. They may, however, "swap" with another Crewmember, who must then move towards rescue instead.
If the boarders overtake the ship, her crew can still try to complete the mission on the Planet Surface. But, if there are no other ships of that faction in play, then they have lost their ship -- they won't be able to leave the planet and the mission ends in a draw.
Combat Aboard a Ship
During combat on board a ship, all characters are considered to be at a range of one space, meaning that most ranged and melee Weapons can be used.
Crewmembers involved in combat on board a ship must be flipped over to the (red) planetary side. They may use their Abilities and equipment as normal (remember that defending Crewmembers may grab equipment from the armory).
Overtaken ships must be sold for Digits. You may never operate more than one ship at a time.
When combat takes place on a Boarded Ship, it happens immediately upon boarding, and begins with one of the defending Crewmembers attacking first, followed by one of the intruders, then another defender, and so on.
Overtaking an Enemy Ship
A ship is said to be Overtaken if the invading crew can successfully defeat all of the Boarded Ship's Crewmembers. If this occurs, the Boarded Ship's player immediately fails the mission, but they may still assist their teammate (if there is one).
After you Overtake an enemy ship, you may do any of the following:
- Take a Prisoner: Remove one (and only one) defeated enemy Crewmember from the Boarded Ship and place them in your Brig. (Invaders may retreat, taking one defeated enemy crewmember with them as well) OR
- Rescue a Prisoner: Remove one (and only one) of your own Crewmembers from the Boarded Ship's Brig and return them to your own ship. The rescued prisoner is playable immediately (though they will likely require medical assistance).
Important: Only one character can be taken from an Overtaken ship: either a defeated one as a prisoner or a rescued prisoner, never both.
- Towing Prize Ships: You may also tow the Overtaken ship back to your home planet(oid) to collect 200 Digits. Remove the ship from the game board for the remainder of the mission. If there were any other prisoners on the Overtaken ship, they return to their original players along with any defeated defenders. They may be used during the next mission as normal.
If you are playing a campaign game, the next mission must be the "Ship Rescue" mission, to give the owner of the Overtaken ship a chance to regain their vessel, so all players are once again on equal ground (or at least semi-equal ground…). Check the Mission Book for details.
Prisoners & Turning
Once you take an unconscious opposing Crewmember onto your ship, heal them, and place them in your Brig, they become your prisoner. Prisoners remain in the Brig until such a time as you decide to use them in a trade with your opponent for items, money, or as a prisoner exchange. In the meantime, a ship that is short a Crewmember due to him or her being imprisoned may recruit a replacement while on Shore Leave (see page 42).
Once you have fully or partially healed a prisoner, you may attempt to turn them to your side. In order to turn a prisoner, the Crewmember on your ship with the highest Initiative must make a Leadership Test. The player who controls the prisoner also makes a Leadership Test, using the prisoner's Leadership. Each player compares the number of 5's and 6's on their Test. If the prisoner rolls the same or more, they remain vigilantly waiting for their ship to rescue them. If the Crewmember controlling the ship wins the roll, then the prisoner is turned and becomes friendly to that crew, regardless of their previous Faction. Place a Faction token on the Crewmember card to indicate their new faction.
There are two points when you can attempt to turn a prisoner in your Brig:
- During the Space Orbital Phase if your ship is in space. (Crewmember must leave their station to perform this free action).
- During Shore Leave.
You may make one attempt to turn each prisoner you are holding at each of these points. No items can be used that enhance tests. Ties go to the imprisoned character.
Example: Jayce attempts to turn Rane during Shore Leave. He rolls five die, while she only rolls one (per their leadership skills on their crewmember cards). Jayce rolls one 6 and Rane rolls one 5. There is a tie. Therefore, Rane stays loyal to the Cerberus.
Turned Crewmembers are no longer prisoners. They act like any other Crewmember aboard the ship, with unwavering loyalty to their new cause. If a turned Crewmember is captured by their original Faction, they will have to turn them back, but the Crewmember in charge of the ship adds +5 to one of their Leadership Test dice.
Important: Commanders (Captains & Inspectors) cannot be turned and must be ransomed back to their owners upon the end of the mission.
Playing Hint: Turning prisoners will generally happen only during a campaign game, as you usually won't have enough time during a single mission to capture, heal, and turn an opposing Crewmember.
Non-Player Characters
The Crewmembers of your ships do not live alone in the universe. All of the other beings you might encounter during a mission are called "Non-Player Characters" or "NPC's." Unlike player ships and Crewmembers, when an NPC is defeated, their figure or token is removed from the board. Do not replace it with an unconscious token. The NPC can "return" to the game if another matching Enemy card is drawn. However, enemy commanders, warriors & soldiers will be replaced by crates when they are defeated.
Special: If you are playing a one-player game (see page 43), opposing Crewmembers will also be NPC's.
Types of NPC's
There are several types of NPC's in the game:
- Villain Fighters (Zurathi and Dreggs)
- Troop Transport Ships and Military Satellites
- Villains (Zurathi, Dreggs, & Ronin Androids)
- Creatures
- Drones
- Neutral NPCs, including Royalty and special mission-specific characters
All NPC's follow the same general rules, though some special rules apply to each type of NPC.
Warriors and Soldiers have two-sided cards. The "Level 2" side is stronger and may be used for higher level missions during a campaign.
If a Crewmember is defeated, all NPC's that were engaged with that Crewmember will move on to the next closest Crewmember, except Commanders, who will hunt the Crewmember with the next highest Initiative.
NPC Actions
Like Crewmembers, NPC's act in Initiative order during the round. When an NPC acts, they will make one movement action, using their full movement value to move towards the Crewmember they are focused on. Then, if there is any opponent in range (Crewmember or Creature), they will attack that target. Before attacking, the NPC will make a free Search Test in an attempt to reveal an adjacent opponent that is in Stealth Mode.
If an NPC is already engaged, it will attack first, and then move if they have defeated their opponent. Or in the case of a commander - they will attack and then move toward the highest initiative character on the board (If there are more than one, choose randomly), even if that crewmember has not been defeated.
Enemy Cards
Over the course of the game, certain situations including World Event cards can add Enemies to the game. Enemies have no loyalties to the Coalition or Renegade Factions, and will attack any Crewmember in their path.
The most common way for Enemies to enter play is through Enemy cards. There are three types of Enemy cards: a single set of Warriors; a Commander with their bodyguard; or two sets of Warriors that have teamed up together. Enemy cards show the following information:
- Enemy Names: The name of the Enemy types that are added to the game. This may include the name of a Villain Commander and his Warriors, listed as keywords.
- Enemy Pool: This area of the card shows how many Enemies are in the group, which may or may not include a Commander. If the words "if available in the Pool" is shown on a card, it refers to the number of Enemies shown here that have not already been placed on the board.
- Rolling Parameters: This illustrates how many Enemies you will pull from the Enemy Pool and place on the board, based on one roll of a single die. If the Enemy card shows a Commander plus Soldiers or Warriors, then he is always placed on the board regardless of the roll.
Example: You turn over an Enemy card that tells you to add Darius + 3-5 Dregg Warriors to the board. You roll a single die and a 4 appears. Based on the card, you add 4 Dregg Warriors to a random location with Darius, their Commander.
If you draw an Enemy card that shows two different Villain types, you will roll a single die twice, once for each Villain type.
Example: The Enemy card shows both Dregg and Ronin Android Warriors, so you roll once for the Dregg Warriors, getting a 2. Therefore, you pull 2 Dregg Warriors from the pool and place them on the board in a random location. You then roll the die a second time and a 4 appears. Now you pull 3 Ronin Androids from the pool and add them to a different random location.
If an Enemy card is drawn with a Villain species that's already on the map, then roll as normal and place enough Villains to bring the total in play up to the level rolled. For example, if there are 3 Dregg Warriors on the board when a World Event card instructs you to add Darius and 3-6 Dreggs to the board and you roll a 5, instead of placing 5 Dreggs in a random location, you would only place 2 (5 minus the 3 in play), along with Darius. If there were already 5 Dregg Warriors on the board, you would add only Darius. If the Commander is already on the board, ignore that part of the Enemy card as well. So, if Darius and 3 Dreggs were on the board in this case, you would only add the 2 Dreggs. If Darius and 5 Dreggs were already in play, you would do nothing and simply discard the Enemy card since it was already satisfied.
- Reference Pictures: These pictures match the artwork on the Villain Reference cards to help you identify them.
Villain Reference Cards
Villain Reference cards show the stats and abilities of the Enemies that may appear in the game. These cards correspond to a figure, token, or standee. Set out the matching cards for any Enemies that enter play. Villain Reference cards are double-sided, with a weaker Level 1 version on one side and a strong Level 2 version on the other. Each Villain Reference card shows the following:
- Name: The name of the Villain.
- Race & Rank: The Villain's alien race and rank: Commander or Warrior.
- Level: The Villain's Level appears in the upper right corner of the card. It is also used as the Villain's Initiative value.
- Attributes: The abilities of the Villain, as well as whether a certain Crewmember's presence on the board affects the Villain's behavior. A Villain's stats may be altered if there are other Warriors adjacent to them.
It is assumed that all Villains are working together during the mission, so they will not attack each other. However, they are still considered opponents for all Creatures.
- Villain Stats: Like Crewmembers, Villains have stats including Health. However, Villains do not need to be assigned Weapons, as they automatically have a Range value.
Playing Hint: If you are playing a campaign game, you may opt to play with the stronger Level 2 Villains as your crew grows in strength.
The way Villains behave depends on whether they are a Commander or a Warrior:
Commanders
Reward: Delivering the killing blow to a Villain Commander awards 50 Digits.
Villain Commanders will always move toward the Crewmember on the board with the highest Initiative unless otherwise instructed by their Villain Reference card. If the highest Initiative is tied, then roll for which Crewmember the Commander will move towards. After moving, the Commander (and any bodyguard) will attack the highest Initiative target in range (roll off if tied).
Exception: Commanders will always return fire against the Crewmember that dealt the most damage to them that round (if any).
Example: So'len Frae will gravitate toward Jayce while attacking any other Crewmembers (or Creatures) in his path until he reaches Jayce. After moving, he is not close enough to attack Jayce, but both Flibby and Grom are in range. They both have an Initiative of 5, so the players roll a die to determine which one So'len Frae will attack this round. If Jayce is not on the board, So'len will instead move towards the highest Initiative Crewmember—in this case either Flibby or Grom, whoever loses the dice-off. This can be done by assigning numbers to each crewmember and rolling 1 die, i.e. Grom is assigned 1, 2, or 3 and Flibby is assigned 4, 5, or 6. Instead, each controlling player rolls a single die and the lower number becomes the target.
Commanders do not need to make an Elude Test to move away from adjacent opponents.
Commanders are always escorted by at least one Warrior of their race, as long as they are available in the pool.
Example: If So'len Frae is added to the board, a Zurathi Warrior will always stay by his side and move alongside him. These bodyguards will always remain in a space adjacent to their Commander. However, if bodyguards are engaged with a Crewmember, they will not attempt Elude Tests, instead they will continue fighting that Crewmember until they are defeated before moving on to the next.
Warriors
Reward: Delivering the killing blow to a Villain Warrior awards 25 Digits.
Unlike Commanders, Warriors do not always move toward the highest Initiative Crewmember, but instead move towards the nearest Crewmember that they can attack by moving into range (roll off if there is more than one). Once a Warrior engages a Crewmember, they will continue to pursue that Crewmember until one of them is defeated.
Like Commanders, Warriors will instead return fire against the Crewmember that did the most damage to them that round, if any.
Whenever possible, Warriors will not team up against a single Crewmember, instead pairing off one-on-one against different Crewmembers. However, if there is only one Crewmember in range, they will all attack the same target. The extra Warrior will then pair off with a new target should one become available.
Guards
If a Warrior is placed on the board in an interior space at the beginning of the mission (due to a Mission card), they are "guarding" a room. Guards will remain in the room until a Crewmember enters. If a Crewmember fails a Stealth Test in a guarded room, all of the guards in that room will attack that Crewmember (unless another Crewmember not in Stealth Mode is also in the room).
If all of the Crewmembers in the room are in Stealth Mode, the guards will move into an adjacent space and attempt a 5+ Search Test to locate them. If a guard succeeds at the Search Test, the guards will attack the sneaking Crewmember.
If a Crewmember fails a Stealth Test in the room and then leaves the room, the guards will follow, believing that the Crewmember has stolen something.
If there is only one Villain Fighter on the board, it will always attack a docked ship on the Planet Surface first, unless damaged by an attacking ship, in which case they will return fire.
Dropping Loot
Any time a Villain Commander or Warrior is defeated, replace it with a random Container token. Crewmembers may Search and Interact with the Container as normal.
Villain Fighters
Reward: Delivering the killing blow to a Villain Fighter awards 25 Digits.
Villain Fighters are Enemies you may encounter in space. They follow the same rules as Villain Warriors, except that you never have to make Elude Tests in space.
Villain Fighters will return fire on any player ship that has damaged them. Otherwise, they will target the ship with the highest Initiative. Villain Fighters always pair off one-on-one with player ships. This includes any ships that are docked on the surface (which are always treated as having the highest Initiative). If there are more Villain Fighters on the board than player ships, roll randomly to determine which player ship is targeted by the extra Villain Fighter.
Dropping Salvage
If a Villain Fighter is destroyed, replace it with a random Salvage token.
Creatures
Reward: Delivering the killing blow to a Creature awards 100 Digits.
Creatures can enter play through World Event cards or begin the game as indicated on a Mission card. Creatures will attack Crewmembers as well as NPC's. They behave similarly to Villain Commanders, pursuing the highest Initiative character in play. But, if a Creature takes damage, they will attack the Crewmember that inflicted the most damage that round. Like Warriors, Creatures can be placed on the board to guard something, in which case they will follow all the rules for guards, above.
Giant Creatures cannot enter interior corner & Side locations, but they can enter interior center tile locations.
Creature Cards
Like Villains, each Creature is shown on a card that has all of the Creature's attributes, including:
- Creature Type: The name of the Creature's species.
- Keywords: Any special traits associated with the Creature that can cause game mechanics to have greater effects against it. For example: Weapons that do more damage against Robots or Weapons that can stun Creatures.
- Attributes: Any special abilities of the Creature are described here.
- Creature Stats: The attack, movement, and defense skills of the Creature. Some Creatures have a Range value and can make ranged attacks. If a Creature has no range, it can only make melee attacks.
Giant Creatures
Creatures with the "Giant" keyword are exceptionally large and cannot enter interior locations that have low ceilings. All interior locations on corner and side tile have low ceilings, but center tile interior locations are always high enough for Giant Creatures to enter. The general rule is if the interior location has a double door (door that takes up two spaces), it has a high enough ceiling for the Creature to enter.
However, these Creatures can use a projectile to attack through the door (if they have Range). If no target is within Range (or they have no Range), they will break off the attack and go after another target that they can reach.
Drones
Reward: Delivering the killing blow to a Drone awards 0 Digits.
Drones work exactly the same way as Warriors, except that Crewmembers do not need to Elude them, and can simply step away from a fight if desired.
Drones will move and attack the closest Crewmember (roll off if more than one), then pair off and move to hunt the next closest if there are multiple Drones. If a Drone is adjacent to a Crewmember, it will remain fighting that opponent until it is defeated before moving on to the next.
Drones will only pair off with one Crewmember each. Any unpaired Drone will remain dormant and continue moving until they find an unpaired target. If a paired Drone is destroyed, another Drone may take its place against its target.
Unlike normal attacks, Crewmembers may attack all Drones in range simultaneously. When performing an attack, and after the Drones' defense dice have been rolled, divide all damage between Drones in range. Since they each have one health, one damage will eliminate each Drone within range.
Winning Missions
The two Factions will go head-to-head until they achieve the Mission Parameters, whether that is to rescue/abduct a princess, find munitions or parts, retrieve data, etc. They will then call for their ship to land and pick them up. If their ship's hull has been reduced to 0 and they were forced to return home to enact repairs, their ship will not be able to land and retrieve them until later. The Crewmembers will be stuck on the planet battling it out until their ship arrives.
Once their ship arrives and they board with the Mission Parameters in hand (or on their Crewmember cards), the mission will be over if the players had agreed to play a Tier 1 game (see "Setting Up the Game" on page 4). The winning Faction receives the Digits printed at the bottom of the Mission Card.
If the players agreed to play a Tier 2 game, then after the Landing Party is retrieved, the ship carrying the Mission Parameters needs to return to its Home Planet(oid) before its Hull is reduced to 0. If they do, they win the mission. If their Hull is reduced to 0, the mission ends in a draw and both players receive half the Digits listed at the bottom of the Mission card.
If you're playing a Timed Game, then when the next World Event Card is to be drawn and cannot, since the pile has run out, then the game will end. Read the Timed Parameters at the bottom of the page in the Mission Booklet to explain the results of the Mission, based on how far each Faction got into achieving the Mission Parameters.
Bounties
In addition to any rewards for completing their mission, each player receives a bounty for every opponent they defeated during the mission. The rewards for defeating Villains and Creatures depends on the type of Enemy (see "Non-Player Characters" on page 35).
- Villain Warrior or Fighter - 25 Digits
- Enemy Crewmember - 50 Digits
- Villain Commander - 100 Digits
- Creature, Satellite or Transport - 100 Digits
- Capture Enemy Crewmember - 100 Digits
Bounty Cards
Bounty cards add another dimension to the game by pressing your team to hunt down a specific opposing Crewmember. After each player chooses their crew, their opponent builds a Bounty deck for those Crewmembers (separated by Faction).
Before a mission, each player draws one Bounty card from the opposing Faction's deck. You may share your Bounty with your team members (if any), but keep it secret from the other side. Note that Commanders have higher bounties than regular Crewmembers, and Tech and Medical Crewmembers have lower bounties. At the end of the mission, you will earn Digits equal to the bounty on your card if you are able to defeat the Crewmember shown.
Important: The value of a Bounty card replaces the normal 50 Digits reward for defeating an opposing Crewmember, and does not add to it.
Normal Play
For normal play, the game ends when the mission is completed. Each player tallies up the Digits their Faction has received to determine their "score." You can compare your performance from mission to mission using the Digits you collected.
Campaign Play
Campaigns are a series of missions strung together that culminate with an Epic Ending. When you are setting up the game, the players must agree on how many missions the campaign will last, and whether they are choosing missions randomly from the entire deck, or only from those that make up the campaign they are playing.
How Campaigns Work
When you are playing a campaign, you play through missions one at a time. After each mission is complete, both Factions get to spend a little time recuperating before their next mission. This is called "Shore Leave." After the Shore Leave phase is complete, the next mission in the campaign can begin.
Once the required number of missions have been played (typically three to five), the campaign reaches its Epic Ending. The result of the Epic Ending will determine which Faction (if any) has won the campaign.
Shore Leave
After the completion of a mission, the ships return to their respective home Planet(oid) to give the crew a little "R & R." This is also a time for players to upgrade their ships and Crewmembers as well as add additional Crewmembers to their crew, depending on their ship's capacity. During Shore Leave, each player may do any or all of the following:
- Receive Digits for completing the mission, Bounties, and rewards for defeating enemy Crewmembers, Villains, and Creatures.
- Remove all Wound tokens from all Crewmembers, revive all defeated Crewmembers, and retrieve any Crewmembers left on the Planet Surface.
- Remove all Damage tokens from their ship.
- Sell any unwanted equipment (that have at least one Energy token still available).
- Purchase Weapons and gear.
- Purchase Upgrades.
- Recruit Crewmembers (if there is any space available on their ship).
- Ransom or trade Crewmembers back to their respective players (Commanders must be ransomed, since they cannot be turned).
- Discard Tactical cards and redraw, if desired.
Once all players have completed their Shore Leave, the Renegades receive their next mission, and the next mission in the campaign begins.
Buying and Selling Weapons, Items & Upgrades
Each Equipment card has a Digit value at the bottom of the card. During Shore Leave, you may sell any equipment cards you have for half the Digit value (rounded to the nearest 25), as long as each card sold has at least one Energy token left on it. Any equipment card without an Energy token is worthless and must be discarded (unless you regenerate them by adding additional Energy tokens). Shuffle all the depleted or sold items back into the deck.
Then, each player turns over the top four Equipment cards to see what is available for them to purchase. You may buy any or all of these cards for the full Digit value, if you are wealthy enough. After a player has purchased all the equipment cards they choose to, any leftover cards are discarded, then the next player turns over four cards from the deck. If no cards remain, shuffle the discard pile for the next player.
Upgrades work the same way as Equipment cards, except that each player only turns over three Upgrade cards (instead of four). Note that some upgrades affect only Aliens or Humans, while others affect only certain Skills or station specialties.
Recruiting Crewmembers
If your ship has more capacity than you have Crewmembers, you may recruit new Crewmembers from your Faction by paying the Digits shown on their card. You may even replace Crewmembers who are being held prisoner by your opponent.
Some Crewmember, including Commanders (i.e. Captains, Inspectors) have an N/A, since Commanders may not be recruited.
There are some Crewmembers who do not have a Station specialty, and instead have keywords such as Royalty, Assassin, Thief, or Investigator. These Crewmembers cannot be chosen as part of a ship's initial crew before the first mission of a campaign. They can, however, be recruited during Shore Leave.
Turning Prisoners
During Shore Leave, you may make one attempt to turn any opposing Crewmembers that you are holding in your Brig (see "Prisoners & Turning" on page 34). If you have more Crewmembers than your ship's capacity after turning a prisoner, you will have to let the excess Crewmembers go.
Commanders may not be turned and must be ransomed back to their controlling player.
Epic Endings
The Epic Endings are listed in the Missions Booklet. Once the final mission in the campaign has been completed, the Epic Ending for that campaign is activated immediately. There is no Shore Leave before the Epic Ending! In some instances, the Epic Ending may cause the two Factions to work together, while in others they may battle to the death. May the best crew win!
Gameplay Options
The Quicker Game
To cut down the time required to play, players may choose to play the Quicker Game. When playing this way, all players begin the mission with their ships already on the Planet Surface board instead of starting on the Space Orbital board. In order of Initiative (see page 9), each player places their ship on an empty Docking Port of their choice. They then perform a free Landing Party Deployment before the first round begins. During the first round, the Space Orbital Phase is skipped.
In addition, only 6-8 World Event cards are used in the Quicker Game, which serves as a mission timer. Randomly choose the World Events to use (without looking at them) and create a face down deck near the board. Draw the first World Event card at the end of the first full round (the second round of play).
The One-Player Game
Destiny Aurora: Renegades was designed to also play as a solo game, using the Coalition Faction as NPC's. Each mission scenario is treated differently in how the Coalition will work to thwart the Renegade's plans. Here are some guidelines for how Coalition NPC's will act while in space:
- Coalition crews are chosen by the Renegade player, with one Crewmember for each station as normal. The Crewmember with the highest matching Skill is always assigned to each station.
- If the mission begins on the Space Orbital board, Coalition ships start on Earth as usual.
- Coalition Commanders do not receive Tactical cards (if in use).
- Coalition ships always move as close as possible to Renegade ships and attack them, following the most direct route to their target. They will skirt around Obstructed Terrain when possible, though they will fire through it.
- Coalition ships will only attack NPC ships if they take damage from them (remember that Villain Fighters will always pair off against both Factions).
- Once a Renegade ship descends to the mission planet, the Coalition ships will follow.
- Coalition ships do receive bonuses from their Crewmembers as normal. Bonuses are always added to the highest dice in combat, in descending order, but Coalition ships never do Penetrating Damage.
- Coalition ships always start the mission with five Crewmembers unless there are not enough left in their pool (because the Renegades have captured too many).
These guidelines cover how the Coalition NPC's will act on the mission planet:
- Coalition NPC's will try to move adjacent to opponents in Stealth Mode and discover them using free Search Tests every round.
- If a Coalition NPC enters a room with other NPC's or opponents, they will move to a wall or Obstructing Terrain and attempt Stealth Tests if they are in search of a Mission Parameter.
- Coalition NPC's will pursue their Renegade target unless they are stopped by a failed Elude Test or they are currently engaged in melee with another opponent.
- They will always try to move into an adjacent square with their target or other opponent.
- Attack and Defense bonuses are always added to the highest dice in descending order, but Coalition Crewmembers never do Penetrating Damage.
- The Landing Party member with the highest Initiative value is always given the Arc-Blade.
- Coalition Medics never heal other Crewmembers.
- Coalition Crewmembers can attempt Tests to fulfill Mission Parameters (including Medical Tests).
- Creatures and Villain Commanders will focus on the highest Initiative Crewmember from both Factions, as normal. Warriors simply pair off and remain fighting the first Crewmember they engage.
- All NPC's may fire through friendly characters. All Coalition Crewmembers are friendly with each other, but they are not friendly with the Villains or Creatures (unless otherwise stated by some game effect, such as the Holographic Emitter).
- The Coalition Landing Party will always mirror the Renegade Landing Party by station. For example, if the Renegades choose their Commander and Weapons expert for the Landing Party, the Coalition will do the same. However, if the Renegades swap out their Landing Party Crewmembers mid-mission, the Coalition does not mirror this action.
- To determine the actions of a Coalition NPC, draw a random NPC card from the deck for each member of the Coalition Landing Party. Place matching colored tokens on the card and under the Crewmember as a reminder of which character is following which behavior.
Tactical Cards
Tactical cards are a game play option that will be added in future expansions. Tactical cards represent the years of training and experience that mission commanders have accumulated, providing them with additional leadership abilities they can call upon. Each card can be used either on the Planet Surface or in Space. Sometimes, a Leadership Test will be needed to use the chosen ability.
There are two types of Tactical cards: Surface Tactical cards (with a red border) and Orbital Tactical cards (with a blue border). At the beginning of the game, each player draws one of each type and attaches them to their Commander. Tactical cards may be discarded between missions of a campaign and new ones drawn, if desired.
Each Tactical card can be used once per round, at any time, unless otherwise noted on the card. Using a Tactical card is a free action.
If your Commander is onboard your ship, you can only use the Orbital Tactical card. If your Commander joins your Landing Party, you can only use the Surface Tactical card instead.
Each Tactical card shows the following:
- Title: The name of the card.
- Requirements: A Tactical ability may require that certain Crewmembers, as well as the Commander, perform Skill Tests as described. Orbital Tactical cards require a Crewmember in the named station make the Test, not necessarily the Crewmember with the matching station specialty. If your Commander is in the matching station, they may satisfy both requirements for the Tactical card.
Example: Donexia remained aboard the Cerberus instead of joining the Landing Party. At the beginning of the turn, she runs back to Engineering, leaving Rane at Navigation. They need to buy some time and get away from the Destiny Aurora, and she wants to use the Quantum Boost to do it. It's a risky maneuver, since she only has a Tech Skill of 1, but if she succeeds, they'll be on the other side of the nebula.
Tactical cards are attached to a Commander, not to a ship.
Glossary
Actions (Crewmembers) - Each Crewmember, Villain, Creature, Drone, etc. may perform two Actions per round. NPC's will only get to move and attack. They may only attack if they are within range after moving. Crewmembers can move twice if desired, but may only attack once. They may interact with an object, crate, defeated crewmember, or console as an action or they may use one of their abilities, which only counts as an action if they pass the Skill Test and perform the ability. (pg. 14, 15, 16, 17, 18)
Free Actions (Crewmembers) - Crewmembers also have a host of free actions including, Stealth, Search/Scan, Swap Weapons, Elude and Ascend with their ship onto the Orbital Map.
Actions (Ships) - Each Ship, including enemy ships, may perform two actions per round. NPC ships may only move and attack. Player ships may move twice, but may only attack once per round. They may also interact with salvage, and adjacent player ships that currently have no shields to board their ship (See Boarding Ships). (pg. 10, 11, 12)
Free Actions (Ships) - Player ships can also perform free actions, such as use ship abilities, move crewmembers between stations, heal wounded crewmembers in Med Bay and revive defeated crewmembers.
Armory - The Weapons, Items and Starting Gear that begin on your ship prior to starting a mission. Armory Cards will be assigned to your Landing Party when they land on the planet surface. (pg. 31, 33)
Boarding - When a ship's shields fail and the card is turned over, it may be boarded by adjacent opponents. No more than one ship can invade an opponent's ship at any given time. Moving between ships counts as an action. Neither ship can move while being boarded, but they may rotate and fire. Ships may move if the link is broken by performing a successful 6+ Tech Test while in Engineering. Attack turns work as follows: Defending crewmembers then Intruding crewmembers. (pg. 16, 25, 32, 33)
Blocking Terrain - Indicated by a red border, Blocking Terrain is impassible and cannot be moved through or perform ranged attacks through. Presently the only exception are flyers, who may fly over exterior blocking terrain, but cannot land atop it, nor can they perform ranged attacks through it. Ships may not fly over Blocking Terrain on the Orbital Map. (pg. 29, 30)
Bounty - Bounties are cards taken at the beginning of a mission that correspond to an opponent's crewmember. If that crewmember is defeated, the Bounty is delivered at the end of the mission and Digits are rewarded. (pg. 23, 24, 34)
Brig - The section on each ship where prisoners are kept. Prisoners may be taken from the planet surface and put into your brig during a mission. Once an opposing crewmember is placed in the Brig, an attempt to turn them to the faction of the imprisoning player can be made. See the Prisoners & Turning Section in this Rule Book. (pg. 6, pg. 33)
Containers - Tokens that are placed face-down in ghosted squares on the planetary map that correspond to cards in the Search Items Deck. There should be 9 Crate Tokens placed on the planetary board at the beginning of every mission. In addition, when a Villain Warrior or Commander is defeated and removed from the board, it is replaced by a random Crate Token. They attach to the character that retrieved them and may be sold during Shore Leave as long as there is at least one Energy Token on the card if applicable. (pg. 6, 16, 17, 18, 32, 38)
Deployment - Term used when a ship lands on the planet surface during the Orbital Phase and the chosen Landing Party is given a free action to disembark the ship and move up to half of their movement value - rounded up. (pg. 9, 12, 18)
Earth - The blue planet on the orbital board. It is the origin planet of the Coalition faction and all Coalition ships begin the mission here unless beginning on the planet surface. (pg. 6, 25)
Elevated Terrain - Elevated Terrain is marked by a yellow border or looking down into Sunken Terrain (orange border). Ladders and other modes to ascend and descend are needed to move up or down from Elevated Terrain. If a character does not use these modes and instead moves from a yellow bordered square to an adjacent square on a lower terrain, they must take +1 Unavoidable Damage. Characters cannot move over a yellow-border to a higher terrain without the use of a ladder or other mode of ascension as they are blocked by a wall. Attackers must be on the edge of Elevated Terrain to draw line of sight to a lower level of Terrain. When attacking from Elevated Terrain add +1 to 1 Rolled attack die or if defending, the character standing on Elevated Terrain adds +1 to 1 Rolled Defense Die. (pg. 29, 30, 31)
Energy Tokens - Tokens assigned to a Weapon, Item or Salvage that determines how many times the card can be used. Once the Energy Tokens are depleted, the card is discarded. (pg. 32, 42)
Giant - Some creatures and villains may have this keyword. They may not enter buildings in corner locations, but may make ranged attacks through doors as long as they have line of sight. Side and Center buildings are said to have high ceilings and they may enter those locations. (pg. 8, 40)
Gravitate Toward - Means that a character/NPC will move toward another character on the map usually with a certain keyword or initiative value.
Hands - The icon listed on the bottom of some Weapons & Gear and Search Items that indicate how many hands are required to use that item or weapon. For example: if the character is holding a sword, which is a one-handed weapon, he can also hold a pistol, which is also a one-handed weapon. However the character cannot wield both a sword and rifle, which is a two-handed weapon. He or she can keep a two-handed weapon on their back and swap it with a one-handed weapon as long as the player declares the swap at the beginning of that character's turn. (pg. 17, 22, 32)
Hindering/Obstructed Terrain - Indicated by a green border, Hindering Terrain may be both moved through and ranged attacks may be performed through this terrain. Movement through Hindering/Obstructed squares requires one movement point to enter and two movement points to either leave or move through into another square of Hindering/Obstructed Terrain. Defenders who are targeted by a ranged attack may reroll 2 of their defense dice while occupying this terrain or if the ranged attack passes through a square of Hindering Terrain. Stealth mode may be activated by a character occupying Hindering Terrain. (pg. 17, 29, 30)
Interact - Characters may interact with certain NPC's and computers inside rooms. Interacting counts as an action even if it fails unless otherwise stated by the mission. Interacting often requires successful tests based on the mission parameter. These tests may range from hacking a computer to getting an NPC character to trust you enough to follow you. For example: In the case of the mission, "Abduct the Princess," Xea'lana will follow a crewmember that succeeded in a Leadership Test, but may be stolen away by an opposing crewmember that succeeds in the same test during their turn. (pg. 16, 18)
Initiative - The willpower of the character and their propensity to lead and others to follow. Initiative determines player order while taking turns on each game board. On the orbital map, the initiative of the ship is based on the Commander (Captain or Inspector). If there is no Commander on the ship, then the ship initiative would be based on the Navigator's initiative value. On the planet surface, player order is based on the combined initiatives of the Landing Party. (pg. 9, 13, 20, 23, 37)
Invading/Intruding Ship - A ship that initiates the boarding and sends one or more of their crew onto an adjacent ship. (pg. 32, 33, 34)
Landing Party - Depending on the mission parameters, up to 3 chosen members of your crew that disembark from your ship onto the planet surface, who are tasked with completing a mission. (pg. 9, 12, 13, 14)
Line of Sight (LoS) - When making a ranged attack. Draw a line from one corner of the attacker's square to the middle of the target's square. LoS is not blocked by other figures when firing down from Elevated Terrain or through friendly figures. Ships do not block LoS from other Ships. (pg. 27, 29, 31)
Location Ability - Some Locations have special events and abilities that help or hinder your crew. These are not mandatory for the game and should be established between all players prior to beginning if they are going to utilize those abilities or not. They range from finding additional weapons to being attacked by training androids. (pg. 8)
Med Bay - The area of each ship where wounded and defeated characters are taken to heal as long as the Medic accompanies them. During each round a wounded character is in the Med Bay with the Medical Officer, they will heal two wounds. Defeated characters will revive after one round and become wounded. (pg. 12, 13, 23, 24)
Melee - Attacks that may occur when a character is adjacent to an opponent character, villain or creature. Melee weapons may be used during these attacks. (pg. 15, 16, 20, 22, 26, 32)
Missions - Mission Cards are chosen at the beginning of gameplay and correspond to a page in the Mission Booklet that tells players which board tiles are necessary, the placement of NPC characters, as well as parameters for completing the mission. Missions will be among the three possible storylines that culminate into Epic Endings. (pg. 5, 6, 7)
Movement (Character) - The number of spaces a character can move as listed on its card. Characters can move in any direction for 1 movement point unless the space has a colored border around it (See Terrain). (pg. 14, 15, 20, 29)
Movement (Ship) - Ships move per the Piloting (Wing Value) number listed on the Character Card of the crewmember inhabiting the Navigation Station. If the shields are still active (front of the Ship Card) the ship will get a +1 bonus to movement. Ships must go in straight lines, but may rotate in any direction at a cost of 1 movement point unless the pilot has a free rotation as listed on their card. (pg. 10, 11)
NPC - Non-Player Character. A character who is not directly controlled by a player and instead is controlled by a series of rules that dictate movement and combat. (pg. 16, 35, 36, 37, 38)
Overtaken Ship - A ship that has been boarded and the invading crew has defeated all crewmembers on the boarded ship and has therefore taken control of it. (pg. 27, 28)
Obstructing Terrain - See Hindering Terrain.
Port Saven - The domed asteroid on the Orbital Board. It is the origin planet of the Renegade faction and all Renegade ships begin the mission here, unless beginning on the planet surface. (pg. 6)
Range - The amount of spaces between the attacker and the target, which includes the space the target currently occupies. A range number is also assigned to each ranged weapon. Character abilities may alter this number. Range may be 1 for the weapon bonuses to be used, unless otherwise instructed on the card. (pg. 15, 20, 26, 27)
Rotation - On the Orbital Map, ships cannot move diagonally or shift to other angles without expending a movement point to rotate into that position. Some pilots allow for a free rotation. (pg. 10, 11)
Royalty - Royal characters such as Princess Xea'lana or Prince Ulep may be added as recruitable crewmembers if one of two things happen. 1. One of crews wins the "Civil War" Epic Ending Storyline. 2. All Players agree to make them recruitable. Once they are recruited they will operate as any other playable character. (pg. 36, 43)
Salvage - Tokens placed on the Orbital Map that correspond to cards in the Salvage Deck. Tokens are two-sided and each one is placed face-down on each tile at least four squares from the endcaps. Therefore, there should be 9 Salvage Tokens placed on the space board at the beginning of every mission. In addition, when a fighter, troop transport or satellite is destroyed, the ship is removed from the board and is replaced with a random Salvage Token. They attach to the ship that retrieved them and may be sold during Shore Leave as long as there is at least one Energy Token left on the card - if applicable. (pg. 6, 10, 11, 12, 40)
Search Items - Items and Weapons found in containers on the planet surface. They attach to the crewmember who picked them up and may be exchanged with other crewmembers if they are adjacent to one another before or after their movement. They can be sold during Shore Leave for half their Digit value, rounded up as long as there is at least one Energy Token on the card - if applicable. (pg. 16, 22, 31, 32, 42)
Ship Abilities - The list of abilities on each Ship Card that allows that ship to perform certain actions based on the Skill Test of the crewmember inhabiting that station. Abilities range from extra movement to rerolling defense die. Only one of these abilities may be attempted during each round and cannot be attempted if no crewmember exists in the respective station. Once the shields of the ship are damaged to the point of failure, the Ship Card is turned over and the abilities are limited. All fractions are rounded up. (pg. 10, 12)
Shore Leave - The break in time between missions where crews can purchase and sell items and weapons collected during a mission. Upgrades may also be purchased and assigned to the appropriate crewmembers. Additional Crewmembers may also be purchased for your ship as long as capacity is available. (pg. 35, 42)
Skills Tests - Each crewmember has a set of skills including: Leadership, Search/Scan, Tech, Stealth, Medical, Weapons, and Piloting. The number, related to the icons, represents how many dice are rolled when a test is required. To pass a 5+ test one of the dice needs to be a 5 or 6. To pass a 6+ test the dice rolled needs to have at least one six. (pg. 12, 15, 21)
Space Mines - In the case of this salvage item, Space Mines will not detonate if within range of the ship that deployed them, but may hit and damage that ship if the mine is detonated by another ship or another mine. Daisy chain detonations may occur.
Stations - Five bubbles on each Ship Card that represent the five stations that make up the ship's operational hub. They include: Command, Weapons, Navigation, Engineering and Communications. The character figures are placed on each of these bubbles and may move between them at the start of the Orbital Phase during each player's turn. (pg. 5, 10, 12, 19, 20, 24)
Stealth - Characters can enter Stealth Mode by rolling a successful 5+ Stealth Test. Roll the number of dice associated with the character's stealth skill. If one of the dice rolled is either a 5 or 6, the Test is passed and the character is said to be in stealth. A Stealth Token is placed next to the character. Characters must be either adjacent to an interior wall space or occupy a space of Hindering/Obstructing Terrain to be eligible for Stealth Mode. Once in Stealth Mode, opposing characters must be adjacent to perform a successful 5+ Search/Scan Test in order to attack or interact with that character. Once that character performs an attack or moves without another successful Stealth Test, they will no longer be in Stealth Mode and the token is removed. If they have not made an attack and only moved, they may perform another Stealth Test. (pg. 14, 15, 17, 18, 21)
Sunken Terrain - Sunken Terrain is marked by an orange border. Ladders and other modes to ascend and descend are needed to move down or up from Sunken Terrain. If a character does not use these modes and instead moves from an orange bordered square to an adjacent square on a lower terrain, they must take +1 Unavoidable Damage from the fall. Characters cannot move over an orange-border to a higher terrain without the use of a ladder or other mode of ascension as they are blocked by a wall. Targets of an attack must be on the edge of Sunken Terrain to draw line of sight to a lower terrain level. See the diagram on page 22 for further details. (pg. 29, 31)
Tactical Cards (Expansion) - Orbital and Planetary Tactical Cards will be available in Expansion Packs. They attach to Commanders (Captains & Inspectors) and are used as a free action and are dependent on whether the commander is on the Planetary Map or the Orbital Map. Tactical Cards are either kept between missions (if a campaign is being played) or a new set drawn before each mission. (pg. 13, 18, 42, 44)
Terrain - Terrain is divided into several types both on the Planet Surface and on the Orbital Map. They include Blocking Terrain and Hindering/Obstructing Terrain on both boards. Sunken, Water and Elevated Terrain are only present on the Planetary Map. Reference each one individually in this glossary. (pg. 29, 30, 31)
Upgrades - During Shore Leave, each crew has the ability to purchase upgrades for their crewmembers to give them new skills or to upgrade their present skills. Each Upgrade Card has an associated Digit cost on the bottom. (pg. 22, 42)
Wall Break - Walls of buildings may be damaged by grenades or other weapons. If this occurs, then that area is said to be open and may be used as a doorway. Place a Damage Token in the space that is destroyed.
Wall Damage - When a character is knocked back due to an attack or other cause (i.e. Quake) and cannot move any further due to a wall or Blocking Terrain, the character takes +1 Unavoidable Damage. If a character cannot move due to being at the edge of the map, on a dock, or adjacent to another character, they do not take Wall Damage. (pg. 30)
Water Terrain - Water Terrain, marked by a blue border, works similarly to Hindering Terrain in regards to movement. Water Terrain requires 1 movement point to enter and two movement points to either leave or move through into another square of Water Terrain. Water Terrain gives no bonuses to defense and Stealth Mode may not be activated while occupying Water Terrain unless the character is positioned adjacent to an interior wall. Water Terrain does not effect range or melee combat in ay way. (pg. 30)
Weapons Cards - Attach to a specific crewmember or ship and are used to augment attacks, defense, or skill tests. Weapons Cards can be sold on the open market during Shore Leave for half their Digit value, rounded up to the nearest 25 Digit, as long as there is at least one Energy Token left on the card - if applicable. (pg. 15, 17, 22, 32, 42)