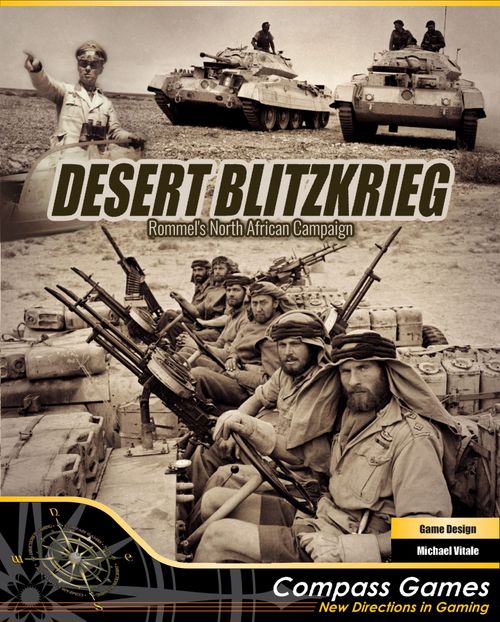
Desert Blitzkrieg: Rommel's North African Campaign
Desert Blitzkrieg: Rommel's North African Campaign Rulebook
Table of Contents
Table of Contents
- Game Inventory
- 1.0 Unit Description
- 2.0 Symbols/Abbreviations
- 3.0 Markers
- 4.0 Sequence of Play
- 5.0 Card Draw Phase
- 6.0 Reinforcement/Replacement/Withdrawal (RRW)
- 7.0 Supply
- 8.0 Stacking and Movement
- 9.0 Combat
- 10.0 Motorized Movement/Limited Combat
- 11.0 Combat Modifiers/Special Units
- 12.0 Winning the Game
- 13.0 Optional Rules
- 14.0 Short Game Scenario
- 15.0 O'Connor's Offensive Scenario
- 17.0 Designer's Notes
- 18.0 Player Notes
- 19.0 Examples of Play
Game Inventory
- One 22" x 34" mounted map
- Two counter sheets of 5/8" counters and markers
- One Event Card Deck of 26 cards
- Four Player Aid Cards
- Battle Board
- One Rule Book
- Three ten-sided dice
- Two six-sided dice
Note: Ten-sided dice are used to determine values from 0-9 in Desert Blitzkrieg, not 1-10.
Official clarifications (9/17/25), applied throughout this rulebook:
- Equivalent Terms: Replacement Units = Unit Upgrades; Primary Roads = Major Roads.
- Dice: the two six-sided dice (d6) are only used to track the number of remaining card draws for each side. All other game rolls use the ten-sided dice (d10s), with 0 representing zero, not ten.
- Counters: there is an Interdiction backing printed on the British 000 VP marker and an Aircraft Sortie printed on the back of the 2nd interdiction marker. Neither of these notes affects gameplay, and the correct number of interdiction & sortie counters are included.
1.0 Unit Description
Each vehicle unit counter shows, on its front: the Division ID (top), the Turn of Entry (left), the Division Color ID (lower left, triangle), the Vehicle Type (Armor) (right), a Modifier (right), an Anti-vehicle Rating (red circle, lower left), and the Basic Combat Value (lower right, the large number). On its back, the unit is shown as Damaged, with a damage marker and a Modifier.
Unit Types
- Vehicle unit types: Axis Armor (German, Italian); Allied Armor (British and Commonwealth); Recon (German, Italian, Allied).
- Infantry unit types: Motorized Infantry; Motorized MG Infantry; Infantry; Parachute MG Infantry; Glider Infantry.
- Artillery unit types: Motorized Artillery; Artillery; Glider Artillery.
Nationality colors
- German: grey-green
- Italian: yellow
- British: tan
- Commonwealth: olive
The Axis side has both Italian and German units. The Allied side has both British and Commonwealth units. German and Italian units may stack together and are considered friendly. British and Commonwealth units may do the same.
Note: When the rules refer to an Infantry unit, it can be of any Infantry unit type.
2.0 Symbols/Abbreviations
2.1 Turn of Entry and Symbols (see Turn Record Track on map, as well as unit counters)
2.1.1 Units with other abbreviations for setup listed below should be set up in the appropriate box on the map or its picture on the Turn Record Track.
| Abbreviation | Meaning | Abbreviation | Meaning |
|---|---|---|---|
| # | Turn of Entry | H | Holding Area |
| R | Replacement | Ab | Agadabia |
| AG | Aghelia | Ba | Barce |
| Bd | Bardia | Bu | Buq Buq |
| Ma | Marsa Brega | Me | Mechili |
| Mr | Mersa Matruh | Ms | Msus |
| Si | Sidi Barrani | So | Soluch |
| To | Tobruk |
2.2 Name Abbreviations on Unit Counters
| Abbreviation | Meaning | Abbreviation | Meaning |
|---|---|---|---|
| Gds | Guards | 5Lt | Fifth Light |
| Indpndt | Independent | RG | Ragruppamento |
| TK | Tank | Ind | Indian |
| N. Zealand | New Zealand | GIO.FAC | Giovanni Facisti |
| Aus. | Australian | SOND | Sonderverband |
| S.Afr. | South African | Free Fr. | Free French |
| Sup. Gp. | Support Group | CCNN | Camicie Nere 'Blackshirts' |
Some units 'belong together' as part of the same Division (see 8.1.3, Divisional Integrity). This is important for Stacking (8.0) and Combat (9.0). Units that belong to the same division have a color coded 'triangle' in the lower left referred to as the 'Division Color ID'. All the units of a division will have the same color coded ID.
Other Common Abbreviations:
| Abbreviation | Meaning | Abbreviation | Meaning |
|---|---|---|---|
| SU | Supply unit | FL | Front Line |
| SL | Second Line | CV | Combat value |
| HQ | Headquarters | OOS | Out of Supply |
2.3 Campaign Game Setup
Set aside units on the counter sheets marked as 'O'Connor Scenario', identified by a black or white dot on the right, they are not used in the Campaign Game scenario.
2.3.1 All units marked with an 'H' should be set up in the Axis Reinforcement Holding Area. This includes the Axis Air Unit.
2.3.2 Control boxes should all have the Allied flag marker on them except Aghelia which should have the Iron Cross marker.
2.3.3 Supply units that have box names on them should be placed in the box named. Allies have 8. Axis have 3.
2.3.4 Place the "NO" marker in the box on the map "Alamein Battle Area".
2.3.5 Place the '-3 To Hit' Tobruk Fort marker and the '-1 To Hit' Bardia Fort marker next to the respective (blank) boxes.
2.3.6 Prepare the card deck according to 5.1.
2.3.7 Campaign Setup Sheet. The official setup sheet (DesertBlitzkrieg_SetupSheets_9_15_25, Campaign Game page) shows the starting placement below. Transcribed from the setup sheet image; the sheet is the authority for placement. Unit notation as printed: strength is the number at the bottom right, and the turn of entry or entry box is the abbreviation at top left.
Axis Reinforcement Holding Area: Pavia Inf 2; Pavia Art 1; Bologna Inf 2; Bologna Art 1; Brescia Inf 3; Brescia Art 1; Savona Inf 2; Savona Art 1; Camicia Nera Inf 0; TAC Air 3.
Map boxes:
- Benghasi: Allied control marker; VP box 0/1; port anchor 1.
- Barce: 9 Aus. Inf, strength 3 (entry Ba).
- Matava: Supply marker; Defender +1 (printed).
- El Guba: Defender +1 (printed).
- Derna: Supply marker.
- Mechili: 3 Ind. Inf, strength 2 (entry Me).
- Tobruk: Allied control marker; Tobruk -3 fort marker; Supply marker; port anchor 3.
- Bardia: Bardia -1 fort marker; Allied control marker; Supply marker; port anchor 0/1.
- Mersa Matruh: Supply marker.
- El Alamein: Allied control marker; Supply marker.
- Ghemings: Supply marker.
- Soluch: 22 Gds Inf, strength 2 (entry So).
- Msus: Allied HQ (entry Ms).
- Agadabia: armor unit, strength 3 (entry Ab, Turn 2 on the sheet).
- Marsa Brega: 2 Sup. Gp. unit, strength 2 (entry Ma).
- Aghelia: Axis control marker (Iron Cross); VP box 1/3; Supply markers (three) off the box.
Aghelia entry area (AG): Axis HQ Rommel; Ariete Armor 3; Ariete Inf 2; Ariete Art 3; Ariete Art 1; 5Lt/21 Inf 3; 5Lt Armor 4; 5Lt Recon 1; 5Lt Art 2.
3.0 Markers
Markers are used for various game functions to make it easier to track events and choices. The marker set shows: Control; Battle Marker; Victory Points (100's), marked "VP 000"; Withdrawn; Turn; Battle Supply; Yes/No marker; Battle Approach; Supply Unit; Combat Attack; Combat Defense; Movement (HQ); Out of Supply; +1 Combat Value; -1 Combat Value; Defense Marker (-1 to Hit); Terrain Penalty (+1 to Hit); Fortification Box Under Construction; Fortified Box; Tactical Air Unit; Aircraft Sortie; Interdiction; Long Range Desert Force (LRDF) A or B; HQ Unit; Tobruk Fort (Full Strength), marked -3; Entrenched; Tertiary Road Used; Congested Road.
The CV alteration markers, +1 CV, +2 CV, -1 CV, +1 To Hit, -1 To Hit, etc. markers are used on the Battle Board.
Terrain Penalty markers are used to indicate combat units that entered a box for Battle by crossing a Terrain Line (+1 To Hit).
Defense markers are used for when units are in a Fort that makes them harder to hit in the firing portion of a Battle round. They are used on the Battle Board.
Some markers, like the HQ 'Combat Attack' and 'Combat Defense' will be on the map, but get transferred to the Battle Board as they will influence the placement of CV alteration markers.
Other markers are for events that may or may not occur from card play, like 'Entrenched' and 'Aircraft Sortie'. See specific cards for use and meaning.
Congested Road markers are used to mark a Tertiary Road that has been 'used up' for movement in a phase. See Road Movement rules (8.4).
Control markers are for the on-board VP locations. There are 5 of them and they can be used to determine which side has control of the box in question. It will usually be obvious but they are there for use when no unit occupies it, just for clarity.
The Battle Marker is used to mark the current box where a Battle is being fought on the Battle Board. The Turn Marker is used on the map's Turn Record Track.
Battle Supply markers are used to identify Supply Units that will be used for Combat Supply and will be subsequently removed.
The Tobruk Fort begins play as a '-3 To Hit' Fort (see 11.4) and there is a reduced marker for when conditions are met to use it.
Two Long Range Desert Force (LRDF) markers, 'A' and 'B' are provided for each side mark any Recon unit that gets used for this purpose.
The YES/NO marker is placed on the appropriate map box to mark whether the "Alamein Battle Area" has been attacked.
Withdrawn markers are used to mark any unit stacks that withdraw from a Battle to another Battle, prior to resolving that Battle, in order to mark that stack on the Battle Board as non-combatants. See rule 9.5.4.
Battle Approach markers are used to mark the roads used by units to enter a box where a Battle is to take place. Their purpose is to identify legal withdrawal routes and their use is optional. Five are provided. If more are needed, they may be made up from blank counters.
4.0 Sequence of Play
The Axis player goes first in each game turn. The following sequence constitutes a player turn:
- Card Draw Phase (5.0)
- Reinforcement/Replacement/Withdrawal Phase (R/R/W Phase) (6.0)
- Determination of Supply (7.0)
- Movement Phase (8.0)
- Determination of Supply and Combat Phase (repeats for each Battle) (7.0 and 9.0)
- Determination of Supply Phase (post combat) (7.0)
- Motorized Movement Phase (8.0)
- Determination of Supply and Limited Combat Phase (repeats for each Battle) (7.0 and 9.0)
- Determination of Supply Phase (post combat) (7.0)
After both players have executed all nine steps of the turn sequence, the game turn is completed. Advance the marker on the Turn Record Track and begin the next game turn.
EXCEPTION: Axis Player Turn 1 Exceptions:
- Rommel gets to choose either Combat or Movement for the turn.
- Supply Unit and HQ captured on 0-6 for this turn only.
- Skip the Card Draw Phase.
- Start with the Movement Phase.
- The R/R/W Phase occurs last, and Rommel gets his -2 die roll modifier for extra supply in this phase.
Official clarification (9/17/25), applies to the bullet above: For the first Axis turn, during the R/R/W Phase, Rommel will get a -2 DRM for the single Axis roll for an extra supply unit. The Axis Player will already have decided on the "Rommel bonus" of "Movement" or "Combat" as the first item on the "1st Turn Exception" list. In all other subsequent turns, the Axis Player would need to elect "Supply" as a turn's "Rommel bonus" (not "Movement" or "Combat") to get 2 extra Supply Unit rolls at -2 DRM. Only on the first turn does the Axis Player get this 'hybrid' "Rommel bonus".
5.0 Card Draw Phase
There are 26 cards provided. Card play is an extra feature of the game to reflect random events and uncertainty.
5.1 Deck Preparation
5.1.1 To prevent the "PAST IS PROLOGUE" or "EXTRA REINFORCEMENTS" card coming up as the first card drawn, first remove these cards from the deck and shuffle. Next, take the next three cards off the top of the shuffled deck and set aside face down. Now place the "PAST IS PROLOGUE" and "EXTRA REINFORCEMENTS" cards back in the deck and shuffle. Replace the three cards set aside on top of the deck and begin the game.
5.1.2 In the Card Draw Phase, six times a game, one card draw may be made from the card deck. Use the included 6-sided dice to track the number of card draws available to each player, starting with '6'.
Official clarification (9/17/25): the Optional Card Draw step on the player aid refers to the Card Draw Phase, during which players may choose to draw a card up to six times per game. The two six-sided dice are only used to track the number of remaining card draws for each side.
5.1.3 Cards must be played the turn they are drawn, unless stated otherwise. The Phase in which it is to be used is listed on the card. If a card cannot be fulfilled (ex: reinforcement card, but none available), then the card is discarded. It still counts as a card draw.
5.1.4 If Tobruk is captured from the opponent on a turn, the capturing Player adds one extra card draw to his total card draws left. Mark this immediately.
6.0 Reinforcement/Replacement/Withdrawal (RRW)
6.1 Sequence of Events in RRW
6.1.1 Roll for elimination for any friendly OOS units: 0-2 and the unit is eliminated. Score VP for the opponent.
Note: All steps in this phase apply only to units belonging to the active player.
6.1.2 Check the PAC for any unit upgrades. If they are available, a roll may have to be made to exchange them in. The replaced units are permanently removed from play.
6.1.3 Check the PAC for any unit withdrawals or returns. If the withdrawals are made, score appropriate VP for doing so, or score VP for the opponent if they are not withdrawn (see rule 6.6.2). If returns are indicated, treat them as any other reinforcements. If HQ return die roll is to be made, that would also be done now.
6.1.4 Check for units that are scheduled to be brought in as reinforcements from the Turn Record Track or scenario rules. Place in the Holding Box.
6.1.5 HQ Choices. The Player's HQ unit may get a bonus of Movement, Combat Attack, Combat Defense, or Extra Supply. See 11.3 HQs.
6.1.6 Decide if Replacements are to be taken. (See 6.3)
6.1.7 Check for supply units (SU). In turns 1-14, one SU is automatically available, but sometimes there is a roll available for an extra one. From Turn 15 on, only the extra SU check is available to the Axis player. See PAC, Capture and Supply Die Rolls. Any SU made available are placed in the Reinforcement Holding Area.
6.1.8 Check if opponent HQ is in play. If not, score 1 VP (12.8.3).
6.2 During Movement
Units enter the map from the holding area either at Aghelia for the Axis or the east edge of the map at El Alamein, Ruweisat Ridge, or Qaret El Himemat for the Allies. Units may also use Sea movement or Rail movement to enter the map with certain restrictions (See rules 8.5 and 8.6.).
6.2.1 Movement to/from Reinforcement Holding Box. Units may also use regular road/rail movement or Port movement as described below to move from the map to the Reinforcement Holding Box. They cannot both enter the box from the map and then move back to the map in the same Movement Phase. This can be useful to move units from the edge of the map or a Port to the Player's Reinforcement Holding Box on one Phase and then use the appropriate movement in the Motorized Movement Phase or next turn to reenter the map at a different location.
6.3 Replacements
Replacements are obtained from eliminated units. When there are enough units of the following varieties; British, Commonwealth, German, Italian; the owning player selects units from those available according to the schedule in 6.4.
6.3.1 Selected units then enter the reinforcement holding area.
6.3.2 Units not selected from those eliminated are permanently removed from play. Mark opponent victory points for units thus removed from play. See 12.2.
6.3.3 Replacements may be taken at the owning player's discretion. He does not have to take replacements simply because he has at least 2, 3 or 5 units eliminated. This allows him to perhaps wait until he has sufficient weak units to remove from play so as to preserve his stronger units.
6.4 Replacement Schedule (See Player Aid for a summary)
Germans - from the beginning of the game until and including MAY 1942 (Turns 1 – 14), choose 2 out of 3 eliminated units as replacements. From JUNE 1942 on (Turn 15 - 21), choose 1 out of 3.
Italians - Italian motorized units choose 1 out of 2 through and including DEC 1941 (Turns 1 – 9). From JAN 1942 through and including MAY 1942 (Turns 10 – 14), choose 2 out of 3. From JUNE 1942 on (Turn 15 – 21), choose 1 out of 2. For Italian non-motorized units, choose 2 out of 3 for the entire game.
British - choose 2 out of 3 for the entire game.
Commonwealth - choose 3 out of 5 for the entire game.
6.5 Upgrading Units (See Player Aid for a Summary).
Certain British and German units are subject to upgrades at various times. Substitute counters have been provided for this purpose. On a roll of 0-2, replace one unit; 3-5, replace two units; 6-9, replace all units.
6.5.1 The German 5LT armor, recon, and artillery units may be replaced with their 21st Panzer Division substitutes beginning AUGUST 1941. Starting with this turn, roll a die each R/R/W phase until all 3 units have substitutes beginning AUGUST 1941. Starting with this turn, roll a die each R/R/W phase until all 3 units have been replaced.
(The printed text repeats the sentence beginning "Starting with this turn, roll a die..." as shown here.)
Note: The 5LT infantry unit also may be used with the 21st Panzer and is designated 5LT/21. It is considered infantry of the 21st Panzer and 5LT for all purposes. No Replacement needed for this unit. There is a 21st Inf that arrives as a Reinforcement on Game Turn 1. Treat this unit as a separate division until August 1942, when it can be considered part of the 5LT or 21st division. It can be identified with a 'dot' in it's divisional color identifier.
6.5.2 British armor upgrades in the turns designated on the turn record. The units available for upgrade are marked on the Turn Record located on the map. The substitute counters should be placed on this Turn Record.
- On Turn 12, three units may attempt an upgrade. On Turn 18, all units which have Substitute counters may attempt an upgrade.
- The 22nd Guards, if still in the game, upgrades to the 201st Guards automatically on turn 15.
- Roll once each R/R/W phase until all armor units which can be upgraded have been upgraded. The results are as follows: die roll of 0, no substitutes; 1-4, one substitute; 5-7, two subs; 8, three subs; 9, four subs.
6.5.3 If any of the units available to be replaced have been removed from the game, the replacement is unavailable.
6.5.4 If the unit to be upgraded is in the units eliminated box or the Withdrawn Units Box, the upgrade must replace it in that box and become available as a potential replacement.
6.5.5 If the unit to be upgraded is in play and in supply, simply replace the unit with its upgraded unit directly on the map. If the unit is not in supply, the player must wait until the unit is in supply to upgrade it. The upgraded unit may be used immediately.
6.5.6 Units replaced do not count for Victory Points and are permanently removed from the game. The Replacement unit becomes the unit in the game going forward for all game purposes.
6.6 Withdrawals (See PAC for Withdrawal Schedule)
6.6.1 Allied Units scheduled for withdrawal are optionally removed from the map during the RRW phase. These units are placed in the 'Allied Units Withdrawn' box as some previously withdrawn units return at a later date. Only the Allied Player has Withdrawals.
6.6.2 Units called for Withdrawal are optional. If they are removed as indicated, the Allied Player is awarded the VP per unit that would accrue to the opponent if the unit was eliminated in combat. If they are left in play, each unit will award the Axis player the VPs that they would award if eliminated in Combat, plus 1 VP. This is true whether the unit is left in play, or cannot be withdrawn because a unit of that type is not available.
6.6.3 Units which start the R/R/W phase out of supply cannot be candidates for withdrawal.
6.6.4 Obviously, if units did not withdraw, directions indicating that unit's return may not be able to be fulfilled. If the units are not in the 'Withdrawn' Box when called for, they simply do not show up.
6.6.5 Withdrawals may not be made from the Holding Area box or the Eliminated Units box.
7.0 Supply
7.1 Being in Supply
7.1.1 Players determine the supply of both sides prior to Movement in both Movement Phases and before/after Battles. Mark any OOS units with an Out of Supply marker.
7.1.2 Units are in supply if they can trace a supply line 2 boxes to a friendly depot or a supply unit which itself can trace 2 boxes to a friendly depot. A friendly depot is one which has, or was the last to have friendly combat units in it at the end of a movement or combat phase.
7.1.3 Supply units within 2 boxes of each other may connect in a Supply Chain, tracing ultimately to a depot.
7.1.4 Supply may be traced 3 boxes in any of the above aforementioned cases as long as all boxes for that leg of the Supply Chain are along a major road.
Example (map): Axis supply units in Beda Fomm, Barce, and Msus. An Axis unit would be in supply in Derna and also in Mechili. The unit in Derna traces 3 boxes on the major road back to Barce. Barce is 3 boxes from Beda Fomm and Beda Fomm is 3 boxes away from Aghelia (not shown), also on the major road. The unit in Mechili is 2 boxes from Msus which is 2 boxes from Beda Fomm, etc.
7.1.5 Supply may not be traced through boxes containing enemy units. Exception: If friendly units are there and that combat has not been resolved, until it is, supply can be traced through the box.
7.2 Depots
Depots are: Aghelia, Tobruk, and Alamein.
7.3 Supply Units
7.3.1 During the R/R/W phase, a player receives supply units as reinforcements. Supply units are back printed with Axis on one side and Allied on the other. If more are needed, they can be made up from blank counters.
7.3.2 The Allied forces receive one supply unit per turn as a reinforcement. If the Allied Player wants to try for more Supply Units, his HQ can roll for two. (See HQ rule 11.3.5.)
7.3.3 The Axis get one supply unit per turn until JUNE 1942. Also, the Axis player rolls a die and may get another supply unit for the following results in the following turns:
- Turns 1-3, APRIL 1941 - JUNE 1941, roll of 0-4
- Turn 4-9, JULY 1941 -DEC 1941, roll of 0-1
- Turn 10-14, JAN 1942 - MAY 1942, roll of 0-2
- Turn 15-21, JUNE 1942 to the end of the game, roll of 0-6
7.3.4 Supply die rolls may be modified by the Rommel unit only. See HQ rules, 11.3.5.
7.3.5 Supply units move like motorized units. Supply Units (SU) cannot move into a box with enemy units in it, even if friendly combat units are in the box for a Battle.
7.3.6 Supply Units alone count as controlling the box they are in and would block enemy movement or retreat through them. However, retreating enemy units may retreat into a box with only an enemy SU and attempt to capture it if all Combat Withdrawal rules are followed and the withdrawing unit is not OOS prior to the capture attempt. This will be rare. See 9.5.2 for LRDF exception.
7.3.7 SU may be Outflanked. They do not get to fire at the Outflanking units, however. Supply Units may not 'Outflank.' Supply units may not enter a battle voluntarily.
7.3.8 Supply units are never considered 'Out of Supply' and always may use full movement, but if they are not in a Supply Chain (see 7.1.3) they may not be used for Combat Supply. If they can move into a Supply Chain, they may be used for Combat Supply in the subsequent Combat Phase.
7.3.9 Supply units may be captured. If there are no friendly combat units with them in a box containing enemy combat units after movement or combat, the enemy units capture a supply unit on a roll of 0-4. On a 5-9 the supply unit is destroyed by the defenders. Roll once for each supply unit in this situation immediately. Captured supply units may be replaced with a friendly supply unit.
Captured Supply Units cannot move in the phase of capture. Captured Supply Units MAY be used for all supply purposes if they are part of the Supply Chain at the time of use.
Example: An armor unit conducts an Outflank on a enemy held box and enters an adjacent box that has an enemy SU capturing it. The box that was Outflanked enters a Battle by other units and the Supply Chain (two boxes, three on the main road) can be traced through that Battle to the captured SU. That SU is now part of the friendly Supply Chain and can be used for all supply purposes.
7.3.10 Friendly supply units may be destroyed by the owning player at any time during his player-turn (no roll required), if a combat unit is stacked with them.
7.3.11 If Supply Units are in a Battle on defense, they cannot be destroyed by the owning player. They can be captured if all the ground combat units with them on the defense are eliminated. battle is resolved. It can and should be used to indicate 'in supply' status for the attacking units. Just note that it can be considered the SU that the Battle units use to be in supply, as well as the SU being expended for the Battle.
Official clarification (9/17/25), rule 7.3.11: Disregard from "battle is resolved" on.
7.4 Supply Effects
7.4.1 Each battle in a turn necessitates the removal by the attacking player of one friendly supply unit from the map. This unit must be within 2 boxes of the battle, 3 boxes if all on a major road. Owner's choice if more than one supply unit fulfills this condition. Use a 'Battle Supply' marker provided to indicate which Supply Unit is to be used. Exception: See LRDF rule 7.4.8 below.
7.4.2 The supply unit to be removed is designated for removal before the battle and is removed after the battle is resolved. It can and should be used to indicate 'in supply' status for the attacking units. Just note that it can be considered the SU that the Battle units use to be in supply, as well as the SU being expended for the Battle.
7.4.3 The battle may not occur if there is no supply unit available for removal at the instant of battle. Units finding themselves in this situation must withdraw to the box from which they entered the disallowed battle. If withdrawal is somehow not possible at this point, the units are eliminated. Exception: See 8.7 for Outflank.
7.4.4 A Depot box alone cannot supply a Battle. A Supply Unit is always needed.
7.4.5 Units may voluntarily place themselves out of supply (OOS). All units except HQs and Supply units which are OOS during any friendly RRW phase must have a die rolled for each. On a roll of 0-2 the unit is eliminated and VPs would be awarded the opponent as if the unit was eliminated in Combat. Units Out of Supply should be marked to indicate their status with an OOS marker. See Rule 11.3.8 for OOS HQ treatment. SU are never considered OOS.
- OOS units may move but may not attack. Motorized OOS units may move 2 boxes in the Movement phase and one box in the Motorized movement phase. Non-motorized OOS units may move one box in the Movement phase. Add one box to movement allowed if all on the Main Road.
- OOS units defend the box they are in at a -1 to their Combat Value, but may not reinforce (see Combat, 9.4).
- Units that start a movement phase OOS may not attack even if SU movement may put them back in supply.
- If units that started the turn OOS are in supply at the moment of Battle in the Combat Phase, they may Combat Reinforce.
- OOS units withdrawing from a Battle may withdraw one box. Stacking rules apply.
- Defenders may Combat Reinforce ANY units available, as normal, as long as the reinforcing units are in supply and stacking limits are observed.
7.4.6 Units which are cut off from a Supply Chain, but are in Benghasi or Bardia are in supply if there is a supply unit stacked with them. They may attack out of these ports, if a Supply Unit is present, but would have to expend a Supply Unit as normal. If there are no Supply Units left in the port after that attack and overland supply is not available, they would then become OOS and should be marked accordingly.
7.4.7 Units in Tobruk are always in supply, but can only Battle out of Tobruk if a friendly SU is available.
7.4.8 Players may have up to 2 recon units operating out of supply indefinitely. These are considered 'Long Range Desert Forces' (LRDF). Candidates for LRDF are any Recon unit belonging to that side.. These units may be designated by the owning player at any time during his player-turn. Mark each with one of the LRDF counters provided. These units may attack without tracing to or expending a supply unit or depot. If non-LRDF or non-Recon units are used as reinforcements in an attack started with LRDF units, a supply unit must be identified and expended as normal.
7.4.9 OOS does not affect Air Units.
8.0 Stacking and Movement
8.1 Stacking
8.1.1 There are three options for ground combat unit stacking limits.
- The combat units of any two different divisions may stack with one other combat unit in a box.
- The combat units of one division may stack with two other combat units in a box.
- Five combat units from any number of divisions may stack in a box.
Official clarification (9/17/25), rule 8.1.1: The three options presented here for stacking are meant to give the player more versatility on the battlefield. Always apply the most permissive case. Stacking by division will allow for larger stacks, but players may always use Case #3 to stack 5 combat units from any number of divisions in a given box.
8.1.2 Stacking limits apply at the end of a movement phase and during the Combat phase. When discovered, excess combat units are eliminated, owner's choice. Award VP in that turn like combat losses. Practically, this means that units cannot reinforce a Combat if that would result in an overstacked condition.
8.1.3 Divisional Integrity. Division color-coded Identifier triangles have been placed on units that have multiple units in their respective divisions to aid in coordinating divisional integrity. Use the color code and the Division name or number to group them. (See 11.2.6 regarding 21st INF exception).
8.1.4 HQ units, supply units, and Aircraft units do not count against these stacking limits.
8.1.5 Starting on Turn 17, any British armor unit may stack with no more than one unit each of British Recon, Inf, and/or Art. and be considered the same division for all game purposes (see Example 1, under 8.7.1).
8.2 Standard Movement
Units may move up to 3 boxes per movement phase, 5 boxes if all are on a major road.
8.3 Motorized Movement
Only motorized units may move in the Motorized movement phase. Units with Vehicle pictures and those with the 'wheels' on their type identifying box, HQs and Supply Units are all considered Motorized.
8.4 Road Movement
Movement on major and secondary roads is unrestricted. Movement over a tertiary road is limited to 2 units per movement phase. This limit applies to the last road travelled by the first non-HQ units to do this only.
Example: A Tertiary road into a box that the first 2 units stop in is 'used up' for that movement phase. No other units may move on that road into that box this phase. Use the marker "Congested Road" to indicate that a road is 'used up' and remove all such markers after the subsequent combat phase is over.
8.4.1 Order of movement matters, so be sure to move the first units as far as you want to on a string of Tertiary roads, or you may cause a 'log jam' once the first 2 units stop.
8.4.2 Supply Units count as units for Tertiary Road limits. HQs do not.
8.4.3 Combat units use the roads to enter an enemy occupied box to initiate a Battle in the subsequent Combat Phase.
8.4.4 As an option "Battle Approach" markers have been provided to mark each road used to enter a battle. Once the battle has been resolved, they would be removed.
8.4.5 Units may not enter a box with enemy combat units for Battle (HQ and supply units are not combat units) during the Motorized Movement phase unless they begin the phase in an adjacent box.
8.5 Sea Movement
8.5.1 An anchor is printed next to the boxes that are ports. The port capacity in units is indicated by the numbers next to the anchor, Axis/Allied. This number indicates how many units total may enter or leave via Sea Movement during the turn. Units may move via Sea Movement in both movement phases either from the Reinforcement Holding Area to/from Tobruk, or from Port to Port. Sea Movement in the Motorized Movement Phase can only be done if the Port Capacity of the port has not been used up in the prior Movement Phase.
8.5.2 Tobruk, Benghasi and Bardia are on-board ports. Units may move from the Reinforcement Holding Area directly to ports under the player's control and vice versa in the first Movement phase. Units may move no further that phase. Exception: See rule 10.5.
8.5.3 A port is under a player's control when he occupies it with friendly combat units or was the last to do so.
8.5.4 Benghasi and Tobruk are the only usable ports for the Axis. Benghasi can only accept Infantry Combat Units in or out, not Supply Units, HQ or other combat units.
8.6 Rail Movement
There is a rail line from off map to Charing Cross. Allied units may enter the map from the Holding box or from anywhere else on the rail line in either direction as far or as few boxes along the Rail Line as desired. Axis cannot use this rail line.
8.6.1 Units must start and end on the Rail Line. Units coming in from the Holding Box are considered to be 'starting' in the Rail Line box, El Alamein for this purpose.
8.6.2 Units can only use the Rail line in the first Movement Phase.
8.6.3 The rail line cannot be used to enter a Battle or move through an enemy-controlled area.
8.7 Outflank
This rule allows certain units to move through a box containing enemy combat units. All such niceties have a price, however.
8.7.1 An armor unit alone or an armor unit and any combination of units of the same division may do an Outflank move at the cost of counting the box outflanked as two boxes for that move. An HQ may participate in the Outflank move. "British Sup. Grp x" belongs to the same division as the corresponding British 'x' Armor unit available at the beginning of the game and they can be used together for all Divisional Integrity purposes including Outflank.
Note: Only the 1 Arm, 2 Arm and 7 Arm have Sup. Gp. to work with the corresponding British armor unit at the beginning of the game.
Beginning Turn 17, British Divisional Integrity can be held by ANY single British Inf, Art, and /or Recon with ANY British Armor unit(s).
Note: The only way to get 2 armor units in this mix is if both armor units have the same unit designation. A single British Inf unit, single Art unit, and/or single Recon unit may be considered to be 'attached' to the armored unit(s) for Divisional Integrity purposes. A combo of Art, Inf and Recon may also stand alone as a 'division' without the armor, but would not benefit from Outflank without an armor unit.
Example 1: On or after Turn 17, the 51st Inf Div Inf, Art, and Recon could form a division with the 8th Armored (two Arm units and a Recon), but one of the Recon units have to be left out.
Example 2: On or after Turn 17, the 1st Tank Unit could be mated with the 70th Inf, 8th Recon and the 51st Art and be considered a division for game purposes.
8.7.2 Each defending unit can fire at the Outflanking units. Each Outflanking unit must be fired on once before an Outflanking unit can be fired on a second time.
8.7.3 If all Outflanking units are eliminated, any remaining HQ is subject to a capture die roll.
8.7.4 If available, more than one division may attempt to Outflank the same box. If they start in the same box, they may move together, only receiving one set of defensive fire die rolls. If they are from different boxes, they EACH get a set of defensive fire die rolls as they would be conducted separately.
8.7.5 Supply units and Italian units may never Outflank until Rommel takes command of the Afrika Korps, then the Italian units may do so.
8.7.6 OOS units may not Outflank, even if with an HQ that has the Movement bonus.
8.8 Outflank Procedure
8.8.1 Units conducting an Outflank, move over the box being Outflanked, counting that box as two boxes for movement purposes. The player's HQ may participate.
8.8.2 Units being Outflanked execute a free combat round versus the moving units as if they were all defending normally from the Front Line of the Battle Box. Defending units in an Outflank can only 'double up' on an Outflanking unit if all other Outflanking units have been fired on by one combat unit.
8.8.3 The surviving Outflanking units do not get combat die rolls versus the units Outflanked, but must complete their move and possibly set up a battle versus other enemy units.
8.8.4 The Outflanking damaged units remain damaged until the end of the ensuing Combat Phase.
8.8.5 Surviving Outflanking units may split up and end their move in different boxes if their total movement does not exceed movement allowances.
8.8.6 The Outflank move is part of movement and as such does not require the expenditure of a supply unit. If units conducting an Outflank find themselves unsupplied in the ensuing Combat phase, they cannot attack. They must take one set of defensive combat die rolls from the defenders and then must withdraw. If withdrawal is not possible, they are eliminated.
8.8.7 Outflanking units can attempt to capture any available Supply Units or HQ if no Combat units are stacked with the HQ or SU.
Example of Outflanking: The Axis 5LT division (4 units) is in Marsa Brega with two Supply Units. Axis Holding Area has the Brescia and Savona divisions and a Supply Unit. An Allied unit is in Beda Fomm, one in Soluch, and one in Ghemings.
The 5LT armor and infantry conduct an Outflank move on the unit at Beda Fomm moving 4 boxes all along the major road, and attack the unit in Ghemings, but cannot reach the unit in Soluch as units only move 3 boxes if not on a major road and it takes 4 boxes to get to Soluch. For Ghemings, it is two boxes to get to Beda Fomm, a third box to Outflank, and a fourth box of movement to enter Ghemings. The Allied unit in BedaFomm rolls a hit on the 5LT armor unit, so it enters the battle at Ghemings with one hit.
The Savona Division and all three supply units stop at Agedabia, coming out of the Holding Area. The Brescia Division and the remaining 5LT units attack Allied unit at Beda Fomm.
9.0 Combat
9.1 General
9.1.1 In a Combat, a unit must be hit twice to be eliminated. The first hit obtained 'flips' the unit to its damaged side. The second hit eliminates it. It can be adjusted up or down on the Battle Board by the rules below. A firing unit scores a hit on an enemy unit if a number less than or equal to its adjusted Combat Value is rolled on a 10-sided die. A zero result is a zero, not a 10.
Official clarification (9/17/25), rule 9.1.1: "It can be adjusted up or down on the Battle Board by the rules below." Refers to the unit's Combat Value (CV).
9.1.2 Combat takes place in a box occupied by both friendly and enemy units. Each box in which combat takes place is a Battle. Battles are fought in rounds. At least one round of a Battle must be fought. The defender fires first in each round. Exception: Recon Withdrawal. 9.6.
9.1.3 Each Battle consumes one of the attacker's supply Units (SU). See 7.4 for details.
9.1.4 Supply for combat is determined at the beginning of a battle and a supply unit must be designated for removal before each battle begins. The supply unit so designated is removed immediately after the battle is over. Supply may change based on movement or battle results, so it must be checked prior to each battle in a turn. Note that when the SU is expended for Battle, this may place units OOS. So, a supply check must be made post-Battle. Mark OOS units accordingly.
9.2 Combat Procedure
9.2.1 Mark the Battle with the 'Battle Marker.' Pull the opposing units off to the side to create your battle lines. Use the BATTLE BOARD card.
9.2.2 On the first round of battle, the player with the fewest combat units (ignoring air units, HQ, SU and any other Markers) sets them up in the "front line" (FL) and "second line" (SL). If players have the same number of combat units, then defender places first.
9.2.3 The first Player to place must place at least one Combat unit in his FL. The rest may be distributed to either FL or SL. The second Player to place then sets up his units across from his opponent's FL in his FL. The second Player to place must place at least one unit in the FL. After that, he may placed as many units in the FL or SL as he desires. Any Air units for either player must be placed in SL. Supply units in a defending stack deploy off to the side, and do not contribute to combat. HQ units in a Battle may or may not have an effect, but are deployed off to the side.
9.2.4 At the start of each Battle Round after Round One, before fire allocation, units other than Air units may move from the SL to the FL, but not vice versa.
9.2.5 All units on both sides must be allocated to fire at a specific unit. Defender chooses first and determines FL matches and SL allocations before any die is rolled. Attacker will have the same opportunity in his round.
Note (printed on the page 12 battle diagram): For the Battle at Ghemings, the Axis units are in supply currently through the Battle at Beda Fomm to their supply units in Agadabia. If the Battle at Beda Fomm is done first and lost, then the Axis units at Ghemings would be OOS and might get eliminated. Axis player has the choice of which Battle to resolve first. There are consequences to orders. Risky business!
Official clarification (9/17/25), printed page 12 diagram: the callouts 4 & 5 should be 3 & 4, respectively.
9.2.6 Player whose round it is must match each of his FL units to a single opponent FL unit for firing assignments until he has no more FL units to assign. A Player may change the assignments from round to round as the battle develops.
- If a Player on his firing round has more FL units than his opponent, each extra FL unit gets a +1 Combat Value (CV) for the round. Each extra FL unit must be assigned to any opponent FL unit. All extra FL units could be assigned to the same FL unit or spread out as the player desires.
- If a Player on his firing round has fewer FL units than his opponent, then not all opposing FL units will be fired on by his FL. Each of his FL units must fire on a different opposing FL unit.
9.2.7 All SL units may fire at any enemy FL or SL combat unit. All ground Combat units other than Artillery get a -1 CV from the SL. If the Player has Artillery units in the SL, each Art Unit gets a +1 CV and can fire at any unit in either line.
9.2.8 If, after being fired at, a player has no more FL units, but has non-artillery ground combat units in his SL (at -1 CV), he must IMMEDIATELY move at least one non-artillery ground unit of any type to his FL before continuing to his round. That may result in a unit that had a -1 CV losing that modifier, but it would then only be able to fire at enemy FL units in his next firing round.
9.2.9 Use Markers to indicate which units have +1 CV, which units have a -1 to hit them, which came across Terrain (+1 To Hit), etc. See Rule 11.5.
9.2.10 After the resolution of a battle, all surviving units return to their undamaged condition. The winner of the Battle scores 1 VP and both players get VP for any eliminated enemy units. See 'Victory Point Scoring' on the PAC or 12.3/12.4.
9.3 Firing
9.3.1 Once the BATTLE BOARD "lines" have been populated, and targets identified, the firing player rolls a die for each firing unit. Units in the FL fire at the units in the FL directly across from them. Extra FL units can only fire at other FL units.
9.3.2 SL units may fire at any enemy FL or SL combat unit, but must be allocated prior to FL fire. The easiest way to do this may be is to fire all SL units first after all units are allocated. SL non-artillery units generally fire at -1 CV, but they may be further modified by HQ or Card bonuses. Anti-vehicle bonus is not allowed from SL.
9.3.3 SL Artillery units can fire at any unit in opponent's Front or Second line (9.3.2) and have a +1 bonus from the SL. However, if all friendly Front line units are eliminated in a round and there are no more non-artillery ground combat units (Armor, Recon, Inf) in the SL, the Art are eliminated.
9.3.4 Remember that the player may have allocated multiple units to fire at a specific enemy unit. Once these firing allocations have been established, they may not be changed until the next round, even if the enemy unit they were to have fired at was eliminated before they had a chance to fire.
(No rule 9.3.5 is printed in the source.)
9.3.6 Note that in some situations, like attacking units in a Fort (-1 to Hit), an attacking unit with a base '0' CV may not be able to be effective. However, that unit, if in the FL, can still line up and be the unit that fires at an opposing FL unit. It simply automatically 'misses'.
9.3.7 A battle must last at least one complete round. If there are still opposing units remaining, a subsequent round may be initiated.
9.3.8 If in a combat round, a player starts his round with no Front Line Units and his SL has some non-artillery units left in it, he must advance at least one unit to the Front Line if he chooses to stay in the Battle.
9.3.9 Before initiating any subsequent round, the defending Player may;
- Withdraw from the Battle (Battle declared 'over')
- Combat reinforce and continue the Battle
- Continue the Battle without reinforcing
If 2) or 3), restart the round with rule 9.2.4.
The attacking Player would also have the same three choices in his subsequent round. Both players are free to adjust unit firing within the limits of FL/SL procedures in 9.2 for each round. If new units enter via combat reinforcement, they may enter either the FL or the SL.
9.4 Combat Reinforcing a Battle
9.4.1 Each round of battle after the first round, a battle may be reinforced by one unit from each box directly connected to the box in which the battle is taking place. If a Combat reinforcement comes into a battle across a Terrain line, it is subject to +1 fire from any units firing at it in the next enemy round. Use the '+1 to Hit' marker.
Air Units on Defense in an adjacent box may be chosen as a reinforcement, if this doesn't put them more than 3 boxes from a friendly HQ or Depot.
An HQ unit with the Combat bonus (either Attack or Defense) can be brought in as a Combat reinforcement and would count as a unit choice from the box connected to the ongoing battle. The reinforcing HQ unit would grant a +1 CV to each eligible unit only in the round they arrive.
9.4.2 Units may not reinforce if the box they are in is also subject to a Battle in this phase, whether completed or not. Units may only participate in one Battle per Combat Phase.
9.4.3 Units may not reinforce if stacking at that point in the Battle would be violated or by sea from port to port, or from the Holding Area boxes.
9.4.4 Reinforcing units may be placed in either the FL or SL if not an Air Unit. Air Units are always placed in SL.
9.4.5 Units Combat reinforcing a Fortified Box or Fort do not benefit from the minus to hit that the units in the Fort or Fortified Box get in the current Battle. Units that Combat reinforced a Battle in such a Fort or Fortified Box which win the Battle are immediately considered to benefit from the Fort or Fortified Box.
9.4.6 LRDF Battles can only be Combat Reinforced by other Recon (LRDF or not) in an adjacent box if supplied. If the non-LRDF Recon is OOS after the Battle, mark with an OOS marker.
9.5 Combat Withdrawal from a Battle
If a player decides to withdraw his units from a battle, he must withdraw them all to the same first box. If they must be split because of overstacking, they split by Motorized ability. Motorized, HQ, and Supply units may withdraw one or two boxes along a supplied path. Non-motorized (or Motorized if desired) must be 'dropped off' in the first box. If more than one box is available to the withdrawing unit, friendly occupied or empty, it must withdraw to a box closer to a friendly supplied unit.
If a Battle Approach marker was used to mark the path into the Battle, then the first box of Withdrawal would be back along that marked path.
If there is no supplied path available, but there is an unsupplied path, the units may move one box and are marked OOS.
If more than one such path exists, player choice. Combat Withdrawal ends a Battle and grants 1VP to the opponent, mark immediately. If it is determined after the above that Combat Withdrawal is impossible, then the units must stay in the battle.
9.5.1 Stacking limits must be observed. If they cannot, excess units are eliminated and VPs are scored as if the units were eliminated in combat. See 12.3.
9.5.2 Withdrawal onto an enemy Supply Unit is possible only if no other paths exist. Roll for SU capture as normal. The path must be supplied before rolling for SU capture. An enemy SU would block this withdrawal if the enemy units would be OOS in that box. Exception: LRDF Withdrawal MAY withdraw to a lone enemy SU and attempt capture.
9.5.3 An enemy HQ by itself would NOT block this withdrawal and would be subject to capture.
9.5.4 Withdrawals to a box containing enemy combat units is not allowed unless the box is also occupied by friendly combat units. All Withdrawing units must stop in the first such box entered and stacking limits must be observed.
Any units withdrawing to an as yet unresolved Battle do not influence that Battle in ANY way. Mark them with the provided counter until the Battle is resolved. In the Battle, leave them on the side of the Battle Board until the Battle is resolved.
9.5.5 If the box to which the unit withdrew loses its Battle, one of the following occurs:
- If all units in the Battle were eliminated, eliminate the previously withdrawn units as well.
- If all remaining units successfully Combat Withdraw, then roll a die for each of the units that previously withdrew to this Battle. Roll a die. 0-4 the unit is eliminated; 5-9 the unit retreats following normal Combat Withdrawal rules.
9.5.6 Withdrawals to or through a box which enemy units passed in order to enter the battle is not allowed. Attacking units which withdraw must all withdraw first to a box from which at least one of them entered the battle. Use the provided counter to temporarily mark such a path if it helps.
9.5.7 Units may withdraw by sea within the limits of port capacity, even if the Port had been used during the player's Movement Phase. Units withdrawing by sea move to the Reinforcement Holding Area box and may not reenter the map until the next owning player's Movement Phase.
9.5.8 HQs may withdraw only if there are friendly combat units (not air units) with which to withdraw on land or, if by port, port capacity to include them and the combat units, else they remain and may be subject to capture.
9.5.9 Supply Units are treated like HQs (9.5.8) except they are subject to a die roll to determine if they remain behind to be subject to enemy capture. On a roll of 0-5 they may withdraw. Otherwise, the enemy player has a chance to capture them.
9.5.10 OOS unit withdrawal may withdraw one box only. See OOS rules, 7.4.5.
9.6 Recon Withdrawal
Defending units in a battle may withdraw from the battle before any rounds of combat if they are all recon, and an HQ unit, and the attacking stack are not all recon, HQ, and/or air units. Supply units in a stack would have to stay behind in such a withdrawal and Air units would simply be removed to the Holding Box in a 'used' state.
9.6.1 If the Defender exercises Recon Withdrawal, the Attacker does not expend a Supply Unit for the attack.
9.6.2 No VP are awarded to the Attacker for Recon Withdrawal from a Combat by the Defender.
9.7 Combat Withdrawal Off the Map
Combat Withdrawal may be made off-map from Aghelia, El Alamein, Ruweisat Ridge or Qaret El Himemat. The units are not considered eliminated and hence do not grant VP, BUT may not reenter the game and are essentially lost in game terms.
9.8 Combat Withdrawal or Combat Reinforce over Tertiary Roads
Combat Reinforcing a Battle or Combat Withdrawal from a Battle in a Combat Phase if done over a Tertiary Road into/from that Battle must still obey the 2 units maximum on that road. E.G. if two combat units moved into a Battle along a Tertiary Road, then that road would be marked as "Congested" and be unavailable for either a third reinforcement that might be in the box connected to the Battle or a Combat Withdrawal from the Battle. Likewise, a Combat Withdrawal along such a road would be limited to 2 units.
10.0 Motorized Movement/Limited Combat
10.1 In the Motorized Movement Phase, motorized units may either move one box and initiate combat or use their full movement allowance without initiating a combat.
10.2 If one box movement for combat is chosen, any units may reinforce such a battle subject to the Combat reinforcement rules. Combat proceeds as described in 9.0.
10.3 Units using 'Outflank' or moving more than one box during this movement phase must end the phase in a box unoccupied by enemy combat units. No combat allowed. Any 'Outflank' units damaged in the 'Outflank' move would flip to their undamaged condition at the end of the Limited Combat Phase.
10.4 Non-motorized units may Combat Reinforce a Limited Combat, if eligible and one box away. They cannot initiate a Battle as they cannot move in the Motorized Movement Phase.
10.5 Units starting the Motorized Movement Phase in the player's Holding Box may enter play at Depots controlled by the player. If Tobruk is one of those Depots, turn Port capacity must be available and could not have been used up in the prior Movement Phase. Depot candidates are Aghelia, Tobruk, and Alamein.
11.0 Combat Modifiers/Special Units
11.1 Combat Modifiers
All combat modifiers are cumulative. If due to modifiers, a unit would have to roll less than a zero to hit in combat, its combat die roll is ignored. The unit may still be part of a Battle, but it cannot hit.
11.1.1 There are a set of markers provided to facilitate managing the bonuses. Add the appropriate marker to the unit on the Battle Board when aligning firing assignments.
- +1 Combat Value (CV); +2 CV, +3 CV (used for SL Art, HQ bonus, Card bonus, Armor bonus, etc.)
- -1 CV (Arm, Recon, Inf in SL; OOS)
- -1 To Hit; -2 To Hit, -3 To Hit (Fort, Fort box)
- +1 To Hit (mark unit crossing Terrain to enter Battle)
11.2 Combat Units
11.2.1 Units having a circled combat rating are considered to have superior anti-vehicle capability. Firing against armor or recon (units with a vehicle picture), they fire as if they are rated one point more than their printed value. Units with a circled rating only receive this bonus if they are in the "front line" of a Battle. All British armor (not recon), circled or not, always get this bonus versus Italian armor and recon.
11.2.2 If a unit has a -1 in the lower right, it is considered a superior unit and as such is harder to knock out. Units firing at such a unit do so at a combat rating of one less than their printed rating.
Official clarification (9/17/25), rule 11.2.2: "...one less than their printed rating." Should be "...one less than their combat rating."
11.2.3 Artillery in the SL get a +1 CV bonus. They do not get anti-vehicle in the SL. In the FL, they use their printed combat value and anti-vehicle rating against armor/recon, if they have one. See rule 9.2.6.
11.2.4 When a Player has more units in the FL of a Battle than his opponent, each 'extra' FL unit gets a +1 CV for that round. Owning player's choice.
11.2.5 Inf, Armor, and Recon units firing from the SL fire at a '-1 CV' and any Anti-vehicle rating is not used.
11.2.6 The German 21st Infantry that arrives on Turn 1 is not considered part of the 5LT division for stacking considerations until Turn 5. Note that it has a 'dot' in the color-coded triangle to indicate this status. Until Turn 5 it operates as an independent unit.
11.2.7 British Armor Upgrade Units: There are two turns in which the Allied Player gets to upgrade some of his armor, as the British got better equipment. Turn 12 and Turn 18. See Player Aid Card for details.
11.3 HQs
11.3.1 HQs may do one of the following four things in a Player-turn. This is decided in the Player's RRW Phase.
- Combat Attack bonus
- Combat Defense bonus
- Movement bonus
- Extra Supply Chance
11.3.2 Combat Attack Marker: An HQ may modify an attack in which it is involved on the first round of battle only. This may be done in both Combat phases of the turn, if possible. An HQ grants a +1 CV bonus in a Combat Round 1 for each eligible firing friendly unit in the battle.
11.3.3 Combat Defense Marker: An HQ on Combat Defense may grant a +1 Combat Value to each eligible unit it is stacked with if the box the HQ is in is attacked in the opponent's turn. This bonus is good for the first round of Defense only. Same procedure as 11.3.2. Use the 'Combat Defense' marker and leave in place for the entire Player Turn. The HQ can move around to get itself in place for the opponent's next turn, but will not have an effect in its player-turn other than the usual Tac Air coordination (Rule 11.6)
HQ on Combat Defense in a stack subject to 'Outflank' may add +1 CV to each unit of a stack being Outflanked as they fire on the 'Outflanking' units as long as they are allowed to add +1 CV in regular Battle. I.E. Italians do not always benefit from HQ pluses.
If at the end of the opponent's next Limited Combat Phase, the HQ is still on the map, remove the 'Combat Defense' marker. Owning player will get a new HQ choice in his upcoming turn.
11.3.4 Movement Bonus Marker: An HQ starting a movement phase with a stack may grant it an additional box of movement in either or both movement phases. In the Motorized Movement Phase, the extra box is used only for movement that does not end in combat. It MAY be used to Outflank as long as the Outflanking units do not end in a combat.
11.3.5 Extra Supply Chance An HQ may influence the acquisition of supply in the R/R/W phase of a player turn. Flip the HQ to indicate that it has been used for this purpose. The back has a 'Supply Used' bar that is used to indicate this. Flip the HQ back at the end of the Limited Combat Phase.
11.3.5.1 Axis: Turns 1-14, the Axis get one SU automatically and get a roll for an extra SU based on the schedule for Turns 1-14, e.g. Turns 1-3, 0-4 (See PAC Summary or 7.3.3 for full list). The HQ bonus chance would provide on extra roll for the Axis Replacement HQ or two extra rolls for the Rommel HQ. Starting on Turn 15, the Axis no longer get an automatic SU. The HQ bonus will provide Rommel only a single extra roll at effectively 0-8. The Axis Replacement HQ gets no extra roll starting Turn 15, which if it is in play means the SU bonus choice for the Replacment HQ is worthless.
11.3.5.2 Allied: Rolls twice for an extra Supply Unit. On each roll of 0-4 an extra Supply Unit is obtained.
11.3.6 Rommel Bonuses. Rommel is treated differently than other HQ and the differences are summarized here. Rommel may only give this bonus to German units until January, 1942 (Turn 10) when the Italians may get this bonus as well. (Rommel declared head of Panzerarmee Africa).
- Combat Attack/Defense: Rommel gives a +1CV to all German units until Turn 10 when the Italians can get it as well.
- Bonus Supply: Rommel gets two chances at -2 to the die roll until Turn 15, then he gets only one chance at -2 to the die roll.
Example: Turn 9, Axis gets one SU and either: 1) Rolls once at 0-1 for a second SU or, 2) Chooses Rommel Supply bonus and rolls once at 0-1 and twice at 0-1 with a -2 to the die roll for potentially 3 more SU.
Second Example: Turn 19, Axis player chooses Rommel Supply bonus. Axis rolls once at 0-6 for a SU. Axis player then rolls once for Rommel at 0-6, but with a -2 to the die roll.
Rommel is worth 10 VP if captured. If the "HQ Escapes" card is drawn, remove the Replacement German HQ if in the game, and place the Rommel HQ with any Axis unit in supply.
11.3.7 HQ Capture
An HQ may be captured if the HQ is in a box without any friendly combat units (an air unit is not a combat unit in this instance) and an enemy combat unit enters this box. Roll a die immediately. The Allied or Axis HQ is captured on a roll of 0-4. Exception: Axis First Turn. See Rule 4.0.
If the HQ is not captured, it must be placed with the nearest friendly supplied combat unit on the board.
If the HQ is captured at any time, there must be a roll to get him back during each subsequent R/R/W phase. The first time, a roll of 0-2 places the HQ in the Holding Box as a Reinforcement. Each subsequent RRW phase, add one to the die roll requirement until the HQ is successfully rolled for. Becomes automatic the turn the roll gets to 0-9.
11.3.7.1 The Axis Player will start rolling for the substitute German HQ the turn after Rommel's capture.
11.3.7.2 The Axis replacement HQ only gets one chance to enhance the roll for the extra Supply Unit, and cannot ever give bonuses to Italians and will be worth 7 VP if this replacement HQ is captured. There is a replacement HQ counter for the Axis for this purpose.
11.3.7.3 Each turn that an unsuccessful die roll is made to return a captured HQ, award the opponent 1 VP.
11.3.7.4 If the "HQ Escapes" card is drawn, but the replacement German HQ is in the game, replace immediately with the Rommel HQ and place the Rommel HQ with any friendly in supply units on the map.
11.3.8 OOS HQ
If an HQ finds itself Out of Supply in the owning player's RRW phase, the HQ does not roll for possible elimination. If the HQ is left alone due to OOS eliminations, it is still OOS. Movement rules for OOS still apply (7.4.5). HQ still may use any bonus as a choice, and may enter a Combat with such a bonus even if starting in an OOS state.
11.4 Forts and Fortified Boxes
11.4.1 Bardia (an on-board fort) and fortified boxes subtract one from the combat value of all attacking units in each round of battle.
11.4.2 Tobruk (an on-board fort) subtracts 3 until attacked in a Combat Phase by at least 5 German combat units together (plus any available Air and any number of Italians within Stacking limits) in one Battle that lasts a minimum of two complete Rounds. Once this occurs, in subsequent player-turns Tobruk subtracts 1 from the combat value of all attacking units. I.E. The reduction to 1 from 3 occurs at the END of the Player Turn the Battle happened.
11.4.3 Once Bardia and/or Tobruk are captured, they are no longer considered Forts and give no more modifier. Remove the modifier marker from play whenever Bardia or Tobruk are captured. A Fortified Box may subsequently be built in their boxes.
11.4.4 Tobruk Supply Capture Chance. Whenever Tobruk is captured by either side, make two die rolls. On each 0-4 add a friendly Supply Unit to the Tobruk box. This is in addition to any Supply Units captured in the Combat that captured Tobruk.
11.4.5 Combat Reinforcing units and air units never get the benefit of a fort or fortified box.
11.4.6 Construction of Fortified Boxes. Any two friendly infantry units which start a player-turn in a box, and do not move during the player-turn may have a fortified box counter placed on them at the end of the Motorized Movement Phase.
11.4.6.1 At the beginning of the Movement Phase, place the 'under construction' side up and flip to the 'constructed' side at the end of the Motorized Movement Phase. The constructed fortified box remains in place as long as there are friendly land combat units in the box. If a fortified box has no land friendly combat units in it at the end of either combat phase, it is removed.
11.4.6.2 Only four fortified boxes per side may be built on the map at any one time.
11.5 Terrain
The thick red-brown lines that may be along various edges of a box represent terrain which benefits a defender. Attacking units that enter a battle over a road which enters a box through one of these dark lines gain a "+1 To Hit" marker, which allows defending units to fire at them as if their Combat Value was 1 higher for the round.
Example of Terrain lines, marked a dark red-brown, shown above. (Map diagram: Gazala and Acroma boxes with terrain lines.)
11.5.1 Reinforcing units may be fired at by the opposing player in this manner in the first round of a Battle after they enter a Battle, by crossing a terrain line. This applies to attacker and defender reinforcements in subsequent rounds. Mark them with a provided marker, '+1 To Hit.' Marker is removed after one round of opponent's combat. Reinforcing attacking Air units do not incur this penalty and may not be fired at with this bonus.
11.5.2 There are four boxes in which a +1 CV is printed on the map; Matava, Cyrene, El Guba, and Junction A. These four boxes grant defending units a +1 CV bonus for the entirety of each battle.
(Map diagram: Cyrene, El Guba, Matava and Junction A, each marked "Defend +1CV".)
11.5.3 Outflanking over a Terrain Line incurs the '+1 To Hit' on any unit Outflanking, just like Round One of a Battle.
11.6 Air Power
HQ units and supply Depots may coordinate Tactical air power. Each side receives air units at various times. They are kept off-map in the Holding Area box until used. They may generally be used each player-turn within 3 boxes of an HQ or friendly Depot for one of the following purposes. Consider the air units as extra combat units in any Battle.
11.6.1 Combat Support, Offense: Place them during the Combat Phase when initiating a Battle. Treat as other combat units for all purposes except as specifically noted earlier. They may not be the only combat units in the battle. If they find themselves in this position, or the Battle is over, they are removed to the Holding Box, flipped to their 'damaged' side to indicate they were used. Flip back at the end of the player turn. I.E. only one use per player turn.
Air units do not count as FL units for any reason or for determination as to who has more units in a Battle. They are always considered SL units and as such can attack any enemy unit in the Battle. Air units never get HQ +1 bonus. They can get Card Draw bonuses.
11.6.1.1 Air units in combat take hits like any other combat unit until the battle is over or they are the only combat units left in the battle. If an Air unit is eliminated in combat, place it on the Turn Record Track any two turns from the turn of loss as a reinforcement and record 5 Victory Points for the opponent.
11.6.2 Combat Support, Defense: Place Air units at the end of the limited combat phase. They remain in place during the entire enemy player-turn. They act as an extra combat unit if the box they are in is attacked.
11.6.2.1 Air units may fire at any unit. Air Units on defense may fire on any units during an Outflank move, even if all Outflanking units have not yet been fired at.
11.6.2.2 Air units on defense that are still in place at the end of the opponent's Limited Combat Phase are removed to the friendly Holding Box and are available in the next friendly Player Turn for use as normal.
11.6.2.3 If an Air Unit is within range of an LRDF combat, it may support that combat or defend the LRDF.
11.6.3 Interdiction: This will prevent enemy withdrawals from a Battle into or through this box. It does not prevent a supply line being traced into or through the interdicted box. Place an Interdiction marker at the beginning of either Movement phase. Place in a box that otherwise contains no combat units. HQ and/or Supply Units alone do not prevent the placement of an Interdiction marker.
11.6.3.1 Air units performing interdiction may be placed only once per player-turn, but in either the Movement Phase or the Motorized Movement Phase. This must be done in the phase before any other friendly unit moves. Air units on Interdiction start in a box alone, except for possible enemy SU. They are not combat units per se in this instance. Use the marker provided to indicate interdiction. Flip the Air Unit used in the Holding Box to the 'damaged' side to show it has been used. Remove the Interdiction marker at the end of the Combat Phase following placement. The marker is removed in the following Combat phase if placed in the Movement phase or the following Limited Combat phase if placed in the Motorized Movement phase.
11.6.3.2 Enemy units may not perform combat withdrawal into a box that has an Air unit on Interdiction. Friendly combat units may freely enter or move through such boxes.
11.6.3.3 If a player no longer has his HQ in play, he must roll for availability of Air units during the R/R/W phase after all other reinforcements have been taken. Roll once for each Air unit available. On a result of 0-4, the Air unit may be used that player-turn within three boxes of a friendly Depot.
11.6.4 Air Unit Elimination. If an air unit is eliminated in a Battle, it is placed on the Turn Record track as a Reinforcement 2 turns from the turn it was eliminated.
E.G. if eliminated in a Battle on Turn 4, it will be placed as part of that side's reinforcements for Turn 6.
12.0 Winning the Game
The game is won by accumulating Victory Points or Auto Victory.
12.1 Control of Boxes
At the end of each player turn, the player totals up Victory Points for the Victory Point boxes he controls and scores them on the VP track. The Victory Point boxes are Aghelia, Benghasi, Tobruk, Bardia, and El Alamein. The points for each are listed on the map with their value to each player, Axis/Allied:
| VPs | Axis/Allied |
|---|---|
| Aghelia | 1/3 |
| Benghasi | 0/1 |
| Tobruk | 2/2 |
| Bardia | 0/1 |
| Alamein | 3/1 |
12.2 VPs from Replacements
During the player's RRW phase, each unit removed from play as a result of a replacement choice scores one point for the opponent (2 out of 3 gives one point, etc.). Mark immediately on the VP track.
12.3 Units Eliminated in Combat
When a unit is eliminated in combat, it scores VP for the opponent according to the following:
| ARM | INF | ART | RECON | AIR | |
|---|---|---|---|---|---|
| British | 3 | 2 | 2 | 2 | 5 |
| Commonwealth | - | 1 | 2 | 1 | - |
| German | 5 | 2 | 3 | 2 | 5 |
| Italian | 3 | 1 | 2 | 1 | - |
12.4 Winning a Battle
After each Battle, the side that wins the Battle is awarded 1 VP.
12.4.1 Recon Withdrawals prior to first round of Combat do not score VP.
12.4.2 OOS units at the end of the last Allied Lim Combat phase of the game must roll for OOS elimination.
12.5 Eliminated Units
At the end of the game, each unit left in the Eliminated Box scores one point for the opponent. Each unit eliminated by OOS awards VP to the opponent.
12.6 Overstacking
When a unit is eliminated due to overstacking, immediately award the opponent VP as if eliminated in combat.
12.7 Alamein Area Attack Rule (Campaign game only)
The 'El Alamein Area' is defined as the following boxes:
- Fuka
- Belaki Mudpan
- El Alamein
- Ruweisat Ridge
- El Taqa Plateau
12.7.1 If the 'El Alamein area' is never attacked by the Axis player using a minimum of 5 supplied ground combat units, the Allied Player is awarded 15 VP at the end of the game.
12.7.2 If the 'El Alamein area' is attacked by the Axis player with a Battle using a minimum of 5 supplied ground combat units, whether the Axis Player wins the Battle or not, the Allied Player is not awarded the 15 VP and the Axis Player is instead awarded 5 VP immediately.
12.8 HQ Capture
12.8.1 Any time the Axis captures the Allied HQ, the Axis player gets 7 points.
12.8.2 If the Allied player captures Rommel, he gets 10 points. If he captures the Rommel replacement HQ, that is 7 points.
12.8.3 Each turn a side has no HQ in play, a VP is scored for the opponent. Count after the player's RRW Phase who is missing the HQ.
12.9 Victory
Victory based on VPs collected is determined by subtracting the Allied VP total from the Axis VP total.
| Difference | Result |
|---|---|
| 36+ | Axis Decisive Victory |
| 11-35 | Axis Marginal Victory |
| -10 to 10 | Draw |
| -35 to -11 | Allied Marginal Victory |
| -36 or less | Allied Decisive Victory |
12.10 Automatic Victory. If at the end of any player-turn, the phasing player controls all 5 Victory Point boxes, he wins the game with a Decisive Victory.
12.11 Tournament or Series Play
If you want to evaluate your victories versus an opponent over time, here is how to score them (call these 'Game Points'):
- Automatic Victory is 4 points
- Decisive Victory is 2 points
- Marginal Victory is 1 point
- Draw is ½ point to each player
Players should also try each side against each other as a balancer if they are going to use this method of evaluating performance.
13.0 Optional Rules
Once you have played through the game a few times, feel free to adjust the command challenge with one or more of these optional rules. Players should agree on which optional rules are in play before setup. Some of them are just fun to use for the extra decisions!
13.1 Rommel Bonuses for the Italians. Rather than automatic in January 1942 (Turn 10), have a die roll. For Early PanzerArmee Africa (mild change).
On November 1941 roll a die. A 0-2 gives Rommel the ability to grant his HQ bonuses to Italian units for the rest of the game. On December, 1941, Turn 9, if November roll failed, a roll of 0-6 gives Rommel this ability for the rest of the game.
13.2 Variable Replacements. Choose one or both of the following: 1) German replacement stays at 2 out of 3 for the entire game. (mild/medium) or, 2) British only get 2 out of 4 replacements from the eliminated box. (mild/medium).
13.3 HQ Variable. Use both of the following:(medium change). 1) Adjust the British roll for captured HQ by +2 each turn instead of the current +1. Example: first try, 0-2; second try 0-4, etc. and 2) Rommel can never be removed from play. If he is captured, Allied player scores the 10 VPs for that, but Rommel 'escapes', and is placed in the Holding area and can return as a reinforcement the next turn. Subsequent captures, if any, would still be worth 10 VPs. If the 'Rommel Escapes' card shows up for the Axis, follow the instructions for when Rommel still in play.
13.4 Other Variables. All or some may be adopted by mutual agreement.
- The Commonwealth replacement rate is 4 out of 5 instead of 3 out of 5 (medium).
- Allow any Card Draw to be changed to "Extra Supply Unit" instead of what it reads. (medium).
- Subtract 2 on all 'extra' supply rolls for whichever side seems to need the help. (major).
- Depending upon player balance, add an extra supply unit to the 'At Start' forces for either side. Axis at Aghelia, Allied at Alamein. (medium).
- Each player Card Draw Phase after the first turn, roll a die. On a '0', get an extra Card Draw added to the total available Card Draws for that player. (mild).
- Move the VP Difference calculation up or down 10 VP depending on which side you want to make it easier on. I.E. If Axis, 26+ for Axis Decisive, and 11-25 for Axis Marginal. If Allied, -26 or less for Allied Decisive, and -25 to -11 for Allied Marginal. Leave Draw the same. (major).
- Each turn all three ports (Benghasi, Tobruk, Bardia) are controlled in a player's RRW phase, the player gets choice of an extra supply roll at 0-3 add 1 VP. (mild).
Official clarification (9/17/25), 13.4 item 7: "...the player gets choice of an extra supply roll at 0-3 OR add 1 VP."
- Once per game, each side can declare an 'Aircraft Sortie' and use that marker as an extra Air Unit during their turn, but must be removed by the end of their Limited Combat Phase (so, no Combat Defense). (mild change).
- All Fortified Boxes for both sides (not Forts) grant a -2 To Hit for all units in them for the first two rounds of any Battle in that box. Starting with Round 3, revert to the usual -1 To Hit.
- Add Minefields to the Campaign Game. Use the rules laid out in 14.1, with one modification: the minefield rules apply to both sides' Fortified Boxes, not just the Allied ones.
14.0 Short Game Scenario
This scenario provides for a game that can be finished in an afternoon or evening of play using all rules. It is based on the Gazala Battle in May, 1942.
The Short Game starts with Axis Turn 14 and ends after Allied Turn 18. All rules are in play, with the exception of changes as follows:
- Two card draws per side, starting with Turn 15. An extra card draw is awarded to players each time they capture/recapture Tobruk.
- Remove the two "Supply Sabotage" cards from the deck.
- Make sure to place any reinforcements on the Turn Record Track for Turn 14 through Turn 18.
14.1 Allied Fortified Boxes and Minefields
14.1.1 All Allied Fortified Boxes (not Forts) grant a -2 To Hit for all units in them for the first two rounds of any Battle in that box. Starting with Round 3, revert to the usual -1 To Hit.
14.1.2 Fortified Box in Bir Hachiem. This Fortified box grants -2 To Hit until defending units are eliminated or Combat Withdraw. This Fortified Box is in supply as long as it is manned by the Free French unit. French forces were very tenacious in this Battle.
14.1.3 The effect of them is as follows;
- Any Axis ground combat unit attempting to move into or through a Fortified Box must make a die roll. On a 0-3 they are damaged and would flip to their damaged side entering that box for a Battle. Rolls for 'minefields' happen before any defensive rolls versus any units using 'Outflank'. Any units damaged in this way would enter any battle damaged, as in the 'Outflank' rules.
- HQ, and Air are exempt from rolling for minefields.
14.1.4 Any Allied Fortified Boxes which are built later in the Short Game use the regular rules (-1 to Hit, no mines).
14.2 First Combat Phase
14.2.1 Axis may get 2 different Battles for expending any one Supply Unit, as long as both Battles can trace supply to that Supply Unit.
14.2.2 Allied Player must conduct one Battle that does not involve the LRDF during their turn 14 (if possible).
14.3 Victory Point Awards
14.3.1 Both sides start at 0 VP. Add VP as normal for Battles, VP boxes, Withdrawals, etc. as per rules.
14.3.2 The following VP changes apply:
- Axis or Allied Capturing of Tobruk, 10 VP
- Axis or Allied Capturing or Recapturing of Bardia, 5 VP
- Axis or Allied Capturing or Recapturing of Sollum, 3 VP
Note: Allied player starts with control of Tobruk, Bardia and Sollum. Allied VPs are only scored if the Axis captures one and it is subsequently recaptured by the Allied player.
- Any units OOS at the end of Allied Turn 18 on either side must make an OOS roll for elimination. Score points as per regular rules.
- All units in the eliminated box count for one VP at the end of Turn 18 as in long game.
14.4 Winning the Game
The side ahead by 10 or more VP wins. No separate victory levels. A differential of fewer than 10 VP points results in a draw.
14.5 Game Setup
Axis Setup:
In Unit Eliminated Box:
- Italian Trento infantry, strength 2
- German 21st infantry, strength 3
- German 15th Recon, strength 2
In the Holding Box:
- Tactical Air Unit
Tmimi: Italian Pavia Division (2 units), Italian Savona Division (2 units), German Sond Infantry
Mechili: Italian Trento Artillery, Italian Trento Infantry, Italian Trieste Division (3 units)
Bir Tenegeder: Italian Littorio Division (4 units), Brescia Artillery
Senegali: Brescia Infantry, Rommel HQ, German 15th Panzer Division (3 units), German 21st Panzer Division (4 units), two Supply units
Wadi El Mra: Italian Ariete Division (4 units), one Supply unit
Track Junction: Italian Bologna Division (2 units)
Gasres Sahabi: Italian RG Recon (marked LRDF A)
Ben Gania: German 90th Division (3 units), one Supply unit
- Place one Supply unit in each of the following boxes: Agadabia, Benghasi and El Guba
- Place an Axis Control marker in Aghelia and Benghasi.
Allied Setup:
In the Withdrawal Box:
- 4th Indian Division (3 units)
- New Zealand Division (3 units)
- 9th Australian Infantry
- 9th Australian Artillery
- 70th Infantry
- 10th Armor
In Unit Eliminated Box:
- Independent Infantry
- 7th Australian Infantry
- 6th Australian Infantry
Tobruk: Polish Infantry, 2nd So. African Division (3 units), 5th Indian Division (3 units), the Tobruk -1 Fort marker, one Supply unit
El Adem: 2nd Armor, 2nd Sup. Gp Infantry.
Bir El Gubi: HQ (with the Combat Defense marker), 7th Sup. Gp. Infantry, 7th Armor (R12 Replacement), 7th Armor (CV 4 without Anti-Vehicle), 1st Armor (R12 Replacement), 1st Armor (CV 4 without Anti-Vehicle), 1st Sup. Gp. Infantry, one Supply Unit.
Acroma: 50th Infantry, 50th Artillery, 1st Tank (R12 replacement), one Fortified Box, one Supply unit
Gazala: 1st S. African Division (3 units), S. African Recon, one Fortified Box
Bir El Harmat: 22nd Guards, 32nd Tank, one Fortified Box, Tactical Air unit (on defense for the full Axis Turn 14)
Bir Hachiem: Free French Infantry, 3rd Indian Infantry, one Fortified Box
Girarabub: 9th Australian Recon (marked LRDF A)
- Place one Supply unit in each of the following boxes: Fuka, Charing Cross, Sollum, Bir El Gellaz, Gabr Saleh, and El Gunse
15.0 O'Connor's Offensive Scenario
This is an introductory 'training' scenario that games the beginnings of the Desert War when the British caught the unprepared Italians in what was supposed to be a probe in force and turned into a rout of the Italian Army in Libya. As the beginning of the main game has the Allied player on the defensive, this is a way for the Allied player to get some 'attack endorphins.' It is meant to be a 'stand alone' scenario and is one-sided for sure, but can be used as an intro to game concepts. This scenario takes place before the turns of the long game. Use the first 4 Turn Record track boxes, placing the reinforcements listed on the appropriate turn (Dec 1940, Jan, Feb, and Mar 1941). This is an interesting puzzle to solve. It's not a slam-dunk, but can be done.
Note: The Axis player should use the German HQ Option chits in this scenario.
15.1 Scenario Exceptions
O'Connor's Offensive Scenario starts with an Allied Dec. 1940 turn and ends after the Allied Mar. 1941 turn (4 Allied turns). The (b) used throughout the scenario setup below denotes units found in both O'Connor's Offensive and the long game. Units not marked with a (b) are used only in O'Connor's Offensive.
Note: The two new units for the 6 Australian will not have a color triangle, group by the name in this scenario.
- One card draw for each player is allowed in either
Official clarification (9/17/25), rule 15.1: Disregard the card draw bulletpoint beneath the "Note".
All rules are in play, with exceptions as follows:
- The Allies go first on all turns in this scenario.
- One card draw per player is allowed in this scenario, which can be used starting on Turn 2. An extra card draw can be obtained by the Allied player for capturing Tobruk.
- Allied player starts Turn 1 with the 'Intelligence' card, the 'Combat Training' card, the 'HQ Bonus' card and the 'Esprit de Corps' card, which may be used in both Movement Phases, in play.
- Remove the 'Past Is Prologue' and 'Extra Reinforcements', and both 'Theatre Ops go Well' cards from the deck.
- Allied player is granted plus one movement for all units in both phases for Turn 1 only.
- If an 'Extra Supply Roll' card is drawn, replace the text with 'Roll a die. A 0-4 grants a SU which can be placed anywhere.'
- Tobruk and Bardia are both '-1 To Hit' Forts in this scenario.
- Supply units can only be gained from the reinforcements listed below or an HQ decision to roll for extra supply.
- Italian HQ gets only one die roll for 'Extra Supply' at 0-4 if that option is chosen. Other options are available as normal. Italian HQ capture worth 7 VP.
- Italian Surrender. If Italian units are OOS, rather than rolling individually for elimination, roll once for each OOS box at the start of each Italian RRW Phase. On a 0-5, the entire box of units surrenders. Otherwise, it stays OOS until it is put back in supply or the next Axis RRW Phase. Score 1 VP per unit for the Allied player for surrendered units regardless of type. Roll for any SU or HQ capture as normal. Surrendered units are considered out of the game and cannot return to play as reinforcements. LRDF are never OOS, so they don't Surrender.
- Allies get to go first in this scenario.
15.2 Scenario Setup
Axis Setup
Italian Setup:
Aghelia: Sabratha Inf and Art
Mechili: Babini Recon, Armor, Art
Tobruk: Sirte Inf and Art
Sollum: 2 CCNN Inf and Art
Sidi Barrani: 1 Libya Inf, 2 Libya Inf, Maletti Arm, 4 CCNN Inf and Art. Fortified Box marker
Buq Buq: Catanzaro Inf and Art, Cyrene Inf and Art, Fortified Box marker
Ft. Capuzzo: 1 CCNN Inf and Art
Bardia: Marmarica Inf and Art, Italian HQ
Axis Reinforcements:
Turn 1 - 3 CCNN Inf and Art, Supply Unit
Turn 2 - Supply Unit
Turn 3 - Pavia Inf (b) and Art (b), Bologna Inf (b) and Art (b), Supply Unit
- Place one supply unit in each of the following: Bardia, Sidi Barrani, Tmimi, El Guba, Benghasi, and Agadabia
Allied Setup
In the Holding Box:
- 6 Australian Recon
- 2 New Zealand Recon, Inf and Art
- 2 Sup. Gp. Inf (b), 2 Sup. Gp. Arm (H)
El Alamein: 6 Australian Inf (Strength 3) and Art (b), 2 Sup. Gp. Arm (AL)
Mersa Matruh: 1 Sup. Gp. Recon, Arm (Strength 2), Arm (Strength 3), Inf (Strength 3), 2 Sup. Gp. Recon (Strength 1), HQ
Allied Reinforcements:
Turn 1 - Supply Unit
Turn 2 - Polish Inf (b), 22 Gds Inf (b), 3 Indian Inf (b), 2 Arm (Strength 3) (b), Supply Unit
Turn 3 - 9 Australian Inf (Strength 3) (b), 9 Australian Art (Strength 2) (b), Supply Unit
Turn 4 - Supply Unit
- Place two supply units in each of the following: Holding Box and Mersa Matruh.
- Place one supply unit in Fuka.
15.3 Winning the Game
15.3.1 Allied player needs to get and hold Beda Fomm in supply by the end of the Allied March turn (Turn 4), capture Tobruk and Bardia, and be ahead in VP by 25 VP. If so, they win. LRDF count as 'holding' a box in supply in this instance. Any Italian units OOS at the end must have a Surrender die roll.
15.3.2 Any other result is a win, if pyrrhic, for the Italian (Axis) player. Rommel and the 5th LT were in Africa by then and the situation changed dramatically.
16.0 Credits & Sources is omitted (credits, bibliography and copyright lines, not rules).
17.0 Designer's Notes
Where does one begin in describing the evolution of something as unusual as a wargame? Let's face it, what we do is unusual; that is, play wargames - much less design them. Attitudes have changed from years past, however. I'm one of those gamers who stretch back to the mid-60s (did I admit to that?) and I remember trying vainly to defend my obsession to the uninitiated.
Nowadays, when I describe this hobby to people, they still look as incredulous as over 40 years ago, but now I've noticed that their incredulity is tempered with awe at the grey matter endurance our hobby seems to require of us. We certainly don't mind reading a lot of rules!
I've always had a fascination for the North African theatre. Where the 'Russian Front' was attractive for its massive nature, representing as it did the struggle of nations and, to a certain extent, ideologies, North Africa was attractive because of the few units involved and perhaps mostly because of the cult of personality it seemed to invoke. Avalon Hill's "Africa Korps" was the first wargame I was introduced to so many eons ago by the boyfriend of a friend's sister. This fellow had me take the Commonwealth/British. I still remember the day and the magic of Rommel's lightning dash across the desert to Tobruk. Of course, being a rookie, ultimately I lost, but I didn't care. I was hooked.
Since then, I have been an avid wargame player. I'm sure my experience stirs similar memories in many of you reading this. As you might guess, North Africa games have held a special fascination for me. My first incarnation of a North Africa design was a primitive attempt to modify "Africa Korps" in a way similar to the old "Stalingrad III" variant by Fred Schachter. This was done by simply doubling the countermix and monkeying with the map somewhat. It was shortly abandoned. So much for unorganized 'shots in the dark'!
Skipping ahead a number of years and a number of North Africa games later, around 1978 I met up with Joe Angiolillo, a former college acquaintance who I knew had been active in wargame design for SPI. SPI had just done his "Operation Typhoon" and he was working on "Kiev" from the "Army Group South" quad. I spent the summer being his chief play tester, contributing a rule or two, making weekly/biweekly trips to SPI with him from his Hartford,Ct. suburb and writing the Player's Notes for "Kiev", but most of all seeing firsthand what it took to build a wargame.
Joe was an exhaustive researcher. He showed me the value of 'doing the legwork'. I also credit him with 'mentoring' me through the initial phases of my first serious attempt at a North Africa game. This was a monster game with fistfuls of counters (for North Africa). The hobby was going through 'monster mania' at the time, and I was no exception. I had what I considered to be the ultimate "Africa Korps" game; about 10 square feet of mapboard, and hundreds of counters, all press typed by hand, both sides. Lots of rules. Lots of flavor. It was glorious, but cumbersome at best.
I learned some things from spending my entire summer of 1979 (I taught High School then). One thing was that lots of research makes you want to include everything you find in the game. "Hey, this is neat; let's see if I can fit it in!". I even had counters for dummy British tank formations. I ultimately felt that this attitude can make games unplayable. One item that survived to the current game was the Long Range Desert Force and let them operate OOS. Another realization was that it would cost a veritable fortune to produce copies of the thing. One other minor point was christening my monster with a name that hadn't already been used. I chose to call it "The Struggle for North Africa". It was aptly named.
As a good design of anything boils down to answering the question, 'What are you trying to demonstrate?', it is probably a good idea we were not going to attempt to publish that monster Looking back, I'm not sure what it was I was trying to demonstrate.
In 1980, Joe, I and others formed the beginnings of what was to be Nova Game Designs, and originally we had plans to publish each other's games within the auspices of our new venture. Within two years, however, we had decided that our corporate future lay in the "Ace of Aces" book-game concept. Board games we concluded were best left to others (too bad, too- we had at least one that we felt was more fun than "Axis and Allies" ). Also, around 1982 GDW had a hit with "A House Divided" and later they published "Attack in the Ardennes". I had seen other point-to-point games such as "Napoleon" by Gamma-Two, but it was "Attack in the Ardennes" which inspired me to rework my old "Struggle" into a system I felt was maybe more suited "Struggle" into a system I felt was maybe more suited for North Africa. At this time the game more resembled the game you now hold.
I also discovered the focus I wanted to have the game demonstrate. What always bothered me about the old AH 'Africa Korps' game was that although it was a relatively easy game to pick up and learn, it very often came down to one big attack and the entire game always seemed to hinge on that. For me, that was disappointing. Therefore, I wanted to turn my work into something that would be relatively easy for new players as well as old hands to pick up, but would have a fair amount of replay value because it didn't hinge on getting one battle to go your way. Also thinking about new players, I felt that the usual arithmetic involved in most wargames intimidated many a potential 'recruit', and this system removed a lot of that (ZOCs, adding stacks of attack/defense factors and dividing to find odds, CRTs, movement points, etc.). That is also why all the terrain lines are generic. Crossing a piece of difficult terrain into a Battle should have consequences, and I kept it simple with the penalty of units doing so having a higher chance of being 'hit' in the first Round after the move. I also wanted a certain 'fluidity' to movement in the desert, and felt the point-to-point system allowed for that.
The movement and combat system is similar to "Attack" but hardly identical. I've made some changes and hope I've defined the procedure a little more, but anyone who is familiar with point-to-point games should have no trouble absorbing the mechanics of this game rapidly. The biggest single difference I feel is the introduction of the 'Battle Board'. This I felt really focused the combat phases and elevated the Battle procedure to a 'game within a game'. Play testers seemed to really love it.
The 'Outflank' rule is a new and important wrinkle. It may seem innocuous, but with proper use it can force an opponent to lose units he would otherwise retreat, or perhaps put an important segment of enemy forces out of supply. It does require an armor unit, so it is limited to that. Also, judicious use of the fact that moving out of supply is possible should be used when the opportunity to place more enemy units out of supply presents itself (look out for those LRDF units!).
Once I decided that a point-to-point system gave me the playable game I was looking for, I proceeded to check my OB with games like SPI's "Campaign for North Africa" as well as their differently scaled version, "Desert Fox". I made some minor adjustments, but overall I was pleased with the scaling down I had done to make my monster game with weekly turns fit one with monthly turns and a totally different scope. The Commonwealth units were shuffled in and out more often than Imelda Marcos changed her shoes, so rather than specify the actual units withdrawn and brought back, it seemed more gamable to allow the Allied player to decide. Also,by tying the withdrawals to Victory Points, it gave what was inflexible a flexibility and a decision point to consider. I felt that was much more fun. The Battle Board I feel is a major improvement on prior point-to-point systems. Using the markers and the Board allows the Battle to flow more easily. Coupled with the Stacking rules that limit Combat reinforcements, Battles can often be rather tense affairs.
A small quandary I had was the 'Rommel commands Italians' rule. The official month for the creation of Panzerarmee Africa was January 1942, but Rommel had asked for and received actual field command of the Italian tank forces as early as November 1941. I originally had the rule take effect in January, but finally deferred to the November date when he got functional command of all of the Italians. Optional Rule is listed to have this come in early via die roll instead of automatic if you want to use it.
Another minor design decision was using Benghasi as a port. The actual port facilities were considered difficult to use. I didn't want to just ignore it, but felt it needed a restriction of some sort. Within the structure of the game and what units represented, the simplest decision was to limit the port's use to just infantry.
A note on the unit strengths. The original "Struggle" combat strengths were based on SUFs, or Standard Unit Factors that were published in S&T compared with researched numerical strengths tempered by performance. I boiled those down to the 0-9 range and 'tinkered' with them until they 'felt' right. The use of Artillery in the Second Line, Front Line bonus for extra Front Line units, HQ Combat bonus, Reinforcements dinged for crossing a Terrain Line and Card Play can make for some interesting and tension filled Combats. Even '0' strength units can perform in the right circumstances.
British Armor. The British armor doctrine at the beginning of this campaign was woefully inadequate. The British considered most of their armor to be infantry support. Matilda tanks were notoriously slow, if heavily armored. The Germans outmaneuvered them and used their 88mm Flak units as Anti-Tank. The British came around to a more integrated 'combined arms' by the end of the time period covered by this game, and is reflected in the rules allowing any British armored div to consider any British Inf, Art, and/or Recon as part of a combined division for game 'divisional integrity' purposes.
'Attack Alamein' rule. As the Axis' (at least Rommel's) idea was to get to the point where the Suez Canal was threatened. This rule allows for that to be what may win or lose the game. As Rommel was always more ambitious about what could be done than were his superiors, it is left as an incentivized option. I felt that it was important to leave the decision to strike for 'the big win' up to the Axis player. If he has done well early on, and has a big point lead, he may be content in holding on to whatever level of victory he figures he can get by giving up a 25 point swing.
Perhaps I should give you an idea of my philosophy of gaming. It should give you an insight into what type of ideas appeal to me and therefore what kind of game you will get from me. I've always viewed wargaming as a hobby and a recreation, not just a re-creation. I like to have fun when I'm involved in a recreation. Because of this, my tastes in games tend to be those that emphasize play value first and exact event re-creation second. I hesitate to use the phrase "historical accuracy". I find that term to be difficult to define and apply to something as grossly compromised as a wargame. Certainly accurate research is important to provide a base for making a game such as this. The more and better the research, the wider and richer the base of knowledge one has to draw on. I'm also sure that others can build more involved systems than this one that 'feel' right. That is great. Find them, buy them and play them. I feel that the research should not be allowed to control the process of making a game, it should simply be a major contributor. My interest in North Africa was sparked by the game, "Africa Korps" which by anyone's standards who cares is only mildly "historically accurate". Because of that "simulation stimulation" I've read and researched and somewhat extensively read up on about that part of WWII. I'm not worried if a game isn't perfectly realistic or takes some historical "shortcuts". I didn't stop playing "Africa Korps" because it was "poor" history, but because it ultimately left me somewhat cold in a gaming sense.
I was a partner in the game publishing house, Nova Game Designs, when we published the original 'Axis and Allies', which is considered more of a general market battle game. It was, however a 'step up' in complexity from a game like 'Risk', but was nowhere near a hardcore wargame by Avalon Hill, GDW, or any one of a number of other publishers. I tried with 'Desert Blitzkrieg' to provide a game that would take a next step towards the more involved wargaming experience, by introducing new players to many wargame concepts without potentially overwhelming them with all the arithmetic required by most hardcore wargames. I felt that the point-to-point process and '2 hit elimination' combat, movement simplicity, etc. gave me that framework. My intent was to provide a game that would be a step toward filling that perceived 'gap' between general market and the hardcore game. There are certainly other examples of what I'm talking about, and now we have this one as well. If you like, this game would be a chance to introduce one of your friends with whom you have only played, say "Axis and Allies" to more involved wargaming. The next game from Compass I would recommend might be John Edward's "African Campaign". "Desert Blitzkrieg" fits in between games like these.
I also still remember the magic of my first game of 'Africa Korps', and have spent, off and on, 35 years or so searching for the "better mousetrap" as it were. One which was fun, playable, reflected history and had enough variables so that the outcome wasn't dictated by one die roll. I have found a few that I like, but I also wanted to 'throw my hat into the ring'. This game was the result. Hope folks enjoy it.
18.0 Player Notes
There are three main parts of the game to master;
- Positioning units to both set up for Battles, and avoiding exposing your supply lines;
- Managing the 'Battle Board' to maximize your firing bonuses and take advantage of any opponent's set up weakness.
- Managing the 'divisional integrity' rules, especially in a Battle, to avoid an overstack that will eliminate a unit.
The Stacking rules of 2 divisions, plus one unit, etc. restrict what can be in a Battle, but also what can Combat Reinforce a Battle. That can sometimes be critical. Especially for the British on Turn 17, when they get a boost to what can be considered a 'division'.
The early game will see the Axis do most of what they will, as the Allied reinforcements are slim and they start the game somewhat disorganized. The Allied side must bide their time. The last third of the game should 'belong' to them, given all the units that they get and the reorganization of their armor units.
As you might expect in a North African WW2 game, Tobruk is a key. The Axis player needs to capture Tobruk as early as can be achieved. To that end, the Axis player should not delay attacking Tobruk with available German units to reduce its Fort bonus from -3 to -1 To Hit as soon as feasible. Remember, the Axis player does not have to win that Battle, just survive it. At the end of the Axis player turn of such a Battle, the Fort will be a -1 for the rest of the game.
Players with equal skill will tend to have even Battle losses over time, baring the usual string of bad luck, of course! It is imperative that the Axis score more VP from VP boxes than the Allied player for as many turns as possible. If the Axis controls Aghelia, Benghasi, Tobruk, and Bardia to the Allied Alamein, that is 3 VP to 1 VP every turn. This will add up. As the first 4-7 turns, Tobruk and Bardia will be Allied VPs, it behooves the Axis player to cut into that 3 VP Allied differential quickly. Only Tobruk gains VP for the Axis, but denying the Allied player the VP for Benghasi and Bardia as soon as possible is also key.
With a little good fortune and skilled play, the Axis player should be able to force the Allied player back closer to Alamein. The game tends to produce Battle slugfests over key points, as players commit many reinforcements to hold a key box. As the map forces a narrowing of approach, both sides must be prepared for more of this and the losses that will cause.
For the end game, baring a full collapse of the Allied army, the Axis player may be presented with a dilemma. If he has a lead, he will have to evaluate the risk/reward of working to attack the Alamein Area to gain the 5 VP that action is worth. It also denies the Allied player 15 VP. The game may hinge on those 20 VP. A 20 VP point swing will often be what determines the final level of victory. Attacking Alamein could be risky. The choice is there. If the Axis player has had better luck and/or skill than his opponent, it may not be needed, but in a close game, this action may determine the victory. Remember, the Axis player does not have to win a Battle in the' Alamein Area', just attempt it with 5 Combat units (and a SU to 'burn').
However, at some point, the Axis player will need to switch to the defensive. Falling back towards Tobruk in an orderly manner, using the Terrain Lines and Fortified Boxes at key spots will be required to avoid an Allied win. If enough time controlling Tobruk and Bardia has passed, the Axis should be close to a victory of some sort, and will need to hold on versus the recently improved British armor.
For the Allied player, the beginning of the game is difficult as their units are spread out and somewhat disorganized. If the Allied player gets lucky and the Allied HQ is not captured, that's a plus, but in any case, placing your best set of units in Tobruk to delay the Axis advance is imperative. The player should not worry about any buildup of supply units. Preserve them, as they will be needed late in the game.
Don't get tempted to possibly waste your best units trying to go for big Battles early on unless the risk/reward seems worth it (e.g retaking Tobruk, or putting the whole Axis army OOS). Bide your time and set up Fortified boxes, especially at Sollum to take advantage of the Terrain Lines. Don't get discouraged by any early losses. The Allied replacement and reinforcements will be plentiful and give opportunities to rally.
Use the LRDF rule to put 2 Recon units along the south portion of the map to frustrate the Axis player and force him to do the same. It may also tie down some Italian units he would rather use elsewhere.
The longer Tobruk is held, the better it is for the Allied player. On Turn 12, the Allied player gets some armor upgrades and can start to think about limited offensives. By the last 6 turns of the game, the Allied player should have the advantage in army strength and be able to push the Axis player back in more than one place. It is then that any VP deficit will need to be closed.
The Allied player has to deal with the mostly Commonwealth withdrawals and that can be a bit tricky, depending on how things are going. The Allied player gets VP for withdrawing the units on schedule. If the Allied player does not remove them, the VP cost is high. Only do that if it will prevent a major loss somewhere, or perhaps near the end of the game when the extra unit is needed for a critical Battle.
The east end of the map is easily defensible and cannot be circumnavigated by the Axis player. If the Allied player is up against the east edge of the map in the endgame, remember that his replacement/reinforcement/supply units come in right there, and the Axis has to travel across the map to get his units and his supply there. That's an advantage.
Fuka and Belaki Mudpan are the first breaker line. Fortified boxes are a must here and will be hard to crack. If that fails, El Taqa Plateau, Alamein and Ruweisat Ridge are also tough positions for the Axis to crack, especially with Fortified boxes there. That said, with proper play, the Allied player may never have to figure out how to defend there. If it does happen, the game should turn on the results. The 'Attack Alamein' rule was a way to perhaps force an Axis Player to advance to this line with a close lead to keep the Allied player from getting the +15 VP, while getting +5 VP for himself.
An intriguing tactic that came up in playtesting was to use a low strength unit in a 'soak-off' attack on a stack to prevent any of the units there from being eligible for reinforcing an adjacent box that was also being put in Battle. Requires the extra supply to pull off, but may allow the main attack to succeed where it might not have, given the heavy support available from the adjacent box. Old wargamer tactic, or as my son called it, a "Pro-Gamer move"!
The 'Battle Board' is sort of the 'game with the game'. Players have to decide how to position their units in the Front and Second lines, and positioning really matters.
Taking advantage of Artillery Second Line bonus, Anti-vehicle bonus, Front Line extra unit bonus, HQ First round bonus, Attacking units coming into Battle across a Terrain Line, and Card Play bonuses gives the players a lot of things to consider.
When to move from Second Line to Front Line? Do I risk losing my artillery if I don't keep other ground units in the Second Line at -1 CV? Where do my Combat Reinforcements come from? Do I put them in Front Line or Second Line? Can I even bring in any Combat Reinforcements at all because of stacking? Do I try to eliminate the enemy Air? All these are questions that will come up.
Setting up second is an advantage of which the Attacking player will mostly get the benefit. Managing coming into a Battle across a Terrain Line (each unit that does picks up the '+1 To Hit' marker – making them a juicy target) is another decision point.
Deciding what is firing at what will change during a multi-round Battle. As most of the units only hit at 30% or less unmodified, hits are sometimes hard to come by. Even so, a well bonused '1' CV unit can be a solid bet. The markers provided will make determining what the final Combat Value for a unit and I tried to provide what seemed a reasonable mix based on testing. Feel free to add to the counter mix with blanks if you need them.
A note about the "O'Conner Offensive" learning scenario. It may be a bit of a challenge for the Allied player to figure out in order to 'win'. Use the Movement HQ bonus instead of the Attack one.
19.0 Examples of Play
Moving along Tertiary Roads
Image 1: The German 5LT (4 units) the Pavia Division (2 units) and the Camicia Nera CN Brigade start the in Marsa Brega box. The Axis player selects the Pavia Division to move from Mersa Brega to Fr. Gtafia (red #1), then to Jalo Oasis (red #2) and ending their movement at Gasres Sahabi. A congested road marker is placed on the road between Jalo Oasis and Gasres Sahabi to show other movement between them is prohibited.
The German player now moves the 5LT Recon Brigade and the Camicia Nera CN Brigade from Mersa Brega to Agadabia (black #1) then to El Haselat (black #2) and ending their movement at Gasres Sahabi. A congested road marker is placed on the road between El Haselat and Gasres Sahabi to show other movement between them is prohibited.
Image 2: The German player now moves two units of the 5LT (the infantry and artillery) from Mersa Brega to Fr. Gtafia (red #1) then to Jalo Oasis (red #2). A congested road marker is placed on the road between Fr. Gtafia and Jalo Oasis to show other movement between them is prohibited.
Finally, the Axis Player moves the armored brigade to Agadabia (black #1) then to El Haslat (black #2), ending movement. The 5LT armored brigade could move to an adjacent box but may not enter the Gasres Sahabi box as movement between Gasres Sahabi and El Haslat is prohibited.
Motorized Movement Phase and Limited Combat
Image 1: The Allied player moves the New Zealand (3 units) and 4th Indian division (3 units) out of Tobruk to El Adem across a Terrain Line. As this is Motorized movement, only attack is allowed from an adjacent box, He brings the 6 Australian Artillery as his 'plus one' unit to max his stack. The HQ has the Combat Attack marker. A Supply Unit in Sidi Rezegh provides supply. Other Allied units are moved into position in Tobruk, Sidi Rezegh and Bir El Gubi as potential reinforcements. The Allied player commits an Air Unit to the Battle as well.
The Axis in El Adem has defense by the 5LT Division (4 units) and the Ariete Recon, Infantry, and Artillery. Rommel with no bonus and, a Supply Unit. They also have the 15 Recon and Infantry in Acroma.
The El Adem box is marked with the Battle Marker and all units are moved to the Battle Board.
Tac Air unit does not count for determining which player has more units for first placement and both sides have seven. The defender (Axis) places first on the Battle Board.
Image 2: The Axis player decides to put Recon, Infantry and Armor of the 5LT and the Ariete Infantry in the Front Line. He leaves the Recon and Artillery of the Ariete Division and the 5LT Artillery in the Second Line. The Axis Supply Unit and Rommel are placed to the side. They will have no effect on the Battle, but may be subject to capture if things go poorly for the Axis.
Allied player now places his units. The Recon and Infantry of the 4 Indian Division as well as the, Infantry and Recon of the New Zealand Division in the Front Line. The New Zealand Artillery, 4 Indian Artillery, and 6 Australian Artillery are placed in the Second Line. The Allied Tac Air is placed in the Second Line. The Allied HQ and the Combat marker is off to the side and will grant a +1 to any Allied units that survive Round One defensive fire. All Allied units, except Tac Air unit, get a marker '+1 To Hit' placed next to them for Round One, caused by crossing a Terrain Line to enter the Battle.
Image 3: Axis Round One. A) 5LT Armor and Ariete Artillery vs. 4 Indian Infantry; B) 5LT Infantry and 5LT Artillery vs. New Zealand Infantry; C) 5LT Recon vs. 4 Indian Recon; D) Ariete Infantry and Ariete Recon vs. New Zealand Recon.
A) results are: 5LT Armor is a 5 (4+1 to hit) and rolls a 2. The Ariete Artillery is a 5 (3+1 SL+1 to hit) and rolls a 1. This results in 2 hits which eliminates the 4 Indian Infantry. It will be placed in the corner of the Battle Board for after Battle VP counting.
B) results are: 5LT Infantry is a 4 (3+1 to hit) and rolls a 4. The 5LT Artillery is a 4 (2 +1 SL+1 to hit) and rolls a 7. This results in 1 hit. The New Zealand Infantry is flipped to its damaged side.
C) results are: 5LT Recon is a 2 (1+1 to hit) and rolls a 5. No effect.
D) results are: Ariete Infantry is a 3 (2+1 to hit) and rolls a 0. The Ariete Recon is a 1 (1+1 To Hit, -1 SL) and rolls an 8. This results in 1 hit. The New Zealand Recon is flipped to its damaged side.
Limited Combat (continued)
Image 4: Allied Round One. All '+1 To Hit' markers are removed from the Allied units. The Allied arranges his units for his round. Allied HQ Combat Attack bonus gives +1 CV to all Allied units except the Air. A) New Zealand Infantry, Tac Air and New Zealand Artillery vs. 5LT Armor; B) NZ Recon and 4 Indian Artillery vs. 5LT Infantry; C) 4 Indian Recon and 6 Australian Artillery vs. Ariete Infantry.
Official clarification (9/17/25), Page 32, Image 4: the three Allied Artillery units should each be marked with "+2 CV" markers. The text is correct.
A) results are: New Zealand Infantry is a 4 (3+1 HQ bonus) and rolls a 3. Tac Air is a 2 and rolls a 0. New Zealand Artillery is a 5 (3+1 HQ bonus and +1 SL) and rolls a 9. This results in 2 hits which eliminates the 5Lt Armor.
B) results are: New Zealand Recon is a 2 (1+1 HQ bonus) and rolls a 6. 4 Indian Artillery is a 4 (2+1 HQ bonus and +1 SL) and rolls a 3. This results in 1 hit and the 5LT Infantry is flipped to its damaged side.
C) results are: 4 Indian Recon is a 2 (1+1 HQ bonus) and rolls 4. The 6 Australian Artillery is a 3 (1+1 HQ bonus and +1 SL) and rolls a 9. No effect.
Round One is complete. Flip the Combat Attack marker over to indicate it is no longer in play.
Image 5: Axis Round Two. The Axis stays and brings the 15 Infantry in from Acroma. He places it in the Front Line to get a Front Line bonus of +1 CV for being the 4th FL unit in a Battle against 3 FL units (9.2.5). Stacking rules allow this as the Axis units on the Battle Board are two divisions (Ariete, 5th LT) allowing a 'plus one unit.' He then moves his Ariete Recon from Second Line to Front Line, freeing up the Ariete Infantry to also get a Front Line bonus. The Axis player arranges his units this round. A) 15 Infantry and 5LT Infantry vs. New Zealand Infantry; B) 5LT Recon, Ariete Infantry and Ariete Artillery vs. 4 Indian Recon; C) Ariete Recon and 5LT Artillery vs. New Zealand Recon.
Official clarification (9/17/25), Page 32, Image 5: missing a "+1 CV" marker over the Axis 15 Infantry.
A) results are: 15 Infantry is a 5 (4+1 FL bonus) and rolls a 6. 5LT Infantry is a 3 and rolls a 7. All are no effect.
B) results are: 5LT Recon is a 1 and rolls a 3. Ariete Infantry is a 3 (2+1 FL bonus) and rolls a 1. Ariete Artillery is a 4 (3+1 SL) and rolls a 0. This results in 2 hits and eliminates 4 Indian Recon.
C) results are: Ariete Recon is a 1 and rolls an 8. 5LT Artillery is a 3 (2+1 SL) and rolls a 1. This results in 1 hit and eliminates the damaged New Zealand Recon.
Image 6: Allied Round Two. Allied player can now bring in reinforcements from three possible paths. He has units from 3 different divisions in the Battle, but only 4 units total. Since he has no units of any division already in the Battle as a reinforcement, he can only bring in one unit, choosing 7 Armor from Sidi Rezegh which does not cross any Terrain Line. He places the 7Arm in the Front Line and arranges his units. A) 7 Armor, New Zealand Artillery, 6 Australian Artillery and Tac Air vs. 15 Infantry; B) New Zealand Infantry and 4 Indian Artillery vs. 5LT Infantry.
A) results are: 7 Armor is a 3 and rolls a 1. New Zealand Artillery is a 4 (3+1 SL) and rolls a 0. 6 Australian Artillery is a 2 (1+1 SL) and rolls 4. Tac Air is a 2 and rolls a 1. This results in 3 hits, of which 2 are needed and eliminates the 15 Infantry.
B) results are: New Zealand Infantry is a 3 and rolls a 2. 4 Indian Artillery is a 3 (2+1 SL) and rolls a 9. This results in 1 hit and eliminates the damaged 5LT Infantry.
Round Two is complete.
Image 7: Axis Round Three. Axis decides to stay and fight. He brings in the 15 Recon and places it in the FL. He commits the Ariete Art to the FL. Risky move to try to eliminate the Allied FL and save the Battle as his losses have been substantial. Note the continued tactic of using the weaker unit as the 'mate' for an enemy FL unit so that the stronger unit gets the FL Bonus. He arranges his units. A) 15 Recon, Ariete Art and 5LT Recon vs 7 Arm; B) 5LT Art, Ariete Recon and Ariete Infantry vs New Zealand Infantry.
A) results are: 5LT Recon is a 1 and rolls a 2. The 15 Recon is a 4 (3+1 FL bonus) and rolls a 1. The Ariete Artillery is a 5 (3+1 anti-armor bonus, +1 FL bonus) and rolls a 9. This results in 1 hit. The 7 Armor is flipped to its damaged side.
Official clarification (9/17/25), Page 33, Image 7: the "+1 CV" marker on item "A" should be over the Axis 15 Recon, not the 5LT Recon. Under "Results" for "A", should read "The 15 Recon is a 3 (2 +1 FL bonus)....."
B) results are: 5LT Artillery is a 3 (2+1 SL) and rolls a 4. The Ariete Recon is a 1 and rolls a 7. The Ariete Infantry is a 4 (3+1 FL bonus) and rolls a 4 This results in 1 hit. The New Zealand Infantry is eliminated.
Official clarification (9/17/25), Page 33, Image 7: under "Results" for "B", should read, "The Ariete Infantry is a 3 (2 +1 FL bonus) and rolls a 3."
Axis bid to eliminate all Front Line units, and thus eliminate all Second Line Artillery units fails.
Image 8: Allied Round Three. Allied Player senses a win and brings in 1 TK from Bir El Gubi. As it is crossing a Terrain Line, it picks up a '+1 To Hit' marker. He also decides to drop his NZ Art into the FL. If he can eliminate an Axis FL unit, he can temporarily remove the Axis unit advantage in the FL. He arranges his units. A) 6 Australian Art, 1 TK vs Ariete Recon; B) 7 Armor and 4 Indian Art and Tac Air vs Ariete Art; C) New Zealand Art vs 15 Recon.
A) results are: 6 Australian Artillery is a 2 (1+ artillery is in SL) and rolls a 3. 1 TK is a 4 (3+1 for anti-armor bonus vs. Italian vehicle) and rolls a 2. This results in 1 hit. The Ariete Recon is flipped to its damaged side.
B) results are: 7 Armor is a 3 and rolls a 2. 4 Indian Artillery is a 3 (2+1 artillery in SL) and rolls an 8. Tac Air is a 2 and rolls a 1. This results in 2 hits and the Ariete artillery is eliminated.
C) results are: New Zealand Artillery is a 3 and rolls 4. The result is no effect.
Round Three is complete.
Image 9: Axis Round Four. Axis has no more reinforcements he can bring in, but as the 1 TK is at a disadvantage due to Terrain crossing, he chooses to stay. Axis brings 5LT Art to FL to get FL bonus and use his anti-vehicle rating against the British armor and also pick up a +1CV for FL bonus. The Axis arranges his units for his round. A) 15 Recon and 5LT Artillery vs. 7 Armor; B) 5LT Recon vs. New Zealand Artillery; C) Ariete Recon and Ariete Infantry vs. 1st TK.
A) results are: 15 Recon is a 2 and rolls a 6. 5LT Artillery is a 4 (2+1 anti-armor bonus, +1 FL) and rolls a 3. The results are one hit and the 7 Armor is eliminated.
B) results are: 5LT Recon is a 1 and rolls a 3. This results in no effect.
C) results are: Ariete Recon is a 2 (+1CV for Allied 1 Tk for having a '+1 to Hit marker') and rolls an 5. Ariete Infantry is a 4 (base 2,+1CV for Allied 1 Tk having '+1 to Hit marker', +1CV for FL bonus) and rolls a 3. This results in 1 hit and the 1 TK is flipped to its damaged side. Remove the +1 to hit marker from the 1 TK.
Official clarification (9/17/25), Page 34, Image 9: the Ariete Infantry should have a "+2 CV" marker and the Ariete Recon should have a "+1 CV" marker. The "C" results should read "C) results are: Ariete Recon is a 2 (1, +1 CV for Allied 1 Tank having a '+1 to Hit' marker) and rolls a 5."
Image 10: Allied Player decides that it is time to withdraw, as he is severely outnumbered in the FL and could only bring one more unit in if he stayed. Also, Tobruk would be relatively undefended if he wins.
Damaged units are now flipped back to their undamaged sides. Axis player places his units back on the map at El Adem.
Allied player places his Tac Air unit in the Holding Box, flipped to show it was used. It will flip back in the RRW phase of his next turn. He must withdraw the rest of his units, including his HQ, one or two boxes, as they are all motorized. First box must be from where any unit entered the Battle.
He chooses Tobruk, dropping the New Zealand unit, his HQ unit, 1 TK and the 4 Indian artillery in Tobruk. The 6 Australian artillery retreats to Gambut. The SU in Sidi Rezegh used for the Battle is removed.
Round Four is complete and Victory Points are totaled.
Axis Victory Points
- 1 VP for winning the Battle
- 2 VP for the 4th Indian Infantry and New Zealand Infantry eliminated
- 2 VP for the 4th Indian Recon and New Zealand Recon eliminated
- 3 VP for the 7th Armor eliminated
- 8 VP Total
Allied Victory Points
- 4 VP for the 15 Infantry and the 5LT/21 Infantry eliminated
- 5 VP for the 5 LT Armor eliminated
- 2 VP for the Ariete Artillery eliminated
- 11 VP Total