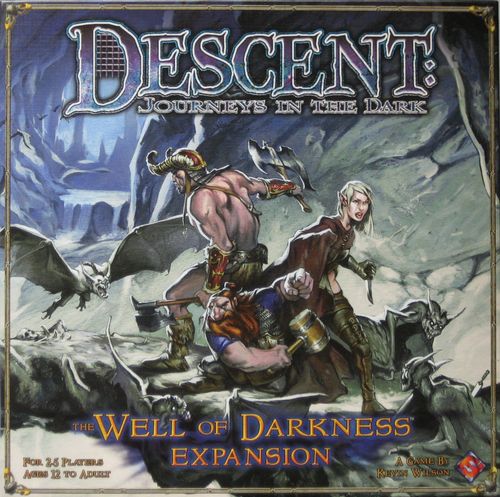
Descent: The Well of Darkness
Descent: The Well of Darkness Rulebook
Table of Contents
Table of Contents
Replacement Cards
Several replacement cards for Descent: Journeys in the Dark are included in this expansion. These cards were changed for various reasons after the release of the base game, and revised cards are included here for your convenience. These changed cards include replacement monster reference cards for the Beastman and the Skeletons (4 cards total), 1 copy of "Acrobat" (a skill), 1 copy of "Divine Retribution" (a skill), 1 copy of "Explosive Rune" (an overlord card), 2 copies of "Bow" (a town store item), 1 copy of "Bow of Bone" (a silver treasure), 1 copy of "Golden Armor" (a silver treasure), and 1 copy of "Dragon Scale Mail" (a gold treasure). To use them, simply remove the old cards from your Descent: Journeys in the Dark card decks and replace them with these revised cards before playing.
Components
This Rulebook (the second half of which is a Quest Guide)
- 6 Hero Sheets
- 6 Plastic Heroes
- 27 Plastic Monsters
- 12 Tan and 6 Red Plastic Kobolds
- 4 Tan and 2 Red Plastic Ferrox
- 2 Tan and 1 Red Plastic Golems
- 110 Cards
- 6 Monster Reference Cards
- 39 Overlord Cards
- 4 Fighting Skill Cards
- 4 Subterfuge Skill Cards
- 4 Wizardry Skill Cards
- 12 Town Store Cards
- 6 Copper Treasure Cards
- 8 Silver Treasure Cards
- 9 Gold Treasure Cards
- 6 Relic Cards
- 12 Replacement Descent: Journeys in the Dark Cards
- 10 Map Pieces
- 1 Room Piece
- 3 Corridor Pieces
- 4 Intersection Pieces
- 2 Dead End Pieces
- 73 Prop Markers
- 48 Obstacle Markers
- 23 Trap Markers
- 2 Staircase Markers
All cards from The Well of Darkness expansion are marked with a small well symbol on their fronts, to allow you to separate them from your Descent: Journeys in the Dark cards.
Component Overview
Below are summary descriptions of the various components included in The Well of Darkness. They should help you identify the components and introduce you to how they are used.
New Heroes
These new heroes can be easily incorporated into Descent: Journeys in the Dark. Simply shuffle the new heroes in with the others when choosing heroes at the start of the game.
New Monsters
The new monsters in this expansion appear in the new quests in this rulebook. Additionally, the overlord can spawn them in any of the quests from Descent: Journeys in the Dark through the use of the spawn cards included with this expansion. The overlord may use all of the monsters from this expansion in addition to all of the monsters from the base game.
Note: For thematic reasons, the kobold figure shows two kobolds crouching together. For game purposes, one kobold figure represents only one kobold.
New Staircase
This staircase is identical to those included in the base game.
Bolt Template
Monsters or traps with the Bolt ability (see page 6) use this cardboard template to determine the spaces affected by their attack.
New Map Pieces
The new map pieces are used in the new quests in this rulebook, and they give players more options for constructing quests.
New Effect Tokens
These tokens are used to track two new lingering effects – Bleed and Daze. See page 6 for further details.
New Props
The new props included with this expansion are listed below.
- Lava: Lava damages figures that move through it, but it does not block line of sight.
- Mud: Mud costs 2 movement points per square to move through instead of 1, but it doesn't block line of sight.
- Dart Fields: Dart fields have a chance of damaging and dazing figures that move through them, but do not block line of sight. See page 4 for further details.
- Scything Blades: Scything blades have a chance of damaging and causing bleeding in figures that move through them, but do not block line of sight. See page 4 for further details.
- Boulders: Boulders are dangerous moving obstacles that kill any figures they hit. Boulders block line of sight and movement. See page 5 for further details.
- Boulder Ramps: Boulder ramps are used to change the direction in which boulders move. They do not block line of sight or movement. See page 5 for details.
New Cards
This expansion includes new cards for the skill, shop, and treasure decks. These cards can simply be shuffled in with their respective decks before the game begins.
New Relics
The six new relics can be acquired in the new quests included with this expansion.
New Overlord Cards
Three of the new overlord cards are intended to be added to the overlord deck from the base game (2 copies of "Kobold Swarm" and 1 copy of "Ferrox Tribe"). The other overlord cards have a colored, hexagonal gem between their threat cost and threat value. This gem contains the card's treachery cost. Treachery is explained on page 3.
New Monster Reference Cards
The new Beastman and Skeleton cards are intended to replace the ones from the original game. The other new monster reference cards provide the game rules and statistics for the new monsters featured in this expansion.
New Miscellaneous Markers
- Furr the Spirit Wolf: The Furr the Spirit Wolf marker represents a new animal companion available to heroes with the proper Fighting skill. See page 6 for further details.
- Haunt: The Haunt represents an unkillable apparition that the overlord controls in the first of the new quests in this expansion.
New Treasure Tokens and Markers
- Power Potion: These markers represent the power potions introduced in this expansion (see page 5) and the new relics featured in the new quests.
Expansion Rules
This section contains rules for the new game elements included with this expansion.
Treachery
With the Well of Darkness expansion, the overlord player has the ability to customize the overlord deck from the base game using treachery.
Most of the new overlord cards have a hexagonal, colored gem between the gems for their threat value and their threat cost – this is their treachery cost. At the start of each quest, before the game begins (step 6B), the overlord receives a certain amount of treachery with which he can customize his base overlord deck.
The overlord's base deck consists of all his cards that have no treachery gem: This includes all the cards from the original Descent: Journeys in the Dark, as well as "Ferrox Tribe" and two copies of "Kobold Swarm," which are new to this expansion.
When customizing his deck, the overlord player swaps out cards from his base deck for cards that have a treachery cost. Each quest states how much treachery the overlord receives when playing that quest. This information is found above the chest contents chart for that quest. (Treachery for quests from Descent: Journeys in the Dark can be found in the "Treachery for the Original Quests" sidebar.)
Treachery comes in three types: Events (green), Traps (purple), and Monsters (red). Power cards are paid for with event, trap, or monster treachery as well, depending on the color of their treachery gem. In order for the overlord to add a card that has a treachery cost to his deck, he simply spends the listed amount of treachery (making sure to spend the proper type), then he adds the card to his overlord deck, removing any one other card of his choice from the deck. The overlord may swap out as many cards from the overlord deck as he wants in this manner as long as he has enough treachery to pay for them all.
The treachery gem on the new overlord cards may be either green (for Events), purple (for Traps), or red (for Monsters). The number in the hexagon indicates the card's treachery cost.
Unspent Treachery
For every 2 points of leftover treachery (of any type), the overlord draws 1 extra overlord card to start the game, up to a maximum of 8 cards.
Example: Thyme adds his remaining treachery together (3 trap treachery + 2 monster treachery) for a total of 5 treachery. He draws 2 extra overlord cards to start the game (giving him 5 cards total), and the final point of treachery is wasted.
Resetting the Overlord Deck
At the end of the game, the overlord deck is restored to its original condition, removing all cards that have treachery costs from it and returning the original cards to it.
Example: Thyme, the overlord for this game, receives 2 event treachery, 6 trap treachery, and 2 monster treachery at the start of a quest. He finds this information by looking on the quest map, above the chest contents chart. He decides that he wants to add "Rolling Stone" (3 trap treachery), "Danger" (1 event treachery), and "Empower" (1 Event treachey) to his deck. This leaves him with 0 event treachery, 3 trap treachery, and 2 monster treachery, which he chooses not to spend. He then adds the 3 cards he has chosen to his overlord deck and chooses 3 other cards to remove from it (in this case, an "Aim," a "Gust of Wind," and a "Hordes of the Things" card).
Treachery for the Original Quests
The overlord should receive the treachery listed below when playing the nine quests from Descent: Journeys in the Dark.
| Quest | Event (green) | Trap (purple) | Monster (red) |
|---|---|---|---|
| Into the Dark | 4 | 4 | 4 |
| The Brothers Durnog | 4 | 2 | 4 |
| Problems of Life and Death | 3 | 3 | 4 |
| Spoiled Brat | 3 | 3 | 3 |
| Last Wishes | 4 | 4 | 2 |
| The Eternal Guardian | 3 | 2 | 5 |
| The Black Blade |
Obstacles
Lava
Lava markers do not block line of sight, but if a figure (hero or monster) moves on to a lava space, the figure immediately suffers 2 wounds that cannot be reduced by armor. In addition, 2 burn tokens are placed on the figure.
Large figures are affected by lava, but only if they make a move that results in the entire figure occupying lava spaces.
If a hero or monster is aware of lava, it may jump across the lava as though it were a pit.
Mud
Mud markers do not block line of sight, but a small figure (hero or monster) must spend 2 movement points instead of 1 to move onto a mud space, or from one mud space to another. It costs only 1 movement point to move from a mud space to a non-mud space. If a small figure only has 1 movement point, then it cannot move onto a mud space.
Large figures are affected by mud, but only if they make a move that results in the entire figure occupying mud spaces.
If a hero or monster is aware of mud, it may jump across the mud as though it were a pit.
Traps
Scything Blades
Scything blade markers do not block line of sight, but each time a hero or monster moves so that any part of the figure is occupying a scything blade space, it risks being hit by the scything blade. The hero or monster must then roll 1 power die. On a surge, nothing happens. On any other result, the figure immediately suffers 2 wounds that cannot be reduced by armor and gains 1 bleed token (see page 6).
Scything blades cannot be jumped over.
Dart Fields
Dart field markers do not block line of sight, but each time a hero or monster moves so that any part of the figure is occupying a dart field space, it risks being hit by a dart. The hero or monster must then roll 1 power die. On a surge, nothing happens. On any other result, the figure immediately suffers 1 wound that cannot be reduced by armor and gains 1 daze token (see page 6).
Dart fields cannot be jumped over.
Boulders
Boulders block line of sight and are treated as a wall for purposes of blocking line of sight, attacks, and movement. Boulders roll through the dungeon, crushing everything that gets in their way.
Any figure in a space that a boulder moves onto is instantly killed, regardless of wounds, armor, or special abilities such as Undying. The only exception to this is figures that are in a pit when the boulder rolls overhead (see below). Boulders remove rubble obstacles from any space they move through, but ignore most other obstacles (other than pits, see below). Walls and closed doors will destroy any boulder that attempts to move through them. If one boulder collides with another boulder, the boulder that is currently being moved is destroyed.
Boulders and Pits
Boulders roll across pits unless the boulder moves completely into the pit. Any figure in a pit that a boulder is rolling across is safe from being crushed by the boulder, but cannot climb out of any space covered by the boulder. If a boulder moves completely into a pit, it falls in. If this happens, any figure underneath the boulder is crushed and killed, and then the boulder shatters and is removed from the board.
Boulder Movement
At the start of the overlord's turn, before he does anything else, he must move all boulders in play. To do this, he selects a boulder and rolls 1 red die and 1 yellow die. He then adds up the range shown on the two dice and moves the boulder that many spaces in the direction shown by the arrow on the boulder. He then repeats the process for each other boulder in play.
In the diagram above, the overlord has rolled 4 range for the boulder's movement, so it moves in the direction its arrow is pointing until it has moved 4 spaces. In the process, it moves over a beastman and Sir Valadir, instantly killing them both.
On the next turn, the overlord rolls 5 range for the boulder's movement. However, it only moves 3 spaces before hitting a ramp that turns it to the left. After turning, it moves its remaining 2 spaces of movement to the left. As it moves, the boulder passes over Mad Carthos. Normally, he would be killed, but he has wisely taken refuge in a pit, so the boulder passes harmlessly over his head.
Boulder Ramps
Boulder ramps do not block line of sight or movement. However, if a boulder moves into any space containing a boulder ramp, it is turned in the direction indicated by the ramp.
New Treasure
The following new type of treasure can be found in the dungeon.
Power Potion Markers
Power potions are elixirs with magical strengthening powers. When a hero picks up a power potion, he may immediately equip it for free if he doesn't already have three equipped potions. He may place the potion in his pack if it isn't already holding three unequipped items.
A hero may drink one of the power potions he has equipped by spending 1 movement point. A hero who drinks a power potion rolls all 5 power dice on his next attack. The attack does not have to be made on the same turn that the potion is drunk, but the effect is canceled if the hero is killed or drinks another potion before making an attack.
Heroes may purchase power potions from the town shop for 50 gold.
New Lingering Effects
This expansion introduces two new lingering effects, described below.
Bleed
A figure that is bleeding is marked with a bleed token. At the start of that figure's next turn, its owner must roll the white die one time for each bleed token on the figure, losing wounds equal to the damage indicated by the die results. These wounds are not reduced by armor. After suffering this damage, all bleed tokens are discarded from the figure.
Example: Laurel of Bloodwood has 2 bleed tokens on her at the start of her turn. She rolls the white die twice, getting a total of 5 damage, so she loses 5 wounds, ignoring armor. She then discards the 2 bleed tokens.
Daze
Daze tokens indicate that a figure has been temporarily weakened or distracted by an injury. At the start of each of that figure's turns, its owner must roll a power die for each daze token on the figure. For each power surge rolled, one daze token is discarded. Otherwise, the tokens remain.
Each time a figure attacks when it has one or more daze tokens on it, it loses 1 die (either yellow, green, or black) from its attack for each daze token on it. The dice lost are chosen by the figure's owner. If there are more daze tokens on the figure than the number of yellow, green, and black dice used in its attack, it loses all such dice.
Example: Brother Glyr has 3 daze tokens on him when he makes an attack. His attack normally allows him to roll 1 red, 1 green, and 3 black dice, but he decides to lose the 3 black dice due to his daze tokens. If he had 4 or more daze tokens on him, Glyr's attack would be reduced to 1 red die.
Using the Bolt Template
When placing the bolt template on the board, align it so that its rear end is flat against the base of the figure making the attack. The bolt template is two squares wide at its base, and either square may be aligned with the figure making the attack. It does not matter if the bolt template is completely on the board or not. The diagram above shows the eight legal positions for the bolt template if a small figure makes a Bolt attack.
The lightning from a Bolt attack flows around obstacles just like the flame from a Breath attack (see page 7). The Bolt attack cannot be made through staircases.
Swarm Examples
In the diagram above, the kobold attacks Sir Valadir. The kobold has the Swarm ability, but there are no other monster figures adjacent to Sir Valadir, so the kobold receives no bonus power dice.
Next, another kobold moves next to Sir Valadir and attacks. Because there is 1 other monster adjacent to Sir Valadir, this second kobold receives 1 bonus power die to attack him.
Later on, a third kobold moves next to Sir Valadir and attacks. This time, there are 3 other monsters adjacent to Sir Valadir (counting the Beastman even though it doesn't have the Swarm ability), so this kobold receives 3 bonus power dice to attack him.
New Special Abilities
Bleed
If an attack by a monster or weapon with the Bleed ability inflicts at least 1 damage on the target (before applying the effects of armor) the target begins bleeding from numerous small wounds. After applying any wounds from that attack, place a bleed token next to the affected figure. A figure can have more than one bleed token at a time.
Bolt
Attacks with the Bolt ability use the bolt template to determine which spaces they affect. The template is placed against one side of the attacking figure (see diagram) and all figures underneath the template (friendly and enemy) are affected by the attack. A Bolt attack ignores rolled range, only missing on a miss result. If the attack does not miss, it deals full damage to each figure affected by it.
If a Bolt attack is dodged by more than one figure, only one re-roll may be made (the first dodging player to the attacking player's left decides which dice, if any, are to be re-rolled). Bolt attacks cannot pass through walls or closed doors, but do not otherwise need line of sight.
Daze
If an attack by a monster or weapon with the Daze ability inflicts at least 1 damage on the target (before applying the effects of armor) the target is temporarily weakened by its wound. After applying any wounds from that attack, place a daze token next to the affected figure. A figure can have more than one daze token at a time.
Ironskin
A figure with Ironskin is immune to Aura, Bleed, Burn, Pierce, Poison, and Sorcery. In addition, all damage dealt to the figure by Blast, Bolt, or Breath attacks is reduced to 0.
Leech
For every wound token lost due to a Leech attack, the target also loses 1 fatigue (or suffers 1 additional wound, ignoring armor, if the target is out of fatigue) and the attacker is healed of 1 wound.
Swarm
When attacking, a figure with the Swarm ability may roll 1 extra power die for every other friendly figure adjacent to its target (up to the normal maximum of 5 total power dice).
Unstoppable
A figure with Unstoppable is immune to Daze, Grapple, Knockback, Stun, and Web.
New Familiar
Furr the Spirit Wolf
This familiar is granted by the "Furr the Spirit Wolf" skill card. Furr's speed is 4. Furr can attack once per turn (before, after, or during his movement), rolling 1 white die, and his attack ignores armor.
Descent: Journeys in the Dark Rules Changes and Clarifications
The following rules have been changed or clarified to improve the game.
Starting Overlord Cards
The overlord starts the game by drawing 3 overlord cards from his deck.
Discarding Overlord Cards for Threat
The overlord can discard cards for threat at any time, even during a hero player's turn.
Drinking Potions
Each hero may only drink one potion (of any type) each turn. This prevents players from using certain overly powerful potion combinations.
Cost of Vitality Potions
Vitality potions should cost 50 coins, not 25 as listed on page 20 of the Quest Guide.
Selling Treasure from Chests
Heroes can no longer immediately turn in a treasure card from a chest to receive its full value. Instead, they must carry the item back to town and sell it for half value in the town shop.
Buying Treasure Cards from the Shop
Heroes can only buy treasure cards from the shop if they've previously opened at least one chest of that color this game. For example, until the heroes open at least one silver chest, they cannot buy silver treasures from the town shop.
Small Monsters and Staircases
By using one movement point, a small monster may move from one space containing a staircase to any space containing a staircase of the same color.
Pits and Line of Sight
Figures in a pit can see into the spaces adjacent to the pit. This prevents a problem from occurring with the Grapple ability.
Breath Template Clarification
The flame from a Breath attack billows out and around obstacles. It usually affects all figures under the breath template, but the flame can be blocked by walls and closed doors. Essentially, if a small flying figure could trace a legal movement path from the square where the Breath attack starts to the target – while staying within the breath template – then the target is affected. See the accompanying diagram for examples. Breath attacks cannot be made through staircases.
Diagram captions:
- The diagram above shows how a section of the dungeon looks just before a Hell Hound makes a Breath attack. In the other three diagrams, the spaces that are shaded yellow show which spaces are affected by the Breath attack, and the red squares show the spaces that the Breath attack is unable to reach.
- In the above example, the Breath attack billows around the curve in the hallway and through the rubble obstacle, reaching both heroes under the breath template. Notice that a flying figure standing on the "start" (leftmost) space of the breath template could trace a movement path to both heroes.
- In the above example, the Breath attack is almost entirely blocked by the dungeon walls. Even though the breath template reaches the heroes, a flying figure on the "start" space of the breath template would not be able to stay within the confines of the breath template and trace a legal movement path to either of the heroes.
- In this example, a closed door has been added. The door blocks the Breath attack, so only one of the heroes is affected by the attack.
Landrec the Wise
Landrec the Wise's special ability should state that he "receives 2 free surges on all attack rolls."
Frequently Asked Questions
The following are the frequently asked questions for Descent: Journeys in the Dark.
The Hero Player's Turn
Q: Can a hero give any type of item to an adjacent hero, or just weapons and potions?
A: A hero may give any item to an adjacent hero at the cost of one movement point. A hero may never give money to another hero.
Q: When can a hero equip items?
A: A hero can equip, drop, or place items in his pack at the beginning of his turn, just after refreshing cards. In addition, whenever a hero receives an item from another player or from a chest, he may immediately equip that item, dropping or placing other items in his pack to free up the hands necessary for the just-received item.
Q: Does a hero have 360 degree line of sight?
A: Yes, as the rules state on page 4, "The direction a figure is facing has no effect in the game. Heroes and monsters are assumed to be constantly looking around and can therefore see in all directions."
Q: Can stunned heroes perform movement actions (such as drinking a potion)?
A: Yes, if the stunned hero chooses to receive movement points rather than attacking or placing an order. A stunned hero can also freely spend fatigue for movement points.
Q: Can a hero that chooses the "Run" action use his movement points for purposes other than moving (such as drinking a potion)?
A: Yes. Whenever a hero receives movement points, he can use them for any movement action, including moving, drinking a potion, opening a door, etc.
Q: In town, are you limited in how many items you can buy or sell and do you have to buy and sell in any specific order?
A: You can buy and sell in any order and as often as you like.
Q: Can a hero rest in town?
A: Yes.
Q: On page 18, the rules for "Copper Treasure" state that "each Hero draws one card from the copper treasure deck." If a chest has 2 copper treasure tokens, does each hero draw 2 copper treasure cards?
A: Yes
The Overlord Player's Turn
Q: When the overlord is controlling a hero through "Dark Charm," who decides how to spend the surges and power dice? Can the overlord move the character and attack, or just make a single attack without moving?
A: The overlord controls the hero for that attack, including the hero's use of surges and power dice. The overlord may also play cards such as "Aim" with the attack. However, the overlord player cannot move the character, or force the hero to spend fatigue to add to the attack.
Q: Is the effect of the overlord's "Dodge" card that the hero's attack completely misses, or that the overlord can force the hero to re-roll dice rolled for the attack, as with the hero dodge orders?
A: The "Dodge" card allows the overlord to force re-rolls.
Q: Can a monster end its movement on or be spawned on to a glyph of transport?
A: Monsters can end their movement on or be spawned on to unactivated glyphs, but cannot end their movement on or be spawned on to activated glyphs. If a monster is on an activated glyph, the overlord must move it off the glyph on his next turn, if possible. Monsters can always move through or attack into spaces containing glyphs.
Q: Can the overlord receive threat tokens for making an attack even though there are no valid targets (for example, no heroes within the monster's line of sight)?
A: No. Only attacks that have the potential to succeed can grant the overlord any threat.
Special Abilities
Q: Can an attacker using Knockback move the target in any direction, or just straight back? Also, can the target be knocked back into a pit?
A: The attacker with Knockback can move the target in any direction, including into a pit or other trap.
Q: Does special abilities stack?
A: Special abilities that require you to spend surges are designed to stack. So if you have an ability such as ": +1 Damage and Pierce 1," and you pay 3 surges, you gain +3 Damage and Pierce 3. Some items may explicitly limit your surge spending/stacking, but those are the exception to the rule.
Q: If a flying monster passes through a hero that has Holy Aura, does the monster suffer a wound for the space it "shares" with the hero?
A: No.
Q: When a chest explodes because of the "Explosive Rune" card, does the hero standing on the chest suffer wounds, or just the heroes adjacent to the chest?
A: The hero standing on the chest suffers wounds.
Q: Why can't I jump over water like I can pits?
A: As every hero knows, the dank water found in subterranean caverns is usually infested with deadly bloodsquids, ready to pull an unwary hero to his doom at a moment's notice. As a result, only the most acrobatic heroes dare to leap across even the most innocent-seeming pools of water.
Miscellaneous
Q: How much fatigue would it cost a hero with Telekinesis to move a hero out of a pit?
A: One fatigue.
Q: Can a player with Telekinesis use it to move a hero that is caught in a web?
A: Yes. However, the web token would stay with the moved hero.
Quest Guide
This section is the Quest Guide, translated from the French printing of the booklet (pages 9–27). Quest maps are not reproduced; the treachery and chest tables are given in full. Each quest's zone descriptions are read when the zone is revealed by the heroes. Treachery is listed as trap (purple), event (green), monster (red), in the order the gems are printed.
Opening page of the Quest Guide (translated): "Several months have passed since you defeated the evil wizard Glim. You have enjoyed some well-earned rest and healing, but you know it cannot last forever. The realm needs heroes. Gathering your equipment, you and your companions prepare to venture once more into the darkness. Welcome to the Quest Guide for The Well of Darkness! Here are nine new quests featuring the new monsters, obstacles, and traps of this expansion. Heroes, beware! Do not read the following lines, so as not to spoil the surprise. The rest of this rulebook is reserved for the overlord, except for the last page, which is a summary of special abilities."
The opening page also gives a map legend (symbols for the rune doors, glyphs, encounter markers, chests, and so on, which is not reproduced here) and a note that monsters with a red border are Major Monsters. It also explains that the overlord's treachery for each quest is shown by three coloured gems above the chest contents, and gives the Fantasy Flight Games scenario editor for fan-made quests.
Quest 1: Buried Alive!
Treachery: 4 trap, 2 event, 2 monster
Introduction
After several days of travel, you have tracked the Dentnoire ogre tribe to an abandoned mine where they have taken refuge. A week ago they kidnapped the Duke, and his family begged you to rescue him. Looking around, you unfold the map an old miner has just sold you. The first thing you notice on it are the words "Unstable Ceiling." That is not reassuring.
Quest Objectives
When you enter the mine, you hear an ominous sound. The entrance begins to collapse behind you! The whole mine seems about to cave in. Your objective is to rescue the Duke and kill the Dentnoire ogre chief before the mine collapses on you. If you manage to activate the ancient transport glyphs, so much the better. You start with 8 conquest tokens. If you drop to 0 conquest tokens, the ogres will have defeated you. Good luck.
Collapsing Mine
At the end of each overlord turn, remove a piece of the map, starting with the 2-space end room in the Start Area and advancing along the corridor. When a room is removed, all dead-end tiles attached to it are also removed. This continues until the final room in Zone 5 is removed at the end of the 17th turn. The diagram above the map gives all the necessary details.
The diagram shows the dungeon collapsing piece by piece. At the end of each turn, the overlord removes a section of the board, starting from the left and moving right. The 2-space red section is removed after the 1st turn, the blue 4-space corridor after the 2nd turn, and so on. Where there is no door on the side of a room, there is a 2-space dead-end tile. When these dead-end tiles are part of a room, they are removed at the same time as the room when it is due to disappear. The diagram marks where the mine begins to collapse.
A figure lying partially or wholly on a tile that is removed is immediately and automatically killed. If a familiar or the Spectre is killed because a piece of the board is removed due to the collapse, immediately place the figure back on the board, on the space closest to the figure (if there are several choices, the overlord chooses). If, because of tile removal, no activated glyph remains on the map, heroes in town can no longer return to the dungeon until one of their companions activates a new glyph. If all heroes are in town and no activated glyph remains on the map, the heroes have lost the game.
Descriptions of the Zones
Zone 1
The ceiling is so unstable that you wonder how long it will hold. Frightened monsters scatter across the room, while a passage to the north leads down into the mud. As you enter, a spectre appears. "More intruders! I shall hunt you down!" With a sinister chuckle, the ghost moves toward you.
The Spectre: The Spectre acts as a familiar for the overlord. It has a speed of 4 and ignores obstacles. Furthermore, it does not block movement or line of sight, and it cannot be wounded by attacks. If the Spectre ends its movement in the same space as a hero, that hero loses 2 points of fatigue. When the Spectre passes through (without stopping in) a hero's space, that hero loses 1 point of fatigue (only 1 fatigue regardless of how many times the Spectre passed through that space that turn). When a hero does not have enough fatigue to lose, he takes the difference in wounds (ignoring armor).
Zone 2
This room is dominated by the endless mine shaft at its center. Animal-men and kobolds crawl over the cracked ground, while an ogre awaits you on the far side of the shaft.
When a hero falls into the pit: You fall for a long time before crashing to the ground. The hero is automatically killed.
When a creature falls into the pit: The creature falls for a long time before crashing to the ground. The creature is automatically killed.
Zone 3
This windy corridor is infested with pits and monsters, which are nearly invisible in the darkness. Watch where you step.
Zone 4
This room is dilapidated, although pillars still support the structure. But they are shaky and will soon collapse. A giant moves toward you to end your quest.
Zone 5
This is the lair of the ogre chief, who also houses his kobold servants and a manticore (his animal companion). The Duke lies unconscious on the floor. The chief speaks to you: "We will all be buried here, but I will crack your skulls first."
The ogre major is the chief. He has the same characteristics as an ogre major, with one additional armor point, 2 extra wounds, and the Sweep ability.
When a hero ends his movement on the encounter marker and the chief has not yet been defeated: The chief shouts, "Leave him! You must deal with me first!"
If the heroes defeat the chief (and he stays dead): The chief staggers, then collapses. "Enjoy your victory for the little time you have left." Spitting a clot of blood, he loses consciousness.
When a hero ends his movement on the encounter marker and the chief has been defeated: You help the Duke to his feet. "Come, we must get out of here now!" Remove the encounter marker. The Duke accompanies this hero from now on. If this hero dies, the Duke stays in place until another hero enters his space and spends 1 movement point to get him back on his feet.
If a hero goes to town with the Duke: You and your companions rush toward a glyph. You finally reach it just as the mine collapses. You stagger, but are happy to see daylight again. Returning the Duke to his family brings you a sense of joy.
Completing the quest: The heroes gain 4 conquest tokens for rescuing the Duke. They have completed their quest.
Chests
| Chest | Contents |
|---|---|
| Copper 1 | 1 conquest token, 200 coins, 1 Copper Treasure |
| Copper 2 | 3 conquest tokens, 1 Copper Treasure |
| Copper 3 | 2 conquest tokens, 1 Vitality Potion, 1 Copper Treasure |
| Silver 1 | 3 conquest tokens, 1 Curse, 1 Silver Treasure |
| Silver 2 | 2 Curses, 2 Silver Treasures |
| Silver 3 | 1 Curse, 1 Silver Treasure, 250 coins |
Quest 2: The Spider's Web
Treachery: 4 trap, 3 event, 3 monster
Introduction
In this quest, you must rescue an innocent victim and escape the lair of a deadly spider.
At first, it seemed like a simple rescue mission. The village elder had vanished in a part of the forest reputed to be infested with poison spiders. Confident, you set out for the place where she was last seen. Perhaps too confident, for you fell into an ambush set by the arachnids and were quickly knocked unconscious.
As you come to, you find yourself wrapped in the sticky shroud of a spider's web. You cannot see your companions anywhere, but it seems a previous prisoner has scratched a map of the area into the wall.
Quest Objectives
Your goal is to rejoin your group and rescue the elder. To do so, you will most likely have to kill the Spider Queen. If you can activate the ancient transport glyphs in this dungeon, so much the better. You start with 8 conquest tokens. If you lose all your conquest tokens, the spiders will have triumphed. Good luck.
The heroes start on different activated glyphs. They have just freed themselves from the spider web and must find their companions. They may only use glyphs that they themselves have activated until the glyph in Zone 4 has been activated.
Gratings
In this quest, many doors are actually gratings, including the door closed by the blue rune. Figures cannot pass through gratings, but gratings do not block line of sight, and figures may pass objects through them.
Descriptions of the Zones
Zone 1
These corridors are rounded by wear and low-ceilinged, forcing you to crawl on all fours. Ahead, you see a rusted iron grate blocking your way. Apparently these tunnels once belonged to a sewer network.
Zone 2
Several abnormally large spiders hang from the ceiling of this section of tunnels. They block access to a staircase leading further into darkness. One of the tunnels has collapsed and forms an impassable obstacle.
The giant spiders found here are called Purple Poisons. Their characteristics are the same as those of poison spiders, with 2 additional armor points, 4 extra wounds, and the Stun ability in place of Web.
The two rubble tokens form an impassable wall. Even a hero with the Acrobat skill cannot cross them.
Zone 3
A faint glow filters through cracks in the tunnel. In this extremely low passage, you crawl forward when, squinting, you make out a grate blocking the passage, as well as several staircases descending into darkness.
The door closed by the yellow rune is a grate. The giant spiders found here are called Purple Poisons (identical to those in Zone 2).
Zone 4
Numerous spiders infest this hall, hunting for victims. At the corner of a wall, you spot a gentle glow from a basin filled with water, and a strange lever sticking out of a nearby wall.
If a hero ends his movement on one of the 4 adjacent encounter markers: You take a long drink of water from the basin, and immediately feel the spiders' poison leave your body. Discard all Poison tokens from this hero. This basin may only be used once per hero. Any use after the first has no effect.
If a hero ends his movement on one of the two isolated encounter tokens: You pull on the lever, which refuses to budge. You have seen this kind of mechanism before: there are several levers that must be operated at the same moment to set off the mechanism.
If a hero ends his movement on one of the two isolated encounter tokens and another hero is already on the other isolated encounter token: You shout and pull the lever at the same time as your companion at the other end of the corridor. After resisting for a moment, the lever clicks down. The door blocked by the red rune swings open with a sinister creak.
Remove both isolated encounter tokens and the door blocked by the red rune that leads to Zone 5. Zone 5 is immediately revealed. Once opened, the door blocked by the red rune can no longer be closed.
Zone 5
A huge poison spider sits in the center of the room. Countless cocoons hang from the ceiling near a wide passage leading outside. With a strange screech, halfway between a human cry and a snake's hiss, the Spider Queen charges you.
The major poison spider in this room is the Spider Queen. Her characteristics are the same as those of poison spiders, but with 8 armor points, 20 wounds, and the ability Psychic Poison: any hero within 16 spaces of her (not blocked by a closed door) suffers 1 wound at the end of his turn for each Poison token he has.
If the heroes defeat the Spider Queen: Stained with her yellowish blood, the Spider Queen collapses with a terrifying cry of agony. Examining the cocoons on the wall, you find the one holding the village elder and free her before returning to the village. Well done!
Completing the quest: The heroes gain 4 conquest tokens for rescuing the elder. Their quest is complete.
Chests
| Chest | Contents |
|---|---|
| Copper 1 | 3 conquest tokens, 1 Copper Treasure |
| Copper 2 | 2 conquest tokens, 100 coins, 1 Copper Treasure |
| Copper 3 | 2 conquest tokens, 1 Healing Potion, 1 Copper Treasure |
| Silver 1 | 3 conquest tokens, 1 Curse, 1 Silver Treasure |
| Silver 2 | 2 Curses, 2 Silver Treasures |
| Silver 3 | 1 Silver Treasure, 150 coins |
Quest 3: The Adventurers of the Lost Temple
Treachery: 3 trap, 5 event, 2 monster
Introduction
In this quest, the heroes travel to an ancient temple to recover an idol of pure gold.
After studying the legends of the lost temple for long months, you finally stand before it. At its center, surrounded by a labyrinth of deadly traps, is supposed to stand an enormous idol of pure gold. During your research you obtained a map of the temple. The idol may have been stolen during a previous expedition, but there is only one way to find out…
Quest Objectives
Your goal is to enter the lost temple and recover the golden idol. After all, those tavern tabs will not settle themselves. If you can activate the ancient transport glyphs in this dungeon, so much the better.
You start with 8 conquest tokens. If you lose all your conquest tokens, the idol will have to wait for the next group of treasure hunters. Good luck.
You start the game with a copy of the "Destin funeste !" card in play, and a hand of 6 cards instead of 3.
Descriptions of the Zones
Zone 1
A group of animal-men stands in the hall before you, led by two sorcerers who are examining the north door. One of the sorcerers turns to the other and says, "It is useless, we need the Rune Key to get through." As he is about to continue, one of the animal-men, sniffing the air, turns toward you with a surprised growl. Drawing their weapons and readying their spells, the group advances toward you.
Zone 2
If the heroes have not yet seen Zone 3: A whirlwind of blades blocks the passage to the south of the room. Beyond it, you see several skeletons and statues that come to life and step down from their pedestals to turn toward you.
If the heroes have already seen Zone 3: This zone seems perfectly identical to the one you discovered to the south, including the whirlwind of blades at the entrance.
Zone 3
If the heroes have not yet seen Zone 2: A whirlwind of blades blocks the passage to the south of the room. Beyond it, you see several skeletons and statues that come to life and step down from their pedestals to turn toward you.
If the heroes have already seen Zone 2: This zone seems perfectly identical to the one you discovered to the south, including the whirlwind of blades at the entrance.
Zone 4
This stone corridor extends north and ends in a door closed by a rune. However, something in this passage makes you shiver. Something is wrong, a terrible danger…
In this zone, do not reveal what is behind the doors before they are opened. When a door is opened, reveal only the adjoining part of the corridor. Doors opened in this zone can no longer be closed.
If a hero enters a space marked with a white X and there is no boulder to the south of his position: You hear a click as you place your foot on a slab that seemed perfectly normal. With a terrible rumble, an enormous boulder falls from a hole in the ceiling and begins to roll toward you!
Place a boulder pointing north on the four red X's of the zone. Any figure present in that place is immediately killed. The boulder begins to move at the end of the next overlord turn.
Zone 5
Arriving at last at the end of this deadly corridor, you open the last door to find yourself surrounded by the tail of a naga. You fight this creature while the boulder keeps rolling in your direction. Beyond the naga, you see a line of skeleton archers protecting several animated statues. One of them seems to be made entirely of gold! This golem is surely the legendary golden idol you came to find. It seems you will have to defeat it if you want to carry it away.
The major golem is the golden idol. It has the same characteristics as a normal major golem, with 2 additional armor points, and it rolls all 5 power dice when it attacks, instead of just one.
If the heroes defeat the golden idol: Your last attack fells the idol. It collapses slowly to the ground before finally ceasing to move. Now you need only find a way to carry these hundreds of kilos of gold out of here…
Completing the quest: The heroes gain 4 conquest tokens for defeating the golden idol. Their quest is complete.
Chests
| Chest | Contents |
|---|---|
| Copper 1 | 1 Curse (and nothing else) |
| Copper 2 | 3 conquest tokens, 100 coins, 1 Copper Treasure |
| Copper 3 | 3 conquest tokens, 1 Power Potion, 1 Copper Treasure |
| Silver 1 | 3 conquest tokens, 1 Curse, 1 Silver Treasure |
| Silver 2 | 1 Curse (and nothing else) |
| Silver 3 | 2 conquest tokens, 1 Silver Treasure, 150 coins |
| Gold 1 | 1 Curse, 1 Gold Treasure |
| Gold 2 | 2 Curses, 1 Gold Treasure, 1 Healing Potion |
Quest 4: A Small Problem
Treachery: 2 trap, 6 event, 2 monster
Introduction
In this quest, the heroes must rid the land of the leader of a local tribe of kobolds, which may not be as easy as it seems.
The King has entrusted you with destroying a rather turbulent kobold tribe. It is led by a surprisingly cunning kobold named Bigg. The King warned you that although they do not look very dangerous, you must be very careful in the kobolds' lair. Three groups of his bravest knights have already gone there, and only their squires returned, half-mad with terror at the things they witnessed.
Quest Objectives
Your goal is to go into the kobolds' lair and kill Bigg. You have a map of the lair, drawn from the squires' memories, bearing the words "beware of the chests."
If you can activate the ancient transport glyphs in this dungeon, so much the better.
You start with 10 conquest tokens. If you lose all your conquest tokens, the kobolds will be able to boast of new victims. Good luck.
You start the game with a copy of the "Expert en Pièges" card in play, and a hand of 6 cards instead of 3.
Chests: every chest in this dungeon is actually a mimic. When one is opened, it behaves as if you had played a Mimic card (French: "Mimétisme"). The chest is moved to an adjacent free space and is activated. Copper chests have the same characteristics as beastmen, silver chests those of ogres, and gold chests those of giants.
As each chest is trapped, you cannot play additional Trap (chest) cards when they are opened – so you should use your treachery to swap all these cards out of your deck.
Descriptions of the Zones
Zone 1
A low, windy tunnel opens before you, at the end of which a golden gleam catches your eye. As you advance, you hear numerous strange noises, and your nostrils are assailed by the stench of kobolds.
There are two encounter markers in this zone.
The first time a hero ends his movement on an encounter marker: Roll a power die.
- On any result except a surge, read this: You hear a creak, and the stone slab blocking the north door sinks into the floor. Remove the rubble obstacle in front of the north door of this zone.
- If the result is a surge, the encounter becomes a pit containing poisoned spikes. The hero must roll a power die. On a blank result, he escapes and moves to an adjacent space of his choice. On any other result, he falls into the pit and suffers 4 Poison wounds (6 in fact, since the Expert en Pièges card is in play), which cannot be absorbed by armor.
When a hero ends his movement on the remaining encounter marker:
- If the rubble is still in front of the north door, read the "creak" text above, then remove the obstacle.
- If the obstacle has already been removed, the encounter becomes the pit trap described above.
Zone 2
Here the passage opens in three directions: whirlwinds of blades to the east and west, and an enormous stone slab blocking the north passage. You hear the whispers and growls of monsters farther along the corridors.
When a hero ends his movement on one of the encounter markers: The encounters are identical to those of Zone 1.
Zone 3
This cavern is occupied by a gigantic mechanical dragon. It moves with difficulty, in a jerky gait, and electric sparks run across its skin. Opening its steel jaws, it growls: "Grésille destroy intruders."
The major dragon of this zone is named Grésille, a mechanical dragon built by the kobolds. Its characteristics are identical to those of a major dragon, with the Bolt ability (French: "Foudre") in place of Breath, and the Stun ability (French: "Assommer") in place of Burn. In addition, you must roll a power die each time you activate Grésille. On a surge result, Grésille suffers a malfunction and can do nothing this turn. On any other result, Grésille functions normally.
There are two encounter markers in this zone.
The first time a hero ends his movement on an encounter marker: Roll a power die. On any result other than a surge, read this: While searching the dust, you find a Rune Key. Give the blue Rune Key to the hero.
- If the result is a surge, the encounter becomes a pit containing poisoned spikes. The hero must roll a power die. On a blank result, he escapes and moves to an adjacent space of his choice. On any other result, he falls into the pit and suffers 4 Poison wounds (6 in fact, since the Expert en Pièges card is in play), which cannot be absorbed by armor.
When a hero ends his movement on the remaining encounter marker:
- If the heroes have not received the blue Rune Key, he receives it as described above.
- If the heroes have received the blue Rune Key, the encounter becomes the pit with poisoned spikes described above.
Zone 4
A legion of kobolds stands before you, ready to sacrifice itself to defend its sovereign. Behind their ranks, to the north, you see the latter seated on a throne and wearing a golden crown. "Approach, heroes. Let us put an end to all this."
The major kobold of this zone is Bigg. His characteristics are identical to those of a major kobold, except that he uses several magic items that enhance his abilities. Thanks to his gauntlets, he attacks like a major ogre. Thanks to his crown, he receives 8 additional armor points and 16 additional wounds. Finally, thanks to his boots, his speed is 5, and he activates once after each hero's turn, instead of activating normally during the overlord's turn. Although these items enhance his abilities, the heroes cannot in any case recover them if they win the combat.
If the heroes defeat Bigg: Staggering slightly, Bigg sneers at you: "You won't get me so easily. Vanderung!" And he explodes into a fireball. Bigg makes one last Blast 3 attack centred on himself (French: "Explosion 3"). If this attack reduces the heroes to 0 conquest tokens, the overlord wins. Otherwise, the heroes gain 4 conquest tokens. Their quest is complete.
Chests
| Chest | Contents |
|---|---|
| Copper 1 | 2 conquest tokens, 1 Healing Potion, 1 Copper Treasure |
| Copper 2 | 2 conquest tokens, 1 Vitality Potion, 1 Copper Treasure |
| Copper 3 | 2 conquest tokens, 1 Power Potion, 1 Copper Treasure |
| Silver 1 | 2 conquest tokens, 1 Curse, 1 Silver Treasure |
| Silver 2 | 2 conquest tokens, 1 Curse, 1 Silver Treasure |
| Silver 3 | 1 conquest token, 1 Silver Treasure, 150 coins |
| Gold 1 | 2 conquest tokens, 1 Curse, 1 Gold Treasure |
| Gold 2 | 1 conquest token, 1 Healing Potion, 1 Gold Treasure |
Quest 5: The Forgotten Catacombs
Treachery: 3 trap, 3 event, 3 monster
Introduction
In this quest, the heroes must recover an ancient relic from catacombs overrun by undead abominations.
A little over a week ago, you had a strangely realistic dream. In it, a woman dressed in a robe as black as night showed you the location of ancient catacombs. Following her inside, you crossed a labyrinth of corridors before flying over a series of pits. There, the woman vanished before your eyes, leaving behind only her robe, which floated to the ground before disappearing into the darkness. On waking, you identified her garment as the Robe of Time and Space, a powerful artifact believed lost forever. Trusting the experience of your dream, you decide to set out in search of this relic.
Quest Objectives
Your goal is to enter the catacombs and recover the Robe of Time and Space. To do so, you must defeat the forces that hid the Robe in darkness. If you can activate the ancient transport glyphs in this dungeon, so much the better.
You start with 8 conquest tokens. If you lose all your conquest tokens, you fail and the relic is lost. Good luck.
Curse of the Undead
The catacombs are cursed, and whoever dies inside will rise again and haunt these halls forever. To this end, all normal skeletons and sorcerers gain a minor form of Immortel (Undying), which triggers when a blank face is rolled instead of an energy bolt.
Descriptions of the Zones
Zone 1
A bitter wind sweeps the corridor as the living dead stagger toward you, their eyes full of hatred. Behind them you see a smoking crevasse. It was once meant to lead to another place, but it has been filled in and forms nothing more than a shallow hole.
Zone 2
The lament of the dead echoes through the stones of this ancient tomb. A heavy statue has evidently shattered as it fell to the floor, and ripped coffins moulder on the ground.
Zone 3
The pestilence of rotting flesh assails your nostrils as soon as you open the door to this room. Shards of bone lie scattered about, and twisted silhouettes growl at you from the darkness.
Zone 4
A faint red glow filters through the floor, as if the fires of hell were burning beneath your feet. Muffled screams rise from far below the surface, testing your nerves to the limit.
If a hero picks up the Rune Key, and the group possesses both the blue and the yellow Rune Keys: When you take the Rune Key, a shiver runs through your arm as a spell dissipates. Far off, you hear a grinding of stones. Place a red stair token on the red X in Zone 1.
Zone 5
A blasphemous text is scrawled on the wall in letters of blood. It is surely dark magic that keeps the red, damp letters so fresh, although they must have been traced an eternity ago.
If a hero picks up the Rune Key, and the group possesses both the blue and the yellow Rune Keys: When you take the Rune Key, a shiver runs through your arm as a spell dissipates. Far off, you hear a grinding of stones. Place a red stair token on the red X in Zone 1.
Zone 6
You recognize this antechamber: it is the entrance to the room where you saw the Robe of Time and Space in your dream. Unfortunately, blocking the passage is a monstrosity you could never have imagined in your worst nightmares: a heap of grinning, howling skeletons, fused one to another in a hideous wall of bones. At the sound of your approach, the horror draws a dozen bows and nocks as many arrows…
Regardless, you will have to get past it to recover the Robe.
The skeletons of this zone form a single entity: the Wall of Bones. The skeletons must remain adjacent when they move, and all normal skeletons gain the improved form of Immortel (Undying), which triggers when a surge is rolled rather than an energy bolt. Each skeleton killed is returned to play in the space where it was killed at the start of the overlord's next turn. Finally, all skeletons of the Wall of Bones attack as major skeletons, but with 5 power dice instead of one.
If a hero brings the Robe of Time and Space to town: The Wall of Bones howls and writhes, its jaws snapping near you as you reach the transport glyph, taking the Robe forever out of its reach. Beaming with joy and relief in the sun that bathes you with its gentle warmth, you carry the relic to the castle, where the King will know how to put it to good use.
Completing the quest: The heroes gain 4 conquest tokens for recovering the Robe. Their quest is complete.
Chests
| Chest | Contents |
|---|---|
| Copper 1 | 3 conquest tokens, 1 Healing Potion, 1 Copper Treasure |
| Copper 2 | 3 conquest tokens, 100 coins, 1 Copper Treasure |
| Copper 3 | 3 conquest tokens, 1 Power Potion, 1 Copper Treasure |
| Silver 1 | 3 conquest tokens, 1 Curse, 1 Silver Treasure |
| Silver 2 | 3 conquest tokens, 1 Curse, 1 Silver Treasure |
| Silver 3 | 2 conquest tokens, 1 Silver Treasure, 150 coins |
Quest 6: Scorching Heat
Treachery: 4 trap, 3 event, 2 monster
Introduction
In this quest, the heroes must explore an active volcano to find a way to keep it from erupting.
Last week, you had barely left a tavern when a small, bald farmer planted himself in front of you. "Please, brave adventurers, I need your help. My village is built at the foot of a volcano that is active, which we sealed a very long time ago so that it would not erupt. Today, despite our efforts, everything indicates that it will erupt within the week. We need someone who can climb to its summit and reseal it before it destroys the village!"
Quest Objectives
Your goal is to enter the volcano, discover why it is about to erupt, and prevent it. You will have to defeat everything that tries to stop you in your mission. If you can activate the ancient transport glyphs in this dungeon, so much the better.
You start with 8 conquest tokens. If you lose all your conquest tokens, you fail and the volcano erupts. Good luck.
Descriptions of the Zones
Zone 1
You enter the volcano through a crack in its wall. You encounter a group of animal-men patrolling this zone with hellhounds held on leashes. To the south, a tunnel leads deeper into the volcano.
Zone 2
A maze of narrow passages has been carved inside the volcano. A thin ledge winds around them, passing along the outside flank of the mountain. Unfortunately, the ledge is so fragile that only the most agile heroes can use it.
Only heroes with a speed of 5 or more may use the staircase (French: "escalier"), at a cost of 3 movement points.
Zone 3
Watching cautiously from the top of this corridor, you discover a dragon surrounded by hellhounds, lounging near a lava pool. You wonder what such a powerful creature can be doing here, and what its connection might be to the imminent eruption.
Zone 4
The heat inside this room is unbearable. A hiss warns you of a dragon, which slowly emerges from a lava pool near you. Behind the monster, you see a rune key on a ledge.
Zone 5
You sweat profusely as you approach a deep crevasse. Behind it, a dragon roars at you, daring you to come and fetch the rune key that its enormous bulk protects.
Zone 6
A deep voice rumbles at the end of this passage. In the faint red glow of the volcano's heat, you see a dragon giving orders to two animal-men: "Guard the object with your lives. As long as it is in our possession, the mountain's fire can be revived. Humans must under no circumstances recover it."
If a hero ends his movement on the encounter token: You unwrap the object from the furs in which the animal-men had wrapped it. On discovering the sword, you are astonished to feel the temperature drop to a much more bearable level. This sword must be Dent de Glace, which holds the powers of ice and cold. It is surely the one the villagers used to seal the volcano.
Give Dent de Glace to the hero and remove the encounter token.
Zone 7
A roar of rage is the only warning you receive before a huge dragon charges you.
Zone 8
Read this description after the heroes open the third rune-locked door: After opening the third door blocked by a rune, you advance cautiously to the south when you are surprised by a cavernous voice: "I will not let you silence the mountain of fire. It spoke to me in a dream. It asked me to free it from the arrogant humans who have chained its anger and keep it from singing its song freely. Face Longcrocs if you dare, but you will not defeat it today."
Longcrocs has the same characteristics as a major dragon, but with 3 additional armor points and 8 additional wounds. It automatically recovers 5 wounds each time it is activated.
If the heroes kill Longcrocs: Howling in pain under your final blow, Longcrocs at last seems to stop moving.
If the heroes do not possess Dent de Glace when they defeat Longcrocs: Unfortunately, your quest is not complete. You must find a way to seal the volcano and bring it here.
If Longcrocs has been killed and the heroes possess Dent de Glace: You approach the centre of the room and plant Dent de Glace in the ground, piercing the volcanic rock with ease. The earth trembles for a moment as roots of ice seem to grow from the blade and creep into the ground, then all falls still. The volcano is sealed once more.
Completing the quest: The heroes gain 4 conquest tokens for saving the village. Their quest is complete.
Chests
| Chest | Contents |
|---|---|
| Copper 1 | 3 conquest tokens, 1 Vitality Potion, 1 Copper Treasure |
| Copper 2 | 2 conquest tokens, 150 coins, 1 Copper Treasure |
| Copper 3 | 3 conquest tokens, 1 Power Potion, 1 Copper Treasure |
| Silver 1 | 3 conquest tokens, 1 Curse, 1 Silver Treasure |
| Silver 2 | 3 conquest tokens, 1 Curse, 1 Silver Treasure |
| Silver 3 | 2 conquest tokens, 1 Silver Treasure, 150 coins |
| Gold 1 | 1 Curse, 1 Gold Treasure |
| Gold 2 | 2 Curses, 1 Gold Treasure, 1 Healing Potion |
Quest 7: Rivers of Blood
Treachery: 3 trap, 2 event, 4 monster
Introduction
In this quest, the heroes must face the half-flooded tunnels of a clan of bloodthirsty ferrox.
Reining in his mount, your guide indicates with a nod of the head the moss-covered entrance to a cavern. "This is the beast's lair. It is well guarded, by ferrox and other creatures of the marshes. I have already given you the map our scouts managed to sketch, so from here on you must manage on your own. But I will gladly watch your horses while you are inside." Once again, the village elder thanks you for accepting this mission and assures you that the rewards will not be lacking.
Lowering your head to avoid the sticky moss hanging in the opening, you step into the darkness.
Quest Objectives
You have agreed to destroy a creature that terrorises the surrounding villages with its ferrox henchmen. Your goal is to go into the ferrox lair and kill the monster that creates these abominations. If you can activate the ancient transport glyphs in this dungeon, so much the better.
You start with 6 conquest tokens. If you lose all your conquest tokens, you fail and the creatures will have won. Good luck.
The Bloody Mist
The caverns are bathed in a mist that liquefies blood and prevents it from being cauterized. Thus, each time a hero rolls a failure as the result of a white die for the effect of a bleed token, he must re-roll the die. If it is again a failure, he keeps that result.
Descriptions of the Zones
Zone 1
You hear only the gentle trickling of water as you advance cautiously through this area. Still, you feel watched from the shadows.
Zone 2
A narrow tunnel leads north before turning 90°. Fine stalactites hang from the ceiling, and you must avoid them so as not to break them. North of the passage you see large boulders piled up.
If a hero ends his movement on one of the two encounter markers: Noticing a trickle of water flowing from the rocks, you shake the pile a little. Immediately the trickle becomes a powerful jet, sweeping the rocks away in a veritable torrent.
Remove the water obstacle from Zone 3. If Zone 3 has not yet been revealed, do not place the water obstacle when this zone is revealed. Remove the encounter tokens from the board.
If a hero uses the staircase: A windy passage carries you deeper into the caverns.
Zone 3
If the boulders of Zone 2 have not yet been moved: This flooded passage sinks westward into icy water, probably filled with all kinds of horrors. If you want to continue in this direction, you will first have to do something about all this water. The passage to the west is completely flooded. Even a hero with the Acrobat skill cannot move through this obstacle.
If the boulders of Zone 2 have been moved: This damp passage sinks westward, and you notice water marks on the walls, which were once submerged. Now the way is clear; it seems that moving the rocks drained the water from the passage.
Zone 4
The rocks are covered with mould, making your progress difficult. Many creatures living in this place crawl and slide toward you as soon as you open the door.
If a hero uses the staircase: A windy passage leads you higher into the cavern network.
Zone 5
Evidently, this area was flooded until very recently. Algae covers every surface of the room, and you hear the roar of an underground river far beneath your feet.
The pits in this zone are particularly slippery. You need 3 movement points to climb out of them (instead of 2).
Zone 6
This maze of caverns houses a gigantic skeletal dragon, which dominates the river to the south. "Mortals invade my domain and take my beloved water? Larvebois will feed them to the worms!"
The pits in this zone are particularly slippery. You need 3 movement points to climb out of them (instead of 2).
Larvebois has the same characteristics as a major dragon, with 2 additional armor points and 4 additional wounds, the Bolt ability in place of Breath, and the Bleed ability in place of Burn. In addition, Larvebois has an enhanced version of the Immortel (Undying) ability, which triggers on a surge roll rather than on an energy bolt roll.
If the heroes defeat Larvebois: The dragon lets out a final infernal hiss as you sever its head from its shoulders, and it says: "You win today, but Larvebois knows the secrets of death… and Larvebois will find its way back, oh yes… and one night, when you sleep warm and safe, Larvebois will come for you…" Before the creature can say anything more, you smash its skull, finally silencing it.
Completing the quest: The heroes gain 4 conquest tokens for defeating Larvebois. Their quest is complete.
Chests
| Chest | Contents |
|---|---|
| Copper 1 | 3 conquest tokens, 1 Healing Potion, 1 Copper Treasure |
| Copper 2 | 2 conquest tokens, 150 coins, 1 Copper Treasure |
| Copper 3 | 2 conquest tokens, 1 Healing Potion, 1 Copper Treasure |
| Silver 1 | 3 conquest tokens, 1 Curse, 1 Silver Treasure |
| Silver 2 | 2 conquest tokens, 1 Curse, 1 Silver Treasure |
| Silver 3 | 2 conquest tokens, 1 Silver Treasure, 150 coins |
Quest 8: Deadly Spiral
Treachery: 2 trap, 2 event, 2 monster
Introduction
In this quest, the heroes must make their way to the heart of the earth and avoid the boulders that crash down upon them, in order to fight an unusual enemy.
You stare at the staircase of basalt carved from the living rock. You are there. It can only be the legendary Deadly Spiral. It is said that a powerful enemy dwells at the centre of this place, sending its dark henchmen to ravage the land. Many have tried to defeat it, but none have returned. Perhaps you will be the first.
Quest Objectives
Your goal is to reach the centre of the Deadly Spiral and kill the creature that awaits you there. If you can activate the ancient transport glyphs in this dungeon, so much the better. You start with 10 conquest tokens. If you lose all your conquest tokens, you fail and the creature will have won. Good luck.
Rolling Stones
On the turn the heroes reveal Zone 1, stones will begin to tumble down the Deadly Spiral. A boulder falls into the appropriate zone (the first is marked by four red X's, north of the first door), oriented to the south, and begins to roll at the start of the overlord's turn, as described on page 5. However, because of the steep slope of the Spiral, the boulders move much faster (roll 1 red die and 2 yellow dice for their movement).
Once the first boulder has fallen, a new one will fall into the starting zone every 3 turns until there are 4 boulders on the board at the same time. After that, each time a boulder falls into a pit, it is immediately moved to the current starting zone to perpetuate the cycle. Boulders that enter a zone that has not yet been revealed are removed from the board and returned to the "queue."
The monsters of the Spiral know how to take shelter when the boulders roll down, and they take no damage when they enter a pit if they move into it of their own accord (if it is because of a Violent Blow (French: "Coup Violent"), for example, they suffer damage normally). In addition, flying monsters can pass over boulders and can never be crushed. If a hero gains Flight, he no longer suffers the inconveniences of the boulders.
Treasures over which the boulders pass, whether chests, potions, gold coins, and so on, are removed from the board permanently.
Revealing Zones
Unlike most quests, the zones of the Deadly Spiral are not separated by doors. Instead, each zone is revealed when a hero passes a corner: as soon as a hero has line of sight to a space in the next zone, that zone is fully revealed.
Descriptions of the Zones
Zone 1
A titanic crash shakes you as a boulder falls from the ceiling to the north. The steeply sloping passage to the west carries the round stone, which seems to gain speed quickly.
Zone 2
The slope steepens again as the passage turns north. Further on, you see a wide pit in the floor.
If a hero enters a space containing an encounter token: As you approach the pit dangerously, it disappears in a flash of magic. Remove the rock ramp to the south of this passage, and the encounter tokens. The new starting zone for boulders becomes the 4 southernmost spaces of this section. The boulders appear oriented to the north.
Zone 3
The passage turns east, sloping ever more steeply. Slippery mud covers the floor, and a menacing pit blocks the corridor further on.
If a hero enters a space containing an encounter token: As you approach the pit dangerously, it disappears with a flash of magic. Remove the rock ramp to the west of this passage, and the encounter tokens. The new starting zone for boulders becomes the 4 westernmost spaces of this section. The boulders appear oriented to the east.
Zone 4
The corridor turns south and levels off slightly. A small passage branches from the main corridor to the east, and you see a wide pit further on to the south.
If a hero enters a space containing an encounter token: The pit disappears in a flash of magic. Remove the rock ramp to the north of this passage, and the encounter tokens. The new starting zone for boulders becomes the 4 northernmost spaces of this section. The boulders appear oriented to the south.
Zone 5
The corridor turns west and slopes a little more.
Zone 6
The passage that turns north is so steep that you can barely keep your feet.
Zone 7
The passage finally flattens out. Ahead of you, you see a wide pit that precedes an equally enormous steel door.
Do not reveal Zone 8 until the door has been opened.
Zone 8
Once this zone is revealed, remove the boulders from play and do not put any back.
This room is covered with runes and seals. The walls do not rise very high, but open onto a firmament of stars and planets. Before you stands a golden dragon with a sinuous body and pupil-less eyes.
"Ah! Someone has finally passed the first stage of my challenge. I congratulate you, heroes. My name is Fortune. If you manage to defeat me and my companions in arms, you will then be ready to face the trials that await you."
Fortune has the same characteristics as a major dragon, with 2 additional armor points and 4 additional wounds, and the Stun ability in place of Burn. In addition, Fortune is always considered to have the French-named ability "Attaque Ajustée" (the English name is not given in the English text available) and the Dodge order (Esquive).
If the heroes defeat all the monsters in this room: As you deliver the final blow, time seems to slow, stop, and then flow back until Fortune appears before you without any injury.
"Well played, heroes. I see that you are ready to face the horrors of the Well of Darkness. Take this pearl, and when you have rested, blow on it. It will take you to the Well, and I will explain what task awaits you."
Completing the quest: The heroes gain 4 conquest tokens for defeating Fortune. Their quest is complete.
Chests
| Chest | Contents |
|---|---|
| Copper 1 | 2 conquest tokens, 1 Vitality Potion, 1 Copper Treasure |
| Copper 2 | 2 conquest tokens, 150 coins, 1 Copper Treasure |
| Copper 3 | 2 conquest tokens, 1 Power Potion, 1 Copper Treasure |
| Silver 1 | 3 conquest tokens, 1 Curse, 1 Silver Treasure |
| Silver 2 | 3 conquest tokens, 1 Curse, 1 Silver Treasure |
| Silver 3 | 3 conquest tokens, 1 Silver Treasure, 150 coins |
| Gold 1 | 2 Curses, 1 Gold Treasure |
| Gold 2 | 2 Curses, 1 Gold Treasure |
Quest 9: The Well of Darkness
Treachery: 6 trap, 6 event, 6 monster
Note: do not play this quest with fewer than 3 heroes.
Introduction
In this quest, the heroes must use the relics given to them by Fortune to seal the fearsome Well of Darkness permanently.
If the heroes completed Quest 8: Having healed and restocked since your last quest, you decide it is time to use Fortune's pearl. You gather together and, lifting its casket to your mouths, gently blow upon it. The pearl begins to shine, and Fortune appears in a flash of light.
If the heroes did not complete Quest 8: As you cross the plains toward the town, the air around you fills with golden light, and a gigantic golden dragon with pupil-less eyes appears before you. "Have no fear. My name is Fortune, and I have chosen you to be the Champions of Light in the battle to come."
In both cases: With a sweep of its claw, Fortune conjures an image of the world, over which a black veil is advancing. It indicates the centre of this stain. "A terrible evil threatens our world. The seals that closed the Well of Darkness are beginning to come undone, and soon they will shatter, leaving the evil contained within the Well to spread its tide of death and despair across the world."
With another sweep of its claw, it materialises four objects before you. "Take these relics and make good use of them to prevent the Well from opening."
It points to the first object, a shield: "The Shield of the Dark God will block any blow or spell directed against you."
"The next object is a staff: The Staff of Light will soothe your wounds with its healing glow and bring death to your enemies."
"Then there is a bow: Infallible shoots as far as the eye can see, and strikes its target at its weakest point."
"Finally, the last object is a set of dice: Luck will always smile on the one who carries my dice."
Give these four objects to the heroes. They may divide them among themselves as they see fit.
"Now hurry, go and close the Well before it is too late!" Fortune wraps you in its golden breath. When the veil dissipates, you find yourselves surrounded by a horde of monsters.
Quest Objectives
Your goal is to find the Well of Darkness and prevent its opening. If you can activate the ancient transport glyphs in this dungeon, so much the better.
You start with 15 conquest tokens. If you lose all your conquest tokens, the world will be plunged into darkness for a millennium. Good luck.
You start with 6 cards in hand instead of 3. The heroes have 500 coins instead of 300 to buy their starting equipment.
The Ritual
Zone 5 is revealed when the game begins. At the start of each overlord turn, one of the two beastmen in Zone 5 pushes one of the two encounter tokens to the west. When they have both pushed their tokens all the way, that is after 14 turns, read the following:
"With the howl of a million souls, the Well of Darkness begins to open. You have little time left to act."
If both beastmen are still alive at the end of your next turn (the 15th), read this: The two heralds fulfil the last condition for the opening of the Well, sacrificing their lives by throwing themselves into the gaping opening. In an explosion of energy, the Well of Darkness opens completely, and shadows and specters pour out, shrieking. As you feel life drain from your body, you realize that you have failed, and that the world will pay the price.
The heroes have lost.
If the heroes kill one of the two beastmen before the end of the ritual: With a horrified squeal, the beastman collapses to the ground. Without its help to channel the energy of the ritual needed to open the Well, the second herald is immediately overwhelmed and destroyed. For an instant, the opening of the Well of Darkness tries to draw you into its depths. Using all your willpower, you and your companions resist this evil influence and drive back the Well's power. With a death-rattle, the Well closes once more.
You have barely begun to savour your victory when a golden light carries you away and sets you down before Fortune. "This was perfectly executed, my dear heroes. I had suspected that choosing your group to close the Well would be a wise decision. The world owes you an eternal debt of gratitude."
"Now hurry, go and close the Well before it is too late!" (see the Introduction above).
Completing the quest: The heroes gain 8 conquest tokens for sealing the Well of Darkness. Their quest is complete.
Chests
| Chest | Contents |
|---|---|
| Gold 1 | 5 Curses, 2 Gold Treasures |
| Gold 2 | 5 Curses, 2 Gold Treasures |
Descriptions of the Zones
Zone 1
This cold, damp passage is decorated with thousands of swords, axes, and other weapons hanging on the walls. When you enter, they come to life and begin to attack you.
The Weapons: Animated weapons attack with 1 red die and 2 green dice each time a hero moves one space in this zone. The weapons do not attack the hero carrying Fortune's dice.
If a hero holds Fortune's dice: As the menacing weapons head toward you, Fortune's dice begin to shine, and all the weapons that approach you collide clumsily before falling to the ground.
The giant of this zone is named Crécelle. It has the same characteristics as a major giant, with 8 additional wounds.
Zone 2
Filaments of luminous magic fill the room beyond the door, like grotesque serpents hanging in the air. The energy escaping from them makes the hair on the back of your neck stand on end.
The Energy Filaments: The energy filaments inflict 1 Stun token, 1 bleed token, 1 poison token, and 1 burn token on each hero who moves one space in this zone. The filaments do not attack the hero who holds the Staff of Light.
If a hero holds the Staff of Light: A filament approaches the Staff of Light, and the staff begins to shine before absorbing it completely, as if it had devoured it.
The demon of this zone is named Wrack. It has the same characteristics as a major demon, with 8 additional wounds.
Zone 3
This place seems particularly unwholesome. Every instinct urges you to flee while there is still time. Suddenly, a giant appears at the corner of the corridor. It flees, screaming in terror. Before it can take another step, its body is struck by a black bolt. Whimpering in anguish, the giant disappears as if it had never existed.
The dragon of this zone is named Mort. Mort attacks twice per turn: once like a normal major dragon, and once with its Rayon Mortel (Deadly Ray). The Rayon Mortel is a special attack with the Bolt ability. Every figure touched by the bolt template is automatically hit (no dice roll is made) and receives 666 points of damage. The only thing that can allow a hero to survive this attack is the Shield of the Dark God (Bouclier du Dieu Sombre). Mort's characteristics are identical to those of a major dragon with 8 additional wounds. It can never suffer more than 5 wounds from a single attack.
Zone 4
Read this only after the heroes have opened the red door: Apart from a staircase leading into the unknown, this zone is completely empty.
Zone 5
Read what follows when the heroes enter this zone for the first time, not when they discover it at the start of the game: A pool of boiling lava stands between you and the Well of Darkness. Nevertheless, two beastmen have managed to pass this obstacle and stand near the Well, performing a strange ritual. You realize that they are trying to open the Well to spread evil across the world.
The overlord cannot generate monsters in Zone 5. The lava in this zone is particularly deadly, and inflicts 4 wounds and 4 burn tokens on each hero who enters a lava space. Since this can kill even the sturdiest hero, the heroes should consider using Infallible (Infaillible) to kill one of the two beastmen (see The Ritual, at the start of this quest).
Special Abilities Summary
Special abilities marked with a symbol in the printed booklet (an icon not reproduced here) are new to this expansion. In all cases, X is equal to the rank of the special ability.
- Aura: Enemy figures that move into a space occupied by or adjacent to a figure with Aura suffer 1 wound that cannot be reduced by armor.
- Blast: Blast attacks affect every space within X spaces of the target (only spaces with line of sight to the target are affected).*
- Bleed: Bleed attacks that inflict at least 1 damage† on the target cause a bleed token to be placed on the target. Victim must roll a white die for each bleed token on next turn: Victim suffers wounds equal to total result,** then discards all bleed tokens.
- Bolt: Bolt attacks use the Bolt template to determine which spaces they affect.*
- Breath: Breath attacks use the Breath template to determine which spaces they affect.*
- Burn: Burn attacks that inflict at least 1 damage† on the target cause a burn token to be placed on the target. Victim must roll a power die for each burn token next turn: Discard a burn token for each surge symbol, then victim suffers a wound for each remaining burn token.**
- Command: A figure with Command adds 1 to the damage of all range attacks made by friendly figures within 3 spaces.
- Daze: Daze attacks that inflict at least 1 damage† on the target cause a daze token to be placed on the target. Victim must roll a power die for each daze token next turn: Discard a daze token for each surge symbol, then victim rolls 1 fewer die for each daze token that remains when making attacks.
- Fear: When an attack affects a space containing a figure with Fear, the attacker must spend X power surges or else the attack misses.
Footnotes to the summary:
- * If more than one figure dodges the attack, only 1 re-roll may be made (first dodging player to the attacking player's left decides who re-rolls).
- ** Damage dealt ignores armor.
- † Determine whether damage is inflicted before applying the effects of armor.
Overlord Player's Turn
- Play up to 1 Power card
- Draw 2 cards and discard down to 8
- Collect 1 threat for each hero and each discarded card. Any time: Discard additional cards to gain threat.
- Play up to 1 Spawn card
- Activate monsters (each moves and attacks once)
Hero Player's Turn
- Refresh Cards
- Equip Items
- Take an Action:
- Run (twice base movement points)
- Battle (2 attacks)
- Advance (base movement points and 1 attack)
- Ready (either move or attack, and place an order)
Equipment Restrictions
- Items whose total number of hand icons is 2 or less
- 1 armor
- 3 potions
- 2 other
- 3 items in pack
- Any amount of money
Orders
- Aim (may re-roll attack dice)
- Dodge (force attacker to re-roll attack dice)
- Guard (may make an interrupt attack)
- Rest (restore Fatigue to max. at start of next turn)
Movement Costs
| Cost | Action |
|---|---|
| 0 | Pick up a token in your space |
| 0 | Drop an item (it is lost forever) |
| 1 | Move between a glyph and town |
| 1 | Walk up or down a staircase |
| 1 | Give an item to an adjacent hero |
| 1 | Drink a potion |
| 2 | Open or close a door |
| 2 | Open chest |
| 2 | Re-Equip |
| 2 | Climb out of pit |
| 3 | Shop in town |
| 3 | Jump over pit |
Shopping in Town
| Item | Cost (gold) |
|---|---|
| Potion | 50 |
| Copper Treasure | 250 |
| Silver Treasure | 500 |
| Gold Treasure | 750 |
| Training Token | 500 |
| New Skill Card | 1,000 |