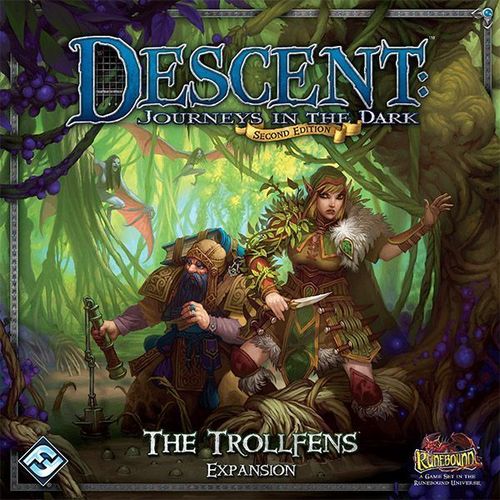
Descent: Journeys in the Dark (Second Edition) – The Trollfens
Descent: Journeys in the Dark (Second Edition) – The Trollfens Rulebook
Table of Contents
Table of Contents
- Component Overview
- Component List
- Plastic Figures
- Green Power Die
- Hero Sheets
- Class Cards
- Shop Item Cards
- Condition Cards
- Search Card
- Relic Cards
- Overlord Cards
- Monster Cards
- Lieutenant Cards
- Travel Event Cards
- Secret Room Cards
- Rumor Cards
- Advanced Quest Cards
- Map Tiles
- Secret Room Tile
- Lieutenant Token
- Class Tokens
- Secret Room Entrance Token
- Condition Tokens
- Challenge Tokens
- The Trollfens Expansion Icon
- Using This Expansion
- The Trollfens Expansion Rules
- Mini Campaign Rules
- Quest Guide
Component Overview
This section describes the various components in detail.
Component List
This expansion includes the following:
- This Rulebook/Quest Guide
- 2 Hero Figures
- 7 Monster Figures, consisting of:
- 4 Harpies; 3 tan and 1 red
- 3 Plague Worms; 2 tan and 1 red
- 1 Custom Six-sided Green Power Die
- 2 Hero Sheets
- 43 Small Cards, consisting of:
- 22 Class Cards
- 8 Act I Shop Item Cards
- 5 Act II Shop Item Cards
- 4 Condition Cards
- 1 Search Card
- 3 Relic Cards
- 33 Bridge-sized Cards, consisting of:
- 10 Overlord Cards
- 4 Monster Cards
- 2 Lieutenant Cards
- 3 Travel Event Cards
- 6 Secret Room Cards
- 6 Rumor Cards
- 2 Advanced Quest Cards
- 48 Tokens, consisting of:
- 9 Map Tiles
- 1 Secret Room Tile
- 1 Lieutenant Token
- 1 Insight Token
Plastic Figures
The heroes and monsters included in this expansion are represented on the map by plastic figures.
Green Power Die
This expansion adds a new type of die: the green power die. This die follows the same rules as the yellow and red power dice.
Hero Sheets
The heroes in this expansion each have a corresponding Hero sheet containing all the information needed to play that hero.
Class Cards
These cards are divided into two separate decks that represent the two different hero classes included in this expansion: the Prophet and the Stalker. Each deck contains all the skills and starting equipment belonging to that class.
Shop Item Cards
These cards are added to the existing shop decks and represent items heroes can find or purchase in the game. They are divided into Act I items and Act II items.
Condition Cards
These cards describe the rules for the new Weakened condition.
Search Card
This card represents a secret room entrance that heroes can find during their adventures.
Relic Cards
These cards represent unique and powerful items that can be found during a campaign.
Overlord Cards
These Overlord cards represent a new class available to the overlord player during a campaign: the Infector. Additionally, three cards are included that may only be acquired as rewards for winning specific quests.
Monster Cards
The monsters in this expansion each have a corresponding Act I and Act II Monster card containing all the information pertaining to the monster.
Lieutenant Cards
These cards list all the information about a powerful new enemy, Bol'Goreth. There is one card each for the Act I and Act II versions of Bol'Goreth.
Travel Event Cards
These cards are used to determine if an event occurs for the heroes while traveling during a campaign.
Secret Room Cards
These cards represent random secret rooms that heroes can find and explore during a quest. The special rules and rewards found within each secret room are described on these cards.
Rumor Cards
These cards present the overlord player with new ways to challenge the heroes during a campaign. Some of these cards correspond to a quest from the Quest Guide that may be played in between quests.
Advanced Quest Cards
These cards are used to display quests that are available for players to choose during a campaign. These cards enter play as a reward for winning certain quests, and remain in the central play area until completed.
Map Tiles
These puzzle-cut tiles represent different locations heroes explore during the game. Each quest has a unique layout that uses different combinations of map tiles. All map tiles are double-sided, with one side showing an indoor location and the other side showing an outdoor location.
Secret Room Tile
This unique map tile represents a hidden room that can be found in any quest. This tile is differentiated from normal map tiles by its lack of puzzle-cut edges.
Lieutenant Token
This token represents a lieutenant on the map. In the case of this expansion, Bol'Goreth. The art on the token matches the art on the corresponding Lieutenant card.
Class Tokens
These tokens are used with the new classes introduced in this expansion, and consist of trap tokens for the Stalker and an insight token for the Prophet. Also included are infection tokens used with the new Overlord class: the Infector.
Secret Room Entrance Token
This token represents a hidden passageway that leads to a secret room. When the appropriate Search card is drawn, players place this token on the map to mark where heroes can access the secret room.
Condition Tokens
These tokens correspond to the Weakened Condition card and are used to mark when a monster is affected by Weakened.
Challenge Tokens
These tokens are used with secret rooms and represent various attribute tests and monsters that heroes must overcome to receive their reward.
The Trollfens Expansion Icon
All the cards and sheets found in this expansion are marked with The Trollfens expansion icon to distinguish these components from those found in the base game.
Using This Expansion
This section describes how to incorporate The Trollfens components into the Descent: Journeys in the Dark Second Edition base game.
Before starting a game, all players must agree upon which expansions to include. When including this expansion, players use all of The Trollfens components unless instructed otherwise. This means that, when using The Trollfens expansion, players have access to the new heroes, classes, items, travel events, monsters and Overlord cards. Simply mix all components found in this expansion with their corresponding components found in the base game (see "Expansion Setup" on page 4). The new The Trollfens Lieutenant and Relic cards are used only when specified in a quest included in this expansion.
When using multiple expansions, simply mix together the respective components. For example, players should mix together the Shop Item cards from this expansion with the Shop Item cards from the base game as well as the Shop Item cards from all other expansions being used.
The Trollfens expansion includes new quests that can be added to a campaign, such as "The Shadow Rune" campaign found in the Descent: Journeys in the Dark Second Edition base game. Before starting a campaign, players must agree upon a single campaign to play, as well as which expansions to include. All components from the chosen expansion are available for the duration of this campaign.
The quests in this expansion can also be played as a mini campagin (see "Mini Campaign Rules" on page 9). In addition, each quest can be played as a single, stand alone quest following the basic game or Epic Play rules (see "Playing Basic And Epic Play Games" on page 10).
Note: When playing with multiple expansions that include rumors and secret rooms, players should combine all Rumor cards, Secret Room cards, and challenge tokens into their corresponding supplies. There should be one deck of Rumor cards, one deck Secret Room cards, and one supply of challenge tokens.
The Insight Token
The Prophet class has several skills that interact with the insight token. This token does not have an inherent function, and is used specifically with the Prophet class. When a player chooses the Prophet class during Hero Setup, he places the insight token in his play area.
There is only one insight token. During a game, it is either in the Prophet player's play area or on a player's Hero sheet. Each time a player is instructed to gain the insight token, he takes the insight token from its current location and places it on his Hero sheet. Only one player can have the insight token on his Hero sheet at a time. Each time the insight token is discarded (normally to trigger an effect from one of the Prophet's skills), it is removed from its current location on the Hero sheet and placed in the Prophet player's play area. The insight token remains on a Hero sheet between encounters, but not between quests.
Trap Tokens
The Stalker class has several skills that interact with trap tokens. These tokens do not have an inherent function and are used specifically with the Stalker class. When a player chooses the Stalker class during Hero Setup, he places the trap tokens in a supply in his play area.
Each time the Stalker uses an ability that places one trap token, he takes one trap token from the supply and places it on the map as instructed. Trap tokens do not block movement or line of sight, and only one trap token may occupy any one space. Trap tokens are limited by the amount in the supply.
Overlord Cards (Infector)
There are seven new Overlord cards belonging to the Infector Overlord class. In addition, some Overlord cards do not have an experience cost and contain a label that reads, "Quest Reward." Overlord cards with this label are only available as rewards for specific quests. When the overlord receives one of these cards, he can use it in his Overlord deck as though it was an Overlord card he purchased using experience points.
Infection Tokens
The Infector Overlord class functions similarly to the Overlord classes from the base game but has several skills that interact with infection tokens. These tokens are specifically used with the Infector Overlord class. During the Spend Experience Points step of the Campaign phase, if the overlord includes an Overlord card from the Infector Overlord class in his deck, he places the infection tokens in a supply near his play area.
Each time a hero is infected by an effect from an Infector Overlord card, he takes an infection token and places it on his Hero sheet. A hero with at least one infection token on his Hero sheet is an infected hero. The number of infection tokens a hero may have on his hero sheet is only limited by the supply. Infection tokens remain on a Hero sheet between encounters, but not between quests.
Many of these new Overlord cards remain in play between rounds and are not discarded until the end of the quest. When the overlord plays an Overlord card that remains in play, he keeps the card faceup in his play area as a reminder.
Expansion Setup
Before playing with this expansion, carefully punch out all tokens and map tiles from the cardboard frames. Then, perform the following steps:
- Incorporate New Cards: Add all Shop Item and Travel Event cards from this expansion to their respective decks. Remove the "Nothing" card from the Search deck and replace it with the "Secret Passage" Search card before shuffling the Search deck. Be sure there is only one copy of the "Secret Passage" Search card in the Search deck (if playing with other expansions). Then, shuffle the Secret Room cards and place them facedown near the Search deck. Take the new Class, Condition, Relic, Overlord, Monster, and Lieutenant cards and add them to the pool of available cards. These cards function like their counterparts found in the base game.
- Prepare Advanced Quest and Rumor Cards: Keep the Advanced Quest cards in the game box until called for. Shuffle the Rumor cards and place them facedown near the Overlord deck. When starting a new campaign, the overlord player draws three Rumor cards from this deck (see "Rumors" on page 7).
- Incorporate Other Components: Add the green power die, Hero sheets, hero and monster figures, all tokens, and map tiles from this expansion to their respective supplies.
Note: Players should begin a new campaign before incorporating the components and rules from The Trollfens into their game for the first time.
The Trollfens Expansion Rules
This section describes how to incorporate the rules and components from this expansion into Descent: Journeys in the Dark Second Edition. After setting up the expansion components (see "Expansion Setup" above), refer to this section for rules on how to use those components in the game.
When playing with The Trollfens expansion, players are required to use all of the new components described in this section. This rulebook provides information for players using this expansion as part of a campaign. These rules are compatible with "The Shadow Rune" campaign found in the base game, as well as campaigns released in other expansions. This rulebook also contains information regarding how to play The Trollfens as a mini campaign (see "Mini Campaign Rules" on page 9).
Quests
This expansion includes five quests, which are found in the Quest Guide at the back of this rulebook. Each of these quests has one Encounter, and they are incorporated into campaigns through the use of Rumor and Advanced Quest cards (see "Rumors" on page 7). These quests may also be played as a mini campaign (see "Mini Campaign Rules" on page 9).
New Hero Classes
This expansion includes two hero classes not found in the base game: the Prophet and the Stalker. These classes belong to the Healer and Scout archetypes, respectively. Hero players may choose these classes during the Choose Classes step during Hero Setup.
Condition (Weakened)
This expansion includes Condition cards and tokens for the Weakened condition, which are added to the existing supply of Condition cards and tokens. Certain monster abilities, items, and special quest rules inflict figures with Weakened. The rules for Weakened are described on its corresponding Condition card.
Secret Rooms
Secret rooms expand quests by giving the heroes the ability to uncover hidden passages that lead to unknown chambers containing valuable rewards. These secret rooms can come into play in any quest through the effects of a new Search card. Heroes are not required to explore a secret room to complete the quest.
Discovering a Secret Room
When the "Secret Passage" Search card is drawn, it instructs the player to place a secret room entrance token in his space. Heroes in this space may explore the secret room by spending one movement point or by following the instructions on the "Secret Passage" Search card (see "Exploring a Secret Room" below).
Important: If the "Secret Passage" Search card is drawn when the hero figures are not on the map (such as during the Travel step), the players draw a replacement Search card, and shuffle the "Secret Passage" Search card back into the Search deck.
Exploring a Secret Room
A hero in the same space as a secret room entrance token may spend one movement point to explore the secret room. He then draws one Secret Room card and resolves the special rules on the card. A hero cannot explore the secret room if there is already a Secret Room card in play. Many Secret Room cards instruct the player to place a secret room tile, in which case he performs the following steps:
- Place Secret Room: He places the appropriate secret room tile near (but not connected to) the map in the central play area. The player must be sure that the tile code on the secret room tile matches the tile code shown on the Secret Room card.
- Move Hero: The player then removes his hero figure from the map and places it on the secret room tile's entrance space (marked with the secret room entrance symbol shown below).
- Place Challenge Tokens: The overlord player randomly draws a number of challenge tokens equal to the number of heroes and, without looking at them, places each one facedown on the secret room tile. There can only be one challenge token per space, and they must be placed as shown on the "Secret Room Setup" diagram on page 6.
Refreshing the Secret Room Deck
At the end of each encounter, discard all Secret Room cards in play that have not been claimed as rewards. At the end of each quest, shuffle all discarded Secret Room cards back into the Secret Room deck.
Secret Room Entrance
The secret room entrance token is used to mark the space where heroes can explore and enter the secret room. The symbol on this token matches the symbol in one space of the secret room tile. Any space containing this symbol is a secret room entrance space.
During a player's turn, if his hero figure is in a secret room entrance space, he may spend one movement point to place his figure in any other secret room entrance space. These spaces are not adjacent, but heroes may move between secret room entrance spaces as if they were. Monsters cannot use secret room entrances.
If a hero player moves his figure to a secret room entrance space that is occupied, he places his hero figure in the closest available empty space of his choice.
Challenge Tokens
When his hero figure is adjacent to or in a space containing a facedown challenge token, the player may perform a search action to flip the token faceup (do not draw a Search card). The face of each challenge token displays either a monster or an attribute icon.
If the revealed challenge token displays a monster, it is placed in the closest available empty space from where it was revealed and is treated as a minion monster figure of the indicated type. This monster does not count against the overlord's monster group limits. The revealed monster uses its corresponding Monster card of the current Act. If the revealed token displays an attribute icon (the fist, burst, eye, or open book icons, which are the Might, Willpower, Awareness, and Knowledge attributes), the hero must immediately test that attribute. If he passes, the hero player immediately draws a Search card and discards the challenge token. If he fails, the hero player still discards the token but does not draw a Search card.
Transcriber's note: the printed attribute icons are pictures, not words. The four icons are named here by their shapes as they appear in the rulebook (fist, burst, eye, open book). The eye and open book are matched to Awareness and Knowledge by the icons used in the German edition; the fist and burst are matched to Might and Willpower by elimination against the four attributes of the base game.
At the start of each overlord turn in which there is a hero on the secret room tile, the overlord player may choose to discard one challenge token or monster figure from the secret room tile. This choice is made before the overlord player draws his Overlord card. The discarded token is not revealed. This may result in the completion of a secret room (see below), but allows the overlord to control how much time the heroes spend exploring the secret room and how many Search cards they might gain.
Secret Room Rewards
As soon as there are zero challenge tokens and zero monster figures on the secret room tile, the player taking his turn pauses to resolve any "Reward" effects on the Secret Room card. If multiple hero figures are on the secret room tile, the heroes choose one of those heroes to resolve the reward effect on the Secret Room card.
Then, players remove all hero figures from the secret room tile and place them in empty spaces nearest to the secret room entrance token (if there are multiple spaces equidistant from the secret room entrance space, the hero player chooses the space in which to place his figure). Then, the secret room tile and the secret room entrance token are discarded. Finally, the player's paused turn resumes his turn.
Knocked Out in a Secret Room
If a hero is knocked out while in a secret room, all normal rules for being knocked out are followed with one exception: the hero player places his hero token in the secret entrance token's space, even if that space is not empty.
Secret Room Card Breakdown
- Name: This area displays the name of the secret room.
- Special Rules: This area describes any special rules associated with the secret room. The bold line at the top is resolved immediately. The italicized text describes the story and flavor of the card while the rest of the text describes any special effects of the card.
- Reward: This area describes the reward that the heroes receive when there are zero challenge tokens in the secret room.
Secret Room Setup
Place a number of random challenge tokens on the secret room tile according to the number of heroes as printed on the tile itself with the number displayed next to the challenge token placement symbol. For example, if there are two heroes, two challenge tokens are placed in the spaces shown below.
[Diagram omitted: Secret Room S2A and Secret Room S2B tiles showing the challenge token placement spaces.]
Secret Room Example
While performing a search action, Tomble draws the "Secret Passage" Search card. Following the instructions on the card, he places a secret room entrance token in his current space. Tomble has the option of immediately exploring the secret room as listed on the "Secret Passage" card. He chooses not to, and play continues as normal.
On a later turn, Tomble decides to explore the secret room. While in the secret room entrance token's space, he spends one movement point to explore. His turn pauses and he draws a random Secret Room card (in this case "Tainted Spring"). The card instructs the players to place secret room tile S2B.
The players find the secret room tile S2B, place it near the quest map, and place Tomble's figure in the secret room entrance space of that tile. Since there are three heroes in the game, the overlord player randomly gathers three challenge tokens and places each one facedown in the appropriate spaces.
Tomble's turn then resumes. He uses one movement point to move adjacent to the nearest challenge token and performs a search action to reveal it. The revealed token displays an Awareness (eye) icon. Tomble immediately tests Awareness and passes, allowing him to discard the challenge token and draw one Search card. Finally, Tomble uses two movement points to move adjacent to the other challenge tokens before ending his turn.
On his next turn, Tomble performs a search action to reveal the challenge token adjacent to him, revealing a Knowledge (open book) icon. He tests Knowledge and fails, discarding the challenge token without drawing a Search card. Then, he performs a second search action to reveal the final challenge token, which turns out to be a zombie.
Grisban decides to enter the secret room to help Tomble dispatch the zombie. During his activation, Grisban moves into the secret room, performs an attack, and defeats the zombie. Since there are now zero challenge tokens and zero monsters in the room, Grisban's turn then pauses while the heroes resolve the reward on the "Tainted Spring" Secret Room card.
After resolving the reward, Grisban and Tomble are moved back to the quest map and the players discard the secret room tile and secret room entrance token. Grisban then resumes his turn.
Rumors
Rumor cards provide the overlord player a way to interact with heroes during the Campaign phase of any campaign. These cards have a variety of effects and are the main way that The Trollfens quests are introduced into a campaign.
Important: Before starting a campaign, the overlord shuffles the Rumor card deck and draws three cards into his hand. The overlord does not normally draw new Rumor cards, and therefore must carefully decide when to play these cards during the campaign.
Playing Rumor Cards
The overlord player can play Rumor cards from his hand at different times during the Campaign phase. Each Rumor card states when it can be played. When playing a rumor card, the hero players must immediately resolve the text on the Rumor card before continuing the Campaign phase. The overlord player can play a maximum of one Rumor card during each Campaign phase.
Some Rumor cards can only be played during Act I of a campaign. At the start of Act II, the overlord player must discard any Rumor cards that can only be played in Act I. He does not draw additional Rumor cards to replace those he discards. Discarded Rumor cards are not shuffled back into the Rumor deck. If the Rumor deck runs out of cards, it is not reshuffled. If the overlord player is instructed to draw a Rumor card and there are no Rumor cards in the deck, he does not draw a Rumor card.
Rumor Card Breakdown
- Name: This area displays the name of the Rumor card. If the Rumor card can only be played during a specific Act, the corresponding Act icon is shown here as a reminder of when that card can be played.
- Rules: This area describes all rules for the Rumor card, including exactly when the card can be played.
- Travel Icons: This area displays the travel icons used during the Travel step of the Campaign phase.
- Flavor Text: This area explains the story of the rumor.
Quest Cards
The term Quest card collectively refers to two specific types of cards: Advanced Quests cards and Rumor cards that feature quests (also known as Rumor Quest cards). All Quest cards represent quests that players can choose during the Choose Next Quest step of a Campaign phase (see below). The only difference between rumor quests and advanced quests is how the quest becomes available for players to attempt.
- Rumor Quest cards are played by the overlord as instructed on the card. After played, the card is placed faceup in the center of the table and is now an available quest (see below).
- Advanced Quest cards only enter play when instructed by a game effect, usually by the Reward section of the Quest Guide. When it enters play, the card is placed faceup in the center of the table and is now an available quest (see below).
Each time a player (overlord or hero) would choose a quest during the Choose Next Quest step of the Campaign phase, he can choose any available quest: either a quest on the campaign sheet or a quest shown on a Quest card in the play area. When the player chooses a quest shown on a Quest card, players immediately begin quest setup as normal, referring to the corresponding quest in the Quest Guide.
Before attempting these quests, the Travel step of the Campaign phase is performed as normal. However, instead of referencing the quest map, players refer to the travel icons at the top of the appropriate Quest card. These travel icons are resolved from left to right as if they were on the path leading to the quest.
Quest cards remain in play until completed or discarded by a game effect. They are not automatically discarded at the start of the Campaign phase, and can persist from session to session until completed. Between sessions, players should store any available Quest cards in a neutral area as a reminder that the quest has not been attempted yet. After either the heroes or the overlord wins a quest, the victor may store the corresponding card with the rest of his materials as a reminder that he won that quest.
Act Specific Quest Cards
Some Quest cards have the Act I or Act II icon in the upper left hand corner of the card. These quests can only be attempted during the corresponding act. If one or more Act I Quest cards are still in play immediately before playing the Interlude, the heroes must choose one of them to attempt (before proceeding to the Interlude). After completing this quest, all other available Act I Quest cards are discarded from the game without effect.
Completing a Quest Card
The Quest Guide lists all rewards for winning each quest. The Campaign phase is performed as normal after completing a Quest card.
Any quest attempted as a result of a Quest card does not count against the number of quests required to complete for the current Act. Quest cards are always played in addition to the required number of campaign quests in a particular Act. Additionally, players do not have to attempt any Quest cards in order to complete the campaign. Players ignore all quests from Quest cards when determining how many quests are won by the overlord or the heroes during any given Act.
Example: The hero players have won the "A Fat Goblin" quest during Act I of "The Shadow Rune" campaign. At the start of the next Campaign phase, the overlord player chooses to play his "Ghost Town" Rumor card. During the Choose Next Quest step, the heroes decide they wish to attempt the "Ghost Town" quest, and immediately begin setting up "Ghost Town."
The overlord player ultimately wins the "Ghost Town" quest, so the players refer to its Reward section of the quest guide. It instructs them to place the "Affliction Spreads" Advanced Quest card into play. The overlord finds the "Affliction Spreads" Advanced Quest card and places it faceup in the play area. This quest will be available during a future Choose Next Quest step in Campaign phases of Act II.
Since the players have only completed one Act I quest off the campaign sheet, they will need to complete two more before proceeding to the Interlude.
Advanced Quest Card Breakdown
- Name: This area displays the name of the Advanced quest card. Additionally, an Act icon is shown here as a reminder of when the quest can be attempted.
- Travel Icons: This area displays the travel icons used during the Travel step of the Campaign phase.
- Flavor Text: This area explains the story of the quest.
- Overlord Reward: This area describes the special reward for the overlord if he wins this quest.
- Hero Reward: This area describes the special reward for the heroes if they win this quest.
Advanced Quest Cards
Advanced Quest cards represent special quests that only come into play when specified by an effect (such as certain quest rewards).
The back of Advanced Quest cards list special rewards that heroes or the overlord can acquire by winning this quest. The reward is only received when instructed by the "Rewards" section of the Quest Guide. The card describes when and how this reward is used.
Advanced Quest cards are double-sided, and both sides are public knowledge. Any player may look at either side of an Advanced Quest card at any time.
[Flavor fiction omitted: the "Marshland Rumors" story text printed on page 8 of the English rulebook.]
Mini Campaign Rules
Instead of integrating The Trollfens quests into an existing campaign, players may choose to play a mini campaign using only the quests found in The Trollfens Quest Guide. This mini campaign contains fewer quests than "The Shadow Rune," and only requires 5–8 hours to complete.
The Story
For thousands of years the Valdari Marsh has laid silent and empty. Crumbling, half-sunken ruins are all that remain of a civilization claimed by the dark swamp. Whoever lived there is long gone, a distant memory tied to an old legend of a terrible sickness.
Over time, superstition faded, and people seeking distance from even the mildest of structure and law provided by the baronies and free cities were drawn to settle around the old swamp. Unaware of the history, they've lived there in peace for many years.
In recent days, however, traders and travelers bring word of trouble in the villages around the marsh. People have gone missing, many are falling ill, and rumors abound of the most distant and secluded villages being completely destroyed by an overwhelming force.
Though it may prove fruitless and your offer of assistance could be spurned by the locals, you've taken it upon yourselves to investigate.
Playing this Mini Campaign
Players play "The Trollfens" mini campaign following the normal "Campaign Rules" described in the Descent: Journeys in the Dark Second Edition base game rulebook in addition to the changes noted in this section.
Unlike "The Shadow Rune" campaign, this mini campaign consists of only four quests played in a specific order. Players do not use Rumor cards when playing a mini campaign. Players play the entire campaign using the following steps:
- Setup: Perform all normal rules for game setup. Each hero receives 4 experience points and 100 gold, and the overlord receives 4 experience points. Then, players perform a Spend Experience Points step and a Shopping step. Players may save any unspent gold and experience points to spend in future Campaign phases. Player's can record their gold and XP on the Campaign log on page 11.
- Travel: Perform a travel step beginning at the "Forest Clearing."
- Quest #1: Play the "Ghost Town" quest.
- Campaign Phase: Perform a standard Campaign phase, skipping the Choose Next Quest step. Heroes begin travel from the quest that was just completed.
- Quest #2: Play the "Food for Worms" quest.
- Campaign Phase: Perform a standard Campaign phase, skipping the Choose Next Quest step. Heroes begin travel from the quest that was just completed.
- Quest #3: Play the "Three Heads, One Mind" quest.
- Transition to Act II: Follow the instructions for "Act II" described on page 22 of Descent: Journeys in the Dark Second Edition rulebook.
- Campaign Phase: Perform a standard Campaign phase, skipping the Choose Next Quest step. Heroes begin travel from the quest that was just completed.
- Finale: If the heroes won more quests than the overlord during Act I, players proceed to the "Source of Sickness" quest. If the overlord won more quests than the heroes during Act I, players proceed to the "Spreading Affliction" quest.
Additional Quest Rewards
At the end of each quest during a mini campaign, each player receives 1 XP. This XP is awarded to both the winning and losing players and is in addition to the rewards listed for each quest in the Quest Guide. Also, if the heroes win a quest, they may choose one hero to receive one random Shop Item card. If the overlord wins a quest, he receives 1 additional XP.
If a quest rewards a Relic card, and the side (hero or overlord) that earned the reward already possess that relic, each player of that side earns 1 XP instead. If the player on the opposing side possess the relic, the player earning the relic takes it from the opposing side.
Quest Guide
This expansion contains five new quests for Descent: Journeys in the Dark Second Edition. Players can integrate these quests into any campaign through the use of Rumor cards (see "Rumors" on page 7), or they may play these quests as a mini campaign (see "Mini Campaign Rules" on page 9).
This guide functions similarly to the Quest Guide found in the Descent: Journeys in the Dark Second Edition base game. Players follow all normal quest setup rules found in that Quest Guide, adhering to any exceptions noted in this guide.
Playing Basic And Epic Play Games
Each of the five quests included in this Quest Guide may be played as a single, stand alone quest following the basic game or Epic Play rules described in the Descent: Journeys in the Dark Second Edition rulebook.
When playing a single rumor quest outside of a campaign, players follow all rules described in the base game's rulebook, ignoring the "Rewards" section for each quest. When using this expansion while playing a basic game or Epic Play, players use all of the rules described in this rulebook, ignoring Rumor cards. The new heroes, classes, monsters, items, conditions, and lieutenant are all used as described in this rulebook.
Omitted: the English file's campaign log page (page 11), a printed form for recording Hero XP, Hero Gold and Overlord XP, and the publisher credits block on page 10.
Quest translation note: the quest section below is translated from the German Quest-Handbuch of Die Trollsümpfe (pages 10–22). Quest maps and their labels are omitted; the setup text refers to them. Icons in the German text are rendered as words: the fist icon is Might, the open book icon is Knowledge, the eye icon is Awareness, and the heart icon is health. Attribute tests are written as "Might test", "Knowledge test" and "Awareness test".
Ghost Town
Act I Rumor: "Ghost Town" (German: Geisterstadt). Scene 1.
Scene 1
For days you have been surrounded by nothing but endless wilderness. As you trudge through storm and thunder, you regret having set out for this remote region and wonder whether you will ever find even a sign of civilization.
You breathe a sigh of relief when you see a column of smoke rising in the distance, surely above a nearby settlement. As far as you know, most villages in this area are tiny and backward, but a hot meal, a beer and a dry bed would be preferable to you even in the sorriest tavern than trudging on through this rain.
You cross a small hill and a stone bridge, when your caution turns to pure dread: ahead you see no picturesque hamlet, but death and destruction. Slain villagers lie in the ruins of the buildings, none of which has remained unharmed.
Through the pouring rain you can make out dark figures moving between the remains of the houses. You cannot see much, but you are certain that there are no survivors among them.
Monsters
Sarcomants. Harpies. 2 open groups.
Setup
The harpies are placed on the stream. One open group is placed on the campsite. One open group is placed on the covered wagon. The elite Sarcomant is placed on the space marked "X" on the path. Normal Sarcomants are not placed at the start.
4 blue and 4 red task tokens are shuffled facedown and laid out as shown. No player may know which of the facedown tokens are blue and which are red. These tokens represent the slain villagers.
One person token is set aside. It represents the survivor and is not placed on the map at the start.
Search tokens are placed according to the number of heroes.
Special Rules
As an action, a hero or the elite monster may turn over a slain villager (task token) from an adjacent space.
As an action, the elite Sarcomant may contaminate a turned-over slain villager from an adjacent space. When it does so, the overlord places a fatigue token on the slain villager. At the start of his next turn, the overlord may replace all contaminated villagers with normal Sarcomants (group size is ignored). The overlord places the task tokens removed from the map in this way in front of him.
As an action, a hero on a space adjacent to a turned-over slain villager may search the body of that villager.
If it is a blue task token, the hero makes a Knowledge test. If the test passes, he removes the token from the map and places it in front of him. The overlord then reads the following text aloud:
Even though the body is covered with cuts and broken bones, some strange discolorations of the skin suggest that some poison was the actual cause of death.
If it is a red task token, the hero makes an Awareness test. If the test passes, he removes the token from the map and places it in front of him. The overlord then reads the following text aloud:
Signs of violence are everywhere, but here everything has been smashed to pieces. The corpse of the unfortunate shows nothing unusual. Nevertheless, you examine the splintered wood, the shattered stones and the trampled ground more closely. From what you read in all the destruction, you conclude that not only swarms of small creatures but a colossus of a monster must have raged here.
The Only Survivor
If, after an overlord turn, 5 slain villagers have been removed from the map, the survivor comes into play on one of the two spaces in the hut or the shed. If the heroes have more task tokens in front of them than the overlord, they choose where the survivor comes into play. Otherwise, the overlord chooses. The overlord then reads the following text aloud:
Amid the shrieking and roaring of the abominable creatures and the clashing of weapons, you hear the panicked screams of a man. You wonder how anyone could have survived here, but at the same time you realize that whoever it is can surely tell you what happened here.
As an action, a hero on an adjacent space may pick up and carry the survivor. If no hero is carrying the survivor, monster attacks may target and hit the survivor. The survivor cannot recover health and is immune to all conditions. If a hero carrying the survivor is knocked out, the survivor is placed on his space. As an action, a hero carrying the survivor may set him down on an empty adjacent space. A hero carrying the survivor may leave the map through the entrance or the exit.
Survivor
- Health: 10
- Defense: gray defense die
- Speed: 0
Reinforcements
At the start of each of his turns, the overlord may place 1 elite Sarcomant or 1 Harpy on the exit (maintaining group size).
After the survivor has come into play, the overlord may, at the end of each of his turns, place 1 monster from an open group on the entrance (maintaining group size).
Victory Conditions
If a hero leaves the map through the entrance or the exit with the survivor, the overlord reads the following text aloud:
Frightened, the battered man clings to you and stammers disjointed words about terrible monsters. He presses a cold iron ring into your hand and croaks: "Here! I didn't want to... take it!" As you flee through the rain into the fields, the man turns deathly pale and loses consciousness.
It seems that more than fear has befallen the poor man, who in the following days only rarely and briefly regains consciousness. He mutters something about people who were dragged from their houses and carried off into the swamp. When you finally reach another settlement, his condition has worsened greatly. You leave him in the hands of a capable healer and resolve to return to the swamp and follow up on his hints.
The heroes have won!
If the survivor has been defeated, the overlord reads the following text aloud:
With a scream the survivor collapses under the onslaught of the monsters. In vain you try to fight your way through to him. Then some of the creatures seize the poor man and carry him off at a limping pace.
Soon the battle is over, but the encroaching darkness makes it impossible for you to follow the monsters' trail.
The overlord has won!
Rewards
If the heroes win, they receive the relic "Ring of the Craftsman," and the Advanced Quest card "Source of Sickness" comes into play.
If the overlord wins, he receives the relic "Ring of the Taskmaster," and the Advanced Quest card "Affliction Spreads" comes into play.
The heroes receive 25 gold for every second task token in front of them.
If the overlord has at least 4 task tokens in front of him, he receives the Overlord card "Secret of the Flesh."
Food for Worms
Act I Rumor: "Food for Worms" (German: Wurmfraß). Scene 1.
Scene 1
The Cart in the Muck
The insects in this swamp show no mercy, and the path is strewn with roots, holes in the ground and other obstacles. Making progress through this muddy region is a constant struggle, and even though you have only reached the edge of the swamp, you wonder whether you will ever be rid of its foul stench. Nevertheless, you have been assured that many of the abducted people taken into the swamp are still alive. If there is even the slightest chance that there are survivors, rescuing them must be your top priority.
The deep furrows and many footprints in the mud are hard to follow through the water, which in places is hip-deep, but after a while you hear something moving somewhere ahead of you. Suddenly you see a massive troll pulling a prison wagon full of abducted villagers through the mire.
As you approach carefully, one of the prisoners spots you. "Help! For all the gods, help us!" he cries, and in doing so ruins your ambush.
Startled, the gray-skinned colossus whirls around. Panting, it looks at you with cloudy eyes before turning back to the prisoners. With a grunt the brute pushes the cart into the water beside the path, where it begins to sink alarmingly fast.
Monsters
Bol'Goreth. Plague Worms. Zombies. 1 open group.
Setup
Bol'Goreth is placed on the log bridge as shown. The zombies are placed on the sunken statue. The open group is placed on the pond. The plague worms are not placed at the start.
4 task tokens are laid facedown on the log bridge as shown. These represent the sinking cart. 1 white task token is placed on the sinking cart as shown. This is the iron lock.
4 person tokens are placed beside the map. They are not placed at the start.
Search tokens are placed according to the number of heroes.
Special Rules
At the start of each of his turns, the overlord places 1 fatigue token in front of him. If at least 1 figure then stands on the sinking cart, he places one additional fatigue token in front of him.
As an action, a hero or lieutenant on a space adjacent to the sinking cart may make a Might test. If it passes, the active player takes each figure off the cart and places it on an empty adjacent space.
Once the overlord has 9 fatigue tokens in front of him, the sinking cart is removed from the map, and all person tokens that have not yet been placed on the map are discarded.
Rescue Action
A hero on the sinking cart may attack the iron lock as if it were a monster. The lock has 2 health per hero and defends with 1 gray defense die. Once it is defeated, it is removed from the map.
If the iron lock is no longer on the map, a hero on a space adjacent to the cart may, as an action, place 1 person token on one of his adjacent spaces.
Villagers
Villager
- Health: 6
- Speed: 4
- Defense: gray defense die
Villagers count as hero figures with the following exceptions. Each round, villagers are activated at the end of the turn of the hero who makes his turn last, and they are controlled by that hero. Villagers can never recover health. An activated villager may perform 1 movement action. When a villager loses its last health point, its person token is removed from the game.
Reinforcements
Once the Elite Plague Worm has come into play, it may leave the map through the entrance.
Until the sinking cart is removed from the map, at the start of each of his turns the overlord may place 2 normal zombies (with 2 heroes, 1 normal zombie) on the sunken statue (maintaining group size). Once the cart has been removed from the map, the plague worms are placed on the stony path. From then on the overlord receives no more reinforcements.
Special Rules: Water and Defeat
Each time a hero enters a water space, he makes a Might or Awareness test of his choice. If the test fails, he is paralyzed. The sinking cart does not block line of sight or movement and is not considered a water space.
If Bol'Goreth is defeated, the overlord reads the following text aloud:
A heavy blow makes the monster howl. It clenches its jagged teeth and crashes off through the undergrowth, a massive hand over the gaping wound in its side.
Victory Conditions
If no monsters remain on the map, the overlord reads the following text aloud:
Once the last monsters have been defeated, you begin to search the surroundings carefully. At first it seems pointless, but after a while you discover another group of prisoners.
The survivors cling to you, fearful and grateful, as you lead them out of the swamp back to their village. The little information they give you is nonetheless revealing. You learn that the troll calls himself Bol'Goreth and has often muttered about important missions.
His ultimate intentions remain a mystery to you, but your efforts have earned you the goodwill and gratitude of the people of this region, not to mention a generous reward.
The heroes have won!
If all person tokens have been discarded, the overlord reads the following text aloud:
The prisoners lie slain on the ground or have sunk with the cart into the deep mud. You realize that you can achieve nothing more here, and you flee from the renewed onslaught of the monsters.
Although you had not hoped for many clues about their abductors and their sinister plans from the villagers, the lack of information makes the grief for the poor souls even harder to bear.
The overlord has won!
Rewards
If the heroes win, they receive the relic "Ring of the Craftsman." The Advanced Quest card "Source of Sickness" comes into play.
If the overlord wins, he receives the relic "Ring of the Taskmaster." The Advanced Quest card "Affliction Spreads" comes into play.
The heroes receive 25 gold for each person token that was not discarded.
If the Elite Plague Worm has not been defeated, the overlord receives the Overlord card "Toxic Retribution."
Three Heads, One Mind
Act I Rumor: "Three Heads, One Mind" (German: Drei Köpfe, ein Gedanke). Scene 1.
Scene 1
Glittering Caskets
Across the swamp and the surrounding wilderness you follow the few clues you have gathered from terrified survivors in abandoned villages. A mysterious illness is spreading through the region and beyond it, and you fear that it is somehow connected to the many raids on the villages.
Your trail leads you to a large stone hut, its massive iron door locked. Black smoke pours from the chimney, and the glow of a fire seeps through tiny cracks in the mortar. Unfortunately, the entrance is guarded by a hulking ettin scratching one of its heads. A large, rusty key dangles from its belt. Perhaps it fits the heavy lock on the door? As you creep quietly forward, a screech makes you look up.
"Strays and thieves! Strays and thieves! Scratch them and bite them!" shrieks a bizarre, birdlike creature, flapping wildly with its leathery wings. A giant key that looks very much like the ettin's is tied to one of its legs.
You hope that one of the two keys will open the door. It will not be easy to get near them.
Monsters
Harpies. Ettins. 1 open group.
Setup
The normal harpies are placed on the campsite. The elite harpy is not placed at the start. The elite ettin is placed on the foundations. The normal ettin is not used in this scene. The open group is placed on the swamp.
The elite harpy is Chi'kriy. Chi'kriy has 2 additional health per hero. The elite ettin is Grug'nik. Grug'nik has 2 additional health per hero.
The overlord takes 1 white task token and 1 green task token and places one each on Grug'nik's and Chi'kriy's Monster cards. The heroes should not see which token he places on which card. The white task token is the rusty key.
Task tokens are placed as shown. They represent jewelry boxes.
Search tokens are placed according to the number of heroes.
Special Rules
At the start of each of his turns, the overlord places 1 fatigue token in front of him.
The locked door can only be opened once the heroes have the rusty key. Once the door is open, the heroes may leave the map through the exit.
If Chi'kriy or Grug'nik is defeated, the overlord shows the heroes the task token on the corresponding Monster card. If it is the green one, it is discarded without effect. If it is the rusty key, it is placed on one of the defeated figure's spaces. As an action, a hero may pick up the rusty key from an adjacent space.
As an action, a hero may remove an adjacent jewelry box from the game. The overlord then reads the following text aloud:
A croaking cry sounds above you, followed by the wild beating of leathery wings and sharp talons. "No! No, no! Mine! Not yours, mine!" shrieks the creature.
The overlord places Chi'kriy on a space adjacent to the hero who removed the jewelry box (regardless of whether Chi'kriy is on the map or not). Chi'kriy immediately makes an attack against this hero. If the hero is not defeated, he may continue his turn.
Chi'kriy and Grug'nik
While Chi'kriy is not on the map, she may perform only 1 special action during her activation, by which she is placed on a space adjacent to Grug'nik. When she is on the map, she may be removed from the map as an action. When she is defeated, she is removed from the game.
If Chi'kriy is defeated while not on the map, and she had the rusty key, the overlord places the key on any empty space in the swamp.
If Chi'kriy is on a space adjacent to Grug'nik, he may, as an action, remove her from the map.
If Chi'kriy and Grug'nik are adjacent, either of them may, with a special action, swap the keys between them. When one of them does so, the overlord takes the two task tokens in hand and places them facedown, in any arrangement, back on the two Monster cards. The heroes should not see which token he places on which card.
Reinforcements
At the start and at the end of each of his turns, the overlord may place 1 normal harpy on the campsite or the swamp (maintaining group size).
Victory Conditions
If a hero leaves the map through the exit, the overlord reads the following text aloud:
With great effort you manage to turn the rusty key in the lock and slip through the door. Inside you find yourselves in a devastated laboratory or torture chamber. The difference is hard to tell. Shattered vials, strange tools and a mass of parchment sheets lie scattered everywhere, smeared with a pungent green liquid. The benches and tables in the room are stained with dried blood.
There are no signs of prisoners or enemies here, but a glowing crystal vial on one of the tables catches your attention. When you pick it up, you see a hastily scribbled note on a slip of paper beneath it. "Don't forget!" Then a shriek sounds in the distance and reminds you of your mission. Quickly you gather as many of the scattered papers as you can before more monsters arrive.
The heroes have won!
Once the overlord has 9 fatigue tokens in front of him, he reads the following text aloud:
The resistance of the accursed creatures has held you up for too long. In the distance you hear a large troop of reinforcements advancing. Cursing, you withdraw before the horde of approaching monsters can surround you.
The overlord has won!
Rewards
If the heroes win, they receive the relic "Immunity Elixir," and the Advanced Quest card "Source of Sickness" comes into play.
If the overlord wins, he receives the relic "Healing Vial," and the Advanced Quest card "Affliction Spreads" comes into play.
The heroes receive 50 gold for each named monster they have defeated.
If at least one of the two named monsters was not defeated, the overlord receives the Overlord card "Wandering Infirmity."
Source of Sickness
Act II Rumor: "Source of Sickness" (German: Quell der Krankheit). Scene 1.
Scene 1
You have penetrated deep into the heart of the swamp. Your clothes, supplies and all your equipment are soaked through with the stinking swamp water, just like you. Yet your efforts were not in vain: you have discovered this place, this abandoned, ruined fortress, in which the horrible, agonizing experiments were carried out on the poor villagers of the region.
The tunnels you walk through are filled with a foul stench, and in the first chamber you reach you see a barrel with a viscous, disgusting green liquid. On the ground around the barrel lie motionless villagers. Their skin is pale and nearly the color of the contents of the barrel. They look deathly ill, probably close to the end that the unknown illness holds for them.
You can only hope that somewhere down here a cure can be found. If not, if you cannot save the poor people, you must at least put an end to the spread of the terrible plague.
Monsters
Bol'Goreth. Plague Worms. 2 open groups.
Setup
Bol'Goreth is placed on the waterfall as shown. The plague worms are placed on the lava pit. One open group is placed on the cave, the other on the underground lake.
5 task tokens are laid out as shown. They represent plague barrels.
5 person tokens are laid out as shown. They represent infected villagers.
Search tokens are placed according to the number of heroes. One of them must be the special search token. No player may know which search token is the special one. The special search token is the Talisman of Health.
Special Rules
If a hero reveals the special search token, he has found the Talisman of Health. The hero draws a Search card as usual and places the special search token on his Hero sheet.
As an action, Bol'Goreth may turn over a search token from an adjacent space. If it is a normal search token, it is placed back facedown. If it is the special one, Bol'Goreth immediately picks up the Talisman of Health (he may simultaneously also carry a plague barrel or an infected villager).
In this quest, Bol'Goreth follows the same rules as heroes when it comes to being defeated: he is knocked down and may, as an action in his next activation, get back up. When Bol'Goreth is defeated, the overlord places a fatigue token on the lieutenant marker to show that he is knocked down.
If a figure carrying the Talisman of Health is defeated, the token is placed on the figure's space. As an action, Bol'Goreth or a hero on an adjacent space may pick up the talisman again.
Containment
As an action, a hero may remove a plague barrel from an adjacent space.
Infected villagers are not activated, cannot be attacked, and do not block line of sight or movement. As an action, the hero carrying the Talisman of Health may cure an infected villager from an adjacent space. The villager is then removed from the map, and the overlord reads the following text aloud:
The rag doll radiates tremendous warmth as you hold it over the motionless villager's chest. With a pulsing orange light, energy flows from the talisman over to the man, who slowly opens his eyes.
You help him up and quickly notice that he needs no further encouragement to get away from here as fast as possible.
Infection
As an action, Bol'Goreth or an elite monster may pick up a plague barrel or an infected villager from an adjacent space. If a figure carrying a plague barrel or an infected villager is defeated, the token is placed on the figure's space. Each figure may carry only 1 plague barrel or infected villager at a time.
As an action, Bol'Goreth or an elite monster on a space adjacent to one of the special spaces on the Secret Passage may drop the plague barrel or infected villager it carries. If Bol'Goreth carries the Talisman of Health, he may drop it as an action on a space adjacent to one of the special spaces on the Secret Passage.
For each dropped plague barrel, the overlord places 1 fatigue token in front of him. For each dropped infected villager, the overlord places 2 fatigue tokens in front of him. If he drops the Talisman of Health, the overlord places 3 fatigue tokens in front of him.
As an action, a plague worm may leave the map from a space adjacent to one of the special spaces on the Secret Passage. For this, the overlord places 1 fatigue token in front of him.
Once all infected villagers and plague barrels have either been removed from the map or dropped, a hero carrying the Talisman of Health may leave the map through the entrance.
Reinforcements
At the start of each of his turns, the overlord may drop an infected villager that is not being carried, in order to place 1 normal plague worm on an empty adjacent space.
Victory Conditions
If a hero carrying the Talisman of Health leaves the map through the entrance, or the overlord can no longer fulfill his victory condition, the overlord reads the following text aloud:
With the talisman in hand, you smash the last of the barrels, from which green slime wells up. You waste no time and make your way out. Your mighty enemy roars and rages behind you, for he sees his life's work stolen.
The heroes have won!
Once the overlord has 10 fatigue tokens in front of him, he reads the following text aloud:
Bol'Goreth grins at you as he loads the last villagers and barrels onto his cart at the back of the cave. Then he activates a hidden mechanism, and with a rumble the entrance to a tunnel opens.
The fight continues, however, and by the time you have fought your way to the tunnel entrance, the wretch has long since disappeared.
The overlord has won!
Rewards
If the heroes win, they receive:
- The relic "Talisman of Health."
- The Hero reward on the back of the Advanced Quest card "Source of Sickness."
If the overlord wins, he receives:
- The relic "Omen of Rot."
- The Overlord reward on the back of the Advanced Quest card "Source of Sickness."
Spreading Affliction
Act II Rumor: "Spreading Affliction" (German: Ausbreitung der Pest). Scene 1. The Advanced Quest card of this name is "Affliction Spreads"; its back carries the Hero and Overlord rewards.
Scene 1
The lack of solid clues has had you searching for days until you found this place. At first it seems to you that this fortress ruin in the depths of the swamp is merely another dead end. Upon closer inspection, however, you discover fresh traces. Shattered vials, dried bloodstains and greenish slime adorn the floor and walls. As you sneak through the half-sunken ruin, you believe at first that you are alone, until you hear a low rumble.
Shortly after, the light of your torch falls on a gruesome sight. Wrapped in chains, a horrible monster lies on a moss-covered stone. Its body is covered with festering wounds and pulsing green veins. The blackness over its eyes and the acrid stench in the air complete the picture of a terrible disease. While you are still wondering what the poor creature may once have been, the monstrosity hurls itself at you and tears at its chains.
It opens its maw and lets out a bone-chilling scream that echoes through the gloomy passages. With growing dread you hear other, similar screams from afar. You draw your weapons while a cacophony of animal sounds deafens your ears ...
Monsters
Bol'Goreth. Plague Worms. Harpies. 1 elite monster from an open group per hero.
Setup
Bol'Goreth is placed on the foundations as shown. The harpies are placed on the underground lake. The plague worms are placed on the swamp.
1 elite monster from an open group is placed, per hero, on one of the spaces marked "X" according to the number of heroes. These are infected monsters. Each infected monster may cover at most 4 spaces. A fatigue token is placed on each of them to show that it is chained.
With 4 heroes, 11 fatigue tokens are set aside. With 3 heroes, 9 are set aside, and with 2 heroes, 7. This is the infection supply.
2 blue task tokens are laid out as shown. They represent the Secret Passage.
3 red and 1 green task token are shuffled facedown and laid out as shown. No player may know which of the facedown tokens is green and which is red. The green task token is the lever.
Search tokens are placed according to the number of heroes.
Special Rules
Chained infected monsters cannot perform movement actions and ignore all effects that allow or force them to move. Otherwise, chained monsters are activated normally during the overlord's turn.
As an action, Bol'Goreth may, from an adjacent space, unchain a chained monster. The fatigue token on that monster is then discarded. From now on the monster may move normally. If Bol'Goreth has been defeated, the overlord may, at the start of each of his turns, unchain a chained monster.
Each infected monster, whether chained or unchained, has 1 additional health per hero and also has the infection icon: Disease, Weakened.
Transcriber's note: the German text shows the infection keyword as a black slash-mark icon, which is reproduced here as "[infection icon]".
Fight or Flight
After Bol'Goreth or an infected monster defeats a hero for the first time, the overlord takes 1 hero token of that hero and places it in front of him.
Each time a hero defeats an infected monster, 2 tokens are discarded from the infection supply. If Bol'Goreth is defeated, 3 tokens are discarded from the infection supply, and the overlord reads the following text aloud:
With a wailing howl, Bol'Goreth collapses. Blood pours from the many wounds in his body. He glares at you with malice and tries to rise, but sinks back to the ground. He drags himself forward laboriously, as if he wants to deal one last desperate blow. But with a dull crash the troll finally collapses, twitches briefly and then lies still and motionless.
The infected monsters may leave the map through the exit. Each time one does so, the overlord takes 2 tokens from the infection supply and places them in front of him.
If no infected monsters remain on the map, Bol'Goreth may leave the map through the exit. If he does so, the overlord takes 3 tokens from the infection supply and places them in front of him.
Secret Passage
As an action, a hero may, from an adjacent space, turn over a facedown task token. If it is a red one, it is discarded without effect. If it is the green one, the heroes have found the lever and opened the Secret Passage. The overlord then reads the following text aloud:
Hidden between the stones you find a lever. As you pull it, the ground trembles and a large stone slab slides aside. From behind it the humid air of the swamp pours in. A gently rising tunnel seems to lead out here, beyond the walls of the fortress.
Once the Secret Passage has been opened, a figure on a blue task token may spend 1 movement point to move to the other blue task token as if the two spaces were adjacent. Large monsters fit through the passage. There is no line of sight from one blue task token to the other. If the space the figure moves to is occupied, it is placed on the nearest empty space.
Reinforcements
None.
Victory Conditions
Once the overlord has 6 fatigue tokens in front of him (5 with 3 heroes, 4 with 2 heroes), he reads the following text aloud:
Completely out of breath, you collapse while the din of the shrieking and roaring creatures recedes further and further. They have fled in all directions, and you see no chance of hunting down and slaying them all.
You can only hope that they never reach populated areas ...
Once the overlord has 1 hero token of each hero in front of him, he reads the following text aloud:
One after another you collapse under the onslaught of the mutated monsters. The wounds they have dealt you burn like hell, and with every minute you grow weaker ...
Hours, perhaps even days, after the battle you come to. You wonder that you have survived, gather your equipment and set off again.
Your journey through the wilderness is uneventful, yet each of you senses that something is wrong. You seem to be doing well, much better than you should after such a terrible battle. If it were not for the brief clouding of your eyes and the twitch in your stomach, one might think all is well with you ...
The overlord has won!
Rewards
If the heroes win, they receive:
- The relic "Talisman of Health."
- The Hero reward on the back of the Advanced Quest card "Affliction Spreads."
If the overlord wins, he receives:
- The relic "Omen of Rot."
- The Overlord reward on the back of the Advanced Quest card "Affliction Spreads."