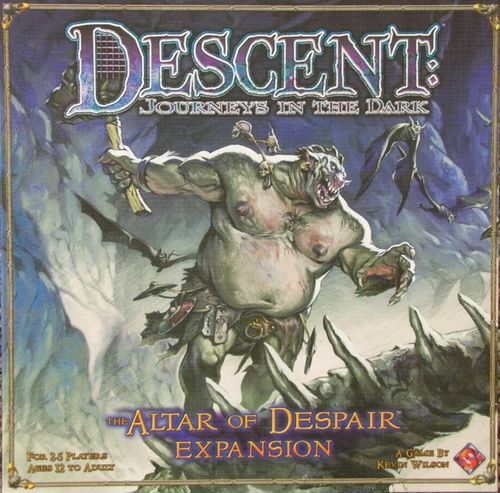
Descent: The Altar of Despair
Descent: The Altar of Despair Rulebook
Table of Contents
Table of Contents
- Using This Book
- Components
- The Replacement "Leadership" Card
- Component Overview
- Expansion Rules
- Prolonged Actions
- Cursed Items
- Dark Relics
- New Props
- New Treasure
- New Lingering Effects
- New Familiars
- New Special Abilities
- Map Legend
- Descent: Journeys in the Dark Rules Changes and Clarifications
- Frequently Asked Questions
- Special Abilities Summary
- Quest Guide
- Quest 1: The Thing in the Pit
- Quest 2: The Hall of the Monkey Kings
- Quest 3: Hold the Position
- Quest 4: The Mists of Time
- Quest 5: Into the Heart of Darkness
- Quest 6: The Altar of Despair
Using This Book
This rulebook contains new rules for use in Descent: Journeys in the Dark. These include changes to or clarifications of the original Descent: Journeys in the Dark rules, entirely new rules for the expansion, and answers to frequently asked questions about the game. While this expansion is designed to be used in its entirety, it is possible to play using only some of the new elements, such as the new heroes, new monsters, or new overlord cards.
The Quest Guide section of this rulebook begins on page 12.
Components
This Rulebook (the second half of which is a Quest Guide)
- 6 Hero Sheets
- 6 Plastic Heroes
- 21 Plastic Monsters
- 6 Plastic Blood Apes
- 6 Plastic Dark Priests
- 3 Plastic Deep Elves
- 3 Plastic Trolls
- 3 Plastic Chaos Beasts
- 110 Cards
- 10 Monster Reference Cards
- 49 Overlord Cards
- 4 Subterfuge Skill Cards
- 4 Fighting Skill Cards
- 4 Wizardry Skill Cards
- 5 Town Store Cards
- 12 Copper Treasure Cards
- 10 Silver Treasure Cards
- 6 Gold Treasure Cards
- 5 Dark Relic Cards
- 1 Replacement Descent: Journeys in the Dark Card
- 8 Map Pieces
- 2 Corrupted Room Pieces
- 2 Corrupted Corridor Pieces
- 1 Corrupted Intersection Piece
- 3 Corrupted Dead End Pieces
- 48 Prop Markers
- 30 Obstacle Markers
- 2 Glyph Markers
- 6 Dark Glyph Markers
All cards from The Altar of Despair expansion are marked with a small altar symbol on their fronts, to allow you to separate them from your Descent: Journeys in the Dark cards.
The Replacement "Leadership" Card
One "Leadership" replacement card for Descent: Journeys in the Dark has been included in this expansion. This card was changed to better work with the new prolonged action rules. To use it, simply remove the old card from your Descent: Journeys in the Dark game and replace it with this revised card.
Component Overview
Below are summary descriptions of the various components included in The Altar of Despair. They should help you identify the components and introduce you to how they are used.
New Heroes
These new heroes can be easily incorporated into Descent: Journeys in the Dark. Simply shuffle the new heroes in with the others when choosing heroes at the start of the game.
New Props
The new props included with this expansion are listed below.
Fog. Fog blocks line of sight, but not movement.
Corrupted. If heroes on corrupted terrain are wounded or spend fatigue, the overlord gains threat.
Dark Glyphs. Dark glyphs have been corrupted by the Overlord and have some negative effect each time the heroes use them. There are three different types of dark glyph, and they must be purchased with treachery at the start of the game.
Glyph of Summoning. (See Dark Glyphs under Expansion Rules.)
Altars. Altars are places for the heroes and monsters to interact with their gods, calling down great and powerful forces to aid themselves or hinder their foes. One side of the altar marker shows a good altar, while the other side shows an evil altar. The Quest Guide will specify which type of altar to use.
Crushing Walls. Crushing walls stand vertically on plastic stands, like doors. Once triggered in a quest, these walls slowly move together, crushing anyone caught between them.
New Monsters
The new monsters in this expansion appear in the new quests in this rulebook. Additionally, the overlord can spawn them in any of the quests from Descent: Journeys in the Dark through the use of the spawn cards included with this expansion. The overlord may use all of the monsters from this expansion in addition to all of the monsters from the base game.
New Map Pieces
The extra map pieces provided allow the boards for the new quests to be constructed. The new pieces are all corrupted terrain (see page 7).
New Effect Tokens
Curse. Frost. These tokens are used to track two new lingering effects, Curse and Frost. See page 8 for further details.
New Cards
This expansion includes new cards for the skill, shop, and treasure decks. These cards can simply be shuffled in with their respective decks before the game begins. However, some of the new treasure cards have the Cursed trait. These are referred to as cursed items and are described in detail on page 7.
Dark Relic Cards
Dark relics are terrifying items that the overlord can sneak in among the treasure that the heroes find. They are triggered by the "Dark Relic" trap card. See page 7 for further details.
New Order Tokens and Progress Markers
Prolonged Order Token and Progress Marker. These tokens and markers are used for making prolonged actions (see page 6).
New Overlord Cards
Six of the new overlord cards are intended to be added to the overlord deck (1 copy each of "Danger," "Dark Balm," "Crushing Block," "Paralyzing Gas," "Blood Ape Tribe," and "Black Order"). The other overlord cards have a colored gem between their threat cost and threat value. This gem contains the card's treachery cost. Treachery is explained on pages 4-5.
New Monster Reference Cards
The new monster reference cards provide the game rules and statistics for the new monsters featured in this expansion. See New Special Abilities on pages 8-9 for a full description of each new ability listed on these cards.
New Treasure Markers
Invulnerability Potion. These markers represent the new invulnerability potions (see page 8) introduced in this expansion.
New Miscellaneous Markers
The Sharr the Brightwing and Shadow Soul markers represent new familiars available to heroes with the proper Wizardry or Subterfuge skill, respectively. The Bottle Imp, on the other hand, is a familiar available to a hero with the proper silver treasure card. The Eyes of Thara marker is used by the "Eyes of Thara" silver treasure card. This expansion also includes extra monkey tokens so that there are now enough for the entire party to be transformed at once.
Expansion Rules
This section contains rules for the new game elements included with this expansion.
Treachery
With this expansion, the overlord player has the ability to customize the overlord deck from the base game using treachery.
Most of the new overlord cards have a hexagonal, colored gem between the gems for their threat value and their threat cost. This is their treachery cost. At the start of each quest, before the game begins (step 6B), the overlord receives a certain amount of treachery with which he can customize his base overlord deck.
The overlord's base deck consists of all his cards that have no treachery gem: This includes all the cards from the original Descent: Journeys in the Dark, as well as 1 copy each of "Danger," "Dark Balm," "Crushing Block," "Paralyzing Gas," "Blood Ape Tribe," and "Black Order," which are new to this expansion.
When customizing his deck, the overlord player swaps out cards from his base deck for cards that have a treachery cost. Each quest states how much treachery the overlord receives when playing that quest. This information is found above the chest contents chart for that quest. (Treachery for quests from Descent: Journeys in the Dark can be found in the "Treachery for the Original Quests" sidebar.)
Treachery comes in three types: Events (green), Traps (purple), and Monsters (red). Power cards are paid for with event, trap, or monster treachery as well, depending on the color of their treachery gem. In order for the overlord to add a card that has a treachery cost to his deck, he simply spends the listed amount of treachery (making sure to spend the proper type), then he adds the card to his overlord deck, removing any one other card of his choice from the deck. The overlord may swap out as many cards from the overlord deck as he wants in this manner as long as he has enough treachery to pay for them all.
Example: Evan, the overlord for this game, receives 2 event treachery, 6 trap treachery, and 2 monster treachery at the start of a quest. He finds this information by looking on the quest map, above the chest contents chart. He decides that he wants to add "Dance of the Monkey God" (3 trap treachery), "Dark Power" (1 event treachery), and "Time Slips Away" (1 event treachery) to his deck. This leaves him with 0 event treachery, 3 trap treachery, and 2 monster treachery, which he chooses not to spend. He then adds the 3 cards he has chosen to his overlord deck and chooses 3 other cards to remove from it (in this case, an "Aim," a "Gust of Wind," and a "Hordes of the Things" card).
Treachery for the Original Quests
The overlord should receive the treachery listed below when playing the nine quests from Descent: Journeys in the Dark.
| Quest | Event (green) | Trap (purple) | Monster (red) |
|---|---|---|---|
| Into the Dark | 4 | 4 | 4 |
| The Brothers Durnog | 4 | 2 | 4 |
| Problems of Life and Death | 3 | 3 | 4 |
| Spoiled Brat | 3 | 3 | 3 |
| Last Wishes | 4 | 4 | 2 |
| The Eternal Guardian | 3 | 2 | 5 |
| The Black Blade |
Dark Glyphs
In addition to spending treachery on customizing his overlord deck, the overlord can also purchase dark glyphs. These glyphs have been corrupted by the overlord and typically have an unpleasant side effect for the heroes when used or activated. Each dark glyph costs 2 treachery of the appropriate color (see below). At the start of the game, if the overlord purchases any dark glyphs, he mixes them in with the normal glyph markers, turning all the glyphs so that their red (unactivated) side is faceup.
Example: Evan has 3 unspent trap treachery and 2 unspent monster treachery, for a total of 5 unspent treachery points. He decides to purchase 1 dark glyph of the Sundered (green) type.
Note: Glyphs that are activated at the start of the quest may not be dark glyphs.
The specific effects of each glyph are listed below:
Summoning (Red): When this glyph is activated, as well as each time a hero uses it to move to or from town, the overlord may spawn 2 monsters (any combination of beastmen, skeletons, bane spiders, razorwings, hellhounds, and/or sorcerers), following the normal spawning rules. Otherwise, this glyph functions as a normal glyph.
Sundered (Green): This glyph only provides 1 conquest token when activated, and cannot be used to move to or from town like a normal glyph.
Power (Purple): When this glyph is activated, as well as each time a hero uses it to move to or from town, the overlord may draw two cards and look at them. He then keeps one and discards the other for threat. Otherwise, this glyph functions as a normal glyph.
When a new glyph is placed on the map (usually as the result of a new area being revealed), the overlord chooses the glyph from his pool of glyphs. He is allowed to look at their facedown sides to select exactly the glyph he wants.
The treachery gem on the new overlord cards may be either green (for Events), purple (for Traps), or red (for Monsters). The number in the hexagon indicates the card's treachery cost.
Unspent Treachery
For every 2 points of leftover treachery (of any type), the overlord draws 1 extra overlord card to start the game, up to a maximum of 8 cards.
Example: Evan has 3 total points of unspent treachery left. He draws 1 extra overlord card to start the game (giving him 4 cards total), and the final point of treachery is wasted.
Resetting the Overlord Deck
At the end of the game, the overlord deck is restored to its original condition, removing all cards that have treachery costs from it and returning the original cards to it.
The Ready Action (Revised)
The Ready action has been slightly redefined for clarity and to better interact with prolonged actions, which are explained below. Now, when a hero readies, he receives two different half actions, one of which must be an order half action. The two actions can be taken in any order.
The different half actions are:
- Move: The hero may move up to a number of spaces equal to his speed. The hero may interrupt his movement with his other half action and then continue moving as desired.
- Attack: The hero may make one attack.
- Order: The hero may place one hero order token faceup next to his figure. If the order is a prolonged action order (see below), the hero may also roll power dice.
- Concentrate: A hero with a prolonged order token on him may take a concentrate half action to roll power dice, as described under "Prolonged Actions." He may spend fatigue to bring this roll up to a maximum of 5 power dice, as normal. This gives the possibility of making two rolls a turn to work on a prolonged action as long as the hero does nothing else.
Stunned Heroes and Half Actions
A stunned hero now effectively receives one half action instead of his normal action, so he could choose to concentrate instead of moving, attacking, or placing an order.
Prolonged Actions
Sometimes heroes want to do something more involved than simply moving and shooting. They may wish to search for a hidden lever to prevent a moving wall from crushing them, or they may want to try and convince a ghost to help them in their quest. That's when prolonged actions come in handy.
Prolonged actions are typically dictated in the text of a quest, and are performed by taking the Ready action (see the revisions made to it, above) and placing a prolonged action order token on your hero. The prolonged order action is removed from the hero at the end of your turn. However, you may keep the progress tokens that you accumulate from performing the prolonged action (see below).
Prolonged actions appear like this in the quest text:
"Make a prolonged Trait (Difficulty) action to do something." This sentence is then followed by an instruction as to whether or not the action can be disrupted.
Trait is either Melee, Ranged, or Magic, and tells you which trait you'll be using for the attempt. Immediately after placing the prolonged action order token on your hero, roll power dice equal to your listed trait. You may spend fatigue to add power dice to this roll, up to a maximum total of five power dice.
Example: The Quest Guide states "A hero must make a prolonged Melee (4) action to break down the stuck door. This action cannot be disrupted." Tahlia, who has a melee trait of 3, moves to the space specified by the quest. On her next turn, she takes a Ready action. She first takes an order half action, placing a prolonged order token next to her hero figure and rolling power dice. She will roll 3 power dice for her melee trait, and she could also choose to spend up to 2 fatigue to roll 2 additional power dice.
Difficulty tells you how many power enhancements you'll need to roll over the course of several turns to complete the action successfully. For every power enhancement you roll on your prolonged action roll, you gain 1 progress marker towards the completion of the action. If this gives you a total number of progress markers equal to or exceeding the difficulty of the prolonged action, then the action is successfully completed and the listed effects take place.
Note: If a prolonged action has a Difficulty of X, then you may choose to complete it with any number of progress markers.
Example: Continuing the example listed above, Tahlia chooses to spend no fatigue, so she rolls 3 power dice. She rolls 2 power enhancements, so she takes 2 progress markers and places them in front of her. Once she accumulates 4 markers (since the difficulty is 4), she will complete the action and break down the door. With her second half action, Tahlia could choose to concentrate and roll power dice again.
Disrupting Prolonged Actions
Some prolonged actions may be disrupted by certain events, such as spending movement points or losing wounds. The individual quest will specify whether and how a particular prolonged action can be disrupted. If a prolonged action is disrupted, it immediately fails and you discard all progress markers you've accumulated for it so far. A disrupted action can be started over as often as the heroes want to keep trying.
Example: In the example above, the prolonged (Melee) 4 action cannot be disrupted, so Tahlia keeps the progress markers she has accumulated until she finishes breaking down the door. She could choose to not take a Ready action for several turns, she could move away from the door, or she could even die, and she would still keep her progress markers until the door is broken down.
Example: The Quest Guide states that a prolonged Magic (2) action to search for a secret door will be disrupted if the hero taking the prolonged action moves away from the space being searched. Aurim decides to take a Ready action and search the space he is on. He takes an order half action, placing a prolonged order token and rolling power dice. His magic trait is 1 and he does not wish to spend fatigue, so he rolls only 1 die. He rolls a power enhancement and places 1 progress marker in front of him. He uses his second half action to concentrate, again rolling 1 power die. Unfortunately, this time he rolls a blank. If on a future turn Aurim moves away from the space he is on, he will lose the 1 progress marker he has accumulated. However, Aurim can do other things, such as attacking and taking wounds, without disrupting the prolonged action.
Continuous Prolonged Actions
Some prolonged actions are continuous, which means that they must be constantly worked on or they fail. Once a continuous prolonged action has begun, the hero must continue it each turn, or it is disrupted.
Example: Kirga is taking a continuous prolonged Ranged (5) action to pick a lock. Kirga uses a Ready action to first move to the space indicated by the quest (a move half action), then to start the prolonged action by placing a prolonged order token and rolling power dice (an order half action). On his future turns, if Kirga does anything besides taking a Ready action and concentrating with his half actions, he will lose the progress markers he has accumulated so far.
Group Efforts
Sometimes the Quest Guide will explicitly allow multiple heroes to contribute to the progress of a prolonged action. In this case, simply combine the progress tokens from the different heroes into one pool to track the progress of the action. If the Quest Guide indicates that a prolonged action can be a group effort and that it is continuous, only one hero must continue the action each turn, even if multiple heroes contribute to its progress.
Cursed Items
Some items possess great power, but come at a price. These items have the Cursed trait. Any time a hero equips a cursed item, he receives one curse token. In addition, if the hero is killed, he must immediately either discard or re-equip any cursed items he had equipped when he died. He receives one curse token for each cursed item that he re-equips, to replace the curse tokens that were removed when he died (see Curse on page 8 for more information).
Dark Relics
A few items are even more dangerous than mere cursed items. These are the legendary dark relics, and their only purpose is to bring misery wherever they appear. In order to use them, the overlord must spend treachery to swap at least one copy of the "Dark Relic" overlord card into his deck. Then, when he plays the card, he can substitute any dark relic of his choice from the deck of dark relics for one of the treasure cards the heroes were about to receive.
The hero who receives a dark relic must immediately equip it, un-equipping other items to do so if necessary. Worse, the hero cannot unequip or drop the dark relic. In fact, the only way to get rid of a dark relic normally is to die, at which point any dark relics the hero is carrying are discarded.
Dark Relic Example: The "Black Ring" is a Weapon dark relic whose text reads: "You cannot spend surges." Dark relic cards have a threat cost listed in the green gem in the upper left corner. For example, the "Black Ring" card shown above has a threat cost of 11.
In addition to this cost, the overlord must spend extra threat depending on what kind of treasure card the "Black Ring" is replacing (as described on the "Dark Relic" trap card). He would pay an extra 4 threat if the ring was replacing a copper treasure (for a total of 15 threat), 8 extra threat for a silver treasure (19 threat total), or 12 extra threat for a gold treasure (23 threat total).
New Props
Obstacles
Fog. Fog markers do not block movement. However, they do block line of sight. Figures have line of sight into adjacent fog spaces. A figure in a fog space has line of sight to all adjacent spaces, but not to any other spaces.
Corrupted. Corrupted terrain does not block line of sight or movement. However, each time a hero spends a point of fatigue when on a corrupted space, the overlord gains 1 threat. Worse, each time a hero loses a wound while on a corrupted space, the overlord gains 2 threat. If a hero is struck by an "instant death" effect like a crushing wall while on a corrupted space, the overlord receives 2 threat for each wound the hero had before being killed.
Crushing Walls
Crushing walls block line of sight and are treated as a wall for purposes of blocking line of sight, attacks, and movement. Unlike other props, crushing walls move through the dungeon, crushing everything that gets in their way.
Crushing Wall Movement. At the start of the overlord's turn, before he does anything else, he must move all crushing walls in play. To do this, he simply moves the crushing wall one space in the direction indicated by the quest. If a figure is caught between a crushing wall and either a wall, a crushing wall, or a closed door, the figure is instantly killed, regardless of wounds, armor, or special abilities such as Undying.
Any figure in a space that a crushing wall moves through is pushed along in front of the wall, taking 1 wound (ignoring armor). The only exception to this is figures in a pit when the crushing wall moves overhead (see below). Crushing walls remove rubble obstacles from any space they move through, but ignore most other obstacles (other than pits, see below). Once a crushing wall has moved into a wall or a closed door, it is removed from the map.
Crushing Walls and Pits. Crushing walls move across the top of pits. Any figure in a pit that a crushing wall is moving across is safe from being crushed by the moving wall and is not pushed along in front of it. A figure moving from one pit space to another may move through a crushing wall as if it were not there.
Altars
Altars do not block movement or line of sight. Altars have effects that vary by quest, but the method to activate them is always the same:
Good Altars: To activate a good altar, a hero must stand on top of the altar, spend 2 movement points as a movement action, and spend 250 coins. The altar's effect then takes place as described in the quest.
Evil Altars: To activate an evil altar, the overlord must move a monster on top of the altar and have the monster spend 2 movement points. The monster is then killed and the altar's effect takes place as described in the quest.
New Treasure
The following new types of treasure can be found in the dungeon.
Invulnerability Potion Markers
Invulnerability potions are elixirs with magical protection powers. When a hero picks up an invulnerability potion, he may immediately equip it for free if he doesn't already have three equipped potions. He may place the potion in his pack if it isn't already carrying three unequipped items.
A hero may drink one of the invulnerability potions he has equipped by spending 1 movement point. A hero who drinks an invulnerability potion places the potion marker on top of his hero's picture on his hero sheet. Any time the hero is struck by an enemy attack, he may discard the invulnerability potion from his hero sheet portrait after the attack roll is made to gain +10 Armor against that attack. This effect is canceled if the hero drinks another potion before using it. Otherwise, the potion remains in effect until the hero discards the token or dies.
Note: Each hero may only drink one potion (of any type) each turn (see Rules Changes and Clarifications).
Bottle Imp
This familiar is granted by the "Bottle Imp" silver treasure card while it is equipped. The Bottle Imp's speed is 4 and it has the Aura ability.
New Lingering Effects
This expansion introduces two new lingering effects, described below.
Curse
A hero that is cursed is marked with a curse token. The hero's conquest value is increased by 1 for each curse token on him. Curse tokens are generally only discarded from the hero when the hero is killed.
Example: Runewitch Astarra has 2 curse tokens on her. Her conquest value is increased from 2 to 4, so if the overlord kills her, the heroes lose 4 conquest tokens. Of course, once she is killed, all of the curse tokens on her are discarded.
Frost
Frost tokens indicate that a hero has been temporarily covered in a thin sheet of ice, weakening his items. At the start of each of that hero player's turns, he must roll a power die for each frost token on the hero. For each power surge rolled, one frost token is discarded. Otherwise, the tokens remain. Each time a hero attacks with a weapon when he has one or more frost tokens on him, he must afterwards roll 1 power die for each frost token on him. If any power die rolls a blank, the weapon used to make the attack is shattered and discarded.
This also applies to the hero's shield each time it is exhausted to absorb damage, as well as to the hero's armor each time an attack deals 5 or more wounds to him (before being reduced by armor).
Example: Sir Valadir has 1 frost token on him when he makes an attack with his sword. After completing the attack and dealing any damage from it, he rolls one power die. He rolls a blank, so his sword is discarded. Then, during the overlord's turn, Sir Valadir is attacked for 5 wounds. He exhausts his crystal shield to reduce it by 1 wound, and his chain mail and base armor reduces it by another 4 – but it still dealt 5 wounds initially. Therefore, he rolls 1 power die for his crystal shield (surge) and 1 power die for his chain mail (blank). Bad luck: His chain mail is discarded as well.
New Familiars
Sharr the Brightwing
This familiar is granted by the "Sharr the Brightwing" Wizardry skill card. Sharr's speed is 5 and she has the Flying ability. If Sharr ends her movement in the same space as a friendly figure, that figure recovers 2 wounds. If Sharr ends her movement in the same space as an activated dark glyph, that dark glyph is removed from the board and replaced with an activated normal glyph.
Shadow Soul
This familiar is granted by the "Shadow Soul" Subterfuge skill card. The Shadow Soul's speed is 5 and it has the Flying ability. The Shadow Soul cannot end its movement in the same space as another figure, nor can figures end their movement in the same space as the Shadow Soul. At the start of its owner's turn, the Shadow Soul's owner may either:
- A) Swap places with the Shadow Soul,
- B) Move the Shadow Soul to an empty space adjacent to the owner, or
- C) Do nothing with the Shadow Soul.
The owner then receives his normal turn, including movement, even if he swapped places with the Shadow Soul.
New Special Abilities
Invulnerability Potion
See Invulnerability Potion Markers under New Treasure, above.
Bash
When making an attack with the Bash ability, the figure may roll up to 5 power dice with the attack. If any of the power dice roll a blank, it is treated as though the figure rolled a miss result. Otherwise, the attack proceeds as normal and has the following ability: for each power surge spent, +5 Damage and Pierce 2. The figure never has to roll any power dice when making a Bash attack, regardless of other effects.
Berserk
If a monster with the Berserk ability is wounded (i.e., currently has one or more wound tokens on it), it rolls all 5 power dice when attacking.
Black Curse
All enemy figures within 3 spaces of a figure with the Black Curse ability receive –1 Range (Melee attacks still ignore range) and –1 Damage to all attacks they make.
In addition, any enemy figure that deals the killing blow to a figure with Black Curse receives one curse token. This only takes effect if the figure with Black Curse actually dies (i.e., isn't saved by Undying or a similar ability).
Dark Prayer
A monster with the Dark Prayer ability generates 1 threat for the overlord for every surge it rolls when attacking, instead of for every 2 surges. In addition, the figure gains +1 Range and +1 Damage for each surge rolled when attacking.
Frost
If an attack by a monster or weapon with the Frost ability inflicts at least 1 damage on a hero (before applying the effects of armor), he is temporarily covered in a thin sheet of ice, weakening his items. After applying any wounds from that attack, place a frost token next to the affected hero. A hero can have more than one frost token at a time. Monsters are not affected by Frost.
Shadowcloak
A figure with the Shadowcloak ability is only affected by attacks made by adjacent figures. The figure does not suffer any wounds or effects from attacks originating farther than one space away.
Leap
A figure with the Leap ability can make a Leap attack. The figure moves in a straight line (vertical or horizontal, but not diagonal) up to twice its remaining movement, ignoring obstacles and enemy figures. Leaps cannot pass through walls or closed doors, and they must end on an empty space. The leaping figure may then make one attack roll that affects any enemy figures in the spaces it just moved through. A Leap attack ignores rolled range, only missing on a miss result. If the attack does not miss, it deals full damage to each figure affected by it. If a Leap attack is dodged by more than one figure, only one re-roll may be made (the first dodging player to the attacking player's left decides which dice, if any, are to be re-rolled). A figure is limited to one Leap attack per turn, and the figure cannot move any further after making the attack.
Leap Attack Examples: The blood ape on the left has 4 movement points remaining when it makes a leap attack. It moves the maximum of 8 spaces (twice the ape's remaining movement points) to the right, passing through Aurim, Sahla, and a beastman. It then makes an attack that affects both Aurim and Sahla, but not the beastman. The attack deals full damage to each of the affected heroes. Either Aurim or Sahla may dodge this attack, but not both of them.
The blood ape on the right also has 4 movement points remaining when it makes a leap attack. It moves 7 spaces upwards, passing through Aurim, Eliam, and a rubble obstacle. (Remember, leap attacks ignore obstacles.) The ape may then make an attack that affects both Aurim and Eliam. The attack deals full damage to each of the affected heroes. Again, either Aurim or Eliam could dodge this attack, but not both of them.
IMPORTANT: Leap attacks must be made either vertically or horizontally. A figure cannot make a diagonal leap attack.
Morph
A monster with the Morph ability can choose which dice it attacks with. For each morph die (indicated by a die icon with a question mark) the monster has on its reference card, the overlord player may choose a red, white, blue, yellow, or green die to roll, as limited by the dice that came with the game. The attack must include at least one red, white, or blue die, but can include more than one of those dice if so desired. The overlord also chooses what type of attack the creature makes (Melee, Ranged, or Magic). The attack must include a red die to be a Melee attack, a blue die to be a Ranged attack, or a white die to be a Magic attack.
Example: A chaos beast attacks a hero. It has 3 morph dice on its reference card, so the overlord chooses 3 dice. Taking a big risk, the overlord decides to roll 1 blue, 1 red, and 1 white die for the attack. Since he has used all three dice listed above, he could choose to make the attack Melee, Ranged, or Magic.
Necromancy
When a hero with the Necromancy ability deals the killing blow to a small (no bigger than one space) normal unnamed monster (and it stays dead, in the event of Undying or other such effects), he may choose to animate that monster. The monster stays on the board and is returned to full health, but is now under the control of the hero. A hero cannot control more than one monster at a time, but may choose to let a monster under his control die in order to animate a new one.
An animated monster moves after the controlling hero's turn ends. The monster activates just like it does for the overlord player, only now it is under the direction of the controlling hero. However, after the monster completes its activation, the controlling hero must roll one power die. If he rolls anything but a power enhancement, the animated monster falls apart and is killed.
Map Legend
The treachery that the overlord receives for each scenario is indicated in three colored gems above the chest contents information. Remember that the overlord must swap out a card from his base deck for each card he purchases with treachery.
The map symbols are: Treachery; Vitality; Healing; Invulnerability; Encounter Marker; Unactivated Glyph; Activated Glyph; Copper Chest; Silver Chest; Gold Chest; Gold Pile; Good Altar; Evil Altar; Large Pit; Yellow Rune; Blue Rune; Red Rune; Rubble; Pit; Water; Gray Stairs; Red Stairs; Blue Stairs; Green Stairs; Red rune-locked door; Yellow rune-locked door; Blue rune-locked door; Door; Fog; Corrupted.
Note: Red-bordered monsters are Master Monsters.
Descent: Journeys in the Dark Rules Changes and Clarifications
The following rules have been changed or clarified to improve the game.
Overlord Cards
The overlord starts the game by drawing 3 overlord cards from his deck. The overlord can discard cards for threat at any time, even during a hero player's turn.
Breath Template Clarification
The flame from a Breath attack billows out and around obstacles. It usually affects all figures under the breath template, but the flame can be blocked by walls and closed doors. Essentially, if a small flying figure could trace a legal movement path from the square where the Breath attack starts to the target – while staying within the breath template – then the target is affected. See the diagram in FFG's online FAQ (www.fantasyflightgames.com) for examples. Breath attacks cannot be made through staircases.
Landrec the Wise
Landrec the Wise's special ability should state that he "receives 2 free surges on all attack rolls."
Drinking Potions
Each hero may only drink one potion (of any type) each turn. This prevents players from using certain overly powerful potion combinations.
Stun and Half Actions
A hero that discards a stun token now receives one half action (see page 5) instead of a normal action.
Small Monsters and Staircases
By using one movement point, a small monster may move from one space containing a staircase to any space containing a staircase of the same color.
Knockback and Large Monsters
Large monsters (monsters that occupy more than one space) are heavier and therefore less affected by Knockback. For each space beyond the first that the monster occupies, it is moved one less space by Knockback. For example, an ogre occupies three spaces, so it would move two fewer spaces when affected by the Knockback ability. A dragon, on the other hand, occupies six spaces, so it would move five fewer spaces.
Pits and Line of Sight
Figures in a pit can see into the spaces adjacent to the pit.
Cost of Vitality Potions
Vitality potions should cost 50 coins, not 25 as listed on page 20 of the original Quest Guide.
Selling Treasure from Chests
Heroes can no longer immediately turn in a treasure card from a chest to receive its full value. Instead, they must carry the item back to town and sell it for half value in the town shop.
Buying Treasure Cards from the Shop
Heroes can only buy treasure cards from the shop if they've previously opened at least one chest of that color this game. For example, until the heroes open at least one silver chest, they cannot buy silver treasures from the town shop.
Frequently Asked Questions
Following are the frequently asked questions for Descent: Journeys in the Dark.
The Hero Player's Turn
Q: Can a hero give any type of item to an adjacent hero, or just weapons and potions? A: A hero may give any item (but not money) to an adjacent hero at the cost of one movement point.
Q: When can a hero equip items? A: A hero can equip, drop, or place items in his pack at the beginning of his turn, just after refreshing cards. In addition, whenever a hero receives an item from another player or from a chest, he may immediately equip that item, dropping or placing other items in his pack to free up the hands necessary for the just-received item.
Q: Does a hero have 360 degree line of sight? A: Yes, as the rules state on page 4, "The direction a figure is facing has no effect in the game. Heroes and monsters are assumed to be constantly looking around and can therefore see in all directions."
Q: Can stunned heroes perform movement actions (such as drinking a potion)? A: Yes, if the stunned hero chooses a move half action. A stunned hero can also spend fatigue for movement points.
Q: Can a hero that chooses the "Run" action use his movement points for purposes other than moving (such as drinking a potion)? A: Yes. Whenever a hero receives movement points, he can use them for any movement action, including moving, drinking a potion, opening a door, etc.
Q: In town, are you limited in how many items you can buy or sell and do you have to buy and sell in any specific order? A: You can buy and sell in any order and as often as you like.
Q: Can a hero rest in town? A: Yes.
Q: If a chest has 2 copper treasure tokens, does each hero draw 2 copper treasure cards? A: Yes.
The Overlord Player's Turn
Q: When the overlord is controlling a hero through "Dark Charm," who decides how to spend the surges and power dice? Can the overlord move the character and attack, or just make a single attack without moving? A: The overlord controls the hero for that attack, including the hero's use of surges and power dice. The overlord may also play cards such as "Aim" with the attack. However, the overlord player cannot move the character, or force the hero to spend fatigue to add to the attack.
Q: Is the effect of the overlord's "Dodge" card that the hero's attack completely misses, or that the overlord can force the hero to re-roll dice rolled for the attack, as with the hero dodge orders? A: The "Dodge" card allows the overlord to force re-rolls.
Q: Can a monster end its movement on or be spawned on to a glyph of transport? A: Monsters can end their movement on or be spawned on to unactivated glyphs, but cannot end their movement on or be spawned on to activated glyphs. If a monster is on an activated glyph, the overlord must move it off the glyph on his next turn, if possible. Monsters can always move through or attack into spaces containing glyphs.
Q: Can the overlord receive threat tokens for making an attack even though there are no valid targets (for example, no heroes within the monster's line of sight)? A: No. Only attacks that have the potential to succeed can grant the overlord any threat.
Special Abilities
Q: Can an attacker using Knockback move the target in any direction, or just straight back? Also, can the target be knocked back into a pit? A: The attacker with Knockback can move the target in any direction, including into a pit or other trap.
Q: Does special abilities stack? A: Special abilities that require you to spend surges are designed to stack. So if you have an ability such as ": +1 Damage and Pierce 1," and you pay 3 surges, you gain +3 Damage and Pierce 3. Some items may explicitly limit your surge spending/stacking, but those are the exception to the rule.
Miscellaneous
Q: How much fatigue would it cost a hero with Telekinesis to move a hero out of a pit? A: One fatigue.
Q: Can a player with Telekinesis use it to move a hero that is caught in a web? A: Yes. However, the web token would stay with the moved hero.
Q: If a flying monster passes through a hero that has Holy Aura, does the monster suffer a wound for the space it "shares" with the hero? A: No.
Q: When a chest explodes because of the "Explosive Rune" card, does the hero standing on the chest suffer wounds, or just the heroes adjacent to the chest? A: The hero standing on the chest suffers wounds.
Q: Why can't I jump over water like I can pits? A: As every hero knows, the dank water found in subterranean caverns is usually infested with deadly bloodsquids, ready to pull an unwary hero to his doom at a moment's notice. As a result, only the most acrobatic heroes dare to leap across even the most innocent-seeming pools of water.
Special Abilities Summary
Special abilities that are new to this expansion are marked with a symbol in the original rulebook; abilities marked with a different symbol are from The Well of Darkness expansion. The symbols are not reproduced here, and power surge symbols are written out in words. The printed "role 1 power die" in the Frost entry is read as "roll 1 power die."
Aura: Enemy figures that move into a space adjacent to a figure with Aura suffer 1 wound that cannot be reduced by armor.
Bash: A figure with Bash may roll up to 5 power dice with its attack. If any of the power dice roll a blank, the attack misses. Otherwise, the attack gains "for each power surge spent, +5 Damage and Pierce 2."
Berserk: If a monster with Berserk is wounded (i.e., currently has one or more wound tokens on it), it rolls all 5 power dice when attacking.
Black Curse: All enemy figures within 3 spaces of a figure with Black Curse receive –1 Range and –1 Damage to all attacks they make. Any enemy figure that deals the killing blow to a figure with Black Curse receives 1 curse token. A hero's conquest value is increased by 1 for each curse token on him.
Blast: Blast attacks affect every space within X spaces of the target (only spaces with line of sight to the target are affected).*
Bleed: Bleed attacks that inflict at least 1 damage† on the target cause a bleed token to be placed on the target. Victim must roll a white die for each bleed token on next turn: Victim suffers wounds equal to total result,** then discards all bleed tokens.
Bolt: Bolt attacks use the Bolt template to determine which spaces they affect.*
Breath: Breath attacks use the Breath template to determine which spaces they affect.*
Burn: Burn attacks that inflict at least 1 damage† on the target cause a burn token to be placed on the target. Victim must roll a power die for each burn token next turn: Discard a burn token for each power surge, then victim suffers a wound for each remaining burn token.**
Command: A figure with Command adds 1 to the range and damage of all attacks made by friendly figures within 3 spaces.
Dark Prayer: A monster with Dark Prayer generates 1 threat for the overlord for every power surge it rolls when attacking, instead of every 2 power surges. In addition, the figure gains +1 Range and +1 Damage for each power surge.
Daze: Daze attacks that inflict at least 1 damage† on the target cause a daze token to be placed on the target. Victim must roll a power die for each daze token next turn: Discard a daze token for each power surge, then victim rolls 1 fewer die for each daze token that remains when making attacks.
Fear: When an attack affects a space containing a figure with Fear, the attacker must spend X power surges or else the attack misses.
Fly: Figures with Fly may move through obstacles and enemy figures, and may end their movement on obstacles without taking damage.
Frost: Frost attacks that inflict at least 1 damage† on the target cause a frost token to be placed on the target. Victim must roll a power die for each frost token next turn: Discard a frost token for each power surge. Heroes with any frost tokens remaining must roll 1 power die when attacking or using a shield: On a blank, the weapon/shield shatters. Frosted armor checks for shattering if it is dealt 5 wounds.
Grapple: Enemies adjacent to a figure with Grapple cannot spend movement points until the figure is dead.
Ironskin: A figure with Ironskin is immune to Aura, Bleed, Burn, Pierce, Poison, and Sorcery. In addition, all damage dealt to the figure by Blast, Bolt, or Breath attacks is reduced to 0.
Knockback: Knockback attacks that inflict at least 1 damage† allow the attacker to move the target up to 3 spaces in any direction.
Leap: Figures with Leap can move up to twice their movement in a straight line (horizontal or vertical, not diagonal), then they may make one attack roll against all figures in the spaces moved through, ignoring rolled range.* See page 9 for details.
Leech: For every wound token lost due to a Leech attack, the target also loses 1 fatigue, and the attacker is healed of 1 wound.
Morph: The overlord chooses which attack dice a monster with Morph uses (the attack must include at least one red, white, or blue die).
Necromancy: When a hero with Necromancy deals the killing blow to a small, normal, unnamed monster, he may choose to animate that monster. The monster stays on the board and is returned to full health, under the control of the hero. A hero may only animate one monster at a time. The monster activates after the player's hero, and afterwards must roll a power die: The monster is killed on any result except a power enhancement.
Pierce: Pierce attacks ignore X points of armor.
Poison: Wound tokens lost due to a Poison attack are replaced by poison tokens. When receiving healing, the victim removes poison tokens rather than gaining wound tokens, until all poison tokens are removed.
Quick Shot: A monster with Quick Shot may attack twice each time it is activated.
Reach: Allows a figure to make melee attacks targeting figures 2 spaces away.
Shadowcloak: A figure with Shadowcloak is not affected by attacks made by non-adjacent figures.
Sorcery: After making an attack roll, a figure with Sorcery may add X to either its range or its damage, and may split the bonus between the two.
Stun: Stun attacks that inflict at least 1 damage† on the target cause a stun token to be placed on the target. Normal monsters that begin a turn with a stun token may do nothing else, while heroes may take one half action and master monsters may move or attack once. Figures discard 1 stun token each turn. Named monsters cannot be stunned.
Swarm: A figure with Swarm may roll 1 extra power die for every other friendly figure adjacent to its target.
Sweep: Sweep attacks affect all enemy figures within melee range.*
Trickster: The Overlord's cost to play Trap cards is reduced by 1 threat for each monster with this ability in play.
Undying: A figure with Undying rolls 1 power die when killed. On a power surge, the figure is instantly restored to full health.
Unstoppable: A figure with Unstoppable is immune to Daze, Grapple, Knockback, Stun, and Web.
Web: Web attacks that inflict at least 1 damage† on the target cause a web token to be placed on the target. Victim must roll a power die for each web token next turn: Discard a web token for each power surge, and victim may not spend movement points if any web tokens remain.
In all cases, X is equal to the rank of the special ability.
* If more than one figure dodges the attack, only 1 re-roll may be made (first dodging player to the attacking player's left decides who re-rolls). ** Damage dealt ignores armor. † Determine whether damage is inflicted before applying the effects of armor.
Quest Guide
The quests below are translated from the French edition of the rulebook. Translation choices: "points de conquête" are conquest points; "pions" are tokens; "hommes animaux" are beastmen; "cerbère" is rendered as hellhound; "araignée poison" as bane spider; "elfe des profondeurs" as deep elf; "prêtre noir" as dark priest; "rose des vents" is the compass rose marker; "faux marqueur rencontre" is a false encounter marker; "action prolongée" is a prolonged action; "prisonniers" are prisoners and their cells are "geôles". Where the printed layout places a block under a zone, this file places it under that zone, and printed duplicates are kept as printed. Quest 3 has no printed text for turns 2 and 6, and none is added.
Quest 1: The Thing in the Pit
Introduction
Yesterday, the mayor of a neighboring village came to see you in a panic while you were carousing at the local inn. "Please, you must help us! Dark priests have kidnapped ten villagers, including my daughter! You must hurry or the priests will sacrifice them!" You gather your weapons and a map of the old ruins where the priests are supposed to be, and off you go.
In this quest, the heroes must rescue innocents about to be sacrificed by a group of dark priests.
Quest Goals
When you enter the tunnel, you hear a cry of distress. Your goal is to save as many villagers as possible and to defeat the chaos beast worshipped by the dark priests. If you manage to activate the ancient glyphs of transport, so much the better. You start with 8 conquest points. If you fall to 0 conquest points, the dark priests have won. If you finish the quest with fewer than 12 conquest points, the losses to the village will be too high and you will have failed. Good luck.
Treachery and Chests
The overlord receives 2 trap treachery, 3 event treachery, and 2 monster treachery for this quest.
| Chest | Contents |
|---|---|
| Copper 1 | 2 conquest points, 150 coins, 1 copper treasure |
| Copper 2 | 3 conquest points, 1 copper treasure |
| Copper 3 | 2 conquest points, 1 invulnerability potion, 1 copper treasure |
| Silver 1 | 3 conquest points, 1 curse, 1 silver treasure |
| Silver 2 | 2 curses, 250 coins, 1 silver treasure |
| Silver 3 | 1 curse, 150 coins, 1 silver treasure |
Prisoners
At the start of each of your turns, if none of the heroes opened a cell this turn, place a wound token in front of you. When you have three wound tokens in front of you, discard them and place a threat token next to the compass rose marker. Each time this happens, one of the prisoners is sacrificed to the chaos beast, in the numerical order shown on the map. If the heroes opened a cell this turn, discard the wound tokens in front of you instead of adding one. Once the ten villagers have been sacrificed or saved, you no longer follow this process.
When the heroes open a cell in which a prisoner has been sacrificed (or all of the prisoners for the cell in Zone 2):
"The cell is empty. Apparently you arrived too late to help the person who was held in this cell..."
When the heroes open a cell containing a prisoner who is still alive (other than the cell in Zone 2):
"There is a villager in this cell. He thanks you and heads back toward the village."
The heroes gain 2 conquest points.
The Secret Room
A secret room (Zone 3) is hidden somewhere on the map. Do not set up Zone 3 until the players have revealed it. One of the three encounter markers in Zones 1 and 2 is real and leads to Zone 3; the other two are false and lead nowhere. At the start of the quest, roll a power die. If the result is a power surge, the encounter marker in Zone 1 is the real one. On a power enhancement, the westernmost encounter marker in Zone 2 is the real one. If the result is a blank, the easternmost encounter marker in Zone 2 is the real one. Remember to note where the real encounter marker is.
When a hero moves into a space with an encounter marker in Zone 1 or 2:
"You feel a light breeze. There may be a secret passage nearby, but you will never know unless you look for it. To do so, make a prolonged Ranged (4) action here."
A hero must make a prolonged Ranged (4) action on the encounter marker to search for the secret passage. This action cannot be disrupted. See below for what happens when the action is completed.
When a hero finishes his search on a false encounter marker:
"The breath comes from a small crack in the wall. False alarm."
Remove the encounter marker from the board.
When a hero finishes his search on the real encounter marker:
"The breath comes from a small crack in the floor. You fiddle in the crack and hear a click. A hidden staircase appears, leading to a small secret room."
Remove the encounter marker from the map and replace it with a red stairs token, then reveal Zone 3.
Zone Descriptions
These descriptions are to be read when the appropriate zones are revealed by the heroes.
Starting Zone
When a hero kills the last of the two master beastmen that started in this zone:
"When you finish off the beastman, he drops a yellow rune key."
Give the yellow rune key to the heroes.
Zone 1
"Several creatures move stealthily, but what catches your attention is the cell to the south, guarded by a fierce hellhound and two beastmen."
Zone 2
"An ogre blocks your path to the south, and you hear the faint sound of cell doors and guards."
When a hero opens the cell containing prisoners 3-6, and at least two prisoners have not been sacrificed:
"You open the jail and free several people. A young woman bows respectfully before you. 'Thank you for freeing us. My father, the village magistrate, will surely reward you. Good luck!' Then the villagers leave."
The heroes gain 2 conquest points per villager still alive, plus 1 additional conquest point for the mayor's daughter.
When a hero opens the cell containing prisoners 3-6, and only one prisoner has not been sacrificed:
"In the jail, a young woman bows respectfully before you. 'Thank you for freeing me. My father, the village magistrate, will surely reward you. Good luck!' The young woman leaves, weeping for her lost friends."
The heroes gain 3 conquest points for rescuing the mayor's daughter.
When a hero kills the troll that started in this zone:
"When you finish the troll, it drops a red rune key."
Give the red rune key to the heroes.
Zone 3
"This small secret room is filled with treasure and guards."
When a hero kills the master ogre that started in this zone:
"When you finish the ogre, it drops a blue rune key."
Give the blue rune key to the heroes.
Zone 4
"This zone is dominated by a large pit containing an enormous creature that seems to change shape before your eyes. Having just noticed your presence, a priest screams: 'Infidels! They must not harm our master!'"
The large pit is to be treated as a normal pit. The master chaos beast is the Thing in the Pit. Its characteristics are those of a master chaos beast, except that it has 1 armor and 8 additional wounds. In addition, each time a hero inflicts at least 4 wounds on it (after armor) with a single attack, place a curse token on that hero. Finally, the Thing in the Pit has 4 additional wounds for each villager that has been sacrificed (number of threat tokens next to the compass rose marker).
The Thing cannot leave the pit, but it can attack spaces adjacent to the pit. It will attack a hero if it can, and if it cannot, it will try to attack one of the monsters adjacent to the pit.
When a dark priest moves onto an encounter marker:
"One of the priests rushes to a lever to activate it. With a deep rumble, the floor of the pit rises to ground level. The horrible creature is freed."
Remove the pit token from the board. The Thing in the Pit is now free to move and attack as it wishes.
If the Thing is freed, has fewer than half of its maximum wounds, and has a clear path to one of the closed cells in this zone:
"The Thing howls and charges at one of the cells in the room. It smashes the door and devours the villager in the cell. You horrifyingly see the creature's wounds close."
Move the Thing next to the cell, then remove the jail door. The Thing's wounds are healed and the villager is sacrificed.
When a hero tries to open the cells containing prisoners 9 or 10 and there are still monsters alive in the zone:
"With the battle raging, you have something else to do than open this cell."
The hero does not lose movement points for trying to open the cell.
If the Thing in the Pit is defeated:
"The Thing lets out a horrible, unreal sound, then collapses and disappears in a cloud of greasy black smoke. You go on to rescue the surviving villagers in this room."
The heroes gain 4 conquest points for defeating the Thing in the Pit, and 2 conquest points per surviving villager who has not yet been rescued (3 for the mayor's daughter, prisoner 6).
If the heroes have at least 12 conquest points when they finish the quest, read this:
"You are filled with the joy of a job well done, and you return to the village for a well-deserved rest."
The heroes have completed their quest.
If the heroes have fewer than 12 conquest points when they finish the quest, read this:
"Unfortunately, the losses inflicted on the villagers are heavy, and even though you have destroyed this unhealthy cult, you wish you had saved more lives."
The heroes have failed their quest.
Quest 2: The Hall of the Monkey Kings
Introduction
During this quest, the heroes must rescue innocent villagers who have been turned into monsters.
The week before, you discovered a village attacked by monsters. But the battle was already over before you could intervene. To your great surprise, the monsters did not kill the villagers. Two blood apes approached. They chanted something in a savage language, and before your eyes, the villagers transformed into monsters. You decide to learn more before attacking and follow the monsters to their lair. You spent the following days observing them and drawing a map of the place. You are now ready to free the villagers from the spell that binds them, and you sneak into the building.
Quest Goals
Your goal is to save as many villagers as you can and to defeat the two blood apes. If you manage to activate the ancient glyphs of transport, so much the better. You start with 8 conquest points. If you run short of conquest tokens, the blood apes have won. Be warned: each time you kill a transformed villager, you lose 2 conquest points. Good luck.
Breaking the Spells
The master monsters shown on the map are all transformed villagers. To break the spells that enthrall them, the heroes must make various prolonged actions on the encounter markers indicated. Monsters cannot end their movement on encounter markers.
Treachery and Chests
The overlord receives 2 trap treachery, 3 event treachery, and 4 monster treachery for this quest.
| Chest | Contents |
|---|---|
| Copper 1 | 2 conquest points, 1 copper treasure |
| Copper 2 | 2 conquest points, 100 coins, 1 copper treasure |
| Copper 3 | 2 conquest points, 1 healing potion, 1 copper treasure |
| Silver 1 | 2 conquest points, 1 curse, 1 silver treasure |
| Silver 2 | 3 conquest points, 2 curses, 1 silver treasure |
| Silver 3 | 1 conquest point, 150 coins, 1 silver treasure |
| Gold 1 | 3 conquest points, 2 curses, 1 gold treasure |
| Gold 2 | 2 conquest points, 1 curse, 1 gold treasure |
Zone Descriptions
These descriptions are to be read when the appropriate zones are revealed by the heroes.
Zone 1
"The echo of your footsteps resounds in these vast dusty corridors. Although you do not yet see any guards, you know they are not far."
Zone 2
"When you open the door, several skeletons burst out of pools of water and head toward you. One of the skeletons wears clothing you have seen worn by a villager, and its eyes have golden glints. Looking around, you notice a golden gem floating in the air above a pedestal."
When a hero reaches the encounter marker:
"As you examine the floating gem, you realize it must be the key to breaking the villagers' spell here. To do so, you must make a prolonged Magic (3) action."
A hero must make a prolonged Magic (3) action on the encounter marker to free the villager from the spell. This action cannot be disrupted.
See below when the action is complete.
When a hero frees the villager from the spell:
"Finishing your incantation, you crush the gem in your hand. The skeleton with the golden gaze instantly transforms into an unconscious young man. As the other monsters pay him no attention, you decide to leave him there for now."
Remove the encounter marker and the master skeleton from the map. The hero who freed it receives 50 coins.
When a hero kills the master skeleton here:
"With a horrible howl, the skeleton with the golden eyes transforms into a young man. Clutching his wound, he looks at you, his eyes overflowing with pain and confusion. Then he collapses to the ground, never to rise again."
Remove the encounter marker and the master skeleton from the map. The hero who killed it receives 50 coins, but the heroes lose 2 conquest points.
When the master skeleton in Zone 2 and the master razorwing in Zone 3 have both been defeated and/or freed:
"A brief golden gleam catches your eye nearby. Leaning over, you find a yellow rune key."
Give the yellow rune key to the heroes.
Zone 3
"The room is old and partially collapsed. When you open the door, several razorwings fall from the ceiling and attack you. One of them wears a golden collar and a pair of earrings. A mechanical music box plays an anguished melody."
When a hero enters the space with the encounter marker:
"You examine the music box and sense that it is a crucial element in breaking the spell binding the villager. To do so, you must make a prolonged Ranged (3) action here."
A hero must make a prolonged Ranged (3) action on the encounter marker to free the villager from the spell. This action cannot be disrupted. See below when the action is complete.
When a hero frees the villager:
"After manipulating the music box properly, it finally stops. The razorwing carrying the jewel lets out a cry and crashes to the ground, transforming into a pretty young gem. As the other monsters pay it no attention, you decide to leave it there for now."
Remove the encounter marker and the master razorwing from the map. The hero who freed it receives 50 coins.
When a hero kills the master razorwing here:
"With a cry, the razorwing wearing the collar transforms into a pretty young woman. Her eyes beg you before she falls to the ground, motionless."
Remove the encounter marker and the master razorwing from the map. The hero who killed it receives 50 coins, but the heroes lose 2 conquest points.
When the master skeleton in Zone 2 and the master razorwing in Zone 3 have both been defeated and/or freed:
"A brief golden gleam catches your eye nearby. Leaning over, you find a yellow rune key."
Give the yellow rune key to the heroes.
Zone 4
"This dreadful room seems filled only with dust."
When the master naga in Zone 5 and the master hellhound in Zone 6 have both been defeated and/or freed:
"There is a grinding noise, and a staircase appears in the room."
Place the other red stairs token on space X of this room.
Zone 5
"When you open the door, hisses and rattling sounds come from the back of the room. Several nagas rise before you. One of them wears the remains of a torn robe. In a nearby alcove you see a crystal statue of a serpent."
When a hero enters the space with the encounter marker:
"You examine the statue and understand that it is the key to breaking the spell that binds the villager. To do so, you must make a prolonged Melee (3) action here."
A hero must make a prolonged Melee (3) action on the encounter marker to free the villager from the spell. This action cannot be disrupted.
See below when the action is complete.
When a hero frees the villager:
"You pull the serpent out of the alcove and throw it to the ground. The naga in the torn robe convulses and transforms into a superb woman. As the other nagas ignore this unconscious woman, you decide to leave her there for now."
Remove the encounter marker and the master naga from the map. The hero who freed her receives 50 coins.
When a hero kills the master naga here:
"With a hiss of pain, the naga transforms into a superb woman who looks at you strangely and murmurs, 'Louis, I love you,' before collapsing to the ground."
Remove the encounter marker and the master naga from the map. The hero who killed it receives 50 coins, but the heroes lose 2 conquest points.
Zone 6
"A light seeps faintly from the ceiling, but what catches your attention most are the fierce hellhounds prowling the room. One of the hellhounds wears the remains of armor. Nearby, you see a spinning mechanical device."
When a hero enters the space with the encounter marker:
"You examine the mechanism and understand that it is the key to breaking the spell that binds the villager. To do so, you must make a prolonged Ranged (3) action here."
A hero must make a prolonged Ranged (3) action on the encounter marker to free the villager from the spell. This action cannot be disrupted.
See below when the action is complete.
When a hero frees the villager:
"After manipulating the mechanical device properly, it finally stops. The hellhound in the tattered armor lets out a cry of anguish and transforms into a young man. He is alive but unconscious, so you decide to leave him there for now."
Remove the encounter marker and the master hellhound from the map. The hero who freed him receives 50 coins.
When a hero kills the master hellhound here:
"With howls and barks, the hellhound transforms into a handsome young man, who simply murmurs, 'Sarah, my love,' before collapsing in a pool of blood."
Remove the encounter marker and the master hellhound from the map. The hero who killed it receives 50 coins, but the heroes lose 2 conquest points.
Zone 7
"At last you reach the source of the danger. The two blood apes that transformed the villagers await you in this great hall. Intermittent electrical discharges pass between them. They move to attack you."
These blood apes are the Monkey Kings. Their characteristics are the same as those of a normal master blood ape, except that each has 20 additional wounds. In addition, if at the start of your turn you can trace a straight line (vertical or horizontal, not diagonal) between the two Monkey Kings (assuming both are alive) that passes through at least one hero, you roll one power die and consult the following table:
- Power enhancement: the affected heroes each receive 2 burn tokens.
- Power surge: the affected heroes each receive 1 curse token.
- Blank: the affected heroes are transformed into monkeys.
When the heroes defeat both Monkey Kings:
"The last Monkey King lets out a howl when it receives its fatal wound, and it collapses. The remaining spells in this zone are broken, and the villagers return to human form. You leave this cursed place with the surviving villagers and escort them to their homes. For their part, the villagers are relieved to be freed from their curse, but saddened by all the deaths."
The heroes gain 4 conquest points for defeating the Monkey Kings. They have completed their quest.
Quest 3: Hold the Position
Quest 3 is printed with no description for turns 2 and 6, and the turn descriptions below follow the printed order.
In this quest, the heroes must protect a temple of Kellos from an invasion of monsters.
Introduction
An army of monsters has pursued you relentlessly for days. You are exhausted, close to starvation. But at last you have some luck. You stumble upon an ancient, abandoned temple of Kellos. You trigger the opening mechanism of the crypts inside. You know that if you hold out long enough, the magical defenses of the temple will activate and drive the monsters back. Of course, you could use the temple's transport glyphs to escape, but you have no intention of letting these monsters defile this place.
Quest Goals
Your objective is to survive long enough to protect the temple. Its magic is concentrated in its transport glyphs. If the monsters destroy them, the temple will not survive. You start with 15 conquest points. If you run short of conquest tokens, or if all the glyphs are destroyed, the temple will be overrun by the monsters.
Good luck.
This is an unusual quest with special rules. First, the temple has already been explored except for its two crypts, which will open when their locking mechanisms release after a certain time. The heroes will not explore this dungeon, but defend it against the hordes of invaders led by the overlord.
Treachery and Chests
The overlord receives 2 trap treachery, 4 event treachery, and 3 monster treachery for this quest.
| Chest | Contents |
|---|---|
| Copper 1 | 3 conquest points, 1 copper treasure, 1 curse, 200 coins |
| Copper 2 | 3 conquest points, 1 copper treasure, 1 curse, 200 coins |
| Copper 3 | 2 conquest points, 2 copper treasures, 1 curse, 250 coins |
| Silver 1 | 3 conquest points, 1 silver treasure, 1 curse, 200 coins |
| Silver 2 | 2 conquest points, 1 silver treasure, 1 curse, 300 coins |
| Silver 3 | 2 conquest points, 2 silver treasures, 2 curses, 100 coins |
Monster-Controlled Zones
The zones in red on the map are controlled by the monsters. The heroes cannot enter these zones, and monsters can be spawned there even if the heroes have line of sight to them. However, the monsters must leave these zones as soon as they are able.
Major Monsters
As there are no glyphs to activate for additional conquest points, major monsters are each worth 1 conquest point when killed.
Glyphs
Each glyph in this quest is considered to have 25 wounds and armor 0. If there is no figure on a glyph, it may be attacked as if it were a figure. When a glyph falls to 0 wounds, the overlord takes it and places it in front of him. The overlord receives 2 additional threat points each turn for each glyph that has been destroyed. In addition, when he draws cards, he may buy additional cards (from his own deck) for 10 threat points per card.
Finally, the heroes can restore glyphs by giving some of their own vitality. To do so, they must be on the glyph, spend 1 movement point, and take 1 wound (which cannot be prevented in any way) to heal one wound on the glyph. The heroes may do this as often as they wish, but a glyph cannot have more than 25 wounds.
Altars
Altars may be activated by the heroes. To activate an altar, a hero must stand on it, spend 250 coins, and spend 2 movement points. The altar inflicts 2 wounds (ignoring armor) and 2 burn tokens on all enemy figures within 5 spaces of the altar. An altar may only be used once per turn.
Turn Descriptions
These descriptions are to be read at the start of the overlord's turn corresponding to each turn.
Turn 1
"With a great crash, two of the doors are smashed in, and the monsters rush through, determined to destroy the temple and its glyphs."
- Zone 2: spawn 2 skeletons and 1 master beastman.
- Zone 4: spawn 2 skeletons and 1 master beastman.
Turn 3
"The two other doors are broken down, and more invaders rush inside."
- Zone 1: spawn 2 beastmen, 1 master razorwing, and 1 dark priest.
- Zone 3: spawn 2 beastmen, 1 master razorwing, and 1 dark priest.
Turn 4
"One of the crypts of the temple unlocks with a loud click."
Remove the doors leading to the west crypt.
Turn 5
"At the sound of a hunting horn, the new wave enters the temple."
- Zone 1: spawn 1 beastman, 2 skeletons, and 1 hellhound.
- Zone 2: spawn 1 master sorcerer, 2 razorwings, and 1 bane spider.
- Zone 3: spawn 1 beastman, 2 skeletons, and 1 hellhound.
- Zone 4: spawn 1 master sorcerer, 2 razorwings, and 1 bane spider.
Turn 7
"The wave of monsters seems never to end."
- Zone 1: spawn 1 troll and 1 deep elf.
- Zone 2: spawn 1 ogre and 1 master dark priest.
- Zone 3: spawn 1 troll and 1 deep elf.
- Zone 4: spawn 1 ogre and 1 master dark priest.
Turn 8
"The other crypt opens with a groan. At the same time, a tension in the air suggests that the final assault is about to begin."
Remove the doors leading to the east crypt.
Turn 9
"With a terrible rumble, the walls of the crypt are torn apart, and a final wave of monsters rushes inside. You sense that the master monsters are using a spell (or something similar) to prevent the activation of the temple's defenses. If you can kill them, this should annihilate the spell."
Replace the blue dead-end pieces with 2-by-4 corridors. These are zones controlled by monsters. The west zone is Zone 5, and Zone 6 is the east zone.
- Zone 1: spawn 1 master dragon.
- Zone 2: spawn 1 master giant.
- Zone 3: spawn 1 master demon.
- Zone 4: spawn 1 master chaos beast.
- Zone 5: spawn 1 master dark priest.
- Zone 6: spawn 1 master sorcerer.
If it is turn 10 (or later) and the heroes have defeated all the major monsters on the board:
"A brilliant glow emanates from the altars as the temple's defenses activate. Beams of light annihilate the monsters, reducing them to nothing."
The heroes gain 4 conquest points for defending the temple. They have completed their quest.
If the heroes have no conquest tokens left, or if the last glyph is destroyed:
"The light of the altar suddenly goes out, and a horde of monsters appears. Without the protection of the temple, you are quickly overwhelmed by their numbers."
The heroes have failed their quest.
Quest 4: The Mists of Time
During this quest, the heroes must defeat a tribe of trolls whose caves have been uncovered by an earthquake.
Introduction
Recently, an earthquake destroyed this region, revealing an ancient cavern. Strange noises and lights come from inside, and villagers are reported missing after nightfall. You have been sent to eradicate the evil that lurks in this cave.
Quest Goals
Your goal is to enter the cave and kill the leader of the monsters. A mage has mapped the location for you using a spell, and gave you this cryptic message: "Beware the rocks underfoot." If you manage to activate the ancient transport glyphs, so much the better. You start with 8 conquest points. If you run short of conquest tokens, there will still be victims. Good luck.
Troll Ambushes
The trolls shown in blue on the map are not real trolls; they are the potential locations for troll ambushes. Twice during this quest (and no more than once per turn), you may pay 9 threat points to immediately generate a troll in one of these blue spaces, ignoring the heroes' line of sight. This troll is immediately activated (it moves and attacks once). Then read the following sentence:
"Suddenly, a large gray shape bursts out of the rocks, roaring and swinging its club."
You may even do this during a hero's turn, interrupting it in the same way that a guard order interrupts your turn. Once the ambush is over, the player whose turn it is continues playing.
Treachery and Chests
The overlord receives 2 trap treachery, 5 event treachery, and 4 monster treachery for this quest.
| Chest | Contents |
|---|---|
| Copper 1 | 2 conquest points, 1 healing potion, 1 copper treasure |
| Copper 2 | 3 conquest points, 150 coins, 1 copper treasure |
| Copper 3 | 3 conquest points, 1 vitality potion, 1 copper treasure |
| Silver 1 | 3 conquest points, 1 curse, 1 silver treasure |
| Silver 2 | 2 conquest points, 1 curse, 200 coins, 1 silver treasure |
| Silver 3 | 2 conquest points, 150 coins, 1 silver treasure |
| Gold 1 | 1 curse, 500 coins |
| Gold 2 | 2 curses, 1 healing potion, 1 gold treasure |
Zone Descriptions
These descriptions are to be read when the appropriate zones are revealed by the heroes.
Zone 1
"The earth rumbles angrily; these are still the scars of the earthquake. The fissures in the ground seem to open and close at random, promising certain death to anyone caught in a fissure as it closes."
The fissures: At the start of each of your turns, roll a yellow die for each of the two fissures shown on the map. Move the fissure to the position indicated by the result of the yellow die. If a fissure opens under a small figure and that figure can fall into it, the figure suffers 1 wound (ignoring armor). If a fissure disappears from under a figure (it closes over the figure), that figure is killed outright, regardless of armor or wounds. The fissures do not affect figures that are not entirely inside them.
When one of the two doors to Zone 2 is opened: The rumbling stops, and the fissures become normal pits.
Zone 2
"A kind of plant growth has spread through this zone, like a cancer. As you approach, it seems to draw off your energy, forcing you to lie down and close your eyes for a moment."
Zone 3
"The fog keeps you from seeing what is happening, but you can feel and hear the presence of huge creatures moving through this room."
Zone 4
"This zone is heavily shrouded in mist, but you can make out the shape of a serpent at the far end of the room."
Zone 5
"The room is covered in rubble, and jets of steam escape from small fissures in the walls and floor. You watch in horror as a huge stone silhouette detaches from the wall and marches straight toward you, a blissful smile on its lips."
This master troll is Basalt. Its characteristics are those of a master troll, except that it has 3 armor and 24 additional wounds. In addition, it ignores rubble obstacles when it moves, and it may even end its movement on them.
Heroes may draw line of sight to Basalt, including into spaces containing rubble.
If the heroes kill Basalt:
"The gigantic troll seems to pause, examining the fatal wound you have just dealt it. Then suddenly, its skin cracks. You throw yourselves aside just before the troll explodes in a burst of rocks and steam."
The heroes gain 4 conquest points. They have completed their quest!
Quest 5: Into the Heart of Darkness
In this quest, the heroes must enter a forbidden underground city and extract information from the spirits that haunt it about the recent events in the region.
Introduction
Having learned of a group of deep elves in this region, the king has sent you to an ancient underground city. He believes the deep elves will plunder its magical relics, and he wants you to stop them. The city is haunted by the ghosts of its inhabitants, so it is perfectly natural that you are uneasy about going there.
Quest Goals
Your goal is to enter the city and defeat the creature that leads the deep elves. If you manage to activate the ancient transport glyphs, so much the better. You start with 10 conquest points. If you run short of conquest tokens, the haunted city will gain a new group of residents. Good luck.
Spirits
Many of the monsters in this quest are in fact spirits. They have the same characteristics as usual, except that they roll one extra green die when they attack, and they have the Superior Undying ability, which revives them on any die result except a power surge.
Spirits do not attack heroes unless the heroes attacked them first. Once a spirit has been attacked, it will attack the heroes until it is destroyed.
Treachery and Chests
The overlord receives 2 trap treachery, 5 event treachery, and 2 monster treachery for this quest.
| Chest | Contents |
|---|---|
| Copper 1 | 2 conquest points, 1 healing potion, 1 copper treasure |
| Copper 2 | 3 conquest points, 1 vitality potion, 1 copper treasure |
| Copper 3 | 2 conquest points, 1 invulnerability potion, 1 copper treasure |
| Silver 1 | 3 conquest points, 1 curse, 1 silver treasure |
| Silver 2 | 2 conquest points, 1 curse, 1 silver treasure |
| Silver 3 | 1 conquest point, 250 coins, 1 silver treasure |
| Gold 1 | 1 curse, 150 coins, 1 gold treasure |
| Gold 2 | 2 curses, 100 coins, 1 invulnerability potion, 1 gold treasure |
Zone Descriptions
These descriptions are to be read when the appropriate zones are revealed by the heroes.
Zone 1
"This ancient city fell into ruin long ago, but monsters still wander its empty streets."
Zone 2
"The opening of the door has drawn the attention of several skeletons. You are so surprised by these undead that you almost fail to notice the deep elf in the corner, camouflaged and visibly guarding the rune-locked door leading south."
Zone 3
"A number of creatures have made their home in this zone, but none looks as terrifying as the ghost that guards the yellow rune key to the south. On reflection, however, you realize the ghost has no reason to hold a grudge against you. It is the deep elves who are here to plunder the city. It may be possible to reason with this spirit."
The master skeleton right next to the yellow rune key is in fact a spirit that guards this key. A hero within 3 spaces of the spirit may make a continuous prolonged Magic (3) action to convince it to leave. This action is interrupted if the hero spends movement points or is killed.
If a hero picks up the yellow rune key while the spirit is still alive, the spirit will attack that hero until it is killed.
Zone 4
"In the room ahead, a group of scholarly ghosts is debating subjects forgotten long ago. They do not seem aggressive to you. You may be able to speak with them rather than fight them."
The master skeletons and master sorcerers in this zone are in fact spirits that are engaged in an endless discussion. They behave like the spirit in Zone 3 and may be convinced to leave in the same way.
Zone 5
"This zone is covered in very strange brown mushrooms that sap the warmth from your bones. Worse, something in this place, and it is not the mushrooms, makes you shiver. Two spirits stand nearby and watch you impassively."
The master skeletons in this zone are in fact spirits.
If a hero tries to open the blue rune-locked door without having disarmed the trap (see below):
"As you reach the door, a wall of spikes rises before you. Another wall of spikes appears to the south and begins to advance north. You had better find a secret lever or try to push this wall back!"
Replace the blue rune-locked door with a crushing wall, and place another crushing wall 7 spaces south of this wall. The north wall does not move; the south wall moves north.
A hero may make a prolonged Ranged (6) or Magic (6) action anywhere on the corrupted terrain of this zone to search for a secret lever that disarms the trap in the wall. Each hero must search separately; heroes may not combine their progress tokens. This action is interrupted if the hero is killed. When a hero completes this action, the trap is disabled, the crushing walls are removed, and the blue rune-locked door is returned to the board.
Alternatively, a hero may make a continuous prolonged Melee (X) action while adjacent to the south crushing wall to push it back one space for every 3 progress tokens accumulated. If this pushes the wall beyond the corrupted terrain, the trap is disarmed as if it had been disabled by the method above.
Zone 6
"A spirit guards this zone against thieves, while other creatures prowl in the room next door. If you look carefully, you can see two deep elves crouching, wrapped in their cloaks."
The master skeleton in this zone and the one in Zone 7 are spirits. Each spirit will attack a hero who picks up a treasure from its zone (including opening a chest or picking up a rune key). If a hero activates the glyph in the zone and the heroes have not taken any treasure there, the spirit of this zone suddenly discovers the presence of the deep elves and attacks them until it has killed them all or is itself killed. If a hero takes a treasure (or a rune key) while the spirit is attacking the deep elves, it will not notice.
Zone 7
"A ferocious spirit guards this zone against thieves. In the room next door, other creatures prowl. You sense more than you see the presence of several deep elves nearby."
The master skeleton in this zone is a spirit. See Zone 6 for details.
Zone 8
"There is a great battle in this room. Three spirits are trying to drive back a dark priest, an ogre, and a powerful-looking demon."
The master skeletons and the master sorcerer are in fact spirits. They will attack the master demon and its allies unless the heroes attack these spirits. These spirits will then turn against the heroes. The master dark priest, the master ogre, and the master demon are all unique creatures. The master dark priest has 10 additional wounds. The master ogre has 10 additional wounds and rolls 3 power dice instead of 1. The demon has 24 additional wounds and has Fear 3 instead of Fear 2.
If the heroes kill the master dark priest, the master ogre, and the master demon (and the spirits, if they have been angered):
"After felling the last of your adversaries, you search the robes of the dark priest. You find notes and a map that chill you to the bone. Apparently, their allies are preparing a ritual in a nearby temple that will allow them to summon their master, Zorek, the god of despair. If they succeed, it will mean the end of everything you hold dear. There is no time to lose!"
The heroes gain 4 conquest points for defeating the demon and its allies. They have completed their quest!
Quest 6: The Altar of Despair
In this quest, the heroes must rid the world of Zorek, the god of despair.
Introduction
Following the information recovered in the ruins of the haunted city, you rush here to find the main temple of Zorek, the god of despair. His worshippers planned to release him into our world, which could reduce every trace of civilization to nothing. Unfortunately, you have arrived too late. As you enter the temple, throwing the doors wide open, the high priest shouts at you: "Poor fools! You cannot stop us! Our god is already among us, and mortal weapons cannot touch Zorek!" You believe him for a moment, but you notice that the temple's glyphs are still intact, and that Zorek does not seem keen to touch them.
Quest Goals
You have a chance to win. If you can destroy the four altars of Zorek before he becomes too powerful, you may send him back to where he came from. But remember that he is a god. As such, he cannot be killed, and he has strange powers. Beware his anger! If you manage to activate the ancient transport glyphs, this will make your task easier. You start with 10 conquest points. If you run short of conquest tokens, the god Zorek will sweep over the world. Good luck.
Treachery and Chests
The overlord receives 4 trap treachery, 4 event treachery, and 4 monster treachery for this quest.
| Chest | Contents |
|---|---|
| Copper 1 | 3 conquest points, 1 copper treasure, 1 vitality potion |
| Copper 2 | 2 conquest points, 1 copper treasure, 150 coins |
| Copper 3 | 3 conquest points, 1 copper treasure, 1 healing potion |
| Silver 1 | 3 conquest points, 1 curse, 1 silver treasure |
| Silver 2 | 3 conquest points, 1 curse, 1 silver treasure |
| Silver 3 | 2 conquest points, 1 silver treasure, 150 coins |
Zone Descriptions
These descriptions are to be read when the appropriate zones are revealed by the heroes.
Starting Zone
The master chaos beast in this zone is Zorek. No attack can harm him, and he is immune to all effects. He attacks like a normal master chaos beast, except that he rolls 5 power dice. However, as long as the glyphs hold, he cannot move at all, and he can only directly attack figures in the central room with him.
But his gaze is deadly. Zorek begins the game looking north. At the start of each of your turns, roll a yellow die. Zorek turns 90° to the right for each point of range on the die. For example, if he begins by facing north and you roll a range of 3 on the yellow die, he will be facing west. Once the direction of his gaze has been determined, any hero within his line of sight in that direction (ignoring obstacles and other figures) first receives a curse token, and then loses 6 wounds (ignoring armor). Any monster within his line of sight in that direction (ignoring obstacles and other figures) is killed outright.
When Zorek is activated, he may attack a glyph as well as activate his gaze. When he does so, he automatically hits the glyph of his choice, inflicting 1 wound on it. Each glyph can take 6 wounds before it is destroyed. The heroes cannot heal these glyphs in any way. This creates a limit of 24 turns to complete the quest.
When the last glyph is destroyed, or when the heroes fall to 0 conquest points:
"There is a terrible detonation as the last glyph explodes. Zorek grows before your eyes, passing through the temple's ceiling until he blots out the sun. With a terrible howl, he demolishes everything that mankind has built until now. His second cry destroys your sanity, and you no longer know anything."
The heroes have failed their quest.
The Great Stone Doors
If a hero ends his movement on one of the encounter markers in the temple, a great stone door closes the corridor facing in that direction (the places where stone doors close are shown by red Xs on the map). Figures cannot open these doors, and they cannot be destroyed by any effect. While a stone door is closed, Zorek's gaze cannot pass through it. But at the end of each turn, roll a power die for each closed stone door. On a blank result, the door opens again and can no longer be closed for the rest of the game. Discard the encounter markers of the room to show this state of affairs.
The Altars of Zorek
When the last altar is destroyed:
"With a howl, Zorek seems to be sucked into the earth. You are forced to cling on, as violent winds push you toward him with incredible force. Briefly, just before he vanishes completely, you meet his gaze and feel all the hatred that emanates from it. You lose your grip with a cry of anguish, but just as you were about to touch his tentacles, Zorek disappears and the portal closes. It seems that all of Zorek's servants were destroyed with his disappearance. Fortunately, as it takes you five good minutes to get back on your feet and reach the door."
The heroes gain 8 conquest points for banishing Zorek. They have completed their quest!
Zone 1
"In this narrow room, dark priests pray to their god, urging him to destroy this world. As soon as they see you, they rise, ready to fight."
Zone 2
"A group of dark priests is absorbed in their prayers. But as soon as they notice your presence, they awaken from their prayers and prepare to fight."
Zone 3
"Two dark priests struggle to control a chaos beast. When the creature sees you, it becomes berserk, and the priests release their leashes."
Zone 4
"Two dark priests are feeding a chaos beast. You cannot make out what it is eating, and you thank your lucky stars for having been spared the sight of its meal. As soon as the creature senses your presence, it decides that you make a more appetizing meal."
Altars: The heroes may make a prolonged Magic (8), Melee (8), or Ranged (8) action while standing on an altar to destroy it. Two heroes may team up to destroy an altar, and they may use different traits to work on the same altar if they wish. This action cannot be interrupted.