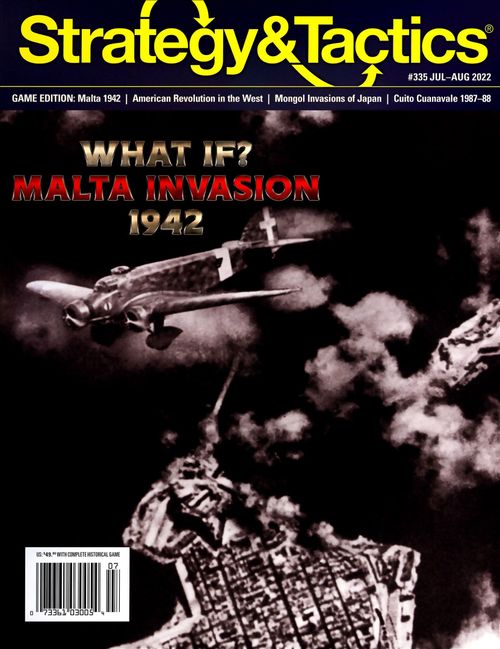
Descent on Malta
Descent on Malta Rulebook
Table of Contents
Table of Contents
- 1.0 Introduction
- 2.0 Game Components
- 3.0 How to Win
- 4.0 How to Set Up the Game
- 5.0 Sequence of Play
- 6.0 The Map & Positioning of Units
- 7.0 Axis Forces
- 8.0 Allied Forces
- 9.0 Comando Supremo Staff Points
- 10.0 Intelligence Operations
- 11.0 Refitting Axis Units
- 12.0 Axis Staging
- 13.0 Axis Tactical Ground Movement
- 14.0 Axis Air Operations
- 15.0 Axis Naval Operations
- 16.0 Axis Strategic Attacks
- 17.0 Air Transport
- 18.0 Amphibious Assaults
- 19.0 Fog of War & Reveal Phase
- 20.0 Anti-Aircraft Fire & Air to Air Combat
- 21.0 Tactical Air Attacks
- 22.0 Ground Combat
- 23.0 Allied Command Level
- 24.0 Allied Middle East Command Events
- 25.0 Allied Reserves
- 26.0 Allied Offensives
- 27.0 Allied Royal Navy Fleet Sortie
- Middle East Command Events Chart (24.0)
- Additional Victory Points
- 28.0 Optional Rules (online only)
1.0 Introduction
Descent on Malta is an operational level simulation of the planned but never executed Axis airborne assault on the British island fortress of Malta.
Descent on Malta is a solitaire game. The player controls the Axis forces (Germans and Italians). The game system controls the opposing Allied forces and their reaction. The objective of the game is for the Axis to capture Malta at the lowest possible cost in casualties.
Descent on Malta includes optional rules that allow for two or more players to control different parts of the Axis invasion.
1.1 Scale
Descent on Malta is an area movement game with 1 inch on the map representing 2.5 miles. Ground units represent Axis and British regiments, battalions, and companies; Axis air units represent 3 to 6 squadrons. Each game turn (GT) equals anywhere from 4 hours of intense combat action to two days of attritional warfare and refitting.
2.0 Game Components
A complete game of Descent on Malta includes a 22×34-inch game map, rule set, and a sheet of 228 9⁄16-inch counters. You must provide one or more six-sided die to resolve combat and other probabilistic game events.
Map Errata
- The Allied Random Placement Chart: RAF Krendi should read RAF Qrendi.
- Commando Supreme Staff Point Expenditure Chart should read: Comando Supremo Staff Point Expenditure Chart.
- Airborne Unit Drop Table: DR result of one or less replace the word Reduce with Loss.
2.1 Game Map
The map shows Malta, the adjoining islands of Gozo, Comino and surrounding waters, with displays (boxes) representing Axis units in Sicily and southern Italy (6.0). There are two map sectors:
- Malta
- Gozo (including the small island of Comino)
Important: There are no land connections between the individual islands.
2.1.1 Game Map Displays
You use the game map displays or boxes to organize the different available forces and their status.
Important: Gozo sector includes the two areas on Comino.
Gozo and Malta Sector Displays: There are two sets of Axis mission displays that separate the Axis forces for the Gozo sector and the Malta sector. Each set organizes Axis units which will enter the map or conduct tactical air/naval missions in the listed sector during the current GT. Each set has four separate mission displays:
- Airborne
- Amphibious
- Airlanding
- Tactical Air & Naval Support
Axis Strategic Missions Display: Organizes Axis air and naval units which will conduct strategic missions during the current GT.
- Attacks on Allied Command
- Attacks on Royal Navy
Axis Eliminated Units: A holding box for eliminated Axis units.
Allied Eliminated Units: A holding box for eliminated Allied units.
Axis Units Available in Sicily Display (Sicily Display): Organizes Axis units in Sicily that will move to Malta.
Allied Random Placement Table: Randomly determines the location of Allied units arriving during play of the game.
Tactical Edge Die Roll Modifiers (DRM) Chart: Lists the DRM used to modify the tactical edge DR.
Terrain Key: Displays graphical information to allow identification of specific terrain and map features.
2.1.2 Game Tracks
Use the below tracks to show game information important to play.
Turn Record Track: Used to show the current GT.
Allied Command Level Track: Indicates overall Allied command and command control level. This affects the number of Middle East Command events.
Royal Navy Level Track: Indicates the current strength and aggressiveness of the Royal Navy in the Central Mediterranean. The number on the lower level is the combat strength when the Royal Navy sorties. This affects Axis amphibious landings and Royal Navy fleet sortie.
Comando Supremo Staff Points Available Track: Indicates the current level of Axis planning and logistic support.
Axis Amphibious Points Track: Indicates the current number of Amphib. points available (18.1).
Victory Points Track: Indicates the current number of victory points (3.0).
2.1.3 Game Tables/Charts
These provide various randomized events and actions:
- Airborne Unit Drop Table: Used when Axis airborne units are making assault landings.
- Amphibious Landing Table: Used when Axis units are moving by sea.
- Combat Results Table: Provides the DR ranges generating outcomes in various types of combat.
- Naval Attack Outcome Table: Provides results for successful Axis air and naval attacks against the Royal Navy.
- Victory Point (VP) Table: Lists events which will change the VP level and the number of VP gained or lost.
- Terrain Effects Chart: Lists the types of terrain present in the game and its effect on movement, tactical edge, and combat.
- Comando Supremo Staff Point Expenditure Chart: Lists the actions that require staff points (SP), the number of SP required for that action and if the action requires a headquarters (HQ).
2.2 Game Counters
There are four general types of counters in the game: ground combat units, air units, naval units, and administrative markers.
Counter Errata:
- The German C/z266 armor company: should have a "R" on the front of the counter.
- The optional 1/7F airborne artillery unit: should not have an "R" on the front side.
- The two Me-231 air units: should read Me-321.
2.2.1 Nationalities
The counters are color coded to show the nationality or side. The Axis forces consist of the German and Italian units. The Allied forces consist of British and Maltese forces.
- German: Gray
- Italian: Blue Gray
- Allied: Tan
- HQ units have a diagonal two-tone background color.
2.2.2 Combat Unit Counters
Ground Combat Units: The counters depicted below are all ground units. Each counter will depict the following information:
- Unit Identification: The unit's historical identification.
- Unit Size Symbol: The relative size of the formation the unit represents.
- Unit Type Symbol: Represents the general type of weapons systems of the unit.
- Combat Rating: A numerical rating of the unit's combat effectiveness.
Airborne Capable: There are two types of airborne drop capable units; airborne infantry and airlanding infantry. The two airborne drop symbols are set within the unit type symbol. These units can arrive via airborne drops and air-landings. Any type of unit with one of the two symbols is airborne drop capable (17.0).
Maneuver Units: Units without a parenthesis around their combat factor. These units can close with enemy forces.
Support Units: A support unit has a parenthesized combat rating. These units provide artillery and fire support.
Elite Units: Certain combat units are elite; they have a sign after their combat factor. Elite units provide a bonus when determining tactical edge.
Important: Elite is a relative term in the game; any Axis and Allied units which would have been involved in Herkules were elite by WWII standards, but for the game this means units with superior leadership.
Reinforcement Units: These units have an on the front and back of the counter. Reinforcements are those units that arrive after the beginning of the game.
Optional units: Optional units have the abbreviation on the front and back of the counter. Do not use them in the standard game.
Designer's Note: The Italians re-designated the Italian 1st Folgore Airborne Division to the 185th Division. The game uses the 1st Folgore identification for the Herkules operation.
2.2.3 Ground Unit Types
- Airborne Infantry
- Airlanding Infantry
- Infantry
- Armor
- Headquarters (HQ)
- Marine Infantry
- Commando (Cdo)
- Engineer/Pioneer
- Reconnaissance (Recon)
Ground Support Unit Types:
- Armor
- Anti-tank (AT)
- Heavy Weapons (HW)
- Artillery
- Anti-aircraft artillery (AAA or Flak)
- Coastal Artillery
Special Ground Unit Types:
- Obstacle
- Ambush
- Intelligence (Intel)
- Deception
2.2.4 Unit Sizes
- XX: Division
- X: Brigade
- III: Regiment
- II: Battalion
- I: Company/Detachment
Important: HQ units are shown at the command level they represent. All Axis HQ units are battalion sized units for transport purposes.
2.2.5 Abbreviations
Axis
- 1A: 1st Assault
- 8G: 8th Guastatori (Assault Engineer)
- Asi: Assietta
- BB: Brandenburgers
- CdS: Corpo di Spedizione (Expeditionary Corps)
- CCNN: Blackshirt (Fascist Militia)
- F: Flieger (Airborne)
- FK: Fliegerkorps XI
- Fol: Folgore
- Fri: Friuli
- KG: Kampfgruppe
- Lehr: Demonstration Unit
- Liv: Livorno
- LS: La Spezia
- Mil: Militia
- MP: Military Police
- N: Nuotatori (Combat Swimmers)
- Nap: Napoli
- P: Paracadutisti (Paratrooper)
- Pio: Pioneer
- R: Ramcke
- SM: San Marco
- Sup: Superga
- z: ZBV (Special Purpose Unit)
Allied
- Buffs: Royal East Kent Regiment
- Dev: Devonshire
- DLI: Durham Light Infantry
- Dor: Dorsetshire
- Hamp: Hampshire
- KOMR: King's Own Malta Regiment
- LF: Lancashire Fusiliers
- Man: Manchester
- ME Cdo: Middle East Commando
- Mil: Militia
- MP: Military Police
- QORWK: Queen's Own Royal West Kent
- RAF: Royal Air Force
- RIF: Royal Irish Fusiliers
- RM: Royal Malta
- RN: Royal Navy
- RWK: Royal West Kent
2.3 Air Units
Air units have the following information:
- Air Superiority Rating: The unit's ability to engage in air to air combat.
- Aircraft Type Symbol: Depicts a graphical representation of the predominant type of aircraft in the unit.
- Aircraft Type Name: The model number of the predominate type of aircraft in the unit.
- Strategic Combat Rating: The air unit's ability to attack the Allied Command and Royal Navy Indexes.
- Tactical Combat Rating: The air unit's ability to attack Allied units located in zones on Malta.
2.3.1 Air Unit Types
For game purposes there are two basic types of air units: combat and transport. Each historical type of bomber, fighter, dive/attack bomber and fighter bomber had varying roles in combat, however in game terms, the difference in the roles of these aircraft are in the varying strengths of the combat factors for each type.
Combat Air Units:
- Bombers: C-1007, SM-79, He-111, Ju-88, B-24, Baltimore, Wellington
- Ground Attack/Dive Bomber: CR-42, Ju-87, Sea Fury, Stuka
- Fighter: Bf-109, MC-200, MC-202, C-2001, Beaufighter, Hurricane, Spitfire
- Fighter-bomber: Bf-110
Transport Air Units:
- Transport aircraft: Ju-52, SM-75, SM-82, SM-84
- Gliders: Me-321
2.4 Axis Naval Units
Naval units have a ship icon, a combat rating and an AAA rating.
Naval Unit Types:
- BB: Battleship Group
- CA: Heavy Cruiser Group
- CL: Light Cruiser Group
- DD: Destroyer Group
- SS: Submarine Group
2.5 Back Printing of Units
Axis units (ground, air and naval) have two steps, the front side of the counter depicts the unit at full-strength. The back (red stripe) depicts the unit at reduced strength.
Important: If a two-step unit suffers a reduction, flip the unit over to show its reduced strength side. If a one-step unit or reduced two-step unit suffers a reduction, eliminate the unit.
Important: Reduced elite units may lose their elite status.
- Axis Front (Full Strength)
- Axis Back (Reduced)
- Allied Front (Revealed)
- Allied Back (Concealed)
Allied units are one-step units. The back of the counter depicts a flag only. An Allied unit with its flag side up indicates the unit is a concealed unit.
Important: Unlike other British units, the ME Cdo unit has two steps (32.0).
2.6 Administrative Markers
Use the following counters to track specific levels and denote special occurrences.
- Axis Amphibious (Amphib.) Used & Axis Amphib. Current: Use these two markers to indicate the number of Axis amphibious moves used and those currently available (in terms of amphibious points).
- MEC Level: Used to indicate the current Allied command control level and willingness to continue the battle.
- Comando Supremo: Used to indicate the current number of Comando Supremo staff points that enhance Axis actions. Note: The marker reads Commando, should read Comando.
- Royal Navy Level: Used to indicate the current strength and aggressiveness of the Royal Navy.
- Royal Navy Sortie: Used to indicate a major counteroffensive by the Royal Navy to relieve Malta.
- VP ×1 & VP ×10: Used to indicate the current number of victory points. When a VP marker is on its front side (black text), this means there is a positive total; when on the reverse (red text), it indicates a negative total.
- Surprise Marker: Used as mnemonic when conducting airborne drops (17.3) and amphibious landings (18.3).
- Turn: Used to indicate the current GT.
2.7 Definitions
Randomization Procedure: Since the game is played solitaire, certain actions will call for you to choose randomly. In this case, assign each alternative an equal number of possibilities for a six-sided die, roll the die, and then implement that path.
- Example: Between two different zones.
- 1d6 or 2d6: Roll that number of dice. Example: 2d6 requires you to roll two dice and total the results to provide an outcome.
- ≥: Greater than or equal to
- ≤: Less than or equal to
- >: Greater than
- <: Less than
- Airborne Drop: Term for landing units by parachute or glider (17.3).
- Airlanding: Term for flying in units to land in a zone with an airfield (17.4).
- Amphibious Landing: Term for moving units via sea.
- Control:
- A side controls a zone if it has at least one ground unit in it and there are no enemy ground units in it.
- A disputed zone is a zone with ground units of both sides.
- If neither side has ground units in a zone, then it is uncontrolled.
- DR: Die Roll.
- DRM: Die Roll Modifier.
3.0 How to Win
At the end of the game, check the Victory Points (VP) Track. The range it is within will determine the level of Axis victory:
- 0 or Less: Strategic Defeat. Malta's garrison successfully repels the invasion, inflicting such severe losses that the Axis collapse in North Africa occurs months earlier than it did historically.
- 1–30: Tactical Defeat. Malta falls, but the Axis losses are serious enough that Rommel decides to cancel his advance into Egypt and assumes defensive positions near Tobruk instead.
- 31–45: Draw. Malta falls but with heavy losses; while Rommel can attack into Egypt, the lack of reinforcements results in his advance stalling short of taking Cairo or Alexandria.
- 46–59: Tactical Victory. Malta falls and the Axis logistical situation in North Africa is significantly improved. Rommel receives enough reinforcements to launch a strong attack into Egypt which might manage to take either Cairo or Alexandria; the Allies consider temporarily pulling back behind the Suez Canal.
- 60 or More: Strategic Victory. Malta falls with negligible Axis losses. Rommel is heavily reinforced and launches a major offensive which not only captures both Cairo and Alexandria but also successfully establishes a secure bridgehead across the Suez Canal.
Designer's Note: The idea here is that given the balance of forces, an Axis victory is likely, but the issue is the commitment of resources that the Axis command could have used to support Rommel's campaign in North Africa.
3.1 Catastrophe
If at any time in the game the VP level goes to −100 (minus 100) or lower, the game immediately ends in an Axis catastrophe. Pack your winter gear and head for the Russian Front.
3.2 VP Markers
Use the VP markers to indicate the current number of victory points. When on their front side, they represent a positive number of VP, when on their reverse, a negative number. If the VP level reaches 99, it can go no higher.
3.3 Scoring VP
The Victory Point Table gives the conditions for gaining and losing VP. You will add or subtract VP during the game, and then add or subtract others at the end of the game.
- Deduct VP for recruiting reinforcements during initial setup.
- Apply VP for units eliminated in combat at the time of elimination (21.0 & 22.0).
- Apply VP awarded for Allied units remaining on the map at the end of the game. Award VP for all units, except revealed obstacles (including deception). This applies only to Allied units on Malta and Gozo, not those in reserve (25.0). See additional VP Chart at end of rules.
Important: Reducing a two-step unit and then later eliminating the unit counts VP for both the reduction and elimination. A reduced two-step unit that is refitted does not restore lost VP.
3.4 Clearing Malta
During each End of Turn Phase, check to see if the Axis forces have cleared Malta. Malta is cleared if:
- Axis forces control all fortress, town, and airfield zones on Malta and Gozo; and,
- There are no Allied units on Malta; and,
- All Allied units on Gozo have their revealed side showing.
- If you meet all the above requirements, you may:
- Declare an end to the game and evaluate VP; or,
- Continue play to the end of GT 7.
Important: Unlike Crete, the British cannot evacuate Malta. It is a fight to the finish.
4.0 How to Set Up the Game
Perform the following actions in the order listed:
- Administrative: a) Place the turn marker in the 1 space on the Turn Record Track. b) Place both VP markers in the zero box on the Victory Points Track. c) Roll 2d6 and place the Comando Supremo SP marker in the box on the Comando Supremo Staff Points Available Track corresponding to the DR result. d) Place the Axis amphibious current marker in the 10 box on the Axis Amphibious Points Track. e) Place the MEC marker in the 12 box on the Allied Command Level Track. f) Place the Royal Navy marker in the 9 box on the Royal Navy Level Track.
- Allied Deployment: a) Place the Royal Navy sortie marker in the Royal Navy Fleet Sortie Display. b) Place the ME Cdo regiment in the Middle East Commando Battalion Display. c) Place all 24 Allied HQ, artillery, coast artillery, and anti-aircraft units in an opaque container. Then randomly pick and deploy one unit (without revealing the unit) face down (concealed) per fortress and airfield zone (both Gozo and Malta) on the map. d) After completing the above, add all 57 remaining Allied units (including 23 combat units, seven support, seven combat air, and 20 special ground units (13 Obstacles, one Intel, three Deception, and three Ambush)) in the above container. Then randomly pick and deploy one unit (without revealing the unit) to each zone on the map. In fortress and airfield zones, the unit will be in addition to those deployed in step c) above. e) After completing deployment, all remaining Allied units in the container make up the Allied Reserve Pool.
- Axis Deployment: Place all Axis ground, air, and naval units (except the 13 counters marked "R") in the Sicily Display. Important: Deploy all Axis units at full-strength. The 13 German units marked "Opt" are only deployed if optional rule 28.1.3 is being used.
- Axis Invasion Preparation: a) Pre-Battle Recon: Roll 2d6. Then select that number of zones on the map and reveal all Allied units in those zones. b) Recruitment: You may recruit any number of the 13 Axis reinforcement units (those marked with a "R") by expending VP. When complete set aside all remaining reinforcement units, they will not be used in the current game.
4.1 Begin Play
Use the Sequence of Play (5.0), executing the listed actions in the order given each GT.
5.0 Sequence of Play
Each GT consists of a series of discrete steps called phases.
-
Comando Supremo SP Phase: Beginning GT 2, you roll 1d6 and add the result to the total points on the Comando Supremo Staff Points Available Track (9.0).
-
Axis Intelligence Phase: You may conduct one or more intelligence operations by expending SP (10.0).
-
Axis Refit Phase: You may refit reduced Axis units by expending SP (11.0).
-
Axis Staging Phase (12.0): You may (in any order): a) Transfer Axis ground combat units from any Mission Display to any other Mission Display. b) Commit Axis air and naval units to missions. c) Transfer Axis ground and air units from the Gozo Mission Displays to the Malta Mission Displays (and vice-versa).
-
Axis Tactical Movement Phase: You may move any Axis units in a zone via ground movement (13.0).
-
Axis Strategic Air & Naval Attack Phase: You may execute combat for Axis air and naval units assigned to attacking the Allied Command and Royal Navy Level Tracks (16.0).
-
Axis Tactical Air & Naval Movement Phase: You may: a) Move Axis air and naval units in a Tactical Air & Naval Support Display to any zones in the assigned sector (14.0 & 15.0); and, b) Move Axis air transports and their transported ground units in Airborne or Airlanding Displays to a landing zone in the assigned sector (17.0).
Important: Do not yet disembark transported ground units. Airborne units disembark (if making airborne drops, they must roll for scatter) in the Axis Air Drop & Airlanding Phase.
6.0 The Map & Positioning of Units
There are three types of areas and/or paths on the map:
- Zones: The geometrical spaces on the three islands comprising Malta. These spaces represent points in which you position units, and through which they can maneuver and fight.
- Sectors: There are two sectors on the map (Malta and Gozo).
- Routes: Lines on Malta and Gozo along which you can move units from zone to zone.
Important: A zone is adjacent to another zone only if a route line connects the two zones.
6.1 Types of Zones
You place units in zones. Conduct movement along routes from zone to zone. Conduct combat when both Axis and Allied units occupy the same zone. Zones include:
- Airfields: Zones where Axis units can airborne drop and airland troops.
- Fortresses: Zones where historical stone forts exist.
- Towns: Zones where small urban areas exist.
- Port Towns: Coastal town zones.
- Rough: Zones with hills or woods.
- Plains: Zones with broad flat areas.
- Towers: Zones with commanding geographical features.
6.2 Axis Units
Axis Ground Units: Axis ground units can be in Mission Displays for either of the sectors, the Axis Eliminated Units Display (2.1.1), the Sicily Display, or on the map within the defined zones (6.1).
Axis Air & Naval Units: Axis air and naval units can be in the Tactical Air and Naval Support Display for either sector, Axis Strategic Missions Displays (2.1.1), in the Sicily Display, or in a zone in either sector (6.1). They must always end the mission back in a display (unless eliminated).
6.3 Allied Units
Allied units can be in zones, the Reserve Pool, or placed aside when permanently eliminated.
6.4 Stacking
Stacking is having more than one unit per display or zone. You may place an unlimited number of units in a display or staging area. Only Axis units can be in Axis displays.
Axis in Zones: In each zone, you may have:
- Up to four Axis ground units; and,
- Up to four Axis air units; and,
- If a coastal zone, one Axis naval unit.
Important: Axis Regiments count as two units for stacking. You may not place more air or naval units in a zone than the stacking limit allows.
Important: Axis ground units transported by air do not count for stacking until landed, at which point they count against ground unit stacking.
Strategic Air & Naval Missions: An unlimited number of Axis air units can conduct strategic air attacks (against the Allied Command Level Index and the Royal Navy).
Axis Combined Operations: German and Italian units may be in the same zone. German and Italian units defend and attack as one force. You may combine these units for attacks on the Allied Command Level Index and the Royal Navy.
Allied Units: An unlimited number of units may stack in a zone or display.
Zones and Combat: There may be both Axis and Allied units in the same zone. This will lead to combat (22.0).
6.5 Over Stack Penalty
If for any reason, at the end of any phase, a zone has more Axis ground units than allowed by 6.4, you must eliminate excess units (your choice). Example: This may occur owing to airborne scatter (17.3).
7.0 Axis Forces
Axis ground, air, and naval units begin the game in the Axis Units Available in Sicily Display.
7.1 Reinforcement Units
Reinforcement units represent forces that you have the option to recruit prior to the start of play. Most reinforcements are from the X Fliegerkorps on Crete which were supporting Rommel's campaign in the Western Desert. There is also the potential for committing the bulk of the 7th Flieger Division which was on the Eastern Front during this period.
- During initial deployment, you can recruit any number of (R) units. Consult the Victory Point Table and reduce the number of Axis VP listed for each type of unit. Then place the recruited units in the Sicily Display.
- Once GT 1 commences, you cannot recruit any further reinforcements.
7.2 Two-Step Axis Units
Axis units which have two steps function in the same manner whether full-strength (front side) or reduced (reverse side). You may restore a reduced unit to full strength via refit (11.0). Always deploy units at full-strength.
8.0 Allied Forces
Allied forces include British Commonwealth ground and air units plus various fieldworks and special actions.
8.1 Concealed Status
Allied units have their concealed status on the reverse and their specific type on the front. Initially deploy Allied units with their concealed side up. Specific actions during the game will reveal these units.
8.2 Special Allied Units
Treat special Allied units as combat units, with the following exceptions:
-
Ambush: The instant you reveal this counter:
Important: If there are no Axis units in the zone, immediately return the counter to the Reserve Pool.
- Pick the number of Allied units equal to the number on the lower line of the Allied Command Level Track (from zero to three) from the Reserve Pool. Place them face-up in the zone in which the ambush marker is located. a) If a second ambush marker is revealed immediately place it back in the Reserve Pool. Do not draw a unit in its place. b) If an intelligence marker is pulled due to an ambush, immediately return it to the pool and draw another unit.
- Combat occurs in the ensuing Combat or Counterattack Phase (whichever occurs first). The Allies gain an additional plus one (+1) for tactical superiority in that combat (use the marker as a mnemonic).
- At the end of the above combat, return the ambush marker to the Allied Reserve Pool.
-
Intelligence Information: The instant you reveal an intelligence unit, designate:
- Any three zones and reveal all Allied units in them.
- Roll 1d6 and reveal that number of units in the Allied Reserve Pool. That is, place them face-up next to the pool.
Important: The next time there is a requirement to place Allied units in a zone, you must place the revealed units before picking any unrevealed units from the container.
- Then return the intelligence marker to the Reserve Pool. If an ambush, deception, or intelligence marker is revealed immediately return them to the Reserve Pool.
-
Deception: The instant you reveal a deception unit, return it to the Reserve Pool.
9.0 Comando Supremo Staff Points
Comando Supremo Staff Points (SP) represent planning, training, and logistical buildup for Herkules. You can use Comando Supremo SP to initiate or enhance certain Axis actions.
Important: You do not need to use SPs to execute most game functions; only those specifically listed.
9.1 Recording
Record the number of available SP on the Comando Supremo Staff Points Available Track. This is set initially per (4.0) (1) (c).
- Each time you use a SP, reduce the number of SP by one.
- The total SP available can never go below zero or above 19.
- Unused SP (within the above limit) carry over from GT to GT.
9.2 Gaining Comando Supremo SPs
Beginning GT 2, during each Comando Supremo SP Phase, roll 1d6 and then increase the number of SP by the result.
9.3 Using Comando Supremo Staff
You can expend one SP to do one of the following:
- Initiate an Intelligence attempt (10.0).
- Initiate a refit (11.0).
- Add +1 to the tactical movement allowance of all Axis ground unit in one sector (13.0).
- Add +1 to all airborne drop DRs for one zone for one GT (17.0).
- Add +1 to all amphibious landing DRs for one zone for one GT (18.0).
- Add +1 to one Axis tactical edge DR (22.2).
9.4 HQ Requirement
The above actions may require an Axis HQ to be in the same zone to allow the use of the SP. See the individual rules. In this event, the HQ can be full or reduced strength.
10.0 Intelligence Operations
You may attempt to reveal Allied units in zones or the Reserve Pool by expending SPs.
- Execute this action in the Intelligence Phase.
- You can declare intelligence operations in any zones occupied by Allied units, or in the Allied Reserve Pool.
- You may make any number of attempts in total (spending SP each time).
Important: Only one attempt may be made in each zone, plus one in the Reserve Pool per GT.
10.1 Procedure for Zones
Designate one zone, expend one SP. Roll 1d6 and apply the following results:
- 1–3: Reveal all Allied units in the zone.
- 4–6: No effect.
10.2 Intelligence Procedure for Allied Reserve Pool
Expend one SP. Roll 1d6 and subtract one from the result. Randomly pick the resultant number of units from the pool and reveal them. The revealed units must be deployed on the map prior to randomly picking any unrevealed units from the pool. Place Allied units using the Allied Random Placement Table (25.0).
11.0 Refitting Axis Units
You may restore reduced Axis ground and air units to their full-strength side, or increase the number of Axis Amphibious Points available, via refit. Refit occurs during the Refit Phase.
- Refer to the Comando Supremo Staff Point Expenditure Chart to determine the number of SP required for each type of unit.
- Other than having the required number of SP available, there is no limit to the number of units you can refit per GT.
- Eliminated units may not be refit.
11.1 Procedure
Expend the required number of SP and flip the unit to its full-strength side.
Ground Units: To refit a ground unit, it must be located either in:
- A Mission Display (2.1.1); or,
- An Axis controlled airfield; or,
- In a hex containing an Axis HQ.
Air Units: Air units must be in the Sicily Display to be refitted.
Naval Units: Naval units must be in the Sicily Display.
Axis Amphibious Points: If the number of amphibious points is less than the maximum allowed, you can increase that number.
12.0 Axis Staging
During the Staging Phase, you can move any Axis units in Mission Displays to any other Mission Display and/or from the Axis Units Available in Sicily Display. You also may assign air and naval units to missions (14.0 & 15.0).
12.1 Staging Procedure
Move the units from one display box to another display. Except for amphibious movement, there is no limit to the number of units that can stage in a GT.
12.2 Air Transports
Units moved via airborne drop (17.3) or airlanding (17.4) must move with transport aircraft.
12.3 Assaults
You can move Axis ground units from the Sicily Display to either the Gozo or Malta sectors and place them in the following boxes:
- Airborne (17.3)
- Airlanding (17.4)
- Amphibious
- Assault (18.0)
Important: There is no requirement to attack each sector on any GT.
Example: You could use the first GT to conduct air attacks while keeping all Axis ground units in the Mission Displays.
13.0 Axis Tactical Ground Movement
Tactical movement is the term for moving Axis ground units on the map from zone to zone (after arriving from a staging area).
13.1 Tactical Movement Procedure
During the Tactical Movement Phase, you may move any or all Axis ground units on Malta and Gozo up to two zones.
- Units move from zone to connected zone by using connecting routes.
- You move each unit individually.
13.2 Restrictions
An Axis unit that begins the Tactical Movement Phase in a zone with an Allied ground unit cannot move (Exception: If the only Allied unit is an obstacle, the Axis unit can move out of the zone). An Axis ground unit must cease movement if it enters a zone containing any Allied unit (revealed or concealed).
13.3 Comando Supremo SP Enhancement
You can increase the movement allowance of Axis units which start in the same zone as an Axis HQ.
- Expend one SP.
- All units which start the Tactical Movement Phase in that zone can move up to three zones. They must abide by the restrictions in 13.2.
- The HQ cannot move in that phase prior to expending the SP. If it subsequently moves, it can move up to three zones.
14.0 Axis Air Operations
There are two types of Axis air units: Combat (with combat factors) and Air Transport.
14.1 Air Missions
During set up place all at-start or purchased air unit reinforcements in the Sicily Display.
- During the Axis Staging Phase, you may place them in the Mission Display.
Strategic Missions: Place air units conducting strategic missions in the Axis Strategic Missions Display. Place them in the corresponding box within the display depending on the mission you wish to conduct.
Important: You may commit any number of air units to strategic attacks.
- Attacks on the Allied Command: Units in this box may attack the Allied Command Level Index.
- Attacks on the Royal Navy: Units in this box may attack the Royal Navy Level Index.
- Once deployed in the Strategic Mission Display, air units must attack the designated index during the Axis Strategic Air & Naval Attack Phase (16.0).
- Return surviving air units to the Sicily Display when the mission is complete.
Tactical Missions: Place air units conducting tactical missions in the Tactical Missions Box corresponding to the type of mission and sector where you wish to conduct the mission.
Air Transport: Place air transport units in the Airborne or Airlanding Displays for the sector you plan on assaulting.
Ground Support Missions: Place air units in the Tactical Air & Naval Support Mission box for the sector you wish to support ground combat units.
- During the Axis Tactical Air & Naval Movement Phase, move air units from the Mission Box to any zones in the corresponding sector. The unit remains in that zone until eliminated or it completes its mission. Return surviving air units to the Sicily Display when the mission is complete.
Important: Air units do not have a range. Air units in mission boxes may conduct missions anywhere in their sector.
15.0 Axis Naval Operations
During set up place all at-start or purchased naval unit reinforcements in the Sicily Display.
- During the Axis Staging Phase, you may place them in the Mission Display.
Strategic Missions: Place naval units conducting strategic missions in the Axis Strategic Missions Display, Attacks on the Royal Navy Box only.
Important: Naval units cannot conduct attacks against the Allied Command Level Index.
- Once deployed in the Strategic Mission Display, naval units must attack the Royal Navy during the Axis Strategic Air & Naval Attack Phase (16.2).
- After completion of their mission return surviving naval units to the Sicily Display; they are available for use the next GT.
Tactical Gunfire Support: Place naval units conducting tactical missions in the Tactical Missions Box corresponding to the sector where you wish to conduct the mission.
Exception: Submarines cannot conduct tactical gunfire support.
Important: Naval units do not have a range. Naval units in mission boxes may conduct missions in any coastal zone anywhere in their sector.
- During the Axis Tactical Air & Naval Movement Phase, move naval units from the Mission Box to any coastal zones in the corresponding sector. The units remain in those zones until eliminated or mission completion.
- Return surviving naval units to the Sicily Display when the mission is complete.
Important: You may only place one naval unit in each coastal zone.
- In the ensuing AAA & Coastal Defense Phase, British coastal defense units in the same coastal zone must fire at naval units in the same zone using the procedures in 20.1 with the coastal defense unit being treated as AAA.
- In the ensuing Axis Tactical Air & Naval Gunfire Attack Phase, any surviving naval units fire at each British ground combat unit in the zone, one at a time.
- Use the gunfire unit's combat factor (to the left of the slash).
Example: An Italian CA has a combat factor of 3. There are two British ground units and one air unit in the zone. The CA attacks each ground unit with the combat factor of 3.
16.0 Axis Strategic Attacks
16.1 Axis Attacks on Allied Command Index
You use air units assigned to attack the Allied Command Track to attempt to reduce the Allied Command Level Index. This mission uses the air unit's strategic combat rating (to the right of the slash).
Important: The Allied Command Level Index or Royal Navy Index can never go lower than one.
16.1.1 Command Attack Procedure
For each attacking Axis air unit, roll 1d6:
- If the DR is ≤ the air unit's strategic combat factor: reduce the Allied Command Level Index by one.
- If the DR is > the air unit's strategic combat factor but < 6: no effect.
- If the DR = 6: reduce the attacking Axis air unit (owing to anti-aircraft fire not otherwise shown).
Designer's Note: One reason to reduce the Allied Command Level Index is to reduce the number of MEC event checks (24.0). Another reason is to increase the possibility of a Royal Navy Sortie (27.0).
16.2 Axis Attacks on the Royal Navy
You use air and naval units assigned to attacks on the Royal Navy mission to attempt to reduce the Royal Navy Level Index. This mission uses the air unit's strategic combat factor.
16.2.1 Royal Navy Attack Procedures
For each attacking Axis air or naval unit, roll 1d6:
- If the DR is ≤ the unit's strategic combat factor: lower the Royal Navy Level Index by one; and, a) Consult the Naval Attack Outcome Table. b) Roll 1d6 and cross reference the result with the VP Gain. Immediately add any VP to the Victory Points Track.
- If the DR is > the air unit's strategic combat factor but < 6: no effect.
- If the DR = 6: reduce the attacking Axis air or naval unit.
Designer's Note: The Royal Navy Level Index affects Amphibious Assault (18.0) and Fleet Sorties (27.0).
17.0 Air Transport
Air transport is used to move Axis units from the Airborne or Airlanding Displays to either the Gozo or Malta sector. Axis air transport units can conduct airborne drops and air-landing missions.
Important: Regiments cannot conduct airborne drops or air-landings. You must use amphibious operations to transport regiments.
Designer's Note: By 1942 the Axis was using gliders large enough to transport light artillery. This gives air transport units the ability to air land most unit types. The Me-321 heavy gliders are capable of transporting vehicles.
17.1 Air Transport Procedure
Air transport units may transport eligible ground units assigned to the same sector and type of air assault as the ground unit.
-
At the beginning of the Axis Tactical Air Movement Phase, place transported ground units under the transporting air unit.
-
Move the air transport unit and the ground unit together to the target zone.
-
During the Allied AAA & Coastal Defense Phase, conduct any AAA fire against the transporting air units in the zone.
-
During the Axis Tactical Air & Naval Gunfire Attack Phase conduct any tactical air and/or naval units attacks against Allied units in that zone.
-
During the Axis Air Drop & Airlanding Phase, place surviving transported units in the zone.
Important: Units conducting airborne drops must follow the procedure in 17.3.
-
Upon completion of the airborne drop/airlanding return the surviving air transport to the Sicily Display.
Important: Units may drop or land in zones containing Allied units. If so, they will have to engage in combat with them in the ensuing Ground Combat Phase.
17.2 Air Transport Capacity
Each air transport can transport one ground unit of the following types:
- Light Transport: One battalion-sized ground unit of any type other than armor.
- Heavy Transport (Me-321 only): One battalion-sized ground unit of any type.
Important: For transport purposes all HQ units are battalion sized units.
Important: Transport capacity is regardless of any reduction of the transporting or transported unit.
Designer's Note: The game factors in the air transport required to tow gliders, thus the rules treat gliders and powered transports using the same rules.
17.3 Airborne Drops
Only airborne capable units (2.2.2) can conduct airborne drops. They may drop on any type of zone (other than towers), regardless of the presence of enemy units. Units transported by air transport conduct airborne drops during the Air Drop & Airlanding Phase using the steps below:
Important: All DRM are cumulative.
- Roll 1d6 for each unit dropped.
- Modify the DR as follows:
- +1: If you expend one SP (this SP expenditure is one per zone and affects all airborne units landing in the zone).
- +1: If the unit is an elite unit.
- -1: If the zone contains a revealed obstacle (max of one).
- Consult the Airborne Unit Drop Table and cross references the modified DR with the appropriate column based on the type of zone.
Important: The DR can not be modified below one or greater than six.
- Apply the result to each unit immediately.
- Land: Place the unit in the target zone.
- Land + Surprise: If any unit conducting the landing receives this result, place a surprise marker on the unit(s) and apply a +1 DRM to any ensuing tactical edge DR this GT.
- Scatter: Pick one coastal zone, at random, directly connected to the landing zone by a route, or if no coastal zone is directly connected to the landing zone, randomly pick the closest coastal zone (using number of zones between the landing zone and coastal zone).
- Loss: Reduce the airborne unit. The unit lands in the landing zone.
- Scatter + Loss: Apply both results.
Important: If after rolling for all units, if any zone is overstacked apply the penalty in 6.5.
17.4 Airlanding
All Axis non-regiment sized units may make air-landings.
Important: Airborne drop and airlanding units may conduct air-landings.
- You may only conduct air-landings in airfield zones that contain at least one Axis ground unit that started the current phase in the zone. Allied units may also be present.
- Units transported by air transport conduct air-landings during the Air Drop & Airlanding Phase.
- The units automatically land in the zone (there are no DRs required).
Example: The Axis makes an airborne drop with two airborne units on an airfield. On the following GT, if the airfield remains occupied by Axis ground units, other units can conduct an airlanding in that airfield zone.
17.5 Post Landing Combat
Airborne-dropped and air-landed units must engage in combat with any Allied units in the same zone during the ensuing Axis Ground Combat Phase (22.0).
17.6 Conquer or Die
You cannot abort air transport missions once launched. The units must attempt to land. And once a unit has landed on the map, you may not move the unit off the island.
18.0 Amphibious Assaults
You may move Axis ground units from Mission Displays to any coastal zone within the sector assigned via amphibious movement.
18.1 Amphibious Points
Amphibious points (AP) quantify the Axis amphibious capacity. See set up (4.0) for the starting AP.
- Use the Amphib. Current marker to show the number of AP available. The number may vary depending upon losses, Royal Navy sorties and expenditure of SP.
- Use the Amphib. Used marker to show the number AP used during the current GT.
- You may never use more AP in a GT than the current marker displays.
18.2 Amphibious Capacity
All Axis ground units are amphibious qualified. To move a unit from the Mission Display to the map requires a specific number of AP.
- Each Company, Battalion, or HQ: 1 AP
- Each Regiment: 2 AP
18.3 Amphibious Landing Procedure
Units making the move must start in the same Mission Display and may land in any coastal zone within the region designated. Follow the steps below when conducting amphibious landings:
-
Move all units making a landing in a coastal zone to that zone.
-
Add the number of AP used to the Amphibious Used tally.
-
Roll 1d6 for all units landing in each zone. Modify the result as follows:
Important: All DRM are cumulative.
- +1: If you expend one SP (max of one per zone).
- +1: If there are any elite units or Marine Cdo units (max of one per zone).
- -1: If the zone contains a revealed obstacle (max of one per zone).
- -1: If the Royal Navy Level is High.
- +1: If the Royal Navy Level is Low.
-
Consult the Amphibious Landing Table and cross references the modified DR with the appropriate column based on the type of zone.
-
Apply the result to all landing units.
- Land: Place the units in the landing zone.
- Turn Back: Return the units to the Sicily Display.
- Loss: Reduce all landing units and reduce the current number of AP by one. The units land in the landing zone.
Important: If there are Allied combat units in the landing zone, then combat will occur in the ensuing Axis Ground Combat Phase. If there are both Allied and Axis units in the coastal zone at the end of the combat phase, all units remain in the zone. The landing units will be subject to a counterattack.
19.0 Fog of War & Reveal Phase
Allied units are in one of two states: Concealed (face down) or Revealed (face up). You may not examine concealed Allied units, or Allied units in the Reserve Display, unless a game action reveals them. You may always examine Axis units.
19.1 Revealing Allied Units
You reveal Allied units in a zone:
- During the Reveal Phase if the zone contains Axis ground or air units; and,
- Immediately when an Axis ground unit enters the zone; and,
- As a result of Intelligence operations (10.0).
- When in the Eliminated Displays.
- Once revealed, Allied units remain revealed for the remainder of the game.
20.0 Anti-Aircraft Fire & Air to Air Combat
Conduct Anti-aircraft fire if there are AAA capable units in the same zone as enemy air units (both combat and transport).
Anti-aircraft fire takes place at two times during a GT.
- Fire Axis AAA (only Axis naval units possess AAA) at all Allied revealed air units during the Allied Air Attack Phase.
- Fire Allied AAA at Axis air units during the Allied AAA & Coastal Defense Phase.
- Conduct air-to-air combat during the Allied Air Attack Phase.
20.1 AAA Fire Procedure
Each AAA unit or naval unit fires once at each air unit in the zone. Roll 1d6:
- If DR is ≤ the AAA or combat factor: reduce that enemy air unit.
- If DR is > the AAA or combat factor: no effect.
Example: Three Axis air units are in a zone containing two Allied AAA units. Each Allied unit fires once each at the three Axis air units. This would be a total of six DRs.
20.2 Air-to-Air Combat
Each air unit fires once (regardless of the number of enemy air units in the zone). Roll 1d6 for each friendly air unit:
- If DR is ≤ the air superiority rating of the firing unit: reduce one enemy air unit.
- If DR is > the air superiority rating of the firing unit: no effect.
- You can choose which air units to reduce for both sides.
Important: Allied air fires first owing to the advantage of fighting in friendly airspace with radar and early warning.
20.3 Effects of Reduction on Air & Naval Units
A reduced unit completes its mission (at its reduced strength). Eliminated air units do not complete their mission. Move eliminated units to the appropriate eliminated units' box.
- If a result calls for an air transport to reduce, then also reduce any ground unit it is transporting.
Important: Reduced air transport units have the same capacity as full-strength units when loading ground units in the staging area.
- If a result requires an air transport unit to eliminate, then eliminate any ground unit it is transporting.
- If AAA fire scores the number of hits against an air unit to eliminate it, do not apply additional hits to other air units.
Example: If three AAA units were firing at a single Axis air unit, and all three scored hits, the first two hits would eliminate the air unit; do not apply the third hit against other Axis air units.
20.4 AAA Units
AAA ground units also function as support ground units. They use their parenthesized combat strength for ground combat.
21.0 Tactical Air Attacks
21.1 Axis Tactical Air Attacks
You use Axis air units to attack Allied units in the same zone during the Axis Tactical Air & Naval Gunfire Attack Phase.
- You may commit up to four Axis air units to a single tactical air attack against each zone.
- You may combine Luftwaffe and Italian air units in the same attack.
- Select one zone at a time, then for each attacking air unit, roll 1d6:
- If DR is ≤ the air unit's tactical combat rating: inflict one hit (eliminate one Allied ground unit).
- If DR is > the air unit's combat factor and < than 6: no effect.
- If DR = 6: reduce the attacking air unit.
- You do not have to state which air units will attack which Allied ground units ahead of time.
- Apply results after making all attacks and then select the eliminated units. If scoring more hits than the number of Allied ground units in the zone, ignore all excess hits.
21.2 Allied Air Attacks
Allied revealed air units conduct air attacks during the:
- Allied Air Attack Phase after all air-to-air and AAA combat is complete.
- During a Counterattack Phase if there is an Allied air unit in the counterattacking force.
Important: Air-to-air and AAA fire does not take place in the Allied Counterattack Phase. Conduct the steps in 21.2.1 starting with step 4.
21.2.1 Allied Air Attack Procedure
During the Allied Air Attack Phase, you follow the below steps for air-to-air and AAA fire.
- Fire Allied air units against Axis air units in the same zone. Use the procedure in 21.1.
- Fire any surviving Axis air unit against any Allied air units in the zone. Use the procedures in 21.1.
- Fire any Axis AAA at Allied air units in the zone. Follow the procedure in 20.1.
- Surviving Allied air units attack any Axis naval unit in the zone (using their strategic combat rating). If there are no Axis naval gunfire units; then,
- Surviving Allied air units attack any Axis ground units in the zone (using their tactical combat rating). Use the DR and procedures in 21.1.
- Move surviving Allied air units to the Reserve Pool.
22.0 Ground Combat
Combat is when enemy units attempt to destroy each other.
22.1 When Ground Combat Occurs
Ground combat must occur when Axis and Allied units occupy the same zone, during the:
- Axis Ground Combat Phase (Axis side is the attacker and the Allied side is the defender); and,
- Allied Counterattack Phase (Allied side is the attacker and the Axis side is the defender).
- You can select the order in which you resolve combat zone by zone. Resolve each combat and then go to the next zone.
22.2 Ground Combat Procedure
Each combat must go through the following steps:
-
Tactical Edge Determination: a) Decide if you will expend a SP point (you may only spend one per combat). b) Roll 1d6 for each side and apply the following DRM:
Axis DRM:
- +1: If you expended one SP in a).
- +1: If there are any Axis elite units in the force (max of one DRM).
- +1: If an Axis airborne or amphibious assault results in a surprise.
- +1: If the Allied Command Level Index is low (i.e., 1–4) (23.0).
Allied DRM:
- +1: If there are any Allied elite units in the force (max of one DRM).
- +1: If there is an ambush marker in the zone.
- +1: If the Allied Command Level Index is high (i.e., 9–12) (23.0).
- +1: If the Axis units made an airborne drop or amphibious assault this GT.
Errata: This modifier is not on the Modifiers table on the map.
- The side with the higher modified DR has the tactical edge for the battle in the zone.
- In the event of a tie: a) If there is an obstacle in the zone, the Allied side wins; or, b) If no obstacle, the TEC indicates who wins, depending on the type of space.
Example: An Axis force which includes two elite units makes an amphibious assault into a port town zone containing an Allied unit. The Axis is the attacker since the combat is taking place in the Axis Ground Combat Phase. The Axis DR is 3 (modified to 5 due to elite units and amphibious assault). The Allied DR is 4 (modified to 5 due to an ambush marker). Since both sides have a modified DR of 5, it is a tie, and you consult the TEC. Since the combat is in a town the Allied side (being the defender) gets the tactical edge.
Important: Each battle consists of one support fire round and one maneuver round for each side. There are no continuing rounds.
22.3 Firing Procedure
In each round, each ground combat unit capable of firing will fire one time (roll for each firing unit).
- You may roll for each unit in any order desired.
- Conduct all fires and then apply the total results for that round.
- Modify all attacking combat units' combat factors using the following modifiers: a) If an obstacle is in the zone, subtract one from each unit's combat factor; and, b) Specific terrain in the zone may reduce each attacking unit's combat factor by one. See the TEC.
- Roll 1d6 for each firing unit. For each unit DR: a) If DR is ≤ the firing unit's printed combat factor: that unit inflicts one hit. b) If the DR is > the firing unit's combat factor: no effect.
- Apply any hits after rolling for all units of each side.
Example: 3 Axis units are attacking 2 Allied units. The Axis side has the tactical edge and rolls one die for each unit, inflicting 1 hit. Eliminate one Allied unit. The surviving Allied unit would then fire. If the Axis side inflicted 2 hits there would be no return fire from the Allied units.
22.4 Resolving Hits
Resolve hits after rolling all dice for each side in each round. Hits in either round can affect any enemy ground unit in the zone. Determine which units suffer hits on both sides using the following procedure:
a) Each hit eliminates one Allied unit (your choice). Place the unit in the Eliminated Allied Units Display. b) Each hit on an Axis units reduces one unit by one step (your choice).
Important: If there are more hits inflicted than there are enemy units to absorb them, then there is no additional effect. Hits in one zone do not affect units in other zones.
22.5 Pursuit
If Axis forces attack and win a battle or if the only Allied unit revealed was Deception, you may conduct a pursuit.
- Pursuit occurs immediately upon conclusion of the battle and before initiating the next battle.
- If Axis units are defending (from a counterattack) and win a battle, there is no pursuit. Allied units never pursue.
- Axis ground maneuver units can conduct pursuit. Support, naval, and air units cannot pursue.
- You may move all maneuver units (up to the stacking limit) one zone in any direction.
- The pursuit may be into a zone containing Allied units. Immediately reveal the Allied units and conduct a counterattack in the ensuing Allied Counterattack Phase.
23.0 Allied Command Level
The Allied Command Level Index Track has two lines. The upper line shows the current morale level (1 to 12).
The Allied morale has three levels that will affect different aspects of the game:
- Low (1–4)
- Medium (5–8)
- High (9–12)
The lower line has a number that indicates the number of Middle East Command (MEC) events DRs you must make each Allied MEC Command Phase.
23.1 Allied Command Adjustment
During the Allied Command Level Adjustment Phase, you must raise the Allied Command Level Index by one for each airfield and coastal town zone that is Allied controlled or disputed (2.7).
- The Allied Command Level Index can never go lower than 1 or higher than 12.
Important: Do not reduce the command level for Axis occupation of airfield and port zones. However, the Axis capturing them will reduce the ability for the Allies to adjust upwards.
24.0 Allied Middle East Command Events
Middle East Command (MEC) events represent the Allied response to the Axis assault on Malta.
-
During the Allied MEC Phase, you must make the number of MEC event checks equal to the number below the current Allied Command Level Index.
-
For each check, roll 2d6 and total the result.
-
Consult the MEC Events Table and implement the result listed.
-
Roll for each event and implement the event before the next check.
Exception: An event may cause the Allied Command Level Index to change. If so, apply the change after rolling for all events.
-
An event can occur only once per GT. If rolled again in the same GT, treat as No Effect (do not re-roll).
-
MEC events supersede other game rules.
Example: The current Allied Command Level Index is 7 (medium). The number of MEC event checks is directly below the 7. You must make two MEC event checks. For each such check, you roll 2d6, and totals the result. The result of the first DR is 8. Cross referencing the result you determine the event is Allied Offensive Malta. You conduct this event and then roll 2d6 to determine the second event. The result is 4, and you conduct the Middle East Commands Event Chart.
25.0 Allied Reserves
The Allied Reserve Pool represents units not otherwise accounted for on the game map but that were on or could have been part of the Allied force sent to Malta and may come into play. Pick units from the pool due to various rules. You always randomly pick units from the pool.
- When a MEC reserves released event occurs:
- Pick the designated number of Allied units from the Allied Reserve Pool.
- For each unit, refer to the Allied Random Placement Table and roll 1d6 twice. The first DR are the numbers across the top of the table and the second DR are the numbers along the left side of the table. Cross reference the two results to determine the zone of placement.
- Place the unit in the determined zone face down (concealed).
- Do not place units in Axis controlled zones. If a unit's zone of placement is Axis controlled, return the unit to the Reserve Pool.
- You can place units in Allied controlled, disputed, or uncontrolled zones (2.7).
- If there are no units left in the Allied Reserve Pool, there is no further effect.
26.0 Allied Offensives
Allied units do not move once placed on the map. However, certain MEC events may trigger Allied unit movement.
- The Royal Navy Level Index is the numbers on the top row of the Royal Navy Level Track. The numbers in the second row directly under the current level is the combat strength of the fleet sortie.
26.1 Allied Offensive Procedure
When an Allied offensive event occurs (MEC Events Chart) follow the procedures below in the designated sector:
-
You must move all Allied units that are in a non-airfield or coastal town zone adjacent to an airfield or coastal town into that airfield or coastal town zone.
Designer's Note: The lower the Royal Navy level, the higher the chance of a fleet sortie. The idea here is that the more the British command feels pressure to do something positive to affect the outcome of the battle, the more likely they are to sortie the fleet.
Exceptions: Allied units in a fortress zone and/or in a zone with Axis units do not move.
-
If two or more coastal town/airfield zones are adjacent, randomly determine the zone the units move into.
-
If the airfield or coastal town contains Axis units, the moving units must conduct a counterattack in the ensuing Allied Counterattack Phase.
26.2 Counterattacks
During the Allied Counterattack Phase, you must execute an Allied counterattack if Axis and Allied units are in the same zone.
- Allied units attack using the standard ground combat procedure (22.3).
- The Allies are the attackers and the Axis the defenders.
- The Axis gain the defender advantage for terrain.
- All Allied units in the zone must participate in the counterattack and all Axis units must defend.
- If the Allied units were placed in the zone due to an Allied MEC event, immediately reveal the Allied units and return any Allied air units revealed to the Reserve Pool. Then conduct the counterattack with any Allied ground units.
27.0 Allied Royal Navy Fleet Sortie
The Allied Mediterranean Fleet represents a one-time major offensive by the Royal Navy to stop the invasion.
Important: Remove the fleet sortie marker from the Royal Navy Fleet Sortie Marker Display after the fleet sorties.
- During the Allied Royal Navy Check Phase, you must determine if the fleet sorties.
- Roll 2d6 and total the result. If the total is:
- ≤ the current Royal Navy Level Index: nothing happens (roll again next GT).
-
the current Royal Navy Level Index: immediately initiate a fleet sortie.
27.1 Fleet Sortie
If the fleet sorties, immediately resolve all the following actions:
- Attack Axis Naval Units: Execute an attack against each Axis naval unit in the Axis Units Available in Sicily Display.
- Roll 1d6 for each Axis naval unit. If the result is:
- ≤ the combat strength of the Allied fleet: reduce that naval unit.
-
than the current combat strength of the Allied fleet: no effect.
- Roll 1d6 for each Axis naval unit. If the result is:
- Attack the Axis AP Level: Reduce the current Axis AP level by the number equal to the Allied fleet combat strength.
- Attack Axis Airpower: Roll 1d6. If the result is:
- < the combat strength of the Allied fleet: subtract the result from the Allied fleet combat strength and reduce that number of Axis air units (your choice).
- ≥ the current combat strength of the Allied fleet: no effect.
- Land the Middle East Commando Unit: Deploy the MEC Cdo unit per the random placement procedure (25.0). The zone can be Axis controlled, disputed, or Allied-controlled.
- Allied Command: Roll 1d6 and reduce the Allied Command Level Index by the result.
27.2 Middle East Commando Unit
The MEC Cdo unit is the only Allied two-step unit.
- If placed on the map, the unit cannot move out of the placement zone for any reason.
- Treat the unit the same as a two-step Axis unit when suffering reduction.
- The Cdo unit defends normally and must conduct counterattacks if the placement zone contains Axis units.
- If eliminated remove the unit from the game.
Middle East Command Events Chart (24.0)
Roll two dice and total the results.
| DR | Event | Explanation |
|---|---|---|
| 2 | Morale Check | If the current VP level is positive: roll 1d6 and gain that number of Axis SP. If the current VP level is zero or less: roll 1d6 and lose that number of Axis SP. |
| 3 | RAF Raids Axis Naval Forces | Roll 1d6: Reduce the Axis AP Level by the result. Roll a 2nd 1d6 for each Axis naval unit: If the result is 1, reduce that naval unit. |
| 4 | Middle East Situation | Roll 1d6: 1–3: reduce the Allied Command Level Index by 1. 4–6: increase the Allied Command Level Index by 1. Roll a 2nd 1d6: 1–3: reduce the Royal Navy Level Index by 1. 4–6: increase the Royal Navy Level Index by 1. |
| 5–6 | Reserves Released | Roll 1d6: pick that number of units from the Allied Reserve Pool. Conduct the random placement procedure (25.0) for each unit. |
| 7–8 | Allied Offensive Malta | Follow the Allied offensive procedure (26.1) for the Malta Sector. |
| 9 | Allied Offensive Gozo | Follow the Allied offensive procedure (26.1) for Gozo Sector. |
Additional Victory Points
Awarded at end of game.
| Awarded at End of Game | VP Gained | VP Lost |
|---|---|---|
| Each Axis Occupied Fort | 6 | – |
| Each Axis Occupied Airfield & Town | 4 | – |
| Each Allied Combat Unit on the Map at the end of the Game | – | 1 |
| GT on which Malta is Cleared | – | (1) |
| Final Royal Navy Level | – | (2) |
Victory Points Table Notes:
- If Malta has been cleared (3.4) you subtract the GT number from seven and adds the result to the victory point total.
- Double the final Royal Navy Level and then subtract the appropriate number of VP.
28.0 Optional Rules (online only)
28.1 Axis Special Units
28.1.1 Engineers
You can use Axis engineers to attempt to remove obstacle markers. There must be at least one engineer unit in a zone containing an obstacle marker at the beginning of the Tactical Movement Phase.
Important: Allied ground units cannot be in the same zone.
- The engineer cannot move in the same phase in which it attempts to remove the obstacle.
- If there is more than one engineer in a zone, then roll one die for each engineer attempting to remove an obstacle.
- To remove an obstacle marker roll 1d6 for each engineer unit in the zone and apply the following results:
- 1–3: Remove the marker.
- 4–6: No effect, the marker remains in place.
28.1.2 Italian Naval Swimmers
The Italian N/SM commando unit receives a +1 when rolling on the Amphibious Landing Table.
28.1.3 7th Flieger Division (Optional Force)
Comando Supremo wanted to use the German 7th Flieger (Airborne) Division for Herkules; however, a large part of the division was off on the Eastern Front, or refitting. The only German airborne unit ready for Herkules was the 1st Parachute Brigade (Ramcke).
- If this option is used, you may add the 13 7th Flieger units shown as optional units. The Ramcke HQ and five units assigned to the brigade are still available.
- If these optional units are used, you must subtract 20 VP from the total.
28.2 Additional Air Missions
28.2.1 Me-321 Powered Gliders
- If using this optional rule, Me-321 gliders may make air-landings in an airfield or plain zone.
- Me-321 gliders cannot conduct paradrops.
28.2.2 Stukas
Normally, Axis air units can be placed only during the Axis Tactical Air & Naval Movement Phase. Stuka's (Ju-87 dive bombers) are a special case.
- If an Allied counterattack initiates an Allied attack against Axis units, you can immediately move any available Stuka's in the Tactical Air & Naval Support Display to that zone.
- After placing them on the map, fire any Allied AAA units in the zone.
- Surviving Stuka's may now make a ground attack.
- Upon completion of the attack, place the surviving Stuka's back in the Tactical Air & Naval Support Display.
- Stukas used for this may not have been involved in any other mission this GT.
- Upon completion of the Stuka attack, conduct the Allied attack in the zone.
28.2.3 Emergency Air-landings
Axis air transports can land in plain zones. Treat plain zones as airfields for this purpose. However, you must roll on the Airborne Unit Drop Table for each air transport. Apply any DRMs. Results are:
-
Reduce: Apply a reduction to the air transports and any ground units being carried; then disembark the ground unit in the plain zone.
-
Scatter: Mission aborts; return the transport and ground unit to the Axis Units Available in Sicily Display (without landing).
-
Land: Disembark the ground unit in the zone.
-
After completion of the mission return surviving air transports to the Axis Units Available in Sicily Display.
28.2.4 Aerial Supply
To expend a Comando Supremo point for the tactical movement bonus or refit (9.3 & 11.0) for units on Malta (in addition to the requirements of those rules), you must assign one air transport unit per SP expended.
- Place air transport in the Airborne Staging Display for the applicable sector (Malta or Gozo). Do not assign any ground units to them.
- During the corresponding phase (Axis Refit or Axis Tactical Movement Phase) move one air transport unit back to the Axis Units Available in Sicily Display for each SP expended. Then roll one die for the air transport unit. If the result is a six reduce the air unit. Any other result has no effect.
Important: Expending SP for other purposes does not require the use of air transports.
28.3 Additional Tactics
28.3.1 Ground Recon
Axis Reconnaissance and commando units may perform a Recon Action. To perform recon, the unit must start the Axis Tactical Movement Phase in a zone adjacent to a zone containing concealed Allied units.
- For each such unit, designate one adjacent zone containing concealed Allied units and roll one die.
- If the DR is less than or equal to the recon unit's combat rating, then reveal all Allied units in that one zone. Otherwise, there is no effect.
- The recon unit cannot move in the same phase.
28.3.2 High Ground
If one side's units occupy a rough zone (regardless of enemy units), then all friendly tactical edge DRs (22.2) in adjacent connected zones receive an additional +1 DRM. If both side's units occupy the same rough, they cancel each other out.
28.3.3 Tactical Retreat
Change combat results applied against ground units to the following: A DR of less than the firing unit's combat factor eliminates one enemy unit. A DR equal to the firing unit's combat factor causes a retreat.
- Retreat (Allied Unit): Place the Allied unit in the Reserve Pool. This does not count as an elimination for VP.
- Retreat (Axis Unit): You may choose one of the following:
- Take one hit (per retreat result); or,
- Move the unit one connected zone. The zone cannot contain any Allied units.
- Apply all eliminations before any retreat. Retreats are applied at the end of each round of combat.
- If more than one retreat is inflicted on a unit, there is no additional effect.
- Air units never retreat.
28.4 Allied HQs & Command Level
The instant that an Allied Headquarters unit is eliminated, deduct the following number of points from the Allied Command Level Index:
- Malta Command: 2
- Other HQs: 1
28.5 Team Play
You can play Malta with more than one player. Recommendations include:
- Axis Command: One player is supreme commander and each other player controls Axis forces in one sector. The supreme commander arbitrates disputed about allocation of airpower, etc.
- Combined Operations: One player controls Axis ground units, another the Axis air and naval units.
Transcriber's note: the following charts and tables are referred to by name in the rules above but are not reproduced in the magazine's rules text, so they are not transcribed here: Allied Random Placement Table (25.0), Tactical Edge DRM Chart (2.1.1), Terrain Key and Terrain Effects Chart (2.1.3), Airborne Unit Drop Table (17.3), Amphibious Landing Table (18.3), Combat Results Table (22.3), Naval Attack Outcome Table (16.2.1), and Comando Supremo Staff Point Expenditure Chart (9.0).