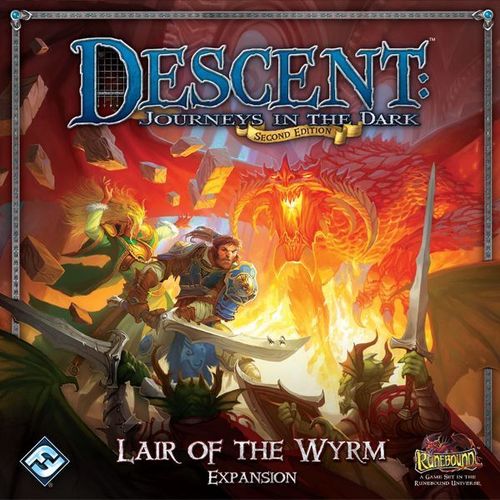
Descent: Journeys in the Dark (Second Edition) – Lair of the Wyrm
Descent: Journeys in the Dark (Second Edition) – Lair of the Wyrm Rulebook
Note: the expansion's separate Quest Guide booklet is not included.
Table of Contents
Table of Contents
Component List
This expansion includes the following:
- This Rulebook/Quest Guide
- 2 Hero Figures
- 8 Monster Figures, consisting of:
- 5 Fire Imps; 3 tan and 2 red
- 3 Hybrid Sentinels; 2 tan and 1 red
- 2 Hero Sheets
- 38 Small Cards, consisting of:
- 22 Class Cards
- 4 Act I Shop Item Cards
- 5 Act II Shop Item Cards
- 4 Condition Cards
- 1 Search Card
- 2 Relic Cards
- 31 Bridge-sized Cards, consisting of:
- 8 Overlord Cards
- 4 Monster Cards
- 2 Lieutenant Cards
- 3 Travel Event Cards
- 6 Secret Room Cards
- 6 Rumor Cards
- 2 Advanced Quest cards
- 60 Tokens, consisting of:
- 12 Map Tiles
- 1 Secret Room Tile
- 1 Lieutenant Token
- 12 Valor Tokens
- 3 Familiar Tokens
Component Overview
This section describes the various components in detail.
Plastic Figures: The heroes and monsters included in this expansion are represented on the map by plastic figures.
Hero Sheets: The heroes in this expansion each have a corresponding Hero sheet containing all the information needed to play that hero.
Class Cards: These cards are divided into two separate decks that represent the two different hero classes included in this expansion: the Champion and the Geomancer. Each deck contains all the skills and starting equipment belonging to that class.
Shop Item Cards: These cards are added to the exiting shop decks and represent items heroes can find or purchase in the game. They are divided into Act I items and Act II items.
Condition Cards: These cards describe the rules for the new Burning condition.
Search Card: This card represents a secret room entrance that heroes can find during their adventures.
Relic Cards: These cards represent unique and powerful items that can be found during a campaign.
Overlord Cards: These Overlord cards represent a new class available to the overlord player during a campaign: the Punisher. Additionally, one card is included that may only be acquired as a reward for winning a specific quest.
Monster Cards: The monsters in this expansion each have a corresponding Act I and Act II Monster card containing all the information pertaining to the monster.
Lieutenant Cards: These cards list all the information about a powerful new enemy, Valyndra. There is one card each for the Act I and Act II versions of Valyndra.
Travel Event Cards: These cards are used to determine if an event occurs for the heroes while traveling during a campaign.
Secret Room Cards: These cards represent random secret rooms that heroes can find and explore during a quest. The special rules and rewards found within each secret room are described on these cards.
Rumor Cards: These cards present the overlord player with new ways to challenge the heroes during a campaign. Some of these cards correspond to a quest from the Quest Guide that may be played in between quests.
Advanced Quest Cards: These cards are used to display quests that are available for players to choose during a campaign. These cards enter play as a reward for winning certain quests, and remain in the central play area until completed.
Map Tiles: These puzzle-cut tiles represent different locations heroes explore during the game. Each quest has a unique layout that uses different combinations of map tiles. All map tiles are double-sided, with one side showing an indoor location and the other side showing an outdoor location.
Secret Room Tile: This unique map tile represents a hidden room that can be found in any quest. This tile is differentiated from normal map tiles by its lack of puzzle-cut edges.
Lieutenant Token: This token represents a lieutenant on the map. In the case of this expansion, Valyndra. The art on the token matches the art on the corresponding Lieutenant card.
Class Tokens: These tokens are used with the new classes introduced in this expansion, and consist of familiar tokens for the Geomancer and valor tokens for the Champion.
Secret Room Entrance Token: This token represents a hidden passageway that leads to a secret room. When the appropriate Search card is drawn, players place this token on the map to mark where heroes can access the secret room.
Condition Tokens: These tokens correspond to the Burning Condition card and are used to mark when a monster is affected by Burning.
Challenge Tokens: These tokens are used with secret rooms and represent various attribute tests and monsters that heroes must overcome to receive their reward.
Inactive Monster Tokens: These tokens are placed on monster cards during certain quests to indicate that the monster group cannot be activated.
Damage and Fatigue Tokens: These tokens track the amount of damage or fatigue heroes suffer during a quest. The damage tokens are also used to track damage monsters and lieutenants have suffered.
Lair of the Wyrm Expansion Icon: All the cards and sheets found in this expansion are marked with the Lair of the Wyrm expansion icon to distinguish these components from those found in the base game.
Expansion Setup
The rules in this expansion assume players are playing Lair of the Wyrm as part of a campaign (see page 4). Before playing with this expansion, carefully punch out all tokens and map tiles from the cardboard frames. Then, perform the following steps:
- Incorporate New Cards: Add all Shop Item and Travel Event cards from this expansion to their respective decks. Remove the "Nothing" card from the Search deck and replace it with the "Secret Passage" Search card before shuffling the Search deck. Be sure there is only one copy of "Secret Passage" in the Search deck (if playing with other expansions). Then, shuffle the Secret Room cards and place them facedown near the Search deck. Take the new Class, Condition, Relic, Overlord, Monster, and Lieutenant cards and add them to the pool of available cards. These cards function like their counterparts found in the base game.
- Prepare Advanced Quest and Rumor Cards: Keep the Advanced Quest cards in the game box until called for. Shuffle the Rumor cards and place them facedown near the Overlord deck. When starting a new campaign, the overlord player draws three cards from this deck (see page 6 [printed reference; the Rumors section is on page 7]).
- Incorporate Other Components: Add the Hero sheets, hero and monster figures, all tokens, and map tiles from this expansion to their respective supplies.
Note: Players should begin a new campaign before incorporating the components and rules from Lair of the Wyrm into their game for the first time.
Lair of the Wyrm Expansion Rules
This section describes how to incorporate the rules and components from this expansion into Descent: Journeys in the Dark Second Edition. After setting up the expansion components (see "Expansion Setup" on page 3), refer to this section for rules on how to use those components in the game.
When playing with the Lair of the Wyrm expansion, players are required to use all of the new components described in this section. This rulebook is written assuming that players are using this expansion as part of a campaign. These rules are compatible with "The Shadow Rune" campaign found in the base game, as well as all other campaigns released in future expansions.
Quests
This expansion includes five quests, which are found in the Quest Guide at the back of this rulebook. Each of these quests have one or two Encounters, and they are incorporated into campaigns through the use of Rumor and Advanced Quest cards (see "Rumors" on page 7).
Inactive Monsters
Some quests in this expansion specify certain monster groups as Inactive. When a monster group is inactive, the overlord player places an inactive monster token on the corresponding Monster card. The overlord player cannot activate inactive monsters or affect them using Overlord cards unless specifically stated in the quest rules.
If a monster group is inactive, all figures corresponding to that monster group are inactive. While inactive monster figures are on the map, they block line of sight and movement, and they may still be targeted and affected by attacks from other figures—the overlord player rolls defense dice as normal. Unless otherwise noted in a quest, if an inactive monster suffers any amount of damage (for any reason; shown as a heart icon in the printed rulebook), the overlord immediately discards the inactive monster token from the corresponding monster group's Monster card, and that monster group is no longer inactive—the overlord player may activate them as normal on his turn.
New Hero Classes
This expansion includes two hero classes not found in the base game: the Champion and the Geomancer. These classes belong to the Warrior and Mage archetypes, respectively. Hero players may choose these classes during the Choose Classes step during Hero Setup.
Valor Tokens
The Champion class has several skills that interact with valor tokens. These tokens do not have an inherent function, and are used specifically with the Champion class. When a player chooses the Champion class during Hero Setup, he places the valor tokens in a supply near his play area.
Each time a player is instructed to gain one valor token, he takes one valor token from the supply and places the token on his Hero sheet. Each time a player spends a valor token (normally to trigger an effect from one of the Champion's skills), he removes it from his Hero sheet and places it back in the supply. Valor tokens remain on Hero sheets between encounters but are discarded at the end of a quest. If a player runs out of valor tokens, he cannot use replacement tokens. Valor tokens are limited to the supply.
Summoned Stone Familiars
The Geomancer class has access to skills that allow him to summon and control Summoned Stone familiars. These familiars follow all rules for familiars (see "Familiars" on page 17 of the Descent: Journeys in the Dark Second Edition rulebook), with exceptions described on the Summoned Stone Familiar card. The Geomancer may have multiple Summoned Stones on the map. Each Summoned Stone shares the characteristics and abilities described on the Summoned Stone Familiar card, and each is activated independently.
A hero player who is playing a Geomancer may remove one or more Summoned Stone familiar tokens from the map anytime during his turn. If the Geomancer uses an ability to summon a Summoned Stone on the map while he is at his limit (initially one), the hero player may first discard a Summoned Stone from play before resolving the ability. If a Summoned Stone is defeated, remove it from the map.
Overlord Cards
The Overlord cards include seven new cards belong to the Punisher Overlord class, which functions similarly to the Overlord classes from the base game.
The one "Rumor Reward" Overlord card does not have an experience cost and cannot be purchased normally. The overlord can only receive this card as a quest reward. When he receives this card, he shuffles it into his Overlord deck as normal.
Condition (Burning)
This expansion includes Condition cards and tokens for the Burning condition, which are added to the existing supply of Condition cards and tokens. Certain monster abilities, items, or quest special rules inflict Burning on figures. The rules for Burning are described on the corresponding Condition card.
Secret Rooms
Secret rooms expand quests by giving the heroes the ability to uncover hidden passages that lead to unknown chambers containing valuable rewards. These secret rooms can come into play in any quest through the effects of a new Search card. Heroes are not required to explore a secret room to complete the quest.
Discovering a Secret Room
When the "Secret Passage" Search card is drawn, it instructs the player to place a secret room entrance token in his space. Heroes in this space may explore the secret room by spending one movement point or by following the instruction on the "Secret Passage" Search card (see "Exploring a Secret Room" below).
Important: If the "Secret Passage" Search card is drawn when the hero figures are not on the map (such as during the Travel step), the players draw a replacement Search card, and shuffle the "Secret Passage" Search card back into the Search deck.
Exploring a Secret Room
A hero in the same space as a secret room entrance token may spend one movement point to explore the secret room. He then draws one Secret Room card and resolves the special rules on the card. Many Secret Room cards instruct the player to place a secret room tile, in which case he performs the following steps:
- Place Secret Room: He places the appropriate secret room tile near (but not connected to) the map in the central play area. The player must be sure that the tile code on the secret room tile matches the tile code shown on the Secret Room card.
- Move Hero: The player then removes his hero figure from the map and places it on the secret room tile's entrance space (marked with the secret room entrance icon).
- Place Challenge Tokens: The overlord player randomly draws a number of challenge tokens equal to the number of heroes and, without looking at them, places each one facedown in a corner on the secret room tile. There can only be one challenge token per space, and they must be placed as shown on the "Secret Room Setup" diagram on page 6.
Secret Room Entrance
The secret room entrance token is used to mark the space where heroes can explore and enter the secret room. The symbol on this token matches the symbol in one space of the secret room tile. Any space containing this symbol is a secret room entrance space.
During a player's turn, if his hero figure is in a secret room entrance space, he may spend one movement point to place his figure in any other secret room entrance space. These spaces are not adjacent, but heroes may move between secret room entrance spaces as if they were. Monsters cannot use secret room entrances.
If a hero player moves his figure to a secret room entrance space that is occupied, he places his hero figure in the closest available empty space of his choice.
Challenge Tokens
When his hero figure is adjacent to or in a space containing a facedown challenge token, the player may perform a search action to flip the token faceup (do not draw a Search card). The face of each challenge token displays either a monster or an attribute icon.
If the revealed challenge token displays a monster, it is placed in the closest available empty space from where it was revealed and is treated as a minion monster figure of the indicated type. This monster does not count against the overlord's monster group limits. The revealed monster uses its corresponding Monster card of the current Act. If the revealed monster belongs to a monster group that is currently inactive, the challenge token is immediately discarded.
If the revealed token displays an attribute icon (one of four symbols, shown as [attribute icon] in this transcription; the icon names are not printed in the source text), the hero must immediately test that attribute. If he passes, the hero player immediately draws a Search card and discards the challenge token. If he fails, the hero player still discards the token but does not draw a Search card.
At the start of each overlord turn in which there is a hero on a secret room tile, the overlord player may choose to discard one challenge token or monster figure from the secret room tile. This choice is made before the overlord player draws his Overlord card. The discarded token is not revealed. This may result in the completion of a secret room (see below), but allows the overlord to control how much time the heroes spend exploring the secret room and how many Search cards they might gain.
Secret Room Rewards
As soon as there are zero challenge tokens and zero monster figures on the secret room tile, the player taking his turn pauses to resolve any "Reward" effects on the Secret Room card. If multiple hero figures are on the secret room tile, the heroes choose one of those heroes to resolve the reward effect on the Secret Room card.
Then, players remove all hero figures from the secret room tile and place them in empty spaces nearest to the secret room entrance token (if there are multiple spaces equidistant from the secret room entrance space, the hero player chooses the space in which to place his figure). Then, the secret room tile and the secret room entrance token are discarded.
Finally, the player whose turn was paused resumes his turn.
Knocked Out in a Secret Room
If a hero is knocked out while in a secret room, all normal rules for being knocked out are followed with one exception: the hero player places his hero token in the secret entrance token's space, even if that space is not empty.
Refreshing the Secret Room Deck
At the end of each encounter, discard all Secret Room cards in play that have not been claimed as rewards. At the end of each quest, shuffle all discarded Secret Room cards back into the Secret Room deck.
Secret Room Card Breakdown
The Secret Room card has three labelled areas:
- Name: This area displays the name of the secret room.
- Special Rules: This area describes any special rules associated with the secret room. The bold line at the top is resolved immediately. The italicized text describes the story and flavor of the card while the rest of the text describes any special effects of the card.
- Reward: This area describes the reward that the heroes receive when there are zero challenge tokens in the secret room.
Secret Room Setup
Place a number of random challenge tokens on the secret room tile according to the number of heroes as shown below with the white numbers. For example, if there are two heroes, two challenge tokens are placed—exactly as shown below (one in each opposite corner).
The printed diagram shows four corners of a secret room tile, each marked with a number giving the challenge token count for that corner: top-left 2, top-right 3, bottom-left 4, bottom-right 2.
Secret Room Example
While performing a search action, Tomble draws the "Secret Passage" Search card. Following the instructions on the card, he places a secret room entrance token in his current space. Tomble has the option of immediately exploring the secret room as listed on the "Secret Passage" card. He chooses not to, and play continues as normal.
On a later turn, Tomble decides to explore the secret room. While in the secret room entrance token's space, he spends one movement point to explore. His turn pauses and he draws a random Secret Room card (in this case "The Dark Council"). The card instructs the players to place secret room tile S1B.
The players find the secret room tile S1B, place it near the quest map, and place Tomble's figure in the secret room entrance space of that tile. Since there are three heroes in the game, the overlord player randomly gathers three challenge tokens and places each one facedown in the appropriate spaces.
Tomble's turn then resumes. He performs a search action to reveal the challenge token currently adjacent to him. The revealed token displays an attribute icon [icon]. Tomble immediately tests that attribute and passes, allowing him to discard the challenge token and draw one Search card. Finally, Tomble uses one movement point to move adjacent to another challenge token before ending his turn.
On his next turn, Tomble performs a search action to reveal the challenge token adjacent to him, revealing an attribute icon [icon]. He tests that attribute and fails, discarding the challenge token without drawing a Search card. Then, Tomble suffers two [icon] (an icon-only symbol in the printed rulebook; its name is not printed in the source text) to move next to the final challenge token. He performs a second search action to reveal a zombie.
Grisban decides to enter the secret room to help Tomble dispatch the zombie. During his activation, Grisban moves into the secret room, performs an attack, and defeats the zombie. Since there are now zero challenge tokens and zero monsters in the room, Grisban's turn then pauses while the heroes resolve the reward on "The Dark Council" Secret Room card.
After resolving the reward, Grisban and Tomble are moved back to the quest map and the players discard the secret room tile and secret room entrance token. Grisban then resumes his turn.
Rumors
Rumor cards provide the overlord player a way to interact with heroes during the Campaign phase of any campaign. These cards have a variety of effects, and are the main way that Lair of the Wyrm quests are introduced into a campaign.
Important: Before starting a campaign, the overlord shuffles the Rumor card deck and draws three cards into his hand. The overlord does not normally draw new Rumor cards, and therefore must carefully decide when to play these cards during the campaign.
Playing Rumor Cards
The overlord player can play Rumor cards from his hand at different times during the Campaign phase. Each Rumor card states when it can be played. When playing a rumor card, the hero players must immediately resolve the text on the Rumor card before continuing the Campaign phase. The overlord player can play a maximum of one Rumor card during each Campaign phase.
Some Rumor cards can only be played during Act I of a campaign. At the start of Act II, the overlord player must discard any Rumor cards that can only be played in Act I. He does not draw additional Rumor cards to replace those he discards. Discarded Rumor cards are not shuffled back into the Rumor deck. If the Rumor deck runs out of cards, it is not reshuffled. If the overlord player is instructed to draw a Rumor card and there are no Rumor cards in the deck, he does not draw a Rumor card.
Rumor Card Breakdown: The Rumor card and Rumor Quest card are labelled as follows:
- Name: This area displays the name of the Rumor card. If the Rumor card can only be played during a specific Act, the corresponding Act icon is shown here as a reminder of when that card can be played.
- Rules: This area describes all rules for the Rumor card, including exactly when the card can be played.
- Travel Icons: This area displays the travel icons used during the Travel step of the Campaign phase.
- Flavor Text: This area explains the story of the rumor.
Quest Cards
The term Quest card collectively refers to two specific types of cards: Advanced Quests cards and Rumor cards that feature quests (also known as Rumor Quest cards). All Quest cards represent quests that players can choose during the Choose Next Quest step of a Campaign phase (see below). The only difference between rumor quests and advanced quests is how the quest becomes available for players to attempt.
- Rumor Quest cards are played by the overlord as instructed on the card. Once played, the card is placed faceup in the center of the table and is now an available quest (see below).
- Advanced Quest cards only enter play when instructed by a game effect, usually by the Reward section of the Quest Guide. When it enters play, the card is placed faceup in the center of the table and is now an available quest (see below).
Each time a player (overlord or hero) would choose a quest during the Choose Next Quest step of the Campaign phase, he can choose any available quest: either a quest on the campaign sheet or a quest shown on a Quest card in the play area. When the player chooses a quest shown on a Quest card, players immediately begin quest setup as normal, referring to the corresponding quest in the Quest Guide.
Before attempting these quests, the Travel step of the Campaign phase is performed as normal. However, instead of referencing the quest map, players refer to the travel icons at the top of the appropriate Quest card. These travel icons are resolved from left to right as if they were on the path leading to the quest.
Quest cards remain in play until completed or discarded by a game effect. They are not automatically discarded at the start of the Campaign phase, and can persist from session to session until completed. Between sessions, players should store any available Quest cards in a neutral area as a reminder that the quest has not been attempted yet. After either the heroes or the overlord wins a quest, the victor may store the corresponding card with the rest of his materials as a reminder that he won that quest.
Act Specific Quest Cards
Some Quest cards have the Act I or Act II icon in the upper left hand corner of the card. These quests can only be attempted during the corresponding act. If one or more Act I Quest cards are still in play immediately before playing the Interlude, the heroes must choose one of them to attempt (before proceeding to the Interlude). After completing this quest, all other available Act I Quest cards are discarded from the game without effect.
Completing a Quest Card
The Quest Guide lists all rewards for winning each quest. The Campaign phase is performed as normal after completing a Quest card.
Any quest attempted as a result of a Quest card does not count against the number of quests required to complete for the current Act. Quest cards are always played in addition to the required number of campaign quests in a particular Act. Additionally, players do not have to attempt any Quest cards in order to complete the campaign. Players ignore all quests from Quest cards when determining how many quests are won by the overlord or the heroes during any given Act.
Example: The hero players have won the "A Fat Goblin" quest during Act I of "The Shadow Rune" campaign. At the start of the next Campaign Phase, the overlord player chooses to play his "Gold Digger" Rumor card. During the Choose Next Quest step, the heroes decide they wish to attempt the "Gold Digger" quest, and immediately begin setting up "Gold Digger."
The overlord player ultimately wins the "Gold Digger" quest, so the players refer to its Reward section of the Quest Guide. It instructs them to place the "Armed to the Teeth" Advanced Quest card into play. The overlord finds the "Armed to the Teeth" Advanced Quest card and places it faceup in the play area. This quest will be available during a future Choose Next Quest step in Campaign phases of Act II.
Since the players have only completed one Act I quest off the campaign sheet, they will need to complete two more before proceeding to the Interlude.
Advanced Quest Cards
Advanced Quest cards represent special quests that only come into play when specified by an effect (such as certain quest rewards).
The back of Advanced Quest cards list special rewards that heroes or the overlord can acquire by winning this quest. The reward is only received when instructed by the "Rewards" section of the Quest Guide. The card describes when and how this reward is used.
Advanced Quest cards are double-sided, and both sides are public knowledge. Any player may look at either side of an Advanced Quest card at any time.
Advanced Quest Card Breakdown: The Advanced Quest card is labelled as follows:
- Name: This area displays the name of the Advanced quest card. Additionally, an Act icon is shown here as a reminder of when the quest can be attempted.
- Travel Icons: This area displays the travel icons used during the Travel step of the Campaign phase.
- Flavor Text: This area explains the story of the quest.
- Hero Reward: This area describes the special reward for the heroes if they win this quest.
- Overlord Reward: This area describes the special reward for the overlord if he wins this quest.
Quest Guide
This expansion contains five new quests for Descent: Journeys in the Dark Second Edition. Players can integrate these quests into any campaign through the use of Rumor cards (see "Rumors" on page 7).
The Quest Guide booklet itself is not included in this transcription.
This guide functions similarly to the Quest Guide found in the Descent: Journeys in the Dark Second Edition base game. Players should follow all normal quest setup rules found in that Quest Guide, following any exceptions noted in this guide.
Playing Basic and Epic Play Games
Each of the five quests included in this Quest Guide may be played as a single, stand alone quest following the basic game or epic play rules described in the Descent: Journeys in the Dark Second Edition rulebook.
When playing a single rumor quest outside of a campaign, players simply follow all rules described in the base game's rulebook. The "Rewards" section of each quest are ignored when not playing a campaign.
When using this expansion while playing a Basic or Epic Play game, all of the rules explained in this rulebook are used except for Rumor cards. The new heroes, monsters, secret rooms, classes, monsters, items, and conditions are all used as described in this rulebook.
Mini Campaign Rules
Source: Fantasy Flight Games' official two-page "Lair of the Wyrm Mini Campaign Rules" sheet (English). Its campaign log record sheet is not transcribed. The quests it names come from the Quest Guide, which is not included here.
This document contains an optional way of playing the Lair of the Wyrm expansion for Descent: Journeys in the Dark Second Edition.
Instead of integrating the Lair of the Wyrm quests into an existing campaign, players may choose to play a mini campaign using only the quests found in the Lair of the Wyrm Quest Guide. This mini campaign contains fewer quests than "The Shadow Rune," and only requires 5-8 hours to complete.
The Story: With the recent resurgence of internal treachery and scheming politicians, rumors abound in the rustic barony of Rhynn. Monster raids, the walking dead, ancient artifacts uncovered, one can't wander too far from the safety of Arhynn's gates without hearing about the doom coming for Terrinoth. Lately, however, the rumor mills have switched focus to an older terror that has made herself known once more: Valyndra, mother to the terrible hybrids—dragonkin that walk like men. The self-styled Wyrm Queen is said to be consorting with other foul forces. Seeing that her lair in the Carthmounts could supply several armies, this does not bode well. Worse yet, some say that Valyndra has caught wind of a recent find of aurium in the Vigil Mines—they say it shines like gold and forges like the finest steel. You don't dare think of the consequences should Valyndra acquire such a powerful mineral...
Playing this Mini Campaign
This mini campaign is played following the normal "Campaign Rules" listed in the Descent: Journeys in the Dark Second Edition base game rulebook in addition to the changes noted in this section.
Players follow all normal Campaign phase steps from the base game during the Campaign phase, but they skip step 6 (Choose Next Quest). In addition, Rumor cards are not used when playing this mini campaign.
Players can record their gold and experience points on the Campaign log shown on the following page.
Unlike "The Shadow Rune" campaign, this mini campaign consists of only four quests played in a specific order. This entire campaign is played using the following steps in this order:
- Setup: Perform all normal rules for game setup. In addition, each hero receives 4 experience points worth of Class cards and 100 gold. The overlord then receives 4 experience points worth of Overlord cards. Any gold and unspent experience points may be saved to spend in future Campaign phases.
- Travel: Perform a travel step beginning at the "Wagon Trails."
- Quest #1: Play the "Gold Digger" quest.
- Campaign Phase: Perform a standard Campaign phase, skipping the choose next quest step.
- Quest #2: Play the "Rude Awakening" quest.
- Campaign Phase: Perform a standard Campaign phase, skipping the choose next quest step.
- Quest #3: Play the "What's Yours is Mine" quest.
- Transition to Act II: Follow the instructions for "Act II" listed on page 22 of Descent: Journeys in the Dark Second Edition rulebook.
- Campaign Phase: Perform a standard Campaign phase, skipping the choose next quest step.
- Finale: If the heroes have won more quests than the overlord, players proceed to the "At The Forge" quest. If the overlord has won more quests than the heroes, players proceed to the "Armed to the Teeth" quest. Whoever wins this quest wins the whole campaign!
Additional Quest Rewards
In addition to the rewards listed for each quest, each player receives 1 XP at the end of each quest. They receive this reward even if they lost the quest. If the heroes win, they may choose one hero to receive one random Shop Item card. If the overlord wins, he receives 1 additional XP.
If a quest rewards a Relic card that is already in another team's possession, the player may take the Relic card from the other team. If a team is rewarded a Relic that is already in their own possession, each player on that team instead receives 1 XP.
Travel
During each travel step of the Campaign phase, heroes always begin travel from the quest that was just completed.