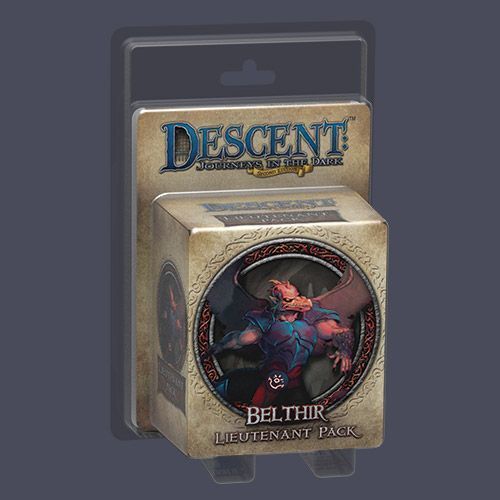
Descent: Journeys in the Dark (Second Edition) – Belthir Lieutenant Pack
Descent: Journeys in the Dark (Second Edition) – Belthir Lieutenant Pack Rulebook
Table of Contents
Table of Contents
Lieutenant Pack Rules
Introduction
Lieutenant packs expand Descent: Journeys in the Dark Second Edition by providing unique plastic figures that can be used to replace lieutenant tokens in quests. In addition, these packs introduce a new layer of strategy and progression for overlord players with the introduction of Plot and Agent cards.
Plot Cards
After hero players choose their classes at the start of a campaign, the overlord may choose one Plot deck. He will use his chosen deck for the duration of the campaign. After the overlord chooses his Plot deck, he takes the basic card (the Plot card with no purchase cost) and places it faceup in his play area. Then, he takes all remaining Plot cards that have the same deck name and places them facedown in his play area. He may look at his facedown Plot cards at any time.
Plot cards are upgrades the overlord player may purchase throughout the course of a campaign. They provide the overlord with special abilities that are available to him when the card is faceup in his play area. Plot cards are different from Overlord cards; the overlord does not add them to his Overlord deck, and he purchases them in a different way.
Important: The overlord player can only use Plot and Agent cards when playing a campaign.
Gaining Threat Tokens
Each time a hero is defeated during an encounter, instead of drawing one Overlord card, the overlord may choose to gain one threat token. The overlord can only gain threat tokens in this way once per hero per quest. If he chooses to gain a threat token, the overlord takes one hero token belonging to the hero and places it near his Plot deck as a reminder that he has gained a threat token for defeating that hero. In addition, there are a number of other ways in which the overlord may gain threat tokens:
- At the end of each quest, the overlord receives one threat token. If the overlord wins the quest, he receives one additional threat token.
- During the Spend Experience Points step of any Campaign phase, the overlord may spend any number of his experience points to gain three threat tokens for each experience point he spends.
- Each time the overlord plays a Rumor card featuring a quest, he gains one threat token. Rumor cards and applicable rules are included in some Descent: Journeys in the Dark Second Edition expansions.
Each time the overlord gains one threat token, he takes one token from the threat and fortune supply and places it in his play area with the threat side faceup. Each threat token the overlord gains during a campaign remains in his play area until he spends it. Between quests, the overlord player records the amount of unspent threat tokens in the Campaign log. He may spend this threat at a future point during the campaign.
Purchasing and Triggering Plot Cards
Each Plot card has a purchase cost that indicates the number of threat tokens the overlord must spend to purchase the card. During the Spend Experience Points step of each Campaign phase, the overlord player may purchase any of his facedown Plot cards by spending threat tokens equal to the Plot card's purchase cost (see "Plot Card Anatomy"). He places purchased Plot cards faceup in his play area and can use them in all future quests during the campaign.
The overlord can trigger abilities on a faceup Plot card as specified on the card. Each time he triggers a Plot card ability that requires him to "exhaust this card" or "use this card", he must spend a number of threat tokens equal to the Plot card's trigger cost (see "Plot Card Anatomy").
Plot Card Anatomy
- Name: This area displays the name of the Plot card.
- Purchase Cost: This area displays the number of threat tokens it costs to purchase the card. The overlord begins play with his basic Plot card. These basic cards have no purchase cost.
- Ability: This area describes all rules for the Plot card, including when the card can be triggered.
- Deck Name: This area displays the Plot deck to which the card belongs.
- Trigger Cost: This area displays the number of threat tokens it costs to trigger this card's effect.
Threat and Fortune
Threat and fortune are represented by different sides of the same token. The red side of the token represents threat, and the white side represents fortune. During setup, place these tokens in a supply within easy reach of all players.
The overlord player may spend threat tokens he has gained (see "Gaining Threat Tokens") to purchase or trigger abilities described on Plot cards. A hero may spend fortune tokens to receive certain benefits (see "Spending Fortune Tokens").
Spending Threat Tokens
When the overlord spends threat tokens, they are either returned to the supply or placed on Hero sheets as follows:
- Purchasing Plot cards: During the Spend Experience Points step of the Campaign phase, each threat token spent to purchase Plot cards is returned to the supply.
- Triggering Plot cards: Each time the overlord spends a threat token to trigger a Plot card, he must flip the token to its fortune side and place it on the Hero sheet which currently possesses the lowest number of fortune tokens.
If there is a tie, the heroes choose which hero among the tied heroes gains the token. If the overlord spends more than one threat token, he follows this process once for each token spent.
Spending Fortune Tokens
Heroes may spend fortune tokens to trigger any of the following abilities:
- 1 fortune token: During his turn, a hero may recover 1 [black drop icon].
- 1 fortune token: After dice are rolled, a hero may reroll 1 of his dice.
- 2 fortune tokens: After performing his two normal actions, a hero may immediately perform one additional action. Limit once per round per hero.
- 2 fortune tokens: During the Shopping step of the Campaign phase, heroes may collectively spend their fortune tokens to draw 1 additional Shop Item card.
When a hero spends a fortune token, he returns it to the threat and fortune supply. Heroes cannot trade their fortune tokens to other heroes. After the Shopping step of each Campaign phase, heroes return all fortune tokens on their Hero sheets to the threat and fortune supply.
Transcription note: The leaflet's text layer contains a glyph that does not extract as text. Rendered from the printed page, it is a single solid black drop icon with no name printed beside it, so it is shown above as "[black drop icon]". Check the printed leaflet if the exact icon name is needed.
Agents
Some Plot cards allow the overlord to use a lieutenant figure as an agent in an open monster group. The Agent card corresponding to the current act lists the agent's characteristics, abilities, and attack dice. An agent is treated as a master monster within its open monster group with the following exceptions:
- Regardless of quest rules, an agent cannot be placed as a reinforcement.
- When an agent is defeated, the overlord must return the Plot card that summoned the agent back to his Plot deck. The card may be purchased again.
- As described on the Plot card, the overlord cannot use an agent in any quest that features the lieutenant version of that agent. Additionally, the overlord cannot use some agents in specific campaigns. For example, the overlord cannot use Baron Zachareth as an agent while playing "The Shadow Rune" campaign because it features Baron Zachareth as an important lieutenant in that campaign.
Plot cards that allow the overlord to summon an agent often require him to replace master and minion monsters of an open group after setup of an encounter. If the overlord cannot meet the replacement requirements, he replaces the entire open group.
When an agent is placed in a monster group, that agent and the monsters in that group are treated as if they are part of the same monster group. While the agent is on the map, the overlord cannot use the monster figures it replaced as reinforcements, regardless of quest rules.
The overlord cannot summon an agent during an Interlude or a Finale. Unlike lieutenants, an agent cannot wield a relic.
Agent Card Anatomy
Agent card front and back.
- Name: This area displays the name of the agent.
- Abilities: This area lists all the abilities for the agent.
- Characteristics: This area lists the characteristics (Speed, Health, and Defense) of the agent. The agent's characteristics differ depending on the number of heroes playing (represented by the gray silhouettes).
- Attack Type Icon: This icon shows the type of attack (Melee or Ranged) the agent has.
- Dice: This area lists the dice used by the agent when performing an attack.
- Ability Rules: This area explains the full details of the agent's abilities.
- Deck Name: This area displays the Plot deck to which the Agent card belongs.
Monster Sizes and Traits
Many Plot cards have effects that interact with monsters that have specific monster traits or sizes. Monster size is defined by the number of spaces the monster's base occupies:
- Small monsters occupy one space (e.g., goblin archers and zombies).
- Medium monsters occupy two spaces (e.g., barghests).
- Huge monsters occupy four spaces (e.g., ettins and merriods).
- Massive monsters occupy six spaces (e.g., shadow dragons).
Note: medium, huge, and massive monsters are still large monsters for the purposes of movement and quest rules.
Belthir Lieutenant Pack Cards
Each Plot card shows its purchase cost as the small red number at the top right of the card face, and its trigger cost as the large red number at the bottom right. The Hybrid Loyalty deck name and card number (for example "1/12") are printed in the footer.
Icons on the card faces are rendered as words: the heart icon as damage, the wedge (lightning) icon as surge, the shield icon as shield, and the axe icon as the melee attack type. These are transcriber's renderings of the icons, not printed names.
Belthir Plot Cards
Only Intrigue cards 1/12 to 10/12 are in the scanned card sheet. Intrigue cards 11/12 and 12/12 are missing from the source and are not transcribed.
Dual Training
Hybrid Loyalty 1/12 · Purchase cost: none printed · Trigger cost: 1
Exhaust this card when you target a monster with the "Frenzy" Overlord card. During this turn, each monster in the target monster's group gains +1 damage on each attack.
Exhaust this card when you target a monster with the "Dash" Overlord card. Each other monster in the target monster's group may immediately move 1 space.
Transcription note: This card shows no purchase cost badge on the scan, while every other card on the sheet does. The leaflet states that the basic Plot card has no purchase cost; the printed badge is absent rather than illegible.
Fight With Honor
Hybrid Loyalty 2/12 · Purchase cost: 2 · Trigger cost: 0
Exhaust this card and discard a Trap Overlord card before triggering the ability of another Plot card. Reduce the Plot card's trigger cost by 1 (to a minimum of 0).
Cut a Deal
Hybrid Loyalty 3/12 · Purchase cost: 2 · Trigger cost: 0
Exhaust this card at the end of a quest to add the following Rewards to that quest:
If the heroes win, the overlord gains 1 threat token and the heroes receive 25 gold.
If the overlord wins, he gains 2 threat tokens and the heroes receive 25 gold.
Show of Force
Hybrid Loyalty 4/12 · Purchase cost: 2 · Trigger cost: 1
Exhaust this card when you knock out a hero, before drawing an Overlord card or gaining a threat token for knocking out that hero. While this card is exhausted, each time you gain a threat token, you may draw an Overlord card.
This card does not refresh as normal. Refresh this card at the end of each quest.
Make Our Own Luck
Hybrid Loyalty 5/12 · Purchase cost: 2 · Trigger cost: 1
Exhaust this card after resolving a "Dark Fortune" Overlord card to change the rerolled die to a result of your choice.
End It!
Hybrid Loyalty 6/12 · Purchase cost: 2 · Trigger cost: 1
Exhaust this card when you play a "Critical Blow" Overlord card to add 1 surge to the attack results.
Bribery
Hybrid Loyalty 7/12 · Purchase cost: 2 · Trigger cost: 2
Exhaust this card after resolving the effects of a "Dark Charm" Overlord card to return that card to your hand. Immediately play it, targeting a different hero.
This card does not refresh as normal. Refresh this card at the end of each encounter.
Resourceful
Hybrid Loyalty 8/12 · Purchase cost: 3 · Trigger cost: 1
Exhaust this card at the start of your turn instead of drawing an Overlord card. Choose a basic Overlord card in your discard pile and place it on top of your Overlord deck.
Hazard Pay
Hybrid Loyalty 9/12 · Purchase cost: 4 · Trigger cost: 0
Exhaust this card when placing reinforcements. You may spend threat tokens to place 1 additional monster from one of your monster groups that you can reinforce, respecting group limits. Spend threat tokens as follows:
- Small monsters cost 1 threat token;
- Medium monsters cost 2 threat tokens;
- Huge monsters cost 3 threat tokens; and
- Massive monsters cost 4 threat tokens.
Summon – Belthir
Hybrid Loyalty 10/12 · Purchase cost: 3 · Trigger cost: 2
Exhaust this card after setup of an encounter to choose an open monster group. Replace 1 master and 1 minion monster in the chosen group with the Belthir agent.
If the Belthir agent is defeated during this encounter, return this card to your Plot deck.
You cannot use this card in any quest that uses the Belthir lieutenant.
Belthir Agent
The Belthir agent card has two faces, one for each act. The current act's Agent card is used (see Agents above). Each face shows the agent's abilities, Speed, Health, and Defense, the dice it rolls on attack, and the act numeral in the bottom right corner.
The three stat rows are printed in order from top to bottom, each marked with a row of gray hero silhouettes. The silhouette counts are not clear enough on the scan to state with certainty which row applies to which number of heroes, so the rows are given in printed order.
The ability rules text (the Ability Rules area of the card) is not present on the scan. The keywords below are transcribed as printed on the card faces; their full rules are not transcribed here.
Belthir – Act I
Act I · Attack type: melee (axe icon)
Abilities: Fly; Reach; surge Poison (the surge icon precedes "Poison").
Attack dice: one blue die and one red die.
| Row | Speed | Health | Defense |
|---|---|---|---|
| 1 (top) | 4 | 9 | one white defense die |
| 2 (middle) | 4 | 11 | one white and one brown defense die |
| 3 (bottom) | 4 | 15 | one white and one brown defense die |
Belthir – Act II
Act II · Attack type: melee (axe icon)
Abilities: Fly; Reach; arrow icon Cry Havoc; surge Poison (the surge icon precedes "Poison"). The arrow icon before "Cry Havoc" is not identified by name on the scan.
Attack dice: one blue die, one red die, and one red die.
| Row | Speed | Health | Defense |
|---|---|---|---|
| 1 (top) | 4 | 13 | one white and one brown defense die |
| 2 (middle) | 4 | 15 | two white defense dice |
| 3 (bottom) | 4 | 18 | two white and one brown defense die |