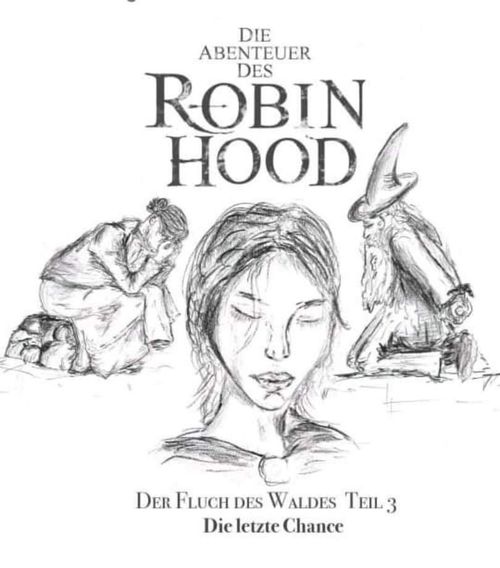
Der Fluch des Waldes III (fan expansion for The Adventures of Robin Hood)
Der Fluch des Waldes III (fan expansion for The Adventures of Robin Hood) Rulebook
Table of Contents
Table of Contents
- Items
- Important Information
- Setup
- Cut-out Slips
- Start of the Adventure (page 5)
- Option 1: Do Not Address Alatar (page 6)
- Option 2: Address Alatar (page 7)
- Page 8
- Page 9
- Page 10
- Page 10 (right-hand side)
- Page 11: The Final Battle
- Page 12: Tiles 57 and 64
- Page 13: Tiles 74 and 80
- Page 14: Tiles 90 and 100
- Page 15: Tiles 102 and 110
- Page 16: Tiles 116 and 119
- Page 17: Tiles 120 and 130
- Page 18: Tiles 138 and 140
- Page 19: Tiles 149 and 150
- Page 20: Tiles 160 and 164
- Page 21: Tiles 170 and 180
- Page 22: Tiles 190 and 200
- Page 23: Tiles 206 and 208/209
- Page 24: Tiles 210 and 214
- Page 25: Tile 215
Items
The functions of the new items are listed on the first pages of the booklet.
Bow: If you place the wooden arrow on your standing figure and its tip touches the tile of a guard, you may perform the action Overpower from a distance as well. Important: You may use the bow only against guards.
Hat: If you own both the hat and the cloak, you are ignored by guards and by Guy of Gisbourne. This disguise lasts until you try to overpower an opponent. Then you must return the two cubes in your colour to the supply.
Cloak: If you own both the cloak and the hat, you are ignored by guards and by Guy of Gisbourne. This disguise lasts until you try to overpower an opponent. Then you must return the two cubes in your colour to the supply.
Sword: When you perform the action Overpower (without the bow), you may draw 1 additional cube from the bag. If you own 2 swords, you may draw 2 additional cubes. Note: A player can use at most 2 swords when overpowering.
Axe: When you perform the action Overpower (without the bow), you may draw 2 additional cubes from the bag. In addition, you may explore the elongated tile 64 (in the middle of the forest) and fell the tree. Note: A player can use at most 1 additional sword when overpowering with the axe.
Two-handed sword: When you perform the action Overpower (without the bow), 1 drawn white cube counts immediately as 2 white cubes. Note: A player who uses the two-handed sword when overpowering cannot use any additional swords or the axe.
Rope: If you explore the elongated tile 111 (at the castle wall), you may turn it so that the rope is visible. Afterwards you must return your cube from the rope to the supply.
Horn: You may use the horn once. When a disc is drawn from the bag, you may throw it back into the bag unused and draw again. Afterwards you must return your cube from the horn to the supply.
Shield: You may use the shield once. You may give it up when the figure of Guy of Gisbourne touches you. Then you lose only the shield. Afterwards you must return your cube from the shield to the supply.
Barrel: During your movement, you may once additionally use the long movement figure of another player. Afterwards you must return your cube from the barrel to the supply. Note: If a player owns several barrels, he can still use only one of them per turn.
Provisions: You have an extra turn, which you may use once instead of drawing the next disc from the bag. Afterwards you must return your cube from the provisions to the supply.
Gold sack: Any player has an extra turn, which he may use once instead of drawing the next disc from the bag. Afterwards you must return your cube from the gold sack to the supply.
Telescope: When the disc in the colour of the player who owns the telescope is drawn from the bag, that player may immediately draw a second disc and place it next to the stack of discs. This becomes the next disc. After his turn, this second disc is placed on the stack.
Important Information
With this booklet you can experience another exciting adventure of Robin Hood and his companions. Its story takes place directly after Parts 1 and 2 of the trilogy "Der Fluch des Waldes". You should therefore play Parts 1 and 2 first. Since new elements and tiles from later adventures have been used, it is recommended that you have already played the base game and the bonus adventure "Die Tochter des Ketzers". This adventure is the third part of the trilogy "Der Fluch des Waldes" and is therefore somewhat more complex. It is recommended that you write the mandatory tasks on a notepad so that you do not forget anything.
All outlaws already have their special abilities.
The functions of the new items are on the following page.
The numbers at the start of the following pages correspond to the numbers on the game board. To help you, the pages have also been numbered at the end. Instead of using the bookmark, you may fold down the corner of certain pages so that you can find them more easily.
Now read the set-up instructions carefully!
Setup
- Assemble the 8-part game board carefully and place it in the middle of the table.
- Very important: At the start, all tiles must be turned so that no star is visible. Exception: tiles with 2 stars.
- If necessary, turn tiles 30 to 38 so that all 9 tree bridges are visible. The elongated tile 64 (in the middle of the forest) must show the question mark. The large tile (60 or 70, depending on where your secret camp is not located) must show the Dark Events.
- Empty the bag next to the game board.
- If wooden parts from a previous game are still on the board, return them to the supply.
- Each player chooses one outlaw and receives that outlaw's 5 figures. The outlaws may be chosen freely.
- Each player throws the wooden disc in his colour into the bag.
- In addition, throw one grey disc, the red disc, one violet disc and the white disc into the bag.
- Each player places 1 cube in his colour on the picture of the bow. Any 2 players each place 1 cube in their colour on the item fur. Important: The fur can be exchanged with a merchant for an item on the lower item parchment (but not for an item on tile 79). The two furs may not be exchanged with the same merchant.
- Each player now takes 6 violet cubes and 1 white cube and then throws them into the bag.
- Stack 4 (!) hourglasses on the Evil End. Only if you play the adventure on "easy", place one additional hourglass on top.
- Place the Minstrel figure on the number on the Banner of Hope shown for the number of players: 2 players: 6 — 3 players: 7 — 4 players: 8
- Cut out the 9 small slips (see the next page, "A"), and have a pencil ready.
- Also cut out the slip (see the next page, "B").
- You also need the 7 small slips marked V and X (see the next page, "C").
- Have a six-sided die ready.
Start positions:
- Place a violet standing figure on tile 57 (in the shadow of the castle wall).
- The outlaws have different starting fields. Select only the participating seals with matching colours beforehand (e.g. Robin Hood = green, ...).
- With 2 players: place the seals with matching colours face down and mixed on the tree bridge of the secret camp and on tree bridge 33. With 3 players: also tree bridge 35. With 4 players: also tree bridge 32. Turn them face up and place the matching figure on each one. Then return the seals used, as well as all other seals, to the bag.
The set-up is now complete and the story continues on page 5.
Cut-out Slips
Page 4 of the booklet is a cut-out sheet. The set-up refers to the following slips:
- A: nine small slips for the tree bridges. Number them 30 to 38 with a pencil, corresponding to the numbers of the tree bridges. Place them face down next to the game board.
- Seal reminders: two small slips, reading "2. Siegel – Seite 8 lesen" (2nd seal – read page 8) and "4. Siegel – Seite 10 lesen" (4th seal – read page 10). Place each one over the matching seal recess, as described in the set-up.
- B: one large slip. Cut it out and keep it ready for the adventure.
- C: seven small slips marked V or X: one V and six X. Place them next to the game board. Depending on the number of players, some X slips are removed (see page 6).
Start of the Adventure (page 5)
There was great uproar in the camp, for the village had been attacked by the sheriff's guards, the forge had burned and Father Egbert had been taken prisoner. Robin, John and Will talked about how things should go on now.
Remove tile 250 (in the village) from the game board and set it aside.
Marian, however, was still lost in thought and firmly convinced that she had heard the name Alatar before. This man had created the curse and brought this misfortune upon her. Then she saw the blacksmith's wife sitting on the forest floor, weeping. But there was far more important business than thinking about the past. Marian was torn. What should she do?
Read the two options (1 and 2) and decide on one!
- Option 1: You drop the thought of addressing the magician, kneel down beside the blacksmith's wife and want to comfort her. Read on the left-hand side of page 6 (this is a page number, not a tile number).
- Option 2: You still want to address the magician? Read on the right-hand side of page 7 (this is a page number, not a tile number).
After you have decided on one of the two options, read on below.
The outlaws had to go to the village at once, help the people and free Father Egbert. Now decide who will take the dangerous path to the village.
The Keeper came to you and handed you a small bird, a dove. "She is a reliable messenger. When you have found something out, write us a message and she will bring it to us. I sense that something far worse awaits us soon! Take care of yourselves!"
Mandatory task: Reach Father Egbert (57). When you reach the priest (who is currently in the power of the sheriff's henchmen on tile 57), read the entry for tile 57.
The blacksmith's wife was very impatient and came over to the outlaws. "I will look around the village. I cannot just watch and do nothing." Before one of the outlaws could stop her, she was almost out of sight. Now place the blacksmith's wife's tile on her position 200 (in the village) on the game board, so that the question mark is visible.
Now draw a seal from the bag, carry it out, and then put it back into the bag. Note: If this seal is drawn again at the next red disc, another seal is drawn instead. Then draw the first disc from the bag.
Your last chance begins...
Option 1: Do Not Address Alatar (page 6)
Why should she know this old man? He had helped the sheriff. He was responsible for this terrible curse in the forest. Speaking to him would be a mistake. He should be locked up. The villagers need our help now.
But wait! Suddenly the magician had vanished! The shackles lay on the bare forest floor. Alatar was nowhere to be seen. He had freed himself and fled. We must search for him before he brings even more misfortune upon us.
Mandatory task A: Alatar had fled, and the outlaws knew that he was a master of disguise. Search for the magician Alatar, who is hidden under a noble tile. Depending on the number of players, he may be hidden under the following noble tiles. Now read on under the point that describes where your camp is.
- Secret camp top left: 2 players: only these five noble tiles: 14, 16, 17, 18 or 20. 3–4 players: only these seven noble tiles: 13, 14, 15, 16, 17, 18 or 20 (not 19 and 21!).
- Secret camp bottom left: 2 players: only these five noble tiles: 14, 16, 17, 18 or 21. 3–4 players: only these seven noble tiles: 13, 14, 16, 17, 18, 19 or 21 (not 15 and 20!).
Now place the 7 slips next to the game board. Depending on the number of players, remove the corresponding number of X slips: with 3–4 players, remove 2 X slips; with 2 players, remove 4 X slips.
After you have overpowered a noble that is face up (!), draw one of the slips marked X or with a tick (V). If the slip shows an X, Alatar was not found. If you turn over the slip with the tick, you have found Alatar. Note: Leave the slips with the tick and the X lying next to the corresponding noble as a reminder. Note 2: Nobles are God-fearing citizens. Perhaps an item in the church can help you summon them.
If Alatar was found, read on the right-hand side of this page.
Now read on at the front of page 5, under the two options!
Alatar sank to the ground and wept: "Let me go. I have heard of Walter Fitzgerald. He was caught. I am a good friend of his. You must let me go to him. He must be in the prison of Nottingham. As a sign of my loyalty I give you this gift."
Place one cube in your colour on the item gold sack.
Mandatory task B: One outlaw must accompany Alatar (tile 252) to tile 57. Note: You can only win the game if you fulfil mandatory tasks B and C. Note: If you do not yet know mandatory task C, you will encounter it later. Note: The Alatar tile can also be handed over.
Now draw another disc from the bag.
Option 2: Address Alatar (page 7)
Marian suddenly remembered: her father had a friend named Alatar, but this man had suddenly disappeared. Marian could not hold back and immediately asked the magician whether he knew a man named Walter Fitzgerald.
Alatar glanced up and laughed: "Of course I know a Walter Fitzgerald! We shared quite a few adventures together. So you need my help?! Yes? Well then, an old man also needs what he needs. Give me gold and I will stand by your side."
Mandatory task A: Overpower a noble from whom you can obtain a gold sack, and bring the gold sack to Alatar in the secret camp. Read only the entry that matches where your camp is:
- Camp bottom left: Now place a red hourglass on noble 20.
- Camp top left: Now place a red hourglass on noble 13.
Note: If noble 13/20 (depending on where the camp is) is revealed, only the red hourglass is removed. The hourglass is removed only if noble 13/20 is printed on a seal. When hourglasses are otherwise removed, it is not removed.
Once Alatar has received the gold sack, read on the right-hand side of this page.
Now read on at the front of page 5, under the two options.
Alatar's eyes shone when he saw the gold sack. "Well then, let us hunt the sheriff's guards!"
From now on, when his coloured disc is drawn and a player puts 3 violet cubes into the bag, that player may use one (!) of the following three abilities. Read through the 3 abilities of Alatar below.
- Ice magic: Alatar rubbed his hands and spoke a spell. He could control a beam of ice and aim it at someone. Guy of Gisbourne does not move at the next violet disc.
- Illusion magic: Alatar raised his hands and suddenly cried out. The image of an item appeared dimly above him. An outlaw may place one cube in his colour on an item on the lower item parchment (not tile 79! and the item rope is not possible) and use it, but only for this round. After this round he must remove the cube again.
- Light magic: Alatar produced a powerful flash of light and shot it in a certain direction. Turn any guard so that it is visible or not visible.
Then Alatar, the magician, suddenly remembered: Walter Fitzgerald must be in the castle. "You must take me to him," Alatar demanded of the outlaws.
Mandatory task B: One outlaw must accompany Alatar (tile 252) to tile 57. Note: You can only win the game if you fulfil mandatory tasks B and C. Note: If you do not yet know mandatory task C, you will encounter it later. Note: The Alatar tile can also be handed over.
Now draw another disc from the bag.
Page 8
Once you have removed the red cube from the 2nd seal recess and fully completed the red disc, read on below.
Suddenly screams were heard in the forest. An outlaw came running into the camp to the Keeper. "It is terrible. Bounty hunters followed the blacksmith's wife and have discovered our hiding place. We must stop them." The question now arose whether people near the forest had to be brought to safety.
- Now turn tiles 74 (messenger), 80 (farmer with cart), 110 (beggar), 130 (maid), 140 (carpenter) and 206 (blacksmith), so that the question marks are visible.
Optional task (not mandatory!): When you explore one of these tiles, you have two options.
- Rescue the person (74, 80, 110, 130, 140, 206) and bring them to the secret camp or onto one of the nine tree bridges. Important: That tile can no longer be explored there, but other outlaws may take it along again from tree bridges. If an outlaw is attacked by a guard or touched by Guy of Gisbourne, the person's tile is removed from the game. Note: Rescuing people can definitely help you at the end of the adventure.
- Ask for support, and you will usually receive an item. Note: The item, on the other hand, helps you immediately.
The forest floor was especially fertile today. Now turn the mushroom tile (160), so that the question mark is visible. If it is already visible, nothing happens.
Now draw another disc from the bag.
Page 9
Destroy the Forest
The Keeper groped in the dark. The message was incomprehensible. What had the outlaw meant with these words? Should we destroy the forest?! That made no sense. Now throw violet cubes into the bag, depending on the number of players. Then read below at "Burning Monster".
No Chance
The Keeper groped in the dark. The message was incomprehensible. What had the outlaw meant with these words? Should they hide or hurry to his aid?! Now throw violet cubes into the bag, depending on the number of players. Then read below at "Burning Monster".
Burning Monster
When the outlaws came to the Keeper to read the message they had sent, the Keeper was very worried. The sheriff had managed to create a weapon that could cause very great damage. There was only one way to stop this burning monster in time. "We need energy! Evil energy sources!" "Where can we find them?" asked the outlaws, at once ready to act. "The guards of the sheriff must have plenty of evil energy!" "Then let us go, we must not lose any time!"
The Keeper handed you black-sparkling stones. "With these you can gather the evil energy! After you have overpowered a guard, hold the stones up and call out: Energy gathering! Take care, these stones have great power."
Now turn all guards face up, so that they are visible, and place one white cube on each of all 12 (!) guards. These represent the evil energy. Place 3 white cubes on the sheriff's tile 119 (on the castle wall). Read on the right-hand side of this page.
Important: From now on, all guards always remain face up until they have been overpowered. When a guard has been overpowered, raise Hope by 1, place the white cube in the secret camp with the Keeper and turn this guard face down. It is not turned again later in the course of the game.
Task: Overpower the guards and so gather the evil energy to defeat the fire-catapult at the end.
Mandatory task C: Defeat the fire-catapult on the castle wall. Note: To win the adventure, mandatory tasks A + B must be fulfilled. Note (editorial): The booklet's text here reads "A + B", whereas the final page (page 11) requires tasks B and C. The booklet's wording is reproduced as printed. Note: When you believe you are ready and have gathered enough energy, read on page 11. Note: You can receive only one white cube from each guard!
The Keeper pressed on: "We must gather enough energy, otherwise everything was in vain! I think we will also find what we are looking for at the sheriff's, and not a little of it!"
But how to get into the castle? The gate is locked and the walls are occupied. The Keeper once again had an ingenious idea. "Bring me fresh herbs and a particularly white feather! I will make you fly!" The outlaws looked at the Keeper with wide eyes. But they believed him and set off at once. "I will wait for you in the forest." The herbs were clear, but where was one to find a feather? The outlaws had an idea... Birds were to be found at the... (The sentence is cut off in the booklet as printed.)
Now return the Keeper's tile to its original position (90) in the middle of the forest, so that the question mark is visible.
Optional task (not mandatory!): Mark the herbs in the forest with a red cube. If a player touches this cube, he may collect the herbs and bring them to the Keeper. Look on the game board for birds and visit them. Speak to the person there who might know more about them. If this person mentions the feather, you may take a red cube. This cube represents the feather. Even if you already know where the feathers are, you may need to speak with that person again (even if you have already spoken with them before). Note: By overpowering the guards and the sheriff, you can gather more energy and have a greater chance of defeating the burning monster at the end.
If the Keeper has herbs and a feather, read on in the box below.
The Keeper took the herbs and the feather, put them in a kettle of water, stirred the water and spoke magic words. He called out: "The spell will not last long!"
Now decide which outlaw goes into the castle. Place this figure in the shadow on field 25.
Page 10
Read here if a seal was placed in the 4th seal recess in round 4, all steps of the red disc have been carried out, and you have removed the red cube from the 4th seal.
Suddenly a great fireball swept from the castle wall toward Sherwood Forest. The fire-catapult was activated and shot burning material onto the tree bridges. The outlaws had to get to safety. The secret hiding place had been discovered, and now the wooden bridges were under attack. The people in the forest were no longer safe.
Now take the 9 small slips (A), number them 30 to 38, corresponding to the numbers of the tree bridges, and place them face down next to the game board. Draw the first slip. Remove the corresponding tile from the game board.
Each time a violet disc is drawn from round 5 onwards, a slip is drawn and the corresponding tree bridge tile is taken from the game board. That tree bridge can no longer be crossed. If all burning tree bridges are visible, the adventure is lost. If a rescued person is on that bridge, this person is removed from the game. One player loses one of his movement figures.
Important: Only from the next round (round 5) is this carried out at the first violet disc, and at every further one.
Note: Place tile 250 as a reminder on the violet events, so that the fire is visible.
Read on the right-hand side.
Page 10 (right-hand side)
If you believe you have gathered enough white cubes and are ready to attack the burning monster on the castle wall, read on page 11. Decide carefully, for you have only one chance. The last chance!
Mushrooms sprouted from the forest floor. Now turn the mushroom tile (160), so that the question mark is visible. If it is already visible, nothing happens.
Page 11: The Final Battle
You are therefore ready and have gathered enough energy. You have handed the black-sparkling stones to the Keeper. The Keeper laid them on the ground and spoke a mighty spell. A great ball of energy arose, and the Keeper lifted it into the air with his hands. It flashed and a storm rose. The ball grew larger and floated above the Keeper. He summoned all his strength and now fired this terrifyingly enormous ball of energy toward the fire-catapult on the castle wall.
For each rescued person on a tree bridge or in the secret camp, place one additional white cube in your secret camp. Now take the collected white cubes from the secret camp and put them into the bag.
Now draw 10 cubes from the bag one after another. If you drew 5 white cubes, you have defeated the fire-catapult and fulfilled mandatory tasks B (!) and C (!), so you have won the game and may read on below. If you drew fewer than 5 white cubes, read on the right-hand side under "Game Lost".
Game Won
With full force the Keeper's energy ball struck the fire-catapult. Then a loud bang was heard. The fire-catapult was destroyed. Together they were able to defeat the burning monster on the castle wall. The Keeper sank to the ground, relieved and exhausted. They had done it.
The magician Alatar had hidden close to the castle wall and now came out of his hiding place. At once he called the outlaws to him, to the back entrance of the castle, where he was waiting for them. Robin and his friends did not hesitate long and followed the voice.
As soon as the outlaws arrived, the old magician murmured a mysterious spell, and suddenly the heavy iron door opened. Carefully he stepped into the interior of the tower, looked around and waved to the outlaws to follow him: "Come! Walter Fitzgerald, my friend, must be in the castle!" Hesitantly the outlaws looked around, for they felt rather uneasy. Was it perhaps a trap? Had Walter Fitzgerald, the father of Marian, really had a friend named Alatar?
Had they not overcome the curse of the forest and found the magician Alatar, who had created this curse, and now was all to end in the castle? In addition, the secret camp had been discovered. Would the bounty hunters ever reach the hiding place?
Not all outlaws felt comfortable entering the interior of the tower, and so they decided to wait at the open iron door and keep watch. The others followed Alatar up the dark staircase, into the castle.
What awaits the outlaws in the castle you will learn in a further adventure, the adventure of Robin Hood.
Game Lost
The spell was too weak, and the energy ball showed no hoped-for effect. Sherwood Forest was lost. Try the adventure again and save Robin and his friends from the burning monster.
Only if you own the cross or the magic spell (item letter) read on below. If none of you owns this item, you have lost the game.
Suddenly one of the outlaws pulled out something that could still turn the tide... Now remove the cube from the cross or from the letter; you may now exchange one drawn violet cube for a white cube. If you now have 5 white cubes in front of you, you have won the game and may read on in the box on the left ("Game won"). If not, you have lost the game.
Note: If you own both items, you may swap two white cubes. (Editorial note: as printed. The booklet does not say which cubes are swapped here; the preceding paragraph describes swapping a drawn violet cube for a white cube.)
Page 12: Tiles 57 and 64
The tile entries below are numbered by the tile numbers on the game board. The numbers at the top of each entry tell you which tile it belongs to.
Tile 57
You had made it just in time; they were about to bring Father Egbert into the castle. The sheriff's henchmen were holding Father Egbert. "Get lost, stay out of this!" shouted one of the sheriff's henchmen.
Now place 5 (!) additional hourglasses on the Evil End.
Mandatory task: Overpower the sheriff's henchmen! Draw 3 cubes from the bag one after another. If you draw a white cube at any point, they have been overpowered. Once they have been overpowered, read on below.
Draw 3 cubes now!
If you have overpowered the sheriff's henchmen, read on below.
The henchmen lay defeated on the ground. An outlaw tied them up. "I owe you great thanks," bowed Father Egbert. "I fear something terrible is going to happen. I will pray for you in the church!"
Now turn tile 57, so that no question mark is visible, and turn tile 150, so that the question mark is visible.
Now only the outlaw who stands on tile 57 reads the following text alone, quietly to himself.
A great noise could be heard on the wall of Nottingham Castle. "Hehe," laughed one of the henchmen who lay overpowered on the ground. "This time you will have no chance! A burning monster will soon stand on the wall and destroy your forest!"
The outlaw was shocked: what could that mean?! A burning monster? The Keeper had sensed it! The attack on the village had only been a diversion! Something was being prepared in the castle.
Write a message quickly!
Which message do you choose? Choose a letter, write the corresponding words on your slip and show it to your fellow players.
- A: No Chance
- B: Burning Monster
- C: Destroy the Forest
Depending on which words are now written on the slip, read the following page and the entry under the matching title:
- A "No Chance" → page 9 (left)
- B "Burning Monster" → page 9 (left)
- C "Destroy the Forest" → page 9 (left)
Tile 64
Your gaze falls on an old, rotten tree. A large beehive with fine honey hangs from it. You may now throw two white cubes into the bag.
Caution: Only if you own the axe may you read on here. Otherwise your turn ends here: turn tile 64 and draw the next disc.
The tree has long been dead and is overgrown with ivy and mistletoe. A single good blow with an axe would fell it.
If you wish, you may now carry out the special action "Tree felling". In doing so you may draw up to 5 cubes from the bag. If you draw only violet cubes, the felling has unfortunately not worked, and nothing else happens. Then turn the tile.
If you draw a white cube, the tree is felled and you must stop drawing immediately. Then turn tile 64 so that it shows the tree.
Note: Players, and also Guy of Gisbourne, can walk over it.
Page 13: Tiles 74 and 80
Tile 74
The messenger is giving his horse something to eat when he catches sight of you and greets you. "People say something terrible is going to happen."
Will you a) rescue the messenger or b) ask for support?
- Answer to a): You may now take the messenger's tile onto a tree bridge or into the secret camp. This can help you at the end of the adventure to win the game.
- Answer to b): "I will try to gain some ground and now take my leave. Here, take my shield." Now place one cube in your colour on the item shield. Now turn the messenger's tile.
Tile 80
The farmer recognises you and greets you with a nod.
Will you a) rescue the farmer or b) ask for support?
- Answer to a): You may now take the farmer's tile onto a tree bridge or into the secret camp. This can help you at the end of the adventure to win the game.
- Answer to b): "I don't have much, but I can take you along for a bit." You may now place your figure on one of the three puddles in the forest. Now turn the farmer's tile.
Page 14: Tiles 90 and 100
Tile 90 (Keeper)
"I have a bad feeling today. Be on your guard. I have something for you. Take this telescope. It will help you." Now place one cube in your colour on the item telescope.
Tile 100 (merchant)
The merchant struggles with his wagon. Sweating, he comes to a halt. "I must bring this barrel to a merchant in the west, but I can't manage it. I have to get to the village today. Could you take this over for me? Here, take the barrel." Now place one cube in your colour on the item barrel.
Optional task (not mandatory!): If a player hands this barrel in to the merchant (120), you may place 1 additional hourglass on the Evil End, and Hope rises by 2. Mark the merchant (120) with a red cube as a reminder. Note: The barrel can also be used as usual. This task can be carried out only once.
"Do you have anything left to trade?" You may now place any number of cubes in your colour from the upper item parchment onto items of the lower item parchment (never the reverse!). No cube may be placed on tile 79 or on the item rope when trading. Do not turn the merchant's tile.
Page 15: Tiles 102 and 110
Tile 102 (cave)
You want to enter the cave entrance, but you see at once that it is blocked by rubble. You cannot go on here. On the ground, however, you find a red banner with a yellow lion on it. Place one cube in your colour on the item banner.
Optional task (not mandatory!): Bring the banner to the church in the village and lay it down there in front of the church door. In this way Hope rises by 2!
Tile 110 (beggar)
You walk up to the beggar, and he is pleased to see you. "I am worried. Something is going on at the castle. How can I help you?"
Will you a) rescue the beggar or b) ask for support?
- Answer to a): You may now take the beggar's tile onto a tree bridge or into the secret camp. This can help you at the end of the adventure to win the game.
- Answer to b): "Here, take this key. I found it here by the castle wall. I saw a carriage with chests drive past here earlier." Place one cube in your colour on the item key. Now turn the beggar's tile.
Page 16: Tiles 116 and 119
Tile 116 (church)
The door is open, and behind it you find a rope that reaches to the bell. You could ring the bell! On the church wall hangs a notice: "Mass today with the archbishop. All nobles of the land are invited."
You may now ring the bell and reveal all nobles.
The beams of the church were brittle, however, and suddenly collapsed. Now turn tile 116 so that the question mark is no longer visible.
Tile 119 (sheriff)
The sheriff stood up in front of you and called out: "What do you want here? Very well, you will pay for having shown up here!" and drew his sword.
You may now overpower the sheriff by drawing one (!) white cube from the bag.
If the sheriff has been overpowered, you may place the 3 white cubes on him into the secret camp.
Page 17: Tiles 120 and 130
Tile 120 (merchant)
The merchant seems very stressed, because his draught animal will not go on. "Oh, always the same! I still have to hand this horn over to a merchant. Could you help me? Here, take this horn!" Place one cube in your colour on the item horn.
Optional task (not mandatory!): If a player hands this horn in to the merchant (100), you may place 1 additional hourglass on the Evil End, and Hope rises by 2. Mark the merchant (100) with a red cube as a reminder. Note: The horn can also be used as usual. This task can be carried out only once.
"Do you have anything left to trade?" You may now place any number of cubes in your colour from the upper item parchment onto items of the lower item parchment (never the reverse!). No cube may be placed on tile 79 or on the item rope when trading. Note: Only 1 fur may be traded with this merchant. Do not turn the merchant's tile.
Tile 130 (maid)
You see the maid hastily filling her basket. She flinches when she notices you. "Goodness, you gave me a fright! Do you know what is going on here?"
Will you a) rescue the maid or b) ask for support?
- Answer to a): You may now take the maid's tile onto a tree bridge or into the secret camp. This can help you at the end of the adventure to win the game.
- Answer to b): "Not much is left to me, but I want to share it with you. Take a little bread." Place one cube in your colour on the item provisions. Now turn the maid's tile.
Page 18: Tiles 138 and 140
Tile 138
You come to a mysterious place, and unstoppable thoughts rush through your head: "Why was Father Egbert taken prisoner?"
You gather new strength and courage. Now put one white cube into the bag.
Tile 140 (carpenter)
The carpenter looks at you anxiously. "Something is being prepared in the castle!"
Will you a) rescue the carpenter or b) ask for support?
- Answer to a): You may now take the woodcutter's tile onto a tree bridge or into the secret camp. This can help you at the end of the adventure to win the game.
- Answer to b): "Here, take my axe. I think it can help you more than it helps me." Place one cube in your colour on the item axe. Now turn the carpenter's tile.
Page 19: Tiles 149 and 150
Tile 149
You look around briefly and, behind the bushes, you hear voices. A family with their children is hiding here. "Oh, we know you. You must help us. Bring us to safety!" they plead.
Place the tile beside you as a reminder. As soon as you are in the secret camp, you may place one additional hourglass on the Evil End.
Tile 150 (priest)
The priest is pleased to see you. "I owe you my life."
Will you a) rescue the priest or b) ask for support?
- Answer to a): You may now take the priest's tile onto a tree bridge or into the secret camp. This can help you at the end of the adventure to win the game.
- Answer to b): "I have put some gold aside. Take it!" Place one cube in your colour on the item gold sack. Now turn the priest's tile.
Page 20: Tiles 160 and 164
Tile 160 (mushrooms)
You find a few mushrooms. You...
Roll the six-sided die (or another player names a number from 1 to 6) and read the entry for the number rolled.
- 1: ...find tasty mushrooms! Place one cube in your colour on the field provisions. Now turn the mushroom tile.
- 2: ...try one straight away, and a strange effect sets in! Now draw 3 (!) cubes. You may decide whether to leave them all outside or return them to the bag. Now turn the mushroom tile.
- 3: ...are hungry and devour one at once, but this very one is not edible. Put your two short movement figures aside. On your next turn, you may not use them. Now turn the mushroom tile.
- 4: ...recognise them at once; they are glowing mushrooms. They glow when shaken. You may use them during one of your turns to turn a guard. Your figure must stand in the same clearing as the chosen guard. (This can be used only once, and at any time, e.g. while resolving the red disc, to avoid being captured.) As a reminder, place a red cube on the mushrooms. Now turn the mushroom tile.
- 5: ...take a big bite straight away. Suddenly everything goes black and you see the silhouettes of a person. You may now hand an item to any fellow player, wherever that player is. Now turn the mushroom tile.
- 6: ...eat the large, yellow-shimmering mushroom at once, and suddenly you feel especially strong. Mere imagination? At the next overpowering of guards or nobles, you may draw 5 cubes instead of 3. As a reminder, place a red cube beside your standing figures. Now turn the mushroom tile.
Tile 164
You stand in front of seemingly dense undergrowth, but suddenly you recognise a narrow path. A useful shortcut. Now turn tile 164 so that it shows the path.
Page 21: Tiles 170 and 180
Tile 170 (armour)
In the reeds beside the river lies an old suit of armour. It is useless, however. Beneath it you find a useful horn and a rolled-up piece of paper. You open it. It could be a magic spell. You close it again and pocket it. Perhaps we can still use the spell at the end. Place one cube in your colour on the items horn and letter. The letter cannot be traded with the merchant. Now turn the armour tile.
Tile 180 (wagon wheel)
By the roadside you find a heavy wagon wheel. Beneath it you find a barrel and a glittering, sparkling cross. "I will keep it. Perhaps it will bring me luck." Place one cube in your colour on the items barrel and cross. You may use the barrel as usual. The cross cannot be traded with the merchant. Now turn the wagon wheel tile.
Page 22: Tiles 190 and 200
Tile 190 (chest)
You find a chest here at the edge of the forest. You try to lift it but cannot manage it. You hear gold coins clinking inside. At once you try to open it, but it is locked.
If you have a key, read on below.
You put the key into the lock and try to turn it. It works! You open the chest and find 2 (!) gold sacks inside. Now place 2 cubes in your colour on the item gold sack. Now turn the chest tile.
Tile 200 (blacksmith's wife)
You speak to the blacksmith's wife, and she answers: "I am so grateful that you are here and helping us. Here, take this horn!" Place one cube in your colour on the item horn. Now turn the blacksmith's wife's tile.
Page 23: Tiles 206 and 208/209
Tile 206 (blacksmith)
Alex, the blacksmith, sits weeping in front of his forge. "I am ruined. You must stop her."
Will you a) rescue the blacksmith or b) ask for support?
- Answer to a): You may now take the blacksmith's tile onto a tree bridge or into the secret camp. This can help you at the end of the adventure to win the game.
- Answer to b): "I have forged a special weapon. Here, take it! May the sheriff and his guards receive their just punishment because of it." Place one cube in your colour on the item two-handed sword. Now turn the blacksmith's tile.
Tiles 208 and 209 (boat)
Read only the entry for the number on which your figure currently stands.
208: You step into the boat on the river bank. Something feels strange; something is wrong here. The boat has a leak, and a storm is coming. Draw 3 cubes now. The drawn cubes are no longer returned to the bag.
- If you did not draw a white cube: The boat only takes you to the other, opposite side. Place your figure in the reeds next to tile 170 (armour). Now put two violet cubes into the bag. Do not turn tile 208.
- If you drew a white cube: You may use the boat as usual: turn tile 208, turn tile 209 and place your figure on it. Remember to put two more violet cubes into the bag.
209: You see the boat on the river bank. Everything seems calm. Use the boat as usual! Put 2 violet cubes into the bag and move your figure to tile 208.
Important: The boat may be visible on the game board only once, as if you had crossed over with it. If you do not want to use the boat, it stays face up. Note: The boat can carry at most 2 people.
Now any player draws the next disc from the bag.
Page 24: Tiles 210 and 214
Tile 210 (miller)
The miller sits by the river and speaks to you. "I need a break. The work is wearing me out. The sound of the water is calming. Do you see these beautiful feathers at the river's edge? Gulls nest here."
Tile 214 (straw wagon)
(The tile has the same function as in the previous adventures.)
- You can hide in it. You may place your standing figure on the straw wagon. As long as it lies there, it cannot be seen by Guy of Gisbourne or the guards. When you are next on turn, you may simply place your figure again (it must still touch tile 214) and move.
OR
- If you give it a little help, you can roll the wagon up to the castle wall. You may turn the wagon's tile and also turn tile 215 at the castle gate, so that the straw wagon is visible there, as if it had rolled up to the castle gate. Note: Your figure remains on tile 214. A player may jump from the castle wall onto the straw wagon. For this, one of his movement figures must touch the straw.
Important: It does not work the other way round. There is no way into the castle!
Page 25: Tile 215
Tile 215 (straw wagon at the castle gate)
The wagon is loaded with fresh straw. You can use the wagon (as always) in two different ways.
- You can hide in it.
OR
- A player can jump from the castle wall onto the straw wagon. Important: It does not work the other way round. There is no way into the castle!