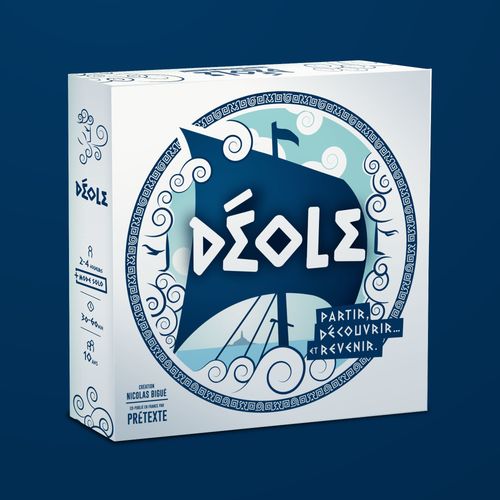
Déole
Déole Rulebook
Table of Contents
Table of Contents
1. The Setup: Components
The Exploration Sheet
The common map where the players trace their voyage, rescue castaways, explore the 4 sunken wrecks and land on the island at the centre. 4 sides in the colours of the Gods and 3 departure/arrival ports per side.
Map elements: sunken wrecks; Island of Éolia; coast of Éolia (1 per colour); bonus; home ports (3 per colour); Exploration evaluation gauge (1 per colour; +5 / +10 / +20 / +30).
Other components
- This rulebook: 12 full pages, and on the last page the rules for solo mode.
- The "Winds - Crew" dice (28): they represent the strength of the wind (blue / yellow / green / red) and the strength of the crew that the players obtain. 7 dice of each colour.
- The bag: the reserve of dice available for the current round.
- The orange mini-meeples (4): the castaways that can be rescued.
- The Navigation sheet: the individual space where players place dice, note their value, obtain bonuses and calculate their final score. Its elements: placement modes; name of the crew; rudders (modifiers); Wind tracks; Crew track; bonuses; counts and score; subtotal and total. A Wind track: indicate the placement mode here; place the dice from left to right; note their value in the boxes. A die box has: a modifier, a box value, a rule reminder, a +/- sign and a bonus.
- The Compass Rose: the dice discard.
- The annex sheet: presentation of the placement modes, and on the back the positioning grid of the castaway meeples.
- A real dice track: the box! An inner wedge (to be turned over in the box) and a felt sheet to place on top of the wedge.
Setup
- Place an Exploration sheet in the centre of the table. Each player's colour is the colour facing them.
- Place the castaways: Roll 1 yellow die and 1 red die. Report the result on the grid in the annex. The coordinates obtained designate a symbol on the grid. On the Exploration sheet, place a castaway on each of the 4 boxes identified by this symbol.
- The dice, placed in the bag:
- 4 players: 7 of each colour.
- 3 players: 6 of each colour.
- 2 players: 5 of each colour.
- Solo variant: 4 of each colour.
- Give a Navigation sheet to each player, and have a pencil/pen (ideally in their colour).
- Each player writes the name of their ship (or crew) in the space provided on the sheet (top right).
- Collectively determine the difficulty of your game by selecting 5 placement modes from the ten offered. For your first game, we recommend: EVEN / ODD / DIFFERENT / INCREASING / DECREASING. Circle the 5 corresponding symbols on each of the Navigation sheets. See the description of the placement modes and their symbols in the annex. On the sides of the box you will find 4 other suggestions. You are free to customise your game according to the difficulty you want.
- Determine the first player: Spin the "Compass Rose"; North designates the first player.
Game Overview
The game is played in 3 rounds, each made up of 5 turns.
At the start of each turn, the first player DRAWS from the bag as many dice as there are players, plus one extra die, and rolls them onto the dice track.
Starting with the first player, and continuing clockwise, each player performs the following sequence:
- 3A. CHOOSE a die
- 3B. PLACE the die on their NAVIGATION sheet
- 3C. TRACE the trajectory on the Exploration sheet
- 3D. APPLY the event on the Exploration sheet*
- 3E. BENEFIT from a bonus*
*These steps are optional and depend on the events in the player's turn.
After 5 turns, the round ends. Refer to the "End of round" chapter (3F, page 10). A new round begins...
At the end of the third round, the player who has accumulated the most renown points thanks to the Exploration sheet and their Navigation sheet is declared the winner.
3A. Choose a Die
(The rulebook gives no further text for this step.)
3B. Place the Die on the Navigation Sheet
The die is placed on the first available box on the left of one of the 5 tracks, respecting the colour of the track (die/track) and the chosen placement mode.
Define the placement mode
If the chosen die starts a track, the player must choose the placement mode for this track (among the 5 determined at the start of the game). The mode thus sets a placement constraint, in addition to the colour of the die.
- Write in the sail the symbol representing the mode chosen for the track.
- Cross out the corresponding symbol once the choice is made.
During the game
The die is placed on the first available box on the left of the chosen track, respecting the colour of the track and the chosen placement mode.
- Write the value of the die in the appropriate box.
- If a rudder appears in the box used, then... circle a rudder in the margin to the left of the track, to make it available. Then place the die on the box.
Place a die on the Crew track
The colour of the die has no importance on this track; only the placement mode must be respected.
The player writes the value of the die in the box, respecting the placement mode of this track (increasing, different, ...).
Change the sign of a box
After passing through a wreck box, a player can turn a "-" into a "+" on one of the four identified boxes of their Crew track. In the previous example, the -4 then becomes +4.
Calculate the points of the Crew track
At the end of the game, add up the 6 boxes. The result can be negative.
Important: The sign of the 3rd box cannot be changed.
The value of the 6th box is positive. It also gives an immediate bonus (see page 10).
Apply a modifier to the selected die
In the left margin of the Navigation sheet the rudder symbols are grouped. Players start the game with 1 rudder available (pre-circled) on the blue, yellow and green tracks.
A blue rudder can modify the value of a blue die on the blue track by + or - 1. Same for the other tracks. The rudder of the Crew track allows modifying a die of any colour assigned to the Crew track.
On their turn, a player can use one or more rudders to modify the selected die. They then cross out the rudders used.
NB: A value of 6 can only be decreased, and a value of 1 can only be increased.
At the end of the game
Each available unused rudder can earn one point. Conversely, each used rudder will cost two points.
(Rudder states: not available / available / used.)
3C. Trace the Trajectory on the Exploration Sheet
The first trace must start from one of the 3 ports of the player's colour. A trace always goes from one edge of a box to a different edge (no U-turn possible). The box is thus crossed entirely in a straight line or a left curve or right curve. (Example of different traces if players do not have a pen/pencil in their colour.)
The next trace extends the end of the previous turn's trace. If the trace joins another player's trace, shift to the side to avoid overlapping. The same box can be crossed several times, including by the same player.
A ship cannot make a U-turn on the same box.
There are 3 possible cases depending on the track where the die is placed:
Case A, die placed on a Wind track (follow the wind): the colour of the placed die indicates the edge of the Exploration sheet (direction) towards which the player is heading.
Example: A red die is selected by the player on the "green" edge. The value of the die is compatible with the placement mode defined for the red Wind track. They place the die, then trace a curve to their left, towards the red edge of the Exploration sheet, through the next box.
Case B, die placed on a Wind track (wind at your back): the colour of the die corresponds to the one to which the stern of their ship turns its back: the ship advances with a very favourable tailwind. The player then makes a trace in the direction of their choice: ahead, right, or left.
Example: A yellow die is selected by the player on the "blue" edge. The value of the die is compatible with the placement mode defined for the yellow Wind track. They place the die, then trace a curve towards the edge of their choice (to the right in this example), through the next box.
Case C, die placed on the Crew track (rowing forward): the die was placed on the Crew track, respecting the defined placement mode (whatever the colour of the die used); the ship advances by the strength of the crew, independently of the wind. The player therefore makes a trace in the direction of their choice: ahead, right or left.
3D. Apply the Event
When crossing a box on the Exploration sheet, many things can happen...
- Wreck: A player crosses a box with a sunken wreck; they then change the sign of one of their "-" boxes (with a "wreck" icon), on their Crew track, to "+". Reminder: only the sign of the 3rd box cannot be changed.
- Castaway: A player rescues a castaway by crossing its box: they remove the meeple and write the castaway symbol in a free box of their sheet.
- Éolia: A player reaches ÉOLIA, the central island, by the coast corresponding to their starting colour: they will gain 5 points at the end of the game. They write "5" in the appropriate box on their Navigation sheet.
The 1st player to reach ÉOLIA gets a bonus (Step 3E): they tick the star on the island. The other players who get there in the same turn also get a bonus.
Rescuing a castaway
When a player crosses a box containing a castaway, they write the castaway symbol in a free box on their sheet, following a used box or at the very start of a track. They may choose to write it on any of the tracks. The box is considered an inert box, with no value. The placement modes "forget" this box.
Example 1: For an oscillating placement mode, if the first 3 boxes are 2, 5, (castaway), the 4th box must necessarily contain a value of 4 or less.
Example 2: For a placement mode of +/- 1, if the first box is a 2, the second is a (castaway), then the third box will be either a 1 or a 3.
No bonus star can be placed in the 6th box of each track, as indicated on the Navigation sheet.
3E. Benefit from a Bonus
There are 3 ways to benefit from a bonus:
- Éolia Bonus: By being the first to reach the central island by the coast of your colour. Grey out the star on the island and in the bubble.
- Crew Bonus: By placing a die on the 6th box of the Crew track. Grey out the star in the box.
- Navigation Bonus: By completing a column on your Navigation sheet (5 dice present and/or boxes filled in). Tick the star under the corresponding column.
The player greys out one of the bonuses still available on their sheet (bonus A / bonus B etc.). They apply the effect of the bonus immediately.
Clarifications, events and bonuses: A die retrieved by bonus A, B or D is used like a normal die. Repeat the sequence of steps B, C, D, E.
Events and bonuses can give you a chain reaction... so be careful to respect the turn steps!
The 6 Bonuses
- Bonus A: Draw a die at random from the bag and choose its value. The colour is therefore imposed. Place it on your Navigation sheet and trace on the Exploration sheet according to the usual rules.
- Bonus B: Take a die of the colour of your choice from the bag then roll it (rudders can be used). Place it on your sheet and trace on the Exploration sheet according to the usual rules.
- Bonus C: Extend your trace by one box in the orientation of your choice (a U-turn remains impossible).
- Bonus D: Choose a die (its colour and its current value) from the discard. It is possible to use rudders to modify the value of this die. Place it on your Navigation sheet and trace on the Exploration sheet according to the usual rules.
- Bonus E: At the end of the game, ignore the penalty that loses 2 points for each rudder used.
- Bonus F: At the end of the game, gain 1 point per available rudder.
3F. End of Round
After 5 turns, the round ends.
Remove all the dice from the Navigation sheets, making sure you have noted the value of each die in the box on which it was placed. This precaution keeps the values of previously placed dice, to respect the placement modes for the following rounds...
Place 4 new castaways, for the following round, following the setup instructions.
After 3 rounds, the game ends.
ATTENTION: if dice are missing to finish a turn, put ALL the dice present on the Compass Rose back in the bag.
AND ALSO... If a player returns to port while turns remain to be played, they continue to place dice to fill in their Navigation sheet.
Final Scoring
Once the 3rd round is over, it is time to evaluate each route on the Exploration sheet as well as on each Navigation sheet.
The final score is obtained by adding together the following scores:
- For each of the 4 colours, the last position filled in on each Wind track indicates the score (the value under the box).
- For the Crew track, add up the points written in the 6 boxes (the total can be negative).
- 5 points if the player makes a stopover on the central island of ÉOLIA on the coast of their colour.
- 5, 10, 20 or 30 points according to the value of the box reached indicated on the gauge of their colour in the margin of the Exploration sheet.
- If the player manages to return to one of their ports: 2 points per distinct box crossed.
- If the player does not manage to return to one of their ports: 1 point per distinct box crossed. In addition, the player loses 1 point per box they are missing to reach the nearest of their ports.
- -2 points per rudder used if the player did not choose bonus E.
- 1 point per available unused rudder if the player chose bonus F.
Tie-break: In case of a tie, the player who obtained the highest value on the Crew track wins the game. In case of a further tie, the player who obtained the most points on the Exploration sheet wins.
Solo Mode: Tempted by a Solo Voyage?
Setup
In the bag, place 4 dice per colour. The player freely chooses their starting side. The game is always played in 3 rounds of 5 turns. Here are the placement modes imposed for a solo game: ODD / INCREASING / EQUAL / OSCILLATING / +/- 1
Overview
With each roll (2 dice), the player selects one die and goes through steps A to E according to the normal rules. The non-selected die is called the Disaster.
Dropping anchor
The player may decide to discard the chosen die onto the Compass Rose and give up their normal turn. They pass their turn but must place their Disaster.
The Disaster is placed on their Navigation sheet, BUT... on the first free box furthest to the right. The die is positioned obliquely, on the Wind track of its colour OR on the Crew track, at the player's choice.
If the value of the Disaster is identical to that of a previously placed Disaster, whatever the track, then the Disaster is ignored and discarded onto the Compass Rose.
If there is no space available on the track of the Disaster's colour, the Disaster is necessarily placed on the first free box furthest to the right of the Crew track.
If the Disaster cannot be placed on the Navigation sheet, you and your crew are no longer able to manoeuvre the ship. You sink and join the sunken wrecks. It's the shipwreck: it's lost!
Helping hand
The player can use the help of a castaway to ignore a Disaster, and thus free a box. The Disaster is then discarded onto the Compass Rose and the castaway is removed from the game.
The island bonus can only be won on the "outward" journey. That is, before reaching the "+10pt" exploration zone.
Warning: a Disaster present in a completed column forbids the player from benefiting from the navigation bonus of that column.
End of round
The player ticks the boxes occupied by a Disaster. The boxes thus ticked over the rounds can no longer receive a die for the rest of the game.
For each ticked box of the round that is ending, the player makes a "Storm" zone appear, or progress, from one of the edges towards the centre.
Example: 1 green box ticked = first row of 8 boxes, green edge side, hatched.
Disasters placed in the Crew zone do not cause a storm.
If the player gets caught or is led to cross the Storm, or the Crew cannot keep the course in these conditions, the ship crashes onto the reefs: it's lost!
Did you and your crew manage to return to port? It's a victory! Share your legend with us...