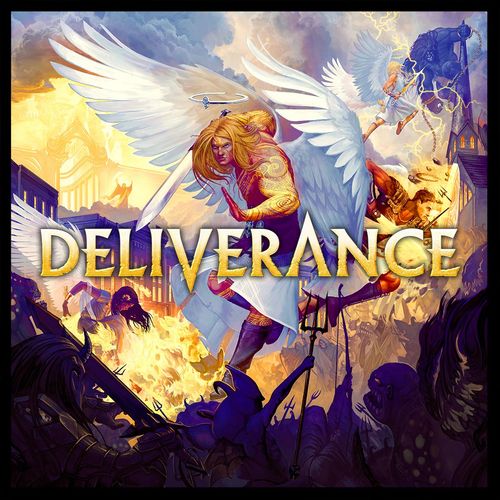
Deliverance
Deliverance Rulebook
Table of Contents
Table of Contents
- Components
- Object of the Game
- Golden Rules
- Game Setup
- How to Play a Round
- Staging the Final Battle
- Prince Cards
- Iconography
- Angel Actions
- Tests
- Movement & Adjacency
- Combat Damage, Range, & Targeting
- Fallen Princes & Minion Details
- Controlling the Forces of Darkness
- Darkness Cards
- Saints, Experience, & Revival
- Heavenly Treasure
- Talent Cards
- Prayer Cards
- Status Effects (Boons & Afflictions)
- Game Modes & Variants
- Solo Rules: The Intercessor (1 Player Variant)
- Angel Character Sheet — Bonuses
Components
- 1 Darkness Board
- 6 Fallen Prince Cards
- 1 Intercessor Card
- 8 Minion Cards
- 9 Angel Cards
- 11 Map Boards
- 150+ Small Round Tokens (boons, afflictions, action, shield, & damage tokens)
- 26 Large Round Tokens (courage, saint, damage, experience (XP), & initiative tokens)
- 1 Campaign Book
- 1 Mystery Campaign Box
- 12 Light/Shadow Tokens
- 4 Custom Dice
- 1 Campaign Tracker Pad
- 49 Cardboard Standees & 24 Acrylic Bases (Fallen Princes, Angels, Minions, & Acrylic Bases)
- 62 Darkness Cards
- 30 Prince Darkness Cards
- 16 Minion Battle Cards + 6 Prince Battle Cards
- 74 Prayer Cards
- 52 Heavenly Treasure Cards
- 150 Angel Talents
- 50 Demon Talents
Each player also has an Angel Character Sheet with fields for tracking their equipped Treasures (Weapon, Helm, Chest, Gloves, Legs) and Talent slots (Slot 1, 2, and 3, each unlocked at Level 1, 2, and 3).
Object of the Game
Deliverance is a cooperative adventure that unfolds over multiple battles between the angelic host and their demonic enemies. (1 - 4 players, Ages 14+, 1 - 2 hours)
- A Campaign game is won when players achieve the victory conditions listed in that mission.
- A Skirmish game is won when all demons, including the Fallen Prince, are defeated in the final battle.
- The game is lost if all angels are defeated in battle (an angel is defeated when their health reaches 0)!
Golden Rules
- Always follow the instructions on a card, even if it conflicts with a rule in this rulebook.
- Campaign scenario instructions override rules in this rulebook.
- If ever the rules are unclear, interpret them in the way that makes the game most fun! If players disagree about how to interpret a rule, cast a tiebreaker roll (highest roll wins).
Watch the Rules Explainer video at PlayDeliverance.com/Learn.
Game Setup
-
Place the Darkness Board in the center of the play area.
-
Shuffle the Darkness, Prayer, Battle, and Heavenly Treasure decks. Place the Darkness and Battle decks in the marked spaces on the Darkness Board. Place the Experience token on position 0 of the Group Experience track. Place the Prayer and Heavenly Treasure decks in the marked spaces on the Heavenly Gates tile. Set the Prince Decks and the Prince Battle cards aside for later use.
-
Set the Demon Minion cards, standees, and bases together within reach of all players.
-
Each player selects an Angel to play, taking the Angel Character Sheet, standee, and talents for the chosen angel. Attach a base to the angel standee. Place the level 1, level 2, and level 3 Talent decks face-down in the marked spaces next to their character card from lowest-level to highest.
-
Give 2 Courage Tokens to each player (angels may hold a maximum of 5 courage tokens).
-
Place the Heavenly Gates starting tile on the board, and then place 1 map tile for each angel in the game attached to the Heavenly Gates (in any orientation). In Campaign mode, tiles will be placed as directed by the Campaign book.
-
Draw and stage 1 Battle card per map tile (Each Battle card should be paired with its own map tile). Icons on Battle cards match icons on map tiles. Place the items listed on the Battle card in the same space as the matching icons on the map tile (1 saint token on the marked space, and one listed demon on each marked space).
For each demon: take 1 standee of that minion type, attach a base to it, and place that standee in the space indicated by the Battle card on the map tile. For each saint, take a saint token and place it in the indicated space with the blue oppressed side facing up (saints may share spaces with angels and/or demons).
If you are playing through a mission in the Campaign, follow the "Staging" instructions inside the campaign book.
-
Place the demon character cards that correspond to the Battle cards (drawn in step 7) in a central location in the play area so they may be accessed by players. Alternatively, players may choose to divide these demon cards as evenly as possible among the players, placing them nearby their angel character cards (players may elect to have an experienced player control demon cards instead. In this case, place all demon cards within range of that player).
If you are playing through the Campaign, follow the "Staging" instructions inside the campaign book instead of steps 6-9 (Heavenly Gates tile placement, staging, and demon card placement).
How to Play a Round
Each battle you fight in Deliverance consists of rounds, with each round being a single cycle through the Darkness, Action, and Level Up phases. Once you complete the final step, begin a new round starting with the Darkness Phase. Continue working through these steps until either the angels have vanquished all their enemies, or all of the angels are defeated.
Darkness Phase
- For each player, place 1 Darkness card face-down on the next open space on the Darkness track.
- Add 1 additional Darkness card for each oppressed saint on the battlefield (skip this step in the first round of each battle).
- If you must draw additional Darkness cards when the Darkness track is full, instead flip a face-down Darkness card face-up (left to right) for each excess card that was to be drawn. If all Darkness cards are face-up and players still have excess cards to draw, deal 1 damage to each angel for each remaining card that would be drawn.
- Resolve each face-up Darkness card that shows the activation icon, then discard any that don't show the ongoing effect icon.
Ongoing effects are marked with the ongoing-effect icon.
Note: Resolve card placement and excess damage before card activation. If all Darkness cards are face-up and players still have excess cards to draw, angels are each dealt a combined total of 1 damage for each remaining card that was to be drawn.
For example, if players had to draw 7 cards instead of 3, all 5 face-down cards on the Darkness Track would be revealed, then each angel would be dealt 2 damage for the two remaining cards that were to be drawn. Then each card with the activation icon activates.
Example: This example shows 3 cards drawn for a 3 player game with two oppressed saints. If the Darkness track was full and 3 more cards need to be drawn, instead 3 cards are flipped over, then each card with the activation icon activates. Finally, discard face-up Darkness cards unless they contain the ongoing effect icon.
Action Phase
- Refresh all action tokens by placing them with their gold-colored side face-up.
- Choose the first angel to act and give them the Initiative token.
- The angel holding the Initiative token takes their turn by using up to 2 actions in any order ("Free Actions" as noted by the free action icon do not count against this total, but are played during this step).
- Remember, certain status effects resolve at the end of each angel's turn - e.g., wither, light, and shadow (see Status Effects below).
- Move the Initiative token clockwise to the next angel.
- The next demon type that has an available action on the Initiative Track takes its turn. Demon cards determine the actions taken by each type of demon, and resolve in order from top to bottom: a. If the demon card shows any skills with the activation icon, activate these skills one at a time. Talent cards with the activation icon activate first. b. Some demon cards may show a special rule icon -- be sure to read these, as they may alter the usual rules or provide additional instructions that need to be followed. c. Then roll a single 6-sided die to determine the action taken. Each demon of this type uses the same action. d. Resolve the rolled action 1 demon at a time. e. Resolve status effects at the end of each demon's turn - e.g., wither, light, and shadow.
- Repeat steps 3 - 6 until all angels and demons have acted.
Level-Up Phase
- If the Group Experience tracker has stored an amount of experience equal to 1 + the number of angels, each angel grows in prowess by gaining a level! Reduce the experience tracker by that amount, then players may choose for each angel they control: a. Draw 2 of their lowest-level face-down Talent cards, OR draw 2 Heavenly Treasure cards. b. Choose 1 to equip, and discard the other. Stat bonuses on these cards permanently increase your character's stats. c. If enough group experience has been stored to level multiple times, repeat this process until all possible levels have been gained.
- If any demons remain, return to the Darkness Phase and begin another round.
In Skirmish mode, once the last remaining demon in the first battle is defeated, players should immediately move into staging the final battle. In Campaign mode, follow the instructions in the scenario book instead.
Note: In the Campaign, Angels only gain XP after a campaign mission has been completed, and do not gain XP during a mission. The Level Up Phase is not used in Campaign Mode.
For example, in a 3-player game, you need to earn 4XP to gain a level. Players earned a total of 6XP by defeating demons and protecting Saints over the previous rounds, and this is enough to level up! Players move the XP token from 6 to 2, then each choose to gain a Talent or Heavenly Treasure.
Staging the Final Battle
Immediately after all the demons are defeated:
- a. Remove all status effects from characters and map tiles. b. Discard any face-down Darkness cards (keep face-up cards in play). c. Remove any saint tokens from the map tiles. d. Do not remove angels from the map.
- For each unused action an angel has remaining, choose one of the following: a. Gain 1 Courage b. Cast down 1 face-up Darkness Card c. Heal 3 damage d. Draw 1 Prayer Card
Continued:
- Angels each gain a free level (without reducing the current XP total) by choosing to draw 2 of their lowest-level face-down Talent cards, OR draw 2 Heavenly Treasure cards. Choose 1 to equip, and discard the other.
- If enough group experience has been stored to gain one or more levels, level up each angel as many times as possible by reducing the group experience accordingly.
- Reveal 1 new map tile per angel in the game using this process: a. Do not move angels from their current spaces. b. Add a number of tiles to the map equal to the number of angels.
- Draw and stage 1 Battle card per angel on the newly revealed map tiles. When staging battle cards, follow the instructions in Step 7 of Game Setup, with one major difference: Shuffle and draw a random Prince Battle card in place of the last Battle card that would be drawn - this card determines which Fallen Prince enters the battle. Saints may be placed in a space containing an angel or demon.
- Stage demons as described in steps 7 - 8 of Game Setup, ensuring the Fallen Prince is placed last on the initiative track. Defeat all of the demons in this battle to earn victory!
- Place the deck of cards matching the Prince's name face-down on the marked space of the Darkness Board. This deck is not shuffled as normal -- Instead, it is ordered by card(s) with the greatest number of stars at the bottom of the deck, up to the card(s) with the least number of stars at the top. Shuffle cards showing the same number of stars before adding them to the deck.
Looking to save space? If you have limited table space and want to save room, you may reveal fewer map tiles by using this adjusted process for step 3 of Staging the Final Battle. Step 3a is the same, then:
b. Flip each unoccupied map tile over to its opposite side (always excluding the Heavenly Gates tile).
c. Add a total number of new tiles to the map equal to the number of angels minus the number of tiles flipped over.
In step 4, draw and stage 1 Battle card per angel on the newly revealed map tiles, including those that were just flipped over.
Prince Cards
Prince cards are a special type of Darkness card, specific to a given Fallen Prince battle. When a Fallen Prince is put into play, place their Demon card as usual, and then place their named 5-card Prince deck in the marked space on the Darkness Board.
On the back of each deck, the Prince's name and a star count is displayed. Place these cards in descending order according to the star count, with 1-star cards on top of the deck. Group cards with the same star counts together (e.g., 1 star, 2 stars, 2 stars, 3 stars, 3 stars).
Players draw 1 Prince card in place of the first normal Darkness card during each Darkness Phase until there are no remaining Prince cards to be drawn.
Prince cards always enter play face-up. (As a result, Prince cards with the activation icon will activate the same turn they are revealed). In some cases, a Prince card may alter the way subsequent Prince or normal Darkness cards are drawn, so be sure to pay close attention to their text!
Many Prince cards are also strongholds. These cards contain the stronghold icon and may not be cast down via Pray actions or other card effects. Cards with this icon will remain in play until all demons are defeated, unless otherwise indicated.
Remember, the total number of Darkness cards in play at any given time may not exceed the number of open spaces on the Darkness track. However, Prince cards must be placed, even when the Darkness board is full.
If you must draw a Prince card when the Darkness track is full, choose and replace 1 face-down Darkness card with the Prince card (you may not replace a Prince card in this manner -- it must be a non-Prince Darkness card). If there are no face-down Darkness cards remaining, choose a face-up Darkness card -- if any card is replaced in this manner (face-up or face-down), each angel is dealt 1 damage per Darkness card discarded.
Iconography
- Action: Angels may only use cards or skills with this icon during their turn or when an effect grants an action to use.
- Free Action: Angels may use cards or skills with this icon during their turn, but this does not count against their action total (you must pay the associated costs -- it is not truly "free" in all cases). These may be used outside of an angel's turn as an action, if an effect grants the angel an action outside of their turn.
- Interrupt: Angels may use this at any time, or as specified by the skill/card text. This is not an action, and does not count against an angel's action limit.
- Activate: A card or skill with this icon activates once, or once per round (follow the text on the card to resolve it).
- Passive: An Ongoing effect that is in play at all times, or that may trigger under the listed conditions.
- Special rule: this is typically found on Demon cards, and should be observed whenever referenced.
- Stronghold: a Darkness card that may not be cast down or otherwise removed from play, except as noted on the card. Usually only found on a Prince Darkness card.
- Upgrade: Represents an upgrade to an existing skill, typically found on some angel talent cards.
Angel Actions
In Deliverance, angels and demons use actions to engage in battle and complete their turns. Track which angels and demons have used actions through the use of action tokens. The golden side of the token denotes an available action, and the gray side of the token shows that an action has been used. Actions are refreshed in the Action Phase of each round.
Actions always resolve in the order written on the card or skill (i.e., from top to bottom).
Angel turns are played in clockwise order starting with the angel holding the Initiative token. Angels begin each of their turns with two (2) actions to use, designated by action tokens ("Free actions", as noted by the free action icon, are played as actions, but do not count against this total). An angel's turn normally ends after their second action is used, but they may use any available free actions before declaring the official end of their turn.
Actions are resolved in order from top to bottom. Angels that use a Pray action, for example, would first spend 1 action, then gain 1 Courage, then draw 1 Prayer card, then finally test 7+. In many cases, the order matters to the outcome of the action, so be careful to follow the text as written.
If a card, skill, or other element of a game ever grants an additional action to an angel outside of an angel's turn, that action should be used immediately. It does not count as another turn as referenced by certain cards or status effects. When using actions on your turn, you may choose any combination of the actions or free actions listed on your Angel Character card, Talent cards, or Prayer cards, including those actions that have already been used. Reminder - Actions with the free action icon do not count against your action total during your turn, but do function as a normal action at any other time.
Example: The first time Azrael uses Spectral Walk on his turn, it is a free action. Each additional use on his turn costs an action. There are no other listed costs on Spectral Walk.
Example: The first time Uriel uses Crucible on his turn, it costs an action and 2 courage. Each additional use on his turn is a free action, but still costs 2 courage. Uriel must always pay the Courage cost to use this skill, even though it is called a "free" action.
Courage
Courage is the angelic resource that grants the ability to unleash powerful skills that aid allies and attack enemies. Some skills grant courage (like the Pray action), and others use it. When using a skill that costs Courage, an angel must first pay the required Courage cost before the skill may be activated, even if the action is a free action.
Maximum 5 Courage, Shield, and Prayer Cards
An angel's maximum courage value, shield value, and the number of Prayer cards in hand at one time is 5. An angel cannot have more than 5 of these at any time. If a card or skill would grant an angel beyond 5 courage or shield, do not gain extra (unless a card or skill indicates otherwise). If an angel would ever gain beyond 5 Prayer cards, that angel must immediately discard down to 5 cards.
Tests
Some cards and actions require a test. This term is always accompanied by a number (i.e. - Test 7+), which shows the value that must be reached in order to successfully pass the test.
To conduct a test, roll a pair of 6-sided dice and add the values together. This is the result of the test. Bonuses or penalties may modify this result, with the final amount being compared to the test number to determine success or failure.
If a card, skill, or action reads "test X", X will always be a numerical value outlined on that card, skill, or action.
Tests that would have a positive or negative consequence must be rolled. However, in limited cases, a test without any consequence at all may be skipped to save time.
Example: Michael uses a Pray action. He spends an action, gains a Courage Token, draws a Prayer card, and is instructed by the skill to "Test 7+." He rolls 2 dice to determine the result, and earns an 8. He now has a choice to make… should he cast down a Darkness card, remove an affliction from an angel, or revive his defeated teammate?
Movement & Adjacency
Movement
All angels, and most demons, have a Move action, or an action that also shows the Move text. The number given is the maximum number of spaces that angel or demon can move as part of that action. All movement is done in orthogonal (i.e., the spaces directly above, below, or to the left or right, and not diagonal) steps. Barriers block movement between two spaces.
When moving, angels and demons may pass through any character, but may not end their movement on a space occupied by a character of the opposing side. When a character ends their movement in a space occupied by a character of the same side (Angel or demon), the character in that space will fall back to the previous space traveled if possible, or will move to another adjacent space if not. Demons moving toward an angel will attempt to "surround" them. Instead of falling back, place the demon in another space adjacent to that angel. Demons never block adjacency of other demons, and will always make room by surrounding angels.
Saints or other tokens placed on the battlefield do not block movement.
When an action, skill, or talent refers to an angel or demon being adjacent to a target, this is always referring to the spaces directly above, below, or to the left or right of the angel or demon, never diagonally. The blue barriers that block movement also block adjacency.
Select Targets
For both angels and demons, when activating a skill or card, you must first select any targets before resolving the skill or card.
For angels, in order to use a card or skill, that skill must first have a valid target that is located within the skill's range. Targets may include a card, character, Saint token, space on the map, and more. Valid target options will always be listed on the card or skill. If a skill would select multiple targets, first determine all valid targets before moving to the next step.
Range represents the maximum number of spaces from a character you may count to select a target. It is listed next to individual angel skills, demon skills (both minions and Fallen Princes), and more. If a skill or card does not have a range listed or the range is infinite, all eligible targets are considered to be in range. If range value is listed as *, the range is described as part of the individual skill's text.
When a demon's skill instructs it to engage a target, first attempt to move the demon toward its target, stopping when they are within the listed range on their card. If they engage within the listed range on their card, do not move them. After moving, if the demon's target is still not in range, its action ends.
Combat Damage, Range, & Targeting
Angels and demons may both move and calculate range through spaces containing the opposing force, though they may not end their movement in a space containing the opposing side.
To calculate range: refer to the listed range value listed on the skill or card. Count the spaces in the shortest path from a character to the target, ignoring other characters on the board. This path may not include diagonals, and cannot pass through barriers shown on the board (it must go around them to the target). If the path to the target is a number of spaces less than or equal to the range value of the skill or card, the target is considered to be in range. For example, a target that is in an adjacent space on the battlefield is considered to be "1 range" away.
Remember, some skills have a * instead of listing a range value. This means that the range value is described in the accompanying text of that skill.
Deal Damage
Deal damage to the targets equal to the amount listed on the skill or card by adding an equal number of damage tokens to the angel or demon card. If the number of damage tokens is equal to or greater than the target's health, that target is defeated and removed from the battle.
Remember that bonuses or penalties (such as stats on items, prayer cards, effects on Darkness cards, etc.) can affect the total damage dealt.
How much damage is dealt? The demons' damage is listed on the individual skills. Angels use the relevant stat value listed in their skills to determine damage dealt. All cards that deal damage list their damage value in their card text.
If angels are dealt damage that "may be divided however players choose," an angel may not be dealt damage in excess of their remaining health (i.e. - If Michael has a maximum health of 16, and has already been dealt 14 damage, you may not assign more than 2 damage to Michael in this manner).
Shield
When the bearer of this effect is dealt damage from any source, remove 1 Shield token per damage dealt. The damage is reduced by an equal amount. If there is still damage remaining to be dealt after all shield tokens have been removed, add damage tokens to the target for the remaining amount. Shield may be applied and "stack" up to 5 times, for a total of 5 damage that may be absorbed. Shield x1 and Shield x2 tokens are available to mark how much shield a character has.
Fallen Princes & Minion Details
The Forces of Darkness are the demonic hordes composed of Fallen Princes and their evil minions, and are controlled by the game itself.
Actions & Skill Trees
Each demon acts according to their own unique skill tree — a "menu" of actions located on their character card. To determine a demon's actions, resolve their card in order from top to bottom (activate talents with the activation icon first).
Demons often have an activated skill which is listed first (or equipped talents with this icon in higher difficulties). Resolve these, one at a time, before rolling to determine demon actions.
Some demons may have a special rule which is to be taken into account before demons use their actions.
Actions that demons will take are determined by the roll of a single 6-sided die. Each demon of the same type will take the same action, one at a time. If there are multiple demons of the same type in play, they act according to their numbered order (i.e. - Meddling Imp 1 would act first, Meddling Imp 2 would act next, etc). To resolve a demon action, roll a 6-sided die. Match the resulting number on the die to the matching numbered dice icon on the skill tree. Each demon of that type uses that same action, one at a time, then their turn ends. Just like their angelic counterparts, demon actions are resolved in order, from top to bottom.
If a demon receives another action from any source, roll a 6-sided die for each extra action, following the instructions listed in the demon's skill tree for that roll, until all actions have been used. These extra actions are only used by that individual demon, not any others of the same type. Activated skills do not trigger when a demon receives another action.
Note: In many cases, actions may be performed in whatever order is most convenient without changing the outcome in any way. However, in some cases, the action order may be important to the game, so players should keep this in mind when resolving demon actions.
Example: Meddling Imps act before Abomination each round based on this initiative order. Each Meddling Imp will move up to 7 spaces, then stop within 2 range of its target before finishing this skill.
Demon Health and Experience Values
Demon health is a stat located in the top right corner of the character card. Health is tracked individually, but each demon minion has a numbered section used for tracking damage or status effect tokens, marked on their character card in the art area. Track individual minions by matching the number in the minion's token area to the matching standee with the same number on its base. Once a demon has been dealt damage equal to their health value, they are defeated. Remove their standee from the battlefield and discard any tokens being used for that demon. Talent cards may increase these values (see Talent Cards below).
Fallen Princes have scaling health based on the number of angels in the game. 1-2 angel games use their listed health value. 3 and 4 angel games each have icons that instruct how much health to add to the base health value (i.e. - In a 4 angel game, only add the health next to that icon. Do not add the combined values from both 3 and 4 angels to the base health).
Each demon minion has an experience (XP) value located near their health value and on their Battle card. In Skirmish mode, whenever a demon is defeated, increase the Group Experience on the Darkness Board by an amount equal to this value.
Engagement (Range and Movement)
Demons commonly have two stats listed within each skill's text - Range and Move. Move is defined as how many spaces the demon may travel when moving or engaging. Range is the distance from a target that a demon will stop moving and attack. If a demon is already in range of an angel and is instructed to engage, it will not move at all. Otherwise, the demon will attempt to complete its full movement before resolving the remainder of its action. Reminder - Similar to angels, demons may not move diagonally, and they must always take the shortest possible movement path to their target.
Controlling the Forces of Darkness
Activation
When a demon type activates, first resolve its equipped Talent cards with the activation icon, then skills on the demon's card with the activation icon, then resolve their action.
Remember, when rolling to determine Minion or Fallen Prince actions, roll once per type of demon. Each demon of that type will take the same action (resolve the action for each demon individually). Match the die roll result to the skill tree listed on that demon's card and follow the instructions listed there, resolving actions one demon at a time.
If a demon receives another action from any source, roll a 6-sided die per extra action immediately, and then resolve that action before continuing. This extra action is only used by that individual demon -- not any others of the same type. That additional action does not count as an additional turn.
Demon Talents that activate will only activate once, unless specified by the skill listed on that Talent card (see Demon Talents below).
Engagement and Targeting
When using a skill that includes the word engage, demons will attempt to select a target (defined in the skill text), then move to a range equal to the value listed in the individual skill before resolving the rest of their action. When a demon's target is within their listed range, complete the remainder of their action without moving them any further. If a demon is still out of range after moving, their action immediately ends. Similar to angels, demons may not move diagonally, and they must always take the shortest possible movement path to their target (see Movement & Adjacency and Combat Damage, Range, & Targeting above for detailed instructions on how to select a target).
Tiebreakers
If there are multiple valid targets at equal range or a target is not explicitly defined, players choose which target to use. If players disagree, cast a tiebreaker roll (highest roll wins).
New Demon Types Enter The Battlefield Exhausted
Whenever you add a new type of demon to the battlefield, that demon type does not act that round. Place the Battle card at the end of the Initiative Track with the action token on that card flipped to its "exhausted" side.
If a demon would enter play with other demons of that type already in play, it will use an action as normal during activation.
Blocking Movement
Angels and demons may move through spaces containing opposing forces, but angels may not end their movement in spaces containing demons, and demons may not end their movement in spaces containing angels. Range may also be calculated through these spaces. In rare cases, an angel skill may have a sufficient movement value to move into range of another character, but insufficient range (i.e. - range 1, when all available spaces are taken by opposing forces). In this case, that target is not considered valid, and another valid target must be selected for that skill. Demons moving toward an angel will attempt to "surround" them. Instead of falling back, place the demon in another space adjacent to that angel. Demons never block adjacency of other demons, and will always make room by surrounding angels.
Initiative Order & Destroying Demons
Over the course of battle, all demons of the same type may be defeated and leave play before using an action. This results in the removal of their battle card from the Initiative track. In this case, slide the remaining Battle cards to the left on the Initiative Track. If a demon type is destroyed before acting, the next demon type on the initiative track to act does so before the next player begins their turn (Multiple angels never act in succession if there is a demon that has not yet acted). Do not remove a demon's character card or Talents from play, because in specific cases, more demons of that type may enter play.
In a Skirmish game, whenever a demon is destroyed, increase the Group Experience on the Darkness Board by moving the experience (XP) token an amount equal to the value listed on the demon's character card. However, during a Campaign, angels do not gain group experience -- refer to the Campaign book for more details on gaining XP in the Campaign.
Casting Down Darkness
When a Darkness card is "cast down," it is removed from play and placed into the Darkness discard pile. A Darkness card is only considered to be cast down when it is removed from the Darkness Board by Angels (usually through a Pray action or a Prayer card effect). If a Darkness card is drawn but discarded before it enters play on the Darkness Board (regardless of activation), it is not cast down.
Darkness Cards
Darkness Cards represent the evils of the mortal world and their effect in the supernatural realm. These cards are placed on the Darkness track.
Over the course of the game, these cards will be turned face-up and activated unless they are cast down!
Darkness Card Details
- If a Darkness card only shows the activation icon, it activates once and is then discarded.
- If a Darkness card only shows the ongoing effect icon, it adds a new ongoing passive effect to the game. This card adds a harmful effect that activates under conditions described on the card, and will remain in play until cast down!
- If a Darkness card contains both of these icons (activation and ongoing effect), it activates but is not discarded. This card remains in play and will activate again in the following round until it is cast down!
- Finally, Darkness cards that contain the stronghold icon are called Strongholds, and may not be cast down or otherwise removed from play by angels.
Remember, the total number of Darkness cards in play at any given time may not exceed the number of open spaces on the Darkness track. If you must draw additional Darkness cards when the Darkness track is full, instead flip one face-down Darkness card per excess card you would otherwise draw. If all the spaces on the Darkness track are full with face-up cards, each angel suffers 1 damage for each additional darkness card that was to be drawn. If a Prince card would be drawn and all spaces on the Darkness Track are full, replace a non-Prince Darkness card with this card (face-down if able, face-up if not). Each angel is dealt 1 damage per card discarded in this way.
As soon as all demons are defeated, the battle ends in victory. Reminder - If you are playing Skirmish mode, see Staging The Final Battle above for how to proceed from the first to final battle.
Saints, Experience, & Revival
Saints
Saints are humans who have special significance in the spiritual realm. As an angel of light, it is your standing order to guard and assist saints. They cannot see or hear you, but they are drawn to your presence. Like demons, saints are controlled by the game.
Battle cards indicate the placement of saints with a marked space. When staging the battle, place a saint token on the map in each marked space, with the blue "oppressed" side face-up (see Game Setup above).
Oppressing and Protecting Saints
Saints begin each battle oppressed, which is indicated by placing the saint token with the blue side facing up. During the Darkness Phase, oppressed saints will cause players to draw more Darkness cards!
In order to overcome the Darkness, angels must protect saints. If an angel's movement ends in or adjacent to a space containing an oppressed saint token, immediately flip that saint to its protected (gold) side. Conversely, if a demon ends its movement in or adjacent to a space containing a protected saint, immediately flip that saint token so its oppressed (blue) side is face-up. Remember: the blue barriers block adjacency.
If an angel or demon is already in or adjacent to a saint's space as an opposing force moves in, the saint token is considered contested, but is not flipped. As soon as either the demon or angel is defeated or otherwise moves out of an adjacent space, immediately flip the saint token to the appropriate oppressed or protected side.
Skirmish mode only: Whenever an oppressed saint is protected, increase the Group Experience on the Darkness Board by 1.
Group Experience & Leveling Up
In Skirmish mode, Angels gain experience through protecting saints and destroying their demonic foes. Protecting a saint grants 1 experience, and destroying a demon grants experience equal to the value listed on their character card (XP values are also listed on battle cards).
During the Level Up Phase, angels spend their experience (XP) to level up. If the Group Experience tracker shows an amount of experience equal to or greater than the number of angels + 1, each angel grows in prowess by gaining a level! Reduce the experience tracker by that amount (the number of angels + 1), then each angel chooses one of the following options: Reveal 2 Talent cards, place one next to your angel, and shuffle the other back into the deck (always draw from your lowest-level unrevealed Talents), OR draw 2 Heavenly Treasure cards, place one next to your angel, and discard the other (any Stat bonuses on these cards permanently increase your angel's stats).
If enough group experience is available to level multiple times, gain as many levels as possible before starting the next round (The token is double-sided with a +10 side for players' use).
During higher modes of difficulty, angels may begin the game with several level-ups. Follow these same steps for each level-up when staging a game on higher difficulty levels (see Difficulty Levels below).
Defeated Angels & Revivals
When an angel is defeated, remove that angel character from the battlefield and remove all positive and negative status effects from their character card. Retain any Damage & Courage tokens, Talents, Heavenly Treasure, and Prayer cards. All is not lost, for the game continues as long as at least one other angel is still standing!
Defeated angels still take their turns as normal, and may still use Pray actions and Prayer cards. However, these angels may not use other skills contained on their character card while defeated.
Defeated angels may be revived through card effects or Pray actions, and angels may even revive themselves! When an angel is revived, remove 1 Damage token from their character and place that angel on any space on the Heavenly Gates map tile. They may once again use all available actions.
Heavenly Treasure
Heavenly Treasure cards are unique items that add power and grant additional skills to the angelic warriors of Deliverance.
Gaining Treasure
After gaining a level, or as a result of certain card effects, you will gain cards from the Heavenly Treasure deck. When an angel is instructed to gain a Heavenly Treasure, draw 2 cards and choose one (1) to add, placing the other face-up into the marked discard pile on the Heavenly Gates tile.
Each angel may use up to 5 Heavenly Treasures at a time. These items may not be exchanged or traded between players, but players may elect to discard a previously gained item and replace it with a new item. There is no item type restriction on these cards in Skirmish mode! (Angels may equip multiple Crowns or several pairs of gloves -- they are Heavenly, after all!)
Penalties may also be listed as ongoing passive effects on Heavenly Treasure cards! These effects are permanent as long as the item is equipped. Penalties on treasures cannot decrease any stat below one (1) or reduce movement or range below one (1). A player may elect to discard an equipped treasure at any time (usually to remove a penalty or avoid some other harmful effect).
Health, Strength, Discipline, and Wisdom stat icons are typically listed on these cards. After an angel gains a Heavenly Treasure card with one or more of these icons, the respective stat is increased by 1 per stat icon. If a Heavenly Treasure card is discarded, these stats are lost.
Heavenly Treasure cards may list the following icons: activate, free action, any time, or passive.
- Cards with the activate icon are activated immediately when gained, and do not activate again.
- Cards with the free action icon may be used during your turn as a free action.
- Cards with the any-time icon may be used at any time.
- Cards with the passive icon contain an ongoing passive effect that affects that angel in some way. Refer to the card text for instructions on its use.
Some Heavenly Treasure cards may only be used once -- this is clarified within the card's text. Once a card with this text has been used, mark that it has been used with a gray action token.
Talent Cards
Talent cards expand the power and skillset of angels and demons. During a Skirmish game's setup, players will place their character-specific Talent decks next to their angel character cards in the designated spaces. In a Campaign, players will spend experience before a game begins on up to three talents, and equip those specific talents by placing them in the designated space on their angel cards during setup.
Angel Talents
After gaining a level in Deliverance's "Skirmish" mode of play, or as a result of certain card effects, you will gain Talent cards. When an angel is instructed to gain a Talent card, draw 2 cards from your lowest-level unrevealed Talent deck and choose one (1) to gain, shuffling the other back into the appropriate-level Talent deck (e.g. - angel has already gained a level 1 Talent, then levels up and chooses to gain another Talent. That angel draws 2 cards from their level 2 Talents and chooses one to gain).
In Skirmish mode, angels should only have a single Talent of each level (1, 2, and 3). In a Campaign however, angels may spend experience to gain any combination of Talent cards they have unlocked, including multiple Talent cards of the same level (e.g. - Level 1, 1, and 3).
In Skirmish mode, angels will unlock Talent cards during the game through gaining XP and leveling up (see Group Experience above). In Campaign games, angels level up after missions are completed instead (See the Campaign book for details). Remember, in any case, angels only have 3 available Talent spaces. Each angel may only use 3 Talents at a time!
For more detailed instructions on gaining Talents and Treasures in Campaign games, refer to the Campaign book.
Angel Talent cards represent new or upgraded character skills, and may contain the following icons: action, free action, any time, passive, or upgrade.
- The action icon may be used as an action on your turn.
- The free action icon may be used during your turn as a free action (you must still pay any other listed costs), or as an action outside of your turn if you are granted an additional action from a card or other effect.
- The any-time icon may be used at any time, or under certain conditions stated on the card (refer to the skill text for instructions on each Talent's use).
- The passive icon represents ongoing passive effects that offer a persistent benefit.
- The upgrade icon represents upgrades to existing skills on your angel's character card.
Refer to Iconography above for more details.
Demon Talents
When battling in higher difficulties of Skirmish Mode or later missions in the campaign, you may be instructed to equip Demon Talent cards to your foes. These increase the difficulty of the foe, granting demons additional health, new skills, or even changing their behavior!
There are three types of Demon Talent cards: Minor, Major, and Prince talents. Their label is listed on the card back as well as the left side of the card face. Major talents pose a greater challenge than Minor, and Prince talents are specific to the named Prince, so be sure to use the correct type when instructed.
Fallen Prince demons have a special set of Talents that further customize their encounters. If players should add talents to these demons, only use their character-specific Talent cards.
Demon Talents affect each demon of that type unless otherwise stated on the card. Most talent cards add health to demons, represented by the health icon with a number in the top right of the card. Talents also add new activated skills and even ongoing passive effects that affect demons of that type. Using Oppressive (a Minor Talent) as an example, each Meddling Imp would be able to sustain 2 more damage tokens before they are defeated, and would act as a greater threat to Saints than before due to this new activated skill!
Demon talents only contain the activation icon (activated skills), or the passive icon (ongoing passive skills). Passive skills on Demon Talent cards only affect demons of that type unless otherwise stated on the card.
When it is a demon's turn to act, players should resolve each Demon Talent card with the activation icon before resolving the rest of their card. These talents resolve in order from Major to Minor talents, then resolve the rest of the demon's turn as stated on their character card.
Note: If all demons of the same type are defeated, players should leave their character card and Talents in play until the battle's end for quicker setup if that demon type happens to return to the battlefield.
In certain cases, players may be instructed to put a new demon type into play. If this demon type needs a talent, add these to complete the setup as directed (randomly select a talent in higher difficulty levels of Skirmish mode, or add as directed by the campaign book).
Prayer Cards
Prayer cards provide divine intervention for the angelic warriors. These cards are considered public information, so they may be freely discussed and viewed by the other players, but can only be played by the card holder.
You may draw Prayer cards from the common Prayer deck by using a Pray action (one card per Pray action), or as a result of certain skills or card effects. Prayer cards are to be discarded in the Prayer discard pile after 1 use.
Prayer cards may contain the following icons: action, free action, and any time.
- Prayer cards with the action icon are played as an action.
- Prayer cards with the free action icon are played as a free action on your turn.
- Prayer cards with the any-time icon do not require an action to play and may be played outside of your turn under conditions listed on their card (If no condition is listed in the card's text, they may be played at any time).
Refer to Iconography above for more details.
When playing a Prayer card with multiple effects, resolve the effects in the order they are written. Start at the top of the card and follow each instruction in order. Some cards have an additional optional or required cost listed, in these cases, the additional cost must be paid before the effect is resolved (even if the card is a "free action"). If you cannot pay a required cost, you may not play that card.
Each angel can hold a maximum of five (5) Prayer cards at any one time. If you ever hold more than five Prayer cards, you must immediately reduce your hand size down to 5 cards, either by playing cards with the any-time icon (marked "Play any time. Not an action"), or by discarding.
Remember: When using a Pray action, you will (in order) spend an action token, gain a courage token, draw a Prayer card, and finally test 7+. It might be tempting to read that new card you drew, but don't forget to test! It is recommended to finish the Pray action by rolling 2 dice for your test before considering if you should use a Prayer card.
Status Effects (Boons & Afflictions)
Status effects are broken up into positive boons and negative afflictions, and may affect both angels and demons. Most status effects last until they are removed by cards or actions, and all status effects on a character are removed upon the conclusion of a battle or defeat of that character in battle. They do not "stack" multiple times unless otherwise indicated by a card or skill.
Some status effects have an ongoing passive effect, and others activate at the end of a character's turn. If multiple effects are to be resolved, boons resolve before afflictions, but players may elect to resolve these in any order they choose. If you cannot decide, the player holding the initiative token decides.
There are 8 status effects in total, split into 4 positive (boons) and 4 negative (afflictions):
Boons (Positive Status Effects)
- Blessed: When the bearer of this boon passes a test, they heal 1 damage (Only skills listed on Talents, the Character card, or Heavenly Treasures trigger blessed).
- Empower: Add 1 to damage dealt to each target from skills by the bearer of this boon (including skills listed on Talent cards and damage dealt by that character's Prayer cards).
- Swift: The bearer of this boon may move up to 1 additional space whenever they are instructed to move using a skill or card. Demons will always use this effect unless they are adjacent to, or otherwise in range of, their target.
- Light: Light affects a space on the map. When any angel ends their turn on this space, they heal 1 damage. It may be removed by any skill or card effect that removes a boon. If a Shadow affliction would be placed in this space, flip this token to its Shadow side instead.
Afflictions (Negative Status Effects)
- Cursed: When the bearer of this affliction fails a test, they are dealt 1 damage (Only skills listed on Talents, the Character card, or Heavenly Treasures trigger cursed).
- Root: The bearer of this affliction has their next movement reduced to 0. After this affliction resolves once, discard it.
- Wither: When the bearer of this affliction ends their turn, they are dealt 1 damage.
- Shadow: Shadow affects a space on the map. When any angel ends their turn on this space, they are dealt 1 damage. It may be removed by a Pray action, skill, or any card effect that removes an affliction. If a Light boon would be placed in this space, flip this token to its Light side instead.
Game Modes & Variants
Deliverance contains multiple modes of play that scale in difficulty to support novices and veterans alike. As players increase in skill and seek greater challenges, increase the difficulty level of Skirmish mode or battle through the "Campaign Challenges!"
Game Modes
We recommend first playing through "Finding a Foothold: Part 1" in the Campaign book to learn as you play. This serves as the tutorial for Deliverance, and will give you a feel for how the game works before you dive into Skirmish mode.
- Campaign: You will walk through the Valley of the Shadow of Death, and might even meet some familiar faces along the way!
- How to Win: Refer to the Victory Conditions section for each Campaign scenario.
- How to Play: Follow the instructions given in the accompanying Campaign book. The campaign takes place over several game sessions as the story unfolds. In order to not have the story spoiled, do not read ahead until instructed!
- Skirmish: Battle the demonic hordes while protecting the saints in order to cast your mighty Fallen adversary into the abyss.
- How to Win: Defeat all demons, including the Fallen Prince and his minions, in the final battle.
- How to Play: In Skirmish mode, you will fight 2 battles, one after another (see Game Setup above).
Difficulty Levels
Deliverance contains the potential for higher difficulty to offer new levels of challenge to newer adventurers ready for more, to even the most grizzled veteran players!
There are two main ways to challenge yourself in Deliverance -- participating in Campaign Challenges, or increasing the difficulty level in Skirmish mode! It is recommended that experienced gamers increase the difficulty level as soon as they learn how to play the game!
Campaign Challenges
Difficulty increases as players venture further into the Campaign's story, but there is an option for those seeking even greater challenges! After earning victory in the Campaign (or when you feel your angels are strong enough), you may play scenarios under the "Challenge" rules of that mission! These challenges will test your ability to prepare your team, find creative solutions to problems, and overcome overwhelming odds in pursuit of the Deliverance of Fallbrook!
Skirmish Difficulty Levels
For players looking for greater levels of challenge in Deliverance's Skirmish mode, assign Demon Talents as outlined below. Shuffle and randomly deal Demon Talent(s), placing them in the marked spaces to the right of each demon card, and add them to any new demon types that enter play as well. When assigning talents to Princes, randomly deal out from their named Talent cards (do not use regular Demon Talent cards for Princes).
Use these guidelines to adjust the difficulty level of Skirmish Mode:
- Adventure: Do not assign Talents to any demons.
- Heroic Difficulty: Assign 1 Talent card to each demon (Minor talents in battle 1, and Major Talents in battle 2). Fallen Princes gain 1 Prince talent. Angels gain 1 level during setup (see Group XP & Leveling Up above).
- Nightmare Difficulty: Assign 2 Talents to each demon (Minor talents in battle 1, and Major Talents in battle 2). Fallen Princes gain 2 Prince talents. Angels gain 2 levels during setup.
- Abyssal: Each demon gains 2 Major talents in both battle 1 and 2, and Fallen Princes gain 3 Prince talents. Angels gain 3 levels during setup.
- Infernal: Each demon gains 2 Major talents in both battle 1 and 2, and Fallen Princes gain 3 Prince talents. Angels only gain 2 levels during setup.
Solo Rules: The Intercessor (1 Player Variant)
Deliverance can be played with one player controlling up to four angels, in which case follow the standard game rules above, treating each angel as if controlled by a separate player. However, for a true solo experience, a single player can also fight in any game mode using only one angel and the Intercessor -- a helpful angelic ally interceding in battle on your behalf!
When using this variant, there are a few changes to the standard rules:
- A solo player will use the Intercessor card and its corresponding Talent cards, which are to be placed nearby their Angel Character card.
- The Intercessor counts as an angel, but does not enter play "on the battlefield." They cannot be targeted or affected by demons or other cards. Cards that affect "the number of angels on the battlefield" would not count the Intercessor in this total.
- Because the Intercessor counts as an angel, place 2 map tiles and draw 2 Battle cards during Skirmish set-up, and place 2 Darkness cards each round during the game (Place demons and saints as normal). In a Campaign, use the 1-2 player set-up rules.
- The angel has 2 actions to use per round, and the Intercessor has 2 actions to use per round (Track these with action tokens).
- Cards and skills that target another angel may also target the solo angel, but the effect can only apply once per target.
- Angel actions and free actions may only be used on the Angel's turn. Intercessor actions and free actions may only be used on the Intercessor's turn. Other cards and skills that reference activation on an angel's turn or that are to be used as a free action during an angel's turn may be used during the Angel or Intercessor turns, but may only activate once per round (unless otherwise indicated).
- Solo angels may only revive themselves if they are able to do so immediately with a card or skill that has the any-time icon ("Play any time. Not an action"). If they are otherwise defeated in battle, they immediately lose the game.
- In solo mode, use the following steps during the Action Phase:
- At the start of the Action phase, the player chooses the Angel OR Intercessor to use 2 actions.
- Then the first demon type activates.
- The other angelic character uses 2 actions (Angel or Intercessor).
- Each additional demon type activates until all demons have acted.
Angel Character Sheet — Bonuses
Each Angel Character Sheet includes a Campaign Experience track for spending earned experience (XP) by filling in the bubbles listed next to a Talent, or Bonus (1 XP per bubble). An upgrade is only earned when each bubble listed next to it is filled in.
When a resource bonus is unlocked, add these resources to your angel during setup. Bonuses must be unlocked in order.
- Brave: Your maximum courage is 6 (up from 5). / Gain 1 additional courage during setup.
- Composed: Gain 1 Shield during setup. / Gain 1 additional shield during setup.
- Disciplined: After setup, move up to 2 spaces. / Add 1 to the result of this angel's tests.
- Wise: Draw 1 Prayer card during setup. / Draw 1 extra Prayer card during setup.
- Strong: During setup, gain swift. / During setup, gain empower. / During setup, gain blessed.
- Stats: +1/+1/+1/+1 (permanent stat increases unlocked along the track).