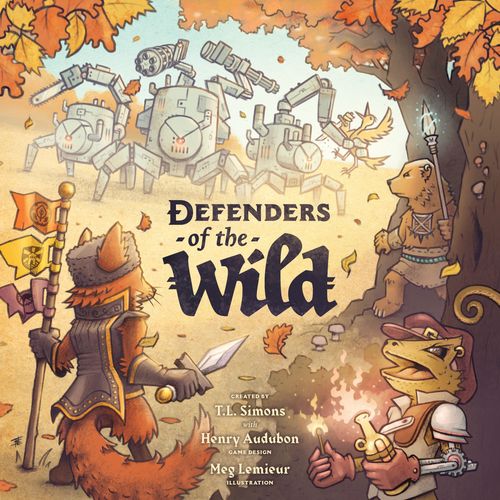
Defenders of the Wild
Defenders of the Wild Rulebook
Table of Contents
Table of Contents
Winning the Game
Defenders of the Wild is a fully cooperative game. All players win or lose together and must cooperate to destroy the machine core by completing 2 objectives together:
- Each player must build all of their camps.
- All factories built by the machines must be rewilded.
Losing the Game
There are 3 ways for all players to lose a game of Defenders of the Wild.
- If 6 factories have been built and the machines are ordered to build another, all players lose.
- If all 6 toxic sites have spread and the machines are ordered to spread more, all players lose.
- If 2 defenders from the same home habitat are killed, all players lose.
Components
- Habitat tiles (12)
- Game board perimeter tiles (6)
- 1 center base tile
- Factory tiles (7)
- Pollution tokens (36)
- Toxic site tokens (6)
- 1 direction circle
- 1 toxic site circle
- 1 machine direction pawn
- Walls (30)
- Mechs (20)
- Engines (2)
- Faction circles (4, 1 per faction)
- Support trackers (4, 1 per faction)
- Camps (24, 6 per faction)
- Turn tokens (4, 1 per faction)
- Organizers (4, 1 per faction: Order, Council, Coven, Sect)
- Damage tokens (12)
- 1 damage die
- Machine cards (6)
- Defender cards (48, 12 per faction)
- Death tokens (4, 1 per habitat type)
- Breach tokens (12)
- 1 first player token
- Item tokens: maps (4), potions (4), rockets (4), bread (4)
Sample components only. Actual components may vary.
Habitat Types & Factions
- Plains habitat ~ preferred by the Council
- Marsh habitat ~ preferred by the Coven
- Mountains habitat ~ preferred by the Sect
- Forest habitat ~ preferred by the Order
- Factory habitat
- Rewilded factory habitat ~ wild, preferred by every faction
Setup
The setup steps below correspond with the numbers in circles in the setup diagram. When playing in 1 player mode, follow the setup steps for 2 players and then read the 1 player mode section at the end of this rulebook.
1. Create the Game Board ~ After connecting all 6 perimeter tiles to create the 6 sided perimeter of the game board, randomly place the 12 habitat tiles inside the perimeter. Each habitat tile can be placed on either of its sides but always make sure that the artwork of all tiles is oriented in the same direction. Place the center base tile in the open spot at the center of the game board.
2. Create the Central Machine Core ~ Stack all of the factory tiles in numerical order with the tile numbered 0 on the bottom and the tile numbered 6 on top. Make sure the darker rewilded sides of the tiles are face down. Shuffle the orientations of the stacked factory tiles so that the factory direction arrows all point in random directions. Don't shuffle the numerical order in which they are stacked. Place the stacked tiles on the center base tile.
3. Set up the Machine Circles ~ Place the direction circle and the toxic site circle to one side of the game board. Place all 6 toxic site tokens on the toxic site circle. Place the machine direction pawn on the right-hand direction space on the direction circle marked by the 1 icon.
4. Deploy Engines ~ Place 1 engine on the edge between the 2 habitats next to the number 6 on the factory tile at the top of the central machine core. Make sure the engine is upright, with its jagged front facing away from the core. Place 1 wall on the habitat edge that the factory direction arrow is pointing towards off the opposite side of the factory tile. Place the second engine on the habitat edge to the right beyond the end of the wall sticking out from the factory direction arrow. Place all other walls within reach of all players.
5. Deploy Mechs ~ Place 2 mechs in the core. Place 1 mech in each habitat with a mech icon. Place all other mechs within reach of all players.
6. Spread Pollution ~ Place 1 pollution token in each habitat with a pollution icon. Place all other pollution tokens within reach of all players.
7. Set up Death Tokens ~ Place all 4 death tokens in a row near the game board.
8. Set up the Machine Deck ~ Shuffle the 6 machine cards and place them face-down within reach of all players. Make room for a discard pile.
9. Choose Factions ~ Randomly assign each player 1 of the 4 factions or allow players to choose their faction. Pass out the corresponding faction circle, turn token, organizer, camps, support tracker, defender cards, and player aid to each player.
10. Distribute Breach Tokens ~ Distribute the 12 breach tokens evenly among the players.
- 2 players: 6 each
- 3 players: 4 each
- 4 players: 3 each
11. Set up Your Faction Circle & Camps ~ Each Player: Place your faction circle directly in front of you and set 1 of your camps to the side along with your organizer. This will be your starting camp.
- 4 players: Use the side with 4 small dots next to the '7' space on the support track. Place 1 camp on the '4' space of the support track above the camp icon and place 1 additional camp in each space to the right. You should now have 4 camps on your support track. Put the remaining camp back in the box. Place your support tracker on the first space of the support track on the left side of your faction circle.
- 3 players: Use the side with 3 small dots next to the first '6' space on the support track. Place 1 camp on the '4' space of the support track above the camp icon and place 1 additional camp in each space to the right except for the final '6' space next to the 2 dots. You should now have 4 camps on your support track. Put the remaining camp back in the box. Place your support tracker on the first space of the support track on the left side of your faction circle.
- 2 players: Use the side with 2 small dots next to the final '6' space on the support track. Place 1 camp on the '4' space of the support track above the camp icon and place 1 additional camp in each space to the right. You should now have 5 camps on your support track. Place your support tracker on the first space of the support track on the left side of your faction circle.
12. Adjust Difficulty
- Beginner: Remove the final camp on the right side of each player's support track and return removed camps to the game box. When playing with 3 and 4 players on beginner difficulty, each player will only need to build 3 camps. When playing with 2 players on beginner difficulty, each player will only need to build 4 camps.
- Challenging: Keep the camps set up on your faction circle as detailed in step 11.
13. Distribute Item Tokens ~ Give each player 1 token of each item type. Place each of your 4 item tokens next to your faction circle with the darker side face-up.
14. Set up Your Defenders Deck ~ Each Player: Shuffle your 12 defender cards and place them face-down to the left of your faction circle. Make room for an exhaustion pile to the right of your faction circle. Draw 3 defender cards from your defenders deck into your hand and do not reveal them to the other players.
15. Distribute Damage Tokens ~ Each Player: Take 3 damage tokens and place them near your faction circle.
16. Choose Starting Camp Locations ~ Each Player: Choose one of your faction's preferred habitats next to the perimeter of the game board as the location for the starting camp you set aside in step 11. Place the camp in that habitat along with your organizer.
- When playing with 2 or 3 players, players decide together where to place 1 camp from each of the unplayed factions in a preferred habitat of that faction next to the perimeter.
- If none of your faction's preferred habitats are next to the perimeter, choose one of your preferred habitats that is 1 habitat closer to the core from the perimeter.
17. Randomly Assign First Player ~ Give that player the first player token.
Round Phases
Defenders of the Wild is played in rounds of turns. Each round consists of 3 phases:
- Phase 1 - All players choose an active defender from their hand in silence
- Phase 2 - All players reveal their active defenders & open discussion
- Phase 3: Actions - The active player takes actions with their active defender (repeated for each player's turn)
- Phase 3: Machines - The active player draws and resolves 1 machine card
- After all players have completed phase 3, start phase 1 of the next round
Phase 1
At the start of each round, all players must cease communication and maintain silence while choosing a defender card from their hand to play. Once you have chosen your active defender for the round, place that card face down on top of your exhaustion pile to the right of your faction circle.
- If you have no defender cards in your hand, draw the top card from your defenders deck as your active defender and place it face down on your exhaustion pile.
Phase 2
When all players have completed phase 1 and each player's active defender card is face down on their exhaustion pile, all players simultaneously flip over their active defenders to reveal the card to all other players. Players may now begin communicating, strategizing together, and sharing the specifics of their active defender with their fellow players. Some defender cards have special abilities marked 'reveal' and these effects must be resolved before proceeding.
- When a player reveals a defender with a Comrade ability, that player takes the first player token. If multiple players reveal defenders with Comrade abilities, the next closest player going clockwise around the table from the left of the previous round's first player takes the first player token.
Phase 3
The player with the first player token takes the first turn of the round. On each player's turn, the player will take actions with their active defender and then draw and resolve 1 machine card.
Phase 3: Actions ~ When it's your turn to be the active player, you may take as many actions as the number of action points noted on your active defender card. Each action takes 1 action point and every defender can complete any of the actions from the action menu (see the Action Menu section). Some defender cards have ongoing special abilities that may affect your turn as well as other players' turns. After spending your active defender's action points, the defender becomes exhausted. You may then team up additional defenders from your hand with the same home habitat as your active defender in order to take more actions (see Support & Camps). When you have finished taking all actions for this turn, place your turn token on top of your exhausted defenders pile to mark the completion of your actions.
Phase 3: Machines ~ After taking actions in phase 3, draw and resolve 1 machine card which will deploy, move, and manage machine components. When you have finished resolving the machine card for your turn, flip over your turn token to the darker side to mark the end of your turn.
Turn order rotates clockwise around the table. After each player's turn, the player to their left becomes the active player and repeats phase 3 for their turn. Once all players have taken their turns, all players remove their turn tokens from their exhaustion piles and start a new round with phase 1. Players must once again cease communication and choose a defender to play for the next round in silence.
Restrictions on Communication
There are 2 ways players must restrict communication with each other while playing Defenders of the Wild:
- During phase 1 of each round, you are prohibited from communicating with other players and must choose your active defender in silence. Communication and discussion may commence once all players reveal their active defenders simultaneously in phase 2.
- At all times during the game, you may not reveal your hand of defender cards to other players and you are prohibited from speaking or communicating with other players about any of the specifics on the defender cards in your hand other than noting the defenders' home habitats. During phases 2 and 3 of each round, you may freely communicate and strategize with other players by saying things like "I have a way to help with that" or "I don't currently have any forest defenders" as long as you never directly mention any of the specific features of any defenders in your hand other than noting the defenders' home habitats. Once your active defender has been revealed and is face up on your exhaustion pile, it can be freely spoken about and viewed by all players.
The Game Board
The game board is made up of 36 hexagonal habitats that surround the central machine core. Each habitat has 6 edges they share with adjacent habitats or with the game board perimeter.
There are 4 types of animal habitats: forests, plains, marshes, and mountains. Each of the 4 animal factions has a preferred habitat type: the Council prefers the plains, the Sect prefers the mountains, the Coven prefers the marshes, and the Order prefers the forests.
Over the course of the game, players will resolve cards from the machine deck that will order engines to advance and build walls along the edges of habitats. When an animal habitat becomes fully enclosed on all 6 edges, it is in danger of having a factory built upon it. Factory tiles start the game stacked in the central machine core and are built on enclosed habitats when an engines card is resolved (see the Machine Cards section). Factories built on top of animal habitats are still considered habitats.
There is no way for players to stop the advance of engines and the building of walls and factories. Players cannot enter the central machine core.
The only way to destroy the central machine core and win the game is to rewild all of the factories that the machines build while also building all of your camps. When players rewild a factory, it becomes a wild habitat that counts as every faction's preferred habitat and every defender's home habitat.
Taking Actions
When it's your turn as the active player (phase 3), you will use your organizer to take actions on the game board using your active defender's action points.
Defender Cards Overview
Each organizer has a unique network of defenders from that organizer's faction. These defenders make up that player's defenders deck of 12 cards. The home habitats of half the defenders in a player's deck are the same as their faction's preferred habitat. The other half of the defenders in the deck are from other home habitats.
A. Action Points ~ On your turn, take actions with your active defender by spending the action points that are noted on the bottom left corner of the card. To take any action from the action menu (see the Action Menu section) you must spend 1 action point. All defenders may be used to take any action from the action menu. You may only take actions in habitats where your organizer is unless a defender's special ability or an item notes otherwise. After spending your active defender's action points, the defender becomes exhausted.
B. Special Ability ~ Each defender also details its special ability along the bottom of the card. Special abilities labeled 'reveal' are resolved in the reveal phase of the round (phase 2). Special abilities labeled 'ongoing' may be utilized during your turn (phase 3). Some special abilities note that they affect other players. But unless specifically noted, all other special abilities affect only you. Using a defender's special ability is always optional.
C. Home Habitat ~ Each defender has a home habitat noted in the upper left corner of the card. Taking a move action in or out of your active defender's home habitat allows you to move faster through habitat corridors (see the Action Menu section).
Teaming Up ~ Once your active defender is exhausted, you may choose to 'team up' additional defenders from your hand to take additional actions. Teamed up defenders must be from the same home habitat as your active defender. Each teamed up defender gives you 1 additional action point to spend. Special abilities and action points noted on teamed up defenders cards are all ignored.
Team up 1 defender at a time, spending the additional action point before teaming up any more defenders. Place teamed up defenders next to your exhaustion pile while you are taking actions and then place them below your active defender in the exhaustion pile once you have completed your turn.
Example: Ubi has the same home habitat as the active defender Flik and can team up after Flik becomes exhausted, giving the Order player 1 additional action point to spend.
Support & Camps
To win the game, all players must build all their camps while rewilding all of the factories built by the machines. In addition to being a requirement for winning the game, building camps is how you draw cards from your defenders deck into your hand. Each of your camps also gives you an additional option for regrouping (see the Action Menu section) and gaining your faction's item (see the Items section).
To build camps, you need support from animals in this region of the Commonwood. Your level of support is represented on the support track that runs around your faction circle. The support track is where you place your camps at the start of the game.
Example: The Order player has taken 2 actions that gain support and has moved their support tracker forward 2 steps on the support track to mark the gained support. The support track is now maxed out and the player may now take a build action to build their next camp that is blocking the next step on the support track.
Gaining Support ~ You gain support by clearing pollution, destroying mechs, breaching walls, and rewilding factories (see the Action Menu section). Each time you take one of these actions, move your support tracker forward 1 step on the support track. You have maxed out your support when the next step on the support track is blocked by a camp. When your support is maxed out, you cannot gain additional support until you have built your next camp and reset the support meter (see below). You may still take any of the actions that generate support when your support track is maxed out, but you will not gain additional support. When you build a camp, your support tracker resets to its starting position on the track.
Building Camps & Drawing Defenders ~ The number under each camp on your support track specifies the hand size of defender cards you will draw up to when you build the camp occupying that step on the track. After building a camp and resetting your support tracker, draw cards from your defenders deck until your hand size reaches the newly-revealed number on the support track.
Your Final Camp ~ When you build your final camp, your support track becomes locked. Move your support tracker to the center of your faction circle for the remainder of the game. From this point onwards, you may give 1 support to another player of your choice whenever you take an action that generates support.
Rolling Damage & Death
Mechs are the machines' deadly attack units. When you take any action near mechs, you are in danger of taking damage. A mech that is on a factory tile is a sniper. A mech in any other habitat type (including a rewilded factory) is a hunter.
Examples of mechs: A) A sniper on a factory tile. B) A hunter in a plains habitat.
After you resolve an action taken with your organizer in a habitat with a mech or adjacent to a sniper, you must roll the damage die once to determine whether or not the mechs inflict damage on you. Only roll damage once per each action taken, regardless of how many mechs are currently threatening to inflict damage on you. The damage die has faces that can inflict 1 damage, 2 damage, or no damage. Whenever a damage roll inflicts damage, place the specified number of damage tokens on your faction circle below your faction shield.
Damage die faces: 1 damage, 2 damage, no damage → place a damage token.
Melee Damage Rolls ~ Both 1 damage and 2 damage faces on the damage die inflict damage on you after resolving an action with your organizer in the same habitat as 1 or more mechs.
Ranged Damage Rolls ~ Only the 1 damage faces on the damage die inflict damage on you after resolving an action with your organizer in a habitat free of mechs but adjacent to snipers. If you are rolling damage after resolving an action in the same habitat as 1 or more mechs and adjacent to snipers, roll for melee damage.
Examples of rolling damage: A) The Coven player rolls 1 damage after taking an action adjacent to a sniper and places 1 damage token on their faction circle. B) The player rolls 2 damage after taking an action adjacent to a sniper and no damage is inflicted. C) The player rolls 1 damage after taking an action in a habitat with a mech and places 1 damage token on their faction circle. D) The player rolls 2 damage after taking an action in a habitat with a mech and places 2 damage tokens on their faction circle.
Defender Death ~ The maximum amount of damage you can sustain is 3 damage tokens. If a damage roll inflicts damage that results in exceeding this maximum of 3 damage tokens, another player must randomly choose a defender from your hand. This defender is killed and is placed face up under the death token corresponding to that defender's home habitat. Whenever one of your defenders is killed, clear all damage from your faction circle. If 2 defenders from the same home habitat are killed, the game ends and all players lose.
- If a damage roll inflicts damage that results in exceeding this maximum of 3 damage tokens and you don't have any defenders in your hand, the top card from your defenders deck is killed. Draw this card and place it under the death token corresponding to that defender's home habitat.
Action Menu
Action: Move
A move action allows you to reposition your organizer to an adjacent habitat or through multiple habitats in a connected corridor if the habitats that make up the corridor are all the same type as the home habitat of your active defender (see below). Ending a move action in a habitat with a camp is also how you gain items (see the Items section).
Obstructions to Movement:
- You cannot move through walls unless those walls have been breached.
- Factories and rewilded factories have walls on all 6 of their edges and you may not move though those factory walls unless they have been breached.
- You cannot move through engines.
- You cannot enter the central machine hub.
- You cannot move off the perimeter of the board.
Moving to an Adjacent Habitat ~ To take a move action, spend 1 action point and reposition your organizer to any adjacent and unobstructed habitat.
Example: The Order player takes 1 move action to reposition their organizer to an adjacent and unobstructed habitat.
Moving through a Habitat Corridor ~ A habitat corridor is any connected set of habitats that are all of the same type. You may take 1 move action to move through multiple unobstructed habitats in a connected corridor if those habitats are all the same as the home habitat of your active defender.
- When taking a move action that starts in a corridor that corresponds with your active defender's home habitat, you may spend 1 action point to reposition your organizer to any habitat adjacent to any of the connected habitats that make up the corridor as long as the path of movement is unobstructed.
- When taking a move action that starts in a habitat adjacent to a corridor that corresponds with your active defender's home habitat, you may spend 1 action point to reposition your organizer to any connected habitat that makes up the corridor as long as the path of movement is unobstructed.
- Rewilded factories may be moved through as part of a connected habitat corridor as long as the walls obstructing the path of movement are breached.
Rolling Damage ~ Roll the damage die after resolving a move action that starts in a habitat with a mech or adjacent to a sniper.
Examples of moving through habitat corridors: A) The Order player takes 1 move action with an active marsh defender to reposition their organizer within a corridor of marsh habitats. B) The player takes 1 move action with an active plains defender to reposition their organizer into an adjacent corridor of plains habitats. C) The player takes 1 move action with an active forest defender to reposition their organizer in a habitat adjacent to a corridor of forests habitats.
Action: Build a Camp
Building all of your camps is a requirement for winning the game. Building camps is also how you draw more defenders into your hand and gives you additional options for regrouping (see below) and gaining your faction's item. In order to build a camp, your support track must be maxed out (see Support & Camps). You may only build camps in your faction's preferred habitat type or in rewilded factories. Only 1 camp can be built in each habitat.
To take a build action, spend 1 action point and place the camp occupying the next step on your maxed out support track in the habitat where your organizer is. Reset your support tracker to the starting position on the track. Draw cards from your defenders deck until your hand size reaches the newly-revealed number on the support track.
- If the cards in your defenders deck have all been exhausted, shuffle all the cards in your exhaustion pile other than your active defender and place them face down to the left of your faction circle to start a new defenders deck.
Rolling Damage ~ Roll the damage die after resolving a build action in a habitat with a mech or adjacent to a sniper.
Build example: A) The Order player has maxed out their support track and takes 1 build action to build their next camp in 1 of their faction's preferred habitats where their organizer is. B) Building the camp reveals a 6 on the support track's next step and the player draws their hand up to 6 defender cards. C) The support tracker resets to its starting position.
Action: Regroup
Regrouping allows you to reposition your organizer to any of your camps, anywhere on the board. To take a regroup action, spend 1 action point and reposition your organizer to any habitat where one of your camps is built. Unlike move actions, regroup actions are not restricted by distance or obstructions and do not allow you to gain an item.
Rolling Damage ~ Roll the damage die after resolving a regroup action starting in a habitat with a mech or adjacent to a sniper.
Regroup example: The Order player takes 1 regroup action to reposition their organizer to another habitat where they have a camp.
Action: Heal
Healing allows you to clear all damage from your faction circle, minimizing the risk of your defenders being killed. To take a heal action, spend 1 action point and remove all damage tokens from your faction circle.
Rolling Damage ~ Roll the damage die after resolving a heal action in a habitat with a mech or adjacent to a sniper.
Heal example: The Sect player takes 1 heal action to clear 2 damage tokens from their faction circle.
Action: Clear Pollution (+1 support)
Clearing pollution allows you to clear all pollution from a habitat (including a toxic site) and is one of the ways you gain support. To take a clear pollution action, spend 1 action point and remove all pollution tokens or the toxic site token from the habitat where your organizer is. Place cleared pollution tokens back in the pollution token pile and cleared toxic site tokens back on the toxic site circle. Move your support tracker forward 1 step on the support track unless the track is already maxed out.
Rolling Damage ~ Roll the damage die after resolving a clear action in a habitat with a mech or adjacent to a sniper.
Clear pollution examples: A) The Council player takes 1 clear action to remove 2 pollution tokens from a habitat. B) The player takes 1 clear action to remove 1 toxic site token from a habitat.
Action: Destroy a Mech (+1 support)
Destroying a mech allows you to remove a mech from the game board and is one of the ways you gain support. To take a destroy action, spend 1 action point and remove 1 mech from the habitat where your organizer is. Place destroyed mechs back in the mech pile. Move your support tracker forward 1 step on the support track unless the track is already maxed out.
Rolling Damage ~ Roll the damage die for melee damage after resolving a destroy action.
Destroy example: The Sect player takes 1 destroy action to remove 1 mech from a habitat.
Action: Breach a Wall (+1 support)
Breaching a wall or a factory wall allows you and other players to move through the breached wall and is one of the ways you gain support. To take a breach action, spend 1 action point and place a breach token next to a wall along an edge of the habitat where your organizer is. Move your support tracker forward 1 step on the support track unless the track is already maxed out. If you have already placed all of your breach tokens on the game board, you cannot take another breach action. Breach tokens stay on the game board in their placed position when a factory is built and the breached wall is replaced with a factory tile (see the Machine Cards section).
Rolling Damage ~ Roll the damage die after resolving a breach action in a habitat with a mech or adjacent to a sniper.
Breach a wall examples: A) The Council player takes 1 breach action to place a breach token next to a factory tile. B) The player takes 1 breach action to place a breach token next to a wall.
Action: Rewild a Factory (+1 support)
Rewilding a factory allows you to flip a factory tile to its rewilded side and is one of the ways you gain support. In order to win the game, all factories built by the machines must be rewilded. Rewilded factories do not spread pollution but continue to have walls on all 6 of their edges. Any faction may build a camp in a rewilded factory and rewilded factories may be moved through as part of a connected habitat corridor if the walls obstructing the path of movement are breached.
In order to rewild a factory, all pollution and mechs in that factory must first be cleared and destroyed. To take a rewild action, spend 1 action point and flip the factory tile where your organizer is to its rewilded side. Make sure to place the rewilded factory in the same orientation with the factory direction arrow pointed in the same direction. Move your support tracker forward 1 step on the support track unless the track is already maxed out.
Rolling Damage ~ Roll the damage die after resolving a rewild action adjacent to a sniper.
Rewild example: After clearing the factory of mechs and pollution, the Council player takes 1 rewild action to flip the factory tile to its rewilded side making sure the orientation of the factory direction arrow is unchanged.
Items
Gaining & Using Items
Gaining ~ Each faction offers a unique item (see the item descriptions below) that can be gained by visiting any of that faction's camps. At the start of a game, all 4 of your item tokens must be placed next to your faction circle with their darkened used sides face up. To gain a faction's item, end a move action with your organizer in the same habitat as one of that faction's camps.
When you gain an item, flip your corresponding item token to its colorful gained side to mark that you have obtained it.
- If your organizer is already in a habitat with a camp, you may spend 1 action point to gain the item offered by the faction's camps.
- Ending a regroup action in a habitat with a camp does not gain you the item offered by that faction's camps.
Gaining an item example: The Order player takes 1 move action to reposition their organizer to a habitat with a camp built by the Council. The player gains bread and flips their bread item token to its gained side.
Using ~ You may use an item you have gained at any time during your turn before drawing your turn's machine card. Using an item does not require spending an action point. You do not need to roll damage when you use an item in a habitat with a mech or adjacent to a sniper. When you use an item and resolve its effect, flip the item token over so its darkened used side is once again face up.
Council Item: Bread
To gain bread, your organizer must end a move action in a habitat with a Council camp. Using bread gives you 1 additional action point to spend on any action from the action menu.
Sect Item: Rockets
To gain rockets, your organizer must end a move action in a habitat with a Sect camp. Using rockets allows you to destroy 1 mech in a habitat adjacent to your organizer. You may not use rockets to destroy a mech in an adjacent habitat obstructed by a wall (or factory wall) unless that wall has been breached. After using rockets and removing the destroyed mech from the adjacent habitat, roll the damage die to check if the rockets backfire. Only the 1 damage faces on the damage die inflict damage on you when using rockets. Move your support tracker forward 1 step on the support track unless the track is already maxed out.
Coven Item: Potions
To gain potions, your organizer must end a move action in a habitat with a Coven camp. Using potions clears all damage from your faction circle.
Order Item: Maps
To gain maps, your organizer must end a move action in a habitat with an Order camp. Using maps allows you to reposition your organizer to any other animal habitat of the same type as the habitat your organizer is in. Maps can only be used in animal habitats and cannot be used to reposition your organizer into or out of a factory or a rewilded factory.
Machine Cards
After taking all actions on your turn, you must complete your turn by drawing and resolving 1 machine card. There are 3 types of machine cards and the machine deck includes 2 of each. After drawing and resolving a machine card, place it face up in the discard pile. If all 6 machine cards have been drawn and resolved on previous turns, reshuffle the discard pile and place it face down to start a new machine deck.
Each machine card is broken into a series of 2 or 3 sequential steps. Always ensure that you resolve a machine card in the correct sequence, one step at a time.
Engines Machine Card
Engines cards build factories on enclosed habitats, order engines to advance along the edges of habitats, and build walls.
ENGINES: STEP 1 ~ If any animal habitats are enclosed, build 1 factory. If no animal habitats are enclosed, skip to step 2.
Check to see if any animal habitats are enclosed. Enclosed habitats have walls enclosing all 6 of their edges. Factories have walls on all 6 of their edges and count towards the enclosure of adjacent habitats. The perimeter of the game board also counts towards the enclosure of the habitats it borders in the same way as walls. Because of this, habitats along the perimeter can be enclosed with only 3 or 4 walls built along their interior edges. Walls are never built on perimeter edges.
- Breached walls and rewilded factory walls still count towards the enclosure of adjacent habitats.
- Engines do not count towards the enclosure of adjacent habitats.
Building a Factory ~ After determining the target habitat, remove all walls enclosing that habitat's edges. Pick up the factory tile on top of the central machine core along with any snipers and pollution tokens or a toxic site token sitting on the factory and relocate it to the target habitat. Make sure to place the factory tile on the target habitat in the same orientation as it was positioned in the central machine core with the factory direction arrow pointing in the same direction.
Examples of enclosed animal habitats: A) Walls are built on 5 edges of the habitat and a factory is positioned on the 6th edge. B) Walls are built on all 6 edges of a habitat. C) Walls are built on all interior edges of a habitat located on the game board perimeter.
If Multiple Animal Habitats are Enclosed ~ The machines will only ever build 1 factory per engine card. To determine which enclosed habitat to build the factory on top of, first check the direction specified by the machine direction pawn on the direction circle. Then find the factory direction arrow pointing off the factory tile on top of the central machine core. Scan the board in front of where the arrow is pointing and rotate the scan in the direction specified by the machine direction pawn until the scan hits an enclosed habitat. That enclosed habitat is the target habitat where the factory will be built.
- If the scan encounters 2 enclosed habitats that are both along the same scan line, build the factory on the enclosed habitat closer to the central machine core.
Multiple enclosed habitat example: Both habitat (A) and habitat (B) are enclosed when an engine card is drawn. The direction specified by the machine direction pawn on the direction circle is left, or the 2 icon (C). A scan outwards and rotating to the left from the factory direction arrow (D) pointing off the factory on top of the central core, hits enclosed habitat (B) first. Enclosed habitat (B) is the target habitat where the factory will be built.
Deploy 2 Snipers to the Core ~ After building a new factory, deploy 2 snipers to the central machine core.
- If a factory is built on top of a habitat with a camp, the camp is destroyed and removed from the game. Place it back in the game box. The camp does not return to the faction circle of the player it belongs to and still counts as having been built. But it no longer provides an option for that player to regroup to or for gaining that faction's item.
- If a factory is built on top of a habitat with any organizers, place the organizers on top of the newly built factory.
- If a factory is built on top of a habitat with pollution, place the pollution on top of the newly built factory. If the number of pollution tokens in the factory is 3 or higher, remove the tokens and replace them with a toxic site token. If a toxic site token is already on the factory, remove the pollution tokens.
- If a factory is built on top of a habitat with hunters, place the mechs on top of the newly built factory. These mechs are now snipers.
Building a factory example: A plains habitat is the only enclosed habitat when an engine card is drawn. The walls around the habitat are removed and the top factory tile on the central core is relocated to the plains habitat along with the 2 snipers that were on the factory. The pollution token that was in the enclosed plains habitat is placed on top of the newly built factory.
Dead Ends & Resetting ~ If an engine is ever ordered to advance into an edge that has a wall, a factory, another engine, or off the perimeter of the game board, it resets. Pick up the engine and place it on the central machine core. Make sure to build 1 wall on the habitat edge where the engine reset from.
Engine reset example: An engine is ordered to advance into an edge that already has a wall and resets to the central core.
Enclosing Perimeter Habitats ~ If an engine is ever ordered to advance off the perimeter of the game board, it fully encloses the habitat that it has been ordered to advance around. The icons on the game board perimeter are a reminder of this. The perimeter of the game board counts towards the enclosure of the habitats it borders and walls are never built on the perimeter edges. After resetting the engine back to the central machine core, build walls on all interior edges of the specified perimeter habitat.
Perimeter enclosure example: An engine is ordered to advance around the habitat to its right (1 icon), and off the game board perimeter. The engine resets to the central core and walls are built on the 3 interior edges of the habitat.
ENGINES: STEP 2 ~ Engines advance & build 2 walls
Engines sit on habitat edges with one habitat to their right side (marked on the engine's right side with the 1 icon) and one habitat to their left (marked with the 2 icon). They have a jagged forward-facing front and a flat back. Engines always advance forward and never in reverse.
Check the position of the machine direction pawn on the direction circle to determine whether each engine will advance around the habitat to its right (1 icon) or to its left (2 icon). Move each engine 2 edges in that specified direction. Build 2 walls behind the engine on each habitat edge that the engine moves through.
Engines advance example: The machine direction pawn is set to right (1 icon). The engine advances 2 edges around the habitats to their right building 1 wall on each edge they move through.
ENGINES: STEP 3 ~ Deploy reset engines
The final step on engine cards deploys any engines that have reset to the core. Reset engines always attempt to deploy to 1 of the 6 edges that radiate like spokes off the central machine core. To determine which of these edges a reset engine will deploy to, find the factory direction arrow on the central machine hub. If the edge the arrow is pointing to is clear, deploy the engine to that edge. If that edge is already obstructed by a wall, a factory wall, or the other engine, search for the next unobstructed edge rotating around the machine core in the direction specified by the machine direction pawn.
If all 6 of the edges radiating from the central machine core are already blocked, move the reset engine to the highest numbered built factory (even if it's been rewilded). Repeat the same steps as above to determine which edge radiating off that factory the engine should deploy to.
- Always deploy engines with their back to the factory and their front facing out.
- If both engines have reset to the core, deploy each engine one at a time.
Engine deploy example: A reset engine is sitting in the core and the machine direction pawn is set to left, or the 2 icon. The habitat edge that the factory direction arrow on the factory is pointing to already has a wall so the engine deploys to the next unobstructed edge radiating from the core to the left of the factory direction arrow.
Engine deploy example: A reset engine is unable to deploy to any habitat edges radiating from the core because all of them are blocked. The engine moves to the highest numbered built factory and deploys to the edge its factory direction arrow is pointing to.
Machine Card: Mechs
Mechs cards deploy mechs and trigger mechs to pursue players.
MECHS: STEP 1 ~ Each engine deploys 1 mech
Locate the habitats directly in front of each engine and deploy 1 mech to each of those habitats. If a mech is deployed to an animal habitat, it becomes a hunter. If a mech is deployed to a factory, it becomes a sniper.
- If the engine is facing the game board perimeter, deploy the mech to the habitat directly behind it.
Example: An engine deploys 1 mech to the habitat directly in front of its position.
Engine deploy example: A reset engine is sitting in the core and the machine direction pawn is set to left, or the 2 icon (A). The habitat edge that the factory direction arrow on the factory is pointing to already has a wall (B) so the engine deploys to the next unobstructed edge radiating from the core to the left of the factory direction arrow (C).
Engine deploy example: A reset engine is unable to deploy to any habitat edges radiating from the core because all of them are blocked (A). The engine moves to the highest numbered built factory (B) and deploys to the edge its factory direction arrow is pointing to (C).
MECHS: STEP 2 ~ Hunters pursue the active player 2 habitats & others 1
Hunters prioritize pursuing the active player and then attempt to pursue each of the other players, one at a time, going clockwise from the active player's left around the table. When a hunter pursues a player, it moves from its starting position to the habitat where the pursued player's organizer is. If a hunter is not in range of any players, it holds its position.
- Hunters never pursue through walls (including breached walls) and never pursue into factories or rewilded factories.
- Hunters that are already in a habitat with any player's organizer hold their position and do not pursue.
Pursuing the Active Player ~ Hunters pursue the active player up to a range of 2 habitats. If any hunters are within 2 habitats of the active player's organizer, reposition those mechs into the habitat where the organizer is.
Pursuing the active player example: The Order player is the active player and draws a mechs card (A). 2 hunters are within 2 habitats of the player's organizer (B). Both pursue the player and reposition to the habitat where the organizer is. A sniper does not pursue (C).
Pursuing Other Players ~ Hunters only pursue players other than the active player at a range of 1 habitat. Going clockwise from the active player's left around the table, check if any hunters are adjacent to a player's organizer and reposition those mechs into the habitat where the organizer is.
Pursuing other players example: The Sect player is not the active player when a mechs card is drawn (A). 2 hunters are within 1 habitat of the player's organizer (B) but 1 is blocked by a wall (C). The hunter that is not blocked pursues the player and repositions to the habitat where the organizer is (D). A 3rd hunter is out of range of the organizer and holds its position (E).
Machine Card: Pollution
Pollution cards toggle the direction specified by the machine direction pawn on the direction circle, inflict damage on players near toxic sites, and spread pollution from factories.
POLLUTION: STEP 1 ~ Toggle machine direction
Only one of the pollution cards includes this first step. Toggle the machine direction by moving the machine direction pawn to the opposite direction space on the direction circle.
Toggle direction example: The pollution card with the toggle step is drawn and the machine direction pawn is toggled from the left direction space with the 2 icon to the right direction space with the 1 icon.
POLLUTION: STEP 2 ~ Players on or adjacent to toxic sites take 1 damage
Any player whose organizer is in or adjacent to a habitat with a toxic site token takes 1 damage. The maximum amount of damage you can sustain is 3 damage tokens (see Rolling Damage & Death).
- Each player only takes a maximum of 1 damage per pollution card, regardless of how many toxic site tokens are in or adjacent to the habitat where their organizer is.
Toxic site damage example: The Sect player's organizer is in a habitat with a toxic site token and adjacent to another when a pollution card is drawn. The player takes 1 damage and places a damage token on their faction circle.
POLLUTION: STEP 3 ~ Factories spread pollution
Locate the 3 pollution chutes on the top factory of the central machine core and the chutes on each built factory. Spread 1 pollution token per pollution chute into the habitat adjacent to that chute.
Toxic Sites ~ If 3 or more pollution tokens are ever spread to a single habitat, the pollution becomes a toxic site. Remove all the pollution tokens and replace them with one of the toxic site tokens from the machine toxic circle.
- Pollution tokens do not spread to habitats that already have toxic site tokens.
- If multiple pollution chutes are adjacent to the same habitat, spread 1 pollution token to that habitat per adjacent chute.
- Pollution chutes spread pollution tokens into adjacent factories in the same way they spread pollution into all other habitats.
Factories spread pollution example: A pollution card is drawn and 1 pollution token spreads to each habitat adjacent to the factory's pollution chutes (A). A third pollution token is not added to the habitat that already had 2 tokens. Both tokens are removed and replaced with a toxic site token (B).
Endgame
Losing
There are 3 ways for all players to lose the game.
Core Construction Complete ~ If 6 factory tiles have been built and the machines are ordered to build the final factory tile, all players lose. Each factory is numbered 0-6 and at the start of the game these factories are stacked on the central machine core in order from tile 0 on the bottom to tile 6 on top. The number on the top factory of the central machine core informs you how many more factories the machines can build before all players lose the game. The final factory tile numbered 0 is never built. If all 6 other factories have been built and an engine card is pulled when at least 1 habitat is enclosed, the game ends and all players lose.
Toxic Disaster ~ If all 6 toxic sites have spread to the game board and a pollution card orders the machines to spread more toxic sites, the game ends and all players lose.
Massacre ~ When a player accumulates more than 3 damage, one of their defenders is killed and placed under the death token corresponding with that defender's home habitat. If another defender from the same home habitat is killed, the game ends and all players lose.
Winning
To destroy the central machine core, claim victory in this crucial battle, and win the game, all players must build all their camps while rewilding all of the factories built by the machines. If at any time during a player's turn, all players have built all their camps and all factories built by the machines have been rewilded, the game ends and all players win. Flip the factory tile on top of the central machine core to its rewilded side.
News of your victory spreads across the Commonwood unleashing the fires of hope and solidarity in its wake. Some defenders will stay in this region utilizing the network of camps you have built to help start the long process of reconstruction and healing of the land. Others will move on to lend their skills and expertise on the other fronts in the ongoing war against the machines.
Everything is connected! Nothing lasts forever!
1 Player Mode
Defenders of the Wild is primarily designed as a multiplayer game that centers player interaction and cooperative strategizing. However, the game can still be enjoyed alone with the following adjustments to the rules:
Play as 2 Factions with 1 Hand of Defenders ~ Follow 2 player setup rules with these changes:
- Place the first player token back in the game box.
- Your initial hand of 3 defender cards may be composed of any combination of defenders from either faction's defenders deck.
No Rounds ~ Ignore all rules detailing rounds of gameplay and restrictions on communication. Each turn, you may choose to play any defender from your hand regardless of faction. Place the active defender on the exhaustion pile next to that defender's faction circle. Resolve the turn with the faction components matching the faction of the active defender. Make sure to draw and resolve a machine card after taking each turn.
- If you have no defender cards from 1 of the factions in your hand, you may draw the top card from that defenders deck as your active defender for the turn.
- Abilities marked ongoing continue to affect gameplay for as long as the defender with the ability is on top of the exhaustion pile.
Teaming Up ~ You may only team up defenders from the same faction as your active defender.
Drawing Defender Cards ~ When taking an action to build a camp, draw cards from the defenders deck belonging to your active defender until your hand size reaches the newly-revealed number on the support track.