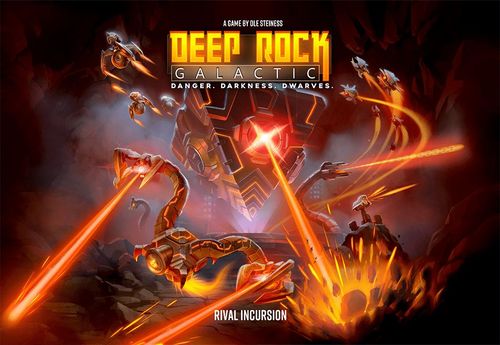
Deep Rock Galactic: Rival Incursion
Deep Rock Galactic: Rival Incursion Rulebook
Table of Contents
Table of Contents
Components
- 7 Caretaker event cards
- 4 creature cards
- 4 Rock 'n Stone cards
- 12 mission cards
- 2 event cards
- 2 swarm cards
- 1 data rack
- 2 double-sided hacking pod tokens
- 1 double-sided control panel token
- 1 data vault cave segment
- 4 crescent cave segments
- 1 Caretaker health tracker
- 4 double-sided rival tool tokens
- 3 Patrol Bot miniatures
- 2 power station miniatures
- 1 Nemesis miniature
- 3 appendage miniatures
- 4 burst turret miniatures
- 1 Caretaker miniature
- 1 rule and mission book
Introduction
This expansion comes with a new mission type: Industrial Sabotage. It features all-new mechanical enemies, from Patrol Bots and stationary burst turrets to the gruesome Nemesis and of course the formidable Caretaker itself, which is guarding the sensitive data our rivals are collecting.
There are also new crescent-shaped cave segments. They contain familiar threats, but also exciting new stuff, such as unique, high-tech excavation tools that were left behind by the rival company.
Finally, there are new Rock 'n Stone cards that are used specifically in the missions containing rival tech (all missions in this expansion). To use them, simply shuffle them in with the original Rock 'n Stone cards. You will also find new event cards and swarm cards in this expansion that you can use with the base game or any other expansion. Simply shuffle them into the main event and swarm decks.
New Features
Crescent Cave Segments
Refer to your mission map to see how many crescent cave segments you need. Shuffle them and randomly place the required number on the board, face down.
Aside from the regular creatures and stalagmites, all crescent cave segments feature a rival tool symbol. Place a random rival tool token face down on each of these symbols.
These represent tools that were abandoned by the rival company. When you enter the space, pick up the rival tool token and add it to your character board. You may use it in any of your turns as a free, one-time action. Discard the rival tool token after use, or at the end of the mission (you cannot carry them over).
Rival Tool Tokens
The expansion includes 4 double-sided rival tool tokens. The four tools are:
- Rock Grinder. Automatically drill wall segments on all spaces adjacent to you. Roll for minerals as normal.
- Tunnel Drone. Automatically drill any wall segment anywhere on the board. Roll for minerals as normal: any minerals found this way fall to the floor. This tool can cause hidden cave segments to be revealed.
- Nitra Scanner. Place 1 Nitra next to each gold still in the walls. When you mine the gold, collect the Nitra at the same time.
- Excavation Charges. Draw 2 throwable cards.
New Mission Type
Industrial Sabotage
A rival mining corporation has infiltrated Hoxxes IV and is gathering information on the planet in a data rack. Your mission is to retrieve it.
The data rack is stored in a large data vault, which in turn is being guarded by a huge, floating, upside-down pyramid called the Caretaker. At the start of your mission, the Caretaker itself is dormant and protected by a force field.
To complete your mission, you will need to go through several steps in order:
- Hack the 2 power stations that are powering the Caretaker's shield;
- Once the shield is down, destroy the Caretaker;
- Once the Caretaker is destroyed, the data vault will automatically open up, exposing the data rack. Retrieve it and carry it back to the escape pod.
Getting to the Caretaker won't be easy either. The surrounding caves are protected by other rival technologies, such as Patrol Bots and automatic burst turrets. However, you can turn this to your advantage. While the rival machines have been carefully coded and designed to co-exist peacefully with the creatures, the Dwarves can permanently take control of the burst turrets by hacking their control panel. Once that's done, the burst turrets will start attacking creatures and other rival units instead!
Setup
Industrial Sabotage missions are prepared like any other missions, but there are a few additional steps:
- The new data vault cave segment with the Caretaker icon must be among the randomly chosen hidden cave segments that are placed during setup.
- The cave segments that are already revealed at the start of the game will have pickup tokens as normal. However, when you reveal a hidden cave segment, place a power station on its flare symbol instead. Weapon upgrade tokens are still placed as normal.
- When you reveal the data vault cave segment with the Caretaker icon, place the Caretaker at the center, with the data rack token below it. Also place a stalagmite on the matching icon.
Rival Technologies
The elements of the rival technology all block movement and line of sight. Refer to the creature list below for all the different abilities and stats of the rival technologies.
Power Stations
Two power stations control the shield protecting the Caretaker. Until they are hacked, the Caretaker is dormant and indestructible.
- Before hacking a power station. The active Dwarf must spend 1 action to call down a hacking pod. Place the hacking pod token with its "unchecked" side face up on an empty space adjacent to the Dwarf and within 3 spaces of the power station.
- While hacking a power station. The rumblings of the hacking pod will attract local wildlife. Add a Patrol Bot to exits 1 and 2, then instead of event cards, draw swarm cards at the end of this turn AND the next Dwarf's turn. The hacking pod will automatically disable the power station at the end of the NEXT Dwarf's turn.
- After hacking a power station. Flip the hacking pod token to its "checked" side, to show that the hacking is complete.
The 2 power stations can be hacked in any order, but not simultaneously.
Note: power stations and hacking pods are indestructible.
Example (Hacking Power Stations): the Engineer spends 1 action to call down the hacking pod: place the hacking pod token with its "unchecked" side face up, adjacent to the Engineer, and within 3 spaces of the power station. After that, you must place Patrol Bots at exits 1 and 2 and start drawing swarm cards instead of event cards. Once the power station has been hacked, flip the hacking pod token to its "checked" side.
Patrol Bots
These armed, flying robots patrol the caves. They never target the creatures, only Dwarves and hacked burst turrets. Patrol Bots are activated whenever an event card instructs you to activate all creatures.
Burst Turrets and Control Panels
Burst Turrets
These operate just like the Engineer's sentry gun, which means they can only shoot once during each Dwarf's turn. They activate when a Dwarf comes into range or performs an action within range.
The Engineer's sentry gun and burst turrets don't shoot at each other. If you attack the burst turret from a range of 2 spaces or less, its resistance is ignored.
Control Panel
The good news is that in some of the missions, the burst turrets can be hacked to work for the Dwarves, instead of against them. The burst turrets are controlled by a control panel, which is indestructible but can be pried open and hacked with 1 pickaxe hit.
- Roll the pickaxe die when adjacent to the control panel token. A single hit is enough to flip the token to its "checked" side. You have successfully hacked the burst turrets!
- Once hacked, the remaining burst turrets will no longer shoot at the Dwarves. Instead, they will shoot at any creature or Bot in range whenever an event card activates all creatures.
Because burst turrets attack with a creature die, creatures and Bots have no resistance against it. The only exceptions are the Caretaker and its appendages. These are simply too resilient for a burst turret to damage: don't roll for them.
Creatures will only attack hacked burst turrets if no Dwarf or sentry gun is in range. Hacked burst turrets also receive the benefits from the Scout's flares and can perform reaction attacks when event cards call for those.
Example (Burst Turrets): in this example, the Engineer is standing next to the control panel token and wants to hack it. He rolls a hit with the pickaxe die and flips the token to its "checked" side. The burst turrets are now friendly and will not fire at him.
Nemesis
This evil, devious machine tries to shred the Dwarves to pieces with its long arms. Once you destroy it, draw a throwable card as a reward.
The Nemesis is activated whenever an event card instructs you to activate all creatures.
Caretaker and Appendages
Caretaker
Once you've hacked its 2 power stations, the Caretaker's force field disintegrates.
The Caretaker will then activate in 1 of 3 ways:
- When a Dwarf moves onto the data vault segment, or
- When a Dwarf who was already on the data vault segment starts his turn, or
- When the Caretaker is attacked from a different cave segment with a ranged weapon.
Once the Caretaker has been activated, draw Caretaker event cards at the end of your turn instead of event cards until it is defeated, after that, go back to drawing regular event cards.
Example (Caretaker Activation): in this example you can see the different ways in which the Caretaker can activate.
The Caretaker is immovable and has 15 health. Take the Caretaker health tracker from the box and place a damage cube on the "15" space to indicate this. Move the damage cube down each time you deal damage to the Caretaker.
Attacking any of the 3 center spaces counts as an attack on the Caretaker's vulnerable mechanical eye. As soon as it takes damage, the eye will close for the remainder of that turn. You may only roll attack dice for the Caretaker once per turn, but you can still deal several points worth of damage for that one attack. This also means successive attacks with the Gunner's minigun are essentially useless. The Caretaker will open its vulnerable eye again at the start of the next Dwarf's turn.
When the damage cube on the Caretaker health tracker reaches "0", the Caretaker is destroyed. Immediately remove it and any of its remaining appendages from the board. Any Dwarf can move over any of the 3 central spaces of the data vault segment to pick up the data rack token; place it on the shared supply space. Doing so will make the escape pod appear, ready to pick up the Dwarves and complete the mission.
Appendages
Appendages spawn through Caretaker event cards. When that occurs, they appear at the 3 marked spaces next to the Caretaker. Any creatures or Dwarves currently on one of these spaces are pushed to the nearest empty space. Those Dwarves are also knocked over.
Important information about the appendages:
- They are immovable.
- They only attack when the corresponding Caretaker event card is drawn, not when creatures activate.
- They have an incredibly long range (6 spaces).
- When they activate, roll 2 creature dice for each appendage, and apply any damage to the active Dwarf. If you roll a [!]-result, the targeted Dwarf takes no damage but is knocked over.
- They have 1 health and are removed from the board when damaged.
- They are immune to freeze and stun effects.
Example (Caretaker Activation, appendages):
- The range of the appendage is 6 spaces, so in this example the Scout is within range.
- A [!]-result is rolled, which means the Scout is knocked over.
- In the next round, the Scout gets up and moves in to get a good shot. Thanks to a successful roll, the Scout deals 1 damage to the targeted appendage, which is enough to remove it from the board.
Creature List
| Creature | Card no. | Health | Range (R) | Movement (M) | Creature dice | Result shown on the card | Resistance | Reward |
|---|---|---|---|---|---|---|---|---|
| Nemesis | 27 | 6 | 2 | 3 | 2 | [!] = stars icon | Pickaxe, explosion (red burst), armor-piercing (green dash), stun (stars icon), freeze (snowflake icon) | Throwable card |
| Patrol Bot | 26 | 2 | 4 | 3 | 1 | [!] = fangs icon (bite) | Pickaxe, bullet (blue arrows), freeze (snowflake icon), bite (fangs icon) | None |
| Burst Turret | 12B |
Transcriber's note: the stars and snowflake icons are read as stun and freeze, matching the appendage rule "immune to freeze and stun effects". The fangs icon is the creature die's bite result. The white arrow icon is not named in the printed rules, so it is left as an icon description.
The printed card text for each creature:
- Nemesis. It moves through walls to reach its target, leaving behind empty cave spaces. When killed, roll a creature die and apply damage to all adjacent Dwarves and creatures. Can move over any obstacle.
- Patrol Bot. Can fly and move over any obstacle.
- Burst Turret. Activates when a Dwarf moves (or is activated) within range. Vulnerable at close range: disregard all resistance when attacking the burst turret from within 2 range or with a throwable.
Creature Descriptions
The printed page gives one description per creature, in the same order as the creature list. The Nemesis entry, the Patrol Bot entry, the Burst Turret entry and the Caretaker entry are printed without headings.
- The Dwarf who destroys it draws a throwable card.
- These armed, flying robots patrol the caves. They can be a nuisance as they can show up before or during a mission, or once you are busy fighting the Caretaker.
- These operate just like the Engineer's sentry gun, which means they can only shoot once during each Dwarf's turn. They activate when a Dwarf comes into range or performs an action within range. The Engineer's sentry gun and burst turrets don't shoot at each other. All burst turrets can be hacked to work for the Dwarves by successfully performing a pickaxe action on a control panel from an adjacent space.
- The Caretaker is a formidable, but stationary foe. It will become active once the 2 power stations have been hacked, and 1 of the following 3 things happens: 1) a Dwarf moves onto the data vault segment; 2) a Dwarf starts his turn on the data vault segment; 3) the Caretaker is attacked from a different cave segment with a ranged weapon. Draw Caretaker event cards instead of regular event cards once it is activated. Defeat the Caretaker to get to the data rack.
Missions
Level: Experienced
Mission 1: Minerals A'Plenty
This cave system is loaded with gems, but that has also attracted the attention of our rivals. You must fend them off and claim the Morkite for yourself. Scanners show that this area is a growth zone for Brood Nexuses, so prepare to face these monstrosities. Speaking of, a Nemesis has been located not far from your landing zone, as well as several Patrol Bots. Good luck miners, and chop fast! There's a lot of soil to dig through...
Objective: Mine: 9x Morkite. Collect: 4x apoca blooms.
Mission specific event: Nexus Growth. If no Brood Nexuses are in play yet, place one on the space with the !-token. If a creature or Dwarf is on that space, move them to the nearest empty space. Then activate all creatures and Bots.
Creatures shown on the card: Nemesis, Patrol Bot.
Mission 2: Technical Terrors
Our rivals have set up shop in a lucrative territory on Hoxxes IV. They are probing the area, installing their machines everywhere and getting in the way of our own operations. You must move in, collect their data and remove their threat. If you could gain control of the rival turrets, maybe they could help you keep the creatures at bay.
Good luck, gang! Try not to get blown up before you finish the job.
Special rules: Setup. The new data vault cave segment must be part of the map. When you reveal a hidden cave segment, place a power station on its flare symbol instead of a pick up token.
Objective: Locate and hack the 2 power stations. Locate the data vault and defeat the Caretaker. Retrieve the data rack.
Mission specific event: Angered Wildlife. Place a Grunt at every exit, then activate all creatures and Bots.
Creatures shown on the card: Mactera, Grunt, Burst Turret.
Mission 3: Fossils and Foreign Tech
This cave is infested with rival machines, including some pesky Patrol Bots. Your mission is to destroy the Caretaker and obtain the data rack. Keep an eye out, because the Nemesis is prowling nearby. Most minerals appear to be located at the far end of the cave system, near those crescent-shaped caves... We have a feeling it might be worth going there to look for any tools that were left behind. Management also wants you to bring back some alien fossils. Time is money, so quit stalling!
Special rules: Setup. The new data vault cave segment must be part of the map. When you reveal a hidden cave segment, place a power station on its flare symbol instead of a pick up token.
Objective: Locate and hack the 2 power stations. Locate the data vault and defeat the Caretaker. Retrieve the data rack. Collect: 4x alien fossils.
Mission specific event: The Nemesis Appears. Place the Nemesis at exit 1. If the Nemesis is already in play, place a Patrol Bot at exit 2 instead. Then activate all creatures and Bots.
Creatures shown on the card: Patrol Bot, Burst Turret.
Mission 4: Aquarqs and Automatons
We have located a pocket of valuable Aquarqs in a zone infested with annoying rival bots. We need you to get down there and retrieve the Aquarqs, as well as 5 apoca blooms. This means you will have to disturb whatever nasty creatures await in the cave hidden far away from the deployed mine head and the Aquarq crystals.
Special rules: Dwarves will have to carry any minerals and apoca blooms they collect themselves. Place them on your character board. When you move onto the mine head, they will automatically be deposited. Remember that the mine head does not block movement or line of sight, and that you can only carry one Aquarq at a time. Once the minerals have been delivered to the mine head, place them on the shared supply space.
Objective: Mine: 4x Aquarqs. Collect: 5x apoca blooms.
Mission specific event: Roaming rivals. Place a Patrol Bot at every exit, then activate all creatures and Bots.
Creatures shown on the card: Slasher, Spitball Infector, Nemesis.
Level: Veteran
Mission 5: Wrong Place, Wrong Time
Hold on to your overalls, because this is going to be a tough one. We're dropping you deep into rival territory, where you must shut down the Caretaker. However, the caves are swarming with Patrol Bots that will call in the Nemesis if they ever get the upper hand. Keep their numbers down, and secure that data rack!
Minerals are extremely hard to get to on this drop, although small hiddens caves might contain useful tools left by the competition. Good luck!
Special rules: Setup. The new data vault cave segment must be part of the map. When you reveal a hidden cave segment, place a power station on its flare symbol instead of a pick up token.
Objective: Locate and hack the 2 power stations. Locate the data vault and defeat the Caretaker. Retrieve the data rack.
Mission specific event: Bot Patrols. Place a Patrol Bot at exit 1. If there aren't any Patrol Bots available, place a Nemesis at exit 2 instead. Then activate all creatures and Bots.
Creatures shown on the card: Patrol Bot, Burst Turret.
Mission 6: Off to a Great Start
We've struck gold this time, miners! We're sending you down into a treasure chamber, and there isn't a single foe nearby! At least, not yet… Sharpen your pickaxes and get digging. Over and out.
Objective: Mine: 5x Morkite. Collect: 4x apoca blooms. Collect: 3x alien fossils.
Mission specific event: Unwanted Rumblings. Place a Patrol Bot and 3 Grunts at every exit. Then activate all creatures and Bots.
Creatures shown on the card: Brood Nexus.
Mission 7: Cramped Cave
Tighten your belts lads, because this is a cramped cave system. The good news is that minerals can be found everywhere, but the bad news is: so can the rival machines. Take them out, including the Caretaker and the power stations protecting it.
Make good use of your tunneling tools and get back in one piece. Well, the priority is the data rack of course. Rock and Stone!
Special rules: Setup. The new data vault cave segment must be part of the map. When you reveal a hidden cave segment, place a power station on its flare symbol instead of a pick up token.
Objective: Locate and hack the 2 power stations. Locate the data vault and defeat the Caretaker. Retrieve the data rack.
Mission specific event: Bothersome Bots. If no Patrol Bots are in play, place one at exit 1. Then activate all creatures and Bots.
Creatures shown on the card: Burst Turret.
Mission 8: Can Wires Grow Back?
We've located a huge cave system with multiple precious alien eggs. However, it seems like our rivals are keen on claiming these caves for themselves. Amongst your foes is a Nemesis with special repair skills. That's the last thing we needed: a hostile bot mechanic! Get rid of it, and whatever you do, don't let it stop you from getting the eggs!
Objective: Eliminate the Nemesis. Collect: 5x alien egg.
Mission specific event: Bot The Builder. Place a Patrol Bot at exit 2. If the Nemesis is still present, remove all damage from hostile burst turrets and Patrol Bots.
Creatures shown on the card: Nemesis, Patrol Bot, Burst Turret.
Mission 9: Scattered
Your team has been sent to explore the entire cave system and also eliminate a harassing Nemesis. Unfortunately, the drop pod malfunctioned and dropped you off at different spots in the caves! Individually, you must survive long enough to eliminate the Nemesis, explore all the caves and then board the drop pod. It will arrive shortly after you've completed your objectives. Try to move fast: you might start off separated, but you are not alone...
Special rules: Dwarves start at their symbol location on the map. Reveal hidden cave segments with Dwarves in them and populate them. Place Dwarves on the flare symbols instead of pickup tokens. There are only pickup tokens on the 2 flare symbols in the central, dark caves. A new drop pod will arrive at the gray area when all objectives have been met. If you're playing with fewer than 4 Dwarves, don't place anything on the flare tokens of the Dwarves that are not in the game.
Objective: Explore (reveal) all 3 crescent cave segments on the map. Eliminate the Nemesis.
Mission specific event: Glyphid Gifts For All. Increase the swarm threat by 1. If that didn't trigger a swarm, evenly distribute 1 Grunt per Dwarf between the exits instead.
Creatures shown on the card: Nemesis.
Mission 10: We're Not Doing That
We've detected a largely unknown cave system containing lots of Morkite. Scanners show there's a big cave as well, but we can't get a good readout of what's in it. You'll have to go and see for yourself. Nitra is scarce, so we tried to send down a supply pod for you. However, it kind of exploded above ground, spreading its contents all over the unknown cave system. It's the thought that counts, right?
Special rules: When the hidden cave segments are revealed, do not place any pickup tokens on them. Instead, place 1 of each ammo type on each of the 5 flare symbols.
Objective: Mine: 6x Morkite.
Mission specific event: Mechanical Patrols. Place a Patrol Bot at exit 1. Then activate all creatures and Bots.
Creatures shown on the card: Patrol Bot.
Mission 11: Clean State
This cave system is getting overwhelmed with rival entities and we can't keep repelling them. This doesn't mean we're bailing out and leaving the valuables behind though. Management wants you to strip every single mineral from the walls of these caves and get out of there before it all turns sour. Get in, mine like crazy, and get home safely. Also, don't leave any alien fossils behind!
Special rules: The drop pod will return to retrieve the team only when all minerals inside the walls have been collected. It's okay for you to spend some of them, just don't leave any behind for our competitors. If any more minerals are revealed (e.g., from stalagmites) after the drop pod has returned, you must collect those, too.
Objective: Mine all minerals from the caves. Collect: 4x alien fossils.
Mission specific event: Escalation. For each mission-specific event card drawn earlier, place 1 Patrol Bot by the exit with the fewest Patrol Bots (if tied, you choose). Then activate all creatures and Bots. Set this card to the side so you can keep track of the total number of mission-specific event cards in play.
Creatures shown on the card: Burst Turret.
Mission 12: Hit the Ground Running
Before we can claim victory in the fight against the rebel incursion, there's one final data rack to track down and retrieve. Watch out, because the initial caves contain more tunnel exits than usual. Keep in mind that all of the minerals seem to be located at the far end of the cave system. We have faith in you, miners. Don't let us down!
Special rules: Setup. The new data vault cave segment must be part of the map. When you reveal a hidden cave segment, place a power station on its flare symbol instead of a pick up token.
Objective: Locate and hack the 2 power stations. Locate the data vault and defeat the Caretaker. Retrieve the data rack. Collect: 3x apoca blooms.
Mission specific event: Grunt Upon Grunt. Add a Grunt to every exit. Then activate all creatures and Bots.
Creatures shown on the card: Patrol Bot, Nemesis, Brood Nexus.