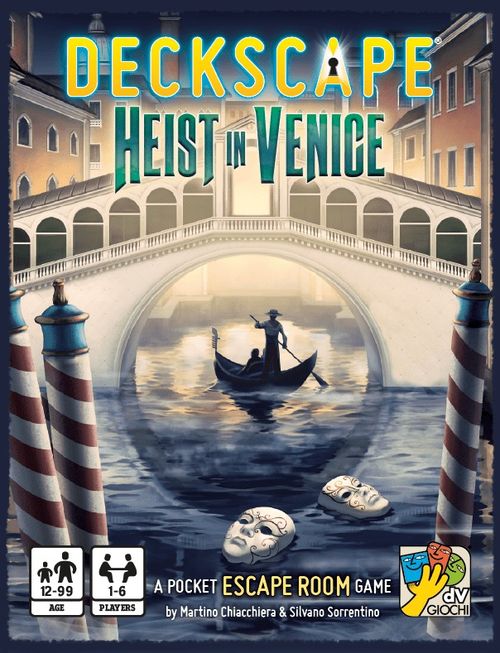
Deckscape: Heist in Venice
Deckscape: Heist in Venice Rulebook
Table of Contents
Table of Contents
Game Info
- Designers: Martino Chiacchiera and Silvano Sorrentino
- Illustrations: Alberto Bontempi
- Publisher: dV Giochi (DV Games)
- Players: 1–6 (can be played alone or with a group of friends)
- Age: 12+
- Playing time: about 30–90 minutes
- Contents: 60 large cards, 1 secret map
The Deckscape System
Deckscape is an "Escape Room" game in pocket format. It can be played with a group of friends or even alone. In this kind of game, a group of people are "trapped" inside a room and they must solve the puzzles and mysteries to escape within the time limit. No foreknowledge is required to solve the puzzles: Anyone can do this!
This game is inspired by the real Escape Rooms. The players are "trapped" inside a room and cooperate to escape within the time limit. In order to succeed, the players have to solve puzzles, make smart use of the items they find, and understand the plot of the story.
Setup
CAUTION! Do not look through the deck nor shuffle the cards. Each card shows a number in the upper left corner, so the deck stays in order from card 1 onward.
Before playing, take paper, pencil, and a clock to check the time. Once you get everything, flip the first card. Check the time on your clock, mark it, and start playing!
Solving a Puzzle
Always follow the text of the card on top of the deck, and proceed to the next card only when instructed to or you have solved the puzzle on top.
In order to solve a puzzle:
- Carefully read the question.
- Discuss to find a common answer.
- Flip the card to check the solution.
Remember that in the end you'll win or lose all together.
Scoresheet
Each time you make an error, mark an X on the scoresheet's red line.
End of the Game
When you reach the final card, count how many minutes it took you to complete the game, then add 2 minutes for each X marked on the scoresheet. Your total determines your score against the time bands printed on the game's own final card — those thresholds are part of Heist in Venice's own 60-card deck and are not reproduced here, since revealing them would spoil the ending along with the puzzles that lead to it.
Worked Example: dV Giochi's Official Demo Round ("The Toolbox")
This is the publisher's own print-and-play sample mystery, distributed as the official demo for the whole Deckscape line (and linked directly from Heist in Venice's own product page). It is a different, generic scenario — not part of the Venice casino heist — included here only to show exactly how a round of any Deckscape game plays out, front and back, card by card.
Card 1 (front): You are trapped inside a small room; there is a locked door but you don't know the code to unlock it. Looking around you can see a solid metal toolbox, an electric panel and a little remote control. How do you escape from here?
Card 2 — The toolbox (front): This toolbox could contain something useful. In order to open it you must insert the correct 3-digit code. (The card shows a dial with the digits 6 5 4 / 3 2 1 arranged around screws marked with math symbols.)
Card 2 (back) — Solution: The correct code is 234. The screws are math symbols and you can calculate the result of each column: 6/3=2, 5-2=3, 4×1=4.
Card 1 (back): Take the next nine cards without looking at them and form 3 decks sorted by colors. Always follow the text of the card on top of each deck, and proceed to the next card only when instructed to or you have solved the puzzle on top. You can try to solve the puzzles on top of the various decks simultaneously, or focus all together on a single puzzle.
Card 3 — Inside the toolbox (front): You open the lid of the toolbox. There is a set of keys; you put them in your pocket, they could be useful. Flip this card to look at the set of keys. Keep it—it may be useful! Proceed to the next card.
Card 4 — There is something more! (front): Inside the safe there is also a plastic badge; it shows a weird grid of letters. Flip this card to look at the badge. Keep it—it may be useful! Now focus on the other cards.
Card 4 (back) — Badge: A card showing an EXIT banner over a 4×4 letter grid: LOVE / XYZU / CHIS / TRAP.
Card 3 (back) — Set of keys: A card showing six keys of different shapes on a ring: a hexagonal key, a round key, a triangular-loop key, a square key, a Celtic-knot key, and a plain round key.
Card 5 — The panel with a maze (front): There is something hidden behind the panel. You have only one chance to open it correctly: push the number suggested by the panel. (The card shows a maze etched into a circuit board above a numeric keypad.)
Card 5 (back) — Solution: The correct number is 2. Following the shortest path from the entrance to the exit of the maze, you create a "2". If your answer is wrong, mark an X. Proceed to the next card.
Card 6 — A recess behind the panel (front): A poster on the wall suggests something. If you have it, find the correct key to open the suitcase!
Card 6 (back) — Solution: You need the set of keys. The correct key is the one with a square shape. The poster suggests the correct key is equidistant from the two keys indicated. If your answer is wrong, mark an X. If you haven't found the set of keys yet, mark a second X and flip this card. If you do have it, proceed to the next card.
Card 7 — A piece of paper (front): What? The suitcase is empty! You double-check and find a false bottom that contains a piece of paper showing weird triangles. Flip this card to look at the piece of paper. Keep it—it may be useful! Now focus on the other cards.
Card 8 — A weird keyboard (front): This door is locked by a colored keyboard. If you have the code, push the 4 buttons to open it! (The card shows a 4×4 grid of colored buttons: green, red, black and blue squares.)
Card 8 (back) — Solution: Push the 4 green buttons from the top to the bottom. As suggested by the badge, they compose the word "EXIT" (found by reading the highlighted letters in the LOVE/XYZU/CHIS/TRAP grid). If your answer is wrong, mark an X. If you haven't found the badge yet, mark a second X and flip this card. If you do have it, proceed to the next card.
Card 7 (back) — Piece of paper: A grid of scattered black and orange triangles pointing in different directions.
Card 9 — The attendant (front): A very polite but resolved attendant stops you. Which rope should you pull in order to open the curtains and escape from here? (The card shows four curtain-pull ropes marked with a diamond, a square, a diamond, and a diamond.)
Card 9 (back) — Solution: The correct rope is the third one. The triangles on the curtains suggest you should match the triangles on the badge and the piece of paper. When all the triangles match, you can see the shape shown on the third rope. If your answer is wrong, mark an X. If you haven't found the piece of paper yet, mark a second X and flip this card. If you do have it, proceed to the next card.
Card 10 — Ready to go! (front): The exit is right here, you can already see the light outside. Make a choice: do you want to leave alone or take the attendant with you?
Card 10 (back) — Solution: The attendant's name tag contains the hidden message "Help"! Apparently, he is sick of this place! If you decided to take the attendant with you, remove one X from the scoresheet. Now count how many minutes it took you to complete the game. Add 2 minutes for each X marked on the scoresheet. Depending on the total minutes, your score is:
| Total time | Result |
|---|---|
| 0–10 minutes | Pure genius! Well done! |
| 11–15 minutes | Mission complete! |
| 16 minutes or more | Better late than never! |
(These bands apply to this 10-card demo only; Heist in Venice's full 60-card mystery has its own scoring bands on its own final card — see "End of the Game" above.)