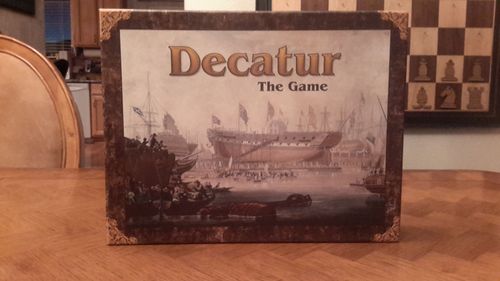
Decatur
Decatur Rulebook
Table of Contents
Table of Contents
Board, cards and pieces
The game is played on a map of the Eastern Hemisphere. Circled land areas (such as Congo Basin or New Guinea) are locations. Locations directly connected via dashed line are adjacent.
Locations are grouped into the following continental regions: Europe, Middle Asia, East Asia, Africa, and Oceania.
Locations are also identified with a commonwealth: British Commonwealth, Dominion of the Crescent, Independent, Orient, and Russian Commonwealth.
The board contains portions of the Atlantic, Indian, and Pacific Oceans, separated by blue lines. (The Atlantic is not adjacent to the Pacific.)
A location is coastal on an ocean if it is next to the ocean and an imaginary path can be traced to the name of the ocean without crossing a dashed line. Therefore Russia is coastal on the Atlantic Ocean; Arabia is not. Egypt, South Africa, and Indo-China are coastal on two oceans. The Urals, Siberia, and Yakutia are not coastal. Each Australian location is coastal on its nearest ocean only.
There are two decks of cards: green prosperity cards that correspond to the continental regions, and purple influence cards that correspond to the commonwealths.
Each player is assigned a set of pieces comprised of 42 factors, 6 merchant fleets, and 6 ports.
Factors represent not only individual persons, but also the organizations and resources they oversee.
A pawn, two dice and various markers are included. They are described in passing.
Set up
Place the pawn on the "I" space of the Interval track.
Place the clock marker face down on the "1" space of the circular round track.
Obtain a coffee cup (not included) to serve as the cup of reckoning. Put one of each player's factors in the cup. Draw one out to determine the first player. Do not return the factor to the cup. Place the cup in front of the first player.
Shuffle each deck of cards. Deal one influence card and two prosperity cards face down to each player. The players may look at their cards. Also deal one prosperity card face up for each player. For clarity place the face up cards next to the board, next to their respective continental regions. Prosperity cards are informational only; they are not used actively during game play.
The board begins empty of player pieces.
Game play
The entire game consists of four intervals. Each interval is made up of several rounds. A round consists of every player taking one turn. Play passes to the left.
At the end of each round, the first player must advance the clock marker before beginning his next turn. If he fails to do so, another player may call out "Decatur." The calling player may exact a penalty by removing one of the offending player's factors from the board, provided he does not lose control of a location.
When the clock marker is advanced to the clock space, flip it face up. When the marker is advanced to one of the shaded spaces, if it is still face up, roll two dice. (The numbers printed on the shaded spaces of the round track are part of the board art and are not transcribed in the rules text.) If the total on the dice is a multiple of the number indicated on the space, the interval immediately ends (see "Interval end: Economic upheaval"). In which case flip the clock marker face down again. If the total is not a multiple, continue playing – the interval does not end yet.
Player turn
Factors and ports will be placed in locations throughout the game. A location may contain only one player's pieces at any one time. The presence of a factor or a port indicates control by that player. (The location is "friendly" to him and "hostile" to others).
Important: At no time may a player have more than seven factors in any one location.
A player may perform one of the seven actions below during his turn. As a courtesy, announce the action first.
-
Draw an influence card – (Replenish the deck with discards if necessary.) Keep these cards secretly in a hand of cards. After drawing, if you have more than three cards in your hand, select and place excess cards "in play" face up in front of you. Likewise, if you have more than three cards in play, select and discard excess cards. Otherwise, do not discard influence cards unless specifically directed by these rules.
-
Exchange influence cards – Reveal and discard any number of the same kind of influence card from your hand and/or in play. Then draw replacements into your hand. Then resolve any excess cards as per above.
-
Restructure – This is how pieces are initially placed onto the board. Remove all your factors from the board. Then place seven factors in any one empty location or friendly (port) location. Ports and fleets are unaffected. You may do this at most once per interval.
-
Expand – Choose up to two locations you currently control. Add one factor to each.
-
Build a port – Choose a friendly coastal location. There is a cost in factors, equal to the number of ports you already have on the board, plus two. (The first port costs two.) Remove the required factors from the location and replace with the port. Place a corresponding fleet in the nearby ocean. In the case of Egypt, South Africa and Indo-China, choose which ocean. A location may contain at most one port. A player may have at most two fleets per ocean.
-
Consolidate – Choose a friendly target location. Move some or all factors from other friendly locations to this location. The other locations must be adjacent to the target location and/or coastal on the same ocean. (Fleets are not required for ocean movement.)
Hostile takeover attempt
The initiator of hostilities is the contender. The targeted player is the defender. Once the contender declares the venture, the takeover attempt must be resolved.
The strength of each side is determined as follows. Each committed factor (explained below) is worth one point. If the target location is coastal, each fleet in a nearby ocean is worth one point.
Each influence card in play that matches the commonwealth of the target location is worth two points. A defending port is worth two points. If the contender is crossing an ocean (i.e., the locations are not adjacent), the defender receives a logistical advantage worth two points.
To succeed, the contender must have a higher cumulative strength than the defender. The defender needs only a tie.
Beginning with the contender, each player bids to show he has the necessary strength to prevail. The contender may bid by committing factors from the originating location and/or by playing influence cards. (Commit factors by physically separating them a bit.) The defender may only bid by playing influence cards; his defending factors are committed from the outset. Bidding goes back and forth until one player concedes.
Example 1: A player ventures from India to Indo-China. He has five factors in the originating location, with one fleet in the Indian Ocean and one in the Pacific. His committed strength (derived solely from the fleets) is 2. The defender has two factors and one port in the target location, with one fleet in the Pacific and an Orient card already in play. His committed strength is 7. Therefore the contender begins the bidding by playing an Orient card and committing four factors to raise his strength to 8.
Example 2: A player ventures from Persia to Iceland. He has three factors in the originating location, with two fleets in the Atlantic and two Independent cards already in play. His committed strength (derived from the fleets and cards) is 6. The defender has one factor in the target location. His committed strength (including logistical advantage) is 3. Therefore the contender begins the bidding by standing pat.
Players must always stay within the limit of three influence cards in play (see "Player turn: Draw an influence card"). Discard cards when necessary.
Resolution of hostilities
When bidding is concluded and the outcome has been determined, resolve attrition. The contender rolls two dice and consults the Attrition table on the player aid card. Neither, one, or both players remove one factor from his committed factors. If he has none, he suffers no attrition.
Note: the Attrition table is printed on the player aid card, which is not part of the rulebook PDF this text was transcribed from, so its values are not reproduced here.
Finally, move factors. If the takeover failed, the contender leaves his factors in the originating location.
If the takeover succeeded, the defender relocates any remaining factors to another single location. This location must be an adjacent location that is empty or friendly. Or it may be a friendly coastal location on the same ocean. Remove any factors that cannot relocate, along with any defending port and its associated fleet.
There is a special case where the defender has ports in Egypt and South Africa, with corresponding fleets in both the Atlantic and Indian Oceans. If he must remove one of the ports, he may remove either fleet.
Now the contender moves all his committed factors, if any remain, into the vacated location. He may elect to move more if desired.
Reminder: At no time may a player have more than seven factors in any one location.
Interval end: Economic upheaval
When the interval ends, flip all dealt prosperity cards face up and combine with those already face up. Rank each continental region by most to least number of cards. Resolve ties by consulting the Continental Precedence list on the player aid card. Precedence is left-to-right (Europe first) during odd intervals, and right-to-left (East Asia first) during even intervals.
Note: the Continental Precedence list is printed on the player aid card, which is not part of the rulebook PDF this text was transcribed from, so the list itself is not reproduced here.
Adjust the number of factors in each controlled location according to the regional ranking. Adjust locations in the highest region to have four factors; the next highest, three; and so on to zero. Sometimes factors will be added to a location; other times they will be removed. Ports may help determine control, but they are otherwise ignored.
If a player has duplicate influence cards in play, discard the excess. For example, if he has three British Commonwealth cards in play, discard two of them.
If more intervals remain, return all prosperity cards to the deck, shuffle well, and deal a new set. Draw another factor from the cup of reckoning to determine a new first player. (Replenish the cup if empty.) As usual, place the cup in front of him. Advance the interval pawn.
Make sure the clock marker is face down.
Start the next interval from the current space on the round track.
End of game: Scoring
When all four intervals have been completed, the player with the most factors on the board wins the game. In the event of a tie, use the following criteria in order until the tie is broken: 1.) most influence cards, 2.) most influence cards in hand, 3.) most ports, 4.) control of the first location by reverse alphabetical order (Yakutia, West Europe, West China, West Australia, West Africa, etc.).
Optional markers
- Influence/Logistics markers – May be used during a hostile takeover attempt to indicate net influence or logistical advantage.
- Continental precedence markers – May be placed throughout an interval to indicate precedence.
- Continental adjustment markers – May be placed at the end of an interval to indicate factor adjustment.
Tips
At the beginning of each interval, you will know approximately half the prosperity cards. Observe the other players' actions to deduce the remainder.
For clarity, group all fleets in an ocean together.
When introducing the game to new players, defer explanation of the Exchange and Consolidate actions until the second interval.
For a short game, play three intervals.