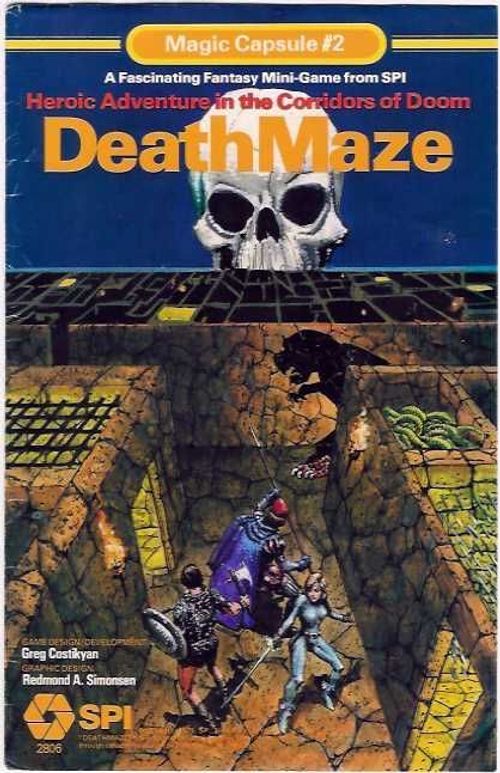
DeathMaze: Heroic Adventure in the Corridors of Doom
DeathMaze: Heroic Adventure in the Corridors of Doom Rulebook
Table of Contents
Table of Contents
1.0 Introduction
Deathmaze is a game for one to six Players in which each Player controls the actions of one or more adventurers exploring the depths of a horror-filled catacomb in pursuit of glory and gold. Like fantasy role-playing games, Deathmaze deals with personal heroic fantasy; unlike such games, Deathmaze requires no gamesmaster, but pits the players' skills against an un-gamemastered gamesystem.
2.0 Game Equipment
2.1 Components
Deathmaze consists of a rules booklet with charts and two identical sets of 100 counters each. If no die is available, Players may use the randomizer chits included in the countersheet. If a die-roll is called for, draw one of these chits at random to give a number from 1 to 6.
2.11 Sample Enhanced Monster Unit
The Enhanced edition of the game removes the need for Tables 7.5 and 8.8 by (A) displaying all relevant information on the relevant information in Table 2.12 in this rulebook. See 12.3 Monster chits themselves as shown below, and (B) listing all for Special Attacks. (Transcribed as printed; the source sentence is garbled in the original.)
Monster unit key:
- # = Combat Bonus
- Letter(s) = Weapon(s)
- * = Monster has Special Attack
- Monster Image, Monster Name
- Negotiation Value
- Magic Resistance
- Treasure Type(s)
- Number of dice rolled to determine Wound Points
- Number added to (or subtracted from) die-roll
2.12 Summary of Units (incl. Tables 7.5 and 8.8)
Hero (x2 each): Wound Points 1; Magic Resistance 1.
Thief (x2 each): Wound Points 6; Magic Resistance 1; Detrap 1.
Wizard (x2 each): Wound Points 4; Magic Resistance 2; Spell 1. Wizards can only wield Dagger(s) and Throwing Dagger(s).
Party Counter (x2).
Monster characteristics:
| Monster | Combat Bonus (weapon letter) | Wound Code | Negotiation | Magic Resist. | Treasure | Specials (12.3) & Weapons | Count |
|---|---|---|---|---|---|---|---|
| Alligator | 5 | 3+0 | 4 | 1 | E | x2 | |
| Cronk | 4 | 1+0 | 9 | 1 | H | * Stench | x4 |
| Evil Hero | S (1D6 Sword) | 1+6 | 5 | 2 | J/C | W: 1D6 Sword (see 8.9) |
The Combat Bonus and Wound Code columns are read from the printed Enhanced Monster Chits (the chit's top-left and top-right figures), since the source's summary table omits them.
2.2 Segment Chits
The Room and Corridor chits are used to build the Deathmaze in the course of play; no game-map is included with the game. Instead, Players lay Room and Corridor chits adjacent to each other during play, like dominoes, to show the configuration of the Deathmaze. Each chit, and each area adjacent to previously-placed chits where a chit may be placed, is called a Segment of the Deathmaze.
Room Cup:
- Room x24
- Room x8
- Room x14
- Room x8
- Room x4
- Room with Statue x2
- Room with Statue x2
- Room with Trapdoor x2
- Room with Trapdoor x2
- Room with Fountain x2
- Room with Fountain x2
- Room with Fountain x2
- Corridor Chit x6
- Corridor Chit x4
- Corridor Chit x2
- Corridor Chit x2
Corridor Cup:
- Corridor x2
- Corridor x6
- Corridor x4
- Corridor x2
- Corridor x2
- Corridor x10
- Corridor x2
2.3 Dice Codes
Throughout these rules, a jargon which has been developed in the fantasy-gaming hobby is used to describe the number and type of dice to be rolled at certain points during the game. These are Dice Codes; a dice code is in the form of a number followed by the letter D followed by another number, plus or minus or times a third number. The first number dictates the number of dice to be rolled; the number after D determines whether six-sided or three-sided dice are to be rolled (when rolling three-sided dice, roll six-sided dice and divide the resulting number by two, rounding fractions up). The third number is a number added to, subtracted from, or multiplied by the number rolled.
Example: 3D6x5 means: roll three six-sided (i.e., regular) dice, and multiply the resulting number by five. 1D3+2 means: roll a six-sided die, divide the number rolled by two (rounding up) to yield a number between 1 and 3, and add two to the resulting number.
3.0 General Course of Play
General Rule: In the Deathmaze, each Player takes the part of between one and six adventurers. If the game is played solitaire, the Player may control up to six adventurers; if more Players play, each controls one or more adventurers as long as there are no more than six (total) adventurers, and as long as all Players have an equal number of adventurers under their control.
The first thing a Player must do before beginning play is to determine what their adventurers are like. Each adventurer is either a Thief, a Hero, or (in the advanced game) a Wizard.
3.1 Creating a Character
On the Chart Sheet provided with the game is a Character Record; one such Record must be filled out for each adventurer who is to enter the Deathmaze. Only one Record is provided with the game: you are free to photocopy it, or to copy Records on pieces of scrap paper.
The first item of information that must be entered for each adventurer is their Class: Thief or Hero. (Wizards may join the party in an Advanced game: see 11.0 for details regarding Wizard creation.) Next, enter each adventurer's Name (names are chosen by a Player).
Under Wound Points enter 8 for Heroes, 6 for Thieves. Enter 1 under Magic Resistance for both Heroes and Thieves. Two weapons must be entered for each adventurer; the available weapons are listed on the Combat Results Table (see Chart Sheet). Enter weapons under Weapons.
If the adventurer is a Thief, enter 1 Detrap under Skills/Spells.
The adventurers are now nearly complete; but before play begins, each adventurer acquires a little experience in the outside world. For each adventurer, either:
(a) increase their Wound Points by one; or (b) give them skill with one weapon (enter +1 and the name of the weapon, for example +1 Sword) under Weapon Skill; or (c) for Thieves, increase their Detrap skill by one (replace 1 Detrap with 2 Detrap).
3.2 How Many Adventurers Should Be Created?
If Deathmaze is played solitaire, the Player may create as many adventurers as they like, to a maximum of six. (Four adventurers is about the minimum number that have a chance of success.) Two Players should each control three adventurers; three Players, two each; four to six Players, one each.
4.0 Winning the Game
General Rule: A Player (in either a solitaire or multi-player game) is considered to win the game if:
(a) at least half of their adventurers make it out of the Deathmaze alive,
and
(b) all of the adventurers who make it out have gained at least 75 Experience Points and 100 Bezants (the unit of currency in Deathmaze) or an equivalent value in gems during their stay in Deathmaze.
Thus, in a multi-player game, more than one Player can win. Deathmaze is a cooperative, not competitive, game.
The methods by which adventurers acquire Experience and Bezants will be described later in the rules.
In order to exit the Deathmaze (and thus end the game), a Player must get their adventurers back to the Corridor chit from which they originally entered the Deathmaze (see Case 5.13).
5.0 Exploring the Deathmaze
5.1 Setting Up for Play
5.11 Before the adventurers enter the Deathmaze, a Player must organize them into a Marching Order. Assign one Hero and Thief counter (and Wizard counters, in the Advanced Game) to each adventurer. Then, arrange these counters in a marching order on a flat surface as described below.
5.12 A marching order consists of a number of rows of adventurers. Adventurers in the first row will come into direct contact with monsters, and will have to use melee weapons to fight them; adventurers in the second row will be able to use missile weapons (and, in the advanced game, cast spells); adventurers in the third and subsequent rows will not be able to engage in combat. No more than three adventurers may be present in each row. At least two adventurers must be present in the first row (unless there is only one adventurer in the party). Players may by mutual agreement organize the adventurers into any order within these limitations (i.e., two or three in the first row, but no more than three in other rows).
5.13 After a marching order has been determined, punch out the Corridor and Room chits. Place the Corridor chits in a cup or other receptacle, and the Room chits in a second receptacle. Draw one Corridor chit at random, and place it facing in any direction on the table. Take the Party marker and place it on top of the Corridor chit; this corridor is the first part of the Deathmaze that the adventurers have entered.
5.14 Note: Except when the party is engaged in combat or negotiations, a Player may rearrange the party's marching order in any way that suits their fancy, in accordance with 5.12.
5.2 Moving Through the Deathmaze
5.21 In Deathmaze, there is no playing board or game-map. Instead, a Player builds up a map of the maze in the course of play by laying Corridor and Room chits adjacent to each other. The Party marker is always placed on top of one of the chits to mark the location of the adventurers' party.
5.22 Each time the party leaves a Corridor Segment through one of the two open sides of the Corridor chit (i.e., not through a door), a Player draws a Corridor chit from the appropriate cup and places it adjacent to the Corridor chit the party has just left. (Obviously, if a chit has previously been drawn and placed for the adjacent Corridor Segment, no new chit is drawn.)
5.23 Each time the party leaves any Segment (Corridor or Room) through a door, a Player draws a Room chit from the Room cup and places it adjacent to the door the party just went through. Some of the chits in the Room cup are marked Corridor, with a corridor configuration; if one of these chits is drawn, throw it back into the Room cup, draw a chit from the Corridor cup, and place it instead of a Room chit. (If the Corridor cup is empty, chits marked Corridor may be used instead.) If then a Corridor chit with no doors should be drawn, this corridor chit may be placed with one of its open ends abutting the door the party has exited.
Note: If a chit has previously been drawn for a Segment the party wishes to enter, no new chit is drawn. If the party exits a door into an area for which no chit has been drawn and that new area abuts on an open, previously drawn Corridor segment, draw a Corridor chit (despite the fact that the party is moving through a door).
5.24 Often, a Player will draw a chit which can be placed adjacent to the previous chit in more than one configuration, that is, facing in two or more different directions. In this case, they may place the chit to face in any valid direction.
5.25 A chit must be placed so that any adjacent doors on previously placed chits abut doors on the new chit and adjacent blank walls must abut blank walls. When a Corridor chit is placed, it must be placed so that any open ends of adjacent Corridor chits abut open ends of the placed chit. Sometimes, a drawn chit does not complement the adjacent chits (for instance, when three doors are required and a drawn chit has only two). In such a case, throw the drawn chit back into the appropriate cup and draw another. Keep on drawing until a chit that fits is drawn. If there are no chits that fit the circumstances (this will happen very rarely), use a chit that matches as many of the adjacent chits as possible, and assume that chit-sides which do not match the chit-side of an adjacent chit are impassable, i.e., the party may not cross such a chit-side.
Example: In the above case, if the party were to enter the empty center (?) segment from either door, they would draw a Room chit for the Segment (since they would be entering through a door). If they drew a chit with four doors, one with two adjacent doors, or one with one door, they would have to throw the chit back since none of these chits can be placed so that doors abut the left and right segments but no door abuts on the upper segment. Only a chit with two opposite doors, or one with three doors (the third door would be placed facing downwards) would fit the circumstances.
5.26 Each time the party moves into a new Corridor or Room Segment, a Player must: (a) determine whether the party moved through a Trapped door (assuming they moved through a door); and (b) whether there are any monsters in the new Corridor or Room Segment. If the party moved through a door, roll 1D6. If a 1 is rolled, the door was Trapped; see the Trap Rules, 10.0. Traps must be resolved immediately.
5.27 After any Traps have been dealt with, a Player determines whether there are any monsters. If the segment is a Corridor, or a Room that the party has previously visited, roll 1D6. On a roll of 1, the segment contains wandering monsters (see 7.3). If the segment is a Room that has not been visited previously, roll 1D6. On a roll of 1, 2, or 3, there is a Room monster (see 7.4). For more information see Monsters & Negotiations, 7.0.
5.28 After Traps, monsters, unusual features (see 6.0), and treasure have been dealt with by the party, the party may leave its Segment through a door or open corridor and enter an adjacent Segment. If there is no chit for the adjacent Segment, draw a chit as outlined above. If a chit has already been drawn for the Segment, simply move the party marker on top of the chit. There will be no Traps on doors abutting on previously-explored Segments, but wandering monsters may exist in such Segments.
5.29 In the unlikely event that all but one potential exit from the explored area of the Deathmaze have been closed off (for instance, only one last door or open corridor out of the Deathmaze remains and all other doors and open corridors end in or open into enclosed areas) and a chit drawn for the last door or open corridor results in a dead end, throw the drawn chit back and draw another. Continue to draw chits until a chit is drawn that will not result in a dead-end.
5.3 Exploration Table
Roll 1D6 when:
| Roll 1D6 when: | On roll of: | Encounter: |
|---|---|---|
| Entering a new Door | 1 | Trap (10.3) |
| Revisiting any Room, or entering any Corridor | 1 | Wandering Monster (7.3) |
| Moving into new Room | 1, 2, or 3 | Room Monster (7.4) |
| Opening Treasure of Type I or J | 1, 2, or 3 | Trap (10.3) |
6.0 Unusual Features
General Rule: Some Rooms contain unusual features, either fountains, statues, or trap doors. A Room chit on which the symbol for a fountain, statue, or trap door is found contains that unusual feature. After a party has dealt with any monsters that may be in a Room, the Player may have the party investigate any unusual feature there. The Player must delegate one adventurer, preferably a Thief, to investigate the feature. If they choose to ignore the unusual feature, it has no effect.
6.1 Fountains
6.11 If a Player investigates a fountain, roll on the Fountain Table (6.15).
6.12 If the result on the Fountain Table is Poison, the water from the fountain is poisonous, and the adventurer who was delegated to investigate the fountain immediately suffers 1D3 Wounds.
6.13 If the result is Potion, the water from the fountain is a magical potion. Refer to the Treasure rules (9.0), specifically the Potion column of the Combined Magic Item table, 9E, to determine what effect the potion has. The party may take one dose of the potion with them. Additionally, the adventurer delegated to investigate the fountain immediately undergoes the effects of the potion.
6.14 If the result is Alcohol, the adventurer delegated to investigate the fountain is considered drunk. They will have a combat bonus (penalty) of -2 for the remainder of the game (see Combat, 8.0).
6.15 Fountain Table
| Roll | Result |
|---|---|
| 1 | Poison |
| 2-4 | Potion |
| 5 | Alcohol |
| 6 | No Effect |
6.2 Statues
6.21 If the Player(s) investigate a statue, roll on the Statue Table (6.25).
6.22 If the result is Becomes Gargoyle, the statue turns into a gargoyle. Players must negotiate or fight with it. The gargoyle may drop treasure.
6.23 If the result is Potion, a potion is hidden in the base of the statue. Roll on Combined Magic Item table 9E to determine the potion's effects.
6.24 If the result is Gems, the statue's two eyes are gems which may be looted. Roll once on Gems Table 9.82 to determine both gems' value.
6.25 Statue Table
| Roll | Result |
|---|---|
| 1-2 | Becomes Gargoyle |
| 3 | Hidden Potion |
| 4-5 | Gems |
| 6 | No Effect |
6.3 Trap Doors
6.31 If a Player investigates a trap door, roll on Table 6.35.
6.32 If the result is Room, the trap door leads to another Room immediately below the Room in which the door is situated. This Room automatically has no doors or unusual features, and no chit is drawn; roll to see if it contains monsters (if so, the monsters may have treasure).
6.33 If the result is Type J Treasure, the trap door hides a Type J Treasure. See the Treasure rules, 9.0.
6.34 If the result is Trap, the door hides a trap. See the Trap rules in 10.0.
6.35 Trap Door Table
| Roll | Result |
|---|---|
| 1-2 | Room Below |
| 3 | Type J Treasure |
| 4-5 | Trap |
| 6 | No Effect |
7.0 Monsters & Negotiation
Case:
7.1 Monster Tables
7.11 If the party discovers monsters in a Corridor Segment or a Room that had been previously explored by the party, a Player must roll two dice and refer to the Wandering Monster Table (see 7.3). Cross-reference the two die rolls on the Table as directed to yield a single result. This result will either be in the form of a monster chit (one monster of the indicated type is present), or a chit prefaced by TWOx in which case two monsters are present, or a monster chit preceded by a die code. In this last case, roll the indicated number and type of dice to determine how many monsters of the indicated type are present.
7.12 If monsters are discovered in a previously unexplored Room Segment, roll two dice, refer to the Room Monster Table (see 7.4) and cross-reference the die rolls as indicated. Results will be in the same form as results from the Wandering Monster Table (7.11 above).
7.13 After determining the type and number of monsters which are present in the Corridor or Room, refer to the Monster Characteristics Chart (see 7.5, 2.12, or the Enhanced Monster Chit) and find the monster's Negotiation value. A Player may now choose to have the party negotiate with the monsters, or to attack the monsters. If the party negotiates with the monsters, refer to 7.2. If the negotiation fully fails the party will be forced to engage in combat with the monsters anyway. Even if they successfully negotiate, the party may choose to attack the monsters after negotiation.
7.14 If the party engages in combat with the monsters (whether as the result of a decision to do so, or if forced to do so after failed negotiation) a Player should find counters in the countermix with the appropriate monster-type printed on them. As many counters should be taken as monsters as are present. Each monster counter has a Combat Bonus and a Wound Die Code printed on it (see counter examples, 2.11). The Wound Die Codes do not follow the normal D format for die roll codes; instead they are in the form of a number plus or minus a second number. Roll as many D6's as the first number, and then subtract or add the second number to the number rolled. (If the first number is 1/2, roll 1D3 instead.) The resulting number is the number of Wound Points possessed by the monster. Note this number on a sheet of scrap paper. Follow this procedure for each of the individual monsters in the Corridor or Room, and note each monster's Wound Points. When finished, proceed to combat using the rules outlined in Combat, 8.0.
7.15 If a Player discovers an Evil Wizard in the Basic Game, treat the Room or Corridor as empty of monsters. Evil Wizards exist only in the Advanced Game of Deathmaze. Similarly, Medusae, Hell Hounds, Cronks, and Trolls have special powers in the Advanced Game which they lack in the Basic Game. Ignore the Special Abilities column of the Monster Characteristics Chart (added to 2.12 above) in the Basic Game.
7.2 Negotiation
7.21 If a Player chooses to negotiate with a monster, roll 2D6 and subtract the monster's Negotiation Value (as determined in 7.13) from the die-roll. Refer to the Negotiation Table (see 7.6) and find the entry which corresponds to the modified roll.
7.22 If the entry is Failure, the monsters immediately attack the party, and the Player proceeds to combat.
7.23 If the entry is Agreement, the monster or monsters will leave the party alone unless attacked. The party may investigate any Unusual Features and exit the room via any path; they will not be bothered. The characters may still attack the monster(s) should their Player so desire.
7.24 If the entry is Cow and the monster(s) are an Evil Hero, Wizard, Thief, Orcs or Goblins, they will offer one-quarter of their Bezants to the party in order to avoid being killed. Determine the monster's Treasure according to the rules for such (see 9.0). Other monsters treat Cow results as Agreement results. Again, the party may always attack the monsters, even after obtaining a Cow result. However, any Bezants taken during negotiation must be subtracted from the Treasure, if the party defeats the monsters in combat.
7.3 Wandering Monster Table
Roll 2D6 (2nd die down the side, 1st die across the top). Entries prefixed by TWOx place two monsters; entries prefixed by 1D3x or 1D6x place the number of monsters rolled on that die code.
| 2nd Die \ 1st Die | 1 | 2 | 3 | 4 | 5 | 6 |
|---|---|---|---|---|---|---|
| 1-2 | Evil Hero | Evil Wizard | Evil Thief | Orc | 1D3x Orc | Ogre |
| 3-4 | TWOx Ogre | Werewolf | Hellhound | Skeleton | 1D3x Skeleton | Giant Ant |
| 5-6 | Giant Spider | 1D3x Goblin | Goblin | Troll | Giant Ant | Hellhound |
7.4 Room Monster Table
Roll 2D6 (1st die down the side, 2nd die across the top). Entries prefixed by 1D3x or 1D6x place the number of monsters rolled on that die code.
| 1st Die \ 2nd Die | 1 | 2 | 3 | 4 | 5 | 6 |
|---|---|---|---|---|---|---|
| 1 | Evil Hero | Evil Wizard | Evil Thief | Gargoyle | Hellhound | Giant Spider |
| 2 | 1D6x Orc | 1D3x Ogre | 1D6x Skeleton | 1D6x Goblin | 1D3x Cronk | 1D6x Vampire Bat |
| 3 | Troll | Werewolf | Mummy | Skeleton | Medusa | Giant Ant |
| 4 | Werewolf |
Enhanced: Table 7.5 is included in the Unit Summary list in 2.12 above. All information is also displayed on the Enhanced Monster Chits.
7.6 Negotiation Table
2D6 minus Target's Negotiation Value.
| Modified Roll | Result |
|---|---|
| 5 or less | Failure |
| 6-8 | Agreement |
| 9 or more | Cow |
8.0 Combat
Cases:
8.1 Joining Combat
8.11 Once combat has been joined, it must be continued until all the adventurers or all the monsters are dead. The party may not back out in the middle of a fight that's going badly.
8.12 If it has been determined that the party is going to fight a group of monsters, arrange counters for the monsters in front of the party's marching order as described below.
8.13 If there are three or more monsters, place the 3 monsters with the highest number of Wound Points in front of the party's first row. A Player may choose which of these monsters are placed in front of which party members. Place any remaining monsters in a row behind the first row of monsters.
8.14 If there are two or fewer monsters, place them all in front of the party's first row.
8.2 Combat Sequence
8.21 Combat between the party and a group of monsters consists of a number of Combat Rounds, each of which is divided into several Phases. At the end of each Combat Round, a new Combat Round is begun, until either the party or the monsters are dead. The Combat Round Sequence is as follows:
8.22 Party Combat Phase: Each member of the party who is in the front row may attack a monster in the monsters' front row. Any party members in the second row who have bows or throwing daggers may shoot their bows or throw their daggers at monsters in the monsters' front row. (In the Advanced Game, any spell-casting by Wizards also takes place now.) Combat results are applied immediately.
8.23 Monster Combat Phase: Each monster in the front row may attack a party member in the party's front row. Any monsters in the second row who have bows may attack party members in the party's front row.
8.24 Party Reorganization Phase: A Player may move one adventurer from one row in the party's marching order to another adjacent row in the marching order. However, at the end of this movement, no row may contain more than three adventurers. If the party's front row contains one or zero adventurers, one (only) adventurer from the second row (if any) must be moved into the front row.
8.25 Monster Reorganization Phase: If the monsters' front row contains fewer than 3 monsters, 1 monster from the second row (if there are any) must move to the front row. No other monster movement may take place.
8.3 Opponents
8.31 If during a Party Combat Phase there are as many monsters in the monster front line as adventurers in the party's front line, each adventurer in the front line must attack their opposite number, i.e., the monster immediately in front of him. During the Monster Combat Phase, the monsters will also attack their opposite numbers.
8.32 If during a Party Combat Phase there are more or fewer adventurers in the party's front line than monsters in the monsters' front line, each adventurer in the front line must attack the monster that is closest to him. If there are two or more monsters that are equally close to an adventurer, a Player may have the adventurer attack either monster.
8.33 If during a Monster Combat Phase there are more or fewer monsters in the monsters' front line than adventurers in the party's front line, each monster must attack the adventurer that is closest to him. If there are two adventurers that are equally close to the monster, a Player must roll 1D6. On a roll of 1-3, the monster attacks the rightmost adventurer, and on 4-6, the monster attacks the leftmost adventurer.
8.34 During a Party Combat Phase, any adventurers in the second row who have bows or throwing daggers may attack monsters in the front line. An adventurer firing a bow or throwing a dagger may fire at any monster in the monsters' front line, at the option of the controlling Player.
8.35 During a Monster Combat Phase, any monsters in the monsters' second row who have bows must attack adventurers in the party's front line. If there is only one adventurer in the front line, monsters with bows automatically attack him; if there are two adventurers in the front line, roll 1D6 and use the procedure outlined in 8.33 to determine which is attacked; if there are three adventurers, roll 1D6: on a roll of 1-2, the monster attacks the rightmost adventurer; on 3-4, it attacks the center adventurer; on 5-6, it attacks the leftmost adventurer. Roll separately for each firing monster.
Examples: (Diagrams A through D in the source show the following situations.)
- Example A: Hero 1 would attack Cronk 1; Hero 2 would attack Cronk 2; Hero 3 would attack Cronk 3, and vice versa.
- Example B: Hero 1 would have the choice of attacking either Cronk 1 or Cronk 2; Hero 2 could attack either Cronk 2 or Cronk 3. Cronk 1 would attack Hero 1; a die would be rolled for Cronk 2, who would attack Hero 1 on a roll of 1-3 and Hero 2 on a roll of 4-6; and Cronk 3 would attack Hero 2.
- Example C: In example C, the Hero could attack any one of the three Cronks. All three Cronks would be forced to attack the Hero.
- Example D: In example D, the Heroes can only attack the Cronk. During the Cronk's Monster Combat Phase, the Cronk would attack Hero 2.
8.4 Attacking
8.41 Before the party enters combat, a Player must determine which of their two weapons each adventurer is using. An adventurer may change their weapons during any Party Combat Phase, but may not make an attack in that same Phase.
8.42 During the Party Combat Phase, determine which monster each adventurer is attacking, and then resolve each attack.
8.43 To resolve an adventurer's attack, determine what weapon they are using and roll 1D6. If the character has Weapon Skill with the weapon they are using (e.g., +1 Sword), add the Skill to the die-roll. If the adventurer is wielding a magical weapon, add the weapon's Combat Bonus to the die-roll. Refer to the Combat Results Table (see 8.7) and find the weapon along the top of the table and the modified die-roll along the left side. Cross-reference the two to yield a result. This result will be in the form of a number between 0 and 4. (Results are explained in Case 8.45.)
8.44 When a monster attacks during the Monster Combat Phase, find the Combat Bonus on the top-left of the monster's chit. If the Bonus is some Letter(s) then the monster is wielding a weapon whose name starts with that letter (e.g., B = Bow). See the Monster Weapons Table (8.8, 2.12) for lookup. (If a monster has two weapons, one will be a bow. The monster will use the bow if it is in the second row of the monsters' marching order, but its other weapon if in the first row. Monsters with two weapons may change from one weapon to the other, and may attack in the same Combat Phase, unlike adventurers.) For weapon-wielding monsters, follow the procedure outlined in 8.43. For other monsters, roll 1D6 and add the monster's Combat Bonus to the die-roll. Refer to the Combat Results Table (see 8.7) and find the word Monster at the top of the table and the modified die-roll along the side. Cross-reference the two to yield a result (again a number between 0 and 4).
8.45 The attacked monster or adventurer immediately suffers as many Wounds as the number obtained on the Combat Results Table. A Player must keep a running tally of the number of Wounds each adventurer and monster has suffered.
8.46 Each adventurer and monster has a Wound Point Total. For adventurers, this total is listed under Wound Points on the Character Record. For monsters, the total is determined by a die-roll using the code on the top-right of the monster chit (see 7.14). If the total number of Wounds an adventurer or monster suffers in combat is equal to or greater than their Wound Point Total, they are dead. Remove the appropriate counter from play. This will leave an empty place in the front row which may be filled by an adventurer or monster from the second row during the appropriate Reorganization Phase.
8.47 When an adventurer makes an attack from the second row with a throwing dagger, they are considered to have physically thrown their dagger. A throwing dagger may only be thrown once in a single combat sequence; daggers may be retrieved after all combat is ended. An unarmed adventurer (one who has thrown a dagger) may switch to their other weapon without spending a Combat Phase switching weapons. Bows may be used any number of times. If an adventurer has no weapons (because both of their weapons were throwing daggers and have been thrown), they may not make any further attacks during the entire combat sequence.
8.5 Reorganization
8.51 During the Monster Reorganization Phase, one monster is moved from the monsters' second row to the front row, if and only if there are two or fewer monsters in the front row and at least one in the second row. In this case, a monster in the second row which is closest to the gap in the monsters' front row is moved forward. If two second-row monsters are equidistant, or if there are two gaps, a die is rolled to determine which one of the monsters moves (1-3, the rightmost monster; 4-6, the leftmost monster).
8.52 Imagine that each row in the party's marching order consists of three boxes, each box capable of holding one party member. During the Party Reorganization Phase, adventurers from the same row may be shifted from one box to another in the same row, as long as no adventurer's counter is moved over or through another counter. (Obviously, this means that no shifting can take place if there are three adventurers in a single row.) In addition to this movement, one adventurer may be moved from their row to a row ahead of or behind the one they occupy. This adventurer may first be shifted as described above; after this first move, they may then either move to the imaginary box immediately in front of or behind that box, or to a box diagonally adjacent to it.
Only one such movement may take place in a single Reorganization Phase. If there is only one adventurer in the front row, this movement must be made by the adventurer closest to the front row in the direction of the front row (preferably, a movement by an adventurer in the second row into the front row). If there are two or three adventurers in the front row, this movement may be made by any adventurer in any direction. Exception: If there are two adventurers in the front row, neither may move back to the second row.
8.53 These imaginary boxes are used only for movement purposes. After movement, rearrange both front lines so that as many monsters and adventurers' counters touch on each other as possible. See Diagram B.
8.6 Experience
After all monsters in a group have been killed, total the number of Wound Points the monsters had before combat began, and multiply this number by six. Divide the resulting number by the number of adventurers who remain alive, rounding any fractions down; each living adventurer receives this number of Experience Points.
Example: Three skeletons, with 2, 3, and 4 Wound Points respectively, are defeated. This is a total of 9 Wound Points which multiplied by six yields 54. If there are three living adventurers, each adventurer will receive 18 Experience Points. Also, see 10.12.
Exception: Charmed monsters do not count as party members when calculating Experience Points (see 9.45).
8.7 Combat Results Table
| Die | Dagger | Throwing Dagger | Bow | Sword, Hammer, Axe | Monsters |
|---|---|---|---|---|---|
| 1-3 | 0 | 0 | 0 | 0 | 0 |
| 4 | 0 | 0 | 0 | 1 | 0 |
| 5 | 1 | 0 | 1 | 1 | 0 |
| 6-9 | 1 | 1 | 1 | 1 | 1 |
| 10 |
8.8 Monster Weapons Table
Enhanced: Table 8.8 is included in the Monster list in 2.12 above. Most information is also added to the Enhanced Monster Chits.
8.9 Evil Heroes
Evil Heroes, unlike all other monsters but like some adventurers, have Weapon Skills with swords. When an Evil Hero is encountered, roll 1D6. The resulting number is the Evil Hero's Weapon Skill with their sword, and will be added to the Evil Hero's combat die-roll each time they attack.
Note: The +1D6 Sword under Evil Hero on the Monster Weapons Chart 8.8 (2.12) (shown as "S" on the Enhanced Monster Chit) refers to this ability, not to a Magical Weapon.
9.0 Treasure
9E Combined Magic Item Table
Roll 1D6 for the first die (across: 1st Die) and 1D6 for the second die (down: 2nd Die). Where a Weapon result is obtained, roll a third die for the Weapon Effect (see 9.2).
| 2nd Die | 1: Weapon (9.2) | 2: Armor (9.3) | 3: Potions (9.4) | 4: Spices (9.5) | 5: Medallions (9.6) | 6: Rings (9.7) |
|---|---|---|---|---|---|---|
| 1 | Sword | WP+1 | Healing | Mustard | NP | MR+1 |
| 2 | Hammer | WP+1 | Healing | Sesame | NP | MR+2 |
| 3 | Axe | WP+1 | Poison | Spinach | Potion Appraisal | Sleep |
| 4 | Bow |
Weapon Effect (9.2), 3rd Die: 1-3 = CB+1; 4-5 = CB+2; 6 = Roll Twice.
WP = Wound Points. NP = Neutralize Poison. MR = Magic Resistance. CB = Combat Bonus.
Cases:
9.1 Treasure Types
9.11 After the party kills a group of monsters (or, sometimes, after successful negotiation with them), a Player must determine what sort of treasure the monsters were guarding or carrying. Refer to the Monster Characteristics Chart (see 7.5, 2.12), or the bottom-right corner of the Enhanced Monster Chit, to find the monster's Treasure Types: either a single letter or two letters separated by a slash. If it is a single letter, the letter is always the Treasure Type of the monsters. If there are two letters, the first letter is the Treasure Type for the monsters that were rolled for on the Room Monster Table, and the second is the Treasure Type for monsters that were wandering (i.e., if they were rolled for on the Wandering Monster Table).
9.12 Refer to the Treasure Table (see 9.81). Find the letter corresponding to the monster's Treasure Type along the left side of the table. There are three columns to the Table: Bezants, Gems, and Magic Items. Under each column on the Treasure Type's row will be a die-face icon followed by a colon followed by a die-roll code (e.g., 1: 1D6x5). For each column (Bezants, Gems, and Magic Items) roll 1D6. If the number rolled is equal to or less than the number shown in the die-face icon before the colon in the appropriate column, then roll the dice again, as specified by the die-roll code after the colon, to determine the number of Bezants, Gems, or Magic Items. If the number rolled is greater than the first number, there is no treasure of that type present which corresponds with that column.
Example: If the above code had been under Bezants on the Treasure Table, a Player would roll a die. If the number rolled was 1, 2, or 3, the Player would then roll the die again, multiplying this roll by 5. The resulting number would be the number of Bezants in the monster's treasure.
9.13 Roll separately for each monster in the group, i.e., if there is more than one monster in the group, determine each monster's treasure separately.
9.14 For each Gem, roll 2D6 and refer to the Gem Table (see 9.82). Find the die-roll along the side of the Table; the corresponding entry is the value (in Bezants) of the gem. Note the value of each gem on a piece of scrap paper.
9.15 For each Magic Item, refer to the Magic Item Table (see 9.83 [9E], top row), and roll 1D6. Find the Column on the Table corresponding to the die-roll, which will determine whether the Magic Item is a weapon, armor, potion, spice, medallion, or ring. If the item is not a weapon, then to determine its effects roll a second 1D6 and find the corresponding Row on the Table. If the item is a Weapon, then (a) roll the second 1D6 and find the corresponding Row on the Table to determine what kind of weapon it is, and then (b) as indicated at the bottom of the table, roll a third 1D6 to determine the magical Weapon Effect. For additional clarification, see the following cases (9.2 through 9.7).
9.16 Treasure from monsters with Treasure Type I or J will be in chests. Roll a die for each chest; on a 1-3, the chest is Trapped. A Thief may attempt to Detrap the chest (see 10.0). If the chest is detrapped or the adventurers survive the traps' effects, they have free access to the treasure. (The party may automatically access non-trapped Treasure Types.)
9.17 Each magic item must be assigned to a specific adventurer who alone may use it during combat or negotiation. When not engaged in combat or negotiation, they may give the item to another adventurer to be used by that adventurer. If an item-carrying adventurer dies, another adventurer may be assigned to use their item (but only after combat is completed).
9.18 Players should keep a running total of the Bezants and Gems (with values) acquired by the party. At the end of the game, determine the total value of all Bezants and Gems, and divide this total among the adventurers equally. Charmed monsters (see Case 9.45) do not accrue treasure.
9.2 Weapons
9.21 If a Magic Item is a weapon, roll 1D6 and refer to the Weapon Table (see 9.24, [9E] Weapon column) to determine the weapon type. Then, roll 1D6 again and refer to the Weapon Effects Table (see 9.25, [9E] bottom nested table) to determine the magical Combat Bonus of the weapon.
9.22 If a 6 is rolled on the Weapon Effects Table, a Player is instructed to roll twice. Roll the die two more times, referring to the Weapon Effects Table, and add the Combat Bonuses resulting from the two die-rolls to produce the total Combat Bonus of the weapon. If a 6 is rolled again during this process, roll twice more. Theoretically, rolling enough 6's could result in an infinite Combat Bonus.
9.23 When a magical weapon is found, any adventurer may jettison one of their two weapons and use the magical weapon instead. Which adventurer uses the weapon is up to the Player(s).
Enhanced Weapon Table [9.24] is included in Table [9E]. Enhanced Weapon Effects Table [9.25] is included in Table [9E].
9.3 Armor
9.31 If a Magic Item is magical armor, roll a die and refer to the Armor Table (see 9.33, [9E] Armor column). This will yield the Wound Points Bonus of the armor. If a 6 is rolled, roll twice on the table adding Wound Points Bonuses, as per the procedure for Weapon Combat Bonus explained in 9.22.
9.32 Any living adventurer may don magical armor: which adventurer does so is at the discretion of the Player. An adventurer wearing magical armor has their Wound Points Total increased by the Wound Points Bonus of the armor. (Thus a Hero with 8 Wound Points wearing +2 armor would have 10 Wound Points.) A Player may have one adventurer give their magical armor to another at any time (except during combat or negotiation); the adventurer who removes the armor loses the Wound Points Bonus (which may kill them), and the adventurer putting it on gains the Bonus.
Enhanced Armor Table [9.33] is included in Table [9E].
9.4 Potions
9.41 If a Magic Item is a potion, roll 1D6 and refer to the Potion Table (see 9.47, [9E] Potion column) to determine its type. One adventurer must be delegated to test the potion before rolling on the Table. The delegated adventurer will suffer the effects or gain the benefits of the potion. After testing the potion, one dosage will remain, to be used at any time in the remainder of the game.
9.42 If an adventurer uses a Healing Potion, roll 1D6 and subtract the number rolled from the total Wounds suffered by the adventurer. (Obviously, the number of Wounds cannot be reduced below zero.)
9.43 An adventurer who finds Poison immediately suffers 1D3 Wounds.
9.44 If an adventurer uses a Strength Potion, roll 1D6. The adventurer will have a Combat Bonus equal to the number rolled for all weapons during the next (or current) combat sequence the party wages with monsters. After that combat, the effects of the potion wear off.
9.45 If an adventurer uses a Charm Person Potion, they may immediately take control of one Evil Hero, Wizard, Thief, Orc, or Goblin in their Segment. (If the potion is being tested and no monster is around, the potion has no effect.) The monster taken over by the adventurer becomes, to all intents and purposes, a member of the party. Immediately place the monster's counter in an empty space in the party's marching order. The monster remains under the control of the adventurer. If the adventurer dies later during the game, the monster immediately attacks the party (if the party is already in combat, place the monster in any gap in the monster's marching order, as close to the party as possible). The party does gain Experience Points for monsters slain by charmed monsters, but charmed monsters themselves never accrue Experience.
9.46 Charm Monster potions work in the same manner as Charm Person potions, except that they may be used to take control of any single monster which is not an Evil Hero, Wizard, Thief, Orc, or Goblin.
Enhanced Potion Table [9.47] is included in Table [9E].
9.5 Spice
9.51 If a Magic Item is magical spice, roll 1D6 and refer to the Spice Table (see 9.58, [9E] Spice column) to determine the type of spice. Spices, unlike potions, are readily identifiable and thus need not be tested. Spices may only be used once, after which they are used up.
9.52 The Mustard spice functions as a Healing Potion (see 9.42).
9.53 Sesame spice can be used to open trapped doors or chests without setting the trap off. When the party encounters a trapped door or chest, Sesame may be used automatically to detrap the door or chest. Sesame must be used before a Thief attempts to detrap the door or chest; it may not be used after a detrapping attempt.
9.54 Spinach spice functions as a Strength Potion (see 9.44).
9.55 Red Pepper spice allows an adventurer who uses it to breathe flame during one Combat Phase. The adventurer may not make a weapon attack in the same Phase they use the spice, and only an adventurer in the party's front row may use Red Pepper. Roll 1D6; the adventurer's opponent immediately suffers as many Wounds as the number rolled.
9.56 Cannabis alters an adventurer's time perception. During the next combat sequence, the adventurer may make two attacks in each Party Combat Phase; both attacks must be made on the same monster. Once all combat ends, the effects of Cannabis wear off.
9.57 Cloves may be used to peg a door shut. After the party opens a door to a segment and determines what kind of monsters are in the segment (if any), a Player may, instead of negotiating or fighting with the monsters, use the Cloves to peg the door shut. Thereafter, the door is considered impassable. The party retreats to the segment it occupied before it opened the door. If the Room or Corridor segment is entered later by another path, the same monsters will be there (a Player may wish to note the positions of the monsters on a piece of scrap paper).
Enhanced Spice Table [9.58] is included in Table [9E].
9.6 Medallions
9.61 If a Magic Item is a medallion, roll a die and refer to the Medallion Table (see 9.67, [9E] Medallion column) to determine its nature. An adventurer must be delegated to test the medallion.
9.62 The wearer of a Neutralize Poison medallion is immune to the effects of poison potions, poisonous fountains, and traps involving poison.
9.63 The wearer of a Potion Appraisal medallion may tell the nature of a potion without testing it: each potion will give 2 doses (since 1 is not spent in testing). Poison potions can be discarded without Wounds.
9.64 If there is a wearer of an Oratory medallion in the Party, add +2 to all rolls on the Negotiation Table (see 7.6). This modifier is cumulative with other Oratory medallions and Oratory spells.
9.65 Wearing a Medallion of Dexterity grants a Combat Bonus of +2 (plus any other bonuses) with a Bow or Throwing Dagger (only).
9.66 An adventurer who tests a Medallion of Strangling immediately suffers 2D6 Wounds.
Enhanced Medallion Table [9.67] is included in Table [9E].
9.7 Rings
Magical rings exist only in the Advanced Game (see 12.0 below). If a Player is playing the Basic Game and a magical ring is rolled on the Magic Item Table, roll again until some other result is obtained.
Enhanced Ring Table [9.71] is included in Table [9E].
9.8 Treasure Tables
9.81 Treasure Type Table
Match your treasure type on the left. For each column, roll 1D6. If the number rolled is equal to or less than the die-roll value shown before the colon, then use the number shown after the colon (or if a die-roll code is shown, roll again) to determine the number of Bezants, Gems, or Magic Items you receive.
| Type | Bezants | Gems | Magic Items |
|---|---|---|---|
| A | 0:0 | 0:0 | 0:0 |
| B | 6: 1D6 | 0:0 | 0:0 |
| C | 6: 3D6 | 0:0 | 1: 1 |
| D | 1: 3D6 | 1: 1D3 | 0:0 |
| E | 2: 1D6 x 10 | 2: 1D6 | 2: 1 |
| F | 6: 1D6 x 4 | 3: 1D3 | 1: 1 |
| G | 6: 3D6 x 5 |
9.82 Gems Table
For each Gem, roll 2D6 (see 9.14):
| 2D6 Roll | Value (Bezants) |
|---|---|
| 2 | 1 |
| 3 | 5 |
| 4 | 10 |
| 5 | 15 |
| 6 | 20 |
| 7 | 25 |
| 8 | 35 |
| 9 | 50 |
| 10 | 75 |
| 11 | 100 |
| 12 | 150 |
Enhanced Magic Item Table [9.83] is included in Table [9E].
10.0 Traps
Cases:
10.1 Detrapping
10.11 Sometimes doors (see 5.26) or chests containing treasure (see 9.16) are guarded by traps. Thieves have the ability to remove traps so that they do not affect the party.
10.12 If a trap is encountered, one Thief in the party may be delegated to remove it. Roll 1D6; if the number rolled is less than or equal to the Thief's Detrapping Skill as shown on their Character Record, the Thief has successfully removed the trap. The Thief immediately receives 10 Experience Points for doing so.
10.13 If there is no Thief in the party, some other party member must be delegated to open the door or chest. (The door or chest must be opened even if a trap has been found.) The adventurer automatically suffers the effects of the trap. If a Thief attempts to remove a trap and fails, they also suffer its effects.
10.2 Effects of Traps
10.21 If a trap has effect, roll 1D6 and refer to the Trap Table (see 10.3).
10.22 If the result on the Trap Table is Arrow, an arrow or bolt is shot from the trap. Roll 1D6 and refer to the Combat Results Table (8.7) under the Bow column to determine whether the arrow strikes the adventurer opening the trapped door or chest (there is no Combat Bonus), and the number of Wounds suffered if any.
10.23 If the result is Poisoned Arrow, follow the procedure for Arrow above (10.22), but if the arrow strikes, the affected adventurer takes 1D3 Wounds from poison (in addition to the Wounds inflicted by the arrow).
10.24 If the result is Poison Gas, the affected adventurer immediately suffers 1D3 Wounds from poison.
10.25 If the result is Explosion, all adventurers (and charmed monsters) in the party immediately suffer 1 Wound.
10.26 If the result is Flaming Oil, the affected adventurer immediately suffers 1 Wound.
10.27 If the result is Roll Twice, roll the die two times on the Trap Table, and two traps are triggered. If a second Roll Twice results, roll twice again (for a total of three traps). Theoretically, if enough 6's are rolled, there could be an infinite number of traps.
10.3 Trap Table
| Roll 1D6 | Trap | Effect |
|---|---|---|
| 1 | Arrow | Roll on the Combat Results Table (8.7), Bow column, to see whether the arrow hits and the Wounds suffered (10.22). |
| 2 | Poisoned Arrow | As Arrow; if the arrow hits, the adventurer also suffers 1D3 Wounds from poison (10.23). |
| 3 | Poison Gas | 1D3 Wounds (10.24). |
| 4 | Explosion | 1 Wound to all adventurers (and charmed monsters) in the party (10.25). |
| 5 | Flaming Oil | 1 Wound to the adventurer opening the trap (10.26). |
| 6 | Roll Twice | Roll twice more on this table; two traps are triggered (10.27). |
11.0 Wizards & Magic
(Advanced Game Only)
Cases:
11.1 Creating Wizards
11.11 In the Advanced Game of Deathmaze, there is a third kind of adventurer: Wizards. Wizards initially have 4 Wound Points and a Magic Resistance of 2. The only weapons Wizards may use (or carry) are daggers and throwing daggers.
11.12 When creating a Wizard, choose one of the spells from the list of twelve spells (see Spell Summary 11.3 and the [11E] Tables). Enter the spell name under Skills/Spells on the Wizard's Character Record.
11.13 When giving a Wizard Initial Experience (see 3.1) they have the usual options (increasing their Wound Points, Magic Resistance, or giving them a Weapon Skill) or they may be assigned a second spell.
11.14 The spell (or spells) which the Wizard has listed on their Character Record are the only spell(s) that the Wizard may cast during the game (unless they acquire a magical ring).
11.2 Casting Spells
11.21 Refer to the Spell Summary 11.3 and the [11E] Tables. Combat spells may only be cast during combat; Non-Combat spells may be cast at any time except during combat. Also, Oratory is the only spell that may be cast during Negotiation. When a Wizard casts a spell during combat (they may do so from either the front or second rows), they may not make a weapon attack in the same Combat Phase.
11.22 Each spell has a Cost, listed on the Spell Summary 11.3 and the [11E] Tables. Each time that a Wizard casts a spell, they suffer as many Wounds as its Cost. A Wizard may not cast a spell if suffering the necessary Wounds to pay the cost would kill them. Wounds suffered casting spells may never be cured by Healing spells, potions, or Mustard. Only Wounds suffered in combat (or from traps or magical items) may be so cured.
11.23 A Wizard may only cast spells listed on their Character Record (whether it is a spell they know at the outset of the game, or one granted by a magical Ring). They may cast a given spell any number of times, as long as they suffer its Cost in Wounds each time. Each Wizard may only cast one spell per Party Combat Phase.
11.24 Monsters on whom spells are cast will attempt to resist the effects of such spells. Each monster's Magic Resistance is listed on the Monster Characteristics Chart (see 7.5, 2.12, or the Enhanced Monster Chits). If a spell is cast on a monster, determine the monster's Magic Resistance, and roll 1D6. If the number rolled is less than or equal to the monster's Resistance, the spell has no effect. If the roll is higher, the full effects of the spell apply to the monster.
11.25 In the Advanced Game, monsters will also resist the effects of Charm potions and Red Pepper.
11.3 Spell Summary
[11E] I: Combat Spells
| Spell | Cost | Target | If Target Fails to Resist |
|---|---|---|---|
| Blast | 1 | Row 1 Monster | Suffers 2 Wounds |
| Charm | 3 | Row 1 or 2 Monster | Joins Party (see 9.45) |
| Explosion | 1 | All Combatants | Each suffers 1 Wound |
| Lightning | 2 | Any 1 Monster | Suffers 1D6+2 Wounds |
| Sleep | 2 | Any 1 Monster | Is removed from Combat |
[11E] II: Non-Combat Spells
| Spell | Cost | Target | Effect on Target |
|---|---|---|---|
| Heal | 2 | One Unit | Recovers 1D6 Wounds |
| Lock | 1 | Door | Becomes impassible |
| Mage Armor | 1 | One Unit | Evades the next 1D3 Wounds |
| Neutralize Poison | 1 | One Unit | Evades Poison effect |
| Stone-to-Flesh | 3 | One Unit | Evades death (see 12.34) |
| Strength | 2 | One Unit | Gains 1D6 Combat Bonus |
[11E] III: Negotiation Spell
| Spell | Cost | Target | Effect |
|---|---|---|---|
| Oratory | 1 | Negotiation | Add +4 to a Negotiation roll (see 7.2) |
Spell descriptions:
- Blast: Cost 1. Combat spell. A Wizard may cast this spell at any monster in the first row during combat. Unless the monster resists the spell, it suffers two (2) Wounds.
- Charm: Cost 3. Combat spell. May be cast at any monster in the first or second row during combat. If the monster fails to resist, it comes under the control of the Wizard, as per 9.45.
- Explosion: Cost 1. Combat spell. If a Wizard casts this spell during combat, all monsters and adventurers including the Wizard, who fail to resist the spell suffer 1 (one) Wound.
- Heal: Cost 2. Non-Combat spell. The Heal spell acts the same way that Healing Potions and Mustard do (see 9.42).
- Lightning: Cost 2. Combat spell. A monster who fails to resist this spell immediately suffers 1D6+2 Wounds.
- Lock: Cost 1. Non-Combat spell. A Wizard may use this spell to lock a door, the same way that Cloves are used (see 9.57).
- Mage Armor: Cost 1. Non-Combat spell. Mage Armor creates a protective field around the adventurer on whom it is cast. Roll 1D3 and make a note of the number rolled on the Character Record of the adventurer. Each time the adventurer suffers a Wound, reduce this number by one. Any Wounds suffered after this number reaches zero are suffered normally by the adventurer. In other words, Mage Armor protects the adventurer against the next 1D3 Wounds that they would normally suffer. NOTE: The Mage Armor does not absorb Wounds suffered in casting spells.
- Neutralize Poison: Cost 1. Non-Combat spell. The Wizard may cast this spell on any adventurer who drinks a Poison Potion, investigates a poisonous fountain, or is the victim of a trap involving poison. The adventurer on whom the spell is cast does not suffer the effects of the poison (as they otherwise would). This spell must be used immediately after the poisoning occurs.
12.0 Rings, Evil Wizards & Special Abilities
(Advanced Game only)
12.1 Rings
12.11 Magical Rings exist only in the Advanced Game. If a magic item is a ring, roll 1D6 and refer to the Ring Table (see 9.71, [9E] Rings column) to determine the nature of the ring.
12.12 Any adventurer may wear a Ring of Resistance to gain +1 or +2 to Magic Resistance for as long as they wear it. A Ring of Resistance may not increase its wearer's Magic Resistance above 5.
12.13 Other rings may only be worn by Wizards. Once per game, a Wizard wearing a Ring may cast the spell matching the ring's name (Sleep, Neutralize Poison, Heal, or Blast) at no Wound cost. Keep the ring after casting the spell: it may be re-used if the Wizard enters the Deathmaze in another game (see 13.0).
12.2 Evil Wizards
In the Advanced Game, Evil Wizards may be encountered as monsters. In addition to having the abilities listed on the Monster Characteristics Table (see 7.5, 2.12), Evil Wizards know one spell: Lightning. If a party fights an Evil Wizard, the Evil Wizard will cast Lightning every Monster Combat Phase, unless doing so would cause the Wizard to die, in which case the Wizard fights with a dagger. Determine which adventurer the Wizard casts the spell at using the same procedure that is used to determine which adventurer a monster attacks (see 8.33). The adventurer may attempt to resist the spell.
12.3 Special Abilities
12.31 Some monsters have special abilities in the Advanced Game.
12.32 When the party begins to fight a group of cronks, each member of the party must attempt to resist the cronks' special ability. Any character who fails to resist the cronks' stench is considered nauseated, and has a Combat Bonus of -2 (in addition to any other bonuses) during the fight with the cronks. The effects of the stench wear off after the combat with the cronks is concluded.
12.33 Each time a hellhound attacks an adventurer, it will breathe flames at them, in addition to attacking them normally. The adventurer determines whether they resist the hellhound's flames, and if they fail to resist, the adventurer immediately suffers one (1) Wound (in addition to any other Wounds they suffer as the result of the hellhound's regular attack). A hellhound breathes flames every Monster Combat Phase at the adventurer it attacks in that Phase.
12.34 Each time a medusa attacks an adventurer, roll 1D6. If a 6 is rolled, the medusa has turned the adventurer to stone. Remove the counter from the party's marching order. At the end of combat, a Wizard may attempt to revivify the adventurer by casting a Stone-to-Flesh spell. If there is no Wizard present who knows the spell, the adventurer is dead.
12.3E Monster Special Abilities
Resist = Roll 1D6. If the roll is greater than the adventurer's Magic Resistance, they suffer the effects of the Special attack.
| Special | Roll | Effect |
|---|---|---|
| Stench | Each adventurer resists once at start of combat | -2 Combat Bonus until end of combat. |
| Lightning | Target can resist. See 11E and 8.33. | Casts Lightning once every Monster Combat Phase that it can pay Cost without dying. |
| Fire breath | Attacked adventurer resists each new attack. | 1 extra Wound. |
| Flesh to Stone | Roll 1D6. If 6, suffer effects. | Remove from combat. Dies after if no Wizard can cast Stone-to-Flesh. |
| Regen | — | After Troll is wounded, it recovers 1 Wound point every 3rd Monster Combat Phase. |
| Charm | Attacked unit resists. | *First 2 attacks. Adventurer: becomes Monster until Vampire is killed. Charmed Monster: charm broken, fights party to death. |
12.35 At the end of every third Monster Combat Phase after it is first wounded, a troll will regenerate one Wound Point. Reduce the total Wounds suffered by the troll by one.
12.36 During the first two Monster Combat Phases in which a vampire engages in combat, it will attempt to Charm the adventurer it attacks. (Doing so does not cost the vampire any Wounds.) The adventurer attempts to resist the Charm. If the adventurer fails, their counter is placed in the monsters' second row, and they become a monster. When the vampire is killed, the adventurer becomes an adventurer again, but they retain any Wounds they suffered as a monster. Charmed Wizards will not cast spells. Previously charmed monsters in the party which are charmed by vampires will fight the party to the death, even if the vampire is killed: the party's charm is considered broken.
13.0 Character Continuity
(Advanced Game Only)
General Rule: A Player may use any adventurer who survives a game of Deathmaze as one of their adventurers in a later game. The adventurer retains any magical items which they picked up in the first game, may restock any non-magical weapons they desire (but may only carry 2 as before), and is considered to be cured of all Wounds. The adventurer's abilities and powers are increased commensurate with the value of treasure (in Bezants) and experience (Experience Points) they have accumulated.
13.1 How to Use Experience Points and Bezants
13.11 If at the end of a game, an adventurer has at least 75 Experience Points and 100 Bezants (or equivalent value in Gems), subtract these values from their Experience Points and Bezants totals. Then give the adventurer one additional point of ability. Use an ability point to:
- increase the adventurer's Wound Point Total by one; or
- give the adventurer skill with one weapon or increase the adventurer's skill with a weapon (from, for instance, +1 Sword to +2 Sword), thus increasing the adventurer's effectiveness in combat; or
- increase the adventurer's Magic Resistance by one (but Magic Resistance may not be increased above 5); or
- if the adventurer is a Thief, increase their Detrapping ability by 1; or
- if the adventurer is a Wizard, give the Wizard a new spell.
Make the necessary changes on the Character Record to reflect the manner in which experience is expended.
13.11 (second paragraph, printed with the same number in the source) An adventurer may spend multiples of 75 Experience and 100 Bezants to acquire multiple points of ability, as above.
13.2 Accumulated Bezants, Experience Points & Charmed Monsters
13.21 An adventurer is considered to leave the Bezants acquired on previous expeditions at home when they embark on a new game of Deathmaze. Thus, if they survive, they may expend the Bezants they left at home as partial payment toward experience, but if they die the Bezants are lost. Experience Points are also saved in this manner.
13.22 A monster charmed on one expedition is considered to wander off before the next expedition. It may not re-enter the Deathmaze with the adventurers.