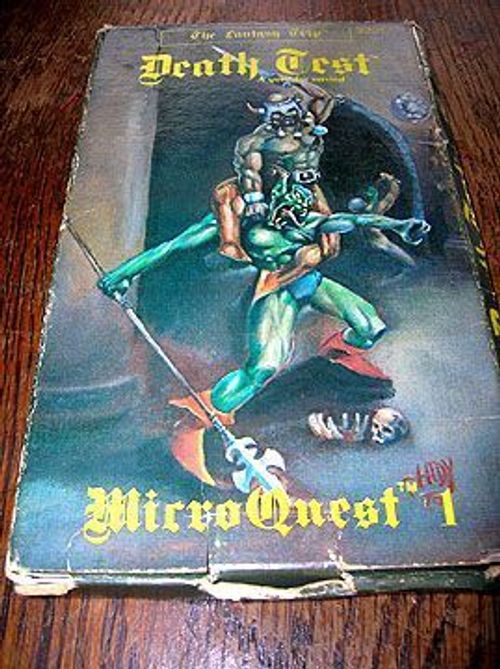
Death Test
Death Test Rulebook
Table of Contents
Table of Contents
Warning
(1) DEATH TEST is NOT a complete game in itself. It is a programmed adventure to be played with the MELEE rules (or with the MELEE and WIZARD rules together). DO NOT buy this game if you don't have MELEE!
(2) This adventure is a KILLER.
You have been warned ...
Game components: This book of instructions / Set of ¾" counters representing men, beasts, and monsters.
How to Play "Death Test"
This is a programmed adventure using the MELEE and (optionally) WIZARD combat rules. You MUST have MELEE to play; WIZARD will allow you to add magical combat if you wish. The DEATH TEST booklet sets up the rooms for you, gives you decisions to make, and tells you the outcomes of these decisions, but you need the MELEE map and rules for the combats you will face. DEATH TEST can be played several ways:
Solitaire — One lone player can take both sides, creating a party of adventurers and running them through. The booklet will give instructions regarding the foes in each room; the player sets up both sides on the MELEE map and plays out the battles.
Two-player — One player creates a party of adventurers and enters the labyrinth. When foes are encountered, the other player controls them on the MELEE board. His objective is to kill all the mercenaries.
Multi-player — One person plays the creatures in the labyrinth. The others each play an individual fighter or wizard, co-operating (or competing) to get through the labyrinth. (If you play this way, the player who operates the monsters should act as Game Master to settle disputes, and players should agree beforehand on whether they will be permitted to fight each other while on the trip.) After a few games, the GM will be familiar enough with the game to introduce his own variations, thus keeping the players from anticipating traps they have already seen.
Creating Figures for "Death Test"
Since DEATH TEST uses the MELEE rules, characters are created as in MELEE; wizards are created as in WIZARD. However, the DEATH TEST labyrinth is tough. Although a group of four "beginning" characters can sometimes make it through, experienced figures will have much better odds. Therefore, you may want to let your figures build up ST, DX, and/or IQ in regular MELEE/WIZARD combat (or just start with more experienced figures) before attempting the DEATH TEST.
Entering the "Death Test" Labyrinth
One to four figures may enter each game. If you are using WIZARD, any or all of the figures may be wizards, and magic may be freely used. If you are using the MELEE rules only, you will be able to use no magic, but no (combat-type) magic will be used against you.
Record sheets should be made up for each entering figure, just as in MELEE. All MELEE rules apply except those for experience. Experience is awarded to survivors based on their labyrinth performance.
If you are using WIZARD, all WIZARD rules except experience apply.
All combat in the DEATH TEST labyrinth is considered "one fight." Thus, wizards have no opportunity to recover lost strength by resting, and must ration their energy carefully — and hits cannot be healed except by magic, for either wizards or heroes, until you are out.
To enter the labyrinth, turn to instruction number 1 and read it. Like each later instruction, it will give you information and directions. Some instructions call for a decision. In this case, make up your mind what you will do BEFORE turning to the next instruction. To avoid losing your place, you can make a note of each instruction number as you pass it. You should try NEVER to read instructions you have not legitimately come to; to do so will lessen your enjoyment of the game. (Also, there are a few instructions included that CANNOT be reached if you play fair.)
As you read the instructions, you will find yourself moving down long corridors and into rooms. All combat takes place in the rooms; the corridors merely take you from one room to the next. (However, you MUST follow the corridor instructions carefully, or you'll get lost.) When you enter a room, MELEE turns begin. It IS permitted to stop just before entering a room, either to change weapons or armor or to cast one or more protective spells on yourself or other members of your party.
As soon as you find yourself in a room, look at the room map and/or instructions and place obstacles, pits, enemies, etc., on the MELEE map. (The WIZARD map is not used.) Place your own figures in the starred entry hexes at the end of the room (east or west) you entered. Finally, read the rest of the room instructions to see what is happening and what your options are. In each new room, game turns begin with your four (or fewer) figures standing in the entry hexes at one end of the room, having just stepped through the curtain of darkness. No figure may BOTH come through the curtain of darkness AND do anything else on the same move.
Obstacles (black hexes) shown on the room maps stop both movement and thrown/missile weapons and spells. Pits (gray hexes) prevent movement (except into the pit), but weapons and spells may pass over them.
Leaving a Room
When all your foes in a room are dead or fled, your party may freely leave and re-enter that room thereafter. However, if a figure (or the group) wants to leave a room containing living enemies (even if they are asleep, trapped behind a fire, etc.), they MUST (a) be given the chance to attempt escape in an instruction, (b) successfully move to one of the three starred hexes at either EXTREME end of the board, and (c) have at least one hex of MA left in order to leave. (It is also permitted to leave by a shift or disengage which takes you off the board from one of those six end hexes, or by teleporting to the other side of the curtain.) When a figure trying to escape reaches the edge of the board, turn to the instruction indicated by the "run away" choice to see if the curtain lets him pass. If it does, the figure may use that last hex of MA to get out and to safety. If the curtain does NOT let him/her pass, the figure stays in that hex, ending movement there, FACING the curtain. If the figure tried to shift out, the attempt fails and the figure stays in the same hex. The same goes for an attempt to disengage. Teleporting out always works, but costs a wizard lots of ST.
NOTE: It is perfectly all right to kill an unconscious foe.
Mapping and Record-Keeping
You will need to keep the following records as you play: (1) the standard record sheets for your own figures, (2) a map of the labyrinth as you explore it, and (3) a record sheet for each room you enter.
The regular figure record sheets are kept in normal MELEE/WIZARD style. Keep track of treasure and weapons carried, hits taken and ST expended, and MA reductions for heavy loot carried (see below).
Your labyrinth map will show which rooms you have passed through. Each room is a different color, to aid you in keeping track. You will need the map if you double back, either accidentally or on purpose.
You should also make a record for each room as you enter it. The book will tell you what foes you encounter (or refer you to the Fighter Table to let you roll for enemies). The room record is made up of one record for each foe there, together with any other notes you make. If you leave living enemies in a room, they will be there if you return. Any corpses (friendly or enemy) will also be there as you left them. However, unattended treasure may vanish, or wounded friends may die (see ABANDONING TREASURE). Therefore, you should keep all the room records until you finish the adventure. When you re-enter a room, go by the record sheet instead of the printed instructions. Things a group has killed will NOT come alive and attack again. However, foes left alive will be back in their starting positions with the wounds you gave them and will attack on sight.
You may wish to keep a record of the number of each instruction you take, in case you lose your place.
Picking Up Treasure
When you find treasure, make notes on the figure record sheets to show who is carrying it. Each GOLD BAR a figure carries will reduce his MA by 1, down to a minimum MA of 4. A figure cannot carry more than 10 gold bars. (Extra weapons picked up in the labyrinth count as gold bars for weight — see below). Other treasure weighs nothing; any amount may be carried.
Abandoning Treasure (or Your Companions)
If a party wishes to avoid being slowed by the weight of gold or extra weapons, some or all of these may be left in any room after it has been cleaned out — that is, after its occupants are dead. Note the abandoned treasures on the record sheet for that room. If the party comes back for them, roll one die. On a 5 or 6, everything is gone; another party came by and took them. Otherwise, they're still there. Roll the same way for wounded but living friends left behind in an empty room: when you come back, they've had their throats cut on a 5 or 6, and are still alive otherwise. Gold, weapons, or bodies left in a corridor will always be gone when you return.
Splitting a Party
It is legal (but unwise) for a party to split up. Not only does it cause inconvenience as you try to read two sets of instructions ... a party which divides its force will probably be wiped out. If you want to send one scout into a room to see what's there, the rest of the party can enter on any later turn (but must still stop in the entry hexes). However, this is a good way to lose a scout.
If a party bugs out during combat and runs out BOTH doors, it may try to rejoin by entering an unexplored room from both ends at once. Place the figures entering from the west on one set of entry hexes, and those entering from the east on the other. If the instructions say there were enemies at one end, they will be in the middle instead.
Strength lies in numbers. Don't split unnecessarily.
Illusions
It IS legal for a wizard to summon something, or create an illusion, to scout a room. However, images cannot pass through the curtains.
It takes at least 12 turns to walk down each corridor. Thus, any image or illusion created in one room will vanish before it or you can get to another room.
If two or more players are involved, the "monster" player can choose whether and when to attempt to disbelieve the mercenary wizards' figures. However, when one player is playing solitaire, use the following rule: Only foes with IQ 8 or higher can attempt to disbelieve — that is, wolves, bears, and other animals can't disbelieve illusions. Foes will only attempt to disbelieve when they see nonhumans attacking them, OR when more than four figures at once attack, OR if they actually see a wizard create a figure in the room. In any of these cases, roll one die for each foe, each turn. On a 5 or 6, it will attempt to disbelieve one of your figures.
Playing the Monsters
If you are playing solitaire, you may use any strategy you like while playing the mercenary side, as long as you follow the instructions. To play the monsters, use the following guidelines:
(1) Monsters and foes always fight to the death, and never run, unless an instruction specifically says otherwise. If an instruction says they might run, assume they will do so as soon as they are hurt worse than you are.
(2) Most monsters will use standard tactics — that is, they will run at you and try to kill you. Human and humanoid foes will attempt to close with you unless their main weapon is a missile weapon. If it is a missile weapon, they will try to stand off and fire as long as they can.
(3) Some monsters or foes will have favorite tactics (mentioned in the instructions). Use these tactics as long as they seem sensible.
(4) In general, use "common sense" to decide what the foes will do. If two or more reactions are equally likely (for instance, one orc trying to decide which of two men to attack), roll a die to decide.
Fighter Table
When the instructions refer to this Fighter Table, roll 3 dice for each fighter you need, and refer to the list below. When you first encounter a fighter, his shield (if any) and first-named weapon will be ready. All except Number 15 carry one dagger. Assume a fighter is human and has IQ 8 unless specified otherwise in the instructions or the table. If the instructions say "orc" and the table says otherwise, it's an orc.
(The printed table is numbered 3 through 18.)
- ST = 15, DX = 14 (11), IQ = 10. Chainmail, battleaxe, two-handed sword.
- ST = 14, DX = 13 (11). Leather, two-handed sword, light crossbow.
- ST = 13, DX = 16. No armor. Longbow, morningstar.
- ST = 13, DX = 12 (10). Leather armor, halberd, small ax.
- Hobbit. ST = 9, DX = 13, IQ = 10. No armor. Javelin, small shield.
- Dwarf. ST = 15, DX = 10 (8). Leather armor, pike ax, battleaxe.
- ST = 13, DX = 11 (10). No armor. Large shield, morningstar.
- ST = 11, DX = 13. No armor. Longbow, shortsword.
- ST = 12, DX = 12 (9). Leather, large shield, broadsword.
- ST = 10, DX = 14 (11). Chainmail, hammer, horse bow.
- ST = 11, DX = 13 (11). Leather armor, small shield, mace.
- ST = 12, DX = 12. No armor, small shield, broadsword.
- Elf. ST = 9, DX = 17 (15). Leather, small bow, rapier, main-gauche.
- ST = 13, DX = 13 (10). Chainmail, small shield, morningstar.
- ST = 11, DX = 18 (15), IQ = 9. Chainmail, small shield, small ax.
- ST = 12, DX = 18 (12), IQ = 11. Plate armor, broadsword, lt. crossbow.
The Labyrinth
1. Your party goes through the door and goes west. You come to a curtain and step through. Go to 48.
2. You come to a 3-way intersection. You can go south (116), east (4), or west (17).
3. You are in the Indigo Room (see below). There are two orcs there, at the Xs (roll from Fighter Table). They attack; roll for initiative. You may fight or run for an exit. If you try to go out the east door, go to 34. If you get to the west door, go to 49. If you stay and kill the orcs, go to 22.
[Printed map: Indigo Room, with the two Xs and the W and E ends. Not reproduced here; see the printed booklet.]
4. You are facing east. In front of you is a curtain. Walk through (13) or turn around (41).
5. You are facing west. There is a curtain in front of you. Walk through (57) or turn around (87).
6. You are facing east. In front of you is a curtain. Walk through (11) or turn around (18).
7. You are facing west. You can go ahead (156) or turn around (44).
8. You are facing east; you turn north and come to a 4-way intersection. You may continue north (86), go back south (19), turn west (144), or go east (42).
9. You are facing west. Go forward (84) or turn around (20).
10. You are facing east. In front of you is a curtain. Go forward (60) or turn around (46).
11. You are in the Gold Room (see map below). As the last of your party passes through the curtain, you hear growling. There is a large bear at each of the Xs. Position your party on the four entrance hexes and go to 21.
[Printed map: Gold Room, with the two Xs, the T hex, and the W and E ends. Not reproduced here; see the printed booklet.]
12. You are in the Silver Room (see map at number 38). There are three fighters there (roll from the Fighter Table), one at each F. They are all wounded: roll one die for each fighter and give him that many hits of damage. You surprised them, so you have movement initiative for the first turn. If you attack, go to 24. If you do not attack, but start to run for the east door, go to 36. If you do not attack, but want to run for the west door, go to 51. If you want to talk to them, go to 55.
13. You are in the Green Room (standard MELEE map without obstacles; no map needed). Arrange your party on the entrance hexes. If you have any wizards in your group, go to 25. Otherwise, go to 53.
14. You try to run through. After each turn of running, roll one die. If you roll a 3, 4, 5, or 6, go to 135. If you roll a 1 or 2, you may keep running for another turn and roll again — and so on. If you make it to the exit without rolling a 3, 4, 5, or 6, go to 162. If you want to stop running while in the room, go to 135.
15. It contained two gold bars and a flask of white liquid. If you drink the liquid (there is only enough for one to drink), go to 39. You can SAVE the flask and drink it at any time you are not in combat. If you save the flask, make a note of Number 39, and read it when you drink. 39, obviously, cannot direct you back to your place, so keep your finger on your place as you read 39. Now you may leave. Go to 162.
16. You are facing west. You walk down a corridor and come to a 4-way intersection. You can go north (86), south (19), west (144), or turn around and go east (42).
17. You are facing west. In front of you is a curtain. Walk through (38) or turn around (28).
18. You are facing west. Go west (116) or turn around (6).
19. You are facing west. There is a curtain in front of you. Go through (12) or turn around (8).
20. You are facing east. In front of you is a curtain. Go through (75) or turn around (9).
21. You have the initiative. If you want to go back through the door, go to 35. If you want to fight, go to 50.
22. You find no treasure on the bodies or elsewhere. You can leave by the east door (111) or the west door (143). Any members of the party who ran out either door may now rejoin you.
23. The stairway leads up and to a curtain. You can go through (47) or go back down (30).
24. If you kill them, go to 95. If you are losing and run out the west door, go to 130. If you run out the east door, go to 118. If any enemy tries to run away, go to 80.
25. Suddenly, you see a black-robed figure standing at the far end of the room (the farthest-back entrance hex). You can attack (52), yell "Hello" or some other greeting (96), or stand and wait (101).
26. Each fighter had one gold bar. One also had a flask of white liquid. [There is enough for one to drink, either now or later: if you decide that one of your figures drinks it (at any time not during combat), go to 72 (make a note of that number now), then back to wherever you are when you drink it.] You may now leave by the east door (132) or the west door (41).
27. If you are walking, each member of your party moves at 3 hexes/turn. Roll one die each turn after you move. On a 6, go to 135; on another number, you can walk another round and roll again, or go back to 38 and pick another action. If you make it to an exit and try to leave, go to 162.
28. You are facing east. Walk forward (2) or turn around (17).
29. You are facing east; there is a curtain in front of you. Walk through (38) or turn around (40).
30. You are facing east. There is a curtain in front of you. You may walk through (126) or turn around (146).
31. You are facing east. Walking forward, you come to a 4-way intersection. You may continue east (113), turn around (145), go north (133), or go south (32).
32. You are facing east. There is a curtain in front of you. You can go through (61) or turn around (89).
33. When you open the chest, 12 spiders jump out. They divide themselves evenly between everyone within 3 hexes of the chest and attack immediately. The spiders have ST 1 (so any hit will kill them) and DX 12. Their MA is 4, but they move INTO your hex (that is, ONTO you) and stay with you wherever you move until you die or they do.
Their bite does 2 hits damage, which means that even leather will offer complete protection unless the spider rolls double or triple damage. However, shields do NOT protect against spider bites.
NOTE: Combat with a spider is considered "HTH combat": hit it with your hand or use a dagger. Since it is HTH, your DX is +4. The spiders do NOT get a +4. If you ignore your own spiders and hang onto your weapon, you can use it to strike at spiders on other figures (NOT on yourself). Hope you hit the spiders and not your friends ...
If anyone is still alive after you deal with the spiders (and you'd better be ... things are just beginning to warm up) you find four gold bars in the bottom of the chest. You can now go out the west door (16). Don't bother trying the east door: it is locked behind you and will remain so.
34. The first one to make it through the door gets through. No one else can. Go back to 3, and don't try the near door again. The one who escaped can't come back until the orcs are dead OR no live humans are left in the room. He is now at 111.
35. You can't get through. Anyone who tried stops in the last entry hex. The bears move normally this turn, though. Go to 50 and fight.
36. You are at 8. They do not follow.
37. The curtain lets you pass. If you came in (and therefore went out) the east door, you are back at 132. If it was the west door, you are back at 41. The enemy cannot follow.
38. You are in the Orange Room (see map below). You see three stone statues of surpassing ugliness at X, Y, and Z. You can turn around and leave immediately (28 if you came in from the east, 40 if you came in from the west), WALK toward the other door at 3 hexes per turn (27), RUN for the other side at full MA (14), attack the statue at X (54), attack the statue at Y (98), attack the statue at Z (120), attack more than one of the statues on the same turn (64), or just stand there and wait (129). Careful. These decisions can kill you.
[Printed map: combination map of the Orange, Brown, Silver, Copper, and Violet rooms, with the statues X, Y, Z, the W and E ends, the triangles 1 to 4, the A and B fighter hexes, the W and Z markers, and the F entrance hexes. Not reproduced here; see the printed booklet.]
This is a combination map representing the Orange, Brown, Silver, Copper, and Violet rooms. None of these rooms have any obstacles. The instructions for each room tell you which letters above are significant for that room, and what they mean.
39. Go to 56.
40. You are facing west. Walk forward (5) or turn around (29).
41. You are facing west. You walk west and come to a 3-way intersection. You can go straight (17), turn around (4), or turn south (116).
42. You are facing east; there is a curtain in front of you. Go through (48) or turn around (16).
43. You are facing east. Go forward (116) or turn around (88).
44. You are facing east. There is a curtain in front of you. You can go through (71) or turn around (7).
45. You are facing west. Go forward (114) or turn around (91).
46. You are facing west. Go forward (115) or turn around (10).
47. You are standing in a richly-paneled room with sunlight coming in the window. The testing officer is there; he congratulates you on your survival. He escorts you into an office, where you sit down. Go to 167.
48. You are in the Red Room (a standard MELEE map with no obstacles). There is a large chest in the exact center of the room. You may open it (93) or go out the west door (16). The east door is now locked.
49. Anyone who tries to leave by the west door succeeds, but can't get back in until only one side is left in the room — that is, until either the orcs are dead or the party is all dead or out. Escapees are now at 143.
50. The bears are exactly as given in MELEE/WIZARD. They will fight to the death and not retreat; other than that, they may use any tactics. If anyone gets away from the bears and tries to run to/through the far door, go to 94. If anyone tries to go out the near door, go to 35. If you kill the bears, go to 117.
51. You are now at 45. They do not follow.
52. Combat occurs. You have the initiative. On his move, he moves one hex forward. His DX is 14. If you kill or incapacitate him before his turn to act comes, he (obviously) does nothing. Otherwise, he fires a lightning bolt at the most threatening member of your party. His ST started at 10. He fires a 4-die bolt (or, if you hurt him, the strongest bolt he can throw without losing consciousness). If he survives the first round, his action on the second round will be to teleport away. If you kill him before he can vanish, you will find 6 jewels on his body. Otherwise, you find nothing in the room. You may leave by the east door (132) or the west door (41).
53. You see four fighters standing in the four entrance hexes at the far end of the room. They shout threats as you enter. (Go to the Fighter Table and roll for the four fighters.) You can attack (110), stand your ground (119), or turn and run out the door you came in (37).
54. The statue did nothing when you attacked it. Roll one die. On a 6, go back to 38 and try something else. On any other number, go to 135.
55. They are not in a mood for discussion. They get initiative the first turn and attack you. Go to 24.
56. ONE figure can drink it. It immediately restores/cures 4 hits or all his lost ST, whichever is less. Return to wherever you came from.
57. You are in the White Room (see map below). Position your figures on the entry hexes, set up the obstacles shown, and go to 65.
[Printed map: White Room, with the W and E ends, the starred entry hexes, and the obstacle hexes. Not reproduced here; see the printed booklet.]
58. It looks like another group of mercenaries, though you can't see for sure. You can fight (66), run out the door you came in (148), or stand still (122).
59. Anyone going into the pit is fried instantly. Everything that that figure was carrying is lost. Go back to 67 and continue.
60. You are in the Copper Room (see map at 38). You see two fighters at A and B. If you have one or two members in your party, go to 68. If you have three or four, go to 124.
61. You are in the Brown Room (see map at 38). You see three wolves, one at each W. Roll for initiative. If you win, you can try to step out the way you came (69) or attack (163). If the wolves win initiative, go to 140.
62. Place your figures on the entrance hexes and go to 161.
63. The curtain stops you. You cannot leave the way you came. Any figure that hit the curtain loses the rest of its move and is facing the curtain at the end of its move. Go to 127 and fight.
64. Carry out your attack — that is, roll to see if you hit and how much damage you do — and then go to 81.
65. Three hobgoblins come from behind rocks and back up to block the exit. (Put a hobgoblin on each of the front three entrance hexes at the other end of the room.) Each has ST 9, DX 11, IQ 8, no armor, and two small axes (one ready). You may fight (121), stand and wait (73), or try to go out the way you came (87 if from the east, 112 if from the west).
66. There are three fighters (roll from the Fighter Table) and one wizard; if you are using MELEE only, there are four fighters. If there is a wizard, he has ST 10, DX 12, IQ 10. He knows the first 10 spells in the Spell Table. If your FIRST choice was to fight, you have the initiative for the first move; otherwise, they do. If you kill them all, go to 158. If at any time you try to leave by either door, go to 74. If you surrender, go to 107.
67. They fire at you. Each has ST 9, DX 15, IQ 8, a small bow and 3 daggers. They will use the bows as long as they can, firing twice per turn since their DX is 15. They have no armor. If anyone moves into the pit, or is forced into it by a retreat, go to 59. If you kill the archers, go to 136. If you run out an exit, go to 123.
68. When they see you, they shout "Hold!" You can attack anyway (go to 76) or stop to see what they have to say (141).
69. You stepped back out. If it was at the west door, you are at 89. If it was the east door, you are at 99.
70. You bounce. You lose the rest of your move and are facing the curtain. Go back to 161 and fight.
71. You are in the Azure Room (see map below). Set up your figures in the entry hexes. You see four goblins in the center of the room. You can attack (127) or turn around to leave (63).
[Printed map: Azure Room, with the four G goblin hexes, the W and E ends, and the obstacle hexes. Not reproduced here; see the printed booklet.]
72. Go to 56.
73. The hobgoblins call you nasty names and move 5 hexes toward you. You can attack (121) or run out the way you came (138).
74. When you hit the curtain, you bounce. No one is going anywhere until this fight is over. Go back to 66, and good luck.
75. You are in the Yellow Room (see map below). There is a pit in the middle of the room; fumes are rising from it. You also see three slender, fur-clad men with bows. You can turn and run out the door you came in (123), or take any other action you please (67).
[Printed map: Yellow Room, with the central pit (shaded hexes), the three M markers, the W and E ends, and the starred entry hexes. Not reproduced here; see the printed booklet.]
76. Roll them up from the Fighter Table; roll for initiative and begin combat. If you kill them, go to 164. If one or both attempt to step out a curtain, go to 134. If YOU attempt to step out a curtain, go to 149.
77. It brings him back to life; hope he was friendly. His ST is now 3. If he gets out alive, he will recover in time, but his basic ST will be 5 points lower. If he is a foe, he attacks you. Go back to wherever you came from.
78. Move each of your characters 3 hexes and go to 161.
79. Anyone who gets past the goblins and out the far door IS out of the room. He cannot return, though, until all the goblins are dead or the rest of the party is out of the room and/or slain. If the "far" door was the west one, you are at 7. If it was the east one, you are at 31.
80. Any enemy who makes it to a door and steps out has escaped. He will not return. Go back to 24.
81. If one of the statues you attacked was Y, and you hit it, go to 109. Otherwise, go to 135.
82. Okay. While you're watching the other statues, your friend is getting mauled. If the Gargoyle kills him, it will attack the next closest figure. You had better fight it (157) or run for an exit (162). One turn passes while you waste time.
83. You find 8 gold bars and one jewel. You can now leave by the west door (18) or the east door (100).
84. You come to a 3-way intersection. You can go north (116), east (20), or west (131).
85. You are facing west. You walk west and come to a 4-way intersection. Turn around (113), go north (133), south (32), or west (145).
86. You are facing west; in front of you is a curtain. Go through (3) or turn around (111).
87. You are facing east. Walk forward (29) or turn around (5).
88. You are facing west; in front of you is a curtain. Go through (159), or turn around (116).
89. You are facing west. You go forward and turn north, where you encounter a 4-way intersection. You can go on north (133), turn around (32), go east (113), or go west (145).
90. You are facing east. Go forward (84) or turn around (131).
91. You are facing east. There is a curtain in front of you. Go through (12) or turn around (45).
92. You are facing east. Go forward (44) or turn around (156).
93. The chest is in the middle of the room. Position your party in the room. At least one person has to be next to the chest to open it. Go to 33. (If you change your mind about opening the chest, go back to 48.)
94. Anyone who makes it to the far door can go through, but cannot re-enter until the entire party is out (or dead) or the bears are dead. If the "far" door was the east one, you are at 100. If it was west, you are at 18.
95. Each one you killed had a gold bar. You can go out the east door (8) or the west door (45).
96. He fires a 4-die lightning bolt at the closest member of your party, and vanishes. You aren't down here to negotiate, idiot. You may leave by the east door (132) or the west door (41).
97. If anyone steps out the east door, they go to 132. They may re-enter at any time. If anyone steps out the west door, they go to 41, and may re-enter at any time. If all four of the enemy fighters die, go to 26.
98. If you hit the statue at Y, go to 109. If you missed, roll one die. On a 6, return to 38 and try something else. On any other number, go to 135.
99. You are facing east. Go forward (10) or turn around (115).
100. You are facing east. You walk east and come to a 4-way intersection. Go on east (42), north (86), south (19), or back to the west (144).
101. Go to 96.
102. They had three gold bars and a jewel. The wizards' daggers were silver. You can go out the west door (7) or the east door (31).
103. Nothing. You can exit the west door (146) or the east door (92).
104. It cures 6 hits (or 6 lost ST points for a wizard) or all the damage that figure has taken, whichever is less. Return to wherever you came from.
105. You now have two swordbrothers to help you. Get two fighters from the Fighter Table. They meant their offer; they will be loyal to you. You had better be loyal, too. If you stab them, send them into combat and run, or otherwise take advantage of them, the Thorsz will see it, and you will have a messy death in store for you if you get out of here. Go to 149. By the way, one of them has one jewel.
106. Whoever went in FIRST is fried. All that that figure was carrying is lost. The rest of you hear the scream and stay out. Go to 136.
107. They slaughter you.
108. You're out. If you left by the west exit, you're at 112. If you left by the east exit, you're at 87.
109. Statue Y gives a grating roar. It is a Gargoyle, exactly as described in MELEE/WIZARD. It didn't think you'd spot it. Its skin stops 3 hits/attack; if you put more hits than that on it, it's hurt. On the next turn, it will attack; if possible, it will take to the air and dive on one of your figures to attempt HTH combat. You can all help fight it (157), leave the gargoyle his prey and run for either door (162), or stand around and watch the other statues (82).
110. Combat occurs normally. The four fighters will divide themselves as evenly as possible among the members of your party. If any of them have missile weapons, they will try to stay back and fire at your wizards (if any), your missile-weapon users, or whoever they can hit. You HAVE to fight (at least until you get a chance to run). Go to 97.
111. You are facing east. You walk east and turn south. You come to a 4-way intersection. You can go back north (86), onward to the south (19), to the west (144), or to the east (42).
112. You are facing west. You turn south and come to a 4-way intersection. You can go on south (32), turn around and go north (133), turn west (145), or turn east (113).
113. You are facing east. There is a curtain in front of you. Go forward (159) or turn around (85).
114. You are facing west; there is a curtain in front of you. Go through (75) or turn around (154).
115. You are facing west; there is a curtain in front of you. Go through (61) or turn around (99).
116. You come to a 4-way intersection. You can go north (2), south (84), east (6), or west (88).
117. Examining the room, you see a large ring in the floor. It will take everyone's strength combined to pull it up, as you find by careful experimentation. Do you lift the trapdoor, or just leave? If you lift it, group your party around hex T on the map (at number 11) and then go to 83. If you go out the east door, go to 100. If you go west, go to 18.
118. Anyone who steps out the east door may leave, and freely re-enter. You are at 8. The enemy will not follow you out.
119. Tough luck. They're attacking. The enemy gets one free turn, during which you may do NOTHING. If any of them had missile weapons ready, they fire at you. If any had missile weapons that were not ready, they ready them. Go to 110.
120. Roll one die. On a 6, go back to 38 and try something else; otherwise, go to 135.
121. They will fight; their favorite tactic is to throw their ready ax at a figure other than the one they were engaged with. If you kill them all, go to 147. If anyone makes it to the far side, go to 108. If anyone breaks and runs for the way your group entered, go to 138.
122. You stood still and lost the initiative. They move to attack you. On your move, you can run for the entry (74) or fight (66).
123. You escape. You are at 154 (if you came from the east) or 9 (if you came from the west). However, those arrows can pass through the curtain (yours can't, so don't try). Roll one die for each of your figures. On a 5, one arrow (1 – 1) hit him. On a 6, two hit. Now run, you cowards.
Printed text reads "(1 – 1)" for the one-arrow case; reproduced as printed.
124. They attack immediately. Go to 76.
125. He had one jewel and one flask of potion. The tag says "Drink, or give to one who can drink no longer." You can, at any time, have one figure drink it (104) or pour it down the throat of a corpse (77). Make note of these numbers; you can go to one of them at any time you are not actually in combat. There is only enough potion for one figure. When you do use the potion, save your place then so you can return to it. If you do not drink the potion right now, you may leave by either exit (69).
126. You are in the Violet Room. It seems to be completely empty. You may stand still (62), walk across at 3 hexes/turn (78), run across at full MA (139), or turn around to leave (150).
127. Each of the goblins has ST 9, DX 13, IQ 8. If you are playing WIZARD rules, two are wizards; otherwise all are fighters. Wizards have the 8 IQ spells, a staff, and two daggers each; fighters have short bows and two daggers each. If you kill them, go to 102. If you run to the far exit, go to 79. If you turn to leave, go to 63.
128. The sword is magic. It has DX 12 even when its user has a worse DX, and does 3 dice damage.
129. Roll one die. On a 6, go to 135. On any other number, nothing happens. You can stand still another turn (142) or go back to 38.
130. Anyone who heads for the west door can step through. He can reenter at any time. He is at 45.
131. You are facing west. There is a curtain in front of you. Step through (60) or turn around (90).
132. You are facing east: walk east (155) or turn around (166).
133. You are facing east; in front of you is a curtain. Go through (57) or turn around (112).
134. If one fighter escapes, he's gone. Keep fighting the other one; go back to 76. If both escape, the fight is over. Go to 149.
135. You see Statue Y move slightly. Then, incredibly quickly, it unfolds leathery wings and leaps into the air. It comes flapping toward the member of your party with the lightest armor — or the closest one, if more than one are equally unprotected. Before you can react, it lands on that person (its MA in the air on the turn it takes off is 8, and it had initiative) to attempt HTH combat. It is, in fact, your standard Gargoyle, straight out of MELEE/WIZARD, and it is trying to smash one of your people. You can all join the fight (157), leave the gargoyle's victim behind and run for the door (162), or stand around for one turn while the fight goes on, watching the other statues for signs of life (82).
136. Each enemy you loot had one jewel. You may now leave by the east door (154), the west door (9), or by jumping into the pit (59). You must leave this room ONE AT A TIME, so line up in the order you want to leave in, whichever way you go.
137. Go to 56.
138. Refusing a challenge from hobgoblins? How cowardly. The curtain does not let you pass, as you find out by running into it. You are still in the entry hex(es), with your face(s) to the wall. Go back to 121 and fight, or die groveling.
139. Each of your figures makes one move at his/her full MA. Place them wherever they went, and go to 161.
140. The wolves are as in MELEE/WIZARD. They ALL attack the same person. This will be the lightest-armored one, or the one who has taken the most wounds; it's up to the wolves. They fight until you all run (69), kill them all (151), or die.
141. One of them says: "We lost our two friends. Since groups of up to four are allowed, shall we join forces? We will give oath to be sword-brothers, if you will do the same." You can accept their offer and swear (105), or refuse and fight (76).
142. Go to 129 again.
143. You are facing west. You go west and come to a curtain. You can go through (13) or turn around (155).
144. You are facing west. In front of you is a curtain. Go through (11) or turn around (100).
145. You are facing west. There is a curtain in front of you. Go forward (71) or turn around (31).
146. You are facing west. A stairway leads up. You may take it (23) or turn around (30).
147. There were two gold bars behind a rock. You can go out the east door (87) or the west door (112).
148. Roll for initiative. If the enemy wins, they attack you; go to 66. If you win, you may run back for the door you entered; go to 74.
149. You can freely leave (and go back, if you wish). If you stepped out the east door, you're at 90. If it was the west door, you're at 46. If you were pursued, don't worry; nothing is chasing you.
150. You bounce. Go back to 126.
151. There is a dead body lying in one corner of the room. You can designate one or more figures to search it (pick which ones, and go to 125), or leave by either exit (69).
152. The ring is a "blur ring." It reduces the DX of all attacks against its wearer by 4.
153. Gargoyles are tough, aren't they? The "pedestal" he was sitting on is actually a chest. If you open it, place the characters who do so around Y and go to 15. If you leave it alone and head for the exit, go to 162.
154. You are facing east. Go forward (91) or turn around (114).
155. You are facing east. In front of you is a curtain. Go through (3) or turn around (143).
156. You are facing west. In front of you is a curtain. Go through (126) or turn around (92).
157. You fight the gargoyle. If you kill it, go to 153. If some or all of you try to run, go to 162 upon attempting to step through either door.
158. There were 4 gold bars in the room. Searching the bodies, you find 3 jewels and a flask of potion. Any one of your figures can drink it, either now or at any time he/she is not actually in combat. When the potion is drunk, go to 137 (make a note of that number now). When you go to 137, keep your finger on your place, because 137 cannot direct you back. You can now leave by the east (43) or west (85) exit.
159. You are in the Black Room (see map below). The only illumination is provided by flickering torches. You see four figures standing in line (Ms on map). Arrange your figures on the entry hexes and go to 58.
[Printed map: Black Room, with the four M figure hexes, the W and E ends, and the obstacle hexes. Not reproduced here; see the printed booklet.]
160. Nothing happens. Go back to wherever you came from.
161. A giant appears. He is as described in MELEE/WIZARD, with ST 30, DX 9, and a club that does 3 + 3 damage when it hits. Play the giant according to the WIZARD rules if you have them. The giant appears in triangle 1 (see map at 38) UNLESS you have a figure in one of those hexes. In that case, he appears in (order of preference) triangle 2, 3, or 4. If you have figures in all these, the giant appears in 4 anyway, putting 10 hits on any figure in that triangle and knocking it down underneath him. You have initiative. If you run for an exit, go to 70. If you attack, play out the combat, going to 70 if someone tries to use an exit and 103 if you kill him.
162. You made it to an exit? Excellent! You may walk on out. If you hear a scream behind you (as of another member of your party getting seriously damaged), you can go back. It might not be smart, though. You are at 40 if you went out the west exit, or 28 if you took the east one.
163. Every wolf that you engage on YOUR move will stay and fight the one(s) who engaged it. The others will do as in 140. Go to 140.
164. One of them had a jewel. Go to 149.
165. That figure dies. Go back where you came from.
166. You are facing west. In front of you is a curtain. Go through (13) or turn around (155).
167. The officer figures your group's score as follows: For each giant or bear killed, 60 points. For each gargoyle, 50 points. For each experienced fighter (numbers 3, 4, 5, 16, 17, 18), 35 points. For other fighters, wolves, and assorted creatures: 25 points each. Spiders don't count.
The total score for the group is divided by the number in the group when it entered (regardless of how many escaped). This is the final score (and number of experience points) for each survivor.
Rank and pay are awarded as follows:
- 90 points or less: Recruit (100 silver pieces/week)
- 91–120 points: Warrior (150 silver pieces/week)
- 121–160 points: Sergeant (250 silver pieces/week)
- 161–200 points: Hundred-leader (500 silver pieces/week)
- Over 200 points: Thorsz' Guard (1,000 silver pieces/week)
However, no figure who left a room while his comrades were fighting may receive a rank higher than Private, regardless of his score. Any figure that ran out twice will not be taken into service at all. Any figure that ran out three or more times will be executed.
Any gold and jewels you brought out are yours to keep; each gold bar or jewel is worth 1,000 silver pieces. All other loot (potions, etc.) must be returned to the officer.
End of the Death Test booklet.