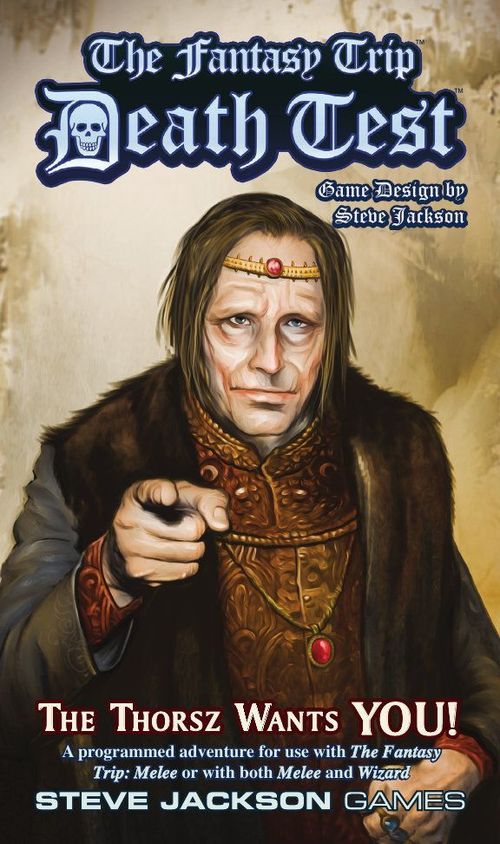
The Fantasy Trip: Death Test and Death Test 2
Rulebook PDF: Metagaming (Steve Jackson Games) · PDF
The Fantasy Trip: Death Test and Death Test 2 Rulebook
Table of Contents
Table of Contents
- Death Test
- Death Test Instructions
- Death Test 2
- Introduction
- How to Play
- Entering the Labyrinth
- Leaving a Room
- Mapping and Record-Keeping
- Picking Up Treasure
- Abandoning Treasure (or Your Companions)
- Splitting a Party
- Illusions
- Playing the Monsters
- Fighter Generation System
- Instructions to Mercenaries
- Magical Items
- Special Weapons, Potions, Etc.
- Restoration of Lost Strength
- Ring Chart
- Experience
- Increasing Your Attributes
- Saving Rolls
- Picking a Party
- Death Test 2 Instructions
Death Test
Warning
(1) DEATH TEST is NOT a complete game in itself. It is a programmed adventure to be played with the MELEE rules (or with the MELEE and WIZARD rules together). DO NOT buy this game if you don't have MELEE!
(2) This adventure is a KILLER.
You have been warned ...
Game components: This book of instructions; a set of counters representing men, beasts, and monsters.
A Programmed Adventure for use with The Fantasy Trip: MELEE or with both MELEE and WIZARD.
Dhallak m'Thorsz Carn is the ruler of a powerful city. He is also famous as a war leader. His ruthlessness with his soldiers, and his generosity toward those who meet his standards, are proverbial. Thus, many adventurers seek his city of Ardonirane - to face death there.
You are one such traveler. Entering Ardonirane, you quickly learn that the Thorsz is, as usual, hiring mercenaries ... but the test they must pass is severe. Singly or in small groups, they must enter a labyrinth under his palace as though in search of treasure. And, indeed, treasure is to be found there - guarded by monsters, prisoners, wizards, and other would-be soldiers of the Thorsz. The penalty for failure is death.
Those who survive the labyrinth honorably will be hired, and given rank appropriate to their performance; in addition, they may keep what treasure they bring out. (The Thorsz does not consider the treasure in awarding rank; he feels gold is its own reward.) He takes into account the number of men that originally made up the party, their bravery in combat, and the number and kind of foes they slay on their way through.
You decide to take your chances, and report to the officer in charge of testing. He tells you that:
(1) The Thorsz has eyes everywhere. Nothing you do in his labyrinth will go unnoticed.
(2) You need search for no "secret" doors. All chambers, passages, etc., will be clearly marked. This is a test of skill and bravery, not eyesight.
(3) Rooms are separated from passageways by "curtains of darkness" rather than doors. These are magic, and appear to be thick velvet-black rectangles. You will usually be able to step through, although you can never LOOK through. However, the beings within a room will never be able to follow you through a curtain. If you are pursued and escape through a curtain, nothing will follow you. Sometimes, though, a curtain will not let you leave a room! The only way to find out is to try - and a curtain may let one man pass and stop another. (If you understand magic, you will realize that the "curtains of darkness" must be Shadow spells, which some hidden wizard occasionally throws a Wall into. However, don't try to look through a curtain with Mage Sight. It won't work.)
(4) You will be lent a set of magic rings which allow your party to speak with one another even if you become separated. You are advised to rejoin as quickly as possible. While you are split, you must operate as two separate groups, but each will know what is happening to the others until you can get back together. (These rings are the ONLY magical items, except for ordinary wizards' staffs, that candidates may take into the labyrinth.)
The testing officer wishes you luck and tells you to report back, with the weapons, armor, and companions of your choice, at noon the next day. And so it comes to pass that you find yourself opening a heavy door at the lowest level of the Thorsz' palace ...
How to Play "Death Test"
This is a programmed adventure using the MELEE and (optionally) WIZARD combat rules. You MUST have MELEE to play; WIZARD will allow you to add magical combat if you wish. The DEATH TEST booklet sets up the rooms for you, gives you decisions to make, and tells you the outcomes of these decisions, but you need the MELEE map and rules for the combats you will face. DEATH TEST can be played several ways:
Solitaire - One lone player can take both sides, creating a party of adventurers and running them through. The booklet will give instructions regarding the foes in each room; the player sets up both sides on the MELEE map and plays out the battles.
Two-player - One player creates a party of adventurers and enters the labyrinth. When foes are encountered, the other player controls them on the MELEE board. His objective is to kill all the mercenaries.
Multi-player - One person plays the creatures in the labyrinth. The others each play an individual fighter or wizard, co-operating (or competing) to get through the labyrinth. (If you play this way, the player who operates the monsters should act as Game Master to settle disputes, and players should agree beforehand on whether they will be permitted to right each other while on the trip.) After a few games, the GM will be familiar enough with the game to introduce his own variations, thus keeping the players from anticipating traps they have already seen.
Creating Figures for "Death Test"
Since DEATH TEST uses the MELEE rules, characters are created as in MELEE; wizards are created as in WIZARD. However, the DEATH TEST labyrinth is tough. Although a group of four "beginning" characters can sometimes make it through, experienced figures will have much better odds. Therefore, you may want to let your figures build up ST, DX, and/or IQ in regular MELEE/WIZARD combat (or just start with more experienced figures) before attempting the DEATH TEST.
Entering the "Death Test" Labyrinth
One to four figures may enter each game. If you are using WIZARD, any or all of the figures may be wizards, and magic may be freely used. If you are using the MELEE rules only, you will be able to use no magic, but no (combat-type) magic will be used against you.
Record sheets should be made up for each entering figure, just as in MELEE. All MELEE rules apply except those for experience. Experience is awarded to survivors based on their labyrinth performance.
If you are using WIZARD, all WIZARD rules except experience apply.
All combat in the DEATH TEST labyrinth is considered "one fight." Thus, wizards have no opportunity to recover lost strength by resting, and must ration their energy carefully - and hits cannot be healed except by magic, for either wizards or heroes, until you are out.
To enter the labyrinth, turn to instruction number 1 and read it. Like each later instruction, it will give you information and directions. Some instructions call for a decision. In this case, make up your mind what you will do BEFORE turning to the next instruction. To avoid losing your place, you can make a note of each instruction number as you pass it. You should try NEVER to read instructions you have not legitimately come to; to do so will lessen your enjoyment of the game. (Also, there are a few instructions included that CANNOT be reached if you play fair.)
As you read the instructions, you will find yourself moving down long corridors and into rooms. All combat takes place in the rooms; the corridors merely take you from one room to the next. (However, you MUST follow the corridor instructions carefully, or you'll get lost.) When you enter a room, MELEE turns begin. It IS permitted to stop just before entering a room, either to change weapons or armor or to cast one or more protective spells on yourself or other members of your party.
As soon as you find yourself in a room, look at the room map and/or instructions and place obstacles, pits, enemies, etc., on the MELEE map. (The WIZARD map is not used.) Place your own figures in the starred entry hexes at the end of the room (east or west) you entered. Finally, read the rest of the room instructions to see what is happening and what your options are. In each new room, game turns begin with your four (or fewer) figures standing in the entry hexes at one end of the room, having just stepped through the curtain of darkness. No figure may BOTH come through the curtain of darkness AND do anything else on the same move.
Obstacles (black hexes) shown on the room maps stop both movement and thrown/missile weapons and spells. Pits (gray hexes) prevent movement (except into the pit), but weapons and spells may pass over them.
Leaving a Room
When all your foes in a room are dead or fled, your party may freely leave and re-enter that room thereafter. However, if a figure (or the group) wants to leave a room containing living enemies (even if they are asleep, trapped behind a fire, etc.), they MUST (a) be given the chance to attempt escape in an instruction, (b) successfully move to one of the three starred hexes at either EXTREME end of the board, and (c) have at least one hex of MA left in order to leave. (It is also permitted to leave by a shift or disengage which takes you off the board from one of those six end hexes, or by teleporting to the other side of the curtain.) When a figure trying to escape reaches the edge of the board, turn to the instruction indicated by the "run away" choice to see if the curtain lets him pass. If it does, the figure may use that last hex of MA to get out and to safety. If the curtain does NOT let him/her pass, the figure stays in that hex, ending movement there, FACING the curtain. If the figure tried to shift out, the attempt fails and the figure stays in the same hex. The same goes for an attempt to disengage. Teleporting out always works, but costs a wizard lots of ST.
NOTE: It is perfectly all right to kill an unconscious foe.
Mapping and Record-Keeping
You will need to keep the following records as you play: (1) the standard record sheets for your own figures, (2) a map of the labyrinth as you explore it, and (3) a record sheet for each room you enter.
The regular figure record sheets are kept in normal MELEE/WIZARD style. Keep track of treasure and weapons carried, hits taken and ST expended, and MA reductions for heavy loot carried (see below).
Your labyrinth map will show which rooms you have passed through. Each room is a different color, to aid you in keeping track. You will need the map if you double back, either accidentally or on purpose.
You should also make a record for each room as you enter it. The book will tell you what foes you encounter (or refer you to the Fighter Table to let you roll for enemies). The room record is made up of one record for each foe there, together with any other notes you make. If you leave living enemies in a room, they will be there if you return. Any corpses (friendly or enemy) will also be there as you left them. However, unattended treasure may vanish, or wounded friends may die (see ABANDONING TREASURE). Therefore, you should keep all the room records until you finish the adventure. When you re-enter a room, go by the record sheet instead of the printed instructions. Things a group has killed will NOT come alive and attack again. However, foes left alive will be back in their starting positions with the wounds you gave them and will attack on sight.
You may wish to keep a record of the number of each instruction you take, in case you lose your place.
Picking Up Treasure
When you find treasure, make notes on the figure record sheets to show who is carrying it. Each GOLD BAR a figure carries will reduce his MA by 1, down to a minimum MA of 4. A figure cannot carry more than 10 gold bars. (Extra weapons picked up in the labyrinth count as gold bars for weight - see below.) Other treasure weighs nothing; any amount may be carried.
Abandoning Treasure (or Your Companions)
If a party wishes to avoid being slowed by the weight of gold or extra weapons, some or all of these may be left in any room after it has been cleaned out - that is, after its occupants are dead. Note the abandoned treasures on the record sheet for that room. If the party comes back for them, roll one die. On a 5 or 6, everything is gone; another party came by and took them. Otherwise, they're still there. Roll the same way for wounded but living friends left behind in an empty room: when you come back, they've had their throats cut on a 5 or 6, and are still alive otherwise. Gold, weapons, or bodies left in a corridor will always be gone when you return.
Splitting a Party
It is legal (but unwise) for a party to split up. Not only does it cause inconvenience as you try to read two sets of instructions ... a party which divides its force will probably be wiped out. If you want to send one scout into a room to see what's there, the rest of the party can enter on any later turn (but must still stop in the entry hexes). However, this is a good way to lose a scout.
If a party bugs out during combat and runs out BOTH doors, it may try to rejoin by entering an unexplored room from both ends at once. Place the figures entering from the west on one set of entry hexes, and those entering from the east on the other. If the instructions say there were enemies at one end, they will be in the middle instead.
Strength lies in numbers. Don't split unnecessarily.
Illusions
It IS legal for a wizard to summon something, or create an illusion, to scout a room. However, images cannot pass through the curtains.
It takes at least 12 turns to walk down each corridor. Thus, any image or illusion created in one room will vanish before it or you can get to another room.
If two or more players are involved, the "monster" player can choose whether and when to attempt to disbelieve the mercenary wizards' figures. However, when one player is playing solitaire, use the following rule: Only foes with IQ 8 or higher can attempt to disbelieve - that is, wolves, bears, and other animals can't disbelieve illusions. Foes will only attempt to disbelieve when they see nonhumans attacking them, OR when more than four figures at once attack, OR if they actually see a wizard create a figure in the room. In any of these cases, roll one die for each foe, each turn. On a 5 or 6, it will attempt to disbelieve one of your figures.
Playing the Monsters
If you are playing solitaire, you may use any strategy you like while playing the mercenary side, as long as you follow the instructions. To play the monsters, use the following guidelines:
(1) Monsters and foes always fight to the death, and never run, unless an instruction specifically says otherwise. If an instruction says they might run, assume they will do so as soon as they are hurt worse than you are.
(2) Most monsters will use standard tactics - that is, they will run at you and try to kill you. Human and humanoid foes will attempt to close with you unless their main weapon is a missile weapon. If it is a missile weapon, they will try to stand off and fire as long as they can.
(3) Some monsters or foes will have favorite tactics (mentioned in the instructions). Use these tactics as long as they seem sensible.
(4) In general, use "common sense" to decide what the foes will do. If two or more reactions are equally likely (for instance, one orc trying to decide which of two men to attack), roll a die to decide.
Fighter Table
When the instructions refer to this Fighter Table, roll 3 dice for each fighter you need, and refer to the list below. When you first encounter a fighter, his shield (if any) and first-named weapon will be ready. All except Number 15 carry one dagger. Assume a fighter is human and has IQ 8 unless specified otherwise in the instructions or the table. If the instructions say "orc" and the table says otherwise, it's an orc.
- 3. ST = 15, DX = 14 (11), IQ = 10. Chainmail, battleaxe, two-handed sword.
- 4. ST = 14, DX = 13 (11). Leather, two-handed sword, light crossbow.
- 5. ST = 13, DX = 16. No armor. Longbow, morningstar.
- 6. ST = 13, DX = 12 (10). Leather armor, halberd, small ax.
- 7. Hobbit. ST = 9, DX = 13, IQ = 10. No armor. Javelin, small shield.
- 8. Dwarf. ST = 15, DX = 10 (8). Leather armor, pike ax, battleaxe.
- 9. ST = 13, DX = 11 (10). No armor. Large shield, morningstar.
- 10. ST = 11, DX = 13. No armor. Longbow, shortsword.
- 11. ST = 12, DX = 12 (9). Leather, large shield, broadsword.
- 12. ST = 10, DX = 14 (11). Chainmail, hammer, horse bow.
- 13. ST = 11, DX = 13 (11). Leather armor, small shield, mace.
- 14. ST = 12, DX = 12. No armor, small shield, broadsword.
- 15. Elf. ST = 9, DX = 17 (15). Leather, small bow, rapier, main-gauche.
- 16. ST = 13, DX = 13 (10). Chainmail, small shield, morningstar.
- 17. ST = 11, DX = 18 (15), IQ = 9. Chainmail, small shield, small ax.
- 18. ST = 12, DX = 18 (12), IQ = 11. Plate armor, broadsword, light crossbow.
Death Test Instructions
The numbered instructions below are the labyrinth text. "Go to N" means turn to instruction N.
1. You come to a curtain and step through. Go to 48.
2. You come to a 3-way intersection. You can go south (116), east (4), or west (17).
3. You are in the Indigo Room (see below). There are two orcs there, at the Xs (roll from Fighter Table). They attack; roll for initiative. You may fight or run for an exit. If you try to go out the east door, go to 34. If you get to the west door, go to 49. If you stay and kill the orcs, go to 22.
4. You are facing east. In front of you is a curtain. Walk through (13) or turn around (41).
5. You are facing west. There is a curtain in front of you. Walk through (57) or turn around (87).
6. You are facing east. In front of you is a curtain. Walk through (11) or turn around (18).
7. You are facing west. You can go ahead (156) or turn around (44).
8. You are facing east; you turn north and come to a 4-way intersection. You may continue north (86), go back south (19), turn west (144), or go east (42).
9. You are facing west. Go forward (84) or turn around (20).
10. You are facing east. In front of you is a curtain. Go forward (60) or turn around (46).
11. You are in the Gold Room (see map below). As the last of your party passes through the curtain, you hear growling. There is a large bear at each of the Xs. Position your party on the four entrance hexes and go to 21.
[Gold Room map not reproduced.]
12. You are in the Silver Room (see map at number 38). There are three fighters there (roll from the Fighter Table), one at each F. They are all wounded: roll one die for each fighter and give him that many hits of damage. You surprised them, so you have movement initiative for the first turn. If you attack, go to 24. If you do not attack, but start to run for the east door, go to 36. If you do not attack, but want to run for the west door, go to 51. If you want to talk to them, go to 55.
13. You are in the Green Room (standard MELEE map without obstacles; no map needed). Arrange your party on the entrance hexes. If you have any wizards in your group, go to 25. Otherwise, go to 53.
14. You try to run through. After each turn of running, roll one die. If you roll a 3, 4, 5, or 6, go to 135. If you roll 1 or 2, you may keep running for another turn and roll again - and so on. If you make it to the exit without rolling a 3, 4, 5, or 6, go to 162. If you want to stop running while in the room, go to 135.
15. It contained two gold bars and a flask of white liquid. If you drink the liquid (there is only enough for one to drink), go to 39. You can SAVE the flask and drink it at any time you are not in combat. If you save the flask, make a note of Number 39, and read it when you drink. 39, obviously, cannot direct you back to your place, so keep your finger on your place as you read 39. Now you may leave. Go to 162.
16. You are facing west. You walk down a corridor and come to a 4-way intersection. You can go north (86), south (19), west (144), or turn around and go east (42).
17. You are facing west. In front of you is a curtain. Walk through (38) or turn around (28).
18. You are facing west. Go west (116) or turn around (6).
19. You are facing west. There is a curtain in front of you. Go through (12) or turn around (8).
20. You are facing east. In front of you is a curtain. Go through (75) or turn around (9).
21. You have the initiative. If you want to go back through the door, go to 35. If you want to fight, go to 50.
22. You find no treasure on the bodies or elsewhere. You can leave by the east door (111) or the west door (143). Any members of the party who ran out either door may now rejoin you.
23. The stairway leads up and to a curtain. You can go through (47) or go back down (30).
24. If you kill them, go to 95. If you are losing and run out the west door, go to 130. If you run out the east door, go to 118. If any enemy tries to run away, go to 80.
25. Suddenly, you see a black-robed figure standing at the far end of the room (the farthest-back entrance hex). You can attack (52), yell "Hello" or some other greeting (96), or stand and wait (101).
26. Each fighter had one gold bar. One also had a flask of white liquid. [There is enough for one to drink, either now or later: if you decide that one of your figures drinks it (at any time not during combat), go to 72 (make a note of that number now), then back to wherever you are when you drink it.] You may now leave by the east door (132) or the west door (41).
27. If you are walking, each member of your party moves at 3 hexes/turn. Roll one die each turn after you move. On a 6, go to 135; on another number, you can walk another round and roll again, or go back to 38 and pick another action. If you make it to an exit and try to leave, go to 162.
28. You are facing east. Walk forward (2) or turn around (17).
29. You are facing east; there is a curtain in front of you. Walk through (38) or turn around (40).
30. You are facing east. There is a curtain in front of you. You may walk through (126) or turn around (146).
31. You are facing east. Walking forward, you come to a 4-way intersection. You may continue east (113), turn around (145), go north (133), or go south (32).
32. You are facing east. There is a curtain in front of you. You can go through (61) or turn around (89).
33. When you open the chest, 12 spiders jump out. They divide themselves evenly between everyone within 3 hexes of the chest and attack immediately. The spiders have ST 1 (so any hit will kill them) and DX 12. Their MA is 4, but they move INTO your hex (that is, ONTO you) and stay with you wherever you move until you die or they do.
Their bite does 2 hits damage, which means that even leather will offer complete protection unless the spider rolls double or triple damage. However, shields do NOT protect against spider bites.
NOTE: Combat with a spider is considered HTH combat: hit it with your hand or use a dagger. Since it is HTH, your DX is +4. The spiders do NOT get a +4. If you ignore your own spiders and hang onto your weapon, you can use it to strike at spiders on other figures (NOT on yourself). Hope you hit the spiders and not your friends ...
If anyone is still alive after you deal with the spiders (and you'd better be ... things are just beginning to warm up), you find four gold bars in the bottom of the chest. You can now go out the west door (16). Don't bother trying the east door: it is locked behind you and will remain so.
34. The first one to make it through the door gets through. No one else can. Go back to 3, and don't try the near door again. The one who escaped can't come back until the orcs are dead OR no live humans are left in the room. He is now at 111.
35. You can't get through. Anyone who tried stops in the last entry hex. The bears move normally this turn, though. Go to 50 and fight.
36. You are at 8. They do not follow.
37. The curtain lets you pass. If you came in (and therefore went out) the east door, you are back at 132. If it was the west door, you are back at 41. The enemy cannot follow.
38. You are in the Orange Room (see map below). You see three stone statues of surpassing ugliness at X, Y, and Z. You can turn around and leave immediately (28 if you came in from the east, 40 if you came in from the west), WALK toward the other door at 3 hexes per turn (27), RUN for the other side at full MA (14), attack the statue at X (54), attack the statue at Y (98), attack the statue at Z (120), attack more than one of the statues on the same turn (64), or just stand there and wait (129). Careful. These decisions can kill you.
[Combination map omitted. It represents the Orange, Brown, Silver, Copper, and Violet rooms. None of these rooms have any obstacles. The instructions for each room tell you which letters above are significant for that room, and what they mean.]
39. Go to 56.
40. You are facing west. Walk forward (5) or turn around (29).
41. You are facing west. You walk west and come to a 3-way intersection. You can go straight (17), turn around (4), or turn south (116).
42. You are facing east; there is a curtain in front of you. Go through (48) or turn around (16).
43. You are facing east. Go forward (116) or turn around (88).
44. You are facing east. There is a curtain in front of you. You can go through (71) or turn around (7).
45. You are facing west. Go forward (114) or turn around (91).
46. You are facing west. Go forward (115) or turn around (10).
47. You are standing in a richly-paneled room with sunlight coming in the window. The testing officer is there; he congratulates you on your survival. He escorts you into an office, where you sit down. Go to 167.
48. You are in the Red Room (a standard MELEE map with no obstacles). There is a large chest in the exact center of the room. You may open it (93) or go out the west door (16). The east door is now locked.
49. Anyone who tries to leave by the west door succeeds, but can't get back in until only one side is left in the room - that is, until either the orcs are dead or the party is all dead or out. Escapees are now at 143.
50. The bears are exactly as given in MELEE/WIZARD. They will fight to the death and not retreat; other than that, they may use any tactics. If anyone gets away from the bears and tries to run to/through the far door, go to 94. If anyone tries to go out the near door, go to 35. If you kill the bears, go to 117.
51. You are now at 45. They do not follow.
52. Combat occurs. You have the initiative. On his move, he moves one hex forward. His DX is 14. If you kill or incapacitate him before his turn to act comes, he (obviously) does nothing. Otherwise, he fires a lightning bolt at the most threatening member of your party. His ST started at 10. He fires a 4-die bolt (or, if you hurt him, the strongest bolt he can throw without losing consciousness). If he survives the first round, his action on the second round will be to teleport away. If you kill him before he can vanish, you will find 6 jewels on his body. Otherwise, you find nothing in the room. You may leave by the east door (132) or the west door (41).
53. You see four fighters standing in the four entrance hexes at the far end of the room. They shout threats as you enter. (Go to the Fighter Table and roll for the four fighters.) You can attack (110), stand your ground (119), or turn and run out the door you came in (37).
54. The statue did nothing when you attacked it. Roll one die. On a 6, go back to 38 and try something else. On any other number, go to 135.
55. They are not in a mood for discussion. They get initiative the first turn and attack you. Go to 24.
56. ONE figure can drink it. It immediately restores/cures 4 hits or all his lost ST, whichever is less. Return to wherever you came from.
57. You are in the White Room (see map below). Position your figures on the entry hexes, set up the obstacles shown, and go to 65.
[White Room map omitted.]
58. It looks like another group of mercenaries, though you can't see for sure. You can fight (66), run out the door you came in (148), or stand still (122).
59. Anyone going into the pit is fried instantly. Everything that that figure was carrying is lost. Go back to 67 and continue.
60. You are in the Copper Room (see map at 38). You see two fighters at A and B. If you have one or two members in your party, go to 68. If you have three or four, go to 124.
61. You are in the Brown Room (see map at 38). You see three wolves, one at each W. Roll for initiative. If you win, you can try to step out the way you came (69) or attack (163). If the wolves win initiative, go to 140.
62. Place your figures on the entrance hexes and go to 161.
63. The curtain stops you. You cannot leave the way you came. Any figure that hit the curtain loses the rest of its move and is facing the curtain at the end of its move. Go to 127 and fight.
64. Carry out your attack - that is, roll to see if you hit and how much damage you do - and then go to 81.
65. Three hobgoblins come from behind rocks and back up to block the exit. (Put a hobgoblin on each of the front three entrance hexes at the other end of the room.) Each has ST 9, DX 11, IQ 8, no armor, and two small axes (one ready). You may fight (121), stand and wait (73), or try to go out the way you came (87 if from the east, 112 if from the west).
66. There are three fighters (roll from the Fighter Table) and one wizard; if you are using MELEE only, there are four fighters. If there is a wizard, he has ST 10, DX 12, IQ 10. He knows the first 10 spells in the Spell Table. If your FIRST choice was to fight, you have the initiative for the first move; otherwise, they do. If you kill them all, go to 158. If at any time you try to leave by either door, go to 74. If you surrender, go to 107.
67. They size you up and attack. Each has ST 9, DX 15, IQ 8, a small bow and 3 daggers. They will use the bows as long as they can, firing twice per turn since their DX is 15. They have no armor. If anyone moves into the pit, or is forced into it by a retreat, go to 59. If you kill the archers, go to 136. If you run out an exit, go to 123.
68. When they see you, they shout "Hold!" You can attack anyway (go to 76) or stop to see what they have to say (141).
69. You stepped back out. If it was at the west door, you are at 89. If it was the east door, you are at 99.
70. You bounce. You lose the rest of your move and are facing the curtain. Go back to 161 and fight.
71. You are in the Azure Room (see map below). Set up your figures in the entry hexes. You see four goblins in the center of the room. You can attack (127) or turn around to leave (63).
[Azure Room map omitted.]
72. Go to 56.
73. The hobgoblins call you nasty names and move 5 hexes toward you. You can attack (121) or run out the way you came (138).
74. When you hit the curtain, you bounce. No one is going anywhere until this fight is over. Go back to 66, and good luck.
75. You are in the Yellow Room (see map below). There is a pit in the middle of the room; fumes are rising from it. You also see three slender, fur-clad men with bows. You can turn and run out the door you came in (123), or take any other action you please (67).
[Yellow Room map omitted.]
76. Roll them up from the Fighter Table; roll for initiative and begin combat. If you kill them, go to 164. If one or both attempt to step out a curtain, go to 134. If YOU attempt to step out a curtain, go to 149.
77. It brings him back to life; hope he was friendly. His ST is now 3. If he gets out alive, he will recover in time, but his basic ST will be 5 points lower. If he is a foe, he attacks you. Go back to wherever you came from.
78. Move each of your characters 3 hexes and go to 161.
79. Anyone who gets past the goblins and out the far door IS out of the room. He cannot return, though, until all the goblins are dead or the rest of the party is out of the room and/or slain. If the "far" door was the west one, you are at 7. If it was the east one, you are at 31.
80. Any enemy who makes it to a door and steps out has escaped. He will not return. Go back to 24.
81. If one of the statues you attacked was Y, and you hit it, go to 109. Otherwise, go to 135.
82. Okay. While you're watching the other statues, your friend is getting mauled. If the Gargoyle kills him, it will attack the next closest figure. You had better fight it (157) or run for an exit (162). One turn passes while you waste time.
83. You find 8 gold bars and one jewel. You can now leave by the west door (18) or the east door (100).
84. You come to a 3-way intersection. You can go north (116), east (20), or west (131).
85. You are facing west. You walk west and come to a 4-way intersection. Turn around (113), go north (133), south (32), or west (145).
86. You are facing west; in front of you is a curtain. Go through (3) or turn around (111).
87. You are facing east. Walk forward (29) or turn around (5).
88. You are facing west; in front of you is a curtain. Go through (159), or turn around (116).
89. You are facing west. You go forward and turn north, where you encounter a 4-way intersection. You can go on north (133), turn around (32), go east (113), or go west (145).
90. You are facing east. Go forward (84) or turn around (131).
91. You are facing east. There is a curtain in front of you. Go through (12) or turn around (45).
92. You are facing east. Go forward (44) or turn around (156).
93. The chest is in the middle of the room. Position your party in the room. At least one person has to be next to the chest to open it. Go to 33. (If you change your mind about opening the chest, go back to 48.)
94. Anyone who makes it to the far door can go through, but cannot re-enter until the entire party is out (or dead) or the bears are dead. If the "far" door was the east one, you are at 100. If it was west, you are at 18.
95. Each one you killed had a gold bar. You can go out the east door (8) or the west door (45).
96. He fires a 4-die lightning bolt at the closest member of your party, and vanishes. You aren't down here to negotiate, idiot. You may leave by the east door (132) or the west door (41).
97. If anyone steps out the east door, they go to 132. They may re-enter at any time. If anyone steps out the west door, they go to 41, and may re-enter at any time. If all four of the enemy fighters die, go to 26.
98. If you hit the statue at Y, go to 109. If you missed, roll one die. On a 6, return to 38 and try something else. On any other number, go to 135.
99. You are facing east. Go forward (10) or turn around (115).
100. You are facing east. You walk east and come to a 4-way intersection. Go on east (42), north (86), south (19), or back to the west (144).
101. Go to 96.
102. They had three gold bars and a jewel. The wizards' daggers were silver. You can go out the west door (7) or the east door (31).
103. Nothing. You can exit the west door (146) or the east door (92).
104. It cures 6 hits (or 6 lost ST points for a wizard) or all the damage that figure has taken, whichever is less. Return to wherever you came from.
105. You now have two swordbrothers to help you. Get two fighters from the Fighter Table. They meant their offer; they will be loyal to you. You had better be loyal, too. If you stab them, send them into combat and run, or otherwise take advantage of them, the Thorsz will see it, and you will have a messy death in store for you if you get out of here. Go to 149. By the way, one of them has one jewel.
106. Whoever went in FIRST is fried. All that figure was carrying is lost. The rest of you hear the scream and stay out. Go to 136.
107. They slaughter you.
108. You're out. If you left by the west exit, you're at 112. If you left by the east exit, you're at 87.
109. Statue Y gives a grating roar. It is a Gargoyle, exactly as described in MELEE/WIZARD. It didn't think you'd spot it. Its skin stops 3 hits per attack; if you put more hits than that on it, it's hurt. On the next turn, it will attack; if possible, it will take to the air and dive on one of your figures to attempt HTH combat. You can all help fight it (157), leave the gargoyle his prey and run for either door (162), or stand around and watch the other statues (82).
110. Combat occurs normally. The four fighters will divide themselves as evenly as possible among the members of your party. If any of them have missile weapons, they will try to stay back and fire at your wizards (if any), your missile-weapon users, or whoever they can hit. You HAVE to fight (at least until you get a chance to run). Go to 97.
111. You are facing east. You walk east and turn south. You come to a 4-way intersection. You can go back north (86), onward to the south (19), to the west (144), or to the east (42).
112. You are facing west. You turn south and come to a 4-way intersection. You can go on south (32), turn around and go north (133), turn west (145), or turn east (113).
113. You are facing east. There is a curtain in front of you. Go forward (159) or turn around (85).
114. You are facing west; there is a curtain in front of you. Go through (75) or turn around (154).
115. You are facing west; there is a curtain in front of you. Go through (61) or turn around (99).
116. You come to a 4-way intersection. You can go north (2), south (84), east (6), or west (88).
117. Examining the room, you see a large ring in the floor. It will take everyone's strength combined to pull it up, as you find by careful experimentation. Do you lift the trapdoor, or just leave? If you lift it, group your party around hex T on the map (at number 11) and then go to 83. If you go out the east door, go to 100. If you go west, go to 18.
118. Anyone who steps out the east door may leave, and freely re-enter. You are at 8. The enemy will not follow you out.
119. Tough luck. They're attacking. The enemy gets one free turn, during which you may do NOTHING. If any of them had missile weapons ready, they fire at you. If any had missile weapons that were not ready, they ready them. Go to 110.
120. Roll one die. On a 6, go back to 38 and try something else; otherwise, go to 135.
121. They will fight; their favorite tactic is to throw their ready ax at a figure other than the one they were engaged with. If you kill them all, go to 147. If anyone makes it to the far side, go to 108. If anyone breaks and runs for the way your group entered, go to 138.
122. You stood still and lost the initiative. They move to attack you. On your move, you can run for the entry (74) or fight (66).
123. You escape. You are at 154 (if you came from the east) or 9 (if you came from the west). However, those arrows can pass through the curtain (yours can't, so don't try). Roll one die for each of your figures. On a 5, one arrow (1 - 1) hit him. On a 6, two hit. Now run, you cowards.
124. They attack immediately. Go to 76.
125. He had one jewel and one flask of potion. The tag says "Drink, or give to one who can drink no longer." You can, at any time, have one figure drink it (104) or pour it down the throat of a corpse (77). Make note of these numbers; you can go to one of them at any time you are not actually in combat. There is only enough potion for one figure. When you do use the potion, save your place then so you can return to it. If you do not drink the potion right now, you may leave by either exit (69).
126. You are in the Violet Room. It seems to be completely empty. You may stand still (62), walk across at 3 hexes/turn (78), run across at full MA (139), or turn around to leave (150).
127. Each of the goblins has ST 9, DX 13, IQ 8. If you are playing WIZARD rules, two are wizards; otherwise all are fighters. Wizards have the 8 IQ spells, a staff, and two daggers each; fighters have short bows and two daggers each. If you kill them, go to 102. If you run to the far exit, go to 79. If you turn to leave, go to 63.
128. The sword is magic. It has DX 12 even when its user has a worse DX, and does 3 dice damage.
129. Roll one die. On a 6, go to 135. On any other number, nothing happens. You can stand still another turn (142) or go back to 38.
130. Anyone who heads for the west door can step through. He can re-enter at any time. He is at 45.
131. You are facing west. There is a curtain in front of you. Step through (60) or turn around (90).
132. You are facing east: walk east (155) or turn around (166).
133. You are facing east; in front of you is a curtain. Go through (57) or turn around (112).
134. If one fighter escapes, he's gone. Keep fighting the other one; go back to 76. If both escape, the fight is over. Go to 149.
135. You see Statue Y move slightly. Then, incredibly quickly, it unfolds leathery wings and leaps into the air. It comes flapping toward the member of your party with the lightest armor - or the closest one, if more than one are equally unprotected. Before you can react, it lands on that person (its MA in the air on the turn it takes off is 8, and it had initiative) to attempt HTH combat. It is, in fact, your standard Gargoyle, straight out of MELEE/WIZARD, and it is trying to smash one of your people. You can all join the fight (157), leave the gargoyle's victim behind and run for the door (162), or stand around for one turn while the fight goes on, watching the other statues for signs of life (82).
136. Each enemy you loot had one jewel. You may now leave by the east door (154), the west door (9), or by jumping into the pit (59). You must leave this room ONE AT A TIME, so line up in the order you want to leave in, whichever way you go.
137. Go to 56.
138. Refusing a challenge from hobgoblins? How cowardly. The curtain does not let you pass, as you find out by running into it. You are still in the entry hex(es), with your face(s) to the wall. Go back to 121 and fight, or die groveling.
139. Each of your figures makes one move at his/her full MA. Place them wherever they went, and go to 161.
140. The wolves are as in MELEE/WIZARD. They ALL attack the same person. This will be the lightest-armored one, or the one who has taken the most wounds; it's up to the wolves. They fight until you all run (69), kill them all (151), or die.
141. One of them says: "We lost our two friends. Since groups of up to four are allowed, shall we join forces? We will give oath to be sword-brothers, if you will do the same." You can accept their offer and swear (105), or refuse and fight (76).
142. Go to 129 again.
143. You are facing west. You go west and come to a curtain. You can go through (13) or turn around (155).
144. You are facing west. In front of you is a curtain. Go through (11) or turn around (100).
145. You are facing west. There is a curtain in front of you. Go forward (71) or turn around (31).
146. You are facing west. A stairway leads up. You may take it (23) or turn around (30).
147. There were two gold bars behind a rock. You can go out the east door (87) or the west door (112).
148. Roll for initiative. If the enemy wins, they attack you; go to 66. If you win, you may run back for the door you entered; go to 74.
149. You can freely leave (and go back, if you wish). If you stepped out the east door, you're at 90. If it was the west door, you're at 46. If you were pursued, don't worry; nothing is chasing you.
150. You bounce. Go back to 126.
151. There is a dead body lying in one corner of the room. You can designate one or more figures to search it (pick which ones, and go to 125), or leave by either exit (69).
152. The ring is a "blur ring." It reduces the DX of all attacks against its wearer by 4.
153. Gargoyles are tough, aren't they? The "pedestal" he was sitting on is actually a chest. If you open it, place the characters who do so around Y and go to 15. If you leave it alone and head for the exit, go to 162.
154. You are facing east. Go forward (91) or turn around (114).
155. You are facing east. In front of you is a curtain. Go through (3) or turn around (143).
156. You are facing west. In front of you is a curtain. Go through (126) or turn around (92).
157. You fight the gargoyle. If you kill it, go to 153. If some or all of you try to run, go to 162 upon attempting to step through either door.
158. There were 4 gold bars in the room. Searching the bodies, you find 3 jewels and a flask of potion. Any one of your figures can drink it, either now or at any time he/she is not actually in combat. When the potion is drunk, go to 137 (make a note of that number now). When you go to 137, keep your finger on your place, because 137 cannot direct you back. You can now leave by the east (43) or west (85) exit.
159. You are in the Black Room (see map below). The only illumination is provided by flickering torches. You see four figures standing in line (Ms on map). Arrange your figures on the entry hexes and go to 58.
[Black Room map omitted.]
160. Nothing happens. Go back to wherever you came from.
161. A giant appears. He is as described in MELEE/WIZARD, with ST 30, DX 9, and a club that does 3 + 3 damage when it hits. Play the giant according to the WIZARD rules if you have them. The giant appears in triangle 1 (see map at 38) UNLESS you have a figure in one of those hexes. In that case, he appears in (order of preference) triangle 2, 3, or 4. If you have figures in all these, the giant appears in 4 anyway, putting 10 hits on any figure in that triangle and knocking it down underneath him. You have initiative. If you run for an exit, go to 70. If you attack, play out the combat, going to 70 if someone tries to use an exit and 103 if you kill him.
162. You made it to an exit? Excellent! You may walk on out. If you hear a scream behind you (as of another member of your party getting seriously damaged), you can go back. It might not be smart, though. You are at 40 if you went out the west exit, or 28 if you took the east one.
163. Every wolf that you engage on YOUR move will stay and fight the one(s) who engaged it. The others will do as in 140. Go to 140.
164. One of them had a jewel. Go to 149.
165. That figure dies. Go back where you came from.
166. You are facing west. In front of you is a curtain. Go through (13) or turn around (155).
167. The officer figures your group's score as follows: For each giant or bear killed, 60 points. For each gargoyle, 50 points. For each experienced fighter (numbers 3, 4, 5, 16, 17, 18), 35 points. For other fighters, wolves, and assorted creatures, 25 points each. Spiders don't count.
The total score for the group is divided by the number in the group when it entered (regardless of how many escaped). This is the final score (and number of experience points) for each survivor.
Rank and pay are awarded as follows:
- 90 points or less: Recruit (100 silver pieces/week)
- 91-120 points: Warrior (150 silver pieces/week)
- 121-160 points: Sergeant (250 silver pieces/week)
- 161-200 points: Hundred-leader (500 silver pieces/week)
- Over 200 points: Thorsz' Guard (1,000 silver pieces/week)
However, no figure who left a room while his comrades were fighting may receive a rank higher than Private, regardless of his score. Any figure that ran out twice will not be taken into service at all. Any figure that ran out three or more times will be executed.
Any gold and jewels you brought out are yours to keep; each gold bar or jewel is worth 1,000 silver pieces. All other loot (potions, etc.) must be returned to the officer.
Death Test 2
A Programmed Adventure for use with The Fantasy Trip: In The Labyrinth or with MELEE and WIZARD.
Introduction
"Walk quietly," the word had gone around the place. "He's angry today."
Still, it was with little trepidation that the guard captain entered the presence of the Thorsz. A Red Plains orc, stolid and loyal, he had little on his conscience and correspondingly few worries. Most likely he would simply be told to have a squad sent for somebody, and that would be that. He began his formal salutation, but was interrupted.
"Never mind that, Captain. Tell me this: What do you think of the new guardsmen we've been getting?"
He swallowed and tried to answer. "Well, Sire ..."
"They stink, that's what! I built that labyrinth to kill off fools, and what do I get? They're not even working up a sweat down there!"
"But, Sire ... nothing has changed. The first month we used that test, eight of ten died. After that fewer tried, but they were better. Still, it kills seven of ten. Or so I thought, Sire."
From a chair in the corner of the room, another voice spoke. "If you will permit a comment, most gracious Sire ... Captain Ayoch has hit on the problem. Nothing has changed. Men speak of what they do, even your guards. Can it be that the tests of your labyrinth are no longer a secret?"
"That must be it." Curiously, the Thorsz sounded calmer. "I should have seen it myself; thank you, mage. Then you've not failed me, Ayoch. You've never been required to watch the tests yourself. Know, then, that my deadly test now kills scarce three out of ten of those who attempt it. They fill the gargoyles with arrows, baffle the giant with images, and relieve themselves against the spider-chest. They've killed so many bears the mages have to use summoned ones now. I believe it's time for some changes."
"Pardon me, Sire - but I try to do my duty. I test every new fighter myself, as soon as the physickers say he's ready, and Trevare Spellsword meets every new wizard on the field. We've had no weaklings get through."
"Foreknowledge or no, no weakling could get through that alive. But I don't just want strong men. I want heroes. Come back here at the sixth hour, Captain. Bring the palace architect with you. And you" - he turned to the wizard - "you be here too, Irrissee. I'll want a wizard's advice for this. We're going to do a little remodeling."
He paused. "One thing more, Captain. Within the week, I want a patrol to go clean out those ruins in Quercim - the old towers. Take all the men that've joined in the last ... hmm ... three months. We'll see if there are any real heroes in that batch. And the next ones won't have it so easy."
He chuckled.
* * *
How to Play
DEATH TEST II is a programmed adventure for THE FANTASY TRIP. It can be played using the MELEE and WIZARD rules -- or you can use TFT: IN THE LABYRINTH, which comprises MELEE, WIZARD, and much more. This booklet will set up the rooms for you, give you decisions to make, and tell you the outcomes of those decisions. You will need to supply six-sided dice, a straightedge, scratch paper, and either MELEE and WIZARD or TFT: IN THE LABYRINTH (ITL), ADVANCED MELEE, and ADVANCED WIZARD. Each room (by a lucky coincidence) is the size of a MELEE map -- or you can build the same shape out of TFT megahexes.
DEATH TEST II can be played several ways:
Solitaire - One lone player can take both sides, creating a party of adventurers and running them through. This booklet will give instructions regarding the foes in each room; the player sets up both sides on the MELEE map (or its equivalent) and plays out the battles.
Two-Player - One player creates a party of adventurers and enters the labyrinth. When foes are encountered, the other player controls them. His objective is to kill all the mercenaries. The second player may be considered the Game Master (GM) for purposes of these instructions, though he's really an opponent.
Multi-player - You can do just as above, with one player taking the monsters and the other players each taking a character - hero or wizard - co-operating or competing to get out alive. Or you can have several players in the party, plus a monster player, plus a true Game Master - a referee to settle all disputes. If you do it this way, the GM should be the one with the book, reading the instructions to the players to tell them what they see. After a few trips through, the GM will be familiar enough with the game to introduce his own variations, thus preventing the players from anticipating traps they have already seen.
Entering the Labyrinth
One to four figures may enter each game. Any or all of the figures may be wizards, and magic may be freely used.
Record sheets should be made up for each entering figure. Experience is awarded to survivors based on their labyrinth performance.
To enter the labyrinth, turn to instruction number 1 and read it. Like each later instruction, it will give you information and directions. Some instructions call for a decision. In this case, make up your mind what you will do BEFORE turning to the next instruction. To avoid losing your place, you can make a note of each instruction number as you pass it. You should try NEVER to read instructions you have not legitimately come to; to do so will lessen your enjoyment of the game. (Also, there are a few instructions included that CANNOT be reached if you play fairly.)
As you read the instructions, you will find yourself moving down long corridors and into rooms. All combat takes place in the rooms; the corridors merely take you from one room to the next. (However, you MUST follow the corridor instructions carefully, or you'll get lost.) When you enter a room, MELEE turns begin. It IS permitted to stop just before entering a room, either to change weapons or armor or to cast one or more protective spells on yourself or other members of your party.
As soon as you find yourself in a room, look at the room map and/or instructions and place obstacles, pits, enemies, etc., on the MELEE map. (The WIZARD map is not used.) Place your own figures in the starred entry hexes at the end of the room (east or west) you entered. Finally, read the rest of the room instructions to see what is happening and what your options are. In each new room, game turns begin with your four (or fewer) figures standing in the entry hexes at one end of the room, having just stepped through the curtain of darkness. No figure may BOTH come through the curtain of darkness AND do anything else on the same move.
Obstacles (black hexes) shown on the room maps stop both movement and thrown/missile weapons and spells. Pits (gray hexes) prevent movement (except into the pit), but weapons and spells may pass over them.
Leaving a Room
When all your foes in a room are dead or fled, your party may freely leave and re-enter that room thereafter. However, if a figure (or the group) wants to leave a room containing living enemies (even if they are asleep, trapped behind a fire, etc.), they MUST (a) be given the chance to attempt escape in an instruction, (b) successfully move to one of the three starred hexes at either EXTREME end of the board, and (c) have at least one hex of Movement Allowance (MA) left in order to leave. (It is also permitted to leave by a shift or disengage which takes you off the board from one of those six end hexes, or by teleporting to the other side of the curtain.) When a figure trying to escape reaches the edge of the board, turn to the instruction indicated by the "run away" choice to see if the curtain lets him pass. If it does, the figure may use that last hex of MA to get out and to safety. If the curtain does NOT let him/her pass, the figure stays in that hex, ending movement there, FACING the curtain. If the figure tried to shift out, the attempt fails and the figure stays in the same hex. The same goes for an attempt to disengage. Teleporting out always works, but costs a wizard lots of ST.
NOTE: It is perfectly all right to kill an unconscious foe.
Mapping and Record-Keeping
You will need to keep the following records as you play: (1) the standard record sheets for your own figures, (2) a map of the labyrinth as you explore it, and (3) a record sheet for each room you enter.
The figure record sheets are kept in normal style. Keep track of treasure and weapons carried, hits taken and Strength (ST) expended, and MA reductions for heavy loot carried (see below).
Your labyrinth map will show which rooms you have passed through. Each room is a different color, to aid you in keeping track. You will need the map if you double back, either accidentally or on purpose.
You should also make a record for each room as you enter it. The book will tell you what foes you encounter (or refer you to the Fighter Table to let you roll for enemies). The room record is made up of one record for each foe there, together with any other notes you make. If you leave living enemies in a room, they will be there if you return. Any corpses (friendly or enemy) will also be there as you left them. However, unattended treasure may vanish, or wounded friends may die (see ABANDONING TREASURE). Therefore, you should keep all the room records until you finish the adventure. When you re-enter a room, go by the record sheet instead of the printed instructions. Things a group has killed will NOT come alive and attack again. However, foes left alive will be back in their starting positions with the wounds you gave them and will attack on sight.
You may wish to keep a record of the number of each instruction you take, in case you lose your place.
Picking Up Treasure
When you find treasure, make notes on the figure record sheets to show who is carrying it. Each GOLD BAR a figure carries will reduce his MA by 1, down to a minimum MA of 4. A figure cannot carry more than 10 gold bars. (Extra weapons picked up in the labyrinth count as gold bars for weight - see below.) Other treasure weighs nothing; any amount may be carried. If you are using ITL, you may use the "weight carried" rules instead.
Abandoning Treasure (or Your Companions)
If a party wishes to avoid being slowed by the weight of gold or extra weapons, some or all of these may be left in any room after it has been cleaned out - that is, after its occupants are dead. Note the abandoned treasures on the record sheet for that room. If the party comes back for them, roll one die. On a 5 or 6, everything is gone; another party came by and took them. Otherwise, they're still there. Roll the same way for wounded but living friends left behind in an empty room; when you come back, they've had their throats cut on a 5 or 6, or are still alive otherwise. Gold, weapons, or bodies left in a corridor will always be gone when you return.
Splitting a Party
It is legal (but unwise) for a party to split up. Not only does it cause inconvenience as you try to read two sets of instructions ... a party which divides its force will probably be wiped out. If you want to send one scout into a room to see what's there, the rest of the party can enter on any later turn (but must still stop in the entry hexes). However, this is a good way to lose a scout.
If a party bugs out during combat and runs out BOTH doors, it may try to rejoin by entering an unexplored room from both ends at once. Place the figures entering from the west on one set of entry hexes, and those entering from the east on the other. If the instructions say there were enemies at one end, they will be in the middle instead.
Strength lies in numbers. Don't split unnecessarily.
Illusions
It IS legal for a wizard to summon something, or create an illusion, to scout a room. However, images cannot pass through the curtains.
It takes at least 12 turns to walk down each corridor. Thus, any image or illusion created in one room will vanish before it or you can get to another room.
If two or more players are involved, the "monster" player can choose whether and when to attempt to disbelieve the mercenary wizards' figures. However, when one player is playing solitaire, use the following rule: Only foes with IQ 8 or higher can attempt to disbelieve - that is, wolves, bears, and other animals can't disbelieve illusions. Foes will only attempt to disbelieve when they see nonhumans attacking them, OR when more than four figures at once attack, OR if they actually see a wizard create a figure in the room. In any of these cases, roll one die for each foe, each turn. On a 5 or 6, it will attempt to disbelieve one of your figures.
Playing the Monsters
If you are playing solitaire, you may use any strategy you like while playing the mercenary side, as long as you follow the instructions. To play the monsters, use the following guidelines:
(1) Monsters and foes always fight to the death, and never run, unless an instruction specifically says otherwise. If an instruction says they might run, assume they will do so as soon as they are hurt worse than you are.
(2) Most monsters will use standard tactics - that is, they will run at you and try to kill you. Human and humanoid foes will attempt to close with you unless their main weapon is a missile weapon. If it is a missile weapon, they will try to stand off and fire as long as they can.
(3) Some monsters or foes will have favorite tactics (mentioned in the instructions). Use these tactics as long as they seem sensible.
(4) In general, use "common sense" to decide what the foes will do. If two or more reactions are equally likely (for instance, one orc trying to decide which of two men to attack), roll a die to decide.
(5) It is perfectly all right to keep the beginning ST of the monsters and foes as a secret - though of course the players should have a good idea just because of the nature of the menace.
(6) Don't let Sex Appeal, Charisma, or any other talent keep a helpless player from being slain - but a GM may let them be useful in a negotiating situation.
Fighter Generation System
When you need a fighter for the Brown or Copper Room, you create him quickly by rolling dice, as follows:
STRENGTH (ST), DEXTERITY (DX), and INTELLIGENCE (IQ): For each of these attributes, roll two dice and add 5 to the total. Thus, all attributes will start between 7 and 17, averaging 12. However, if you get an attribute of 7, increase it to an 8.
Weapons Carried: The figure's main weapon will be the largest sword, mace, or ax-type weapon his ST allows. For secondary weapon, roll one die. On a 1, he carries a large shield. On a 2, he carries a small shield. On a 3 or 4, he carries the largest missile weapon his ST will allow. On a 5 or 6, he carries the largest pole weapon his ST will allow. All figures have a dagger in their belts.
NOTE: If a figure's main weapon is a two-handed one, he will not have a shield, so disregard a 1 or 2 and roll again.
Ready weapon: On a 1, 2, 3, or 4, the main weapon and shield (if any) will be ready. On a 5 or 6 the secondary weapon (if one is carried) will be ready. If the "secondary weapon" is a shield instead, the main weapon and the shield are carried. (Alternatively, you can just choose the best weapon for the tactical position.)
Armor worn: Roll one die. On a 1, 2, or 3, no armor is worn. On a 4, the figure wears leather. On a 5, he/she wears chainmail. On a 6, he/she wears plate. However, if a figure gets armor which reduces his/her DX below 10, roll again.
Race: Roll two dice. On a 2 or 3, the figure is an elf. 4 or 5: a dwarf. 6 or 7: human. 8 or 9: orc. 10: goblin. 11 or 12: halfling.
Sex: On a 1 through 4, he's male. On a 5 or 6, she's female.
This system does not have to be limited to the Brown and Copper Rooms. You can also use it to create figures for the Black and Silver Rooms, and even bowmen for the Maroon Room ... or any time you need a few thugs quickly. You can even use it to create your own quick player-characters, though it's more fun to invent your own from scratch.
Instructions to Mercenaries
When you speak to the Thorsz' officer in charge of the labyrinth, he tells you several things. From one to four may enter at a time; no groups of over four are allowed. Anyone who survives the labyrinth honorably will be hired, and given rank appropriate to their performance; in addition, they may keep whatever treasure they bring out. (The Thorsz does not consider treasure in awarding rank; he feels that gold is its own reward.) You are also told that:
(1) The Thorsz has eyes everywhere. Nothing you do in his labyrinth will go unnoticed.
(2) You need not search for "secret" doors. All chambers, passages, etc., will be clearly marked. This is a test of skill and bravery, not eyesight.
(3) Rooms are separated from passageways by "curtains of darkness" rather than doors. These are magic, and appear to be thick velvet-black rectangles. You will usually be able to step through, although you can never LOOK through. However, the beings within a room will never be able to follow you through a curtain. If you are pursued and escape through a curtain, nothing will follow you. Sometimes, though, a curtain will not let you leave a room! The only way to find out is to try - and a curtain may let one man pass and stop another. (If you understand magic, you will realize that the "curtains of darkness" must be Shadow spells, which some hidden wizard occasionally throws a Wall into. However, don't try to look through a curtain with Mage Sight. It won't work.)
(4) You will be lent a set of magic rings which allow your party to speak with one another even if you become separated. You are advised to rejoin as quickly as possible. While you are split, you must operate as two separate groups, but each will know what is happening to the others until you can get back together. (These rings are the ONLY magical items, except for ordinary wizards' staffs, that candidates may take into the labyrinth.)
(5) Anyone you meet in the labyrinth is a potential enemy unless he wears red robes. No one except the Thorsz' representatives are permitted to dress thus in the city of Ardonirane. If you meet a red-robed figure, you must follow his instructions to the letter; you may not attack him. It is forbidden to create a magical likeness of a red robe anywhere in the city - and this labyrinth is no exception. As the Thorsz says: "That's an old trick. I want to see new ones."
(6) Certain exotic weapons and other items cannot be brought into the labyrinth; see MAGICAL ITEMS and SPECIAL WEAPONS, POTIONS, ETC., below.
Magical Items
No one is permitted to bring any magical item (except a wizard's staff or Staff of Power, without additional spells) into this labyrinth. However, there are several magical items already there. Each bears the Thorsz' glyph, so wizards won't waste strength checking everything for magic. However, determining the nature of a magical item will require either an Analyze Magic spell (if you are using ITL) or experimentation. Magic items may be helpful, harmful, or mixed. Some magic items may be explained in the text. Others vary from adventure to adventure, as explained below in the RING CHART.
Special Weapons, Potions, Etc.
Mercenaries are not allowed to bring crossbow-windlasses, gunpowder weapons, molotails, gas bombs, poisons, or potions of any kind. Likewise, trained animals and strange artifacts are forbidden. The Thorsz is interested in testing guards - not bank accounts or collections of (what he considers) unmanly or unreliable gadgets.
However, finely-made weapons (see ITL) that give their users a DX or damage bonus without magic are quite acceptable, as if Fine Plate armor for those who may possess it. Silver weapons (non-magical) are also legal. If the wearer or user of any such item dies in the labyrinth, though, that item goes into the Thorsz' armory.
Restoration of Lost Strength
It is permitted to rest a quarter-hour (but no longer) in each room. In this time, a wizard can recover one ST point spent on spell-casting. This may only take place if the occupants of a room have all been killed/subdued/driven out/made allies, and may only happen once per room.
Healing wounds: If you are using TFT: IN THE LABYRINTH, you may have a character who is a Physicker or even a Master Physicker. If so, he can use his abilities - but remember that he only has 15 minutes in each room. All other Physicker rules must be followed as well. If you're using the simple weight rules given characters elsewhere in this book, count the Physicker's Kit as equal to one gold bar.
If you are not using ITL, all your figures are untrained in medicine and must keep the wounds they get.
Ring Chart
When you find a ring bearing the Thorsz' mark, the text may direct you to this chart in order to determine what the ring is. Roll one die and make a note of the number from the chart below - for instance, if you roll a 1, make a note of no. 116. DO NOT go to that number now. You may look at the number for your ring only if (a) a character casts a successful ANALYZE MAGIC spell, or (b) a figure wearing that ring is involved in combat. The usual magic ring would not reveal its nature just because its wearer is in a fight -- but these do. (If you're not using ADVANCED WIZARD, you will have to experiment; you don't have Analyze Magic.)
If you are playing with a Game Master, the GM is the one who looks at the ring number and tells the players what they have at the appropriate time. NOTE: If a wizard attempts ANALYZE MAGIC on a ring, the GM makes the roll. If the roll is badly missed (say, 16 or above) the GM should tell a horrendous LIE about the nature of the ring. For an "ordinary" miss, he should simply say "You learn nothing."
Note that putting on or taking off a ring is considered equivalent to picking up or putting down a weapon, for option purposes. For example, you cannot put on (or remove) a ring on the same turn you attack a foe.
| Die Roll | Make a note of this number |
|---|---|
| 1 | 116 |
| 2 | 38 |
| 3 | 151 |
| 4 | 77 |
| 5 | 182 |
| 6 | 208 |
When you go to one of these numbers, make sure you keep track of your place - because the ring instruction cannot direct you back to your position in the labyrinth.
Experience
The object of this game is the same as that of life itself - to survive and to better yourself at your chosen pursuits. In THE FANTASY TRIP, a character betters himself by increasing his attributes - ST, DX, and IQ. The major way to increase your attributes is by gaining experience points (EP).
Experience points are awarded by the Game Master whenever a character does something "well". Any action which would teach the character something (or which shows that he's learned his lessons well) should be worth experience points. Trying a valiant action and failing should also be worth something.
Experience should be awarded as follows:
For combat: One experience point for every hit of damage you put on a foe, or for every one-hit "nuisance" creature, like a rat or wasp, you kill. For killing larger nuisance creatures, like slimes, give five points to the person who puts in the death blow, and no points to anyone else. Killing a slime isn't much harder than knocking down a door, and shouldn't be worth much. NOTE: hits done by a wizard's spells -- including rue and illusions -- count as experience for the wizard. ALSO: the person dealing the killing blow to any enemy (except a very weak nuisance monster, like a rat) gets experience points equal to that foe's basic DX. This serves two purposes: it encourages fighters to press the attack, and it makes killing a high-DX low-ST foe (often a deadly opponent) worth something.
For casting spells: A wizard gets one EP for each point of strength he expends in casting (or trying to cast) a spell. Even missed spells count for experience. Strength used in making magical items also counts.
For die rolls: Making a saving roll against danger (thus avoiding it) or putting one of your talents to good use (thus learning more) are worth experience. Any character who successfully makes any roll on four or more dice will get experience points: 10 for a 4-die roll, 15 for a 5-die roll, 20 for a 6-die roll, and so on. Only a roll which produces results will count - for instance, if you look for a secret door and none is there, you don't get experience, no matter how good the roll. NOTE: Sometimes the GM will make a roll for a character, so the result will be secret. These rolls do count for experience, if they are successfully made. The GM tells the player later.
Successful disbelief of an illusion is the only 3-die roll good for experience: 10 points.
For time spent in play: Each hour of real time spent in play is worth 5 experience points to each character actively involved. The GM should not award points to characters who don't participate or who waste time deliberately. However, characters who actively take part in the risks and triumphs of four (real) hours of play will amply deserve the extra 20 points.
Game Master's discretion: The game master can give out extra experience points (or TAKE THEM AWAY) whenever he feels it proper. These bonuses or penalties should be small (usually not more than 10 at a time) and should reflect the performance of the characters. Examples: a heroic-knight-type character stands alone in a tunnel against three foes, or volunteers to open a door that is probably trapped, to save the rest of the party -- 10 points. Maybe more, if the foes are dangerous. The same heroic figure turns and runs when confronted by a bear -- lose ten experience points for acting out of character. The GM might give extra points for acting out of character. The GM might give extra experience points to a character that figured out a riddle-clue, defeated or frightened enemies by a cute trick, or even (for a sneaky character) cheated the other players out of treasure. Points should be taken away for actions that are very out-of-character, or for very stupid actions (unless the character is supposed to be stupid, in which case the GM might award EP for dumb actions!)
Increasing Your Attributes
When experience points are earned (except on a secret roll made by the GM), the GM should tell the player immediately. Good play brings quick rewards, and players should keep tally marks on their character sheets so they can mark down EP as they earn them. The benefits of experience points come at the END of an adventure - when the players are safely back in the village, or their own castle, or wherever their "base" is. Experience points are traded directly for increased attributes, according to the following schedule. The higher your attribute total is, the more experience you need to go up another point.
- Up to 36 attribute total: 125 EP each.
- 37-40 attribute total: 250 EP each.
- 41-45 attribute total: 1,000 EP each.
- 46-50 attribute total: 3,000 EP each.
- 51-55 attribute total: 5,000 EP each.
For each series of 5 attribute totals over 55, double the EP needed again. The 56th point costs 10,000 EP, and so on.
Saving Rolls
In several of the rooms, a "saving roll" - a roll made against one or more of a character's attributes - may be required to escape some sort of danger. The saving roll represents the idea that, for certain kinds of danger, a higher attribute gives you a better chance to escape.
A saving roll is made in the same fashion as a "to hit" - that is, you are trying to roll a number less than or equal to a given attribute. However, the number of dice is variable. To escape a shower of arrows, a character might be required to roll his DX or less on FOUR dice; this would be a "4-DX" saving roll. The attribute does not have to be DX. To avoid shock from a nearby explosion, an instruction might require a 4-die roll on ST - that is, if you roll your ST or less on 4 dice, you won't be hurt. Or a roll might be made on combined attributes, where both ST and DX are needed to escape a trap. Or a roll might be required on IQ, to figure out a puzzle.
A saving roll is never applicable when another figure has already made his DX roll "to hit". You do not get a saving roll to escape an arrow aimed at you by a foe - but you may get a roll to escape something fired in your general direction, or fired by a trap.
Picking a Party
Characters are created just as in MELEE/WIZARD or THE FANTASY TRIP: IN THE LABYRINTH.
In general, if you are using ITL, a party of four 36-point characters should have an even chance of making it through if they are played well and the labyrinth is unfamiliar. Weaker characters can survive if the labyrinth is known.
If you are using MELEE and WIZARD only, your characters will have fewer options and spells - so take more powerful figures. If you want to take a smaller party, they should of course be stronger figures. Three 45-point supermen can usually get through all right. Of course, the point of the game is not to take super-powerful characters and smash everything you encounter, but to try to play skillfully enough that more ordinary figures will survive.
When you're ready to begin, go to instruction 1.
Death Test 2 Instructions
The numbered instructions below are the labyrinth text. "Go to N" means turn to instruction N.
1. You pass through a great brass door. It closes behind you; you hear bars being thrown. Go east to 153.
2. You are facing west. In front of you is a curtain. Go forward (94) or turn around and go south (264).
3. You are facing west. In front of you is a curtain. Go forward (113) or turn around and go south (212).
4. You are facing east. In front of you is a curtain. Go forward (89) or turn around (84).
5. You are facing east. In front of you is a curtain. Go forward (136) or turn around (85).
6. You are facing west. In front of you is a curtain. Go forward (89) or turn around (85).
7. If you turn and try to escape through the door behind you, go to 189. If you choose to fight, go to 87. If you want to try a quick missile attack on the wizard in red, go to 213.
8. The wizard compliments you on your continued ability to breathe and informs you that you may go. There is no treasure in the room. You may leave by the east door (265), or the west door (49). If you wish to attack the wizard, go to 213.
9. Roll one die. The potion cures that many hits or all your lost ST, whichever is less. There is no way to save any potion for later. Return to wherever you came from.
10. These are shallow pits; you're not injured. Any figure in a pit may attempt to escape on his next movement turn. It requires a successful 3-die roll on DX or ST (whichever is higher) to escape. You end the turn standing on an adjacent hex, and may not do anything else that turn. It IS all right to move about in the bottom of the pits.
A figure above a pit may strike at an adjacent character in the pit at +2 DX. A figure in a pit may strike UP, but at a -4 DX. Missile and thrown weapons (and missile spells) may not be used from pit to floor or vice versa unless the figures are adjacent; otherwise, the pit wall gets in the way. Thrown spells used from floor to pit, or vice versa, are at an extra -1 DX if the wizard is lying down in the bottom of the pit; no DX- otherwise. However, if a figure lies down in the bottom of a pit, the troll can't reach him from above at all.
A figure may voluntarily jump into a pit; it costs all his remaining movement (whatever it was) that turn, and he may do nothing else that turn unless he has jumped on another figure for HTH combat.
Now return to 50 to finish the combat.
11. You are in the Yellow Room (see map at 89). It is lit by six torches on the walls (at the Xs). In a corner of the room is a chest (at C). Surrounding it are several peculiar lumps which (you soon realize) are different kinds of Slimes - obnoxious, day-hating scavengers. From where you are, you can't see just how many there are. You may turn around and attempt to leave (51) or advance into the room (130). If this adventure is being run by a Game Master, he may want to look down to 12 to read a vicious alternate suggestion.
12. GMs: If the party is composed of low-IQ types (or, if you are using ITL, if none of them are Naturalists) you may wish to describe the slimes only by color. Let them find out for themselves what works to kill the various varieties! You may even want to put in a couple of new slime varieties of your own. Now go back to 11.
13. You are facing west. Go forward and turn south (211) or turn around (120).
14. He snatches his ax out of the air and charges at you, screaming mad laughter. You'll have to defend yourself as best you can. Go back to 266.
15. Go to 55.
16. When you open the chest, two Dragonets fly out. These look like miniature dragons. They are graceful, intelligent, and savage. Each has MA 14 (flying), ST 4, DX 14, IQ 6. Any attack against one is -4, or -8 for missile, thrown weapon, or missile spell attack. They do one die damage with bite/claw. A dragonet can also breathe fire, at a cost of 1 ST to itself, doing 1 die damage. It may make both kinds of attacks in one turn, but both attacks must be against the same figure. A dragonet must enter your hex to attack you, so if anyone else swings and misses they must roll to miss you. This is not a HTH attack, because the dragonet doesn't land.
If you kill the Dragonets, go to 236. If you flee, go to 194.
17. If you're really abandoning your friends to be eaten (or if there's no one left alive in the room anyway) go to 194. If you decide not to leave, go back to 134.
18. It works. Go back to 98.
19. You are facing east. Go forward (124) or turn around (250).
20. Each of your figures is engaged by one foe. The third one stays back to crank up the arbalest. He will have it ready in 12 turns and will fire on the 13th. It will be an aimed shot - its hitting will be determined by his DX and not by a saving roll. If anything happens to threaten him, he will pick up his own weapon and defend himself, and then resume cranking when he can. His friends will try to keep you away from him, of course. If you kill them all, go to 255. If you try to run away, go to 239. If you reach the arbalest and try to fire it, go to 278.
21. You are facing east. Go forward (42) or turn around (210).
22. The dwarves don't mind the help at all. The goblins are unhappy about the situation, of course. If there are two newcomers, the goblins try to shift their attack to them for a couple of turns. If there are three newcomers, they try to put their own backs to the wall. If there are four newcomers, the goblins will try to run. Go to 62.
23. The combat continues. If any goblins reach the door while dwarves are still alive, they will escape; you may not chase them. If all the goblins are dead or gone, and one or both of the dwarves still live, go to 270. If both dwarves are killed and one or more goblins still live, go to 63. If they all get killed (or flee) on the same turn, go to 279. The dwarves will not flee.
24. If any goblins are in your party, go to 173. Otherwise, roll one die. Go to 173 on a 1 or 2, 64 on a 3 or 4, 200 on a 5 or 6.
25. You bounce off the curtain. Go back to 199.
26. They attack you. You can do nothing for one turn; they caught you by surprise. Go to 279 if you kill them, 142 if you try to run away.
27. You are in the Gold Room (no map needed). The only visible feature is a huge pit which takes up the entire central megahex. Flames leap out of the pit; their heat may be felt even where you stand. You may leave the room the way you entered (106), run for the door (143), or stand and watch (175).
28. It attempts to escape into the conflagration. If you still want to kill it, you may try - but if it reaches the pit, it will vanish from sight and you might as well leave. In either case, go to 243.
29. You get initiative this turn. Go to 260.
30. Illusions work normally here. Return to 70.
31. The curtain will not let you pass. Go to 32.
32. There is a rattling noise. Your skin crawls as you see each of the skeletons stand up, holding a shield and weapon, and advance on you. Three have ST 12, DX 11, broadsword, and a small shield. Two (the closest to you) have ST 11, DX 11, shortsword, and small shield. You know that Skeletons are a form of Zombie, which makes their reaction to illusions unpredictable. You also know that skeletons are unaffected by missile weapons (which pass between their bones) but that magic and other weapons affect them normally, and that any single hit doing at least 8 points of damage will shatter one totally. Their MA is 10.
Combat will begin next turn (neither you nor the skeletons can attack this turn). If you wish to run, go to 225. If a wizard attempts to cast an illusion, go to 72. If you kill the skeletons, go to 246.
33. You are facing west. Walk forward and turn south (153) or turn around (41).
34. If you're using MELEE/WIZARD, go to 148 and fight; the wolves get initiative this turn. If you're using ITL, and one of your characters is an Animal Handler, he may attempt to use his talent as per ITL. If he succeeds, the wolves will sniff him and then lie down in their starting hexes; the party may run past (35), walk past at 3 hexes/turn (247) or attack the wolves (114). If the Animal Handler fails his roll, both wolves attack him.
35. Move all your figures one full running move and go to 149, unless the move took all your figures out the door. In that case, go to 226 (east door) or 74 (west door).
36. The Octopus of Cidri is a dangerous foe. Man-sized, capable of walking on land for extended periods of time, it is crafty, cowardly, and vicious. An Octopus has eight legs; it can use three at once to hold weapons, giving it the ability to combine options in a way that human figures can't. (For instance, it can use a two-handed weapon and shield, or take the "defend" option with one weapon while attacking with one or two others). It can make up to 3 attacks per turn, against either the same or different foes, at no DX penalty. In HTH combat, it uses its bare tentacles (never a dagger), striking with 3 a turn and getting a separate (1-2) attack with each.
The Octopus on the north has ST 20, DX 15, IQ 10. It carries a two-handed sword and small shield. A heavy crossbow is slung on its back. The one to the south has ST 15, DX 15, IQ 12, and carries three broadswords. A light crossbow is slung on its back.
An Octopus has MA 8 on land. Its leathery skin stops 2 hits/attack. Its side hexes count as front hexes, and its rear hex counts as a side hex, due to its large, wide-set eyes.
These two Octopi will not use their missile weapons unless the party attacks with missile weapons or spells. Their preferred tactic is to force a figure to retreat into the water, or to knock a figure down on one of the paths. Any figure who falls down on a path over the pit must make a 3-die saving roll on DX, or fall into the water instead.
If anyone goes into the water, go to 183. If either Octopus has its ST reduced to 8 or less, go to 207. If the Octopi are killed, go to 227. If anyone attempts to leave by either door, go to 76.
37. You may leave the room (51) or change your mind and open the chest (228).
38. This ring puts a Speed Movement spell on its wearer at no ST cost, but it also reduces his DX by 3 whenever it is worn.
39. You hear a twanging sound. All characters EXCEPT those in the megahex with the chest you opened must now make a saving roll - 4 dice/DX - to dodge the shower of arrows. No arrows go into the MH with the opened chest. Any figure who misses the saving roll (fails to roll his DX or less on 4 dice) is hit by one arrow and takes 1 die of damage. Anyone rolling a 20 through 23 is hit by two arrows; anyone rolling a 24 is hit by three. Armor protects; shields don't. Now go to 194.
40. In the bottom of the chest you find four bars of gold. If you take them, go to 166. If not, go to 194.
41. You are facing east. In front of you is a curtain. Go forward (71) or turn around and go south (153).
42. You are at a four-way intersection. You may go north (119), south (229), east (154), or west (210).
43. You are facing west. In front of you is a curtain. Go forward (131) or turn around and go south (230).
44. You are at a four-way intersection. You may go north (121), south (156), east (122), or west (230).
45. You are facing west. In front of you is a curtain. Go forward (110) or turn around and go north (212).
46. You are facing west. In front of you is a curtain. Go forward (102) or turn around and go south (85).
47. You are at 19 if you came from the east, 85 if from the west.
48. All six attack you. Since they have MA 10, at least one and probably more will engage you on the first turn; you are still on the entrance hexes. The slight breeze which has been blowing through the curtain behind you stops and you know that the wall has closed and you cannot escape without fighting. Go to 87.
49. You are facing west. Go forward and turn north (84) or turn around (157).
50. The Troll is fearsome indeed: ST 40, DX 11, IQ 8, MA 8. It does not use armor or weapons, but strikes with its hands for 2 dice damage in either regular or Hand to Hand (HTH) combat. Its favorite combat tactic is to force its foes back into a pit. If the troll forces a figure to retreat, and the only place to retreat is a pit hex, the figure must make a 3-die saving roll on DX to stand still rather than falling in. Also, if a figure adjacent to a pit hex takes 8 or more hits and falls, he must make the same roll to avoid falling into the pit (since the troll is trying to knock him in). If the troll knocks someone into a pit, it may then jump onto them for HTH combat. The victim does not get a HTH reaction roll, since he is already "down", and takes 1+1 damage for being jumped on.
Since the troll is so strong, it must suffer 9 hits in one turn to lose 2 DX for the next, and must suffer 16 hits in one turn to fall down. Furthermore, trolls regenerate one hit of physical damage at the beginning of each turn.
If anyone (including the troll) jumps or falls into a pit, go to 10. If someone tries to jump over a pit, go to 129. If anyone remembers that trolls don't like fire, go to 161. If you kill the troll, go to 190. If anyone tries to run out the opposite door, go to 214.
51. You may freely leave and re-enter by either door. If you go out the east door, you are at 215. If you take the west door, you are at 234.
52. He springs to his feet, grabbing the battle-ax, and puts his back to the wall. He is even bigger than you thought, and does not seem alarmed by your attack. If you changed your mind and want to talk, go to 192. If you mean to press your attack, go to 266. If you turn to run, go to 92.
53. The warrior hails you, saying "Ho! I am Arpad Zloty, called by some the Cruel!" He waits for your names, and continues: "If you want to fight me, I'll oblige you. If you want to run away, do it now - you won't pass me. Or if one of you wants to fight me man-to-man, you can travel with me after I kill him."
If you want to attack him, go to 52. If you want to run, go to 92. If you want to fight him man-to-man, go to 266. (And if the rest of the party decides in mid-fight to abandon honor and pitch in, they may join the fight). If you're still indecisive and want to talk further, go to 235.
54. Roll one die. On a 1 or 2, go to 253. On a 3 or 4, go to 39. On a 5 or 6, go to 96.
55. Arrange your figures in the room in any way you wish. At least one figure must be adjacent to the chest in order to open it. If you open the chest, roll two dice and go to the number indicated, as follows:
2, 5: go to 40. 3, 4: go to 54. 6: go to 236. 7: go to 16. 8: go to 276. 9, 12: go to 95. 10, 11: go to 134.
If you have second thoughts about opening any of the chests, you may leave the room (194).
56. If you have IN THE LABYRINTH, it will have occurred to you to attempt an illusion of a water elemental. Remember: it can't have a ST of more than 14. The best type to use is the ice-form; it does (1+2) damage with its hands, doubled against a fire elemental. The fire elemental will not try to disbelieve; it's more likely to try to melt the illusion with a big fireball (double damage!) and/or attack the wizard. It will be sure the water elemental is an illusion, but it knows its low IQ makes disbelieving hard! Return to 259.
By the way, it may occur to you to use illusions of elementals to do all your fighting. You can try - but there are problems. First, an illusion represents an "average" creature of its type, so its ST cannot be over 14. Second, an illusion cannot divide itself - so an illusory fire elemental can't throw fireballs or leave fire-hexes behind. And third, all kinds of weapons have full effect against illusory elementals (with fire doing double damage against water illusions and vice versa). This last fact is totally contrary to the known laws of illusion - a problem which has puzzled mages for centuries.
57. Through each door comes a huge, ragged figure covered with wounds. You realize that these are Zombies - but no ordinary Zombies. Each was once a mighty warrior - and each is full of unnatural strength. Each Zombie has ST 30, DX 11, IQ 0, MA 10, and a two-handed sword. If you try to flee, go to 237. If you destroy the Zombies, go to 194.
58. You may freely leave. Against the wall behind your late foe you find three jewels. Go to 268.
59. He gathers them in and backs against the wall, making a purring sound. He is no longer paying attention to you. Go to 169 to leave by the east, or 283 to leave by the west - or 98 if you want to attack him after all.
60. It is healing potion. Roll one die. The potion cures that many hits, or all your lost ST, whichever is less. Go back to wherever you came from.
61. You are facing west. Go forward (153) or turn around (184).
62. Dwarf no. 1 has ST 15, DX 13, IQ 9. He is unarmored and has taken 4 hits at present. He is using a battleaxe; a small ax and dagger are stuck in his belt. Dwarf no. 2 has ST 13, DX 14 (12), IQ 11; he has a morningstar, a small shield, leather armor, and a dagger in his belt. He has taken 2 hits at present.
Goblin no. 1 has ST 10, DX 12, IQ 10. He is fighting with a cutlass and small shield. Goblin no. 2 has ST 11, DX 11, IQ 11. He has a shortsword and small shield. He has taken 2 hits at present. Goblin no. 3 is a wizard. He has ST 12, DX 12, IQ 11. His spells are Staff, Magic Fist, Blur, Drop Weapon, Image, Aid, Summon Wolf, Fire, Dazzle, Shock Shield, and Illusion. He has taken no hits, but has expended 4 ST in casting spells. Each goblin has a dagger in his belt.
If you had already decided to help the dwarves, go to 23. If you had already decided to help the goblins, go to 256. If you are fighting both sides, go to 285.
63. One of the goblins cries "Can't we negotiate?" If you want to break off the fight, go to 271. If you want to keep fighting, go to 279 if you kill the goblins. If anyone tries to escape through the curtain, they go to 104.
64. They just keep fighting. Go to 279 if you kill them, or 201 if anyone tries to run.
65. In addition to the two jewels and four gold bars, you find two more jewels and a magic ring in one of the goblins' pouches. He was holding out on you. If you want to investigate the ring, go to the Ring Chart. To leave the room, go to 280.
66. You are facing west. Go forward and turn south (84) or turn around (123).
67. You are facing east. Go forward (230) or turn around (186).
68. You hit the curtain and bounce. The enemy gets a free turn while you stand there. Go to 260.
69. You are facing east. Go forward and turn north (42) or turn around (229).
70. Continue the combat. If you try an illusion, go to 30. If you fire a missile weapon, go to 224. If you run, remember it is hazardous here; return to 110 long enough to recheck the rules. If you kill the orcs, go to 204. If you try to run away (out either door) go to 145.
71. You are in the Black Room (see map below). As your eyes adjust to the gloom, you see that there must have been a major fight here recently. There are eight bodies lying about, as well as five skeletons and a number of loose bones. The bodies are at the Bs and the skeletons are at the Ss. You may turn to leave (31), advance into the room at a walk (111), advance at a run (147), or stand still and watch (179).
[Black Room map omitted.]
72. Roll one die. On a roll of 1, 2, or 3, go to 79. On a roll of 4, 5, or 6, go to 112.
73. The traps are too cunningly designed (and possibly enchanted) for you to handle - as you quickly realize. Give that figure 10 EP for trying, though. Return to 94.
74. You are facing west. Go forward and turn south (44) or turn around (121).
75. You are in the White Room (see map below). The shaded area represents a large pit full of water; two pathways one hex wide lead over it. Standing on each pathway over the pit is an Octopus. You may turn to leave the room (115) or advance to fight (36).
[White Room map omitted.]
76. You may freely leave (and re-enter on any later turn, if you wish). Go to 115.
77. This ring puts a Reverse Missiles spell on its wearer - but only when he wills it into action. It costs the wearer 1 ST each turn he "powers" the ring.
78. You hear a voice saying "The Thorsz has no need of guardsmen who cannot follow orders." Then the chest explodes. Anyone in the megahex with the chest takes two dice of damage - no saving roll, though armor does protect. Now go to 39.
79. The skeletons are uncontrolled zombies; their effective IQ is zero. They cannot perceive illusions and are not affected by them. Go back to 32 and keep fighting.
80. He says "Lay down your weapons, then, and I'll drop mine - and we'll split the loot." He starts to toss his ax aside. If you comply, go to 14. If not, go to 164.
81. You are facing east. In front of you is a curtain. Go forward (108) or turn around and go north (153).
82. You are facing east. In front of you is a curtain. Go forward (94) or turn around and go south (154).
83. You are facing west. In front of you is a curtain. Go forward (75) or turn around and go north (230).
84. You are at a four-way intersection. You may go north (123), south (157), east (4), or west (212).
85. You are at a four-way intersection. You may go north (46), south (231), east (5), or west (6).
86. You bounce off the curtain. Go back to 140.
87. Each has ST 12, DX 12. The real Myrmidon has IQ 8. You may fight them with weapons and spells - or try to disbelieve them. To disbelieve a figure, you must stand still (or move one hex) and take no other action, meanwhile concentrating on the figure you wish to disbelieve. If you have an opponent or GM, HE will then roll 3 dice against the IQ of the figure trying to disbelieve. A successful roll (rolling the IQ or less) means that the figure vanishes - UNLESS it is the one the GM has already designated, unknown to you, as the real Myrmidon. An unsuccessful roll, or any roll against the Myrmidon, produces no results. The GM does NOT tell you whether a roll was successful. Thus, if the figure does not vanish, you have no way of knowing whether a figure missed an IQ roll or just picked the wrong figure to disbelieve!
If you are playing solitaire, you have no way to "fool" yourself about what your IQ rolls are or which figure is the Myrmidon. Therefore, the first time you make a successful IQ roll against one of the figures, designate that one as the Myrmidon and leave him there! The loss of your first successful "disbelief" will make up for your subsequent knowledge of which figure is which.
If anyone tries to escape from the room, go to 189. If someone attacks the wizard in red, go to 213. If you successfully eliminate all the summoned fighters, go to 8.
88. Some people never learn. Go to 213.
89. You are in the Orange Room (see map below). There are many holes in the floor; they look about two meters deep. You see a huge, misshapen, green figure at T. It appears to be a troll. You can try to run (128) or attack (50).
This is a combination map for the Orange Room and the Yellow Room. The black hexes are pits in the Orange Room; ignore them in the Yellow Room. The Xs are torches in both rooms. Ignore the C when you play the Orange Room.
[Combination map omitted.]
90. You are facing east. Go forward (85) or turn around (6).
91. Green Slimes have ST 20, DX 1, IQ 1. They are corrosive; anyone in the same hex with a Green Slime will be stuck to it and will take 2 hits/turn until the slime is dead. Only fire harms Green Slime. The torches on the wall can be taken down (use Change Weapons option) and used against them. A torch normally does (1-2) damage. Against a Green Slime this is doubled, so they do (2-4) damage. A torch will not go out if dropped or hit; it will go out if broken. If a Green Slime tries to crawl onto you while you are holding a torch, make a roll as if the Slime had just attempted HTH with you. You'll probably drop the torch, but you might drive the Slime off.
Lightning, Fireball, and Fire spells also do double damage to Green Slime.
Brown Slimes have ST 30, DX 1, IQ 1. Anyone in the same hex with a Brown Slime takes one hit every second turn until the Brown Slime is dead. The only good way to kill a Brown Slime is to tear it to little pieces. Since you do not have any explosives with you, your only good weapons are your hands; weapons just cut through, and fire won't hurt it. If a Brown Slime gets on you you will of course fight it HTH. (Unarmed Combat skills from ITL, or great strength, will be a help here!) Simply hitting a Brown Slime with your hand does not hurt you; it has to get onto you.
Red Slimes have ST 20, DX 1, IQ 1. Anyone in the same hex with a Red Slime takes 2 hits/turn until the slime dies. Fire does not harm Red Slime. Weapons, hands, etc. do - but there's a catch. Red Slimes eat metal. Any metal weapon that hits a Red Slime will begin to corrode. 12 turns later, it will become useless. If a Red Slime gets onto a figure in metal armor, that armor will be ruined in 12 turns.
PLAYING THE SLIMES: All slimes have a MA of 2. They have NO front hex; thus, they cannot engage a figure, and all attacks made against them are at +4 DX. A slime can only attack by "HTH" - that is, by entering its enemy's hex. To do so, it must (a) be next to the enemy before it moves, and (b) beat the enemy by at least THREE on its initiative roll. (Therefore, separate initiative rolls for the slimes are a good idea). Slimes cannot get the initiative unless they win the roll by at least three. If a slime gets into someone's hex, and they do not immediately repel it (by rolling a 5 or 6 on the HTH reaction), the slime sticks to them, and eats away until it dies or its enemy does. Slime damage takes effect at the end of a turn.
Slimes will not fight over a victim unless they're starving (and these aren't!) Only one slime at a time will be on a one-hex figure. If you have a slime on you, you're safe from attack by the other slimes. But you can't move, since you're in HTH combat with 50 KG of jelly.
Armor protects for ONE turn. After that the slime flows through it.
All the slimes will come after the party EXCEPT the Red Slime on top of the chest. That one will stay where it is until attacked. Once attacked, it will attempt to flow onto an attacker - but will stay on the chest unless it succeeds in getting somebody.
If for any reason, during combat, you try to jump over a slime (even the one on the chest), go to 162.
If anyone attempts an illusion, go to 107.
You may open the chest at any time the Red Slime is off of it and no other slime is left alive. If you wish to open it, go to 228. If you don't wish to open it, go to 37. If at any time you want to give up the fight and leave, go to 51.
92. You run. As soon as all backs are turned, he throws a small ax (which you didn't even see) at the most lightly armored member of your group. His DX is 15; figure it at 11 for this attack, assuming someone got within 4 hexes of him. If you keep running, go to 275. If you turn to fight, go to 266.
93. Go to 14.
94. You are in the Blue Room (see map below). At each of the letters A, B, and C is a pedestal bearing a richly-carved chest about 150 cm tall. As you stand in the entrance hexes, a red-robed figure appears at the far end of the room and says:
"Welcome, heroes! This room will test your skill, your judgment - and possibly your luck as well. You may open one and only one of the chests that you see. One contains treasure, one contains a trap - and one contains terror."
The figure disappears.
You may choose to open chest A (165), chest B (133), or chest C (15). You may also wish to leave without bothering with any of the chests (194). If you are using IN THE LABYRINTH, you may have a figure with the ability to detect and/or remove traps. If such a figure wishes to attempt the use of one or both of these talents, go to 73 if you are playing solitaire. If there is a GM, he goes to 125 and reads it.
[Blue Room map omitted.]
95. Roll one die. On a 1, 2, or 3, go to 284. On a 4, 5, or 6, go to 57.
96. You hear a loud explosion. The chest flies to pieces. There was an air elemental confined within it! It manifests itself as a whirlwind. Those figures in the megahex with the chest must now attempt a 4-die saving roll against ST. Any figure missing the roll - that is, failing to roll their ST or less on 4 dice - will be lifted about 5 meters and then dropped, as the elemental suddenly dissipates and vanishes. Anyone dropped takes 1 die of damage. Armor does protect against fall damage, though shields don't. Now go to 194.
97. You are in the Indigo Room (see map at 94). You see four large snakes at the Ss. You also hear a "thunk" sound from behind you. Turning, you see that a heavy portcullis has come down just this side of the curtain; you observe a similar one blocking the other side. This is a gentle hint that you are expected to fight. The snakes have ST 12, DX 12, IQ 4, MA 6, and do 1-1 damage when they bite. Any attack on a snake is at -3 DX. If you kill the snakes, the portcullises (portculli?) will be raised and you will be able to leave. Go to 135 if you take the east door, and 167 if you take the west door. No treasure. Have fun.
98. If you use a missile spell or weapon against the dragon, go to 196. If you use a thrown weapon, go to 18. If you attempt an illusion, go to 218. If you try to bribe him with treasure, go to 238. If you kill him, go to 58. If someone makes it to either door while the dragon is still alive, and attempts to go out, go to 268.
99. His eyes glow and he backs away from the door. "Bring it to me," says he. You may comply, having one or more figures take the loot to a hex adjacent to the dragon; go to 137. Otherwise, go back to 98 and fight.
100. Anyone who tries to flee will bounce upon reaching the curtain. End your move(s) there, take no action, and return to 284.
101. You're wasting your time. The arbalest will no longer work. That figure loses one turn. Go back to 278 and fight.
102. You are in the Silver Room (see map at 94). When you enter the room, you see a fight going on. You immediately realize that not one, but both sides, are mercenaries being tested; you saw them preparing to enter the labyrinth just before you did. There are dwarves at D1 and D2, goblins at G1, G2, and G3, and five bodies for you to trip over at the Os. You have five choices: step out of the room again (139), aid the dwarves (22), aid the goblins (171), attack both sides (62), or simply stand and watch for a turn (198).
103. If the spell was Sleep or Freeze, it fails. Anything else works. (GMs: Apply this result, but don't tell the players what else would or wouldn't work. Let them try if they want to find out!) Now return to 266.
104. Anyone (from either side) who tries to escape will bounce. Go back to 63.
105. In addition to the loot you already had, you find four more gold bars. You can now leave. Go to 280.
106. If you go out by the east door, you are at 67. If you take the west door, you are at 202.
107. Illusions are not perceived by creatures with an IQ of 0 or 1. Therefore, even if the spell works, it won't do you much good under the circumstances. Return to 91.
108. You are in the Brown Room (see map at 94). You see four mercenaries, one at each M. They look somewhat worn-out. Roll one die. On a 1, 2, or 3 they are all fighters. On a 4, one is a wizard. On a 5, two are wizards. On a 6, three are wizards.
Create fighters as per the Fighter Table. Determine the attributes and race of wizards according to the same table. You may use any method you like to select their spells. A suggested way is to start with the first spell in the Spell Table and roll one die; on a 1 or 2 the wizard knows it. Continue until the number of spells he knows is equal to his IQ. If you do this, you may want to automatically give each wizard a few of the most useful spells, such as Staff, Summon Wolf, Illusion, and (if he has the IQ for it) Fireball or Lightning.
When you have finished creating the enemy figures, go to 144.
109. You are facing west. Go forward and turn north (153) or turn around (81).
110. You are in the Maroon Room (no map needed). You see that the floor is covered with rubble and loose stone, which will interfere with movement. Anyone who runs (moves more than half their MA) in this room must make a saving throw (3 dice vs. DX) to avoid falling down. If he falls, roll one (or two) dice until you get a number less than the number of hexes the figure attempted to move. This is the number of hexes he moved before falling.
Furthermore, anyone involved in normal combat, OR trying to make the above saving roll, is at -2 DX. Figures who stand still and use a thrown or missile weapon, or cast a spell, do NOT have the -2 DX.
You also see two figures with bows, standing in two of the entrance hexes at the far end of the room. You can turn to leave (145) or fight (177).
111. Move each of your figures 3 hexes and go to 32.
112. The skeletons are controlled by a wizard outside the room. His IQ is 15. Any skeleton may disbelieve on any turn, using the wizard's IQ - or several may. However, the skeletons are all vulnerable to damage caused by illusions. Go back to 32.
113. You are in the Gray Room (see map at 94). You see two beasts at the Ws; they look like enormous shaggy wolves. Both have blood on their muzzles. Against one wall, at R, you see a pile of rags that looks as though it once might have been human. You may attack (148), turn to run (180), or try to make friends with the beasts (34).
114. Go to 148 and fight - but your fuzzy foes lose a turn while they stand up.
115. You are at 150 if you exited from the east door or 181 if from the west.
116. This ring gives its wearer the Eyes-Behind power at no ST cost. All his side hexes are treated like front hexes; his rear hex is treated like a side hex.
117. This ring is cursed. Once put on, it cannot be removed until its wearer leaves the labyrinth - UNLESS he is willing to cut his own finger off, taking 2 hits in the process. The ring's curse increases every die roll its wearer makes by 1 - UNLESS he is trying for a high roll, in which case it DECREASES every roll by 1.
118. You are standing in front of the huge brass door by which you entered. No amount of pounding, pleading, swearing, or sorcery will get it open. Turn around and go back east to 153.
119. You are facing west. In front of you is a curtain. Go forward (71) or turn around and go south (42).
120. You are facing east. In front of you is a curtain. Go forward (131) or turn around and go south (211).
121. You are facing east. In front of you is a curtain. Go forward (113) or turn around and go south (44).
122. You are facing east. In front of you is a curtain. Go forward (97) or turn around (44).
123. You are facing east. In front of you is a curtain. Go forward (102) or turn around and go south (84).
124. You go up a flight of stairs. You are now facing east. In front of you is a curtain. Go forward (287) or turn around and go back down the stairs (250).
125. GMs: They may look at any or all of the chests. A successful 3-die roll against IQ will let a figure with DETECT TRAPS know that a chest is trapped - ANY of the chests will give this indication. A badly-failed roll will give an indication that a chest is NOT trapped. Give experience points for successful rolls. Sometimes the trap won't be triggered when the chest is opened - but one will always be detected.
The traps cannot be removed. If a figure with Remove Traps announces his intention to try, tell him "it looks very difficult." If he insists on trying, quickly read ahead to find out just what the nature of that particular chest is. If there IS a trap, have it go off when he tries to remove it. The Thorsz did not have these traps built just so anybody off the street could circumvent them; they're not really mechanical at all, but activated by his hidden watchers.
Return to 94.
126. You are in the Red Room (no map needed). It is completely empty, except for a tall, red-robed figure in the exact center of the room. He raises a hand to halt you in the entrance hexes. You recognize him as one of the Thorsz' servants, and obey. He then speaks, saying:
"I will now create six warriors. When all are ready, I will say "Now!" They will then attack you. You may defend yourselves in any way you please - except, of course, by attacking me. I will tell you one thing further: five will be illusions, but the sixth will be real." Go to 159.
[Red Room illustration omitted.]
127. No escape! You bounce. Go back to 213.
128. You cannot escape the way you came in. You lose a turn. Go to 50.
129. To attempt to jump over a pit takes no extra MA; it's easier than jumping over a body or other object. Jumping a 2-hex pit costs you only 2 hexes of movement, and so on. As to falling in: Anyone can jump a 1-hex pit. To jump a 2-hex pit requires a 3-die roll against ST; a 3-hex pit requires a 5-die roll against ST, and so on. Missing a roll means you fall into the pit; go to 10. If you don't fall, return to 50.
130. Having advanced into the room, you can now see the chest and the slimes. The chest is at C; there is also a Red Slime in that hex. Now roll one die. On a roll of 1 or 2, there are 5 slimes (including the Red Slime on the chest). On a 3 or 4, there are 6. On a 5 or 6, there are 7. These slimes are on or adjacent to the chest, with one slime per hex. Each slime may be Red, Green, or Brown. For each one except the one on the chest (which we already know is red) roll one die. On a 1, 2, or 3, it is green. On a 4 or 5, it is brown. On a 6 it is red.
Now that you can see what you're up against, you may turn and attempt to leave (51), move to attack the slimes (91), or stand for a turn and watch (191).
131. You are in the Green Room. There are no less than eleven bodies of various types scattered about the floor. Against a pillar leans a massive figure wearing only a light tunic with a jeweled belt. He is covered with blood, some of which is obviously his own. Beside him is a great battleaxe. You can try to leave the way you came in (163), attack him (52), stand and check out the situation (192), or run for the other door (92).
[Green Room map omitted. The fighter is at F; the bodies are at B.]
132. The corpses yield up a total of three gold bars, four jewels, and one empty bottle which looks as though it contained potion. Arpad's belt bears the Thorsz' glyph. If anyone puts it on he may learn what it is according to the rules given for the Ring Chart - except that, instead of rolling randomly, go to 188 to learn its nature. (Actually, you should know by now ...) You may now leave by the east door (216) or the west door (13).
133. Go to 55.
134. When you open the chest, you hear a popping sound, and several sleeping-gas flasks explode at random spots around the room. Each character in the room must now make a saving roll of 4 dice against DX. Any figure who fails to roll his DX or less on 4 dice will sleep for 3 minutes (18 turns) - long enough to miss what is about to happen. A concealed door just north of the west door opens, and quickly closes behind a large reptilian beast - ST 30, DX 11, IQ 4, MA 8, with a bite that does (2-1) damage. Its front, side, and rear hexes are as shown.
[Beast diagram omitted.]
The beast will be more interested in the sleeping figures than in the active ones. Left to itself, it will grab the nearest body and begin to eat it, ignoring everything else. If you attack it, though, it will fight. If you kill it, go to 194. If you flee (leaving any of your comrades who may be unconscious for lizard food) go to 17. If ALL the figures were put to sleep by the bomb, the lizard goes straight to the weakest one and kills him (tough luck ...); the others will wake up before the meal is finished, and can choose whether to fight or run, as above.
If you like, you can try to pick up fallen comrades and run with them. It takes one turn to pick someone up, assuming you start next to them. You can then move at MA 6 (if two people carry one between them) or MA 4 (if one picks up one) regardless of armor anyone is wearing. If the beast engages you, you must drop your burden and fight, or you'll die. If you make it to an exit, go to 17.
135. You are facing east. Go forward (212) or turn around (187).
136. You are in the Violet Room. It is empty except for a 4-hex dragon chained to the east wall (see map at 94). The dragon is chained to a ring at hex C. He may not take any position which does not leave his head on or adjacent to this hex. The only way to reach the east door is to pass the dragon. He is exactly as given in WIZARD and/or ITL. You may attack the dragon (98) or go out the way you came in (47).
137. He breathes AND claws at that figure as he approaches. (If there are more than one approaching, he breathes at one and claws at another). This is a free attack; you can't respond that turn. Go to 98 and fight.
138. You are in the Copper Room (see map at 94). You see three figures, one at each F, standing behind a device that looks like a gigantic bow (X). You may attack (219), stand still (170), or try to dodge out again (197).
139. You find the curtain closed; the Thorsz thinks this situation is interesting! Go back and pick another option at 102.
140. The goblins all choose options - disengaging and/or running - that gets them out of the fight. They do not try to leave the room; they just break out of the melee to watch. The dwarves will not follow them and will not listen to anything you say. At least one of your people will have to keep each dwarf busy. Any figures remaining may engage the goblins if they wish. The goblins will attack if and when the dwarves are dead. Go to 279 if you slay them all, 86 if you try to run.
141. Nothing unusual happens. When you drink the potion, go to 60 to determine its effects, then back to wherever you came from. To leave the room, go to 239.
142. When you reach the curtain, you bounce. Go back to 26.
143. Move each of your figures up to his/her full MA and go to 259.
144. You may attack (29), stand your ground (176), or turn to run (68).
145. You're out. You are at 261 if you left by the east door, 245 if by the west door.
146. Nothing unusual happened. Go to 70.
147. Move each of your figures up to its full MA and go to 32.
148. They are Dire Wolves: ST 16, DX 12, IQ 5, MA 12. Their fur stops 1 hit/attack; their bite does 2 dice damage in either regular or HTH combat. They are vicious and will fight until you or they are dead. If you kill them, go to 263. If anyone tries to run, go to 206.
149. They attack you. Go to 148.
150. You are facing east. Go forward and turn north (230) or turn around (83).
151. This ring puts a Stone Flesh spell on its wearer - but only when he wills it into action. It costs the wearer 1 ST each turn he "powers" the ring.
152. This ring reduces its wearer's IQ by four points. Once put on, it cannot be removed unless its wearer's finger is also removed - doing him 2 hits damage.
153. You are at a four-way intersection. You may go north (41), south (81), east (184), or west (118).
154. You are at a three-way intersection. You may go north (82), south (249), or west (42).
155. You are facing east. In front of you is a curtain. Go forward (75) or turn around and go north (211).
156. You are facing east. In front of you is a curtain. Go forward (110) or turn around and go north (44).
157. You are facing east. In front of you is a curtain. Go forward (126) or turn around and go north (84).
158. Go to 195. Dodging doesn't really help much on your saving roll; the man behind the arbalest barely has time to aim anyhow.
159. As you watch, he points his finger in turn at each of the hexes adjacent to him. In each hex appears an unarmored warrior, wearing a red cloak, boots and loincloth, and carrying a red-jeweled broadsword. You know that one is a summoned Myrmidon with ST and DX of 12; the others are illusions identical to him. The wizard claps his hands and says "Now!" Roll for initiative. If you win, go to 7. If you lose, go to 48.
160. Go to 282.
161. Congratulations on your ability to take a hint. There are six torches lighting the room (one at each X on the map). These can be used as weapons. Torches normally do (1-2) damage - but all fire-type damage against a troll is doubled. It is also permanent; the troll will not recover hits due to fire. Anyone can grab a torch by getting next to it and taking the "change weapons" option. Fireball, Fire, and Lightning spells are definitely good against trolls. However, the troll will NOT flee fire; he will attack its users. Return to 50 to finish the combat.
162. To jump over a slime, you must make a 3-die saving roll vs. your DX. It also costs 3 hexes of your MA that turn. Jumping over two slimes in a row requires no more MA, but means you must roll FIVE dice against your DX. Three slimes in a row would require a 7-die roll, and so on.
If you miss your DX roll, you fall on top of the last slime in the row (if there were more than one). You are stuck with it, so to speak, until it is dead. If you make your roll, you land safely on the other side and may continue movement normally that turn. Return to 91 and continue the combat.
163. You can go. You're at 216 if you came from the east, or 13 if you came from the west.
164. "No shilly-shallying! Drop your weapons or fight!" He twirls his ax, laughs, and tosses it in the air. If you put your weapons down, go to 14. If not, go to 93.
165. Go to 55.
166. Go to 194.
167. You are facing west. Go forward (44) or turn around (122).
168. This ring has no effect.
169. We shall assume that you were not caught totally by surprise when the dragon lunged at you as you tried to pass. However, you were surprised to see that the chain no longer held him! Go back to 98, but set up the dragon blocking the east door, with all your figures adjacent to him. The dragon gets one free turn to attack; then normal combat begins.
170. They quickly fire the device (a large arbalest) at one of your figures. If they can aim in such a way as to get two or more of you in the line of fire, they will - otherwise, roll randomly to choose the target. The target must make a 4-die saving roll on DX or be hit by the missile (which does 4 dice damage). If it misses one figure and passes through a hex occupied with another, that figure must make a 3-die roll on DX or be hit. Now go to 269.
171. The goblins gleefully accept your aid. The dwarves don't seem worried. "Ha! More meat for my axe!" shouts one. Go to 62.
172. "Ah, traitors!" shouts a gruff voice - then the fight continues. Go to 279 if you kill them, 257 if you try to run. They won't run.
173. The goblins drop their weapons, wipe their brows, and say "Good fight. Let's split this loot." You can attack them where they stand (if you kill them, go to 279), or agree to a truce. If you agree to a truce, the loot from all the bodies in the room will total two jewels and four gold bars. You can split evenly with the goblins and go your separate ways (280) or attack them. If you attack them after the split and kill them, go to 65.
174. You are facing east. Go forward and turn south (85) or turn around (46).
175. Your figures stay where they are. Go to 259.
176. They get initiative this turn. Go to 260.
177. They are orcs. Each has a DX of 15; neither is armored. To determine their ST and IQ, roll 3 dice for each - discard any number less than 10 and roll again. (If you are playing with a GM, he does this, and does not reveal the results.) Each is armed with a small bow and carries a shortsword and dagger by his side. Neither has armor. They will use their bows as long as they can, firing twice per turn.
If you are playing solitaire, go to 70. If there is a GM or monster player, HE should go to 273 and read it to himself.
178. Go to 204 if you kill the orcs, or 145 if you try to escape out either door.
179. Go to 32.
180. Make your initiative roll. If you win, you can run; go to 226 if you entered from the east, or 74 if you entered from the west. If you lose the initiative roll, the wolves charge you while you are still taking in the situation; go to 148. Neither you nor they will get to attack the first turn; the second turn will begin with your figures still in the entrance hexes and the wolves adjacent to you.
181. You are facing west. Go forward and turn south (211) or turn around (155).
182. This ring grants its wearer immunity to all kinds of fire (but not lightning) for as long as it is worn. It costs no ST.
183. If an Octopus enters the water for any reason, he will dive for the bottom and will not be seen again. Return to 36.
If a member of the party falls into the water, he/she is probably doomed. That figure must make a 7-die saving roll on the total of his ST at the moment and his DX (adjusted for armor and wounds, if any). Failing the roll means that figure drowns. Success means that figure may stand up on any bank (but not on the path over the pool) at the beginning of the next turn.
The reason a 7-die roll is required is this: if a figure goes into the water, and misses the roll, the closer octopus will jump in after it on its next turn in order to pull it under. Octopi like human flesh.
If you are using ADVANCED MELEE, you may ignore the 7-die saving roll and play out the combat using the Swimming and Diving talents, the hazardous terrain rules, etc. This will take longer, of course; in any event, return to 36.
184. You are facing east. In front of you is a curtain. Go forward (138) or turn around (153).
185. You are facing west. In front of you is a curtain. Go forward (11) or turn around and go north (264).
186. You are facing west. In front of you is a curtain. Go forward (27) or turn around (230).
187. You are facing west. In front of you is a curtain. Go forward (97) or turn around (212).
188. It puts an Iron Flesh spell on its wearer - at no cost to him, it subtracts 5 hits from every attack against him. It also gives him immunity to the Sleep and Freeze spells. However, it does not work at all if its wearer has armor on. In fact, it's almost impossible either to buckle it over armor, or to put armor on over the belt. (GMs: Rather than just telling the players all this, you might make them experiment. This extremely valuable magic item can be a snare and a delusion to those who don't understand how it works!)
189. Anyone who reaches either door just bounces. If the fight had not yet started, you've lost initiative; go to 48. If the fight was in progress, the figure(s) who hit the door can take no further action that turn, and are left facing the door. Go to 87 and continue the fight.
190. Searching the room, you find four jewels in a smashed skull at the bottom of a pit. Don't burn the troll up entirely; leave enough of it to regenerate and give the next party some fun. You can leave by the east door (90) or the west door (233). By the way, strength stolen by a Drain Strength will not be immediately regenerated by the Troll - he is not a living strength battery.
191. There is a plopping sound. A Green Slime falls from the ceiling at the T on the map (at 89). If someone happened to be underneath, they are now being eaten (at 2 hits/turn) by a Green Slime. Otherwise, the Slime heads for the nearest figure. Go to 91.
192. If you have four in your party, go to 53. If you have three or less, go to 252.
193. Although he is unarmored, every injury you do him seems to be less than it should be. Subtract 5 from every successful hit on him - i.e., a wound that should have hurt him for 7 hits puts only 2 on him. Now go back to 266 and keep fighting.
194. You may leave by the east door (217) or the west door (267). Or you may open another chest. Place your characters (at least one must be beside the chest you select) and go to 78.
195. They fire the device (it is a large arbalest) at one of your figures - roll randomly to see whom. He must make a 3-die saving roll on DX to avoid being hit. If he misses the roll, he takes 4 dice of damage. Now go to 269.
196. The missile spell (or weapon) has normal effect, but the chain comes loose. He is now free to carry the fight to you. Go to 98.
197. One of your figures (roll randomly) is the target of a huge arrow that comes whizzing through the curtain. The target must make a 3-die saving roll on DX. If he misses the roll, he takes 4 dice of damage. You are now out in the hall; if you want to go back and fight, go to 269. Otherwise, go to 239.
198. Roll one die. On a 1, 2, 3, or 4, go to 240. On a 5 or 6, go to 209.
199. The dwarves laugh and press the attack. If you kill them, go to 279. If you want to run away, go to 25.
200. The goblins sigh and lower their weapons. Go to 26 if you want to attempt a truce, 64 if you want to attack them.
201. You bounce. Go back to 64.
202. You are facing west. Go forward (211) or turn around (274).
203. If any of their men make it to a curtain, they pass through and escape. If you have living foes remaining, go to 281. If not, go to 223.
204. Each orc had his weapons, plus one jewel. One also is wearing a ring bearing the Thorsz' sigil. You may already know what this ring is. If not, follow the Ring Chart rules for determining its nature - but instead of rolling randomly, go to 273 when you are entitled to learn what the ring is. When you are ready to leave the room, go to 145.
205. You are facing east. Walk forward and turn south (42) or turn around (119).
206. Anyone who tries to escape can freely leave and re-enter. If you ran out the east door, you are at 226. If you ran out the west door, you are at 74.
207. That octopus will now abandon the combat and attempt to escape into the pool. If it succeeds, you will not be able to find or attack it. In any event, return to 36.
208. This ring gives its wearer the power of Flight - but only when he wills it into action. The ring costs the wearer 1 ST each turn it is used.
209. They realize that you're waiting for them to kill each other off; they join ranks and come after you. You will now have to fight both sides. If you want to run away instead, go to 220. If you want to fight, go to 62.
210. You are facing west. In front of you is a curtain. Go forward (138) or turn around (42).
211. You are at a four-way intersection. You may go north (120), south (155), east (274), or west (264).
212. You are at a four-way intersection. You may go north (3), south (45), east (84), or west (187).
213. That was an error. The wizard has DX 15, ST 13, and IQ 16. He is protected by items giving him Iron Flesh and placing a Reverse Missile spell on him, and is carrying a strength battery which effectively increases his ST to 20. If attacked, he will attempt to kill his attacker(s) - first with a 5-die lightning bolt, and then (if that fails) by summoning alternate Wolves and Myrmidons to do the job. New Myrmidons will be identical to those already summoned, but will wear blue. They (and the wolves) will ignore anyone who does not attack them or the wizard. Any remaining figures in red will also switch their attention to those who attacked the wizard. If the wizard in red is knocked out or slain, go to 251. If all who defied him are slain, any remaining figures may go to 232. If anyone tries to run, go to 127.
214. Anyone who makes it to the far door can leave (and freely re-enter). If you left by the east door, you are at 90; if the west door, 233.
215. You are facing east. Go forward and turn north (264) or turn around (185).
216. You are facing east. Go forward and turn south (230) or turn around (43).
217. You are facing east. Go forward and turn south (264) or turn around (2).
218. Illusions work normally - but remember the dragon has IQ 16! Go back to 98.
219. You may move each of your figures up to its full MA (195), move each figure up to half its MA while dodging (158), or have some figures dodge and some do anything else except try to escape (decide which do which and go to 248).
220. You tried to step through the curtain and you bounced. Meanwhile, your foes were charging you. Go back to 62, set up the enemies in their starting positions, and move them toward you. Any foe that can reach you in half his MA or less gets an attack this turn. You can do nothing until next turn, of course.
221. The total loot from the available bodies is four jewels, two bars of gold, and one magic ring. The dwarves will take the jewels, and leave you the gold and the ring - or vice versa. If you are willing to take one side of this split, do so and go to 280. If not, you had better prepare to fight the dwarves. Go to 105 if you kill them, 242 if you try to run.
If you get the ring, determine its nature by using the Ring Chart.
222. Whoever went into the pit falls 5 meters (1 die damage) and lands in a fire hex. If he/she has a ring granting immunity to fire, he/she can climb out by making a 6-die saving roll on combined ST and DX - try once per turn. Otherwise, the only way out is to fly or teleport. If that character is not one of the fortunate few who possesses these abilities (or if the fall and/or fire knocked him unconscious) he had better resign himself to a quick and painful death. Go back to 259.
223. Looting the bodies, you find one jewel on each corpse. A knapsack in the corner yields two bars of gold. You may leave by the east door (69) or the west door (109).
224. If you fired at the one on the right, go to 146. If it was the one on the left, go to 273.
225. If you get initiative, you may run; go to 262. If they win initiative, they will close with you to fight; go to 32.
226. You are facing east. Go forward and turn south (212) or turn around (3).
227. Each Octopus had two jewels in a belt pouch. The three-sword one also had (but was not wearing, for some reason) a ring bearing the Thorsz' mark. If you wish to investigate the ring, go to the Ring Chart. When you are ready to leave the room, go to 115.
228. Inside you find two jewels and one ring. Whenever you want to investigate the ring, go to the Ring Chart. You may now leave the room - go to 51.
229. You are facing west. In front of you is a curtain. Go forward (108) or turn around and go north (42).
230. You are at a four-way intersection. You may go north (43), south (83), east (44), or west (186).
231. You are facing west. In front of you is a curtain. Go forward (126) or turn around and go north (85).
232. He tells the rest of you to leave. You can take the east door (265) or the west door (49). Or you can attack him (88).
233. You are facing west. Go forward (84) or turn around (4).
234. You are facing west. Go forward and turn north (154) or turn around (249).
235. He laughs and says "Well, then, I'll fight any TWO of you!" (If you have only one or two in the party, you might as well go on back to 53 and make a decision quickly.) Otherwise, if two of you want to fight him, go to 266. If you want to run, go to 92.
236. In the bottom of the chest you find four gold bars. If you take them, go to 54. If not, go to 194.
237. Anyone who tries to flee bounces on reaching the curtain - end the move there, take no other action, and return to 57.
238. If you offer gold, go to 254. If you offer both gold and jewels, go to 99. If you offer jewels only, go to 277.
239. You're out of the room. You may re-enter if you wish. If you left from the east door, you are at 21. If you left by the west door, you are at 61.
240. You watch for one turn as the combat continues. Go back to 102.
241. The dwarves are agreeable. If you and they, together, total four or less, they might join you. Roll one die; on a roll of 1 or 2, they join your party. Go to 279. (You are now forbidden to double-cross them.) On any other roll, or if you and they total five or more figures, it's time to divide the loot. Go to 221.
242. You can't run; you bounce off the curtain. Go back to 221 and fight.
243. You find four gold bars and a bottle of potion. You may drink it now or later. If you drink it, go to 9 to determine its effects - then, from 9, return to wherever you were when you drank the potion. To leave the room now, go to 106.
244. They will now break off combat and attempt to escape. If any of their men make it to a curtain, go to 203. If you kill them all, go to 223.
245. You are facing east. Go forward and turn north (44) or turn around (156).
246. The room is full of weapons; you can of course pick up anything the skeletons had. Furthermore, there are enough other weapons lying around so that anyone in the party can find something to match anyone he entered the labyrinth with. However, there are no fire weapons or silver weapons. One of the corpses is also wearing a ring with a magic glyph on it. If you wish to investigate the ring, go to the Ring Chart. To leave the room, go to 205 (east door) or 33 (west door).
247. Move your figures three hexes per turn to walk past. When you are one move from the door, go to 206. If at any time you wish to attack the wolves as they lie watching you, go to 114. If you decide to run instead of walking, go to 35.
248. Go to 195, but select the target figure from among those that did not dodge.
249. You are facing east. In front of you is a curtain. Go forward (11) or turn around and go north (264).
250. You are facing west. In front of you is a curtain. You may go through (136) or turn around (124).
251. A black-robed figure appears and says to you: "All right! This has gone far enough. You were told not to attack anyone who wore red. The action was supposed to carry its own punishment - but if you were good enough to take care of Midraig, you may be of some use anyway. Now get out of here." He seems rather angry with you. You may leave by the east door (265) or the west door (49). If you choose, you may attack the wizard in black (282) or simply ask to loot the corpse in red (160).
252. He hails you, saying "Ho! I am Arpad Zloty, called by some the Cruel! Your group is under-strength, and my followers are all dead; wouldst join me?" If you want to join him, go to 80. If you attack him, go to 52. If you want to run out the door you entered, go to 92.
253. You hear several sharp popping noises. Each character in the room must now make a saving roll (4 dice vs. DX). Anyone who fails to roll his DX or less on 4 dice has failed to jump out of the gas-cloud created by a popping gas grenade, and has inhaled a noxious potion. Anyone who breathes the potion will have DX -2 for the next two rooms. Go to 194.
254. The dragon says "I want it all. Bring it to me." If you wish to comply, give all the gold you have to one figure and have him take it to a hex adjacent to the dragon. Go to 137. If you don't like this idea, go back to 98 and fight.
255. You have three dead bodies and an arbalest which is now mysteriously jammed and will not fire. You find two jewels, one gold bar, and one bottle of white potion in a knapsack. If you take them out of the knapsack, go to 141. When you are ready to leave the room, go to 239.
256. The combat continues. The dwarves will not flee. Roll one die each turn. On a 6, go to 140. Otherwise, keep fighting. If all the goblins are slain, go to 199. If both dwarves are slain while goblins yet live, go to 24. If all get killed (or flee) on the same turn, go to 279.
257. Anyone who tries to run will bounce off the curtain. Go back to 172.
258. If you have any goblins in your party, go to 173. Otherwise, go to 64 and give the goblins the initiative the first turn.
259. Out of the flames comes a humanoid figure two meters tall. It seems to be composed of living flame. It is, in fact, a Fire Elemental. It attacks the figure closest to the pit (roll randomly if more than one are equally close).
This elemental has ST 20, DX 13, IQ 8, and MA 10. It can do 1 die of damage by striking with its burning hands, or 1+2 in HTH combat.
Fire Elementals have the following abilities: (1) Choosing the "cast spell" option and using a Fireball spell; ST cost and effects are just as for a wizard. (2) Spending 3 movement points in a single hex and turning that hex into a "fire hex" which burns for 12 turns, as per the Fire spell. Thus, a fire elemental can create up to 3 fire hexes per turn if it chooses a "move" option. If it stands still for a turn, it automatically creates a fire hex, and if it moves one hex, both hexes become fire hexes. (3) Immunity to all Fire and Lightning-type spells, and to ordinary weapons. Magic weapons affect fire elementals, but the only magic weapons your group may possibly have are wizards' staffs.
Fire elementals are adversely affected by water, taking 1 die damage for each liter of non-flammable liquid that hits them. Unfortunately, you don't have any. A Magic Rainstorm spell (from ADVANCED WIZARD) will do 4 dice damage per turn.
The fire elemental will attempt to block the party's way through the room by spreading attacks between the intruders and by creating fire hexes to bar their way. It will not attempt HTH combat unless it faces only one enemy - then it will
[The printed text ends this sentence there.]
If anyone attempts to flee by either door, go to 106. If the elemental is reduced to 5 ST or less, go to 28. If the elemental is killed, go to 243. If anyone enters the flaming pit, voluntarily or otherwise, go to 222.
If you have IN THE LABYRINTH, you may want to counter with an illusion of a water elemental (you have no running water with which to create a real one). Go to 56.
260. Combat ensues. As the enemy nears, you can see that all of them are somewhat hurt - immediately give each foe (1+1) damage. However, if this reduces anyone's ST below 6, give them a ST of 6 instead.
If at any time your survivors outnumber theirs by two or more, go to 244. If at any time their survivors outnumber yours by two or more, go to 272. If you try to escape, go to 68. If you kill them, go to 223.
261. You are facing east. Go forward and turn north (212) or turn around (45).
262. Move each of your figures to one of the entrance hexes. (You can head for either end of the room; if it takes more than one move, go ahead and move, but after you move, give the skeletons one turn's movement to chase you.) Then go to 31.
263. You find nothing of interest on the dead wolves. Investigating the body, you find a broken staff and a ring bearing the Thorsz' glyph. If you wish to investigate the ring, now or later, go to the Ring Chart. If you wish to leave, go to 226 (the east door) or 74 (the west door).
264. You are at a three-way intersection. You may go north (2), south (185), or east (211).
265. You are facing east. Go forward and turn north (85) or turn around (231).
266. He has ST 18 (in spite of his wounds), DX 15, and IQ 11. He carries a battleaxe; there is a dagger stuck in his belt. He prefers to keep his back to the wall and hack. Given the opportunity, he may make a "sweeping attack" as described in ADVANCED MELEE. It works as follows: He makes a swing with his ax, getting a SEPARATE attack (at -4 DX) on EACH of the figures in his front hexes. He will fight viciously and will not flee.
When you first hit him, go to 193.
If you try a thrown-type spell, go to 103.
If you kill him, go to 132. If someone tries to run for either door after combat is joined, go to 275. If one (or two) men answered his challenge to a duel, fought him fairly, and died, go to 80.
267. You are facing west. Go forward and turn south (154) or turn around (82).
268. You may leave. To go out the east door, go to 19. To go out the west door, go to 283.
269. The figures behind the bow move to attack you; roll them up from the Fighter Table. If you have only two figures, go to 20. Otherwise, combat takes place normally. If you kill them all, go to 255. If someone tries to run, go to 239. If one of your figures gets next to the arbalest and wants to try to fire it, go to 278.
270. You may attack the dwarves (172) or try to continue the alliance (241).
271. Roll one die. On a 1, 2, or 3, go to 258. On a 4, 5, or 6, go to 173.
272. They keep fighting; they mean to see you dead. Go back to 260.
273. The orc on the left is wearing a Reverse Missiles ring. It costs him 1 ST per turn (and he energizes it every turn!) but it causes any missile weapons and/or spells fired at him to veer and go after the one who fired them, instead! If and when a player attacks that orc with a missile weapon or spell (or a thrown weapon), they find this out ... the hard way. Go to 178 and continue the combat.
274. You are facing east. In front of you is a curtain. Go forward (27) or turn around (211).
275. You escape. If you went out the east door, you're at 216. If it was the west door, you're at 13.
276. In the bottom of the chest you find four bars of gold. If you take them, go to 95. If not, go to 194.
277. "Jewels! Toss them here!" says he. If you comply and toss him the jewels, go to 59. Otherwise, go back to 98 and fight.
278. If it's totally cranked and you are not engaged, you may point it at a foe and fire. If you have the Engineer talent or Crossbow ability (from ITL) you make a 3-die roll to hit. Otherwise your DX is 4 for this unfamiliar missile weapon.
If it is not cranked up, you may try to crank it on any turn you are not engaged. If you have the Engineer or Crossbow talent, you know how to use the crank, and after it has been cranked for 12 turns you may fire it.
If you have neither of these talents, you must make your DX roll (or your IQ roll, whichever is higher) on 3 dice every turn. If you miss the roll on any turn, the crossbow will go SPROING. If it does so, you can keep trying to crank it (101) or go back to fighting (255 if you kill them, 239 if you try to run). If you manage to crank it for 12 turns without mishap, you may fire it - but at DX 4.
279. Congratulations. You have a few minutes of looting to look forward to. All the foes you killed are there, as well as two dead orcs and three hacked-up wolves. (You obviously missed the best part of the fight!) One of the orcs is wearing a ring with the glyph on it. If you want to check it out, go to the Ring Chart. The other bodies yield a total of four jewels and six bars of gold. You may now leave the room (280).
280. You are at 174 if you leave by the east door, 66 if you choose the west.
281. Combat continues. If their last man makes it to a curtain, he escapes. If you want to flee and you make it to a curtain, go to 286. If at any time you have survivors in the room, and no foes are alive, go to 223.
282. That was your last mistake. Anyone who didn't leave immediately is struck dead. Don't bother asking how. Survivors are advised not to stop to loot their fallen companions. Take the east door (265) or the west door (49) - and move.
283. You are facing west. Go forward (85) or turn around (5).
284. Through each door come two fearsome figures - shambling, stinking corpses that nevertheless move nimbly enough. They are Zombies; each has ST 11, DX 10, zero IQ, and MA 10. Each has a shortsword. If you try to flee, go to 100. If you destroy all for zombies ("kill" is not the right word) go to 194.
285. The combat continues. The dwarves will not flee. Roll one die each turn. On a roll of 5 or 6, go to 140; otherwise, keep fighting. If and when your party are the only survivors in the room, go to 279.
286. You may now freely leave - and re-enter on the next turn, if you like. If you left by the east door, you're at 69. If it was the west door, you're at 109.
287. You find yourself in an elaborately decorated room that looks like an office of some kind. The afternoon sun shines through the colored panes of one window. You have escaped! The testing officer (looking slightly surprised to see you) figures each character's score, calculating as described under EXPERIENCE (at the beginning of this booklet).
- 125 EP or less: Recruit (100 silver pieces/week)
- 126-175 points: Warrior (150 silver pieces/week)
- 176-250 points: Sergeant (250 silver pieces/week)
- 251-300 points: Hundred-leader (500 silver pieces/week)
- Over 300 points: Thorsz' Guard (1,000 silver pieces/week)
However, no figure who left a room while his comrades were still fighting (or helpless) within will receive a rank higher than Recruit, regardless of his score. Any figure that ran out twice will not be taken into service at all. Anyone that ran out three times will be put into the Labyrinth again - as an obstacle for the next group.
Any gold and jewels you brought out are yours to keep; each gold bar or jewel is worth 1,000 silver pieces. All other loot (potions, magical items, weapons, etc.) must be returned to the testing officer.
A Final Note: Using Death Test II in a Campaign
If you are playing TFT: IN THE LABYRINTH, you may want to work the Thorsz' city of Ardonirane into your campaign. Any of your characters who survive DT 2 honorably will be taken into service by the Thorsz, as per JOBS & PROFESSIONS in ITL. This is a very well-paying job - but it is dangerous! Risk numbers for the various ranks are 4/16 for Recruit, 4/15 for Warrior, 5/15 for Sergeant and Hundred-leader, and 6/13 (!!!) for a member of the Thorsz' Guard.
The treasure you took from the labyrinth is your enlistment bonus - though of course the magical items must be returned.
Your term of service is six months; you may sign up for additional six-month terms at the same rank and pay. Promotion comes at the end of a term if (a) you go through the testing labyrinth again and better your performance, (b) you rolled a 3 for Risk at any time during your hitch, or (c) you increased your attribute total by at least 3 during your previous hitch.
You will be entitled to one day of leave for each week you serve (regardless of rank). You may accumulate leave; you may use your leave time to go adventuring. If you return unfit for duty, you will receive the best medical care available, but its cost will be deducted from your pay. However, your convalescence from the testing labyrinth, or from any injury you take while on duty, will be paid for by the Thorsz.
If several characters wind up in the guard, a Game Master may wish to set up an adventure situation involving their duties. These might involve wars, assassination attempts (the Thorsz has many enemies, but none of them have gotten him yet), hazardous missions, or drunken overnight passes in town.