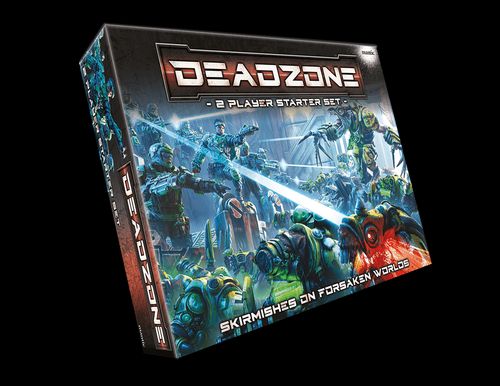
Deadzone: 2 player starter set (Third edition)
Deadzone: 2 player starter set (Third edition) Rulebook
Table of Contents
Table of Contents
Welcome to Deadzone
Set on the fringes of civilised space, Deadzone is a game of futuristic battles fought among the ruins of human colonies against a variety of alien threats.
All of this is represented by collections of highly detailed Mantic models and is played out on your tabletop with evocative terrain, special dice and tokens to keep track of the action.
As a player, you will take command of elite Strike Teams of human soldiers or alien warriors.
Each Turn you decide which of your models to move and what they will do, advancing across the battlefield, engaging the enemy using dice rolls and picking up items on your way to taking vital objectives and securing victory!
What You Will Need
Models
Mantic Games supply a range of ready-made Strike Teams for Deadzone so it's easy to start your collection and get playing. You don't have to paint your models to play the game, but painting is a fantastic part of the gaming hobby and we would encourage you to do so. Playing with amazing looking miniatures you have painted yourself only adds to the fun!
Throughout this book, you will find wonderful examples of painted models and Strike Teams to inspire your own collection.
Bases
Models should be glued to the circular base they are supplied with, as shown in their product photos, which will be the size appropriate for the model and specified in its profile. A model, or parts of one, may extend over the base, but the base itself defines where the model is for all game purposes (such as movement or range to a target), and is considered to be part of the model. Players should not attempt to position or convert models to gain a perceived advantage in the game.
Typically, human-sized models come on circular 25mm bases. Big brutes like Nightmares and Ripper Suits can be on 40mm bases. Vehicles and Striders will typically be on 60mm bases.
Dice
Deadzone uses two types of dice.
D8
8-sided dice (usually referred to as D8s) are used for determining most actions and results in the game. These are rolled and read just like normal 6-sided dice. You may sometimes have to roll more than one die to see what happens. For example, 3D8 means you should roll three 8-sided dice and check each score.
Sometimes rolls may benefit from bonus dice. Add the number of dice specified before any dice are rolled.
Command Dice
Command Dice are 6-sided dice with special symbols on them. They are rolled to generate a series of Commands that can be given to your models.
If the rules specify to roll a die, a D8 is implied. The rules will be explicit if a Command Die is to be used.
Model Stats
Not all Strike Teams and their warriors are equal. They will all have different abilities, strengths and weaknesses. In the game, these are represented by each model having a number of statistics (stats for short), skills, special rules and other game values. A model's stats are presented in a profile, for example:
Assault Enforcer — SP 1-2, RA 5+, FI 4+, SV 4+, AR 1, HP 2, SZ 1, Base 25mm, Jump Pack.
Weapon stats for the same Strike Team:
- Assault Enforcer (Troop): Wristblade (CC, AP1, -, 1VP), Pistol (R3, -, -), part of a 14pts model.
- Breach & Eradicate Enforcer (Troop): Phase Claws (CC, AP2, Frenzy (1), 2VP) or Thermal Mines (CC, AP3, -, 2VP), Pistol (R3, -, -), part of a 17pts model.
- Breach & Eradicate Enforcer (Specialist): Fusion Gun (R4, -, Explosive - Frag (3), 2VP), part of a 20pts model.
Each model in a Strike Team will have the following stats:
Name
Well, you need to know what your model is!
Speed (SP)
Written as two numbers. The first for an Advance action, the second is for a Sprint action.
Ranged (RA)
Written as a value to be rolled on a single die, e.g. 4+. It is never modified. Used for shooting and throwing.
Fight (FI)
Written as a value to be rolled on a single die, e.g. 5+. It is never modified. Used for close combat fights.
Survive (SV)
Written as a value to be rolled on a single die, e.g. 3+. It is never modified. Used when the model is attacked in some way.
Armour (AR)
A fixed value describing the amount of protection the model has from damage.
Health Points (HP)
This is a measure of how much damage the model can take before it is removed from play.
Size (SZ)
It is used to determine how many models can fit in a cube and what kind of gaps in terrain a model can pass through. Plus, models may gain bonuses when fighting smaller models in close combat.
Base Size
Each model's entry will indicate the model's base size (e.g. 25mm, 60mm, etc.).
Model Keywords
Any special skills and attributes the model may have.
Weapon Stats
Every model in the game is assumed to be equipped with basic weapons for fighting (knives, teeth, tentacles, etc.) but they will also have the chance to pick from available weapons.
Some models will have weapons that must be taken as standard, whereas others can choose from one or more available weapons. Depending upon the weapon chosen, it may also change the name or type of the model. For example, a standard Enforcer becomes an Enforcer Eradicator when armed with the Burst Laser.
Weapon stats are listed under the model stats and have their own values.
Weapons have some stats of their own, and choosing a weapon option may change a model's Type:
Model Name
The new name of the model once equipped with the chosen weapon.
Type
Models are divided into a number of categories which may change depending on the equipment and skills they have:
- Leader: the commanders of a Strike Team
- Troop: normal rank and file
- Specialist: models with unusual weapons, training or equipment
- Living Legend: a unique named individual
- Support: Rare and heavy support for your Strike Team
Weapon
The name of the weapon the unit is equipped with.
Range
This is the maximum weapon Range in cubes. Weapons with a range of "CC" may only be used in a close combat fight.
Armour Piercing (AP)
The Armour Piercing value of the weapon.
Keywords
The weapon's special abilities will be listed here.
VPs
How many Victory Points you or your opponent score when the model is removed from play, depending upon the scenario. Note: some models will increase their VPs depending upon what weapons they select.
Cost
How much it costs to add this model option to your Strike Team. Note: some models will also increase their cost depending upon what weapons they select.
Dice Tests
Some actions and game events require a dice roll to determine their success (using D8s).
These rolls are called tests and are always written in a standard format which tells you:
- How many dice to roll in the test.
- The target number: This will be the relevant stat of the model performing the action, or simply a number, to aim for.
- The number of successes required (in brackets) to carry out the action.
If this last part is an (X) it means that both players must roll against each other and the number of successes they each roll is compared. Whoever rolls the most wins the test. If an action offers a choice between two or more stats to roll against for a test, players must decide which one to use before rolling any dice.
Example 1
A 3 dice Ranged test (1) would require you to roll 3 dice. Each dice result that is the same or higher than the models' Ranged stat, counts as a success, and only a single success is required to perform the action.
Example 2
A 3 dice Assault test (X) requires both you and your opponent to roll against each other. You are trying to equal or beat your own model's Fight stat. Then compare the number of successes you rolled against the number your opponent rolled (they will have been rolling their own, separate test to try and survive the attack or fight back) to see who wins. The difference in the number of successes rolled by both players may also have an effect in some tests.
Re-rolls
Sometimes you will get the opportunity to re-roll one or more dice. You must accept the second result, even if it is worse than the first. You cannot re-roll an already re-rolled die!
Attempting a test
Take the number of dice specified. Apply any modifiers to the number of dice rolled, as listed in the action description. Important! Modifiers always add or subtract from the number of dice to be rolled. They never modify the target stat or value you are trying to roll.
If modifiers ever reduce the number of dice you can roll to zero or less then you cannot make this roll. You count as rolling zero successes for this test.
The Exploding 8! mechanic applies to tests (see below).
Roll your dice and add up the number of successes to find your total and determine the test outcome as described in the action.
Blank Stats
If a model has a value of "-" for the required stat then it may not choose to perform that action. If a model with a stat of "-" must use that value for a test then regardless of modifiers, it rolls no dice and counts as making zero successes.
Exploding 8!
For all test rolls in the game (e.g. Fight test, Ranged test, Survive Test etc.), a mechanism called Exploding 8! is used. This means that for each dice result of 8 in the roll, an automatic success is achieved and another bonus die can be rolled to see if a further success is achieved. It's possible to keep rolling 8s and to keep getting bonus dice!
The rules will state if the Exploding 8! Mechanic applies to any other roll.
The Rules
In a game of Deadzone, both you and your opponent take control of a Strike Team that you will be using to play an exciting skirmish encounter using your models. In each game, you will play a particular scenario that describes what each player needs to do to win. Maybe one side has to grab a vital objective from the enemy force, or perhaps both are fighting over control of a landing zone.
Once the battlefield has been set up with terrain and any objectives, the scenario you are playing will also tell you how to deploy your models ready to play.
Friendly Models
If a rule refers to friendly models, this means all models in your Strike Team.
Enemy Models
Conversely, your opponent's models in their Strike Team are considered the enemy models in the rules.
Neutral Models
If a scenario requires other, third party models to be involved, these are considered neutral.
The following pages are intended to introduce you to the rules in a prescribed way as follows:
- Basic Concepts
- Cubes and Stacks
- Measuring Range
- Line of Sight
- The structure of the game
- Rounds and Turns
- Command Dice
- Things you can do…
- Activations (and Actions)
- Using Command Dice
- And how you do them
- Movement
- Shooting
- Fighting
Cubes and Stacks
Deadzone battlefields are represented by an 8 x 8 square gridded mat onto which you place buildings and other scenery. Scenery adds a third dimension to the battlefield and reinforces that we are really dealing with cubes and cube stacks, not squares.
Mantic's Terrain Crate scenery can be assembled in an infinite number of ways and placed anywhere on the board. You should experiment for yourself to find out what suits you, but lots of smaller buildings often make for more interesting games than a few large ones. Adding varying amounts of height and interesting gaps and walkways between structures will also make for a much more immersive game.
Wherever possible, align building edges with the printed grid on the play mat and we recommended that no 3 x 3 cube area on the mat's grid be completely devoid of scenery – even if it's just some rubble or barricades to break up Line of Sight and provide models some cover.
During terrain set-up it is important to agree with your opponent on the size of gaps in buildings and what size units can fit on certain pieces of scenery. If you have unusual terrain from your collection that is not covered by the rules, agree with your opponent in advance what rules to use for models moving through, over or otherwise interacting with the scenery.
Sometimes a scenario may call for some specific scenery and give you instructions on how to arrange your battlefield.
A series of cubes piled directly on top of one another is called a stack. Here is a typical example: the Terrain Crate scenery has been used to make a tower which is 3 cubes high.
- Model A is on level 3 (within the third cube in a stack)
- Model B is on level 2 (within the second cube in a stack)
- Model C is on level 1 (within the first cube in a stack)
This is an important concept to grasp for both players because it will affect movement, shooting and more advanced rules like falling!
Make sure both players understand the battlefield and how models can move around the scenery before you begin your game.
Positioning within a cube
In Deadzone, a model's exact placement within a cube is very important. You can place a model wherever you like on the board, including partly over the lines that form the grid between cubes. But in all cases, the centre of a model's base defines which cube it is in.
You should treat the edge of the board as a solid wall that blocks all movement. Models can only move off the board if specifically allowed by the scenario being played and only then from the cubes specified. A model that leaves the battlefield cannot return during the current game. In these instances, a model may leave the board as part of an Advance or Sprint action (simply treat the model as moving to a cube "beyond" the playing surface) following the normal movement rules.
Cube capacity
Every model has a Size listed in its stat line. Each cube has a maximum capacity of 4 "Size-points" of models from a single faction. You may not voluntarily move models from your Strike Team into a cube if this would exceed the capacity of that cube. However, it is possible for two different factions to each have 4 Size-points of models in a single cube, making the total capacity 8.
When moving into a cube already containing one or more models, you may not move another model out of the way unless there is nowhere else the moving model could possibly be placed within that cube.
If you must move a model in order to fit in, then you must move friendly models before moving enemy ones and only make the minimum adjustment required to fit the new model into the cube. The model's own player always decides on a model's exact position when it needs to change position for any reason and no models can ever be removed from a cube by models entering in this way.
Half-cubes, platforms and walkways
Deadzone can be played on very interesting and complex terrain. Once you have mastered the basics and are ready for more intricate environments, additional rules for features such as walkways, platforms, and half-cubes can be found on pages 28-29.
Measuring Range
When you need to work out distance between two models (such as how far a model can shoot) you always use the same method. Count the cubes to the target as if the distance was all on one level, then count the difference between the heights of the two models in levels. The higher of these two numbers is the range to the target.
You never count the cube you are shooting from and always count the one the target model is positioned in. When shooting, if the target is further away than the maximum Range of the weapon being fired, the target cannot be shot and the Shoot action is not taken.
Line of Sight (LOS)
Deadzone uses a variation of True Line of Sight (or TLOS). In the intricate and claustrophobic playing space of a Deadzone game, TLOS make for a much more immersive and cinematic experience for both players.
LOS is calculated by looking from the model's perspective. Take a model's eye view and ask yourself if it can see the target model at all, even partially. Remember, the model includes its base as well.
What defines a model for LOS?
For both the model you are drawing LOS from, and to, use the following rules:
Only consider parts of the model within the width of its base, and up to the highest part of the model's head, or torso (if that is higher). For vehicles or other models without a head, use the highest part of the torso, hull or main body. Parts like weapons, fins, aerials, arms and tails that extend outside the base width, or above the high point, cannot be used for LOS purposes.
When drawing a "model's eye view", you can take the LOS from anywhere inside the same defined area of the model the LOS is being drawn from. In reality, they would be able to crouch down or move within an area to get a good view of their target. LOS can be taken from, and to, any part of the model that is inside the valid area (i.e. within the width of the base and below the highest counted point) — parts outside the base width are not counted.
Model A can see all of model B, so gains the Clear Shot modifier (see page 21). Model A can only see part of Model C, which would mean a normal shot with no modifiers. Model D can see all of model B and is also firing from a higher level so gains both the Clear Shot and High Ground modifiers. However, due to the wall and roof, while model B can see model D, it is not a Clear Shot because of the angle from model B's position.
Can the model be seen?
YES - This allows a normal shot. Normally you will be able to see at least part of the model and the clutter of the environment will obscure the rest.
NO - If you can't see the model at all then you do not have LOS and may not take the action.
- If LOS needs to be established for any other reason than shooting, simply follow the same rules as outlined here.
Fairness
The rules are designed to allow players to get into the action by getting down to a model's level to "see" what they can see. They are also designed not to penalise players with models that have dynamic poses and that extend beyond their base.
Some situations will call for common sense from the players and the rules cannot be comprehensive while using TLOS and the infinite variety of models and terrain players will have. Players should come to a sensible conclusion or roll a die to decide any 50/50 calls that they cannot agree on.
Your first few games
To make things a bit easier for your first few games, you can simply treat any part of a model as being valid for drawing LOS to and from. This will mean you don't have to worry about base width and model height and can learn the other key mechanics of the game. Once you've mastered those, you can then use the full LOS rules and think more carefully about positioning and hiding your models!
Rounds and Turns
A game of Deadzone is played across a number of Rounds. Within each Round, players alternate taking Turns, activating their models, until both players have completed activating their whole Strike Team. A game might last a set number of Rounds, or be determined by a particular victory (or defeat!) condition. The scenario being played will tell you how long to play for. See page 45 for how to set up scenarios.
Game Sequence
- Set up the playing area
- Determine who takes the first turn
- Play Rounds a. Roll Command b. Take alternating Turns activating models c. End Phase
- Determine the winner!
A Round will always begin with both players Rolling their Command Dice. Players then take their alternating Turns.
During each of their Turns, a player gets to do something (act) with a single model of their choice. When it is a player's turn to Activate a model, they are said to have the Initiative.
Each model in a Strike Team only gets to act once in each Round, unless specified. During the Turn in which it is acting, a model is known as the acting (or active) model. Once it has finished acting, the model is marked as Activated by placing an Activation Marker next to it.
Taking Turns
Once a player has finished activating all their models and declares they are finished, the player with models yet to activate continues playing Turns until their models are also all Activated.
Passing a Turn
If you have fewer models left to activate than your opponent then you may choose to Pass the Initiative back to your opponent without activating anything. If all your models have been activated then you have no choice but to Pass. In this case, the remainder of the Round will involve the other player retaining the Initiative and taking consecutive Turns until all models have been activated.
The End Phase
When all models have been marked as activated the Round is over. Follow these steps:
- Award the appropriate Victory Points (VPs) to any player who has the only model(s) present in an objective cube. Count each objective once, not once per model in the cube. Note that objective cubes can score every Round so long as the conditions are met. Note that you may also score VPs for other reasons, such as killing enemy models.
- Count the VPs in each player's pool to see if either has won the battle.
- If the battle is not over then remove the activation markers from all models and start a new Round by Rolling Command.
Who goes first in the next Round?
The player who finishes activating their models first in the current Round, starts the next Round with the Initiative (and so takes the first Turn).
Rolling Command
Command Dice are a representation of how the training and cohesion of a well-led fighting force can lead to extraordinary moments of inspiration, cunning and good fortune in battle.
At the start of each Round, before any Turns are taken, each player rolls their Command Dice as follows:
1) Roll
Both players roll 3 Command Dice plus any extra dice provided from a single model with the Tactician (n) keyword in your Strike team, usually your Leader.
2) Re-Roll
After rolling, starting with the player who has Initiative, you may perform one single re-roll of as many of your Command Dice as you choose. If you reroll any dice you must keep the new result(s).
Important! If less than half of your Strike Team (by model count) remains on the battlefield, you lose the ability to re-roll Command.
3) Set
Finally, set your Command Dice results beside your edge of the board. They will be available to spend in the coming Round to augment the actions of your Strike Team.
You can spend as many Command Dice as you like during a Turn and each die is discarded when used. Any that are not spent by the end of the Round are discarded. See below for more details about how and when Command Dice can be used.
Using Command Dice
Each Round you will be able to 'spend' your Command Dice on a number of special abilities. Once you have used one of your Command Dice, place it to one side until the start of the next Round.
Some Command Dice results will give a model an extra Advance, Shoot, or Assault action. These are 'free' actions, and do not count as one of the active model's limit of two short actions or one long action per Turn.
+1 Model
What: Activate a second model that has not yet been activated.
When: After you have finished your model's activation. You may only spend one +1 Model activation result per Turn. Unless specified otherwise by a model keyword or Army special rule, you may only activate a maximum of two models per Turn before you must hand the Initiative back to your opponent.
Dice Symbol
What: Add 1 dice to any Ranged, Fight or Survive test.
When: You may spend a Dice Symbol result whenever you make a Ranged, Fight or Survive test, including during your opponent's Turn (e.g., on a Survive test as part of a Shoot action aimed against your model). This is considered a modifier to the dice roll. You may spend any number of Dice Symbol results on a single test, but must decide how many to spend before any dice are rolled.
Advance
What: The active model takes a free Advance action. This Advance is restricted to one cube, regardless of the model's Speed stat, but otherwise follows the normal movement rules. Models with a Speed stat of "-" may not use this Advance ability to move.
When: You may spend a single Advance result per activation. You may play it before the model takes any actions, after a short action, or after a long action. Can be used on models that have already taken an Advance or Sprint action.
Shoot
What: The active model takes a free Shoot action (whether the action is short or long for the model/weapon).
When: You may spend a single Shoot result per activation. You may play it before the model takes any actions, after a short action, or after a long action. Can be used on models that have already taken a Shoot action.
Assault
What: The active model takes a free Assault action.
When: You may spend a single Assault result per activation. You may play it before the model takes any actions, after a short action, or after a long action. Can be used on models that have already taken an Assault action.
Special Order
What: Activate your Leader's Special Order. The Special Order is different for each Strike Team and explained in the Force list. Special Orders do not count towards any other restriction on number of actions per Turn unless specifically mentioned otherwise. They may affect specific models within a Strike Team which will be listed.
When: Unless otherwise specified, you may spend a single Special Order result per activation. The rules for any keywords that require a Special Order result will indicate when you may spend the dice to use the keyword. The Leader chosen for a Strike Team will determine what the Special Order result will do. Even if the Leader dies or is otherwise removed from the game, Special Order results can still be spent in the same way.
! A model may have only one of either the Advance, Shoot or Assault results spent on it during its activation.
Purchase a re-roll
You may choose to spend any Command Die result to re-roll a single die as part of a Fight, Ranged or Survive test. You may only do this once per test to re-roll a single die. Declare you want to purchase a re-roll in this way, immediately after the initial test has been rolled.
Actions
When a model is activated during a player's Turn, it may perform a number of actions: either one long action or up to two different short actions.
A player can always choose to activate a model but perform no actions with them. Simply mark the model as Activated.
Actions:
- Advance (short)
- Stand Up (short)
- Shoot (short)
- Special Action (short)
- Sprint (long)
- Assault (long)
During its activation, a model is called the active model.
IMPORTANT! Restrictions:
- A model may only perform each type of action once in a Turn. However, extra actions granted by Command Dice do not count towards this limit, and may result in duplicate actions for the same model in a Turn.
- A model that starts its activation Pinned (lying down) must choose Stand Up as its first action.
- A model that is not Pinned, and is in the same cube as one or more unpinned enemy models, may only choose an Assault or Advance action.
Advance (short)
Each model has two movement values in its stat line, separated by a dash. When taking the Advance action a model can move a number of cubes up to its first Speed value, or reposition itself within the cube it is currently in.
Each step of the move must be into a cube adjacent to the one the model is currently in, respecting cube capacity limits, and diagonal movement is permitted.
Taking the Advance action and having a Speed of 1, a model would be able to move 1 cube in any direction, diagonally or orthogonally.
Moving into enemies
If a model moves into a cube containing an enemy model, deliberately or otherwise, then they must fight it immediately (see the Assault action). This does not count as an additional action and the moving model must use its Fight stat for the test. If the model has a Fight stat of "-" then it counts as rolling zero successes. If there is more than one enemy model in the cube then the moving model chooses which one enemy model to fight. After the Assault action is resolved, the Advance action ends.
Moving away from enemies (Breaking Away)
If an active model in a cube containing one or more enemy models wishes to leave, it may do so as an Advance action (following the normal movement rules). However, before it moves, one of the enemy models in that cube (chosen by the opposing player) may make a free Assault action against the moving model. The moving model must roll a Survive test – it cannot choose to roll a Fight test in response. As long as the model is not Killed, Stunned or Pinned it "Breaks Away" and may continue any further movement it has.
The Effect of Scenery on Movement
Moving on the same level in order to move into an adjacent cube should be via the shortest orthogonal path between the two cubes and must not be completely blocked by scenery. In other words, any cube face you wish to cut across must have enough empty space for the model to fit over or under, or through. The smallest gap a model can squeeze through is based on their Size as shown in the table below. It is a good idea to look at the scenery you are using before the game and agree with your opponent what is going to be possible in advance.
When making a diagonal move, trace the shortest orthogonal route to the destination (imagining the model had moved in that way). If there is more than one route, choose one, then check that each cube face it would be necessary to cross is either empty or has a suitable space to pass through. If it does, the move can go ahead.
Models can jump across some smaller gaps (see page 28). Otherwise, they must climb or otherwise deal with any lack of floor by using a different route!
A Size 1 model with Speed 1, taking the Advance action, could move into a cube if the cube face it would pass through is completely empty. It could alternatively move into a cube passing through a Medium Gap in the scenery. However, it cannot move to a cube where the shortest orthogonal route is blocked by a solid wall.
A model wanting to move diagonally to a highlighted cube should check the shortest orthogonal route; if there are two routes of equal length and one is blocked by a solid wall but the other is viable, the diagonal Advance can go ahead since only one viable route is required.
| Gap Type | Models that fit |
|---|---|
| Blocked — 100% of the cube face, e.g. a solid wall | None |
| Small Gap — approx. 25% of the cube face, e.g. a small window | Size 1 only |
| Medium Gap — approx. 50% of the cube face, e.g. a large window | Size 1-2 |
| Large Gap — approx. 75% of the cube face, e.g. a large door | Size 1-3 |
Hatch (n): Hatch (n) is a rule that can be assigned to any solid 3"x3" surface before the game begins. It can represent a door, hatchway or other portal. A Hatch allows the unimpeded passage of a model up to size (n) through a solid floor or wall. A Hatch is easily opened by any model to move through and closes again automatically. A Hatch always blocks LOS just like the terrain it is assigned to.
Moving up and down levels
All of the cubes on the level immediately above and below the cube a model is in are considered to be adjacent. All the cubes in a column form a stack.
Models can climb or descend scenery to move between cubes using an Advance or Sprint action, including moving diagonally up or diagonally down.
To climb up a level, in simple terms, there must be scenery to climb. This scenery must be in a suitable position along the route of the movement, and the scenery must reach up to the destination cube.
It is assumed that the elite warriors of a Deadzone Strike Team are sufficiently well trained to be able to scramble up and over small obstacles and up or down walls.
Also, just like the rules for moving on the same level the shortest orthogonal route to the destination should be checked and must not be completely blocked.
Always lean towards allowing difficult or unusual movement unless it is obviously not "realistic". For example, having a jetpack to cross or scale a gap might be realistic, when leaping or climbing is not. Settle any disagreements as described under Fairness above.
Sprint (long)
The model may move up to their second Speed value in cubes. Otherwise, the rules for movement are the same as for the Advance action.
This Sprint action cannot be taken if the active model is in the same cube as an enemy model.
Shoot (short)
To take this action, a model must be equipped with a Ranged weapon - one that has a Range number (R) in its stat line. Range is given in cubes e.g. 'R3' indicating a Range of 3 cubes. Weapons with Range of "CC" may only be used in an Assault (close combat) fight.
If a model has a "-" listed for its Ranged (RA) stat, it may not make a Ranged attack or be given any equipment of type Ranged.
The Shoot action cannot be taken if the active model is in the same cube as an enemy model unless specified otherwise.
The Shoot action targets a single model – other models in the same or intervening cubes are not affected unless specified by a weapon's keywords. You may not target a friendly model, or a model in the same cube as the active model, unless specified by a weapon or model keyword.
The target must be within the maximum Range of the weapon, and in Line of Sight (LOS) from the model doing the shooting.
If a model has more than one type of Weapon equipped, the player using the model must state which weapon is being used before any dice are rolled.
Note that some weapons or other abilities might make Shoot a long action for a model, instead of short (for example, see Heavy and Sniper Scope, in the Keywords section).
Shooting Roll
The player making the Shoot action rolls a 3 dice Ranged test (X).
Modifiers:
- Clear Shot, +2 Dice: If you have a completely unobstructed view to all parts of the target model (the valid LOS area, as defined under Line of Sight).
- High Ground, +1 Dice: If you are on a higher level than the target.
- Friendly Fire, -2 Dice: If there are any friendly models in the target cube.
Example: Louis is shooting with one of his Steel Warriors. He starts with three dice, as standard. The target is in a cube below the Steel Warrior, which means he adds +1 dice to the roll, and will now roll four dice as a result. The Steel Warrior has a Ranged (RA) stat of 4+. Louis rolls all four dice and scores 1, 5, 6 and 6, which means he has scored three successes.
Target Survive Roll
Simultaneously with the shooting model, the player using the target model rolls a 3 dice Survive test (X).
Shooting Results
Both players now compare the number of successes they have rolled.
Ranged test scores wins: the difference in successes between the target model's Survive test and the active model's Ranged test is the amount of HP lost by the target. Apply the effects of Armour and Armour Piercing as normal (see Damage & Death).
Draw, or Survive test wins: the target is unharmed.
Example: Louis has just rolled to Shoot with his Steel Warrior and scored three successes. Louis was aiming at Martin's Assault Enforcer, which has a Survive (SV) stat of 4+. Martin rolled a 3 dice Survive test and scored 3, 4 and 5, which means he has made two successful Survive rolls. Both players now compare the amount of successes rolled – Louis has three, compared to Martin's two. The difference in successes is one, which means Martin's Assault Enforcer will suffer one damage and so may lose a HP (depending on Armour).
Assault (long)
If a model begins its Turn in the same cube as an enemy model then it may choose to fight it in close combat. Weapons that can be used in a close combat fight are those with Range "CC". If a model has more than one CC weapon then it must choose which one to use before any dice are rolled (and so only apply the keywords of the selected weapon).
However, models may always make an Assault action*, even if they do not have a specific close combat weapon equipped. It assumed they use their fists, knives, teeth or tentacles.
If a model moves, deliberately or otherwise, into a cube that contains an enemy you initiate an Assault (close combat fight) automatically, without it counting as an action. If there is more than one enemy model in a cube the active model chooses which one it will fight.
*A model with a Fight stat of "-" may not choose to roll a Fight test when targeted by an Assault action. If a model with a Fight stat of "-" is forced to initiate an Assault action and close combat fight (for example, as a result of forced movement) then it counts as rolling zero successes.
Pinned Targets
If the active model targets a Pinned model with an Assault action, the target will automatically Stand Up without it counting as an action, but may only choose a Survive test reaction.
Assault Roll
Before either player rolls any dice, the target model must choose whether to fight back by rolling its own 3 dice Fight test (X) or survive with a 3 dice Survive test (X). Neither choice counts as an action for that Round.
The player making the Assault action now rolls a 3 dice Fight test (X) and the player of the target models rolls their chosen test at the same time.
Modifiers:
Fight test modifiers:
- +1 dice if the model moved into this cube in this action.
- +1 die if one or more other friendly models are in the same cube.
- +1 die if the opposing model is Injured.
- +1 die if the model is a larger Size than its opponent.
- +1 die if the opposing model was Pinned at the start of the action.
Survive test modifiers:
- +1 die if one or more other friendly models are in the same cube.
- +1 die if the opposing model is Injured.
- +1 die if the model is a larger Size than its opponent.
Assault Results
Both players now compare the number of successes they have rolled.
Draw, or a Survive test wins: nothing happens and the Assault action is over.
A Fight test wins: the difference in successes between the winner and the loser is the amount of HPs lost by the losing model. Apply the effects of Armour and Armour Piercing as normal (see Damage & Death).
Example A: Kelly moves her Feromite into a cube with Richard's Mawbeast and automatically initiates an Assault action. She starts with three dice, as standard. Because her Feromite moved into the cube, she gains +1 die and Richard's Mawbeast has lost one HP, so she gains an additional +1 die. The Feromite is larger than the Mawbeast and so she gains one more – taking her total roll to six dice. Richard chooses to fight back and rolls the standard three dice, with no modifiers or bonuses.
Both players now roll. Kelly's Feromite has a Fight (FI) stat of 4+. Kelly rolls six dice and rolls 2,3,3,4,5 and 7. She has scored three successes. Richard's Mawbeast has a Fight (FI) stat of 4+. Richard rolls three dice and gets 1,2 and 4. He has scored one success.
Kelly has two more successes than Richard, so she wins the Assault action. While the Feromite's Massive Claws have AP(2), the Mawbeast has no Armour, so the AP is not applied.
The Mawbeast loses two HPs, which is the most it can suffer, so it is removed from play.
Example B: This time Kelly moves her Feromite into a cube with Richard's Gruntbot and automatically initiates an Assault action. She starts with three dice, as standard. Because her Feromite moved into the cube, she gains +1 die – taking her total roll to four dice. Richard chooses to Survive and rolls the standard three dice, with +1 die for being a larger size.
Both players now roll. Kelly's Feromite has a Fight (FI) stat of 4+. Kelly rolls four dice and rolls 1,1,4 and 5. She has scored two successes. Richard's Gruntbot has a Survive (SV) stat of 5+. Richard rolls four dice (+1 for larger size) and gets 1,2,4 and 7. He has scored one success.
Kelly has one more success than Richard, so she wins the Assault action, causing a single point of damage. The Feromite's Massive Claws have AP(2), which reduces the Gruntbot's Armour value from 2 to 0, so it has no effect on stopping the damage.
The Gruntbot loses one HP, which isn't enough to remove it from play.
Special Action (short)
This is a catch-all action. It is required for some scenario actions, such as calling in a drop ship, setting the timer on detonators and so on. It is also used by some keywords. The specific rules and effects of a Special Action are described by the scenario or keyword that calls for it.
Note that a model can perform two different Special Actions in the same Turn.
Stand Up (short)
A Pinned model (see Additional Rules) must choose Stand Up as its first action of its activation, if it acts at all. Its owner positions the model standing up, anywhere in the same cube.
If a Pinned model Stands Up in a cube containing an enemy model, then it is immediately attacked. The opposing player chooses one of their models in that cube to fight the active model in close combat (Assault) with the bonus for the target being Pinned. The model that is standing up must roll a Survive test – it cannot choose to fight back.
Damage & Death
Shooting, close combat or even just a misstep, can all have a bad effect on a model's health! A model's ability to continue as it accumulates damage during a game is represented by its Health Points (HP) stat.
The more HP a model starts with, the more damage it can sustain before it is killed, or incapacitated enough that it is no longer effective. If a model ever takes damage equal to or more than its HP stat, it is immediately removed from play and cannot be used again this game, assumed dead (killed). A model that has taken damage but is not killed, is Injured.
Resolving Damage
When a model suffers damage and loses HP for any reason (such as from a shooting attack, or in close combat), the damage is applied to the model straight away. Damage counters can be used to track how many points of damage a model has suffered. Keep the counters next to the model as a reminder.
A model's Armour can help reduce the amount of damage suffered. However, Armour Piercing weapons can in turn negate a model's Armour.
Armour (AR) – the Armour rating of the target model automatically decreases the amount of damage suffered by the target model by the AR stat of the target model.
Armour Piercing (AP) – the Armour Piercing (AP) rating of the attack reduces the Armour value of the target model by the AP stat of the chosen weapon used by the attacking model (or other means of attack). A target model's AR stat can be reduced to a minimum of zero.
Any reduction in the Armour of a target due to AP, only applies to that attack, and isn't a permanent effect.
Note: if an attack has an AP value, but the target has no AR value, there is no effect.
Example 1: An undamaged model with 2 HP is hit by a shooting attack that results in 2 damage being suffered – this would normally kill the model. Luckily, the model is wearing Armour (AR stat 1). This reduces the damage to 1 and so the model is merely Injured.
Example 2: The same model is later attacked in an Assault and loses, suffering 1 point of damage. Unfortunately for our target model, the attack has an AP of 1, meaning the model's AR of 1 is reduced to zero, and so the Armour has no effect on stopping the model taking the damage. The model can only take a maximum of 2 damage before it is dead (losing both HP), and so the model is removed from play.
Additional Rules
Most of your games will be covered by the preceding core rules. However, there are additional rules that may have an effect during your hard-fought skirmishes!
Pinned
In the midst of combat, models sometimes get blasted off their feet, or simply hit the deck in order to avoid incoming fire. This is called being Pinned. To show a model is Pinned, simply lie it down. If an active model becomes Pinned it ends its activation.
A model that starts its activation Pinned (lying down) must choose Stand Up as its first action. The owning player positions the model within the cube as they wish.
A Pinned model that is attacked in an Assault action will Stand Up automatically without counting it as an action but may only Survive as a reaction. However, their opponent gains the +1 modifier for fighting a Pinned enemy for this Assault action.
A model moved into a cube with enemy models as a result of forced movement (e.g. Knockback, Falling, Scatter etc.) that are then Pinned, will automatically Stand Up and make a Survive test as described above. If the enemy model is also Pinned, both models Stand Up, but no fight takes place (in effect they would both roll Survive tests which would result in no damage).
Slammed into walls
If a model is thrown into a wall that blocks its movement into a different cube, it makes a 3 dice Survive test (X), and it remains in the original cube.
The opposing player rolls a 3 dice 5+ test (X) on behalf of the wall, which counts as an 'attack'.
Both players now compare the number of successes they have rolled.
Model wins, or the roll is a tie: the model is unharmed.
Wall wins: the model is Pinned and the difference in successes is the amount of HP lost. The attack has no Armour Piercing however, so any Armour the model has will reduce any HP lost.
Falling
If a model falls or jumps down more than one cube it rolls a 3 dice Survive test (X).
The opposing player rolls a n dice 5+ test (X) on behalf of gravity, which counts as an 'attack', where n is the number of dice to roll based on the number of cubes fallen. The further a model falls the greater the risk of damage.
| Fall Height | Gravity test dice |
|---|---|
| 1 cube | No test required |
| 2 cubes | 3 dice |
| 3 cubes | 4 dice |
| 4 cubes | 5 dice |
Both players now compare the number of successes they have rolled.
Model wins or the roll is a tie: the model is unharmed but is Pinned.
Gravity wins: the model is Pinned and the difference in successes is the amount of HP lost. The attack has no Armour Piercing however, so any Armour the model has will reduce any HP lost.
For example, a model falling from level 3 (the third cube up in a stack) to level 1 (the first cube in a stack – usually on the ground) has fallen 2 cubes, and so there is a 3 dice test for Gravity vs the model's Survive test.
Directly Away
A number of weapon effects move a target "directly away" from the attacker or an explosion.
If the attacker and target are in the same cube then the attacker chooses which adjacent cube to move the target into.
Otherwise, use a normal Line of Sight between attacker and target to work out where the model moves. Continue the LOS from the attacker through the target and into the first new cube, beyond the one the target is standing in and on the same level. If there is any choice of cubes, the attacker may decide which.
Scatter
Sometimes an explosion or other effect will cause a model or item to be moved into a random adjacent cube. Random movement of models or items is called scattering and is usually worked out with a single dice roll. Use a scatter diagram with eight numbered directions around a central point (1-8, going clockwise). Simply move the model or item in question one cube in the direction indicated. Agree on which cubes correspond to each numbered location before rolling.
Scatter is always worked out initially on the same level. Then, if the model or item scatters into a cube that has no floor on that level then it will fall until it lands on something.
If a cube has a partial floor, such as a half-width walkway, then roll to see if the model or item has landed on it or fallen past. Roll a single dice to see whether they land on the walkway or carry on falling:
On a 1-4 the model or item misses the walkway and continues to fall. On a 5+ they land on the walkway. In this way, a model or item may scatter into another cube on the same level, or fall into a lower level. Nothing ever scatters upward.
If the scatter movement is completely blocked by solid walls (including the edge of the battlefield) then the model or item simply bounces back into the original cube. Models that fall or are thrown into walls may take damage.
Indirect weapons scattering off the battlefield will miss completely however and have no effect.
Items can always fit in a cube and do not count towards a cube's capacity. If a model scatters into a cube that it cannot fit into due to the Size limitations explained previously, then it must remain in the original cube (if on the same level) or scatter again from that cube (if it has already fallen to a lower level).
Partial Cubes
Many games will feature interesting environments featuring narrow walkways, balconies and other platforms, as well as walls at angles that bisect a cube in some way, or otherwise reduce the amount of available floor space for models to use.
To account for these situations, use the following rules.
Gaps in floors
Sometimes there will be a gap in the floorspace of a cube. So long as the gap is less than a full cube in width, a model may move across the gap to the other side to be at the same level as part of its movement. This allows models to move across small gaps from a balcony or walkway to a roof top for example.
If a model moves to a lower level, they may take falling damage as normal. Models cannot move across a large cube-sized gap to a higher level – or through walls!
Half-cubes
If the available floorspace of a cube is only half that of a normal cube (or less), then the cube capacity is also half what it would normally be (2 Size-points per side, and 4 in total).
Sometimes, you may have a situation where a solid wall with no gaps bisects a cube to its full height but it is possible to place models on both sides. In such cases, each side of the wall is considered its own half-cube with corresponding capacity. The models on either side cannot interact with each other (so can move away from enemy models on the other side freely for example). All the models on both halves are considered to be in the same cube for contesting or scoring objectives however.
If the bisecting wall has any gaps in it (e.g. a window or battle damage) then the whole cube counts as one and the models interact as normal.
Walkways and Balconies
These are typically half-width tiles that bridge gaps between or even within buildings, or extend out from a wall and over the empty space beneath. The capacity of a cube containing a walkway or balcony will be half. Also, models can only be placed on a section of walkway or balcony in a half-cube if there is physically enough space for them. Other models may be moved following the normal rules but cannot be forced off the walkway for any reason.
Platforms
Platforms are significant areas within a cube that have a raised floor, different to the rest of the cube – usually some kind of large step. The cube capacity is not affected, but models that cannot climb (such as models with the Vehicle keyword) will not be able to move from the lower level to the platform level.
Overstacked cubes
Some special rules or circumstances may result in a cube becoming more crowded than it is normally allowed. This is called being overstacked. Whenever a model starts their activation in an overstacked cube and is free to choose their action, they must move out of that cube before they do anything else.
Close Combat in Half-cubes
Because of the reduced capacity of half-cubes and walkways, some larger models (size 3 and 4) may technically not be able to enter a cube at all. While this makes sense in many cases (it prevents huge monsters happily stomping across rickety walkways for example), it can lead to odd situations where smaller models cannot be attacked in close combat with an Assault action, even if the route to them is perfectly clear and legal. To overcome this, use the following rule:
If a Size 3 or 4 model cannot enter an adjacent half-cube to attack an enemy model with an Assault action, when it would normally be legal to do so if the cube was a full one, then it can make an Assault action against a target model in that half-cube as follows. The large model enters the half-cube as part of an Advance or Sprint action, and makes its Assault attack (with all normal modifiers, except for being a larger Size model). Assuming it has not been killed, the larger model that initiated the Assault action must move back to the adjacent cube it came from immediately after the Assault action has been resolved. The only exception is if they were already moved out of the half-cube e.g. by Knockback. This is a free action and does not trigger any free Assault actions when the model leaves the half-cube or returns to its original one.
Keywords
The members of a Strike Team are typically elite soldiers with a wealth of training and expertise at their disposal. Being sent into a Deadzone or behind enemy lines is no easy task. Keywords represent the range of skills and abilities that both models and the weapons they use can have.
- Some keywords will belong to the model and others to the weapons they carry. Weapon keywords are listed as part of the weapon's stats and profile.
- Where a keyword rule conflicts with a core rule, the keyword rule takes precedence.
- If a model is removed from the game, its keywords can no longer be used unless specified otherwise.
Aerial Deployment
A model with this keyword may choose to make an aerial deployment. If it does so, do not deploy it with the rest of your Strike Team. Once both players have deployed their teams, but before any Scout or Recon moves, a model using aerial deployment may be deployed in any cube not containing an objective and provided it is at least two cubes away from the nearest enemy model. If there are multiple cubes in a stack, it must deploy on the highest level.
A model may always aerially deploy into the player's own deployment zone (if cube size limits allow it) but may never aerially deploy in the enemy's deployment zone. If both players have models with aerial deployment then alternate aerial deployments starting with the player with Initiative. If this means that a model cannot be deployed legally then that model will have to instead be deployed within your deployment zone.
Agile
When a model with this keyword takes an Advance or Sprint action it may move one additional level up or down in the same stack following normal movement rules.
AP (N)
AP is short for Armour Piercing and denotes a type of weapon that is particularly good at penetrating Armour. AP will always be listed with a number after it in place of the "n", e.g. AP1.
Attacks by a model or weapon with this keyword reduce the target's Armour stat equal to the number after the AP. So if an AP1 attack successfully hits a model with Armour 2, then the target's armour is reduced to 1 for the attack. AP is cumulative: if more than one AP modifier applies then add together the n value from each source.
Auxiliary Weapon
This weapon can be equipped in addition to another selection.
Beast
A model with this keyword cannot pick up, carry/use Items or Equipment, or interact with control panels. All of its weapons and equipment are either natural or have been grafted on permanently by skilled bio-technicians. A model with this keyword can still claim objective cubes.
Bike
A model with this keyword is a type of vehicle. The model follows all the rules that apply to the Vehicle keyword. However, a Bike can be Pinned.
Blast
This weapon does no damage, though the force of the blast may push models off buildings or slam them into walls.
No HP is lost, but every model in the target cube is thrown one cube in a random direction (see Scatter) and is then Pinned.
BOOM! (n)
When a model with this keyword is killed, they explode. In addition, the model may choose to trigger the explosion as a Special action, which may be performed even if in an occupied cube.
Regardless of the cause, when the model explodes, treat it as a Frag (n) explosion in that cube, where (n) is the value of BOOM! - then remove the model with the BOOM! keyword from play.
Charged
A model with this keyword may choose to move an extra 1 cube as part of an Advance action (not Sprint) and gains Frenzy (1) until the end of the activation. At the end of the activation, the model must make a 3 dice Survive test (2). If the test is failed it loses 1 HP. Armour and other keywords do not protect against this damage. If this kills the model, VP's will be awarded to the opposing player.
Cloaking Device
This device disrupts the visual appearance of troops. All models in a cube or adjacent to a cube containing a model with a Cloaking Device will suffer a -1 dice modifier to target them with Shoot. No additional effect will be gained from smoke or additional Cloaking Devices. Models benefitting from a Cloaking Device may also be subject to a Clear Shot modifier, for a total +1 modifier.
Combat Team Training
As long as a model with this keyword remains in play their Strike Team may re-roll Command Dice, even if it has lost more than 50% of its models.
Comm-link
A model with this Keyword is able to act as a spotter for their comrades. The model may use a Special Action to call in the co-ordinates of a target. Place a suitable marker in a cube within the comm-link model's LOS. Models using Indirect weapons treat this cube as being within their LOS.
Note that this does not allow models to target cubes outside of their weapon's range, or to otherwise fire into cubes that are not valid targets.
Communications Relay
A model with this keyword grants a free additional +1 Model Command Dice result per Round. You may not reroll this extra Command Die and if the model granting Communications Relay is killed you lose the extra activation for all subsequent Rounds.
Companion
A model with this keyword always counts as having a friendly model in the same cube during Assault actions.
Construct
This model is an artificial creature and as such is immune to certain keywords. Additionally, the model can never be Pinned. If hit by an attack that has effects in addition to pinning, such as Blast, the additional effects still apply.
Defender Shield
The Defender Shield is a mobile barricade behind which a model and its comrades can advance safely. They may only be used by Size 1 or 2 models.
While in a cube with a friendly model with the Defender Shield keyword, the equipped model and all Size 1 or 2 friendly models gain +1 to their Armour value. Each model can only benefit from a single Defender Shield bonus at a time.
Rarely a Strider may carry an enlarged Defender Shield (see Force lists). When it does, the Strider will benefit from +1 Armour but no other friendly models in the same cube will.
Dismantle
A model with this keyword has a special knack for finding the weak spots of mechanical objects. Whenever this model causes damage to a model with the Vehicle, Walker or Construct keyword, increase the HP lost by 1.
Drop Suit
A model with the Drop Suit keyword starts the battle off the table. A model in the same Strike Team already in play may call in a Drop Suit model currently off table using a Special Action.
When called in, place the Drop Suit model in any empty cube on the table. If there is a stack, place it on the top level. The force of the model's entry may send nearby models flying - the Drop Suit model rolls a 3 dice 4+ test (X) for the strength of the attack. Models in all adjacent cubes must roll a 3 dice Survive test (X). Roll once for the attack and separately for each target model's survival roll.
Draw or Survive has more successes: Attack fails to cause any harm.
Drop Suit has more successes: No direct damage is caused but the target model is thrown one cube directly away from the Drop Suit model and is Pinned. Damage may be caused by a model falling or hitting a wall.
The Drop Suit model is able to activate as normal during one of its player's next Turns.
For the rest of the game, the model equipped with Drop Suit counts as having a Jump Pack.
Energy Shield (n)
Energy Shields are designed to absorb the energy of incoming attacks and damage, whether this is from particle weapons or kinetic energy devices, close combat or even just falling.
Shields take effect whenever the model would potentially take damage, but before any Armour or Armour Piercing is taken into account.
When a model wearing this item would potentially take damage, make an (n) dice 6+ test.
For each success you roll, 1 point of the potential damage is absorbed by the shield.
After the roll for the shield, if any potential damage remains, adjust this by any Armour and Armour Piercing that apply before finally calculating if the model will actually lose any HP.
If a model is protected by more than one Energy Shield/Shield Generator then all apply. Roll for each separately and reduce the potential damage by the total number of successes.
Example: A model is the target of a shooting attack. The firing model's Ranged test rolls 3 successes vs the target model's Survive test which only scores 1 success: therefore 2 potential damage - but the target has an Energy Shield (2). Making a 2 dice test for the shield, the target scores a 3 and a 7, meaning one success, which reduces the potential damage to just a single point. The target has an Armour value of 1 and the attack has no AP, so the last point of damage is negated by the Armour and the model is saved from losing any HP. Phew!
Engineer
The model is experienced with tripwires and mines. If they reveal a Booby Trap item or enter a cube with a Trap (x), then the trap is defused and discarded. The model's activation then ends immediately.
In addition, some units may only be taken if you also take a model with Engineer in your Strike Team.
Evade
When an unpinned model with the Evade keyword is the subject of a Shoot action but is not killed or Pinned, it may make an immediate 1 cube move in any direction. This may trigger a close combat fight as normal.
Explosive
When an Explosive attack is used it may injure or kill models in the target cube, and the force of the explosion will throw survivors to the ground. There will always be a second keyword to denote the type of explosive attack e.g. Frag (3), Blast etc.
Perform a Shoot action automatically hitting the target cube that is in LOS; you do not need to be able to see an individual model within the cube. Now resolve the type of attack using the secondary keyword.
Fire Control
When the model takes a Shoot action it can use two weapons instead of one. Each weapon may choose the same or a different target. Declare the target of both weapons before rolling any attack dice. A model with Fire Control that uses a Shoot symbol on a Command Die only benefits from a single extra Shoot action from only one of the available weapons.
Firing Platform (n)
A Vehicle firing a weapon with the Firing Platform keyword gains +n dice when performing a Shoot action.
Flight
A model with this keyword does not require a wall or ramp to change levels. It may move over gaps of any size on the same level. It will not take damage or be Pinned for falling. The model must end its move in a cube (and position) that allows it to be physically placed on the gaming table.
Frag (n)
Roll a (n) dice 4+ test (X) for the strength of the attack. No additional dice can be added for any reason. For example, a Frag (5) weapon would roll 5 dice for the test. Models in the target cube must roll a 3 dice Survive test (X).
Gas Cloud
A model with this keyword is able to produce a One-use Gas Cloud. The effect varies by type.
Gas Cloud (Smoke)
At the beginning or end of its activation, this model may place a Smoke marker in its cube even if there are enemy models in the same cube (see Smoke, below).
Roll once for the attack and separately for each affected target model's Survive test.
Draw or target has more successes: Attack misses or fails to cause any harm.
Frag has more successes: The difference in number of successes is the amount of HP lost.
Whatever the results of the attack, all surviving models in the target cube are thrown one cube in a random direction (see Scatter) and are then Pinned.
Frenzy (n)
A model with this keyword may re-roll (n) dice when making Fight tests.
Frenzy is cumulative. If more than one Frenzy modifier applies to the test then add together the (n) value from each source.
Gas Cloud (Toxic(n))
At the beginning or end of its activation, this model may place a Smoke marker in its cube even if there are enemy models in the same cube (see Smoke, below).
While in the cube, models are subject to the Toxic (n) keyword if they lose any HP – where n is the value of the Toxic Gas Cloud. Adjacent cubes are not affected by this Toxic effect but are affected by the smoke for LOS.
Regardless of type, if the model moves away, the Gas Cloud remains in the cube it was deployed in. It may dissipate as normal at the end of a Round (see Smoke, below).
Grenade
Grenades are thrown using a Shoot action. Choose a target cube. You do not need LOS to an enemy model, though if you do not have LOS then both the shooting model and the target cube must be visible when viewed by the throwing player from directly above.
Roll a 3 dice Ranged test (1) with no modifiers or re-rolls allowed of any kind. Success means that the Grenade has landed in the target cube. Failure requires a Scatter roll to determine which cube the Grenade detonates in. An inaccurate Grenade will Scatter onto the same or lower level (never up).
A Grenade that would Scatter into a wall or other solid object will bounce off that object and stay in the original target cube.
Unless specified otherwise, all grenades are One-Use and have a Range of 3. The effect the Grenade has varies by type, see below to see the effects:
- Frag Grenade: The standard anti-infantry fragmentation grenade. Grenade (Frag (3))
- Smoke Grenade: Grenades that generate a thick cloud of smoke to conceal the target when they detonate. Grenade (Smoke)
- Stun Grenades: Stun Grenades disorient those nearby and are a favourite in urban combat. Grenade (Stun). No damage is caused to models in the target cube. All models in the affected cube are marked as activated.
- Toxic Cloud Grenade: Toxic grenades contain chemicals that burn the airways, eyes and skin to incapacitate a soldier. Grenade (Gas Cloud (Toxic(n)) — a toxic gas cloud is placed in the cube with the effect of a Gas Cloud (toxic (n)).
Hacker
A model with this keyword is skilled at accessing terminals and intel. This keyword is used in conjunction with Tactical Asset Missions and Interactive Scenery. In addition, a model with this keyword which finds an Intel item will gain an additional VP.
Headstrong
If a model with this keyword is Pinned at the beginning of its activation, roll a d8. On a result of 5 or more, the model may perform a free Stand Up action, then continue the Turn as normal.
Heavy
The weapon is cumbersome and takes time to set up and sight in. Any Shoot action made with this weapon is as a long action.
Holo-Sight
Specialised range finder and targeting optical equipment. A model that has the Holo-Sight keyword adds a +1 dice modifier to their Shoot actions. A Holo-Sight may not be used with Indirect, Explosive or It Burns! weapons. A weapon with the Sniper Scope keyword may not benefit from Holo-Sight.
Honourable
A model with this keyword may not target a Pinned model with an Assault or Shoot action. In addition, an enemy model attempting to leave a cube cannot be attacked with the normal free Assault action by any model in that cube with the Honourable keyword. If another friendly model is in the same cube that doesn't have the Honourable keyword it may make an Assault action against the moving enemy model as normal.
Horde
During a close combat fight, models with the Horde keyword will gain the friendly model bonus as normal, plus an additional +1 die modifier for each friendly model in the same cube (not counting itself) that also has the Horde keyword.
Indirect (n)
For Indirect weapons Shoot becomes a long action and you may not target models within 2 cubes of the shooting model.
Indirect weapons can shoot at models within Line of Sight, or they can choose to shoot at targets they cannot see.
To shoot, choose a target cube within range and more than 2 cubes from the shooting model.
If the firing model has LOS to an enemy model in the target cube, roll a 3 dice Ranged test (1). No other dice can be added, or re-rolls of any kind made, for any reason.
If the firing model does not have LOS to an enemy model, then a Shoot action may still be undertaken if both the shooting model and the target cube are visible when viewed from directly above. If a Shoot is possible but there is no LOS then the test becomes 3 dice Ranged test (2).
Success for either test means that the shot has landed in the target cube. Failure requires a Scatter roll to determine which cube the shot explodes in. An inaccurate shot will Scatter onto the highest level of the stack it scatters onto.
Indirect will always be listed by the type of missile being fired as Indirect (n) e.g. Indirect (Frag(3))
Ink Sac
Once per game a model with this keyword can deploy a Smoke marker in its cube at the beginning or end of its activation. In addition, when this model is killed place a Smoke marker in its cube.
Invigorate
Weapons with this keyword deliver a jolt of energy to their target, whether through a cocktail of combat drugs or through Psychic unleashing of a soldier's hidden potential. Weapons with Invigorate may target a single friendly model in the same cube as the active model. The firing model makes a 3 dice Ranged test (2) with no modifiers or re-rolls allowed of any kind. If successful, the target model removes an activation token. A model may only benefit from the Invigorate keyword once per Round.
It Burns!
Weapons with this keyword unleash indiscriminate sheets of flame, acid, or similar lethal concoctions.
It Burns! weapons attack every model in the same cube as the primary target, regardless of which side they are on or whether they are visible to the Shooter. In reality, the weapon fires great gouts of flame that fill the cube, and even near-misses set things alight.
Choose one visible model as the primary target and roll a 3 dice Ranged test (X) with no modifiers or re-rolls allowed of any kind. Roll a 3 dice Survive test (X) separately for each model in the target cube. Compare each individually to the attack roll to see the results as per a normal ranged attack.
Whatever the result of the attack (even if it misses) all models in the target cube are set on fire (mark them with a fire marker). A model can have a maximum of one fire marker at any one time.
A model with a fire marker must attempt to put out the fire when it is activated. This is a free Special action that the model must take (before even a Stand Up action) but will not count towards its normal action limit this activation. It is resolved as follows:
The fire rolls a 3 dice 4+ test (X).
The target rolls a 3 dice Survive test (X).
Draw or Survive has more successes: The target puts out the fire before it does any real damage. The model may continue with any remaining actions as normal.
Fire has more successes: The target manages to put out the flames and is no longer on fire, but suffers damage in the process. The number of HP lost is equal to the difference in total successes. Armour can reduce damage as normal (resolved using AP0, regardless of the AP of the original attack). The model's activation ends immediately.
Jump Pack
Short distance aeronautical gravitation devices can allow rapid movement around the battlefield.
A model that has the Jump Pack keyword takes no damage and is not Pinned by falling.
In addition, a model with a Jump Pack can:
- Move up or down levels without needing a wall to climb.
- Jump over solid full cube height walls on the same level counting as a single cube of movement.
- Jump over gaps in the floor of the same level (up to one cube wide), provided it has enough cubes of movement to do so.
Knockback
When a weapon or model with this keyword attacks and rolls more successes than the target model (even if no damage is caused) it will knock the target back into a different cube. Resolve the attack as normal, then move the target one cube directly away from the attacker. If the knocked-back model's route is blocked by a wall, the model is slammed into it (see Slammed into walls). For Shoot actions back is directly away from the firing models cube. For Assault actions the model with Knockback can choose which direction to move the target model.
Life Drain
A model or weapon with this keyword may make a Psychic attack against a target enemy model within range. For each HP lost, up to the number needed to kill the target, you may recover 1 HP previously suffered by a friendly model within 2 cubes of the Psychic model making the attack. This keyword has no effect on models with the Vehicle or Construct keywords.
Life Support
A model with this keyword has an in-built automated life support system designed to keep them alive even when gravely wounded. If the model loses HP, but is not killed, then the Life Support automatically kicks in. The model is immediately returned to an undamaged state. This happens automatically and does not cost an action.
Life Support is always One-Use.
Life Support only works on the model itself and cannot be used to resurrect models that have been killed outright.
Medic
A model with this keyword may use a Special Action to heal a single injured friendly model in the same cube (which may be the Medic themselves). No test is required and all damage counters are removed from the model. In addition, friendly models will gain Resilient (1) whilst in the same cube as the Medic. Note however that this keyword only affects living models and cannot repair models with either the Vehicle, Walker or Construct keywords (nor do they gain Resilient).
One-Use
This keyword, item, or weapon, may be used only once during a game.
Prey
Some factions mark targets with triclinic shards or pheromones to attract predators. If this weapon rolls a success on a Shoot or Assault action (but not a Blaze Away), place a Prey marker on the target model. Friendly models targeting a model with a Prey marker receive +1 dice to Fight tests. This effect is not cumulative.
Psychic
A model with this keyword possesses mental abilities that allow it to influence objects and creatures in its environment. Whether these abilities are natural, such as those possessed by the Chovar, or the product of forbidden scientific research, they are all represented in-game in the same way.
Weapons listed with the Psychic weapon keyword. These abilities are, in effect, another weapon that the model can use: they will have a Range characteristic, are used in Ranged tests just like other weapons, and receive the same modifiers as standard Ranged tests.
The only exception is that a Psychic weapon does not need Line of Sight to its target in order to be used.
Rampage
When a model with this keyword is Injured, it goes crazy. In this state of blood frenzy it may even attack its friends. For the remainder of the game, while it remains injured, whenever the player chooses to activate it, they must roll one dice and consult the following list:
1-2: The opposing player may control the model's actions for this Turn. This can include attacking the active model's friends. In the confusion, neither side may claim the +1 modifier for additional friends in a close combat fight. This model's actions count as an activation for the active model's side, not for the side that actually controlled it.
3-6: The player may use the model as normal.
7-8: The player may use the model as normal. In addition, as the model is so frantic it may move 1 cube before it takes its normal actions, or, if it starts its turn Pinned, it may automatically Stand Up instead, before taking its normal actions.
While under the effect of result 1-2, the model does not count as a member of any Strike Team in play for purposes of cube capacity, and as such may move into cubes containing members of its Strike Team (and initiate close combat fights against them). The model may still have items and keywords used on it by members of its original Strike Team (such as Medic or Medi-kits).
This may result in a cube becoming more crowded than it is normally allowed. Whenever a model starts their activation in an over-crowded cube and is free to choose their action, they must move out of that cube before they do anything else.
Rapid Fire
A model using a weapon with the Rapid Fire keyword may choose to fire it normally, or Blaze Away with a Shoot action in an attempt to pin models, but cause no damage. Rules that affect Shoot actions, still apply (e.g. Evade, Smoke etc.).
The active model must declare they are making a Blaze Away attempt and then follow the same rules for making a Shoot action (LOS, Range etc).
However, the player making the Blaze Away rolls a 4 dice Ranged test (X).
Modifiers:
- Clear Shot, +2 dice: If you have a completely unobstructed view to the whole of the target model (including the base).
- High Ground, +1 die: If you are on a higher level than the target.
- Friendly Fire, -2 dice: If there are any friendly models in the target cube.
Note: Armour and Armour Piercing is not applicable when making a Survive roll against a Blaze Away because no damage is caused.
Target Survive Roll
Assuming the shooting model scored at least one success, the player using the target model now rolls a 3 dice Survive test (X).
Blaze Away Results
Both players now compare the number of successes they have rolled.
If the active model has rolled more successes than the target model, the target model is Pinned.
With any other result, nothing happens.
Example: Trisha has decided to perform a Blaze Away with her Marauder Commando and targets Michael's Teraton. Trisha has a Clear Shot to the Teraton, which means she adds +2 dice to the roll. The Marauder Commando has a Ranged (RA) stat of 5+. Trisha rolls six dice and scores 3,3,4,5,7 and 8 (this explodes so Trisha rolls another dice and scores a 5). In total she has scored four successes. Michael now rolls a three dice Survive test for his Teraton. The Teraton has a Survive (SV) stat of 5+. Michael rolls a 1,5 and 6, which is a total of two successes, compared to Trisha's four. Trisha's Blaze Away has been successful and the Teraton is Pinned.
Remote
A model with this keyword acts under remote control. To take this model in your Strike Team, at least one friendly model with the Engineer keyword must be part of the Strike Team when the game starts. Remote models are deployed with the rest of your Strike Team and are activated in your Turns like any other model.
Resilient (n)
A model with this keyword may re-roll (n) dice when making Survive tests.
Resilient is cumulative. If more than one Resilient modifier applies to the test then add together the (n) value from each source.
Scout
After deployment, but before the first Turn of the first Round, a model with the Scout keyword may make a free Sprint action. If both sides have models with Scout then the player with Initiative moves all their scouts first. A scout may not enter a cube containing another model during this pre-battle movement but may pick up items.
Shield Generator (n)
This is a more advanced version of the Energy Shield and works in the same way. Instead of covering a single model however, a model with the Shield Generator keyword provides protection for every model, friend or foe, in the same cube.
If a model is protected by more than one Energy Shield/Shield Generator then all apply. Roll for each separately and reduce the HP lost by the total number of successes.
Smash (n)
A model with the Smash keyword gains +n dice when performing a Fight test.
Smoke
Smoke can be deployed by grenades, grenade launchers, devices some soldiers carry and from some creatures.
No HP are lost by models in the target cube. Instead, the smoke filled cube blocks all LOS, including to and from models inside it. Note, however, that it does not block LOS to the cube itself. Any Shoot attacks that trace a LOS through a cube that is adjacent to a smoke-filled cube suffer a -1 dice modifier (regardless of how many such cubes they cross).
At the end of each Round roll one die per smoke filled cube.
On a 1-4 the smoke in that cube remains in place. On a 5-8 the smoke dissipates and is removed.
Sniper Scope
This weapon may be used with either a short or long Shoot action. Declare before rolling any dice. If a long action is selected, the Ranged test gains a +2 dice modifier. No bonus applies to short Shoot actions. A weapon with Sniper Scope may not also benefit from a Holo-Sight.
Solid
A model with this keyword is not affected by weapon effects that move their target to a new cube, such as Blast, Frag or a Knockback. It may still lose HP from such attacks however. In addition, the model is never Pinned for any reason.
Stealthy
If a model with this keyword is the target of a Shoot action, the attacking model cannot gain the Clear Shot modifier.
Stun
A weapon with this keyword does not cause any damage and lost HP. AP and Armour are not considered. Instead, if the attacker rolls more successes, the target model is immediately marked as Activated. If an active model is stunned, it may not perform any more actions – its Turn is immediately over. If the model was attempting to Break Away from an enemy-occupied cube, it fails and the model is not moved.
Suppression
A weapon with this keyword will cause all models (from either side) in the target cube to be Pinned, regardless of whether they suffered any lost HP from the shot, or how many successes were rolled.
Tactician (n)
A model with this keyword is a great leader and intuitively understands how to get the most out of a combat situation. Its player adds (n) Command Dice to their Command Dice roll while the Tactician model remains in play (not left the game, or killed).
Having more than one Tactician in a Strike Team provides no additional benefit beyond having a replacement if the first one is killed. Simply select the model you wish to use (probably the one that gives the most extra dice!).
Teleport
A model with this keyword may teleport as a long action.
Teleport allows the model to move up to 3 cubes in any direction irrespective of LOS, terrain and models. A model using Teleport must end its move in a cube where it can be physically placed on the table and respecting the normal cube capacity rules. If a teleporting model ends this move in the same cube as an enemy model then they will trigger a close combat fight as if it had moved into the cube normally.
A model may teleport out of a cube containing an enemy model but will be subject to the 'breaking away' rule.
Tenacious
An enemy model attempting to leave a cube that includes a model with this keyword, suffers -1 die to their Survive test.
Thermal Mines
Thermal mines are shaped charged of high explosive designed to direct all kinetic energy at a single small point maximising damage. A model with this keyword may use them with a normal Assault action as follows: CC, AP3, One-use
Tough
A model with this keyword automatically reduces the numbers of HP lost during an attack on it by 1.
Toxic (n)
A model that loses any HP from a Toxic weapon will lose (n) additional HP. Toxic has no effect on models with the Construct keyword.
Trap
When a weapon with the Trap rule is used, place a Trap marker in the target cube. Whenever an enemy model enters a cube with a Trap token, the player who placed the token may choose to detonate it; if they do so, immediately resolve the effect of the Trap (i.e. if a weapon is listed as Trap [Frag(3)], resolve an Frag (3) attack in the cube). This ends the active model's activation, and the token is removed from play.
If a model with the Engineer keyword enters the cube then the trap is defused and discarded. The engineer's activation ends immediately.
If a model or weapons has the ability to shoot a trap into a target cube, roll a 3 dice Range test (1). If the test is successful, place the trap in the target cube as normal. If the test is failed, roll for scatter to see where the trap is placed.
Trip mine (One-use)
Trip mines are placed to prevent the enemy advancing into areas of the battlefield you wish to control. A model with this keyword may use them with a normal Shoot action as follows: R4: Grenade (Trap [Frag(3)])
Under Control
An Injured model will not need to test for Rampage if it begins its activation in a cube with a friendly model with this keyword.
Vehicle
A model with this keyword is a vehicle. If the model comes with separate crew figures then you can choose to either attach them to the main chassis, or leave them loose.
A Vehicle can only change level by moving up or down a ramp. It may not climb – even within the same cube if it contains multiple levels of flooring or platforms.
- A Vehicle cannot pick up, carry, or use Items or Equipment.
- A Vehicle has the Solid keyword.
Walker
A model with this keyword is a type of vehicle. The model follows all the rules that apply to the Vehicle keyword. However, a Walker is permitted to climb.
Weight of Fire (n)
A model with this keyword may re-roll (n) dice when making Ranged tests.
Weight of Fire is cumulative. If more than one Weight of Fire modifier applies to the test then add together the (n) value from each source.
Items
Picking Up and Carrying Items
The battlefields of a Deadzone are littered with valuable items, but models can pick up and carry one item at a time.
When a model moves into or through a cube containing an item, but no enemy models, they may choose to pick it up. This is free and does not count as an action.
In addition, if a model spends an Advance action repositioning within the same cube then they may also pick up an item in that cube. If there is more than one item in a cube then the model must choose which to pick up. They can only pick up, and carry, one at a time.
Item tokens begin the game face down, so that their type is unknown. Picking up an item allows a player to turn it over and look at what it is. Once an item is revealed, it remains face up for the rest of the game even if it is dropped, unless specified otherwise.
If the model picks up an item then they may choose to keep it, drop it or destroy it. If they already have an item, and pick up a new item, they may choose which to keep and which to drop or destroy.
A dropped item is placed face up in the same cube. A destroyed item is removed from the game. You cannot swap items between models.
Note that some models may be given Equipment (see Force Lists book) before the game as part of building the Strike Team. These still count to the 1 item limit that a model can carry.
If a model dies, any items it was carrying are placed face up in the cube. However, any Equipment purchased for the model is never left on the battlefield.
Item Types
Ammo (One-use)
Extra Ammunition (Ammo) is always helpful. A model may choose to use the Ammo when it makes a normal Shoot action. Add a +1 dice modifier for that Shoot action.
Adrenaline Shot (One-use)
The Adrenaline Shot increases the heart rate and blood supply to drive the user to higher degrees of physical activity. Use the item to increase the model's Speed by +1/+1 for this Round.
AP Ammo (One-use)
A model may choose to use the AP Ammo when it makes a normal Shoot action. Add a +1 dice modifier for that Shoot action, and increase the weapon's AP value by one, or gain AP1 if it did not have any.
Intel
Vital intelligence can take many forms from scientific, legal or commercial documents or data sticks to biological samples for later analysis. When an Intel item is picked up by a model, immediately exchange it for a VP counter as defined by the scenario and add it to the player's total. The Intel item is then discarded.
Booby Trap
A Deadzone is a hostile place, riddled with traps rigged to punish the unwary. If a model reveals a Booby Trap when picking up an item token, treat it as though a Frag (3) explosion has detonated in the cube.
Frag Grenade (One-use)
A Fragmentation (Frag) Grenade is a small handheld explosive that rains metal fragments over a small area. It is used with a normal Shoot action as follows: R3, Grenade (Frag(3))
Combat Blades (One-use)
A variety of sharp and serrated combat weapons that are designed for deadly combat. It is used with a normal Assault action as follows: CC: Frenzy (1)
Medi-Pack (One-use)
Essential field medical supplies can be the difference between life and death in a Deadzone. A model without the Construct, Vehicle or Walker keywords with a Medi-Pack may use it to make a Special Action to recover one HP previously lost.
Shock Baton
Used to control test subjects or unruly citizens, Shock Batons can be useful in combat. The baton is used with a normal Assault action as follows: CC: Knockback, Under Control
Smoke Grenade (One-use)
Smoke Grenades generate a thick cloud of smoke when they detonate. It is used with a normal Shoot action as follows: R3, Grenade (smoke)
Stimulants (One-use)
Many stimulants are banned within civilized GCPS space, but in the carnage of a Deadzone survival is all that matters. Weaponised stimulants drive combat soldiers to incredible feats of violence. Use the item to gain +1 die for a single Fight or Ranged test.
Stun Grenade (One-use)
Stun Grenades disorient those nearby. No Damage is caused to models in the target cube. All models in the affected cube are marked as activated. It is used with a normal Shoot action as follows: R3: Grenade (stun)
Playing a Game
In Deadzone, each game you play will be a set scenario with specific win conditions and objectives to achieve for your Strike Team's mission. These might not be the same for you and your opponent!
- The game mat, and all the scenery on it, is the battlefield for the game.
- Although some scenarios may differ, the standard procedure and steps for preparing for a game of Deadzone is as follows:
Prepare your Strike Team
First of all, you and your opponent must select your Strike Teams, as described in the Force Lists book.
Select a scenario
Each scenario will have a different objective for the players to complete in order to win the game (and thwart their opponent!). You may mutually agree which scenario you will play, or roll a die twice and consult the table below:
| 1st Result | 2nd Result | Mission |
|---|---|---|
| 1-4 | 1 | Patrol |
| 1-4 | 2 | Scour |
| 1-4 | 3 | Breakthrough |
| 1-4 | 4 | Uplink |
| 1-4 | 5 | Scatter |
| 1-4 | 6 | Divide & Conquer |
| 1-4 | 7 | Invade |
| 1-4 | 8 | Occupy |
| 5-8 | 1 | Deepstrike |
| 5-8 | 2 | Pandemonium |
| 5-8 | 3 | Strength in Depth |
| 5-8 | 4 | Area Denial |
| 5-8 | 5 | Chem Chase |
| 5-8 | 6 | Envelopment |
| 5-8 | 7 | Ambush |
| 5-8 | 8 | Smash and Grab |
Set up the battlefield
Take it in turns to place building and other terrain on the board, making sure to follow the guidelines under Cubes and Stacks.
Remember, some scenarios might require some specific terrain placement or arrangement, so you should ensure this is done before finishing the rest of the battlefield.
Place Objectives and Items
Each scenario will tell you if and where to place Objectives and what Victory Points (VPs) they are worth.
In addition to objectives, the shattered battlefields of a Deadzone can be littered with items, ranging from ammunition to traps (see Items). A random selection of these is placed on the battlefield before every game begins as follows:
Take the item tokens and shuffle them face down. One player takes a single token at a time from the pool without looking at it. The other player rolls two dice - one die for a random column and another die for a random row. This will give a grid reference where a token will be placed (face down).
If there is scenery in the token's (or objective marker's) space, place the token on or inside it. If the location contains a cube stack, tokens should be placed on the highest level of that stack, and a single cube may contain more than one item. If a dice roll would place a token in either player's deployment zone then re-roll both dice for its position.
When you have placed a total of eight item tokens, put the remaining tokens to one side. They will not be used in this game.
Determine who goes first
To determine which player deploys their Strike Team to the battlefield first, both players roll a 5 dice Recon test (n).
In the Recon test, each player is rolling to try and equal or beat their Strike Team's Recon value, where (n) is the Recon value listed for a Strike Team's chosen Leader. Compare the number of successes each player rolls. Roll the test again if there is a draw.
After rolling the Recon test, the winner should also consult the rules for the Recon Table below.
Finally, if both players agree, they can also both roll for Secret Missions (see below).
The winner of the Recon test decides who will be the starting player. The starting player chooses which deployment zone they will use, places their models anywhere within their deployment zone as shown on the scenario map. They will have Initiative for the first Turn.
Their opponent then deploys all of their models in their deployment zone.
Models with the Vehicle keyword must be deployed at ground level.
While all cubes and cube stacks within a deployment zone can be used, if you cannot deploy your entire Strike Team in the deployment zone due to cube capacity limits, you may expand your deployment zone by the minimum number of cubes to place your entire Strike Force on the board. Your opponent may also expand their deployment by the same number of cubes.
Recon effects, then Scout moves are performed (in that order) before the first Round begins.
Start the Game!
Once all the steps above have been complete, the game begins with Round 1. Good luck!
Winning a game
Games of Deadzone are normally played over 5 Rounds or less.
The game ends when at least one player has achieved the required number of Victory Points (VPs). The number of VPs required to win is determined by the size of the game being played. VPs are calculated and checked at the end of each Round.
If both players reach the target VPs in the same Round the game is a Draw. If neither player achieves the target VPs by the end of Round 5 the player with the highest number of VPs will be the winner.
| Strike Team Points | VPs required to win |
|---|---|
| 100 | 12 |
| 150 | 16 |
| 200 | 20 |
| Per extra 50pts | +4 |
If, at the end of 5 Rounds, neither player has won, but one player has no models left in play, that player loses and the other player wins.
VPs accumulate from Round to Round and VP counters are used by each player to keep track of their running total.
Recon Table
When making the Recon test at the start of each game, instead of just noting who wins the roll, also note the difference in the number of successes rolled by each player. The winner of the Recon test then rolls that many dice, up to a maximum of three, consulting the Recon Effect table. Roll for all of the effects you are entitled to and then resolve them in any order you wish.
- Recon effects are performed after all deployment, but before any Scout moves. You will then be ready to start the first Turn.
For example, Philip wins the Recon test roll with 3 successes to his opponent's 1, a difference of 2. He rolls 2 dice on the Recon table, one after the other.
| Result | Effect |
|---|---|
| 1 | Look at 1 item token, then replace it, face down, in the cube it came from. |
| 2 | Look at up to 3 item tokens, then replace them, face down, in the cube they came from. |
| 3 | Choose an item token and discard it without looking at it (even if you already have) or showing it to your opponent. |
| 4-6 | Move one model in your Strike Team up to one cube. Do not mark it as activated. The model may not move into a cube that is occupied by the enemy. Models can only be moved like this once. You must move a different model if you roll this result again. |
| 7 | You may optionally redeploy up to two models in your Strike Team. They must stay within the deployment zone they are currently placed in however, but may move to a new position within it. |
| 8 | Choose any one result from this table. |
Secret Missions
Secret Missions are optional. If both players agree to use Secret Missions, they can be used to earn extra VPs during the course of the game.
Playing Secret Missions
Each Round, each player rolls for two Secret Missions per Strike Team. Do not let your opponent know what your Secret Mission is, until you have completed them. Write them down with the Round number and show them to your opponent when they are completed.
If a Secret Mission is not achievable because the target model has been killed, you must keep it even though you may not score for it. If a Secret Mission was never achievable because your opponent did not take any of the particular model type you may reroll this Secret Mission.
If you rolled the same Secret Mission twice, you score VPs twice when you achieve the Secret Mission. If you did not complete either of your Secret Missions you may choose to keep one for the next Round and roll for the other.
If using these Secret Missions, add 4VPs to the total required for the game as the winning target.
For example, a game using Strike Teams worth 150 points, would increase to 20 VPs to win the game.
| Result | Secret Mission |
|---|---|
| 1 | Gain an additional 1VP if you can claim one or more objectives for this Round. |
| 2 | Gain 1VP for killing the enemy Leader model this Round. |
| 3 | Gain 1VP for killing an enemy Specialist model this Round. |
| 4 | Gain 1VP for killing an enemy Support model this Round. |
| 5 | Gain 1VP for killing an enemy model with an Assault action this Round. |
| 6 | Gain 1VP for killing an enemy model with a Shoot action this Round. |
| 7 | Gain 1VP for Pinning an enemy model with a Rapid Fire Blaze Away this Round. |
| 8 | Choose any one result from this table. |
Scenarios
Scenario 1: Patrol
All Deadzones contain important tactical locations that your Strike Team must secure. However, you are not the only Strike Team in the Deadzone and others may be trying to secure the same assets. Your aim is simple: grab the goods before they do, and destroy your opposition in the process.
Victory points in this mission are gained by:
- Killing an enemy model (VP value of that model as shown on their stat line).
- Discovering Intel. Immediately gain 1VP and discard the Intel item token on discovery.
- Claiming an objective. You must have the only model(s) in the cube. You get either 1 or 2VPs (as shown on the map) per objective claimed at the end of each Round. The VPs are awarded for each objective claimed, not per model on the objective.
Scenario 2: Scour
This sector of the Deadzone contains highly valuable equipment and information, which everyone stands to gain from and so are attempting to retrieve as many resources as possible before disengaging.
Play this scenario for 6 Rounds instead of the normal 5.
Scenario Set-up:
- Both players state which cube in the stack will be their cache cube (the X by their deployment zone). It can be at any level the player chooses.
- Use 12 item tokens in this game, rather than the usual 8. Ensure that Intel is one of the tokens selected. The first 4 tokens should be placed in the central 4 cube stacks (one in each) and then roll for the others as normal.
Victory points in this mission are gained by:
- Discovering Intel. Immediately gain 2VP and discard the Intel item token on discovery.
- Recovering items and depositing them at your cache (X). To retrieve an item, you must first pick up an item token placed during set-up, and then the model must move into their nominated cache cube (X). The item is then removed from play as a free action and the player gains 2VP.
- In Rounds 1-3, no VPs are scored for killing models. From Round 4 onwards, VPs are scored for killing models as normal.