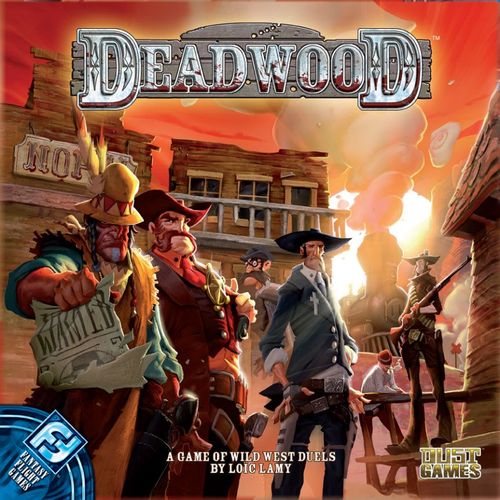
Deadwood
Deadwood Rulebook
Table of Contents
Table of Contents
The Goal
It's always best to start your journey by knowing where you're going…
The players send their cowboys into the town of Deadwood to "annex" the businesses and collect as much money as they can. The player with the most cash at the end of the game is the winner.
Game Components
Just because it's a desert, don't mean it's empty…
1 Game Board
The game board shows the town of Deadwood. It is divided into a number of square plots. Each plot can hold one building. Silhouettes and stars in the top three rows show where buildings are placed at the start of the game. The row with red plots shows all possible plots where the Train Station can be built. The bottom four rows show all possible routes for the railroad.
In the lower corners of the board, away from the square plots, there are two special areas: on the right is the Abandoned Mine; on the left is Boot Hill.
45 Cowboy Tokens
Each gang has nine cowboys. Cowboys come in three varieties:
- Greenhorns have a strength of 1.
- Gunslingers have a strength of 2.
- Trail Bosses have a strength of 3.
The players use their cowboys to annex buildings in town and to fight other cowboys in shootouts. Each cowboy has a strength, which determines how many dice he can roll during a shootout.
20 Cartridge Tokens
Cartridges are used by cowboys to roll one extra die during a shootout.
10 Pony Tokens
Ponies are used when a cowboy wants to skedaddle away from a shootout.
29 Wanted Poster Tokens
Wanted posters are used to track how badly each gang is wanted by the authorities. While collecting wanted posters may be a source of pride for many cowboys, the players must be careful: at the end of the game, each player has to pay a fine for all wanted posters he has collected.
4 Railroad Tiles
The railroad tiles indicate which route the railroad takes into town. When all four railroad tiles are on the board, the Train Station can be built.
1 Sheriff Token
The Sheriff is none too pleased about the arrival of gangs in "his" town. He knows that he doesn't have enough men to stop the gangs from taking over the town, but he is famous for his quick-draw and there's not a single cowboy this side of the Pecos who will cross him. No shootouts can occur at any building that is protected by the Sheriff token.
8 Dice
The dice are used to resolve shootouts during the game.
50 Money Tokens
Money tokens are included in the game: 15 x $1, 15 x $2, and 20 x $5.
Players are free to make change with the supply at any time.
26 Building Tiles
The buildings represent the honest folk of Deadwood and their businesses. Buildings are placed on open plots on the board. During the game, players will send their cowboys to fight over and annex these buildings. Each building tile has either an "X" or a number (between 1 and 3) on the back that represents which tile stack it belongs to.
Starting a Game
You have to start at the beginning, I always say…
- Place the game board in the middle of the table.
- Sort the building tiles into stacks by the symbol on the back. Place the Town Hall, Sheriff's Office, and Church tiles on the matching plots in the top row.
- Individually shuffle each tile stack and place them near the board.
- Draw four random tiles from the first building stack ("1") and shuffle them with the Saloon tile marked with an "X." Place these tiles randomly on the five plots that are marked with a star.
- Set the four railroad tiles and the Train Station tile together near the three tile stacks.
- Place the Sheriff token on the intersection of the Sheriff's Office and the two tiles below it.
- Take five wanted posters per player and place them near the board. This is the Crime Pool. Return the rest of the wanted posters to the box.
- Form a supply with the money tokens, cartridge tokens, pony tokens, and dice near the board.
- Give each player a set of cowboys in his chosen color, five dollars worth of money tokens, one cartridge token, and one pony token. Each player takes one cowboy of each type (strength 1, 2, and 3) and places them faceup in front of him. This is called his Ranch. The rest of his cowboys are added to the supply. Players can always see everything that is in another player's Ranch, which includes cash on hand, cowboys, cartridges, ponies, and wanted posters.
- Each player rolls a die: the highest roller becomes the starting player and takes his turn first.
The Game Turn
Even outlaws gotta play "accordin' to Hoyle"…
On his turn, a player must perform one of two actions. These actions are explained in detail below and are summarized here:
Head Back to the Ranch – Remove one or more cowboys from the board and return them to his Ranch; or
Hit the Town – Take one cowboy from his Ranch and place it at a building on the board.
A player cannot choose to pass on his turn. He must perform one of these two actions. Once the player has completed his chosen action, his turn is over and the player to his left begins his turn.
The players continue to take turns, in order, until one of three events causes the end of the game: the Train Station is placed on the board, there are no wanted posters left in the Crime Pool, or any player has no cowboys alive (see "End of the Game").
Head Back to the Ranch
The ranch is the only place a gang can plot in peace…
On his turn, a player can choose this action to remove one or more of his cowboys from the board and return them to his Ranch. These cowboys can be removed from any building(s), and/or from the Abandoned Mine, in any combination. A player cannot remove "zero" cowboys.
Hit the Town
Every cowpoke is eager for a night on the town…
On his turn, a player can choose this action to take one (and only one) of the cowboys from his Ranch and place it at any building on the board. Cowboys cannot be placed at the Abandoned Mine, an open plot, or a railroad tile. Also, a player cannot place a cowboy on a building that is already occupied by one of his own cowboys.
If another player's cowboy already occupies the building, there is a shootout to see who controls the building. If the building is empty, there is no shootout.
If the cowboy is alone at a building (i.e., he survived a shootout or no cowboys were there before he arrived), he can annex the building (see "The Buildings").
Shootouts
The buildings in Deadwood just ain't big enough for the two of us…
There can only be one cowboy on each building tile at any time (exception: see "Church"). If a player places his cowboy at the same building as another player's cowboy, they have a shootout. To resolve a shootout, follow these steps:
- The attacker (the player who just arrived at the building) must take one wanted poster from the Crime Pool and place it faceup in his Ranch.
- The defender (the player who was already at the building) can choose to skedaddle. To do so, he must discard one pony token to the supply and move his cowboy to the Abandoned Mine. If he skedaddles, the shootout is over.
- If the defender stays to fight, the attacker must announce if he is going to use a cartridge. A player may only use one cartridge in each fight. Used cartridges are returned to the supply.
- The defender then announces if he is going to use a cartridge (following the restrictions above).
- Now both players take the number of dice equal to the strength of his cowboy. The cowboy's strength is determined by what type of cowboy he happens to be:
- A Greenhorn takes one die.
- A Gunslinger takes two dice.
- A Trail Boss takes three dice.
- If a player used a cartridge, he takes one additional die.
- Compare the total number of dice each player holds. The player with the most dice rolls as many dice as the difference between their two totals. See "Nice Shootin'" below for the results of the dice roll.
Example: Redhand Jack has three dice and Bobby the Kid has only one. Redhand Jack rolls two of his dice.
- If the other cowboy is not killed, both players now hold the same number of dice. They both roll one die each at the same time, and determine the result. They continue rolling one die each until one of the two cowboys is killed, or they both run out of dice.
- Depending on the result, do the following:
- If the defender is killed and the attacker survives, or if the defender skedaddled, then the attacker remains at the building and may annex it.
- If both cowboys survive, the attacker must flee to the Abandoned Mine (he does not discard a pony token) and the defender keeps control of the building.
- If both cowboys are killed, then no one controls the building.
Nice Shootin'
If any die shows a skull, the other cowboy involved in the shootout is killed. Place the dead cowboy on Boot Hill.
If any die shows one or two wound symbols, the other cowboy involved in the shootout is wounded. Place the die on top of the wounded cowboy to mark that he is wounded. The first wound a cowboy suffers has no effect. The second wound kills him (place him on Boot Hill).
Note: There is no way to revive a cowboy after he has been killed!
After the shootout, all wounded cowboys are healed by removing the die that was placed on them.
Example: Wild Bill Hancock really wants to take control of the Bank (who can blame him?). Sadly, it is already owned by Six-shot Alfie. Wild Bill knows that he needs to send in some serious muscle, so he places a Trail Boss (strength 3) on the Bank that's being defended by Alfie's Gunslinger (strength 2) and takes a wanted token from the Crime Pool. Alfie refuses to skedaddle (probably because he doesn't have any ponies…), so they're gonna fight it out:
Wild Bill wants an extra edge, so he uses a cartridge and returns it to the supply. He can only use one cartridge in the shootout.
Alfie would love to use a cartridge to help him out, but he decides it's better to save his last cartridge for later.
The final strength of the two cowboys is: Wild Bill Hancock: 4, Six-shot Alfie: 2.
Since Bill has two more dice than his opponent, he now rolls two dice (to make their totals equal). He gets a wound and a skull. Alfie's cowboy is wounded! One more wound will kill him.
The cowboys each have two dice now, so they both roll one die. Both dice come up wound! That means that both cowboys are wounded. Since Alfie's cowboy was already wounded, he is killed and placed on Boot Hill. Bill's cowboy is also wounded, but since it's the end of the shootout, all wounds are healed!
Since Alfie's cowboy was killed, Bill now annexes the Bank to receive $5 and another wanted token.
The Sheriff
Some days, you need a little more than a tin star to make it past breakfast…
The Sheriff is sworn to protect the innocent townsfolk of Deadwood. No cowboy is foolish enough to cross paths with him.
The Sheriff token is always placed on the intersection of three plots (empty or with a building). All three plots touched by the Sheriff token are safe. No player can ever attack another player's cowboy in any building that is protected by the Sheriff (i.e., a player cannot place a cowboy on an occupied building that is protected by the Sheriff).
If a player places a cowboy on a building that is protected by the Sheriff, he must give $1 to the player who controls the Sheriff's Office (if there is a cowboy there).
A player can move the Sheriff token by annexing the Sheriff's Office.
The Buildings
Oh, give me a home, where the buffalo roam…
The building tiles represent the businesses and honest folk who make a living in Deadwood. Building tiles are placed on open plots on the board. The players compete to control buildings during the game.
Each type of building has a unique ability. In order to use this ability, a player must annex the building by placing one of his cowboys there (and defeating any defending cowboy in a shootout). Most buildings only have a single ability that is used immediately after taking control. This ability is listed after "annex" in the following descriptions.
Some buildings also have a "control" ability that offers a bonus to the player who has a cowboy there when another event takes place (i.e., when the Train Station is built, every time a cowboy is killed, etc.). If this cowboy leaves the building for any reason, the player loses the "control" bonus.
Before the game, the building tiles are sorted into four stacks by the symbol on the back. All buildings and their abilities are listed below.
Starting Buildings (Marked with an "X")
Church
Annex: When a player annexes the Church, he returns one of his wanted posters to the box.
Special: There can never be a shootout at the Church! All players can annex the Church, even while other players' cowboys are at the Church. No player can ever have more than one cowboy at the Church.
Saloon
Annex: When a player annexes the Saloon, he may hire one cowboy. A Greenhorn is free, a Gunslinger costs $1, and a Trail Boss costs $3. The player chooses one cowboy of his color from the supply, pays its hiring cost to the supply, and places the new cowboy at the Abandoned Mine.
Sheriff's Office
Annex: When a player annexes the Sheriff's Office, he moves the Sheriff token to any intersection of three plots on the board. At least one of the plots that touches this intersection must have a building tile.
Control: When another player places a cowboy on a building that is protected by the Sheriff, that player must pay $1 to the player who controls the Sheriff's Office.
Town Hall
Annex: When a player annexes the Town Hall, he must perform these three actions in order:
- Return one of his wanted posters to the box.
- Place one railroad tile (see "The Railroad").
- Place new buildings:
The player draws the top building tile from each of the three stacks (if a stack is empty, then one less tile is drawn). Building tiles can only be placed on open plots that are adjacent to a building tile that is already on the board. If there are no open plots available, then the tile is returned to the bottom of its stack.
First Building Stack (Marked with a "1")
Gunsmith
Annex: When a player annexes the Gunsmith, he takes $1 and two cartridges from the supply.
Hotel
Annex: When a player annexes the Hotel, he takes $2 from the supply.
Control: Each time a railroad tile is placed on the board, this player receives $2 from the supply. When the Train Station is placed on the board, this player receives $4 from the supply.
Laundry
Annex: When a player annexes the Laundry, he takes $1 from the supply.
Control: If a player annexes the Church while he controls the Laundry, he may return two of his wanted posters to the box instead of one. If the player controls both Laundry buildings when he places a cowboy at the Church, he may return three of his wanted posters to the box.
Special: When a player annexes the General Store and moves a cowboy from the Laundry to the Church, he may discard two wanted posters instead of one. If the player controls both Laundry buildings when his cowboy moves from the Laundry to the Church, he may return three of his wanted posters to the box.
Stage Depot
Annex: When a player annexes the Stage Depot, he takes $2 from the supply. Then he draws the top building tile from one of the three stacks and places it on an open plot that is adjacent to at least one other building tile that is already on the board.
Control: If the game ends before the Train Station is built, this player receives a $10 bonus.
Undertaker
Annex: When a player annexes the Undertaker, he takes $1 from the supply.
Control: Each time a cowboy is killed, this player receives $1 from the supply.
Special: If a cowboy is killed during a shootout at the Undertaker, the survivor receives the control bonus ($1) for the cowboy that he killed.
Second Building Stack (Marked with a "2")
Bank
Annex: When a player annexes the Bank, he takes $5 from the supply and one wanted poster from the Crime Pool.
Blacksmith
Annex: When a player annexes the Blacksmith, he takes $1 and one pony from the supply.
Casino
Annex: When a player annexes the Casino, he takes $1 from any other player of his choice who has money.
General Store
Annex: When a player annexes the General Store, he takes $1 from the supply. Then he moves one of his other cowboys that is already at a building (not the one at the General Store) to a different building. This move may trigger a shootout and does allow the player to annex this building if his cowboy is alone.
Example: Sly Sam sends his first cowboy to the General Store. He earns $1 and decides to move his second cowboy from the Courthouse to the Bank. This cowboy can then annex the bank.
Gunsmith
This is identical to the Gunsmith in the first building stack.
Blacksmith
This is identical to the Blacksmith in the first building stack.
Gold Mine
Annex: When a player annexes the Gold Mine, he rolls one die and consults the chart:
| Die Roll | Money Taken From Supply |
|---|---|
| 1 or 2 | Nothing |
| 3 | $1 |
| 4 | $2 |
| 5 | $3 |
| 6 | $5 |
General Store
This is identical to the General Store in the first building stack.
Laundry
This is identical to the Laundry in the first building stack.
Saloon
This is identical to the Saloon that begins the game in play.
Third Building Stack (Marked with a "3")
Fortune Teller
Annex: When a player annexes the Fortune Teller, he takes $1 from the supply. Then he may examine any one of the three building stacks. He may rearrange the building tiles in that stack in any order he chooses. Then he returns the stack facedown to the supply.
Courthouse
Annex: When a player annexes the Courthouse, all players (including himself) must pay $1 to the supply for each wanted poster he holds. If a player cannot pay this fine, or if he chooses not to, he must take one wanted poster from the Crime Pool (regardless of the number of posters that he currently has).
Grifter
Annex: When a player annexes the Grifter, he takes $1 from the supply. Then he moves any two of his opponents' cowboys, who are at a building in town or at a player's Ranch, to the Abandoned Mine.
Newspaper
Annex: When a player annexes the Newspaper, he takes $1 from the supply. Then he takes one wanted poster from the Crime Pool and gives it to the player of his choice.
Dance Hall
Annex: When a player annexes the Dance Hall, he takes $1 from the supply. Then he may remove one or two of his cowboys (including the cowboy at the Dance Hall) from anywhere on the game board and return them to his Ranch.
Telegraph Office
Annex: When a player annexes the Telegraph Office, he takes $1 from the supply. Then he chooses one of these two options:
- Take two wanted posters from the box and add them to the Crime Pool; or
- Take two wanted posters from the Crime Pool and return them to the box.
Essentially, the player can choose to shorten or lengthen the game by increasing or decreasing the number of wanted posters in the Crime Pool (see "End of the Game").
The Railroad
The railroad's the biggest thing to ever happen to this town, yessiree!
The arrival of the railroad promises to bring great wealth to Deadwood – particularly to whoever is rich enough to take advantage of it! Completing the railroad is one of the three ways that the game can end (see "End of the Game").
The railroad is comprised of four railroad tiles and the Train Station tile. At the beginning of the game, the players do not know the exact route that the railroad will take. The players determine the route when they add railroad tiles to the board. Choosing the route is very powerful, because any building in the railroad's path is destroyed!
When a player annexes Town Hall, he adds one railroad tile to the board. The new tile must be placed at the end of the current railroad route, forming a continuous path into town. There are always two possible locations to place a railroad tile.
The tile is placed on the chosen plot. If there is a building tile on the plot, the building is removed from the board and placed at the bottom of its building stack (if the Saloon marked with an "X" is destroyed, place it on the bottom of the first building stack). Also, any cowboys at a building that is destroyed by a railroad tile are immediately sent to the Abandoned Mine. The Sheriff remains unaffected when a building is destroyed.
Example: The new track can be placed on plot 1 or plot 2. If it goes over plot 2, the Gold Mine is destroyed, and returned to the bottom of the second building stack.
Every cowboy who is at a building that is adjacent to the new railroad tile can immediately annex his building. The player who placed this railroad tile chooses the order in which the buildings are annexed. This procedure has no effect on adjacent buildings with no cowboys.
Note: Remember to take $2 from the supply and give them to the player who controls the Hotel, even if the Hotel is not adjacent to the new railroad tile.
If all four railroad tiles are already on the board when a player annexes Town Hall, he places the Train Station on the board instead of a railroad tile. Every cowboy who is at a building that is adjacent to the Train Station can immediately annex his building twice. The player who placed the Train Station chooses the order in which the buildings are annexed. After these buildings have been annexed, the game is over.
Note: Remember to take $4 from the supply and give them to the player who controls the Hotel, even if the Hotel is not adjacent to the Train Station.
The Outskirts of Town
There ain't much to do out there on the outskirts of town… less 'en you like jackalope…
There are two special locations on the game board: On the right side of the board is the Abandoned Mine. During the game, cowboys may find themselves sent to this area (if they skedaddled to avoid a fight, for example). There are no actions or abilities that a cowboy can use at the Abandoned Mine. No shootouts are held at the Abandoned Mine, and there is no limit to the number of cowboys (of any player) that can be at the Abandoned Mine at one time.
Cowboys remain at the Abandoned Mine until the player annexes the Dance Hall or performs a "Head Back to the Ranch" action to return them to his Ranch.
On the left side of the board is Boot Hill. This is where cowboys are sent when they are killed during the game. There are no actions or abilities here either: the only reason a cowboy goes here is if he's dead!
Cowboys on Boot Hill cannot be used again for the rest of the game. Once cowboys are sent to Boot Hill, they can't ever leave – Rest in Peace.
End of the Game
There are three ways that the game can end:
- The Train Station is placed on the board;
- There are no wanted posters left in the Crime Pool; or
- Any player has no cowboys alive.
When any of these events occur, the current player completes his turn and the game ends. If a player has no cowboys alive, he can still win the game if he has the most money.
Now each player must pay a fine for any wanted posters he holds:
| Wanted Posters | 1 | 2 | 3 | 4 | 5 | 6 | 7 | 8 | 9 | 10+ |
|---|---|---|---|---|---|---|---|---|---|---|
| Fine | $1 | $3 | $6 | $10 | $15 | $21 | $28 | $36 | $45 | $55 |
After paying fines, the player with the most money takes control of Deadwood and wins the game! If there is a tie, all tied players face off in The Final Shootout!
The Final Shootout
If there is a tie for the most money at the end of the game, all tied players will face off in The Final Shootout! Each player chooses one of his surviving cowboys to make his stand. Unlike other shootouts, there is no limit to the number of cartridges a player can use. If there are more than two cowboys in The Final Shootout, each player must declare which cowboy he is shooting at before rolling any dice. The starting player chooses his target first, followed by the other players in clockwise order.
Similar to other shootouts, the cowboy with the highest strength gets to roll first. If there are more than two cowboys in the final shootout, the player may divide his first roll of dice between the enemy cowboys. He must declare how many dice he is allocating to each cowboy before rolling.
The winner of The Final Shootout takes control of Deadwood and wins the game! If all the cowboys involved in The Final Shootout are killed, then the player with the most money who was not involved in The Final Shootout is the winner. If all players were involved in The Final Shootout and no cowboys survive, then all players lose; the Cavalry arrives in an empty town and wonders where all the gangs have gone…
Example:
- Fastshot Arnie: $18 and 3 wanted posters (-6) — Total points: 12
- Wild Joe Buck: $15 and 0 wanted posters (0) — Total points: 15
- Jim Teaspoon: $20 and 2 wanted posters (-3) — Total points: 17
- Sally Read: $21 and 4 wanted posters (-10) — Total points: 11
With 17 points, Jim Teaspoon wins!