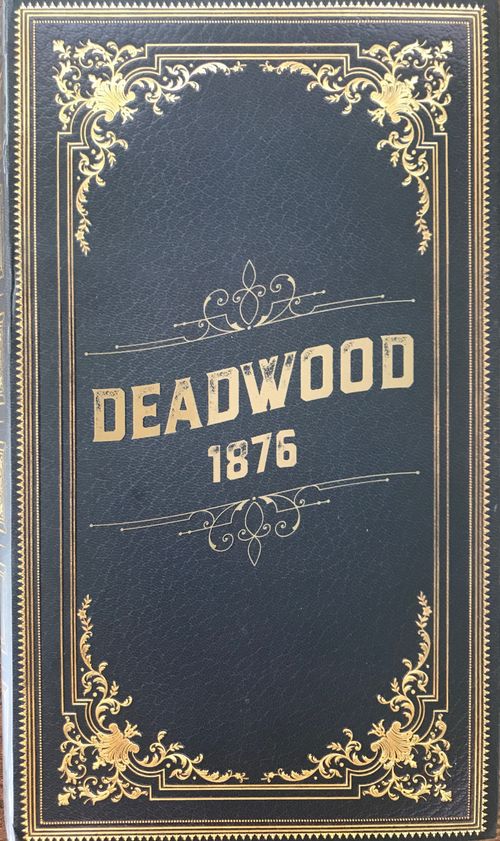
Deadwood 1876
Deadwood 1876 Rulebook
Table of Contents
Table of Contents
Contents
- 3 Wooden Platforms
- 9 Wooden Star Pawns
- 9 Character Cards
- 10 Wooden Dice
- Linen Bag
- 25 Safe Cards
- 50 Deadwood Cards
- 2 Reference Cards
Objective
In Deadwood 1876 you'll use guns from your hand to try to win Safes from other players. Most Safes contain Badges, Gold, or Showdown Guns. Near the end of the game, players with Badges get extra turns. After the final turn, the team with the most Gold will advance to the Final Showdown. There, teammates will have to fight each other to the death using Showdown Guns from their Safes and guns from their hand. The last person alive is the winner!
Set Up
-
Place the three establishment platforms in the center of the playing area. (In 2-3 player games, remove the Grand Central Hotel so that there are only two establishments.)
-
Each player chooses a character card. Place matching stars in the bag and place any unused stars back in the box. Beginning with the Gem Theatre and moving clockwise, pull stars out of the bag and place them in establishments one at a time. Your matching star represents you in the game. (In 4-player games, do not place any stars in the Grand Central Hotel, though players may still move there during the game.)
-
Shuffle the stack of Deadwood cards and deal four face down to each player (deal only three for 8-9 player games). Place the remaining Deadwood cards face down in a deck in the center of the playing area.
-
Find the five Safes that have a silver border on the front and place them back in the game box. Shuffle all remaining Safes. Place three of these Safes in a face down stack in the middle of the playing area (place only two for 8-9 player games). Deal two Safes, face down, to each player. Place any remaining Safes back in the game box without viewing them. These Safes will not be in play.
If you are playing with an experienced group, you may shuffle in any number of the silver-bordered "Mystery" Safes during step 4. View optional advanced rules on page 12 for details.
-
All players view their two Safes and then choose one to pass, face down, to the player on their left. All players view and shuffle their new set of Safes and then place them face down in a row in front of them.
How to Play
Everyone roll a black die. The highest roller goes first. Proceed clockwise.
On Your Turn
On your turn you will play one Deadwood card from your hand. It can be used either as the special item on the bottom of the card OR as the gun on top of the card.
If you choose to utilize the card's special item — just follow the directions written on the card. If necessary, more detailed descriptions of each item can be viewed later on page 10.
If you choose to utilize the card's gun — you can instigate either a Robbery or a Duel.
ROBBERY: In a Robbery, you attempt to steal a Safe from another player. Lay down a gun from your hand face up in front of a specific Safe belonging to another player. The defending player must play one of the guns from their hand to defend it. You and the defender simultaneously roll the dice that match your played guns. Reroll to break ties. If you have the higher final result then you successfully steal the Safe. Privately view the stolen Safe and shuffle it with your other Safes before laying them back down in a row. If the defender has the higher final result, the defender keeps the Safe and nothing gets shuffled.
DUEL: Winning a Duel lets you change certain star positions. Lay down a gun from your hand face up in front of another player's character card. The defending player must play one of the guns from their hand in defense. You and the defender simultaneously roll the dice that match your played guns. Reroll to break ties. If you have the higher final result, you swap star positions with the defender. If you attack and defeat someone in your own establishment, instead of swapping, you send that player to an establishment of your choice if it has a vacancy (see establishment capacity in table). If the defender succeeds, nothing happens.
ESTABLISHMENT CAPACITY
| Players | Capacity |
|---|---|
| 2 - 5 players | 2 / establishment |
| 6 - 8 players | 3 / establishment |
| 9 players | 4 / establishment |
Each gun corresponds with a die that has its own specific values on it. Using a high-powered gun like a Messenger will give you better odds of victory compared to a weaker gun, such as a Pepperbox.
HOLSTERS: Unlike other special items, Holsters are played out of turn before a Robbery or Duel dice roll. If you are not the attacker or defender, you may assist either of them by giving them a holster from your hand. Assisted players roll the die matching the gun they played and the die on the Holster card they were given and add both dice to determine their total score. Only one Holster may be used by each battling player. If a player is given multiple Holsters, the recipient chooses which Holster to use and returns the others to their owners.
After each turn, all used cards are discarded and anyone who used a card during the turn (the current player, the defender, and anyone who played a Holster) draws a Deadwood card so that all players again have 4 cards in their hand (or three in 8-9 player games).
Whenever the deck runs out, shuffle the discard pile and reform the deck.
After Each Time Around the Circle — Heist
Each time the last player in the circle completes their turn, a Heist occurs! Reveal the top Safe card from the middle so everyone can see its contents. Each player plays a gun from their hand simultaneously and rolls accordingly. The highest roller takes the Safe and shuffles it face down with their other Safes. Reroll for ties. Played guns are discarded, each player draws a replacement card, and play continues around the circle in the same order.
After the final Heist has occurred, each player will get one final turn, meaning players will each have a total of four turns during the game (or three turns each in 8-9 player games).
Hint: If necessary, place the game box between the first and last player so that you remember to Heist each time the last player takes their turn.
After the Final Turns — Badge Round
After the last player's final turn, players must reveal Badges one at a time and take an extra turn as their Badge is revealed. Reveal in this order:
1st — Tin 2nd — Iron 3rd — Copper 4th — Silver 5th — Gold
If nobody claims to have a certain Badge, then it isn't in play and you should move on to the next one.
After the Badge Round — Final Showdown & Winning the Game
All players reveal all remaining Safes. The players within each establishment add their combined gold together, and the players in the establishment with the most Gold all advance to the Final Showdown! Players who did not advance are out of the game. Better luck next time.
If multiple establishments are tied for the most Gold, the tied establishment with the fewest players advances. If still tied, all players in the tied establishments advance to the Final Showdown together.
If you are the only player to advance, YOU WIN!
If multiple players advance, THEY MUST ALL FIGHT TO THE DEATH!
-
When fighting to the death, each advancing player simultaneously plays a card from his or her hand. Each player then rolls dice matching the gun he or she played plus dice that match all of his or her Showdown Guns. The player with the lowest roll total must flip his or her character card to the black and white side. Reroll to break ties.
-
Continue repeating the process above. If your card is already on the black and white side and you lose again, you are out of the game! THE LAST PLAYER ALIVE KEEPS ALL THE GOLD AND WINS THE GAME! Let out a hearty "Yee-haw!"
-
Deadwood cards can be used only as guns, and unlike before, cards will not be replenished after each roll. If multiple players are still alive after running out of Deadwood cards, they each pick up the hand of cards they had going into the Final Showdown and continue fighting (so play cards close to you and do not put them in the discard pile). Be sure to add your Showdown Guns to every roll during the Final Showdown!
If you are the lowest roller, flip over your character card. If it happens again, you're out of the game. Sorry there, buckaroo! Better luck next time!
The 3 Laws of Deadwood
-
You may shuffle your Safe cards only immediately after gaining a Safe from a Robbery or Heist. Otherwise, they must remain face down in a row in their same positions. You may view your own Safes at any time, including if one of your Safes is being attacked, but be sure to not get them out of order.
-
You may never show Safe cards or cards in your hand to other players, although you can tell teammates or enemies anything you'd like. Communication and deception is encouraged.
-
There is a three Safe limit! If a player owns three Safes and they win a fourth Safe from a Robbery or Heist, they must choose any one of their Safes to give to the player with the fewest Safes (you pick the recipient if there is a tie). The recipient of the free Safe may not shuffle their Safe cards at that time. This law is no longer in effect once the Badge Round begins.
You are now ready to play! Information about game strategy, card stats, optional rules, and rule clarifications are explained in detail later in the rulebook. Continue reading if you'd like, or begin your game and read the rest as needed.
Note: 2-3 Player games involve several adjustments to the rules. View those on page 14 before starting.
Gameplay Strategy Tips
Deadwood is a balance between teamwork and selfishness. If a player uses all of their best Deadwood cards and Badges to hunt down Gold for their team, they'll be defenseless to fight against their teammates in the Final Showdown. But if a player only goes after Showdown Guns and saves all of their best cards, their team might not have enough Gold to actually reach the Final Showdown. If someone on your team doesn't seem to be pulling their weight, they're probably plotting to use your Gold to reach the Final Showdown and then destroy you! There may come a point when you need to attack, mislead, frame, abandon, or banish your own teammates.
Since you'll only get a handful of turns, communicate with allies and gather clues by observing what other players say and do with their Safes. If you don't have much Gold, you can always use a Horse, or Duel your way into an establishment filled with Gold on your final turn so that you can make it into the Final Showdown. You can also persuade players with lots of Gold to join your establishment, or trick undesirable players into leaving your establishment. Deadwood is not a memory game so feel free to use your phone or pen and paper to write down where you know (or suspect) certain Safes are hiding.
Be sure to manage the guns in your hand. If you attack and defend every Safe with your best gun, you may be stuck with weak guns when it really counts. Sometimes it's worth it to use a bad gun and lose a Safe to improve your hand of cards.
Card Details
(read if questions arise)
BADGES: If your Badge is stolen during the Badge Round before you get to use it, too bad! It now belongs to the other player. If you own multiple Badges you will get multiple turns in the Badge Round. As referenced in the 3rd Law of Deadwood, Safe limits no longer apply once the Badge Round begins. Cards are replenished like normal during the Badge Round. Revealed Badges have no value and can not be attacked.
DUSTER: Discard your Duster and then draw four Deadwood cards. Of your now larger hand of seven cards (or six in 8 and 9-player games), discard three cards so that at the end of your turn you again have four in your hand (or three in 8 and 9-player games). Play then moves on to the next player.
HOLSTER: Holsters can be played on an attacker or defender's gun (but not both) by anyone who is not the primary attacker or defender. Therefore, you can never give a Holster to yourself or a person you are fighting against. Rolls should happen simultaneously, but if a player rushes their roll before receiving a Holster, their roll counts and they cannot receive a Holster (but their opponent still can). If a group is picky about the order that Holsters should be played, play in the order of attacker, defender, Holster for attacker, Holster for defender. Holsters continue to be used for tiebreak rolls. Only one Holster may be used by each battling player. If a player is given multiple Holsters, the recipient chooses which Holster to use and returns the others to their owners. If given at least one Holster a recipient cannot refuse to use one. Holsters may not be used in Heists or the Final Showdown.
HORSE: Move your star to any other establishment with a vacancy (see establishment capacity table on page 5). Unless using the optional advanced "horse thief" rule, the color of the Horse does not matter.
SHOWDOWN GUNS: Showdown Guns are only used in the Final Showdown. As an example, if Holly plays a Colt from her hand and also has a Winchester Showdown Gun in her Safe, she will get to roll both a Colt and a Winchester in her Final Showdown roll. Next, she plays a Deringer from her hand. She will get to roll both a Deringer and a Winchester for her roll since the Winchester is used in all rolls during the Final Showdown.
STETSON: View any two Safe cards. They don't need to belong to the same player. Be sure to place them back in their same positions after viewing. Also be sure that nobody else sees the front of the Safes when you view them. You cannot view Safes that will be used in future Heists or Safes that are not in play.
Stats
ODDS OF WINNING A SHOOTOUT
| This one wins vs. → | Pepperbox | Deringer | Colt | Winchester | Messenger |
|---|---|---|---|---|---|
| Pepperbox | 50% | 33% | 19% | 7% | 3% |
| Deringer | 67% | 50% | 31% | 14% | 7% |
| Colt | 81% | 69% | 50% | 31% | 18% |
| Winchester | 93% | 86% | 69% | 50% | 31% |
| Messenger | 97% | 93% | 82% | 69% | 50% |
(Read the table as: the row gun's odds of winning against the column gun.)
Card Counts
50 Deadwood Cards (10 of each gun)
- 10 Horse
- 12 Duster
- 13 Stetson
- 15 Holster
25 Safe Cards
- 5 Badges
- 5 Mystery Safes
- 7 Guns
- 8 Gold Values
Optional Advanced Rules
If you're an experienced group of Deadwood players, feel free to try out any or all of these optional advanced rules!
MYSTERY SAFES: Shuffle in any number of silver-bordered Mystery Safes during step 4 of Set Up. If any player has a Mystery Safe with a star on it they must reveal and resolve it immediately after the final turn of the Badge Round before the rest of the Safes are revealed. If multiple starred cards are revealed, resolve them in alphabetical order (Dagger, Explosives, Poker Deck). Listed below are details about each Mystery Safe.
BAD SARSAPARILLA: Owner is unable to use their best Showdown Gun in the Final Showdown. If the owner does not own a Showdown Gun or does not go to the Final Showdown, Bad Sarsaparilla does nothing. Bad Sarsaparilla has no effect on the Dagger.
CASH: Owner automatically advances to the Final Showdown even if their team does not have the most Gold. The team with the most gold also advances. The gold owned by the Cash player still counts towards their team's total. In 2-player games, if you, your opponent, and the Stranger all go to the Final Showdown (because of Cash), the Stranger is removed and you fight your opponent to the death.
DAGGER: Reveal immediately after the final turn of the Badge Round. When revealed, owner must decide if the dagger is Worth -1 Gold and a Pepperbox Showdown Gun, or +1 Gold and a negative Pepperbox Showdown Gun. For a negative Pepperbox, after each roll in the Final Showdown (including tie-break rolls) a Pepperbox die is rolled and the result is subtracted from the player's roll total.
EXPLOSIVES: Reveal immediately after the final turn of the Badge Round. When revealed, owner chooses any 1 unrevealed Safe belonging to another player to remove from the game. Show all players the Safe that is being removed.
POKER DECK: Reveal immediately after the final turn of the Badge Round. When revealed, owner must play any gun from their hand and roll the matching die. Next, roll a red die. If the red die is a 0 or 1, the result from the first die is subtracted from the owner's gold total. If the red die is a 2 or 3, the result from the first die is added to the owner's gold total. Replace the played card from the deck.
"PEACE-LOVIN'" TEAM VICTORY: If nobody in the Final Showdown owns a Showdown Gun, all advancing players win together! If at least one advancing player does own a Showdown Gun, all advancing players fight to the death as normal. Showdown Guns cancelled by Bad Sarsaparilla do not count as Showdown Guns.
"FAIR SHARE" TEAM VICTORY: Only use for 6-9 player games. If everyone in the Final Showdown has at least 1 Gold, the advancing players all win together! If any advancing player has zero or negative Gold, all advancing players fight to the death as normal.
HORSE THIEF: If you have a white-colored Horse you may play it immediately after the attacker and defender have laid down guns for a Robbery. You will be a "Horse Thief" and roll the gun on your Horse card during the Robbery. If you roll higher than both the attacker and defender, you take the Safe that was being fought over. Highest rollers reroll to break ties. Horse thieves cannot give or receive Holsters, and the Laws of Deadwood still apply (so if you win a Safe you may shuffle, and if it is your fourth Safe you must give one away). Horse cards are replenished after use. There is no limit to the number of players using a Horse to enter a fight, but after the attacker and defender have rolled it is too late to join. Horse cards of either color can also still be used as regular Horses when used on a player's turn. The Horse Thief rule does not apply in 2-3 player games, and you can not use cards as Horse Thieves during the Badge Round for any game.
2-3 Player Rule Adjustments
(view after reading normal rules)
Set up 2-3 player games as normal, noting the special instructions in step one of Set Up. Play the game as normal, but with the following adjustments:
-
Go around the circle twice before each Heist, and after the final Heist. This means that players will have a total of 8 turns during the game.
-
Stetsons allow players to view only one Safe instead of the usual two.
-
Holsters can not be played out of turn. Instead, for your turn you may attach a Holster to any Safe (including your own or another player's). The next time that Safe is attacked it will be defended with a gun played by the defender plus the gun on the Holster. The attached Holster is then discarded. Only one Holster can be on a Safe at a time, and Safes with Holsters on them cannot be shuffled. If a Safe with a Holster is given away, it retains its Holster. You can also attach a Holster to any player's character card (including your own). The next time that player is Dueled against, they will defend with a gun from their hand plus the gun on the Holster.
Additional 2-Player Adjustments — The Stranger
Before beginning play, roll a black die. The highest roller places a star, representing "the Stranger," into their establishment and places its matching character card on the table. Give the Stranger two face down Safes from the box. The Stranger does not have turns, but their Safes can be viewed with Stetsons or attacked in Robberies. You can also Duel against the Stranger to swap positions with them or to kick them out of your establishment. If you attack the Stranger's Safes or Duel the Stranger, your opponent will act as the Stranger and play cards from their own hand in defense. Your opponent must play cards for the Stranger, even if they don't know the contents of a Safe being attacked. You may attach Holsters to the Stranger's Safes or character card as described in the 2-3 player rule adjustments. Attached Holsters will be used by the player acting as the Stranger to defend against applicable Robberies or Duels.
During the Badge Round, Badges or starred Safes (Explosives, Dagger, Poker Deck) owned by the Stranger are not revealed and have no effect. The 3rd Law of Deadwood treats the Stranger as a player, so before the Badge Round they will have three Safes.
The Final Showdown for 2 Player Games
If you go to the Final Showdown alone, YOU WIN. If you go to the Final Showdown with your opponent, follow normal rules and FIGHT YOUR OPPONENT TO THE DEATH. If you go to the Final Showdown with the Stranger, your opponent becomes the Stranger. Your opponent will use guns from their own hand plus any Showdown Guns owned by the Stranger. Showdown Guns owned by your opponent are not used. If your opponent acting as the Stranger defeats you in the Final Showdown, YOUR OPPONENT WINS! If the Stranger goes to the Final Showdown alone, YOU AND YOUR OPPONENT BOTH LOSE and are banned from playing Deadwood 1876 for seven days.
Deadwood History
Large deposits of gold were discovered in the Black Hills of South Dakota in late 1875. Word quickly spread and the town of Deadwood was born almost overnight in early 1876, settled illegally on Native American land. It soon reached a population of 5,000 miners, gamblers, prostitutes, outlaws, and businessmen. Lawlessness was prevalent as people flocked to the town to find (or steal) their share of the gold. Deadwood quickly became an infamous western town where old west legends lived and died. The gold found in the area accounted for 10% of the world's gold for the next 125 years.
Character Bios
AL SWEARENGEN — ENTREPRENEUR, 31 Swearengen arrived in Deadwood in May of 1876 and opened an outdoor gambling saloon called The Cricket. Later he opened the Gem Theatre, a notorious saloon, dance hall, and brothel. Swearengen made an enormous amount of money each night and often paid off authorities to look the other way when things weren't exactly legal. In 1899 the Gem burned down and Swearengen left Deadwood for good.
CALAMITY JANE — COWGIRL, 24 One of the most famous figures of the old west, Martha "Calamity Jane" Canary built her legendary status as a storyteller in Buffalo Bill's Wild West Show. She was known for dressing in men's clothing, being involved with several skirmishes with the American Indians, and for her exploits into prostitution and alcoholism. She was also remembered for her generosity to the sick and misfortunate. Jane was a good friend of Wild Bill, coming to Deadwood with him in 1876.
KITTY LEROY — TRICK SHOOTER, 26 Kitty led a fast-paced and wild life, moving all around the west until she settled in Deadwood in 1876. Along the way Kitty worked as a dancer, trick-shooter, faro card dealer, and eventually owned her own brothel after working for Mollie Johnson. By the age of 27 Kitty had married five times, allegedly shooting and killing her third husband. Karma caught up with her when her fifth husband murdered her in 1877 after growing jealous of her many affairs.
MOLLIE JOHNSON — HUSTLER, 24 Mollie owned and operated a famous brothel in Deadwood and soon became known as the "Queen of the Blondes" because of the three blonde women she employed. Mollie was known for her elaborate antics to get more customers and she appeared in the gossip column of the Black Hills Pioneer often. While in Deadwood she married a comedian who worked at the Bella Union Theatre, the "grandest" establishment in town.
POKER ALICE — GAMBLER, 25 After her first husband died, Alice Ivers turned to poker to make ends meet. Excellent at counting cards and figuring odds, Alice soon dominated the tables across the old west, winning the equivalent of 3 million dollars during her life. She splurged her winnings on the latest fashions, and often wore beautiful dresses and smoked cigars at the poker table. She eventually opened a saloon and lived her life out in South Dakota.
REVEREND H.W. SMITH — REVEREND, 49 After living most of his life in the northeast United States and fighting in the Civil War, Reverend Smith felt a call to preach in Deadwood in 1876. Smith quickly became well known in the town since he would give sermons on Main Street every Sunday. In August of 1876 Reverend Smith left a note on his door that said "Gone to Crook City to preach, and if God is willing, will be back at three o'clock." He was mysteriously shot in the heart on his way.
SETH BULLOCK — SHERIFF, 27 The day after Seth arrived in Deadwood in 1876, Wild Bill Hickok was shot and killed. The town, looking for some stability, soon elected the no-nonsense Bullock to be the first Sheriff of Deadwood. During his life Seth helped create Yellowstone National Park, served as a US Marshall, and became good friends with Teddy Roosevelt. Roosevelt later said, "Seth Bullock is a true Westerner, the finest type of frontiersman."
SOLOMON STAR — MAYOR, 36 A German immigrant, Solomon traveled to Deadwood in 1876 when himself and Seth Bullock saw an economic opportunity to open a hardware store in the town. A bachelor his whole life, Solomon kept busy serving on Deadwood's town council and later as mayor. He also served in the South Dakota Senate. Solomon and Seth later opened the Bullock Hotel in the town, which still operates today.
WILD BILL HICKOK — FRONTIERSMAN, 39 Wild Bill was one of the most famous old west figures to ever live, working as a scout, spy, soldier, lawmen, gunfighter, gambler, wagon master, and actor during his lifetime. He was involved in multiple famous shootouts, fought in the Civil War, and acted with Buffalo Bill Cody. He met his end in 1876 in Deadwood when an angry poker opponent shot him from the back while Wild Bill was holding a pair of Aces and Eights, now known as the Dead Man's Hand.
Packing & Sleeving Instructions
If you are interested in placing sleeves on your cards, everything will still fit if you remove the tuck box and sleeve all cards with 56x87mm standard USA Game Size Sleeves from Mayday Games. If using thicker premium sleeves, we recommend that you sleeve only the 25 Safe cards so that everything will fit. Place all wood pieces in the linen bag in the top slot of the book, place the wood disks in the middle, and place cards on the bottom section. Place extra cards on top of the wood disks in the middle section. Place the rulebook on top of everything.
The Dark Cities Series
Deadwood 1876 is part of the Dark Cities Series! Each game in the series comes packaged in a magnetic book box, focuses on a particular city and year from history, and includes a dark, secretive, or mysterious element in its gameplay.
We are already hard at work on the next volume! You can learn more about the Dark Cities Series and add existing volumes to your collection by visiting us at www.facadegames.com