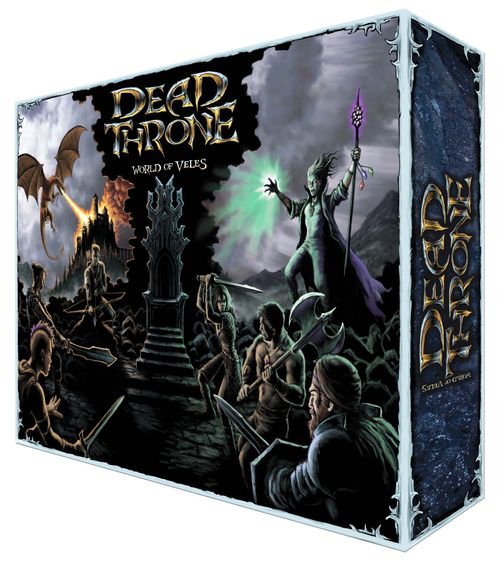
Dead Throne
Dead Throne Rulebook
Table of Contents
Table of Contents
- Terms and Symbols
- Characters
- Deluxe Box Set Up
- Lirennor's Salvation (Competitive Mode)
- Rogue Regions (Competitive Mode)
- Hero of Lirennor (Solo Mode)
- Defender (Co-Op/Solo Mode)
- Core Mechanics
- Battles
- Other Combat Elements
- Gameplay Area (Card Tray)
- Items
- Scrolls
- Traps
- Lone Quests
- Others
- Contents
- Interactive Features
- Key Points Index
Terms and Symbols
Terms
- Players = Everyone in the Game.
- Heroes = Everyone other than Saladar.
- Opponents = Refers to players that you are currently battling against.
- Enemies = Refers to anything that you can fight other than opponents, such as creatures, bandits, or summoned creatures.
- Standing Enemy = Enemies on the map on card stands (p. 25).
- Creatures = Everything other than players, bandits, and other humans you encounter.
- Elements = Are held by some enemies and are shown by an element symbol (p 4) and are also used with scrolls (pp 30 - 31).
- Turn = Your turn begins when the player before you has ended theirs. You can only roll to move once per turn unless it specifies differently on a card. You can land on one or more steps if you manage to, one after the other (for example, by using a Teleport scroll). Your turn ends when there are no more interactions or moves you can make or want to make. Turns go in seating order. See page 19 for more details on interacting.
- Game Turn = A player's turn is from when it is their turn to roll and until they have landed and completed an interaction outside of a battle or Market.
- Game Round = A round is a circle around the board from one player and back comprising all players outside of a battle or the Market.
- Battle = Is an entire battle from the beginning of an attack to when someone either loses, flees, or leaves in some way. The battle is over for the player who left regardless of whether others are still battling. When in a battle your Game Rounds become your Battle Rounds.
Symbols
- Buy = The number represents how much it can be bought for at the Market.
- Sell = The number represents how much it can be sold for at the Market.
- Life Token (Health Potion) = The number refers to the amount of health gained.
- Life Token (Damage Potion) = The number refers to the amount of direct damage you can inflict on an opponent.
- Description = This is the description box. It will vary in layout slightly depending on the item or enemy.
- Reference Code = Each card has a unique code. This can be used to search for translations on our website or more.
- Attack = For weapons and enemies, and is used to replace the word "attack". The number is the amount of attack or damage that will be inflicted.
- Defense = Represents the amount of defense something has and is used to replace the word "defense". The number is the amount of defense provided.
- Hand Attack = Only used when you have no weapon equipped. This represents how much attack your character has. If you have a weapon you don't add this number to your attack.
- Hand Defense = Only used when you have no item offering defense equipped. This represents how much defense your character has. If you have an item for defense you don't add this number to your defense.
- Solo Gameplay = Cards with this symbol can be played in Solo gameplay or in any mode without opponents.
Characters
There are seven characters in the game. Each has a different skill set, starting item, and hand attack and defense, so choose wisely. Their skill, attack, and defense are on their cards.
They also have unique starting items.
| Character | Abilities | Starting Equipment |
|---|---|---|
| Saladar | - Can teleport between any two active Region Stones or heal himself at one. - He also gains an extra 2 max health from each active stone. | Region Stones + Traps both equal to the amount of players in the game other than himself. |
| Falewin | - Is rewarded an extra 10 coin when completing any quest, even when no coin is offered. | 1 Rucksack + 1 Steel Dagger |
| Elena | - Can reduce any level 2, 3 trap by 1. - Can avoid any Non-Standing level 3 or lower enemy. | 1 Strong Rope + 1 Enchanted Bronze Dagger |
| Aaron | - Any weapon or shield that he uses is unbreakable by any means. | 1 Light Gauntlets + 1 Enchanted Hammer |
| Ereveth | - Sells items (not including scrolls) at their buy price. | 1 Rucksack + 1 Non-Enchanted Short Spear |
| Rhilik | - Gains an extra 2 current health when healing. - Can fully heal herself if she consumes an essence. | 1 Rucksack + 1 Non-Enchanted Bronze Dagger |
Deluxe Box Set Up
- Open the Market by using both holes on either side of it to pull the slider down thus opening the Market.
- Open the box and slide the lid under the bottom box making sure the Market inside the lid is upright.
- Remove and set up the Health Boards with their characters individual Health Board Markers (p 21). A characters starting equipment determines how it is set up.
- Remove the three scroll boxes and place them on the table. The other tuck boxes rest over the edge of the box above their own category.
- Set up the map however you wish as long as each tile is connected by at least one path. The harder it is to traverse the map the harder and longer the game can become.
- Each player will take one card tray and their characters starting equipment.
Lirennor's Salvation (Competitive Mode)
The year is 2410 After The Darkness (ATD) and the throne is dead. Everyone wants to be the King. But there can only be one. Saladar is prevented from entering the castle without the Medallion Pieces. He has the blood of the King and so can claim the throne, but he is evil at heart and therefore was rejected by the magic of the throne. With no king, a commoner must prove themselves worthy of the title by collecting the Region Stones and returning them to the castle to become the new king or queen of Lirennor.
Competitive Mode
This mode is a core Competitive mode of the game. It follows the main story within the World of Veles and is played with two to seven players.
Intro and Objective
The kingdom was lost many years ago. Saladar, the dark mage, controls the regions of Lirennor with his Region Stones. The power of the throne prevents him from sitting upon it. He needs to repair the broken Medallion that was handed down to the heroes. The heroes need to prove their worth by restoring all the Region Stones to their place on the throne.
- Saladar's Objective: Steal all six of the Medallion pieces from the heroes and enter the castle to win.
- Heroes Objective: One hero must collect all available Region Stones and enter the castle to win.
Alternative Objectives:
- Kill all other players in the game to be the last player standing.
- Defeat the dragon Agrimor in the Rocks Region to collect the crown of the king. Then enter the castle to win.
Set Up
- Choose one character each. One player must be Saladar.
- Take 5 coin, three scrolls and your characters starting equipment from the Market.
- Activate two Tavern Quests.
- Heroes start at any Inn and Saladar on one of his Active Region Stones.
Remember that opponents means other players that you are currently battling.
Before the first player rolls, all players can discard their unwanted scrolls.
When drawing cards from their respective decks you draw from the bottom and replace them on the top.
Competitive Mode Components
- Region Stones. Are the stones that Saladar uses to control Regions.
- He starts the game with an equal amount of Region Stones as there are heroes. The rest are left out of the game.
- He must activate at least one and can carry the rest. A Region Stone is always active when on a step of its relevant tile.
- Green = Woodmist, Oldhedge (Woods)
- Blue = Alepond, Grayloch (Docks)
- Red = Stonesea, Palecliffs (Rocks)
- The active Region Stones will provide Saladar with the ability to heal himself, teleport between two of them and gain an extra two max health.
- The heroes will gain one max health for each one they have.
- Medallion Pieces. Are pieces from an ancient medallion.
- The heroes must distribute them equally amongst themselves. Any that are left over are placed into the Market and can be bought back later.
- Saladar will gain one max health for each one he collects.
Dropping and Picking Up
- You can drop any items on a step after interacting with it first. Medallion Pieces and Region Stones will remain on that step, anything else is returned to where it came from.
- To pick up one or more Medallion Pieces or Region Stones you must first interact with the step itself or anything on it. As long as you don't die or are moved somewhere else you can pick it up.
- Only Saladar can pick up an active Region Stone without interacting with the Region first.
Dying and Respawning
- If you are defeated in battle (your health has gone down to nothing), you will die.
- After dying, players must wait one Game Turn out of the game before they can come back to life on their following Game Turn.
- Respawning:
- Heroes: When a Hero dies, if at the time of death they had a Medallion Piece they will respawn in any Inn after waiting one Game Turn out of the game. Their Medallion Piece is consumed and left on the step they died on unless it was stolen by their opponent.
- Saladar: When Saladar dies he will have to wait one Game Turn out of the game before he can respawn. If Saladar has an active Region Stone when it's his turn to respawn he will respawn at that chosen active Region Stone.
- If a Hero is killed and at the time of death had no Medallion Pieces, then they will leave the game.
- If Saladar is killed and at the time to respawn has no active Region Stones, he will have to leave the game.
- If a player dies and must leave the game, their unstolen items go back to where they came from. Region Stones and Medallion Pieces stay on the step they died on.
Restrictions and Others
- No one can enter the castle building until they have collected all the pieces they require. Heroes need all in-play Region Stones and Saladar needs all the Medallion Pieces. (This doesn't mean the Region the castle is on, just the castle itself. The castle counts as a step.)
- If a Hero kills Saladar in battle within the Region of an active Region Stone, that Hero will automatically receive that Region Stone, if they wish to.
- When players have a Region Stone and an essence from that region, they can consume the essence to fully restore their health. If used immediately after defeating a creature, that creature doesn't need an essence, nor do you need to make room for it as an item. In either case the creature is then returned to its original deck.
- Saladar can't enter the walls of the towns until he has at least 2 Medallion Pieces even with a scroll. If he loses/sells them whilst in a town and then has less than 2 he can stay in the town, but he can't re-enter after leaving until he has at least 2 again.
- When interacting with an active Region Stone, he can teleport to another active Region Stone. Unless there is a player or something else to interact with (not the step) he will end his turn.
- He can't interact with a Region Stone whilst currently interacting with a player.
- Saladar can also pick up Region Stones which counts as an interaction ending his turn afterwards. However, when he does, that Region Stone is deactivated and he will have to move his max health marker down by 2.
Rogue Regions (Competitive Mode)
Descendants of the Queens Guard. Your duty and quest as the Medallion Bearers has finally revealed itself. When the Region Stones of Lirennor were expelled from the throne, the Regions gained autonomy and a life of their own. It is up to you to reclaim them and return them to the throne in order to restore the balance of power and the command of the throne over Lirennor. But only one can rule, only one can wield the power of all six, only one of you will make it.
This mode is a core Competitive mode of the game that sets the heroes against each other to reclaim the power of the throne in Lirennor.
Objective
- Main Objective: One hero must collect all of the Region Stones and enter the castle to win.
- Alternative Objectives:
- Kill all other players in the game to be the last player standing.
- Defeat the dragon Agrimor in the Rocks Region to collect the crown of the king. Then enter the castle to win.
Set Up
- Choose one hero each (not Saladar).
- Take 5 coin, three scrolls and your characters starting equipment from the Market.
- Take one Medallion Piece each.
- Activate two Tavern Quests.
- Place your hero on any step in any Field Region.
- Place all six of the Region Stones on any random step of their relevant Region.
- Green = Woodmist, Oldhedge (Woods)
- Blue = Alepond, Grayloch (Docks)
- Red = Stonesea, Palecliffs (Rocks)
Region Stones
- The heroes will gain one max health for each one they carry.
- If you defeat a creature from a Region that stone represents, you can fully heal yourself after the battle. You can also consume the essence of a creature you're carrying to fully heal yourself (if of the same Region). In both cases the creature goes back to its deck afterwards.
Medallion Pieces
- Each hero starts with one. The others are left out of the game.
- If you die and at the time of death had at least one Medallion Piece you can respawn in any Inn after missing one Game Turn.
- After a Medallion Piece has been used to respawn it is removed from the game.
- If you don't have one when you die then you will have to leave the game.
- Optional: Leave all Medallion Pieces out of the game and just respawn after one turn.
Picking Up
- To pick up one or more Medallion Pieces or Region Stones you must first interact with the step itself or anything on it. As long as you don't die or are moved somewhere else you can pick it up.
- If there is a Standing Enemy on a step with something to pick up, then you must defeat it first before you can pick it up (do more damage to it than it does to you).
Other Points
- If a player dies and must leave the game, their unstolen items go back to where they came from. Region Stones stay on the step they died on.
- No one can enter the castle building until they have collected all Region Stones.
- If you battle an enemy and it defeats you (does more damage to you than you did to it) then it will remain on that step (using a card stand) until defeated. You are pushed back one step and just end your turn.
- You cannot pass a Standing Enemy without interacting with it. Only when defeated will it be removed. After which the player ends their turn.
Hero of Lirennor (Solo Mode)
There is no order in Lirennor. The kingdom is lost and overrun by horrid creatures. You are a lone traveler who cannot just stand by and watch the people of this lost kingdom suffer alone. With creatures around every corner and many in need of help you must act fast. Agrimor, the mighty dragon will not take kindly to your heroism and will hunt you down. But Lirennor needs you now more than ever. It is up to you to restore some peace in the kingdom.
Solo Mode Set Up
- Choose one Hero as your character and get their starting equipment from the Market.
- Get five coin, three scrolls and activate three Tavern Quests.
- Take out one Medallion Piece (the rest are left out of the game). That Medallion Piece can only be used to revive you once, after which it is removed from the game.
- Locate Agrimor's card in the Rocks Region and place it on the Castle.
- Set up the Solo Board (pictured below) by placing a red Region Stone on the arrow of the brown (upper) hexagons and a green Region Stone on the arrow of the green (lower) hexagons.
- Start in any Inn.
Solo Objective
You can either:
- Defeat Agrimor to retrieve the Crown of the King.
- Make it to the end of one of the challenges on the Solo Board.
- Make it to or beyond the red highlighted hexagons of both of the challenges on the Solo Board.
Using The Board
There are three main challenges:
- If you roll a double: (Your turn ends afterwards. Draw one card after the other).
- Double 2 = Move the red stone up by 4.
- Double 3 = Draw 2 Docks Cards.
- Double 4 = Draw 2 Woods Cards.
- Double 5 = Teleport to the waymarker in Stonesea.
- Double 6 = Battle Agrimor.
Battle To Victory
- In this challenge you must battle your way to victory. Each time you defeat an enemy you move the red Region Stone up by its level.
- You start each row on the left.
- The numbers indicate boss creatures. You cannot pass without defeating it. Roll one die for their attack and one die for their defense. You then times those numbers by the number in the hexagon to get their attack and defense.
- You must battle it as soon as you reach it.
- After defeating it you remain there and can only move forward after defeating another creature.
- If you fail to defeat it you must tray again when you feel ready.
- When you reach the final boss creature and defeat it you will have won.
Quest Galore Double Challenge
- The quest challenge is a simple one. For each quest you complete, be it Lone Quest or Tavern Quest you move the green Region Stone up by one.
- When you make it to the end you have won.
- On both scroll cards and Tavern Quest cards you will find the Solo Play symbol on them. This indicates that the card can be used during Solo Play. You can only use quests and scrolls that have this symbol on them. If they do not, simply put it out of play and draw a new one.
- The double challenge combines both of the aforementioned challenges. Along both challenges there is a red highlighted hexagon. If you reach this point or beyond on both challenges then you have won.
Solo Differences
- Trap Cards and Region Stones aren't used.
- You must roll each turn at least once.
- A maximum of three Tavern Quests can be active at any one time.
- Scroll and enchanted cards that differentiate between enemy and opponent are ignored allowing all effects to be carried out against enemies.
Agrimor (Solo)
- If you go into the castle or roll a double 6 you will have to fight Agrimor.
- After each battle, if Agrimor wins he will gain 2 extra attack and defense on top of what is rolled. You can track this by placing two, one-coin tokens on Agrimor's card after each battle.
- If you win, unless already there, you must enter the castle to win.
Defender (Co-Op/Solo Mode)
Whilst traversing through Lirennor, your party finds a kingdom under attack. The creatures of the dark are no longer aimlessly existing. Lead by the dragon Agrimor himself they are rising up. The towns are under assault and Agrimor has his eyes set upon the Castle. You must defend the towns and its people and fight off the waves of creatures attempting to besiege them. You must work together, spreading yourselves around the land and coming together again. If just one town falls or if Agrimor controls the castle you will have failed the people of Lirennor.
Objective
- Defend the towns and kill Agrimor.
- If any of the towns fall or Agrimor remains one round in the Castle you will lose the game.
Set Up
- Choose between 1 - 4 Heroes as your characters and get their starting equipment from the Market.
- Get five coin and three scrolls each and activate three Tavern Quests.
- Take out one Medallion Piece each, the rest are left out of the game. You can give them to others if you want. If you are in a group and a member dies, you can also use yours to respawn them. After use, the Medallion Piece will go into the Market, from there you can buy them back for 50 coin. The sell price is the same as on the Market Card.
- Set up the Scenario Board (pictured below) and place a Red Region Stone on the 10 mark of Agrimor's health. A Green Region Stone on the 1 of your XP bar and one stone on the 35 mark of each town.
- Take out the first enemy die (green).
- Start at any Inn.
Defender Terms
- Enemy Die: The Green, Blue and Red dice.
- Spawned Enemy: A Standing Enemy spawned as a result of rolling the enemy die.
- Non-Spawned Enemy: All other enemies.
- Point Player: This is the player in a group who's Game Turn it is.
- Waymarker: The blue stack of stones on each tile.
- On the Defender Card are the Hero's Stats. Each time you reach one you unlock that ability. 10, 15, 28 and 40 are used immediately and only once.
- Each time you defeat a Spawned enemy your xp will go up. The amount is inverse to the number of players left in the game. If four players in the game it will go up by one for each defeated Spawned enemy; 3 players by 2; 2 players by 3; and 1 player by 4.
- Your level increases by reaching a certain point on the XP bar. The colors relate to the Enemy Die to be used.
- Level 1 = 1 - 18
- Level 2 = 19 - 36
- Level 3 = 37 - 50
- Agrimor will die when his health goes to 0.
- In battle, take his health down according to the damage he sustained.
- Each time you roll an Ag+, his health will go up by the number of players.
- If you roll Ag, find his card in the Rocks deck and place him on a card stand on the waymarker in Stonesea. Then shuffle the deck.
- Each time you defeat Agrimor, roll the level 2 die to spawn him on that waymarker. If Ag+, ignore it and roll again.
Defender Differences
Spawned Enemy
- The letters on the Enemy Dice, apart from Ag and Ag+ relate to the first letter of each Region name. If you roll "A" for example, you will have to spawn an enemy on the waymarker of Alepond.
- You spawn enemy by drawing from the rolled regions deck. If you draw anything but an enemy with an attack you simply put it back on top and draw a new one.
- You roll the appropriate Enemy Die for the level you are on.
- After every player has played, each spawned enemy will then move on the same turn. You must move them towards their closest town. They move the equivalent steps to their level's number. If two towns have equal distance then you decide where they go.
- If an enemy walks over a player or group they will automatically attack them. The battle begins after all the enemies have moved.
- If multiple enemies happen to be on the same step, they function as one. If in a battle, their attack and defense is added up and their elements are not factored in. When they move again they then move together as a group. They move equal steps to the highest level enemy.
- Spawned enemy can be attacked en route by the players. Players will get the first attack.
- When you attack Spawned enemy, you can either attack the enemy group or you can attack them individually as normal.
- You can return a Spawned enemy to its deck by simply inflicting damage onto them.
- You must do more damage to them than they did to you to get any reward and XP.
- A Spawned enemy will stop on the first step of a town. They will always attack a player first. If no players on their step, they will attack the town.
Moving As A Group
- If you are moving as 2 or more players you then move as a group. You only use one die.
- Whoever's turn it is rolls the die as well as the enemy die.
Groups
- Any two players or more can come together to form a group. At this point your attack and defense is added up and becomes one.
- When you are in a group, players can swap items around as they normally would if alone. This includes scrolls or Lone Quests. The group's inventory and carrying capacity acts as one.
- Players can split off from the group on their turn should they wish to.
- Each turn, the point player rolls one die. They decide where to go and you all move as one.
- If you discover anything other than an enemy, such as items or Lone Quests then the point player will interact as normal.
- If damage is sustained, then the point player will have to take the damage.
- If enemies attack the group then the group can decide who will take on the roll of point player for that battle.
Group Battles
- Each town has a health bar on the Scenario Board.
- If an enemy is in a town, that town's health will go down by the equivalent of the enemy's attack on each enemy turn.
- When in a town, you can repair/heal it by 5 per 20 coin.
- When a player is in a town their attack is increased by two.
- When a player dies, if they don't have a medallion piece they stay on the step they died on. Another player can respawn them by using a medallion piece on them.
- You can have an optional, non-hero Spawned enemy controller working against the heroes and moving the enemy how they want.
- The game can be made harder by spreading the towns apart.
- The 4+ rule and Traps aren't used.
- Only use Quest and Scroll cards with the co-op symbol on them, or the solo symbol if alone.
Core Mechanics
These are the default rules. A mode or scenario can introduce new rules that will always override these if they conflict.
Moving
Rolling
- To move you roll two of the wooden dice.
- The total number that you rolled is the maximum you can move up to, but you can stop on your first or second etc. step if you want to.
- You can carry out an action before you roll if you wish.
Steps
- Each cluster on a tile is a step. They are separated by a gap. If there is a tree or rock etc. between two clusters then you cannot pass.
- Each town building is a step.
- When on a step you must draw from its relevant Region deck.
- The only features you can interact with are Loot Structures and Town Buildings. Any other feature is only relevant when completing some quests or with traps (p 38).
Quick Paths
- A Quick Path is just a longer step.
- When you take a Quick Path you step onto it as a move and continue on the other side with the remainder of your moves. If you use your last move on the Quick Path you land on the other end, interact then end your turn.
- Some Quick Paths have multiple routes giving you an option of more places to land.
- You cannot teleport onto a Quick Path.
- If you land on a card that makes you move back, then your first step must be in the exact direction you came from. If you hadn't moved when you picked up the card, or if you had teleported then you move in any direction.
Regions
- Field = Eritown, Rhoekin, Deridien, Castle
- Docks = Alepond, Grayloch
- Woods = Woodmist, Oldhedge
- Rocks = Stonesea, Palecliffs
- The Region types are as follow with Field being the easiest, then Docks, then Woods and the hardest is the Rocks.
- The Castle is in the tile without a name and is the large broken building itself.
Dead Zones
On the back of the region tiles you will find a more malicious theme (these will have a skull on them). When on this side you have optional rules for your gameplay. They must be accepted from the beginning. You can also make your own rules to follow.
- Docks = If starting your turn here you can only use one die to move.
- Woods = You can only enter if you have an axe or a torch.
- Rocks = These creatures cannot receive direct damage by any means.
- Castle = This tile now counts as a rock region.
Towns
The three buildings in the town walls are considered town buildings even when elsewhere around the land. In order to use town structures you must land on their own step.
- When you land on one, you complete your interaction and then end your turn.
- You can do battle within a town.
Loot Structures
- Apart from the Field tiles, every tile has one Loot Structure (p 38).
- If a structure is on a step or a Quick Path leads to a structure, you can walk into it and pick up a Loot Card.
- However, if you are forced to exit, you must exit the structure in any available direction and interact with whatever you land on.
- These structures are dangerous, hiding some vicious enemies. But they are also places of great reward. Travelers often find items of great value within these places, but you may also encounter creatures of that region. Good luck!
Inn
The Inn is the place you begin and get respawned in. You can also go there to restore all your health by interacting with it, restoring your health and then ending your turn.
Market
- In the Market you can buy or sell any item(s) indefinitely.
- If you sell an item that isn't from the Market, but was found, then you place it in the Region item's section (one of the two hexagons in the box) to be bought later.
- Items that are part of a combo must be sold separately.
- Whilst a player is currently in an interaction with the Market, other players can't interact with them.
- There are two Market cards.
- One will have the buy and sell price of things like essences, scrolls, Medallion Pieces etc.
- The other will show the minimum buy price of any category in the Market. This is a reference guide that you can use when deciding what you might want to buy.
Carriage Man
Every town has a carriage which you can use to quickly travel to any other town's carriage immediately.
- You have to pay 5 coin.
- When you get there, unless you interact with a player you end your turn on that town's carriage without picking up a Region Card.
Interacting
- To interact with anything, all you have to do is be on it or land on it. If you choose to interact with it, you stop and interact with it. If possible (by being teleported somewhere or by being forced to by a creature) you can make more than one interaction per turn, but you can't stay on one step and keep picking up a card continuously within the same turn.
- If you choose to interact with the step you are already on when you begin your turn, you then don't have to roll, you simply interact with it as normal ending your turn afterwards. This rule also applies when you have to wait for a number of turns.
- If you are forced to move a number of steps you must interact with whatever you land on.
- Remaining with an enemy: The enemy card is kept for the duration. Players can't interact with you and you can't interact with the Region or move. However, if another player defeats the enemy by interacting with it instead of the step you are on, then that player can initiate an interaction with you or simply set you free.
- Remaining with anything else: You must still interact each turn with the step you are on and other players can interact with you.
Interacting with Players
When you walk over a player or a player walks over you, you can choose to interact with them. If you do, you have one of 3 options:
- Trade: You can trade whatever you like for whatever price you agree on.
- Battle: Battles can be between 2 or more players. See battle rules for more details (pp 22 - 23).
- Battles are non-optional. If you intend to battle a player, you must announce it before you land on them. If you don't, they can initiate the battle when you walk over them and get the first attack.
- Whoever initiated the battle gets the first attack.
- Players can enter ongoing battles if they choose to. But as soon as they do, they have to wait until it's their Battle Turn (seating order) to attack. No one knows you are there until then so others can't attack you either.
- Use a scroll or trap:
- You can use a scroll on a player and if the other player can react by defending themselves they can initiate a battle. See (pp 30 - 31) for more details on scrolls.
- For some traps you will have to interact with a player to activate them. You do this by simply landing on the same step as them and activate that trap as an interaction with that player. See (pp 32 - 33) for details on traps.
- For both of these options you must announce what you are doing before hand otherwise they can attack you.
Tavern
When you go to a Tavern, pick up a Quest Card. Place the card to the side. The quest can be completed by anyone.
- With some quests you will have to return an item(s) to a specific Tavern to collect the reward. The location of that Tavern will be specified on the quest's instructions. If it doesn't, you just have to go to any Tavern.
- Some quests will direct you to people or locations on the map. It will always explain the location on the card and what you are looking for.
- After you have completed a Tavern Quest, return the card and draw a new one immediately.
- Any items that get given for the quest are returned to their deck.
Ending Your Turn
You end your turn when you have nothing left to do, when you choose to end it after interacting at least once with something, someone or:
- Immediately after leaving a battle by any means; Unless directed otherwise by a scroll, are fleeing or dropping items.
- After interacting with a player; Unless directed otherwise by a scroll or are dropping/picking up items.
- After interacting with any step; Unless otherwise directed by the card or you are dropping/picking up items.
The 4+ Rule (Optional)
- If there are four or more players in the game, then players in a battle with each other or in the Market do so in their own bubble.
- Other players will skip your turn until you exit.
- If there are only 3 players or less in the game then each player takes it in turn to do their battle turn or anything else.
- There can be multiple battles at once. But no one can be in more than one battle at the same time.
- If you are the only player outside of a battle or the Market, you must wait 15 seconds between each turn.
Losing Health
There are two ways to lose health.
- Suffering Direct Damage: Through poison or scrolls etc. You move your current health marker by the indicated amount without factoring in your defense.
- Sustained from an attack:
- For you to lose current health your opponent or enemy has to attack you and not your summoned creatures.
- They will have to generate more attack than your defense. If they do then your health goes down by the difference.
- For example: if your opponent's or enemy's attack is 4 and your defense is 2, then you lose 2 health.
Respawning
These are the standard respawning rules. If a scenario specifies anything different then use those.
- After you die you must wait one turn out of the game.
- You then can respawn, with full health, on any waymarker or Inn.
Health Board
The Health Board displays a player's current health and maximum health. There are two Health Boards which can be placed anywhere on the table. One row per player.
- Each player will start on 10. If you start the game with items that increase your maximum health then you place your health board markers on 10 + whatever those items offer.
- You can set up the Health Boards wherever they are convenient for you on the table.
- Maximum health is how much your armor provides. When you increase it, your current health stays where it is. When you fully heal, your health goes up to where your max health is. You can increase your armor by equipping items that offer the armor symbol on them, but you can't go beyond 20.
- Current health is how much health you have (due to losing health in battle, for example). This will move up and down if you suffer damage or if you heal yourself but cannot go beyond your maximum health marker.
Healing
There are four main ways of healing yourself:
- Going to an Inn. Restore all your health by interacting and then ending your turn.
- Using a Scroll.
- Defeating a creature that belongs to the Region of a Region Stone you are carrying to restore all your health.
- Using a Life Token:
- Hold onto them until you choose to use them.
- The front side (little blue bottle intact) will heal you; the back (broken blue bottle) can be used to inflict direct damage to your opponent. You must pick one side to use. The amount to be healed with or damaged by is on the bottle of the relevant side.
- To be used like a tool item on your turn and only once, then returned to its compartment in the insert.
- Counts as an item.
- Can be stolen.
- Affects carrying capacity by 1.
- Each player has their own. They are both colored with that player's color.
Battles
Opponents
- You enter a battle by interacting with a player. Either you start the battle with someone you walked over, or they do when you walk over them. Other players can then join the battle.
- More than two players can be in a battle. If you choose to join an ongoing battle, you announce it before landing on that step so no one can bring you into it. Before it is your turn to attack, depending on seating order you are effectively hiding and waiting for the ideal moment to attack. During this time no one in the battle can attack you. As soon as it is your turn to attack that is the moment you have joined the battle.
- Being forced to join. If you pass over an ongoing battle, one of the players in that battle can attack you if your passing over them coincides with their Battle Turn and they still have the ability to attack. However, if there are 3 players or less in the game the player bringing you into the battle must be next in line to attack. You can only force a player to join a battle against other players, not enemies even if you use a long-distance interaction scroll card.
- A player's equipped items are what they will use in the battle. They can't change armor or use anything in their Rucksack during the battle.
Battling
- The player who initiated the attack has the first Battle Turn. Each player will play on their own Battle Turn. Battle Turns go in a clockwise motion between the players in the battle.
- Battling
- On each player's Battle Turn they can do any number of actions but can only attack once with their weapon and once per any summoned creatures. Or they can combine their attack (p 25). They can also use their scroll cards.
- Players can direct each attack at anyone they want in the battle, but must keep to the above rule.
- If a player has summoned creatures then you simply have to inflict damage upon them by generating more attack than its defense. When the creature is defeated it's returned to the deck from which it came. After a battle it is also returned.
- When a player is attacked they can defend themselves with scroll cards.
- When a player has completed their Battle Turn it is then the Battle Turn of the next player in the battle.
- If you fail to complete any action for 15 seconds then your next opponent in line will see this as an opportunity to attack and begin their Battle Turn.
- Fleeing.
- If you choose to flee a battle, at the beginning of your Battle Turn you roll both dice and if the number you roll is 9 or higher you use that number to flee.
- You can flee in any direction and after you take that first step you enter a normal Game Turn and interact as normal with anything you land on. You can't, however, interact with the player(s) or standing enemy in the battle you just fled whilst fleeing. If you fail to roll a 9 or more then you end your Battle Turn and remain in the battle.
- If all of your opponents are trapped in the battle then you can flee by rolling both dice regardless of the number rolled.
- You can only roll to flee from opponents or standing enemy, not normal enemies.
Enemies
- "Enemies" refers to anything that you can fight other than players, including summoned creatures. The 4+ Rule doesn't apply when battling enemies.
- When you run into an enemy you will have to fight it in order to survive.
- If you encounter an enemy that will remain on that step (Standing Enemy) and you fail to defeat it, it will push you back one step. End your turn and don't interact.
- When you get attacked by an enemy they will get the first attack and damage your health if they can.
- The same attack and defense rules apply to enemies. If their attack is more than your defense then you lose the difference in health.
- During their attack you can use Defense, Shield and Spell scrolls as normal (p 31).
- Creatures with x1, 2, 3, 4 in their attack or defense means that you have to roll one die and times it by that number to find the true value of their attack or defense.
- After they have attacked it's your turn to attack.
- Whoever does the most damage overall wins the fight and gets the rewards.
- After the enemy and you have finished your battle turns the battle will be over.
- You deal with rewards or loses and any conditions.
- Then the interaction is over, you return the enemy to the top of its deck and end your turn.
- For example: the player would defeat the enemy and win the fight in this scenario: the player loses 2 health and the enemy loses 3 health.
- If you get defeated by an enemy:
- Enemies will take your coin if they defeat you. The amount of coin they take is always the same number as their level.
- Some enemies will make you remain where you are for a number of turns, move in a specific direction, lose items, etc. You will only have to do this if you are defeated, i.e. they took more health from you than you did from them or they have no attack and defense values meaning you can't battle them.
- If you have to remain with it, see (p 19).
- Some enemies have preferences. If they want a specific item it will mention what you lose on the card. The item they want is referring to what you have equipped. Or sometimes your Rucksack, meaning it and everything in it.
- If you don't have what they want equipped or you don't have a Rucksack, then ignore it and carry on as normal.
Essences
- If you get a reward like this you keep the card. It will affect your carrying capacity by 1 and can still be stolen.
- With some enemies you can also get a reward for summoning, selling, or for a quest.
- If you sell it at the Market, it stays in the Market to be bought again and placed in the Region section of the Market (one of the two hexagons in the box).
- After you have used it, summoned it in battle, used its essence in some way, or completed the quest, return the card to its original deck.
Other Combat Elements
Combined Attacks
- Combined attacks can be performed by combining the attack of your weapon and summoned creature(s) in a battle into one single attack.
- When doing so, everything involved can't attack again until your next Battle Turn and can only be used to attack one opponent or enemy at a time.
- They work simply by using your own attack, for example 5 and your creature's attack, for example 4. This will result in a single attack of 9.
- If you choose to combine your attack, then you can do so in any combination you wish. For example, if you have two summoned creatures, you can combine your attack with one creature to attack opponent A and with the remaining creature alone to attack opponent B if you want it to. Or you can attack the same opponent with both of those attacks.
Scrolls (In Battle)
- Your scroll cards are kept in your hand out of the view of other players.
- You can have a maximum of 8 scrolls.
- Scrolls have to be used during your battle turn except for Defense, Shield and Spell scrolls (pp 30-31).
Standing Enemy (S.E.)
- S.E. move equal steps to their level (if the scenario allows them to move).
- If multiple enemies are together they form a group. Their attack and defense is added up to become one and their elements are not factored in. They then move equal to the highest level enemy.
- If an S.E. walks over a player or is spawned on one they will automatically attack them.
- S.E. can be attacked by the players. Players will get the first attack.
- When you attack S.E., you can attack one or multiple. If multiple you add up their defense.
- If they can't bypass your combined defense of summoned creatures and you then they will attack the lowest level summoned creature you have.
- You can return a S.E. to its deck by simply inflicting damage onto them. You still only claim rewards by defeating them as normal.
Gameplay Area (Card Tray)
- The card tray has been designed to organize your cards whilst playing.
- During gameplay, you place your character card underneath.
- Your Rucksack card is on the right with all your items within under it so they can't be seen.
- Your inventory cards are placed on the left-hand side.
- Equipped items are placed in the slots. Battle items such as weapon, shield, and special items are placed in the top three vertical slots. The five horizontal slots above your character card are for equipped armor (Helmet, Body Armor, Gauntlets, Boots, Ring).
- For combinations or items attached with a scroll you can place all relevant cards together in a single slot.
- Other players can see all of your cards except for anything within your rucksack, any of your scrolls and any trap cards (plus attached items) you have.
Items
Getting Items
- Items can be bought from the Market or merchants, found throughout Lirennor or rewarded to you.
- You can also sell any items you have (even items you have found) at the Market or to merchants. When you do, it remains in the Region items section of the Market (one of the two hexagons in the box) and anyone can buy it back.
- Items can be equipped, held, or kept in your Rucksack. You cannot end your turn with more items than you can carry. You can move items around regardless of whether it's your turn or not but not when in a battle.
Equipping
- During a battle, only at the beginning of your Battle Turn or after defeating an opponent can you move your shield, weapon, special item, and inventory items around. You cannot equip or un-equip armor.
- Anything you have equipped is slotted into one of the standing slots on your card tray.
- The items you equip are the items you wear and use in battle. You can equip one of each:
- Weapon = Anything that has an attack.
- Shield = Your shield to provide defense.
- All armor = Helmet, Body Armor, Gauntlets, Boots, Ring. One of each can be equipped.
- Special Items = Any item that has an enchantment other than the above items. Only one special item can be equipped at any one time.
Rucksack
- A Rucksack is used to carry an extra 5 items, but doesn't affect carrying capacity itself when being used.
- Each player can only use 1 Rucksack but can carry more if they want.
- During battle players can't access their Rucksack for any purpose.
- Place any items in your Rucksack under your Rucksack card so others cannot see them.
Inventory Items
- Items that aren't equipped or in your Rucksack are considered to be held in your inventory. You can hold up to 3 items.
- You cannot use the attack, defense, or enchantment of an item you are holding; only items you have equipped.
Item Definition
- Items = Is everything that can be equipped, carried, or placed in your Rucksack. The only exceptions (and therefore won't affect your carrying capacity but are still considered items) are:
- Medallion Pieces, Region Stones, Coin, Rucksack (these CAN be stolen).
- Scrolls and Lone Quests (these CAN'T be stolen).
Using Items
- Equipped: Anything you have equipped is what you will use in a battle and can use its enchantment. Equipped items are your shield, weapon, special item, and all your armor.
- Unequipped:
- Items in your Rucksack or inventory are considered to be unequipped.
- Outside of a battle you can use your unequipped items, swap items around, and drop items that you don't want. But you can only use an item's enchantment if it is equipped.
- When you drop an item, it is returned to its appropriate deck. If you drop an item after defeating an opponent in battle then those items will be left for the opponent you just defeated.
Enchanted Items Combos
- Enchanted items are indicated by purple text and the purple enchantment symbol under it.
- By using these items you can gain a significant advantage in the game.
- The effect will tell you how and when it can be used.
- You can only use an enchanted item's effect if you have it equipped.
- You can only equip one Special Item (non weapon, shield or armor item).
- When an enchanted item is equipped you can use its effect indefinitely should the particular effect allow.
- Some scroll cards will make you attach that scroll to an item to enchant it. When doing so, attach that scroll to the item and keep it with that card. Draw a new scroll after doing so. That attached scroll will remain with that item until discarded, at which point it is returned to the scroll deck.
Tool Items
Tool items will offer you various abilities throughout the game.
- Any item with the tool item symbol under the description/effect text is a tool item.
- Tool item effects can be used without them being equipped. So if you have a tool item in your inventory or Rucksack you can use its effect if applicable.
- You can only use them during your turn.
- Unlike enchanted items, tool items are a one-time use. After you have used their effect you must return the item to its original deck.
- You can't use tool items that are in your Rucksack during battle.
Combos
- You can combine two items together to create a single weapon with both an attack and defense. When you do, their enchantments (if any) are kept active. If they get broken, keep the combo to fix it or separate them if you wish though they will both still be broken and will have to be fixed individually.
- The weapon will always display what item can be used to make a combo along with the resulting attack and defense on the left under the description box.
- Each weapon will have a maximum of three options and you can only choose one.
- The resulting item becomes your primary attack and defense should you equip it. Keep both items together as one. You cannot have any other weapons or shield equipped if you use that combo.
Dropping, Picking and Losing
- After finishing an interaction on a step you can drop or pick up any item. You then end your turn immediately.
- If you drop an item or lose it in any way into the game, then return it to its deck.
- Medallion Pieces and Region Stones will remain on the step that you are on and so can be picked up later.
Breaking Items
- Other than by using scrolls, weapons and shields can break each other in battle.
- When any item is broken you can't use their effects, attack, or defense and you can't use them to build a trap or for any other means until fixed.
- When an item is broken, place it upside down where you can or drop it. It will still affect your carrying capacity.
Weapons
- Weapons can break if you attack a defense that is greater than your weapon's attack. During any battle (including with enemies) you can choose to not attack if you know your weapon will break.
- This could happen, for instance, when a player activates a scroll card giving them extra defense during their opponent's attack.
- For example: a weapon with an attack of 2 is used against a defense of 4. The weapon will break.
Shields
- Shields will break if the attack received is double or more than your shield's defense, including with enemies.
- For example: a shield with a defense of 2 receives an attack of 4. The shield will break.
Repairing Items
You can repair broken items by:
- Going to the Market or merchant and paying 5 coin to fix all your items.
- Or you can use a hammer to fix 1 item. Once you use a hammer, the hammer goes back to where it came from.
Scrolls
Obtaining Scrolls
- When you buy a scroll you are essentially buying the slot because you will be replacing them. You can have up to a maximum of 8 scrolls in your hand. The three scroll decks can be used by anyone in the game.
- You can also find scrolls or get them as rewards for completing quests. If you have 8 then you must swap one out to keep it.
- Scrolls can't be stolen. But you can trade with other players or sell that slot at the Market.
- If a scroll is attached to anything, leave that scroll with whatever you attached it to and pick another.
Using Scrolls
- Each scroll has a usage that is displayed in the top left corner.
- Once a scroll's effect has been used or it's been defeated, you must put it aside until it's your turn again.
- Once = Put aside straight after usage.
- One Battle = When the battle is over for you the scroll is put aside.
- # Round(s) = After you complete the round(s) put the scroll to the side.
- # Turn(s) = When you complete your turn(s) put the scroll aside.
- Until Discarded = After you have chosen to end its effect put it aside.
- Attached = You attach that scroll to whatever it indicates and draw a new one immediately. When the attached scroll gets discarded, don't replace it with a new one.
- When you have used a scroll, place it to the side. When it's your turn again put those cards back into a scroll deck and replace those cards with new ones. At any point during the game you can choose to discard any scrolls in your hand (not active ones).
- If a player dies after activating a scroll that lasts for a number of Game Rounds/Turns, that scroll will remain in use until its effect is over.
Scrolls In Battle
- A scroll's effect can be used at any point on your turn depending on the scroll. Its effect is displayed on the card and its effect will explain when it can be used.
- Some scrolls make you discard your own or others' scroll cards and draw new ones. When doing this you discard only the scroll cards that are in hand, including the one that was used to discard them.
- Some scrolls you can use during your opponent's or enemy's attack. These are: Defense, Shield, and Spell scrolls.
- If a scroll card's effect is blocked by another, a rule in the game, or fails in any way to carry out its effect after being used, it is defeated and put aside to be replaced at the beginning of your next turn.
Scroll Categories
- Attack scrolls: Typically used in battle to inflict damage on either your opponent or enemies or increase a weapon's attack.
- Defense scrolls: Used to defend yourself or others from taking damage, deflecting damage or increasing your shield's defense.
- Shield scrolls: If it's to protect your items or coin if you get defeated in a battle you must activate it during the battle before you are defeated. You can attach them to traps. Shields that protect you from players or enemies interacting with you can be activated during an interaction to end that interaction.
- Spell scrolls: These scrolls have a general purpose which will be displayed on the card.
- Enchant scrolls: You can enchant your items to gain a special effect. When you do, attach the scroll with that item and pick another scroll. When the item is discarded or destroyed, return the scroll to its deck, but don't draw another.
- Summon scrolls: They act as normal enemy on your side.
- You can attack one or multiple at the same time; If you attack multiple you add up their defense and they act as one.
- If you are attacked, you add up your defense and that of your creatures. If you sustain damage your creatures are defeated.
- They are defeated when they sustain any damage.
- Return to their deck afterwards.
- Lock and trap scrolls: With these you can trap players or enemies and also lock your items or coin away. Locking your items away refers to anything unequipped. Attach to the items and pick a new card. When locked not even you can gain access. You can only gain access when you discard the scroll.
Traps
Setting A Trap
- Buy a trap from the Market for 5 coin.
- The trap will explain how it is used. The top box will show its feature should it have one. If not it will explain how it is activated. Under that is the when, where, or how it can be activated. For example, some traps can only be activated within particular Regions.
- The three trap levels show the traps effects. The first level is unlocked when you acquire the trap. The following two will require the trap to be combined with an item one after the other. That item is displayed on that level. Each item is on top of any previous and so is the effect it offers. If you unlock the third level, for example, the effects of the previous two are still applicable.
- When you complete the trap put it and everything else aside, hidden from others. The items don't go towards your carrying capacity. You cannot trap yourself.
- Regardless of the trap's effects your victim must stop to interact with it.
- The top level is the first level, you then move down sequentially when making it.
- As soon as a trap is bought it is active. You can add items/scrolls to it to increase its level whenever you wish, but you can't then retrieve them.
Springing A Trap
You can spring a trap when you choose to as long as it meets the trap's requirements.
- If all that's there is a feature, then all they have to do is pass over it and your trap can be activated. They do not need to land on it.
- Other traps are more specific and the trap will explain when it can be activated.
After its use all cards involved are returned to their decks.
Remaining In Place
- When a player is trapped in place they can only use their natural defense. The same applies with some trap scrolls.
- Each new turn you must still interact with the step you are on.
- You cannot flee or move when trapped.
Trap Categories
Each level's effects will explain what your victim will have to do. There are different categories of effects that will be put upon your victim:
- Your victim is barred from passing beyond a specific location.
- Your victim will have to face up against a creature.
- Your victim will receive an attack.
- Your victim will lose a specified item or one of your choosing.
- The attack of a creature or a weapon will increase.
- A specified item of your victim will be broken.
- Your victim cannot enter a building or town.
- Your victim will have to remain in their current location.
- Your victim will lose their weapon.
- Your victim will lose some health.
- Your victim will have to move a number of steps.
- Your victim will lose coin and you will gain it.
- Transport your victim to a specified location or one of your choosing.
- Your victim will have to pick up a new card.
Lone Quests
Finding a Quest
Unlike Tavern Quests, Lone Quests can be found on your travels, when you find people around the land that are in distress.
- When you find a quest it is yours to complete. Only you have that option.
- Keep the card until completed unless you choose not to take it on (if it allows). If you leave, the quest is not completed and you return the card to its deck.
- You can't give the quest to someone else nor can it be stolen and it won't affect your carrying capacity.
Lone Quest Structure
Lone Quests have options. You choose which direction you want to follow. A quest is only completed when you reach a reward.
- Structure: Quests are separated into steps. You follow each step one by one to get to the reward. This must all happen within your turn, unless there is an hourglass on an arrow indicating that it will take multiple turns.
- Leaving: If you choose to not do the quest by walking away, or any other option that doesn't lead to a reward, then you simply place the card back and end your turn. The quest is then not completed.
- Battling: Fighting enemies is like normal; whoever does more damage wins the battle. You have to win before you can move onto the next step, otherwise you fail the quest and return it to its deck ending your turn. Some creatures have a x1, 2, 3, 4 in their attack or defense icon. This means that you must roll one die and times that number by the one in the icon to find out their attack or defense.
- Following directions: If a quest tells you to go to a specific place then you must enter the borders of that town or Region to complete the quest or step. An arrow means you must complete it now; an arrow with an hourglass on it means you complete that step on a following turn so you must keep the card.
- Finding items: If you have to find an item or anything else, keep the Quest Card until you do.
- To complete a lone quest you interact with the location the quest sends you to, you then complete the quest and end your turn if you survive or are not moved away.
- When you complete a quest you get a reward depending on which direction you followed.
Completing / Rewards
- Coin: If your reward is coin then you just collect the amount of coin that is stated.
- Scroll: When you get a scroll, you pick the given amount out of the deck. You can carry a max of 8.
- Life Tokens: Hold onto them until you choose to use them.
- Item from the Market: Keep the card until you're at a Market or with a merchant and then use it. When you do so, discard the Quest Card.
- Trap Card: Take a Trap Card from its deck and don't reveal it to anyone.
To save time you can place quest items back after your turn has ended.
Others
- Merchants work the same way as the Market allowing you to buy or sell anything from the Market wherever you are (p 18). If you choose not to interact you return the card to its deck and end your turn.
- Mages are the few good mages left in Lirennor. They will help you by selling you scrolls, trading one for another (only once), or swapping things for a new scroll from the Market.
- Ring Rocks: On the card will be a list of numbers with a corresponding effect. Whatever you roll you must obey no matter what.
- Relics: Similar to ring rocks, whatever you roll you must obey. You don't have to use a relic's effect immediately and they can be sold. But once you roll there is no turning back.
Contents
Game Contents
| Name | Contents | Total |
|---|---|---|
| Field Region | 23 enemies - 14 items - 8 other | 45 |
| The Docks | 22 enemies - 16 items - 12 other | 50 |
| Woods Region | 24 enemies - 15 items - 11 other | 50 |
| Rocks Region | 27 enemies - 13 items - 1 other | 41 |
| Loot Buildings | 10 enemies - 23 items - 4 quests - 9 Other | 46 |
| Scrolls | - | 150 |
| Traps | - | 33 |
| Quests | - | 27 |
Market Contents
Transcription note: the printed Market Contents table (printed p 37) is a multi-column grid whose item rows and per-column counts are not recoverable with confidence from the PDF text layer used for this transcription. The item names printed in that table are: Sword, Spear, Shield, Body Armor, Helmet, Boots, Gauntlets, Rings, Rucksack, Shovel, Torch, Dagger, Rope, Hammer. Their counts are listed on the printed page and should be checked there.
Interactive Features
The below map features are the only features that you can interact with unless otherwise specified. Anything else is a feature for scenery, a quest or traps.
- Loot Buildings (see Loot Structures, p 18)
- Town Features (see Towns, pp 18 - 19)
Key Points Index
Battles (pp 22-24)
- Use what is equipped.
- Cannot swap armor around.
- One attack per weapon and summoned creature.
- When you finish you enter the normal Game Rounds again.
- Opponents:
- Interact with a player.
- Announce that you are attacking so they don't attack you.
- Enemies:
- Anything with an attack other than players.
- Enemy always attacks first, then your battle turn.
- Whoever does the most damage wins.
- You only lose what is stated if you lose the battle (they do more damage to you).
- Gain coin equal to its level if you win.
- After the battle the card goes back to its deck unless it states otherwise.
Breaking Items (p 29)
- Weapons break if their attack is less than the total defense.
- Shields break if the attack received is double or more.
- Hammers can repair one item or pay 5 coin in the market to repair all items.
Carriage Man (p 18)
- Pay 5 coin to travel to any other Carriage man and then end your turn.
Combined Attacks (p 25)
- Your attack and your summoned creature's attack are added up into one attack.
Combos (Items) (p 28)
- A weapon and an item can combine to form one item with an attack and defense.
- You cannot use any other weapon or shield if using a combo.
Dead Zones (p 17)
- One side of each tile indicated with a white skull near the name with optional rules to follow.
Direct Damage (p 20)
- Direct damage is damage that you sustain without taking into account your defense. If you suffer five direct damage for example you lose exactly five health.
Enchanted Items (p 28)
- When equipped they provide a continuous effect.
- You can only equip one Special Item (non weapon, shield or armor item).
Ending Your Turn (p 20)
- When you have nothing left to do.
- Immediately after leaving a battle by any means; Unless directed otherwise by a scroll, are fleeing or dropping items.
- After interacting with a player; Unless directed otherwise by a scroll or are dropping/picking up items.
- After interacting with any step; Unless otherwise directed by the card or you are dropping/picking up items.
Equipped Items (p 27)
- The items you equip are the items you wear and use in battle. You can equip one of each:
- Weapon = Anything that has an attack.
- Shield = Your shield to provide defense.
- All armor = Helmet, Body Armor, Gauntlets, Boots, Ring. One of each can be equipped.
- Special Items = Any item that has an enchantment other than the above items. Only one special item can be equipped at any one time.
- Anything equipped is standing in one of the slots of your card tray (p 26).
Essences (p 24)
- A part of a creature you have defeated.
- Can be used to summon them back into battle, conjure items, sell to the Market and other usages within the game.
Fleeing (p 23)
- Only from opponents (players).
- Roll a 9 or more and use that number. If you fail to, end your battle turn.
- Use Teleport Scrolls.
- Trap all other players in your battle then use both dice to flee.
Inventory (p 27)
- You can carry up to three items.
- You can use tool items that are in there.
- When in a battle, and only in the beginning of your battle turn, you can only change your weapon, shield and special item around from your inventory.
Life Tokens (p 21)
- Considered a tool item and so when you choose to use it you must put it back.
- Intact blue bottle side will provide health.
- Broken blue bottle side will inflict direct damage onto an opponent (player).
- Affects carrying capacity by one.
Items (pp 27-29)
- Items = Is everything that can be equipped, carried, or placed in your Rucksack. The only exceptions (and therefore won't affect your carrying capacity but are still considered items) are:
- Medallion Pieces, Region Stones, Coin, Rucksack (these CAN be stolen).
- Scrolls and Lone Quests (these CAN'T be stolen).
- You can't end your turn with more than you can carry.
- Outside of a battle you can drop anything you don't want and it will go back to its deck. Medallion Pieces and Region Stones stay on that step.
Health Board (pp 20-21)
- All players start at 10 plus whatever their starting equipment offers.
- Wooden hexagon is your maximum health. This is offered by the armor you have.
- Wooden rectangle is your current health. This moves independently of your max health but can't go beyond it.
Healing (p 21)
- Go to an Inn to fully heal.
- Use scrolls.
- Defeat a creature from the region of a Region Stone you are carrying.
- Use Life Tokens.
- Lirennor's Salvation Only: Saladar can heal on an active Region Stone.
Lone Quests (p 34)
- These quests are for only you to complete.
- Start at the top and follow the arrows down on your current turn.
- Any arrow with an hour glass on it will indicate that you have to spend more than one turn to complete it.
- Follow the arrows for the desired reward.
- If you encounter an enemy you must defeat it before you can pass to the next stage.
- If you choose to follow a path that doesn't lead to a reward (e.g. walk away), then you simply put the card back and end your turn.
Loot Structures (p 18)
- Every tile apart from the field tiles have one Loot Structure on them. They can all be seen on page 36.
- You step into one like a normal step and draw from the Loot deck.
Losing Health (p 20)
- When you receive an attack you deduct your defence from that attack to find the damage you'll receive.
- If you suffer direct damage you do not take into account your defense, you simply lose the total of that direct damage.
Market (p 18)
- The Market is where you can buy and sell any items within the game indefinitely.
- There are two Market aid cards.
- One has the minimum buy price of any category in the main Market cards.
- The other has other prices for items without their price on the card or token.
Looting/Stealing (p 23)
- After defeating your opponent (killing them) you can then take 1 item from them. Coin, Medallion Pieces and Region Stones, regardless of how many, each only count as one and so does a Rucksack regardless of what is in it.
- Whatever you leave behind, the defeated opponent will get if they respawn.
Inn (p 18)
- Any player can go into an Inn to fully heal. After which they end their turn.
Interacting (pp 19-20)
- To interact with anything you simply have to land on it and carry out the relevant interaction.
- Multiple interactions can happen in one turn, e.g. being forced to move again.
Scrolls (pp 30-31)
- Always used on your turn apart from Defense, Shield and Spell categories.
- No more than eight.
- You can discard any unwanted scrolls at any time but always replace it on the beginning of your next turn.
Moving (p 17)
- Roll two of the wooden dice together. The number you get is the maximum amount of steps you can make.
- You can stop and interact whenever you choose to up to the number rolled.
- Each step will be separated by an open patch. If there is a tree or rocks etc. between two steps, you can't cross over.
Picking Up Items (p 28)
- Any item that is on a step can be picked up by completing any interaction with the step itself or something that is on the step. As long as you survive the interaction or are not moved away you can pick it up.
Quick Paths (p 17)
- Quick Paths are simply elongated steps.
- You step onto one as a move and continue on the other side. Can't teleport onto one.
- If your last move was on one you then land on the other end.
Regions (p 17)
- The four Region types increase in difficulty from Field to Docks, Woods and then Rocks being the hardest.
Rucksack (p 27)
- Can only use one but can carry more.
- Can be used to carry an extra five items inside it. Hide those items by placing the Rucksack card on top of them.
- You can't access it when in a battle.
- If stolen, then everything in it gets stolen too.
- Counts as one item.
Remaining (p 19)
- With an enemy:
- Can't interact with anything.
- Another player can defeat it to then interact with you or set you free.
- With anything else:
- You must still interact with the step you are on.
- Other players can interact with you.
Summoned Creatures (p 25)
- Summoned creatures fight on your side using the attack and defense on their card.
- They get one attack per battle turn which can be directed onto any other player.
- They can be defeated simply by sustaining any damage from an attack.
- They will have to be defeated before you can be attacked.
Tavern Quests (p 19)
- These are competitive quests. Whoever achieves it first gets the reward.
- If it doesn't specify where to return something then it is returned at any Tavern to complete that quest.
Tool Items (p 28)
- These are one use items that will have some kind of effect.
- Once used the card is returned to where it came from.
Traps (pp 32-33)
- Bought from the Market for five coin.
- Will indicate a feature or means of activating the trap as well as the tile(s) it relates to.
- The first level is provided immediately. Levels two and three will require an item to attach to the trap card. You can attach items at any point but can't reclaim them.
- Must set level two first and then three.
- When your victim interacts with it they first interact with level one, then two and then three.
- If you have to remain in a trap you have zero defense but can still attack.
4+ Rule (p 20)
- Optional rule.
- If there are four or more players in the game, then players in a battle with each other or in the Market do so in their own bubble.
- Other players will skip your turn until you exit.
- If there are only 3 players or less in the game then each player takes it in turn to do their battle turn or anything else.
- If you are the only player outside of a battle or the Market, you must wait 15 seconds between each turn.