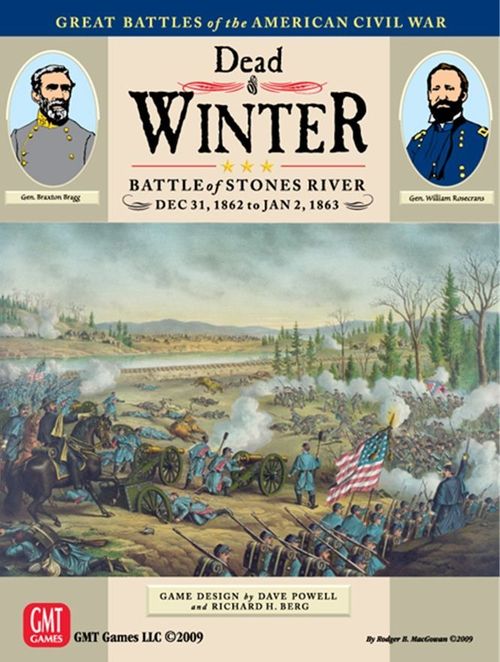
Dead of Winter: The Battle of Stones River (Second Edition)
Dead of Winter: The Battle of Stones River (Second Edition) Rulebook
Table of Contents
Table of Contents
- Series Rule Book
- 1.0 Introduction
- 2.0 Components and Terminology
- 3.0 Sequence of Play
- 4.0 The Command System
- 5.0 The Activation System
- 6.0 The Orders System
- 7.0 Facing and Refusal
- 8.0 Stacking and Extension
- 9.0 Movement
- 10.0 Fire Combat
- 11.0 Shock Assault
- 12.0 Combat Results
- 13.0 Combat Effectiveness and Rally
- 14.0 Special Units
- 15.0 Engineering
- 16.0 Night
- 17.0 Fatigue [Optional]
- Battle Book
Series Rule Book
1.0 Introduction
The Great Battles of the American Civil War (GBACW) system allows gamers to simulate American Civil War era battles on a regimental level, using mechanics that concentrate on the use, effects and personalities of battlefield command, as well as the tactical difficulty in maneuvering such large numbers of troops and bringing them to bear on the enemy.
Each game in the system uses this base set of Series Rules. However, each battle also contains additional rules, and typically some changes to the Series Rules, which allow us—and you—to simulate the specifics and peculiarities of each battle. Battle Book rules take precedence over Series Rules. Each game in the system has its own set of components.
2.0 Components and Terminology
2.1 The Game Maps
The maps depict the battlefields, covered by a hexagonal grid that is used to regulate movement and combat. The different types of terrain featured on the map, such as Woods, Streams, Roads, etc., are explained in these rules.
2.2 Counters
Three types of counters are in the game: combat units, leaders, and informational markers.
2.21 Combat Units. Combat Counters are infantry, cavalry, or artillery. In addition, cavalry may have two types of counters: mounted and dismounted. Each combat unit is rated for Weapon Type, and, reading across the bottom of the counter, Combat Strength (Fire Strength for Artillery), Cohesion Rating, and Movement Allowance. Artillery Combat Strengths are bracketed to show they are used for Fire only.
Each counter also shows the unit's parent organization, usually its brigade, division, and corps.
The individual units are color-coded so that they can be identified by brigade. The color of the top band identifies the division to which that unit belongs; the colored Cohesion box identifies the brigade within that division to which the unit belongs. The designation on the right side of the counter indicates the brigade/division/corps to which that unit belongs.
An Infantry Unit counter shows, front and back: Name, Formation, Weapon Type, Strength, Cohesion, and Movement Allowance. An Artillery Unit counter shows the same, with bracketed Strength used for Fire only.
The reverse of all combat units is their Disordered side, indicated by a disorder icon (or a stripe in Gringo! and its expansions). The values and ratings for Disordered units are lower, except for the Combat Strength, which remains the same. Artillery values remain the same in Gringo!, Churubusco, and Battles with the Gringos. Artillery Movement Allowance remains the same in Twin Peaks, Death Valley, and Into the Woods.
Horse Artillery Movement Allowance is printed in yellow with a black outline as a reminder.
2.22 Leaders. There are four levels of leaders: brigadiers (AKA brigade leader), division leaders, corps commanders, and army commanders [4.1].
- An Army Commander counter shows Name, Rank, Initiative Rating, and Command Range.
- A Corps Commander counter shows Name, Rank, Efficiency Rating, and Command Range.
- A Division Leader counter shows Name, Rank, Brigade Coordination, Command Range, and Activation Rating.
- A Brigade or Regiment Leader counter shows Name, Rank, Action Profile, Command Range, and Orders Rating.
2.23 Activation Markers (AM). These markers (usually three or four for each division) represent the mechanic the game uses to determine who goes, and when [see 5.0].
2.24 Informational Markers. These include corps Efficiency Markers (EMs), Orders markers, Step Loss markers to record combat losses, Extended Line markers, markers related to special events, and other similar indicators of status. Use of markers is explained throughout the rules.
2.3 Charts and Tables
The game provides several charts and tables, all used to resolve actions and/or list applied effects. These are discussed throughout the rules in detail.
2.4 Game Scale
2.41 Unit Scale. Most infantry units are regiments, but some units called battalions are included. Cavalry is also by regiment, although many cavalry regiments are divided into two or even three battalions.
Artillery units are mostly batteries (usually of four to six guns each); however, where the guns within the battery were not uniform in caliber, each gun type is represented by a "section." In some games, same caliber guns within a battery may also be divided into sections. Each infantry or cavalry combat Strength Point represents 50 men, and each artillery Strength Point is one gun.
2.42 Map Scale. See the individual game's Battle Book.
2.43 Time Scale. Each turn encompasses about one hour of real time. The game uses a military (0100-2400) clock. For example, 1600 is four o'clock in the afternoon. Exception: Turns in Twin Peaks are 45 minutes, and Into The Woods uses 12 hour standard time.
2.5 The Die
The game includes one ten-sided die that is used to resolve certain game functions. The 0 is read as zero, not 10.
2.6 The Universal Disorder Die Roll
During play, you will often perform a Universal Disorder Die roll (UDD) to determine the outcome of certain situations. When a unit is required to undergo a UDD, the owning player rolls one die and compares the result to that unit's Cohesion Rating:
- If the result is the same as or lower than the unit's Cohesion Rating, the unit passes, usually without penalty.
- If the result is higher than the unit's Cohesion Rating, the unit fails, and a penalty usually applies.
Note: UDDs are not actions [3.0 III/C/3]
2.7 Terminology
The following words, abbreviations and phrases are used throughout the rules.
- Activation: The game mechanic whereby the player determines which of his units is going to undertake movement, fire, etc.
- Advance: Occupying an enemy hex vacated due to Fire or Shock. Advance is distinguished from Movement, but affected by terrain, particularly when the advancing unit may Advance beyond the vacated hex [11.46, 11.47, 12.6].
- AM (Activation Marker): A chit (one to four for each division) placed in the AM Pool and used in the Activation mechanic.
- AM Pool: An opaque container used to hold AMs and other markers for both players.
- Base Elevation: The actual elevation of the ground in the hex irrespective of other terrain such as Woods or Towns.
- Charge: A Charge is a form of Shock combat in which movement creates much of the effect. There are two types of Charge: Infantry [11.21] and Cavalry [11.5].
- CI (Combat Ineffective): A term referring to a formation severely degraded by casualties and disorganization [13.2, 13.3].
- Cohesion Rating: The measure of a combat unit's morale, training, regimental-level command, equipment, and esprit de corps, all of which affect how well that unit can fight and what happens to it after taking losses.
- Command: A group of units commanded by a leader. This can be a brigade, a division, or a corps.
- Commander: A term for the corps and Overall Commanders.
- Command Range: The maximum distance: 1) a combat unit may be from its leader to be In Command, or 2) a subordinate leader can be from his superior to be in the Chain of Command [4.15].
- Disordered: A loss of unit cohesion—flip the counter to its reverse (Disordered) side and use those values.
- DRM: Die Roll Modifier, a numerical adjustment to whatever die roll is being undertaken.
- Efficiency: A game mechanic that determines how often during a single turn the divisions in a corps can be activated.
- EM: Efficiency Marker [5.0, 5.21].
- Fire: The use of small arms and cannon to inflict casualties on the enemy.
- Fire Arc: Those hexes into which a unit can fire [7.34, 10.16].
- Green: New, untried units [14.1].
- Initiative: Gives the designated player a choice of which AM to start a turn with, before AMs are drawn.
- Leader: A term for all leaders in the game, but also used for division and brigade leaders when contrasting them with corps and army commanders.
2.8 Questions?
For ongoing online support of this game, the GBACW Facebook Group has grown into a major resource, with over 1800 members, including a number of GBACW designers and developers.
The GBACW design team can also be found, along with most of the rest of the GMT designers and developers, on Consimworld's discussion boards, at www.consimworld.com. We heartily recommend this site to anyone interested in wargaming.
3.0 Sequence of Play
The Sequence of Play is the order in which you perform the functions the rules describe.
General Overview of Play: After determining Efficiency, and giving Orders to eligible brigades, the player with the Initiative (determined by die roll at the start of the turn) chooses which division he wants activated to start the turn. In the Activation Phase, brigades may change Orders and units Move, Fire, Shock, etc., based on their Orders. After the Initiative Player undertakes actions with his chosen command, commands are then activated by blindly drawing an AM from the AM Pool. This continues until all AMs have been drawn. After the Activation Phase, some housekeeping steps are performed, and the turn ends.
The Sequence of Play
I. Initiative Segment
Players roll a die to determine who has the Initiative for that turn [5.1].
II. Orders Segment
A. Determine Chain of Command Phase. Determine if division leaders, brigade leaders, and individual units are within their Chain of Command [4.2].
B. Activation Efficiency Determination Phase. Each player picks Efficiency Markers to determine the Efficiency of each of his corps. He uses this Efficiency to see how many AMs the divisions of that corps receive that turn [5.2 and 5.4].
C. Division Orders Phase. Players with a Chain of Command from brigade leaders to corps commanders may change the Orders of any brigade in that chain.
D. Reinforcement Orders Phase. Give Orders to all reinforcements scheduled to arrive that turn.
E. Reserve Placement Phase. Commands may be placed In Reserve [6.3].
F. Engineering Phase. Place build markers to indicate Breastwork construction.
III. Activation Segment
A. Initiative Activation Choice. The player with the Initiative chooses which AM he will activate to start the turn.
B. AM Pool Placement. All AMs available from II/B for both sides, except the one selected for the Initiative Activation [3.0 III/A], are now placed in the Pool (an opaque container).
C. Activation. The command selected in III/A activates first. Thereafter, either player draws an AM from the Pool. The AM drawn determines which command is now active and able to undertake various actions. An active command may do the following:
- CHANGE ORDERS PHASE. The player may attempt to change the Orders of activated brigade leaders by die roll, using the Brigade Orders Change Table.
- BRIGADE COORDINATION PHASE. The player may attempt to activate all brigades in the division simultaneously by die roll using the Brigade Coordination Table.
- ACTION PHASE. Each unit in an activated brigade may undertake one of the two actions below if not assigned to Construction, or it may do nothing.
- Move and/or Fire; or
- Resupply Ammo [Optional for small arms units] and Rally Disordered units.
Eligible units may Shock after the brigade's units have undertaken all desired actions. Each brigade in that division completes all actions before the next brigade goes. (Exception: Brigade Coordination.)
When the selected division has finished, one of the players blindly draws a new AM from the AM Pool. If none remain, go to IV.
IV. End of Turn Segment
A. Commander Movement Phase. All corps and Overall Commanders may move. This is the only time in the turn they may voluntarily do so.
B. Replacement/Recovery Phase.
- Replace any eliminated leaders.
- Undertake In-Reserve activities [6.35] and automatic Rally or Fatigue reduction [17.42].
- Remove commands from Reserve status, if so desired. Assign Advance or Attack orders to commands removed from Reserve.
- Eliminate all artillery with an Abandoned 2 marker.
- Flip Abandoned guns markers from Abandoned 1 to Abandoned 2.
- Replace Construction markers with Breastwork markers if construction is finished.
C. Combat Effectiveness Phase. Players check to see if any brigades or divisions are Combat Ineffective.
D. Turn Record Phase. Advance the Turn marker one space on the Turn Track and begin a new turn. If the new turn begins past 0000, move the Day marker to the next day.
PLAY NOTE: Phases II/C, II/D, and IV/A normally can be done simultaneously. But, if it matters, the Initiative Player goes first.
4.0 The Command System
There are four levels of command in most GBACW games: army, corps, division, and brigade. Each command is represented by a leader (brigade/division) or commander (corps/army). One of the premises of the game system is that units operate better when communications are maintained, in the form of a Chain of Command.
4.1 Commanders and Leaders
4.11 Overall (Army) Commanders (OC) are the generals in command of the battle (e.g., at Gettysburg, Lee and Meade). They have four stars on their counters. An OC has two ratings on his counter: Initiative Rating and Command Range.
INITIATIVE RATING: This rating is used to: 1) Affect the Initiative Die Roll; and 2) Increase the corps Efficiency of that number of corps commanders, if eligible [5.22].
COMMAND RANGE [4.15].
4.12 Corps Commanders have three stars on their counters. A corps commander has the following ratings on his counter: Efficiency Rating and Command Range.
EFFICIENCY RATING: A Modifier (e.g., +1) used to adjust division Efficiency [5.23].
COMMAND RANGE [4.15].
4.13 Division Leaders have two stars on their counters. They command all brigade leaders in their division, and they are subordinate to their corps commander. They have the following ratings: Brigade Coordination, Command Range, and Activation Rating.
BRIGADE COORDINATION [5.34].
COMMAND RANGE [4.15].
ACTIVATION RATING: A modifier (e.g., +1) used to adjust the number of Activations that division may undertake that turn [5.23].
4.14 Brigade Leaders are the leaders directly commanding combat units. They have one star on their counters. Brigade leaders have the following ratings: Action Profile, Command Range, and Orders Rating.
ACTION PROFILE: (A = Aggressive, N = Normal, C = Cautious, U = Unreliable) This rating is used when a "Loose Cannon" result occurs while changing Orders [see 6.24]. An Aggressive leader also may provide a DRM in Shock.
COMMAND RANGE [4.15].
ORDERS RATING: A DRM used whenever the brigade wishes to change Orders, as needed [6.21].
4.15 Command Range. Command Range is measured in leader MPs and is always counted from the superior to the subordinate leader/unit, including the subordinate's hex but not the superior's hex. Command Range:
- May not be traced into/through a hex/hexside impassable for Leader Movement; and
- May not be traced through a hex adjacent to an enemy unit unless occupied by a friendly combat unit. This applies to all Command Ranges. See 5.36 for the effects of being Out of Command.
- May be extended through adjacent friendly units [4.22].
If a combat unit is adjacent to its leader it is automatically In Command, regardless of the intervening terrain hexside.
4.16 Brigade and Division Leader Movement Allowances. Leaders do not have their MA printed on the counter; it is ten (10) for all brigade and division leaders [9.33].
4.17 Corps and Overall Commander Movement Allowances. The MA for these leaders is 40. They may move only in the Commander Movement Phase, and if they use more than 10 MPs, their abilities are reduced in the upcoming turn [9.32].
4.18 Replacement Leaders and Commanders. The reverse side of a leader counter usually shows the leader who replaces him if he becomes a casualty. See 12.74.
4.2 Chain of Command
4.21 The Chain of Command can use up to four levels of command, from the Overall Commander (OC) to corps commanders to division leaders to brigade leaders.
PLAY NOTE: While the OC is part of the chain, he has little effect on play; you are the OC.
4.22 The Chain of Command is maintained through the Command Range of the leaders.
EXAMPLE: If a brigade leader is 3 MPs from his division leader (Command Range of 5), who is 5 MPs from his corps commander (Command Range of 6), then the Chain of Command is complete from that corps to that brigade.
Exception: If a combat unit is outside its brigade leader's Command Range but adjacent to a unit from the same brigade that is within Command Range, it is considered to be In Command. Likewise, if a combat unit is part of a chain of units, and at least one unit in the chain is in Command Range, then all units in that chain are In Command. Each unit in the chain must belong to the same brigade and must be adjacent to at least one other unit in its brigade. The same applies to units directly subordinate to a division or higher leader (i.e., if the unit is adjacent to another unit that is within range of their direct leader, it too is In Command).
4.23 Command status for Activation purposes and Engineering eligibility [15.11] is only checked during Step II/A of the Sequence of Play. Command status for orders purposes is checked during Step II/A and at the time of a Brigade Orders Change [6.2]. Units Out of Command at these times do not change orders. However, such units automatically change to the orders of their brigade if they are within Command Range when that brigade next activates.
PLAY NOTE: As units/commands under March Orders may move the equivalent of four Activations, they are, in effect, always considered to be In Command for Activation purposes [5.35].
4.3 Artillery Command
4.31 Artillery brigade leaders are treated as brigade leaders for purposes of Activation. All batteries assigned to that artillery brigadier may Move, Fire, etc., when activated.
4.32 Artillery assigned at division level may be attached to brigades in that division, one battery per brigade. Assign artillery during the Division Orders Phase [3.0 II/C] at the start of a turn. Command Range does not matter for such an assignment, but will for the number of times the artillery activates [5.36].
4.33 Certain battles have artillery commanders (corps-level officers) and large "Reserve" formations. The rules for their use are found in the individual Battle Books.
5.0 The Activation System
The Activation system is based on Efficiency—the ability of the cardboard units to do what the player wants them to do. Efficiency is a product of Chain of Command and leadership ability. The Efficiency mechanic serves two other play and simulation functions: it slows down the pace of a gamed battle to something approaching reality a bit more, and it provides just a touch of the fog of war.
General Overview: Players determine the Efficiency of their corps by blindly drawing an Efficiency Marker for each corps that has units on the map from the Pool of available Efficiency Markers. The number on that marker represents the number of Activations he may provide for each of his subordinate divisions. For each division, that number may be further adjusted by the corps commander's Efficiency Rating, the Activation Rating of the individual division leader, the Chain of Command, and Combat Effectiveness.
To represent a division's Activation Efficiency, both players then place AMs equal to that Efficiency, for each division, in the AM Pool for blind draw. When a division is activated by AM, each of its brigades may then undertake actions.
5.1 Turn Initiative
5.11 To determine which player will have the Initiative each turn, each player rolls one die, to which the following adjustments (DRMs) may be made:
- The player who had the Initiative for the previous turn adds one (+1) to his roll.
- The player may add his OC's Initiative Rating to the roll if the OC did not use more than 10 MPs in the Commander Movement Phase and has at least one of his corps commanders in his range.
Exception: Some scenarios state which player automatically has the Initiative for the first turn of the game.
5.12 The player with the higher total has the Initiative. If the modified rolls are tied, no one has the Initiative. Place all AMs in the Pool and start drawing.
5.13 The player with the Initiative chooses which of his divisions will be used first in the Activation Phase. Remember to set aside one of that division's AMs; it does not go into the Pool. The March AM of the Initiative Player's side may also be chosen as the first AM. Also, the player with the Initiative changes Orders, gives Reinforcement Orders, and moves commanders before the other player. If neither player has Initiative, apply the above to the player who last had Initiative.
5.2 Efficiency
Efficiency determines how many times the units in a corps may be activated in a turn.
DESIGN NOTE: Smaller battles, especially those that do not have corps, use a similar system to this but focus more on divisions.
5.21 In the Activation Efficiency Determination Phase [II.B], each player places his EMs (the ones numbered 1 through 4) into an opaque cup (the Efficiency Pool). The player then randomly draws an Efficiency Marker for each corps which has any units on the map or entering that turn as Reinforcements. The drawing player must announce for which corps he is drawing and assign the Efficiency Marker to that corps on the Efficiency/Activation Chart.
PLAY NOTE: On the game map or on a separate display there is a series of boxes for each corps commander (the Efficiency/Activation Charts), so that the drawn Efficiency Marker may be placed in it, face down, in case "A Matter of Honor" arises.
5.22 A corps' Efficiency may be adjusted by the OC's Initiative Rating. If an on-map corps commander is within Command Range of his OC, and the OC has an Initiative Rating greater than zero, the OC may increase that number of corps commanders' Efficiency by +1 (each). Thus, an Initiative Rating of +2 (quite rare in this series), would allow an OC to increase two in-range corps' Efficiency by one each. A corps' Efficiency may never end up below one or above four.
DESIGN NOTE: The number and ratings of the EMs for each battle differ and they are not truly linear. They reflect a bell curve of capabilities, possibly adjusted for different battles.
5.23 Each division in a corps uses its parent corps' Efficiency (regardless of where it is on the map) to determine the number of Activations it may undertake that turn. That corps' Efficiency [5.22] may be adjusted as follows, for each division:
- If a division leader is within Command Range of his corps commander, the corps commander's Efficiency Rating is applied as follows: a. When the corps commander's Efficiency Rating is +2, the Activation Efficiency of one In Command Division may be increased by two, or the Activation Efficiencies of two In Command Divisions may be increased by one each. b. If the corps commander's Efficiency Rating is +1, he may increase the Activation Efficiency of any one, In Command division leader by one. c. If the corps commander's Efficiency Rating is –1, the corps Efficiency for that turn is reduced by one for all In Command divisions [see #3, below]. d. If the corps commander's Efficiency Rating is 0, there is no effect.
- If a division leader is not within Command Range of his corps commander, subtract one from that number (for that division only). This applies if a division leader and/or corps commander is/are not on the map. Exception: Entering Reinforcements [9.71].
- The division leader's Activation Rating, whether positive or negative, adjusts the number of Activations that the division may undertake that turn [4.13]. If the leader is off map, do not apply the adjustment. Exception: Entering Reinforcements [9.71].
- Division Ineffective Status [13.32].
EXAMPLE: II Corps draws an Efficiency of 3 for that turn. The II Corps commander has a +1 CE Rating. There are three divisions: 1/II and 2/II's leaders have Activation Ratings of 0; The 3/II leader has an Activation Rating of +1. Both 2/II and 3/II are within the corps commander's range; 1/II is not. The following division AMs are used this turn:
- 1/II: 2 AMs. The division leader is out of range (–1).
- 2/II: 4 AMs. The corps commander gives him the +1 [1b above].
- 3/II: 4 AMs. His Activation Rating gives him a +1.
5.24 The result of the above is the number of Activations [5.3] the brigades in that division may undertake that turn, represented by AMs. For each division, take that number of AMs and place them in the AM Pool. A division's number of AMs may never be below one or above four.
5.25 A Division whose division leader is not within Command Range of that division's corps commander may never use more than 3 AMs in a turn, although units under March Orders may move the equivalent of four activations regardless of their command status.
5.26 A brigade whose brigade leader starts his turn out of the Command Range of his division leader must skip one division AM in that turn. The choice of which AM not to use (for that brigade) is up to the player.
EXAMPLE: Division 1/I gets 3 AMs for a turn, but 1/1/I is Out of Command Range. As the turn progresses, the player decides, as the second 1/I AM is drawn, not to "activate" the 1/1/I with that AM.
5.27 Unless specifically stated otherwise in the rules for a given battle, a brigade always activates at least once per turn.
5.28 The following are instances when certain units do not use the marker-induced Activation result:
- MARCH ORDER UNITS: Units (be they corps, division, brigade, or individual) entering the map as reinforcements under March Orders, or have been given March Orders to move, have a maximum possible Activation Level of four. Moreover, units under March Orders do not use the divisional AM [5.35].
Exception: On-map Commands given March Orders during the Division Orders Phase use the March AM, but in the initial turn of that March receive a number of AM equivalents equal to the AMs allotted for that division. Thus, such a command may be limited to less than four Activation equivalents that turn, with a minimum of one [5.24].
- SPECIFIC AM: Some reinforcements arrive with a specific number of Activations available for that turn.
EXAMPLE: A brigade that arrives as a reinforcement with an Activation Efficiency of 1 may be activated only once that turn, regardless of how many AM its division has.
5.3 Activation
5.31 The player with the Initiative selects the AM he will use to start the turn. All other AMs are randomly drawn from the Pool (an opaque cup or similar container). Each turn, the Pool will start with:
- All of the AMs available that turn to each player (or fewer, if a player so elects),
- The March AM for each player (if he has units under March Orders at the time),
- The Random Event marker (if the game uses that rule), and
- Any Battle-specific AMs (e.g., Artillery leaders).
5.32 When a division's AM is drawn, all that division's brigades—regardless where they are on the map—may be activated. Each brigade activates individually, completing all actions before the next brigade is activated (Exceptions: Brigade Coordination [5.34] and Out of Command Brigades [5.26, 5.36]).
EXAMPLE: The 1/I Union Division has three brigades: 1/1/I, 2/1/I, and 3/1/I. The Union player activates 2/1/I first, completing all of its actions. He then activates 1/1/I, etc.
5.33 Brigade Activation. When a brigade is activated, all combat units—regardless of their location—may do what the Orders for the units in that brigade allow [4.23, 6.1]. The brigade may include as a combat unit any one artillery battery (all sections) that is from that division.
EXAMPLE: A brigade under Advance Orders has four regiments. The player may now Rally one of its Disordered units, construct Breastworks with another, and Move or Fire with the other two.
5.34 Brigade Coordination. Division leaders are rated for their ability to coordinate and combine the actions of more than one of their infantry or cavalry brigades during any one action (a DRM ranging from +0 to +3). Any divisions attempting this must have their brigade leaders within the division leader's Command Range; brigades outside that range are not eligible for coordination. The player wishing to combine brigades into a single Activation rolls the die, adjusting it by adding the division leader's Coordination Rating. The possible results are:
- CONFUSION: No units of the brigades whose leaders are within the division leader's Command Range may undertake any move or combat actions that AM. Leader Movement, Rally, Ammunition Resupply, and one-vertex Facing changes are allowed.
- FAIL: No penalty; brigades move individually: No coordination is possible, but there is no penalty for trying.
- MAY COORDINATE # BRIGADES: The player may undertake actions with that number of In Command brigades from that division as if they were one brigade.
- MAY COORDINATE ALL BRIGADES IN COMMAND: All eligible brigades may undertake actions as if they were one brigade.
PLAY NOTE: Coordination does not override stacking restrictions [see 8.12], nor does Confusion override Loose Cannon results of Brigade Orders Change [see 6.24].
Brigade Coordination Table
| Adjusted Die Roll | Result |
|---|---|
| 0-2 | Confusion |
| 3-6 | Fail |
| 7-9 | May Coordinate 2 Brigades |
| 10, 11 | May Coordinate 3 Brigades |
| 12 | All |
DRM: + Division Leader's Coordination Rating
EXAMPLE: Smith's Division's AM is drawn. All three of Smith's brigades are within his range, and the player wants to launch a division-sized attack with all of his brigades at once, rather than piecemeal. Smith has a Coordination Rating of 2. He rolls the die, getting a 6. The player may activate two of Smith's brigades (his choice) at the same time, as if they were one. The other activates separately.
PLAY NOTE: The Coordination Ratings usually are not very high (lots of 0's).
5.35 March Order Activation. Units under March Orders do not move when their division AM is drawn; they move only when their (one) March AM is drawn. When a player's March AM is drawn, he may move all units under March Orders the equivalent of any number of Activations, from one to four (but see the Fatigue rules [17.22]). Each unit completes its move before the next one starts.
Exception 1: Entering reinforcements with an AM # are limited to that number of Activations [9.74].
Exception 2: see 5.28.
5.36 Out of Command. Being Out of Command affects units depending on the nature of that unit or command.
- DIVISION LEADERS: May not receive Orders from their corps commander, which means they may not transmit any Orders to their brigades in the II/C Phase. The division has one fewer AM placed in the AM Pool [5.23 #2].
- BRIGADE LEADERS: May not receive Orders from their division leader in the II/C Phase. They must roll a die in the III/C/1 Phase, if they wish to change Orders. And, they activate one fewer times than the division [5.26].
- INDIVIDUAL UNITS: Out of Command combat units use the last Order received while In Command. They also activate one fewer times than the division, with a minimum of one, like Out of Command brigades.
PLAY NOTE: Units, brigades, or divisions under March Orders and Out of Command cannot change orders during the II/C Phase but suffer no other penalty.
5.4 Efficiency Transfer
5.41 In the Activation Efficiency Phase [3.0 II/B], after all Efficiency and Activation Levels have been determined for that turn, a player may transfer focus—in the form of an increased Activation Level—to a selected division.
5.42 Only divisions that can trace a Chain of Command back to the Overall Commander may benefit by, or be used for, Transfer.
5.43 A player may add one to a division's number of Activations by lowering another division's by two, or lowering two other divisions' by one each. A division may never have its Activation Level reduced to 0, nor increased above 4, by Efficiency Transfer.
5.44 A Player may undertake only one Efficiency Transfer per turn.
EXAMPLE: The corps Efficiency for XV Corps is 2. All of XV Corps' division leaders are within range, and 2/XV has a +1 division leader. This means that, normally, 1/XV and 3/XV would get two AMs, and 2/XV three AMs. However, the player wants to undertake a big push with 2/XV, so he reduces 1/XV and 3/XV to one AM each, and gives an extra AM to 2/XV, so that it has four.
5.5 Ending the Turn
The Activation Segment is finished when no AMs remain to be drawn from the Pool.
6.0 The Orders System
General Premise: All brigades operate under Orders. Orders determine the parameters under which the combat units under those Orders may Move, Fire, Rally, etc. The ability to give and change Orders has nothing to do with the Efficiency or AM mechanics; it has everything to do with Chain of Command and brigadier leadership ability.
6.1 The Orders
6.11 The three types of Orders are March, Advance, and Attack. A brigade (and the units therein) must be under one of these three Orders at any given time. If a command has no such marker, it is considered to be under Orders to Advance. Death Valley and later games include a limited number of Advance markers used to designate units that were Out of Command when their brigades switched from Advance to March or Attack.
Orders Comparison Chart
| Action | March Orders | Advance Orders | Attack Orders |
|---|---|---|---|
| Road/Pike Movement Rate | ½ MP | 1 MP | NA |
| Move Adjacent to enemy unit? | No (keep 4 hexes away) | No (except enemy artillery) | Yes |
| Activation | March AM | normal | normal |
| Infantry Stacking | 7 SPs | 15 SPs | 15 SPs |
| Cavalry Stacking | 4 SPs | 7 SPs | 7 SPs |
| Construction? | No | Yes | No |
| May Fire? | No | Yes | Yes |
| May Move and Fire? | No | No | Yes |
| May Shock? | No | Yes | Yes |
6.12 Orders can be changed in three different phases:
- DURING THE DIVISION ORDERS PHASE [3.0 II/C]: Any division leader that is within Command Range of his corps commander may change the Orders of any or all of his brigades if the brigadier is within his range. Each brigade may have different Orders; no die roll is necessary—simply change the Orders.
- DURING THE CHANGE ORDERS PHASE OF THE ACTIVATION SEGMENT [3.0 III/C/1]: Before any brigade is activated, the player may, if he wishes, try to change brigade orders by rolling a die [6.2].
- DURING THE REPLACEMENT/RECOVERY PHASE [3.0 IV/B]: Commands removed from Reserve status may be assigned Attack or Advance orders.
6.13 March Orders. A command or unit under March Orders:
- Uses March Movement Rates [9.22].
- Moves only when the March Order AM is drawn.
- May not move into any hex that is within four hexes and LOS of an enemy combat unit. Regardless of LOS, no such unit may move adjacent to an enemy unit. Units under March Orders that start their Activation within four hexes and LOS of an enemy combat unit may not move. [see also 6.25 and 6.26]
- Must use Extended Column [8.5] where applicable.
- Must obey the Stacking limits for March Orders [8.12].
- May not Fire—not even Reaction Fire.
- Suffers a Pre-Shock Cohesion Check DRM of +2 if shock attacked.
- May not Rally or Resupply.
- May not Retreat Before Shock, Advance after Shock, or Continue Shock.
- May not undertake any Construction.
- May not use Reaction Refusal/Facing Change [9.61] or Reaction Movement [9.63].
PLAY NOTE: In essence, the only thing units under March Orders can do is move.
6.14 An on-map Command may be given March Orders only in the Division Orders Phase, and only if no unit in that command is currently within four hexes and LOS of an enemy combat unit. Entering reinforcements may be assigned March Orders during the Reinforcement Orders phase, unless the Battle Book specifies otherwise.
6.15 Advance Orders. An activated combat unit under Advance Orders:
- May Move or Fire, not both (changing Facing one vertex to fire is not considered movement).
- If moving, uses Advance Movement [9.23].
- May not move into the hexes adjacent to an enemy combat unit other than artillery. (Exception: Bridge/Ford [9.23].) If it starts the Shock sub-phase adjacent to an enemy combat unit, it may Shock Attack if otherwise eligible.
- If firing as a phasing unit, it may gain Prepared Fire bonus.
- May use Prepared Fire when undertaking Non-Phasing Fire.
- May undertake Construction.
- Must obey the Stacking Limits for Advance Orders.
- May Retreat Before Shock.
- May Refuse [7.3].
6.16 Attack Orders. An activated combat unit under Attack Orders:
- Uses Attack Movement restrictions [9.24].
- May Move and/or Fire.
- If Firing, gains the Prepared Fire Bonus if phasing (but not moving) or when using Non-Phasing Fire [10.4].
- May be eligible for the Infantry Charge bonus if moving and not firing [11.21].
- If mounted, cavalry may Charge.
- May Refuse [7.3].
- May not undertake Construction.
- May not Retreat Before Shock.
- Must obey the Stacking Limits for Attack Orders.
6.17 Assigned Orders. Initial Deployment instructions in the Battle Books often assign Orders to commands that start the game on the map. Similarly, the Battle Book may assign orders to Reinforcements for their turn of entry. Where orders are not assigned, the player assigns them.
6.18 Artillery and Orders. Artillery is never under Attack Orders. See 9.52, 10.61 and 11.33 for exceptions when Artillery is under Advance Orders.
6.19 Leaders and Orders. Leaders/commanders are never under Orders. Only combat units are under Orders. However, leaders whose commands are under March Orders activate when the March AM is drawn for that side.
6.2 Brigade Orders Change
6.21 When an AM is drawn that activates an on-map brigade (whether it be a division AM or March AM), each brigade so activated may attempt to change its Orders [3.0 III/C/1], provided its leader is also on map. This is done before any units of any brigade or any leaders activating under this AM undertake any actions. To attempt to change the Orders of an Activated brigade, the player rolls the die, adjusts it by the Brigadier's Orders Rating DRM, and consults the Orders Change Table [6.23].
Brigade Orders Change applies only to units of the brigade within the brigadier's Command Range at the start of the activation [4.23]. In the rules that follow, such units are referred to as "in command units".
PLAY NOTE: Orders may be changed automatically only in the Division Orders Phase [6.12].
6.22 If the brigadier is stacked with his division leader there is a +1 DRM. If his corps and/or Overall Commander is stacked with the brigadier there is a +2 DRM. Both DRMs may apply.
6.23 The Orders Change Table
| Die Roll | Result |
|---|---|
| 1 or Less | Retain and Stand |
| 2 or 3 | Retain |
| 4 | Loose Cannon |
| 5 | Change and Stand |
| 6 or More | Change |
Key:
- Retain: Brigade keeps the Orders it has.
- Change: Brigade may change to Attack or Advance Orders.
- Stand: In Command units of the brigade may not move (i.e., expend MPs) this Action Phase. A Stand result does not prohibit Leader Movement or a unit from firing, changing facing to fire, engaging in shock, rallying, resupplying, or engaging in construction. However, if any unit performs an action other than Rally, Resupply, or a Facing change costing no MPs, the Activation counts toward Fatigue. Note: Cavalry units may not Mount or Dismount [14.22].
- Loose Cannon: See 6.24 below.
EXAMPLE: A 2nd Division AM has been selected. General Hackenbush, in command of the division's 1st Brigade, wants to change his Orders from Advance to Attack. His division leader was too far away to do this in the Division Orders Phase, so Hack must now roll a die to effect the change. His Orders Rating DRM, though, is a –1. He rolls the die, getting a 4, which his rating lowers to 3. Hack's Brigade retains its Orders for that Activation.
6.24 Loose Cannon. If the result is Loose Cannon, the player who was trying to change Orders now consults the Action Profile of the brigadier in question [Aggressive (A), Normal (N), Cautious (C), or Unreliable (U)] and follows the instructions below.
If Aggressive, the phasing player does one of the following:
- If any In Command unit in the brigade is within 3 MPs (5 MPs if mounted cavalry) of a hex adjacent to an enemy combat unit, the player places that brigade under Attack Orders and launches a Charge [11.21] (or shocks without firing if mounted cavalry) with as many of the In Command units in that brigade as possible. Choice of targets is otherwise up to the player. Green units are still required to pass their Green Attacker Commitment Check [11.36]. Any In Command unit (including a Disordered unit) unable to move adjacent to the enemy must move as far as it can toward the nearest enemy unit and may not fire. Units that start adjacent to enemy units shock those units without a Charge bonus, but may not fire prior to shock. Exception: see 6.25.
- If no In Command unit in the brigade is within 3 MPs (5 MPs if mounted cavalry) of a hex adjacent to an enemy unit, place the brigade under Advance Orders and move all its In Command units as far as possible towards the nearest enemy units.
If Normal, the brigade retains its Orders.
If Cautious, the player retreats each In Command non-artillery unit in the brigade one hex, after which he places the brigade under Advance Orders. The In Command units may perform no other actions during that Activation.
If Unreliable, roll the die, consult the following table, and treat the brigadier in the appropriate manner listed above:
| Die Roll | Result |
|---|---|
| 0-2 | Aggressive |
| 3-6 | Normal |
| 7-9 | Cautious |
6.25 A brigade under March Orders may attempt to Change Orders, as per III/C/1, to any other Orders when the March AM is drawn. If successful, the brigade remains in place and its March Orders are replaced by Advance or Attack Orders. Brigades that change Orders use their division AMs for the rest of the turn, if any remain to be drawn. Regiments not currently In Command [see 4.23] retain their March Orders and may move without penalty, but cannot activate under any remaining division AMs [5.35]. A Change and Stand result applies to the first Division AM drawn. If none remain to be drawn, a Change and Stand has no effect on the next turn. A Retain and Stand applies to the current March AM. Exception: Treat a Loose Cannon rolled by an Aggressive brigadier as a Retain.
6.26 A brigade that is under March Orders that is either Shock attacked or undergoes any fire except artillery Shot/Shell is, at the end of that enemy brigade Activation, immediately placed under Advance Orders. Unless the March AM has already been drawn, the brigade activates for the rest of the turn when its Division AMs are drawn. Combat does not affect other Orders.
6.3 Reserve
6.31 Any command (brigade, division, or corps) may be placed In Reserve, regardless of its Orders, if it qualifies, as below:
- All units must be out of LOS of any enemy unit and at least five hexes from the nearest enemy combat unit; or
- All units are at least ten hexes away from the nearest enemy combat unit (there are no LOS requirements for this qualification).
- If it is a Night Turn, the minimum distance is reduced to five hexes.
6.32 Commands are placed In Reserve in the Reserve Placement Phase at the beginning of the turn. Commands In Reserve pay no attention to drawn AMs. They may not undertake any actions available to non-Reserve units.
6.33 If all (remaining) units in a command have been Routed [12.5], the command may be put In Reserve by having the brigade leader follow 6.31. The leader loses his In Reserve status if alone in a hex and an enemy unit moves adjacent [see also 12.73].
6.34 Reserve status is removed:
- VOLUNTARILY: At the end of the turn, in the Recovery Phase.
- INVOLUNTARILY: If any unit in the brigade is designated as a target of Shock or of Fire at a range of four hexes or less, all units of the brigade immediately Disorder (unless already Disordered) and adopt Advance Orders. The shock or fire is then conducted normally. The brigade may activate when its division AMs are drawn (if any remain).
6.35 During the Replacement/Recovery Phase, units from a command in Reserve may do the following, in the order listed:
- Reduce Fatigue [17.0] by two levels.
- Flip all Disordered [12.3] units to their normal side unless Collapsed.
- Attempt Straggler Recovery [16.2].
- Attempt to recover routed units [13.5].
- Fully resupply ammo (including small arms units if using 10.9).
- Change Orders to Attack or Advance Orders (no die roll needed; applies to all units regardless of command status).
7.0 Facing and Refusal
7.1 Facing
7.11 At the end of Movement, Advance, and Reaction Facing [9.61] each combat unit under Attack or Advance Orders must be faced towards a vertex (joint) of the hex it is in—not a hexside. All combat units under March Orders must be faced towards a hexside. The first unit to stop movement in a hex determines the facing for units that stack with it.
7.12 Facing determines a unit's front, flank, and rear.
7.13 A unit may Move, Fire and/or Shock only into its Front hexes.
7.2 Changing Facing
7.21 A unit may change facing without leaving the hex. A moving unit under Advance or Attack orders may change facing one vertex for each hex it starts in or enters at no cost in MPs. Any change of more than one vertex (per hex) costs 1 MP. Units under March Orders pay 1 MP for a change of more than one hexside (per hex) Exceptions: see 7.22 and 9.53. If changing 180° when stacked, invert the stacking order for all non-artillery units not exiting the hex during the current Activation, as the top unit is now the bottom unit, etc. When inverting, non-artillery units may choose to stack above or beneath artillery [see 8.44 for Extended Lines].
7.22 In addition to the above, units under Attack Orders, because of their very linear state, pay 1 MP per vertex when changing facing in a Woods hex. As an alternative to paying 3 MPs for changing three vertices, they may pay only 1 MP to change 180° [7.21].
7.23 Under certain circumstances a unit pays no MP cost to change facing:
- When changing to/from March Orders. Adjust facing at the time the new order takes effect, either during the Division Orders Phase or the Change Orders Phase [7.13].
- Pike/Road/Trail movement [9.45].
- Advance after combat [12.6].
- As a Reaction to enemy Movement or Fire [9.62].
- Changing one vertex to fire [10.32]. Exception: see 7.22.
- After Rally [13.41].
- An Extended Column may become an Extended Line when the unit's orders change from March to Advance or Attack, as long as the requirements for Extended Line are met. Vice versa is also true. There is no cost for changing facing in either case.
7.24 A phasing unit that starts movement adjacent to an enemy unit may change facing by (only) one vertex in that hex before exiting [9.53].
7.25 Units suffering certain combat results, or rallying from such results, have the following abilities and restrictions concerning changing facing:
- RETREAT: Unit maintains original facing; no change allowed.
- RALLY: A rallied unit may change facing one vertex upon being rallied [but see 13.41].
7.3 Refused Flanks
7.31 A unit may Refuse if it is either:
- At the end of a line, or
- In the center of a line with a friendly unit in one flank hex and another friendly unit in the opposite rear hex, or
- Not adjacent to any friendly unit.
This means that the end of the unit (or stack of units) bends backward, away from the line. Place a Refuse Right, or Refuse Left, as appropriate, on the unit so doing.
7.32 Only units under Attack or Advance Orders may Refuse. Exception: Units in Extended Column may not Refuse. In addition:
- It costs each unit in a stack 1 MP to Refuse. Units subsequently stacking with a Refused unit must spend an additional MP to enter the hex.
- A unit alone in a hex must have at least 2 SPs to refuse. If a refused unit alone in a hex falls below 2 SPs, immediately remove the marker at no MP cost.
- A unit may not Refuse in both directions. Exception: see 8.44.
- A unit may not Refuse if it is adjacent to an enemy unit. Exception: Reaction Refuse [9.61]. Treat parts of Extended Lines separately for purposes of this rule.
- A unit may not Refuse if it is in between (adjacent to) two, friendly-occupied (flank) hexes. If a friendly unit ends Movement, Retreat, Advance or Reaction Move in a unit's Refused flank, immediately remove the marker. If phasing and it has not yet moved, the stationary unit has 1 less MP than it otherwise would.
- A moving unit may not Refuse when stacking with a unit that is not Refused, unless the stationary unit exits the hex during the same Activation.
7.33 Each unit in a phasing stack pays 1 MP to leave Refused status. A unit must leave Refused Status to move or change facing. Any Reaction Movement, Withdrawal Movement, Advance, or Retreat similarly ends Refused status, but at no MP cost.
EXAMPLE: A 3-SP unit stacked on top with a 2-SP unit below it and an 8 SP on bottom could fire its 3 SPs through its normal frontal hexes. The 2-SP unit could fire 1 SP through its normal frontal hexes and the other through its Refused Frontal hex. The 8-SP unit could fire 2 SPs only through its Refused Frontal hex. A 2-SP unit under Attack Orders stacks with a refused 4-SP that has already fired. The 2-SP unit may not fire during this Activation. During its next Activation it would fire both its SPs through its Refused Frontal hex.
7.34 A Refused unit or stack has three Frontal hexes: the usual two Frontal hexes plus the third, Refused Frontal hex. The hexside adjacent to the Refused Front is now a Flank hexside. Refused units may fire into/through any or all of these frontal hexes, splitting their fire to do so. However, no more than half a stack's Fire Strength may fire into/through a Refused frontal hex, and, if Refused, no more than half may fire into/through its normal Frontal hexes. If the unit's/stack's SP is "odd," round down for the Refused Frontal hex; round up for the normal Frontal hexes. When the top unit in a refused stack has fewer SPs than the total eligible to fire into/through its normal Frontal hexes, the next unit(s) in the stack may also fire into/through the normal frontals up to the maximum SPs defined in the above paragraph. If the top unit cannot fire all its SPs into/through its normal Frontal hexes, it may fire the remainder into/through the Refused Frontal hex up to the maximum. If it cannot fire the maximum, the next unit(s) stacked below it may also fire into/through the Refused Frontal up to the maximum. Artillery consisting of multiple sections follows the above provisions, as if the sections were separate units.
Exception: A unit under Attack orders that stacks with one or more Refused units after any of the latter fire may not itself fire during that Activation.
Refused units/stacks may not shock defenders in the Refused Frontal hex.
EXAMPLES:
- A 7-SP unit on top could fire 4 SPs through its normal frontal hexes and 3 SPs through its Refused Frontal hex. Units stacked beneath it could not fire.
- A 5-SP unit stacked above a 3-SP unit could fire 4 SPs through its normal frontal hexes and 1 SP through its Refused Frontal hex. The 3-SP unit beneath it could fire 2 SPs only through its Refused Frontal hex.
- A battery with four TBs and two H12s is stacked above infantry. The TBs are stacked above the H12s. The four TBs may fire into/through the frontal hexes. The two H12s plus 1 SP of infantry may fire into/through the refused frontal. If the H12s had been stacked above the TBs, they plus two TBs could fire into/through the frontal hexes, while the other two TBs and 1 SP of infantry could fire into/through the refused frontal.
- A stack of two six-gun batteries refuses. The top battery may fire into/through the frontal hexes. The bottom battery fires into/through the refused frontal.
8.0 Stacking and Extension
Stacking refers to having more than one combat unit in a hex, a function more of tactical usage than how many men can be crammed into a space. Extension is just the opposite, in that it is concerned with the ability of a unit to increase its frontage.
8.1 Stacking Limits
8.11 Stacking limits apply at all times during the turn. Exceptions:
- Moving/retreating through units [8.22, 12.46]
- Cavalry mounting/dismounting prior to movement [14.22].
- Prior to movement for on-map units assigned March Orders [see 8.25].
There are no stacking limits for leaders or informational markers.
8.12 The stacking limits depend on the Orders applicable to the unit. Stacking also may vary according to the scale of the battle.
March Orders
- INFANTRY: May stack up to 7 SPs of infantry (as long as they are all from the same brigade). If an individual unit contains more than 7 SPs, the player must use Extended Column.
- CAVALRY: May stack up to four mounted cavalry SPs in a hex, as long as they are all from the same brigade. If an individual unit contains more than 4 SPs, the player must use Extended Column.
- ARTILLERY: Two batteries, regardless of the number of guns, or 12 guns from any number of batteries may occupy a hex.
There is no intermingling of unit types when in March Order; artillery may not stack with infantry, etc. Units under March Orders may not stack with units under other orders. Dismounted cavalry may not be assigned March Orders.
Advance or Attack Orders
- INFANTRY: May stack any units from the same brigade, up to a maximum of 15 SPs per hex, or any one unit regardless of strength. (Exception: Units in Extended Line/Column; see 8.44 and 8.5.) In addition, one battery or 6 guns from any number of batteries may stack with infantry. The artillery need not be part of the infantry's brigade.
- CAVALRY: 7 mounted SPs from the same brigade or one mounted unit regardless of strength. In addition, one battery or 6 guns from any number of batteries may stack with cavalry. The artillery need not be part of the cavalry's brigade.
- ARTILLERY: If not stacked with infantry or cavalry, up to two artillery batteries per hex, regardless of strength, or 12 guns from any number of batteries. If stacked with infantry or cavalry, artillery is limited to one battery per hex, or 6 guns from any number of batteries.
8.13 Units under Advance Orders that wish to make use of the movement costs for Pikes, Roads and Trails [9.43] must use March Orders stacking to do so [8.5].
EXAMPLE: An infantry regiment with 8 SPs would require one extension between itself and a following unit; a 15-SP unit would need two.
8.2 Stacking and Movement
8.21 During an Action Phase, each unit must be moved one at a time. See 9.31 for Leaders moving with units.
Exception 1: Stacks under March or Advance Orders and adhering to March Order stacking limits may move as stacks.
Exception 2: Cavalry moving along a Charge Path may move as a stack [8.52].
8.22 A combat unit may move through another unit at a cost of 2 MPs (in addition to the terrain). In addition, the moving unit undertakes a UDD [2.6] immediately after exiting the stationary unit's hex. It adds to that roll the normal cost for entering the stationary unit's hex, if that cost is two or greater. There is no DRM if the hex is Clear terrain. The stationary unit does not undertake a UDD. If the moving unit fails the UDD it is Disordered. The unit may continue moving if any MA remains. If incurring a 2nd Disorder, the unit returns to the hex from which it entered the stationary unit's hex without changing facing, its Activation finished.
Note: A combat unit that starts its Activation stacked with another combat unit is never considered to be moving/retreating/advancing through the other combat unit when it leaves its starting hex.
PLAY NOTE: Given the terrain costs for Woods, it will be extremely difficult for units to pass through units in that type of hex.
Exceptions:
-
THE ARTILLERY Exception: Infantry or cavalry units may move through artillery units, but not vice versa. The non-artillery do not UDD or pay the 2 MPs in addition to the terrain in this case.
-
THE ROAD MOVEMENT Exception: Units (including artillery) moving along Pikes and Roads (but not Trails) may move through friendly units in such a hex, paying the movement cost for the Pike or Road, unless the latter are under March orders. The moving unit must enter and exit the stationary unit's hex from/to a connected Pike or Road hex. If the friendly units are under March orders, the moving unit pays the cost of the actual terrain in the hex plus any hexside cost to enter it; in essence, moving around the units blocking the Road.
-
THE BRIDGE/FORD Exception: If a unit under March Orders occupies either side of a Bridge or Ford, a moving unit may not use that Bridge or Ford.
8.23 A unit may move or retreat [12.44] into a hex with another unit within stacking restrictions [8.12], and end its movement therein. If the moving unit entered the stationary unit's hex through a Frontal hexside, it is placed on top of the stack. If it entered through a Flank or Rear hexside, it is stacked beneath the non-moving unit(s).
Exception: Infantry or cavalry that moves or voluntarily retreats [12.43] into a hex that contains only artillery may freely choose to stack under or on top of artillery. If non-artillery is already stacked under the artillery, and the moving unit enters the hex through one of the stationary stack's front hexsides, it may stack directly under or above the artillery (if stacking restrictions allow).
8.24 A phasing unit may change its stacking order within a hex instead of moving and/or changing facing. Exception: A phasing multi-section battery may change the stacking order of its sections after movement or before firing (this stacking change is not considered Movement).
If under Advance Orders, an infantry or cavalry unit changing stacking order cannot fire [see 10.61 for artillery]. Stacking order may not be changed if the stack is adjacent to an enemy unit. Exception: see 7.21.
8.25 Units assigned March Orders may begin the turn using Attack/Advance stacking limits. They must follow March Order stacking limits when they move.
8.26 When stacked small arms and artillery units activate using different AMs or with different brigades activated by the same AM, any facing change by one unit in the stack determines the new facing for the entire stack, unless the phasing unit moves after the facing change. Similarly, if one unit in the stack Refuses, the entire stack is then Refused, except for phasing units that exit the hex during the same Activation. If using the optional Fatigue rules, non-activated infantry or cavalry does not incur Fatigue if stacked with phasing artillery that changes facing or Refuses.
8.3 Stacking and Combat
8.31 Maximum Fire Strength Per Hex.
- If not stacked below artillery, 7 SPs of infantry or dismounted cavalry or 4 SPs of mounted cavalry can fire from a hex. Example: A 10-SP infantry unit may fire with only 7 SPs.
- If not stacked with infantry or cavalry, 12 artillery SPs can fire from a hex.
- If artillery is stacked above infantry or dismounted cavalry, any combination of 7 total SPs or one battery (which, on occasion, can exceed 7 SPs) can fire from a hex [8.33].
- If stacked above mounted cavalry, any combination of 7 total SPs or one battery can fire from a hex with the cavalry firing no more than 4 SPs.
These limits apply each brigade activation to the units currently in the hex. Reset the limits if all those units exit the hex after firing (for any reason), and others subsequently move into it.
8.32 If an infantry and an artillery unit are stacked together and both are eligible to fire [see 8.33], each may fire at separate targets or the same target. However, they may not combine their fire upon the same target.
8.33 The Fire Frontage Rule. The top-most units up to the limits of 8.31 do the firing (in any order). If the topmost unit(s) cannot or choose not to fire for any reason, units stacked with it are limited to firing the number of SPs they could have fired had the top unit(s) also fired.
Exception: Artillery stacked with infantry or cavalry can only fire if it is stacked above all non-artillery at the time of the fire.
EXAMPLES:
- When a 5-SP infantry unit is stacked on top of a 9-SP unit, 7 SPs of infantry (the top unit plus 2 SPs of the lower unit) can fire out of the hex.
- When a 6-SP battery is stacked on top of a 7-SP unit, the battery and 1 SP of infantry can fire out of the hex
- When a 5-SP unit at the top of a stack performs a rally action, units beneath it can fire a maximum of 2 SPs.
8.34 Massed and Dispersed Targets. For artillery firing at Shot/Shell range, if 8 SPs or more of any (non-artillery) type are in a hex, that hex is subject to a Massed Target penalty. The shot gets a +1 DRM on the Fire Table. Conversely, where there are 2 SPs or fewer (again, excluding artillery SPs), then apply a Dispersed Target adjustment of –1 to the roll. Hexes occupied solely by artillery receive neither of the above DRMs; they do not apply to artillery alone.
8.35 Stacking and Fire Table Results. The top unit suffers Fire Table results. However, if it is eliminated or suffers a Disorder, the player must undertake a UDD [2.6] for all other units in the hex, ignoring any +/– from the Fire Table result.
Exceptions:
- If step losses eliminate a unit, excess step losses are applied to the next unit in the stack. Non-step loss results are ignored, the other units in the stack conduct UDDs because the top unit was eliminated.
- This rule does not apply to the results of Shot/Shell artillery fire, because all the units in the hex are individually affected by such fire [10.67]. EXAMPLE: Artillery fire at a range of five hexes results in a UDD for a stacked hex. Each unit will UDD individually. The top unit fails its UDD, but the bottom unit passes. Because this was artillery fire at a range greater than three hexes, the bottom unit does not suffer another UDD because the top unit failed.
- Pre-Shock Fire [10.43] targets the top shocking unit. Apply excess step losses to the new top shocking unit or, if there is no such unit, to the top unit in the hex. All units in the hex undertake a UDD if the top shocking unit is eliminated or Disorders.
- For multi-section batteries, randomly determine the section losing the SP.
8.36 Stacking and Shock.
- Stacked units, whether attacking or defending, combine their strengths during Shock resolution [see also 11.32].
- The top unit takes all step losses [see also 12.35e]. Exceptions: For Bloody Standoff results, the participating unit with the highest cohesion takes the step loss, unless artillery is the top unit in the defending stack, in which case it takes the loss. If step losses eliminate a unit, excess step losses are applied to the next unit in the stack.
- Retreats apply to all units. Exception: Abandoned guns [12.36]. See 11.46 for Advances.
- Shock Resolution Table Disorder results apply to all units in affected stacks; previously Disordered units thus incur a 2nd Disorder.
- The top defending unit is used for the Pre-Shock Cohesion Check [11.37]. A Disorder result applies to all units in the stack, as above.
- Defending units conduct Pre-Shock Reaction Fire separately [10.43, 11.38].
- Each Green unit checks Attacker Commitment separately [11.36].
- If attacking units Disorder due to Shock results, any non-participating units stacked with them also Disorder and, if necessary, retreat.
8.37 Artillery. A battery is always a single unit. If a battery consists of two or more sections all sections must stack together and move together and conduct UDDs as a single unit. If a multi-section battery suffers a loss, randomly assign the loss to a section.
8.4 Extended Lines
8.41 Individual infantry units (but not dismounted cavalry) with 8 SPs or more may extend their presence into an adjacent Flank hex by placing an Extended Line marker in that adjacent hex.
- It must be placed either to the direct left or right Flank of that unit.
- The extending unit may not be stacked with another non-artillery unit, nor can the Extension hex be occupied by another non-artillery unit.
- The hex into which the line is extending must not be adjacent to an enemy unit. However, an extension, even if Disordered, may retract into the parent unit or vice versa, despite the stationary part of the unit being adjacent to the enemy. The unit must then stop movement and cannot change facing [9.53]. A retracting part that starts adjacent to an enemy unit may be subject to Withdrawal Fire [10.44].
- The MP cost to extend or retract must not be greater than 2 MPs.
8.42 The MP cost to Extend or Retract is the same as moving into the hex. No Facing Change is involved. Thus, a unit in a Woods hex and extending or retracting into another Woods hex pays 2 MPs in most games of the series, whether under Attack Orders or not. Withdrawal Fire versus a retracting part earns the +1 DRM for Flank Fire only if the non-phasing unit is in the retracting part's flank hex [Exception to 10.44]. If an Extended Line is reduced in strength by combat below 8 SPs, remove the Extended Line marker at the end of the brigade activation in which the reduction occurs, and place the parent unit in either hex, without spending any MPs.
8.43 Units with 15 SPs or more may Extend to both sides (if they drop below 15 SPs, remove the extension of the player's choice as in 8.42). As long as both extensions are placed simultaneously, the MP cost to extend to both sides is the same as Extending to one side. If the terrain costs on both sides are different, the larger is used.
8.44 An Extended Line occupies two hexes, or, if desired, three in the case of units exceeding 14 SPs. No part of an Extended Line may end movement stacked with a non-artillery unit. The base unit and any extensions must all have the same facing. The Extended Line has the following properties:
- For Movement it is treated as one, solid unit. The unit may only move into a frontal hex, unless using Withdrawal Movement [9.54]. MPs are paid for the most costly hex entered by any portion of the Extended Line. As units may move only frontally, an Extended Line must either pivot to change its direction (and facing), paying the cost of the hex into which it pivoted, or may change facing 180° paying 1 MP [7.22]. If under Attack Orders, it pays an additional 1 MP when pivoting into a Woods hex. If stacked with artillery and not exiting the hex, the artillery must also change its facing. An Extended Line changing facing 180° and remaining in the hex may stack above or below the artillery [8.23]. If the artillery is activating with the brigade, its Facing change costs 1 MP, and it would thus suffer a –2 DRM for any fire conducted either before or after the Facing Change [10.61].
- A unit with two line extensions in place "pivots" on either the left or right extension when changing direction (and facing). This means the line extension on the circumference of such a "pivot" must move two hexes.
- An Extended Line cannot use Reaction Facing [9.61]. Extended Lines may use Refusal and may Refuse in both directions, if otherwise eligible [7.3]. If half the Extended Line is adjacent to the enemy, the other half may move adjacent only to enemy artillery, unless the Extended Line is under Attack Orders and in good order [but see also 8.48]. If under Advance Orders and not adjacent to an enemy unit, an Extended Line may form Extended Column [8.5, 8.52], paying 1 MP if changing facing by more than one vertex.
- For purposes of Fire and Massed Target determination, an Extended Line has its strength divided among the hexes it occupies as equally as possible (with any left-over points assigned to the actual unit counter, or, in the case of a unit with two extensions, to the actual unit counter and one of the extensions).
EXAMPLES: An extended 9-SP unit would have 5 SPs in the counter's hex, and 4 SPs in the Extension hex. A 17-SP unit extended to both sides would have 6 SPs in the counter's hex, 6 SPs in one Extension hex, and 5 SPs in the other.
8.45 Extended Lines and Fire Combat
- Each part of a unit in Extended Line may fire separately, or combine fire with one or both the other parts versus a single target hex. When a phasing Extended Line fires its parts separately, announce all its fires before rolling for any. All Return Fire is simultaneous [10.42], unless the latter is preceded by a Reaction Refusal/Facing Change. When firing at the same enemy hex with more than one part, an Extended Line must combine the fire of those parts. Parts that split their fire [see 10.15] may not combine that fire with other parts.
- If combined fire crosses hexsides providing different terrain DRM, the defender receives the most favorable DRM benefit.
- Return Fire [10.42] versus an Extended Line that combined its fire may target any of that Extended Line's hexes in the non-phasing unit's fire arc.
- For fire versus part of an Extended Line, the part targeted benefits only from the terrain of the hex it occupies.
- Any Disorder result against any part of an Extended Line Disorders the entire unit. Artillery stacked in any hex of an Extended Line must UDD if the Extended Line Disorders.
- If using optional rule 10.9, apply ammo depletion to the entire unit.
The maximum Fire SPs per hex (side) from a 10-SP unit is 5 and 5, and from a double-extended 18-SP unit is 6-6-6, out to two-hex range.
8.46 Extended Lines and Shock. An Extended Line must attack all enemy units in its frontal hexes as one shock attack in accordance with 11.31. An Extended Line is treated as one solid unit, attacking or defending. Calculate the Shock Ratio [11.43] using the Extended Line's full strength. Units attacking an Extended Line are not required to be adjacent to all the defender's hexes, but see 11.32 for combining attacking units' strength.
8.47 Extended Lines Advance or Retreat as follows:
- If the Extended Line advances, it must do so Extended, unless it cannot do so, in which case the Extended Line marker must be removed before advancing. Extended markers may not be removed voluntarily in an advance. An advance by pivoting the Extended Line is allowable as if using Wrap-Around [8.48].
- If an Extended Line retreats, it must retreat Extended, unless it cannot do so or would be forced to change facing for any reason. If it does not retreat Extended, the Extended Line marker is removed and the unit retreated. The owning player then conducts a UDD [2.6]. If it fails, the unit suffers a Disorder result. If already Disordered, there is no further penalty.
EXAMPLE: A 9-SP infantry unit is in 2222, Extended into 2223. It Shock Assaults an enemy infantry unit in 2323, causing it to retreat. The unit may advance after combat by moving directly ahead, into, say, 2323-2324, or it may pivot into the abandoned 2323, leaving the Extender in 2223. The Extender, of course, has its facing adjusted to reflect its flank extension.
8.48 Wrap-Around. When a two-hex Extended Line unit in Good Order and under Advance or Attack orders shock attacks a single-hex enemy unit, and part of the Extended Line is not adjacent to the enemy (but, if it could move forward, it would be), that half of the Extended Line may move forward following Shock Step 3 (causing the unit to pivot and at no cost in MP) into the empty hex if:
- The moving part of the extension does not begin its attack in an enemy frontal hex, and
- It would place the defending hex in one of its Frontal hexes without the pivot placing any additional enemy units in any of the Extended Line's other frontal hexes, and
- The empty hex is not in the Frontal hex of another enemy unit, and
- The Extended Line is not Refused.
PLAY NOTE: This will probably result in a +4 DRM for attacking through the Front and Flank or Rear and Flank.
EXAMPLE OF WRAP-AROUND: Defender in 3412 facing west; attacker in 3210-3211, Extended, facing east. Attacker moves into 3311-3312 to Shock. The extension in 3311 is not in contact with the defending unit but it may become so by moving the half that is in 3311 into 3411.
8.49 Before any Advance, Retreat, or Continued Shock, an attacker using Wrap-Around immediately retracts, removing the Extended Line marker.
8.5 Extended Columns
Individual infantry units of 8 SPs or more (but not dismounted cavalry), and individual cavalry units of 5 SPs or more, under March Orders or under Advance Orders but using March Order stacking for Pike/Road/Trail Movement, must Extend one hex to the Rear to represent the length of that column. An infantry unit with 15 SPs or more, or a cavalry unit with 9 SPs or more, must Extend two hexes to the Rear when at full strength. A unit in Extended Column has its strength divided as equally as possible among the hexes it occupies, with any left-over points assigned to the actual unit counter, or, in the case of a unit with two extensions, to the actual unit counter and one of the extensions.
EXAMPLES: An 8-SP infantry regiment or a 5-SP cavalry regiment would require one marker between itself and a following unit; a 15-SP infantry unit or a 9-SP cavalry unit would need two markers.
- If not adjacent to the enemy, an Extended Line under Advance Orders may form Extended Column [8.44] by changing facing. Switch the parent unit with its rearmost extension if the direction of movement requires.
- For units larger than 7 SPs and not in Extended Line, place the Extended Column marker(s) in the starting hex of the parent unit after it moves out of that hex. It follows behind the parent unit as it moves.
- For units under Advance Orders, subtract 1 MP from the extension's MA for the Activation in which it is created. For a second extension, subtract 2 MP. These subtractions apply only to this Activation.
- At the end of Movement, a unit in Extended Column cannot be stacked with another unit. Count MP expenditure for extensions as if they were separate units. The extensions must follow the hex path of the parent and must end movement adjacent to the parent (or to the first extension), unless they retract.
- Treat each part of a unit in Extended Column as a separate unit when targeted by enemy fire. Exception: Any Disorder result against any part of an Extended Column disorders the entire unit.
PLAY NOTE: Use of Extended Column markers is often unnecessary, as long as players remember which units are extended, as this status may matter for command and combat. Extended Columns fulfill the "chain of units" requirement in 4.22's Exception.
- If shocked, an Extended Column is treated as one "solid" unit. Calculate the Shock Ratio [11.43] using the unit's full strength. Attacking units are not required to be adjacent to all the Extended Unit's hexes. See 11.32 for combining attackers' strength.
- Extended columns follow 8.47 if retreating. See 6.13 and 8.52 for Advance after combat.
- If combat reduces an Extended Unit's strength below that which requires an Extended Column, remove the extension at the end of the brigade activation in which the reduction occurs, and place the parent unit in either hex, without spending any MPs.
8.51 March Orders. Units under March Orders moving along a Pike/Road/Trail extend to the Rear in conformance with the Road. With two-hex extensions or several consecutive Extended Columns moving by Road, this can result in a serpentine column that follows the Road. In all cases, the column has only one Front and Rear hex (at the beginning and end of the column); all other hexes are flank hexes. This also applies to non-Road/Pike/Trail column Movement. A unit in Extended Column may change facing 180 degrees. Switch the parent unit with its rearmost extension. If not moving along a Pike/Road/Trail, the facing change costs 1 MP [7.21].
If the target of Small Arms Fire or Shock, apply Advance Orders to the attacked brigade at the end of that enemy brigade Activation [6.26], and change its units' facing immediately [7.23]. Unless their March Order AM has already been drawn for that turn, such brigades may activate when any remaining divisional AMs are drawn.
8.52 Advance Orders. Units under Advance Orders and using March Orders Stacking adhere to the following:
- They use Advance Orders facing [7.11].
- Unless forming Extended Line, an extension must face at least one of its parent unit's rear hexsides after movement and after a change from March Orders. The parent unit's facing must allow this. In the case of a unit with two extensions, the second extension must similarly face at least one of the first extension's rear hexsides. Exception: If the course of a Pike/Road/Trail makes this impossible, the affected extension(s) must face the next contiguous Pike/Road/Trail hex(es). Within these provisions, a phasing unit in Extended Column may change facing as desired. Switch the parent unit with its rearmost extension if the new direction of movement requires. If not moving along a Pike/Road/Trail, the facing change costs 1 MP [7.21].
- Provided it has sufficient remaining MPs, a unit in Extended Column may retract into any of the hexes it occupies, even if adjacent to the enemy. The movement cost is that for the hexside and the other terrain in the hex, rather than the Pike/Road/Trail cost. Units with two extensions pay the cost of the second extension's retraction unless retracting into the middle hex of the unit.
- Unless ineligible due to the course of a Pike/Road/Trail, Extended Columns may form Extended Line during movement by changing facing, paying 1 MP for any change of 2 or more vertices. Note: Forming Extended Line is not Pike/Road/Trail movement; hence the exemption in 7.23 does not apply.
8.53 Extended Column and Attack Orders. When first activated under Attack Orders, units in Extended Column must Retract or form Extended Line [8.52] before undertaking any other action. If retracting into a hex adjacent to an enemy unit, apply the restrictions in 9.42, Exception 2, and those of 9.53. If expending MP it is ineligible for Prepared Fire. If unable to retract due to a Change and Stand result, it may remain in Extended Column until able to Move, applying the restrictions of 8.52. If unable to retract due to Movement restrictions on units under Attack Orders [see 9.24], it retracts but automatically Disorders and is finished for the Activation, automatically retracting their Extended Column marker(s) prior to advancing [11.46].
- If retracting into a hex adjacent to an enemy, a unit may not form Extended Line or change facing after retracting [9.53].
- Only the parent hex may fire. It is never eligible for Prepared Fire.
PLAY NOTE: Extended Columns may not conduct Reaction Facing Change [9.61], which may significantly affect their ability to fire.
- Units in Extended Column cannot shock without first retracting or forming Extended Line. They defend against shock normally, and, if otherwise eligible, may Advance after Fire or Shock, automatically retracting their Extended Column marker(s) prior to advancing [11.46].
9.0 Movement
9.1 Movement Allowance
9.11 Each combat unit has a MA printed on its counter. Leaders do not have a printed MA—it is 10 for brigadiers and division leaders, and 40 for corps and army commanders.
9.12 The MA represents the total number of MPs the unit may use in a phase, which may vary according to the Orders under which a unit is operating.
9.13 Units expend MPs to enter hexes and cross hexsides, moving into adjacent, contiguous hexes. These MPs may not be saved or transferred in any way. A unit need not use its entire MA. The player may choose to expend fewer; he may never expend more.
Note: No unit may leave the map voluntarily (some battles have exceptions to this).
9.14 Dismounted cavalry uses infantry movement costs and horse artillery uses artillery movement costs.
9.2 Movement Modes
9.21 There are three different modes of Movement, corresponding to the Orders under which a unit is operating. The entire brigade must use the type of Movement corresponding to its Orders.
Exception: Units Out of Command at the time the brigade changed orders continue to use the type of Movement corresponding to the brigade's previous order, until the start of their next Activation after reentering Command Range [4.23].
9.22 March Movement. An activated combat unit under March Orders uses March Movement, as follows:
- It may move into a hex with any type of terrain.
- It may not move adjacent to an enemy unit.
- It may not move into any hex that is within four hexes and within LOS [10.2] of an enemy combat unit at any time. A March Orders unit starting its move within four hexes and LOS of an enemy unit must change orders in order to move.
- The MP cost for Pikes and Roads (but not Trails) is halved (to ½ MP per hex).
- It may be activated only by the March AM; the division AM does not affect it [5.35].
9.23 Advance Movement. An activated combat unit under Advance Orders uses Advance Movement, as follows:
- It may not voluntarily move adjacent to an enemy combat unit other than artillery. (Exception: A unit under Advance Orders may cross a Bridge or Ford to move adjacent to an enemy combat unit. It cannot shock attack, however, until its next Activation.)
- It may use Roads, Trails, Pikes, Bridges, and/or Fords (which will speed movement [9.43]).
9.24 Attack Movement. An activated combat unit under Attack Orders uses Attack Movement, as follows:
- Its MA is halved, rounding up.
- It may not use Road, Trails, or Pike movement costs; instead it uses the MP cost of the terrain in the hex.
- It may not use Bridges or Fords as part of movement [9.44].
- If artillery is attached to a brigade under Attack Orders, it moves as if under Advance Orders [6.18].
9.3 Leader Movement
9.31 A brigade, division, or Artillery leader may move when his command is activated. Unless moving with a unit with which he was stacked at the start of the Activation, he moves as if he were a separate unit. A leader may also move to and stack with a unit of the activated command and continue moving with that unit, as if he had started the Activation with it, provided he does not exceed his movement allowance. These leaders do not have their MA printed on the counter; it is ten (10) MPs. A brigade, division, or Artillery leader may move only once per Phase; i.e., he must undertake all of his movement at one time and may not break up his movement into sections. The MA of a leader/commander is unaffected by the Orders of its Commands. Leaders always use the best available movement rate for movement and command. A Division leader moves during the Action Phase of any one brigade in his division. If a subordinate brigadier under March Orders is within his Command Range, he can instead move when the March Orders AM is drawn.
9.32 Corps and Overall Commanders may move only in the Commander Movement Phase [3.0 IV/A]. However:
- If a corps commander uses more than ten of his allowed 40 MPs, his Command Range is reduced to 0 during the following turn (only division leaders stacked with the corps commander would be In Command).
- If an OC uses more than ten of his allowed 40 MPs, he may not use his Initiative Rating for any purpose during the following turn.
9.33 A Leader may move adjacent to an enemy unit only if the hex is occupied by friendly units, or if moving with a unit of his command.
9.4 Terrain and Movement
As a general rule, this section applies to all games within the system. Specific terrain rules can be found in the respective Battle Book.
9.41 The type of terrain in a hex dictates the cost to enter (such as Woods) or to cross (such as Stream or Slope hexsides), depending on the unit type moving. For example, it may cost an infantry unit 2 MPs to enter a Woods hex, whereas it will cost an artillery unit 4 MPs to do the same. Most terrain types are self-explanatory; those that require elaboration are discussed below or in the Battle Book.
9.42 If a unit does not have the necessary MPs to enter a hex—for whatever reason—it may not enter that hex.
Exception 1: A unit may always move one hex (including any and all facing changes) as long as it would have been able to enter that hex using its full, Good Order MA and does not move adjacent to an enemy unit.
Exception 2: A unit under Attack Orders may always move one hex (including any and all facing changes) into a hex adjacent to an enemy unit provided it neither Shocks nor Fires during that Activation and it would have been able to enter that hex using its full (unhalved), Good Order MA.
Prohibited hexes or hexsides may never be entered or crossed despite these exceptions.
PLAY NOTE: Extension/Retraction counts as a 1-hex move.
9.43 Pikes, Roads, Trails, Fords, and Bridges can speed movement.
- For units in March Order, the cost to enter a Road or Pike hex is ½ MP [9.45]. All other costs are as listed for the terrain on the Terrain Effects Chart.
- Units under Advance Orders use printed Pike, Road, Trail, Ford and/or Bridge movement costs if complying with March Order stacking limits [8.13]. A unit must pay the cost of the hexside and the other terrain in the hex to end its move stacked with another unit, if the resulting stack will exceed March Order stacking limits.
- Units under Attack Orders may not use Roads, Pikes, Trails, Fords, and/or Bridges. They must use the cost of the terrain in that hex.
- Artillery is always under Advance or March Orders and therefore may use the movement cost benefits of Road, Pikes, Trails, Fords, and Bridges.
9.44 When being used:
PIKES AND ROADS: Pike and Road movement rates apply regardless of the terrain, including elevation changes. Units are not subject to Disorder from terrain [9.47].
TRAILS: Trail movement rates are one-half the non-Trail rate for the terrain in the hex. Units are not subject to Disorder from terrain [9.47]:
- Round down, to a minimum of 1 MP, if under March, and for Leaders;
- Round up, if under Advance (and obeying stacking limits [8.13]).
EXAMPLE: If Woods terrain would normally cost 5 MPs for an artillery unit under Advance Orders, using a Trail costs 3 MPs.
Note: Trail movement costs vary by game, particularly on whether trails negate the cost of hexside terrain. See the Battle Book and TEC.
BRIDGES: Units may not move (as part of Movement) across a Bridge if under Attack Orders. However, they may Shock Attack across the Bridge under those Orders, and, if the result allows, advance across that Bridge [see also 6.15 and 9.23].
FORDS: They may be used under March or Advance Orders; units under Attack Orders may not move using Fords, but they may attack and advance across the Stream or River through the Ford hexside. The cost to use Fords is often appropriate to the specific battle. See the Battle Book and the game's Terrain Effects Chart.
9.45 Units gain the benefit of Roads, Pikes, Trails, Fords, and Bridges, when available, only if they enter such a hex from a connecting Pike/Road/Trail hex. In addition, units using these paths, do not pay any MPs to change facing during movement as long as they are moving from one Pike/Road/Trail hex directly into another, connected Pike/Road/Trail hex.
9.46 The GBACW system uses a graduated Elevation system to represent changes in terrain height. Some changes in elevation are gradual, others are not. As the representation varies from game to game, depending on the elevation scale adopted, see the Battle Book for specifics.
9.47 Certain terrain, as shown in the Terrain Effects Chart, carries with it Disorder possibilities:
- If a unit enters or crosses terrain with a "D," that unit is automatically Disordered the instant it enters/crosses that hex/hexside (and remember the reduced MA of a Disordered unit [12.33]).
- If a unit enters or crosses terrain with a "d" or "dr," that unit undergoes a UDD [2.6] the instant it enters/crosses that hex/hexside. If the roll is higher than its Cohesion Rating, the unit is Disordered.
Notes:
- No D or d/dr applies to a unit using a Pike/Road/Trail, unless Battle Book rules specify otherwise.
- TECs vary. The most recent use a note rather than "d" or "dr".
EXAMPLE: Woods has a normal cost of 2 MPs. The player rolls the die for each hex, adding +1 for each Woods hex to get the UDD result. If the infantry unit started the move Disordered and fails the UDD for the first hex, it may not enter the second Woods hex. If it is Disordered in the first hex and fails the UDD for the second hex, it must return to the first hex.
9.5 Enemy Units and Movement
9.51 A friendly unit may never enter a hex containing an enemy combat unit.
9.52 Only units under Attack Orders may move adjacent to an enemy infantry or cavalry combat unit, unless crossing a Bridge or Ford hexside to do so [9.23]. Units under Advance Orders may move adjacent to artillery, but artillery may never move adjacent to an enemy unit.
Exception: If the hexside between the non-phasing and phasing unit is un-crossable (e.g., a river), the prohibition on moving adjacent to enemy infantry and cavalry does not apply for infantry and cavalry units under Advance Orders
9.53 A combat unit must cease movement for the Phase when it moves adjacent to an enemy combat unit, even if separated by what would be impassable terrain. It may not change facing after moving adjacent.
Exception: If in moving adjacent to the enemy the moving unit stacks with another unit and must adjust its facing to match that of the stationary unit, it can neither fire nor shock during that Activation.
A unit that starts movement adjacent to an enemy unit may change facing by only one vertex before moving. If not moving, it may change facing any number of vertices. If its orders permit, a unit starting movement adjacent to an enemy unit may move directly to another hex that is adjacent to the same (or another) enemy unit, whereupon it ceases movement.
9.54 Withdrawal Movement. Units under either Advance or Attack Orders may use Withdrawal Movement as their movement for that Activation. When using Withdrawal Movement, a unit moves backwards (rear hexes only) a maximum of two hexes. It may not extend, and may not change facing unless stacking requires it [7.11]. If any hex the unit enters costs more than 1 MP, the unit undergoes a UDD [2.6] as it enters each such hex, earning a +1 DRM for each MP in excess of one required to enter.
- If the unit fails it is Disordered.
- If a Disordered unit fails, it may not enter the second hex; it remains Disordered in the first Withdrawal Movement hex.
If under Advance Orders and adhering to March Order Stacking limits, units may use Pike/Road/Trail movement costs to modify or avoid a required UDD. Except along a Road or Pike, artillery using Withdrawal Movement may not move through a friendly unit, and non-artillery may not move through a non-artillery unit. Extended Columns may not use Withdrawal Movement; Extended Line may not use thoroughfares. If an Extended Line cannot withdraw extended, it may Disorder, retract into any of its hexes, and then follow normal Withdrawal Movement rules. If already Disordered there is no additional effect.
Units under Advance Orders must comply with 6.15, third bullet. Units under Attack Orders must comply with 9.53.
Units using Withdrawal Movement may not fire or shock. If Refused, they remove their Refused marker after any Withdrawal Fire [10.44].
EXAMPLE: An infantry unit withdraws two hexes, both Woods. Woods has a normal cost of 2 MPs. The player rolls the die for each hex, adding +1 for each Woods hex to get the UDD result. If the infantry unit started the move Disordered and fails the UDD for the first hex, it may not enter the second Woods hex. If it is Disordered in the first hex and fails the UDD for the second hex, it must return to the first hex.
9.55 Artillery and Enemy Units.
DESIGN NOTE: While Civil War artillery manuals cautioned against artillery deploying within effective small arms range of the enemy, at least one conceded that it might sometimes be justified. Attempts to do so occurred throughout the war, with varying results. Thus, we offer players two mutually exclusive options. The first reflects the prudent streak in Civil War gunnery. The second allows for the actual practice of "running the guns in close".
Option 1: Artillery units may move no closer than four hexes away from enemy combat units, unless the enemy has no LOS to the closer hex. Friendly units do not block LOS for purposes of this rule. If otherwise eligible [see 6.15, 9.53, and 10.44], artillery starting an Activation within three hexes of enemy combat units may move into or through a hex equally close or further away from the enemy regardless of LOS, but may not fire during that same Activation unless it ends its move at least four hexes from the nearest enemy with LOS to its hex.
Option 2: Unless stacking with or adjacent to friendly infantry or cavalry, artillery cannot move within three hexes of enemy mounted cavalry. Provided it conforms to this restriction, the following rules apply:
- Artillery moving into a hex within three of any enemy unit having LOS to it must, after resolving any Approach Fire targeting it, immediately undertake a UDD with a +DRM equal to the number of enemy units within three hexes and LOS. Count all extensions as separate units. Disregard enemy range limitations or ammo depletion when calculating the DRM. Enemy units block LOS [10.26], but units friendly to the moving artillery do not block LOS for this purpose. Failing the UDD results in Disorder and retreat to a hex not within three of enemy units or out of their LOS. If the artillery fails the UDD by more than two, it loses a number of guns equal to half the margin of failure, rounding down. Restrictions on artillery retreat apply [12.45].
EXAMPLE: Artillery with cohesion "7" rolls a ten for its UDD. Its margin of failure is three. The artillery loses one gun.
- Artillery moving within two hexes and LOS of enemy units adds two to the DRM for its UDD in addition to the DRM for the qualifying enemy units described above.
- Already Disordered artillery failing this UDD retreats as above and loses a gun in addition to any others lost.
- Artillery starting its own or an enemy brigade activation within three hexes and LOS of the enemy is not subject to the provisions of this option if it retreats, conducts a Reaction Move, or enters only hexes further from enemy units within LOS and does not fire.
PLAY NOTE: Artillery typically had a healthy respect for enemy capabilities. When it ventured close, it did so on the assumption the enemy was too weak or disorganized to threaten it. That assumption often proved wrong.
9.6 Reaction Movement
A non-phasing unit may move during an opponent's phase in Reaction to what is happening, if not under March Orders [6.13] or in Extended Column [8.5]. Phasing units and units friendly to them may not react.
9.61 Reaction Refusal/Facing Change. A non-phasing combat unit may Refuse or change facing in reaction to movement by, or fire from, an enemy unit.
- Any enemy movement or advance into a hex adjacent to the non-phasing unit may trigger a Refusal or Facing Change.
- Enemy fire targeting a non-phasing combat unit from a hex outside its front may trigger a Refusal or Facing Change by the targeted unit, unless the non-phasing unit must retreat as a result of the fire. The reaction occurs after the results of the Phasing Fire are applied, including both shots from rapid firing artillery [10.68] or Spencer Repeaters [14.3]. A unit may Return Fire after a Refusal or facing change [10.42], unless it suffers a 2nd Disorder due to failing its UDD [9.62]. For firing after Reaction Refusal, follow the restrictions of 7.34.
- To use Reaction Refuse, a unit must be eligible to Refuse [7.31, 7.32].
- Units in Extended Line may Refuse, but cannot change facing using this rule.
9.62 Restrictions on the use of Reaction Refusal or Facing Change.
- A unit may do so only once per enemy brigade Activation.
- The unit undergoes a UDD [2.6] when it does so (infantry and cavalry only, not artillery). If it fails, it suffers a Disorder result. Stacked units conduct separate UDDs.
- There is no MP cost (as it is not a phasing unit).
- A unit may not use these Reactions if already in the Frontal hex of another enemy unit. Apply this restriction to each part of a unit in Extended Line separately, as if the part were an independent unit.
Additional restrictions on the use of Reaction Facing Change:
- May change facing by only one vertex.
- May not do so if it is Refused or stacked with a unit that cannot Reaction Face.
- If artillery, it is subject to a –2 DRM for the first non-phasing fire following the Reaction Facing during that enemy brigade Activation. Rapid Fire is not allowed for that fire.
9.63 Moving in Reaction. Mounted cavalry and artillery have the additional capability of moving in reaction to enemy Movement within three hexes of their present position. They may not react to enemy Advance or Retreat.
- Mounted cavalry and artillery may move in reaction one or two hexes, using the Retreat rules [12.44]. Because it is a non-phasing unit, there is no MP cost to do so.
- A mounted cavalry or artillery unit under March Orders or already in the Frontal hex of another enemy unit may not reaction move.
- Artillery may not reaction move into a hex that would normally cost it more than 2 MPs to enter. Artillery may use the Road/Pike/Trail movement cost if eligible.
- Units must perform a UDD after a reaction move. A failed UDD results in Disorder, a 2nd Disorder results in the loss of 1 SP or one gun. For cavalry, add to the roll the MP cost of any hexside crossed plus that of each non-clear hex entered. If the cavalry unit's strength is 4 SPs or less, and it is under Advance Orders, it may use the Pike/Road/Trail cost to calculate the UDD modifier [8.13].
- The decision to move in reaction is announced and implemented before the phasing unit moves to a hex in triggering range but use the triggering hex to determine the retreat path.
- If mounted cavalry or artillery chooses to move in reaction, the phasing unit must move into the triggering hex, but may keep moving, if it has MPs remaining.
- An artillery unit may move in reaction once per enemy brigade Activation.
- An artillery unit can either move in reaction or use Approach Fire [10.45] during a given enemy brigade Activation, but may not do both.
- Each hex artillery enters during Reaction Movement may not be closer to any enemy unit that is within four hexes of the artillery and has LOS to it.
- If possible, the phasing unit may fire at artillery before the reaction move. Any failed UDD, D, or step loss limits the reaction move to one hex.
PLAY NOTE: Theoretically, cavalry can keep retreating if the phasing unit keeps moving toward it. This could happen even when the phasing unit is mounted. However, each time the non-phasing unit so retreats, it could incur Disorder.
EXAMPLE OF MOVEMENT AND REACTION: All phasing units are under Attack Orders. Unit A is an artillery unit that cannot move closer to enemy units, unless the latter have no LOS to it [9.55 Option 1]. Unit E uses Withdrawal Movement to back up two hexes without changing facing [9.54]. Unit F moves into the rear of the enemy. Enemy Unit C may conduct Reaction Facing Change [9.61] and rotates one vertex then must conduct a UDD. Enemy Unit D cannot change facing because it is in the Frontal hex of another enemy unit. Unit B moves directly across the frontal hex of an enemy unit, which is allowed [9.53]; however, it must stop after that first hex. The movement by Unit B triggers possible Artillery Reaction Movement from Artillery A [9.63]. Unit G moves toward the enemy cavalry and artillery units, which triggers Moving In Reaction [9.63]. The enemy cavalry and artillery units may move one or two hexes and then undergo a UDD. Unit G may continue moving. Unit I cannot use the Road rate through the Woods because Roads may not be used by units with Attack Orders.
9.7 Reinforcements
9.71 In most games in the GBACW system, reinforcements enter through the map edge hexes listed in the scenario, paying the appropriate movement cost to enter the edge hex. Arriving units are given specific Orders—in the Reinforcement Orders Phase [3.0 II/D]—prior to their arrival, and use that Movement mode to enter. All reinforcements are considered to be In Command for Activation purposes during the turn of entry. Entering leaders and commanders apply their ratings to reinforcements that are under their command and entering via the same hex or area during the same turn, unless the Battle Book specifies the number of AMs the reinforcements receive. Off-map leaders do not affect commands already on the map. A unit entering without its brigadier retains its orders until starting an activation within Command Range of its brigadier. It then immediately assumes the orders of that brigade. If it already moved under March Orders, it is finished for the turn. If it enters under Advance Orders, however, it may not shock until its next Activation. No unit may enter an enemy Entrance hex until all reinforcements scheduled to enter through that hex have done so, or could have done so.
9.72 If more than one stack enters through the same hex during the same Action Phase, the first stack pays the cost of the entrance hex, the second its cost plus that of the first, and so on. Unless under March Orders, reinforcements may move into an Entrance Hex despite an enemy unit being adjacent to that hex.
9.73 Arriving units that are unable to enter due to units entering ahead of them may enter the map during the next Action Phase for that command. Reinforcements may also delay their entry at the player's discretion, but must enter before the next group scheduled to enter via the same entry hex(es). Unless stated otherwise in the Battle Book, reinforcements within a particular group do not have to enter in the order listed.
9.74 Some reinforcements are restricted as to the number of Activation Phases they may undertake in the turn in which they enter. This applies even to entering reinforcements using March Orders.
EXAMPLE: A unit arriving under March Orders stated to have only one AM allowable for its turn of entry may move only the equivalent of one Activation.
10.0 Fire Combat
10.1 Basic Fire Concepts
Fire combat is of two types: small arms and artillery.
10.11 Units may fire at the enemy when:
- Activated and under Attack Orders (in addition to Movement).
- Activated and under Advance Orders (instead of Movement).
- In reaction to certain enemy actions (but not while under March Orders).
10.12 A unit may fire at any enemy unit within the Range of its Weapon Type and within its LOS [10.2]. The Range is the number of hexes from the firing unit to the target, counting the target unit's hex but not the firing unit's hex.
10.13 No unit is ever required to fire; fire is always voluntary. However, each phasing unit must complete its Movement/Fire before any other phasing unit starts. Exception: see optional rule 10.82.
10.14 Each unit fires separately; two units may not combine fire. See 8.31 for the maximum fire allowed from a single hex.
Exceptions:
- An infantry unit in Extended Line may combine fire from its constituent hexes as it is a single unit. [8.45]
- Artillery fire may be combined [10.63].
- See optional rule 10.82, Combined Small Arms Fire.
10.15 When a phasing unit fires—and this includes a unit in Extended Line—it may split its fire between all possible adjacent targets in its Frontal hexes. Such splitting must be done as evenly as possible. A unit may not split its fire against the same target. Roll separately for each fire. Split fire and all Return Fire is simultaneous [10.42], unless the latter is preceded by a Reaction Refusal/Facing Change. See 10.65 for artillery exceptions to the above.
Non-phasing units split Return, Withdrawal, and Approach fire by reserving part of their firepower for use in a possible later fire opportunity. They split Pre-Shock Fire the same way a Phasing unit splits its fire. Non-phasing units split their fire as evenly as possible and are limited to firing twice (treat a refused frontal hex separately). They are not limited to firing at units in their two frontal hexes, but cannot fire at the same hex twice. Non-phasing units that split Return Fire but suffer SP losses from the first fire combat may still fire with the SPs originally allotted for the second fire, unless their remaining SPs are less than allotted, in which case they fire with their remaining SPs.
EXAMPLE #1: A 5-SP phasing unit with an enemy unit in each Frontal hex may fire all 5 SPs at either unit. Or, it can split fire, directing 3 SPs at one hex and 2 SPs at the other. No other combinations are possible.
EXAMPLE #2: A 3-SP non-phasing unit may Return Fire with 1 or 2 SPs, reserving the rest for a later opportunity to return fire. If the result of the first fire combat leaves it with fewer SPs than the number reserved for the later fire, it may use only its remaining SPs for that fire.
10.16 Each Weapon Type has a Maximum and Prepared Fire Range, listed on the Range Effects Chart. Maximum and Prepared Fire Range can vary from game to game. No unit may fire at a target that is outside its maximum range. All fire must be through a unit's Frontal hexsides.
EXAMPLE: Units with "R" weaponry (rifled-muskets) have a maximum range of five, and a Prepared Fire Range of one; and those with "M" (muskets) have a maximum range of two and, for Prepared Fire, one.
10.17 To resolve fire, the player determines the number of SPs and rolls one die, cross-referencing the roll with the Fire Strength on the Fire Table. The roll may be modified by several DRMs, all listed in 10.8 and on the Fire Table. The results are applied immediately [12.0].
Note: If there is Return Fire [10.42] non-artillery units and artillery able to Return Fire at Canister range will fire before the effects of the fire are applied; artillery units firing at Shot/Shell range will apply the results before they return fire [10.45].
10.2 Line of Sight
10.21 Units firing at a target two or more hexes distant may fire only at targets to which they can trace a LOS; they must be able to see the target. LOS is traced from the center of the firing hex, through the Front of the unit [7.11] to the center of the target hex. Line of Fire is the LOS extended indefinitely past both the firing and target units, regardless of terrain. For all purposes other than fire combat, LOS is traced from the center of the sighting unit's hex, through any of its hexsides, to the center of the enemy unit's hex (i.e., 360 degrees).
10.22 Certain terrain hexes block LOS [see Terrain Effects Chart]. If the LOS is blocked, fire is not possible. Blocking terrain hexes can always be fired into, but never through. Fire at an adjacent hex may be prohibited across certain hexsides [10.67; see individual Battle Books for specific cases].
10.23 The following may block LOS, depending on their location:
- WOODS: Woods are treated as being one full level higher than the base elevation. However, Orchards do not block LOS.
- TOWNS: Towns are treated as being one full level higher than the base elevation.
- ELEVATIONS: A hex may block LOS due to its elevation and the type of slope hexside it has (if any). An elevation change from one hex to an adjacent hex determines the type of slope hexside between them. For LOS purposes there are two types of elevation changes: Gradual—one elevation change to an adjacent hex without any slope hex sides; Non-Gradual—one or more elevation changes to an adjacent hex with a Minor, Steep, or Sheer slope hexside between them.
Notes:
- Combat units are always considered to be at their hex's base elevation.
- Treat the hexsides of Woods and Town hexes like Steep Slopes for determining LOS, i.e., as if they were steeply-sloped hills one level higher than the actual ground level.
10.24 Intervening Blocking Terrain:
- Higher Elevations. If both firing and target hex are on the same or different level, any intervening hex with an elevation higher than both units blocks LOS.
- Canopy of Trees. LOS may not be traced through a lower Woods hex adjacent to a wooded target hex or a wooded firing hex (due to the canopy of the trees), unless: a. The adjacent Woods hex is lower than both the firing and target hexes, and b. The base elevation change between the two Woods hexes is non-gradual.
- Slopes. If the firing and target hexes are on different levels, LOS is blocked by any intervening hex or hexside higher than the average level between them and closer to the lower unit. Halfway or equidistant is closer if: a. The potential blocking hex has a non-gradual slope hexside closer to the lower unit, or b. The potential blocking hexside has a non-gradual slope.
Notes:
- The average level is the sum of the higher and lower units' base elevations, divided by 2 [Average Level = (H+L)/2].
- The halfway or equidistant point can either be a hex or hexside depending on the number of hexes between the firing and target hex.
- A potential blocking hexside can exist only midway between the firing and target hexes, and only when the adjusted heights of its two adjacent hexes differ. In such cases, the height of a potential blocking hexside is the average of the two adjacent hexes' adjusted height. Woods and Towns adjust the height of their hex's base elevation by one level for this determination [10.23].
- If the higher hex adjacent to the non-gradual hexside is only one elevation higher than the lower unit, treat the hexside as gradual. Exceptions: Woods and Town hexes.
SLOPE LOS EXAMPLE: In an illustration with hexes lettered D, C, B, A (at Level 6) and W (Level 5), X (Level 3), Y (Level 2), Z (Level 1): LOS is clear between A and W-Z. A is on Level 5, while X is on Level 2, thus the average level between them is 3.5, and W is lower than the average. Y/Z are on Level 1; the average level between them and A is 3. No hex higher than that level is closer to Y/Z than to A. Although the elevation of the non-gradual slope between A and W (4) is higher than any of the average levels for X-Z, it is not equidistant or closer to the lower hex.
LOS is blocked between B and W because A (5) is higher than the average level (4.5) and has a non-gradual slope hexside closer to the lower unit (and also due to the Shadow Exception, below). The LOS is clear between B and X. A (5) is higher than the average elevation (4), but is not closer, while the height of the non-gradual slope (4) halfway between is not higher than the average level. The LOS is clear from B to Y-Z because there is no higher average level or non-gradual slope closer to the target hex.
LOS is blocked between C and W. A is higher than the average level (5 vs. 4.5) and is closer to the lower hex. LOS is blocked between C and X. The average level (4) is lower than A (5), and A counts as closer to X as it has a non-gradual slope hexside closer to X. LOS is blocked between C and Y because the non-gradual slope that is halfway between has a height (4) that is higher than the average level (3.5). LOS between C and Z is clear because the potential blocking hexside is not halfway or closer to the target hex.
LOS is blocked from D to W and X because A (5) is higher than the average level of both hexes (4.5 and 4) and closer to the lower hexes. LOS is blocked between D and Y because A (5) is higher than the average level (3.5) and has a non-gradual slope hexside closer to the lower hex. LOS is blocked between D and Z because the potential blocking hexside has a height (4) higher than the average level (3.5) and is halfway to the target hex.
Additional Restrictions on LOS:
- The Intervening Hill Exception. An intervening hex or ridge at the same base elevation as the higher unit blocks LOS if separated from the higher unit along the Line of Fire by a hex of lower base elevation.
- The Shadow Exception. For firing and target units on different levels: a. An intervening Woods or Town hex always blocks LOS if higher than and adjacent to the firing or target unit. b. A steep or sheer slope hexside blocks LOS if higher than, and adjacent to, the lower unit, unless all other hexsides along the LOF to the higher unit are equally steep or steeper.
- Crests [Optional, but Recommended]. If the firing and target units are at different elevations, LOS is blocked if: a. The base elevation of hexes along the LOF and behind the higher unit descends sooner than it does between the higher and lower units (count the same level hexes in both directions from the higher unit's hex, exclusive), and b. The LOF beyond the higher unit does not cross any hexes of higher base elevation before entering hexes of lower base elevation. For purposes of this rule do not count Woods or Towns when determining elevation of hexes beyond the higher unit.
EXAMPLE of LOS and Geographic Crests: LOS is blocked between A and Y, because elevation descends sooner beyond A than it does between A and Y, and the LOF beyond A crosses lower elevations before entering any higher hexes. This implies a geographic crest on the hexside between 4406 and 4505. LOS is clear between A and Z. The number of hexes at the same elevation along the LOF beyond A is the same as the number between A and Z, so the geographic crest does not block.
10.25 Reciprocal Nature of LOS. LOS is always reciprocal—if the Firing unit can see the target, then the target can see the firing unit. Exception: see 10.26.
10.26 Combat Units.
DESIGN NOTE: LOS is not the only consideration when determining whether combat units "block" fire. The danger of "friendly fire" incidents was such that small arms/canister fire over the heads of friendly troops only occurred when the latter were well below the LOS. Even then it was at least unnerving and sometimes damaging for the intervening unit. Firing over the heads of enemy troops held no such risks, but typically the closest enemy unit was the most exposed and the only one that mattered to the firing unit.
Given no blocking terrain, intervening combat units block small arms fire at all ranges and artillery fire at canister ranges [10.67], with the following Exceptions:
- The intervening unit's hex has a base elevation lower than that of both the firing and target units.
- No intervening units are friendly to the firing unit, and terrain blocks the firing unit's LOS to all intervening enemy units.
- An intervening unit in a hex adjacent to a hex two or more levels higher will not block fire for artillery in that higher hex [10.67].
- The Firing and target units' base elevations differ by two levels or more, the intervening unit is on the same base elevation as the lower unit and is not closer to the lower unit.
Whenever fire is permitted over the heads of friendly combat units adjacent to the target, and the unadjusted Fire Roll is 2 or less, those friendly units must conduct a UDD, Disordering if they fail.
Given no intervening, blocking terrain, friendly combat units block artillery fire at a range of four or more hexes regardless of their elevation, if such units are on the LOF and within two hexes of the target, including the two hexes past the target. This applies even if the firing unit's range is sufficient only to reach the target. Where the LOF runs along a hexside, friendly units adjacent to that hexside and within two hexes of the target block as well. Enemy units do not block artillery fire at ranges of four or more hexes. Combat units do not block LOS to units under March Orders for the purposes of rule 6.13, or for purposes of rule 6.31 (Reserve), or to targets of Cavalry Charge [11.52].
10.27 If LOS runs along the hexside of a hex that blocks LOS, the LOS is blocked. (Accurate? No sir. But it stops arguments.)
10.3 Phasing Fire
Phasing Fire applies to activated units (i.e., it is their turn).
10.31 A phasing unit may fire only once per Activation, although it may split its fire at the time [10.15].
Exceptions: Artillery Rapid Fire [10.68] and, in certain battles in the series, Spencer Repeaters [14.3].
10.32 A phasing non-artillery unit may fire when Activated under the following Orders:
- ATTACK ORDERS: It may fire once during its Activation, at any time before, during, or after Movement.
- ADVANCE ORDERS: It may fire once, instead of Movement. It may change facing one vertex before firing, but not afterward.
See 10.61 for Artillery.
10.33 The following units may not use Phasing Fire:
- Units under March Orders.
- Units under Advance Orders that expend MPs. Exception: Artillery [10.6].
10.4 Non-Phasing Fire
Non-Phasing Fire refers to opportunities for non-phasing units to fire at activated enemy units that are threatening them in some way. There are four different types of Non-Phasing Fire: Return Fire, Pre-Shock Fire, Withdrawal Fire (for infantry/cavalry only), and Approach Fire (for artillery only). Phasing units (and units friendly to them) may never use Non-Phasing Fire in any form. Exception: If otherwise eligible [10.43], phasing units and units friendly to them may use Pre-Shock Fire versus non-phasing units that Continue Shock [11.47].
10.41 Non-Phasing Fire is available to units under Advance and Attack Orders; it may not be used by those under March Orders. An eligible unit may use all its SPs for each type of Non-Phasing Fire once per enemy brigade Activation. The limits in 10.14 apply.
For each triggering action, the owning player must declare which units will use Non-Phasing Fire.
- If multiple non-phasing units fire in response to the same trigger, apply each result in the order that it is rolled.
- For each result, apply step losses before applying any non-step loss result [12.21].
- If step losses eliminate the top unit in a targeted stack, apply excess step losses to the next unit in the stack, but ignore any unapplied non-step loss result (d+2 or D). Other units in the stack conduct a UDD if the top unit Disorders or is eliminated [8.35].
- If the target hex is vacated before all fire has been conducted, non-phasing units that declared fire are still considered to have fired. No actual die roll is needed unless using optional rule 10.9, in which case the firing unit ammo depletes on an unadjusted roll of 5.
- A non-phasing unit may choose to split its fire, provided it fires at two different stacks. In all cases except Pre-Shock Fire, splitting Non-Phasing Fire involves reserving part of it for a possible later opportunity, provided the fire targets two different stacks. Apply the restrictions of 10.15 and, for artillery, 10.65.
10.42 Return Fire. If fired upon by phasing enemy units, non-phasing units may fire back at the hex from which the Phasing Fire originated, if eligible (frontal hexes, range, and LOS all being taken into consideration). If facing permits, non-phasing units or eligible parts of Extended Units not targeted by Phasing Fire but adjacent to either the target unit, the firing enemy unit, or both may also Return Fire, unless already in the frontal hex of an enemy unit in another hex. Return Fire is simultaneous with the fire that triggered it: both sides fire before results are applied (see Exceptions below).
EXAMPLE #1: The phasing player announces a unit will fire. The non-phasing player then decides whether he will declare any return fire. The fire attack and associated Return Fire are then resolved. Note that multiple units may return fire, up to the 7 SPs per hex limit [8.31]. The phasing player then declares his next fire attack, and the non-phasing player declares any return fire to this next attack. Note that non-phasing units may be fired on by two or more enemy units in succession during an enemy brigade Activation. A non-phasing unit can hold back firepower in anticipation of a second Return Fire opportunity.
EXAMPLE #2: A phasing brigade has two 3-SP infantry units stacked above a 5-SP unit and a 4-SP unit. The top 3-SP unit announces its fire, which is then resolved, including any Return Fire it triggers. The 3-SP unit below the top unit (if still in the hex) now fires at the same or a different target. Such fire and any Return Fire is resolved. 1 SP from the 5-SP unit (if still in the hex) fires, either at one of the same targets or at a different target, and such fire is resolved as above. The 4-SP unit on the bottom cannot fire at all.
EXAMPLE #3: A phasing 1-SP unit stacked above a Disordered unit announces its fire versus a stack of two enemy units. The non-phasing player declares he will Return Fire with both units. The phasing unit and the two non-phasing units all fire before the results are applied. The top non-phasing unit's fire results in a "1d+2"; the bottom non-phasing unit's fire results in a "d". The "1d+2" is applied [10.41]. It eliminates the 1-SP phasing unit. The "d+2" part of the result is disregarded, but the Disordered phasing unit remaining in the hex must undertake a UDD, as the top unit was eliminated [8.35]. It fails its UDD. Following the 2nd Disorder Table, it loses an SP, and must retreat one or two hexes. As it is a phasing unit suffering a 2nd Disorder, it cannot use Phasing Fire, as it is done for the Activation [12.35]. No phasing units remain in the hex, so the second non-phasing unit's "d" result cannot be applied (although it may result in ammo depletion if using optional rule 10.9). If the bottom phasing unit had passed its required UDD and remained in the hex, it would now have had to again conduct a UDD due to the second non-phasing fire result.
Exceptions:
- If Reaction/Refusal Facing [9.61] occurs prior to Return Fire, the attacker's fire is resolved before the defender fires. This only applies if the Phasing fire that triggered the Return Fire also triggered the Reaction Refusal/Facing Change.
- Artillery's Return Fire is resolved after resolving the enemy fire at ranges of four hexes or more.
10.43 Pre-Shock Fire.
- A unit may fire at its attackers' hex(es) during Shock Resolution [11.38]. In the case of attacking units stacked beneath units not participating in the shock, the top shocking unit is the target.
- If an enemy unit shocks a friendly unit while in the frontal hex of one or more other friendly units, or parts of Extended Units that are not in the frontal hex of another enemy unit, the nontargeted friendly unit(s) or eligible parts may also use Pre-Shock Fire, whether or not the targeted unit retreats or routs prior to shock resolution.
- Pre-Shock Fire is available to both phasing and non-phasing defenders against Continued Shock [11.47], unless they used it previously during that brigade Activation or are in the Frontal hex of another enemy unit.
10.44 Withdrawal Fire. Whenever an enemy unit during Movement attempts to leave a non-phasing infantry or cavalry unit's adjacent Frontal hexes, the latter may fire before the enemy unit leaves. This fire is possible only during voluntary Movement, not during Advances or Retreats. All eligible units fire before the enemy unit leaves.
Exception: If any enemy units remain in the hex, then the fire targets the top remaining unit after the moving unit has finished its move.
10.45 Approach Fire: Artillery may fire at an enemy unit (LOS/facing permitting) that, when using Movement [9.0], enters a hex anywhere within three hexes of the guns. It may do this only once per enemy brigade Activation. Artillery that uses Reaction Facing may fire at the enemy unit that moved adjacent, but with a –2 DRM [9.62]. Advancing [12.6] and retreating [12.4] units are not eligible targets for Approach Fire.
10.5 Prepared Fire
10.51 Each small arms (i.e., non-artillery) weapon type has a (reduced) range within which it may gain the DRM benefit of Prepared Fire (see the Range Effects Chart). Units may not gain the Prepared Fire DRM outside that Range.
10.52 Prepared Fire may be used (only) by:
- Phasing infantry units (but not dismounted cavalry) in Good Order and under Advance or Attack Orders, instead of moving.
- Non-phasing infantry and dismounted cavalry under Advance or Attack Orders and in Good Order [10.4].
- Units that have not changed stacking order, advanced, retreated, or are in Extended Column during that activation [8.24, 8.52, 12.6, 12.4].
Note: Units that change facing by one vertex either before or after firing, remain eligible for Prepared Fire. Exception: Units in Woods hexes while under Attack Orders [see 7.22].
10.53 Units that are eligible for Prepared Fire have a +1 DRM when resolving fire.
10.6 Artillery Fire
For the most part, the mechanics for artillery fire and small arms fire are the same: roll the die, adjust the die roll for range, etc., and find the result. There are, though, some rules specific to artillery.
10.61 Artillery may move (once) and fire (once) in the same Activation. However, the following penalties/restrictions apply:
- Guns that fire have their MA halved for that Activation.
- Guns that move (or will move) suffer a –2 DRM when they do fire. Guns that change facing by one vertex either before or after firing do not suffer the –2 DRM.
- Moving batteries that exceed half their MA may not fire.
- Disordered artillery may not fire; it may move.
- Phasing or non-phasing artillery that starts a brigade Activation stacked under non-artillery but for any reason becomes the top unit may fire if otherwise eligible, but incurs a –2 DRM for that fire and cannot Rapid Fire.
10.62 Artillery batteries may use Phasing Fire either when activated as part of a brigade or a division or when their Artillery leader is activated.
10.63 Combined Fire. Batteries or sections stacked in the same hex may combine their fire at ranges of four hexes or greater. Different batteries, even those in the same hex, that are firing at ranges of one to three hexes (canister/grape), may not combine fire, although gun sections from the same battery may combine.
10.64 If there is more than one type of gun combining fire, and the DRM for the range is different for each, use the worst DRM for all.
10.65 Split Fire. Unlike phasing Small Arms units that split fire, artillery may target enemy units at any range. [Exception: see 10.66]. A single battery may split fire in one of three ways, targeting a maximum of two hexes.
- Batteries consisting of multiple gun types (sections) split fire by section, combining them as desired if consisting of three or more sections. Apply the restrictions of 10.15 when a battery of one gun type splits its fire.
- A battery may split fire against the same hex [Exception to 10.15], but runs an increased risk of ammo depletion. a. A battery consisting of one gun type may fire twice, splitting its fire as evenly as possible [10.15]. If eligible, it may use Rapid Fire [10.68], for either or both parts of the Split Fire, but any ammo depletion result leaves the whole battery in No Ammo status following the fire. If not using Rapid fire, apply one level of ammo depletion [10.69] to the whole battery, if either or both rolls are 5s. b. A battery consisting of multiple gun types may fire each section at the same hex. If one or more sections uses Rapid Fire, any ammo depletion result leaves all Rapid firing sections in No Ammo status following their fires. Sections not using Rapid Fire deplete by one level, maximum, if any of the battery's rolls results in any level of depletion.
- A multi-section battery targeting two hexes and assigning more than one section to fire at either or both may fire those sections separately, following the rules for ammo depletion listed in 2b, above.
Additionally,
- A battery's Split Fire is declared prior to any fire die rolls. All Return Fire is declared prior to any fire die rolls, unless the Return Fire is not simultaneous with the Phasing Fire [10.42].
- If splitting fire by section but combining two or more sections, see 10.64.
- Two or more stacked batteries or sections combining fire may not split that fire [10.63].
- A section may not split its fire.
10.66 A phasing battery choosing to fire when alone in a hex and in the Frontal hex of an enemy unit must, if it can, fire at that enemy unit. It may split its fire against that hex [10.65]. If enemy units are in both its adjacent frontal hexes, it may instead split fire between those two hexes, but may not target another hex unless unable to fire into either adjacent frontal hex.
10.67 Artillery Range Issues
- Canister/Grapeshot vs. Shot/Shell. Artillery used different types of ammunition, depending on the range to the target:
- Artillery fire at one, two or three hexes (canister and grapeshot) is resolved as small arms fire.
- Artillery fire at a range of four hexes or greater uses the Artillery Fire Table. It affects all units individually and equally in the target hex [Exception to 8.35].
- Artillery And High Ground. If an artillery unit is firing downhill—the target is at a level lower than the firing guns—at ranges of four hexes or greater, add one to the roll. This DRM is not cumulative with +1 DRMs for downhill fire listed in the TECs.
- Artillery may not fire into an adjacent hex if it is two or more levels higher or lower than the firing hex. Exception: Artillery may use Pre-Shock Fire in such a case, but with a –2 DRM and may not Rapid Fire.
Note: Battle Book rules on terrain take precedence.
10.68 Rapid Fire. Smoothbore cannon-artillery types noted with an (RF) on the Range Chart; e.g., "N"—may use Rapid Fire to increase their firepower at ranges of one, two or three hexes. However, guns that have expended or will expend MPs may not use Rapid Fire. Procedure:
- Cannon using Rapid Fire may fire twice (whether it is Phasing or Non-Phasing Fire).
- When using Rapid Fire, if an unadjusted 0 or 5 is rolled on either shot, the guns are Out of Ammo after firing both shots (this represents overheating, overuse of available ammo, etc.) [10.69].
- For both Phasing Fire and Return Fire, the artillery's first and second shots are simultaneous with enemy fire. Apply the results of both shots in the order rolled. Exception: If the Phasing Fire is from outside its fire arc, a non-phasing unit applies both results prior to any Reaction Refusal/Facing Change.
- If combining fire with rifled artillery types, all guns fire the first shot. Only the Rapid Firing smoothbore types fire the second shot.
Rapid Fire is declared before any die roll and applies even if there is no remaining eligible target for the second shot. Both the first and the second shots must target the same hex.
10.69 Whenever a battery or section fires, either separately or in combination, and rolls an unadjusted 5, it incurs a Low Ammo –2 DRM. If it is already at –2, then it is Out of Ammo (with no firing allowed). If the firing unit is a section, then the penalty applies to the section. The new ammo depleted DRM does not apply to the fire that triggered it. For guns using Rapid Fire, anytime a player rolls an unadjusted 0 or 5, those guns are Out of Ammo [10.68]. Apply it after the second shot is resolved. Use the procedure in optional rules 10.92 and 10.93 for Ammo Resupply.
10.7 Small Arms Fire vs. Artillery
SP losses from small arms/grapeshot fire are treated as the loss of one gun per SP loss.
DESIGN NOTE: In reality, it is the crew loss that makes operation of that gun impossible, the gun being abandoned.
10.8 Fire Die Roll Modifiers
10.81 The die roll to resolve artillery or small arms fire may be modified by various conditions. All DRMs are cumulative.
| DRM | Condition |
|---|---|
| +/– | Range effects [see the Range Effects Chart]. |
| – | Terrain effects [see the Terrain Effects Chart]. |
| +1 | Small arms fire from directly "behind" Breastworks (not for arty firing as small arms at one to three hexes). |
| –1 | Infantry/dismounted cavalry defending against small arms/canister fire through a Breastwork hexside. There is no defensive benefit for artillery fire at Shot/Shell range [15.23]. |
| +/–1 | Massed or Dispersed Target [8.34], applies only to Shot/Shell artillery fire. |
| +1 | If target is non-phasing (only) mounted cavalry. |
| –1 | Mounted cavalry firing. |
| +1 | Prepared Fire [10.5]. |
| –1 | Disordered unit firing. |
| +1 | Flanking Fire. If a target incurs fire through a Flank hexside, including flank fire from any part of an Extended Line using combined fire. This does not apply when: the target is under March Orders, or the fire is artillery (shell) at four hexes or greater. |
| +1 | Artillery Fire at a lower-level target at Ranges of four hexes or more [10.67]. |
| –2 | Artillery Fire in same phase in which it Moved or became the top unit. |
| –1 | Green Infantry firing. |
| –? | Night Turn fire [16.1]. |
| –2 | Dawn or Dusk firing [16.11]. |
| –2 | Artillery Non-Phasing Fire after a facing change. |
| –? | Fatigue [17.31]. |
General Terrain Notes:
- When a LOF follows a hexside and then enters the target unit's hex at a vertex between a hexside that benefits the target unit and one that does not, the target unit receives the benefit.
- The +1 benefit does not apply to a firing unit behind breastworks but whose LOF passes through the vertex between Breastwork and non-Breastwork hexsides.
- Most Terrain Effects Charts in the series include the following note, which applies even when omitted. Combat Effects are all an adjustment to the Die Roll. They apply if the defender is in the named hex, or being shocked or fired at across that hexside directly into the target hex.
- For slope hexsides that provide DRM for fire, compare the firing unit's elevation to the target's elevation whenever the range is greater than one hex. Use that elevation difference to determine which Slope DRM applies.
10.82 Combined Small Arms (Non-Artillery) Fire [Optional]. Non-artillery units stacked in the same hex must combine fire when targeting a single hex, applying all other rules governing fire. Apply the least favorable DRMs for range, Prepared Fire, unit status, and ammo depletion. Phasing units may postpone fire after moving, until all units that will combine fire have stacked together. If splitting fire, follow 10.15, treating the stack as a single firing unit [Exception to 10.13 and 10.14].
10.9 Ammo Depletion and Resupply [Optional]
DESIGN NOTE: This is an optional rule because it means putting another layer of markers on the counters, which many of you do not like to do. We recommend it to players who like an added level of realism and enjoy the challenge of getting an army to do what you want it to do. Ammo Depletion DRM markers are not supplied with River of Death and Three Days of Gettysburg, 2nd Edition.
10.91 Whenever an infantry or dismounted cavalry unit fires and rolls an unadjusted 5, it incurs a –2 DRM Low Ammo. If it is already at –2, then it is Out of Ammo (with no firing allowed). The new ammo depleted DRM applies after the unit has finished its fire, including Split Fire and Rapid Fire. This rule does not apply to mounted cavalry.
10.92 A unit may reduce its ammo DRM by undergoing a Resupply and Rally Action [3.0 III/C/3]. An Out of Ammo can be reduced to a Low Ammo (–2 DRM), or a Low Ammo can be removed. A battery of multiple sections may Resupply one or more while firing with the others during the same Activation. Ammo Resupply is automatic—no UDD is required. Ammo Resupply is not a Fatigue action. A unit that Resupplies may change facing by one vertex, but only after resupplying and not if it already changed facing after rallying, or fails a rally attempt.
10.93 Units adjacent to an enemy unit are not eligible for Ammo Resupply.
10.94 Dismounted cavalry units that mount automatically and fully resupply ammo.
11.0 Shock Assault
The term "shock" simulates hand-to-hand, charge-and-assault. Although there is some firing going on, most of what is happening is an initial, short charge, followed by a rather disorganized melee intended to get the other guy to abandon his position. Shock was intended to take advantage of the casualties and Disorder caused by fire. In itself, it caused few losses; but when effective, it could throw an enemy unit, teetering on the edge of indecision, into a widespread loss of cohesion (if not headlong flight), rendering it ineffective for a long time.
11.1 Basic Shock Concepts
11.11 General Shock Procedure:
- Designate all attacking units and targets of Shock and Charges [11.31].
- Perform Retreat Before Shock [11.33].
- Green Attacker Commitment Check [11.36].
- Defender's Pre-Shock Cohesion Check [11.37].
- Pre-Shock Reaction Fire [11.38].
- Resolve Shock and Apply Disorder [11.4].
Each of the above steps must be undertaken in the order listed, and each step must be completed for all units before the next is undertaken. Other than that, players may choose whichever units they wish to go first, second, etc.
Exception: Step 6 is resolved left-to-right or right-to-left down the line.
11.12 Shock is resolved after all Movement, Fire, Rally, and Resupply is completed by units of that brigade for that phase. A unit is eligible to Shock Attack if:
- It is under Attack or Advance Orders, and
- It is from the brigade that was active in that phase, and
- It did not undertake Rally or Construction, and
- There is an enemy unit in a Frontal hex, and
- It did not enter the hex using a 9.42 Exception, and
- It did not change facing after moving into the hex, and
- There is no hexside terrain feature prohibiting movement between the attacker and defender hexes.
PLAY NOTE: Yes, units under Advance Orders may not move adjacent to non-artillery enemy units. But they may find themselves adjacent and, in those circumstances, may elect to Shock.
11.2 Requirements for Shock
Whether a unit "must" or "may" shock varies, as follows:
11.21 The units in the following circumstances must Shock Attack:
- INFANTRY CHARGE: Infantry or dismounted cavalry under Attack Orders in that Action Phase that moved adjacent to an enemy unit, did not fire, and are not stacked under any non-charging units. An infantry Charge carries with it a +1 DRM in favor of the attacker (the +1 DRM does not carry over to Continued Shock [11.47]).
- MOUNTED CAVALRY SHOCK: Mounted cavalry that moved adjacent to an enemy unit and did not fire, whether possessing fire capabilities or not.
- MOUNTED CAVALRY CHARGE: Charging mounted cavalry [11.5].
Note: All stacked units participating in a shock must be eligible to Charge in order to gain the Charge DRM.
11.22 Any unit eligible under 11.12 and not listed in 11.21 may Shock Attack. This includes Disordered units, which are eligible to Shock (with a penalty for being Disordered).
11.3 Pre-Shock Resolution
The sections below refer to the steps of the General Shock Procedure [11.11].
11.31 Step 1: Target Designation. The phasing player designates his attacking units and the enemy units they will attack. He must designate all enemy units in the Frontal hexes of an attacking unit as the target of shock by at least one attacker. As long as this requirement is met, the phasing player is free to withhold eligible, non-charging units from participation in the shock. All declared shock attacks must be designated such that there is either only one attacking hex or one defending hex.
Exception: Multiple hexes can attack multiple hexes when a single Extended Line unit, possibly stacked with artillery, is either defending or attacking, or both.
Note: A designated shock that fails to reach Step 6 due to failed Green Commitment Checks [11.36] or retreats resulting from Pre-Shock Fire [11.38] has no effect on other designated shocks.
- A defending unit may end up being shock attacked more than once (e.g., by two attacking units not adjacent to each other). One attack is resolved, then, if the defender is still in place, the latter is resolved. The defender conducts only one Pre-Shock Cohesion Check in such instances, applying the worst case DRM from the Defender's Pre-Shock DRMs table.
- As long as all defending units in the frontal hexes of attacking units are designated for shock, there is no other requirement. Use the Shock markers to indicate attackers and targets, removing them as the combat proceeds.
EXAMPLE 1: The following principles apply to Attacker "A" in a shock where three attackers (A1, A2, A3) face two defenders (D1, D2):
- A1, A2 and A3 may not combine to attack D1 and D2 because each shock must designate only one attacking or one defending hex unless Extended Units are involved.
- A2 may attack both D1 and D2, with A1 and A3 not attacking anyone.
- If A2 (with or without A3) attacks D2, then A1 must attack D1.
- If A1 attacks D1, and A2 attacks D2, then A3 need not attack, as all defenders are covered.
11.32 Combining Strength. Apply the following principles to determine when attacking units may combine their strengths against a single defending hex or Extended Unit. Combined attacks are declared during Shock Step 1 and apply even if the attacking units are no longer adjacent for any reason at the time they shock (e.g., results of Pre-Shock Reaction Fire versus the middle hex of three attacking hexes).
- Adjacent infantry and/or dismounted cavalry must combine. If attacking units are not adjacent to each other (or to one other) they may not combine.
- Infantry and/or dismounted cavalry may not combine with mounted cavalry.
- Adjacent mounted cavalry must combine when charging—and adjacent mounted cavalry must combine when shocking—but charging cavalry may never combine with shocking cavalry.
- Conversely, one attacking hex with defenders in both frontal hexes must shock both those hexes, combining the strength of the defenders, unless one of the defending hexes is the target of another shock.
- A shocking unit may not split strength; that includes an Extended Unit.
EXAMPLE 2: If A and B are attacking Extended Line C, they cannot combine their strength, as they are not adjacent. The Shock Ratio will be calculated for each shock using the Extended Line's full 12 SPs. If Extended Line C is attacking, it must attack both A and B, and the Shock Ratio will be C's 12 SPs versus A and B's 12.
EXAMPLE 3: If Extended Line A is attacking B, the Shock Ratio will be calculated using the Extended Line's full 12 SPs, despite B not being adjacent to both hexes of A.
EXAMPLE 4: If the three-hex Extended Line A is attacking, it must attack both C and B, and the Shock Ratio will be A's 18 SPs versus B and C's 12. If B and C are attacking A, they cannot combine their strength, as they are not adjacent.
11.33 Step 2: Retreat Before Shock. Non-phasing infantry and cavalry about to be shock attacked by infantry may Retreat Before Shock:
- Infantry or dismounted cavalry move one hex away from the attacker, maintaining facing.
- Mounted cavalry move up to two hexes, maintaining facing.
- A disordered unit immediately conducts a UDD [2.6] after retreating. If the unit fails, consult the 2nd Disorder Table.
The following may not Retreat Before Shock:
- Units under Attack or March Orders,
- Artillery units, and
- Any unit being shocked or charged by mounted cavalry.
11.34 A retreating unit may not stop in a friendly-occupied hex in violation of stacking restrictions. Instead, it must retreat through those units [12.46] until it reaches a hex in which it can stack. A retreating unit may not enter an enemy Frontal hex occupied by a friendly unit if that hex is designated for a shock that is not yet resolved.
11.35 If all defenders retreat, only the following Shock steps may be performed:
- Step 5, for units eligible to use Pre-Shock Fire [10.43]. Retreating units are not eligible.
- Step 6c [11.46].
See 11.11 for the sequence in which these steps are performed.
11.36 Step 3: Green Attacker Commitment Check. If an attacking unit is Green [14.1], it must pass a UDD [2.6] before shock attacking. If it fails, it will not shock, but the failed check counts as a shock attempt for Target Designation purposes [11.31]. Failing this UDD does not produce Disorder.
11.37 Step 4: Defender's Pre-Shock Cohesion Check. Prior to resolving Shock Assaults, each designated defending stack undergoes a Pre-Shock Cohesion Check. The top unit in each stack conducts a UDD [2.6]. If a defending Extended Line is stacked with artillery and more than one unit could be regarded as the "top" unit, the defending player has his choice of which one to use.
- If the unit passes, the stack defends normally.
- If the unit fails, all units in the defending stack immediately disorder. Non-artillery units already disordered prior to the failed roll then conduct a 2nd Disorder UDD [12.35] (already Disordered artillery is Abandoned).
MARCH ORDER DEFENDER'S PRE-SHOCK COHESION CHECK: If a defending unit is under March Orders, it undergoes the same check as above. However, the results are different:
- If the unit passes, it Disorders.
- If the unit fails, it Routs (non-artillery) or is Abandoned (artillery).
Exceptions:
- Units attacked in Continued Shock do not perform a Pre-Shock Check.
- If defending cavalry countercharges, the stack does not conduct a pre-shock cohesion check [11.56].
DRMs: Certain DRMs apply to the defending unit (only) in Pre-Shock Check. These are listed in the Defender Pre-Shock DRM section of the charts. The DRM for defenders attacked from the flank or rear applies regardless of whether the attacker would be eligible for a Position Modifier during Shock Resolution [11.42]. The DRM for Breastworks applies if the shock will cross a protected hexside. Extended Units qualify for the DRM if any one of their attacked parts qualify.
11.38 Step 5: Pre-Shock Reaction Fire. Units with shock attackers in their Frontal hexes may fire at those attackers only, within the restrictions for Non-Phasing Fire [10.4, 10.41, 10.43]. All results are applied immediately.
11.4 Step 6: Shock Resolution
11.41 Resolution Procedure. Each separate shock attack is resolved (conducting all of the steps listed below) before proceeding to the next. Resolve all attacks either left-to-right, or right-to-left.
a. Determine Shock DRMs b. Resolve Shock c. Conduct Advance d. Perform Shock Continuation e. Apply Post-Shock Automatic Disorder
11.42 Step 6a: Determine Shock DRMs. The Shock Adjustments chart lists adjustments favorable to the Attacker as additions and favorable to the Defender as subtractions from the die roll. In addition to the Shock Ratio DRM [11.43], and positional advantage [11.44], check the chart for other applicable DRMs. All such DRMs are cumulative.
Multi-hex attacks use the following guidelines:
- When the cumulative terrain DRMs between each attacking and defending hex are different, the best case cumulative terrain DRM for the defender applies as the terrain DRM for the attack.
- The Charge DRM applies only if all participating units in all attacking hexes are charging, but charging units must Continue Shock if eligible [11.47].
- When units from different, but coordinated brigades, are attacking and would have different brigadier DRMs, the best case DRM for the defender applies.
- When the position DRMs for each defending hex are different, the best case position DRM for the defender applies.
- When there are multiple attacking units with different Fatigue Level shock DRMs, use the Fatigue Level shock DRM that is least beneficial to the attacker.
- When there are multiple defending units with different Fatigue Level shock DRMs, use the Fatigue Level shock DRM that is most beneficial to the defender.
11.43 Attacker and defender compare their combat strengths to obtain the Shock Ratio. The concepts regarding combining strength [11.32] apply. In addition, mounted cavalry charging into a defender's Flank or Rear has its strength doubled, while mounted cavalry shocking or charging into Woods or Cedar hexes, or defending in such hexes, has its strength halved. The Attacker compares his SPs to those of the Defender and reduces that comparison to a simple odds ratio—one of the ratios given on the Shock Ratio Chart. Odds are always expressed attacker to defender. The Shock Ratio is used as a DRM.
Rounding. When reducing to a simpler ratio, round off as follows:
- Round off in favor of the Attacker if all Attackers moved during the Action Phase and the Defender is not getting any DRM benefit from terrain or Breastworks. Exception: Odds round in favor of the Defender during Continued Shock [11.47].
- Round off in favor of the Defender in all other instances.
EXAMPLE: 5 SPs shock attacking 3 would be at a 2-to-1 ratio if the attacker moved, but the ratio would be 1½-to-1 if the attacker started adjacent or the defender is in the Woods.
An odds ratio less than 1-4 is treated as 1-4; a ratio more than 5-1 is treated as 5-1.
11.44 Position. Position benefits only the Attacker and refers to whether the attacker is shock attacking through the defender's Flank or Rear hexes, or a combination of Front, Flank, and/or Rear. Green units failing their Pre-Shock Commitment Check do not count for determining Position DRM.
If attacking stacks have designated the same defender(s) but are ineligible to combine, apply any positional modifier to each of those shocks. Exception: Calculate positional modifiers separately for attackers using Continued Shock.
"Surrounded" means that all hexes adjacent to the defender are either occupied by units shocking that defender or are Frontal hexes of those shocking units. Apply the +5 DRM to all shocks, regardless of whether the shocking units can combine.
If the attacker will benefit from a DRM for Position, subtract one from the shock resolution die roll for each attacking hex in the frontal hex of an enemy unit not targeted for shock.
11.45 Step 6b: Resolve the Shock. Shock is resolved by rolling the die, adjusting according to the DRMs determined in 6a, and referring to the Shock Resolution Table.
Results from the Shock Resolution Table are applied immediately and in the order listed. For units incurring a 2nd Disorder, see the 2nd Disorder Table.
Note: This is where Fatigue is incurred if using that option.
11.46 Step 6c: Undertake Advances. If all defenders vacate the hex(es) or only Abandoned guns remain, all attacking units within stacking limits, must now advance into at least one vacated hex. Charging units have first priority, followed by non-charging units at the top of stacks. (Exception: Advance is voluntary when the defender Retreats Before Shock [11.35].) The advancing unit(s) may change facing by one vertex after the advance. If extended, see 8.47. Defending units eligible for Continued Shock may Advance [11.47]. If attacked from the Flank or Rear, but eligible to Continue Shock, the original defender may change facing as needed to advance into the attacker's vacated hex. If choosing not to Advance, the defender(s) may nevertheless freely change facing.
PLAY NOTE: Due to the Shock Resolution Procedure's sequence of steps [11.41], Shock or Continued Shock [11.47] may result in a defender vacating a hex designated as the target of a still unresolved shock. In such a case the attacker now without a target must advance into the hex (stacking limits permitting). It then ends its shock sequence, suffering no Post-Shock Disorder [11.48]. If the defender remains in its hex, resolve the designated shock. Similarly, a victorious defender may target a phasing unit that declared a shock but has not yet resolved it. Resolve the phasing unit's shock according to 11.41 if it does not vacate its hex as a result of the Continued Shock.
11.47 Step 6d: Continued Shock. A possible result of Shock (in addition to losses and Disorders) is the ability of the attacker to Continue Shock by attacking again or, in the case of the defender, counter-attacking.
Eligibility. In the following cases, Continued Shock is mandatory for units that Charged [11.21] and voluntary for units that did not Charge.
- Failed Pre-Shock Cohesion Checks lead to all non-artillery defenders routing and all defending artillery being Abandoned.
- The adjusted Shock Resolution die roll is 8 or higher (see the Shock Resolution Table).
In the following cases Continued Shock is always voluntary:
- Adjusted Shock Resolution rolls of 8 or higher for any Continued Shock after the first.
- For the Defender after an adjusted Shock Resolution roll of 1 or lower. In this case, the Defender in the original Shock becomes the Attacker for the Continued Shock [see also 11.48].
Exception: Units unable to advance in Shock Step 6c due to stacking restrictions are ineligible to Continue Shock. If the defender could not retreat, conduct Continued Shock against the same defending hex(es) with all charging units and any others chosen from the non-charging units that participated in the shock.
If Continued Shock eligibility is due to Routs and/or Abandoned guns following failed Pre-Shock Cohesion Checks, and the attacking brigade has designated multiple shocks, place a Continued Shock marker on the eligible attacker(s). During their Shock Step 6 they advance into the vacated hex [11.46]. If then declining a voluntary Continued Shock, remove the marker.
Procedures. Unit(s) able to advance in Shock Step 6c and conducting Continued Shock must, if possible, place at least one enemy unit in their frontal hexes, either in that initial advance, or by advancing one or two additional hexes. The attackers:
- May change facing one vertex for each hex they Advance, and, if necessary, must do so to comply with the above rule.
- May still advance one or two additional hexes, if unable to place an enemy unit in a frontal hex using the above rules.
- Must declare a voluntary Continued Shock before the defender decides on Reaction Facing/Refuse, if the initial advance places an enemy unit in a frontal hex.
Exceptions: The attackers:
- Must stop after advancing adjacent to an enemy combat unit or suffering a 2nd Disorder due to terrain.
- May not enter or cross impassable terrain during any stage of the advance.
- If advancing the one or two additional hexes, may not do so into any hex that would cost more than 2 MPs during Movement.
Upon finishing their advance, the attackers must then shock all enemy units in their Frontal hexes, using standard rules for Steps 1 through 6d, with the following Exceptions:
- If the defender was designated as the target of a different, still unresolved shock, the Continued Shock cannot combine with that other shock. However, the defender may not now Retreat Before Shock.
- There is no die roll for Green attacker commitment or defender Pre-Shock Cohesion Check.
- Continued Shock never gets a Charge bonus DRM, whether infantry or cavalry.
- Odds ratios round in favor of the defender.
- If the -1 DRM for "No Brigadier" did not apply to the first shock, it does not apply to Continued Shock.
- For each Continued Shock a unit undertakes, subtract one (–1) from the Shock DR. Thus, the second Continued Shock (in succession) would be –2, etc.
- Apply Shock Step 6e, Automatic Disorder [11.48], after all successive Continued Shocks have concluded.
- Extended Lines that Continue Shock may not use Wrap-Around [8.48].
PLAY NOTE: It is possible that one Continued Shock attack will result in another. Successful attackers can roll up an enemy line in this fashion.
11.48 Step 6e: Apply Post-Shock Automatic Disorder. At the conclusion of each Shock attack (including any Continued Shocks, if applicable) the additional results below are applied unless the affected units routed. The term attacker, for this subsection, applies to the player who is rolling the die to resolve the Shock or Continued Shock. Both sides may have attacked during the phase. This Automatic Disorder applies only to units that have actually engaged in Shock Step 6b. (Exception: see March Order Defending Units, below.) It does not apply to an attacker when the defending units routed before Shock Step 6b was resolved.
- All Disordered mounted cavalry are now Blown.
AFFECTING ONLY DEFENDING UNITS UNDER MARCH ORDERS:
- The brigade automatically changes to Advance Orders.
- Units in that brigade that were not involved in Shock that phase must then undergo a UDD [2.6], which, if they fail, Disorders them. If already Disordered they lose 1 SP. Unbrigaded units that activate as a brigade are treated as a brigade for purposes of this rule.
Note: These two effects occur even if the defending March Orders unit routed before shock (Step 4).
PLAY NOTE: Essentially, units attacked while under March Orders suffer several (bad) effects: they cannot Reaction Fire, their Pre-Shock Cohesion Check can cause them to rout, and, when it is all finished, the rest of the brigade undergoes a UDD.
11.5 Cavalry Charge
11.51 Mounted cavalry units that Shock are Charging if they meet the requirements of 11.52 to 11.54. Cavalry units that did not move in the Action Phase, or that moved but are otherwise ineligible to Charge, use the normal Shock rules above.
11.52 Eligibility. For cavalry to Charge it must:
- be under Attack Orders,
- have an enemy unit within its LOS,
- be able to move adjacent to that unit using no more than 5 MPs,
- have started the Activation within Command Range of its brigade leader (if it has a brigade leader).
Cavalry that Disorders during the Charge attempt must complete the Charge (Exception: see 11.57), unless it retreats due to suffering a 2nd Disorder [12.34].
Charging cavalry may not fire during any portion of a Charge.
11.53 Procedure. A player wishing to Charge announces his intention and, before moving, makes a UDD for the top eligible unit in the stack [2.6]:
- If the unit passes, it and any eligible units with which it is stacked must Charge.
- If the unit fails, there is no Charge, and the unit/stack remains in place, its Activation finished.
Cavalry that passes its UDD then conducts its Movement. Stacked units that charge may move as a stack. (Exception to 8.21.) Upon moving adjacent to the enemy, mark the charging units with a Cavalry Charge marker. When the Shock sub-phase begins, conduct the applicable steps of the Shock Sequence, starting with Step 1 [11.11].
11.54 The Charge Path. The last three hexes (or less depending on how far it moved) of Movement is called the Charge Path. While in the Charge Path, the charging unit or stack may not change facing (it may, of course, have moved more than three hexes, but it may not change facing in the last three). The Charge Path does not include the target hex and may not include any hex occupied by a friendly unit or which costs more than 1 MP to enter, though crossing Streams is allowed.
11.55 Benefits of Charging. If charging a defender that does not receive a favorable terrain DRM, the Charging unit or stack earns the following benefits:
- A +1 DRM for Charging.
- Defending units except mounted cavalry add one (+1) to Pre-Shock Cohesion Checks.
Regardless of terrain, Charging mounted cavalry doubles its strength if charging into a defender's Rear or Flank, but halves it (cumulative with the doubling) if the defender is in a Woods or Town hex.
As in the case of an Infantry Charge [11.21], the benefits of Cavalry Charge do not carry over to Continued Shock, nor does the defender's option to Countercharge [11.56].
11.56 Countercharge. Defending cavalry may opt to Countercharge charging infantry or cavalry, provided it is not being attacked through Flank or Rear and has not used Return or Withdrawal Fire during the current enemy brigade Activation. A Countercharge does not include any actual movement by the non-phasing unit. Because Countercharges thus have no Charge Path, apply the terrain restrictions of cavalry Charges to the Attacker's hex. For example, a defender cannot countercharge infantry units in Woods hexes. It may Continue Shock after an Attacker Retreats result.
- If the non-phasing unit or stack is under Attack Orders, the ability to Countercharge is automatic. If it chooses to countercharge, the unit or stack does not roll a Pre-Shock Cohesion Check.
- If the non-phasing unit or stack is under Advance Orders, it must pass a UDD [2.6] to Countercharge. The top cavalry unit in a stack rolls for the stack. If it fails, the stack must then undergo a Pre-Shock Cohesion Check [11.37], and the provisions of 11.55 will apply to the remainder of the Shock sequence.
The effects of successful Countercharges are:
- The defender may not use Pre-Shock Fire [14.24].
- AGAINST PHASING MOUNTED CAVALRY: ignore the provisions of 11.55.
- AGAINST PHASING INFANTRY: Instead of the infantry receiving a +1 shock DRM for charging, it suffers a -1 shock DRM (representing the Countercharge).
PLAY NOTE: A cavalry unit being shocked through a Flank hexside may first use Reaction Facing Change [9.61] to negate the Position approach of the enemy and then opt to Countercharge.
11.57 Cavalry Charge and Reaction Move. If the defending units Reaction Move [9.63], the charging cavalry has a choice:
- It may continue its move up to the limit of its MA, but cannot violate the Charge Path restrictions. If it ends its move with an enemy unit/stack in its frontal hex(es), it must complete its Charge, even if that enemy unit/stack was not within LOS of the cavalry prior to moving.
- It may attempt to break off the charge. To do so, roll a UDD for the top unit in the charging stack. If it passes, the stack stops in place, its activation finished. If it fails, the stack must proceed as in no. 1, above.
It does not apply to an attacker when the defending unit voluntarily Retreats Before Shock or vacates the hex because of a Defender Pre-Shock Cohesion Check. Step losses from Post-Shock Automatic Disorder cannot cause leader casualties [12.7].
AFFECTING ONLY ATTACKING UNITS:
- All attacking infantry and dismounted cavalry in Good Order are now automatically Disordered.
- Each stack of attacking units (except Mounted Cavalry) with at least one already Disordered unit suffers a 1 SP loss.
AFFECTING ATTACKING AND DEFENDING CAVALRY (whether charging [11.5] or not):
- All mounted cavalry in Good Order is Disordered.
11.58 Blown Cavalry. Blown cavalry is a Disordered unit with the following additional restrictions:
- Its Disordered printed MA is halved (rounded up) for all purposes.
- A Blown unit that suffers any Disorder or Step Loss combat result automatically loses an additional 1 SP to that result and then must make a UDD [2.6] to check for possible Rout. If it fails, it routs. Blown stacks lose a maximum of 2 additional SPs, one from the top unit and the other applied randomly. Blown units that lose an SP after Collapse [12.23] check for Rout only once.
- Blown cavalry may not Dismount.
- Blown cavalry is considered under Advance Orders.
A Blown marker is automatically removed at the end of the next Activation for that unit's command unless the unit has again been involved in a completed Shock Step 6b. After the Blown marker is removed, the unit remains Disordered, but assumes the orders of its brigade. (Battle Book rules may permit individual cavalry units to roll to change orders)
EXAMPLE: Hampton's Legion Cavalry is Blown in its first Activation of the 1600 turn. At the end of its next Activation, Hampton's Blown marker is removed; the unit starts its succeeding Activation Disordered.
11.6 Artillery Shock Capability
11.61 Artillery may never Shock attack. Artillery may not Retreat Before Shock.
11.62 If a Disordered artillery unit fails a Pre-Shock Cohesion Check [11.37, Shock Step 4], then the crew has abandoned the guns. Place an Abandoned 1 marker on the artillery unit.
11.63 Artillery does not use its printed strength to Determine Shock DRMs [11.42, Step 6a].
- If artillery is the top unit in a stack with infantry or cavalry or if there is only artillery in the hex (unsupported artillery), then add 1 SP for every four guns in the hex, rounded down (with a minimum strength of 1 SP) to the strength of any non-artillery stacked beneath it when determining Shock DRMs.
- Artillery units that are stacked with infantry or cavalry but are not the top unit, as well as Abandoned guns, do not contribute to the odds determination for shock.
11.64 To Resolve the Shock [11.45, Step 6b], refer to the Shock Resolution Table with the following Exceptions:
- For an Attacker Retreat result, artillery cannot Continue Shock.
- For a Bloody Standoff, if the artillery is the top unit or unsupported then it loses one gun.
- For a die roll result of 10+, all defending artillery is abandoned. Place an Abandoned 1 marker(s) on the artillery unit(s) without retreating the artillery [12.36].
11.65 Any artillery that suffers a 2nd Disorder due to shock is abandoned. Ignore any Retreat result. Place an Abandoned 1 marker on the unit.
11.7 Leadership and Combat
11.71 Fire. Leaders/commanders have no effect on Fire.
11.72 Shock.
- When a brigade designates shocks [11.31], and none of its shocking units are stacked with their brigadier, the player subtracts one from the roll for all attacks by regiments in that brigade. This does not apply to defending units, even those that Continue Shock.
- If during Step 6 a unit is stacked with its "Aggressive" brigadier when attacking (not defending), add one to the Shock Resolution die roll.
11.73 UDD/Rally. A leader/commander stacked with units from his command will provide a negative DRM, equal to his rank (represented by the number of stars on the counter) for each unit in that stack, for any die roll that requires using the unit's Cohesion Rating. Multiple leaders/commanders may combine their ranks/stars.
EXAMPLE: A corps commander (three stars) would provide a –3 DRM to a Rally die roll.
Notes:
- A leader/commander stacked with an Extended Unit benefits all parts of that unit.
- A leader that must stack with the nearest friendly unit/stack [see 12.73] may not assist its UDDs during that brigade activation.
12.0 Combat Results
12.1 Combat Unit Strengths
12.11 All combat units have combat SPs, i.e., incremental steps representing their manpower (for infantry/cavalry) or guns (for artillery) at the start of the battle. Thus, an infantry unit with 6 SPs starts with six such "steps," while one with 11 SPs starts with eleven steps.
12.12 The SP value on the counter is the maximum strength that unit may ever have.
12.13 To indicate lost steps (SPs), place a numbered Step Loss marker beneath the counter to keep track of its present strength. When a unit has taken step losses equal to its original strength it is eliminated.
PLAY NOTE: Some players like the marker to indicate steps lost; others, present strength. It matters little which method you use, as long as both of you agree what method is being used.
12.2 Strength Point Losses
12.21 Units take SP losses from enemy fire (as indicated by the numbered results on the Fire Table), from Shock (where indicated by the Shock Resolution Table), from Additional Disorder [12.35], and from Recovery from Rout [13.5]. All step losses are taken before applying any other results.
12.22 All step losses apply to the top unit. If the top unit is eliminated before absorbing all the required step losses, the next unit in the stack takes the remaining losses. If all units are eliminated, ignore leftover losses. Exceptions: Bloody Standoff [8.36]; Artillery fire at Shot/Shell Range [12.35e].
12.23 Collapse. A non-artillery unit that has taken step losses that reduce it to less than half of its original strength is automatically and immediately Disordered the instant such loss takes effect. (There is no effect if already Disordered.) It is also considered Collapsed; place a Collapsed marker on this unit. Extended Units are considered one unit for the purposes of Collapse.
Note: If the combat result causing Collapse also includes Disorder this Disorder will be a 2nd Disorder.
A Collapsed unit has these characteristics, in addition to those for being Disordered:
- It may never be rallied to normal status while at less than half strength [16.2].
- Each time a Collapsed unit takes additional SP losses, the player must make a UDD [2.6] after any required retreat and/or other UDD for 2nd Disorder. If it fails this final UDD, it Routs. This does not apply to the step loss involved in Recovery from Rout [13.5]. Collapsed defenders suffering a shock result of an adjusted 10 or higher check for rout only once.
- A unit recovers from Collapse only by recovering stragglers [16.2].
EXAMPLE #1: An 8-SP unit that has lost 4 SPs is still normal. The instant it loses its 5th SP it is Disordered and Collapsed. If the Collapse is due to a numbered step loss result, then apply the D or d+2 result.
EXAMPLE #2: The unit from the above example suffers an additional result of "1D" from enemy fire. The player reduces it to 3 SPs, flips the unit to its Disordered side and places a "Collapsed" marker on it. The unit is then reduced to 2 SPs, from the (now 2nd) Disorder result (and retreated). Lastly, as it has taken additional SP losses while Collapsed, it must roll to see if it Routs.
12.3 Disorder
Disorder represents a wide range of reactions to combat, other than being killed. As such, it often (but not always) represents disintegration of a unit's cohesion.
12.31 The reverse side of a combat unit is its Disordered side. When a unit in Good Order suffers a Disordered result it is flipped to its Disordered side (retaining its facing). A unit's Cohesion Rating and MA are reduced when Disordered; not the Strength.
Exception: Disordered status for artillery does not affect Movement. This is a design change beginning with Battles with the Gringos! and may be applied to all previous games.
12.32 Disorder from the Fire or Shock Tables:
- A "d" means that all affected units must make a UDD [2.6]. Roll one die for each unit. The UDD is modified by any DRM listed with the combat result (e.g., "d+2"), and/or the presence of a leader [11.73]. If a unit fails, it is Disordered.
- A "D" means that the Disorder result is automatic to all affected units.
12.33 Disorder from Terrain (as shown in the Terrain Effects Chart) is the same as in 12.32 (without any of the DRMs). In addition, a moving unit Disordered by terrain immediately uses the MA on its Disordered side, subtracting what it has already expended.
12.34 The effects of being Disordered are:
- Units may not voluntarily move adjacent to an enemy. However, if a Disordered unit is already adjacent to an enemy it may shock attack. Also, cavalry that is Disordered during a Charge is still eligible to move adjacent and must attack unless suffering a 2nd Disorder. [11.55].
- Disordered units may Retreat Before Shock, but must undergo a UDD [2.6] upon doing so. If the unit fails, consult the 2nd Disorder Table and/or see 12.35b.
- Disorder also causes DRMs for the Pre-Shock Cohesion Check and for Shock (see the Shock Resolution Table).
- A firing Disordered unit has a –1 DRM and may not use Prepared Fire [10.52].
- Disordered Artillery may not fire, but it may move.
- A unit Disordered while it is moving assumes the MA of its Disordered status.
12.35 Additional Disorder to Infantry or Cavalry [see also the 2nd Disorder Table]. Infantry and cavalry units that are already Disordered and that incur another Disorder suffer effects that depend upon the cause of the Disorder ("a" through "d", below), and upon whether a unit is stacked with other units ("e", below).
a. FROM FIRE (including UDDs due to Fire Table results Disordering or eliminating the top unit). A Disordered infantry/cavalry unit (including Blown cavalry) that takes an additional Disorder remains Disordered and:
- Takes one step loss, and
- Retreats one or two hexes, player's choice. b. FROM SHOCK (including Pre-Shock Cohesion Checks and Retreat Before Infantry Shock), FROM REACTION FACING/REFUSAL, ADJACENT UNIT ROUT, FRIENDLY FIRE, OR FROM RETREAT THROUGH FRIENDLY UNITS: The unit undergoes a UDD [2.6]:
- If it fails, it Routs.
- If it passes, it loses 1 SP and retreats one or two hexes (player's choice).
Non-phasing units incurring a 2nd Disorder due to a failed UDD for Reaction Facing Change/Refusal may not return fire versus the triggering unit. c. FROM TERRAIN: If a Disordered unit is Disordered a second time by terrain (e.g., in Dead of Winter, Disordered artillery crosses a Stream hexside and fails the UDD) it ceases movement in the hex that caused it. There is no other penalty. Exception: see 12.46. d. FROM AUTOMATIC POST-SHOCK DISORDER:
- Disordered mounted cavalry is Blown.
- Disordered infantry or dismounted cavalry loses 1 SP. e. When two or more stacked non-artillery units suffer a 1 SP loss from additional Disorder as a result of the same Fire or Shock, or as a result of failing UDDs for any reason, the stack loses a total of 1 SP. Treat each Shock Step separately (it is possible to lose SPs during Shock Steps 2, 4, 5, 6b and 6e). Apply the loss to the unit that was at the top of the stack prior to any retreats required by the fire combat or Shock Step in question, or after any required advances. Exceptions:
- In case of additional Disorders caused by artillery fire at Shot/Shell range, apply the loss randomly.
- Blown Cavalry [11.58].
- A stack momentarily formed by a stationary unit and a retreating unit which must continue its retreat after a 2nd Disorder UDD does not count as a stack for purposes of this rule. f. If a phasing unit incurs a 2nd Disorder from any of the causes listed in 12.35a or 12.35b, it may not undertake further phasing actions of any kind during that Activation. Exception: see 12.47.
12.36 Additional Disorder to Artillery. If a Disordered artillery unit suffers an additional Disorder:
- From Friendly Fire, Pre-Shock Cohesion Checks or shock results, it is abandoned, ignoring any Retreat specified on the Shock Resolution Table.
- From Fire, it loses 1 SP [10.7]. It does not retreat.
12.4 Retreat
12.41 Units retreat due to a variety of circumstances. The owning player always has the choice of retreat path, when choices are available. If under Advance Orders and adhering to March Order Stacking limits, a retreating unit may "use" Pikes/Roads/Trails to enter a hex it could otherwise not enter, or to avoid a UDD or Auto-D that might otherwise limit its retreat to one hex.
12.42 Involuntary Retreats.
- ONE HEX: As a result of a Shock Resolution die roll of 1 or lower (attacker) or 5-9 (defender), or by a Loose Cannon result for a Cautious Leader [6.24].
- TWO HEXES: As a result of a Shock Resolution die roll of 10+.
- ONE OR TWO HEXES: Additional Disorder from Fire, Reaction Facing Change, Retreat Before Infantry Shock, Pre-Shock Cohesion Check, Adjacent Unit Routs, Friendly Fire, and Retreat Through Friendly Units.
12.43 Voluntary Retreats. These are retreats the player chooses to conduct.
- ONE HEX: Infantry Retreat Before Shock.
- ONE OR TWO HEXES: Mounted cavalry Retreat Before Shock and Cavalry or Artillery Reaction Movement.
12.44 A retreating unit is subject to the following restrictions:
- It cannot retreat off the map, enter an enemy-occupied hex, or cross a hexside or enter a hex that in movement it would not be able to enter or cross. Exception: Units under March Orders may retreat involuntarily even if within four hexes and LOS of the enemy.
- It may stop in a friendly-occupied hex only within stacking restrictions. The retreating unit automatically assumes the facing of the non-retreating unit. Note: A retreating unit that stacks with a non-retreating unit, but which must then keep retreating due to a 2nd Disorder, retreats through the non-retreating unit [12.46].
- If possible, the retreating unit must end its retreat further from the closest enemy units and not adjacent to any other enemy unit. If only a two-hex retreat will allow the retreating unit to comply with these requirements, and the required retreat is one or two hexes, it must retreat two hexes. Note: Possible retreats include retreat Through Friendly Units [12.46].
- It cannot enter an enemy frontal hex or any hex adjacent to either the unit(s) causing the retreat or to any unit(s) that designated it for a separate but unresolved shock, unless that hex is occupied by a friendly unit not currently designated for shock.
- If a unit retreats into a hex that carries a "d" or "D" terrain cost, the retreating unit must either conduct a UDD (d) or take the Auto Disorder (D) as part of the retreat. A failed UDD or a D halts the retreat if the unit is already Disordered.
- Stacked units retreating as a result of shock do so as a stack, and retain their stacking order, unless retreating to different hexes.
If any of the above restrictions prevent a non-artillery stack from retreating, then the stack loses 1 SP for each hex it should retreat but cannot [see 12.45 regarding artillery]. The top unit suffers the loss. Resolve Shocks and Continued Shocks declared against a unit unable to retreat after subtracting the appropriate number of Strength Points.
PLAY NOTE: See 8.47 and 8.5 for treatment of Extended Units.
12.45 Artillery and Retreat
- Artillery may not retreat into a hex that would normally cost it more than 2 MPs to enter. Artillery may use the Road/Pike/Trail movement cost if eligible.
- If an Artillery unit cannot complete a retreat, it is abandoned.
12.46 Retreat Through Friendly Units. A unit or stack that retreats but finds its path blocked by friendly units with which it cannot stack, or which must retreat through friendly units due to 2nd Disorder Table results, continues its retreat until it reaches a hex in which it can stop, regardless of any "D" or "d" listed in the TEC for the terrain in the hex(es) of the stationary unit(s). Once the retreating unit or stack has concluded its retreat and conducted any 2nd Disorder UDD or Rout check to which it might be liable, all stationary units through which the unit or stack retreated must conduct a UDD, with failure causing Disorder. If already Disordered, consult the 2nd Disorder Table or 12.35b. A stationary Extended Unit conducts only one UDD, even if a unit retreats through more than one of its hexes. Successive retreats caused by the same Fire Table or Shock Table result do not require additional UDDs for the stationary unit; retreats caused by a new Fire Table or shock result do.
Exceptions:
- A retreating unit cannot retreat through friendly units in a hex designated for a shock yet to be resolved.
- A unit required to retreat 1-2 hexes must stop after one hex if a retreat of two hexes would force it to retreat through a friendly unit.
Note: As stationary units suffering a 2nd Disorder may also be forced to retreat, a chain reaction of retreats may result. However, for any given chain reaction there is no double jeopardy; neither units that have already conducted a UDD for retreat through nor the originally retreating unit(s) undertake a UDD if other units subsequently retreat through their hexes as a result of 2nd Disorders.
12.47 If a phasing unit is forced to retreat for any reason then it may not undertake further phasing actions of any kind during that Activation. Exception: If targeted by a defending unit's Continued Shock, it may if otherwise eligible use Pre-Shock Reaction Fire and may Continue Shock on a Shock Resolution DR of 1 or less [10.43, 11.47].
12.48 If Both Sides Would Retreat. If both sides must retreat, and the order in which retreats are conducted matters, the side with the unit having the highest Cohesion Rating retreats last. If there is a tie, the defending unit(s) retreat first. If using the Fatigue rules, subtract half the unit's Fatigue, rounded up, from its cohesion rating when determining the unit with the highest cohesion.
12.5 Rout
12.51 A Rout may occur when:
- A Disordered unit suffers an additional Disorder. See 12.35b or the 2nd Disorder Table for specific cases.
- An adjusted shock resolution roll is 10 or more.
- A Collapsed or Blown unit loses a SP and fails its required UDD.
12.52 If Both Sides Would Rout. If both sides involved in shock end up routing, the single (one) unit with the highest Cohesion Rating does not rout; it ignores the Rout result. All other units rout. If there is a tie, the defending unit(s) will rout; one attacking unit will not. If using the Fatigue rules, subtract half the unit's Fatigue, rounded up, from its cohesion rating when determining the unit with the highest cohesion.
Note: For purposes of this rule consider an Abandoned guns result as a Rout [11.6]. Do not count them when determining which unit does not rout.
12.53 An infantry or cavalry unit that Routs is removed from the map and placed in the appropriate box for its Command on the Activation Tracking sheet.
12.54 Friendly infantry or cavalry units (but not artillery) that are adjacent to, or stacked with, a unit that routs (including one that routs from this rule) must undergo an immediate UDD [2.6] each time a unit so routs. If it fails the UDD, the unit incurs a Disorder result. The rout of one unit could end up having a chain reaction effect. However, there is no "double jeopardy" due to this rule; if a routing unit causes two adjacent units to UDD and one of those also routs, the remaining non-routed unit does not undergo another UDD. For example, unit A is adjacent to units B, C and D, while B and D are adjacent to C. If C routs due to A's routing, B and D only check for A's initial rout and not for C's subsequent rout. The same applies if B and C happened to be stacked.
12.6 Advance
If all non-phasing units vacate a hex as a result of combat, or only Abandoned guns remain, the phasing unit(s) causing that result may (and sometimes must) advance into the vacated hex. Advancing units may change facing one vertex, unless that would prevent another unit from conducting a mandatory advance. Advance is subject to the following:
- If the hex is vacated or only Abandoned guns remain in it during Shock (including Pre-Shock Cohesion Check, Adjacent Unit Routs, and failed Reaction Facing during Continued Shock), the phasing player must advance all of the attacking units, within stacking restrictions. Charging units have first priority, followed by non-charging units at the top of stacks. If the defender Retreats Before Shock, the attacker may advance [11.35]. Defenders may Advance after shock [11.46] and must advance to Continue Shock [11.47]. For Extended Units, see 8.47 and 8.52. Abandoned guns remain in the hex after an Advance [12.8]. Shock-related advances occur during Shock Step 6c.
- If the hex is vacated due to the results of Fire, including failed UDDs, the phasing player may advance the firing unit (the decision must be made immediately). Such an advance may be made only if the firing unit started adjacent to the target. Again, see 8.47 and 8.52 for Extended Units. Units under Attack Orders may not move following an advance.
- A unit may never advance across a hexside or into a hex where movement is prohibited. Exception: see 9.44.
- If a unit advances into a hex that carries a "d" or "D" terrain cost, the advancing unit must either conduct a UDD (d) or take the Auto Disorder (D) as part of the advance. A failed UDD or a D halts the advance if the unit is already Disordered.
- Artillery may never advance.
- Advancing units are not eligible targets for Withdrawal Fire [10.44] or Approach Fire [10.45].
12.7 Leader Casualties
12.71 If a leader is stacked with combat units that suffer one or more step losses as a direct result of either Fire or Shock Steps 2, 4, 5, or 6b (including a step loss as a result of a 2nd Disorder), roll again for each such Fire Combat/Shock Step:
- If the roll is a 0, that leader has been killed and is removed from play.
Note: For a "1d+2" Fire Table result, roll first for the Leader(s), then for the unit's UDD. For step losses incurred only due to 2nd Disorders, roll after all units have conducted their UDDs.
- If the roll is a 1-9, nothing has happened (to the leader).
If all units in his command are eliminated, the leader is automatically Killed.
A leader is not removed if all of his units are routed. He can bring them back by being placed In Reserve [6.33].
For an Extended Unit suffering a step loss, conduct casualty checks for any Leaders stacked in any of its hexes.
12.72 Leaders stacked with units which Advance or Retreat may stay with that unit for some or all of the advance or retreat. Leaders, themselves, are never routed nor are they required to advance or retreat.
12.73 If under any circumstances a leader not stacked with friendly units finds himself adjacent to an enemy unit, the leader is immediately placed with the nearest friendly combat unit he can reach, regardless of MP. Measure the path in leader MPs to determine the closest unit. A moving enemy unit continues moving as if the leader had not been there. If there is no path to any friendly combat unit free of enemy units, adjacent enemy units, or impassable terrain, the leader is Killed.
12.74 To replace a leader, in the Leader Replacement Phase flip the fallen counter over to the replacement leader side and place the new leader with any unit in that command.
- If the leader is a brigadier and the counter is already on its Replacement side, simply bring that Replacement back in the Replacement Phase.
- If all units in the leader's brigade are routed, the Replacement is stacked with his immediate superior.
PLAY NOTE: The depiction of leader replacements varies from game to game. In addition, some leaders have no replacements and are not replaced if they become casualties. In such cases, all Chain of Command rules remain in effect, unless the Battle Book specifies otherwise.
12.75 If a Replacement leader happens to be the same person as a lower-level leader, flip over the latter's counter, too, in the Replacement Phase.
12.76 If a Replacement leader is one who is already out of the game, flip the surviving original leader of the highest numbered immediately subordinate command. Thus, 1/III would be chosen before 2/III, etc., to replace the III Corps commander. Where subordinate commands are not numbered, use the immediate subordinate with the best ratings. It is the player's choice in case of ties.
12.8 Abandoned Guns
When combat results call for artillery to be Abandoned, mark it with an "Abandoned 1" marker, retaining any strength marker. During that same turn's Recovery Phase, flip the marker to its "Abandoned 2" side if not yet recrewed. Exception: If a friendly unit in the artillery's hex and in Good Order passes its UDD for Friendly Fire or Retreat-Through, disregard Abandoned result(s).
Abandoned guns do not count as units. They neither block LOS nor count toward the 7-SP limit on fire from a hex [8.31]. All units, friendly or enemy, may move without penalty through a hex containing only Abandoned guns.
12.81 Abandoned artillery may be recrewed. The owning player removes the Abandoned marker at the end of a Brigade Activation during which:
- A friendly unit in Good Order moved into or through the hex (even if it subsequently Disordered), or
- A friendly unit Advanced into the hex as a result of combat (even if Disordered), or
- A friendly unit already in the hex rallied.
Friendly units may stack above or below the artillery. The Recrewed artillery returns to play in Disordered status. It may move or rally the next time its AM is drawn. When recrewed, the artillery assumes the facing of any friendly units in the hex. If no friendly units are in the hex, the artillery may choose its facing. Batteries may not be recrewed in excess of stacking limits.
12.82 If not recrewed before the Recovery Phase at the end of the second turn, any artillery with an "Abandoned 2" marker is eliminated.
13.0 Combat Effectiveness and Rally
13.1 Unit Combat Effectiveness
Individual units can have the following combat effectiveness states (which are not mutually exclusive):
- GOOD ORDER: The unit is on its front side.
- DISORDERED: The unit is on its Disordered side.
- COLLAPSED: The unit is on its Disordered side, and it is at less than half strength.
- ROUTED: The unit has disintegrated and is off the map.
The last three states may be improved by Rally [13.4], Straggler Recovery [16.2], and Recovery From Rout [13.5], respectively.
13.2 Brigade Combat Effectiveness
The effectiveness of a command is dependent on how much of a beating its component units have taken.
13.21 Brigades become Combat Ineffective (CI) when one or both of the following situations exist:
- All regiments (excluding those yet to enter as reinforcements) are either Eliminated, Collapsed, Disordered, or Routed.
- More than one-half of the brigade's regiments are Eliminated, Collapsed, or Routed.
13.22 The Combat Effectiveness of a brigade is determined in the Combat Effectiveness Phase [3.0 IV/C]. If either of the above apply, place a "Combat Ineffective: Brigade" marker atop the brigadier. The CI marker may be removed at the conclusion of any Combat Effectiveness Phase in which enough of the units return to normal status.
13.23 A CI brigade may activate a maximum of twice in a turn. When its parent division will activate more often, the player may choose which Activation(s) the CI brigade skips.
13.24 This rule does not apply to artillery battalions/brigades. Artillery that is part of the brigade or attached to it does not count for the determination of Combat Effectiveness for infantry and cavalry brigades.
13.3 Division Combat Effectiveness
13.31 A division is rendered CI when more than half of its brigades are Combat Ineffective in Phase IV/C. Place a "Combat Ineffective: Division" marker atop the division leader. Artillery battalions/brigades do not count as brigades for purposes of this rule.
13.32 If a division is Combat Ineffective, it (and its brigades) may not have more than two Activations in a turn. Moreover, its brigades may not be coordinated [5.34] in any Activation.
13.33 A "Combat Ineffective: Division" marker may be removed at the end of any Combat Effectiveness Phase in which a majority of its brigades are no longer CI.
13.4 Rally
Disordered units may be rallied as part of an Ammo Resupply and Rally action [3.0 III/C/3]. Units wishing to Rally may perform no other voluntary actions except Resupply Ammo in the phase in which Rally is attempted.
13.41 To Rally a Disordered unit, roll the die, adjusting as described below in 13.42. If the adjusted roll is:
- The same as or lower than its Disordered Cohesion Rating, the unit is no longer Disordered. Flip the unit to its normal side. Unless the unit is Refused, Extended, or has already changed facing after Resupplying in the same Activation, the player may adjust facing by one vertex. Two or more stacked units attempting Rally may change facing only if all succeed, and if all other units in the stack are still eligible to change facing.
- Higher than its Disordered Cohesion Rating, it remains Disordered. However, see below.
- At least two times higher than its Disordered Cohesion Rating or an adjusted 9 or higher, it remains Disordered and loses 1 SP.
EXAMPLE #1: A unit with a Disordered Cohesion Rating of 5:
- A Rally roll of 4 would flip the unit to its normal side.
- A Rally roll of 8 would keep the unit Disordered.
- A Rally roll of 9 would keep the unit Disordered and cause the loss of 1 SP.
EXAMPLE #2: A unit with a Disordered Cohesion Rating of 4:
- A Rally die roll of 4 would flip unit to normal side.
- A Rally die roll of 5 would keep unit Disordered.
- A Rally die roll of 8 or higher would keep unit Disordered but minus 1 SP.
13.42 The following DRMs, all cumulative, apply to any Rally roll:
- If the unit is adjacent to an enemy combat unit there is a +1 DRM.
- If the unit is mounted cavalry there is a –1 DRM.
- If the unit is stacked with a leader, subtract one (–1) for each rank (star) on the leader counter [11.73].
13.43 A leader may affect a Rally attempt only at the end of his movement. The leader may not participate in Shock during the same brigade activation in which he affected a Rally attempt.
13.44 Rally is Voluntary. Players may choose to not attempt Rally for a unit. Such units retain their present status.
13.45 Automatic Rally/Fatigue Reduction. Any on-map brigade that is not in Reserve but whose non-artillery units do not move, reaction move, use Phasing Fire, construct Breastworks, declare a shock, or are designated as a shock target for one full turn may, during the Replacement/Recovery Phase [3.0 IV/B] of that turn either:
- Automatically rally all Disordered units within Command Range of their brigadier, or
- Reduce Fatigue by one level [17.42].
Neither facing changes that do not expend Movement points, mounting/dismounting, nor Reaction Refusal/Facing Changes are considered Movement for purposes of this rule.
Notes:
- Disordered batteries of artillery battalions/brigades may rally if the battalion/brigade meets the above requirements.
- Unbrigaded units may rally or reduce Fatigue by one level if they meet the above requirements and are within Command Range of their immediate superior.
13.5 Recovery From Rout
13.51 Routed units in an off-map Division Box are eligible to be returned to play at the conclusion of any turn [3.0 IV/B] in which that brigade has been In Reserve [6.3] for the entire Activation segment [3.0 III].
13.52 To have a routed unit recover, the player undertakes a UDD for the unit using its Disordered side Cohesion Rating (cavalry uses its mounted rating):
- If the roll is the same as or lower than the Cohesion Rating, it passes. Place the unit on the map within one hex of its brigadier. However, reduce the unit by 1 SP, and the unit is Disordered.
- If the roll is higher than the Cohesion Rating, it fails. The unit loses 1 SP and remains routed.
- Regardless, if a 9 is rolled the unit is permanently eliminated instead.
13.53 Recovered cavalry is always replaced on the map in mounted status.
14.0 Special Units
Individual battles usually have additional Special Units, other than those discussed below.
14.1 Green Units
Regiments that had not been in any action before are Green; they are indicated with a "G" next to their Cohesion Rating. Green units remain green the entire course of the game. Green units must make a special, Pre-Shock Commitment Check when shock attacking and have a –1 DRM when firing. Other than that, they are treated normally.
14.2 Cavalry
14.21 Cavalry can exist in one of two states: mounted or dismounted. Therefore, each cavalry unit has two counters, each one representing one of these states. See individual Battle Books for exceptions.
14.22 Units may Mount or Dismount only at the beginning of their Activation, before Movement. The unit must not be adjacent to an enemy unit. To indicate its status, simply change counters. Its MA for that Activation (only) is one-half (rounded up) of the printed MA of its new status. If under Attack Orders, halve its printed MA again (round up). If under Advance Orders, units that Mount or Dismount may not Fire.
Exception: Mounted cavalry that is Blown may not dismount.
14.23 Mounted cavalry is treated as cavalry; dismounted cavalry is treated as infantry.
14.24 Mounted cavalry may fire, but they may never do so during an Activation in which they are Charging or Countercharging. Moreover, phasing mounted cavalry may not fire at a distance in excess of two hexes. The latter restriction does not apply to non-phasing mounted cavalry using Return Fire. Fire from Mounted cavalry has a –1 DRM.
Fire at a non-phasing, mounted cavalry benefits from a fire DRM of +1.
14.25 Horse-holders. For purposes of fire and shock strength all dismounted cavalry units subtract one from every 4 SPs the unit currently has, to account for the fellows holding the horses.
EXAMPLES: Both a 4- and a 7-SP unit would subtract 1 SP; an 8-SP unit would subtract 2 SPs.
PLAY NOTE: The advantages to being mounted are Movement (including Reaction Movement) and Charge (and Countercharge). The advantage to being dismounted (where available), is better fire ability.
14.3 Spencer Repeaters
The Spencer Repeating rifle (and its brethren) was a major step forward in small arms firepower. This increase is reflected in several rules that apply to units armed with Spencer Rifles (SR) and Spencer Carbines (SC). These rules do not apply to mounted cavalry or to Disordered units.
Note: A Disordered Spencer Repeater unit or a mounted cavalry unit using Spencers undertakes phasing and/or non-phasing fire as if it were any other type of small arms.
Units armed with Spencer Repeaters fire twice if they are in Good Order prior to their first shot and do not suffer a 2nd Disorder [12.35] before their second shot. If they fire twice, both shots must target the same hex, even if there is no enemy unit in the hex after the first shot.
14.31 If a phasing unit in Good Order is firing with Spencer Repeaters, it gets an extra round of fire, as shown in the following play sequence:
- Phasing unit fires; apply results.
- Any Return Fire is not simultaneous but follows the Phasing Fire; apply results.
- Unless it suffers a 2nd Disorder, the phasing unit fires again, whether or not the target used Return Fire.
14.32 If a non-phasing unit in Good Order is returning fire with Spencer Repeaters, it gets an extra round of fire, as follows:
- Phasing unit announces fire.
- Phasing unit fires, and non-phasing SR unit(s) Return Fire simultaneously; apply results. Exception: If it conducts a Reaction Facing Change triggered by the Phasing Fire, a non-phasing SR unit's Return Fire is not simultaneous with the Phasing Fire.
- SR units that have not suffered a 2nd Disorder fire a second round of Return Fire.
14.33 The "*" on the Fire Table means that if a player rolls an unadjusted 5 for a Spencer Repeater unit when it is firing in any of these "second rounds," the unit is Out of Ammo (a representation of jammed weapons—a problem with many Spencers—and/or overuse of ammunition). Use the procedure in optional rule 10.92 for Ammo Resupply. If using 10.91 and rolling an unadjusted 5 on the first shot only, ammo depletion applies after the second shot.
14.34 Return Fire by non-target units versus phasing units armed with Spencers follows Series Rule 14.31—the Spencers fire first.
14.35 When using Withdrawal Fire, a unit armed with Spencers fires twice before the withdrawing unit leaves the hex, or against the top unit remaining in the hex.
14.36 Units armed with Spencers fire twice for Pre-Shock Reaction Fire.
14.37 When a unit in Good Order, armed with Spencers returns fire against phasing, rapid-firing artillery, both the first shots and the second shots are simultaneous. The result of each shot is applied after all of the rolls are complete.
14.38 When a unit in Good Order, armed with Spencers, fires at non-phasing, rapid-firing artillery, the Spencer fire alternates with the artillery fire, with the Spencers firing first. Artillery suffering a Disorder as a result of the first or second shot from the Spencers cannot fire after that result is applied. Any non-artillery unit stacked with the artillery and eligible to fire does so after the Spencers' first shot.
15.0 Engineering
Engineering, in the base rules, involves constructing Breastworks. Individual battles may have rules for Bridge construction and so on. Breastworks represent temporary fortifications that provide a benefit against both Fire and Shock. However, they do take some time to construct, because the only available materials for such construction are trees (which are hard to cut and take time to saw) and wooden farm fences.
15.1 Constructing Breastworks
15.11 Breastworks may be built by any infantry or dismounted cavalry unit under Advance Orders if it is In Command and its brigade leader is eligible to change orders during Step II/C of the Sequence of Play [3.0]. Units under March or Attack Orders may not build Breastworks. If using the Fatigue rules [17.0], units at Fatigue Level 2 or higher may not build Breastworks.
15.12 With the exception of Town and Marsh hexes, Breastworks may be constructed in any hex that is within three hexes of a Woods, Orchard, or Town hex or a hex with a Building/House. The hex of construction, the Woods, Orchard, Town, or Building/house hex, and the two hex path between them cannot be adjacent to an enemy unit when construction is started.
Note: No hex can contain more than two Breastworks. Two Breastworks markers in a hex only serve the purpose of protecting additional hexsides.
15.13 Breastworks require two complete Game Turns for construction, except at Night, when they require only one turn. A building unit cannot do anything else for those turn(s). For construction starting in a non-night turn, place the build marker during the Engineering Phase [3.0 II/F] of the first turn, re-facing the building unit toward the hexsides the Breastwork will cover. Flip the marker in the Replacement/Recovery Phase of the second turn (or the same Night turn) so that the Breastwork design matches the hex configuration. Once placed, Breastworks can never be reoriented.
15.14 If a constructing unit changes to Attack Orders, retreats out of the construction hex for any reason, conducts any action other than construction (including Non-Phasing Fire), or if its hex is the subject of enemy shock assault or its brigade's Fatigue level increases to 2 or more, construction is discontinued. Remove the Construction marker. Construction may continue despite the constructing unit being Out of Command or its brigadier unable to change orders at the start of the second turn of construction. Non-phasing units that use Return Fire benefit from Prepared Fire if otherwise eligible.
15.15 Construction started by one unit must be completed by that unit. Additional units in the hex do not speed up construction. Each part of a unit in Extended Line may build Breastworks.
15.16 Units building Breastworks retain all defensive capabilities.
15.17 Breastworks may be removed by any combat unit that moves across a Breastworks hexside by expending one additional MP to do so. Once a unit has moved through the protective hexside of a Breastwork and expended the extra MP, remove the Breastworks marker.
15.2 Effects of Breastworks
15.21 Breastworks have a two-hexside facing, as indicated on the Breastworks counter. The Breastworks must be placed to conform to those hexsides, and they affect Fire/Shock/Movement only through those hexsides.
15.22 The cost to move through a Breastworks hexside is listed in the Terrain Effects Chart. This cost applies regardless of Pikes, Roads, Trails, and Railroads.
15.23 Breastworks provide the following beneficial DRMs:
- +1 Firing small arms fire from within Breastworks (through a Breastworks hexside). This does not apply to artillery firing at canister range.
- –1 Infantry/dismounted cavalry defending against small arms/canister fire through a Breastworks hexside (there is no defensive benefit when targeted by artillery at Shot/Shell range).
- –1 Defender's Pre-Shock Cohesion Check [11.37].
- –1 Defending against shock within Breastworks.
16.0 Night
16.1 From Dusk 'til Dawn
16.11 For a Dawn or Dusk Game Turn, all daylight rules are in effect, with the following changes/additions:
- All Command Ranges are halved, rounding up.
- There is a –2 DRM for any fire over one hex range.
16.12 For a Night Game Turn, all daylight rules are in effect, with the following changes and additions:
- All Command Ranges are halved, rounding up.
- There is a negative adjustment for distance that is cumulative. For one hex, it is –1; for two hexes, it would be –3 (–1 + –2). For a range of four hexes it would be –10 (or prohibitive).
- Artillery batteries each fire separately, regardless of the command situation or stacking.
- There is no Prepared Fire or Cavalry Charge.
- All Activations while under Attack Orders incur Fatigue, unless the brigade's only actions are Leader Movement, mounting/dismounting, Rally, Resupply, Retreats caused by Cautious Loose Cannon results, facing changes that cost no MPs, or no action at all. When part of a brigade is under Attack Orders, the brigade incurs Fatigue only if the units under Attack Orders conduct a Fatigue action.
- Cavalry and artillery may Reaction Move only when the enemy is about to move adjacent.
16.2 Straggler Recovery
16.21 To undergo Straggler Recovery, a brigade must be In Reserve during a Dusk or Night turn. It undertakes the actual Recovery at the conclusion of each such turn.
16.22 For eligible brigades [16.21], each non-artillery unit within its brigadier's Command Range conducts a UDD.
- If it passes, increase its SP by one.
- If it fails, there is No Effect.
16.23 A unit's strength may never be increased to its original face value (nor higher). The best it can do is to return to one short of its original strength.
16.24 Units may Recover Stragglers and Fatigue; they are not mutually exclusive.
HISTORICAL NOTE: Not all combat losses were casualties. A not-insignificant number of losses were from soldiers who simply drifted off, fell by the road during marches, or opted for discretion, etc. Some of these could be recovered during extended lulls in the battle, which here means at Dusk/Night.
17.0 Fatigue [Optional]
DESIGN NOTE: This is optional because it adds another layer of complexity to the game. However, we highly recommend its use. It adds a level of realism.
17.1 Who Gets Fatigued?
Fatigue applies to all combat units, except artillery. Fatigue is applied at the brigade level, and a brigade can incur a new level of Fatigue if even one unit in that brigade does any of the actions that would incur Fatigue.
17.2 How Fatigue is Incurred
17.21 Brigades start with no Fatigue Level. This is indicated by the absence of any Fatigue Indicator with the brigadier. Fatigue is incurred as it happens, but the effects—placement of the Fatigue marker—take place when the affected brigade has done all that it will for that Activation.
PLAY NOTE: In certain battles, on-map commands may start and reinforcements may enter at a specific Fatigue Level.
17.22 There are two ways in which Fatigue is incurred:
CAUSE 1: Any turn in which a brigade undertakes more than two Activations, its Fatigue Level increases by one for each Activation above two [17.24]. Thus, a brigade that undertakes four Activations in one turn will increase its Fatigue Level by two. Activations by Out of Command units also count towards Fatigue, but Activations that are solely undertaken by attached artillery, alone, do not count.
Exceptions:
- A brigade Activation during which its units undertake no actions at all, or undertake only mounting/dismounting, Rally, Resupply, Retreats caused by Cautious Loose Cannon results, facing changes that cost no MPs, and/or engineering, does not count toward Fatigue.
- A unit using March Movement solely on Roads/Pikes (including Bridges and Fords) does not incur Fatigue for its brigade for the first three Activation-equivalents in a turn; it does for a fourth. If it enters any terrain other than Roads or Pikes, both a third and fourth Activation-equivalent earn Fatigue.
- The retreat caused by a "Cautious" Loose Cannon result does not incur Fatigue.
- Leader Movement does not incur Fatigue, because Leaders are not units.
EXAMPLE: An infantry regiment under March Orders can move up to 24 MPs (or 4 AM worth) in one turn (for that March AM), incurring Fatigue for any movement above 18 MPs. Note that in most games, Road movement would be at ½ MP per hex, so the maximum distance would be 48 hexes, with Fatigue being incurred starting with hex 37.
CAUSE 2: If any brigade has been engaged in Shock (either attacking or defending) in more than one friendly or enemy Action Phase [3.0 III/C/3] in a turn, all such phases after the first earn Fatigue. A brigade engages in Shock by one or more of its non-artillery units participating in Shock Step 6b [11.45]. Only one level of Fatigue is incurred per Action Phase per participating brigade, no matter how many times it participated in Shock Step 6b during that phase.
COMPREHENSIVE EXAMPLE OF FATIGUE: A unit moves for its first AM, shock attacks for second AM, and shock attacks for its third AM. It also had to defend against shock during two different enemy Action Phases (AMs). The brigade has incurred four levels of Fatigue as follows:
- Its first AM movement did not incur Fatigue as Fatigue is not incurred for the first two Activations.
- Its second AM shock attack did not incur Fatigue as Fatigue is neither incurred for the first two Activations nor does the first shock incur Fatigue.
- It incurred one Fatigue Level for its third AM Activation and one Fatigue Level for its second shock attack (for a total of two Fatigue Levels).
- Add one Fatigue Level each for the two shock defenses.
17.23 Each turn a brigade may incur a maximum of two Fatigue Level increases due to Activations. (Exception: see 16.12.) There is no limit to how many Fatigue Levels may be incurred due to shock attacks/defenses. However, an Activation in which a brigade shock attacks and subsequently defends against a shock (due to rolling a 1) only counts once toward Fatigue, not twice (and the same is true for the initial defender-turned-attacker).
HISTORICAL NOTE: It is estimated that the average unit/brigade could undergo about one and one-half hours of combat before becoming so fatigued as to be relatively worthless.
17.24 Other than having no Fatigue marker, the following are the levels of Fatigue incurred, in ascending order. Place an appropriate marker with the brigadier to so indicate:
- Fatigue OK
- Fatigue 0
- Fatigue 1
- Fatigue 2
- Fatigue 3
- Fatigue 4 (the highest)
17.25 Once a unit reaches Fatigue Level 4, it goes no higher, nor is there any further effect of undertaking an action that would earn Fatigue.
17.26 Artillery neither incurs nor generates Fatigue for an infantry or cavalry brigade to which it is attached. However, if under March Orders and using a fourth AM-equivalent [17.23], an artillery unit must check for broken wheels. Roll the die; if it is 6-9, the unit loses 1 SP.
PLAY NOTE: If artillery MA is 8 or higher, it usually only need move the equivalent of three AMs to keep up with the foot-sloggers.
17.3 Effects of Fatigue
17.31 All units in a brigade use the number on the Fatigue Level marker as a modifier to a variety of actions.
Subtract half the Fatigue Level (rounding up) from:
- MA (after halving for Attack Orders and/or cavalry that mounts or dismounts) but see also 9.42.
- All Shock Resolution rolls when attacking.
- All Fire rolls.
Add half the Fatigue Level (rounding up) to:
- All UDDs.
- All Shock Resolution rolls when defending.
- All Pre-Shock Check rolls (including Green).
- All Rally Attempts.
17.32 Brigades at Fatigue Level 4 automatically and immediately revert to Advance Orders. They may not be given March or Attack Orders until they lower their Fatigue Level.
17.33 Fatigue OK and Fatigue Level 0 have no effect, other than that they are a level closer to one that does.
17.34 Units at Fatigue Level 2 or higher may not build Breastworks.
17.4 Reducing Fatigue
17.41 To reduce a brigade's Fatigue Level, the player may place that brigade In Reserve for that entire turn [6.31]. At the end of the turn, if the brigade is still In Reserve, its Fatigue Level is reduced by two levels.
17.42 Any on-map brigade that is not in Reserve but whose non-artillery units do not move, reaction move, use Phasing Fire, construct Breastworks, declare a shock or are designated as a shock target for one full turn may, during the Replacement/Recovery Phase [3.0 IV/B] of that turn either:
- Automatically rally all Disordered units within Command Range of their brigadier [13.45], or
- Reduce Fatigue by one level.
Neither facing changes that do not expend movement points, mounting/dismounting, nor Reaction Refusal/Facing Changes are considered movement for purposes of this rule.
Notes:
- Disordered batteries of artillery battalions/brigades may rally if the battalion/brigade meets the above requirements.
- Unbrigaded units may rally or reduce Fatigue by one level if they meet the above requirements and are within Command Range of their immediate superior.
This concludes the GBACW Series Rule Book. The Battle Book that follows contains the rules and scenarios specific to Dead of Winter: The Battle of Stones River.
Battle Book
Changes to Basic Rules
4.0 The Command System
4.3 Artillery Command
4.34 Artillery Command & Stacking. Artillery units are assigned to specific brigades, and always move and fight with those brigades, unless otherwise noted in a scenario special rule. However, batteries may stack with any friendly unit, without regard to brigade affiliation.
4.4 Special Command Rules
Both armies had a fairly informal chain of command for their cavalry units, but the Federals were more efficient in how they used their mounted forces. Also, the Federals had a unique formation, the Pioneer Brigade, that was not attached to any wing. Accordingly, the following rules apply:
4.41 Union Cavalry Command. If a Union cavalry unit can trace command to either Stanley or Kennett (assuming they are in play) or can trace to their brigade commander who can trace to Stanley or Kennett, then those units are considered in-command for all purposes.
- Note that Kennett need not trace to Stanley in order to be in command—if he is present, he is automatically in-command. If either Stanley or Kennett becomes a casualty, they are replaced normally.
- Units of Minty's Brigade (1/1/Cav) are always considered in-command if they can trace to Minty. Minty need not trace to a higher commander to be put in command.
4.42 Union Pioneer Brigade Command. The Pioneers are considered in-command if the brigade commander, Morton, can trace directly to Rosecrans, as if Morton were a wing commander. Assume Morton's corps level efficiency rating, his divisional level brigade and activation ratings, are "0". The Provost unit traces to Rosecrans and moves with the Pioneers.
4.43 Walker's Brigade (1/3/C). This brigade arrived as a reinforcement during the battle, and was the only part of Thomas' third division to reach the field during the battle. Walker acts as both division and brigade commander. To be in command, he traces to Thomas normally. His divisional brigade and activation ratings are both "0". Regiments in Walker's brigade trace to him normally to be considered in command.
4.44 Confederate Cavalry Command. Confederate cavalry must first trace to their brigade commander, who then must be able to trace to Wheeler in order to be in-command. If Wheeler is not on the map then no Confederate cavalry unit can be considered in-command. Units in Wheeler's own brigade need only trace to Wheeler. If Wheeler becomes a casualty, he is replaced with a replacement leader, but then no Confederate cavalry unit can be placed in-command for the rest of the game.
Design Note: Bragg did not have a formal chain of command for the cavalry. Wheeler was nominally the overall cavalry commander, but none of the other brigade commanders was capable of or prepared to replace him, if need be. Given Wheeler's propensity to run off on raids, this often hamstrung Bragg at critical moments.
Additional Rules
18.0 Stone's River
Because of heavy rain during the campaign, Stone's River and it's tributaries were rising during the battle. As the water rose, those watercourses became a more significant impediment to movement. Note: for simplicity's sake, the rules below talk about Stone's River, but in all cases, these rules apply equally to Overall Creek.
18.1 River Levels
Stone's River has three levels: Low, Medium, and High.
A. At low water, Stone's River is treated as a stream for all purposes. All fords are considered "A" level fords (Note: the only effect of fords here will be to let artillery cross without being disordered).
B. At medium water, Stone's River is now considered a river, and impassable except at bridges or fords. Fords retain normal characteristics.
C. At high water, the only additional effect is that "B" class fords are now impassible.
18.2 Changing River Levels
At the beginning of each scenario, the river level is determined by the date:
- December 29th—the river level is "low."
- December 30th—the river level is "medium."
- December 31st and beyond—the river level is "high."
Once set initially, random events change the river level, via a rain result (see Random Events.) If a 'rain' result is rolled on a random events check, change the river level by one condition. The river level never goes down. Once the river level is at "high," no further changes to the level are possible.
18.3 Pioneers, Bridges and Fords
18.31 There is one bridge in the game that requires a Union pioneer presence to activate. The bridge between hexes A4619 and A4720 is only usable after an undisordered Union pioneer spends at least 10 daylight turns in at least one of the listed hexes. Additional units do not speed up this process. If the pioneer fires or is fired upon, that turn does not count for construction purposes. If an enemy unit is adjacent to the pioneer unit or occupies either hex, Construction is impossible and the whole process must begin again. River level does not effect construction.
18.32 Union pioneer units can upgrade fords. With a non-disordered Pioneer unit adjacent to a hex containing a ford hexside, any ford can be raised one class. An 'A' rated ford is treated like a bridge, and a 'B' rated ford is treated like an 'A' rated ford, as long as the pioneer unit is present and remains non-disordered. A pioneer unit must have at least 2 SP left to upgrade a ford. Multiple pioneer units do not have additional upgrade effects (two pioneer units cannot upgrade a 'B' class ford to a bridge, for example) but multiple pioneer units can combine to meet the 2 SP minimum strength requirement.
19.0 Random Events (RE)
In any scenario where Random Events are used, players place the Random Events AM in the cup at the beginning of every turn, along with both sides' regular AM chits. When, instead of a regular AM, the RE AM is drawn, play halts while the RE is resolved. First, roll the die. On a roll of 7 or less, no RE happens and play proceeds normally. If a 8 or 9 is rolled, consult the Chart below.
| Die | Result |
|---|---|
| 1 | Friendly Fire: USA Player |
| 2 | Friendly Fire: CSA Player |
| 3 | Brigade Leader Loss Check |
| 4 | Green Unit Rout check |
| 5 | Division Leader Loss Check |
| 6 | Gideon Pillow takes command |
| 7 | Ambush |
| 8 | Rain |
| 9 | Rain |
| 0 | Rain |
Results Explanations
- Friendly Fire: USA Player. The Union player must choose one of his own units, while the Confederate player must choose two of the Union player's units. From these three units, choose one unit at random. This unit is the target of an immediate fire attack by the closest unit of its own side. The firing unit fires on the target regardless of facing. Resolve fire combat normally. The target units must be within 4 hexes of a CSA unit, and there must be a USA unit within 2 hexes to fire on the target. If these conditions are not met, ignore the event.
- Friendly Fire: CSA Player. The Confederate player must choose one of his own units, while the Union player must choose two of the Confederate player's units. From these three units, choose one unit at random. This unit is the target of an immediate fire attack by the closest unit of its own side. The firing unit fires on the target regardless of facing. Resolve fire combat normally. The target units must be within 4 hexes of a USA unit, and there must be a CSA unit within 2 hexes to fire on the target. If these conditions are not met, ignore the event.
- Brigade Leader Loss Check. Roll the die: 0–4, Union brigade leader, 5–9, Confederate brigade leader. Next, each player picks one leader to be the target. Note that both players pick a leader on the same side (For example, if a Union Leader is rolled to be the target, then both players pick Union brigade commanders). The leaders chosen must be within 3 hexes of an enemy unit. Again choosing randomly, make a leader loss check on the chosen leader (12.71). If only one leader is eligible, check that leader. If there is no leader eligible, treat as no event.
- Green Unit Rout Check. Roll the die: 0–4, Union green unit, 5–9, Confederate green unit. The player must choose one of his own green units (marked with a "G" alongside their cohesion) and make an immediate UDD check. This unit must be within 3 hexes of an enemy unit. If the unit fails, it becomes disordered. If it is already disordered, it immediately routs. If there is no unit eligible, treat as no event.
- Division leader Loss Check. Roll the die: 0–4, Union division leader, 5–9, Confederate division leader. Next, each player picks one leader to be the target. Note that both players pick a leader on the same side (For example, if a Union Leader is rolled to be the target, then both players pick Union division commanders). The leaders chosen must be within 3 hexes of an enemy unit. Again choosing randomly, make a leader loss check on the chosen leader (12.71). If only one leader is eligible, check that leader. If there is no leader eligible, treat as no event.
- Gideon Pillow Takes Command. Pillow arrived on the field on January 2nd, and, asserting his authority, took over Palmer's Brigade in Breckinridge's Division. Once this result is rolled, replace Palmer (2/1/H) with Pillow. If rolled again, treat as no event.
20.0 Optional Units
There are a number of optional troops in the game, amounting to several extra divisions for Thomas's Center Wing on the Union side, and an extra Corps for Bragg. The Confederates also have the option of replacing Bragg with Joseph E. Johnston, who had recently been sent to Chattanooga by President Jefferson Davis to take overall command in the West. There was at least some expectation that Johnston might take field command, especially if forces from several Rebel armies united.
Scenario 10, The Meeting Engagement, is the primary vehicle for using all of these extra forces in play. There, all the added troops are already included for both sides, as a pre-packaged scenario. However, players may want to add in a mix of optional forces to some of the other scenarios in order to experiment with alternative outcomes, adjust for play balance issues, or just explore historical "what if" questions. Short of the scenario 10 extravaganza, then, the rules below will help you introduce some or all of those forces elsewhere.
20.1 The units engaged
Below is a list of optional forces for each side, and their relative VP worth. Players can "buy" extra troops using those VP, which are then added to the opposing side's VP total at the end of the game. Each VP "package" must be taken as a single command—you may not mix and match individual leaders or units beyond the command structures given below.
Design Note: There are a number of creative ways that players can use these VP costs to regulate optional force use. Each player might be allowed a limit of say, up to 5 VP, from which he can "buy" any forces he chooses, up to that limit. Alternatively, Players may choose to bid on winning the game, spending as many VP as each chooses. A third method might be for a skilled player to spot a new player a VP limit to add in additional forces as a balancing method. Feel free to be as creative as you want with these troops; the idea is to add a bit of historically reasonable variety to the game.
Union Optional Forces
| Command | VP award |
|---|---|
| 1/2/C | 1 VP |
| Fry, 2/3/C, 3/3/C | 3 VP |
| 4/C Division | 2 VP |
| 5/C Division | 3 VP |
Confederate Forces
| Command | VP Award |
|---|---|
| Johnston | 2 VP |
| 1/S | 4 VP |
| 2/S | 3 VP |
| Smith | 1 VP |
20.2 Use and deployment
We strongly recommend that players only use optional troops in Scenarios 4.0 through 9.0. Even single brigades can wildly upset the balance of the one-map scenarios.
20.3 Union
1/2/C: This unit may set up within five hexes of Negley. It must be behind Union lines and no closer than five hexes to any Confederate unit.
Remainder of 3/C: This force can arrive with 1/3/C, at 1600 December 31, or in any scenario prior to that arrival time, for an ADDITIONAL 1 VP, set up on map within command range of Thomas. It must set up generally behind Union lines and no closer than 10 hexes of an enemy unit.
4/C: This command arrives at 0600 January 1, at hex A1401. In any scenario prior to that arrival time, it may set up on map for an ADDITIONAL 1 VP PER DAY (example, on December 30th, this would cost an extra 2 VP) within command range of Thomas. It must be generally behind Union lines and no closer than 10 hexes to any Confederate unit.
5/C: This command arrives at 0800 1 January, Hex A1401. In any scenario prior to that arrival time, it may set up on map for an ADDITIONAL 1 VP PER DAY (example, on December 30th, this would cost an extra 2 VP) within command range of Thomas. It must be generally behind Union lines and no closer than 10 hexes to any Confederate unit.
20.4 Confederate
Johnston: Replace Bragg with Johnston. Add 1x2, 1x3, and 1x4 to the efficiency pool when Johnston is in play. Bragg would replace Johnston were he to become a casualty.
1/S: This unit arrives at 1200, December 30, at hex D4821, the RR depot; or sets up anywhere on Map D (at no extra VP cost.) If Smith is not in play, this unit must be attached to Polk or Hardee (whichever commander has less divisions already under his command—generally this will be Polk unless 2/S is also in play) for the duration of the game.
Design Note: Stevenson's Division was ordered to Vicksburg just before the battle, sent specifically at Richmond's orders, despite Bragg and Johnston's worries that Rosecrans was going to advance. Stevenson's men did little to help defend Vicksburg that December, but Bragg felt their absence keenly at Murfreesboro.
2/S: This unit arrives 0800 December 31, at hex D4821, the RR depot. In any scenario prior to that arrival time, it may set up on map for an ADDITIONAL 1 VP within command range of Bragg, It must be behind Confederate lines and no closer than 10 hexes of any Union unit. If Smith is not in play, this unit must be attached to Polk or Hardee (whichever commander has less divisions already under his command—generally this will be Polk unless 1/S is also in play) for the duration of the game.
Smith: Use only if BOTH divisions of S Corps are in play. Smith may arrive with or set up with any of his subordinate units. When he arrives, add 1x2 and 1x3 to the CSA efficiency Pool.
21.0 Towards a More Complete Historical Simulation
The following rules apply—in whole or part, where applicable—to Scenarios 1.0, 2.0, 4.0, 8.0 and 9.0. They are designed to more faithfully mimic the sluggish Union response to Bragg's surprise attack. Players will find that they will greatly limit Union options, and should be used only if both players agree.
21.1 Union Breastworks
No Union unit may build breastworks on the morning of December 31st. Union units may start building breastworks on the 1200 turn of December 31st.
21.2 Crittenden's Attack
The first eight movement activations for any unit of the LW involve significant movement restrictions that limit the freedom of LW units. Each activated unit must move across to the east bank of Stone's River as quickly and directly as possible, using all of it's movement allowance. If the unit does not have enough movement to cross the river, then it must move as close to a crossing point as it can, and must end its move closer to the river than it started. Since it is not possible for all the units of a division to cross at a ford in a single activation, some reasonable interpretation of this rule is allowed, as long as the player moves in such a manner to make a crossing more efficient the next turn. Units may not go into Attack during this 8 AM restriction until they are on the east bank.
Note: This rule does not require that each division of the LW spend it's first eight activations trying to cross the river, only that the first eight activations TOTAL are spent in this manner. For instance, it is theoretically possible that a player could activate one division eight times in two turns and fulfill this requirement, or he could move two divisions four times each (assuming that efficiency otherwise allows this) in a single turn. On the ninth activation of any LW unit, units may move normally.
Note: Within this restriction, LW units may move and fight normally against Confederate units on the east bank. It is perfectly allowable for the Union player to attack Breckinridge's Division, for example.
21.3 Confederate Fatigue on 0600 31 December
Confederate units ignore fatigue for the first turn of the game.
Design Note: The Confederates were able to approach quite closely to the Union line in the pre-dawn darkness, moving with relative ease. This rule is intended to simulate that approach, but removing some of the penalty units would normally incur for advancing into an attack.
21.4 Cumulative effect of Cedars and Breastworks
When a breastwork is built in a Cedar hex, the cumulative modifiers are treated like Breastworks in normal woods.
Design Note: The Cedars were unusual in that they also included large rock outcroppings that made for effective impromptu stone walls, very useful for protection against incoming fire. However, this effect is largely duplicated by more conventional breastworks of the hasty sort typically constructed at Stones River.
Scenarios
General Setup Notes
Set up hexes are listed first, then the unit or stack.
Example: C3215 74 IL/1/1/RW means that the 74th Illinois of the 1/1/RW sets up in hex C3215.
(#) after a unit is that unit's starting strength for that scenario, if different from the printed strength.
In some scenarios, in order to save space, "B:" following the listed hex but at the beginning of the units of a set up indicates that the unit or stack is in breastworks. It is not a map reference.
Example: C3215 B: 74 IL/1/1/RW means that the unit sets up with a breastwork counter.
"Bn" is the abbreviation for Battalion.
"Bty" is the abbreviation for Battery.
Unless specifically noted all units start with whatever Orders the owning player chooses. Be sure to remember the restrictions and requirements of rule 21.
The same holds for cavalry—mounted or dismounted.
Facing is always up to the owning player.
Victory Points
Victory is determined by the number of victory points each player gains over the course of the game. Points are awarded for capturing key terrain and for each enemy division rendered Combat Ineffective (13.3). In most scenarios, to determine victory, calculate each side's victory point total based on the chart below, and then subtract the Union total from the Confederate total. Compare that number, positive or negative, to the level of victory schedule shown in the scenario rules, to determine who won and the exact level of victory.
Points for Enemy Units
| CSA Units | Pts. Awarded | Union Units | Pts. Awarded |
|---|---|---|---|
| 1/P | 4 | 1/RW | 3 |
| 2/P | 4 | 2/RW | 3 |
| 1/H | 4 | 3/RW | 3 |
| 2/H | 5 | 1/C | 4 |
| 3/H | 3 | 2/C | 3 |
| 1/S | 4 | 3/C | 3 |
| 2/S | 3 | 4/C | 2 |
| 1/Cav | 2 | 5/C | 2 |
| 2/Cav | 1 | 1/LW | 3 |
| 3/Cav | 2 | 2/LW | 3 |
| 4/Cav | 1 | 3/LW | 3 |
| Pioneers | 2 | ||
| 1/1/Cav | 1 | ||
| 2/1/Cav | 1 |
Points for Terrain
| Hex | CSA | USA |
|---|---|---|
| A2308 | 5 | 2 |
| A1945 | 2 | 1 |
| A4328 | 4 | 1 |
| B2438, 2638, 2641 | 1 | 1 (must control all 3 hexes) |
| B4843 | 0 | 2 |
| C3019 | 1 | 1 |
| D3706 | 1 | 2 |
| D2930 | 0 | 2 |
| D2643 | 0 | 3 |
Introductory Scenario: Skirmish of December 30th
On the afternoon of December 30th, a short but violent fight developed as the Federal division of Jefferson C. Davis led McCook's corps towards Murfreesboro. Davis' skirmishers encountered Rebels pickets, and, upon driving them back, a Confederate infantry line. This encounter convinced McCook and Davis that the Rebels were present in force. This scenario is designed to let players get used to the mechanics of movement and combat in a limited setting.
Maps. Only Map C is used in this scenario, and no unit on either side may move south of the XX19 hexrow.
Game Length/Playing Time. The game length consists of one full turn, the 1300 December 30 turn.
Initiative. The Union player has the initiative.
Victory. The side with more collapsed or routed regiments at the end of the scenario (if any) loses. Any other result is a draw.
Historical Efficiency. Davis' Division and Cheatham Division each have 4 AM for the turn.
Random Events. None
UNION SETUP
- C3108: McCook, Davis/1/RW, Escort/RW
- C3014: Post/1/1/RW, 59 IL, 5 WI Bty
- C3213: 75 IL
- C3215: 74 IL
- C3217: 22 IN
- C3508: Carlin/2/1/RW, 38 IL
- C3208: 2 Minn Bty
- C3410: 101 OH
- C3708: 15 WI
- C3610: 21 IL
- C3205: Woodruff/3/1/RW, 81 IN
- C3104: 8 WI Bty
- C3404: 35 IL
- C3406: 25 IL
Union Reinforcements: None
CONFEDERATE SETUP
- C4515: Cheatham/1/P
- C4416: Vaughn/4/1/P, Allen SS Bn, 29 TN
- C4415: 154 TN
- C4417: 9 TX
- C4418: 12 TN
- C4514: Scott Bty
- C4615: 47 TN
- C4616: 13 TN
- C4413: Loomis/1/2/P, 19 AL
- C4313: 25 AL
- C4314: 39 AL
- C4315: Robertson Bty
- C4512: 17 AL SS Bn, 22 AL
- C4612: 26 AL
- C4711: 1 LA
Note: All Confederate brigades are under Cheatham's command.
Confederate Reinforcements: None.
One-Map Scenarios
1.0 Dawn Attack
This scenario covers the initial attack on the Union Right Wing, including the near destruction of Johnson's division. It is a short but violent scenario, requiring aggressive play by the Confederates.
Maps. Only Map C is used
Game Length/Playing Time. The Game starts with the 0600 turn for December 31st, and ends at the conclusion of the 0900 turn of that day.
Visibility. Due to fog and darkness, visibility for the 0600 Turn is 2 hexes.
Initiative. The Confederate Player starts with the initiative.
Confederate Shock and Awe (Optional)
- The initial CSA assault on McCook's Right Wing virtually eliminated them as a fighting force that morning. These were good troops having a very bad morning. The following give the CSA a chance (not a certainty) of recreating this. It is strongly recommended that these only be used with the Fatigue rules.
- All of McCook must take a UDD after setup. Failure disorders the unit. Leader DRMs apply (11.73) but not 3) below.
- Give McCown (3/H) and Cleburne (2/H) ONE free Orders change during any of their Change orders phases (III.C.1) in the first turn. No need to roll. This should allow the attack to maintain momentum.
- Apply a temporary –1 Cohesion to all of McCook's divisions on the first turn. Alternatively, apply a +1 to all UDDs for any of McCook's troops.
- Johnson, Davis, and Sheridan's AMs may not be placed in the cup until any unit of the Right Wing has been fired upon by Rebel infantry, or a Rebel unit of any kind has moved adjacent. Note that this does not happen on a division by division basis—the first time that ANY unit of the RW meets the condition, but the AMs for all three divisions in the pool.
- Rosecrans cannot move until turn 2.
Victory. The Confederate player wins a Decisive Victory if all three Union divisions (counting Sheridan and the 1/3/RW brigade as a division of one brigade) are combat ineffective at the end of the scenario.
The Confederate player wins a Major Victory if any two of the Union divisions are combat ineffective at the end of the scenario.
The Confederate player wins a Minor Victory if any one of the Union divisions are combat ineffective at the end of the scenario.
Shift one level of victory in the Union favor for each Confederate division that is combat ineffective at the end of the scenario. For victory purposes, Cheatham's Division has two brigades, Vaughn and Loomis.
The victory level may be shifted to a draw, Union Minor or Union Major Victory, but no farther. There is no Union Decisive Victory. Any other result is a draw.
Historical Efficiency. For all four turns, the Confederate Corps efficiency is: Hardee 4, Polk (who is not in play, but needed for Cheatham): 3 [Cheatham is considered out of command range of Polk for efficiency purposes.], Cavalry: –3
The Union Corps Efficiency on turn 1 is: McCook: 1; After that, the Efficiency pool is 1x1, 1x2, and 1x3.
Random Events. Random Events are used in this scenario
UNION SETUP
Right Wing
- C2716: 15 OH/1/2/RW
- C2717: A, 1 OH Bty
- C2818: 49 OH
- C2916: 89 IL
- C2919: 32 IN
- C3315: Kirk, 30 IN
- C3415: 77 PA
- C2804: 5 KY/3/2/RW
- C2806: 1 OH
- C2905: Baldwin, 5 IN Bty
- C3004: 93 OH
- C3006: 6 IN
- C3108: Johnson/2/RW, Willich/1/2/RW
- C3001: McCook, Escort/RW
- C3312: 22 IN/1/1/RW
- C3411: Post, 59 IL
- C3512: 5 WI bty
- C3513: 74 IL
- C3612: 75 IL
- C3408: Davis/1/RW
- C3409: 21 IL/2/1/RW (strength of 7)
- C3507: 15 WI (strength of 8)
- C3508: Carlin, 2 Minn Bty
- C3608: 38 IL
- C3610: 101 OH
- C3705: Woodruff, 81 IN/3/1/RW
- C3807: 35 IL
- C4006: 25 IL
- C4005: 8 WI Bty
- C3402: Sheridan/3/RW, L 2 KY/Escort
- C3901: 21 MI/1/3/RW
- C3903: 24 WI
- C4002: Sill, 4 IN Bty
- C4101: 88 IL
- C4103: 36 IL
Note: Sheridan and all in-play units of the 3/RW must remain within 5 hexes of the northern map edge.
Union Reinforcement: None
CONFEDERATE SETUP
H Corps
- C4817: Hardee
- C4216: 4 Ark, 1 Ark MR/3/3/H
- C4217: 2 Ark MR
- C4218: 30 Ark, 4 Ark Bn
- C4317: McNair, Humphreys Bty
- C4220: 10 TX DC/1/3/H
- C4221: 11 TX DC
- C4222: 14 TX DC
- C4223: 15 TX DC
- C4320: Ector, Douglas Bty
- C4225: 9 GA Bn, 3 GA Bn/2/3/H
- C4226: 11 TN
- C4227: 29 NC
- C4325: Rains, Eufala Bty
- C4422: McCown/3/H, Hardy/3/H
- C4817: 15 Ark, 13 Ark/1/2/H
- C4818: 5 TN, 2 TN, Key Bty, Polk
- C4819: 1 Ark, 5 CS
- C4820: 37 TN/3/2/H
- C4821: 44 TN
- C4822: Cleburne, Johnson, 25 TN, Darden Bty
- C4823: 17 TN
- C4824: 23 TN
- C4825: Liddell, 2 Ark/2/2/H
- C4826: 5 Ark, Swett Bty
- C4827: 6/7 Ark
- C4828: 8 Ark
- Within 3 hexes of C4135: Wharton, 3/Cav
- C3019: 39 IN
- C3218: 34 IL/2/2/RW
- C3317: E, 1 OH Bty
- C3316: 29 IN
Confederate Reinforcements
Wood and 4/2/H (except Semple Bty, not in play) enter the map on the 0600 turn, between C4818 and C4822. They may enter during any activation of the 2/H Division.
Cheatham, Vaughn's Brigade (4/1/P), and Loomis' Brigade (1/2/P) enter the map at the 0700 turn, between C4808 and C4813. Loomis' Brigade is considered part of the 1/P Division for this scenario.
Historical Efficiency. The Confederate Efficiency Pool is 1x1, 2x2, 1x3, and 2x4. The Union Efficiency Pool is 3x1, 2x2, and 1x3.
Random Events. Random Events are used in this scenario
2.0 Hardee at High Tide
Map A covers Sheridan's stand and the drive to capture the RR, 0900–1400 December 31st.
Maps. Only Map A is used.
Game Length/Playing Time. The Game starts with the 0900 turn for December 31st, and ends at the conclusion of the 1400 turn of that day.
Initiative. The Confederate Player starts with the initiative.
Victory. Use the victory point schedule in the battle book:
| Result | VP Margin |
|---|---|
| Confederate Major | 7 or more |
| Confederate Minor | 4 to 6 |
| Draw | 3 to –3 |
| Union Minor | –4 to –6 |
| Union Major | –7 or less |
UNION SETUP
Right Wing (the following units all set up disordered; the number in parentheses is the unit's current strength)
- A3146: McCook/RW, Escort/RW
- A2747: Post, 74 IL/1/1/RW (5)
- A2847: 75 IL (4) 5 WI Artillery (5)
- A3048: 15 WI/2/1/RW (6)
- A3148: Carlin, 101 OH (7) 38 IL (5)
- A3147: Davis, 2 MN Artillery
- A3248: 21 IL (5)
- A3446: 8 WI Artillery/3/1/RW (3)
- A3447: 25 IL (5)
- A3546: Woodruff, 81 IN (9)
- A3646: 35 IL (8)
The following units set up undisordered:
- A4146: Sheridan, L 2 KY Cav/3/RW
- A3746: 24 WI/1/3/RW (9)
- A4746: 4 IN Artillery/1/3/RW
- A3847: Sill, 36 IL (7) 88 IL (9)
- A4648: 21 MI (7)
- A3946: 15 MO/2/3/RW
- A4047: 44 IL
- A4248: 2 MO
- A4147: Schaefer, 73 IL
- A4647: G 1 MO Artillery/2/3/RW
- A4347: 27 IL/3/3/RW (7)
- A4348: 51 IL
- A4449: Roberts (repl) 42 IL, C 1 IL Artillery
- A4548: 22 IL (5)
- Within 4 hexes of A3112: Johnson/2/RW, Willich/1/2/RW (repl), A 1 OH/1/2/RW (2), Kirk/2/2/RW (repl), Baldwin/3/2/RW (repl), 5 IN Artillery/3/2/RW (4) 93 OH (9) 1 OH (5) 6 IN (7)
The following units are routed:
- 1/1/RW: 22 IN (4), 59 IL (5)
- 1/2/RW: 49 OH (2), 32 IN (2), 39 IN (2), 15 OH (2), 89 IL (2)
- 2/2/RW: 29 IN (2), 79 IL (3), 34 IL (2), 77 PA (4), 30 IN (4)
- 3/2/RW: 5 KY (2)
Note: E 1 OH Artillery/2/2/RW is eliminated.
Center
- A4426: Thomas, Rosecrans, 9 MI/Provost
- A4126: Rousseau/1/C, 2 KY/1/C (3/1/C Brigade arrives as a reinforcement)
- Within 1 hex of A4027: 1/1/C
- Within 1 hex of A4029: 2/1/C
- Within 1 hex of A3727: 4/1/C
- A4746: Stanley, 11 MI/2/2/C
- A4646: 19 IL
- A4744: 18 OH (8)
- A4845: 69 OH, M 1 OH Artillery
Left Wing
- A4535: Palmer, Grose, 23 KY/3/2/LW
- A4334: 6 OH
- A4336: 24 OH
- A4435: H 4 US Artillery
- A4436: M 4 US Artillery
- A4533: 84 IL
- A4537: 36 IN
Cavalry
- A2140: 2 TN/R/Cav
- A2240: 3 OH/2/1/Cav
- A2340: Zahm, 1 OH/2/1/Cav
- A2441: 4 OH/2/1/Cav
- A2029: 3 KY/1/1/Cav
CONFEDERATE SETUP
H Corps
- A3751: Hardee
- A3052: Cleburne/2/H
- A3151: Polk, 15 AK (3), 13 AK/1/2/H (3)
- A3051: 2 TN (3), 5 TN (3)
- A3251: 1 AK (3), 5 CS (2)
- A3152: Key Artillery
- A2450: 8 AK/2/2/H (5)
- A2550: Liddell, 6/7 AK (7)
- A2651: 5 AK (3)
- A2652: Swett Artillery
- A2751: 2 AK (4)
- A2951: Johnson, 17 TN/3/2/H (6)
- A2752: 23 TN (4), 25 TN (4)
- A2852: 37 TN (4), 44 TN (6)
- A2853: Darden Artillery
- A3451: 16 AL/4/2/H (3)
- A3550: 33 AL (3)
- A3651: Wood, 45 MS (2), 15 MS BN SS (1)
- A3750: 3 CS (2)
- A1952: McCown, Hardy/3/H
- A1950: Ector, 14 TX DC (3), 15 TX DC/1/3/H (4)
- A2051: 10 TX DC (4), 11 TX DC (3)
- A2552: Douglas Artillery
- A1449: Rains, 11 TN/2/3/H (3)
- A1649: 29 NC (4)
- A1850: 9 GA Bn, 3 GA Bn (2)
- A2252: McNair (repl), 2 AK MR/3/3/H (4)
- A2129: Kennett, 7 PA Cav
- A2229: 4 US Cav/R/Cav
- A2151: 30 AK (3), 4 AK Bn (3)
- A2352: 4 AK (4), 1 AK MR (3)
- A3053: Humphreys Artillery
P Corps
- A4552: Cheatham, 24 AL/4/2/P (7)
- A4652: Manigault, 10+19 SC (4)
- A4751: 28 AL (6) 34 AL (5)
- A4752: Waters Artillery
Cavalry
- Within 2 hexes of A1350: 3/Cav: 3 CS (7)
Not in Play: Eufala Bty/2/3/H and Scott Bty/4/1/P.
Movement Restrictions. If any unit of either 2/2/C or 3/2/LW Brigades moves west of hexrow 43XX, they automatically drop to 1 AM permanently, and may never use more than 1 AM in a turn.
Union Reinforcement
- 1100, A4824: Pioneers, CBOT
- 1100, A4830: 1/1/LW
- 1200, between A4824 and A4828: Crittenden, Van Cleve, 1/3/LW, 2/3/LW
Confederate Reinforcements
The following units enter at 1000:
- A3253: 4/1/P (except Scott Bty), 12 TN (3), 13 TN (3), 29 TN (3), 47 TN (4), 154 TN (3), 9 TX (3)
- A3653: 1/2/P (except Robertson Bty), Loomis (repl) 19 AL (5), 22 AL (6), 25 AL (7), 26 AL (5), 39 AL (7), 1 LA (5)
- A3952: 3/1/P 4 TN PA (6), 1+27 TN (7), 6+9 TN (7)
The following unit enters on the 1200 turn:
- A3053: 1/Cav, Fatigue level 4
The following unit enters on the 1300 Turn:
- 2/Cav, enter at A3053, Fatigue level 4
Confederate Command. Cheatham commands 3/1/P, 4/1/P, 1/2/P, and 4/2/P as a single division.
3.0 Doomed Assault
On the afternoon of January 2nd, Braxton Bragg ordered John C. Breckinridge to take his division and attack the Federal forces that had crossed McFadden's Ford to the east side of Stone's River. Bragg felt that the Union advance could be potentially disastrous for the Rebel Army, especially for those Confederate troops holding the low ground just west of the river. While Bragg did not have a great deal of faith in Breckinridge, his was the only division available for the task. Breckinridge, having also inspected the Federal lines, was convinced that the attack was going to be a disaster for his command.
Maps. Only Map B is used in this scenario.
Game Length/Playing Time. The Scenario lasts from 1400 to 1700, January 2nd.
Initiative. The Confederate Player starts with the initiative.
Union Special Command Rule: At the start of any turn, the Union player may place any artillery batteries he chooses, up to a total of 12, under command of 2/LW. Once so attached, these batteries remain part of 2/LW for the rest of the scenario. Any batteries so attached now move and fire whenever an AM for 2/LW is drawn.
Design note: this rule simulates the grand battery assembled by Captain John Mendenhall on the west bank of Stones River. The main advantage of attaching these units is that they can all fire at the same time, allowing the Federal player to mass fires not normally possible.
Victory. If there are no combat-effective Union divisions east of Stone's River, and 1/H is still combat effective, the Confederate player wins.
If there are no combat effective Union divisions east of Stone's River but 1/H is also combat ineffective, then the result is a draw.
If at least one Union division still combat effective and 1/H is combat-ineffective, then the Union player wins.
Use the victory point schedule in the battle book.
| Result | VP Margin |
|---|---|
| Confederate Major | 8 or more |
| Confederate Minor | 3 to 7 |
| Draw | 2 to –3 |
| Union Minor | –4 to –8 |
| Union Major | –9 or less |
Historical Efficiency. The Confederate Efficiency Pool is 2x1, 3x2, 2x3, and 2x4. The Union Efficiency Pool is 3x1, 3x2, 2x3, 1x4.
Random Events. Random Events are used in this scenario.
Union Setup
The following units are all considered attached to 2/LW:
- B1724: 7 IN Bty/2/3/LW
- B1625: H 4 US Bty/3/2/LW
- B1525: M 4 US Bty/3/2/LW
- B1526: F 1 OH Bty/2/2/LW
- B1527: B 1 OH Bty/1/2/LW
- B2120: Van Cleve/3/LW (replaced by S. Beatty/1/3/LW)
- B2122: S. Beatty/1/3/LW (repl) 9 KY (5)
- B2121: 11 KY (5)
- B2023: 19 OH (2)
- B2821: Fyffe/2/3/LW, 13 OH (1)
- B2722: 44 IN (4)
- B2620: 86 IN (3)
- B2521: 59 OH (4)
- B1919: 3 WI Bty
- B2425: Price/3/3/LW, 8 KY
- B2523: 79 IN/1/3/LW (6), attached to 3/3/LW
- B2524: 35 IN
- B2323: 99 OH
- B2324: 21 KY
- B2325: 51 OH
CONFEDERATE SETUP
- B2445: Bragg
- B1941: Polk/P Corps
- B1344: Withers/2/P
- B1141: B: Jackson/5/1/H (attached to 2/P), Lumsden Bty
- B1041: B: 5 GA (4), 5 MS (1)
- B1242: B: 8 MS (3), 2 GA SS Bn (2)
- B2045: B: Anderson/3/2/P, 39 NC (7), 30 MS (2)
- B2144: B: 45 AL (5)
- B1840: 24 MS
- B2244: B: Garrity Bty/2/2/P
- B1945: B: 27 MS (4), 29 MS (3)
- B1845: B: Barrett Bty/3/2/P
- Within two hexes of B1937: 2/2/P, Chalmers (repl), 44 MS (6), 41 MS (3), 7 MS (7), 9 MS (6), 10 MS (5)
- Within two hexes of B1740: 3/1/P (attached to 2/P), TN SS Bn (1), 6/9 TN (7), 4 TN PA (6), 1/27 TN (7)
- B1837: Stanford Bty/2/1/P
- B1737: Carnes Bty/1/1/P
- B1638: Smith Bty/3/1/P
- B1538: Scott Bty/4/1/P
- B1439: Robertson Bty/1/2/P
Note: Stanford, Carnes, Smith, Scott, and Robertson are all considered part of 2/P
H Corps
- B2945: Hardee
- B3042: Breckinridge/1/H
- Within one hex of B3541: 1/1/H, 13/20 LA (8), 16/25 LA (4), 32 AL (1)
- Within one hex of B4042: 2/1/H; Palmer is replaced by Pillow, all units at full strength
- Within one hex of B3044: 3/1/H, 4 FL (5), 60 NC (4), 20 TN (6), 1/3 FL (8)
- B2539: Hanson/4/1/H, 9 KY
- B2340: B: 6 KY
- B2339: B: Pritchard Bty/5/1/H (attached to 4/1/H)
- B2338: B: 4 KY
- B2438: B: Cobb Bty
- B2537: B: Byrnes Bty
- B2637: B: 2 KY
- B2737: B: 41 AL
- Within one hex of B4431: 3/Cav, 14 AL (2), 1 CS (1), 3 CS (6), 2 GA (6), 3 GA (1), 2 TN (2), 8 TX (5), Murray (2)
- Within one hex of B4129: 4/Cav
Place breastwork counters in the following hexes: B1746, B1647, B1648, B1649, B1650, B1651, B1652.
Random events. Random events are used in this scenario.
Two-Map Scenarios
4.0 The Last Ditch
This scenario extends Scenario 2.0, Hardee at High Tide, to cover the full fighting on the afternoon of December 31st. Bragg's overall objective was to extend his attack to reach the Nashville Pike, thereby cutting Rosecrans off from his base. For his part, the Federal commander, with his army bent double like a folded jack knife, struggled to stop Bragg's onslaught short of the main road.
Maps. Maps A and B are used.
Game Length/Playing Time. The game starts at 0900, December 31st, and ends with the completion of 1700, December 31st.
Initiative. The Confederate Player starts with the Initiative.
Union Setup. Use the set up information found in Scenario 2.0, Hardee at High Tide. In addition, add to set up:
Center
- B1140: Negley/2/C, 21 OH/3/2/C
- B1142: Miller/3/2/C, G 1 OH Bty
- B1141: 74 OH, 8 KY Bty
- B1143: 37 IN
- A4844: 78 PA
Left Wing
- B1328: Crittenden
- B1430: Wood/1/LW
- B1525: Hascall, 8 IN Bty/1/1/LW
- B1526: 3 KY
- B1524: 58 IN
- B1425: 100 IL
- B1426: 26 OH
- B1834: Wagner, 57 IN, 10 IN Bty/2/1/LW
- B1933: 40 IN
- B1734: 97 OH
- B1635: 15 IN
- B1631: Harker, 65 OH/3/1/LW
- B1632: 51 IN
- B1630: 64 OH
- B1830: 73 IN
- B1831: 6 OH Bty
- B1832: 13 MI
- B1137: Cruft, B 1 OH Bty/1/2/LW
- B1238: 2 KY
- B1239: 31 IN
- A4838: 90 OH
- A4839: 1 KY
- B1436: Hazen, 41 OH, F 1 OH Bty/2/2/LW
- B1535: 110 IL
- B1435: 9 IN
- B1336: 6 KY
- B1234: Van Cleve/3/LW
- Within one hex of B1234: 1/3/LW
- Within one hex of A4724: 2/3/LW
- B1723: Price, 99 OH, 3 WI Bty/3/3/LW
- B1724: 8 KY
- B1722: 35 IN
- B1624: 21 KY
- B1623: 51 OH
Army Troops
- Within one hex of A4627: Pioneers, CBOT
Union Reinforcements. Ignore the reinforcements found in Scenario 2.0.
- 1400, either A1025 or A1041: Stanley, D 1 OH Cav, 15 PA/R/Cav, 1 MdTN/R/Cav, Minty, M, 2 IN/1/1/Cav, 4 MI/1/1/Cav
- 1600, A1401: 3/1/C, 1/3/C
Confederate Setup. Use the set up information found in Scenario 2.0, Hardee at High Tide. In addition, add to set up:
- B1951: Bragg, Polk/P Corps
- B1848: Withers/2/P
- Within one hex of B1743: 2/2/P (except Garrity Bty)
- B2244: Garrity/2/2/P
- Within one hex of B1851: 3/2/P (except Barrett Bty)
- B1746: Barrett Bty
- Within two hexes of B2046: 1/1/P (except Carnes Bty and 84 TN) in breastworks.*
- B2253: Carnes, 84 TN
- Within one hex of B1749: 2/1/P (except Stanford Bty) in breastworks.*
- B1647: Stanford Bty
- B1649: Robinson Bty/1/2/P
*1/1/P and 2/1/P are considered attached to 2/P. They trace command to Withers and activate with the 2/P AM.
Place a line of Breastworks in the following hexes: B2244, B2144, B2045, B1945, B1846, B1746, B1647, B1648, B1649, B1650, B1651, B1652.
H Corps
- B3439: Breckinridge
- Within one hex of B3238: 1/1/H
- Within one hex of B3638: 2/1/H
- Within one hex of B4038: 3/1/H (except Wright Bty, which is not in play)
- B2539: Hanson, 9 KY/4/1/H
- B2737: B: 41 AL
- B2637: B: 2 KY
- B2537: B: Byrnes Bty
- B2438: B: Cobb Bty
- B2338: B: 4 KY
- B2339: B: Pritchard/5/1/H (attached to 4/1/H)
- B2340: B: 6 KY
- B2638: Semple Bty/4/2/H (attached to 4/1/H)
- Within one hex of B4438: 5/1/H (without Pritchard Bty, see above)
- Within one hex of B3121: 4/Cav
Confederate Reinforcements
The following units enter at 1000:
-
A3253: 4/1/P (except Scott Bty), 12 TN (3), 13 TN (3), 29 TN (3), 47 TN (4), 154 TN (3), 9 TX (3)
-
A3653: 1/2/P (except Robertson Bty), Loomis (repl) 19 AL (5), 22 AL (6), 25 AL (7), 26 AL (5), 39 AL (7), 1 LA (5)
-
A3952: 3/1/P, 4 TN PA (6), 1+27 TN (7), 6+9 TN (7)
-
1200, A3052: Wheeler, 1/Cav (Fatigue level 4)
-
1300: 2/Cav (Fatigue level 4)
5.0 The Eerie Silence—January 1st, 1863
After the furious fighting of New Year's Eve, New Year's Day was strangely quiet. Both armies dug in during the night, and neither army moved much. Each side launched tentative combat patrols in the afternoon, producing nothing more then desultory skirmishing. Towards evening, Federal troops cautiously crossed the river at McFadden's Ford and deployed facing Wayne's Hill.
Maps. Maps A and B are used.
Game Length/Playing Time. The game starts at 0600, January 1st, and ends with the completion of 1700, January 1st.
Initiative. No player starts with the initiative.
Victory. Use the victory point schedule in the battle book.
| Result | VP Margin |
|---|---|
| Confederate Major | 8 or more |
| Confederate Minor | 3 to 7 |
| Draw | 2 to –3 |
| Union Minor | –4 to –8 |
| Union Major | –9 or less |
Historical Efficiency. The Confederate Efficiency Pool is 2x1, 3x2, 2x3, and 1x4. The Union Efficiency Pool is 3x1, 2x2, 2x3, 1x4.
Random Events. Random Events are used in this scenario.
Union Setup. Place Breastworks in the following hexes: A3120, A3121, A3222, A3223, A3323, A3324, A3425, A3426, A3526, A3527, A3528, A3629, A3729, A3830, A3929, A4030, A4031, A4131, A4132, A4233, A4234, A4235, A4335, A4435, A4535, A4636, A4734, A4735, A4834, B1133, B1233, B1332, B1432, B1531, B1631, B1730, B1830, B1929, B2029, B2128
- A4426: Rosecrans
Right Wing
- A3621: McCook, Escort/RW
- Within one hex of A3220: Davis/1/RW, 1/1/RW, 59 IL (7), 74 IL (5), 75 IL (5), 22 IN (5), 5 WI Bty (5)
- Within one hex of A3322: 2/1/RW, 21 IL (3), 38 IL (2), 101 OH (5), 15 WI (8)
- Within one hex of A3420: 3/1/RW, 25 IL (7), 35 IL (8), 81 IN (9), 8 WI Bty (3)
- Within one hex of A3826: Johnson/2/RW, 3/2/RW, 6 IN (10), 1 OH (8), 93 OH (12), 5 KY (4), 5 IN (4)
- Within one hex of A3521: 1/2/RW, repl leader, 89 IL (3), 32 IN (3), 39 IN (1), 15 OH (1), 49 OH (3), A 1 OH Bty (2)
- Within one hex of A3829: 2/2/RW, repl leader, 34 IL (3), 79 IL (5), 29 IN (4), 30 IN (6), 77 PA (5), E 1 OH eliminated
- Within one hex of A3723: Sheridan/3/RW, L 2 KY/RW, 1/3/RW, repl leader, 36 IL (4), 88 IL (8), 21 MI (6), 24 WI (6), 4 IN Bty (4)
- Within one hex of A3424: 2/3/RW, repl leader, 44 IN (5), 73 IL (8), 2 MO (6), 15 MO (7)
- Within one hex of A3525: 3/3/RW, repl leader, 22 IL (2), 27 IL (6), 42 IL (4), 51 IL (8), C 1 IL Bty eliminated
Center
- A4426: Thomas, 9 MI/Provost/C
- A4328: Rousseau/1/C, 2 KY/1/C
- Within one hex of A4635: 1/1/C, 38 IN (4), 2 OH (5), 33 OH (6), 94 OH (7), 10 WI (4)
- Within one hex of A4232: 2/1/C, 42 IN (4), 88 IN (6), 15 KY (7), 3 OH (4)
- Within one hex of A4130: 3/1/C, 24 IL (5), 1 WI (6), 21 WI (9)
- Within one hex of A3921: 4/1/C, 1/15 US (4), 1/16 US (3), 1/18 US (3), 2/18 US (3), 1/19 US (2)
- A2817: Negley/2/C
- Within one hex of A2615: 2/2/C, 19 IL (5), 11 MI (6), 18 OH (6), 69 OH (9), M 1 OH Bty (3)
- Within one hex of A2819: 3/2/C, 37 IN (6), 21 OH (9), 78 PA (7), 74 OH (5), B 2 KY (2), G 1 OH Bty (2)
- Within one hex of A3618: 1/3/C
Left Wing
- B1424: Crittenden/LW
- Within one hex of A4730: Wood/1/LW, repl leader, 100 IL (7), 58 IN (6) (repl by Hascall), 3 KY (3), 26 OH (6), 1/1/LW
- Within one hex of B1331: 2/1/LW, 15 IN (5), 40 IN (6), 57 IN (5), 97 OH (8)
- Within one hex of A4833: 3/1/LW, 51 IN (3), 73 IN (5), 13 MI (6), 64 OH (4), 65 OH (5)
- Within one hex of B1627: Palmer/2/LW, 3/2/LW, 84 IL (7), 36 IN (6), 23 KY (5), 6 OH (2), 24 OH (4)
- Within one hex of B1630: 2/2/LW, 110 IL (6), 9 IN (5), 6 KY (4), 41 OH (5)
- Within one hex of B1928: 1/2/LW, 31 IN (3), 1 KY (5), 2 KY (4), 90 OH (3)
- Within one hex of A4725: Van Cleve/3/LW, 2/3/LW (repl, S Beatty commands), 44 IN (5), 86 IN (4), 13 OH (3), 59 OH (4)
- Within one hex of B1124: 1/3/LW, repl leader, 79 IN (6), 9 KY (5), 11 KY (5), 19 OH (2)
- Within one hex of B1623: 3/3/LW
- Within one hex of A4334: Pioneers, CBOT, 1 Bn (11)
Cavalry
- A2511: Stanley, D 1 OH Cav/Cav
- Within one hex of A2120: 1/1/Cav, 4 MI (3), 7 PA (7)
- Within one hex of A2309: 2/1/Cav, 1 OH (6), 4 OH (6), 3 OH not in play
- Within one hex of A2107: Kennett, R/Cav, 2 TN (3), 4 US (4), 15 PA not in play
Confederate Setup. Place breastworks in the following hexes: A2740, A2840, A2940, A3040, A3139, A3239, A3338, A3438, A3537, A3638, A3737, A3838, A3937, A4038, A4138, A4238, A4338, A4439, A4539, A4640, A4740, A4841, A1141, A1242, A1652, A1651, A1650, A1649, A1648, A1647, A1746, A1846, A1945, A2045, A2144, A2244, A2340, A2339, A2338, A2438, A2537, A2637, A2737
-
B2345: Bragg
-
B1951: Polk/P Corps
-
Within one hex of A4139: Cheatham/1/P, 2/1/P (less Stanford), 4/5 TN (7), 19 TN (5), 24 TN (6), 31/33 TN (5)
-
B2045: Stanford/2/1/P
-
Within one hex of A4341: 1/1/P (less Carnes), 8 TN (4), 16 TN (4), 38 TN (3), 51 TN (4)
-
B1647: Carnes/1/1/P
-
Within one hex of A3938: 3/1/P (less Smith), 1/27 TN (7), 4 TN PA (6), 6/9 TN (7)
-
A4744: Smith/3/1/P
-
Within one hex of A3247: 4/1/P (less Scott), 12 TN (3), 13 TN (3), 29 TN (2), 47 TN (3), 154 TN (3), 9 TX (4)
-
B1846: Scott/4/1/P
-
B2039: Withers/2/P
-
Within one hex of A4339: 1/2/P (less Robertson), Repl Leader, 19 AL (5), 22 AL (6), 25 AL (7), 26 AL (5), 39 AL (7)
-
A4648: Robertson/1/2/P
-
Within one hex of B2046: 2/2/P (less Garrity), Repl Leader, 7 MS (7), 9 MS (6), 10 MS (5), 41 MS (3), 44 MS (6), 9 MS SS elim
-
B1649: Garrity/2/2/P
-
A3341: Cleburne
-
Within one hex of A3449: 1/2/H, 1 Ark (3), 13 Ark (3), 15 Ark (3), 5 CS (2), 2 TN (3), 5 TN (3)
-
Within one hex of A2841: 2/2/H (less Swett), 2 Ark (6), 5 Ark (3), 6/7 Ark (8), 8 Ark (5)
-
A2740: Swett/2/2/H (3)
-
Within one hex of A3139: 3/2/H, 17 TN (8), 23 TN (4), 25 TN (5), 37 TN (4), 44 TN (7)
-
Within one hex of A3045: 4/2/H (Less Semple), 16 AL (3), 33 AL (4), 3 CS (3), 45 MS (2), 15 MS SS (1)
-
Within one hex of A3640: McCown, Hardy/3/H, 2/3/H (less Eufala), Repl leader, 3 GA Bn (3), 9 GA Bn (2), 29 NC (5), 11 TN (3)
-
A3447: Eufala/2/3/H
-
Within one hex of A3538: 1/3/H (less Douglas), 10 TX DC (5), 11 TX DC (4), 14 TX DC (4), 15 TX DC (5)
-
A2748: Douglas/1/3/H
-
Within one hex of A3738: 3/3/H (less Humphreys), 1 Ark MR (4), 2 Ark MR (5), 4 Ark (3), 30 Ark (3), 4 Ark Bn (3)
-
A3048: Humphreys/3/3/H (2)
-
Within one hex of B1851: 3/2/P (Less Barrett), 45 AL (5), 24 MS (5), 27 MS (6), 29 MS (3), 30 MS (2), 39 NC (7)
-
B1649: Barrett/3/2/P
-
Within one hex of A3940: 4/2/P, 24 AL (6), 28 AL (5), 34 AL (4), 10/19 SC (2)
-
A3446: Hardee/H Corps
Cavalry
- Within two hexes of A2143: 3 AL Cav/1/Cav
- Within two hexes of B3021: 4/Cav
Design Note: Early on January 1st, Wheeler conceived the idea of a raid on Rosecrans' supply line back to Nashville. At first light, he took Wharton's Buford's, and his own Brigades (except for the 3rd Alabama Cavalry) and rode out to Lavergne, Tennessee, where he struck at Union supply depot there. The raid had little effect on Rosecrans' supply situation, but did deprive Bragg of most of his cavalry for the day.
6.0 Doomed Assault, or Something Better?
Breckinridge's isolated attack on January 2nd accomplished nothing but to add to the casualty lists. When he ordered it, however, Bragg thought there might be a chance that the Federal army was about ready to collapse anyway. Bragg contemplated a larger attack, but the condition of most of his army made him hesitate. This scenario allows the players to explore that possibility in greater detail.
Maps. Maps A and B are used in this scenario.
Game Length/Playing Time. The game lasts from 1400 to 1700, January 2nd.
Initiative. The Confederate Player starts with the initiative.
Union Special Command Rule. At the start of any turn, the Union player may place any artillery batteries he chooses, up to a total of 12, under command of 2/LW. Once so attached, these batteries remain part of 2/LW for the rest of the scenario. Any batteries so attached now move and fire whenever an AM for 2/LW is drawn.
Design Note: this rule simulates the grand battery assembled by Captain John Mendenhall on the west bank of Stones River. The main advantage of attaching these units is that they can all fire using the same AM, allowing the Federal player to mass fires not normally possible.
Victory. Use the victory point schedule in the battle book (scenario 6):
| Result | VP Margin |
|---|---|
| Confederate Major | 6 or more |
| Confederate Minor | 2 to 5 |
| Draw | 1 to –3 |
| Union Minor | –4 to –6 |
| Union Major | –7 or less |
Historical Efficiency. The Confederate Efficiency Pool is 1x1, 2x2, 2x3, and 2x4. The Union Efficiency Pool is 2x1, 2x2, 1x3, and 1x4.
Random Events. Random events are used in this scenario.
Union Setup
- A3824: Rosecrans
- Within one hex of A4426: Pioneers, CBOT, 1 Bn (11)
Right Wing
- A3619: McCook, Davis/1/RW, Escort/RW
- A3419: B: Post/1/1/RW, 22 IN (5), 75 IL (5)
- A3318: B: 74 IL (5), 6 WI Bty (5)
- A3317: B: 59 IL (5)
- A3520: B: Carlin/2/1/RW, 101 OH (5) 38 IL (2) 2 MN Bty
- A3420: B: 15 WI (8), 21 IL (3)
- Within one hex of A3619: 3/1/RW, 25 IL (7) 35 IL (8) 81 IN (9) 8 WI Bty (5)
- A3727: Johnson/2/RW
- Within one hex of A4321: 1/2/RW, Willich (repl), 39 IN (1), 89 IL (3), 15 OH (1), 32 IN (3), 49 OH (3), A 1 OH Bty (2)
- A3728: B: Kirk/2/2/RW (repl), 30 IN (6) 29 IN (4)
- A3727: 34 IL (3)
- A3628: B: 79 IL (5), 77 PA (5)
- A3829: B: Baldwin/3/2/RW (repl), 6 IN (10) 5 IN Bty (4)
- A3828: 1 OH (8) 5 KY (4)
- A3827: 93 OH (12)
- A3723: Sheridan/3/RW, L 2 KY/3/RW
- Within one hex of A3723: 1/3/RW, Sill (repl), 21 MI (6), 36 IL (4), 88 IL (8), 24 WI (6), 4 IN Bty (4)
- A3522: B: Schaefer/2/3/RW, 73 IL (8), G 1 MO Bty
- A3521: B: 15 MO (7)
- A3622: 44 IL (5)
- A3621: 2 MO (6)
- A3524: B: Roberts/3/3/RW (repl), 42 IL (4), 22 IL (2)
- A3523: B: 27 IL (6)
- A3525: B: 51 IL (8)
Center
- A4327: Thomas, 9 MI/Center
- A4229: Rousseau/1/C, 2 KY Cav/1/C
- A4332: B: Scribner/1/1/C, 33 OH (6), 2 OH (5)
- A4433: B: 94 OH (7)
- A4431: B: 38 IN (4) 10 WI (4)
- A4130: B: Beatty/2/1/C, 88 IN (6), A 1 MI Bty
- A4231: B: 15 KY (7), 42 IN (4), 3 OH (4)
- A3929: B: Starkweather/3/1/C, 24 IL (5) A KY Bty
- A4030: B: 21 WI (9)
- A4029: 79 PA (8)
- A3928: 1 WI (6)
- Within one hex of A4527: 4/1/C, 1/18 US (3), 2/18 US (3), 1/16 US (3), 1/15 US (4), 1/19 US (2)
- A3527: B: Walker/1/3/C, 82 IN, D 1 MI Bty
- A3526: B: 38 OH
- A3627: 21 OH
- A3626: 17 OH
- B1324: Negley/2/C
- Within one hex of B1125: 2/2/C, 69 OH (5), 19 IL (6), 18 OH (6), 11 MI (6), M 1 OH Bty (3)
- Within one hex of B1323: 3/2/C, 21 OH (9), 78 PA (7), 37 IN (6), 74 OH (5), B KY Bty (2), G 1 OH Bty (2)
Left Wing
- B1723: Crittenden
- A4630: Wood/1/LW (repl by Hascall)
- A4531: Hascall/1/1/LW (repl), 3 KY (3), 26 OH (8)
- A4532: B: 100 IL (2)
- A4632: B: 58 IN (6), 8 IN Bty
- B1030: B: Wagner/2/1/LW, 15 IN (5), 10 IN Bty
- B1029: 7 OH (8), 67 IN (5)
- B1129: B: 40 IN (6), 26 PA Bty/1/3/LW
- A4730: B: Harker/3/1/LW, 51 IN (5), 6 OH Bty
- A4631: B: 64 OH (4), 65 OH (5)
- A4630: 13 MI (6), 73 IN (5)
- B1424: Palmer/2/LW
- B1428: B: Cruft/1/2/LW, 90 OH (3), 2 KY (4)
- B1427: B: 31 IN (3), 1 KY (5)
- B1328: B: Hazen/2/2/LW, 110 IL (6), 6 KY (4)
- B1229: B: 9 IN (5), 41 OH (5)
- B2020: Gross/3/2/LW, 24 OH (4)
- B1820: 84 IL (4)
- B2219: 23 KY (5)
- B2018: 36 IN (6)
- B1818: 6 OH (2)
The following units are all considered to be attached to 2/LW:
- B1724: 7 IN Bty/2/3/LW
- B1625: H 4 US Bty/3/2/LW
- B1525: M 4 US Bty/3/2/LW
- B1526: F 1 OH Bty/2/2/LW
- B1527: B 1 OH Bty/1/2/LW
- B2120: Van Cleve/3/LW (replaced by S. Beatty/1/3/LW)
- B2122: S. Beatty/1/3/LW (repl), 9 KY
- B2121: 11 KY
- B2023: 19 OH
- B2821: Fyffe/2/3/LW, 13 OH (3)
- B2722: 44 IN (5)
- B2620: 86 IN (4)
- B2521: 59 OH (4)
- B1919: 3 WI Bty
- B2524: Price/3/3/LW
- B2523: 79 IN/1/3/LW, attached to 3/3/LW
- B2524: 5 IN (4)
- B2323: 99 OH (5)
- B2324: 21 KY (5)
- B2325: 51 OH (4)
Cavalry
- A2618: Stanley, D 1 OH Cav/Escort/Cav
- A2621: Kennett
- All units within two hexes of A2420: 1/1/Cav, 4 MI (3), 7 PA (7)
- Within one hex of A2621: 2/1/Cav, Only Zahm, 1 OH (6), 4 OH (6) are in play
- All units within one hex of A2721: R/Cav, 4 US (4), 2 TN (3)
Eliminated units: E 1 OH Bty/2/2/RW, C 1 IL Bty/3/3/RW
Confederate Setup
- B2445: Bragg
Cavalry
- Within three hexes of A2334: 1/Cav, 1 AL Cav (3), 3 AL Cav (2), 51 AL PR (1), 8 Conf Cav (3), 1 TN Cav (4), Douglas (1)
- Within two hexes of A2032: 2/Cav, 3 KY (2), 5 KY (3), 6 KY (4)
- Within two hexes of B4431: 3/Cav, 14 AL (2), 1 CS (1), 3 CS (6), 2 GA (6), 3 GA (1), 2 TN (2), 8 TX (5), Murray (2)
- Within one hex of B4129: 4/Cav
H Corps
- B2945: Hardee
- B3042: Breckinridge/1/H
- Within one hex of B3541: 1/1/H, 13/20 LA (8), 16/25 LA (4), 32 AL (1)
- Within one hex of B4042: 2/1/H, Palmer is replaced by Pillow, all units at full strength
- Within one hex of B3044: 3/1/H, 4 FL (5), 60 NC (4), 20 TN (6), 1/3 FL (8)
- B2539: Hanson/4/1/H, 9 KY
- B2340: B: 6 KY
- B2339: B: Pritchard Bty/5/1/H (attached to 4/1/H)
- B2338: B: 4 KY
- B2438: B: Cobb Bty
- B2537: B: Byrnes Bty
- B2637: B: 2 KY
- B2737: B: 41 AL
- A2843: Cleburne/2/H
- A3240: B: Polk/1/2/H, Key Bty, 1 Ark (3)
- A3340: B: 2 TN (3), 15 Ark (3)
- A3140: B: 5 TN (3), 13 Ark (3), 5 CS (2)
- A2740: B: Liddell/2/2/H, 5 Ark (3), 6/7 Ark (8)
- A2641: B: 2 Ark (6), 8 Ark (5)
- A2737: Swett Bty (3)
- A2939: B: Johnson/3/2/H, 23 TN (4), Darden Bty
- A3040: B: 17 TN (8)
- A2840: B: 44 TN (7)
- A2940: B: 25 TN (5), 37 TN (4)
- A2541: B: Wood/4/2/H, 45 MS (2), 33 AL (4)
- A2442: B: 15 MS SS Bn (1), 16 AL (3), 3 CS (3)
- A2537: Semple Bty (5)
- A3641: McCown/3/H, Hardy/3/H
- A3540: B: Ector/1/3/H, 14 TX DC (4), Douglas Bty
- A3440: B: 11 TX DC (4), 10 TX DC (5)
- A3441: 15 TX DC (5)
- A3840: B: Rains/2/3/H (repl), 9 GA Bn, 3 GA Bn (3), Eufala Bty
- A3940: B: 11 TN (3), 29 NC (5)
- A3640: B: McNair/3/3/H (repl), 30 Ark (3), 4 Ark (3), Humphreys Bty (2)
- A3740: B: 2 Ark MR (5), 1 Ark MR (4)
- A3641: 4 Ark Bn (3)
P Corps
- B1941: Polk
- A4042: Cheatham/1/P
- A4140: B: Donelson/1/1/P, 84 TN, 38 TN (3)
- A4040: B: 51 TN (4)
- A4240: B: 16 TN (4), 8 TN (4)
- A4339: B: Stewart/2/1/P, 24 TN (6), 19 TN (5)
- A4440: B: 4/5 TN (7), 31/33 TN (5)
- Within two hexes of B1740: 3/1/P (attached to 2/P), TN SS Bn (1), 6/9 TN (7), 4 TN PA (6), 1/27 TN (7)
- Within one hex of A3843: 4/1/P, 12 TN (3), 13 TN (3), 29 TN (2), 47 TN (3), 154 TN (3), 9 TX (4), Allen SS Bn (1)
- B1344: Withers/2/P
- B1141: B: Jackson/5/1/H (attached to 2/P), Lumsden Bty
- A4841: B: 5 GA (4), 5 MS (1)
- B1242: B: 6 MS (3), 2 GA SS Bn (2)
- A4641: B: Loomis/1/2/P (repl), 39 AL (7)
- A4540: B: 25 AL (7)
- A4741: B: 22 AL (6), 19 AL (5)
- A4541: 17 AL SS Bn, 26 AL (5)
- A4642: 1 LA (6)
- Within two hexes of B1937: 2/2/P, except Garrity Bty
- B2045: B: Anderson/3/2/P, 39 NC (7), 30 MS (2)
- B2144: B: 45 AL (5)
- B1840: 24 MS
- B2244: B: Garrity Bty/2/2/P (attached to 3/2/P)
- B1945: B: 27 MS (4), 29 MS (3)
- B1845: B: Barrett Bty/3/2/P
- Within one hex of A4343: 4/2/P, 10/19 SC (2), 34 AL (4), 28 AL (5), 24 AL (6)
- B1837: Stanford Bty/2/1/P
- B1737: Carnes Bty/1/1/P
- B1638: Smith Bty/3/1/P
- B1538: Scott Bty/4/1/P
- B1439: Robertson Bty/1/2/P
Note: Stanford, Carnes, Smith, Scott, and Robertson are all considered part of 2/P
Place breastwork counters (only) in the following hexes: B1746, B1647, B1648, B1649, B1650, B1651, B1652.
Four-Map Scenarios
7.0 The Day Before…
The Union approach to the field was quite slow, almost halting. The morning of December 30th might have presented an opportunity for Bragg, had he been looking for it, to strike Rosecrans before the Federal army was all present.
Maps. All four maps are used, map A is Northwest, B is northeast, C is southwest, D is southeast.
Game Length/Playing Time. The Game starts with the 0600 turn for December 30th, and ends at the conclusion of the 1700 turn of December 31st.
Visibility: due to fog and darkness, visibility for the 0600 and 1700 Turns ONLY is 2 hexes. From 0700 to 1600 visibility is normal. For the three night turns, visibility is one hex.
Initiative. No player starts with the initiative. (Aggressive Alternate: the Confederates start with the initiative.)
Victory. Use the victory point schedule in the battle book:
| Result | VP Margin |
|---|---|
| Confederate Decisive | 10 or more |
| Confederate Major | 7 or more |
| Confederate Minor | 4 to 6 |
| Draw | 3 to –3 |
| Union Minor | –4 to –6 |
| Union Major | –7 or less |
| Union Decisive | –10 or less |
(when using the alternate initiative and efficiency rules for an aggressive Confederate, subtract and additional two points from the final total.)
Historical Efficiency. The Confederate Efficiency Pool is 1x1, 2x2, 2x3, and 1x4. (Aggressive alternate: Add 1x3 and 1x4 to the pool for the Confederates) The Union Efficiency Pool is 2x1, 2x2, 1x3, and 1x4.
Random Events. Random events are used in this scenario.
Union Setup
- A3924: Rosecrans
Right Wing
- Within one hex of A1141: Davis/1/RW, 1/1/RW
- Within one hex of A1440: 2/1/RW
- Within one hex of A1137: 3/1/RW
Center
- A3430: Thomas, 9 MI/Provost/C
- Within one hex of A3833: Negley/2/C, 2/2/C
- Within one hex of A3635: 3/2/C
Left Wing
- A4429: Crittenden
- Within one hex of B1630: Wood, 3/1/LW
- Within one hex of B1723: 1/1/LW
- Within one hex of B1333: 2/1/LW
- Within one hex of A4636: Palmer, 2/2/LW
- Within one hex of B1241: 1/2/LW
- Within one hex of B1236: 3/2/LW
- Within one hex of A4725: Van Cleve, 1/3/LW
- Within one hex of A4728: 2/3/LW
- Within one hex of A4127: 3/3/LW
Union Reinforcements
December 31st
- 1400, either 1025 or 1041: Stanley, D 1 OH Cav, 15 PA/R/Cav, 1 MdTN/R/Cav, Minty, M, 2 IN/1/1/Cav, 4 MI/1/1/Cav
- 1600, A1401: 3/1/C, 1/3/C
CONFEDERATE SETUP
- B3350: Bragg
Cavalry
- Within two hexes of B4329: 1/Cav
- Within one hex of B3021: 4/Cav
- Between A3146 and C3019, anywhere along the road: 3/Cav
P Corps
- D2502: Polk
- D1111: Cheatham/1/P
- Within one hex of D2904: 1/1/P
- Within one hex of D2305: 2/1/P
- Within one hex of D1509: 3/1/P (less Smith)
- D3207: Smith/3/1/P
- Within one hex of D1113: 4/1/P (less Scott)
- D2719: Scott/4/1/P
- B1950: Withers/2/P
- Within one hex of C4412: 1/2/P (less Robertson)
- C4315: Robertson/1/2/P
- Within two hexes of B1944: 2/2/P (less Garrity)
- B2243: Garrity/2/2/P
- Within two hexes of B1650: 3/2/P
- Within one hex of C1704: 4/2/P
H Corps
- B3949: Hardee
- Within one hex of B3842: Breckinridge, 3/1/H
- Within one hex of B4141: 1/1/H
- Within one hex of B3443: 2/1/H
- Within two hexes of B2539: 4/1/H, Lumsden/5/1/H (attached to 4/1/H)
- Within one hex of B4641: 4/1/H (less Lumsden)
- Within one hex of B4047: Cleburne, 3/2/H
- Within one hex of B4345: 1/2/H
- Within one hex of B3449: 2/2/H
- Within one hex of B4024: 4/2/H
- D4421: McCown, Hardy/3/H
- Within two hexes of D4020: 1/3/H
- Within two hexes of D4024: 2/3/H
- Within one hex of D4318: 3/3/H
Cavalry
- Within one hex of B1231: 1/1/Cav
- A1945: 15 PA/R/Cav
- Within one hex of C1918: Kennett, 2/1/Cav
Place breastworks in the following hexes: B2143, 2044, 1944, 1845, 1745, 1646, 1647, 1648, 1649, 1650, 1651, 1652.
Union Reinforcements
December 30th
- 0600, A1025: Sheridan, 3/RW Division
- 0900, A1401: Rousseau, 1/C Division (except 3/1/C)
- 1000, A1041: McCook, Escort/RW
- 1100, A1041: Johnson, 2/RW Division
- 1100, A1401: Stanley, D 1 OH/Cav, R/Cav (less 15 PA)
- 1200, A1401: Pioneers
- 1800, WITHDRAW: Stanley, D 1 OH/Cav, R/Cav, 1/1/Cav
Confederate Reinforcements
December 30th
- 2200, WITHDRAW: 1/Cav
December 31st
- 1100, C1019: 1/Cav (Fatigue level 4)
- 1200, C1019: 2/Cav (Fatigue level 4)
8.0 Day of Battle
This scenario encompasses the fighting on all of December 31st, commencing with the dawn attack and ending with the final assaults at darkness. The bulk of the battle of Stone's River occurred on this day.
Maps. All four maps are used, map A is Northwest, B is northeast, C is southwest, D is southeast.
Game Length/Playing Time. The Game starts with the 0600 turn for December 31st, and ends at the conclusion of the 1700 turn of that day.
Visibility: due to fog and darkness, visibility for the 0600 and 1700 Turns ONLY is 2 hexes. From 0700 to 1600 visibility is normal.
Initiative. The Confederate Player starts with the initiative, and may pick the first TWO AM chits to be used.
Victory. Use the victory point schedule in the battle book:
| Result | VP Margin |
|---|---|
| Confederate Decisive | 10 or more |
| Confederate Major | 7 or more |
| Confederate Minor | 4 to 6 |
| Draw | 3 to –3 |
| Union Minor | –4 to –6 |
| Union Major | –7 or less |
| Union Decisive | –10 or less |
Historical Efficiency. On the 0600 turn, the Confederate Corps efficiency is: Hardee 4, Polk 3. The Union Corps Efficiency is McCook 1, Crittenden 1 and Thomas 1. The Confederate Efficiency Pool is 2x1, 3x2, 2x3, and 2x4. The Union Efficiency Pool is 3x1, 2x2, 3x3, and 1x4.
Random Events: Random events are used in this scenario.
Confederate Shock and Awe (Optional): The initial CSA assault on McCook's Right Wing virtually eliminated them as a fighting force that morning. These were good troops having a very bad morning. The following give the CSA a chance (not a certainty) of recreating this. It is strongly recommended that these only be used with the Fatigue rules.
- All of McCook must take a UDD after set-up. Failure disorders the unit. Leader DRMs apply (11.73) but not 3) below.
- Give McCown (3/H) and Cleburne (2/H) ONE free Orders change during any of their Change orders phases (III.C.1) in the first turn. No need to roll. This should allow the attack to maintain momentum.
- Apply a temporary –1 Cohesion to all of McCook's divisions on the first turn. Alternatively, apply a +1 to all UDDs for any of McCook's troops.
- Johnson, Davis, and Sheridan's AMs may not be placed in the cup until any unit of the Right Wing has been fired upon by Rebel infantry, or a Rebel unit of any kind has moved adjacent. Note that this does not happen on a division by division basis—the first time that ANY unit of the RW meets the condition, but the AMs for all three divisions in the pool.
- Rosecrans cannot move until turn 2.
Union Setup
Right Wing
- C2716: 15 OH/1/2/RW
- C2717: A, 1 OH Bty
- C2818: 49 OH
- C2916: 1, 89 IL
- C2919: 32 IN
- C3019: 39 IN
- C3218: 34 IL/2/2/RW
- A2047: 79 IL (yes, this is correct)
- C3317: E, 1 OH Bty
- C3316: 29 IN
- C3315: Kirk, 30 IN
- C3415: 77 PA
- C2804: 5 KY/3/2/RW
- C2806: 1 OH
- C2905: Baldwin, 5 IN Bty
- C3004: 93 OH
- C3006: 6 IN
- C3108: Johnson/2/RW, Willich/1/2/RW
- C3001: McCook, Escort/RW
- C3312: 22 IN/1/1/RW
- C3411: Post, 59 IL
- C3512: 5 WI bty
- C3513: 74 IL
- C3612: 75 IL
- C3408: Davis/1/RW
- C3409: 21 IL (strength of 7)
- C3507: 15 WI (strength of 8)
- C3508: Carlin, 2 Minn Bty
- C3608: 38 IL
- C3610: 101 OH
- C3705: Woodruff, 81 IN/3/1/RW
- C3807: 35 IL
- C4006: 25 IL
- C4005: 8 WI Bty
- C3402: Sheridan/3/RW, L 2 KY/Escort
- C3901: 21 MI/1/3/RW
- C3903: 24 WI
- C4002: Sill, 4 IN Bty
- C4101: 88 IL
- C4103: 36 IL
- A3351: 73 IL/2/3/RW
- A3450: 2 MO
- A3451: Schaefer, G, 1 MO Bty
- A3552: 15 MO
- A3651: 44 IL
- A4050: 22 IL/3/3/RW
- A4148: 27 IL
- A4149: Roberts, C, I IL Bty
- A4251: 51 IL
- A4349: 42 IL
Center
- A4429: Thomas, 9 MI/provost/C
- A4126: Rousseau/1/C, 2 KY/1/C (3/1/C Brigade arrives as a reinforcement)
- Within 1 hex of A4029: 2/1/C
- Within 1 hex of A3727: 4/1/C
- A4646: 69 OH/2/2/C
- A4648: 19 IL
- A4846: 18 OH
- A4847: Stanley, M 1 OH Bty
- A4848: 11 MI
- A4844: 78 PA/3/2/C
- B1140: Negley/2/C, 21 OH/3/2/C
- B1141: 74 OH, 8 KY bty
- B1142: J. Miller; G 1 OH Bty
- B1143: 37 IN
Note: 1/2/C brigade is not in play.
Left Wing
- B1424: Crittenden
- B1425: 100 IL/1/1/LW
- B1426: 26 OH
- B1524: 58 IN
- B1525: Hascall, 8 IN Bty
- B1526: 3 KY
- B1430: Wood/1/LW
- B1630: 64 OH/3/1/LW
- B1631: Harker, 65 OH
- B1632: 51 IN
- B1830: 73 IN
- B1831: 6 OH Bty
- B1832: 13 MI
- B1532: 40 IN/2/1/LW
- B1533: Wagner, 10 IN Bty
- B1634: 97 OH
- B1435: 15 IN
- B1333: 57 IN
- B1238: 2 KY/1/2/LW
- B1239: 31 IN
- B1137: Cruft, B, 1 OH Bty
- A4838: 90 OH
- A4839: 1 KY
- B1335: 110 IL/2/2/LW
- B1234: 41 OH
- B1235: Hazen, F 1 OH Bty
- B1236: 6 KY
- B1134: 9 IN
- A4533: Palmer 2/LW, Grose, 23 KY/3/2/LW
- A4537: 36 IN
- Within 1 hex of A4027: 1/1/C
- A4435: H, 4 US Bty
- A4436: M, 4 US Bty
- A4334: 24 OH
- A4336: 6 OH
- A4734: 84 IL
- A4827: Van Cleve/3/LW
- Within 1 hex of B1224: 1/3/LW
- Within 1 hex of A4527: 2/3/LW
- Within 1 hex of A4825: 3/3/LW
Army troops
- Within 1 hex of B1721: Pioneer Brigade
- B1621: CBOT Bty/Pioneers
- A3924: Rosecrans
- A3823: Kennett/1/Cavalry, 4 US/R/Cav
- Within 1 hex of A1942: 2/1/Cavalry, 2 TN/R/Cav
Reinforcements
- 900, Special, appears at A3924: 3 KY/1/1/Cav, 7 PA/1/1/Cav
- 1400, Enter at either A1025 or A1041: Stanley, D 1 OH Cav, 15 PA/R/Cav, 1 MdTN/R/Cav, Minty, M, 2 IN/1/1/Cav, 4 MI/1/1/Cav
- 1600, Enter at A1401: 3/1/C, 1/3/C
Confederate SetUp
H Corps
- B4440: 4 FL/3/1/H
- B4340: 60 NC
- B4241: Wright Bty
- B4141: Preston, 20 TN
- B4042: 1/3 FL
- B4745: 2 GA SS, 8 Miss/5/1/H
- B4645: Jackson, Pritchard Bty
- B4544: 5 Miss, 5 GA
- B3942: 18 TN/2/1/H
- B3843: Moses Bty/1/2/H
- B3742: Palmer, 45 TN
- B3643: 26 TN
- B3542: 28 TN, Breckinridge/1/H
- B3345: Slocumb Bty/1/1/H
- B3245: 13/20 LA
- B3144: Adams, 16/25 LA
- B3045: 14 LA Bn, 32 AL
- B2737: 41 AL/4/1/H in breastworks
- B2637: 2 KY/4/1/H, Semple/4/2/H, in Breastworks
- B2537: Brynes Bty in Breastworks
- B2539: Hanson, 9 KY
- B2438: Cobb Bty in Breastworks
- B2338: 4 KY in breastworks
- B2339: Lumsden/5/1/H in Breastworks
- B2340: 6 KY in breastworks
- D1118: Hardee
- C4216: 4 Ark, 1 Ark MR/3/3/H
- C4217: 2 Ark MR
- C4218: 30 Ark, 4 Ark Bn
- C4317: McNair, Humphreys Bty
- C4220: 10 TX DC/1/3/H
- C4221: 11 TX DC
- C4222: 14 TX DC
- C4223: 15 TX DC
- C4320: Ector, Douglas Bty
- C4225: 9 GA Bn, 3 GA Bn/2/3/H
- C4226: 11 TN
- C4227: 29 NC
- C4325: Rains, Eufala Bty
- C4422: McCown/3/H, Hardy/3/H
- C4817: 15 Ark, 13 Ark/1/2/H
- C4818: 5 TN, 2 TN
- C4819: 1 Ark, 5 CS
- D1117: Polk, Key Bty
- C4820: 37 TN/3/2/H
- C4821: 44 TN
- C4822: Johnson, 25 TN
- C4823: 17 TN
- C4824: 23 TN
- D1122: Darden Bty
- C4825: Liddell, 2 Ark/2/2/H
- C4826: 5 Ark
- C4827: 6/7 Ark
- C4828: 8 Ark
- D1124: Swett Bty
- D1321: Cleburne/2/H
- D1518: 16 AL/4/2/H
- D1519: Wood, 45 Miss, 15 Miss Bn
- D1520: 3 CS, 33 AL
P Corps
- B2244: Garrity Bty/2/2/P in breastworks
- B2144: 9 Miss in breastworks
- B2045: 10 Miss in breastworks
- B1945: Chalmers, 9 Miss SS, 41 Miss in breastworks
- B1846: 44 Miss in breastworks
- B1746: 7 Miss in breastworks
- B1647: 27 Miss, Barrett Bty/3/2/P in Breastworks
- B1648: 39 NC in breastworks
- B1649: 29 Miss in breastworks
- B1650: Anderson, 30 Miss in breastworks
- B1651: 24 Miss in breastworks
- B1652: 45 AL in breastworks
- B2052: Withers/2/P
- C4804: 34 AL/4/2/P
- C4805: 10/19 SC
- C4806: Manigault, 24 AL
- C4807: 28 AL
- D1105: Waters Bty
- D1110: 22 AL/1/2/P
- D1111: 19 AL
- D1112: 1 LA
- D1113: 25 AL
- D1114: 39 AL
- D1115: 17 AL SS, 26 AL
Cavalry
- Within 3 hexes of C4135: Wharton, 3/Cav
- Within 2 hexes of B2920: Pegram, 4/Cav
Note: Semple/4/2/H and Lumsden/5/1/H are considered attached to 4/1/H for all purposes.
Confederate Reinforcements
December 31st
- 1100, C1019: Wheeler, 1/Cav (Fatigue Level 4)
- 1200, C1019: Buford, 2/Cav (Fatigue level 4)
Confederate Special Command Rule. Due to the difficult terrain and extended deployments of Polk's Corps, Cheatham and Withers worked out informal command arrangements to simplify tactical control. Withers Division now consists of Chalmers Brigade (2/2/P) and Anderson's Brigade (3/2/P) of his own division, plus Donelson's Brigade (1/1/P) and Stewart's Brigade (2/1/P). Cheatham's Division now consists of Maney's Brigade (3/1/P) and Vaughn's Brigade (4/1/P) of his own command, plus Manigault's Brigade (4/2/P) and Loomis's Brigade (1/2/P) of Withers' Division.
Thus, when an AM for Withers' Division is drawn, for example, Chalmers, Anderson, Donelson, and Stewart can move. When Cheatam's Division AM is drawn, Maney, Vaughn, Manigault and Loomis can move.
This arrangement lasts until the Confederate Player chooses to dissolve it, in which case all brigades automatically revert to their normal command. The Confederate Player can do this during the Orders Segment of any turn, when normal divisional orders are changed, simply by declaring the arrangement over.
- D1213: Loomis, Robertson Bty
- D2502: Polk
- B2653: 38 TN/1/1/P
- D2602: 16 TN
- D2603: 51 TN, 84 TN
- D2604: 8 TN
- D2703: Donelson, Carnes Bty
- D2204: 19 TN/2/1/P
- D2205: Stanford Bty
- D2104: Stewart, 31/33 TN
- D2005: 24 TN
- D1905: 4/5 TN
- D1508: 1/27 TN/3/1/P
- D1509: Maney, TN SS Bn, 4 TN PA
- D1510: 6/9 TN
- D1610: Smith Bty
- D1513: Cheatham/1/P
- D1714: 13 TN/4/1/P
- D1715: Vaughn, 47 TN, 9 TX
- D1716: Allen SS Bn, 154 TN
- D1717: 12 TN, 29 TN
- D1617: Scott Bty
Army troops
- D3504: Bragg
Confederate Reinforcements and Withdrawals
December 31st
- 1100, C1019: Wheeler, 1/Cav (Fatigue Level 4)
- 1200: Buford, 2/Cav (Fatigue level 4)
January 1st
- 0600, WITHDRAW: 1/Cav (except 3 AL Cav), 2/Cav, 3/Cav
January 2nd
- 0200, C1019: 1/Cav: 1 AL Cav (3), 3 AL Cav (2), 51 AL PR (1), 8 Conf Cav (3), 1 TN Cav (4), Douglas (1) (Fatigue level 4)
- 0200, C1019: 2/Cav: 3 KY (2), 5 KY (3), 6 KY (4) (Fatigue level 4)
- 0200, C1019: 3/Cav: 14 AL (2), 1 CS (1), 3 CS (6), 2 GA (6), 3 GA (1), 2 TN (2), 8 TX (5), Murray (2) (Fatigue level 4)
9.0 Welcoming The New Year…
This scenario covers the entire historical battle, from the dawn attack on December 31st until the final spurt of fighting on January 2nd. It is a long scenario, with periods of inaction. All information is the same as that found in Scenario 8.0, Day of Battle, except for the following changes:
Game Length/Playing Time. The Game starts with the 0600 turn for December 31st, and ends at the conclusion of the 1700 turn of January 2nd.
Visibility: due to fog and darkness, each day, visibility for the 0600 and 1700 Turns ONLY is 2 hexes. From 0700 to 1600 visibility is normal.
Union Reinforcements and Withdrawals
December 31st
- 0900, Special, appears at A3924: 3 KY/1/1/Cav, 7 PA/1/1/Cav
- 1400, Enter at either A1025 or A1041: Stanley, D 1 OH Cav, 15 PA/R/Cav, 1 MdTN/R/Cav, Minty, M, 2 IN/1/1/Cav, 4 MI/1/1/Cav
- 1600, Enter at A1401: 3/1/C, 1/3/C
Confederate Reinforcements and Withdrawals
December 31st
- 1100, C1019: Wheeler, 1/Cav (Fatigue Level 4)
- 1200: Buford, 2/Cav (Fatigue level 4)
January 1st
- 0600, WITHDRAW: 1/Cav (except 3 AL Cav), 2/Cav, 3/Cav
January 2nd
- 0200, C1019: 1/Cav: 1 AL Cav (3), 3 AL Cav (2), 51 AL PR (1), 8 Conf Cav (3), 1 TN Cav (4), Douglas (1) (Fatigue level 4)
- 0200, C1019: 2/Cav: 3 KY (2), 5 KY (3), 6 KY (4) (Fatigue level 4)
- 0200, C1019: 3/Cav: 14 AL (2), 1 CS (1), 3 CS (6), 2 GA (6), 3 GA (1), 2 TN (2), 8 TX (5), Murray (2) (Fatigue level 4)
10.0 Meeting Engagement
A somewhat speculative scenario, covering the initial arrival of the armies and the Federal groping for position. Covers from 1200 December 29th to 1700 January 1st. This scenario uses variable Union reinforcement times and locations, potential delays for Confederate reinforcements, and some initial hidden CSA deployments.
Maps. All four maps are used, map A is Northwest, B is northeast, C is southwest, D is southeast.
Game Length/Playing Time: The Game starts with the 1200 turn for December 29th, and ends at the conclusion of the 1700 January 1st Turn.
Visibility: due to fog and darkness, visibility for the 0600 and 1700 Turns each day, ONLY is 2 hexes. From 0700 to 1600 visibility is normal. At night Visibility is 1 hex.
Initiative. No player has the initiative.
Victory. Use the victory point schedule in the battle book:
| Result | VP Margin |
|---|---|
| Confederate Decisive | 10 or more |
| Confederate Major | 7 or more |
| Confederate Minor | 4 to 6 |
| Draw | 3 to –3 |
| Union Minor | –4 to –6 |
| Union Major | –7 or less |
| Union Decisive | –10 or less |
Historical Efficiency. The Confederate Efficiency Pool is 2x1, 4x2, 3x3, and 2x4. The Union Efficiency Pool is 3x1, 2x2, 3x3, and 1x4.
Random Events. Random events are used in this scenario.
Union Setup. No Union units start the game on the map.
Union Reinforcements. Union reinforcements are of two types: fixed and variable. Fixed reinforcements appear at the time specified in the hex specified. Variable reinforcements must be rolled for. For each group of reinforcements that arrives on a given turn, start rolling on that turn. If the number rolled is within the range listed, then the units appear in that hex (or either hex, if given a choice) normally. If the roll is outside the listed range, roll again next turn and every turn thereafter (including night turns) until the units arrive. Each entry line is considered one group.
December 29th
- 1200, Fixed, A1401: Crittenden, 1/LW, 1/1/Cav
- 1300, Fixed, A1041 or C1019: 3/Cav
- 1400, Fixed, A1401: 2/LW
- 1400, Variable, A1041: McCook, Escort/RW, Stanley, R/Cav, 1/RW — Enter on 1–3
- 1400, Variable, C1019: Kennett, 2/1/Cav — Enter on 1–3
- 1500, Fixed, A1401: 3/LW
- 1500, Variable, A1025: Thomas, 9 MI/Provost/C, 2/C (including 1/2/C) — Enter on 1–4
- 1700, Variable, A1041: 3/RW — Enter on 1 (add one to each roll starting December 30)
December 30
- 0600, Variable, A1401: 1/C (less 3/1/C) — enter on 1–3
- 0600, Variable, A1041: 2/RW — enter on 1–3
- 0800, Variable, A1401: Pioneers — enter on 1–3
December 31
- 0800, Variable, A1401: 3/1/C — enter on 1–2
- 1200, Variable, A1401 or A1025: 3/C — enter on 1–2
- 1500, Variable, A1401, A1025, or A1041: 4/C — enter on 1–2
- 1600, Variable, A1401, A1025, or A1041: 5/C — enter on 1–2
The time listed is the turn of entry. Each group should be recorded and the arrival time kept secret from the Union player.
| Roll | Turn |
|---|---|
| 1 or less | 0600 |
| 2 | 0800 |
| 3 | 1000 |
| 4 | 1100 |
CONFEDERATE SETUP
- B3550: Johnston
Note: Bragg is not in play. He only comes into play to replace Johnston if the former becomes a casualty.
- D2502: Polk
- Within one hex of B2152: Withers/2/P, 1/2/P
- Within one hex of B1945: 2/2/P
- Within one hex of B1749: 3/2/P
- Within one hex of D1504: 4/2/P
- Within one hex of B3542: Breckinridge, 2/1/H
- Within one hex of B4539: 1/1/H
- Within one hex of B4041: 3/1/H
- Within one hex of B3045: 4/1/H
- Within one hex of D4715: 5/1/H
- Within five hexes of B3924: 1/Cav
- Within two hexes of B4329: 4/Cav
Hidden set up/Variable arrival. For each of the groups listed below, roll one die. Read the result below:
- Group 1—1/P (–1 DRM to all die rolls below)
- Group 2—2/H, Hardee
- Group 3—3/H
1st roll result
| Roll | Result |
|---|---|
| 1–3 | Hidden deployment |
| 4–7 | December 29 Arrival |
| 8–9 | December 30 arrival |
| 0 | December 31 arrival |
If Hidden deployment is rolled, the Confederate player can secretly record the set up locations for each group. Each group must set up on:
- Map C east of the 31XX hex row, or
- Map B, south of hex row XX40, or
- Anywhere on map D.
If the result is a day, roll again, with the following DRMs:
- December 29: +4
- December 30: –1
- December 31: –4
| Roll | Turn |
|---|---|
| 5 | 1200 |
| 6 | 1300 |
| 7 | 1400 |
| 8 | 1500 |
| 9+ | 1600 |
Additional Confederate Reinforcements
December 30th
- 1200, D4821: 1/S
December 31st
- 0800, D4821: Smith, 2/S
- 1200, C1019: Buford, 2/Cav (Fatigue level 4)
Design Note: The cavalry withdrawals are ignored in this scenario because we assume that Johnston kept a better rein on his cavalry forces.
Historical Notes
The Battle of Stone's River was one of the more evenly balanced actions of the war, featuring two nearly identically sized armies, each operating with essentially the same battle plan. Designated "Murfreesboro" by Southerners, the battle was fought on December 31st, 1862, and was the climax of a week-long campaign from December 26th to January 3rd, 1863. While the main fight raged for twelve hours on New Years' Eve, preliminary actions occurred on the 29th and 30th of December. After an exhausted pause on New Years' Day, a final spasm of action occurred late in the day on January 2nd, when the Confederates launched a quixotic division-sized assault on a portion of the Federal line east of the river. Of 80,000 combatants, 23,500 were casualties; tactically the Confederates very nearly routed the Federals, but as Bragg withdrew his army on the 3rd, leaving the Yankees in control of the field it was hailed as a Union victory.
A winter offensive
Both armies had undergone re-organization in the wake of a difficult campaign in Kentucky that fall. The battle of Perryville (October 8–9, 1862) ended Confederate General Braxton Bragg's overly optimistic campaign to 'liberate' Kentucky from Union occupation, a scheme that proved more idealistic than practical. Among other things, Unionist Kentuckians outnumbered Confederate Kentuckians by a wide margin, and though Bragg's Rebels occupied the most pro-secessionist part of the state, even the most ardent Southern sympathizers wanted some assurance that the Confederate army would be around to protect them for the long haul. A brief invasion, a series of hasty proclamations and an equally abrupt withdrawal back to Tennessee would do little more than identify who most to extract retribution from when the Unionists regained the upper hand.
Perryville itself was one of the most confused battles of the war. 15,000 Rebels attacked 45,000 Federals, but the blow fell largely on Alexander McDowell McCook's isolated corps so that the massive Yankee numerical advantage came to nothing. Most of the Federals on the field were mere spectators, and the Union commander, Major General Don Carlos Buell, was oblivious to the whole thing for almost the entire action. Buell sustained an injury which limited his mobility, and a combination of climate and terrain hid all sounds of the battle from him at his headquarters. None of the other Union officers on the field thought to inform their commander about the massive battle being waged before their eyes until far too late. They all assumed, naturally enough, that he was aware of the unfolding action and his silence was intentional, not accidental. With the Federal response so botched by mishandling and communications failures, the Rebels managed to achieve a tactical draw, mauling one Union Corps. Losses were roughly equal for both combatants.
Ironically, however, Bragg was also having miscommunication problems with his commanders, but in reverse: despite repeated warnings from his subordinates, Bragg thought his small force was only attacking an equally limited Federal diversionary column, not Buell's main body. Once the true nature of the Federal force became apparent Bragg had no choice but to retreat in haste. He fell back to Danville, reunited his scattered columns to assemble his own full strength of near 40,000 men, and could have given battle on more favorable terms. By then, however, Bragg was disgusted with the lackluster welcome given him by the locals, his army's morale was questionable, and his subordinates equally fed up with him, so much so that retreat seemed the only option. The Rebels slunk out of Kentucky in a series of miserable winter marches to come to rest some 30 miles south of Nashville, at Murfreesboro, Tennessee, where they thought to enter winter quarters. Buell pursued so haltingly that he was replaced by Major General William Starke Rosecrans on October 24th, 1862.
E. Johnston, who stepped into a quasi-departmental command embracing all the states between the Appalachians and the Mississippi River. In theory, President Davis intended Johnston to coordinate action between Bragg and the Confederate army in Mississippi, using interior lines to substitute maneuver for manpower. Johnston, however, disagreed with Davis' strategic concept. Instead of simplifying command in the west, Johnston's arrival instead created only one more layer of bureaucratic confusion in Bragg's chain of command.
For Bragg, things came to a head in early December, when in response to a Federal advance towards Vicksburg, Richmond bypassed Johnston to detach one of Bragg's largest divisions – that of Carter Stevenson – and send it to Mississippi. Davis felt that if Bragg and Johnston were not going to use their forces in Tennessee, then some of them at least, should be moved to a more active theater. This order proved the dangers inherent in Davis' scheme: Stevenson's men were no help to Vicksburg, arriving there after the attack had already been repulsed, but they were also beyond Bragg's reach when Rosecrans' army finally attacked.
Bragg was also plagued by continued internal dissent. His commanders lost confidence in him as a result of Perryville, and would have preferred that Johnston take direct command. All of this unrest would come to a head a few months later, when the generals of the Army of Tennessee essentially voted 'no confidence' in their leader, but trouble was brewing within the ranks already.
Rosecrans was a careful planner and intricate strategist. Rather than rush at Bragg headlong, he would move his army in a broad arc to the south and east, in order to outflank Bragg, whose lead forces were at Triune Tennessee. The turning movement was a favorite of Rosecrans'. He employed it to good effect in later campaigns, but it proved less successful here. Technically, Rosecrans' army was called the 14th Corps, but it was divided into three wings of 3–5 divisions each. Each wing numbered between 15,000 and 20,000 men. All told, the Federals had more than 80,000 men in the department, but the need to protect vulnerable supply lines from raiders like Morgan and Forrest meant that only about 40,000 troops would be present when battle came. Opposing Rosecrans, Bragg had five divisions in two corps, also numbering roughly 40,000 men. Shortly after the battle, the 14th Corps was renamed the Army of the Cumberland: the Center under Thomas retained the 14th Corps designation, while the right and left wings were renamed the 20th and 21st Corps, respectively. This change can sometimes lead to minor confusion in the official records, as commanders used both nomenclatures in their reports.
On December 26th Rosecrans set his forces in motion. Thomas L. Crittenden's Left Wing marched southeast along the railroad, serving as the diversion that hopefully would hold Bragg's attention while Alexander McCook and George H. Thomas' Right and Center Wings swept south, then east. Their initial objective was to defeat William J. Hardee's Rebel Corps at Triune. Bragg, however, was not fooled and quickly concentrated his whole force at Murfreesboro.
December 27th and 28th were marked by methodical Union advances and daily skirmishes between the Federals and Joseph Wheeler's Confederate cavalry. Rosecrans expected Bragg to fight for the militarily significant crossings at Stewart's Creek several miles north of Murfreesboro, but Union troops seized those crossings handily on the 29th, driving away Wheeler's Cavalry. Rosecrans, now a bit perplexed as to exactly where he would find Bragg, advanced cautiously.
Rosecrans' confusion was understandable. The next defensible point was the Duck River, some 30 miles to the south. Bragg's concentration point at Murfreesboro offered no such easily defensible ground as could be found along Stewart's Creek or the Duck. The terrain was flat, and Stone's River, the only significant watercourse, flowed south to north, essentially bisecting Bragg's line rather than serving as a barrier to Rosecrans. By December 28th, Bragg had his army fully concentrated at Murfreesboro, and placed one corps on each side of the river, north of town.
November and December passed quietly as the armies recovered from the fall campaign. Both commanders also felt pressure from above for their inactivity. Union advances in Virginia and against Vicksburg pointed up the relative inaction on Rosecrans' front, and the Union War Department urged a new offensive. For his part Bragg got a new boss, Joseph
The commanders plan a battle
Murfreesboro was a battle marked by curious lulls. December 30th, which both sides expected to open with furious combat, proved to be the first such pause. Bragg fully expected Rosecrans to attack him at dawn. Rosecrans, however, was more concerned with getting his whole force assembled, including the tardy Right Wing. The day passed with only limited contact and a brief reconnaissance by Federal troops late in the afternoon. For most of the men in each army, it was a miserable day of interminable waiting in a cold, driving rain. By nightfall, the armies were camped within half a mile of each other, close enough that they could hear each others' bands that evening in what became one of the legendary stories of the war, as competing musical renditions vied with each other for supremacy.
If Rosecrans wasn't going to attack, however, Bragg would. Transferring most of Hardee's Corps from the east bank to west of the river to join Leonidas Polk's Corps, Bragg massed the bulk of his army against the Union Right Wing. Bragg planned a dawn attack to overwhelm the Federal right, advance to seize the railroad that marked Rosecrans' supply line, and destroy the remaining Federals. The plan required substantial risk: Only five brigades under John C. Breckinridge would be holding Bragg's own right to keep Rosecrans from doing the exact same thing to him.
Naturally enough, this was exactly what Rosecrans intended. Crittenden's Left Wing was ordered to cross the river on the 31st, attack Breckinridge and capture Wayne's Hill, the only real vantage point in the area and an ideal location for Union artillery to enfilade Bragg's line west of the river. From Wayne's Hill, Crittenden could also advance directly into the town and sever Bragg's supply and retreat routes. With each army developing identical offensive plans, the force that struck first would accrue the advantage.
Rosecrans took steps to ensure that Bragg remained deceived. McCook was ordered to build extra campfires in the direction of Overall Creek in order to confuse the Rebels about the location of the real Union flank and prevent Bragg from shifting any men back towards Wayne's Hill. This deception coincided nicely with both Rosecrans' intentions and various Rebel actions, so that even when McCook received word from a local civilian that he faced major portions of both Polk's and Hardee's Corps, Rosecrans was reassured rather than concerned. His plan must be working. When McCook expressed concern that the Rebels might attack him, Rosecrans was even more pleased: let them. All McCook needed to do was hold for three hours, until Crittenden's and Thomas' attacks had done their work. Reassured in turn, McCook took no other action to strengthen his line.
One of McCook's divisional commanders, Philip Sheridan, was not so easily placated. His men could hear the sounds of shifting troops on his front, and at about 2:00 a.m., he and his senior brigade commander – Brigadier General Joshua Sill, a highly respected Regular – went to find McCook. Sheridan and Sill expected to be attacked furiously come the dawn, and were also worried that the Rebels were working around their flank. When they wakened McCook, however, he dismissed their fears. It was all part of the plan: Crittenden's attack on the left would pull the rug out from Bragg's feet before any real damage could be done to them.
Opening attack
In the pre-dawn gloom of December 31st, Hardee set his two divisions in motion. Brigadier General J. P. McCown's three brigades led the way, drifting westward as they moved to attempt to envelop the illusionary Union flank, marked by McCook's lonely line of campfires. Behind McCown, Major General Patrick R. Cleburne's four brigades moved in two lines, ready to provide the successive hammer blows needed to shatter the Union right. Brigadier General John A Wharton's cavalry brigade accompanied the move. Once the Union flank was turned, Wharton could slip behind the Union line to begin harassing the Federal rear.
Brigadier General Richard W. Johnson's Union Division held McCook's flank. Two of his brigades held the front, angled so as to refuse the line. Brigadier General Edward Kirk's brigade faced eastward, holding a dense cedar brake, connecting with Brigadier General Jefferson C. Davis' division (not to be confused with his counterpart the Confederate President) on the left. Brigadier General August Willich's brigade curved to form a front that faced south and a bit west, marking the right flank of the Union line. Johnson's last brigade, under Colonel Philomon P. Baldwin, was held in a reserve position about a half mile to the rear.
Dawn came at about 6:00 a.m. The morning was foggy and cold. McCook, alert to a surprise attack, had all his men up before dawn, in line, ready to receive an enemy assault. However the fog muffled the sounds of the Rebel advance, and to Union eyes and ears it appeared so quiet that Willich even joked that the Rebels had gone. Willich, "Reddest of the Red," was an unusual soldier. A former Prussian officer, exiled revolutionary, and deeply committed his Marxist ideals, He was extreme enough to have scorned Karl Marx as a 'drawing room revolutionary' during their exile together in London after fleeing Germany in the wake of the 1848 revolt. He came to the United States, settled in Cincinnati, and was active in German-American politics in the decade before the war. When the war came, he helped raised a regiment, then accepted a colonelcy in the 32nd Indiana. He was an exemplary soldier, and his German-American Regiment was one of the better trained units in the army. His divisional commander, Johnson, thought highly of him. Johnson once noted that Willich handled a brigade as competently as most men drilled a regiment. Circumstances here, however, conspired to render Willich virtually powerless this day.
As the first minutes of the morning passed without incident, Willich left his command and rode back to Johnson's headquarters for orders. The regiments of his and Kirk's brigades relaxed, busying themselves with the more mundane chores of breakfast and watering the horses. While so occupied, just before 6:30 in the morning, picket fire erupted and the first Rebel line materialized out of the fog. The timing could not have been better, and Federal units scrambled to get back into line.
Contrary to the popular conception, the whole Federal army was not surprised in the act of eating, nor was anyone bayoneted in their tent, as some of the more hysterical newspaper accounts later described. Units did have time to form up and go into action as regiments, but there can be no denying that McCook's troops were caught off-guard and put wrong-footed by the powerful attack. The absent Willich, for example, was unhorsed on his way to rejoin his brigade and captured before he got there. All the military skills in the world did him or his regiments no good while in the hands of McCown's Rebels.
The Confederates overlapped McCook's flank by a wide margin, exacerbated by a drift farther to the left in response to the campfire deception. This drift allowed Cleburne's four brigades to come into action on McCown's right, and Johnson's two Federal brigades were quickly overwhelmed. Johnson's final brigade under Baldwin made an effort to stem the tide but was also swept away by the converging attacks of Brigadier General Evander McNair's brigade, of McCown; and Brigadier General St. John R. Liddell's Arkansans from Cleburne's command. In less than an hour, Johnson's entire division was routed.
Jefferson C. Davis' Yankees managed to deal the first check to the Rebel attack, albeit a fleeting one. Davis shifted Colonel Sidney Post's brigade to a new position facing south, and it bloodily engaged Brigadier General Bushrod Johnson's Tennesseans (also from Cleburne) in a stand-up fight for half an hour. Baldwin's retreat, however, rendered this defense untenable, and one by one, Post's regiments unraveled from west to east, as Rebels swept past them deep into the Union rear. Post's retreat exposed the rest of Davis' command to destruction.
Davis' other two brigades – under Colonels William P. Carlin and William E. Woodruff – held a 600 yard frontage facing southeast. The right wing of Cleburne's Division faced them; including Brigadier General S.A.M. Wood's Alabamians and Brigadier General Lucius E. Polk's brigade. Moving on Cleburne's right, Colonel J. Q. Loomis's brigade from Polk's Corps joined the attack. As Hardee's advance unfolded Bragg intended Polk's Corps to support the outflanking maneuver by attacking the Union line frontally, catching the Yankees between two fires. Timing these attacks proved difficult, and initially Carlin's Yankees achieved some success. Wood's Alabamians were ambushed as they blundered into his 101st Ohio and fell back in disorder. Within a few minutes, however, Post's retreat allowed Lucius Polk's Rebel brigade to swing around his flank, and soon Carlin was fighting a two front war against much stronger opponents. The combined efforts of Polk and Wood collapsed his Federals, and subsequently Woodruff's Brigade. Colonel Woodruff had been in command of the brigade all of a week, and when Sheridan passed him to see what was up seemed dazed by the experience. In any case, by 9:00 a.m. Davis' troops were as badly routed as Johnson's. This left Sheridan's division to stem the tide. Fortunately, they would prove equal to the task.
Advance and retreat
Crittenden's Left Wing moved ponderously on December 31st. Brigadier General Thomas J. Wood, whose division was to lead the advance across Stones River, was up early enough at 5:00 a.m., but it took some time for his troops to get under way and start crossing. Brigadier General Horatio Van Cleve's Division did not get the orders to cross until 7:00 a.m., just as all Hell was breaking loose with Johnson and Davis. The sounds of that fight, however, were muted, and no one in the Left Wing appreciated the scale of the action even then opening against McCook.
The crossings were undefended and fording the stream proved no problem. Crittenden crossed his men and deployed the two divisions for an advance. Then, some time after 8:00 a.m., urgent orders arrived from Rosecrans. Crittenden must stop the attack, re-cross the river with all but one brigade, and rush to support of the Right Wing.
Once he discovered the extent of the Rebel attack, McCook dispatched a staff officer to inform Rosecrans. The army commander, however, at first dismissed McCook's concerns. Later Rosecrans explained that the officer did not fully convey the size and scope of the Rebel attack, and that also the staffer did not mention that Johnson's Division had been routed in the first engagement. It took a second courier to convey the full extent of the disaster to headquarters.
Once Rosecrans realized the danger, he decided to shift Thomas' troops to support McCook, and use some of Crittenden's men to fill the gaps in Thomas' line. In practical terms, however, brigades were dispatched from both Thomas and Crittenden's Wings haphazardly in order to bolster the collapsing right. Even the Pioneers were sent into the line to stem the attack. Van Cleve hurriedly re-crossed his three brigades, and, leaving Colonel Samuel W. Price's Brigade to guard the ford, was sent to the west end of the line.
Sheridan and Negley
Sheridan's three brigades proved to be the first real bone in the throat of the Rebel attack. In the face of assaults by a number of brigades from the Rebel divisions of Major Generals Benjamin F. Cheatham and Jones M. Withers, Sheridan's men fell back to a position near the Blanton House along Wilkinson Pike. In doing so, they bent back the Union line until it faced southwest instead of southeast. Major General James S. Negley's two brigades formed the apex of this angle, holding a position north of the Wilkinson Pike and west of a farm lane running north that was destined to be nicknamed 'The Slaughter Pen." Sheridan's regiments were first engaged around 9:00 a.m., and by 10:00 o'clock had retreated north of the pike. For the next hour, they and Negley's two brigades held on to an increasingly tenuous position.
Note: Lucius E. Polk was nephew to the Bishop and corps commander (Leonidas Polk).
To bolster this defense, George Thomas sent Major General Lovell H. Rousseau's Division to Sheridan. When Van Cleve's two brigades arrived, Thomas used them to extend Rousseau's right. All of these troops formed a line roughly parallel to the Nashville Pike, less than a mile to the north. If the Rebels captured the Pike and the railroad running alongside it, Rosecrans' main retreat route would be cut. If the Federals could hold the road, however precariously, then the Union position could be maintained.
The sight that greeted Rousseau and Van Cleve's men, however, was unnerving. Later, Major Charles Manderson of the 19th Ohio described the sight: "The scene was one of disorder and panic. Regiment after regiment swept our lines in the greatest confusion." It seemed as if the entire Union army was running.
All was not yet lost. The Confederate left was running out of steam. Cleburne and McCown's men had driven more than a mile into the Union rear, taken significant losses, and needed time to re-group. Moreover, Polk's attacks against the forward Union positions had not fared so well. Repeated efforts against Sheridan and Negley failed to move those Federals. Polk's men needed to break Negley's command in order to help Hardee's attacks, but could not make headway. Four Confederate brigades hammered at this line: Those of Patten Anderson, George Maney, Arthur M. Manigault, and A. J. Vaughan. Part of the problem was numbers: four Confederate brigades faced five of Federals. The Rebel line lacked the weight to overwhelm the Yankees and lacked the advantage of position to outflank them. Faulty deployment on Polk's part also played a role. Polk had stretched his two divisions under Cheatham and Withers across too wide a front, one behind the other. So wide, in fact, that neither divisional commander could control his entire line. Recognizing the problem, Withers and Cheatham worked out an informal deal: each man took control of two of his own brigades and two of the other division, on the right and left flanks, respectively. This expedient helped some, but it was no substitute for a compact, proper formation. Of the four brigades hammering Sheridan and Negley, Anderson's Mississippians and Manigault's combined Alabama/South Carolina brigade were from Cheatham's division, while Maney's and A. J. Vaughan's largely Tennessee brigades belonged to Withers. This clumsy command arrangement was to blame for sending the Rebel brigades forward in a series of piecemeal frontal attacks. For nearly an hour Sheridan and Negley held their line, until ammunition problems forced them to fall back after 11:00 a.m. This delay proved—barely—to be enough time for Rousseau and Van Cleve to firm up their own defense.
Farther to the right, the Confederates made no headway at all. A series of frontal attacks against the Federal line astride the Nashville turnpike all proved costly failures. Brigadier General James R. Chalmers' Mississippians made one such effort, notable for its bloody repulse, which included the 44th Mississippi (Blythe's Regiment) armed with weapons so defective that some could not be fired at all, or could only be used by carrying the hammers in the men's pockets while moving. These assaults earned Union Brigadier General William B. Hazen's brigade a reputation for dependability as they defended the Round Forest – the focal point of Chalmers' attack – but did little damage to the Federals.
Thus, by early afternoon, Bragg had come close to completely collapsing the Union line, but not close enough. Rosecrans' army bent back like a jackknife, not quite fully closed. The turnpike remained in Yankee hands, and both sides dug in where they stood. Field fortifications sprung up all along both lines, and neither side made elaborate plans for the next day.
Rosecrans was mentally and emotionally battered. His trusted chief of staff was messily killed by an artillery round at his side during the fight, splattering Rosecrans and several others with flesh and blood. Undeterred, the General was everywhere rallying troops and directing the defense, but all thoughts of attack were gone. At a nighttime conference of his commanders, the Union generals discussed the idea of retreating. George Thomas, however, settled the matter in his blunt way: "This army can't retreat," he said. With that pronouncement, the council of war broke up, making on decision other than to await the next Rebel move. (Another source has Thomas stating: "I know of no better place to die than right here.")
For his part, Bragg thought the Yankees had no other option but to fall back. Late in the day the Rebel cavalry had sent word that the Union trains were already retiring, and Bragg ended the day's fight expecting no less than full scale Union withdrawal. So confident was Bragg of this Union response that he let Wheeler take virtually of the Rebel cavalry on a raid of the Union wagons, designed to savage the Yankee columns as they headed back to Nashville. Wheeler's men had some fights with Union rear guard troops, and rode completely around Rosecrans' army, but were unable to sever the Union supply lines completely. They were also absent for nearly 24 hours, leaving Bragg blind to possible Union moves.
January 1st was another of the battle's curious lulls. The two armies, each of which suffered nearly 25% losses the day before, now simply stared at each other across a 600 yard no-mans land, secure behind their breastworks, each waiting for the other to do something. The day passed quietly. Rosecrans pondered why the expected attack never came. Bragg wondered why the expected retreat had not begun. The troops were just relieved to not have to fight. The only significant move came at dusk, when Rosecrans tentatively sent Van Cleve's division (now commanded by the ranking Brigadier, Samuel Beatty) back across Stones River.
It appeared that January 2nd would be no different. The day dawned quietly, with both armies still sitting behind their fortifications. Bragg was now convinced another attack would be needed, but disliked the prospect of frontal attacks against Union defenses. Artillery would serve this time. Planting guns on the high ground east of the river, Bragg hoped that concentrated artillery fire could enfilade the Union defenses and drive Rosecrans back. The only problem was the presence of Union troops on the east bank of the river, threatening the ground Bragg envisioned for his artillery platform.
Accordingly, orders were issued for Major General John C. Breckinridge to send his division forward and drive off the Federals. Breckinridge's men were the logical choice, here: they were in the right position and most of his brigades had not seen heavy action on the 31st. The best brigade in Breckinridge's division was the Kentucky Orphan Brigade, four Kentucky Rebel infantry regiments that joined the Confederacy despite their state's failure to follow.
The Rebel Army proved a poorly functioning team on January 2nd. Command confusion and outright reluctance meant that the day all but slipped away before the attack was made at approximately 4:00 p.m. Breckinridge and his officers were unhappy with the orders. The Federals, for their part, were surprised by the attack that came with less than an hour of daylight left. That surprise contributed to the initial success of an assault that most Confederates felt was doomed from the start, and Van Cleve's men were routed and driven back across the river. However Union artillery, not Rebel cannon, would decide the issue.
Major John C. Mendenhall was a talented artillerist. He had seen action at Shiloh and was now Crittenden's chief of artillery. He believed in mass. Forty guns from ten batteries were drawn up on the high ground above McFadden's Ford, focal point of the Union crossings and the Rebel attack. As Van Cleve's brigades ran through the Union guns and rallied behind them, Mendenhall's artillery line laid a devastating close range barrage on the onrushing Rebels. Union infantry from Negley's and Brigadier General John C. Palmer's Divisions both rushed to help. The result was a slaughter. Breckinridge's attack was repulsed with heavy loss. Perhaps the most significant result of the attack was the lasting enmity created between Bragg and his Kentucky generals due to the suicidal nature of Bragg's orders.
Breckinridge's defeat was the last act of a fitful drama. January 3rd proved to be another stare-down between battered armies, neither of whom wanted much to resume the fighting. Rosecrans and his commanders hung on, determined still not to retreat, but bereft of offensive ideas. Bragg's Headquarters was a turmoil of discontent. The problem began with Polk's two division commanders, Cheatham and Withers, who sent Bragg a letter before dawn urging a retreat. Bragg refused. By mid-morning, however, he had changed his mind, thanks again to Joe Wheeler. Wheeler informed the commander that the Federals were being heavily reinforced. Wheeler's intelligence was false, and Rosecrans was not receiving any fresh troops, but Bragg placed great faith in Wheeler's information, despite the cavalry commander's lack of success in this arena so far.
St. John Liddell, whose men were close to the pike down which any Union reinforcements had to come, urged Bragg not to believe Wheeler, since his own scouts reported no such arrivals. Liddell also urged Bragg to continue to think offensively and adopt a turning movement to place the Rebel army between Rosecrans and Nashville. Bragg would hear none of it. That night, the Army of Tennessee began their retreat, a difficult and depressing movement through cold rain and foot-deep mud to Shelbyville on the far side of the Elk River. For the Rebels Stones River ended much like Perryville: a successful Confederate attack followed by retreat and recrimination. The result confused the men in the ranks, and morale plummeted. Officers came to the conclusion that the Army could not win under Bragg. The seeds of larger discontent, sown in Kentucky, germinated in the mud of a Tennessee Winter.
For his part, Rosecrans was hailed as a victor. This acclaim likely had as much to do with the fact that Fredericksburg and operations around Vicksburg made for depressing news in the North, and Rosecrans, however much he had been surprised and beaten on the field, at least out-waited Bragg and forced a retreat. It was barely a victory, but a victory none-the-less. Lincoln and the Union would accept it.