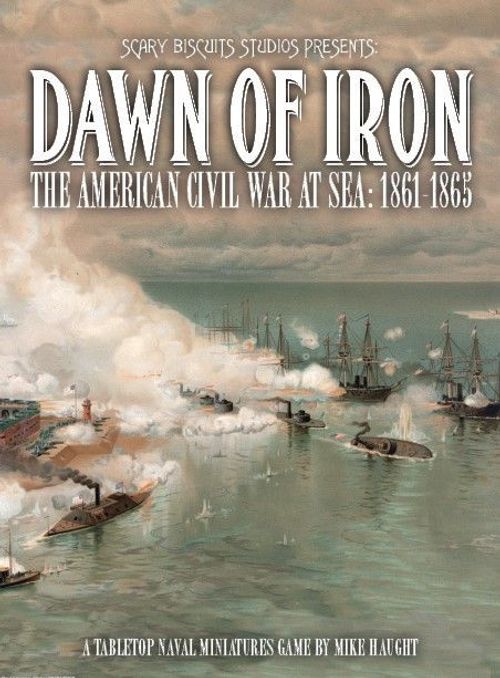
Dawn of Iron: The American Civil War at Sea – 1861-1865
Dawn of Iron: The American Civil War at Sea – 1861-1865 Rulebook
Table of Contents
Table of Contents
- Introduction
- What You Need
- Card Types
- Orders Cards & Tokens
- Damage Cards
- Upgrade Cards
- Turn Sequence
- Command Phase
- Control Phase
- End Phase
- Actions
- Shooting Action
- Hit Resolution Procedure
- Derelict Ships
- Sinking Ships
- Collisions
- Entangled
- Boarding Actions
- Civil War at Sea
- Coastal Battlefields
- The Mighty Mississippi
- Fortifications
- Minefields & Obstacles
- Setting Up a Game
- Wind Direction
- Missions
- Battle Matrix
- Mission: The Blockade
- Mission: Damn the Torpedoes
- Mission: The Duel
- Mission: The Island
- Mission: The Raid
- Mission: The Sortie
- Optional Rules
- Quick Reference
- Reference Sheet
Introduction
Your ears ring as the impact of the solid shot strikes the turret just above your head. Sailors around you shout orders that you can't hear. Trying in vain to ignore the unbearable heat that has drenched your uniform in sweat, you peer out of the small gap in the iron plating and spot your enemy, low in the water, and not more than 20 yards away. Her ram pulls painfully at the water as she tries to come about. The nearby 11-inch Dahlgren smoothbore gun lurches back, flinging a massive solid shot at the enemy. It strikes true, smashing the enemy's launch into splinters and carrying away a portion of her upper armor and smokestack. A puff of smoke jets out from her forward battery and a split second later a heavy impact strikes the turret, this time tearing through the open gunport. It wreaks havoc among the other gun crew as they take cover from flying metal.
Nearby the captain lies on the deck unconscious with blood streaming from his eyes. You collect yourself and look through the gunport. The target is less than 15 yards away. The crew looks to you as you feel the weight of your lieutenant's rank.
"Hard to port! Reload the gun and brace for impact!"
...
What You Need
Dice
Ironclads uses 5-10 standard six-sided dice.
Table
The game is played on a table of at least 3x3 ft (90x90cm). For larger games with many ships, simply use a larger table.
Terrain
Games can be played on the open sea, coastal waters, or on the many rivers of North America. See page 12 for more details about terrain.
Fleets
Both players will need a fleet of up to a dozen ships, although most battles will be between fleets of three to six ships. The rules are designed to be ready to play for any scale, as long as both you and your opponent both use a similar scale. See page 16 for more details about assembling your squadron.
A Measuring Device
The rules use both imperial and metric measurement, so agree with your opponent ahead of time to use an appropriate measuring device.
Tokens
The game uses Orders, Speed, Sinking, and other similar tokens. You can find a supply of these tokens in the Ironclads print-and-play pack. Make sure you have a good supply of these for both players to use.
Card Types
Ship Cards
A ship is represented on the battlefield by a model, but its attributes and characteristics are listed on a ship card. This card tells you the name, class, tonnage points value, general characteristics, and weapon attributes of the ship.
- Orders Queue
- National Icon
- Ship Type
- Ship Name
- Propulsion Type
- Armor Type
- Tonnage Points
- Damage Token
- Characteristics
- Card Set Info
- Main Battery
- Secondary Batteries
- Ship Picture
Ship Characteristics
Characteristics define all of the most important aspects of a ship.
- Command tells you how quickly the ship is at executing orders. The larger the number, the slower it will be putting those orders in action.
- Speed tells you the ship's maximum speed. The higher the value, the higher the potential speed of the ship. The second speed value is the ship's Acceleration rating. The higher this value, the faster the ship can adjust its speed.
- Size describes how large the ship is. A ship can be S (Small), like river gunboats or monitors, M (Medium) for ships like frigates, and L (Large) for major capital ships of the line. The second size rating is the ship's Draft. The higher the value, the heavier the ship sits in the water. The values are: 1 (Very Shallow), 2 (Shallow), 3 (Medium), 4 (Deep), and 5 (Very Deep). This is important when traveling over shallows or navigating rivers.
- Hull value defines how durable the ship is before it sinks.
Battery Attributes
A ship's weapon batteries are described here. The ship's Main batteries (1) are always listed first in red. The ship's Secondary batteries (2) are listed next. Each weapon has a Range (3). Next is the weapon's rate of fire in each of its firing arcs, fore (4), sides (5), and aft (6). The weapon's size (7) tells you how powerful it is.
Firing Arcs
A ship's firing arcs are measured as an X, positioned on the center of the ship. Each arc is exactly 90°, and cover the fore (front), broadside (left and right), and aft (rear) of the ship.
Orders Cards & Tokens
You issue orders to your ship to get it to do something, such as changing its speed or turning. The larger the ship, the slower it is to react to the orders you have issued, so you will need to think ahead to make sure things go according to plan.
Keywords
Keywords tell you what type of order it is. Some cards will reference this keyword.
Orders Cards
- Orders Icon
- Card Title
- Keyword
- Order Illustration
- Descriptive Text
- Game Text
- Card Set Info
- Matching Orders Token
Damage Cards
As your ship takes hits, it will start to accumulate Damage cards. Damage includes everything from flooding to knocked out gun batteries and more. Some Damage cards are repairable and can be removed. Others are not and will affect the ship until the end of the game.
Keywords
Keywords tell you what type of damage it is. Other cards will reference this keyword.
Damage Cards
- Damage Type Icon
- Card Title
- Location Keyword
- Repair Difficulty
- Descriptive Text
- Game Text
- Characteristic Modifiers
- Card Set Info
Cumulative Damage Cards
Generally speaking, most naval commanders assumed that a ship would be neutralized through successive hits inflicting slow but cumulative damage, rather than outright sinking. When your ship takes cumulative damage, use cards from the Cumulative Damage Deck.
These cards represent results from successive hits that temporarily shut down some of a ship's operations. They are repairable, so you can restore operations and get back into the fight.
Critical Damage Cards
Shell fire and large caliber shot caused significant damage to a ship's internal structure. When this happens, use the Critical Damage Deck.
These cards are more likely to cause major problems aboard the ship, such as loss of hull integrity, magazine explosions, and destroyed guns. This sort of damage is permanent for the duration of the battle and cannot normally be repaired.
Upgrade Cards
Upgrades offer bonuses for your ship in the form of technology, crew, leadership, tactics, and more. Upgrades are assigned to a ship before the game and cannot be transferred during the game. When assembling your fleet, you may attach upgrades to your ships. When attached, an upgrade's points are added to the ship's tonnage points.
Keywords
Keywords tell you what type of upgrade it is. Some cards will reference this keyword.
Upgrade Cards
- Upgrade Icon
- Card Title
- Keywords
- Tonnage Points Cost
- Flavor Text
- Restrictions
- Game Text
- Characteristic Modifiers
- Card Set Info
Turn Sequence
A game of Ironclads is played in a series of turns, which are broken into three phases:
1. Command Phase
Players simultaneously assign new Orders to their ships.
2. Control Phase
Players take turns choosing a ship to complete actions.
3. End Phase
Players resolve a number of effects and end the turn.
Players move through these phases together. After the End Phase, the turn ends and another begins.
Command Phase
Ships are issued orders during the game that will help them better react to the situation or press an advantage. These orders are represented by Orders tokens that are assigned to a ship and executed in a sequence called the Orders Queue.
A ship's Orders Queue is located to the left of its ship card. The queue will have a number of Orders tokens equal to the value of its Command Rating.
At the start of the Command phase, players simultaneously and secretly assign Orders tokens to each of their ships that have fewer orders in its queue than its Command rating, filling the Orders Queue. Place each new Orders token face down and kept secret until revealed. Players can always look at their own ships' Orders at any time if they want to, but cannot rearrange them.
Each ship must have a full Orders Queue at the end of the Command Phase.
Initial Orders: At the start of the game when a ship is deployed, or when a ship first enters play, the owning player assigns orders tokens to them to fill up their Orders queue.
Control Phase
Starting with the first player (as determined by the mission), players take turns choosing one of their ships to activate and doing the following actions (and executing any relevant Orders) for that ship:
- Orders Action (pg. 5): Reveal ship's Orders token
- Movement Action (pg. 5): Move, turn, and change speed
- Shooting Action (pg. 7): Shoot at any enemy targets
Smaller Fleets: At the start of this step, if you have fewer ships than your opponent, take one Pass token for every additional ship your opponent has currently in play. Instead of activating a ship in this step, you may discard one of the Pass tokens. Discard all unused Pass tokens at the end of the Control Phase.
End Phase
Step 1: Damage Control
Each ship may remove a damage token (such as a Flooding token) or attempt to remove any one Repairable Damage Card assigned to it. To remove a card, roll a die. If the result is at least equal to the card's Repair rating, remove that card from the ship and shuffle it back into the Damage Deck. Otherwise, the damage remains in play and you can try repairing it again next turn.
Step 2: Ships Wrecked
All Sinking ships cease functioning and become Wrecks (pg. 12).
Step 3: Discard Active Orders
Remove all Active Orders (pg. 5) tokens from all ships in play and shift any remaining Orders tokens in the queue right, towards their ship cards.
Step 4: Check Victory Conditions
Starting with the player that has initiative, both players check to see if they have completed the mission's objectives to win the game. If no one has won the game, the players then start a new turn.
Actions
Orders Action
Before the ship moves or shoots, it must first reveal its active orders. Reveal the Orders token closest to the ship's card.
The revealed side is this ship's Active Orders. This gives that ship an optional bonus for that turn, such as changing its speed, sending out damage control teams, or turning the ship.
Following this Order is optional. You can only reveal one order during a ship's activation, so if you choose not to follow the order, you can not execute any other Orders this turn.
Once the ship's Orders has been revealed, the ship begins its Movement Action.
Movement Action
Ships in Ironclads will have steam or sail propulsion (or both), as indicated in the Ship Type on the ship card.
No matter which propulsion type a ship uses, they both follow these common movement rules.
Speed
A ship's speed value lists the ship's maximum Speed, followed by its maximum Acceleration.
Current Speed
A ship's current speed is marked by Speed tokens. For a sailing ship, this represents how much sail the ship has deployed. The more sail unfurled, the faster the ship can move. For a steam ship, this represents the level of pressure from its boiler being converted into power for its screws.
A ship can never have more tokens than its maximum Speed. Place the ship's Speed token behind the ship's model on the board to remind all players of its current speed.
Maintain Course
How a ship maintains its course depends on its propulsion system.
- Steam ships follow the Steam Power Movement Rules
- Sail ships follow the Sail Power Movement Rules
- Ships with both steam and sail propulsion can choose which of the two methods it will use at the start of each of their activations.
Steam Power Movement
A ship under steam must move a full 2"/5cm for each point of its current speed directly in a straight line.
Sail Power Movement
A sail ship must move a full 2"/5cm for each point of its current speed directly in a straight line. However some modifiers will apply to the ship's overall Current Speed, depending on the direction of the wind relative to the ship.
| Ship's direction vs. Wind direction | Speed Modifier |
|---|---|
| Sailing with the wind | None |
| Sailing across the wind | +1 |
| Sailing into the wind | STOP |
Note: At the start of the game you will need to determine Wind Direction (see pg. 16).
Sailing With the Wind: If the Wind Direction Token is located in the Aft arc at the start of the ship's Movement, the ship moves its normal Current Speed.
Sailing Across the Wind: If the Wind Direction Token remains in the Side arc at both the start and the end of the ship's Movement, gain a +1 Speed bonus in the same direction.
Sailing Into the Wind: If the ship attempts to move with the Wind Direction Token in its Fore arc, then the ship immediately loses all speed and cannot move forward. However, it can still rotate 45° on its stern as though it had moved. Current Speed (previously 2) is changed to 0.
Increasing and Decreasing Speed
At the end of the ship's movement, it may increase or decrease its Current Speed by up to the value of the ship's Acceleration value.
Turning
At the end of the ship's movement along the straight line, it may turn up to 45° to port (left) or starboard (right).
Move the ship to the end of its movement and then rotate it on its stern in the desired direction.
Reverse Movement
Ships under Steam can also move in reverse. To do so, a ship must first decrease its speed to zero before moving in reverse. A ship can move up a maximum speed of 1 while traveling in reverse. Place the ship's speed tokens next to the bow of the ship to signify its reverse direction.
For example, if the ship's current speed is 1 with an acceleration rating of 2, it must first decrease speed to 0, and then may apply its speed to reverse with a new current speed of 1.
Reversing a ship: Step 1: Starts its turn moving forward at Starting Current Speed: 1. Step 2: Decrease Speed to 0 with one point of the ship's Acceleration. Temporary Current Speed: 0. Step 3: Increase Speed to 1 in Reverse with the second point of the ship's Acceleration. New Current Speed: 1 (in reverse).
Leaving Play
A ship that sails off the edge of the table, leaves play and is considered Sunk (pg. 9).
Collisions
If a ship's movement passes through or ends with it on top of another ship, it instead ends its movement adjacent to the ship and immediately resolves a Collision (see pg. 10).
Shooting Action
Once the ship's movement has been resolved, it then proceeds to the Shooting Action. A ship may shoot at enemy ships during this action. If it chooses to do so, use the following steps:
- Step 1: Target Ship (pg. 7)
- Step 2: Firing Solution (pg. 7)
- Step 3: Fire! (pg. 8)
- Step 4: Resolve Hit (pg. 8)
Step 1: Target Ship
To shoot with a ship's battery, target an enemy ship and draw a line of sight from the center of the target ship, back to the center of the shooting ship. Ships cannot see over or through other ships to shoot at something. The Firing Arc determines which column to use in the battery's characteristics.
The line between the center of both ships passes through the shooting ship's Fore Firing Arc, and will therefore use the Fore column when shooting.
Check Range
Ship's batteries have an effective range characteristic that tells you how far they can effectively shoot on the table. This distance is called Range.
Targets within a battery's range can be hit more reliably than targets outside its range.
Measuring Range
This ship's battery has an effective Range of 16"/40cm, so it stands a better chance at hitting Target Ship A than it does Target Ship B.
Splitting Fire
Each battery can only fire at a single target each turn. However different batteries can shoot at the same or another target. When shooting at different targets, always determine the firing arc for each battery separately. Resolve each shooting action separately, completing one battery before moving to the next. When shooting at the same target, resolve the batteries separately.
The shooting ship's Gun Deck battery can target one ship per turn, so it shoots at the target ship in its starboard arc. The shooting ship's Upper Deck battery can shoot at the same or a different target and chooses the enemy ship in the fore arc.
Step 2: Firing Solution
Before a ship can shoot, it needs to figure out its Firing Solution. Start with the base number, which is the target's size. Next, add any modifiers. The resulting number is your Firing Solution and is the score needed to successfully hit the target ship.
Target's Size
| Target Ship Size | Result Needed |
|---|---|
| Small | 5+ |
| Medium | 4+ |
| Large | 3+ |
Modifiers
| Modifier | Value |
|---|---|
| Stationary Target | -1 |
| Point Blank Range | -1 |
| Long Range (Cumulative) | +1 |
| Concealed | +1 |
Stationary Targets
Subtract 1 from your Firing Solution when shooting at a target ship that has Current Speed: 0.
Point Blank Range
If the range to the target ship is within half the battery's range, it is considered Point Blank Range, subtract 1 from the Firing Solution.
Long Range
If a target ship is beyond a battery's effective Range, it is considered Long Range. Add +1 to the Firing Solution per 8"/20cm beyond its Range. This means that eventually the target will be impossible to hit.
Concealed
If a shooting ship's line of sight to a target passes through concealing terrain (smoke, fog, etc), add +1 to that ship's Firing Solution. Concealment is not cumulative, no matter how many sources there might be.
The Target Ship is Concealed by fog or smoke or both, the Shooting Ship must add +1 to its Firing Solution.
Step 3: Fire!
Roll one die for each point in the battery's appropriate Firing Arc.
Each die that has a score equal to or greater than the Firing Solution successfully hits the target ship.
Example (Firing at a Target Ship): Step 1: Target Ship is within the Starboard Firing Arc. Step 2: Firing solution is 5 (Small Ship: 5+, no modifiers). Step 3: The shooting battery has a Starboard Rating of 4, so it rolls 4x dice, scoring two hits. With 2 hits, the shooting ship now resolves its effect on the target ship.
Step 4: Resolve Hit
If the battery has hit its target, use the Damage Table to determine the result of the hit.
Damage Table
Target's Armor Type (rows) against Shooting Weapon's Size (columns). Each cell shows the score needed on the die, followed by the result of the hit.
| Target's Armor Type | Very Light | Light | Medium | Heavy | Very Heavy |
|---|---|---|---|---|---|
| Unarmored | 3+ (Cumulative Damage) | 4+ (Critical Damage) | 5+ (Critical Damage) | 6 (Catastrophic Damage) | 6 (Catastrophic Damage) |
| Cottonclad | 3+ (Cumulative Damage) | 4+ (Cumulative Damage) | 5+ (Critical Damage) | 5+ (Catastrophic Damage) | 6 (Catastrophic Damage) |
| Timberclad | 3+ (Cumulative Damage) | 3+ (Cumulative Damage) | 4+ (Critical Damage) | 5+ (Critical Damage) | 5+ (Catastrophic Damage) |
| Tinclad | 2+ (Cumulative Damage) | 3+ (Cumulative Damage) |
The damage table has four results, each with their own effect:
- Crew Shaken: The hit has shaken the crew, but causes no real damage. (No effect.)
- Cumulative Damage: The hit has damaged some of the ship's stations. Draw a damage card from the Cumulative Damage Deck, place it with that ship, and immediately apply its effect.
- Critical Damage: The hit has severely damaged the ship's hull and affected some of the ship's vital stations. Draw a damage card from the Critical Damage Deck, place it with that ship, and immediately apply its effect.
- Catastrophic Damage: The shell has exploded inside the ship's magazine or coal bunker! The ship is immediately wrecked (pg. 9).
Hit Resolution Procedure
To determine the result of the hit, follow this procedure to see the extent of the damage:
1. Strength of Hit - First determine the strength of the hit. Take the shooting battery's Size rating and the target's Armor Type to find the Strength of the Hit. [Editor's note: the Strength of the Hit is read from the Damage Table on page 8, labelled "Strength of Hit" on the page 9 diagram.]
2. Check Range - If a target ship is hit at less than half of the shooting battery's Range, it is considered a Point Blank Hit and the shooting battery's rating is increased by one column to the right on the Damage Table.
If a target ship is hit at more than the shooting battery's Range, it is considered a Long Range Hit and the shooting battery's rating is reduced by one column to the left on the Damage Table, but never more than one column regardless of range.
Example (Check Range), a Medium weapon with a 24"/60cm range: A target at 12"/30cm is within Point Blank Range, so the shooting weapon rating is increased from Medium to Heavy. A target at 24"/60cm is within Normal Range, so the shooting weapon rating remains at Medium. A target at 36"/90cm is within Long Range, so the shooting weapon rating is decreased from Medium to Light.
3. Roll to Save - Once the strength of the hit is determined, the defender rolls a die:
- If the result is equal to or greater than the number in the box, then the ship has escaped any meaningful damage.
- Otherwise, the hit strikes home and the ship takes a damage card matching the color of the box.
Example (Roll to Save): The shooting weapon's size is Heavy against an Ironclad, giving a 3+ yellow box. The target ship now rolls a save, looking for a result of 3 or more to avoid damage. If the save is failed, it is dealt a Cumulative Damage (Yellow) card.
Derelict Ships
When a ship carries a number of Damage cards equal or greater than its Hull value, it becomes Derelict. This means that it:
- Becomes Current Speed: 0
- Cannot Move
- Cannot Shoot
Getting Underway Again
If a derelict ship's total number of Damage cards is ever less than its Hull Value (i.e. by repairing), it returns to operating as normal.
Sinking Ships
A ship begins sinking if its Hull Points are reduced to zero. A ship that is sinking becomes a Wreck (pg. 12) at the end of the round during Step 2 of the End Phase (pg. 4). Mark sinking ships with a Sinking token to remind you at the end of the turn.
A ship that has suffered Catastrophic Damage as a result of a hit is immediately wrecked (pg. 12) at the end of that shooting resolution rather than during the End Phase.
Collisions
If a ship collides with another friendly or enemy ship along any point in its movement, it immediately stops on contact. Then both ships resolve a Collision against each other. The type of collision depends on where the Point of Impact is on the target ship, in the fore, side, or aft.
Frontal Collision
When both ships are moving toward each other, an impact will cause maximum damage to both. Even at low speeds, damage to the ship's bow will have serious ramifications.
If the point of impact on the target ship is in its Fore Firing Arc, both ships inflict one Cumulative Damage for each point of Speed they were traveling prior to the collision as well as one Critical Damage.
Frontal Collision diagram: Target ship inflicts 1x Cumulative Damage and 1x Critical Damage on the moving ship. Moving ship inflicts 2x Cumulative Damage and 1x Critical Damage on the target ship.
Side Collision
The side of a ship presents a broad target, but it's also the most dangerous approach due to the ship's broadside batteries.
If the point of impact on the target ship is in its Side Firing Arc, both ships inflict one Cumulative Damage for each point of Speed it was traveling prior to the collision.
Side Collision diagram: Target ship inflicts 1x Cumulative Damage on the moving ship. Moving ship inflicts 2x Cumulative Damage on the target ship.
Aft Collision
A collision from the rear is not without danger, but the impact is largely absorbed by the forward momentum of the target.
If the point of impact on the target ship is in its Aft Firing Arc, the moving ship inflicts one Cumulative Damage for each point of its Speed, subtracted by each point of the target ship's Speed. In return, the target ship inflicts one Cumulative Damage on the moving ship.
Aft Collision diagram: Target ship inflicts 1x Cumulative Damage on the moving ship. Moving ship inflicts 1x Cumulative Damage on the target ship.
Ship Sizes
The larger the ramming ship, the greater the impact of the collision.
- If the target ship is the same size as the moving ship, no additional damage is taken.
- If the target ship is smaller than the moving ship, the target ship takes one additional Cumulative Damage.
- If the target ship is larger than the moving ship, the target ship takes one less Cumulative Damage.
Ram Ships
Some ships are purposely built for ramming. If the moving ship has the Ram characteristic and makes contact with the target with its bow, up to half of all Cumulative Damage inflicted (rounding up) on the target ship during a collision becomes Critical Damage instead.
Entangled
Following a collision, both ships are then Entangled and their Speeds drop to zero.
Place an Entangled token near the ships to remind all players that these ships are Entangled.
Entangled token.
Coming Alongside
If the moving ship ends its movement within 1"/2.5cm from another ship, but does not make contact, it may attempt to grapple and come alongside. Roll a die:
- On a result of 4+, the ship succeeds in coming alongside the target ship. Move the ship directly into contact with the target. This contact does not result in a collision. The two ships then become Entangled.
- Otherwise, the grapple is unsuccessful and the ships remain where they are.
Breaking Free
If a ship starts its activation Entangled with another ship or an obstacle, its Current Speed is reduced to 0. Instead of moving, during the movement action, roll a die:
- On a result of 4+, the ship breaks free. Move the ship up to 1"/2.5cm directly away from the other ship.
- Otherwise, the ship remains Entangled and cannot move this turn.
Boarding Actions
If a ship starts its Shooting step Entangled with another ship, it can launch a Boarding Action. The player who initiated the Boarding Action is the Attacker, and the other player is the Defender in this action.
Both players roll a die and add the size of their ship modifier to the result, along with any other modifiers.
| Your Ship Size | Size Bonus |
|---|---|
| Small | +0 |
| Medium | +1 |
| Large | +2 |
Other Modifiers
| Modifier | Value |
|---|---|
| Enemy is a Light Ironclad | -3 |
| Enemy is an Ironclad | -5 |
Whichever player has the higher total wins the Boarding Action and the losing player's ship takes a Cumulative Damage. If the result is a tie, neither player wins and no damage is taken by either ship.
If a defeated ship is Derelict at the end of a Boarding Action, it strikes its colors and is Captured by the winner of the Boarding Action.
Boarding Ironclads
Ironclads were exceptionally difficult to board because they were well secured against outside access. Subtract -3 from your Boarding Action roll if your target is ship rated as a Light Ironclad, or -5 if it is an Ironclad.
Captured Ships
If a ship is captured, discard all Upgrades on the ship that do not have the keyword Equipment. It is now controlled by the player that captured it to use as their own for the remainder of the game.
Civil War at Sea
Naval battles of the American Civil War were fought from the rivers and coastlines of North America, to the shores of Europe, and as far away as the Bering Strait near Alaska.
The three main types of battlefields in the Civil War were on the open seas, close to land in the coastal areas, and in shallow river valleys. Each of these present unique challenges for ship captains.
The Open Sea
For your first few battles, you may want to try playing your game on the open sea, using the Calm Sea rules below. Once you've got your sea legs, feel free to add more weather effects, such as Choppy Seas and Fog Banks, or move closer to land and use the Coastal and River rules in the following pages.
Calm Seas
This is the most basic and non-threatening type of battlefield. No unique weather events will impact your battle and there's no land in sight. Use the wide open area to your advantage.
Choppy Seas
Games on the open sea are usually considered to happen during a calm sea. However, if you and your opponent agree (or roll off to decide), you can play with choppy seas. Unsettled water prevents the lower gundeck from using all of its battery. All ships' Main Batteries have -1 to their SIDE ARC, as the gun ports are sealed up to prevent flooding.
Fog Banks
If a shooting ship draws its line of sight through Fog, the target ship is Concealed (pg. 7).
Storm on the Horizon
A storm's approach usually cut the battle short, as the fighting ships were forced to break off and brace for the incoming threat.
If you choose to start the battle with a storm on the horizon, at the end of turn six, and each turn there after, roll a die:
- On a result of 5+, the storm arrives and the battle ends immediately. Calculate victory points as normal.
- Otherwise play continues as normal.
Wrecks at Sea
Ships lost at sea that were destroyed rarely sink straight away, sometimes taking days to finally break apart and slip beneath the waves. These hulks and their debris usually created a serious hazard for passing ships.
Leave wrecked ships in play as Navigation Hazards. However, ships rated as Ironclads are immediately removed from play when wrecked and do not remain in play as hazards.
Coastal Battlefields
Battles on the open seas were relatively rare in the Civil War. From the outset, the Union navy quickly blockaded southern ports in attempt to strangle the Confederacy. While ultimately this blockade greatly contributed to the fall of the rebel cause, the Confederate navy came close to breaking this grip with its ironclad fleets sailing out of river estuaries near southern coastal cities.
Coastal battlefields presented a blend of blue water (open sea) and brown water (riverine) challenges. While deep enough to allow heavier ships to operate, the threat of the coastal tides going out was a constant worry. Furthermore, ships operating near the coastline had to contend with enemy fortifications, raiders, and blockade runners.
Cliffs
A Ship's Main Battery cannot shoot at targets on the top of a cliff, such as fortifications or enemy ground forces.
Add 4"/10cm to the effective range of units and fortifications positioned on a Cliff when shooting at targets below. Furthermore, when hit by units or fortifications positioned on a cliff, the target ship's Armor rating is decreased by one row on the Damage Table.
Islands and Shoreline
Islands and shorelines are classified as Land terrain. Ships cannot cross or see through Land terrain. If a ship comes into contact with land, it becomes Snagged.
Tides
When fighting around coasts and estuaries, the tides often dictated when and where the battles were fought. If the battle is using the Tides rules, starting on turn 3, the player with Initiative rolls a die:
- On a result of 1, the tide goes out. All water terrain becomes Shallows (see above), and all ships crossing areas previously defined as Shallows, must subtract -1 from their rolls on the Shallows table.
- On a result of 2 to 6, nothing happens. Roll again for the Tides at the start of the next turn.
Navigation Hazards
Shallows and underwater objects present a hidden danger to ships.
When a ship crosses shallows, roll a die and consult the Navigating Hazards table.
Navigating Hazards
| Ship Draft | Safe | Slowed | Snagged |
|---|---|---|---|
| 1 | 3+ | 2 | 1 |
| 2 | 4+ | 3 or 2 | 1 |
| 3 | 5 or 6 | 4 or 3 | 2 or 1 |
| 4 | 6 | 5 or 4 | 3 or less |
| 5 | - | 6 or 5 | 4 or less |
Hazard Crossing Result.
Ships that score a Safe result continue moving without interference. Ships that are Slowed, lose a point of their Current Speed and continue moving. Ships that are Snagged use the rules below.
If a ship begins its movement within a hazard, it is assumed to have already cleared the hazard and may move safely through.
Snagged
Snagged ships immediately take a number of Cumulative Damage cards equal to half the ship's Current Speed (rounding up). Then lose all Speed and become Entangled (pg. 11). In a following turn, the ship may attempt to Break Free (pg. 11).
Wrecks Near Land
During the Civil War, ships that were destroyed rarely sank in deep water and even if they did, their wooden hulks could remain afloat for hours, creating a serious hazard for passing ships.
Leave wrecked ships in play as Navigation Hazards.
The Mighty Mississippi
"The malice of the river was like that, it was ever so impartial ...perhaps, after all, it smiled." — Irvin Anthony, Paddleboats & Pistols
When the war broke out, the Mississippi River and her tributaries provided vital highways through the wilderness of the west. Railroads could be cut off, blown up, or captured. Rivers could not be destroyed and so the supplies flowed north and south. The strategic value of the rivers was not lost on both sides, and soon a battlefield unique to the American Civil War emerged.
Large Rivers
Large tributaries flow into the Mississippi River along its length. These include the Missouri, Ohio, and Tennessee Rivers. Generally speaking, these rivers flow year-round and have deep channels. Larger ships, such as lighter ocean-going vessels, can operate here without too many issues.
Medium Rivers
Major waterways, such as the Cumberland, Arkansas, Red, and Yazoo Rivers flow into the Mississippi or its larger tributaries. These are generally accessible throughout most of the year, but the summer heat and winter freezes makes them less navigable in those months. They can be shallow in places, and flanked with tall cliffs, especially near bends in the river. Side and stern wheel paddleboats, with their very shallow drafts, are ideally suited for operations on these rivers.
Small Rivers
Countless smaller rivers flow into larger tributaries. These are generally very shallow and narrow, usually fit for launches, canoes, or small stern-wheel paddleboats. These have a substantial amount of navigational obstacles and dangers. However, these small tributaries can swell into larger ones during the Spring runoffs, making them a little more accessible, but still risky routes.
River Terrain Rules
River battlefields have their own unique character. As such, they have their own set of rules. If a battle is taking place on a river, use the following river rules, in addition the Coastal Battlefield rules (pg. 13).
Current
Rivers will always start at one table edge and flow to another. At the start of the game, determine which end is upriver. The river's current flows from that point and follows the contours of the riverbanks to all exits.
A ship's movement is impacted by the current as shown in the Current Modifiers table. Note that this modifier might mean that the ship will travel in Reverse.
Current Modifiers
| Ship's direction vs. Current direction | Speed Modifier |
|---|---|
| Moving with the current | +1 |
| Moving across the current | None |
| Moving against the current | -1 |
Landings
Landings were frequent along the riverbanks, with some being trickier to navigate than others. A ship that contacts a riverbank at Current Speed 1, loses all Speed but does not become Snagged.
Riverbank Brush
Riversides were also usually lined with trees, mangroves, and brush. If a shooting ship draws its line of sight through brush, the targets within 4"/10cm of the other side are Concealed (pg. 7). Targets beyond that range cannot be seen to be shot at.
Unseen Hazards
Rivers are rife with navigational hazards, such as large rocks or loose logs that could snag or puncture the hull of a boat. The water can be muddy, making spotting these hazards that much more difficult. Before a ship moves, roll a die and consult the Unseen Hazards table. If the result is less than what is on the table, the ship collides with an unseen Navigation Hazard (see pg. 13).
Unseen Hazards
| River Size | No Hazards |
|---|---|
| Large | 2+ |
| Medium | 3+ |
| Small | 4+ |
Fortifications
Forts, batteries, and other fortifications played a major part in coastal and riverine naval battles. Some missions will give players fortifications to bolster their defenses.
Characteristics
Fortifications shoot and take damage just like a normal ship, however they are never issued orders, nor can they move or rotate once placed.
Entrenched Medium Battery card (Fort, Unpowered; Armor: Light Ironclad; Command 0; Speed 0 0; Size M 0; Hull 6; 9" Dahlgren Smoothbore, 16"/40cm, Fore 3, Side 3, Aft 3, Medium).
Adding Fortifications to your Fleet
You can add fortifications to your fleet by paying the Tonnage Points listed on the cards. Fortifications do not have a national affiliation, so any side can take them. Up to 50% of your total fleet's Tonnage Points may be spent on fortifications.
Placing Fortifications
Fortifications must be placed in the owning player's deployment area, however some missions may allow you to place them elsewhere. In these cases, follow the scenario's instructions.
Activating Forts and Batteries
Activate forts and batteries during the Control Phase in the same way as one of your ships.
Taking Damage
Fortifications take damage just like ships. When a fortification takes a Damage Card, only apply the Ship Characteristics modifiers to the fortification and ignore the card's game text. Like with ships, a fortification is wrecked if it's Hull Value is reduced to zero.
Minefields & Obstacles
Civil War minefields and obstacles were crude but effective. During the Civil War, mines were referred to as "torpedoes" but, for the purposes of clarity, we will use the more modern term.
Minefields and obstacles were typically part of a literal line of defense across bays, harbors, and rivers. As such they are represented in the game as an invisible line on the battlefield. However this can be visually modeled or marked with tokens, if you prefer. The position of these lines are noted on the scenario maps.
Crossing Mines
When a ship comes into contact with a line of mines, there is a chance it will strike one. The ship comes to a temporary stop, then roll a die:
- If the result is a 5+, the ship strikes a mine.
- Otherwise, the ship passes through safely and continues the rest of its movement unhindered.
If a ship begins its movement touching a line of mines, it is assumed to have already cleared the minefield and may move safely through.
Exploding Mines
If a ship is struck by a mine, it comes to a full stop and loses all of its Speed and any remaining Actions this turn. It then immediately takes one Critical Damage, regardless of its armor value.
Moving Through Mines: Step 1: The ship pauses its movement as soon as it comes in contact with a line of mines. Step 2a: If the mine was not triggered, ship continues its movement. Step 2b: If the mine was triggered, ship comes to a full stop and loses all actions for the remainder of the turn. Then, it takes a Critical Damage card.
Obstacles
Obstacles were typically designed to punch holes in the wooden hulls of ships, while others were made of rope with the intention of fowling up a steam ship's screws or paddles.
Obstacles are Navigation Hazards (see pg. 12) and use the Navigating Hazards table to resolve. [Editor's note: the printed page reference reads "pg. 12"; the Navigation Hazards section itself is on page 13.]
Setting Up a Game
1. Choose Tonnage Points Level
You and your opponent need to first choose a Tonnage Points value for your game. This value sets the upper Tonnage Points limit that each of your fleets and upgrades can total up to.
2. Build Fleets
Players then choose their ships and upgrades that will make up their fleets. All ships in a fleet must be from the same nation. Players are otherwise free to build their fleets to their own design.
3. Choose Mission
Once the players have assembled their fleets, choose a Mission from the mission cards. If there is a specific mission that you and your opponent want to play, just find that mission and play it. Otherwise, you can use the Battle Matrix to choose one for you.
4. Set Up Mission
- Follow the mission card to set up your game.
- Determine the wind direction (see below)
- Issue starting Orders to all ships (pg. 4).
5. Play Mission
Smoke on the horizon, enemy ships. Engage!
Wind Direction
At the start of the game setup, before any ships are placed on the table, roll to see which direction the wind is coming from.
The wind direction flows from that point directly across the table to the opposite corner.
Step 1: Find North
Agree with your opponent which table edge is North. If you cannot agree, then roll a die to randomly determine which edge is North.
Note: Some missions will assign North to a table edge for you.
Step 2: Roll for Wind Direction
Roll a die and consult the wind direction table to see what corner the wind is coming from.
Note: Some missions will assign Wind Direction for you.
Wind Direction Table
| Result | Direction |
|---|---|
| 1 | Light Wind |
| 2 | North East |
| 3 | South East |
| 4 | South West |
| 5 | North West |
| 6 | Roll Again |
Step 3: Place Wind Marker
If the wind is coming from one of the directions, place the Wind Direction token in the matching corner so that all players can reference it.
Light Wind
When a Light Wind result occurs, all ships under sail suffer a -1 Speed penalty. Starting on turn 2, the player with Initiative rolls a die:
- On a result of 5+, there is a shift in the wind. Roll again on the Wind Direction Table to see what direction the wind will blow.
- On any other result (or if the result on the Wind Table is Light Wind again) then the wind does not pick up that turn. Roll again at the start of next turn.
Missions
Missions define the battlefield that you and your opponent will be fighting over. You can choose one of the following missions, or you can use the Battle Matrix to dynamically choose a narrative mission to play.
General Victory Conditions
The game ends when:
- only one player has ships on the table, or
- at the end of Turn 10.
The player with the highest score wins the game.
Note: Some missions have additional victory conditions.
Scoring
When a ship is sunk (including ships that are captured or left derelict at the end of the game), the other player scores points equal to the total points cost of the ship sunk, including any upgrades on the ship when it was sunk or discarded when it was captured.
Note: Some missions will describe how to score additional points.
Objectives
Objectives mark out a point on the table that is important for the game. Generally, players will vie for control of objectives. Missions that use them will tell you where to place them and how they will work in that battle. They do not block line of sight, interfere with movement, nor have any other impact on gameplay.
Objective token.
Attacker vs. Defender
If a mission specifies an attacker or defender, then roll a die to see which role each player will take.
If you are using the Battle Matrix, then your plan will define your role in the mission instead.
Deployment Areas
Deployment Areas are defined by the mission map. Players must place their respective fleets entirely inside these areas at the start of the game.
Starting Orders and Speed
When a Ship is placed on the table, that player immediately:
- Issues starting Orders to the ship (pg. 4)
- Chooses the ship's Current Speed (pg. 5)
Relief Forces
There were never enough vessels to cover all tactical needs, so commanders were forced to keep reserve forces at hand to be quickly dispatched to where they were needed most. Some missions will use the Relief Force rules as follows.
Relief Force: You can only deploy up to 50% of your points on the table. All remaining ships are held off the table in your relief forces. At the start of each Control Phase, you may choose one of your ships held off the table and roll a die:
- If the result is a 4+, it enters play anywhere along the Defender's table edge.
- Otherwise, no ships are available this turn.
Unless otherwise directed, ships arriving from Relief forces do so anywhere along that player's table edge.
The mission might also override some aspects of the Relief Forces rules, such as how many forces you are allowed to begin the game with, etc.
Small Fleets: You always have at least one ship on the table, even if it exceeds more than 50% of your points.
Battle Matrix
The Battle Matrix is a mission selector that gives players a chance to decide how they want to engage in battle. The postures you and your opponent take will have an impact on the mission you will play.
Step 1: Choose Action Plan
Before the game, the players each secretly pick an action plan (Attack, Maneuver, or Defend).
Step 2: Reveal Plan
Once both players are ready, reveal them at the same time and then compare the two actions on the table below. The resulting mission is what you will play.
Battle Matrix (rows: Player 1; columns: Player 2)
| Player 1 \ Player 2 | Attack | Maneuver | Defend |
|---|---|---|---|
| Attack | Sortie (pg. 20) | Blockade (pg. 18) | Damn the Torpedoes (pg. 18) |
| Maneuver | Blockade (pg. 18) | Duel (pg. 19) | Raid (pg. 20) |
| Defend | Damn the Torpedoes (pg. 18) | Raid (pg. 20) | Island (pg. 19) |
Mission: The Blockade
[Map diagram: Defender's table edge at top, Attacker's table edge at bottom; Defender deployment area in the centre-top, Attacker deployment area at bottom. Dimensions as printed: 12"/30cm and 6"/15cm.]
Situation Report: The Union's Anaconda Plan is squeezing the Confederacy's imports along its coasts and rivers. There are not enough US Navy vessels to completely blockade the rebel coast line, so intrepid rebel captains find gaps in the line and exploit them to escape abroad and return with supplies.
Special Rules
- Relief Forces (Both Players): This mission uses the Relief Forces rule (pg. 17). As usual, the Attacker's ships arrive along their table edge. The Defender's ships arrive at a random location by rolling a die to determine the location where the ship will arrive.
- Blockade Run (Attacker): Nominate one of your ships as the Blockade Runner. The first time the Blockade Runner leaves the Defender's table edge it is not Sunk. Instead, return it to play the following turn anywhere along the Defender's table edge. It can then safely exit the board on the Attacker's table edge without Sinking.
Deployment
The Defender deploys their blocking force, then the Attacker deploys their fleet.
The Attacker automatically wins the first Initiative roll for the game.
Victory Conditions and Scoring
- Standard Victory Conditions and Scoring (pg. 17)
- Attacker scores +25 bonus points if their blockade runner successfully completed a Blockade Run (see above) and safely exited the board along the Attacker's table edge.
Mission: Damn the Torpedoes
[Map diagram: Defender's table edge at top with Defender deployment area; Objective at centre; Battery and Fort marked on green land-edged areas at the sides; two Lines of Mines across the table; Attacker deployment area at bottom. Dimensions as printed: 12"/30cm and 6"/15cm.]
Situation Report: The enemy port lies behind a chain of forts and minefields. The only way to take it is to power your way through the bay fortifications and defeat the enemy defenses beyond, regardless of casualties.
Special Rules
- Defense Force (Defender): This mission uses the Relief Forces rule (pg. 17); however you can only deploy up to 25% of your force on the table. In addition to your fleet, you also control a Brick Fort, a Shore Battery, and two lines of mines (pg. 15), placed on the table as shown on the map.
Objectives
Place one Objective in the center of the table at the front of the Defender's Deployment Area.
Deployment
Starting with Attacker, both players alternate placing ships until there are none left to place.
The Attacker automatically wins the first Initiative roll for the game.
Victory Conditions and Scoring
- Standard Victory Conditions and Scoring (pg. 17)
- Attacker scores +10 bonus points for each of their ships within 12"/30cm of the Objective Marker.
Mission: The Duel
[Map diagram: Player 1's table edge at top, Player 2's table edge at bottom; Player 1 deployment area in the top right corner, Player 2 deployment area in the bottom left corner. Dimensions as printed: 6"/15cm and 12"/30cm.]
Situation Report: The skies are clear and through your looking glass you spy that wretched ship that's been causing you problems and evading you for months. Sound general quarters!
Special Rules
- Duel (Both Players): This mission uses the Relief Forces rule (pg. 17); however you can only deploy a single ship at the start of the game. These are the Duelling Ships.
Deployment
Attacker places their Duelling Ship first, followed by Defender.
The Attacker automatically wins the first Initiative roll for the game.
Victory Conditions and Scoring
- Standard Victory Conditions and Scoring (pg. 17)
- Players score +10 points if they sink their opponent's Duelling Ship, and a further +15 points if it was sunk by their Duelling Ship.
- When a player brings a non-Duelling ship into play, that player immediately loses -10 points.
Mission: The Island
[Map diagram: Attacker's table edge at top, Defender's table edge at bottom; Attacker deployment area in the top left, Defender deployment area in the bottom right; three Battery positions and a Fort marked on the land areas. Map omitted; see printed page 19.]
Situation Report: An enemy fort is situated on the river, blocking traffic along the waterway. The navy has been called upon to force its surrender.
Special Rules
- Relief Forces (Defender): See pg. 17. Your force is further reinforced with three shore batteries and a brick fort, placed on the table as shown on the map.
Deployment
Starting with Defender, both players alternate placing ships until there are none left to place.
The Attacker automatically wins the first Initiative roll for the game.
Victory Conditions and Scoring
- Standard Victory Conditions and Scoring (pg. 17)
- Attacker scores +25 bonus points if the Fort is destroyed.
- Defender scores +25 bonus points if the Fort is not destroyed.
Mission: The Raid
[Map diagram: Defender's table edge at top with Defender deployment area and Objective; Attacker deployment area at bottom; Attacker's table edge at bottom. Dimensions as printed: 6"/15cm and 12"/30cm. Map omitted; see printed page 20.]
Situation Report: A valuable enemy ship has beached itself on a sandbar. We may not get another chance to destroy it...
Special Rules
- Crippled Ship (Defender): Choose a ship model from your collection that is not a part of your fleet and place it on the objective. This ship becomes permanently Snagged on the Objective. It has Armor: Timberclad and Hull: 4.
- Finish the Job (Attacker): You can shoot or ram the Crippled Ship with your ships, inflicting damage normally.
- Hasty Attack (Both Players): This mission uses the Relief Forces rule (pg. 17); however you can only deploy up to 25% of your force on the table.
Deployment
The Attacker places their available ships on the table, followed by the Defender.
The Attacker automatically wins the first Initiative roll for the game.
Victory Conditions and Scoring
- Standard Victory Conditions and Scoring (pg. 17)
- Attacker scores +15 bonus points if the Crippled Ship is sunk. Otherwise, the Defender scores +15 points.
Mission: The Sortie
[Map diagram: Player 1 deployment area at top and Player 2 deployment area at bottom, with an open play area between them. Dimensions as printed: 6"/15cm. Map omitted; see printed page 20.]
Situation Report: Both fleets are at sea, hoping to draw out the enemy and engage them in decisive battle.
Special Rules
- None
Deployment
Starting with Player 1, both players alternate placing ships until there are none left to place.
The player who finishes deploying their ships first adds +1 to the first Initiative roll for the game.
Victory Conditions and Scoring
- Standard Victory Conditions and Scoring (pg. 17)
Optional Rules
Advanced Sailing Movement
Replace the Sail Power Movement rules (pg. 6) with the following advanced version.
Before moving a ship under sail, use the Points of Sail template to determine the impact of the wind on the ship's overall speed. The template is divided into eight zones, with two per firing arc.
Place the template over the ship with its Fore Arc aligned with the bow of the ship. Next, draw a line from the Wind Direction Token to the center of the ship. Whatever zone on the template the line passes through will tell you what modifier to apply to the ship's Current Speed. Then, the ship must move a full 2"/5cm for each point of its current speed directly in a straight line.
Note: At the start of the game you will need to determine Wind Direction (see pg. 16).
Points of Sail template zones, as printed: The two zones in the Fore Arc are SPEED: STOP. On each side, the zone nearer the bow is SPEED: -1 and the zone nearer the stern is SPEED: +1. The two zones in the Aft Arc are SPEED: +0.
Sailing into the Wind: If the modifier says Speed: Stop, then the ship immediately loses all speed and cannot move forward. However, it can still rotate 45° on its stern as though it had moved.
Barges
Unpowered "ships" and platforms (mortar boats, etc) are Barges and cannot move on their own (but are still subject to currents). Barges must be lashed (adjacent) to a friendly ship to move and does so during the towing ship's turn. Otherwise, Barges operate as normal.
You can cut loose the Barge at the end of its activation.
If a ship lashed to a Barge sinks, the Barge is lost as well.
Durable Ships
Ships that have a Size rating of L (Large) and a Hull rating of 4+ treat two hits from a single battery as one. This means that two hits counts as one on Durable Ships, four counts as two, etc. If there are any odd number of hits remaining, they are automatically saved.
Fire as She Bears
A ship may shoot one of its batteries as it moves past a target rather than at the end of movement. Add +1 to the ship's Firing Solution when shooting on the move like this.
Lashed Ships
When placing a ship at the start of the game you may choose to lash it to an adjacent friendly ship. If you do so, treat the ship as Barge.
You can cut loose the ship at the end of its activation, at which point it comes under its own power at the start of its next activation.
Mortars
Mortars are special weapons that are built to bombard targets from above. They are a little more difficult to use, but they can yield excellent results, especially against heavily armored targets.
When shooting with weapons that are Mortars, they cannot shoot at targets closer than 16"/40cm away. Mortars do not require Line of Sight to the target. When shooting a mortar, add a +1 penalty to their Firing Solution.
Raking
If your ship is hit in its front or back arcs and takes damage cards as a result, add one more Cumulative Damage card to the ship.
Small Scale
If you are using a smaller scale, such as 1/1200, and you want to quickly scale down measurements in the game, simply re-assign the values from inches to centimeters. For example, movements are measured in 2cm segments, rather than 2" segments.
[Design Notes & Credits (page 22) are omitted: they are designer commentary and attribution, not rules text. The printed Table of Contents (page 23) is also omitted; the section headings it lists are noted in the source note at the top of this file.]
Quick Reference
Turn Sequence
- Command Phase (pg. 4): Players assign Orders to each ship.
- Control Phase (pg. 4): Players take turns choosing a ship to move and shoot with.
- End Phase (pg. 4): Players resolve a number of effects and end the turn.
Command Phase
All players secretly assign Orders tokens to the far end of each ship's Orders queue. A ship must have no more and no less Orders assigned to it equal to the ship's Command Rating.
Control Phase
Starting with the first player (as determined by the mission), players take turns choosing one of their ships to activate and doing the following actions (and executing any relevant Orders) for that ship:
- Orders Action (pg. 5): Reveal the Order token at the end of the ship's Orders Queue.
- Movement Action (pg. 5): A ship must move a full 4"/10cm for each point of its current speed directly in a straight line. [Editor's note: this Quick Reference figure of 4"/10cm conflicts with the 2"/5cm stated in the Movement Action section (pg. 5) and the Sail Power Movement section (pg. 6), which are transcribed above as printed. Both are kept as printed; the body text was not altered.] At the end of the movement, a ship may:
- turn up to 45° to port (left) or starboard (right),
- change its Current Speed up to its Acceleration value.
- Shooting Action (pg. 6): A ship may shoot at enemy ships as follows:
- Step 1: Target Ship (pg. 6)
- Step 2: Firing Solution (pg. 6). Target's Size + Modifiers = Firing Solution
- Step 3: Fire! (pg. 7). Roll one die for each point in the weapon's Firing Arc. Each die that has a score of equal to or greater than the Firing Solution successfully hits.
- Step 4: Resolve Hit (pg. 8)
- Strength of Hit = Shooter's Battery Size vs Target's Armor Rating.
End Phase
- Step 1: Damage Control (pg. 4): Each ship may remove a damage token (such as Flooding) or attempt to remove any one Repairable Damage Card assigned to it. Roll a die. If the result is at least equal to the card's Repair rating, remove that card from the ship.
- Step 2: Ships Wrecked (pg. 4): All Sinking ships cease functioning and become Wrecks (pg. 12).
- Step 3: Discard Active Orders (pg. 4): Remove all Active Orders (pg. 5) tokens from all ships and shift any remaining Orders tokens towards the ship card.
- Step 4: Check Victory Conditions (pg. 4): Check to see if either player has completed the mission's objectives to win the game. If not, start a new turn.
Derelict Ships
When a ship carries a number of Damage cards equal or greater than its Hull value, it becomes Derelict. This means that it:
- Becomes Current Speed: 0
- Cannot Move
- Cannot Shoot
Getting Underway Again
If a derelict ship's total number of Damage cards is ever less than its Hull Value (i.e. by repairing), it returns to operating as normal.
Sinking Ships
A ship begins sinking if its Hull Points are reduced to zero. A ship that is sinking becomes a Wreck (pg. 12) at the end of the round during Step 2 of the End Phase (pg. 4).
A ship that has suffered Catastrophic Damage as a result of a hit is immediately wrecked (pg. 12) at the end of that shooting resolution rather than during the End Phase.
Reference Sheet
The final printed page of the source (page 25) is a set of reference diagrams. Its content is transcribed here as text. The Damage Table reproduces the table on page 8, and the Ramming Attacks diagrams reproduce the Collisions diagrams on page 10.
Sailing With the Wind
Sailing Direction Modifiers
| Ship's direction vs. Wind direction | Speed Modifier |
|---|---|
| Sailing with the wind | None |
| Sailing across the wind | +1 |
| Sailing into the wind | STOP |
- Sailing With the Wind: If the Wind Direction Token is located in the Aft arc at the start of the ship's Movement, the ship moves its normal Current Speed. (Diagram: Normal Movement 4"/10cm.)
- Sailing Across the Wind: If the Wind Direction Token remains in the Side arc at both the start and end of the ship's Movement, gain a +1 Speed bonus in the same direction. (Diagram: Normal Movement 4"/10cm, Wind Bonus 2"/5cm.)
- Sailing Into the Wind: The ship can rotate in place. It loses all speed. (Diagram label: "Loses all speed".)
Firing Solution
Target's Size
| Target Ship Size | Result Needed |
|---|---|
| Small | 5+ |
| Medium | 4+ |
| Large | 3+ |
Modifiers (pg. 7)
| Modifier | Value |
|---|---|
| Stationary Target | -1 |
| Point Blank Range | -1 |
| Long Range (Cumulative) | +1 |
| Concealed | +1 |
Target's Size + Modifiers = Firing Solution.
Damage Table
The Damage Table is transcribed in full in Step 4: Resolve Hit (page 8) above.
Ramming Attacks
The Ramming Attacks diagrams show the Frontal, Side and Aft Collision results. They are transcribed in full in the Collisions section (page 10) above.