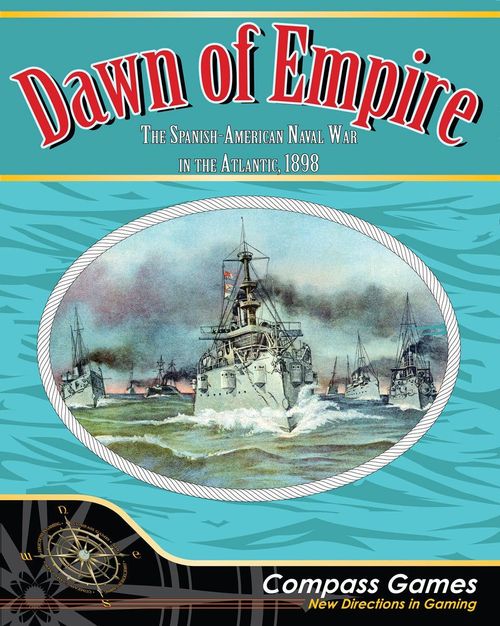
Dawn of Empire: The Spanish American Naval War in the Atlantic, 1898
Dawn of Empire: The Spanish American Naval War in the Atlantic, 1898 Rulebook
Table of Contents
Table of Contents
- 2.0 Object of Play
- 3.0 Components
- 4.0 Sequence of Play
- 5.0 Orders
- 6.0 Leaders
- 7.0 Movement
- 8.0 Combat
- 9.0 Damage Repair
- 10.0 Disengagement
- 11.0 Area Control
- 12.0 Victory Points and Victory Conditions
- 13.0 Setup
- 14.0 Optional Rules
- 15.0 Design Notes
- 16.0 Differences From Other War at Sea Games
- 17.0 Credits
- 18.0 Detailed Example of Play
2.0 Object of Play
A. The object of the game for the United States is to control the sea areas around the US Atlantic coast and Caribbean Sea to prevent Spanish combatants from supporting their island holdings and to destroy the naval forces of Spain.
B. The object of the game for Spain is to disrupt US sea control, retain sea control around the Spanish coastline for as long as possible, and destroy United States naval forces.
C. Both sides must deploy their naval resources into the sea areas on the map to earn victory points at the end of each turn for areas under their control, blockaded, and for opposing units destroyed.
3.0 Components
3.1 Rules
This booklet you are reading constitutes the rules for the play of DAWN OF EMPIRE. In general, the rules are sequenced similarly to the order of events played during a turn. If you have questions, or wish to check for corrections to any errors that may have been discovered since publication, please go to the web page of Compass Games.
3.2 Map
The map depicts the Atlantic Ocean and the Caribbean Sea. These waters are subdivided into areas of different shapes, each of which is named. An area shape carries no special meaning. Solid border lines and land masses separate these areas from one another. In general, movement will be between adjacent areas. Ports are present on the coast of some land masses and the eastern side of the Atlantic Ocean areas. Units deploy from these ports and return to them as per the movement rules. Ports are controlled by the US, Spain, or are neutral.
3.3 Counters
A. The die cut playing pieces supplied with the game are termed counters. They represent combat forces or indicators for various game functions. Counters may be either units or markers.
B. Each unit represents one ship (see types, 3.4.1.1) or shore batteries (with the name of the port).
C. The other counters are all termed markers. Markers are used to represent leaders, area control, victory points, orders, damage, etc.
3.4 Sample Counters
Examples of the locations of the various values on the ship unit, port markers and leader markers are found on the map.
3.4.1 Ship Units
The top line contains the nation, unit type, and start location/entry turn information, the unit name and silhouette in the center, and attack, defense, and movement values across the bottom.
3.4.1.1 Ship Types
| Abbreviation | Type |
|---|---|
| BB | Battleship |
| CA | Armored Cruiser |
| CP | Protected Cruiser |
| CU | Unprotected Cruiser |
| GB | Gun Boat |
| MO | Monitor Ship |
3.4.1.2 Start Locations
| Abbreviation | Location |
|---|---|
| CE | Cienfuegos |
| CI | Canary Islands |
| CZ | Cádiz |
| EC | East Coast sea area |
| HR | Hampton Roads |
| HV | Havana |
| KW | Key West |
| MB | Mobile |
| SA | Santiago |
| SJ | San Juan |
| VE | Caracas (for optional German units) |
3.4.2 Order Markers
Each order marker has a single order on the front and is blank on the back so the order issued to the units in the stack under the marker is undisclosed until needed.
3.4.3 Turn and Victory Point Track Markers
These markers are used on the appropriate tracks on the map to keep record of the turn in play and the victory level.
3.4.4 Area Control Markers and Damage Markers
A. Control markers have an American Flag on one side and a Spanish flag on the other. When placed in an area with the appropriate side up they indicate control for that area.
B. Damage markers have numbers on both sides and are used as needed to indicate damage taken by units during play. They are interchangeable and can be used as full value on the side facing up or in combinations as change.
3.4.5 Leader Markers and Port (Shore Defense) Markers
A. Leader markers indicate the name of the leader, a rank value for his leadership, and the name of the Squadron under his command and its historical starting position.
B. Port (Shore Defense) markers have a mine value and their location on the top, the name of the port in the middle, and as with ship units, their attack, defense, and movement values across the bottom, though the movement value will always be zero. They display Disrupted on their reverse.
3.4.6 Disabled and Sunk Markers
These markers are used to indicate units that have been disabled or sunk during combat until those units are removed from play.
3.5 Definitions of Terms
3.5.1 Battle Line
A battle line is used to resolve combat. It represents the units that are to stand in lines of battle for extended gunfire combat in the sequence in which they are sailing into that combat (8.31).
3.5.2 Forces
A general term for all units, whether in a squadron or independent, with or without a leader.
3.5.3 Independent Units (IUs)
Units that are not stacked with any other unit or leader marker, that is single units, may still be moved to sea, but do so as Independent Units (7.4).
3.5.4 Markers
Markers are used to deal with other game functions such as orders, leaders, Sea Area control, tracking victory points, the game turn, etc.
3.5.5 Navy
The combat capable units of each side constitute the navy for that side.
3.5.6 Ports
A. Ports exist on the land zones adjacent to some sea areas (6.1 XXX). Ports are not part of the sea area to which they are adjacent. Units often start movement from a port. They move to an adjacent sea area as their first move, spending the required movement points to do so. When moving into a port they must be in a sea area with the port on adjacent land and must spend a single movement point to enter the port. Units are not required to return to a port at the end of a turn.
B. Spanish ports are indicated with green circles and a number, while American ports are indicated with blue circles and a number. All other ports are neutral and have the name of the port, and a 2-letter national designation.
C. The number within a port's circle indicates its ability to repair damage to friendly ships in the port. One neutral port, Caracas, has such a number as well in parenthesis, which can come into play with an optional rule.
D. In a number of instances, a named port on the map will actually represent other nearby ports as well. For instance, for the Spanish, Cádiz also represents the Azores while the Canary Islands port also represents the Verdes Islands. For the US, Hampton Roads represents a number of east coast port cities while Mobile represents a number of gulf coast port cities.
3.5.7 Sea Areas
The map is divided into 17 named sea areas. Their borders run through the seas which, along with adjacent land zones, indicate the boundaries of each sea area. (Some of the land zones contain ports.) Each side earns a number of victory points at the conclusion of each Combat Phase for the sea areas controlled (12.1.1).
3.5.8 Squadron
A stack of friendly units containing two or more combat unit counters is considered to be a Squadron for game purposes (7.3).
3.5.9 Units
The capital and supporting ships of the opposing sides, either as individual ships or in squadrons are represented as large counters and referred to as units (7.3, 7.4).
4.0 Sequence of Play
Each turn is composed of the following sequence of events, termed phases. Spain controls the Spanish (and optional German) counters, normally referred to as Spanish forces, while the United States controls the American counters, called American or United States forces. At the start of each turn, move the Game Turn marker to the box on the Game Turn Record Track representing that turn. Each side may also place its forces that did not start the game in play on the Turn Track corresponding to the turn the forces will enter play.
4.1 New Forces and Orders Phase
4.1.1 New Forces (Reinforcements)
A. New forces are units that have not previously been in play. The turn of entry for reinforcements is listed on the upper right of the counter. Also listed is the letter designating for the port where they begin on that turn.
B. Only the US receives reinforcements. When there are reinforcements for the current turn, they are placed on the map in this phase.
C. Flip over any damaged or destroyed ports where the damage markers were removed to their front full use side.
4.1.2 Issuing Orders
A. Each side places Order markers both side with each stack of its units. Invert the Order markers so the opposing side cannot determine the selected order.
B. Specify the order of units within each stack as every stack is considered a squadron.
C. If the squadron has a leader, he should be placed on top of the stack. Only one leader in a stack may be lead a squadron and it must be the leader with the most stars. If there is more than one with the same number of stars, use the top leader in the stack.
D. The order of units in the stack will be retained and used to form battle lines if a combat for the squadron occurs later in the turn.
4.2 Movement Phase
A. This phase is composed of two segments. Spain moves first then the United States.
B. Each unit's movement allowance number represents the maximum movement ability for that unit. Most areas require the expending of a single movement point (MP) to be entered, however, all three Atlantic Ocean areas require expending 3 MPs to be entered while the four areas representing straits and passages each require expending 2 MPs to be entered.
C. A stack of units being moved together as a squadron may not be moved further than the movement ability of its slowest (fewest MPs) member if it is to remain together as a stack.
D. Movement must be as a line of contiguous adjacent areas.
E. Movement is not always required to end when entering an opposing controlled area. Instead, ending movement is only required when entering an area if that area contains opposing squadron(s) with Patrol or Blockade orders. The non-moving side must indicate this when such an area is entered by turning front side up any such order marker in the area.
F. Units remain face down at all times during movement so they are not disclosed to the opposing side. Orders are also face down unless they need to be disclosed due to other rules.
G. At the completion of movement, the Combat Phase begins.
4.3 Combat Phase
A. Combat is resolved one area at a time for all squadrons in each area containing squadrons of both sides with successful passes for the search die roll on the Search Matrix chart.
B. The order of combat resolution is determined by Spain. The resolution of combat within each area follows this sequence:
- Search Resolution Segment
- Battle Line Resolution Segment
- Port Attack Resolution Segment
- Disengagement Resolution Segment
C. Forces that are still engaged at the conclusion of the Disengagement Resolution Segment must repeat the Battle Line Resolution and the Disengagement Resolution Segments in that order as often as required until all forces involved (except IUs) are disengaged or destroyed and the forces of only one side remain in the area.
D. Combat is then resolved for the next area.
4.4 Area Control and Victory Points Phase
A. At the end of the Combat Phase, control of each area is determined by the side with squadrons remaining in the area (not including ports in the area), and is used to determine victory points (VPs) for area control.
B. Oher factors which earn VPs are considered at this time.
C. Rules dealing with the control of areas and other VP earning items are found in Rules 11.0 and 12.0.
D. Remove all old area control markers and then place any new control markers to reflect the new controlling side. Then add VPs for each area and other VP earning situations to the appropriate side by moving the marker on the VP Track.
4.5 Repairs Phase
A. Damaged units are repaired by the owning side to the limits of the repair ability of the friendly ports in which the units are located, and Disabled markers are removed.
B. The completion of repairs ends the turn, and the next turn begins unless it is Turn 6, in which case the game ends. Optional rules allow play to be continued for up to three more turns (14.1) or to end early if one side has achieved an automatic victory (14.7).
5.0 Orders
A. Squadrons are assigned orders by picking an order marker in its unit color and placing it face down on top of the squadron stack. This order remains undisclosed unless it must be revealed due to actions during the turn described later in the rules.
B. The number of counters provided is an intentional limit on the number of orders of each type available to each side and additional order counters may not be added.
C. The orders are described below.
5.1 Anchor
A. Squadrons remaining in the same port for the turn are considered a single squadron and must be given an Anchor order.
B. Squadrons at sea at the start of their side's turn in an area with a friendly or neutral port, or in an area with no ports, may also be given Anchor orders. They must move into that port during the Movement Phase or, if there is no port, may not leave the area that turn.
C. Anchored units may not move further and may not attack, but if they are attacked they defend normally.
D. Anchored squadrons are not required to Coal in the following turn.
5.2 Blockade
A. For a squadron to be given Blockade orders, it must be in a port or sea area with an opposing port in movement range. Move squadrons with Blockade orders to the sea area of the port to be blockaded. They may not move further for the turn.
B. They are considered to be off the port trying to prevent opposing forces from entering or leaving the port.
C. Squadrons with Blockade orders that are still in the area at the end of the turn will earn VPs.
D. Squadrons with Blockade orders for the turn must be given Coal orders in the following turn.
5.3 Coal
A. Squadrons with Coal orders, either individual squadrons that were in transit or squadrons that had other orders the previous turn now requiring coaling may not move in the current turn. If opposing squadrons end movement in the area, they must participate in the Search Matrix roll. If combat results, all have their movement allowance reduced by 1 MP for purposes of disengagement resolution.
B. Squadrons are not required to be in a port to be given Coal orders, however the maximum number of squadrons that each side may coal per turn outside a port is restricted (7.5).
5.4 Patrol
A. Squadrons with Patrol orders must move to a sea area if they are in a port. After moving to sea area from a port, the squadron may then enter a maximum of two more sea areas.
B. If a squadron is already in a sea area at the start of its movement, it may move a maximum of two areas away from that starting area, if the units in the squadron have enough movement allowance, or it may remain in their starting area or the first area entered, regardless of their movement allowances.
C. Squadrons are considered to be searching about in the area in general.
D. Squadrons with Patrol orders for a turn must be given Coal or Anchor orders in the following turn.
5.5 Raid
A. Squadrons given Raid orders must be moved to an in-range sea area with an opposing port on one of its borders.
B. Squadrons with Raid orders may not move further than that area during that turn and are considered to be engaging in shore bombardment and/or maritime disruption activities.
C. Squadrons with Raid orders that are still in the area at the end of the turn will earn VPs.
D. Squadrons with Raid orders must be given Transit orders in the following turn and they must end that turn in a friendly or neutral port.
5.6 Sortie
A. Sortie orders may only be given to squadrons in a port when the adjacent area (or areas) contain opposing forces.
B. Squadrons to be ordered to be leaving port in such a situation must be given Sortie orders and may only move into an adjacent sea area, regardless of their movement allowance amounts.
C. They may only be given Patrol, Raid, or Transit orders for that following turn.
5.7 Transit
A. Transiting units move normally using their full movement allowance, either as single independent units or as a stack, considered to be a squadron.
B. No squadron or Independent Unit may have Transit orders for more than two consecutive turns. Use a marker to indicate when a second turn of Transit Orders has been used.
5.4.1 Transiting Independent Units (IUs)
A. Transiting IUs (which may or may not also contain a leader):
- Do not require a Transit order marker,
- May not have combat, and
- Do not roll on the Orders Matrix if ending a turn in the same area as an opposing squadron.
B. In the following turn such IUs may remain in with Transit orders or they must enter a friendly port. They may not end their movement in their starting area.
C. Individual IUs not stacked with another unit or units do not require an Orders marker, but are always considered to have Transit orders.
5.4.2 Transiting Squadrons
A. Transiting units that are in a squadron may have combat.
B. They must use the Search Matrix when ending a turn in the same area as an opposing squadron.
C. Squadrons with Transit orders must be given Anchor or Coal or another Transit order for the following turn.
6.0 Leaders
6.1 Movement
Each side has a number of leader markers.
A. A leader must be placed with a unit or stack of units to be moved.
B. Leaders do not counted toward the total for determining whether a stack becomes a squadron.
C. Leaders have no effect when stacked with an IU, only with a squadron, though leaders may be moved with IUs.
D. Leaders must be stacked either with a squadron or with an IU to be moved. They may not be moved on their own.
6.2 Effect on Combat
A. If a squadron with a leader engages in battle line combat, the leader is considered to be aboard the first vessel in the battle line when set up for combat.
B. The one active leader for a stack, if there is more than one present, is the one placed at the top of the stack and it must be the one with the most stars on his counter, representing his command rate.
C. If there is more than one leader of the same rating, the one on top is the one in use.
D. Other leaders in the stack have no effect.
E. Leaders add dice to the combat equal to their command rate.
F. One die is added per ship, starting with the unit they are aboard and continuing down the combat line until all the command rate is used up.
Example: If a battle line has six units and the leader has a rating of three stars, one extra die will be rolled for each of the first three units in the battle line.
6.3 Leader Casualties
A. When a leader in combat is aboard a ship that is damaged, determine if the leader was killed or otherwise out of the combat. This occurs each round that the ship incurs damage.
B. If the unit was disabled, the leader must leave the combat area with that unit and is not counted in further rounds of combat resolution in that area for that turn.
C. If the unit was sunk, the leader is automatically considered to have been killed and is removed from play immediately. The leader's rating has no further effect for any further combat resolution rounds.
D. If the unit was damaged but not sunk, roll a single die for that leader. On a 6, the leader is killed in combat and removed from play immediately.
7.0 Movement
7.1 General Rules
A. The start of movement is always from the starting location of a unit to an adjacent sea area or to a port, or from a port to an adjacent sea area as the first move.
B. Movement thereafter is through a sequence of adjacent areas and/or ports, paying the movement cost of each to enter, up to the maximum movement allowance for the unit.
C. All forces have a movement allowance. This number is used in relation to movement by the entry into areas as a counter is moved in a turn. Different areas require different numbers of MPs to be entered.
D. MPs may not be conserved if not used and start again at full value at the beginning of the next Movement Phase.
E. Units remain in the port or area where they finished their movement for the turn. They do not automatically return to a friendly port at the end of the turn.
F. Movement must stop when entering an area with opposing squadron(s) which have Patrol or Blockade orders. Areas with opposing forces that do not contain such orders may be traversed if the owning side so desires. If the opposing side has units with Patrol or Blockade orders in an area entered by the moving side, the opposing side must so indicate so as to stop the movement of those units of the moving side.
7.2 Areas and Ports
7.2.1 Areas
A. The map is divided into 17 sea areas with borders through the oceans to indicate their limits, along with adjacent land zones as limits. Ports exist on the land zones of some sea areas. Forces may only enter land area when entering a port.
B. Most areas require the expense of only 1 MP to be entered, however, all three Atlantic Ocean areas require expending 3 MPs to enter, while the four areas representing straits and passages each require 2 MPs enter.
7.2.2 Ports
A. Most ports are only adjacent to one sea area, and movement from the port must begin into that adjacent sea area.
B. Two ports, however, are adjacent to two areas. Cádiz is adjacent to the North Atlantic and the Middle Atlantic. Forces ported there may enter either of these sea areas as their first move. The Canary Islands port is adjacent to the Middle Atlantic and the South Atlantic, and units may move to either of those areas.
C. Each Port marker contains values for attack and defense. They also display a zero for movement ability.
D. Some ports have a + indicated number for their mine value.
E. Ports are never required to be given orders and are never able to move.
F. Ports require 1 MP to be entered.
7.2.3 Neutral Ports
A. There are five neutral ports: Kingston, Cartagena, Curaçao, Caracas, and Martinique.
B. Units of either side may use them.
C. Neutral ports cannot provide repair for damaged units.
D. The Orders Phase after entering a neutral port, units must be ordered to Anchor. The following turn they must leave the port during the Movement Phase or they are considered to have been interned for the duration of the war.
-
Interned units are removed from play for the rest of the game at the end of the Movement Phase in which they did not move from the neutral port.
-
Interned units do not count toward VPs for either side.
E. Units that start movement in a neutral port may not end movement for that phase in a neutral port.
F. Neutral ports may never be the subject of actions by units with Raid or Blockade orders.
7.3 Squadrons
A. Squadrons represent coordinating command structures for units. Any stack of two or more friendly units (excluding leaders) is considered a squadron. Squadrons do not require leaders to move or engage in combat, however a leader stacked with a squadron will affect the combat ability of that squadron.
B. Only squadrons may be given orders other than Transit. A squadron may not be moved further than the movement ability of its slowest member (fewest MPs) if it is to remain together as a stack.
C. Whenever two or more friendly squadrons end their movement in a single area or the same port, they are automatically combined to become a single stack and a single squadron.
-
If two combining stacks are the same size, then the owning side decides which of the orders for the previously separate squadrons is retained as the ongoing orders for the new combined squadron for the remainder of the turn. Otherwise, the order of the larger squadron is retained and the other order is removed.
-
If the squadrons have the same number of units, the order of the squadron with a leader is retained. If both have leaders, the squadron with the leader with the most stars of rank retains its orders for the new combined squadron. If none of these conditions apply, flip a coin to see which orders are retained.
D. Moving squadrons may drop off units in areas they traverse. If a single unit is dropped, it is considered to have Transit orders. If more than one unit is dropped, the new squadron has the same orders as its original. If there is any remaining movement allowance, both the new squadron and the remainder of the original squadron may continue to move independently of each other.
7.4 Independent Units
A. A unit that is not stacked with another friendly unit is an Independent Unit (IU). Such single units may still be deployed, that is moved to sea or into a port, but do so as IUs. They have Transit orders when moving, or Anchor orders if they remain in port in a sea area, but they do not need to have an order marker placed on them to indicate this.
B. IUs are not required to stop movement when entering areas containing opposing forces.
C. IUs may not engage in combat or earn VPs.
D. IUs may never enter an opposing port.
E. When an IU enters an area or port containing other friendly units, it may be stacked with the other friendly units to become part of that squadron or may remain separate to continue with Transit orders in a following turn. The stacking must occur on entry to the area.
F. A unit that is not stacked with other friendly units at the start of a Movement Phase is considered independent and remains so until moving into an area with friendly units and then joining a squadron stack in such an area.
G. IUs that remain in a port for the turn are considered to have had Transit orders, but for some reason not been able to sail. In all other ways, they still count as if with Transit orders.
H. If multiple IUs end movement in the same area, they combine into a squadron with Transit orders, but if there are no such order markers remaining available, they may not combine and may not be considered for control of the area.
7.5 Coaling
A. Movement must reflect coaling as a limitation on ship movement. To reflect this, units that have used a good deal of coal due to their orders of the previous turn are required to coal in the current turn.
B. The Orders rules (5.0) indicate which specific orders must be followed by a coal order.
C. There are limits to the number of ships that can be coaled, based on their location:
-
Friendly ports: There is no limit on the number of units that may be coaled for the turn in a friendly port.
-
Neutral ports: Up to three units of each side may be coaled in a turn.
-
Sea areas: The US may coal a maximum of eleven units for the turn, regardless of the number of areas involved. Spain may coal a maximum of eight units per turn.
D. Excess units must be separated into separate squadrons from those being coaled and given orders besides Coaling, such as Anchor.
7.6 Sea Control
At the start of some turns one or more sea areas may have a Sea Control marker of one of the sides as a result of actions in a prior turn.
A. When entering an area with such a marker from the opposing side, a moving squadron must halt its movement for that turn in the area containing the marker.
B. IUs are not required to stop movement in this manner and may enter or leave such an area while continuing movement.
7.7 Reinforcements
Reinforcements have a number such as 3 or 7. This indicates they are a reinforcement that arrives on Turn 3 or Turn 7. On their entry turn during the New Forces Phase, place them in the port location indicated by their start location letters. They begin their movement for that turn from that location.
8.0 Combat
After all movement is completed, the Combat Phase begins.
8.1 Determining Initiative
A. Combat may occur in an area containing the squadrons of both sides, whether at sea in the area and/or in a port that borders the area.
B. First, determine who has the initiative in the area.
-
If one side's squadrons are all in port and the other side's are at sea in the same area, the side with the squadrons at sea has the initiative for that area.
-
If both sides have squadrons at sea in the area (even if one or both sides also has squadrons in a port in the area):
a. Count the number of units in the area for each side.
b. Add to that the number of stars rating for each side's highest rated leader in the area.
c. Then each side rolls a single die and adds that result to their total.
-
The side with the higher number has the initiative for that area.
-
In case of ties, the US has the initiative.
C. Finish combat for one area before starting resolution for another area.
D. IUs never take part in any aspect of combat, including initiative and search.
8.2 Search Resolution
A. After determining initiative for an area, conduct a search for that area using the Search Matrix Chart.
B. Compare the orders for the opposing squadrons in the area. The order for the side with the initiative is used to find a column on the chart. The order for the side without the initiative is used to determine the row of the chart. Cross index the column and the row to find one of three possible results.
8.2.1 No Result (N/A)
This indicates the forces will not engage in combat. There is no further action and play moves to resolve the next area. If all areas have been resolved, proceed to determining VPs for the turn.
8.2.2 VP Event
A. This result indicates that the initiative side immediately scores VPs per the VP rules, but no ship combat occurs. However, port combat does occur if required by orders such as Blockade.
B. The result is otherwise considered an N/A, and again play moves to the next area to be resolved. If all areas have been resolved, proceed to determining VPs for the turn.
8.2.3 Engagement Roll
This result includes a range. The initiative side rolls a die and if the result is in that range, combat will occur between the squadrons in the area. If the roll is outside the range, it is treated the same as an No Result.
8.3 Combat Resolution
A. Resolve combat one area at a time.
B. Once a combat round for an area begins, the results are considered simultaneous, with each side being the attacker and each the defender one time to complete the round, and with no results applied until after all units have fired.
C. Combat for different areas can be resolved in any order. If the players cannot agree, each rolls a die with the side rolling higher picking the first area, then the other side picking the next area. The players alternate until combat is resolved for all areas. (Roll again if tied until one side has a higher roll.)
8.3.1 Battle Lines
A. When resolving combat for battle lines of opposing squadrons, each side lines up its units using the top to the bottom of the stack from the area involved in the combat.
B. Line up the opposing units counter to counter on the Battle Line Card.
C. If there is overlap (i.e., one side has more units than the other), the side with more units may overmatch the side with the lesser number, starting at the beginning of the line as indicated by the top unit of the squadron.
D. Excess units must be placed one unit per opposing unit, starting from the beginning of the opposing line, until all extra units are placed.
E. If there are still excess units, repeat until all units are placed.
Example: Squadron A contains nine units and Squadron B contains fourteen units. Line up A's nine units as a single battle line, starting with the top unit in the stack and continuing to the bottom unit of the stack. Squadron B lines up the first nine units from its stack, one against each of the A's units, first against first, second against second, and so on. There will be five units left over. B's tenth unit is doubled up against A's first unit. B's eleventh unit is doubled up against A's second unit. B's twelfth unit is doubled up against A's third unit. B's thirteenth unit is doubled up against A's fourth unit, and B's fourteenth unit is doubled up against A's fifth unit. Now combat may be resolved for this battle.
8.3.2 Results
A. Conduct a round of gunfire after setting up the battle lines.
B. Roll a number of dice for each unit equal to its attack factor against the opposing opposite unit.
C. When there are multiple attackers against a single defender due to overlap, roll for all attacking units.
D. A roll of a 6 is a hit. Roll damage for each hit.
E. A roll of a 5 is a disabled result. The defender will drop out of the battle line and may not participate in further combat
8.3.2.1 Disabled Result
A. Mark each disabled unit with a Disabled marker.
B. Disabled units are sent back to the nearest friendly port (in terms of MPs) immediately after finishing the combat round, regardless of their damage level. They may go to the nearest neutral port if using Optional Rule 14.9. If more than one port is equally distant, the port moved to is at the option of the owning side.
C. Disabled units are considered to have had Anchor orders for purposes of the orders for the next turn. Remove Disabled markers in the Repairs Phase.
8.3.2.2 Damage Result
A. Roll again for each hit. The result is the number of damage points taken by the target, including units which received both hit and disabled results.
B. Put Damage markers on each damaged unit to represent the amount of damage taken.
C. Units that accumulate damage greater than their defense value are sunk and should be noted to be removed at the end of the current round of combat. However, for each round of gunfire combat, no results take effect until after all units have fired and results from their firing have been assigned.
D. When the round ends, both sides determine if disengagement by gunfire occurs. If it does, the battle is ended. If not, another round of gunfire combat is conducted.
E. This continues until either one side disengages, or no units remain for one side. In either case, the side with remaining units or that did not disengage wins the battle.
F. Once in combat, as the results are considered simultaneous, each side takes a round of being the attacker and the defender.
8.3.2.3 Damage Effects
A. Undamaged units and damaged units that have not been disabled must continue to fight in ensuing rounds of battle; however they do so with modification of their unit values due to their damage.
B. Each point of damage reduces a unit's movement and attack values by one for subsequent rounds of combat and for later movement requirements. However, no unit may be reduced to less than a two movement allowance or one attack value.
C. Set aside sunk units for the Area Control and VP Phase.
8.3.3 Reforming Battle Lines
To form new battle lines after a round of combat:
A. Remove damaged units and place them at the end of the line, in the order of least number of damage points to most number of damage points. (Place the unit with the least damage right after the last undamaged unit.) In instances of the same damage, the owning side may pick the order of those units with the same damage total.
B. Then close the order for the remaining units after those sunk or disabled have been removed, thus maintaining the same line of battle sequence.
C. Then determine any new resulting overlap.
D. Damaged units may not overlap from the front of the opposing line, but instead overlap from the end of the opposing line. Thus, in the case of a heavily outnumbered opponent, it is possible that undamaged units might overlap the front of the opposing line while damaged units overlap the back of the opposing line, potentially producing even a doubled overlap at the center of the opposing line.
8.4 Port Attack Resolution
A. When opposing squadrons have Raid or Blockade orders, if they are still in the area after any other combat has concluded for the turn, they must make a port attack.
B. Units with Blockade orders combat with the port marker using its attack and defense values.
C. Units with Raid orders combat with the port marker using its mine and defense values.
D. There is only one round of combat in a Port Attack Resolution.
E. Combat with a port is resolved similarly to that of two squadrons except:
-
When engaging units that have Blockade orders the port attacks only the odd numbered units in the opposing squadron stack (e.g., the 1st unit, the 3rd unit, the 5th unit, etc.) All of the attacking units do fire on the port, so the combat is resolved as a sequence. The port and the first unit resolve against each other simultaneously, then the second unit engages the port, then the third unit and the port engage simultaneously, etc.
-
When resolving the port against a squadron with Raid orders the same system is used except the port only engages every third unit (e.g., 1st, 4th, 7th, etc.).
F. At anchor units in the port do not participate in Blockade or Raid combat. They simply remain at anchor in the port.
G. A port takes damage on a 5 or a 6.
H. A port hits an opposing unit on a 6 and disables it on a 5, just like an opposing squadron does.
I. As soon as the port is destroyed by an attacking unit (i.e., its defense value is exceeded damage taken), the attack ends and the attacking side earns VPs for the destruction of the port. Flip the port marker to its Disrupted side. A disrupted port is still available as a port, but may not provide repair for friendly units for the current turn.
J. If not, combat continues against the remaining units in the squadron.
K. If the port is not destroyed after one complete round, regardless of the amount of damage to the port, the side with the initiative may not initiate further rounds of combat. The blockade or raid has failed for the purposes of VPs.
L. When combat ends, if the attacker has units remaining and the port has been destroyed, award 3 VPs plus the defense value of the port in VPs to the attacker.
M. At the start of the next turn's New Forces and Orders Phase, remove any damage markers from the port. Turn the Port marker face up to its full-strength side.
9.0 Damage Repair
A. Damage points assigned to units may be repaired to over time.
B. Each side's ports have a repair capability number printed on the map. The number is the maximum total number of damage points that a port may remove from units in that port during the Damage Repair Phase. Each side simply removes damage from units of its choice in each such port up to the indicated point limit.
C. The owning side may repair all of the damage of a particular unit or only part of a unit's damage.
Example: If there are three units, each with two damage, in a port with a capability of four, then two units may be fully repaired and one unit left with two damage; or two units may receive one repair and one unit is fully repaired (two damage repaired).
D. Damage to a unit may have occurred due to combat or because of the optional Maintenance rule (14.3). There is no difference between the two causes of damage in any way from a repair standpoint.
E. Recovery of a Port marker from its Disabled side occurs during the New Forces and Orders phase and consumes all of the available repair points for that port for the turn prior to its recovery. Thus ships may not be repaired until the next turn when the Port marker is flipped back to its front full use side. Units may still move into and out of the port.
10.0 Disengagement
10.1 By Gunfire Resolution
A. This form of disengagement is involuntary, and occurs to the loser of a battle.
B. If all of the units of the battle line of a squadron have been either sunk or sent back to port as disabled, then disengagement by gunfire has occurred.
C. No further combat rounds are played for that battle.
D. This disengagement may not occur in the middle of the resolution of a round of gunfire combat, but only after all involved units have fired and all damage has been assessed.
E. It is possible for a unit to be both damaged and disabled, thus being forced out of the battle and back to port with damage.
10.2 By Speed
10.2.1 Before Battle Begins
A squadron of either side may disengage by speed before the start of a battle if all of its units are faster than all of the units of the opposing squadron.
10.2.2 During Battle
A. Disengagement by speed may also occur after each round of a battle is concluded if units of one side are faster than all units of its opponents.
B. To determine this, compare the speed of the opposing units. Units that have a higher movement allowance, (including effects from damage), than all of the opposing units involved in the battle may disengage by speed and must return to a friendly or neutral port.
C. Forces that do not have a speed advantage may not disengage by speed and remain in the area to fight battle rounds as required.
11.0 Area Control
A. An area is controlled if there is only a squadron of one side remaining in the area at the end of the turn, even if there are enemy IUs present. In all cases at least two units (regardless of damage) of one side's squadron must be present to control the sea area.
B. An area is uncontrolled if squadrons of more than one side are in the same area but a) did not find each other due to Search Matrix results, or b) remain in the area after battle concludes in the area for the turn.
C. An area is uncontrolled if there are only IUs in the area from either or both sides at the end of the turn. A single unit with or without a leader cannot be used to control areas.
D. If forces of one side in an area have disengaged by any method, or an entire squadron of one side in the area has been removed due to loss or disablement, that side cannot control that area.
E. In most instances the winner of a battle in an area will end up controlling that that area.
F. Squadrons with Transit orders may never control an area, regardless of the number of units in a squadron, nor may they prevent an opposing squadron from establishing control in the area.
G. It is possible that some areas will be uncontrolled at the end of the Combat Phase or a turn due to no forces having been moved to the area or all forces having been removed.
H. Do not place a control marker in an uncontrolled area.
12.0 Victory Points and Victory Conditions
12.1 Victory Points
12.1.1 Area VPs
A. The sea areas controlled by each side after the conclusion of the Combat Phase determine the number of VPs for area control. This represents the ability to bombard undefended coastal locations and interdict maritime traffic in the area.
B. There are two numbers under the name of each area. The number on the left are the VPs the US earns for controlling the area. The number on the right are the VPs for Spanish control.
C. During the Area Control and VPs Phase the US counts points first and moves the VP markers on the VP Track to reflect additions. Next Spain counts VPs for controlled areas and again moves the VP markers, but this time toward the Spanish side of the VP Track.
D. Uncontrolled areas do not earn VPs for either side.
E. Some areas have zero control points for one or both sides thus controlling them has no VP effect.
F. All areas that award VPs for control do so for every turn that they are controlled.
12.1.2 Losses VPs
A. VPs are earned for destroying opposing units. During the Area Control and VPs Phase, after completing the calculation of VPs for Area Control, count and record on the VP Track amounts for opposing units sunk during the turn just completed. Drop any fractions.
| VPs | Ship Type |
|---|---|
| 2 | BB |
| 1 | CA |
| ½ | CP |
| ½ | CU |
| ½ | GB |
| 1 | MO |
B. For each leader killed the opposing side earns VPs equal to the star value of the leader.
12.1.3 Orders VPs
A. When a side with the initiative has Raid or Blockade orders and its attack on a port is successful in destroying that port, it immediately earns 3 VPs plus the defense value for the port. After the port recovers, it can then be attacked again in subsequent turns and will again earn the initiative side VPs if the port is destroyed another time.
B. If during a combat phase the initiative side has a squadron with Blockade orders while an opposing squadron in the same area or a port adjoining that area has Coal orders, the blockading initiative side immediately earns 2 VPs. The side with Coal orders is considered to have coaled as per the order, but was prevented from doing so in a timely manner and thus unable to otherwise be ready that turn.
12.2 Victory Conditions
Victory is determined at the end of the game by the amount on the VP track. A side wins by having at least six VPs. If neither side has that many, the game is a draw.
13.0 Setup
A. The side playing Spain should sit on the west side of the map while the side playing the US should sit on the opposite side, looking in from the continental US and Gulf of Mexico.
B. Many counters start the game on the map. Each unit, leader, and port marker has a double letter designator in the upper right corner of the front of the counter to indicate the starting position for the counter (3.4.1.2).
C. Reinforcements have a number to the left of the letters indicating the turn the unit enters.
D. Except for port markers, place units and markers on the map face down to conceal their identity from the opposing side. Units and markers remain face down throughout the game except when they are turned face up to resolve combat.
E. Each side has a number of markers with orders for squadrons. Place these face down off the map near the owning side.
F. Place the Game Turn marker on Turn 1 of the Game Turn Record Track, and the VP x1 and x10 markers on the zero box of the VP Track.
G. All squadrons are considered to have had Anchor orders for the turn before the start of the game except for the squadron in the East Coast area, which is considered to have had Patrol orders.
H. All areas of the map start the game uncontrolled, so do not place any Control markers at the start.
14.0 Optional Rules
These rules are extra which complicate or alter play, but can make the game somewhat more historically reflective or easier to play solo. They may be used individually or in combination as agreed to by both sides before the start of play. Additionally, some of the rules will obviously advantage one side or the other, so they may be added to balance out unequal sides and make for a better game.
14.1 Extra Time
Though the naval war in effect ended with the battle results from Santiago Bay in early July of 1898, without that event the war could have continued.
At the agreement of both sides prior to the start of play of the first turn, the game may be extended to seven, eight, or nine turns. These additional turns are played in the exact same way as prior turns.
14.2 Alternate Delayed Repair
For simplicity, repair is assumed to have occurred sometime during the ongoing turn, since events of the turn would have occurred over a long time period. However, players may want to delay repair to reflect long term problems and complicate the game slightly.
A. Only units remaining in the repairing port for the entire turn may be repaired during the Repair Phase for the current turn.
B. Instead of automatically returning damaged and destroyed ports to full use during the New Forces and Orders Phase, ports retain their damage markers and must repair themselves with their repair capability prior to being flipped to their full use side and being then able to again repair ship units.
C. All damage done during a Raid or Blockade is retained, so even if there is excess to what is needed to destroy the port, that excess must also be repaired before the port can be flipped to its front side from its Disrupted side.
D. Such ports may still be used as ports in all other respects.
14.3 Maintenance
Maintenance damage, that is, damage as a result of inadequate upkeep on the very complex machinery of modern warships, was a common problem throughout the war for all participants, but worse for some than for others.
A. The US must assign one damage point per turn from Turns 2-5 to a United States BB and/or MO type unit, and two damage points per turn to a combination of United States CA, CP, and/or CU types units.
B. For all other turns of the game the US must assign one damage point per turn to a United States BB type unit and one per turn to a combination of United States CP and/or GB type units.
C. Spain must assign four damage points per turn, to be allocated to a combination of Spanish BB, CA, CP, and/or CU type units.
D. Maintenance damage is assigned last, after normal repairs, and thus may not be repaired the turn in which it is assigned.
E. A unit may not be assigned upkeep damage two turns in a row. Record the names of units assigned such damage each turn to keep track of which units become ineligible, or place an unused marker under them as an indicator.
F. When using this rule, units with damage of half or more of their defense strength may not leave port. Round down for Spanish units and up for United States units.
G. This rule is in addition to Damage Repair (9.0) and may not be used with Alternate Delayed Repair (14.2).
14.4 Bidding
A. Both players may wish to play the same side due to a perception of an advantage for that side. Should that happen, before determining which side will play which side, each bids secretly noting the number of VPs to play the desired side.
B. Both then reveal their bids, and the player with the higher bid plays the side of his her choice, with the other side taking the other side.
C. However, the bid losing side is granted a starting VP level before the game begins equal to the number bid by the winning side. The players could also agree to use the difference in bids as the starting VP level instead.
D. In event of a tie, flip a coin with the winner picking a side first and no extra VPs earned.
14.5 Handicapping
If players are of unequal skill or experience in play or with the game, play may be balanced by giving to the weaker side a starting number of VPs as a handicap. Determining the level of a handicap is always difficult, but an attempt should be made to reflect the differences between the sides and any optional rules in use as fairly as possible. Additionally, some players may, after playing the game a number of times, discern what they consider to be an imbalance toward one side or the other.
Modify the starting level of the side perceived to be at a disadvantage to start the game with a number of VPs, rather than starting at zero, that reflects what is considered by the sides to compensate for their view of the imbalance.
14.6 Fog of War
A. DAWN OF EMPIRE in its standard rules is oriented toward the fog of war aspects of naval campaigns. If players wish to reduce this fog of war aspect, instead of playing the game with unit and maker counters face down until the stage of laying out units to resolve combats, players may simply play with counters face up and subject to examination by the opposing side at any time. This reduces considerably the historical uncertainty of the situation of the naval aspects of the Spanish-American War, but it also makes the game much more chess like by allowing additional calculation of potential combats in advance.
B. The only exception is for orders markers, which still should remain undisclosed until a situation occurs which requires them to be revealed to determine an outcome.
14.7 Automatic Victory
In the standard game, victory is only determined at the end of the last turn. However, to increase tension, automatic victory may be used.
Automatic victory occurs at the end of any turn when a side has a score of 29 or more, thus ending the game before the end of the last turn.
14.8 Restricting Disabled Units
In the standard rules for the WAR AT SEA family of games, a disabled result is to some degree a 'get out of jail free' card, as it sends both damaged and undamaged units to a home port without consideration of damage or distance at the conclusion of the combat round in which they were disabled. In DAWN OF EMPIRE, this is perhaps more historically reflective than in the other games, as a unit forced out of the battle line due to damage or other events might then proceed back to port independently, even as the battle continued, and this happened a number of times.
A. If players wish to make this more realistic, any existing damage should be considered, and if as a result the unit cannot make the distance to the nearest port, it should be considered lost due to scuttling.
B. To make this work best, players should also alter the lowest value that movement can be restricted to due to damage to be one, rather than two, but may not round movement down to zero.
14.9 Speed Defined Subgroups
When disengaged by speed, all units faster than the opposing highest speed succeed in disengaging, but those slower all remain for another round of combat for simplicity of resolution. What would actually happen is that a number of subgroups would be formed due to speed differences and then the pursuing commander would have to decide if he would engage only the slowest of those groups or if he would split his forces to try to catch some or all of the other speed separated opposition.
A. To represent this, the disengaged side splits into separate subgroups by speed when it disengages.
B. The pursuing side may then split its forces to engage, also restricted by speed ability, and decide which forces to leave with which disengaging subgroup.
C. A side is not required to send all of its faster units against all of the opposing faster subgroups. It may have all of its units fight the slowest or the two slowest opposing subgroups, within its unit's movement abilities limitations, or it may split them into two or more subgroups to pursue each opposing subgroup.
D. However only one additional round of combat is fought in this manner and at its conclusion the disengagement of all surviving forces is considered to have occurred.
E. Control of the area will belong to the side that won the initial round of combat and forced the other side to disengage, regardless of the later results of the combat round of the speed defined subgroups.
14.10 Extra Warships
There were a few more warships that the Spanish could have sent along and the Americans had a few more also. The counters for these have an asterisk next to the position for their location/arrival.
A. Add the Spanish units to those that are available at the start of the game.
B. Add the extra US unit on Turn 3 at Key West.
14.11 Free Deployment
Players wishing to try their own starting locations for their units and leaders may try this option.
A. Ignore all of the counter deployment indicators. The US places its starting forces first in any US port in any quantities per port the player desires.
B. Additionally, a single US squadron of up to six units with no more than one leader may be placed in any sea area that boarders coastline of the US. This squadron has Patrol orders as if from a turn prior to the start of the game.
C. Spain sets up second and must start all units and leaders in Spanish friendly ports but no units or leaders may start in a sea area, they must all be in port.
D. Reinforcement units still must enter at the port location indicated on their counters.
14.12 The Germans
There was a remote chance that German naval units in the Caribbean might have been ordered to come to the aid of Spain against the United States. To play this option, there are counters for the four German naval units in the sea. They have a gray center background. There is also one leader for these units.
A. If playing this option, all four units and their leader are available at from the start of the game and act entirely as Spanish units controlled by Spain.
B. They start the game deployed in Caracas which has a repair value of 1 but only for use in the repair of German units. Caracas is otherwise considered neutral and may not be blockaded or raided.
15.0 Design Notes
I do not usually dedicate games, but I would like to dedicate this one to the memory of Terry Stibal, whose huge interest in this topic got me looking into the idea of a game on it in the first place. Despite this, I had pretty much decided not to do this game. Then along came Bill Thomas when the topic was being discussed on ConSimWorld in the folder for SETTING SUN, RISING SUN, a game on the Russo Japanese War that I had done and that Bill had published in Compass Game's Paper Wars magazine. He convinced me I should give it a try and urged that I keep in mind solo play, of which he is a big fan. The game you have in your hands is the result.
As with my prior extension of the War At Sea family of design concepts to cover the Age of Sail, this design pushes the basic ideas a good deal. Fuel considerations were, at this point in naval history, hugely important and the logistics of keeping fleets going with constant supplies of coal had not yet been fully worked out. Half a dozen years later in the Russo-Japanese War, a lot of these kinks were gone and coaling was much less of a constraint. By the time of the Great War, another decade on, all of the major powers had solved the logistics involved and systems were in place to make keeping fueled a much less central consideration.
Additionally, Spanish-American War era fleets had gotten smaller as the Age of Sail closed, but had not yet really started their growth into the huge groupings of warships that would typify the First World War. As a result, searching for and, after finding, coming to grips with opposing squadrons or warships was not yet as systematized or reliable as it would become heading into the Great War.
Two reflect these two really large breaks with the general concepts of the War At Sea family ideas, new systems had to be developed. Specifically, these are the Orders systems and the iterations of those orders with search and then engagement. Both of these new structures take some getting used to. In effect, they produce a form of sequencing where the sides must think well ahead, turn wise, to make sure they have the maximum possible force of units in the right places at the right times and with the right orders to have the best chance of both finding and then fighting the opposing forces. None of this is intuitive and it requires experiment and practice.
Finally, a word or two on strategy. In the historical events, the US Navy simply wiped the Spanish forces off the map. The reasons for this are varied, but they were no certainty. On paper, the Spanish looked to be a serious threat. And from a strategic standpoint, they could have been. A huge concern for the US command was the vulnerability of the Eastern seaboard of the nation to raid, particularly considering the fairly light defensive infrastructure of the two main naval bases at Key West and Hampton Roads. The Spanish never forced the US to do more than be concerned, however, and this was a serious strategic error on their parts. In the game Spain is fully able to correct this, and the US side must be on guard for it. Additionally, in the Caribbean, the Spanish did very little to attempt to consolidate their forces at sea, instead concentrating in ports. This enabled the US Navy to maintain loose blockades by rotating watchers and, when a sortie did happen, to apply full force. In the game, Spain need not be so cooperative in their own destruction.
16.0 Differences From Other War at Sea Games
| Section | Category | Difference |
|---|---|---|
| 3.5.6 | Ports | Units are not required to return to a port at the end of a turn. |
| 7.1.C | Movement | Different areas require different numbers of movement points to be entered. |
| 7.1.E | Movement | Units remain in the port or area where they finished their movement for the turn. |
| 7.1.F | Movement | Movement is not always required to end when entering an opposing controlled area. |
| 7.5 | Coaling | Rule in general. |
| 12.1.2 | Losses VPs | Victory points are earned for destroying opposing units. |
17.0 Credits
Omitted from this transcription.
18.0 Detailed Example of Play
This example of play will cover all actions for the first two turns of a game to give an idea of the flow of the game by demonstrating the rules. Please note that this is not an indication of game strategy.
The Example of Play has been composed to display the rules rather than suggest useful strategic or tactical actions. Remember that units and leaders are deployed inverted so that the opposing side is unaware of the identity of opponents until potentials for combat must be resolved in the Combat Phase, and orders are also placed on squadrons inverted and not disclosed until the Movement Phase. However for this example, counters are shown face-up for clarity.
18.1 Turn 1
18.1.1 Setup
A. Setup is done as from Rule 13.0 as, for the first turn, all units are, in effect, New Units. The only optional rule in play is 14.10, Extra Warships, which are also deployed to their indicated starting locations per rule 13.0.
B. In Key West, the only starting location with two leaders and so able to form two squadrons that each has a leader, Sampson forms the North Atlantic squadron with the Indiana, Iowa, Wilmington, Helena, Nashville, and Detroit. Watson forms the Eastern squadron with the New York, Cincinnati, Machias, Castine, and Marblehead. A third squadron without a leader is formed in Key West with the Annapolis, Vicksburg, and Newport.
C. All squadrons are set up stacked with the most powerful units at the top (front end of the line for combat), grading down through the stack to the least powerful of the stack, and with any leader in the squadron on the lead vessel.
18.1.2 Spanish Orders
A. Cámara's 1st Cádiz squadron located in Cádiz is given Raid orders.
B. Cervera's 2nd Cádiz squadron located in the Canary Islands is given Anchor orders.
C. Manterola La's Havana squadron starting in Havana is given Transit orders.
D. In Cádiz, Lepanto, Alfonso XIII, Asturias, and Carlos V are removed from Cámara's squadron and stacked as a separate squadron without a leader and given Transit orders.
18.1.3 US Orders
A. Schley with the Flying Squadron located in Hampton Roads is given Transit orders with the Massachusetts, Brooklyn, New Orleans, Minneapolis, and Columbia.
B. A separate squadron without a leader is formed in Hampton Roads with the Texas and Montgomery and is given Transit orders.
C. The monitor Maintonomoh remains in Hampton Roads without orders.
D. Howell, with the Northern Patrol squadron in the East Coast sea area is given Anchor orders.
E. Sampson in Key West with the North Atlantic squadron is given Patrol orders for the Indiana, Iowa, Wilmington, Helena, Nashville, and Detroit.
F. Watson, with the Eastern squadron, is also in Key West with the New York, Cincinnati, Machias, Castine, and Marblehead is ordered to Anchor.
G. The third squadron in Key West with the Annapolis, Vicksburg, and Newport is given Transit orders.
H. The monitors Terror, Amphitrite, and Puritan are ordered to Anchor in Key West.
18.1.4 Spanish Movement
A. Cámara's squadron raids through the North Atlantic and into the East Coast sea area, but the squadron moves with only five ships, as the other two ships, Furor and Pluton, have only 3 MPs so they are left behind. (This is not noted in the example.)
B. The Lepanto, Alfonso XIII, Asturias, and Carlos V as a squadron transit through the Middle Atlantic and into the Canary Islands.
C. Manterola with Ensenada and I Isabel transits through the Gulf of Mexico into Yucatan Straits and then ends movement in the North Yucatan Basin sea area.
D. Venadito and Alphonso XII anchor in Havana while Cervera anchors his squadron in the Canary Islands.
18.1.5 US Movement
A. Howell with San Francisco and Chicago moves into Hampton Roads to anchor.
B. Texas and Montgomery transit into the East Coast sea area and stop movement for the Spanish squadron in the area.
C. Schley also transits his squadron into the East Coast sea area and stops to look for the Spanish. Being in the same area, the two US squadrons combine under Schley with their Transit orders.
D. Annapolis, Vicksburg, and Newport transit through the Florida Straits and then into the Bahamas sea area.
E. Sampson moves his squadron through the Florida Strait and into the Gulf of Mexico sea area to patrol.
F. All other United States squadrons sit at anchor.
18.1.6 Combat
A. Search: The only area with squadrons of both sides is the East Coast. The Spanish squadron has five units and a 3 Star leader for a value of 8 plus a die roll which is a 4, for a total initiative value of 12. The United States has seven units plus a 2 Star leader for a value of 9 plus a die roll of 2 for an initiative value of 11. Thus Spain wins the initiative for the East Coast sea area combat.
B. To perform the search refer to the Search Matrix Chart and find an indicated column by the Raid orders for the Spanish squadron that won the initiative comparison. Next find a row by the Transit orders for the United States squadron that lost the initiative comparison. Crossing these gives a result of 1-2 as the die roll range for a successful search. Spain rolls a die and gets a 4, so the squadrons do not find each other to have an at sea naval combat resolution, but there will still need to be a resolution of the port Attack from the Raid orders for the Spanish squadron.
C. The Raid on Hampton Roads resolves as follows. The 1st and 4th units of Cámara's squadron conduct the combat of the raid against the Hampton Roads port marker. Cámara is stacked with the Castilla and so adds another die to its 2 attack dice to attack with 3 dice while also adding another die to the 1attack die from the Cristina, which though starting as the 4th unit has become the second unit for this combat due to the port Attack Resolution system (rule 7.5). The port marker's zero mine value gives it no ability to in return attack the Spanish raiding units. Castilla rolls two 1s and a 5 for a single hit. Cristina rolls a 3 and a 4 for no hits. A die is now rolled for the single hit against the port. The roll is a 2, and the Hampton Roads port defense is a 3 so the port takes two points of damage markers and is turned over to its disabled side, but port is not destroyed so the raid has failed and no raid VPs are earned.
D. As there are no other areas in which to resolve combat, the 1st turn Combat Phase ends.
18.1.7 Area Control and VP Phase
A. Area Control is now determined. Many areas have no units at sea within them and thus become or remain uncontrolled.
B. The US is the only side with a squadron at sea in the Gulf of Mexico and in the Bahamas, however the squadron in the Bahamas has Transit orders so cannot exert sea control.
C. The Patrol orders for the squadron in the Gulf of Mexico give the United States sea control there earning the US one VP.
D. Spain has a squadron in the North Yucatan Basin, but it has Transit orders, so cannot exert control. In the East Coast sea area the US squadron with Transit orders cannot prevent the Spanish squadron in the area with Raid orders from establishing area control, which earns Spain four VPs.
E. This shifts the VP markers on the VP track from +1 United States to +3 Spain.
F. As the port was not destroyed, no extra VPs are earned for the raid itself.
18.1.8 Repair Phase
Finally, there is a Repair Phase to end the turn. There are no damaged units in ports, so the Repair number for each port is not needed this turn for ships. However, the Hampton Roads port marker has two damage markers from the raid and has a repair capacity of four, so both damage markers are repaired by this and removed from the port marker.
18.2 Turn 2
18.2.1 New Forces and Orders Phase
Their are no new forces coming into play this turn. The Hampton Roads port marker that was flipped to its Disabled side is returned to its front, fully functional side (which would happen even if it had been destroyed, though in such a case it would have earned Spain more VPs).
18.2.2 Spanish Orders
A. Cámara's squadron in the East Coast sea area had Raid orders in the previous turn so must be given Transit orders for this turn.
B. Manterola La's squadron in the North Yucatan Basin had transit orders so must Coal, Anchor, or Transit again. It gets Coal orders, using up two of Spain's possible eight Spanish units that may have Coal orders while in a sea area during a turn.
C. The squadron with the Lepanto, Alfonso XIII, Asturias, and Carlos V that used Transit orders to reach the Canary Islands in the previous turn are given Anchor orders.
D. The Cervera squadron is given Patrol orders.
E. Venadito and Alfonso XII in Havana are given Sortie orders.
F. Several units will Transit as IUs, so no order markers for them are placed. They are Galicia in Cienfuegos, Mercedes in Santiago, and Isabel II in San Juan.
18.2.3 US Orders
A. Howell with the San Francisco, Chicago, and Maintonomoh in Hampton Roads are given Patrol orders.
B. Schley's squadron in the Bahamas is given a second consecutive Transit order, so will not be able to Transit again next turn.
C. Newport, Annapolis, and Vicksburg in the Bahamas sea area are ordered to Coal. Sampson's squadron in the Gulf of Mexico sea area will Coal.
D. Watson's squadron in Key West is given Patrol orders.
E. Terror, Puritan, and Amphitrite in Key West are given Blockade orders, with Havana as the opposing port in range as a target.
18.2.4 Spanish Movement
A. Cámara's squadron transit from the East Coast sea area through the North Atlantic and into port at Cádiz. Cervera's squadron leaves the Canary Islands on patrol, dropping a patrolling squadron consisting of the Colón and Pelayo in the South Atlantic sea area while moving on through the Nares Abyssal and into the Puerto Rico Passage.
B. Galicia independently transits from Cienfuegos through the North Yucatan Basin and the Columbia Basin into the Puerto Rico Passage to join Cervera's patrolling squadron already in that sea area.
C. Mercedes leaves Santiago on an IU Transit through the Bahamas sea area and into the Nares Abyssal. Isabel II IU transits from San Juan through the Nares Abyssal to joint Mercedes in a squadron that now is marked with a Transit order.
D. Venadito and Alfonso XII sortie out of Havana into the Gulf of Mexico sea area.
18.2.5 US Movement
A. Howell's squadron moves out of Hampton Roads into the East Coast sea area on patrol.
B. Schley's squadron transits from the Bahamas through the Windward Passage, continues through the Columbia Basin, and ends movement by moving into the Puerto Rico Passage. Newport, Annapolis, and Vicksburg are coaling so remain unmoving in the Bahamas sea area.
C. Terror, Puritan, and Amphitrite move out of Key West, passing through the Florida Strait and into the Gulf of Mexico to blockade Havana.
D. Watson's squadron leaves Key West, moving through the Florida Strait and then through the Bahamas sea area to enter the Nares Abyssal on patrol.
E. Sampson's squadron in the Gulf of Mexico remains unmoved as it coals.
F. The US squadrons now in the Gulf of Mexico are compared to determine their conjunction. Sampson's with the coal orders is larger so the blockading squadron of Terror, Puritan, and Amphitrite are integrated into Sampson's squadron and placed in the stack in positions the US would want to use for a combat line with the entire squadron remaining with Coal orders while the Blockade order marker is removed.
18.2.6 Combat
A. Three sea areas contain squadrons of both sides and thus need to resolve initiative and search to determine if there will be combat in those areas.
B. In the Nares Abyssal sea area, the transiting Spanish squadron made from the two previously IUs that ended movement there is a 2 plus a die roll of 2 for an initiative value of 4, while Watson's patrolling squadron has 2 stars just for its leader and 5 units for a total of 7 so easily wins the initiative without even considering its die roll. Crossing the Initiative Patrol column with the Non-Initiative Transit line shows a 1-3 roll needed to have a successful search. The US rolls a 5, so the squadrons never find each other and there is no combat to resolve.
C. In the Puerto Rico Passage sea area Cervera's squadron is four units plus his 2 stars for 6 plus a die roll of 4 for a 10 initiative value while Schley's squadron is seven units plus his 2 star leader rating to get to 9. The US rolls a 5, bringing the US initiative value to 14 and winning the initiative in the area. Crossing the Transit column from Schley's squadron with the Patrol line for Cervera's squadron produces a 1-3. The US rolls a 2, so there will be a naval battle in the Puerto Rico Passage.
D. The Spanish battle line is Teresa with Cervera aboard, followed by Vizcaya, then Oquendo, and then Galicia. The US battle line puts Massachusetts with Schley on board opposite and against Teresa, Brooklyn against Vizcaya, Texas against Oquendo, and New Orleans against Galicia in the first US line. But there remain more US units, so they overlap to put in a second line Columbia also against M. Teresa, Minneapolis against Vizcaya, and Montgomery against Galacia.
A. For the first US attack lead by the Massachusetts, the US side will roll seven dice for the Massachusetts, one for the Columbia, and one more for Schley. The results are two sixes, a five, 2 fours, 2 threes, and a one. Rolling two more dice to determine the damage inflicted by the two six result hits gets two threes for a total of 6 damage, well over the M. Teresa's defense of 3, so it will be sunk at the end of the round.
B. The second attack lead by the Brooklyn has five dice from the attacking units plus another from Schley. The rolls are a six, three fives, and a one. Rolling a single die for damage from the six hit roll gets a two, so Vizcaya will have two damage points at the end of the round and any of the five results produces a Disabled so after the round ends the Vizcaya will be returned to the nearest friendly port automatically, with the additional 5 results having no effect.
C. The third attack group has three dice from the attacking units but is past the limit for help from Schley so rolls just the three dice, getting 2 ones and a single two for no hits.
D. The final attack group has two dice for attacks and rolls a single five and a single four. So Galacia will also be disabled and returned to the nearest friendly port after the combat round ends.
E. Next the Spanish ships return fire for the round as combat results within a round are considered simultaneous.
F. M. Teresa has a 3 attack value plus one for Cervera for 4 dice. The roll is one each of 5, 4, 3, and 2. So the Massachusetts is disabled and will be forced to return to the nearest friendly port.
G. Vizcaya also is a 3 attack plus one for Cervera for 4 dice. The roll is two sixes and two fives. Rolling two dice for the two 6 hits produces a 3 and a 2 for a total of 5 damage. This is equal to Brooklyn's defense, but not over it, so it survives, but only barely. And it will be returned to the nearest friendly port at the end of the combat round due to either of the 5 rolls for a disabled.
H. Oquendo rolls 2 attack dice and gets two ones, for no results.
I. Galicia rolls one attack die for a one result so also scores no hits. This ends the first combat round.
J. For the leaders in this round of combat, the Massachusetts was disabled but took no damage so no die roll is needed for Schley, he just returns to port with his ship. However M Teresa was sunk, so Cervera is considered killed and is removed from play, along with his ship. The disabled Spanish ships are moved to San Jan and the disabled US ships are moved to Key West.
K. As one Spanish unit remains, the Oquendo, there is not disengagement by gunfire. Since Oquendo is not faster than all of the US units, it cannot disengage by speed, so another round of combat is needed. With only one unit, all US units fire at the Oquendo, for seven attack dice while reforming the US battle line has the Oquendo fire on the Texas with 2 dice. Oquendo rolls a 2 and a 3 for no hit results. The US units roll two sixes, two fours, two twos, and a one. The two sixes are rolled again for damage and get a five and a six, totaling eleven damage. Oquendo's defense is only four, so it is sunk, ending combat for the Puerto Rico Passage sea area.
K. In the Gulf of Mexico sea area Sampson's squadron has nine units plus his 3 stars and gets a die roll of 2 for a total of 14 in initiative value. This easily wins over the two unit squadron of Spanish ships that sortied out of Havana which adds a die roll of 5 to its two units for a 7. Crossing the US using the Initiative column for Coaling with the Spanish using the Sortie line produces a range of 1-2 for the engagement roll. The US side, having the initiative, rolls and gets a six, so the squadrons never find each other. This ends combat for the turn.
18.2.7 Area Control and VP Phase
For area control, Spain controls the South Atlantic sea area or a single VP. The US controls the East Coast sea area, but it earns no points. However, control of the Bahamas sea area earns the US one point and US control of the Puerto Rico Passage earns another. So, after area control Spain is at +2 VPs. However, Spain has lost two CA type units for a US VP for each. Plus, Cervera was killed which earns the US two more VP to leave the US ahead at +2 VPs at the end of the second turn.
18.2.8 Repair Phase
Finally damage is repaired. Vizcaya in San Juan has one damage point removed, leaving one damage point remaining. Brooklyn in Key West has one damage point removed, which leaves four damage points remaining. This ends the second turn.