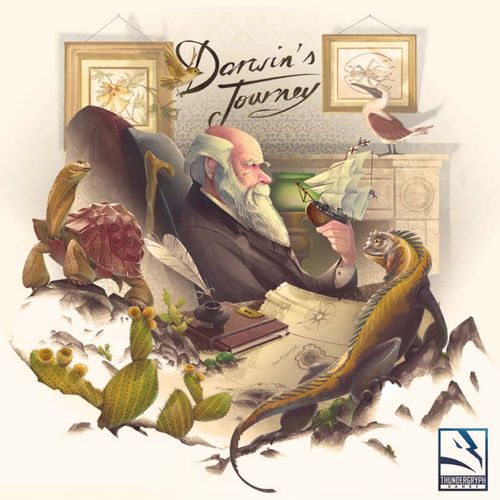
Darwin's Journey
Darwin's Journey Rulebook
Table of Contents
Table of Contents
Overview
Darwin's Journey is a worker placement game where players recall Charles Darwin's memories of his adventures through the Galapagos Islands, where he developed his theory of evolution.
With an innovative worker progression system, each worker studies the disciplines required to perform many actions in the game, such as island exploration, ocean navigation, and correspondence. Throughout the game, players gather specimens from the land and sea to facilitate further scientific research. These specimens are then delivered to museums to contribute to humanity's knowledge of biology.
The game lasts five rounds; in each round, the players work toward numerous short- and long-term objectives. At the end of the game, the player with the most victory points will be the winner.
Components
General components: 1 Main Board, 16 Crew Cards, 56 Regular Wax Seals (14 per type: yellow, red, blue, green), 16 Temporary Knowledge tokens, 12 Special Wax Seals (purple), 16 Museum Tiles, 16 Specimen Tokens, 30 Research Tokens, 2 Neutral Lens Tokens, 40 Coins (28 value 1, 12 value 5), 12 Beagle Goal Tiles, 12 Special Action Tiles, 8 Correspondence Tiles, 1 HMS Beagle Token, 1 2-player Turn Order Action Token, 8 Starting Objective Tiles (4 silver, 4 golden), 20 Objective Tiles (10 silver, 10 golden), 1 Player AID.
Player components (x4): 1 Personal Board, 3 Explorers, 5 Workers, 4 Cubes, 5 Tents, 1 Ship, 6 Personal Lens Tokens, 12 Stamps.
Solo components: 4 Alfred Boards (backside of Personal Boards), 8 Alfred Action Cards, 8 Alfred Bonus Track Cards (2 for each board).
Setup
Main Board
- Place the main board with the side corresponding to the number of players face up. One side of the board is for one-, two- and three-player games, while the other side is for four-player games.
- Shuffle the 12 Special Action tiles, then draw 6 and place them face up on the corresponding Diary. Place the unused Special Action tiles back into the box. (For your first game, instead of choosing random tiles, place these tiles in order — Top row: 7 & 8; Middle row: 1 & 9; Bottom row: 5 & 12.)
- Place the 2 neutral Lens tokens on the two top-most Special Action tiles.
- Shuffle the 8 Correspondence tiles and randomly choose 3 to be placed face up on the associated envelope locations on the main board. Place the other Correspondence tiles back into the box. (For your first game, place Correspondence tiles 2, 4, and 5, starting from the top and going to the bottom.)
- Remove seals as indicated and place them back into the box: 2-player game only — remove 2 Regular Wax Seals per color; 3-player game only — remove 1 Regular Wax Seal per color. Then place all Regular Wax Seals (green, blue, yellow & red) into a face-down shuffled pile near the board.
- Randomly place a Regular Wax Seal face up onto each of the 12 Wax Seal spots located on the 4 Scrolls on the main board.
- Place all Special Wax Seals (purple) in a face-up pile on the silver plate on the main board.
- Place the 8 Starting Objective tiles off to the side; they will be assigned during the player setup steps before the game starts.
- Shuffle the silver and golden Objective tiles separately and place these stacks face-down onto the matching location on the main board. Draw 2 silver and 2 golden Objective tiles and place them face up below the stacks.
- Place the 16 Museum tiles beside the main board, replicating the order shown in the Museum display of the main board.
- Place one Coin to the right of each row of the Museum display.
- Place one cube of each player color on the red book at the start of the victory point track. These cubes are referred to as victory point markers.
- Place one cube of each player color onto the large book at the start of the Theory of Evolution track. These cubes are referred to as Evolution markers.
Player Setup
- Each player places in front of them the following items that match their player color: 1 Personal Board, 2 remaining Explorers, 5 Workers, 5 Tents, 6 Personal Lens Tokens, 1 Cube, 12 Stamps.
- Place 4 workers onto worker spots on the bottom left of the personal board. The 5th worker will only enter play once the left-most golden Objective is achieved.
- Place the 5 Tents onto the Tent locations in the bottom right area of the personal board.
- Make three stacks of 4 Stamps each and place one stack onto each associated Stamp location in the bottom right area of the personal board.
- Take 4 Coins from the supply.
- Take 1 Temporary Knowledge token from the supply.
Gaining Crew Cards & Starting Objectives
Each player gains 3 Crew cards by following one of two methods.
Option 1: First Play Setup — Search through the Crew card deck and give players the cards indicated. The Turn Order track shows the order, from left to right, that players will gain these cards: 1st player — Crew cards 1, 2, and 3; 2nd player — Crew cards 4, 5, and 6; 3rd player — Crew cards 7, 8, and 9; 4th player — Crew cards 10, 11, and 12. Players reveal their 3 chosen Crew cards and place them face up next to their personal board. Players take the corresponding Regular Wax Seals, shown in the top right corner of each Crew card, from the Wax Seals supply. Reshuffle the Regular Wax Seal stack after all necessary Wax Seals have been taken. These are placed onto the left-most empty Wax Seal spots next to each worker so that each worker starts the game with one Wax Seal next to them.
Option 2: Standard Setup — Shuffle the deck of Crew cards and deal 4 cards to each player. Each player selects one card to keep and places it face down in front of them. Players pass the remaining cards to their left. This process repeats until each player has three cards face down in front of them. Place all cards not chosen during the draft, along with the rest of the Crew card deck, back in the box. Players reveal their 3 chosen Crew cards and place them face up next to their personal board. Players take the corresponding Regular Wax Seals (as above) and place them next to each worker.
Drafting Starting Personal Objective Tiles — Each player begins with 2 Starting Objective tiles (1 silver and 1 golden). Sort the Starting Objective tiles into two stacks based on their color (silver or golden) and shuffle each stack separately. Place a row of Starting Objectives from the silver stack, face up, equal in count to the number of players. Place a second row from the golden stack, each directly under one face-up silver Objective. Each set of silver and golden Objective tiles next to each other is considered a pair that cannot be separated during setup. The player whose Turn Order marker is farthest to the right drafts one pair, placing the tiles on the right-hand side of that player's personal board, next to the Objective rows. Continuing left on the Turn Order track, each player selects a pair.
Playing the Game
Game Overview
Darwin's Journey consists of five rounds with four phases each: Action, Turn Order, Reward, and Cleanup. During the Action Phase, players send their workers to a wide variety of locations across the Galapagos Islands, where they explore and conduct research. During the Turn Order Phase, player turn order is adjusted based on who sent workers to the turn order location during the Action Phase. During the Reward Phase, players receive benefits based on their correspondence with the scientific community and their progress toward the current Beagle goal. Finally, during the Cleanup Phase, players prepare the game for the start of the next round or proceed to final scoring after all five rounds have been completed.
Key Concepts
- Each time a player activates an action icon, they perform that action immediately.
- Players are allowed to use anything gained from one action to pay the costs of following actions within the same turn.
- Players may achieve Objective tiles or Crew cards at any point during the Action or Reward Phases to immediately gain the associated actions as a reward. Because of this, players might be able to perform actions when it is not currently the Action Phase.
- Whenever a player performs an action with, or covers up, a Coin with a red number on it, they must pay the indicated number of Coins to the supply.
Worker Placement
Diary Sections
On the main board, there are 4 Diaries (2 Main, 1 Special Action, and 1 Small). Each Diary contains one or two Diary Sections, depending on the number of players. A red bookmark in the middle of the Diary divides it into two Diary Sections. All worker placement locations on the left side of the bookmark are considered a separate Diary Section from the locations on the right. If the Diary does not have a bookmark, the entire Diary is one single Diary Section. The Small Diary is always a single Diary Section, regardless of the player count.
Placement Penalties
There is no additional cost for placing the first worker, regardless of color, into a single Diary Section. If a Diary Section already has 1 or more workers of any color (including the active player's), the active player must pay Coins to the supply as a placement penalty. The number of Coins spent depends on player count, and the cost is always the same no matter how many workers are in the Diary Section: Two players — 3 Coins; Three or four players — 2 Coins.
Worker Placement Locations
There are three types of worker placement locations, each with a different shape.
Circular Magnifying Glass — These only appear within Diary Sections. Any number of workers may be placed on a circular Magnifying Glass, including multiple workers from a single player. Players must pay a placement penalty if their worker is not the first one placed within that Diary Section.
Square or Rectangular Magnifying Glass — Any number of workers may be placed on a square or rectangular Magnifying Glass, including multiple workers from a single player. There is never a placement penalty for placing workers onto these locations, no matter how many workers are already there.
Unlocked Lenses — Lens action locations can be printed on the main board, unlocked with neutral Lens tokens during setup, and unlocked with player-specific Personal Lens tokens. Only one worker may be placed on an unlocked Lens. Players must pay a placement penalty if their worker is not the first one placed within that Diary Section. Whenever a player places a worker onto a Lens token that matches an opponent's color, that opponent gains 1 Coin from the supply. Players do not gain a Coin for placing a worker onto their own Lens token.
Wax Seal Requirements
Many placement locations have Wax Seal requirements that must be met to place a specific worker there. Each player starts the game with four workers on their personal board, and each worker starts with one Wax Seal in their corresponding row. Each player's fifth worker will never have any Wax Seals next to it and can be unlocked using an Objective.
The top worker has a Special Wax Seal (purple) and no empty Wax Seal spots, while the other 3 workers have the Wax Seal gained during setup and five empty Wax Seal spots that can be covered with tokens during the game. Regular Wax Seals come in four colors (green, blue, yellow, and red) and are associated with specific requirements on the main board. Special Wax Seals (purple) are treated as if they were any color.
A worker may only go to a location if that specific worker has at least the corresponding number of Wax Seals of the indicated colors on its row of that player's personal board. If a worker placement location requires more than one Wax Seal of a specific color, the Wax Seal icon will have a number next to it. Wax Seals are never removed once they are placed in a worker row.
Each player starts the game with a single Temporary Knowledge token next to their personal board. These tokens may be spent back to the supply while placing a worker to act as any color Wax Seal to meet the location's Wax Seal requirements.
Perform Location Actions
After placing a worker and paying any Coin penalties, the active player may perform all actions at that location. Each action is designated by an icon. If a worker placement location has multiple action icons, the player may perform the actions in any order. The player is not required to complete all actions. Any benefits gained from an action may be used to pay for other actions during that player's turn.
Round Structure
Each of the game's five rounds consists of four phases completed in order.
Action Phase
On each player's turn, they must place a single worker from their personal board onto a location on the main board. If a player no longer has any available workers, they must pass, and they take no more turns for the rest of the phase.
Players take turns placing workers in the order indicated by the Turn Order track. The player whose marker is in the left-most location on the Turn Order track places 1 worker and performs the location's actions in any order of their choice. Then the player whose marker is 2nd-left-most takes their turn. Continue from left to right until all players have placed 1 worker. Once every player has placed their first worker, repeat the order until all workers have been placed.
The game has a variety of different actions organized into four types: Board Actions, Special Actions, Crew Actions, and Objective Actions. Many actions also have a modifier icon in their top right corner affecting how the associated action is performed.
Modifier Icons
- Number (e.g. "2"): Indicates the number of times the associated action may be performed on this turn.
- Discount (e.g. "-2"): Represents a total discount for that particular action.
- X: You won't pay any Coins to perform all steps of that particular action.
- Repeat (circular arrows): Perform the indicated previously played action once again.
- Infinity: The associated effect is applied for the rest of the game.
- Arrow to bar: This action is gained once the game is over, during final scoring.
- Lightning bolt: Immediately perform this action or apply the bonus.
- Meeple: Collect the corresponding reward based on one of the islands containing an Explorer of your color.
Board Actions
These actions appear on the main board on worker placement locations or on various tracks on the map at the bottom of the board.
Gain Victory Points (also appears on Special Action tiles and Crew cards) — The active player gains the indicated number of victory points by moving their marker up the victory point track. If they now have more than 50 points, they place a marker of their color on the "50" icon in the top right corner of the main board (this is the cube placed next to their personal board during setup). This new marker is moved to the right whenever the player crosses the "0" points space on the track again. Place the original marker back on the "0" space and continue using it to track additional points gained. (There are +50, +100, +150, and +200 book tokens.)
Gain Coins (also appears on Special Action tiles and Crew cards) — The active player gains the indicated number of Coins from the supply.
Unlock Lens Location — The active player may place 1 personal Lens token onto a locked location on any Main or Special Action Diary. Every locked location shows a Coin penalty that must be paid before the personal Lens token can be placed on it. This action is usually performed after placing a worker onto the Small Diary and thus has a placement penalty if another worker has already visited the same Diary Section. As a special unlocking bonus, the active player may immediately perform all associated actions with this location without placing a worker and ignoring all Wax Seal requirements. This location is now unlocked for the rest of the game, and any player may place a worker onto it during their turn, if available. On each page of the Main Action Diaries, all actions must be unlocked in order (from top to bottom). If a player places a worker onto a personal Lens token of an opponent's color, that opponent gains 1 Coin from the supply; players do not gain a Coin when placing a worker on a Lens token of their own color.
Academy — The active player may purchase one Wax Seal from any Scroll in the Academy. If there is a Coin penalty associated with the Scroll row where the Wax Seal was taken, those Coins must be paid to the supply. The player adds the new Wax Seal to the left-most empty Wax Seal spot on any worker's row on their personal board. If the Wax Seal is placed on a spot with a Coin penalty, those Coins must be paid to the supply. Once a worker gains its 4th and 6th Wax Seal, it will also gain the benefits of the silver and golden distinctions, respectively. These will give extra options and/or discounts to the actions performed by that worker.
Navigation — The active player may move their Ship along the Ocean track up to the number of spaces associated with the value shown in the top right corner of the icon. Any number of Ships, including the HMS Beagle, can be on the same location at the same time. When a Ship crosses a silver banner on the Ocean track, the active player must place an Explorer onto a new island. Each island has a starting location marked with an Explorer icon matching the icons on the silver banners on the Ocean track. The active player places an Explorer from their personal area onto the corresponding island starting space. Any number of Explorers may be on the starting location of an island at the same time. If there is an action icon where the Ship stopped, the active player may perform the indicated action. The first player to place a Ship onto the final location of the Ocean track gains 3 additional victory points. There is no effect associated with stopping on a Beagle space.
Exploration — The active player may move a single Explorer of their color along a corresponding Island track up to the number of spots associated with the action being performed. Any spot occupied by an opponent's Explorer is skipped and does not count towards the total movement amount. Only one Explorer can be on each location, except for the first and last spot on each Island track — any number of Explorers can stop at these locations. The first Explorer to cross over a golden ribbon on the Island track will gain the active player victory points equal to the number on the ribbon's icon (only the first Explorer to cross a golden ribbon will award these points). After moving their Explorer, the player immediately performs the indicated action shown on the location where the Explorer stopped. The first player to place an Explorer onto the final location of the Island track gains 3 additional victory points.
Research Galapagos Specimen — These actions appear on Specimen tokens that are placed on Island and Ocean tracks. The active player may place a Research token onto the matching Specimen icon on their personal board.
Theory of Evolution Track Advancement — The active player moves their Evolution marker forward on the Theory of Evolution track as many individual spaces as the number shown in the activated action icon. Some spaces on the track contain Book Multiplier icons that only have an effect during final scoring.
Establish Campsite — This action may only be performed if there is an empty Tent location next to the activated icon. The active player removes the top-most Tent from their personal board and places it onto an empty Tent location next to the action icon. If the location has a Coin penalty, the player must pay the number of Coins to place the Tent. The active player may perform any additional actions indicated by the icons shown in the location where they just placed their Tent. After performing the "Establish Campsite" action, the player may perform action icons next to the location where a Tent token was removed (on their personal board). Note that some personal board Tent actions have a slash between two options; the player may perform only one of these two actions.
Correspondence — The player may move Stamps from their personal board to a single Envelope on the main board. The action's icon indicates the number of Stamps that may be moved. The player may take the Stamps from any combination of stacks on their personal board, but they may only place them onto one Envelope. After the player has finished placing their Stamps onto the main board, if the final Stamp was removed from one or more stacks, the player may perform any of the actions associated with the depleted stack(s). Each Envelope represents bonus actions that can be performed during the Reward Phase by the players with the most and second-most Stamps placed there. During the Reward Phase, some Stamps might be discarded to the used Stamps tray next to the Envelopes. When performing a Correspondence action, if there are not enough Stamps in the player's personal board stacks, the active player may take Stamps of their color from the used Stamps tray until they have enough Stamps to perform the action.
Deliver Specimen — The active player may deliver one Specimen to the Museum if that Specimen's matching Museum tile is not already in the Museum display. The player may only deliver a Specimen if they have a Research token placed on it on their personal board. The player takes the matching Museum tile, which was set aside during setup, and places it on the corresponding location for that Specimen on the Museum display. If this is the first Museum tile placed into a row (excluding Specimens placed during setup), the active player takes the Coin next to that row. If this was the last Museum tile placed into a row, the active player may move their Evolution marker one space forward on the Theory of Evolution track. The active player gains Coins and Evolution marker advancements based on the Specimen token's position in the Museum. They must consider each space in the row and column when placing the Museum tile, as each will give them a benefit. For each empty space, they gain 1 Coin, and for each space that already has a Museum tile, they move their Evolution marker forward once on the Theory of Evolution track. The newly placed tile does not give a bonus action at this time. Note that you can deliver up to 2 Specimens when visiting the Museum — the first Specimen is free, and the second costs a penalty of 3 Coins. Players may use the Coins gained from delivering the first Specimen to pay for the delivery of the second Specimen.
Research Museum Specimen — The active player selects a Museum tile that is already on the Museum display on the main board. They may now place a Research token onto the matching Specimen icon on their personal board. Note that you can Research up to 2 Specimens when performing the Research Museum Specimen action — the first Specimen is free, and the second costs a penalty of 3 Coins.
Reserve Turn Order — The active player places their worker on the left-most empty spot within the rectangular magnifying glass above the Turn Order track. They then gain 2 Coins from the supply (3 Coins in a two-player game). The order of the workers within this spot will affect the turn order for the following round.
Gain Objective — The active player may take one available Objective tile from the main board's Objective display and place it face up in their reserve, next to their personal board to the right of the Objective rows. A maximum of 2 Objective tiles can be placed in a player's reserve. Both tiles may be of the same type (silver or golden). If there are already 2 Objective tiles in a player's reserve, the player must place the new Objective tile face up onto an empty Objective location of the matching type (silver or golden). If the location is marked with a Coin penalty icon, the cost must be paid to place the tile.
Special Actions & Crew Actions
Special Action tiles and Crew cards have a variety of action icons on them. Many depict board actions already explained. The following are new actions that appear on Special Action tiles and Crew cards:
- Establish Any Campsite — The active player may place a Tent onto any empty tent location on any Campsite and pay any corresponding Coin penalty. The location of their Explorers or ship does not affect this action. They then may perform any actions at that Campsite and any actions on their personal board next to where the Tent was removed.
- Repeat Delivery — The active player performs a "Deliver Specimen" action for a Specimen that has already been delivered to the Museum. The player must have a Research token for the associated Specimen on their personal board. This action is performed exactly as if they were placing the Museum tile for the first time, including the additional bonus if this token is the last one of the row to be delivered. If the selected Museum tile had previously been the first delivered to that row, the first-delivery bonus Coin is not taken when that delivery is repeated.
- Automatically Fulfill an Objective — The active player may immediately achieve any one of their Objectives. The player does not have to meet any of the Objective's requirements and can place it face down onto any open Objective location on their personal board. Any corresponding Coin penalties at the chosen location must be paid. The player then takes the associated Objective action as a reward.
- Gain Special Wax Seal (purple) — The active player takes a Special Wax Seal (purple) from the supply and places it on the left-most empty Wax Seal spot in one of the worker rows on their personal board without paying a Coin penalty. This Special Wax Seal acts as any color for the purposes of worker placement Seal requirements.
- Gain Temporary Knowledge — The active player gains one Temporary Knowledge token from the supply. These tokens may be spent back to the supply while placing a worker to act as any color Wax Seal to meet a location's Wax Seal requirements.
- Convert Temporary Knowledge — The active player may return one Temporary Knowledge token to the supply to gain 7 Coins or 7 victory points.
- Place Explorer — The active player may place one of their unused Explorers onto the starting location of any island where they do not already have an Explorer.
Distinctions
Once a worker gains its 4th Wax Seal, it obtains the silver distinction. Once it gains its 6th Wax Seal, it obtains the golden distinction. Each Diary Section has distinction bonuses, shown in a box at the top of that area, that are associated with silver and golden distinctions.
When a worker with the silver distinction is placed into a Diary area, the active player receives the bonus with the silver distinction icon:
- Extra Exploration — Add up to one movement to the associated Exploration action.
- Extra Navigation — Add up to one movement to the associated Navigation action.
- Extra Stamp — Add up to one more Stamp with this Correspondence action.
- Extra Wax Seal — Gain up to one more Wax Seal with this Academy action. Any scroll and/or personal board Coin penalties must be paid.
- Gain Coins — Gain two Coins from the supply.
When a worker with the golden distinction is placed into a Diary area, the active player receives the bonuses associated with both the silver and golden distinction icons. Golden distinction bonuses include:
- Extra Stop — While Exploring or Navigating, an Explorer or Ship can stop on its way to perform the indicated action before completing its movement. It then performs the action of its last stop as normal.
- Split Stamp Locations — Stamps placed with this Correspondence action may be placed onto multiple Envelopes instead of just one.
- Wax Seal Discount — Pay 1 fewer Coin for each Academy action. This discount may apply to the cost of taking a seal from the board or the cost of placing the seal on a personal board.
- Gain Victory Points — Immediately gain 3 victory points.
There are endgame victory points associated with a worker gaining its 5th and 6th Wax Seal. Players gain the victory points at the top of the column for each worker with a Wax Seal in that column. A worker with 5 Wax Seals will receive 3 victory points, while a worker with 6 Wax Seals will receive an additional 7 points, for a total of 10 victory points.
Achieving Objectives & Crew Cards
Each Objective tile and Crew card has specific fulfillment requirements listed on them. Players may fulfill Objective tiles and/or Crew cards in their personal area any time during their turn in the Action Phase or any time in the Reward Phase.
Objectives
Each Objective has a specific set of requirements that a player must meet to achieve that Objective. Note that players never have to spend anything to achieve an objective; they just have to meet all of the requirements.
When an Objective is achieved, the Objective tile is either flipped face down onto its location or moved from the player's reserve and placed face down on an empty Objective location of the matching color (silver or golden). If the tile is moved from the reserve and the chosen Objective location is marked with a Coin penalty icon, the cost must be paid to achieve the Objective. When an Objective is achieved, the player gains the reward associated with the location where the newly achieved Objective was placed. Note that all victory point rewards on the personal board are gained once the game is over. If a player fulfills both Objectives on the right-most silver and golden locations, they will be rewarded with 4 additional points during final scoring.
Objective Requirements
All symbols shown in the Objective Requirements without a number represent one single requirement of that type.
- Postmark / Stamp icon: The player must have the indicated number of empty Stamp stacks on their personal board.
- Specimen symbol: The player must have placed at least the indicated number of Research tokens onto Specimens with the matching Specimen symbol on their personal board.
- Specimen shape/color: The player must have placed at least the indicated number of Research tokens onto Specimens of the matching shape/color on their personal board.
- Book / Evolution: The player's Evolution marker must be on, or past, the indicated position on the Theory of Evolution track (this is the number of steps on the track, not the number of books achieved on the track).
- Tent: The player must have placed at least the indicated number of Tents onto Campsites.
- Lens: The player must have placed at least the indicated number of their personal Lens tokens to unlock actions.
- Ship/Anchor: The player's Ship must be at least on the same position, or farther, on the Ocean track as the HMS Beagle.
- Wax Seals: The player must have the indicated number of Regular Wax Seals of the indicated Wax Seal colors on their personal board. These Wax Seals do not have to be in the same row of their personal board. Special Wax Seals (purple) and Temporary Knowledge tokens may not be used to meet Wax Seal requirements on objectives.
Objective Actions
- Reactivate Tent: Select a previously placed Tent of that player's color and perform the associated actions as if the Tent had just been placed for the first time. No Coin penalties are paid with this re-activation.
- Academy Discount (infinity): The player no longer pays the Coin penalty for taking Wax Seals from any Scroll row in the Academy. They must still pay the Coin penalty associated with the Wax Seal placement on their personal board.
- Research Explorer Specimen: The active player places a Research token onto any Specimen on the player's personal board that matches any Specimen token found on an island with that player's Explorer.
- Book Multiplier: When scoring the Theory of Evolution track, the player adds 1 Book multiplier to the number of Book multipliers reached on the Track. This happens before scoring the Theory of Evolution track.
- Gain 5 victory points during final scoring.
- Paired Objective bonus: If the Objectives above and below this icon are achieved, gain 4 victory points during final scoring.
- Gain 8 victory points during final scoring.
- Gain Special Wax Seal (purple): The player immediately takes a Special Wax Seal (purple) from the supply and places it onto the left-most empty Wax Seal spot on one of the worker rows on their personal board. They do not have to pay any indicated Coin penalty for this placement.
- Unlock 5th Worker: The player may move their 5th worker from the side of the player's board onto this spot to unlock the worker. The player may use this worker in the current round if this is achieved during the Action Phase, and for the rest of the game. Wax Seals cannot be placed next to this worker, but Temporary Knowledge tokens may be spent to meet Wax Seal requirements.
Crew Cards
Crew cards have four areas of note: (1) The Regular Wax Seal that is assigned to a specific worker during setup; (2) Required minimum Wax Seals that a specific worker will have to accomplish to achieve the Crew card action; (3) Achieved Crew card action; (4) Crew card number used for rules reference and setup.
Each Crew card has a list of Wax Seals shown in the center row of the card. In order to achieve a Crew card, a player must have a worker with at least the indicated Wax Seals on its Wax Seal row (not necessarily in order). Only one accomplished Crew card can be assigned to a specific worker's row. Note that Special Wax Seals (purple) act as any color for the purpose of achieving Crew cards. Temporary Knowledge tokens, however, cannot be spent to fulfill a Crew card.
During the Action and Reward Phases, players may achieve their Crew cards by performing the actions on the bottom of the card and flipping the card over to denote that it has been accomplished. After flipping the card over, the player places it to the left of their personal board with the arrow pointing towards the worker used to achieve that card. The card is now associated with that worker, and that worker can no longer achieve Crew cards.
Turn Order Phase (Modify Turn Order)
If there are any workers on the Turn Order location, then the Turn Order track must be modified. The player whose worker is farthest to the left must move their Turn Order marker to the #1 location on the track. If there is more than one worker at this location, each player moves their Turn Order marker to match the relative position of the placed workers. Turn Order markers will only move in relation to others if a worker is placed. If no workers are placed on this location, then the turn order will not change.
Reward Phase
Players gain rewards for Correspondence majorities and Beagle goals. These rewards are gained in the current turn order.
Correspondence Majorities
Three Envelopes give benefits to players with the most and second most Stamps on each Envelope. These majorities are determined starting at the top envelope and moving down.
The player with the most Stamps on an Envelope may now perform all the actions shown in the first section of the associated Correspondence tile as their reward. If there is a tie, then all tied players may perform these actions in current turn order.
The player with the second-most Stamps on an Envelope may now perform all actions shown in the second section of the associated Correspondence tile as their reward. If there is a tie, then all tied players may perform these actions in current turn order. Note that if there is a tie for first-place, the second-place reward will still be performed.
Then, all players who performed an action as a majority reward must remove half their Stamps, rounding up, from the corresponding Envelope and put them into the used Stamps tray on the main board.
Score Beagle Goal Tile
The Beagle Goal tile, directly below the HMS Beagle's position on the Ocean track, is now scored. Each player gains the indicated number of victory points each time they meet the current goal's condition. The gained points may be reduced by penalties depending on the relative position of the players' Ships to the HMS Beagle.
Goal Conditions:
- Gain 4 victory points for each of the indicated Regular Wax Seals (red/yellow/blue/green) on the player's personal board. Do not score for Special Wax Seals (purple).
- Gain 6 victory points for each Research token of the indicated Specimen type on the player's personal board.
- Gain 5 victory points for each personal Lens token of the player's color on the main board.
- Gain 8 victory points for each empty Stamp stack on the player's personal board.
- Gain 4 victory points for each of the player's Wooden Tents on the main board.
- Gain 3 victory points for each achieved Objective.
Victory Points gained by scoring Beagle goals will be affected by the Lagging Penalties.
Lagging Penalties
If a player's Ship is behind the HMS Beagle on the Ocean track, the player's Beagle Goal points are reduced. Each victory point penalty between the player's Ship and the HMS Beagle reduces victory points gained by the indicated amount. This penalty will never bring the number of victory points gained from a Beagle Goal tile to less than zero. Once all players have scored the Beagle Goal tile, flip the scored tile face down.
Cleanup Phase
If it is the fifth round of the game, the Cleanup Phase is skipped, and players proceed to final scoring. Otherwise, the Cleanup Phase should be performed as follows:
- Move the HMS Beagle along the Ocean track to the next Beagle Goal position.
- All players return their workers back to their personal boards.
- Remove all of the remaining Objectives from the main board and draw 2 new silver and 2 new golden Objectives. Place them on their associated locations.
- Remove all Wax Seals on the top-most Scroll on the main board. Shift all remaining Wax Seals to the top-most positions until there are no empty Wax Seal locations above any Wax Seal token. Then draw new Wax Seals and fill all empty Wax Seal spots on the Scrolls.
Final Scoring
After the fifth round is complete, players proceed to final scoring, where they will gain all endgame victory points from their personal board, the Theory of Evolution track, leftover Coins, and leftover Temporary Knowledge tokens.
Personal Board Scoring
- Each achieved Objective awards the player endgame victory points. If a player achieved the right-most silver and golden Objectives on their personal board, they also gain the 4 victory points shown between those two locations.
- Each worker with 5 Wax Seals in their corresponding row awards the player 3 victory points. Each worker with 6 Wax Seals awards an additional 7 victory points for a total of 10 victory points gained from each worker's Wax Seals.
- If a player has placed all 5 Tents on Campsites, they receive 5 victory points.
Theory of Evolution Track Scoring
Before players can score this section, the universal Museum modifier must be calculated. This modifier equals 2 plus the number of Museum rows with all four Museum tiles placed on the board. The resulting number is the Museum modifier. Each player now multiplies the Museum modifier by the number of books the player reached or passed on the Theory of Evolution track. Players gain the resulting number of victory points. Note that when scoring the Theory of Evolution track, if a player has completed the relevant Objective, they add one Book Multiplier to the number of Book Multipliers reached in their Theory of Evolution track.
Coins & Temporary Knowledge
- Players gain 1 victory point for every complete set of 5 Coins they have left over.
- Players gain 1 victory point for each Temporary Knowledge token they have left over.
The player with the most victory points is the winner. If there is a tie, the player that has advanced their Evolution marker farthest on the Theory of Evolution track is the winner. If there is a further tie, the player with the most leftover Coins is the winner. If there is still a tie, players share the victory.
Darwin's Journey Solo Rules
Darwin's Journey can be played solo, where the player competes against an artificial opponent named Alfred.
Setup
Select Alfred's Difficulty — Each player board has an Alfred opponent on its opposite side. There are several difficulty levels of Alfred that can be chosen: White (Easy), Blue (Medium), Yellow (Advanced), Green (Advanced). Select an Alfred difficulty level and place the associated board nearby. Flip the unchosen boards over to their player sides and choose one for yourself. Gather all player pieces of your color and Alfred's color and place them next to their associated boards.
Main Board — Follow the Main Board Setup for a two-player game with these changes: (A) During step #2, only shuffle and reveal 4 Special Action tiles instead of 6, leaving the bottom row of the Special Action Diary empty. (B) During step #9, after shuffling the two Objective tile stacks, only place one silver and one golden Objective face up on the board. (C) Skip step #14 and instead place the 2-player Turn Order Action token on top of the Turn Order track. Place the marker corresponding to Alfred in the first position of the Turn Order track and your marker in the second position.
Player Setup — Follow the Player Setup instructions without any changes.
Gaining Crew Cards — (A) Shuffle the Crew cards, draw 5 cards, and place them face up. (B) Select 3 of these cards to keep and place the other 2 back in the box. (C) Take the corresponding Regular Wax Seals from the chosen Crew cards from the Wax Seals supply and place them onto the left-most empty Wax Seal spots next to their workers.
Drafting Starting Personal Objective Tiles — Follow the two-player instructions with this change: During step #4, select one of the available pairs and place the tiles on the right side of your personal board, and remove the other pair from the game.
Alfred Setup — Follow the standard Player Setup with these changes: (1) During step #1, ensure the personal board is showing the Alfred side; place Alfred's personal board directly above your own. (2) Find the 2 Alfred Bonus Track cards of Alfred's color; randomly place them above the two indicated spots on Alfred's Bonus track. (3) During step #2, place 4 of Alfred's workers onto the A, B, C, & D spots on Alfred's board; place Alfred's 5th worker onto the left-most space of the Bonus track. (4) Skip step #5 and place one Coin onto the indicated spot on Alfred's Coin Track. (5) Skip step #6 and instead shuffle the 8 Alfred Action cards and place them face down in a stack below your personal board.
General Gameplay
Turn Order — The game is played as if there were 2 players, which means the Placement Penalty will be 3 coins. During each round, Alfred always takes the first turn, alternating turns between Alfred and the Player until all workers have been played. The Turn Order Action area is replaced by the 2-player Turn Order Action token — when the active player places a worker there, the player gains 3 Coins instead of 2. There is no further effect from this action when playing solo, as Alfred is always the first to place a worker each round.
Alfred's Board Tracks — Alfred's board has two tracks, a Bonus track along the top and a Coin Track along the bottom.
Bonus Track — Whenever the Bonus action is activated, the worker on Alfred's Bonus track moves right by the number of spaces shown on the icon. Alfred gains the indicated victory points every time the bonus worker lands or surpasses the right-most spot of the track. When surpassing the right-most spot, the bonus worker loops back to the left-most spot. If the bonus worker surpasses or lands on the 5th or 10th spot on the Bonus track, Alfred performs the action on the Bonus Track card placed above that spot according to the current round number. If both the 5th and 10th spots are surpassed or landed on with one movement, both associated actions are performed in the order they were crossed.
Coin Track — Alfred's Coins are tracked using the Coin Track. When Alfred spends Coins, the Coin moves left an equal number of spaces; when Alfred gains Coins, the Coin moves right. Alfred can have a maximum of 12 Coins; each excess Coin gained instead moves Alfred's worker one space on the Bonus track. If Alfred spends their last Coin, place the Coin outside the track to indicate its value is 0.
Alfred Turn Structure
On each turn, Alfred sends one worker to a location on the main board or to the rest spot on Alfred's board.
Step 1: Draw Alfred Action Card — Before drawing a card, if both Alfred Action cards show a Delivery Action icon, reshuffle all Alfred Action cards to create a new deck. Draw the top card from Alfred's Action card deck and place it face up below your personal board. All cards drawn from Alfred's Action card deck must be displayed next to each other.
Step 2: Perform One Action — Each Alfred Action card has two or three different action options shown. Alfred will only perform one action per turn and will always attempt to perform the top-most option first. If there is no legal way for Alfred to perform that action, the next action is attempted. The bottom option on every Alfred Action card is a Rest action, which can always be legally performed.
All non-rest Alfred action options that are executed successfully place one of Alfred's workers onto a main board action space. Unless otherwise stated, Alfred performs these actions following the standard rules for players. Alfred's workers will never gain distinctions and will therefore never use the distinction effects shown on the main board.
- Rest Action — Place the bottom-most available worker onto any available hammock spot in the Rest action area of Alfred's board. Alfred then gains 7 Coins and moves the Bonus Track worker two spaces to the right.
- Main Diary Action — The Main Diary action shows a list of four descending letters corresponding to Alfred's workers. This list defines the priority order for selecting the worker to use, with the left-most letter being the highest priority. Alfred attempts to place the highest priority worker available on their personal board; if there is no legal way to place it onto a Main Diary, Alfred uses the next worker in the priority order. If no workers have legal placements, this action cannot be performed and Alfred attempts the next action option. (Main Diaries are the Diary Sections in the top-left and top-middle sections of the board, containing Exploration, Navigation, Correspondence, and Academy actions.) Each Main Diary placement space has Wax Seal color requirements that Alfred's selected worker must meet. Alfred must pay 3 Coins to place a worker into an occupied Diary Section; if Alfred cannot afford the Coin penalty, the worker cannot be placed there.
- Strongest Placement Location — Alfred will always try to place the worker on the strongest location possible, based on owned Wax Seals, unlocked locations, previously placed workers, and available Coins. The strongest location is the bottom-most unlocked, empty worker placement location (1 is stronger than 2, and 2 is stronger than 3) for which Alfred has at least one Wax Seal matching the requirements. If Alfred doesn't have enough Wax Seals to meet the strongest location's requirements, they can spend 3 Coins to add a Temporary Knowledge. Alfred must purchase as many Temporary Knowledge tokens as they can afford until they reach the requirements; if Alfred cannot reach the requirements, no Coins are spent, and Alfred chooses the next strongest location available.
- Priority Cost — When there are multiple locations available of equal strength, Alfred's worker goes to the location which requires they spend less coins for Temporary Knowledge.
- Priority Color — When there are multiple available locations of equal strength and requirements/cost, Alfred's worker goes to the location associated with the worker's left-most matching Wax Seal.
Action Differences:
- Gain Objective — When Alfred activates this action, they discard one Objective from the main board, if possible. If there are multiple Objectives, the golden Objective is discarded. Alfred then moves the Bonus worker forward on the Bonus track (the Bonus worker always moves, even if no Objective was discarded).
- Gain Temporary Knowledge Token — Alfred never takes Temporary Knowledge tokens from the supply. Instead, they gain 3 Coins for each token they would have gained.
- Academy — Each of Alfred's worker rows has a bracket between two Wax Seal spots. When Alfred takes a new seal, they place it in the top-most worker row with at least one empty Wax Seal spot to the left of its bracket. If there are no empty spots to the left of any bracket, Alfred places the seal in the top-most worker row with at least one empty spot to the right of its bracket. Alfred always takes a Wax Seal from the cheapest Academy Scroll (unless the action indicates no Coins are spent). Alfred will never place a 4th Wax Seal of the same color within a row. If they cannot afford the scroll to gain a different color, or if none is available, this action cannot be performed. If there are multiple Wax Seals to choose from: (1) Alfred takes the Wax Seal matching the color of the selected worker's left-most seal, unless that worker already has three Wax Seals of that color; (2) Otherwise, Alfred takes the left-most Wax Seal. Alfred must pay the indicated Coins shown on the Academy Scroll. If the taken Wax Seal is placed on top of an action, the action is immediately performed.
- Correspondence — Alfred always takes Stamps from the top-most available stack of Stamps on their board. The Stamps are placed onto one letter with the following priority: (1) The top-most Envelope where placing the Stamps takes the Stamp majority away from the Player; (2) Otherwise, the top-most Envelope that currently doesn't have any of Alfred's Stamps; (3) If all three Envelopes have Alfred's Stamps, the new Stamps are placed on the Envelope with the least number of Alfred's Stamps (if multiple, the top-most). If Alfred removes the last Stamp from a stack with an icon next to it, that icon's effect becomes active.
- Navigation — Alfred's Ship moves the full distance indicated on the Navigation action icon. If there are multiple path options, the Ship takes the longest route. After advancing, the Ship performs every action that it sailed through or landed on. If Alfred's Ship passes a silver banner, one of their Explorers is placed on the starting location of the associated island, as in the multiplayer game.
Step 3: End of Turn — Once Alfred has performed all actions associated with their worker placement, their turn is over, and the Player can now take their turn.
Solo Phases
Turn Order Phase — This phase is ignored when playing against Alfred because Alfred always goes first in each round.
Reward Phase — Alfred and the Player score the Correspondence Envelopes in the same way as the multi-player rules. The Player scores for the HMS Beagle tile as in the base game, but Alfred ignores this tile. Instead, Alfred gains points equal to the value shown on their personal board multiplied by the current round number. Then subtract all lagging penalties between their Ship and the HMS Beagle from the multiplied total.
Cleanup — Perform the standard Cleanup Phase, but only place one new silver and one new golden Objective into the Objectives action area. Slide the bottom rows of the two Bonus Track cards under Alfred's board so that the lowest visible row matches the next round's number.
Endgame Scoring — The Player and Alfred both gain endgame points according to the multi-player rules. The Player wins if they have a higher final score than Alfred. If there is a tie, the Player wins if their Theory of Evolution track marker is farther than Alfred's marker. If there is still a tie, the Player wins if they have more leftover Coins than Alfred. If there is still a tie, Alfred wins.