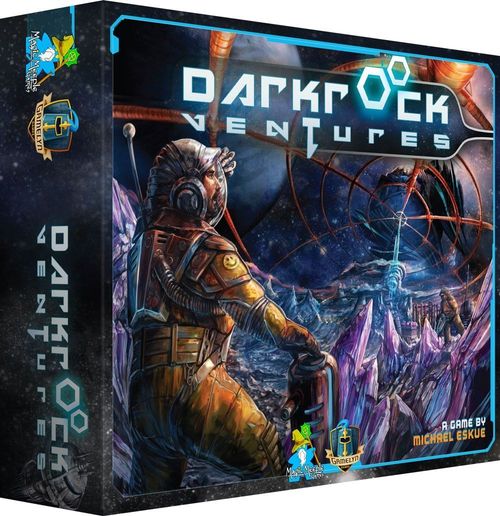
Darkrock Ventures
Darkrock Ventures Rulebook
Table of Contents
Table of Contents
Components
- 1 Game Board (14"x14")
- 1 Leader/Quick-Reference Tile
- 5 Ship boards (1 for each player color)
- 2 Standard Mining dice (frosted)
- 1 Neutronium die (black w/ red pips)
- 15 Rig dice (3 for each player color)
- 20 Crewmember Meeples (4 for each player color)
- 5 Captain Meeples (1 for each player color)
- 24 Metal Resource tokens
- 6 Platinum (white octagons)
- 8 Cobalt (blue hexagons)
- 10 Iron (orange squares)
- 6 Solar Energy tokens (yellow flames)
- 6 Neutronium tokens (red hexagon-rings)
- 5 Cargo Hold (Lock) tokens (1 for each player color)
- 5 Credit tokens (1 for each player color, $ shaped)
- 14 Therion Marauder cards (optional)
- 12 Corporate Sponsor cards (optional)
- 15 Research cards (optional)
The following components (17-19) are only used with the Cooperative Mini-Expansion (pg. 15)
- 10 Damage tokens (10 orange starbursts)
- 5 Disintegration tokens (5 black starbursts)
- 1 Neutronium Track board
Objective
Use your Crewmembers to collect the most Credits by mining and exporting resources from the asteroid Amelia's Jewel. Crewmembers may be assigned to Stations to mine the asteroid directly or to help provide bonuses and upgrades from support satellites. The game ends after three of the six Mining Stations on the asteroid have been depleted. The player with the most Credits at the end of the game is the winner.
Standard Game Setup
One of the great features of Darkrock Ventures is its built-in versatility to accommodate many different play experiences. In the following sections, you will see how to set up the standard game as well as optional items that you can choose to include or omit to suit the experience you're in the mood for. Need a shorter game or want to teach a new player? Try removing the Therion Marauders, Research, or Corporate Sponsors cards. Want tons of rich decision-making and a satisfying conflict? Include everything! Once you've mastered the standard game, there are entirely new play variants at the end of this rulebook to explore if you're thirsty for an even bigger challenge!
Game Board Setup
Place the tokens for Metal resources (Iron, Cobalt, Platinum), Solar Energy, and Neutronium in the appropriate locations on the board.
| Resource | Shape | Location | Quantity | Value |
|---|---|---|---|---|
| Platinum (octagon, white) | Mining Stations [2] and [12] | 3 units each, 6 total | $8 | |
| Cobalt (hexagon, blue) | Mining Stations [4] and [10] | 4 units each, 8 total | $6 | |
| Iron (square, orange) | Mining Stations [6] and [8] | 5 units each, 10 total | $4 | |
| Solar Energy (flare, yellow) | Solar Array at bottom of board | 6 units total | $3 | |
| Neutronium (hexagon-ring, red) | Neutronium zone at top of board | 6 units total | $1 |
-
OPTIONAL - If you are playing with the Therion Marauders option, shuffle the Therion Marauders deck and place it face-down next to the board.
-
OPTIONAL - If you are playing with the Corporate Sponsor option, shuffle the Corporate Sponsor deck and deal 2 cards face-down to each player. Each player chooses one to keep and discards the other. Players will use the starting quantity of Crewmembers, Captain, Rig dice, Cargo Hold slots, and Credits listed on their chosen Corporate Sponsor card instead of the standard starting values for these during Player Ship Setup.
-
OPTIONAL - If you are playing with the Research Deck option, shuffle the Research deck and deal 3 cards in a row face-up next to the board. Place the remaining cards in a face-down pile at the end of the row. Take note of the hexagon on the back of the Research Deck, this is a Station where Crewmembers may be assigned during the game.
-
Place each player's Credit-tracker token ($-shaped) on the Credits track at $2. If a different number is indicated on your Corporate Sponsor card, use that Starting Credit value instead.
TIP: Your remaining Credits will be your victory points at the end of the game. Spend them wisely!
- Choose a starting player to begin the game as the Leader. You may use the dice or any other method you like for determining a starting player. Give the starting player the Leader Tile, the 2 Standard Mining dice (clear), and the Neutronium die (black).
Player Ship Setup
-
Place 3 of your Crewmembers (small meeples) in the appropriate location on your Ship board. If a different number is listed on your Corporate Sponsor card, or if your Corporate Sponsor card immediately recruits your Captain (large meeple symbol), place those instead.
-
Place 1 of your colored Rig dice in the appropriate location on your Ship board. If a different number is listed on your Corporate Sponsor card, place that many Rig dice instead.
-
Place 1 Cargo Lock token on your Ship board in the leftmost space of the Cargo Hold with a lock, indicating that each ship may hold up to 3 units of cargo at the start of the game. If a different location is listed on your Corporate Sponsor card, use that location instead.
-
Place your remaining Crewmembers, Captain, and Rig Dice off to the side of the board within reach. You may unlock additional Crewmembers or your Captain at the Recruit Station during the course of the game. You will automatically unlock your second Rig die for use during any Round you begin with $10 or more, and your third Rig die on any Round you begin with $20 or more.
Round Sequence
A game of Darkrock Ventures is played in a series of Rounds. Each Round consists of five Phases which are described in detail below. The Leader Tile also lists the five Phases for easy reference. They are:
- Roll Standard Mining Dice
- Assign Crewmembers
- Roll Neutronium Die
- Resolve Therion Marauders
- Resolve Crewmembers
Phase 1: Roll Standard Mining Dice
The Leader rolls the two clear Standard Mining Dice and places them in the center of the board. If doubles are rolled, so that the two dice show the same result, reroll one of them until they no longer show the same result.
[If you are using the Therion Marauders option]: Therion Marauders will be alerted to your presence in the quadrant once any player has begun exporting resources from Amelia's Jewel. Beginning with the round after any Export Station is first used to export at least one resource for credit(s), a Therion Marauders card will be resolved during Phase 4 of every round. If a Therion Marauder card will be resolved in the current round because of this, and if doubles were rolled on the Standard Mining dice during the current phase, reveal the top card of the Therion Marauders deck now. Your long-range scanners have detected an attack in advance!
TIP: This allows players to know where the alien attack will occur later this round and provides an opportunity to plan accordingly.
Phase 2: Assign Crewmembers
Each Station around Amelia's Jewel has a different effect. The round Stations on the surface of the asteroid are Mining Stations where Crewmembers can collect resource tokens. Various support satellites orbiting the asteroid contain additional groups of hexagonal Stations where Crewmembers can activate bonuses or purchase upgrades. In addition, some Stations allow you to negotiate specific benefits from the Darkrock Ventures Deep-Space Mining Consortium which you can exploit to your advantage. The Darkrock Ventures Deep-Space Mining Consortium has already established a half-dozen Mining Stations and another half-dozen support satellites with over a dozen different auxiliary Stations to support your efforts to harvest the resources of Amelia's Jewel.
(More detailed information about all of the Stations can be found on page 10)
Mining Stations have been set up where site surveys have identified very valuable deposits of Iron, Cobalt, and Platinum. Extremely large quantities of the newly discovered element "Neutronium" have also been detected in the outer layers of Amelia's Jewel, indicating that it should also be very easy to extract here.
The Gear Satellite provides special equipment which allows your mining crew to recalibrate their Rig Dice after they have been rolled. Use the Rough Imaging Station, Precision Imaging Station, Vortex Drill Station, and Rover Station here to modify the results of your Rig Dice or relocate Crewmembers to improve your chance of collecting resources from Mining Stations.
The Rig Satellite offers temporary upgrades your mining rigs. Use the Rig Rental Station, Rig Modification Station, and Rig Reboot Station here to temporarily gain additional Rig dice or modify their behavior.
The Crew Satellite helps to manage all of your human(oid) resource needs! Use the Recruit Station, Release Station, and Subcontract Station to hire additional Crewmembers, fire unnecessary ones, or assign them to day-labor for some quick extra income.
The Cargo Hold Satellite recognizes that not every Ship comes standard with third row seats and extra trunk space. Use the Cargo Hold+ Station and Cargo Hold++ Station to permanently increase your Ship's cargo capacity.
The Export Satellite is the reason you're here - exchanging precious resources for large quantities of money. Use Export Station #1, Export Station #2, or Export Station #3 to send your hard-earned resources back to the Consortium for cash.
Solar Array - In the not-so-distant future, solar power has finally been adopted as a primary energy resource and has become mission-critical for mining expeditions such as yours. Use the Solar Array Station to collect it for export.
Research Lab [If you are using the Research Deck option] - As much as there is for the Mining crews to do here, there is plenty to keep the scientists busy as well. Use the Research Station to discover powerful ongoing upgrades.
Starting with the Leader and proceeding clockwise, players take turns each assigning one of their Crewmembers from their Ship to a Station until all Crewmembers from all Ships have been assigned, according to the following placement rules:
Since Crewmembers are resolved individually in Phase 5, you may assign multiple Crewmembers (one at a time) to the same Station in a single round to gain its benefit multiple times.
Unless you are assigning your Captain or using the effect of the Delegate Station, you may only assign Crewmembers to Stations which are unoccupied or to which you have already assigned at least one of your Crewmembers this round.
Once you have recruited your Captain (large meeple), it is assigned the same way as other Crewmembers (small meeples). However, the Captain may be assigned to a Station that is already occupied by another player's Crewmember. Additionally, once you assign your Captain to a Station, no further Crewmembers can be assigned there unless the player has already assigned at least one Crewmember there this round.
TIP: Your Captain may activate the benefit of its Station up to two times during Phase 5, as if it was two Crewmembers.
When you assign a Crewmember to the Delegate Station, you must immediately assign one additional Crewmember from your Ship to any Station that is already occupied by another player's Crewmember. If you do not have another Crewmember available to place, you may not use the Delegate Station. The Delegate Station cannot be used to assign a Crewmember to a Station occupied by another player's Captain. The second Crewmember will be resolved normally in phase 5, but the Crewmember assigned to Delegate Station has no further effect during Phase 5.
When you assign a Crewmember to the Leader Station, you must immediately take the Leader Tile from the current Leader. In addition, you may collect one unit of Neutronium from the board. You are now the Leader until another player assigns a Crewmember to the Leader Station. If you assign the Captain here, you may collect up to two units of Neutronium instead of one. The Leader Station has no further effect during Phase 5.
When you assign a Crewmember to the Solar Array Station, place it at "0" on the Solar Array track. Crewmembers cannot be assigned directly to any other spaces on the Solar Array track. As per normal, you cannot assign a Crewmember to the Solar Array Station if another player has already assigned a Crewmember here this turn. However, you may still assign a Crewmember to the Solar Array Station if the "0" space is unoccupied, even if another player's Crewmember is further along the Solar Array track.
TIP: Remember that when resolving Crewmembers during Phase 5, activating a Station's effect is optional. You may assign Crewmembers to Stations solely to attempt to prevent your competition from using that Station later this round. Just remember that players might still find other ways around you!
Phase 3: Roll Neutronium Die
Once all players have finished assigning their Crewmembers, the Leader rolls the Neutronium die (black) and places it in the center of the board. Take note, the Leader may be a different player now than it was at the beginning of the Round.
Phase 4 [If playing with this option]: Resolve Therion Marauders
In space, no one can hear you scream…but they can hear you digging loud and clear. The Therion Syndicate is an alien criminal organization that preys on any un-militarized operation they can find out in deep space. The Therion Syndicate will frequently send Marauders to disrupt your mining operations in hopes of delaying you long enough for their mothership to arrive and claim the resources of Amelia's Jewel for themselves. Don't worry though; the plentiful Neutronium contained within the Asteroid is an ideal power source for dome-mounted deflection shield systems. What's that? You don't have any Neutronium? You'd best flee…
Beginning with the round after any Export Station is first used to export at least one resource for credit(s), a Therion Marauders card will be resolved during Phase 4 of every round. If the top card of the Therion Marauders deck was not already revealed during Phase 1, reveal it now.
Starting with the Leader and proceeding clockwise, each player must individually check if they have any Crewmembers assigned to the Stations under attack and fully resolve the attack on their Crewmembers. If you have a Crewmember assigned to any of the Stations indicated on the revealed Therion Marauder card, you must immediately do one of the following:
A. Activate Shields: Spend 1 Metal, Solar Energy, or Neutronium resource to activate your deflection shields. This protects all of your Crewmembers for this round. Neutronium and Solar Energy resources are returned to the board when spent. Metal resources are removed from the game when spent. Resources spent this way are lost, and players do not receive any credits for them. Since each player's personal shields operate at different frequencies, each player who chooses to protect their Crewmembers from the attack must spend 1 resource, even if another player has activated shields at the same Station this round.
B. Flee: Remove all of your Crewmembers from the Stations indicated on the Therion Marauders card and return them to your Ship. These Crewmembers will not resolve any Station effects in Phase 5, but they may be reassigned next round.
IMPORTANT: If you have assigned a Crewmember to the Solar Array when it is under attack and you choose to Flee rather than Activate Shields, only Crewmembers on the "0" space at the start of the attack must be returned to your Ship. Move all other Crewmembers backwards on the track by one space.
TIP: Since players resolve the attack in clockwise order, you may find that your competition for a Station suddenly disappears. Conversely, you might be willing to sacrifice a resource and stick around if it will mean acting before your competition in Phase 5. It's a tough decision, but that's why you make the big credits.
TIP: Do not worry about when to reshuffle the Therion Marauders deck. There is a card in the deck which, when drawn, does not result in an attack for the current round and also prompts you to reshuffle the Therion Marauders discard pile back into the deck.
After all players have resolved the Therion Marauder attack, place the revealed card into the Therion Marauder discard pile and proceed with the next phase.
"Space dirt ain't worth dying for, kid. No shield, no payload. Just get out. The paperwork is a nightmare, anyway." – Captain Cremix, of the "Dark Star" deep-space mining vessel.
Phase 5: Resolve Crewmembers
Starting with the current Leader and proceeding clockwise, each player rolls their Rig dice and resolves all of their Crewmembers in any order they choose. Unlike Phase 2, in which each player took turns assigning one Crewmember at a time, in Phase 5 you will resolve all of your Crewmembers before the next player may begin to resolve theirs. When all players' Crewmembers have been resolved, the round is over.
Q: I started my turn with $9 and after resolving one of my Crewmembers I am now above $10. Can I immediately roll another Rig die and use it on this turn?
A: No. Players roll all available Rig dice at the very beginning of Phase 5, except those gained from the Rig Rental Station.
When you resolve a Crewmember, remove it from its current Station and return it to your Ship. Activating the effect of any Station when resolving a Crewmember is optional, but you must return it to your Ship regardless of whether or not you activated the Station's effect (unless it is on the Solar Array track).
Captains are resolved in the same way as Crewmembers, but you may activate the effect of their current Station up to two times instead of once. You do not have to resolve you Captain first, but when you do resolve your Captain you must decide whether to activate the Station's effect once, twice, or not at all; and you must return the Captain to your Ship before resolving any remaining Crewmembers.
Mining Stations
Your Rig dice represent the equipment you have available to attempt to gather resources from Amelia's Jewel. The Standard Mining dice and the Neutronium die represent the environmental and electrical power conditions around the asteroid at the moment. These conditions can vary wildly from round to round, sometimes enabling you to dig easily into the asteroid and sometimes leaving you struggling.
In order to successfully collect metal resources, you must pair any one of your Rig dice with one Standard Mining die or with the Neutronium die so that the sum of these two dice exactly matches the number on a Mining Station. You may then resolve a Crewmember located at that Mining Station to collect one unit of that Mining Station's remaining resources, or a Captain to collect up to two units. You may create pairs out of as many dice as you have available so long as each pair includes one Rig die of your own and one non-Rig die from the board. You may not use more than two dice to collect a single resource and each die may only be used to collect resources once per player per turn. Once there are no more resource tokens remaining at a Mining Station, it is depleted and you cannot collect resources from it even if you have a successful pair that matches its number.
TIP: Remember that the End of Game conditions will be triggered when three of the six Mining Stations have been depleted.
Q: I successfully paired dice totaling 10 and I have a Crewmember on Mining Station [10]. I should be able to collect a Cobalt resource cube, but there are no more resource cubes at Mining Station [10]. If there are still Cobalt cubes on Mining Station [4], can I just take one of those?
A: No. Once a Mining Site is depleted, it is depleted for the rest of the game. You may only collect resources from a Mining Station where you have a Crewmember.
During your turn, you may spend one unit of Neutronium from your Ship to reroll the Neutronium Die one time. You may do this before or after resolving each of your Crewmembers, as many times as you wish, as long as you spend one Neutronium for each reroll. The new result remains in effect until the next time a player spends Neutronium to reroll the Neutronium Die on their turn or until the end of the round.
When you collect a resource unit, you must immediately place it in an available slot in the cargo hold of your Ship. Each unlocked cargo hold slot can carry exactly one resource unit at a time. You cannot temporarily "hold-over" more resources than you can actually carry on your Ship, even if you could use or export the excess before the end of your turn. If you ever choose to collect a resource when you do not have any remaining cargo hold slots available, you must discard a resource token from one of your current cargo hold slots and replace it with the new resource. Iron, Cobalt, and Platinum are removed from the game when they are discarded and cannot be collected again. Neutronium and Solar Energy are renewable resources which are returned to the board when discarded, and can be collected over and over again.
If you have at least one Crewmember assigned to any Mining Station at the start of Phase 5 but are unable to collect any resources from any Mining Station (either because you are unable to successfully match a Mining Station's number or because a Mining Station was depleted before your turn), you may collect one unit of Neutronium for your efforts. Regardless of how many Crewmembers you had assigned to Mining Stations, you may only receive one unit of Neutronium per round this way.
TIP: Remember that you can resolve Crewmembers in any order. It will frequently be useful to resolve other Crewmembers at satellite Stations before resolving your Crewmembers at Mining Stations, either to modify your Rig dice or to free up space in your cargo hold.
Gear Satellite
Rough Imaging Station – Increase or decrease the value of one of your Rig dice by exactly three (not up to three), i.e. you may change a 2 into either a 5 or a -1; you may change a 5 into either a 2 or a 7. The resulting value of the affected die may be greater than 6 or less than 1. That is to say, to decrease a number below 1 does not loop it back around to 6, or vice-versa.
Precision Imaging Station – Increase or decrease the value of one of your Rig dice by one. The resulting value of the affected die may be greater than 6 or less than 1. That is to say, to decrease a number below 1 does not loop it back around to 6, or vice-versa.
Vortex Drill Station – Take one of your Rig dice which you have already rolled and physically flip it over onto its opposite face to use that result instead. A 1 would become a 6, a 2 would become a 5, a 3 would become a 4, and vice-versa. This cannot be used to affect the Standard Mining dice or the Neutronium die, only your own Rig dice.
Rover Station – One of your Crewmembers assigned to a Mining Station may collect resources as if they were assigned to an adjacent Mining Station. Mining Stations are considered to be adjacent immediately clockwise or counter-clockwise; i.e. Mining Station [12] is adjacent to Mining Station [10] and Mining Station [2] but not to Mining Station [6]. You may collect from an adjacent Mining Station even if another player has a Crewmember or Captain there, but you must still pair dice to match the number of the Mining Station you wish to collect from.
TIP: Since resources are collected in turn order it is possible to move a Crewmember this way and then resolve it before another player has an opportunity to collect resources from the same Mining Station. Use turn order and the Leader position wisely, as they are more important than they might seem!
Rig Satellite
Rig Rental Station – Immediately roll one extra Rig Die that you have not unlocked yet, regardless of your current number of Credits. You may use this Rig die when resolving Crewmembers on Mining Stations this same turn. You may only ever roll a maximum of three Rig dice on your turn. If you have already unlocked all three of your Rig dice, the Rig Rental Station offers you no benefit.
Rig Modification Station – You may create a pair using two Rig dice instead of including a Standard Mining die or the Neutronium die when you resolve a Crewmember at a Mining Station this turn.
Rig Reboot Station – Reroll one of your Rig Dice that you have not yet used to collect a resource this round.
Crew Satellite
Recruit Station – You may choose one of the following:
- A. Spend $3 to unlock 1 of your currently-unavailable Crewmembers and add it to your Ship.
- B. Spend $5 to unlock your Captain and add it to your Ship if you do not already have one.
You may have a maximum of four regular Crewmembers and one Captain recruited at any time.
Release Station – Collect $2 for each regular Crewmember you have assigned here, or $3 for a Captain assigned here. They become unavailable when you resolve them; remove them from the board instead of returning them to your Ship. You may use the Recruit Station normally to regain Crewmembers that you have previously released. Unlike other Stations, the Captain may only receive the benefit of this Station once per round.
You may not have fewer than one Crewmember/Captain at any time, except on the final round.
Subcontract Station – Collect $1 for each regular Crewmember you have assigned here. When resolving your Captain here, you may active the effect twice to collect a total of $2.
Cargo Hold Satellite
Cargo Hold+ Station - Permanently increase your Ship's number of unlocked cargo hold slots by one at no cost. To signify this, move your lock-shaped Cargo Hold token one space to the right (or off of your Ship entirely if you are unlocking your sixth cargo hold slot). When resolving your Captain here, you may unlock two slots instead of one.
Cargo Hold++ Station - Spend $1 to permanently increase your Ship's number of unlocked cargo hold slots by two. To signify this, move your lock-shaped Cargo Hold token two spaces to the right (or off of your Ship entirely if you are unlocking your sixth cargo hold slot). When resolving your Captain here, you may unlock a total of four additional Cargo slots at the cost of $2. Your Ship can never carry more than six units of resources.
TIP: Remember that you are not required to activate the Station's effect twice with a Captain unless you choose to do so.
Export Satellite
Export Station (1, 2, or 3 units) – Turn in a number of resource tokens up to the corresponding number of your current Export Station. When resolving your Captain here, you may turn in up to 2x the corresponding number of your current Export Station. Move your Credit token ($-shape) up the Credit track a number of spaces equal to the total amount of Credits earned.
The values of each resource are as follows:
| Resource | Value |
|---|---|
| Platinum (octagon, white) | $8 per unit |
| Cobalt (hexagon, blue) | $6 per unit |
| Iron (square, orange) | $4 per unit |
| Solar Energy (flare, yellow) | $3 per unit |
| Neutronium (hexagon-ring, red) | $1 per unit |
Iron, Cobalt, and Platinum are removed from the game when they are Exported and cannot be collected again. Neutronium and Solar Energy are renewable resources which are returned to the board when Exported, and can be collected over and over again.
TIP: You are not required to turn in the maximum number of resources possible at an Export Station. Remember that resources are good for more than just Credits.
Q: The rules state that Crewmembers can be resolved in any order. Does this mean that I can Export a resource that I didn't have at the beginning of the round?
A: Yes. In most cases, Export should be resolved last so that you can Export any resources that you might have collected that round. Or, if your Cargo Hold is getting full, you may want to Export before collecting more resources. It is up to you!
Solar Array
Solar Array Station – For each Crewmember assigned here, choose one of the following:
A. Collect: Return your Crewmember to your Ship Tracker board and collect the amount of Solar Energy tokens shown on the space your Crewmember currently occupies. When resolving your Captain here, you may collect up to 2x the corresponding number of the current space.
OR
B. Charge: Move your Crewmember one space forward on the Solar Array track and leave them there until the next Round. The Captain does not behave differently than a regular Crewmember when choosing this option.
TIP: The longer a Crewmember continues to Charge, the more Solar Energy it can ultimately Collect. If you Collect while still on "0", you do not collect any Solar Energy from the Station, but you do regain the opportunity to assign your Crewmember to other Stations for the next round.
Like all other resources, the amount of available Solar Energy is limited to the number of Solar Energy tokens on the board. If you attempt to Collect while there are not enough Solar Energy tokens available, you may only take those that are available.
TIP: As long as Solar Energy tokens are available on the board, Solar Energy is guaranteed; no dice are required to Collect it, making it a very reliable and consistent source of income and a critical point of strategy. Whether you choose to wait for enough tokens to become available to Collect is up to you.
Important: As various Crewmembers Charge, it is possible for multiple players' Crewmembers to occupy the same space on Solar Array track at the same time. Because players resolve their Crewmembers in turn order, your Crewmembers will often move into a space on the Solar Array Track that is already occupied by another player. Since you did not assign the Crewmember directly to the shared space, this is allowed.
Research Station [If you are using the Research Deck option]
Choose one of the following:
A. Take none: Did you change your mind? You do not have to resolve a Station if you choose not to.
B. Take one: Take one of the face-up Research cards and place it near your Ship. You gain the effect of this card beginning next round. Refill the supply of available Research cards by drawing a new card from the Research Station deck. If doing this leaves you with more than 1 Research card, you must disc
C. Recycle, then take one: Prior to taking a card, you may choose instead to discard all three available face-up Research cards to the bottom of the Research Deck and draw three new cards to replace them, then choose one to take for yourself and replace it with the next card from the top of the Research Deck. Beware when choosing this option; taking a card after Recycling is mandatory.
You may only have one Research card at a time. When you draw a new Research card, you must immediately discard down to one Research card, placing the card(s) you do not wish to keep on the bottom of the Research Deck. If you lose or discard a Research card, you also immediately lose its ability.
There is no discard pile for Research cards. Any discarded/replaced cards go onto the bottom of the Research Deck.
Game End
The Game End is triggered when three of the six Mining Stations have been depleted. As soon as that happens, players will finish the current round and then play through one additional final round.
If you are using the Therion Marauders option: There is no Therion Marauder attack on the final round.
Any resources remaining on each player's Ship at the end of the game are immediately turned in for one Credit ($1) each to their owner, regardless of the resource type.
The player with the highest total of Credits ($) is the Winner. If two or more players are tied, the tied player with the most Captain and Crewmembers on their Ship is the winner. If there is still a tie, the tied player whose turn was last is the Winner.
TIP: If you prefer a longer game, try triggering the Game End only after four of the six Mining Stations are depleted!
Gameplay Variants
Head-to-Head Variant #1: Insider Partnership
2 players ~30-45 minutes
Players that enjoy highly competitive games for two may use the following variant to discover who the master of strategy is. In this scenario, each player controls two separate mining companies at once. Galactic antitrust laws prevent the merger of such mining operations, so even though you are controlling two separate mining crews, they must be treated completely and totally separately. Here's the hook: you have shareholders that want their investments protected, so you're not allowed to let either of your two companies flounder. Your final score is the lower of the two companies you control.
TIP: You may choose to include the optional Research Deck and/or the Corporate Sponsor cards with this variant. Including the Therion Marauders deck is strongly recommended.
This variant uses the Standard rules with the following changes:
Setup
During standard setup, have each player choose two colors and set up each Ship according to the standard setup or with Corporate Sponsor cards, treating each separate color as an individual player. Each of these individual Ships and their respective crew are referred to as Companies.
Place all four of the chosen Ship Trackers in a circle so that a consistent clockwise turn order is established. Arrange the Players' Companies so that player control alternates, for example:
Player 1, Company 1 Player 2, Company 1 Player 1, Company 2 Player 2, Company 2
TIP: If you have difficulty keeping track of which crew colors belong to each player, mark each Ship Tracker with a Destruction token (orange or black) and assign each player one of those two colors to assist you.
Randomly determine one of the four separate Companies to begin as the Leader. Begin play with each player controlling their two separate Companies independently. Your two Companies cannot share anything between one another. Proceed playing clockwise as if it were a four-player game.
Game End
This variant uses the Standard Game End and victory conditions. Only each player's lowest-scoring Company counts for their final score.
Head-to-Head Variant #2: Saboteurs
2 players ~30-45 minutes
Groups of two that would like a slightly more competitive experience than the standard game may use the following variant to shake up the Darkrock Ventures experience in small but meaningful ways. In this scenario, two competing Mining Companies are playing dirty as they face off to edge the other out of the business once and for all. Each company has employed the services of a small group of Saboteurs who will tamper with the equipment at some Stations, fooling the control systems into believing they are occupied or disabling them entirely until the next round. Unfortunately for you however, the Saboteurs are savvy, and are working for both sides.
TIP: You may choose to include the optional Research Deck and/or the Corporate Sponsor cards with this variant. Including the Therion Marauders deck is strongly recommended.
This variant uses the Standard rules with the following changes:
Setup
After standard setup, pick out two of the small meeples and the large meeple from one of the three unchosen colors. These represent the two Saboteurs and the Saboteur Captain. The Saboteur Captain disables a Station completely until the next round – preventing any Crewmembers from either player being assigned there. A regular Saboteur only fools the control system into believing the Station is occupied - you may still assign Crewmembers there with the Delegate Station.
Round Sequence
Phase 1: Roll Standard Mining Dice
Each round, give the Leader the Saboteur Captain, and give one Saboteur to each player.
Phase 2: Assign Crewmembers
After the Leader assigns the first Crewmember from their Ship, the Leader then immediately assigns the Saboteur Captain to any unoccupied Station.
After the second player assigns the first Crewmember from their Ship, the second player immediately assigns a Saboteur to any unoccupied Station.
After the Leader assigns the second Crewmember from their Ship, the Leader then immediately assigns the remaining Saboteur to any unoccupied Station. You may not assign Saboteurs to the Leader Station or Delegate Station.
TIP: If it is helpful, think of the Saboteurs as Crewmembers or a Captain belonging to another player when they are on the board. The same rules regarding Assigning Crewmembers apply.
Phase 5
Saboteurs and the Saboteur Captain do not have any additional effects and are not resolved in Phase 5. At the end of Phase 5, remove the Saboteurs and the Saboteur Captain from the board. They will be redistributed in Phase 1 of the next round.
Game End
This variant uses the Standard Game End and victory conditions.
TIP: It is technically possible to stretch this variant to introduce a third player, simply use another Regular Crewmember meeple from one of the unused colors and play using the rules above, adding a third player and another Saboteur.
Co-operative Variant: Neutronium Crisis
1-5 players ~30-45 minutes
Players that enjoy solo and/or cooperative games may use the following variant rules to dramatically alter their Darkrock Ventures experience. In this scenario, Amelia's Jewel is under a full-blown assault by the Therion Marauders. To make matters worse, the Neutronium throughout the entire surface of the asteroid has begun destabilizing in a catastrophic chain reaction that threatens to destroy the entire asteroid - and everyone in the vicinity! You are attempting to collect just enough resources to repair your Ships, pack up, and leave. It won't be easy though, and any Mining Companies present will find their differences melt away as it becomes clear that the only way to survive is to work together, and work quickly.
This variant uses the Standard rules with the following changes:
Setup
The Corporate Sponsor deck is not used in this variant. Players begin with the standard Ship setup. If you are playing on the Cakewalk or Easy difficulty setting, players begin with two Rig dice instead of one. Each player begins with starting Credits according to the respective difficulty setting:
| Difficulty | Starting Credits |
|---|---|
| Cakewalk | $15 |
| Easy | $13 |
| Normal | $10 |
| Hard | $7 |
| Very Hard | $5 |
| Extreme | $2 |
Although players are working together to escape the asteroid, each player's assets are their own. You may not trade, borrow, or share credits, resources, or crewmembers with other players.
Place the Neutronium Track near the board. Place a black Disintegration token on the first space, labelled "$1". Place the remaining Damage tokens and Disintegration tokens in a pool near the board.
Round Sequence
Phase 1: Roll Standard Mining Dice
If the Leader rolls doubles on the Standard Mining dice, do not reveal a Therion Marauders card. Instead, move the Disintegration token backward one space on the Neutronium Track. If the Disintegration token is already on the $1 space, it cannot move backward.
Phase 2: Assign Crewmembers
Even though you are working cooperatively with other players, the Standard rules for assigning Crewmembers to occupied Stations still apply. Unless you are assigning your Captain or using the effect of the Delegate Station, you may only assign Crewmembers to Stations which are unoccupied or to which you have already assigned one of your own Crewmembers this round.
You may assign a Crewmember to a Station even if it has one or more Damage tokens. You may not assign a Crewmember to a Station with a Disintegration token. When you assign a Crewmember to a Station with one or more Damage tokens, you must immediately Repair that Station by spending Credits equal to the current Repair Cost on the Neutronium Track per Damage token on the Station.
- The current Repair Cost is always the $ amount shown on the Destruction Token's position on the Neutronium Track
- You cannot assign a Crewmember to a Station with one or more Damage Tokens if you cannot afford to immediately Repair it.
After the Repair Cost has been paid, remove the Damage Tokens from the Station and proceed with the next player's turn. Damage tokens removed this way are returned to the pool.
TIP: Be careful, the Repair Cost starts low but quickly increases throughout the game.
Phase 3: Leader Rolls Neutronium Die
Phase 4: Resolve Therion Marauders
Skip Phase 4. Therion Marauders will be resolved during Phase 5 instead.
Phase 5: Resolve Crewmembers
Each player must draw and resolve a Therion Marauders card before they may begin resolving their Crewmembers. This means that multiple Therion Marauders cards will be resolved during Phase 5 in each round.
Each time you resolve a Therion Marauders card that attacks a Station, advance the Disintegration token one space on the Neutronium Track. If no Crewmembers are assigned to any of the Stations indicated on the card, or if all players Flee from all affected Stations, place a red Damage token on each of the affected Stations.
Unlike the Standard game, only one player needs to Activate Shields in order to defend all players.
There is no limit to the number of Damage tokens that can be on each Station. If there are no more Damage Tokens available, then remove all Damage tokens from that Station and place a black Disintegration token on the Station instead. Damage tokens removed this way are returned to the pool. If at any time a fifth Disintegration token is added to the board, the game immediately ends and the players collectively lose.
Q: Multiple Stations are under attack, all players Flee, and there are no remaining Damage tokens available. Does this mean that multiple Stations each receive a Disintegration token, or can I place the Damage tokens removed from one Station on another affected Station immediately?
A: If there are no remaining Damage tokens, each Station immediately receives a Disintegration token. The Damage tokens from these Stations are returned to the pool normally and may be used during the next Therion Marauders attack.
A Station with a Disintegration token cannot be Repaired and is unavailable for the remainder of the game. No further tokens will be placed on it, even if another Therion Marauders card attacks it in the future.
Any time a player spends Neutronium, either to defend against Therion Marauders or to reroll the Neutronium die, advance the Disintegration token one space on the Neutronium Track.
Export Satellite
Just like in the Standard game, you will earn Credits by exporting valuable resources. Place exported Metal resources on their respective slots on the Export section of the Neutronium Track until they are full. Players must collectively export at least five Iron, four Cobalt, three Platinum resources, and then survive until the end of the round to win the game.
Solar Array
While the Solar Array Station has at least one Damage token, any Crewmembers on the Solar Array track may not Charge or Collect there until the Station is fully repaired by another Crewmember. However, you may still resolve Crewmembers caught on the Solar Array in this situation and return them to your Ship - they simply do not collect Solar Energy resources nor can they advance while the Solar Array Station has at least one Damage token. Alternatively, you may choose to resolve Crewmembers on the Solar Array track by leaving them in place in order to wait for another Crewmember to Repair the Solar Array Station.
Game End
The game ends if any of the following occur:
-
If a fifth Disintegration token is added to the board because of a Therion Marauders attack: The game immediately ends and the players collectively lose.
-
If the Disintegration token on the Neutronium Track reaches the last space of the track, marked with a skull: The game immediately ends and the players collectively lose.
-
If it ever becomes impossible for the players to collect or export the remaining resources required to win: The game immediately ends and the players collectively lose.
-
If players have successfully exported at least three Platinum, four Cobalt, and five Iron resources; and the players manage to complete the current round without meeting any of the above conditions: The game ends and the players collectively WIN!
All players win or lose as a team; individual Credit totals are irrelevant.