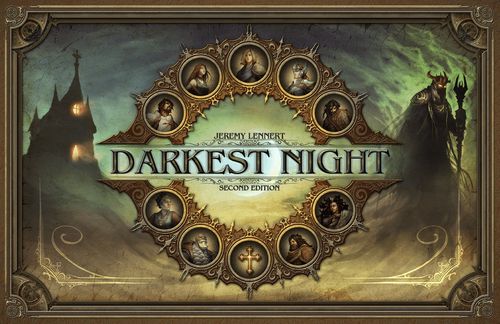
Darkest Night: Second Edition
Darkest Night: Second Edition Rulebook
Table of Contents
Table of Contents
- [1.0] Introduction
- [2.0] Game Equipment
- [3.0] Setting Up The Game
- [4.0] Heroic Resources
- [5.0] Die Rolls
- [6.0] Sequence Of Play
- [7.0] Events
- [8.0] Actions
- [9.0] Darkness
- [10.0] Necromancer Movement
- [11.0] Blights
- [12.0] Combat
- [13.0] Penalties
- [14.0] Powers
- [15.0] Items
- [16.0] Quests
- [17.0] Mysteries
- [18.0] Victory And Defeat
- [19.0] Other Rules
- [20.0] Optional Rules
- Extended Example of Play
[1.0] Introduction
A great shadow has fallen over the kingdom as the undead multiply under the control of a dread Necromancer. The king's army is broken, the lands overrun, and now the Castle has fallen. The last of the kingdom's strength has taken refuge in the hallowed ground of the Monastery, where the Necromancer and his dead dare not tread… yet.
As he tightens his grip on the land and builds his power for a final assault on this last refuge, a few brave souls seek a way to fight back…
Darkest Night is a cooperative game where four heroes fight a guerilla war to retake a kingdom invaded by an evil Necromancer. All players share victory or defeat and must work as a team to succeed.
[2.0] Game Equipment
- 1 Game Board
- 30 Standees
- 30 Plastic Stands
- 10 Dice (9 white, 1 black)
- 1 Necromancer Miniature
- 29 Hero Sheets
- 377 Power Cards (13 per hero)
- 57 Artifact Cards
- 75 Event Cards
- 50 Map Cards
- 45 Quest Cards
- 45 Mystery Cards
- 44 Darkness Cards
- 81 Blight Tokens
- 42 Item Tokens
- 15 Spark Tokens
- 20 Quest Tokens
- 4 Holy Relic Tokens
- 12 Active Tokens (6 Pairs)
- 5 Turn Trackers
- 5 Grace Trackers
- 5 Secrecy Trackers
- 1 Darkness Tracker
- 1 Clue Tracker
- 1 Rulebook
- 1 Compendium
- 1 Player Aid
The Game Board: The game board depicts the kingdom where the game takes place. The map shows the seven locations that the players can visit (the Mountains, Castle, Monastery, Village, Swamp, Forest, and Ruins) and numbers that are used to determine the Necromancer's movement. Along the bottom of the map is the Darkness Track, which represents the Necromancer's growing power and influence.
Hero Sheets: These sheets describe the heroes and have tracks at the bottom for recording the hero's current grace and secrecy. On the reverse side is a player aid.
Before your first game you have to construct the standees. Punch out the hero standee counters and carefully place each into a plastic stand.
Standees: These are used to track the current location of each hero and the Necromancer.
The Cards: There are several different kinds of cards in the game:
Event cards represent chance encounters the heroes may have while roaming the kingdom (see 7.0).
Quest cards denote additional objectives for the players to complete around the map, with rewards for success and penalties for failure (see 16.0).
Mystery cards provide opportunities for the heroes to earn clues, which eventually lead to the Holy Relics (see 17.0).
Artifact cards represent powerful objects that can aid the heroes; they follow the rules for powers (see 14.0) and also the rules for items (see 15.0).
Darkness cards provide new abilities to the Necromancer as the game continues (see 9.0).
Map cards are used to randomize blight creation and search results. Each card lists a type of blight and a search result for each of the locations on the board; except during setup (see 3.4), only one of these results is used each time you draw a card. The Map Deck can be customized to choose the variety of blights you will face during the game (see 3.3).
Power cards represent the unique abilities or equipment of different heroes; each hero has a separate set of 13 power cards (see 14.0).
Blights: These tokens represent centers of the Necromancer's power; each one produces an adverse effect, usually (but not always) limited to its location on the map (see 11.0).
Item Counters: These tokens represent helpful single-use magical objects the heroes find during the game (see 15.0).
Holy Relics: These tokens represent powerful items that will be key to winning the game (see 15.2).
Trackers: These counters are used to keep track of game status, including who has taken their turn, heroes' basic statistics, clues, quest progress, and the current darkness level.
Sparks: These tokens represent reserves of energy or willpower that can spur the heroes to extraordinary efforts (see 4.2).
[3.0] Setting Up The Game
[3.1] Play Area
Place the game board in the center of the playing area.
Place the 4 Holy Relic tokens on the board in the locations labeled Mountains, Forest, Ruins, and Swamp, with their "undiscovered" sides facing up. Place the clue tracker at the zero position on the Darkness Track.
Shuffle all of the event cards together to form the Event Deck, shuffle all of the quest cards together to form the Quest Deck, shuffle all the darkness cards together to form the Darkness Deck, shuffle all the mystery cards together to form the Mystery Deck, and shuffle all of the artifact cards together to form the Artifact Deck. Set each of these decks face down in reach of all players.
Set the blight, spark, and item counters aside to form the Stock. You will need these counters later.
[3.2] Choose Heroes
By default, the game is always played with 4 heroes, chosen from among the 29 hero characters included in the game. If there are 4 players, each player chooses a hero to play. If there are fewer than 4 players, divide control of 4 heroes among yourselves as you choose (e.g., with 2 players, you might each control 2 heroes; if playing alone, you would control all 4).
If you prefer to play with a different number of heroes, there are some optional rules for doing so (see 20.2), but playing with 4 heroes is recommended.
Then, perform all of the following steps for each selected hero:
- Take the appropriate standing character token for that hero and place it on the board in the location labeled "Monastery."
- Take the appropriate hero sheet and set it near the player controlling that hero.
- Take a turn tracker and set it near the hero sheet, sun-side up.
- Take a grace tracker ( ) and a secrecy tracker ( ) and place them on the default values of the corresponding tracks on the hero sheet. These spaces are denoted with a decorative bracket.
- Take the 13 power cards matching the selected hero. Find the 5 power cards with the symbol in the top corners, read them, and choose 3 of those powers to start with, setting them face up near the hero sheet.
- Shuffle the remaining 10 power cards (including the unchosen powers) to form that hero's Power Deck, and set these cards face down near the hero sheet.
Flip the remaining hero sheets to their reverse side for use as player aids. Set aside the power cards for the remaining heroes; you will not need them unless one of your starting heroes is killed.
[3.3] Prepare the Map Deck
The Map Deck can be customized to change the varieties of blight you will face during the game. Select one of the "subdecks" described below, then look through the map cards and find all the cards with the corresponding colored orb in the lower left-hand corner; shuffle only those cards together to form the Map Deck, and return the rest of the map cards to the box. (Note that some map cards have multiple colored orbs, indicating they are used in more than one subdeck.)
Map Subdecks
Simplicity (top-right position) — 16 cards — 12 blights. This subdeck has the smallest variety of blights and search results; recommended for your first game.
Crows (5), Enigma (4), Evil Presence (4), Nexus (3), Omen (6), Shades (5), Shroud (5), Skeletons (5), Taint (5), Unholy Aura (4), Webs (5), Zombies (5)
Hunted (bottom-right position) — 20 cards — 16 blights. Everything is out to get you in this subdeck filled with traps and detection.
Confusion (4), Corruption (5), Crows (5), Dark Fog (5), Desecration (4), Flux Cage (6), Gate (5), Omen (6), Revenants (5), Specters (4), Spies (5), Stigma (5), Terror (4), Void (7), Webs (5), Wraiths (4)
Overrun (bottom-center position) — 20 cards — 16 blights. Face the teeming hordes of undead in this subdeck with an emphasis on monster blights.
Crows (5), Curse (5), Decay (5), Lich (5), Oblivion (4), Revenants (5), Shades (5), Shroud (5), Skeletons (5), Specters (4), Stigma (5), Taint (5), Terror (4), Vampire (6), Wraiths (4), Zombies (5)
Entropy (bottom-left position) — 20 cards — 20 blights. The world has fallen into shadow in this subdeck including every kind of global-effect blight.
Confusion (4), Corruption (5), Curse (5), Dark Fog (5), Decay (5), Desecration (4), Enigma (4), Gate (5), Nexus (3), Oblivion (4), Omen (6), Shades (5), Shroud (5), Skeletons (5), Spies (5), Stigma (5), Taint (5), Vampire (6), Void (7), Zombies (5)
Spiritual Warfare (top-left position) — 20 cards — 20 blights. Enter a battle of wills in this subdeck containing NO monster blights.
Confusion (4), Corruption (5), Crows (5), Dark Fog (5), Decay (5), Desecration (4), Enigma (4), Evil Presence (4), Flux Cage (4), Gate (6), Nexus (3), Oblivion (4), Omen (6), Shroud (5), Spies (5), Stigma (5), Taint (5), Unholy Aura (4), Void (7), Webs (5)
Classic (top-center position) — 20 cards — 15 blights. This subdeck uses the blights and search results from the original release of Darkest Night.
Confusion (4), Corruption (5), Curse (5), Dark Fog (5), Desecration (4), Evil Presence (4), Lich (5), Shades (5), Shroud (5), Skeletons (5), Spies (5), Taint (5), Unholy Aura (5), Vampire (6), Zombies (5)
Everything — 50 cards — 30 blights. You can also play with the entire Map Deck at once, for maximum variety.
Map Card Anatomy: 1. Quest Symbol (only used in optional rules) — 2. Location Column — 3. Blights Column — 4. Search Column — 5. Subdeck Key — 6. Card Back Image
[3.4] Necromancer's Forces
Place the standing Necromancer token on the board, in the Ruins.
Place the Darkness Tracker at the zero position on the Darkness Track (located at the edge of the board). Note that the Darkness Tracker and the Clue Tracker share the same track.
Draw the top card from the Map Deck. For each location listed on the card except the Monastery, take the indicated blight counter from the Stock and place it on the board in the corresponding location. You should have 6 blight counters on the board when you are done. (Ignore the search results listed on the card.) Then, place the map card you drew face up next to the Map Deck, starting a discard pile.
Blight Placement Example (diagram): the illustration shows example setup results — Forest: Dark Fog, Ruins: Spies, Monastery: (no blight is placed at the Monastery during setup).
[4.0] Heroic Resources
[4.1] Grace and Secrecy
Each hero sheet has a grace track ( ) and a secrecy track ( ) at the bottom.
Grace represents the mysterious power that allows heroes to survive in situations where normal men would perish. If you are about to die, you can spend grace to save yourself (see 13.1); however, running out of grace is not inherently fatal, it just leaves you vulnerable.
Secrecy represents how well the hero's movements are hidden from the Necromancer and his minions; it affects the odds of being detected by the Necromancer and the severity of certain event cards. If your secrecy reaches zero, the Necromancer will be able to attack you during your event step (see 7.2).
The bracketed values are each hero's default grace and secrecy, and are the amounts available to the hero at the start of the game (not the maximum). Place markers on these numbers.
If a card instructs you to gain grace or secrecy, move the marker up the track (but not beyond the maximum value specified in the instruction to gain, if any).
If a card instructs you to lose grace or secrecy, move the marker down the track, but do not reduce it below zero (any loss beyond zero is ignored).
If a card instructs you to spend grace or secrecy, then you may not use that effect unless you have at least that much grace or secrecy available to spend.
Remember: You cannot spend what you do not have, but when you have nothing to lose, then losses are ignored.
The minimum value for both grace and secrecy is zero (represented by moving the token to the symbol printed to the left of "1" or removing the token from the track). Neither grace nor secrecy has an absolute maximum, but most things that raise grace or secrecy will only do so up to some threshold.
Common Gains and Losses
Grace increases when you:
- Perform the pray action (up to default)
- Discover forgotten shrines while searching (no limit)
All gains are negated if a Taint blight is present.
Grace decreases when you:
- Spend it to survive a wound (typically after failing a combat)
- Spend it to avoid various negative effects
Secrecy increases when you:
- Perform travel or hide actions (up to 5)
- Spend your entire turn in the Monastery (up to default)
Secrecy decreases when you:
- Attack any blight (regardless of success)
- Start your turn at the Necromancer's location
- Start your turn carrying a Holy Relic
- Receive a Holy Relic from another hero
Additionally, many events and powers can influence grace and secrecy, as described on the respective cards.
Resource Examples:
The Seer enters a location with a Curse blight, which causes heroes to lose 1 secrecy when they enter. She adjusts her secrecy from 1 to zero. Next turn, the Seer enters a new location with another Curse blight. Since the Seer's secrecy is already zero, the Curse has no effect on her.
The Rogue has the Eavesdrop power, which allows him to spend 1 secrecy to search with 2 dice. However, his secrecy is currently zero, so he cannot use this power until he gains some secrecy.
The Druid has 6 secrecy and travels from the Monastery to the Village. Heroes gain 1 secrecy (up to 5) when traveling, but since the Druid already has more than 5 secrecy, his secrecy remains at 6.
The Valkyrie has 4 grace and prays, rolling 5 and 3. This result allows her to gain 2 grace (up to default), but her default is 5, so her grace only increases to 5 (not 6).
The Valkyrie has 4 grace and searches, uncovering a forgotten shrine, which allows her to immediately gain 2 grace. Since no limit is specified on this gain, her grace increases to 6.
[4.2] Sparks
Sparks represent reserves of energy or willpower that can spur a hero to extraordinary efforts. Heroes can spend sparks before making any die roll to gain extra dice on that roll (1 extra die per spark spent).
Unlike grace and secrecy, sparks are not represented by a track; instead, take one spark token from the Stock whenever you gain a spark, and return one spark token to the Stock when you spend (or lose) a spark.
Each hero can have a maximum of 3 sparks at one time; any excess sparks must be discarded immediately and without effect. Sparks do not count as items (see 15.0) and cannot be traded among heroes.
[5.0] Die Rolls
Generally, when a die roll is called for, you will roll several dice and compare them individually (not added together) to a target number. Any die that is greater than or equal to the target number is a success; the die roll as a whole is considered a success if at least 1 die succeeds. Some rolls give an extra reward for multiple successes, but usually all that matters is whether you have any successes or not. The roll as a whole is only considered a failure if none of the dice succeed.
Various effects may increase or decrease the number of dice you roll. There is no upper limit to the number of dice you might roll; if you do not have enough physical dice, roll what you have, make a note of the results, and then reroll enough to bring your total up to the correct amount. Conversely, regardless of all penalties, you always roll at least one die.
[6.0] Sequence Of Play
The game consists of a series of rounds. During each round, each hero will take a turn, and then the Necromancer will also take a turn.
- In any order, each hero takes a turn
- Start: Resolve start-of-turn effects. Common effects: losing secrecy when the Necromancer is in your location (see 10.0); losing secrecy for carrying a Holy Relic (see 15.2)
- Event: Draw one event card (see 7.0)
- Action: Perform one action (see 8.0)
- End: Resolve end-of-turn effects. Common effects: defending against monsters spawned by blights in your location (see 11.2), gaining grace for spending your whole turn in the Monastery (see 19.2)
- The Necromancer takes a turn
- Darkness: Advance the Darkness Track (see 9.0)
- Quest Timers: Place one time marker on every quest in play (this may cause quests to expire; see 16.3)
- Movement: Roll a die and move the Necromancer (see 10.0)
- Blight: Create a blight at the Necromancer's current location (see 11.0)
At the start of a round, flip each hero's turn tracker to the sun side. The players select a hero to go first; that hero takes their turn, then flips their turn tracker to the moon side to indicate that their turn is complete. The players then select a hero to go next, repeating the process until all heroes have taken a turn.
Once all heroes have completed their turns, the Necromancer takes a turn, and then a new round begins. This continues until the victory or defeat conditions are met (see 18.0).
Note that heroes can choose to take their turns in a different order each round.
Turn order is sometimes very important, but a lot of the time it doesn't matter. If you are not sure who should go next, try going in seating order (or whoever knows what they want to do).
[7.0] Events
Events represent chance encounters that the heroes experience while roaming the realm. The Necromancer's influence has turned the kingdom into a dangerous place, and so events are usually harmful to the heroes, but you may occasionally obtain a positive outcome. The fate value on an event card (number in the top corner) gives a rough idea of how bad an event is (higher numbers being worse).
When you experience an event: draw a card from the Event Deck, resolve its effect, and then discard it (regardless of the outcome).
Some event cards have a variable effect depending on your current circumstances, such as your level of secrecy (see 4.1), the number of blights in your location (see 11.0), or the current value of the Darkness Track (see 9.0).
Many blights will involve a combat (see 12.0) or bring a new quest into play (see 16.1).
[7.1] Renewal
The Event Deck includes a special card called Renewal. When you draw Renewal, immediately reshuffle the Event Deck (including Renewal and all the discards) and draw another card instead.
Renewal is not considered an event, and cannot be ignored or discarded by other game effects; you should always resolve it immediately when you draw it (even in the middle of another effect).
[7.2] Necromancer Attacks
During the event step of your turn, if the Necromancer is in your location and you have zero secrecy, then do not draw an event; instead, the Necromancer has caught you and you must engage him in combat (see 12.2).
[7.3] No Events in the Monastery
Never draw an event card while in the Monastery.
Event Card Anatomy: 1. Title — 2. Fate Value — 3. Image — 4. Special Text — 5. Flavor Text — 6. Card Back Image
Event Card Example: When you draw the Dead Servant card pictured here, you will encounter one of three different enemies based on your secrecy. If your secrecy is 5 or higher, you encounter a Scout; if your secrecy is 3 or 4, you encounter an Archer; if your secrecy is 2 or less, you encounter a Dread. Each of these opponents has different statistics (listed on the card) that will be used to resolve a combat (see 12.0).
[8.0] Actions
Each hero may typically perform one action on their turn, selected from the following list:
-
Travel: Move to an adjacent location, and also gain 1 secrecy (up to 5).
-
Hide: Refresh all of your powers (see 14.2), then gain 1 secrecy (up to 5).
-
Attack: Choose a blight (see 11.0) in your location and fight it following the combat rules (see 12.0). If you win, the blight is destroyed and returned to the Stock; otherwise, you suffer the blight's defense. Succeed or fail, you lose 1 secrecy for revealing yourself.
You can also attack the Necromancer in the same way as a blight (see 12.2).
-
Search: Roll a die and compare to the search difficulty listed on the board for your location. If your result equals or exceeds the difficulty, draw a map card and take the search result for your location.
If you roll multiple dice (e.g., using a power), draw one map card for each success (i.e., each die result that is greater than or equal to the search difficulty), then choose one card to resolve and ignore the others.
If you do not have enough game tokens to take the search result indicated by one of the cards, discard that card and draw a replacement. In the rare event that you draw 3 cards and do not have enough tokens for any of them, you may either draw 1 power card from your deck (see 14.0) or take any item token with a green back (see 15.0). In the extremely rare event that you cannot do any of those things, you receive nothing.
The Monastery cannot be searched.
-
Pray (Monastery Only): Roll 2 dice against a target number of 3. Gain 1 grace (up to default; see 4.1) for each success (i.e., each die that rolls a 3 or higher). Then, refresh all of your powers (see 14.2).
-
Meditate: Gain 1 spark (see 4.2).
Some cards allow you to perform a free action: This means you can do that action in addition to your normal one-action-per-turn. Free actions can be performed either before or after your regular action (if allowed by the card in question) but must be completed during the action step of your turn (they cannot be performed at any other time).
You are not required to perform an action during your turn (though you will usually want to).
[9.0] Darkness
There is a Darkness Track printed on the game board. Darkness represents the amount of power the Necromancer has gathered and increases gradually throughout the game. Each time the Necromancer takes a turn, he increases the darkness by 1. (Some cards and blights also add or remove darkness.)
At specific thresholds, the Necromancer gains certain advantages, as indicated on the track.
- 10+ darkness: Draw a darkness card.
- 20+ darkness: Draw a darkness card.
- 25+ darkness: All blights have +1 might (making them harder to destroy).
- 30+ darkness: Any effects that would increase the darkness beyond 30 instead create a blight in the Monastery.
All of these advantages are cumulative.
When drawing a darkness card, place the card face up in view of all players. Once drawn, they remain in play for the rest of the game, and the instructions on the cards apply whenever relevant. (If the darkness decreases and increases again after reaching a threshold, do not draw an extra card for that threshold; only draw 2 cards total.)
Darkness also changes the severity of some event cards (see 7.0).
[9.1] Activating Darkness Cards
Some darkness cards can be activated; this works just like activating power cards (see 14.1).
Darkness Card Anatomy: 1. Title — 2. Image — 3. Effect Text — 4. Card Back Image
Example: Last Gasp — When any hero destroys a blight, they suffer that blight's defense.
[10.0] Necromancer Movement
Roll a die for the Necromancer and compare the result to every hero's current secrecy. If the die roll is greater than that hero's secrecy, the Necromancer detects that hero, unless that hero is in the Monastery. If the die roll is less than or equal to that hero's secrecy, the Necromancer does not detect that hero.
Notice that heroes succeed on die rolls if they exceed or equal the target number, but the Necromancer only detects a hero if his roll exceeds their secrecy. You can remember this as "heroes win ties."
If the Necromancer detects any heroes, he moves one space towards the closest hero that he detects by the shortest possible route (or stays in his current space, if he detects a hero there). If there is a tie for closest hero or shortest route, resolve it randomly.
Otherwise, the Necromancer follows the arrow shown on the board in his location that matches the number he rolled (circular arrows cause him to remain where he is). Note that this is not a separate roll; use the same result that you already compared to heroes' secrecy.
The Necromancer may never enter the Monastery for any reason. He ignores heroes located there, and if trying to move from the Mountains to the Forest (or vice versa), he must always go by way of the Village, not via the Monastery.
If the Necromancer moves to a location containing heroes, nothing special happens at that time. However, during heroes' individual turns, they each lose 1 secrecy at the start of their turn if the Necromancer is present (as he searches for them), and if this leaves them with no remaining secrecy, he can attack them during their event step (see 12.2).
[11.0] Blights
Blights represent the unholy magic spells the Necromancer has worked upon the realm. Each blight has some harmful effect it produces as long as it is in play (described in the included player aid and also summarized on each blight token).
[11.1] Creating Blights
The Necromancer creates a new blight every turn (various cards and abilities can also create blights).
Whenever a new blight is created, draw a card from the Map Deck and find the blight type listed on that card for the relevant location. Take a token corresponding to that blight type from the Stock and place it in the affected location. Then discard that map card (ignore the other information on the card).
If there are no more tokens in the Stock for the indicated type of blight, discard that map card and draw another. In the rare event that you draw 3 consecutive map cards and you are out of tokens for all of them, create any blight of your choice.
If any effect would create a new blight in a particular location, but that location already contains 4 (or more) blights, create the blight in the Monastery instead.
If any effect would create a new blight in the Monastery, but the Monastery already contains 4 (or more) blights, the heroes immediately lose the game (see 18.3).
Therefore, it is not ordinarily possible for any location to have more than 4 blights at one time.
[11.2] Effects of Blights
Blights with a yellow border fill their location with dangerous monsters. Any hero ending a turn in the affected location will encounter one of those monsters and must defend themself in combat (see 12.0). Notice that this is different from combating the blight itself; spawned monsters use separate stats and defeating one of them does not destroy the blight. (Destroying a blight typically requires an attack action; see 12.1.)
Blights with a blue border have other effects — typically weakening or restricting the heroes in some way, making them less effective. These blights do not trigger combats against the heroes (but heroes can still fight and destroy them using the attack action).
Blights with a red border are especially dangerous because they have global effects covering the entire kingdom, not just their own location. Though they affect the whole map, these blights can only be attacked in the location where they reside, and thus heroes may need to hunt down and destroy these blights in order to escape their effects.
Blight Effect Example: The Prince moves to the Mountains, where the Necromancer has previously created a Shades blight (Shades: might 3, defense 5). Since the Prince ends his turn there, he gets attacked by a Shade (3 strength, 5 awareness) and must fight or elude it. He fights it and wins, but the blight is unaffected. Next turn, he can spend his action to attack it and try to destroy it, but he will need to roll a 5 or more to do that (the blight's might), even though the Shades only have 3 strength.
[11.3] Destroying Blights
Heroes can destroy blights by performing the attack action and making a successful fight roll against the blight's might (see 12.1).
When a blight is destroyed, remove the corresponding token from that location and return it to the Stock.
Heroes may attack and destroy any type of blight.
Blight Anatomy: 1. Title — 2. Blight Effect — 3. Image — 4. Blight Might — 5. Blight Defense — 6. Monster Strength — 7. Monster Fail Effect — 8. Monster Awareness
[12.0] Combat
Combat represents a hostile encounter between a hero and an armed opponent. It can occur as a result of blights or events, when the Necromancer catches a hero during the event step, or when a hero performs certain actions (usually an attack).
In combat, the hero can choose to either fight the enemy (an attempt to subdue the opponent) or elude them (an attempt to disengage and escape).
To do so, the hero can utilize one (and only one) tactic from a power card (see 14.0). If the hero has no tactics, or does not wish to use any, they can fight or elude with 1 die.
If using a tactic, roll dice as instructed by the power card; otherwise, roll 1 die (in either case, you may add extra dice from other sources). If the hero is attacking a blight, the target number for this roll is the blight's might; otherwise, the target number is the opponent's strength if fighting or the opponent's awareness if eluding. If the monster has a dash (-) in place of one of these values, that combat option is not available against that monster.
Regardless, compare the result of each die (separately, not added together) to the target number; each die that rolls greater than or equal to the target number is considered one success. If the hero rolls at least one success, they win the combat; otherwise they fail (see 5.0).
A failed combat roll will usually inflict a penalty (see 13.0). A success during an attack action can destroy a blight or (under the right circumstances) even win the game, but at other times a success often has no effect, representing only that the hero escaped unscathed.
Combat Examples:
A Scout (on the Dead Servant event card) lists its stats as – strength, 5 awareness. This means the Scout cannot be fought (this represents the fact that the Scout will flee on sight and that killing one would reveal nearly as much about your location as if it spotted you). The Scout can still be eluded as normal.
The Valkyrie draws an event card and encounters a Ghoul (4 strength, 3 awareness). Since the Ghoul's awareness is lower than its strength, eluding it would normally be easier than fighting it, but the Valkyrie has a tactic power called Skewer that lets her fight with 2 dice, so she chooses to use that. She rolls a 2 and a 3. Since neither of the dice meet the target number (the Ghoul's strength), the Valkyrie fails the combat.
As a result of an event card, the Valkyrie encounters a Scout. She sees that the result of losing this combat would be to lose 1 secrecy. At this moment, the Valkyrie wants the Necromancer to detect her (see 10.0) in order to lure him into combat, so lower secrecy would actually be to her advantage. Therefore, the Valkyrie chooses to let herself be seen by the Scout. She rolls no dice and is considered to have lost the combat.
[12.1] Attacking a Blight
When performing an attack action, a hero must always fight (rather than elude). The target number for the fight roll is the blight's might, shown in the corner of the blight token.
If the fight roll succeeds, the blight is destroyed, and its token is returned to the Stock.
If the fight roll fails, the hero suffers the blight's defense, shown on the blight token.
Regardless of the result, the hero always loses 1 secrecy, since the attack draws attention.
[12.2] Battling the Necromancer
A hero can battle the Necromancer directly under two circumstances: The hero can initiate combat with an attack action, or the Necromancer can initiate combat during the hero's event step if the hero's secrecy is zero (see 7.2). Both of these are only possible when the hero and the Necromancer are in the same location.
The Necromancer has a strength of 7 and an awareness of 6.
Rolling a 7 on a six-sided die is, of course, rather difficult. Winning a fight against the Necromancer is rarely possible without a Holy Relic (15.2).
Failing any combat with the Necromancer results in a wound (see 13.1). Successfully eluding has no effect.
If there are any blights in the location, successfully fighting the Necromancer will entice him to sacrifice one of them so he can escape; destroy one of your choice.
Successfully fighting the Necromancer when there are no blights in the location slays him and wins the game — but only if you are holding a Holy Relic when you do so (see 18.1). Otherwise, there is no effect.
[12.3] Pulling Punches
In rare cases, a hero may prefer not to resist a foe. In this case, they may choose to accept the result of a loss without rolling any dice.
[13.0] Penalties
As a result of an event card, a failed combat roll, or various other effects, a hero can suffer various penalties that deplete their resources or reduce their effectiveness.
[13.1] Wounds
The most important penalty is a wound, which means the hero dies (see 13.5) unless they spend 1 grace to negate the effect. Remember, you cannot spend a resource you do not have (see 4.1), so if a hero is already at zero grace before taking the wound, they will not be able to spend grace to escape, and will die (unless another effect prevents it).
Technically, you can choose to let a wound kill you even if you have grace remaining, but this is generally not recommended.
You do not automatically die when you have zero grace. You merely cannot spend grace that you do not have (see 4.1), which means the next wound will kill you. But you can survive with zero grace indefinitely as long as you do not suffer a wound.
Dying does not directly end the game, but it carries some hefty penalties.
When a hero dies:
- Their turn ends immediately. Remove that hero and all of their powers from play, and give their items to other heroes in the same location (see 15.1).
- Raise the darkness by 1 (see 9.0). This may indirectly end the game; see 18.3.
On that player's next turn, he selects a new hero to play (one that has not already appeared in the current game, if possible). Perform setup for the selected hero as normal (see 3.2), except that the new hero begins with 1 fewer power cards (2 instead of 3), and their default grace and secrecy are both reduced by 1 for the entire game (place the dead hero's character near the new hero's sheet as a reminder).
The new hero does not do anything during the round in which they appear but may act normally starting the following round (which will be 2 rounds after the death).
[13.2] Losing Resources
Other penalties may cause the hero to lose grace and/or secrecy (see 4.1). Remember, any loss beyond zero is ignored.
[13.3] Losing a Turn
When a hero loses a turn, tip the hero's character on its side.
The next time that hero would begin a turn, stand the character back up, flip their turn tracker to the moon side, and skip all parts of the turn (both good and bad); for instance, do not draw an event and do not lose secrecy for being in the same location as the Necromancer.
"Losing a turn" always refers to the hero's next turn. If you are in the middle of a turn (which is usually the case), always finish the current turn as normal.
If a hero is already tipped on their side when instructed to lose a turn, there is no additional effect. You can only lose your next turn; as with resources, if you have nothing to lose, then any further loss is ignored.
[13.4] Exhausting a Power
Some effects will force the hero to exhaust one or more power cards (see 14.2). The hero chooses which cards to exhaust, but cannot choose cards that are already exhausted.
[13.5] Dying
When a hero receives a wound, they either spend a grace to negate the wound or they die.
Power Card Anatomy: 1. Hero Symbol — 2. Hero Image — 3. Starting Power — 4. Title — 5. Power Image — 6. Rules Text
[14.0] Powers
Each hero has several cards representing that hero's unique abilities, which are called powers. Keep a hero's current powers face up near their hero sheet. Powers are permanent and can be used as often as a player desires (subject to the conditions described on the cards themselves).
Each hero begins the game with any 3 of their 5 "basic" powers (those marked with a symbol), and the remaining powers are shuffled to form their Power Deck, from which new powers are drawn during the game (generally after searching; see 8.0).
Each power card describes its own effects. Most effects fall into one of these categories:
- Actions provide more options that can be used during the action step of the hero's turn (instead of taking one of the standard actions; see 8.0).
- Tactics provide more options for resolving a combat (see 12.0).
- Bonuses simply do whatever they say and may be used as often as they are relevant.
- Active effects can be used only after the power has been activated (see 14.1).
- Inactive effects can be used when the power is not activated (see 14.1).
[14.1] Activating Powers
Some powers can have a lasting effect; when this happens, the power is said to be Activated. Place an activated power card on top of your hero sheet as a reminder that it is active. (Or, if you prefer, use one of the included active/inactive tokens to track its status.)
Once a power has been activated, its active effect becomes available (and its inactive effect becomes unavailable) until the power is Deactivated.
Some powers also Target a particular location, hero, or other entity when they are activated; in this case, place the power card on or near the target as a reminder. Unless otherwise specified, any active effects apply only to the target.
Action, tactic, and bonus effects on a power card are still available to its owner while that power is active (even if they are separated from the target); you do not "lose" the normal use of the power. However, a power can only be active on one target at a time; activating it again effectively just "moves" the power to a new target. (Power cards are intended to be self-explanatory, but some of the more subtle ones are described in further detail in the Compendium.)
Power Examples:
The Druid chooses to use Wolf Form on his turn, a power that can be activated as an action. He places the power card on top of his hero sheet as a reminder. He now rolls 1 extra die on fight and elude rolls, as described in the active effect. This effect continues until Wolf Form is deactivated, which only happens when a card specifically says so (for example, if the Druid uses the action on Wolf Form again and chooses not to activate it, or if he uses another one of his Form cards).
The Prince chooses to use Inspire on his turn, an action power that is activated targeting any hero at his location when used. He opts to target the Crusader, so he places the power card on top of the Crusader's hero sheet as a reminder. The active effect allows the Crusader to choose to roll 3 extra dice on any future roll at the cost of deactivating the power.
If the Prince chooses to use Inspire again next turn, he can target a different hero at his location (including himself), but then the Crusader will no longer be targeted and will lose the opportunity to use Inspire's active effect.
The Seer is in the Forest, and there is a Dark Fog blight present. Since the search difficulty is so high, she decides to use Dowse, an action power that can be exhausted to automatically search successfully. Next turn, she cannot Dowse again, because the power is already exhausted, so she performs the hide action in order to refresh it.
[14.2] Exhausting Powers
Some powers will instruct you to Exhaust them when they are used. Flip an exhausted power face down.
Exhausted powers cannot be used again until they are Refreshed, which normally happens when the hero performs the hide or pray actions (see 8.0). Flip a refreshed power face up again; it now works as normal.
Do not exhaust a power unless instructed to do so. Most powers do not become exhausted and can be used repeatedly without a rest.
Any power can be exhausted by an outside force. If a card or a blight tells you to exhaust a power, you can exhaust any of your powers, even if it is not normally exhausted when used. While a power is exhausted, you cannot use any of that card's effects.
In the event that a power is exhausted while it is currently active, that power becomes suppressed. It counts as exhausted and none of its effects can be used (including active effects), but when the power is refreshed it will automatically become active again (on the same target, if any). Suppressed powers do not count as being "active" (if another card checks their status), but they can still be deactivated (after which they are simply exhausted).
[14.3] Timing
[14.3.1] Simultaneous Effects
Whenever two effects appear to take place at the same time, the affected player may choose the order in which to resolve them.
[14.3.2] "Any Time"
When an effect says "at any time," that means literally any time.
You can use it on someone else's turn. You can use it after making a die roll or drawing a card but before resolving its effects. You can use it between two "simultaneous" effects. Any time you like.
[14.4] Artifacts
Artifact cards represent ancient magic items of legendary power.
Artifacts count as powers and follow all of the same rules; anything that affects powers also affects artifacts. For example, artifacts can be exhausted when something tells you to exhaust a power.
However, artifacts also count as items, and follow all of their rules as well (see 15.0).
[15.0] Items
Items are useful objects that the heroes can carry around with them and use to produce various beneficial effects. They fall into three categories:
Basic Items are represented by tokens. They can only be used once each. Their effects are described on the included player aid.
- Basic items with green backs have a one-time, instantaneous effect
- Basic items with gold backs give heroes access to new or improved powers, permanently increasing their capabilities; they are still only used once, but their effects are permanent
Artifacts are represented by cards from the Artifact Deck. They function exactly like power cards (see 14.0), but they also count as items and may be traded among heroes.
Holy Relics are very special and powerful items; you will need at least one to win the game. They can only be obtained with the "Retrieve a Holy Relic" action (see 8.0), which requires 10 clues (usually obtained from mysteries, see 17.0).
Items: Bottled Magic, Charm, Soothing Lyre, Vanishing Dust, Tome of Retraining, Holy Relic, Cursed Ashes, Skull Token, Waystone, Psion Stone, Treasure Chest, Artifact
[15.1] Managing Items
Each hero may carry an unlimited number of items.
A hero may give any item to another hero at the same location. A hero in the Monastery may also store an item there for safekeeping, or retrieve any item currently stored there. All of these things are free and may be performed at any time — even during another player's turn or in the middle of a combat.
Basically, you do not need to worry about who is holding an item until you decide to use it or the heroes split up. Just assume that everyone at the same location has access to all the items until someone actually decides to use one.
However, whenever a hero uses an item, that item becomes locked and may not be given away or stored until the next turn of the hero carrying the item. A hero can always choose to refuse the benefits of an item in order to be able to trade it later.
Basically, you cannot pass the item around in a circle and all use it in the same round, unless the item explicitly benefits all heroes at the location. Once someone uses it, no one else can grab it until they are done with it.
If a hero dies while carrying items, those items must immediately be given to another hero at the same location (even if the items have been locked by use and could not normally be traded). If there are no other heroes at the location, the items go to the next hero to arrive at that location.
An artifact can be traded even while exhausted; the artifact remains exhausted until the hero currently carrying it has an opportunity to refresh their powers.
[15.2] Holy Relics
Holy Relics have several special rules:
-
Each hero can only carry one at a time. If you already have a Holy Relic, you cannot get another one until you give it away or store it at the Monastery.
-
Holy Relics add 1 to your highest die in fights. Note that this is different from most fighting bonuses, which give you additional dice — Holy Relics improve the result of a single die after it is rolled. You can refuse this benefit if you plan to give the Holy Relic to someone else, but must do so before making the roll.
Note that this is the only way for most heroes to roll a 7, which is necessary to win a fight against the Necromancer.
-
You lose 1 secrecy at the start of your turn while carrying a Holy Relic. This does not count as using the Holy Relic — it is not optional, but it also does not prevent you from giving the Holy Relic away the same turn.
-
You lose 1 secrecy if another hero gives you a Holy Relic. This only applies when receiving the relic directly from another hero, not when initially discovering one or picking up a Holy Relic stored at the Monastery.
[16.0] Quests
Quests represent specific problems besetting the heroes or the kingdom. They appear at particular locations and describe steps that heroes can take to resolve the problem. Quests that the heroes complete will yield rewards, while quests the heroes ignore will eventually expire and inflict penalties.
[16.1] Starting Quests
Quests enter play when called for by certain event cards. When told to draw a quest, take the top card from the Quest Deck and place it on the map.
The hero placing the quest determines the quest's location by rolling a die and comparing it to the Necromancer's movement arrows printed on the map in the Village (this gives an equal probability for all locations except the Monastery).
Example: If the die roll is a 3, the quest appears in the Forest.
If the hero uses powers, sparks, or other effects to roll multiple dice, they choose any one of the results rolled. They may draw the quest card and read it before choosing.
This die roll is considered part of the event card, so the Shaman's Balance power applies.
Quest Card Anatomy: 1. Title — 2. Completion Requirement — 3. Image — 4. Time to Complete Quest — 5. Progress Requirement — 6. Completion Reward — 7. Time Expired Consequence — 8. Flavor Text — 9. Card Back Image
[16.2] Completing Quests
Each quest card includes instructions for how a hero can make progress (tokens) towards its completion. A hero must be in the quest's location to attempt it.
Some quests have an "action" heading, which describes a special action (see 8.0) that can be taken to advance the quest; other quests do not require an action but will require an expenditure of other resources. Regardless, quests can only be attempted during the action step of a hero's turn.
Many quests require a hero to attempt a combat (see 12.0). Failure on this combat roll has no effect unless noted on the quest card.
For each progress token earned (following the quest's instructions), place a token on the quest card. It is often possible to earn multiple progress tokens with a single action. When the number of tokens equals or exceeds the number shown next to the symbol on the quest card, the quest is completed: The quest card is discarded, and the hero that added the last token earns the reward listed in the middle of the card under "Completed."
If you are unable to collect a quest reward because there are not enough game pieces, you may choose any green-backed item instead.
Example: The Zombie Horde quest is in the Village and has 1 token. The Druid is in the Village and chooses to spend his action attempting this quest. He makes an elude roll, using his Vines tactic to roll 4 dice. He rolls 5, 3, 1, and 1. The 5 and 3 are successes, so he adds 2 tokens to the quest (and exhausts Vines, as instructed by the Vines card). The quest now has 3 tokens, so it is completed; the Druid discards it, and as a reward he gets a supply cache.
[16.3] Expiring Quests
On each Necromancer turn, after raising the darkness but before movement, add one token to each quest card in play. (Quests may also accumulate tokens as a result of certain event cards.)
If the number of tokens on a quest card ever equals (or exceeds) the number shown next to the symbol on the quest card, the quest is expired: The quest card is discarded, and the heroes suffer the penalty listed at the bottom of the card under "Expired." Any tokens on a quest when it expires are wasted.
Example: The Zombie Horde quest appears in the Swamp. On the fifth Necromancer turn after its appearance, it gains its fifth token and expires. It is discarded, and a Zombies blight is created in the Swamp.
[17.0] Mysteries
Mysteries represent potential sources of information regarding the lost Holy Relics. Each mystery card provides an opportunity for the heroes to earn clues (and sometimes other rewards), which will be needed to perform the action "Retrieve a Holy Relic" (see 8.0).
Mystery Card Anatomy: 1. Title — 2. Image — 3. Flavor Text — 4. Clues Acquired — 5. Location — 6. Location Symbol — 7. Effect Text — 8. Card Back Image
[17.1] Clues
Clues are a resource obtained from mystery cards and shared in common by all heroes. When the heroes obtain clues, adjust the clue tracker upwards along the Darkness Track to indicate the new number of clues.
[17.2] Discovering Mysteries
When you draw a mystery card, immediately gain the number of clues indicated at the top of the card and place the card in the specified location. If the location is listed as Random, determine its location by rolling a die and comparing it to the Necromancer's movement arrows printed on the map in the Village (this gives an equal probability for all locations except the Monastery).
Example: If the die roll is a 5, the mystery appears in the Swamp.
[17.3] Pursuing Mysteries
Each mystery card offers one or more objectives the heroes can pursue to obtain additional clues (and possibly other rewards).
If a section of the card is labeled Action, then any hero in the card's location can spend their action to trigger that effect.
If a section of the card has the icon of a key, that section will list some reward and a condition for receiving it. Each such reward can only be obtained once; place a key token over the icon once it has been completed.
If a section of the card is labeled Permanent, then the mystery remains in play forever, and the heroes may utilize the effects of that section as many times as they wish.
If a mystery card has key icons but no permanent effects, then it should be discarded once all of its key icons have been covered.
Mystery Examples:
The Mesmer is in a location with the Defiled Shrine mystery. He chooses to spend his action to use the mystery card, which calls for him to make a fight roll; he uses his Consume Dreams tactic to fight with 3 dice, rolling a 2, 3, and 5.
Because he rolled a 4+, he gains 1 clue and places a key token over the first outline on the card. Because he also rolled a 5, he also gains a treasure chest and places a key token over the second outline on the card. (Notice that both rewards are earned from the same die.)
If the Mesmer (or another hero) spends another action to make another roll for this mystery, they can no longer earn rewards for rolling 4+ or 5+, but are still eligible to earn 3 more clues for rolling 6+.
The Contemplation mystery appears in the Swamp, causing any hero who gains an epiphany there to also gain 3 clues. This card remains in play for the entire game, and will continue to trigger every time a hero gains an epiphany while in the Swamp.
[18.0] Victory And Defeat
There are two possible ways for the heroes to win the game and one way for them to lose.
[18.1] Slay the Necromancer
If you can slay the Necromancer, most of his magic will be undone, and the remaining undead will lose direction, making them easy to defend against.
To kill the Necromancer, a hero wielding a Holy Relic must fight him and win. However, the Necromancer is pitiless and will mercilessly sacrifice his minions to save himself. If there are any blights present when you defeat the Necromancer, you may destroy one blight of your choice, but the Necromancer will escape.
He can only truly be killed if he is beaten in a fight by a hero with a Holy Relic when there are no blights in the location. If this is achieved, all the heroes win.
This will generally require the concerted effort of several heroes to clear the area so that you can get a clean shot.
[18.2] Holy Ritual
If you gather enough of the Holy Relics, you can combine them in a ritual that will release a great cleansing power and scour the land of the undead.
The Necromancer's power will be broken. To perform the ritual, the heroes must find 3 Holy Relics and gather them all at the Monastery.
All the heroes win as soon as there are 3 Holy Relics in the Monastery simultaneously.
[18.3] Monastery Overrun
The Monastery is a sanctuary that repels evil, but nothing lasts forever. If any effect tries to create a blight in the Monastery when there are already 4 (or more) blights present, its defenses will shatter and the kingdom's last light will be snuffed out, plunging the land into darkness. All the heroes lose.
Remember that any effect that would create a blight in a location that already has 4 blights will instead create a blight in the Monastery. Thus, blights in the Monastery will begin to build up faster as the rest of the kingdom is overrun.
Additionally, any effect that would increase the darkness beyond 30 will also, instead, create a blight in the Monastery. Thus, blights will begin to accumulate rapidly in the Monastery if the game goes on too long.
(An Extended Example of Play can be found on page 26.)
[19.0] Other Rules
[19.1] Reshuffling
If any deck runs out of cards, reshuffle the discards to create a new deck (this will usually only happen with the Map Deck).
In the very rare event that a deck runs out of cards and there are no discards, players cannot draw from that deck anymore. Ignore any instructions to draw from that deck until more cards become available.
[19.2] Monastery
The Monastery has several special rules. These are all mentioned elsewhere, but to summarize:
- Heroes in the Monastery do not draw events (see 7.3)
- The Monastery is the only location where heroes can perform the pray action (see 8.0)
- The Monastery has no search difficulty and cannot be searched (see 8.0)
- A hero who spends their entire turn in the Monastery gains 1 secrecy (up to default) (see 6.0)
- The Necromancer can never enter the Monastery and ignores heroes there (see 10.0)
- You can store or retrieve items at the Monastery (see 15.1)
- When an effect tries to raise the darkness beyond 30, it creates a blight in the Monastery instead (see 9.0)
- When an effect tries to create a blight in any location that already has 4 (or more) blights, it creates a blight in the Monastery instead (see 11.1)
- If you gather 3 Holy Relics at the Monastery, you win the game (see 18.2)
- If any effect tries to create a blight in the Monastery when there are already 4 (or more) blights there, the heroes immediately lose the game (see 18.3)
[20.0] Optional Rules
The following rules can be used separately or in combination to adjust the game to taste.
[20.1] Adjusting Difficulty
The rules listed in the main body of this book should present a fair challenge for a typical group experiencing Darkest Night for the first time. However, if you find the game to be too difficult, or if you crave a greater challenge, there are many optional rules that can be used to adjust the difficulty.
Some optional rules have a greater impact than others. To help you gauge the effect of an optional rule, each rule is rated with a difficulty modifier (dm) showing its approximate magnitude (positive numbers mean that using that rule will make it harder to win, while negative numbers mean the game becomes easier to win).
To determine the combined effect of multiple rules, simply add their modifiers together. However, remember that this is only a rough guideline; the effects of difficulty are not entirely linear, and some optional rules may interact in special ways.
If you feel your last game was good practice, but you are ready for a new challenge, try adding rules with a combined modifier of +2.
If you feel you've mastered your previous difficulty level and your last game posed no real risk of defeat, try adding rules with a combined modifier of about +4.
If your last game felt about right, but you think it could use some fine-tuning, try modifying your difficulty by ±1... or even try swapping out some of the optional rules you were using for some different rules with an equal rating.
Difficulty Modifiers
Easier (-)
- -1 (each): Draw 1 fewer darkness cards during the game (see 20.1.1).
- Start the Darkness Track at -5 (see 20.1.3).
- Start every hero with 2 extra grace (see 20.1.4).
- Start every hero with 3 sparks (see 20.1.4).
- Start every hero with 4 power cards (see 20.1.4).
- -2: Start every hero with all 5 power cards (see 20.1.4).
- -3: Start with no blights on the map (see 20.1.2).
Harder (+)
- +1 (each): Draw 1 extra darkness card during the game (you can apply this more than once; see 20.1.1).
- Start the Darkness Track at 5 (see 20.1.3).
- Use the Pall of Suffering optional rule (see 20.1.5).
- Use the Increased Quests optional rule (see 20.1.6).
- +3: Start with 2 blights per location (12 blights total; see 20.1.2).
- +4: Play the game with only 3 heroes (see 20.2.2).
[20.1.1] Darkness Cards
+1 dm: Add an extra darkness card (this can be applied more than once, see the table below). Playing with 2 cards is normal. Enhancing the Necromancer with extra darkness cards is an easy way to increase the difficulty. Depending on how many darkness cards you are using, draw them the first time you reach these darkness levels:
- 1 card (-1 dm): 15
- 2 cards (normal): 10, 20 (each 10)
- 3 cards (+1 dm): 7, 14, 21 (each 7)
- 4 cards (+2 dm): 5, 10, 15, 20 (each 5)
- 5 cards (+3 dm): 4, 8, 12, 16, 20 (each 4)
- 6 cards (+4 dm): 2, 6, 10, 14, 18, 22 (each 4)
- 7 cards (+5 dm): 0, 4, 8, 12, 16, 20, 24 (each 4)
- 8 cards (+6 dm): 0, 3, 6, 9, 12, 15, 18, 21 (each 3)
Regardless of the number of darkness cards you use, the special Darkness Track effects at 25 and 30 take place as normal.
[20.1.2] Starting Blights
Placing more blights during setup creates more obstacles for the heroes and also makes it possible for the Necromancer to win more quickly. This can change the difficulty dramatically.
Normally, you start with 1 blight per location (except the Monastery); 6 blights in total.
+3 dm: Start with 2 blights per location (12 blights total).
-3 dm: Start with no blights on the map.
[20.1.3] Starting Darkness
Adjusting your starting point on the Darkness Track provides a way to make small changes to the difficulty and may be useful for fine-tuning.
+1 dm: Start the Darkness Track on the "5" space (instead of zero). You can start even higher than that, but doing so may force you to play very aggressively and deny you the opportunity to develop your heroes, so is usually not the ideal way to raise the difficulty.
-1 dm: Start the Darkness Track at -5. To indicate starting this track at less than zero, just flip the tracker over and count down until you reach zero, then flip it normal-side up and begin counting up.
[20.1.4] Starting Heroes
-1 dm: Start every hero with 2 extra grace. This may be an attractive option for new players who are struggling, since it provides more of a buffer against mistakes without adding any complexity.
-1 dm: Start every hero with 3 sparks.
-1 dm: Start every hero with 4 of their power cards (instead of the usual 3). -2 dm: Start every hero with all 5 of their power cards. However, keep in mind this will give you more to keep track of, and so might not be the best option if you have trouble keeping track of the rules.
Starting with fewer power cards than normal is not recommended, because certain heroes rely heavily on interactions between their cards and might suffer disproportionately. Starting with less is also not recommended, because in most cases it will simply cause heroes to spend their early turns praying.
However, if you want a more challenging game, you should consider selecting your characters and/or your starting powers at random. This will force you to experiment with new strategies every game instead of relying on memorized tactics. (If you still want some control over your play style, consider dealing each player 3 random characters for them to choose between.) This rule does not have a difficulty modifier, because any team you could choose is also a possible random team, but a truly good player should be able to play with whatever they are dealt.
[20.1.5] The Pall of Suffering
The Necromancer has always been merciless, but lately he's become gratuitously cruel. Rumors say he's found a way to draw power from suffering and misery, and to wear it like a shield...
+1 dm: This is a complex optional rule and is especially recommended if you find the Necromancer dies too early in the game or if you want a greater emphasis on quests.
Place 1 quest card in the Village during setup.
When a quest expires, instead of discarding it, place it next to the Darkness Track. These cards form the Necromancer's pall, which protects him from attacks.
Whenever you successfully complete a quest, you may immediately remove one card from the Necromancer's pall (this has no effect if the pall is already empty).
When you win a fight against the Necromancer, if there are any cards in his pall, you remove one card but do not gain the normal benefit for winning (that is, you do not slay the Necromancer or destroy a blight). Thus, the new procedure when you win a fight against the Necromancer is:
- If there are any cards in his pall, remove one.
- If there are no pall cards to remove, destroy a blight in his location.
- If there are no pall cards to remove and no blights to destroy and you are wielding a Holy Relic, you slay the Necromancer and win the game.
[20.1.6] Increased Quests
+1 dm: This optional rule is especially recommended in conjunction with the Pall of Suffering (previous section).
The first time on each Necromancer turn that you draw a map card, if that map card has a quest symbol on it, draw a quest card and place it in the location with the quest symbol. (This is in addition to whatever you would normally do with that map card, and it does not matter whether the indicated location is otherwise being used.)
Increased Quests Example: On the Necromancer's turn, he rolls a 5 and moves to the Swamp, where he creates a blight (like always), drawing a map card (1). He places a Shades blight in the Swamp (as indicated by the card), and also creates a new quest in the Village (because of the quest symbol on the card).
Because of the darkness card Creeping Shadows, the Necromancer also creates a second blight in the Swamp, drawing a second map card (2) and creating an Oblivion. Although this new map card has a quest symbol in the Mountains, he does not create a second quest, because it was not the first map card of his turn.
[20.2] Playing with Different Numbers of Heroes
Darkest Night is balanced to work best when playing with 4 heroes. However, if you want to try playing with other numbers of heroes, you can use the following rules:
[20.2.1] Five Heroes
When playing with 5 heroes, use the following additional rules:
- The first Holy Relic you retrieve costs 17 clues, instead of the normal 10.
- Draw 1 darkness card during setup; this is in addition to any darkness cards you would normally draw throughout the game. (If you draw Eclipse during setup, draw another card instead, and then shuffle Eclipse back into the deck.)
- At the start of the Necromancer's turn, if the darkness is already at 30 (before increasing it), create an extra blight in the Monastery (in addition to the one you would create normally for trying to increase the darkness past 30). This usually means you will add 2 blights to the Monastery per round after the darkness reaches 30.
[20.2.2] Three Heroes
Playing with 3 heroes counts as a +4 dm (see 20.1), so you should compensate by applying other optional rules with a combined value of -4 dm. For instance, you could start with 1 fewer blights in every location (-3 dm) and 1 extra power card per hero (-1 dm), or you could play with 4 less darkness cards than normal (if you would normally add some).
[20.2.3] Two Heroes: Dual-Class Variant
Significant changes are required to play with only 2 heroes. In this variant, the players collectively control only 2 heroes against the Necromancer; however, each hero combines the powers of 2 regular characters.
Setup
Each player chooses a primary class: take the hero sheet, standee, and power cards for the selected hero.
Each player also chooses a secondary class: take only the power cards for this hero.
(Note: Some classes with a focus on group support may be less effective in this variant.)
Place your standee in the Monastery. Place your hero sheet in front of you, and place grace and secrecy trackers on the default values indicated on the sheet.
From your primary class Power Deck, find all the cards with a symbol in the corner (there should be 5). Choose 3 of these powers to start with, and place them face up in front of you.
Do the same with your secondary class Power Deck, so that you have a total of 6 powers in front of you.
Take all the remaining power cards from both decks (including the powers you did not choose) and shuffle them all into a single combined pile (which should contain 20 cards). This is the Power Deck you will draw from during the game.
Power cards show their related hero on the back. To avoid knowing anything about the card that you will be drawing next, always draw from the bottom of your Power Deck. Any time you would normally place a card on the bottom of the deck (such as after using a supply cache), put it on top instead.
Place two turn trackers (sun/moon tokens) near your hero sheet. Take an extra grace tracker and an extra secrecy tracker and keep them handy.
Turn Sequence
Each character takes 2 turns each round. At the end of your first turn, flip one of your turn trackers to its moon side. At the end of your second turn, flip your other turn tracker to its moon side.
Heroes may take their turns in any order, and may choose a different order each round. (For example, you could alternate turns, or you could take both of your turns before the other player takes any.)
Each turn follows the full, normal turn sequence: Resolve start-of-turn effects (including the Necromancer, if you are in his location); draw an event; perform an action; and resolve end-of-turn effects (such as blights in your location). This means that blights (and the Necromancer) that can attack you during your turn may do so twice in a single round.
Once both players have finished both turns, the Necromancer takes a turn as normal.
Holy Relics
Each hero may carry up to 2 Holy Relics at a time.
If you are carrying 1 relic, that relic only affects your second turn during each round. During your first turn, the relic is completely inert and has no effect on gameplay (but may be traded, if you wish). During your second turn, you lose secrecy for the relic at the start of your turn and add 1 to the result of your highest die in fight rolls, as normal.
If you are carrying 2 relics, you experience all of the usual effects for carrying 1 relic, but on both turns.
You should never apply the effects of 2 Holy Relics during a single turn.
Tactic Limitations
You may not use the same tactic in two consecutive combats (see 12.0).
Whenever you use a tactic, place your spare grace tracker on the tactic you used. You may not use that tactic again while the grace tracker remains on it.
When you use a different tactic, move the grace tracker to the newly-used tactic. The previous tactic is now available to use again (subject to all the normal limitations, like exhaustion or costs).
If you resolve a combat without using any tactic at all, remove the grace tracker and set it aside. All of your tactics are now available for use in the next combat.
The grace tracker is only moved when you resolve a combat. Exhausting, refreshing, activating, or deactivating a card has no effect on the grace tracker. The grace tracker persists across turns and may remain in place for multiple rounds if you do not get into any combats.
Exception: When any effect allows a tactic to be used by heroes other than the original owner (for example, if you attach a Psion Stone to the tactic), usage of that tactic is no longer limited; you may use it as often as the regular rules would allow.
Action Limitations
You may not spend two consecutive actions using the same Action effect from a power card.
Whenever you use an Action effect from a power card, place your spare secrecy tracker on the Action you used. You may not use that Action again while the secrecy tracker remains on it.
When you use a different Action from a power card, move the secrecy tracker to the newly-used Action. When you use any action that does not come from a power card, remove the secrecy tracker and set it aside.
[20.3] Playing the Necromancer
With at least 2 players, assign 1 player to control the Necromancer. This player works in opposition to the heroes and tries to make them lose. The game plays as normal, except for the following changes:
[20.3.1] Setup
The Necromancer draws 4 map cards to form his initial hand. Do not show these cards to the heroes.
[20.3.2] Necromancer Movement
Roll for Necromancer movement as normal.
If the Necromancer detects any heroes, he chooses one to pursue (regardless of distance), and moves towards them by the shortest available route (Necromancer's choice in case of a tie). If the Necromancer detects a hero in his own location, he may choose that hero and remain in that location.
If the Necromancer does not detect any heroes, he moves to any adjacent location he chooses, but he may not move to any location with a hero. If all adjacent locations contain heroes, he does not move (but he must move if possible).
If there is a Gate blight in effect, the Necromancer treats all locations as adjacent. If he detects any heroes, he moves to any location containing a detected hero, regardless of distance. If he does not detect any heroes, then he may move to any location that does not contain any heroes (but must still move, if possible).
The Necromancer may still never enter the Monastery and never detects heroes there.
The movement numbers on the board have no effect on movement in this variant.
[20.3.3] Creating Blights
Whenever a new blight is created, instead of drawing a card from the Map Deck, the Necromancer plays a card from his hand to determine the type of blight. When his hand is empty, he draws a new hand of 4 map cards.
If the heroes would normally draw multiple map cards and choose one, the Necromancer must play an appropriate number of cards and let the heroes pick among them.
The Necromancer may not play a card that calls for a blight for which all tokens are already in use. If he has no legal card to play, he reveals and discards his hand, draws a new hand of 4, and plays one of those cards. If he still has no legal cards to play, the heroes choose the type of blight.
[20.4] Hidden Relics
Do not place any Holy Relic tokens on the map during setup. Instead, once the heroes have obtained enough clues to potentially retrieve a relic, determine the relic's location randomly in the same manner as a quest (roll a die and compare to the Necromancer's movement arrows for the Village). Continue adding new relic tokens to the board in this way each time the heroes obtain enough clues to retrieve another.
[20.5] Playing without Mysteries
If you want to play without mysteries, treat all mystery/revelation symbols as keys. Keys are items, and when retrieving a Holy Relic, you discard 3 keys instead of 10 clues. In the rare case that something still gives you clues (such as the Mesmer power card Pilfer Secrets), roll 1 die for each clue you would have gained and take a key for each die that rolls 5-6. (You may not modify this roll with sparks or powers.)
[20.6] Playing without Quests
To play without quests, do the following:
- Remove all quest-generating event cards from the Event Deck.
- Remove the mystery card Common Knowledge (if using mysteries).
- Remove the darkness card Well of Misery.
- Remove the following hero power cards: Bard: Eucatastrophe; Knight: Oath of Service; Paragon: Man of the Hour; Tinker: Stabilizing Gadget; Wayfarer: Good Samaritan.
There are other cards in the game that reference quests, but they do enough other things to still be useful even when playing without quests. The 5 powers above, however, will have severely limited usefulness without quests, so you should not use them.
[20.7] Playing without the Darkness Deck
Remove the mystery card By Starlight. Instead of shuffling the Darkness Deck and drawing randomly, use the darkness card Dying Land at darkness 10 and the card Creeping Shadows at darkness 20.
Extended Example of Play
The board is set up with an Unholy Aura blight, a Shroud blight, and a Shades/Skeletons pairing in play at various locations.
Prince's Turn
The Prince elects to go first. He draws an event card, Dead Servant. Following the instructions on the card, he checks his secrecy, which is 4, so he faces an archer (4 strength, 4 awareness). His Loyalty power card gives him an extra die on elude rolls, so he decides to elude the archer and rolls 2 dice, getting a 3 and a 4 as results. The 4 is greater than or equal to the archer's awareness, so he wins the fight and discards the event without effect.
For his action, the Prince uses his power card Inspire, choosing to activate it on the Valkyrie. After that, his turn is over.
Valkyrie's Turn
The Valkyrie goes next. She draws an event card, Rescue (5 strength, 4 awareness). Her Skewer power allows her to fight with 2 dice, so normally she would have better odds fighting this event despite the higher target number; however, the Unholy Aura blight takes away one of her dice in fight rolls, so she chooses to elude instead. Unfortunately, she only rolls a 2. Since the rescue failed, she increases the darkness by 1 (as instructed by the event card), then discards the event.
For her action, the Valkyrie attacks the Unholy Aura. She uses her Skewer tactic to fight with 2 dice, deactivates the Inspire power the Prince just gave her for +3 dice, and finally subtracts 1 die for the Unholy Aura's effect, giving her a net total of 4 dice. Sadly, all of the dice roll 1s. Since none of the dice is individually 4 or higher, the attack fails; the blight remains in play, and the Valkyrie suffers its defense (lose 1 grace). She also loses 1 secrecy for making the attack, regardless of the result, which lowers her secrecy from 4 to 3.
Seer's Turn
Meanwhile, the Seer is in the Monastery, trying to recover her grace. She does not draw an event card, because she is in the Monastery. For her action, she prays, rolling the standard 2 dice and getting a 3 and a 6. Since both of the dice rolled 3 or higher, she has 2 successes, and can gain 2 grace (but not higher than her default of 4), so she raises her grace from 1 to 3.
At the end of her turn, since she spent her entire turn in the Monastery, she also gains 1 secrecy, raising her from 5 to 6 (but she cannot raise her secrecy higher than default in this way, so she won't gain more on her next turn unless something changes).
Crusader's Turn
The Crusader is in the Castle facing the Necromancer, wielding a Holy Relic. A Skeletons blight and a Shroud blight are also there.
At the start of the Crusader's turn, he loses 1 secrecy because the Necromancer is in his location and another 1 secrecy because he is carrying a Holy Relic. He reduces his secrecy from 2 to zero.
Since the Crusader's secrecy is zero and the Necromancer is in his location, he does not draw an event card; instead, the Necromancer attacks him. The Crusader chooses to fight using his Wrath tactic, which requires him to spend 1 grace (lowering him from 3 to 2), but lets him roll 4 dice. His initial roll gives him a 2, 3, 5, and 6, but the Holy Relic adds 1 to the result of his highest die, turning the 6 into a 7, which fortunately is just enough to beat the Necromancer.
The Necromancer sacrifices a blight to save himself. The Crusader would like to destroy the Skeletons blight, but the Shroud is protecting it, so he selects the Shroud.
Now that the event step of the Crusader's turn is done, he gets to perform an action. He chooses to search, and rolls 1 die, getting a 2. Since the search difficulty in the Castle is 2, he succeeds and draws a map card to see what he has found. The map card lists a supply cache for the Castle, so the Crusader draws 2 cards from his Power Deck, chooses one to keep, and puts the other at the bottom of the deck.
At the end of the Crusader's turn, the Skeletons blight generates a monster for him to fight, and he has to defend himself. Though he could use his Wrath power again, that would require spending a grace, and since the worst possible outcome for this fight would only be a wound, that is not worth the cost, so he chooses to fight with no tactic. He rolls a 3, which the Holy Relic modifies to a 4, which is enough to defeat the Skeleton (4 strength). The blight itself is unaffected, but the particular skeleton that the Crusader ran into is now dead, so he is safe for this turn. (There will be another skeleton to face next round, unless something changes.)
Necromancer's Turn
Now that all the heroes are done with their turns, the Necromancer takes a turn.
First, he raises the darkness by 1.
Next, he adds one marker to every quest currently on the board. The Ill Weather quest card in the Swamp gets a marker and so does the Tribute quest in the Village. That makes 5 markers on Tribute, which matches the rating on the card, so the quest expires; the Tribute card is discarded, and the penalty listed under "expired" on the card is applied. In this case, the penalty is a blight, so the players draw a map card and find the blight listed in the Village row, which happens to be Zombies. They take a Zombies blight token from the Stock and place it in the Village.
Then, the Necromancer rolls for his movement and gets a 4. No possible roll could detect the Seer, because she is in the Monastery. The Prince is not detected either, because he has 4 secrecy (though a roll of 5 or 6 could have detected him). However, the Valkyrie and the Crusader both have less than 4 secrecy, so they are both detected. Since the Necromancer detected multiple heroes, he chases the nearest one, which in this case is the Crusader, who is already in the same location as the Necromancer, so the Necromancer does not move.
Finally, the Necromancer creates a blight in his location, so he draws a new map card and finds the blight listed in the Castle row, which is an Evil Presence, so he takes an Evil Presence blight counter from the Stock and places it in the Castle.
Next Round
After the Necromancer's turn, a new round begins. Each of the heroes can take a new turn, and they can go in any order (they do not have to go in the same order as last round).