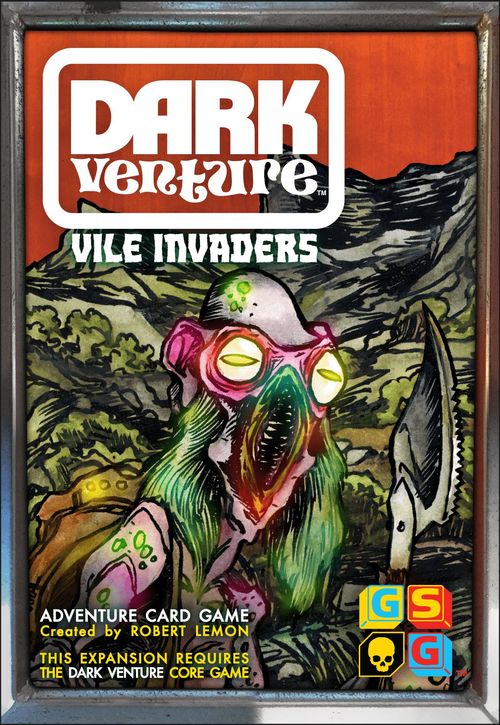
Dark Venture: Vile Invaders
Dark Venture: Vile Invaders Rulebook
Table of Contents
Table of Contents
Dark Venture Vile Invaders
This expansion to DARK VENTURE enhances the core game and offers the opportunity to gather RESOURCES, which can be used to CRAFT and UPGRADE items.
-
RESOURCE PILE: Shuffle 10 ORE, 7 WOOD, and 5 WATER RESOURCE cards into a resource pile and place it near the play area, facedown. When a resource is successfully collected in a location, a card is drawn from this pile.
-
CRAFTED-ITEM PILES: Place the METAL and MEAT cards into their own faceup piles near the play area. When crafting METAL at a location with the KILN, a METAL card is drawn from the metal pile. After using a SMALL ANIMAL TRAP, a MEAT card is drawn from the meat pile.
-
COLLECTING RESOURCES: In any location, for 1 ACTION POINT (AP), a player-controlled HERO or their FOLLOWER may attempt to collect a resource by rolling 2d6 + LUCK. If the roll total is 11 or higher, a RESOURCE is drawn from the pile.
There are a limited number of resources in the resource pile. Players can shuffle the discarded resources to create a new resource pile as necessary. If all resources have been collected, and there are no discarded resources, no more can be collected until some have been discarded or spent.
-
SETUP: Add all the VILE INVADERS ITEM, LOCATION, CHARACTER, HEROIC QUEST, and SIDE QUEST cards to the core game decks, then shuffle them. Set up the rest of the game as outlined in the CORE RULE BOOK ("DARK VENTURE: GAME SETUP," p. 3).
-
NEW CHARACTER RULES: All DHARGON COLLECTORS, DHARGON EGGS, and BOHMERK (all types) can be drawn from the character deck or discard pile as needed. If all DHARGON or BOHMERK of a specific type are in play, others of that type cannot be crafted, hatched, or "grown" (using GROWTH) until they are returned to the deck or discard pile. NOTE: DHARGON EGGS are not "weapon-holding" and do not have inventories to hold or equip items.
-
NEW LOCATIONS & CORE QUESTS: When added to the core game, THE HATCHET WATERFALL, POISON POND, DEATHBED ISLE FORGE, and DEATHBED ISLE CRATER are considered "locations with water." DEATHBED ISLE FORGE and THE EGG OUTPOST are considered "locations with buildings."
Hero Biographies
23 TORS the WEIRD is shunned by most residents of Darkgrange for his strange behavior. He is often caught hiding in roadside bushes from which he observes people for reasons unknown. He has no qualms about invading private land to dig holes and destroy property. However, because of occasional acts of valor and kindness, he is considered a hero by some.
29 The ETHER RIDER is a vigilante who rides the line between good and evil. He is known for single-handedly protecting the village of Drenn from a bandit attack. Later, in a horrifying black magik ritual in the center of town, he danced wildly around the burning bodies of the bandits he killed. Inhabitants of the Darkgrange fear him, for good reason. His behavior is as unpredictable as his presence is threatening.
39 IR'RAK the FEARED was once a high-ranking member of the Great Varpen Legion, an organization of varpen tribes who inhabit vast caverns beneath Darkgrange. She was caught leading an assassination attempt on the corrupt head of the Legion and imprisoned. After her escape, she fled the caverns and has not returned underground since.
Expansion Locations
NOTE: Numbers in MAGENTA CIRCLES on VILE INVADERS location cards correspond to EXPANSION LOCATION entries in this book. Numbers in MAGENTA HEXAGONS correspond to EXPANSION ACTION entries in this book. For more information on playing locations, review the LOCATION GUIDES included with the CORE GAME.
- Dhargon Starship Bow: Upon placing this location, draw the DHARGON STARSHIP STERN location, and place it adjacent to the BOW location to complete the Dhargon Starship; then shuffle. NOTE: If a player's character is moving from the DHARGON STARSHIP STERN to the BOW location for the first time, skip this entry and read ACTION 076.
A gigantic metal spacecraft lies half buried in the forest clearing ahead. It has been here for quite some time. The hull of the ship was severely damaged when it crash-landed. You see something moving in the spherical cockpit of the craft. When a player's hero or follower enters this location, read ACTION 090.
- Dhargon Starship Stern: Upon placing this location, draw the DHARGON STARSHIP BOW location, and place it adjacent to the STERN location to complete the Dhargon Starship; then shuffle. NOTE: If a player's character is moving from the DHARGON STARSHIP BOW to the STERN location for the first time, skip this entry and read ACTION 079.
Up the road, a sleek craft lies half buried in the dirt, shrouded by trees. Vines cover the twisted landing gear and most of the underside of the disintegrating vessel, but you can clearly see a circular hatch protruding through the vines. When a player's hero or follower enters this location, read ACTION 095.
- Deathbed Isle Forge: After playing this card, place it into the play area, disconnected, away from the main map. Draw the DEATHBED ISLE CRATER location. Place it adjacent to the FORGE location to complete Deathbed Isle, and then shuffle. NOTE: If a player's character is moving from DEATHBED ISLE CRATER to the FORGE location for the first time, skip this entry and read ACTION 066.
There's a rustling in the underbrush nearby. A small gray-skinned man wearing a woolen cloak cautiously steps out of the forest and onto the road. He speaks in a hushed tone. "Listen to me," he whispers. "We are all in danger. There is an island off the coast of Darkgrange. Go there, and stop the plot to change our timeline." He looks about nervously and, before you can ask a question, disappears into the forest. When a player's hero or follower enters the DEATHBED ISLE FORGE, read ACTION 066.
The forge on DEATHBED ISLAND can SMELT, FORGE, and UPGRADE like the "SMELTING KILN" and "HAMMER & ANVIL" items. Any player's hero, or their follower, can perform these actions while on the DEATHBED ISLAND FORGE.
SMELT: Discard 1 ORE to draw 1 METAL. FORGE: Spend 1 AP and discard 2 METAL to draw until you find 1 sword, tool, or shield and then add it to your character's inventory, shuffle the rest back. UPGRADE: Discard 2 METAL to roll 2d6 + MIND. If the roll total is 13 or higher, increase the ATTACK BONUS of a sword or the ARMOR BONUS of a shield by +2. If 12 or lower, increase the ATTACK BONUS of a sword or the ARMOR BONUS of a shield by +1 (once per item).
- Deathbed Isle Crater: After playing this card, place it into the play area, disconnected, away from the main map. Draw the DEATHBED ISLE FORGE location. Place it adjacent to the CRATER location to complete Deathbed Isle, and then shuffle. NOTE: If a player's character is moving from DEATHBED ISLE FORGE to the CRATER location for the first time, skip this entry and read ACTION 081.
A cloud of red smoke appears on the road ahead. It spins, becomes more dense, and then transforms into a person. Draw cards from the character deck until you find a HERO, then shuffle. Equip and place the drawn hero into the current location of your existing hero.
"I've been cursed by an evil sorcerer," says the drawn hero. "Help me to remove this hex, and I will reward you. Meet me on Deathbed Isle. The meteor that struck the isle is imbued with powerful magik." The drawn hero explodes in a puff of red smoke, which blows away with the wind. Set their cards and token aside. When your hero, or their follower, enters DEATHBED ISLE CRATER, read ACTION 101. If another player's character enters the DEATHBED ISLE CRATER before one of yours does, read ACTION 081.
-
The Egg Outpost: Several figures stand atop a tower on the outpost ahead. Draw THE EGG KING (along with his EGGMAN SOLDIER, if possible) from the character deck or discard pile, or reveal him if he is in a player's hand. If drawn, shuffle; then equip and place him at the outpost. Draw another character, equip them as necessary, and place them here also. This character is unable to engage in combat as the Egg King and his follower are dangling them from the top of the tower! When a player's hero or follower enters this location, read ACTION 070.
-
The Hatchet Waterfall: In the distance, you see a majestic waterfall. The thunderous roar of the falling water is almost deafening. There is a rickety, old rope and plank bridge spanning the river. You could use it to get to the other side of the river, but it seems precarious. Intermittently, above the roar of the falls, you hear rhythmic chanting. When a player's hero or follower who is WARLOCK faction enters this location, read ACTION 073. When a hero or follower of any other faction enters this location, read ACTION 088.
-
Poison Pond: The breeze carries a putrid smell. Waste barrels litter the sides of a road that leads to a small pond ahead. An eerie purple mist floats above the pond's surface. As you walk closer, the putrid smell becomes overwhelming. You hear a gurgling sound. When a player's hero or follower enters this location, read ACTION 069.
-
The Ruined Chapel: Music and uproarious merriment beckon from up the road. Following the sound, you stumble upon an unexpected scene. Among the ruins of a building, three individuals, arms linked, are singing and dancing with intensity while circling a glowing object. You notice that their eyes are blank, white, and empty. When a player's hero or follower enters this location, read ACTION 071.
Expansion Actions
ACTION 066: You hear a loud hammering noise coming from inside a nearby shack. With each hammer strike, you see a flash of multicolored light. Your vision blurs for an instant, and you feel a wave of energy! If someone hasn't already, you can ENTER THE BUILDING (ACTION 072), LOOK IN THE WINDOW (ACTION 086) or, for 1 AP, you can WALK TO THE OTHER END OF THE ISLAND (ACTION 081).
ACTION 067: The hero takes the glowing ore from you. They whisper an incantation and the wind picks up. A spinning vortex of sand and debris surrounds you and the hero, but this time the hero does not turn to red smoke. They drop the ore and the wind stops. "HUZZAH! The hex has been lifted, and I am free!" The hero bows. Gain 3 QP and, if you wish, you may take them as your follower (with no follower roll).
ACTION 068: You grab the masked individual and pull them away from the machine. The crystal drops from their grasp. It hits the table and then ricochets, like a bullet, across the room. It strikes the wall and explodes in a shower of multicolored sparks, releasing a blast of energy that throws both of you into the wall. Your character incurs 2d6 damage but retains at least 1 HEALTH (they do not die or fall unconscious).
You stand, brush yourself off, walk toward the masked individual, and remove their mask. Draw cards until you find 1 HERO, if possible, then shuffle. Equip and ready this hero. They also took damage in the explosion: Roll 2d6 and reduce their health by the roll total. Currently, the hero is unconscious, but they will awaken in 2 game rounds, at the start of the second of those 2 rounds. After awakening, this hero will be AGGRESSIVE toward you. Lying next to the unconscious hero, you find a scrap of paper. It's a decree from the king to his Kingsguard about a thief who stole a powerful artifact. There is a photograph of this hero attached to the decree. Your hero (or their follower) can bring this hero to THE CROSSROADS and hand them over to the Kingsguard. If you do so, discard the hero and receive 4 QP.
ACTION 069: As you walk closer to the misty pond, you begin to see movement in the water. The tip of a tentacle snakes slowly onto a large rock. Then, another tentacle breaks the surface of the water and slaps down onto the same rock. The tentacles strain to drag the gelatinous creature's bulk out of the water. Meanwhile, other tentacled abominations, barely visible under the pond's dark surface, are propelling themselves toward you. You turn to walk away, but feel a tug on your leg.
Draw 2 BOHMERK GLUTS from the character deck or the discard pile, if possible, and place them here. As noted on their cards, roll 1d6 for each. On a roll of 4 or higher, a bohmerk will become AGGRESSIVE for the round. When a bohmerk is killed in this location, roll 2d6 + LUCK: If the total is 10 or higher, discard that bohmerk and gain 1 QP. If the roll total is 9 or lower, set that bohmerk aside. (NOTE: If one has grown into its SLOG or TERROR form, discard it and draw a GLUT from the discard pile to set aside instead). Return it to this location at the end of the next round.
The chemicals contaminating the pond have altered these bohmerk, giving you an advantage. Potions can damage them. To inflict 4d6 + POWER damage to a bohmerk in this location, throw MARSH APPLE EXTRACT, FOXBONE TINCTURE, or GORGON BERRY TONIC at them (then discard the potion) as your battle turn. If a potion does not kill it, the bohmerk will consume the bottle, healing 1d6 damage.
ACTION 070: If a player wants to convince the Egg King to release the dangling character, the player's hero or non-beast-faction follower can roll 2d6 + MIND. Only after the roll, if the Egg King is alive, will he issue his ROYAL REQUEST (see his character card for details).
If the roll total is 9 or higher, the Egg King will pull the character he is holding back into the tower. The "saved" character will immediately attack the Egg King. Players can decide whether they want their characters to join the fight or not, but, for this battle, the saved character will align with the player's characters who saved them (and won't attack them).
If the roll total is 8 or less (or the player chooses not to roll), the Egg King will drop the dangling character. The dropped character falls unconscious and their health is reduced to 8, but they will awaken at the beginning of the next round.
ACTION 071: Ahead, you see three people, arms linked, excitedly dancing in a circle while singing. As you walk closer, they begin to dance faster and sing more loudly. The artifact they're circling glows brighter. If someone hasn't already, you can CALL OUT TO THEM (ACTION 077) or ATTEMPT TO GRAB THE GLOWING OBJECT (ACTION 080). Alternatively, you can REMAIN HIDDEN (ACTION 085).
ACTION 072: You barge through the door of the small building. Standing next to a broken wood staff, a masked person is carefully placing a tiny crystal shard into an ornate, spherical machine with a pair of tweezers. Do you TRY TO STOP THEM (ACTION 068), or LET THEM CONTINUE (ACTION 083)?
ACTION 073: You hear a familiar chant. It is a warlock mantra that helps to bolster both power and mind. You are also familiar with this waterfall; it hides a secret Guild of Warlocks' meeting place. If someone hasn't done so already, you may ENTER THE SECRET SANCTUM (ACTION 092), or you may attempt to CROSS THE RICKETY ROPE BRIDGE that spans the river (ACTION 088).
Also, for 1 AP, your WARLOCK-faction character may attempt to cast an incantation on the bridge to strengthen it so it won't break when it is crossed. Roll 2d6 + MIND. If the roll total is 9 or higher, your character succeeds, and the bridge is shored up for the rest of the game. Anyone may cross it without fear. If the total is 8 or lower, the incantation fails. When attempting to cross the bridge, read ACTION 088.
ACTION 074: You climb the ladder into a clean, well-lit chamber. Seated in front of a large control panel are the dried remains of a dhargon (see the DHARGON COLLECTOR card for more details). The control panel is connected by various cables to a large, circular metal platform. You push the remains of the dhargon back and examine the control panel. Its buttons are marked with symbols you don't recognize. You can leave the ship (at no AP cost), or you can PRESS A BUTTON ON THE CONTROL PANEL (ACTION 099).
ACTION 075: You feel powerful. Draw a HEROIC QUEST, gain 1 QP, and then take any 1 of these actions: (1) Add 1 to any of your character's attributes. (2) Choose any 1 item from the item deck, shuffle, and then place the item into any location. (3) Draw 2 resources, and then place them into any other location. (4) Transport any 1 of your characters, unseen, to any other location. (5) If you're not playing solo, give this action to another player to gain 2 QP (once taken, this option cannot be repeated). After you've made your choice, and if your character wasn't transported away, you may return to ACTION 099.
ACTION 076: You climb over a partially-destroyed wing fin pushing through the brush. At the front of the vessel, you see a campsite with a cooking pit, some folding chairs, and a makeshift shower apparatus. You walk around the front of the craft to the other side where you notice a large hole in the rusted hull. If someone hasn't already done so, you can ENTER THE SHIP THROUGH THE HOLE (ACTION 100).
ACTION 077: You walk toward the merrymakers and call out to them cheerfully. They promptly stop dancing and turn to look at you. Their eyes become clear. One of them, a man, screams in terror. Shockingly, the object they were dancing around explodes in a blast of arcane energy, and all three are instantly vaporized! Even though you aren't close, you are struck by the blast. If your character is wearing LEATHER BODY ARMOR or a TACTICAL VEST, it is damaged beyond repair and must be discarded. Roll 1d6 + SPEED. If the roll total is 8 or higher, your character turns quickly and avoids most of the explosion; take 2d6 damage. If 7 or lower, your character is struck hard and takes 3d6 damage, but their HEALTH can't be reduced below 1.
You inspect the site of the explosion. Piles of white ash are all that remain of the three unfortunate individuals. The glowing object has mostly disintegrated except for a small, magenta crystal. If available, draw a RIFT CRYSTAL from the item deck or discard pile; then shuffle and gain 1 QP.
ACTION 078: You grab the two handles and rotate the hatch. A hiss of compressed air escapes from the compartment above. If someone hasn't already, you may CLIMB THE LADDER INTO THE SHIP (ACTION 074), or you can EXPLORE THE BACK OF THE SHIP (ACTION 097).
ACTION 079: You push your way through the thick brush around the ship. As you do, you discover a loose panel on the underside of a wing. If someone hasn't already done so, you can PULL OFF THE PANEL (ACTION 102), or move to the STERN of the ship. On the underside of the craft, you notice a pair of chrome handles on a circular hatch. If someone hasn't already, you can ATTEMPT TO OPEN THE HATCH (ACTION 078) or EXPLORE THE BACK OF THE SHIP (ACTION 097).
ACTION 080: You focus on the glowing object that stands in the center of the circling dancers and run, as fast as you can, towards it. Roll 1d6 + SPEED: If your roll total is 8 or higher, read ACTION 087; if it is 7 or lower, read ACTION 098.
ACTION 081: You notice two strange masses half buried in the sand. Peering through the thick, transparent skin, you realize what you've found. Draw 2 DHARGON EGGS from the character deck or discard pile, and place them here.
Something peers out from behind a nearby mound of seagrass. Draw characters until you find one that is BEAST faction (not a follower), then shuffle. This creature, trapped on the island without food for some time, is starving. Reduce its POWER by 3 and set its HEALTH to 18. You can attempt to move to the other side of the island (once) to escape this creature, if your character rolls 11 or higher on a roll of 2d6 + SPEED. NOTE: If a player's character is moving to DEATHBED ISLE FORGE from the DEATHBED ISLE CRATER location for the first time, read ACTION 066.
ACTION 082: Under the water, along the sides of the crater, you see pockets of glowing, metallic rocks. They must be fragments of the meteor, scattered upon impact. Your task will be easier than you expected. For 1 AP, you can gather meteor fragments from the crater by rolling 2d6 + LUCK. If the roll total is 8 or higher, draw an ORE from the resource or discard pile, and then shuffle. Mark it with a cube to denote that it is a meteor fragment.
Collect 3 ORE from this location and give them to the hero here (at no trade cost) to gain 4 QP. You may leave this location and come back to complete this task later if you desire. Once you have gathered 3 ORE this way and given them to the hero, read ACTION 067.
ACTION 083: The masked person glares in your direction and then returns to their task. They carefully place the crystal shard into the spherical machine, close a small latch, flick several switches, and the device sparks to life. Metallic rings begin to spin as the machine lifts off the table. The device emits a blinding flash, and the stranger fades away! Draw a HEROIC QUEST. You must choose 1 of the following 3 actions:
(1) Gain 3 QP, then CHANGE THE TIMELINE. Remove all characters and items from the map and set them aside. Return all search tokens. Pick up all the map locations that have been played so far and shuffle them together. Drawing 1 location at a time, create a new map. Then all players, in turn order (beginning with the current player), add back each of the characters and items that were taken off the map, one at a time. Next, resolve any AGGRESSIVE combat. Any previously searched locations may be searched again. The metallic rings on the spherical machine stop spinning, and it drops from the air. The current player may continue their turn.
(2) Gain 2 QP, then CHANGE YOUR DESTINY. Discard as many HEROIC QUESTS and SIDE QUESTS as you desire to draw that many new ones. The metallic rings on the spherical machine stop spinning, and it drops from the air. The current player may continue their turn.
(3) Gain 2 QP, then CHANGE YOUR IDENTITY. Search the character deck for another HERO, draw their items from the item deck, and then shuffle. Exchange your hero for that one, and set them up on your dashboard. Shuffle your previous hero and their starting items (wherever they are) back. Your new hero retains your previous hero's health, their follower, and all the items they have collected in this game so far. The metallic rings on the spherical machine stop spinning. It drops from the air. The current player may continue their turn.
ACTION 084: You carry the item holding Saegon's soul back into the hidden warlock sanctum. Tras takes it from you and places it next to Saegon's body. Together, you whisper an incantation. The item begins to radiate with a bright, blue light. Tras makes an intricate gesture over the object and a small, flickering blue orb lifts from it. You guide the orb toward Saegon's lifeless body, and it hovers for a second before slowly lowering into him. His chest moves; he's breathing! Tras lays her hand on your shoulder and says, "He will live, thanks to you." Her touch energizes you, increasing your character's MIND and SPEED by 1 permanently. Gain 4 QP.
ACTION 085: You crouch behind a bush and continue watching. The dancers become even more frenzied and the object at the center of their ritual glows brighter until, unexpectedly, it breaks into fragments that float out to form a circle. Arcane energy spins wildly around the outside of the circle. Anything seen through it becomes increasingly distorted. One at a time, the dancers throw themselves into the arcane ring and, as they do, they explode into bursts of multicolored, electric confetti. Roll 2d6 + LUCK: If 8 or below, read ACTION 091; if 9 or higher, read ACTION 094.
ACTION 086: You peer into a small window and see a masked person holding a hammer. They are examining a rough-hewn, wooden staff that is secured to a table. One end of the staff glows from within. On the table beside the staff sits an ornate, spherical machine. Suddenly, the stranger hauls back and strikes the glowing end of the staff! There is a flash of multicolored light, and your vision blurs for an instant. The stranger strikes the end of the staff again; it shatters! The person sets the hammer down, picks up a pair of tweezers, and carefully extracts a tiny, glowing crystal shard from the debris. If someone hasn't done so already, you can ENTER THE BUILDING (ACTION 072) or, for 1 AP, you can WALK TO THE OTHER END OF THE ISLAND (ACTION 081).
ACTION 087: You speed toward the dancers, ducking under their locked arms, and grab the glowing object. It is WHITE HOT, and you instantly take 2d6 damage. Bolts of arcane energy explode from the object. The bolts seem to avoid you, but they target the dancers, who are instantly vaporized! Gain 2 QP, and then draw until you find the PRISM SWORD, the DIMENSIONAL JEWEL, and the SOLAR STAFF, if possible. Place 1 into your character's inventory, and then shuffle the rest back. If none of these are found, the glowing object falls to pieces.
ACTION 088: You test the bridge by swaying it back and forth. It seems fine, but, as you step on the first plank, it makes a cracking noise. You realize that the boards of the bridge are rotten and frail. Whenever a character attempts to cross the bridge, their player must roll 1d6 + SPEED + LUCK. (NOTE: Horses cannot cross the bridge.)
If your roll total is 11 or higher, your character crosses the bridge safely, without incident. If your roll total is 10 or less, a bridge plank breaks as your character steps on it, and the plank falls to the river below! Roll again and step on the next board. If 4 BOARDS are broken this way by any character (you can track the number of broken boards with cubes), the bridge becomes impassable. If it is rendered impassable, the location cannot be crossed by foot for the rest of the game. As such, your character must remain on the side where they made their attempt to cross.
ACTION 089: You explain to the hero that you must be on your way. They seem distraught. Abruptly, they disintegrate into a cloud of red smoke. You continue on along the beach, intending to explore more of the island; read ACTION 081.
ACTION 090: As you walk closer to the front of the ship, you notice a large, rusted hole in the bulkhead behind the cockpit globe. It's large enough for a person to fit through. If someone hasn't done so already, you can ENTER THE SHIP (ACTION 100) or, for 1 AP, you can walk around the ship to the STERN to EXPLORE THE BACK OF THE SHIP (ACTION 097).
ACTION 091: The arcane energy spinning around the ring slows, and the pieces of the object pull themselves back together. Draw THE PRISM SWORD, a TEMPORAL BEACON, the DIMENSIONAL JEWEL, and the SOLAR STAFF from the item deck or discard pile, if possible. Choose 1 randomly and place it into this location with your character. Shuffle the rest back and gain 2 QP.
ACTION 092: Near the bridge, you climb down onto a small, virtually hidden ledge on the steep rock face. You sidle along the ledge, moving behind the largest waterfall stream. You wave away a protective incantation that conceals an entry point. A cavernous space is revealed, and you step into it. At the center of this cavern room, a fire blazes within a large, rectangular stone hearth. It is encircled by low, intricately decorated, bronze pedestals. Tras, a master warlock you've known for a long time, is seated on one of them. Her chest and right arm are covered in wound dressings, and she looks upset. Near her, there is a person lying on the floor unconscious. It is the warlock, Arch Lieutenant Saegon.
"Earlier today, Saegon and I were attacked. I was hurt very badly but Saegon, he…" She pauses to take a deep breath, then continues, "The villain took Saegon's soul and captured it inside an object. I have been maintaining his body, but if his soul is not returned to his body soon, he will die." Draw from the character deck until you find a hero, then shuffle. Equip and place them into a location with no other characters, when possible. Draw 1 item. Saegon's soul has been trapped inside this item by the drawn hero, so give the hero this item to hold. If your hero returns to this location with the item, read ACTION 084.
ACTION 093: You pull the lever and the control board flickers to life. Text in a language you cannot understand begins to scroll across a large screen above the board. You realize that it's a countdown! The screen flashes red, the ground beneath your feet begins to shake, and the engine of the starship ignites with a blast that throws you to the ground. Roll 2d6 + LUCK. If the roll total is 8 or lower, the engine case ruptures and explodes in a ball of flame! You are partially shielded but take 2d6 damage from the explosion. If the roll total is 9 or higher, the engine fizzles out.
Either way, you notice a small hatch on the side of the ship that has shaken open. Someone has hidden a cache of resources in a cavity behind the hatch. Draw 3 RESOURCES, whenever possible, into your character's inventory, and drop other items as necessary. You can travel to the BOW of the ship for 1 AP. If you have been there before, read ACTION 090; if not, read ACTION 076.
ACTION 094: You walk closer to the spinning ring of arcane energy. Through it, you see various places: A castle, a lake, and a cave. Each location appears for a moment but fades away quickly, replaced by a view of another place. Once per turn, for 1 AP, a player's hero and their follower (if both are in this location) can attempt to use this gateway: Draw 3 locations from the location deck. Choose 1, shuffle the others back, and then read the location entry for that location. Decide whether or not to send your character(s) there. If so, place the location anywhere on the map. On this turn, your character(s) may travel there instantly, through the portal, at no additional AP cost. If not, shuffle the location back, and continue your turn. The player of the first hero to use the portal gains 2 QP.
ACTION 095: As you get closer, you see a pair of chrome handles attached to the circular hatch on the underside of the craft. If someone hasn't already done so, you can ATTEMPT TO OPEN THE HATCH (ACTION 078), or you can EXPLORE THE BACK OF THE SHIP (ACTION 097).
ACTION 096: You leave the ship the way you came in, through the hole in the hull. Any character can re-enter the ship this way (ACTION 100). If someone hasn't already done so, you can, for 1 AP, walk towards the back of the ship to EXPLORE IT (ACTION 097).
ACTION 097: You trip as you step over a pile of wires. They are attached to an open panel on the side of the ship and connect to a control board situated between a pair of short, cylindrical towers. The board is covered in colored buttons and switches that are protected by a metal guard. Part of the guard has been torn away, revealing a lever. At one time, a saftey bar with a heavy locking device protected the lever, but it has been ripped away.
If someone hasn't already, you may pull the lever (ACTION 093). You can also travel to the BOW of the ship for 1 AP: If you have been there before, read ACTION 090; if not, read ACTION 076.
ACTION 098: You run toward the ring of dancers and, as you get closer, the object at the center of their ritual breaks into several floating pieces. These fragments expand out to create a circle, spinning with energy. The cloudy center of the circle slowly becomes clear and, through it, you see an alien wasteland. It teems with thousands upon thousands of ORPAL, humans transformed into mindless monsters during the Cataclysm. Several orpal notice the open portal and begin walking towards it. Draw 2 ORPAL WANDERERS from the character deck (shuffle after) or the discard pile, or reveal them from players' hands, if possible, and place them here. They lurch fiercely toward your character!
Meanwhile, the dancers scream in terror as bands of arcane electricity twist from the edges of the circle, lifting them into the air. Suddenly, they explode into bursts of multicolored, electric confetti! The spinning energy around the portal dissipates, and this window into a distant land closes. Pieces of the glowing object rain to the ground, destroyed. You gain 3 QP.
ACTION 099: On this turn, the player's character(s) who entered this room may roll 4d6 to press a button, subsequent button presses (rolls) cost 1 AP. After 3 button presses or at the end of the player's turn, the lights in the room dim and the machine becomes inoperable.
If the roll total is 4 - 7, the room begins to fill with gas. Roll 1d6 + LUCK. If this roll total is 6 or higher, the gas is filled with HEALING NANOBOTS, your character gains 2d6 HEALTH, and you recieve 1 QP. If the total is 5 or lower, SLEEPING GAS fills the room. Your turn ends immediately, but you gain 1 QP. If 8 - 11, an item materializes atop the glowing metal platform. Draw an item and place it here, then gain 1 QP. If 12 - 13, a nozzle drops from the ceiling, spraying the room with purple dust. All weapons that you hold (equipped or not) gain +1 ATTACK BONUS against BOHMERK (to a maximum of +2) and you gain 1 QP. If 14 - 15, a BOHMERK GLUT materializes atop the metal platform. Draw 1 from the character deck or discard pile, if possible, place it here, and gain 1 QP. If 16 - 18, there is a flash of blue light and you float up. You travel through the room's ceiling, through the hull of the ship, and high into the air. Choose any location, and fly there (unnoticed). Replenish your AP, gain 1 QP, and continue your turn. If you roll 19 - 24, there is a flash of white light; read ACTION 075.
ACTION 100: You push through the hole in the ship's hull and into an expansive oval room. Wires and chunks of electronics dangle from the ceiling. Monitors, torn from the walls, lay scattered among piles of overturned furniture and other refuse. You find something useful in this trash: Draw 1 item into your character's inventory, and drop an item as necessary. Your character can LEAVE THE SHIP (ACTION 096) or, if someone hasn't already done so, your character can CONTINUE EXPLORING (ACTION 103).
ACTION 101: NOTE - Take the hero who was drawn when the DEATHBED ISLE CRATER location was played, and move them here now. The previously drawn hero appears amid a cloud of red smoke. "The meteor that fell here was imbued with powerful arcane magik," they explain. "If you gather pieces of it, I can use their power to free myself from this hex. I am unable to hold this human form for long, so please make haste. I fear that, soon, I will be trapped as smoke forever." AGREE TO GATHER ORE (ACTION 082), or BE ON YOUR WAY (ACTION 089).
ACTION 102: You pull off the panel and are taken aback by the rancid smell within. Roll 1d6 + SPEED. If your roll total is 6 or higher, your character is quick enough to avoid a stream of fluid that sprays out of a viscous, purple mass that wraps the machinery behind the panel; gain 1 QP. If your roll total is 5 or lower, the stream covers your character in glowing, yellow fluid. Instantly reduce their MIND by 1 permanently (to a minimum of 1), and gain 1 QP. If someone hasn't already, you may now EXPLORE THE BACK OF THE SHIP (ACTION 097).
ACTION 103: You walk toward the cockpit of the ship, following a faint, golden light. Stepping through a broken sliding door, you enter a room in which a cylindrical, glass canister is displayed. It contains a luminous, yellow crystal. Suddenly, a tarp strung across the far side of the chamber is pulled back, and a glowing figure is revealed. They scream incoherently and charge toward you!
Draw until you find a weapon-holding character who is not GHOST faction, then shuffle. Equip and place them into this location. After living here for many years, this character is saturated with radiation. Set their MIND to 1 and their MAX HEATH to 18. They are AGGRESSIVE for the rest of the game. Characters who are struck by this character, except those equipped with a TEMPORAL BEACON or the DIMENSIONAL JEWEL, incur radiation damage. Each time the drawn character strikes another character, roll 1d6 for the struck character. If a 1 is rolled, reduce 1 of that character's attributes (chosen by the character's controlling player) by 1 permanently. The player controlling a hero or follower who defeats the drawn character in combat gains 3 QP (once per game).
Components
The DARK VENTURE VILE INVADERS EXPANSION includes this Rule Book, 34 Resource Cards, 8 Location Cards, 18 Character Cards (3 Heroes, 1 Follower, and 14 Enemies), 7 Weapon Cards, 1 Armor Card, 7 Object Cards, 9 Heroic Quest Cards, 12 Side Quest Cards, 18 Character Standees, 1 Boat, 10 Bases, and 36 Tokens.
All VILE INVADERS EXPANSION cards have an icon on them for quick identification.
Dark Venture Quick Reference
Player Turn Phases: 1: Card Draw. 2: Actions. 3: Quest Points.
Actions: Players have 3 ACTION POINTS to use on their turn. 1 ACTION POINT may be used to:
- Play a Location
- Move 1 Location
- Play a Character
- Trade/Give an Item
- Engage in Combat
- Pick Up an Item
- Search Location: 1d6 + MIND, 8 or more
- Equip/Use an Item
Combat Part 1: First Strike (Battle Turn Order): At the beginning of combat, all involved characters roll SPEED + 2d6 + FIRST STRIKE BONUSES.
Combat Part 2: Attack Damage (Damage Dealt): POWER + 2d6 + ATTACK BONUS. SUBTRACT the defending character's ARMOR BONUS, then reduce their CURRENT HEALTH by this score.