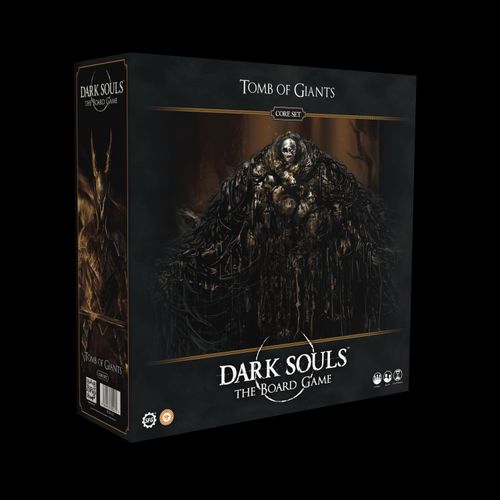
Dark Souls: The Board Game – Tomb of Giants
Dark Souls: The Board Game – Tomb of Giants Rulebook
Table of Contents
Table of Contents
Game Contents
Characters
- Cleric: 1x Miniature, 4x Starting Equipment cards, 1x Player Board
- Pyromancer: 1x Miniature, 4x Starting Equipment cards, 1x Player Board
- Thief: 1x Miniature, 4x Starting Equipment cards, 1x Player Board
Enemies
- Giant Skeleton Archer: 2x Miniatures, 1x Enemy Data card
- Necromancer: 2x Miniatures, 1x Enemy Data card
- Giant Skeleton Soldier: 2x Miniatures, 1x Enemy Data card
- Skeleton Archer: 3x Miniatures, 1x Enemy Data card
- Skeleton Beast: 1x Miniature, 1x Enemy Data card
- Skeleton Soldier: 3x Miniatures, 1x Enemy Data card
Bosses
- Black Knight: 1x Mini Boss Miniature, 1x Mini Boss Data card, 9x Mini Boss Behaviour cards, 1x Mini Boss Health dial
- Gravelord Nito: 1x Main Boss Miniature, 1x Main Boss Data card, 13x Main Boss Behaviour cards, 1x Main Boss Health dial
Treasure Deck
- 30x Class-specific Treasure cards (Cleric, Pyromancer, and Thief: Starting Equipment, Class Treasure, and Transposed Treasure cards)
- 45x Common Treasure cards
- 5x Legendary Treasure cards
- 5x Boss Treasure cards (Black Knight and Gravelord Nito)
Cards
- 29x Encounter cards
- 30x Event cards
Dice
- 5x Black dice
- 4x Blue dice
- 2x Orange dice
- 4x Green dice
Tokens and Terrain Elements
- 8x 1 Wound tokens
- 3x 3 Wound tokens
- 1x 5 Wound token
- 13x 1 Soul tokens
- 6x 3 Soul tokens
- 3x 5 Soul tokens
- 1x 8 Soul token
- 6x Shortcut tokens
- 3x Luck tokens
- 3x Heroic Action tokens
- 3x Estus tokens
- 3x Ember tokens
- 1x Aggro token
- 1x Party token
- 21x Condition tokens
- 1x Spark dial
- 3x Treasure chest tokens
- 5x Gravestone tokens
- 10x Barrel tokens
- 1x Shrine token
- 3x Lever tokens
- 1x Torch token
- 20x Trap tokens
- 1x Skeleton Ball token
- 1x Patches token
- 4x Skeleton Soldier tokens
- 4x Skeleton Archer tokens
- 2x Giant Skeleton Soldier tokens
- 2x Giant Skeleton Archer tokens
Characters
Character Dashboards
Each character has a unique dashboard which includes the following information.
- Name and symbol
- Taunt level
- Equipment slots a. Armour slot b. Backup slot c. Hand slot
- Luck token slot
- Estus Flask token slot
- Ember token slot
- Heroic action token slot
- Heroic action rules
- Stat progression track
- Endurance bar
Equipment Slots
Character dashboards have dedicated slots for different types of cards.
Armour cards have an armour symbol, and must go in the armour slot.
Weapon cards have either the one-handed or two-handed weapon symbol and go in either of the hand slots. If a two-handed weapon card is placed in a hand slot, the other hand slot must be empty.
The backup slot can hold up to two cards of any type.
Cards in the armour and hand slots are always considered to be equipped. Cards in the backup slot are never considered to be equipped.
Stat Progression Track
The stat progression track lists the character's base strength, dexterity, intelligence, and faith stats, and the upgrade tiers and values for those stats.
Stats must be upgraded in ascending order—i.e., to upgrade to tier two, the character must first have upgraded to tier one. When a character upgrades a stat, they punch out the corresponding square from their dashboard, flip it over, and push it back into the vacant slot with the upgraded side showing in gold.
Characters can only upgrade when they rest at the bonfire.
The Cleric dashboard shows the following starting values for its stats.
| Stat | Base | Tier 1 | Tier 2 | Tier 3 |
|---|---|---|---|---|
| Strength | 12 | 18 | 27 | 37 |
| Dexterity | 8 | 15 | 24 | 33 |
| Intelligence | 7 | 14 | 22 | 30 |
| Faith | 16 | 23 | 32 | 40 |
The Endurance Bar
A character's endurance bar is used to track their stamina and how much damage they've suffered.
When a character spends one or more stamina, they add an equal number of stamina tokens to the bar, starting from the left edge and placing them in the first empty spaces available.
When a character suffers one or more damage, they add an equal number of character wound tokens to the bar, starting from the right edge and placing them in the first empty spaces available.
Character Tokens
There are four different types of character token. Each has a ready and used side, and an effect, detailed below. A token's effect can only be used if the token's ready side is face up.
A character can only have one of each token type on their dashboard.
If a character recovers stamina or heals damage, remove the corresponding number of tokens from the bar. If there are insufficient tokens to remove, simply remove as many as possible.
If all of a character's endurance bar spaces have tokens, and another token would be added to the bar (because the character spent stamina or suffered damage), that character dies.
Heroic Action. At any time during their turn, a character can flip their heroic action token to the used side to resolve the heroic action on their dashboard.
Estus Flask. At any time during their turn, a character can flip their Estus Flask token to the used side to remove all stamina and character wound tokens from their endurance bar.
Luck. At any time, a character can flip their luck token to reroll a die in one of their attack or defence rolls.
Ember. Unlike other character tokens, ember tokens do not have a ready and used side, and their effect is always in play. If a character with an ember token suffers 3 or more damage from a single attack, reduce the damage by 1.
If a character with an ember token dies, discard the token.
Treasure Cards
Equipment
Equipment includes weapons, armour, shields, and spells, and governs a character's combat capabilities. Each equipment card includes the following information.
- The equipment's name.
- The card's type.
- The equipment slot the card goes in on a character's dashboard.
- Which set of Dark Souls™: The Board Game the card is from.
- The range of the action or attack option(s) on the card.
- The minimum stat requirements a character must meet before they can equip the card.
- The attack options a character can perform if this card is equipped.
- The equipment's block value.
- The equipment's resist value.
- The equipment's dodge value.
- The number of upgrade slots the equipment has.
Upgrades
Upgrade cards are used to enhance equipment. There are two types of upgrade cards.
- Weapon upgrade cards are used to upgrade weapons.
- Armour upgrade cards are used to upgrade armour.
Upgrades can only be added to or removed from equipment when the party is resting at the bonfire.
Each character can use upgrade cards from the inventory to upgrade items on their dashboard, by sliding the upgrade card(s) underneath the equipment card(s).
A character can only equip an upgrade card if they meet the minimum stat requirements on both the equipment and upgrade cards. If a character doesn't meet the minimum stat requirements of an upgrade card, they cannot use it to upgrade a card on their dashboard.
Each equipment card has an upgrade slot value. If a card already has a number of upgrades equal to this value, it can't be upgraded, unless one or more of these upgrades is removed.
If an upgraded card is placed in the inventory, turn the cards to the side to make it easy to track the upgraded equipment within the pile of spare cards.
Individual upgrade cards can be removed from equipment and returned to the inventory at any time during this step.
Embers
When an ember card is drawn, the players can either choose a character to immediately resolve the text on the card, or place it in the inventory.
Tiles and Nodes
The Basics
The action in Dark Souls™: Tomb of Giants takes place on the game's tiles.
The edge of each tile is a wall, which models cannot move across. Models can only move between tiles by using doorway nodes, which allow them to leave their current tile and be placed on an adjacent doorway node on another tile. After the model is placed it must stop its movement.
Each tile has a number of nodes, used to measure movement and range. Models are always placed on nodes.
Some nodes have a different colour and icon, used to indicate the starting position of specific elements during setup. Models can move onto these nodes and use them to measure movement and range as normal.
- Character Start nodes are used when placing characters. These are only shown on encounter cards, and not printed on the tiles.
- Enemy Spawn nodes are used when placing enemies.
- Terrain nodes are used when placing terrain.
Movement
When a model moves, place it on an adjacent node, either horizontally, vertically, or diagonally. Nodes have guidelines printed on them to aid in determining adjacency.
The green nodes are adjacent to the Pyromancer.
Range
Attacks and effects have a range, measured between nodes in the same way as adjacency.
An attack or effect with range 0 can only be used if the target is on the same node. An attack or effect with range 2 can target a model up to two nodes away.
An attack or effect with ∞ can affect any model on the same tile. Actions and attacks cannot target a model on a different tile.
Node Model Limits
Up to three models can share the same node, even if it's awkward for them to fit—as long as players know which models are on which nodes, models can overlap or spread out as needed.
If there are three models on a node and another model moves onto that node, the players must choose a model already on the node and place it on an adjacent node to make way for the new model.
Terrain
Terrain is represented by tokens. Individual encounter cards will indicate when and where to place a token. Each token occupies a single node.
Terrain features come in the following types.
Gravestones
Models cannot move onto a node containing a gravestone.
Gravestones always begin encounters with the illuminated side face up. A character in an adjacent node to an illuminated gravestone can spend their action to look at the top card from the treasure, event, or encounter deck, then return it to either the top or bottom of the deck. After the card has been returned to the deck, flip the gravestone to its diminished side.
Barrels
If a model moves onto the same node as a barrel, discard the token.
At the end of an encounter that includes barrels, roll a black die for each remaining barrel, and gain a number of souls equal to the number of pips.
Lever
A character on the same node as the lever can spend their action to activate it. Encounters that include the lever will detail the effect of doing so on their card.
Torch
At any time during their turn, a character on the same node as the torch can place it on their dashboard, or remove it from their dashboard and place it on their current node. When a character places the torch on their dashboard, they also gain the aggro token. While the torch is on their dashboard, other characters cannot gain the aggro token.
Shrine
The shrine has no special rules, although characters will interact with it in order to complete some encounters.
Chests
Models cannot move onto a node containing a chest.
Chests always begin encounters with the closed side face up. A character in an adjacent node to a closed chest can spend their action to draw a card from the treasure deck and place it in the inventory. After drawing, flip the chest token so the opened side is face up.
Traps
If a tile has traps on it, during setup shuffle the trap tokens, then place a random token face down on each of the tile's nodes, excluding character start, enemy spawn, terrain, and doorway nodes.
When a character is placed on a node with a trap, flip the token.
- If the token is blank, discard it.
- If the token has a dodge and damage value, the character must make a defence roll using only their dodge dice.
- If the roll is equal to or greater than the dodge value, discard the token.
- If the roll is lower than the dodge value, the character suffers the damage shown on the token. After applying the damage, the token is discarded.
Traps do not affect enemies and are not flipped if an enemy moves onto the same node.
Getting Started
Choosing Characters
At the start of the game, each player chooses a character and places the corresponding model and dashboard in front of them. Collectively, these characters are known as the party.
Each player places an Estus Flask, heroic action, and luck token on their dashboard, with the ready side face up. Then, each player takes the starting equipment cards with their character's symbol and places them in an equipment slot on their dashboard.
Punch out the squares on the endurance bar. Keep the punched-out squares handy, as these will be used to track stamina and wounds during the game.
Do not punch out the character stat squares. These will be removed and flipped over during gameplay.
Setting Up the Dashboard
Card Decks. At the start of the game, shuffle the level one encounter cards, then place them face down in the encounter deck slot. Shuffle the level two cards and place them to the left of the level one cards; then shuffle the level three cards and place them to the left of the level two cards, creating a row of decks in ascending levels.
Take the class specific treasure cards for the characters being used, and shuffle them together with the common treasure cards to create the starting treasure deck. Place this deck face down on treasure deck slot.
Shuffle the event cards and place them face down in the event deck slot.
Place the transposed, legendary, and boss treasure cards, and enemy and boss cards face up to one side for the time being. These will be used later in the game.
Encounter Track. Place the party token on the bonfire slot. Then, take the Black Knight and Gravelord Nito encounter cards, and place each face up on the corresponding encounter track slot.
Tokens. Separate any remaining tokens and dials by type and place them to one side, within easy reach of each player.
Spark Dial. Place the dial on top of the spark dial slot, displaying a number of sparks corresponding to the number of players, as shown on the table below.
| Players | Sparks |
|---|---|
| 1 Player | 5 Sparks |
| 2 Players | 4 Sparks |
| 3 Players | 3 Sparks |
| 4 Players | 2 Sparks |
Playing the Game
Winning and Losing the Game
Players win a game of Dark Souls™: Tomb of Giants if Gravelord Nito is killed.
In order to reach Gravelord Nito, players will need to complete several encounters as they explore his lair. This will not be easy, however. Powerful and deadly enemies lurk in the darkness, waiting to repel any intruders from their realm.
If the party is defeated during an encounter, all is not lost. The players return their characters to the bonfire, and can try again. However, the players cannot do this indefinitely. Each time they return to the bonfire, they'll use up a spark. If the spark dial has reached 0, and the players return to the bonfire, they lose the game—the fire has burned too low and they are forever lost to the darkness.
The Campaign Dashboard
The campaign dashboard serves as the party's base camp, and allows them to track their progress through the game.
- Encounter Decks. This is where encounter cards are placed, in three face down decks.
- Spark Dial Slot. The spark dial tracks the status of the bonfire.
- Soul Cache. When the party gains one or more souls, they are placed here. When souls in the soul cache are spent, they are discarded.
- Inventory. This is a communal slot where the party stores the items they've discovered.
- Treasure Deck. When the players find treasure, they draw from the treasure deck in this slot to see what they've discovered.
- Blacksmith Andre Item Slots. These slots are used when the party visits Blacksmith Andre and purchases items.
- Event Deck. This is where the event deck is placed.
- Timer Track. The timer track is used to record the number of player turns during encounters, and is used by several cards to add additional challenges and/or rewards.
- The Encounter Track. The encounter track shows how far the party has progressed through the game, measured in spaces. Each space has an encounter level, and a slot for the encounter the party must play when on the space.
Exploration Basics
In order to progress, the players make their way across the campaign dashboard encounter track from left to right, stopping at each space to play an encounter.
Encounters are where combat happens and take place on the game tiles, as described on the following pages.
At the end of an encounter the players return to the dashboard, before moving on to their next encounter.
Getting Underway
When the players are ready, move the party marker to the first space on the encounter track. Then, draw two cards from the encounter deck that matches the symbol on the space below it.
The players choose which of the cards they'd like to attempt, and place it in the encounter card slot below the party marker. The other card is shuffled back into the deck.
When moving to a new space on the encounter track, if there is already an encounter card in the slot (because the players have attempted the encounter before) setup and play the existing card instead of drawing new cards.
Encounter Cards
Encounter cards provide all of the information necessary to set up an encounter.
- The encounter's name.
- Which set of Dark Souls™: The Board Game the encounter is from.
- The objectives the characters must achieve in order to complete the encounter.
- The rewards for completing the encounter.
- The encounter's special rules.
- The encounter's map.
- The enemies that appear in the encounter and the nodes they are placed on during setup.
- The terrain that appears in the encounter and the nodes it is placed on during setup.
Each encounter is different, providing the players with a wide variety of challenges to overcome.
Number of Players Symbol
Several encounter cards include the number of players symbol. This symbol represents a value equal to the number of players.
Boss Encounters
If the party marker is moved onto an encounter track space with the Black Knight or Gravelord Nito encounter card, the players must play the boss's encounter instead of drawing from the encounter deck.
The rules for playing boss encounters are detailed on pg. 28.
Encounters
Setting up Encounters
Place the tiles shown on the map in the middle of the table. It doesn't matter which individual tiles you use, as long as they have the corresponding enemy and terrain spawn nodes, and you ensure adjacent tiles are connected by doorway nodes.
Place enemies and terrain on each tile on the corresponding nodes shown on the card. Once this is done, each player chooses a character start node, and places their character on that node. Choose one character to receive the aggro token.
The encounter can then begin.
Turn Order
Gameplay during encounters takes place over a series of turns, starting with an enemy turn and then alternating between character and enemy turns.
During an enemy turn, all enemies take a turn. During a character turn, only a single character takes a turn.
When it's time for the first character turn of an encounter, the players choose the character. From then on, characters take their turns in clockwise order around the table.
For example, in a game with the Pyromancer, Cleric, and Thief, the turn order might be as follows.
- Enemy Turn: all enemies take turns
- Character Turn: the Pyromancer takes a turn
- Enemy Turn: all enemies take turns
- Character Turn: the Cleric takes a turn
- Enemy Turn: all enemies take turns
- Character Turn: the Thief takes a turn
Special Rules and Keywords
Although some objectives are straightforward, simply requiring the characters to kill enemies, others are more complicated. In addition, each encounter also features unique special rules, adding thematic elements and challenges.
Although unique rules are explained in text, more commonplace rules are represented by keywords, detailed below.
Objective Keywords
These keywords are used in the objectives section of encounter cards.
Survive. The characters meet this objective if they can avoid being killed for a set number of turns, shown in brackets next to the keyword.
Exit. Exit nodes are not represented by tokens, and only appear on encounter cards, indicated by the exit symbol. Exit nodes have an increased node limit of four. If an encounter's objective is to reach the exit and all characters are on the exit node, the party completes the encounter.
Occupy. In order to meet this objective, the characters have to end a set number of turns on a specific node. Track this by placing a wound token by the side of the playing area when a character ends their turn on the node. Tokens do not have to be placed in consecutive turns, and can be placed by any character that ends their turn on the node.
Special Rules Keywords
These keywords are used in the special rules section of encounter cards.
Onslaught. Each tile begins the encounter as active (see pg. 24).
Darkness. During this encounter, characters can only attack enemies on the same or an adjacent node.
Timer. If the timer marker reaches the value shown in brackets, resolve the effect listed.
Respawn. Place additional models using the enemies and enemy nodes shown on the encounter card.
When respawning, if there are insufficient enemy models (because some enemy models are already in play), place as many enemies as possible, then place an enemy token for each missing enemy on the node it would spawn on. As soon as the corresponding model becomes available, replace the token with the model.
Trial. Trials offer an extra objective providing additional rewards if completed. This is shown in brackets, either in writing, or as a number of turns in which the characters must complete the encounter's main objective. Completing trial objectives is not mandatory to complete an encounter.
Using the Timer Track
Some objectives and special rules require the party to track the number of turns during an encounter.
During setup for these encounters, place the timer marker at the start of the timer track, marked 0. At the end of each character's turn, move the marker to the next space.
Ending an Encounter
Each encounter has set objectives, detailed on its card. If the players meet these objectives, they have completed the encounter, and it immediately ends.
If a character dies during the encounter, the party is defeated and the players fail the encounter.
Completing the Encounter
Return the tiles and all models and tokens on them to the side of the playing area, then remove all tokens from each character's endurance bar.
The players then return to the campaign dashboard and follow the steps below, in the order shown.
- If the completed encounter card has one or more soul tokens on top of it, add them to the soul cache.
- Gain any rewards listed on the encounter card.
- Tilt the encounter card 90°, to indicate it has been completed.
- Draw a card from the event deck.
Failing the Encounter
Return the tiles and all models and tokens on them to the side of the playing area, then remove all tokens from each character's endurance bar.
The players then return to the campaign dashboard and follow the steps below, in the order shown.
- If any encounter card on the dashboard has one or more soul tokens on top of it, discard the tokens.
- Place any souls in the soul cache on the encounter card the players failed.
The players then return to the bonfire (see pg. 26).
The players can then move the party marker to the next space on the encounter track, repeating the steps listed under "Getting Underway" to choose and then play their next encounter; or, should they wish, return to the bonfire instead (see pg. 26).
If the players choose to attempt the next encounter, before setting up, their characters can exchange any number of equipment cards between their dashboards and/or the inventory.
Remember that in order to equip a card to a slot on their dashboard, a character must meet the minimum stat requirements on the card.
Rewards
If the characters complete an encounter, they gain the rewards listed on the encounter card. The types of reward are detailed below.
Souls. Add the corresponding number of souls to the soul cache.
Draw. Draw a number of cards from the corresponding deck. Treasure cards are placed in the inventory, event cards are resolved as described in the next section.
Search. Search the treasure deck for the named card and place it in the inventory. Then, shuffle the treasure deck. If the named card is not in the treasure deck, this reward cannot be claimed.
Refresh. Each character can flip the player token shown to the ready side.
Trial. Trial rewards can be any of the reward types above, and are resolved as described in those entries.
Trial rewards can only be gained if the characters met the trial objective during the encounter.
Shortcut. Place a shortcut token on the encounter card. After resting at the bonfire, instead of returning to the starting space on the encounter track, the party can instead choose to be placed on a shortcut token, allowing them to skip earlier encounters.
Event Cards
Event cards represent a variety of unpredictable occurrences that might befall the characters on their journey.
There are three types of event card.
Immediate. Immediate cards are resolved when they are drawn and then discarded.
Consumable. When a consumable card is drawn, one player places the card next to their character's dashboard. The text on the card will dictate when its rules come into effect, and how to resolve them.
Rendezvous. When a rendezvous card is drawn, place it below the next non-boss space on the encounter track. The text on the card will dictate when its rules come into effect, and how to resolve them.
An encounter track space can only have one rendezvous card. If a space already has a rendezvous card and another card would be placed there, discard the existing card.
Character Turns
Overview
A character's turn is made up of two phases—the upkeep phase, and the action phase, which are resolved in that order.
The Upkeep Phase
During a character's upkeep phase, they follow the steps below, in the order shown.
- The character recovers 3 stamina.
- The character gains the aggro token.
- The character can swap any number of items between their backup slot and hand slots.
- Each other character can move one node.
Once these steps are complete, the upkeep phase ends, and the action phase begins.
The Action Phase
During the action phase the character can move and perform an action. They can either move and then perform an action; or perform an action and then move.
Should they wish, a character can skip their move and/or action.
Character Movement
When a character moves, they can be placed in an adjacent node.
After doing so, the character can run. When a character runs, they can move any number of additional times, at a cost of one stamina per additional node of movement.
Example of a movement using a walk and three runs. This movement costs 3 Stamina.
Character Actions
The most common way a character will spend their action is by making an attack.
Some encounter special rules and terrain provide characters with an alternate way to spend their action. If a character spends their action interacting with a special rule or a piece of terrain, they cannot attack during their turn.
Character Attacks
To perform an attack, choose which card is being used and follow the steps below. Characters can only attack with weapons equipped to their hand slots.
- Choose one of the card's attack options, and spend the number of stamina shown next to the option.
- Choose an enemy in the card's range to be the attack's target.
- Roll the dice shown on the attack option.
- Add the face up pips from the roll together. The result is the damage total.
- Subtract the target's block value from the damage total.
- The target suffers any remaining damage.
- Place a number of wound tokens beside the target's model equal to the damage it suffered. If the model has a number of wound tokens equal to or greater than its starting health, it is killed and removed from the tile, along with any tokens it had.
If the character has a weapon equipped to their other hand slot, they can then perform an attack option with that weapon as part of the same action, following the steps above.
Once the character has performed or skipped their move and action, their turn ends.
Equipment Modifiers
Some attack options have modifiers that add or subtract a value from the damage total. Apply these modifiers during step 4 of the attack sequence.
When making the second attack option, the player rolls 2 black dice and adds +1 to the total. For example, if 2 and 1 were rolled, the damage total would be 4.
Pushes
Both characters and enemies have attacks and special rules that can inflict a push against another model. When a model is pushed, it is placed on an adjacent node to the one it currently occupies. Models cannot be pushed onto a different tile.
Pushed models are always placed on an adjacent node that is further away from the source of the push. If there are multiple equidistant nodes, the players choose which node the model is pushed onto.
Boss models cannot be pushed by a character's movement or attacks.
Conditions
Some attacks inflict conditions. Conditions are persistent effects that remain in play until the token is discarded.
If an enemy is hit by an attack with a condition symbol, or a condition symbol appears after an enemy's attack behaviour and the enemy's attack hits, place the corresponding condition token next to the target after the attack is resolved, even if the attack doesn't cause damage.
Models cannot have multiple condition tokens of the same type at the same time. If a character has a condition token when an encounter ends, discard the token without effect.
Bleed. When a model with a bleed token suffers damage, it suffers 2 additional damage, then the token is discarded.
Poison. At the end of a model's turn, if it has a poison token, it suffers 1 damage, then the token is discarded.
Frostbite.
- Characters with a frostbite token recover one less stamina at the start of their turn.
- Enemies with a frostbite token reduce the value of their move symbols by 1.
At the end of a model's turn, if it has a frostbite token, the token is discarded.
Stagger.
- Characters with a stagger token must spend 1 additional stamina when performing attack options.
- Enemies with a stagger token reduce the value of their attack symbols by 1.
At the end of a model's turn, if it has a stagger token, the token is discarded.
Weapon Special Abilities
Although most weapons only inflict damage, some also have special abilities.
Although more complicated abilities are explained in text, simple abilities are represented by symbols shown on the attack option, next to the attack dice.
Common examples are shown below.
- Magical damage. When resolving attacks with the magical symbol, during step 5, subtract the target's resist value from the damage total instead of subtracting the target's block value.
- Option-specific range. Some attack options specify an option-specific range. When resolving attacks with this ability, replace the weapon's normal range with the option-specific range.
- Shift. When resolving an attack with the shift symbol, the character can move up to the number of nodes shown on the symbol.
- If the shift symbol appears before the attack dice, the character moves during step 1 of the attack sequence.
- If the shift symbol appears after the attack dice, the character moves after the attack is resolved.
- Movement from the shift symbol does not spend stamina and does not replace the character's normal move.
- Area of effect. Attacks with the area of effect symbol can damage all enemies on a node, instead of just the target. When making an attack with the area of effect symbol, follow the attack sequence as normal until step 4, then apply steps 5, 6, and 7 to each enemy (including the target) in the target's node individually, in an order of the player's choosing.
- Shaft. Attack options with the shaft symbol cannot be used against targets on the character's node.
- Repeat. An attack option with the repeat symbol allows the character to perform the attack up to the number of times shown on the symbol. The extra attacks do not have to target the same enemy, do not cost additional stamina, and do not prevent the character using a weapon card in their other hand slot, if they have one.
Example weapon: This weapon has three attack options.
- The first costs 0 stamina, and rolls one black and one blue dice. It causes magical damage, and cannot be used against targets on the same node.
- The second costs 4 stamina, and rolls one black and two blue dice. It causes magical damage, and cannot be used against targets on the same node.
- The third costs 4 stamina, and rolls two blue dice. It causes magical damage, cannot be used against targets on the same node, but has an increased attack range of 4.
Enemy Turns
Enemy Data Cards
Each enemy type has a data card, which includes the following information.
- The type of enemy.
- The enemy's threat level.
- The enemy's starting health.
- The enemy icon for this enemy.
- The enemy's attack range.
- The enemy's block value.
- The enemy's resist value.
- The enemy's dodge difficulty.
- The enemy's behaviour symbols.
- Which set of Dark Souls™: The Board Game the enemy is from.
Overview
During an enemy turn, all enemy models on active tiles take a turn.
A tile becomes active if a character is placed on it. Once a tile becomes active, it remains active for the remainder of the encounter.
The order in which enemies take their turns is determined by their threat level, beginning with the model with the highest value. If there is a tie, the players choose the order in which the tied enemies take their turns.
How an enemy moves and attacks during their turn is determined by the behaviour symbols on their data card, which are resolved from left to right.
Enemy Movement
An enemy movement symbol indicates the enemy performs a move. Various smaller symbols appear around this symbol, indicating how to resolve the movement.
-
This is the target of the enemy's move.
- The character with the aggro token is the target.
- The closest character is the target.
If multiple characters are equidistant when determining the closest character, the enemy targets the character with the aggro token. If none of the tied characters have the aggro token, the enemy targets the tied character with the highest taunt value.
-
A number in this position indicates the enemy moves that many nodes towards the target. If the enemy moves onto the same node as the target during this movement, it will stop moving.
-
A number in this position indicates the enemy moves that many nodes away from the target. If the enemy can't increase the number of nodes between it and the target during this movement, it will stay where it is.
-
If the push symbol appears in this position, the enemy pushes any characters on its current node at the start of its movement, and on nodes it moves onto during its movement. If there is a number on the symbol, any characters that are pushed suffer an attack after the push is resolved (see pg. 25).
-
If the leap symbol appears in this position, the enemy is placed on the target's node.
If two or more nodes are equidistant to the target during movement, the players choose which node the enemy moves onto.
The movement symbols are:
- Move 1 node away from the character with the aggro token.
- Move 2 nodes towards the nearest character, pushing characters it passes through.
The movement icon key (page 32) lists these as: deal damage while pushing; push characters while moving; move towards the nearest character; move towards the character with the aggro token; leap to specified character (either the nearest or the character with the aggro token); move number of nodes in indicated direction; turn 90° right; turn 90° left; turn around.
Enemy Attacks
An enemy attack symbol indicates the enemy performs an attack. There are two different enemy attack icons, indicating the type of damage the attack causes.
- The physical damage attack icon causes physical damage.
- The magical damage attack icon causes magical damage.
As with movement, various smaller symbols appear around these symbols, indicating how to resolve them.
-
This is the target of the enemy's attack.
- The character with the aggro token is the target.
- The closest character is the target.
If multiple characters are equidistant when determining the closest character, the enemy targets the character with the aggro token. If none of the tied characters have the aggro token, the enemy targets the tied character with the highest taunt value.
-
The attack's damage total.
-
If the area of effect symbol appears in this position, the attack affects all characters in the target's node. Each character makes their defence roll and suffers damage individually.
-
If the push symbol appears in this position, after the attack is resolved any character(s) hit by the attack are pushed.
The printed examples on the enemy attack pages read as follows.
- Attacks all characters on the node of the nearest character for 5 physical damage, then pushes them.
- Attacks all characters on the node of character with the Aggro token for 4 physical damage.
- Attacks the character with the Aggro token for 3 magical damage.
The enemy attack icons are also listed in the icon key (page 32): push characters hit by attack; attack the nearest character; attack the character with the aggro token; attack all characters on target node; attack all nodes in range in specified arcs; deal physical damage.
Resolving Enemy Attacks
When a character attacks, players roll dice to establish the damage total and then subtract the enemy's block or resist values. Enemy attacks instead have a fixed damage total, and players make defence rolls to determine how much of this they suffer.
When an enemy attacks, follow the steps below.
- Check the enemy's attack range. If the target is not in range, the attack misses and the following steps are not resolved.
- Gather a number of dodge dice equal to the target's equipped cards' dodge value.
- If the attack causes physical damage, add a number of dice equal to the target's equipped cards' block value. If the attack causes magical damage, add a number of dice equal to the target's equipped cards' resist value instead.
- Roll the dice.
- If the number of face up dodge results is equal to or greater than the enemy's dodge difficulty, the attack has missed and the following steps are not resolved. The target can then choose to spend 1 stamina to move one node if they wish.
- If the number of face up dodge results is less than the enemy's dodge difficulty, the target is hit.
- Subtract the combined value of the face up pips from the attack's damage total.
- The target suffers any remaining damage.
- Apply any conditions or push effects from the attack, even if the attack caused 0 damage.
Example: The Thief does not successfully dodge the attack in step 5. They add the pips on their other dice together, reducing the attack's damage total by 3, then suffer the remaining 2 damage as character wound tokens on their endurance bar.
Enemy Attacks During Movement
Some enemy movement includes an attack, indicated by a number within the push icon. This attack is resolved individually against each character the enemy pushes during its movement.
These attacks cause physical damage, and characters make defence rolls as normal, starting at step 2 of the attack sequence.
Resurrect
If the resurrect symbol appears on an enemy card, at the end of the enemy's turn, place a skeleton soldier on the closest enemy spawn node to the enemy. If each skeleton soldier model is already on the playing area, ignore this rule.
The Bonfire
Returning to the Bonfire
After completing an encounter, the players can return to the bonfire instead of moving to the next space on the encounter track. If the players failed the encounter they won't have a choice—they'll have to return to the bonfire.
The bonfire is a safe haven where characters can rest for a short time. When they do so, they can access their inventory, and if they have souls to spend, visit Blacksmith Andre and the Firekeeper.
Resting at the Bonfire
When the party returns to the bonfire, resolve the following steps, in the order below.
- Place the party token in the bonfire slot.
- Turn the spark dial down one number.
- Flip each character's heroic action, Estus Flask, and luck tokens to the ready side.
- Return each encounter card to its normal orientation.
After performing these steps, the party can visit the Firekeeper and/or Blacksmith Andre.
The Firekeeper
When visiting the Firekeeper, each character can spend souls from the soul cache to upgrade one or more of their stats. Upgrading stats allows characters to equip more potent weaponry—players should look at the cards in their inventory to help them determine which stats to upgrade.
Stats must be upgraded in ascending order—i.e., to upgrade to tier two, the character must first have upgraded to tier one. When a character upgrades a stat, they punch out the corresponding square from their dashboard, flip it over, and push it back into the vacant slot with the upgraded side showing in gold.
The cost of upgrading is shown on the table below.
| Upgrade | Cost |
|---|---|
| Base to Tier 1 | 2 Souls |
| Tier 1 to Tier 2 | 4 Souls |
| Tier 2 to Tier 3 | 8 Souls |
A character can upgrade multiple times in a single visit, if they have the souls to do so.
The Cleric decides to upgrade their strength stat to Tier 1, and their faith stat to Tier 2. They discard a total of eight souls from the soul cache.
The next time they visit the Firekeeper they'll be able to continue upgrading their improved strength and faith stats, or begin upgrading their dexterity and/or intelligence instead.
Blacksmith Andre
The party can visit Blacksmith Andre to purchase treasure, change equipment, and upgrade equipment.
Purchasing Treasure
When purchasing treasure, draw the top four cards from the treasure deck, and place them face up in the slots next to the deck.
Players can purchase any number of these cards by spending one soul from the soul cache per card, placing the purchased card in the inventory.
After the players have made their purchases, return the remaining cards to the bottom of the treasure deck.
This step can only be done once per visit to the bonfire.
Changing Equipment
When the party changes equipment, characters can exchange any number of equipment cards between their dashboards and/or the inventory.
Remember that in order to equip a card to a slot on their dashboard, a character must meet the minimum stat requirements on the card.
Upgrading Equipment
Each character can use upgrade cards from the inventory to upgrade items on their dashboard, by sliding the upgrade card(s) underneath the equipment card(s).
A character can only equip an upgrade card if they meet the minimum stat requirements on both the equipment and upgrade cards. If a character doesn't meet the minimum stat requirements of an upgrade card, they cannot use it to upgrade a card on their dashboard.
Each equipment card has an upgrade slot value. If a card already has a number of upgrades equal to this value, it can't be upgraded, unless one or more of these upgrades is removed.
If an upgraded card is placed in the inventory, turn the cards to the side to make it easy to track the upgraded equipment within the pile of spare cards.
Individual upgrade cards can be removed from equipment and returned to the inventory at any time during this step.
The Sunless Armour example: A Morning Star has been upgraded with a Titanite Shard, giving its attacks +1 damage. As it has only one upgrade slot, this weapon cannot be upgraded again. A Sunless Armour has been upgraded with the Chloranthy Ring. The Sunless Armour card has two upgrade slots, and a second upgrade card could be added later if desired.
Resuming Exploration
Once the characters are done visiting the Firekeeper and/or Blacksmith Andre, they must resume exploration. Place the party token on the first encounter track space.
Because all of the completed encounter cards have been reset, the players will have to complete them once more in order to progress—but things are not as bleak as they seem. By replaying encounters, players can collect the rewards for completing them again too.
When moving to a space on the encounter track, if there is already an encounter card in the slot (because the players have attempted the encounter before) setup and play the existing card instead of drawing new cards.
Losing the Game
Remember, the party cannot visit the bonfire indefinitely. Each time they return to the bonfire, they'll use up a spark. If the spark dial has reached 0, and the players return to the bonfire, they lose the game—the fire has burned too low and they are forever lost to the darkness…
Boss Encounters
Boss Basics
If the party marker is moved onto a space with the Black Knight or Gravelord Nito encounter card, the players must setup and play the boss's encounter instead of drawing from the encounter deck.
These encounters are a true test of player skill and readiness. Each has a great deal more health than normal enemies, and an arsenal of devastating attacks that can quickly defeat the party.
Bosses are a type of enemy and can be targeted by character attacks as normal. When facing a boss, follow the standard rules for enemies and enemy turns, except for the differences outlined in the following sections.
There are two types of bosses—mini bosses and main bosses.
In Dark Souls™: Tomb of Giants, the Black Knight is a mini-boss, and Gravelord Nito is a main boss.
Tiles During Boss Encounters
During boss encounters, models can move freely between tiles as though they were a single large tile, and treat the nodes shown below as being adjacent to each other.
Boss Data Cards
- The boss's name.
- The boss's threat level.
- The boss's starting health.
- Whether the boss is a mini boss or a main boss.
- The boss's behaviour deck size.
- The boss's block value.
- The boss's resist value.
- The boss's heat-up value.
- The boss's special ability.
- Which set of Dark Souls™: The Board Game the boss is from.
Behaviour Cards
Instead of following behaviour symbols on their data cards, each boss uses a unique deck of behaviour cards. Each behaviour card includes the following information.
- Name
- Heat-up symbol
- Attack range
- Dodge difficulty
- Behaviour symbols
Bosses use these cards when taking turns, to represent the wide variety of attacks they are capable of performing. Each card has its own behaviour symbols, and an attack range and dodge value for when resolving attacks on the card.
After setting up a boss encounter, shuffle the boss's behaviour cards that do not have the heat-up symbol, then draw a number of cards equal to the boss's behaviour deck size. Place these cards face down without looking at them to create the boss's behaviour deck for the encounter. Return the other cards to the side of the playing area—these cards will not be needed during the encounter.
Heat-Up Cards
Cards with a heat up symbol indicate particularly powerful attacks that do not start in the behaviour deck. When the boss's health is reduced to equal to or lower than its heat up value, shuffle its heat-up behaviour cards, then draw a random card and shuffle it into the boss's behaviour deck.
From this point onwards the players will not only need to relearn the boss's attack pattern, but also contend with a powerful new card.
Boss Arcs
The base of a boss model is separated into four distinct arcs—front, left, right, and back.
Gravelord Nito is facing the top of the page. Above is the front arc, to the left is the left arc, to the right is the right arc, and behind is the back arc.
When placing a boss on a node, the centre of the boss's front arc must always directly face an adjacent node, as shown below.
This splits the tile into four areas defined by the four arcs of the boss, with each node in at least one of the arcs. Nodes along the lines between arcs count as being in both arcs.
The Black Knight is facing the Pyromancer. The nodes with green highlighting are in his front arc, the nodes with purple highlighting are in his left arc, the nodes with blue highlighting are in his right arc, and the nodes with yellow highlighting are in his back arc.
Characters observe the following rules for movement and positioning when on the same tile as a boss.
- When a character is on the same node as a boss, they must be placed in one of the boss's arcs, touching the boss's base within that arc.
- When a character moves onto the same node as a boss, the character must remain in the same arc they were in before the movement began. If the character was on a line between two arcs, they can choose which of the two arcs to be placed in.
- When a character on the same node as a boss performs a move, instead of moving to another node, they can remain on the same node and be placed in an adjacent arc instead.
- If a character moves away from or is pushed off a boss's node, the character must remain in the same arc. If the character is pushed and there are no available nodes in the same arc due to a wall, the character can move to any adjacent node touching that wall instead.
- If a boss's attack misses a character and the character spends 1 stamina to move, they can ignore the rules for boss arcs, and either move onto any adjacent node or remain on their current node and be placed in any of the boss's arcs.
To move from the front arc to the back arc, the Pyromancer spends 1 Stamina (0 to walk + 1 to run).
Attacking Bosses and Weak Arcs
When a character attacks a boss, they attack the arc they are currently in. If the character is on a line between two arcs, they can choose which arc to attack.
Some boss attacks leave the boss vulnerable in one or more arcs. When a character performs an attack against a boss, look at the top card in the behaviour deck discard pile. If the card shows the weak boss arc symbol in the arc being attacked, the character rolls an additional black die during step 3 of the attack sequence.
Boss Turns
Overview
At the start of a boss's turn, draw the top card from the behaviour deck, and follow the behaviour symbols on the card. After resolving the card, place it face up on top of the behaviour deck discard pile.
If there are no cards remaining in the behaviour deck at the start of a boss's turn, reset the deck by flipping the discard pile face down once more. When doing so, take care not to shuffle the deck. By carefully watching the boss's attacks, players can learn the boss's move and attack patterns and gain the edge they need to defeat their foe.
Boss Movement
Although bosses follow most of the enemy movement rules, exceptions and boss-specific symbols are outlined below.
- When a boss moves towards its target, first turn the boss so the centre of its front arc faces an adjacent node that is closer to the target, then move the boss onto that node, repeating this for each node of movement the boss has.
- When a boss moves away from its target, turn the boss so the centre of its back arc is facing an adjacent node that is farther away from the target, then move the boss onto that node, repeating this for each node of movement the boss has.
- If a boss would move towards a target that is already on the same node, turn the boss so the centre of its front arc faces the target instead.
- If a character is on the same node as a boss when it turns, the character remains where it is and does not move to stay in the same arc.
- When a boss moves onto the same node as a character, the character is placed touching the boss's base in the same arc they were in before the movement began. If the character was on a line between two arcs, they can choose which arc to be placed in.
- If a boss's movement symbol doesn't show a target, the boss simply moves the number of nodes in the direction shown, without changing its facing.
- If the boss is placed in a character's node as a result of movement, keep the boss's current facing. Characters pushed by this movement can be placed on an adjacent node of their choice, ignoring arc restrictions.
Boss Specific Movement Symbols
- The turn symbol indicates the boss turns 90° to the left or right as shown by the direction of the arrow.
- The rotate symbol indicates the boss turns 180°, reversing its current facing.
Boss Attacks
Boss attacks follow the same sequence as enemy attacks, but can also include the symbols outlined below.
Bosses do not change facing when they make attacks.
- The area symbol indicates that instead of targeting a specific character, the boss attacks in multiple arcs instead. The area symbol is always accompanied by an arc diagram below the attack. Any characters that are in an arc that has the area symbol and within the behaviour card's attack range are targeted by the attack, and must make defence rolls as normal.
Repeat
Similar to the equipment symbol, some boss cards also feature the repeat rule. If the repeat symbol (2) appears on a behaviour card, the boss resolves their entire row of behaviour symbols the number of times shown.
The arc diagrams on the behaviour cards show the boss's arcs as Normal Boss Arcs, Attack Boss Arcs, and Weak Boss Arcs.
Defeating Bosses
Bosses have so many wounds they use a health dial to track their wounds instead of tokens. Boss dials begin the encounter at the boss's starting health value, and count down by the corresponding value each time the boss suffers damage.
If the dial reaches 0, the boss is killed, and the players successfully complete the encounter.
The Black Knight
When the players kill the Black Knight, add the Black Knight treasure cards (Black Knight Halberd, Black Knight Shield, and Blue Titanite) to the inventory. Then, shuffle the legendary treasure cards, Gravelord Nito treasure cards, and transposed treasure cards for the characters in the party into the treasure deck.
Increase the spark dial by 1, then each character gains an ember token.
Flip the Black Knight's encounter card face down to reveal the bonfire side. For the remainder of the game, when the characters rest at the bonfire, place the party token on this space instead, allowing the players to avoid the earlier encounters.
Before resuming their journey, the party can now choose to return to the bonfire without spending a spark.
Gravelord Nito
If the players kill Gravelord Nito they have completed Dark Souls™: Tomb of Giants!
Well done! The world has moved one step closer to ushering in a new Age, and perhaps an end to the Curse of Undeath!
Icon Reference
The icon key printed on the final page of the rulebook (page 32).
Encounter Cards
- Primary spawn node
- Secondary spawn node
- Primary terrain node
- Secondary terrain node
- Trapped encounter
- Encounter level 1, Encounter level 2, Encounter level 3
- Enemies: Skeleton Soldier, Skeleton Archer, Giant Skeleton Soldier, Giant Skeleton Archer, Skeleton Beast, Necromancer
- Terrain: Treasure Chest, Barrel, Gravestone, Lever, Shrine, Torch
Enemy Statistics
Threat; Behaviour deck size; Block (vs physical); Resist (vs magic); Starting Health; Heat Up Point.
Enemy Movement
Deal damage while pushing; Push characters while moving; Leap to specified character (either the nearest or the character with the Aggro token); Move towards the nearest character; Move towards the character with the Aggro token; Move number of nodes in indicated direction.
Turn 90° right; Turn 90° left; Turn around.
Enemy Attacks
Attack the nearest character; Attack the character with the Aggro token; Push characters hit by attack; Attack all characters on target node; Attack all nodes in range in specified arcs; Deal physical damage.
Boss arcs: Neutral boss arc; Attack boss arc; Weak boss arc; Deal magical damage.
Equipment Icons
One-handed weapon; Two-handed weapon; Armour; Upgrade slots; Weapon upgrade; Armour upgrade; Block (vs physical); Resist (vs magic).
Character Attacks
Black dice (1); Blue dice (2); Orange dice (3); Move indicated number of nodes in any direction; Deal magical damage; Damage all enemies on target node; Shaft (can't attack at Range 0); Push affected enemies.
Other Icons
Taunt; Attack range; Repeat behaviour or attack (2); Dodge.
Conditions
Bleed; Frostbite; Poison; Stagger.