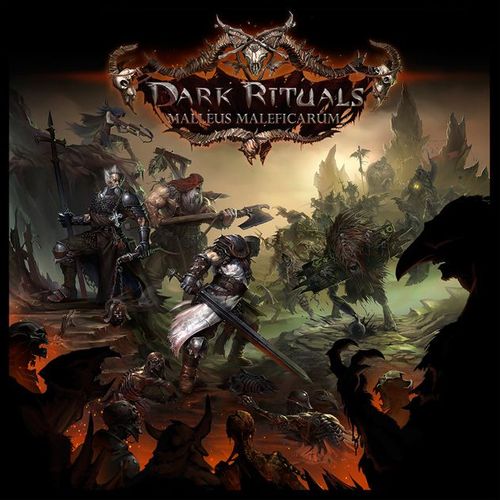
Dark Rituals: Malleus Maleficarum
Dark Rituals: Malleus Maleficarum Rulebook
Table of Contents
Table of Contents
- Component Overview
- Hero Dashboards
- Hero Attribute Board
- Hero Weapon Card
- Hero Alchemy Card
- Farmer ID Card
- Witch ID Cards
- Witch Master's Misery Board
- Witch's Grimoire
- Dark Legion ID Cards
- Witchcraft Cards – Summon Creature
- Witchcraft Cards – Black Magic
- Plague Cards
- Loot Cards – Artifact
- Loot Cards – Upgrades
- Loot Cards – Black Magic
- Botanical Cards
- Tokens
- Setup
- Core Concepts
- Game Details
- Glossary
Component Overview
- 38 Miniatures
- 4 Hero Dashboards
- 4 Hero Attribute Boards
- 4 Hero Alchemy Books
- 4 Hero Weapon Cards
- 2 Witch Dashboards
- 1 Witch Master's Misery Board
- 1 Witch's Stamina Board
- 1 Farmer ID Card
- 6 Dark Legion ID Cards
- 39 Botanical Cards
- 8 Loot Cards
- 8 Witchcraft Cards
- 9 Plague Cards
- 6 20x20cm Map Tiles
- 4 20x10cm Map Tiles
- 2 Blue Attack Dice
- 3 Yellow Attack Dice
- 1 Red Defense Dice
- 3 Green Defense Dice
- Stamina Cubes
- Wound Tokens
- Soul Tokens
- Chest Tokens
- Botanical Tokens
- Summoning Circle Tokens
- Plague Reward Tokens
Hero Dashboards
Each Hero Dashboard shows: the Hero's Name, a Class Icon, the maximum Weight the Hero can carry, Health Points, the Available Actions and their Stamina Cost, the Stamina Source, an Image, the starting Attribute Values, the Locked Stamina Location, and the Exhausted Stamina Location.
Hero Attribute Board
Each Attribute Board shows the Attribute Levels for the four Attributes — Agility, Strength, Resistance, and Alchemy — with a marker showing the current Attribute Level on each Attribute Track.
Hero Weapon Card
Each Weapon Card shows the Hero's Name and Class Icon, the Attack Modes and their Stamina Cost, the color and number of dice for each Attack Mode, the Weapon's Weight, an Image, the Defense value with its Stamina Cost, and the color and number of dice for Defense.
Hero Alchemy Card
Each Alchemy Card shows a Class Icon, the Alchemy Effect, the Alchemy Ingredients required, and the required Alchemy Level.
Farmer ID Card
The Farmer ID Card shows the Farmer's Name, Health Points, an Image, the Available Actions with their Stamina Cost, Color and Number of Dice, the Farmer's Attributes, and a Special Ability.
Witch ID Cards
Each Witch ID Card shows the Witch's Name, Health Points, an Image, the Available Actions and their Stamina Cost, the Witch's Attributes, the Attack Modes and their Stamina Cost, the color and number of dice for each Attack Mode, Attack Special Effects, the Defense and its Stamina Cost, the color and number of dice for Defense, and Defense Special Effects.
Witch Master's Misery Board
The Misery Board tracks the Aura of Evil Track, the Soul Track, and the Sacrifice Track.
Witch's Grimoire
The Grimoire is a double-sided reference card that lists each Spell's Name and its full Spell Effect.
Dark Legion ID Cards
Each Dark Legion ID Card shows the Character's Name, Health Points, an Image, the Available Actions and their Stamina Cost, the color and number of dice for Actions, the Character's Attributes, and a Special Ability.
Witchcraft Cards – Summon Creature
These cards show an Image and Name, and the Card Action.
Witchcraft Cards – Black Magic
These cards show the Spell Name and the Card Action.
Plague Cards
Plague Cards show a Stamina Source Icon, the Card Action, and the Plague Effect.
Loot Cards – Artifact
These cards show the Artifact's Name, Weight, Artifact Effect, an Image, and Attribute Requirements.
Loot Cards – Upgrades
These cards show whether the card is an Armor Upgrade or Weapon Upgrade, the Attribute Requirements, the Upgrade Effect, an Image, and the Weight.
Loot Cards – Black Magic
These cards show a Name, Card Effect, Card Penalty, and Attribute Requirement.
Botanical Cards
The Botanical Deck contains many different Alchemical Ingredients, each identified by a Name and an Image.
Tokens
The token set includes: Chest Tokens, Botanical Tokens, Soul Tokens, Stamina Tokens, Wound/Sacrifice Tokens, Plague Reward Tokens, and Summoning Circle Tokens.
Setup
Encounter Setup
- Choose the Encounter.
- Using the Encounter mini-map, create the game board:
- Place the double-sided Map Tiles as shown in the Encounter mini-map. The Map Tiles are numbered to help you locate them. Take care to place the Tiles in the correct orientation.
- Place tokens on the Map Tiles as shown. This includes the Chest, Botanical and Summoning Circle Tokens.
- Place the Miniatures in their starting locations. This includes the Heroes, Farmers, the Witches and their Disciples.
- Create each Hero Player's playing area:
- Take the Hero ID Card for your Character and place it in front of you.
- Find the Weapon and Alchemy Book that match your Hero's Class.
- Take an Attribute Track and mark the Hero's starting Attribute Values.
- Place the Botanical and Loot Decks and the Farmer ID Card within easy reach of all Hero players.
- The Witch Master creates their playing area:
- Take the Witch's Stamina Dashboard and place it in front of you.
- Take the Witch Master's Misery Board. Place a marker in the first slot of the Aura of Evil Track and place Plague Reward Tokens on the Soul Track as defined in the Encounter.
- Collect all the ID Cards for all the Evil Characters in play for this Encounter, including the Witches, the Disciples, and the Possessed Farmer.
- Any related Miniatures that are not already placed on the Map should be placed nearby.
- Shuffle both the Witchcraft and the Plague Decks and place them within reach.
- The Witch Master should draw 3 cards from the Witchcraft Deck into their hand. These should be hidden from the other players.
- Place the Soul and Wound Tokens within easy reach.
The Hero Play Area
Each Hero Character has four important game components in their play area at the start of the game:
- A Hero Dashboard
- An Attribute Board
- An Alchemy Book
- A Weapon Card
When you set up your Character, begin by selecting a Hero Dashboard, which shows important information, such as the Class Icon and the initial value of the four Attributes.
For example, the Crusader's Dashboard shows the Warrior Icon on the left, which matches the icons on the Weapon Card and the Alchemy Book. His initial Attributes are Agility 2, Strength 2, Defense 1, Alchemy 1. Markers are placed on the Attribute Board in these positions to show the current Attribute values. These values may improve during the game.
The Witch Master's Play Area
The Witch Master has many important game components in their play area from the start of the game:
- The Witch Master's Misery Board.
- The Witch's Dashboard.
- Witch's Grimoire.
- Witch's ID Cards (one for each Witch in play).
- Minion ID Cards (one for each Witch in play).
The Witch Master's Misery Board tracks the Witch's growing power throughout the Encounter. At the top, the Misery Board shows the current level for the Aura of Evil. A marker is placed in the first slot at the start of the Encounter and advances when the Witch Master kills characters.
The Soul Track stores Soul Tokens when they are taken as rewards. During setup, Plague Reward Tokens are placed as described in the Encounter, and show the number of Soul Tokens the Witch Master will need to draw Plague Cards.
The Sacrifice Track is used to store Encounter Objectives. This is Encounter dependant and can be found in the Encounter Description.
For full details of how to use the Misery Board see Witch Master's Misery Board below.
The Witch's Dashboard stores Exhausted Stamina. Each time the Witch Master Exhausts Stamina, move the Stamina Tokens to this board.
The Witch's Grimoire is a double sided reference card that describes the spells cast by the Witches when they Attack and Defend. The Witch's ID Card only shows the name of the spell and the full effect is explained on the card. Keep the Grimoire close at hand until you have learned all the Effects.
During setup, take the ID Cards for the Characters you will be using. This will include one or more Witch, Creature and Minion ID Cards. There are many Characters in the Dark Legion but you will not play every Character in every Encounter. If the ID card is double-sided, start the game with the less powerful side showing. The upgraded statistics are shown on the side with the red triangle in the upper left corner.
The information on the ID Card is similar to the information on the Hero Dashboard, but Stamina is not stored on the Witch's ID Card.
Core Concepts
The Game Round
The game is played over a series of Rounds. A Round consists of the Heroes and the Forces of Evil alternately activating a Character and taking one or two Actions. The order that the Characters on each side activate is totally up to the Players, with the only restriction being that if you have no Stamina, you cannot activate at all.
Note that one Character does not take a full turn when they activate: they do not take repeated Actions until all their Stamina is exhausted.
The two sides continue to alternate until one side is completely out of Stamina, then the other side takes Actions for its Characters until it is Exhausted too, marking the end of the Round.
Here are more details of what happens in each phase of the Round:
1) Start of Round Phase
Recover all Exhausted Stamina by moving it to the Reserve area on your Dashboard. Leave the Locked Stamina in the Locked area. Perform this step even if you are Stunned.
If the Witch Master has a Witch in play, they may discard any number of unused Witchcraft Cards from their hand, and then draw new Witchcraft Cards from the Deck, up to their hand limit (normally three cards).
2) Activation Phase
This is the main phase of the game, where most of the action occurs. It is dynamic and fluid, with each Character taking a few Actions and then allowing the other Characters in the game to act and react. There is no formal turn order, nor does anyone take a complete turn.
The Heroes activate one of their Characters first, taking one or two Actions. Then the Witch Master does the same, also taking one or two Actions. Game play alternates until one side is out of Stamina, at which point the other side plays on, taking one or two Actions per Character, until they are also Exhausted.
The Player is only allowed to activate Characters if they have Stamina. For example, if you have no Stamina, you cannot Activate and take one Action that costs zero Stamina.
Hero: One of the Heroes, who is not exhausted, Activates. There is no turn order and this can be any of the Heroes, including the Hero that Activated immediately before. That Hero has two options:
- Take one or two Actions, Exhausting Stamina for each Action as it is performed.
- Pass - take no Actions. Any of the Hero Players can say they Pass, but they must agree they are taking no Actions. If the Heroes cannot Activate any Characters, they must Pass.
Note that Stunned Heroes can Activate if they have the Stamina to perform the Revive Action, which must then be their first Action.
A complete list of Hero Actions is presented below. Note that when a Hero Activates, it may be able to take Actions with the Serfs, as well as with the Hero Character.
Witch Master: The Dark Legion activates in a similar way. If the Witch Master has Stamina, they may Activate any one of their Characters, meaning Demons, Witches, Creatures or Minions. That Character has the same options as above:
- Take one or two Actions, Exhausting Stamina for each Action as it is performed.
- Pass - take no Actions. If the Witch Master cannot Activate any Characters, they must Pass.
If a Character takes two Actions, they are free to take any legal Action, including taking the same Action twice. If the Character has Actions that cost zero Stamina, and they have Stamina in Reserve, they are allowed to Activate and perform those Actions, but the Action still counts towards the one or two Action limit.
Once a Character has taken an Action, if a second Action is performed, it must be taken by the same Character.
Passing will often be performed when you are running out of Stamina and have too little Stamina left to take an Action. However, don't overlook tactics here. When the Heroes are nearing the end of their Stamina Reserves they can Pass in the hope that they will be able to take a couple of Actions near the end of the Round. You may even want to Pass when you have Stamina available, if you are already well positioned for the next Round.
Manage your Stamina carefully. It may seem like an advantage to rush to take many Actions if your opponent seems to be passive, but being able to take many Actions together at the end of the Round can be a great advantage.
3) End of Round Phase
The Round is over when both sides Pass.
You may wish to Pass early in the Round, in order to see your opponent's plan. This is risky! If your opponent plays on, you may gain an advantage. But if your opponent Passes, the Round ends and everyone regains their Stamina. This may not be what you wanted to happen!
If there are any game effects that reference the End of Round, perform them now.
Actions, Reactions and Abilities
Characters always have something to do. They are most involved in the game when they are Active, as this is when they may perform Actions. However, other Characters can often react to the Active Character by performing Reactions. You will often be able to perform Reactions when you are not the Active Character.
Actions: Characters only perform Actions when they are Active. All Actions are described in detail below, and all Actions a Character can perform will be indicated by an Action Icon on a Card in the Character's Play Area. This will often be the Character's ID card, but can be another card such as the Hero's Weapon Card or various Loot Cards, etc. There are custom Icons for the common Actions, such as Attack, but the generic Action Icon is used for many card-specific Actions.
Actions can only be started when there is no ongoing game play, i.e. you cannot interrupt one Action to perform another Action.
Individual Actions are described in the section below.
Reactions: A Reaction is performed at a specific time. The description of the Reaction will include the trigger and a Character can perform the Reaction whenever this trigger occurs. The Character does not need to be Active to perform a Reaction. Reactions can be started at many different times in the game, and so they may interrupt your own Action, interrupt an Ally's Action, or interrupt an Enemy's Action. There is a list of the most common Reactions below. Common Reactions have icons, but unique, card-specific Reactions will use the generic Reaction Icon.
There are fewer restrictions on Reactions, but the most important limitation on a Reaction is when they can be performed. For general Reactions, we will describe the timing in the rule book; for card specific Reactions, the timing will be described on the card.
Individual Reactions are described in the section below.
Timing: There is one general timing rule for all Reactions, Abilities and other optional game effects that affect a random outcome, such as a dice roll or card draw. You must activate the Reaction or Ability before you see the random result. For example, you cannot make an Attack Roll, see the result is a failure and then use an Ability that adds dice to the Attack Dice Pool.
Cost: There will often be a cost associated with performing an Action or Reaction. The cost may be in the description of the task or printed on the card that gives you the task. This cost will most often be Stamina that you should Exhaust, but you will sometimes have to pay another price. You must be able to pay the cost in full before resolving the effect. The cost is always paid, even if the effect fails or is canceled by another Player.
Managing how you Activate your forces is an important aspect of the game and you will have many options. The Heroes may take a balanced approach, activating each Hero in turn, or they can continuously reactivate one Hero until it has no stamina, etc. The Witch Master can activate many different Characters, a few, or just one.
No Witches in Play: The Witch Master has a special restriction on when it can Activate Characters: it must have a Witch in play. If there are no Witches in play, the Witch Master cannot Activate a Creature or Minion, even to perform Reactions. Think of the Witches as commanding and focusing the Dark Legion.
If there are no Witches in Play, the Witch Master has two options:
- Summon a Witch. This Action is described below. It will be the only Action the Dark Legion performs this Activation.
- Pass - exhaust all their remaining Stamina and take no Actions.
Because having no Witches in play is such a limitation, the Dark Legion will almost always want to summon a Witch as soon as possible.
Note: Burning Witch Tokens do not count as Witch Characters and cannot perform Actions and Reactions. They take no part in the game until they are Saved. See the Save Burning Witch Action below.
Stamina
Most Actions and many Reactions are associated with a Stamina cost. If there is a Stamina cost for an ability, Characters must pay the Stamina cost in full before resolving the effect.
Stamina is organized on a Dashboard. Each Hero Player has their own Hero Dashboard, integrated with their Hero ID Card, to organize the Stamina that belongs solely to that Hero. Heroes cannot share Stamina.
The Witch Master has more flexibility. There is one Witch Master Dashboard and the Stamina Reserve is shared between all Characters in the Dark Legion.
Your Stamina will be distributed between the three areas of your Dashboard:
- Reserve Stamina. This Stamina is still available for use during this Round. You may keep it anywhere, for example, on the Hero Image on the Dashboard. The Witch Master has one Reserve to share between all the Dark Legion Character, so you can just have one pile of Reserve Stamina anywhere in your Play Area.
- Exhausted Stamina. Exhausted Stamina has already been used this Round but will be Recovered at the start of the next Round. The bottom right area of the Hero Dashboard should be used for each Hero's Exhausted Stamina. The Witch Master has a Dashboard specifically for the Exhausted Stamina.
- Locked Stamina. The Witches cause Plagues that Lock Stamina out of the Heroes' Stamina pool. Locked Stamina should be placed in the top right area of the Heroes' Dashboards. It is not Recovered in the Start of Round Phase.
Both sides spend Stamina the same way. You Exhaust Stamina as you pay for Actions or Reactions then Recover all your Exhausted Stamina at the start of the next Round. However, various game Effects will temporarily Lock Stamina, and you may even Permanently Lose Stamina, returning it to the game box. Managing your Stamina and controlling the Stamina of other Players is an important aspect of the game.
Starting Stamina – Heroes: Each Hero Dashboard has a circular Icon with 3 segments, Body, Sustenance and Mind, showing how each segment contributes to the Hero's starting Stamina. The Hero adds the Stamina obtained from Body, Sustenance and Mind to get their starting Stamina and places this number of Starting Stamina in their Reserve during Setup.
For example, the Crusader gets 2+2+5, or 9, starting Stamina Tokens.
See Plague below for how this affects the Hero's access to Stamina.
Starting Stamina – the Witch Master: Each Encounter Description will state how much Stamina the Witch Master takes at the start of the game. Plague does not affect the Dark Legion, but they can permanently lose Stamina when they Summon more Witches to the game.
Managing Stamina is just as important as managing your Activations. Rushing to perform as many high cost Actions as you can may give you a temporary advantage, but saving Stamina for later in the Round may leave you in a situation where you can take Actions and your enemy cannot even React.
Characters and Miniatures
"Characters" is our general term for the actors in the game, whether they are Heroes or Witches or just lowly Minions. All Characters share some things in common, for example they can all Move. Some Characters are unique, some are not.
Miniature refers specifically to the game piece used to show the Character's position on the board. Game play is limited by the number of Miniatures available. For example, a Witch cannot Summon a Condemned Minion when all the Condemned Miniatures are in play.
Heroes: There are four Heroes in each Encounter and each one is controlled by a Player. The Heroes cooperate to defeat the Witches.
Serfs: Serfs are low level Characters caught up by accident in the Heroes' battle against the Witches. The Heroes will try to protect the Serfs, while the Witch Master will kill or possess them.
Serfs are not controlled by specific Players, cannot be Activated during the Activation Phase and do not use their own Stamina. Instead, a Hero Player Activates a Hero normally and can control any of the Serf Characters by Exhausting the Hero's Stamina to pay for the Serf's Actions. There are no restrictions on how many Actions a Hero can take with a Serf, so long as the Hero has sufficient Stamina in Reserve. However, each Action taken with a Serf counts as one Action towards the limited number of Actions a Hero may take when they Activate (one or two Actions). If the Heroes want to use a Reaction for a Serf, for example to Defend, any of the Heroes can Exhaust the Stamina.
Note that Stunned Heroes cannot pay for Serf Actions or Reactions.
Farmers are the only Serfs in the core game.
Witches: Witches form the core of the Witch Master's Dark Legion. The Witch Master must always have a Witch that they can Activate if they want to perform Actions or Reactions with any of the Dark Legion. Witches have many Actions and Reactions themselves and command the Dark Legion's Disciples into Action.
Disciples: Disciple is the generic term for the weaker Characters in the Dark Legion, the Minions, Creatures and Possessed Serfs. Like Serfs, the Disciples need to be controlled by a Witch. If the Witch Master does not have any Witches in play, the Disciples cannot take any Actions or Reactions, including Defend. When a Witch activates a Disciple, the Stamina for the Action is Exhausted from the Witch Master's Reserve Stamina.
Creatures: Each Creature is unique and they are the strongest of the Disciples. Witches can only Summon them through Witchcraft.
Minions: Minions are the rank and file troops of the Dark Legion. There can be several of each Minion on the board at once. Witches can Summon Minions as one of their Actions.
Possessed Serfs: These are the weakest members of the Dark Legion. They are not summoned to the game. Instead the Witch must Possess an existing Serf.
Possessed Farmers are the only Possessed Serfs in the core game.
The Demon: The Campaign features a boss character that is only used later in the Campaign.
Attributes and Attribute Sheets
The Attributes of Characters affect how well they perform in the game. The details of the Attributes used in the game are described below, but here is a summary.
- Agility: Helps Heroes move away from Areas containing Enemy Characters. See Move and Evade.
- Strength and Resistance: Improves the Heroes' Attack and Defense. See Combat.
- Alchemy: Determines whether specific Alchemical Spells are available to the Hero. See Alchemy.
The Heroes' starting Attribute values are shown on the Hero ID Card, but the Hero Attributes will probably change during the game. Actions taken by the Hero may cause the Attributes to increase:
- Agility, Strength and Resistance: When a Hero defeats a member of the Dark Legion, the Hero can increase any one of these by one level.
- Alchemy Attribute: Whenever a Hero composes and uses an Alchemy, they may increase their Alchemy Attribute one level.
Other effects found on cards may increase or decrease these Attributes. The Attributes cannot be decreased below the lowest value on the Track or increased above the highest value.
Note there are more rewards for defeating Characters, see Spoils of War in the Details section below.
Other Characters have fixed Attributes.
Attribute Requirements and Equipping Cards
Many cards have Attribute Requirements. Heroes cannot equip the card unless their current Attributes are equal to or higher than all the values shown on the card.
Loot cards show a simple example of Attribute Requirements. The Death's Head has two Attribute Requirements, a Strength of 3 or more and also an Alchemy of 3 or more. Another example is the Hero's Alchemy book, where different spells require different Alchemy levels. This spellbook shows 3 spells that require an Alchemy of 1 or more, and 1 spell where the Hero must have an Alchemy of at least 2.
Attributes can vary during the game, going both up and down. If your Attributes decrease, you must recheck the Attribute Requirements for all the cards you have equipped. Unequip any cards where you no longer meet the requirements, and add them to your hand.
Note that if Heroes draw cards that they cannot currently equip because they do not meet the Attribute Requirements, they are allowed to keep the card in their hand for later use. There is no hand size, but cards in your hand do count towards your Weight Limit, see below.
Equipping, and unequipping cards, is not an Action and can be performed any time the Hero is Active. This includes immediately after a card is drawn or as part of the Pick Up, Search, or Trade Actions. Both Heroes involved in a Trade Action can equip and unequip cards. Cards that are unequipped, perhaps because you have drawn a better version, can be moved to your hand or discarded.
Weight and Weight Limits
Each Hero has a maximum Weight that the Hero can carry shown on their Hero Dashboard. Some of the Cards they gain during the game have individual Weights written on them. The weight of all the cards carried by a Hero cannot exceed their maximum Weight allowance. This includes cards that are equipped and the cards that are in the Hero's hand.
Heroes can discard cards to stay under the weight limit. This is not an Action and does not take Stamina.
Note that Farmers and all Characters in the Dark Legion can ignore Weight. They do not gain cards during the game that weigh anything.
Game Details
Common Actions
There are many Actions that can be performed by different Characters in the game. These Common Actions are described in detail here in the rule book and have their own Action icons on the game components.
Card-specific Actions are essentially the same. They are simple enough to be described on a card, use the generic Action icon and are often specific to one Character. However, all Actions are resolved the same way.
Check the Characters' ID cards to find which Characters can perform which Actions. Heroes and Witches have the most actions available to them.
The Common Actions are: Attack, Save Witch, Move, Search, Pick-Up, Summon Minion, Possess Serf, Summon Witch, Revive, Trade, and Component Action (a generic icon used for card-specific Actions).
Attack
A Character may attack an enemy by exhausting Stamina as shown on their ID Card or Weapon Card. Melee and Ranged Combat are indicated separately and may have different costs. Because Attacking is linked to Defend Reaction, they are both described below in the Combat section.
Move
Characters can Move to an adjacent Area by Exhausting the Stamina specified as the cost on their ID Card.
Movement is prevented by walls. To Move into a building, there must be a door on the border between the two Areas. However, there is no cost related to moving through doors on the Map Tile, think of them as being open. Doors are marked by grey arrows on the Map Tile.
You can Move into Areas with other Miniatures without restrictions.
For example, a Crusader can Move into an open, adjacent Area even if the Possessed Farmer occupies it, but cannot Move into a building where the border is solid wall rather than a marked door. An Executioner beside a marked door can enter the building, but if there is an enemy Character in his starting Area, he cannot simply Move — he must Evade.
If the Active Character is moving from an Area with one or more enemy Characters, they must Evade those Characters. This is still a Move Action, so think of Evade as an extra check that must be made before making the Move. To Evade Enemies, the Active Character's Agility Attribute must be equal to or higher than the Agility of the most Agile Enemy Character in the Area. If the Active Character has enough Agility, they may take the Move Action normally, with no additional Stamina cost. If not, they cannot Move at all.
For example, if the Executioner's current Agility is 1, which is lower than the Agility of the Possessed Farmer, 2, the Executioner cannot Move out of the Area at all. A Crusader with an Agility of 2, equal to the Agility of the monster in his Area, is able to Move normally.
Various card effects may say that the Character can Evade. This means they do not have to make the Agility check when trying to Move away from Enemies when using that particular Component Action and can Move normally.
Pick Up
Characters can Pick Up Items that are in plain sight in the game. This includes:
- Botanical Tokens (Heroes Only).
- Encounter Specific Objectives.
In all cases, any marker for the item, such as a Token or card, is removed from the Map Tile. See the Botanicals section for more details on Picking Up Botanical Tokens.
Possess Serf
A Witch can Possess a Farmer that is in its Area. There is no way to prevent this Action and the Farmer Miniature is immediately replaced with a Possessed Farmer Miniature. The Witch Master will receive rewards for Possessing a Farmer, see below. Possessed Farmers are controlled by the Witch Master just like any other Minion, the only difference being how they enter the game.
Save a Burning Witch
A Witch can Save a Burning Witch in their Area by Exhausting Stamina as shown on their ID Card. The Burning Witch Token is replaced with the appropriate Witch Miniature and can take part in the game normally.
Search
The Characters can Search their Area for Items that are hidden:
- Loot Tokens (Heroes Only).
- Hidden Encounter Specific Objectives.
Searching Chests shown by Loot Tokens is described below.
Trade
Two Heroes can Trade a Card when they are in the same Area. Only the Active Hero pays the Stamina Cost and may give or take one Card. This Action must be used repeatedly to Trade several times, and, as expected, Stamina must be Exhausted each time. Heroes can't trade Stamina, or any of their class-based cards, such as the Alchemy Book.
Revive
When a Hero is reduced to zero Health Points, immediately lay their Miniature on its side and Exhaust all their remaining Stamina. While the Hero is Stunned, they cannot perform any Actions or Reactions except for Revive. Stunned Heroes can Activate as normal, if they have the Stamina to Revive (so they will not be able to do this in the Round they are Stunned). They must perform Revive as their first Action when they Activate and then they continue their Activation normally, for example, taking an optional second Action.
If the Hero does not have enough Stamina to pay the Revive Cost, the Hero remains Stunned.
Witchcraft
The Witch Master has a hand of hidden Witchcraft Cards, with a hand limit of 3 cards. The Witch Master can play a Witchcraft Card by Exhausting the Stamina stated on the card and resolving the card's instructions. See the Witchcraft section below.
Summon Minion
A Witch can Summon a Minion to a Summoning Circle. The Witch Exhausts Stamina to pay the cost of the Action and places a Minion of their choice in any Area with a Summoning Circle. This Action is limited by the number of Minion Miniatures available in the game. The Witch does not need to be in the Area where the Minion is Summoned. Note the cost for the Summoning Action is on the Witch ID Card and is therefore the same for all Minions. If the Witch Master has multiple Witches in play, they can choose which Witch performs the Summon Action.
Summon Witch
To Summon a new Witch, the Witch Master must Permanently Lose 5 Stamina. As normal, the Stamina comes from the Witch Master's Reserve but it is returned to the game box instead of being Exhausted. Then a new Witch Character is brought into play:
- Add the new Witch's ID Card to your Playing Area.
- Place the new Witch Miniature in any Summoning Circle.
The Witch that is summoned must be a new Witch Character, one that has not taken part in this Encounter so far.
This is a special Action that is taken by the Witch Master, not an individual Witch. After completing this Action, the Witch Master may Activate the Witch that has been Summoned and take one more Action, so that 1 or 2 Actions can be taken this turn. The special Summon Witch Action is the only Action that can be performed when the Witch Master has no Witches in play, but it can also be performed when other Witches are present.
Common Reactions
Just like Actions, there are some Reactions that have unique icons and appear on several ID Cards. Most Reactions are card-specific, but they are essentially the same. They are simple enough to be described on a card, use the generic Reaction icon and are often specific to one Character. However, all Reactions are resolved the same way.
The Common Reactions are: Aid and Defend (plus a generic Component Reaction icon for card-specific Reactions).
Aid
Aid is a Reaction that allows Characters in the same Area to help each other. It is triggered when the Active Character performs an Action that uses one of their four Attributes and its effect is to boost that Attribute by 1 point for the duration of the Action.
The active Character states they will perform an Action that uses an Attribute and Exhausts Stamina normally. Then, an inactive Character in the same Area states that they will Aid the Active Character and Exhausts Stamina for their Aid Reaction. The Active Character then gains +1 to the Attribute that they are using for their Action. Once all Aid Reactions are performed, the Active Character must perform their Action immediately. For example, they cannot interrupt play to equip an Item they are carrying, perform a second Action or perform a Reaction even if one has been triggered. Once the Action has been performed, the boost is immediately lost.
If there are many Characters in the same Area, all the inactive Characters can Aid and the active Character gains +1 for each Aid Reaction that is performed. Attributes cannot be increased above the limit shown on the Hero Attribute Board.
Defend
When a Character is Attacked, it is possible that they can block the damage by Defending. The Character must have Stamina available in Reserve to Defend. This is a Reaction taken when the Attacker is Active and is described in detail below, in the Combat section.
Dice Rolls and Abilities
Many abilities and card effects change the outcome of dice rolls and the timing of these effects are important. Unless otherwise stated, follow these steps for all dice rolls in the game:
- The Player Exhausts Stamina for the Action and creates a dice pool by taking the correct number of dice for their Character.
- If there are ongoing effects, or Reactions that have been triggered that add dice to this pool or that add results to the roll, the Characters resolve them before the dice roll. This includes Exhausting Stamina and discarding cards if required.
- Roll the dice.
- If there are ongoing effects, or Reactions that have been triggered that allow you to reroll dice, you may use them now. Again, this includes paying any necessary costs and discarding cards if required. You may Activate these Reactions one by one until you get the result you need, or you run out of re-rolls.
There is no limit to the number of different Reactions that can be combined in steps (2) and (4) but each ability must be activated at the appropriate time and paid for regardless of the outcome. However, each Reaction can only be activated once.
Combat
Combat is a two step process where the Active Character makes an Attack and the Target may optionally Defend. Both steps involve dice rolls added to base Attributes. Further, the Attack may involve some magical effects too. If the Attack succeeds, it causes 1 Wound.
At its heart, combat is simple. The Active Character's Attack Action generates an Attack Value and the Target's Defense Reaction generates a Defense Value. If the Attack Value is greater, the Target takes 1 Wound.
These terms and more options are described below.
Melee Attacks
Melee Attacks are the simplest of all Attacks. The Melee Attack icon is a Crossed Sword icon, which can be seen on ID Cards, and Weapon Cards, if the Character can equip different Weapons.
Melee Attacks can only be made against other Characters in the same Area as the Attacker.
The Melee Attack icon will always be followed by other information:
- The Stamina cost, 3 in this example.
- The Dice Pool, 2 yellow dice here.
Since Attacking is an Action, the Attacker must be able to Exhaust the required Stamina to Attack the Target. Then they roll the specified number of dice.
The Attack Value is: the Attacker's Strength Attribute + Dice Pips.
If the Melee Attack icon is not present, the Character cannot make Melee Attacks. For example, the Farmer Serf cannot Attack.
Ranged Attacks
Some Characters have Weapons or Abilities that can make Ranged Attacks. The procedure is very similar to Melee Attacks. For example, the Assassin's crossbow can make Ranged Attacks.
The Ranged Attack icon will always be followed by other information:
- The Stamina cost, 3 in this example.
- The Dice Pool, one blue and two yellow dice for the Assassin's crossbow.
The only difference between Ranged Attacks and Melee Attacks is using Range and Line of Sight to select a valid Target.
Range: Ranged Attacks all have a fixed Range of 1 Area, meaning the Attack can be made against Targets in Adjacent Areas only. Specifically, they cannot be used to shoot Targets in the same Area as the Attacker.
Line of Sight (LOS): Only completely solid walls along the boundary between two Areas block LOS. No other objects block LOS, including other Miniatures, Tokens and walls with doors.
Note: In case it is referenced in other game effects, you always have LOS to Targets in your Area. However, Ranged Weapons cannot be used against Targets in your Area, which is a Range of 0.
For example, an Assassin may have four potential targets. Both Condemned can be Attacked — one is in an open, adjacent Area, and the other can be seen through the door. The range to the Possessed Farmer is good, but the wall blocks LOS, so the Possessed Farmer cannot be targeted. The Assassin has LOS to the Mortus, but both Characters are in the same Area, so the Range is not legal — although the Assassin cannot use her ranged crossbow to Attack the Mortus, she can still make a Melee Attack against it.
If the Target is at a Range of 1 and there is LOS, the Attack is allowed and proceeds just like Melee Attacks, with the Attacker Exhausting the required Stamina, forming a Dice Pool and generating the Attack Value. Like Melee Attacks, Strength is still the base Attribute for Ranged Attacks.
Defense
Just as Attack is a very common Action in Dark Rituals, Defend is a common Reaction, triggered by the Attack. In fact, the Defend Reaction named Armor Save is always available to the Target, even when they have no Reserve Stamina.
The Target may be able to defend against the Attack and prevent it Wounding them. Defense is based on the Resistance Attribute.
Armor Save: In all cases, even when there is no Defense Icon on a Character's card, the Character may use the Armor Save Reaction to generate a Defense Value. The Character does not need to Exhaust Stamina, and can use Armor Save when they have no Reserve Stamina.
When the Character uses Armor Save, the Defense Value is the Character's Resistance Attribute.
Defense: Characters that have a Defend Icon on their ID or other cards can roll dice to gain a high Defense Value, if they can Exhaust Stamina to perform the Reaction.
Defense requires Stamina and adds the dice result to the Defense Value:
- The Defense icon indicates that the owner can use this Reaction.
- The Stamina cost, two in this example.
- The Dice Pool, three green dice here.
The Target must be able to Exhaust the required Stamina to make a Defense. Then they roll the specified number of dice. The Defense Value is: the Target's Resistance Attribute + Dice Pips.
The Target can decide between making an Armor Save or a Defense roll after seeing the Attack Value.
Resolve the Attack
Once you have the Attack and Defense Values, it is simple to resolve the Attack.
The Attack causes one Wound if the Attack Value is greater than the Defense Value, then the Target takes 1 Wound, otherwise the Attack has no effect.
For a worked example: the Assassin makes a Ranged Attack against a Condemned, who is in the Adjacent Area. LOS and Range restrictions are satisfied. The Assassin has a Ranged Weapon Equipped. She Exhausts 3 Stamina to perform the Attack Action. The Dice Pool of 1 blue and 2 yellow dice gives her a roll of 4. Her Strength Attribute has not improved from its starting value of 1. This gives an Attack Value of 5, pretty good.
The Witch Master sees that an Armor Save will not help the Condemned, as its resistance is only 2, and decides to Defend instead. This will Exhaust 2 Stamina from the Witch Master's Stamina Reserve, but it is worth it! A roll of 4 on the two green dice gives a Defense Value of 6. This is plenty!
The Assassin's Attack Value needs to exceed the Defense Value to cause 1 Wound, so this Attack is a failure.
Modified Attacks and Defense
Attacking and Defending can be modified by many different kinds of cards. We will describe many of them here, but the general principles above are the same.
Weapon Upgrades: The Loot Deck contains many cards that can be attached to your weapon to change its statistics and add special effects.
There are two kinds of Weapon Upgrades, Attack Upgrades and Defense Upgrades. The location of the card effect and the icons used distinguish them: an Attack Upgrade (for Melee or Ranged Weapons), a Defense Upgrade, a Name, an Image, Attribute Requirements, an optional Upgrade Weight, and the Upgrade Effect.
There are a few requirements for using an Upgrade:
- You must meet or exceed all the Attribute Requirements.
- Attack upgrades must match at least one of the Attack Icons (Melee/Ranged) on your Weapon.
- Your total Weight with the Upgrade cannot be more than you can carry.
- You can only equip one Attack Upgrade and one Defense Upgrade.
If you meet the criteria, these cards are used by sliding them under your Weapon Card.
Note: You must recheck these requirements every time an Attribute changes. If the Attribute increases, this check is trivial, as you will certainly pass. However, you may be forced to remove an Upgrade if an Attribute decreases. Fortunately, this rarely happens.
If you can use an Upgrade, you must equip it first. Attaching it is not an Action and can be done any time you are Active. It is neither an Action nor a Reaction. You can remove any existing Upgrade if you want to equip a new Upgrade. However, you cannot change your equipped Upgrade while you are in the process of resolving an Action or Reaction.
The Upgrade is attached by sliding it under your Weapon Card, so that only the Upgrade Effect is visible. Slide Attack Upgrades under the top of your Weapon Card and slide Defense Upgrades under the bottom.
Note that bonuses/effects that change dice rolls are only applied if you roll the dice. For example the Defense bonus above is only applied if the Character makes a Defense roll.
Witch's Attacks and Defense: The Witch's ID Card shows Spell Effects that are resolved depending on the Attack Value and Defense Value. Note that these Spells only affect Heroes, they are not used in Attacks against Serfs.
Start by making the Attack as described above. Witches do not have separate Weapon Cards, and the relevant information is all on the Witch's ID Card. Once you have the Attack Value, check the Witch's ID Card to see if the Attack is strong enough to trigger a Spell. Simply compare the final Attack Value to the numbers listed on the ID Card. For example, if Hagatha Attacks and scores an Attack Value of 6, resolve Pierce. If she scores 7 or more, resolve Fireball.
These Spell Effects are described on the Witch's Grimoire. Resolve the Spell effect immediately, before the Target makes its Defense Roll.
Resolve the rest of the Attack normally. The Target may Defend and the Attack may Wound the Target.
Similarly, there are Magical Effects named below the Defense Values. Just like the Attack Effects above, resolve the Magical Defense Effects matching the Defense Value immediately after you calculate the Defense Value, and then continue to use the Defense Value to resolve the Attack.
Other Reactions and Ongoing Effects: There are many game effects that can affect Attacks and Defense. For example, a Hero can cast an Alchemy to buff an Attack; a Witch's Spell may affect a Defense roll; an ongoing Effect may affect several Attacks made by a character.
Combat Summary
Here is a complete summary of all the steps in Combat:
- The Attacker Exhausts Stamina, as shown beside the Melee or Ranged Attack icon. Effects in play may change this amount. The Attacker must be able to Exhaust the required amount.
- The Attacker selects a valid target, taking LOS and Range into account, where necessary. Effects in play may change the target selection rules.
- The Attacker forms the Attack Dice Pool, based on the dice shown beside the Attack Icon and further modified by effects in play.
- The Attacker rolls the Attack Dice and then makes any re-rolls allowed by effects in play. The Attacker must accept the re-rolled result.
- The Attacker calculates the Attack Value. The base value is the Attacker's Strength plus the number of Blast icons shown on the dice. This base value is then modified by effects in play.
- If the Attack has any Special Effects, either fixed or based upon the Attack Value, the effects are applied now.
- The Defender chooses between Armor Save or Defense.
- Armor Save: Calculate the Defense Value, based on the Target's Resistance Attribute and modified by any effects in play.
- Defense: The Target Exhausts Stamina, as shown beside the Defend icon. Effects in play may change this amount. The Target must be able to Exhaust the required amount.
- The Target forms the Defense Dice Pool, based on the dice shown beside the Defend Icon and further modified by effects in play.
- The Target rolls the Defense Dice and then makes any re-rolls allowed by effects in play. The Target must accept the re-rolled result.
- The Target calculates the Defense Value. The base value is the Target's Resistance plus the number of Shield icons shown on the dice. This base value is then modified by effects in play.
- The Attack is resolved by comparing the Attack Value to the Defense Value. If the Attack Value is higher than the Defense Value, the target takes 1 Wound. This may be modified by effects in play.
Defeated Characters
Use Wound Tokens to track how much Health a Character has lost. For Unique Characters, place the Wound Tokens on the ID Card. For other Characters, place the Wound Tokens beside the Miniature on the game board.
When a Character takes as many Wounds as it has Health Points, it is immediately Defeated. However, the exact result depends on the Character.
Hero: The Hero is Stunned. When a Hero is Defeated, immediately lay their Miniature on its side and Exhaust all their remaining Stamina. They will regain their Stamina as normal and then they may be able to Revive and rejoin the game. While they are Stunned, they take no part in game play.
Serf: The miniature is simply removed from play.
Witch: Swap the Witch Miniature with a Burning Witch Token.
Disciple: Return the miniature to the general pool of Miniatures.
Spoils of War
Defeating your enemies is its own reward, but it also gives your Characters some benefits. These have been discussed above, but are summarized here.
Heroes: When a Hero defeats an enemy Character:
- Increase one of the Strength, Resistance or Agility Attributes by one Level.
Dark Legion: Every time the Witch Master Defeats a Farmer or Hero, immediately:
- Place a Soul Token on the next available space on the Soul Track.
- Increase the Aura of Death by one level.
Botanical Tokens and Cards
A Hero can Pick Up Botanicals from a Botanical Token in their Area. Flip the token and discard it from the playing Area. Then draw 1-3 cards from the Botanical Deck, as indicated on the back of the Token. Keep these cards in your hand, hidden from the Witch Master.
Witches and their minions ignore Botanicals, as they are common on Neemoss and are not required to cast magic.
The Botanical Deck contains many different Alchemical Ingredients, all identified by a name and image. The Heroes use Alchemical Ingredients when they use Alchemy, see Alchemy.
Alchemical Ingredients have no weight and there is no limit to the number you can hold. They can be Traded between the Heroes.
Loot Tokens and Cards
Heroes can Search a Chest in their Area. The Hero discards the Chest Token and draws a Loot Card to their hand, which should be kept hidden from the Witch Master (the cards can be shown to the other Heroes).
There are many kinds of Loot Cards:
- Artifacts. Artifacts must be equipped before they become active, and once equipped, they give the owner ongoing benefits. Artifacts have Attribute limits that the owner must meet or exceed, before the Artifact can be equipped. They have a weight and contribute to the total weight the Hero is carrying.
- Black Magic Scrolls. There are many Black Magic Scrolls, describing new spells the Heroes can cast. The card shows Attribute Requirements, any costs or penalties to be paid and the effect. Black Magic Scrolls are kept in your hand until you cast them and they are discarded when the Spell is resolved.
- Weapon Upgrades. These are described in the combat section. They must be equipped before the effect becomes active.
Alchemy
Each Hero has a double-sided Alchemy Card related to their Class in their play area. This card shows many Alchemical Spells that the Hero can cast, although the Hero may not be able to access them all at the start of the Encounter.
The Alchemy Card shows the following information: a Class Icon, the Alchemical Spell Effect, the Alchemy Ingredients, and the Required Alchemy Level.
For example, on the Assassin's Alchemical Spell book, the Class Icon shows this belongs to the Assassin. There are eight Alchemical Spells in the book, and each one has an Alchemical Spell Effect, the required Ingredients and the Alchemy Attribute Requirement.
To cast an Alchemical Spell:
- The Hero must satisfy the Alchemy Requirement, meaning their Alchemy Attribute must be equal to or greater than the value shown next to the spell.
- The Hero must discard one Alchemy Ingredient card matching each symbol shown in the spell.
The Hero then resolves the spell effect. The spell effect will say if the Spell is an Action or a Reaction, and state how much stamina to Exhaust, if any.
Alchemy Ingredients can be found in the Botanical Deck. Higher level Alchemical Spells require rare Alchemy Ingredients.
After a Hero resolves the effects of casting the Alchemical Spell, they may increase their Alchemy Attribute one level on the Attribute Board.
Witchcraft
The Witch Master has a hand of 3 Witchcraft Cards, which can be exchanged during the Start of Round Phase, see above.
All Witchcraft Cards are spells that are cast by the Witches. You must be able to activate a Witch to cast any Witchcraft spell.
There are two kinds of Witchcraft Cards:
- Black Magic, which have a Name and Effect.
- Summon Creature, which also have a Name and Effect.
Black Magic: To cast a Black Magic play, resolve and discard the card. Some cards are Actions, some are Reactions; Exhaust the amount of Stamina given on the card, if any is required.
Summon Creature: These Witchcraft Cards allow Witches to summon unique Creatures to the game. To summon a Creature, follow the instructions on the card and discard it. For example, the Tree of Despair card shows that it is an Action and you must Exhaust 4 Stamina. Summoned Creatures always appear in Areas that contain a Summoning Circle. However you are free to summon the Creature to any such Area. The Witch does not need to be in the Area.
Creatures are unique. You cannot play a Summon Creature spell if that Creature is already on the Board.
Witch Master's Misery Board
As the Witches wreak havoc, their power rapidly increases. This is managed by the three tracks on the Witch Master's Misery Board: the Aura of Evil Track, the Soul Track, and the Sacrifice Track.
The tracks are marked with cubes and tokens during game play: a marker moves along the Aura of Evil Track, Soul Tokens fill the Soul Track starting at position 1, Plague Reward Tokens show when Plague Cards are drawn, and Wound Tokens fill the Sacrifice Track.
Aura of Evil Track: As the Witches and their Dark Legions kill more of the Forces of Good, the Aura of Evil increases across the land. The Witch Master moves the marker one square along the Aura of Evil Track when:
- A Hero is Stunned
- A Serf is Killed
For example, after the Aura of Evil has already advanced to position 4, a further death moves the marker to the final position, completing the track. All Dark Legion cards are flipped over, to the side with the red highlight on the top left corner — the Dark Legion gets a little stronger.
Soul Track and Soul Tokens: The Soul Track is used to track the Witch Master's progress towards Plague Rewards defined in the Encounter. Soul tokens are earned by:
- Defeating a Hero.
- Defeating a Serf.
- Other game effects that specifically instruct the Player to take a Soul Token.
Soul Tokens are placed as soon as they are obtained, filling the track in numerical order.
The Encounter says where Reward Tokens are placed on the Soul Track and when the reward Token is covered with a Soul Token, the Evil Player takes the corresponding reward:
Plague Rewards: The Encounter defines where to place Plague Reward Tokens during Setup. When the Witch Master covers a Plague Reward Token with a Soul Token, they immediately draw a Plague Card.
Sacrifice Track: As the Witch Master completes objectives defined in the Encounter, Wound Tokens are placed on the Sacrifice Track, marking progress towards the Witch Master's goal. The objectives, the number of tokens to collect and the final result are all defined in the Encounter.
Spreading Plague
Plagues are a powerful weapon that the Witches can use to reduce the Stamina available to all Heroes.
A Plague Card shows: a Stamina Source Icon, the Card Action, and the Plague Effect.
The Witch Master may exhaust Stamina to use the Spread the Plague Action on a Plague Card in their hand, bringing the Plague into play. The Witch Master must select an active Witch to cast this spell and should place the card on the Witch's ID Card to track the spellcaster.
The Plague effect changes the amount of Stamina a Hero can access, by reducing the Stamina drawn from the three sources: Mind, Sustenance, Body. As soon as the Plague Card is in play, the Heroes must adjust the Stamina on their Dashboard:
- First, calculate the amount of Stamina that is locked: the amount on the Plague Card or the amount on the Source, whichever is smaller.
- Then move the corresponding number of Stamina Tokens to the Locked Location on their dashboard. The Heroes may choose to Lock Stamina that is in their Reserve or is currently Exhausted. While the Plague rages, they can no longer use the Locked Stamina.
Each Plague Card affects one source of Stamina, indicated by the Stamina Source Icon at the top of the card. There can be several Plagues in play at the same time and the Heroes will lock Stamina for all the Plagues that are active. In fact, there can be more than one Plague of each type in play, and each Witch can spread several Plagues at once. If more than one Plague affects the same Source, the Heroes must still resolve all the Plague Cards, rather than the highest of each type.
For example, a Witch named Pekka has already spread a Plague, reducing Body Stamina by 3 — both Heroes have Locked 3 Stamina as a result. Now she casts another, reducing Mind Stamina by 2. The Heroes are in trouble. The Crusader has 9 Stamina, drawn from Body 5, Sustenance 2 and Mind 2. The Crusader must Lock 2 Stamina as a result of the new Plague. He has 1 Exhausted Stamina at the moment, which he Locks, together with 1 Reserve Stamina.
The Executioner has 10 Stamina, drawn from Body 5, Sustenance 4 and Mind 1. He only Locks 1 Stamina, since his Mind Source is smaller than the reduction by the Plague. He has 1 Exhausted Stamina, so he Locks that one.
Note that you can always check the amount of Stamina your Heroes have by reducing each Stamina Source by the active Plagues and adding the three values together. Remember, Sources may be reduced to zero, but will never be negative. The current total is the amount of Stamina currently in play, split between Reserved and Exhausted. The difference between the current total and the unadjusted or starting total should be Locked. Plague Cards are obtained as rewards for completing objectives described in the Encounters.
Note that there may be a limit on the number of Plagues a Witch can spread. If there is a limit, it will be stated in the Encounter.
Curing Plague
There are various ways a Hero can cure a Plague:
- They can defeat the Witch who spread the Plague. As soon as the Witch is defeated, remove all the Plague Cards that the Witch caused. These Plague Cards were placed on the Witch's ID Card when they came into play.
- Alchemical Spells.
- Black Magic.
When the Heroes cure a Plague:
- Discard the Plague Card.
- Immediately move the correct amount of locked Stamina to the Exhausted Location. This will be the reduction on the Plague Card, or the amount drawn from the Source, whichever is smaller.
Summoning Circles
Summoning Circles mark weak areas in the veil that separates Earth from Neemoss during the Conjunction. As well as marking where Summoned Creatures may appear, they mark Areas where the Witch's power is especially strong.
Witches that are in an Area with a Summoning Circle gain +1 to their Strength, Resistance and Agility Attributes.
Victory and Defeat
At the end of a session of Dark Rituals: Malleus Maleficarum, either the Witch Master will emerge victorious, or all of the Hero Players as a group will be the winners.
Winners are determined by Encounter Objectives that are described in each Encounter. The Encounter will explain exactly what the Objectives are and when to check that the Objectives have been met.
However there are some general Objectives that are always in effect:
If there are no Witches in play and the Witch Master cannot summon more Witches next Round, the Heroes have won the Encounter. The Witch Master may be unable to summon Witches because there are no new Witch Characters or the Witch Master does not have enough total Stamina to Summon a Witch.
If all the Heroes are Stunned, the Witch Master has won the Encounter.
Number of Players
Encounters are balanced for equal difficulty for both sides when playing 4 Heroes. Instructions for changing the number of Heroes and changing the difficulty are covered by the final game's Encounter material.
Campaign
The Encounters are organized into a continuous Campaign, with instructions for Stand Alone play. As the Heroes progress through the campaign, Encounters include instructions for constructing the Loot deck. This prevents weak Heroes drawing high level cards and strong Heroes drawing weak cards.
Glossary
- Armor Save: A reaction to an Attack, that allows you to use your (modified) Resistance Attribute as your Defense Value to prevent the Attack wounding you. All Characters can use an Armor Save, regardless of whether they have stamina in reserve or whether they have a Defense Reaction listed on their Cards. See Defense.
- Creatures: Members of the Dark Legion. Creatures are unique. Witches can only summon Creatures using Witchcraft Cards.
- Characters: Characters can Activate and take Actions. This includes all actors in the game except Serfs/Possessed Serfs. Serfs never Activate on their own: another Character is Active and has an Action to Command the Serf.
- Dashboard: The game component that is used to organize your Stamina. Note this might also be your ID Card, but when the rules talk about your Stamina they will call it your Dashboard.
- Defense: A reaction, triggered when you are Attacked, that allows you to exhaust stamina to make a Defense roll to prevent the Attack wounding you. This can only be done if you have the reaction and have sufficient stamina. See Armor Save.
- Disciples: This is a generic term for the weaker Characters in the Dark Legion. It includes the Minions, Creatures and Possessed Farmers, but not the Witches or the Demon.
- ID Card: The game component that has the Actions, Reactions and fixed or starting Attributes for a Character. Note this might also be your Dashboard, but when the rules talk about your statistics and abilities, we will call it an ID Card.
- Minions: Members of the Dark Legion. Minions are not unique. Witches can summon Minions as an Action, i.e. no special card is required.
- Possessed Serfs: Members of the Dark Legion. Possessed Serfs are not summoned. They are characters that are on the board in Human form first and then Possessed by a Witch during game play. Possessed Farmers are the only Possessed Serfs in the base game.