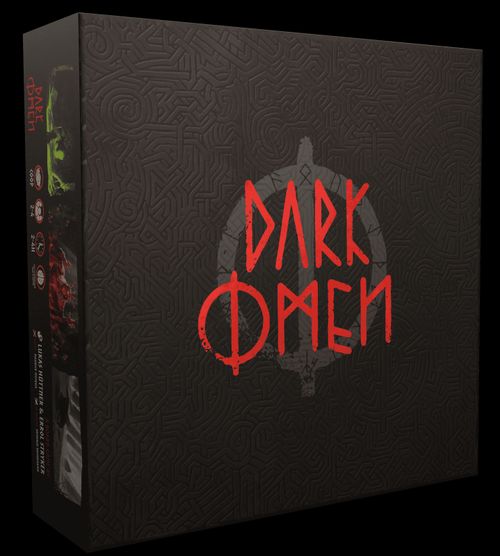
Dark Omen
Dark Omen Rulebook
Table of Contents
Table of Contents
- Introduction
- Objective
- Parts List
- Setup
- Session Structure
- Runes
- Obstacles
- Full Chapter Order
- Your Character
- Actions
- Locations
- Combat Basics
- Attack Solo
- Attack Team
- Combat Scenarios
- L1 Dice Battle - Solo 1:1
- L1 Dice Battle - Team Attack - 2:1
- L1 Dice Battle - Team Attack - 2:1 (continued)
- L2 Dice Battle - Team Attack - 3:1
- L2 Dice Battle - Solo 1:1
- L3 & L4 Dice Battle - Solo 1:1 & Heroic Attack
- L3 Dice Battle - Team Attack - 4:1
- L4 Dice Battle - Team Attack - 4:1
- Creature Tokens
- Boss Combat
- Chapter 4 - The Underworld
- Quick Start
Introduction
Dark Omen is an adventure board game set in the mysterious land of Edaia. You, and up to 3 friends, set forth in a lost Nordic time, taking on the role of one of 8 different characters. Experience strategic decision-making, resource management, captivating battles, and difficult puzzles.
At its heart, Dark Omen is a campaign-style cooperative game where you and your fellow players will be led through the epic 4-chapter story, culminating in your victory, or the destruction of Edaia as it is engulfed by darkness.
This rulebook is designed to guide you through your first campaign, starting with the call to adventure in the city of Hoglichten. After learning the basic rules, you can start your game with your first story card: "Prologue". Here you will further develop your character's uniqueness before heading off on your adventure. While we strongly recommend players learn the game through the experience of the story campaign, we realize that fate calls some of us into much busier times. Players can instead play Dark Omen using the Quick Start rules (p. 27), which allow you to enjoy a single chapter of the game outside the campaign structure.
Objective
Dark Omen is story based, and a chapter of the story typically consists of 3 to 5 Omens and one boss fight at the end. A chapter should take between 2 to 3 hours to complete. The full story is made up of 4 total chapters, meaning you should expect to finish the game over several sessions or evenings.
Players work through all four chapters, uncovering the source of The Darkness that creeps over the land of Edaia by vanquishing the powerful forces behind it. Most of the time, when players successfully finish an Omen, the darkness meter moves toward the light. But should the players be defeated, the meter decreases towards darkness. If the meter ever moves totally into the black, Edaia succumbs to evil, and the players lose the game and the campaign. As the world grows darker, the heroes rise in valor and fortitude. As the world grows brighter, the enemies become more reckless and wild, diminishing the heroes morale.
The Darkness (Darkness Meter)
- State of Valor (dark end of the meter): Players add +1 to their DR.
- State of Resistance (light end of the meter): Players receive only +1 Morale when defeating an enemy.
- If the land gets fully consumed by the Darkness, you lose the game.
Parts List
(Items included in the ALL-IN SLAYER edition are marked in the original; those marks are noted below.)
- 1 jigsaw base board center piece (p. 4)
- 8 jigsaw base board pieces (p. 4)
- 4 acrylic white obstacle layer jigsaw pieces (p. 4)
- 4 acrylic transparent obstacle layer jigsaw pieces (p. 4)
- 4 jigsaw top layer pieces (Map) (p. 4)
- 5 plastic standee holders
- Dice: 20 D6 (4x black, 4x blue, 4x green, 4x purple, 4x yellow); 1 D8 black, 1 D12 black, 5 D4 (1 of each color)
- 4 Player aid cards
- 8 Character miniatures
- 5 Boss miniatures (only in ALL-IN SLAYER edition): Vahva the cave bear, Jörthnur the earth serpent, Solveig the witch, Guardian of Darkness
- 5 Boss punch-out standees: Vahva the cave bear, Jörthnur the earth serpent, Solveig the witch, Guardian of Darkness
Standard playing cards: 8 character cards, 74 creature cards, 12 guard cards, 141 gear cards, 7 holographic cards, 18 guild cards, 16 moon rune cards, 16 sun rune cards, 16 fortune rune cards, 16 hope rune cards.
Jumbo cards: 36 big Omen cards, 4 big Boss cards, 12 big story cards.
Boards: 4 character boards, 4 enemy boards.
Punch-out tokens: 2 double-sided town locations; 4 double-sided region banners (Swamplands, Woodlands, Mountains, Valley); 1 sacred grove; 64 loot tokens; 24 omen-specific loot (diverse loot on back); 40 creature tokens; 24 blood of the beast; 3 darkness crystals; 68 gold coins; 8 each of blue, purple, yellow and green battle markers; 1 Stone of Courage; 1 Stone of Rejuvenation; 2 Trading Posts; 2 Villages; 2 Runehenges; 2 River Travels; 4 Campfires; 9 Fires; 4 Graves; 4 Barrows; 2 Vortices; 2 Dwarven Clocktowers; 4 Eternal Maze entrances; 1 Gloomy Waters; 1 Blood Bag.
Other: 1 Darknessmeter; 5 red Omen tokens; 1 black day tracker; 4 transparent character board lids (only in ALL-IN SLAYER edition); 3 big wooden tokens; 40 3D stickers (final color may differ); 70 colored wooden tracker cubes (20 black, 10 red, 12 blue, 12 green, 12 purple, 12 yellow) - player board trackers; 1 Rune bag deluxe (only in ALL-IN SLAYER edition; CORE ADVENTURER edition gets a cloth bag); 16 wooden Runes; 1 special rubber dice tray (only in ALL-IN SLAYER edition).
Setup
If this is your first time playing the game, the following might all seem a bit daunting. But fear not! After your first session, you'll be much more familiar with how our puzzle is put together and should be able to complete the setup rather quickly.
Game Board
- Locate the eight bottom base board jigsaw puzzle pieces and connect them so that each edge connects to another edge with the same number.
- Insert the raised center piece into the base boards so that the red arrows line up.
- Before you set up the board for the first time, carefully remove the transparent protective film from the acrylic parts. Locate the four white plastic pieces with the horizontal lines. Connect these by matching their shapes and ringing them around the centerpiece. This is known as the White Obstacle Layer.
- Locate the four clear plastic pieces with the vertical lines. Connect these like you did in step 3, placing them on top of the white obstacle layer. Make sure this clear circle is not upside-down, the black lines should be at the top of your board. The printed numbers should help you with that. This new layer is known as the Clear Obstacle Layer.
- The top layer should now be connected together and placed on top of the centerpiece. Once connected correctly, the top layer should show a ring of numbers that go clockwise around the circle in ascending order. There is also a guide on the centerpiece to help guide you on the proper placement so that the layer connects properly. This final layer is known as the Map.
One-time Pre-Assembly: Carefully attach the 36 self-adhesive 3D stickers to the grey circular markers. These create an air buffer and reduce friction when rotating the layers. Once applied, they should remain permanently attached. If they happen to come off, feel free to reattach them using super glue. (Final sticker color may differ.)
Caution: The game board must not be exposed to direct sunlight! Otherwise, the puzzle pieces may warp. If this does happen, simply place heavy books on top of the boards and wait a while until the puzzle pieces bend back.
Map
- Locate the two town tokens that are in the shape of a T. On the underside of each town you will see a number. Match that number to its location on the map board and place the town so that the longest edge of the town borders the edge of the map circle.
- Add the region effect banners, with lighter background face up, to their respective quadrants on the base board. These add special rules to heroes in those quadrants. The banners (hardcore side) read:
- Swamplands - Hardcore: Moving costs 2 AP
- Woodlands - Hardcore: Ranged weapons -1 range
- Mountains - Hardcore: Armor suffers -1
- Valley - Hardcore: Don't worry, be happy
- Additionally, place all Overworld Location tokens that have a round shape face down on their respective spaces which are indicated by numbers that are printed on the backside.
- Locate all the Loot tokens and randomize them in a face down pile or separate opaque container. Loot tiles all have the same back showing a grey rock pattern. Tokens with different backs should not be added to the randomized pile and will be used for specific omens.
Loot token faces shown: 1HP; 4MP; 4HP; 2HP & 2MP; 6MP; +1 AP; a stone (1 fist symbol -> 3 fist symbols); Purple, Blue and Yellow herbs; Gear (scroll); 1 coin; a ring (2 coins); a tick (1 fist symbol); dung (2 fist symbols); a straw doll; mushrooms; red mushrooms; a trap (-1 AP); a creature token; a chicken.
Loot Drop
Without looking at them, add a face-down loot token to each of the spaces on the map marked with a grey outline box. You will notice loot is distributed in a spiral like pattern. Refresh empty loot spaces after you perform the rune throw (as stated by the story card in a later step).
Character Board
- Each player takes a Character Board as well as all the wooden tokens and dice of their chosen color.
- Place a Tracking Cube in the health track at 15. Do the same for the morale track. Place another on the inner ring of the game board, just before the start of day space.
- Choose a Character from the 8 available character cards and place that card in the slot on the left. They have two sides: In Chapter 1 & 2 you play the grey misfit character card side. In chapter 3 & 4 you play the teal-colored hero card side. Characters that aren't chosen for this game can be returned to the box.
- Take the Miniature Figure which matches your character card, and place it on the entrance to Hoglichten (space number 39).
(The character board has Health and Morale tracks of 1-30, Potion Crafter slots, Inventory slots and a Gold area.)
Cards
The chapter that you are playing will be the indicator of which cards you will need during the game. For example, all player characters are level 1 during chapter 1. You can only use gear of your own or a lower level and, unless specified otherwise, all enemies you fight during the game will also be of your own level. A card's level is indicated in the top left corner.
- During your first game of Dark Omen, set aside all L1 cards and return the rest to the box. This includes: Creatures, Gear, and Omen cards.
Level symbols: one stroke = Level 1; a cross = Level 2; a cross with extra marks = Level 3; the most elaborate = Level 4.
Gear Cards
- Gear cards not only have a level, but they also have a type in their top right. Organize them into matching categories (i.e. level 1 weapons, level 2 armors, etc.). Types: Weapons, Armor, Accessories, Artifacts.
Omen Tokens
- If this is your first game of Dark Omen, place an Omen token on the "Start Chapter 1" space of the game board. Then place another Omen token in the second space clockwise, then a third on the third space. If this isn't your first game, see Chapter Difficulty page 8. NOTE: If you would like a slightly easier first game, place the third Omen token on the fourth space instead.
Finally, place the black day tracker token on top of the first Omen marker.
Enemy Boards and Battle Markers
- Set aside the red and black Enemy Boards. Place a black wooden tracking cube in each (on any number for now) and place them to the side. Place the black enemy dice near these boards. You should notice the small grooves at the top of both the character and enemy boards. These are designed to hold cards during the game, including your hero's gear and the enemy battle card.
You can place a battle marker here, to track who is currently engaged in fighting this creature specifically. For this, each player has 2 x 4 numbered tokens in their respective color. This enables you to track up to 4 active fights at once.
Darkness Meter
- Place a big black tracking cube in the middle space of the darkness meter. See page 2 for more details.
Story Cards
- You should now read Story Card 1: Prologue, in order to introduce your character to Hoglichten. Story Card 1 is then flipped to explain the rules for the "Trial of the Stjornandi". The trials will customize each character before the adventure begins. Full details on when to read each story card are listed on page 11, as well as on the story cards. Select and sort all story cards from your current chapter. Mark the Omen circle with generic tokens at the respective slots (days) which are indicated on the story cards, to be reminded when to read a story card.
After the Trial of the Stjornandi you are instructed to do a Rune Throw.
Runes
- Take the 16 wooden Rune pieces and put them into the black Rune Bag. Casting Runes is defined in greater detail in the Rune section on page 9.
Session Structure
Games of Dark Omen are divided in the following ways:
- 1 campaign = 4 chapters
- 1 chapter = 6 days
- 1 day = 4 rounds
- 1 round = 6 actions
In general, one chapter should be long enough to fill a single game night. However, should you need to finish in the middle of a chapter, simply take a picture of your character board and remember which day you most recently finished (NOTE: All-In Slayer owners save their stats with the included plastic character board cover).
Progression Tracker
The two circles with 24 squares are known as the progression trackers. The outer circle tracks story progression, the inner circle tracks player actions. In the inner circle, each player gets 6 actions per round, and 4 rounds make up a full day. After a full trip around the inner circle, your day tracker on the outside circle moves one square clockwise, marking the start of a new day and (usually) a new omen. On the 6th day you have a boss battle, which ends the chapter.
- An outside quadrant represents one chapter.
- An inside quadrant represents one round.
- An outside square represents one day.
- An inside square represents one action.
Note that the terminology of one "hour" being an action is an abstract shorthand and doesn't mean all actions would take a full hour.
The inner circle is also divided by night and day, depending on where your action cubes are. The time of day is relevant to certain cards.
Chapter Difficulty
The chapter you are playing determines the levels of the cards you will be using. For example, during the first chapter, you can put all cards of levels 2 and greater back into the box until you start a later chapter. All level 1 cards are returned to the box when you finish chapter 1.
When setting up your chapter, you need to determine the difficulty you will be facing. A chapter will always consist of six days, with the boss fight Omen waiting for you on the sixth day - the red space of the Omen circle.
The other five days will hold three to five other Omen tokens, the number and location of each is chosen by the players. The more omens you face, and the fewer non-omen days you have, the more difficult the chapter will be as a whole.
- Light: days 1, 2, and 4.
- Rough: days 1, 2, and 3.
- Stressful: days 1, 2, 3, and 5.
- Pain: all 5 days.
The Omens you face are normally random or determined by the Story card. For your first playthrough we suggest you use the following Omens on days one, two, and three/four respectively: Attack at Dawn, Demonic Weather, Fire Devil.
Omens
Omens represent the challenges you need to face as you progress through the story. They have three main sections: setup, rules, and ending.
At the start of the day, if there is an Omen token for the day, draw a random Omen card that matches your current chapter level. If there isn't an Omen token, then you and your allies are free to spend the day doing what you need to in order to prepare yourself for future days.
After normal setup - game board, loot, player characters, etc. - refer to the top of your Omen card, just below the background story, to find the extra setup required. Below the setup are all the rule changes for this Omen. This section will detail how to succeed or fail the Omen, and provide the new rules that enter play while this Omen is active. These rules don't remain active after the day ends.
The bottom two sections mark the ending of the Omen. If you manage to complete the Omen before the end of the day, gain the rewards as written on the left (you gain the reward immediately, you do not wait until the day ends). But should you fail to complete the task in time, you read the failure penalties on the right.
When rewards are distributed:
- 'The Group' means rewards are collectively shared or chosen by all players.
- 'All Players' means each player individually receives the listed reward.
The day does not end if an Omen is completed early. Finish the day, allowing players to use their extra actions to rest, heal, and repair.
Unless otherwise stated, everything you set up specifically for the omen (e.g., locations, creatures, etc.) is removed from the board before you begin the next omen.
(Omen card layout: Story, Setup, Rules / Mission, Success, Failure. The example card shown is "A Call for Aid".)
Dark Omen is a highly immersive game, and therefore not every game element you might need has a matching token. For example, if an Omen asks you to 'Place a Witch on space 42', you won't find a witch token in the box. Instead, use the included generic tokens and place one of those on space 42, representing the witch.
Runes
Reading the Runes
Each player will be deciding their fate multiple times throughout the game by tossing and reading the Runes. These 64 cards are divided into 4 houses of 16 cards each (also represented by color): House of Sun, House of Moon, House of Fortune, House of Hope.
Each card also has one of 16 runes in their top left corner - these match the Runes on the 16 wooden Rune pieces you put in the Rune bag during setup.
Casting Runes
After setting up the game - including the setup caused by the "Trial of the Stjornandi" Story Card - each player takes a turn rolling their fate. Each player draws 4 Rune pieces from the bag at random, then rolls them simultaneously (but don't put it back into the bag yet). Each of the Runes match a card in the Rune deck that you need to find and place in front of you. Once each player has found their four cards, place all the Runes back in the bag, then have each player read their cards aloud.
You must cast Runes at the beginning of day one, three, and six (respectively on the first, middle and last day of each chapter). Each player discards all their Rune cards and casts the Runes again.
Rune Cards
- Rune - The rune symbol that matches the dice
- House - The house name, color, and symbol (in this example: Hope, green, and the flying dove)
- Target - Individual cards will only affect the owner of the card. Group cards will affect all players.
- Longevity - Immediate cards perform their effect after being drawn and are then returned to the players deck. Reactionary cards stay with the player until they are triggered in reaction to an event during the game. Permanent cards remain until the card is discarded on the next rune throw.
- Effect - The cards effect. Some effects are ignored by characters with a specific attribute (ie. a card that is 'Ignored by "Attunement"' won't affect the Visko character.)
Group cards that are not immediate can be placed in the middle of the board as a reminder to all players that their effect is ongoing.
Contradictions of Fate
Some Rune cards may overlap in their effect and seemingly cancel each other out. For example, one Rune card might increase your damage, while another decreases it. When there are contradicting or overlapping Rune cards, adhere to the following rules:
- 1-2 players: Ignore the negative Rune card (ie, the damage decrease)
- 3-4 players: Ignore the beneficial Rune card (ie, the damage increase)
Example: "Tryors Wrath - The god of war is with you. Your weapons do 1 Damage extra per player level." and "Ningus Sorrow - The god Ningu scorns the adventurers for their prideful-ness. Your blades are dull. Your weapon does 1 less Damage. Ignored by Attunement."
Obstacles
The white and clear Obstacle Layers control the obstacles your character will face while moving around the map. On the map, between the numbered spaces, are slits that show the lower layers of the full rotating game board. As the obstacle circles are adjusted, these slits will either be white or black (the obstacle layers should be adjusted so that the slits are never partially colored one way or the other).
The black lines on the map are called Obstacles, and in general represent obstacles that the characters cannot pass through normally, such as walls, hedges, crevices, etc. The labyrinth created by the Obstacle circles plays a large role in how you navigate the map.
Omen Setup
Some Omen setups will cause you to move the white or clear tabs of the obstacle circles to specific numbers. For example, if the Omen instructs you to start the day with the white tab on space 14, rotate the white obstacle layer until its tab rests above space number 14 on the map, as shown. If the Omen doesn't specify a tab placement, start the day off with an obstacle throw (see next section).
Obstacle Throw (OT)
When the Omen doesn't specify a tab placement for the Obstacle layers, you perform an Obstacle Throw instead. For each Obstacle layer, roll one six-sided die. If the roll was even, move that circle clockwise. If the roll was odd, move it counterclockwise.
- 2, 4, or 6: Clockwise that many spaces
- 1, 3, or 5: Counterclockwise that many spaces
Full Chapter Order
All those previous sections may seem like a lot, but as you play it'll become more intuitive. As a helpful reminder, here is a full synopsis of what you do after each day:
- Move the Omen Tracker to the next day.
- Do a Rune Throw on days 1, 3 and 6. Look for the rune symbol on the board.
- Replace all missing Loot Tiles after a Rune Throw.
- Check all Rune Cards and make sure their effects are being implemented.
- Read your current Story Card (indicated on the card itself, or the Omen). Start with the Prologue and continue as and when instructed.
- Draw a new Omen Card according to your story, or a random one if you aren't using the story cards. Follow its setup instructions.
- If the Omen did not set your Obstacles, do an Obstacle Throw.
On the 6th day, use a Boss Fight Omen card as your Omen for that day. After the 6th day, your chapter is over, and the next one begins. Take all your gear with you into the next chapter, but all other cards matching the previous chapter level will be discarded.
Your Character
Card
You are defined by your character card and the miniature figure that represents it.
Each character has a name, an ability, and an attribute.
Your attribute is listed at the bottom of the card and has its own name identifier. Some rune cards might not affect characters with certain attributes. For example, Visko here has the attribute 'Attunement' due to his pet raven. This means that Visko is unaffected by the rune card 'Decayed Water' because it reads: 'Ignored by "Attunement"'.
In chapters 1 & 2 the characters are regarded as misfits (grey side), and in chapters 3 & 4 they've become heroes (teal side). Choose the side based on which chapter you're playing.
Guilds
Starting chapter 2, our misfits become more experienced. They might not be heroes yet, however, each character now enters the "Apprentice" tier of one of the 6 guilds before the beginning of the chapter. Each guild grants your character different traits. For every new chapter, the heroes automatically advance in their guild of choice, becoming "Journeymen", and ultimately "Masters". Therefore each guild has three different cards with the respective tiers, indicating which new trait the hero has learned.
Choose between these Guilds: Architect, Druid, Ranger, Rogue, Shifter and Warrior.
Use of Traits
Each guild tier is either action or attack based. Perform the action as stated on the card. Heroes can use every learned skill, but cannot stack their effects (e.g. they cannot use apprentice + journeyman at the same time).
Health Points
Health, or Health Points (HP) are the measurement of players' life in the game. When your HP is 0, your character dies. Health is primarily restored by using the rest action or health potions. HP is tracked on your character board with a colored token which sits in the numbered spaces. Your character starts with 15 HP.
Some creature damage effects might reduce your Max Health, meaning you cannot refresh your health to the max. Mark your respective max health with a generic token, indicating you cannot heal more than the number left to the token.
Moral
Morale Points (MP) represent your inner strength and will-power. Morale points can be spent to enhance or allow various actions throughout the game. Morale is tracked on your character board, each character starts with 15. MP is a major resource throughout the game and should be spent strategically.
Death
If your character dies, all their belongings get buried in the space where they died and their character card is discarded. Leave their figure on the board and place a death token under it as a reminder. Move your action token to the 6th space of the round. At the start of your next turn, choose a new character from those remaining and place their figure at the entrance of the town of your choosing.
Set aside all your items and other belongings. Discard all your 'individual' rune cards, then cast your runes again. Any 'group' rune cards that you played before stay in play.
Your character figure rises from the grave as a zombie, defending its place of rest. Any other character may fight this zombie as if it was a normal enemy. It has 8 HP, no armor, cannot manipulate dice, but adds the weapon you were using at the time of your death to its attack and damage. Once dead, a living character entering the space with the death token may suffer -2 morale to take all the dead character's possessions.
Dead characters cannot return in later chapters and are entirely removed from the game. If you reach a point where a player needs to choose a new character, but there are none left in the reserve, the game session is lost.
Inventory
"What's an adventure without loot?" - Nyrkki
Gear: At the top of your character board you will find an indent to help you hold your cards. You can use this to hold your Rune cards, but you can also use this to hold your gear. You can have an unlimited amount of gear cards, but you are limited in how many you use during combat. See Gear, p. 19.
Gold: You may store an unlimited amount of gold on your character board, but some may question how you managed to gain an unlimited amount of gold. Gold, like morale, is another currency in the game and will be gained and spent in various ways.
Inventory: Your inventory is limited to the six spaces shown on your character board. Your inventory is where you will store the loot tokens that populate the map. Loot tokens can be picked up by standing on their space. If you ever need more room in your inventory, you'll need to discard some of your loot, or transform it into potions. See Loot Tokens, p. 14.
Potions: Potions are a necessity to survive in a game of Dark Omen. You can store three at a time and can turn your other inventory items into potions to make space. See Craft Potion, p. 14.
Actions
Each player has 24 Action Points (AP) to spend during a full day. These actions are tracked using your action cubes on the inner action circle. There is no set turn order and players will be spending their actions simultaneously, while keeping the following two rules in mind:
- You cannot spend more than 6 action points per round. When you have finished the round, either by spending 6 AP or by choosing to forfeit the remainder (See "Meditate" on page 15), you must wait on the 6th square until all player cubes are on that square. Then the next round can be started.
- Some actions in the game, like combat, can be done as a team. While you don't need to be at the same location on the action circle, you will need to wait for your ally to be "ready" to help you. You then spend your action points simultaneously.
Remember that Dark Omen is a cooperative game. You do not need to spend all your actions in one mad dash and should consult your teammates to devise a plan before you start spending your AP. But even then, random bad luck could require you to change your plan in order to help a teammate. Be prepared for the worst and use your AP with slow, careful caution.
Remember the story of the tortoise and the hare, except in this case the hare ends up getting the entire forest consumed by darkness. Be the turtle.
Before you spend any AP for the round, it is a good idea to review all the rune cards currently affecting you and the group. They are easy to forget!
List of Actions
Basic Actions (Every round) - AP cost
| Action | AP cost |
|---|---|
| Movement | 1 |
| Discover loot or hidden item | 1 |
| Dropping loot | 0 |
| Crafting/Using potions | 0 |
| Using a weapon or gear effect (unless stated otherwise) | 0 |
| City actions | 1 |
| Attacking | 1 |
| Healing | 1 |
Special Actions - AP cost
| Action | AP cost |
|---|---|
| Trading at the Market | 0 |
| Sacrificing to use the Runehenge | 1 |
| Player Trading - for both players (when on the same space) | 0 |
| Equip/Change items (once per round) | 1 |
| Repairing items | 1 |
| Meditation | 1 |
| Looking for Barrows | 1 |
| Unlocking locations | 1 |
Movement
Your character's figure represents their location on the map. When you want to move to an adjacent (non-diagonal) space, you must pay 1 AP. If there is a black line obstacle in your way, you may move through it for the cost of 4 MP.
Player figures can move through or share the same space on the map.
Looting
If your character shares a space with a loot token, you may spend 1 AP to flip it and reveal its effect. The effects of each loot are listed in the chart below. Some of the loot tokens have no effect and are just meant to be discarded when crafting potions or activating a runehenge, but it is also possible that an Omen will require you to collect specific loot tokens.
If you uncover an enemy, your next AP must be spent fighting it.
Dropping loot does not require AP. Place the loot token on the board under your character figure. If it has not been picked up by the start of the next Omen, remove it as part of the usual Omen loot replacement.
Loot Tokens
- Potions: Can be stored in inventory and used when needed. (Tokens: 1HP, 4MP, 4HP, 2HP & 2MP.)
- Ceremonial skull: Major MP heal (6MP). Can be stored in inventory and used when needed.
- Quail eggs: Minor HP heal (1HP). Can be stored in inventory and used when needed.
- Ring: Can be traded at any location for the amount listed (2 gold).
- Coin: Can be traded at any location for the amount listed (1 gold).
- Travelers bread: 1 extra action (+1 AP). Can be stored in inventory and used when needed.
- Gear: Can be traded at any location for a gear of the same level.
- Crap: 2 direct damage attack. See Battle Effects p. 19
- Herbs: Potion ingredient. Offer two different colors for Runehenge activation. (Colors: Purple, Blue, Yellow.)
- Straw doll: Offering for Runehenge activation. Counts as 1 torch charge.
- Chicken: Potion ingredient. Offering for Runehenge activation. Immediate: Draw the "Angry Chicken" item card. If the card would be discarded, remove this loot token as well - and visa versa. (Printed "visa versa".)
- Mushrooms: Potion ingredient. Offering for Runehenge activation.
Free Actions
Item Abilities: Unless otherwise stated, you do not need to spend AP to activate the abilities of your items and gear.
Exchanges: Players that share the same space can freely swap loot and items.
Craft Potion
Players can craft potions which replenish HP and MP. Potions can be crafted for 0 AP by discarding loot tokens that are used for potion creation (such as herbs, see list above). This is represented symbolically on your player board. When brewing, choose either Fast Crafting or Advanced Crafting (see below). Potions you find as loot can be stored in your inventory. Potions you craft are used immediately, do not find a matching token to store.
Fast Crafting
Done without finesse, creates one of two types of effects.
- 2 potion ingredients = 4 MP
- 3 potion ingredients = 4 HP
Advanced Crafting
Knowledge of botany is helpful! Choose and spend exactly two herbs OR an herb and a mushroom to create an immediate effect. You may also spend a magic mushroom as a third ingredient to increase all numerical values of an advanced potion by 2 (including negative effects).
| Potion | Ingredients | Effect |
|---|---|---|
| Morale | Blue + Blue | Gain 5 MP |
| Courage | Blue + Yellow | Set one AR as a 7 |
| Wellness | Blue + Purple | Gain 2 HP & 2 MP |
| Speed | Yellow + Yellow | Spend 1 AP to move 2 spaces |
| Levity | Yellow + Purple | Ignore an obstacle |
| Health | Purple + Purple | Gain 5 HP. |
Almost Poisons:
| Potion | Ingredients | Effect |
|---|---|---|
| Boldness | Blue + mushrooms | Gain 4 MP, lose 2 HP. |
| Lethargy | Purple + mushrooms | Gain 4 HP, lose 2v MP. (printed "2v MP") |
| Adrenaline | Yellow + mushrooms | Spend 1 AP to move 2 spaces. Lose 1 AP next round. |
- Magic mushrooms: Increase effects by 2 values.
Barrows & Meditation
Every once in a while you will come across a situation where you still have AP left and don't want to spend more AP. You can simply spend all your remaining AP doing nothing for the round, or you can spend it on the following:
Barrow: Explore the space you are on and search for a barrow. See Barrow, p. 16.
Meditate: Gain 1 MP for each 1 AP you spend. Meditation is not limited, you may do it multiple times in a day, and your location does not limit your ability to meditate.
Note: After an omen is completed, and for as long as there is no active omen, you cannot meditate. Go find yourself a bed rather than resting in the dirt!
Locations
The world of Dark Omen is not a barren landscape full of monsters, there are various places on the map where you can put down your sword and escape for a while. Depending on where you are on the map, you can take different actions.
Towns
There are two towns on the board: Ravensden and Hoglichten. Both towns contain a:
- Tavern - for Resting and Gambling
- Market - for Trading and Repairing/Upgrading
- Chief & Healer - Heal yourself from a Moon Rune by paying 3 Gold or 5 loot tokens. Then discard this Rune card.
Towns must be entered and exited through the front entrance before the market. Moving from space to space in a town costs the same as moving on the main board.
Note: Obstacles never block the entrance of towns or your moment [sic] through the town.
Symbols
Health, Morale, Trade, Gamble, Smith, Rune Throw.
Location Tokens
While towns contain multiple places for you to do actions, these options might show up outside the town as well, in the form of location tokens. These tokens will start face down at the start of the game. To flip them over and unlock them you may pay 2 blood of the beast tokens, or free them from a creature while on their space. Some Omens and other events and effects will have you flip the location tokens without paying the cost. The symbol shown both in and out of town represents the action that you'll take.
- Stone of Courage: Regain 2 HP by sacrificing an item from your inventory.
- Stone of Rejuvenation: Regain 2 MP at no cost. Can be done once a day.
- Trading Post: Once per day you can do a trade action while on this space.
- Village: Trade, repair, or gamble. Each action can be done here only once per day.
- Runehenge: By offering loot, proactively do an Obstacle Throw and control the movement. Appropriate loot is listed on the loot table on page 14.
- River travel: Spend 2 gold and 1 AP to move your figure from one river space on the map to the other.
- Campfire: Can be made with Torch. When on this space regain 2 MP. Holds up for one round - then remove from the board.
Runehenge
The runehenges are mystical stone circles which allow players to connect directly to the gods. This powerful game mechanic can be used to strategically alter the board state.
When standing on a runehenge, you may spend 1 AP to perform an obstacle throw (OT). On top of the AP, you must also make an offering to the gods in the form of a sacrifice. You may discard any one of the following to make the throw: a gold, gear, or loot token in your inventory.
The OT at a runehenge works slightly more in your favor, due to the sacrifice you are willing to make. After rolling the dice, you can decide which direction to turn each of the obstacle layers, rather than it being determined by the die result. Make a note of the current spaces where the layers sit before you rotate them, this will help you when making your decision.
Barrow
From Chapter 2 onwards, Barrows can be used as an alternative to meditating (p. 15) when you have extra AP to spend. It can help you acquire powerful artifacts.
Discovering a barrow While on an empty space, spend 1 AP to roll a D6. You discover a barrow if you roll a 1. You may spend extra AP to increase the success range by 1 each. For example, if you spend 3 AP, you discover a barrow on a 1, 2 or 3.
If you fail your roll, you cannot try again until the next round. If you succeed in your roll, place a barrow marker on your space. It remains on the board for the rest of this chapter.
Exploring a barrow Entering a barrow has two requirements: you spend 1 AP, and 1 torch charge. You can repeat this process as many times as you want.
Roll three D6. Keep any dice you want, then reroll the rest. Repeat this keep and reroll one more time. Your final result determines what you find during your exploration.
- 2 of a kind (2/2, 4/4, etc): 1 gold
- Straight (2/3/4, 4/5/6, etc): 3 gold
- 3 of a kind (1/1/1, 4/4/4, etc): An artifact guardian!
Attaining the artifact Every artifact has a guardian enemy that you need to defeat in order to obtain the artifact. Roll a D6 and set up and fight the following: 1-3 a Screeching Specter or 4-6 a Draugr Champion.
Once defeated, draw a random artifact of your level (chapter) and below from the artifact stack and remove the barrow marker from the map and return it to the box. You cannot place that barrow token again for the remainder of this chapter.
Increasing your chances After your first 3 rolls, you can decide to spend 1 torch token for 3 more rolls. Additionally you can spend another torch token to add a 4th die to your next roll. You cannot roll with more than 4 dice. If you now roll 4 of a kind, you'll find an artifact and 3 gold. You can leave a barrow at any time - However, should you have used your last torch token without finding anything, you plunge into pitch black darkness: Lose 5MP. Roll a D6: The Screeching Specter (chapters 1 & 2) or the Draugr Champion (chapters 3 & 4) appears and needs to be fought until the end - you cannot flee this fight.
Location Actions
In general, most location actions only require the AP needed to get to the location. However, these actions might also require a little extra in order to use them, normally gold.
Rest
The weary traveler needs a place to rest. Rest locations can be found in towns and other locations on the board throughout the game. You must pay 1 gold to enter the space if you are resting at a town, otherwise you just need to spend the AP to get to the location.
While on a rest space, you can spend AP to regain HP and MP. For every 1 AP spent, you recover 2 health and 1 morale.
Trade
Where there is loot there are places to dump it. Any location with the trading post icon, including the Marketplace, will sell you gear and buy what you don't need. Once you are on one of these spaces, you do not need to spend AP to interact.
The market value for each gear and item you wish to purchase is indecated [sic] on the respective gear card. You can purchase gear equal to or lower than your level, but not higher than it. However, before you make the purchase, you can spend MP to haggle and lower the cost.
Note: Unless a loot token shows a coin symbol, they cannot be sold for gold.
Light Haggling (1 MP): Roll one player die and one monster die. If your die is higher, you may purchase one item at a reduced price of 1 gold per player level. You may do this roll-off twice; if you still fail after the second roll you would need to spend another 1 MP to haggle again.
Heavy Haggling (2 MP): Roll a single player die. If your result is a 5 or a 6, you may purchase one item at a reduced price of 2 gold per player level. You may do this roll twice, but if you fail the second time you get a beating by the guard and lose 1 HP.
If you wish to sell your gear, you may return them to the gear deck and receive 1 gold per level of the item (e.g. a level 3 item gains you 3 gold). You can also exchange certain item tokens for their gold value listed on the token.
Smith - Repair
During your adventures, your gear might become damaged. Also, some gear cards - such as torches - have tokens or counters that are spent when the gear is used, and need to be restored. For example, some shields have multiple tokens on them, which can be spent to take 0 damage from an attack. For all of these things, you have the repair action.
Players can repair gear by paying 1 gold per level of the gear as well as a time investment of 1 AP.
Gambling
To gamble, you must pay 1 AP and 1 MP, then choose and play one of the games listed below. Two or more players at the same gambling location can all gamble against each other (including the house).
Game 1 - Draugr Dice
In Draugr Dice, you and the other players are playing against the house. Your goal is to roll the lowest total sum on five dice, with 3s counting as zero. Each player starts by adding one gold to the ante, then the house adds two gold to the ante from the general supply.
The house rolls last. On your turn, roll your 5 dice, then set aside any amount that you'd like to keep. Roll the un-kept dice again, setting aside any from the second roll into your kept pile. You may do a third roll if you have any un-kept dice, but this is your final roll. Do not forget that 3s count as 0. Record your total, then the next player rolls.
Special: If a player ends with five 6s, this is known as "Shooting the Moon". They win instantly, no further play happens.
Once each player has rolled and found their total, have one player roll for the house. The house rolls 4 dice only, but does not get any rerolls. The house's total remains as is after the first roll, and it also ignores 3s.
The lowest total is the winner. In case of a tie, the player with the most 1s is the winner, broken by most 2s, and so on (split the pot if they somehow roll the exact same dice values). The winner keeps the ante. If the house wins, return the ante to the general supply.
Game 2 - Hard Life
The goal of Hard Life is to roll as close to 18 as possible without going over. Each player starts by adding one gold to the ante, then the house adds two gold to the ante from the general supply.
The house starts by rolling two dice and putting them aside, then the players take their turn. On your turn, roll 3 dice then sum their total. You may then roll another die to add its value to your total. You may stop and keep your current total at any time. If you ever have a total of 19 or more, you lose immediately.
After each player has taken their turn, the house finishes their roll, under the following conditions:
- The two dice rolled at the start of the game count toward the house's total.
- If at any point the house has a higher roll than all the other players without going over 18, it wins and takes the ante.
- If the house has a total of 15 or less, it will roll another die. Exception: If the house and another player are tied at 15 for highest score, it will stop.
- The house must stop rolling if it has 16 or more.
The player with the highest total without going over 18 is the winner. If multiple players are tied for the highest total, they split the ante evenly (round up by adding gold from the general supply).
Special: If a player immediately rolls an 18 with their three dice, they take half the ante, rounded down, as extra gold from the general supply.
Combat Basics
Battling enemies makes up a large portion of your Dark Omen story. As the darkness encroaches, it's your job to fight it back. The following section covers starting and setting up a battle, how you use your gear, and how to defeat your enemy.
Engaging Your Enemy
For most combats, you engage your enemy by entering their space and then setting up the combat for your next action. Unless otherwise stated, enemies do not engage you in battle, even if they enter your space due to a game effect. This is because a combat action requires you to spend 1 AP. A notable exception to this is revealing a Surprise Attack loot token, which requires you to spend your next AP to fight the enemy you revealed.
Ranged combat does not require you to be on the same space as the enemy. You simply need to spend the AP for your first attack.
Ranged Engagement
Ranged combat works entirely like normal combat, but you have the added benefit of not needing to spend the AP to move towards the enemy. In this case you don't take damage dealt by the enemy. However, being enraged by your sting, the enemy rushes to your space, eliminating your distance - meaning, if you attack with range, do an AR & DR as usual, but then the creature is on your space. If more than one player attacks with range, the creature rushes to the space of the ranged attacker with the least HP and MP. You can flee the space for your next attack, attacking with range again. The range of each gear item is indicated on the card. To make a ranged attack, you must be within the range listed by counting vertically or horizontally from your space (diagonal distance is not counted). If there are no obstacles between you and your target, you may attack them without being on their space. Meaning the enemy must be in line of sight.
Setup
After engaging an enemy, draw a random enemy card equal to your level to fight. If the enemy is not random, find the appropriate enemy card, or simply set up the correct health if the enemy doesn't have a card.
Place the enemy card in an enemy board. Place a tracker token in the board equal to the enemy's starting HP, the number next to the heart at the bottom of the card.
If you find yourself fighting multiple enemies, set up multiple boards. You'll still only attack one enemy per AP you spend later.
When fighting a boss, use three enemy boards. Divide the health tracking tokens among the boards so that the sum of all the boards equals the boss's total starting health. See Boss Combat, p. 24.
Now would also be a good time to review any Rune cards in play that might play a role in how your battle is resolved.
Gear
What is an adventurer without their gear? Gear cards describe the effects of the different types of gear you have during the game. There are primary weapons, secondary weapons, armor, and accessories.
Gear card parts:
- Level
- Item price
- Card type
- Primary/Secondary use
- Name
- Ability
- Range
- Damage Roll
- Armour value
Gear & Enemy Icons caption: Range (X); Damage Roll + Modifier (D4, D6, D8 or D12, +X); Direct damage* (X); Armor (X). *Direct damage ignores armor.
Equipping
When dressing up your character, you can freely exchange between which gear you are using without spending AP. However, once you engage with an enemy you must declare which gear you are wearing by laying it out in front of you. If you share a space with an enemy, and/or your last AP was spent to attack an enemy, you must spend an AP in order to switch the gear you are using with another piece you own.
When deciding on your gear, you are allowed each of the following: 1 primary gear, 1 secondary gear, 1 armor of each type (helmet, body, shield), 2 accessories, 1 artifact
If no weapon is equipped, a Damage Roll (DR) is reduced to rolling a D4-1 by default.
(Illustrated example: three armor pieces of different types is allowed; two armor pieces of the type "body" is not.)
Enemy Cards
Enemy card parts:
- Level
- Seal of the enemy
- Name
- Combat Effects
- Damage
- Defense
- Starting Health
Attack Solo
When you wish to attack an enemy, you must be on their space (unless you have a ranged weapon), then you must spend 1 AP. Then you resolve this attack by first checking your attack roll against the enemy's, then the damage roll.
Attack Roll (AR)
If you are currently playing in chapter 1, you roll one attack die. In every other chapter you roll 2. Another player will roll enemy dice equal to the level of the enemy you are fighting. (Alternatively, you may roll the enemy dice with your attack dice, though we encourage your teammates to roleplay the enemy). Then compare the dice by placing your dice in a row from highest to lowest, with the enemy dice placed above yours, also highest to lowest.
Compare your highest die roll to the enemy's highest roll. The die with the greater number wins and will deal damage according to their damage roll (DR). Nobody wins in a tie. Compare the remaining dice in the same way to determine your number of successes and defeats. If a die doesn't have a defending die (e.g. the enemy rolls more dice than you, or your team outnumbers the enemy's dice), it automatically succeeds and will deal damage.
Make sure you apply all gear and rune effects that modify your attack rolls.
Morale Boost
Before finalizing the attack, you may spend morale to adjust your attack dice. Spend 2 MP to increase one of your dice by a value of 1. Rotate that die to its new value. You cannot increase a die value to a total higher than its maximum (e.g. a D6 cannot be 7 or higher).
Heroic Attack
Starting at level 3, you are known as a hero among locals and the gods take notice. The enemies you face will have a base attack roll using three dice compared to the two you roll. However, you can call on your inner strength by spending 5 morale to roll one extra attack die during the attack roll. You must choose to spend this MP before you roll the other dice.
Damage Roll (DR)
Each die that succeeds in the AR, either yours or the enemy die, will result in damage against you or the enemy. To determine the damage, players examine their gear cards (e.g. D4+1, D6 + effect etc).
Enemy Attack
The bottom of the enemy card will detail the damage it deals for each successful attack. The fist icon represents damage. If there is a number next to the icon, the enemy deals that much damage. However, an enemy might deal damage as dice, in which case you'll see a dice icon where X is the number of sides for the damage roll needing to be made (e.g. a D4 requires you to roll the 4 sided die to determine damage, a D6 to roll the 6 sided die etc). Then add a modifier if the card says so - (i.e. roll a D4 and add (+) 2, like in the example below).
For each point of armor that you are equipping, reduce the enemy damage by that much. Then lower your health by the remaining total.
NOTE: You always take 1 damage as a minimum when the enemy rolls damage against you, regardless of the final damage total.
Player Attack
Your damage die is a D4 by default. After you roll, add the total value of base bonus damage (or penalties in the case of runes) given to you by your gear that you are currently equipping. Make sure you apply all gear and rune effects that modify your damage rolls.
If the enemy has armor, subtract it from your damage roll. Your enemy might also have abilities that modify your attack or damage in some way and need to be applied.
State of Valor: The darkness meter grants a bonus! Players add 1 damage to their DR when in a state of valor.
After applying all modifiers, reduce the enemy health on the enemy board by the final total.
Resolution
When an enemy health drops to 0, the enemy is defeated. Remove their card from the tracking board and remove their figure from the map.
The player that dealt that final amount of damage gains a Blood of the Beast token, and all players involved in the battle receive 2 MP. Blood of the Beast tokens are sometimes required to resolve omens, but it can also be used to craft potions or be sacrificed at a runehenge like any other item.
Attack Team
If you and a teammate both share a space with an enemy (or one of you is using a ranged attack within range), you can - but are not required to - attack that enemy together. You both spend 1 AP and perform the attack.
REMINDER: Action points are not spent in turn order. If you engage an enemy, you can "wait" for your teammate to spend their AP to move to your space, then do a team attack.
Attack Roll (AR)
When you attack as a team, each player on the team rolls their normal amount of dice, but each player will only contribute one die to the attack. After putting the enemy dice in numerical order, place the highest player die as the first die opposing the enemy's highest die.
Then place the second highest player die against the enemy's second highest die. Repeat until all players involved have contributed exactly one die. In the case of a tie, players choose the order of their die against the enemy.
At lower levels, this could cause some player attacks to automatically succeed and be very advantageous. However, it can also cause the enemy to deal twice as much damage. See the Attack Team - 2:1 examples.
After lining up the dice, compare them as in a solo attack to determine who succeeded with each attack. Each attack the enemy wins will allow that enemy to attack the player whose die it defeated, whereas the players are all attacking the same enemy. If the enemy has a die that goes unblocked, that die will become a damage roll against the player that rolled the lowest, with players choosing the target in the case of a tie.
Morale Boost
As with the solo attack, you may increase your highest die value by spending 2 MP per increase. However, you still only contribute one die to the attack.
Heroic Attack
As with a solo attack, at levels 3 or 4, you may add a bonus die to your attack by spending 5 MP. Afterwards, add your two highest dice to the attack.
Damage Roll (DR)
Damage is resolved exactly as in a solo attack, remembering that the enemy rolls all their damage rolls against the players first.
Combat Scenarios
L1 Dice Battle - Solo 1:1
You must spend 1 AP to attack the enemy. The enemy rolls dice equal to its level. In the example scenario (enemy rolled a 5, player rolled a 4), your attack roll (AR) was bested.
You can accept your fate and take the damage, or spend 4 MP to do two morale boosts, bumping your 4 to a 6.
The winner of the AR performs a damage roll DR against the loser, using the appropriate die and adding any modifiers. Then subtract the value of the victim's armor to find the total.
L1 Dice Battle - Team Attack - 2:1
Example: the enemy rolled a 5; the heroes rolled a green 4 and a purple 3. A joint attack increases the heroes' chance to win the roll. However, both heroes rolled too low in this scenario. The enemy die will be paired with the higher of the two: the green 4.
Green or Purple can morale boost to tie (no DR) or best the enemy die. In both cases, the other hero will deal damage automatically. If neither boosts, the enemy DR hits both.
All heroes can join to attack a single enemy. (Example: with a green, purple and yellow die against one enemy die, since Yellow bested the die, all three heroes will deal damage.)
L1 Dice Battle - Team Attack - 2:1 (continued)
The enemy rolled a 6. You cannot roll higher than a 6.
Either player can boost to tie. The player that does will not DR, but they will distract the enemy enough that their ally can make a DR.
If neither hero can boost for a tie, or choose not to, both heroes are hit by the enemy's single DR.
L2 Dice Battle - Team Attack - 3:1
In a team attack, each player only contributes a single die (obviously, their highest). Ignore the other dice. (Example: enemy rolled 5 and 4; heroes' highest dice are green 6, blue 4 and purple 3.)
Green wins and makes a DR. Resolving the second enemy die will be identical to the L1 - Team Attack at the bottom of page 21.
If all of the enemy dice are bested, the heroes do their DR in numerical order. Hero ties are broken by the highest value of the unused die, or by player choice. Remember that only the hero that does the finishing blow gains the blood of the beast.
L2 Dice Battle - Solo 1:1
Starting in chapter 2, players roll 2 dice for their AR. When rolling against an enemy, place the dice in descending order for comparison.
Example: enemy dice 5 and 4 against your 6 and 4. Your 6 defeats the enemy 5, so you make a DR. If the enemy survives, the 4's are compared. You have the option to boost and get another DR, otherwise there is no DR from either combatant.
If you cannot, or choose not to boost your AR, your hero will be hit by the DR of the enemy. If the enemy or the hero dies after a DR, ignore the rest of their attack dice.
In this example, your hero will deal damage first, then the enemy will damage your hero.
L3 & L4 Dice Battle - Solo 1:1 & Heroic Attack
After chapter 2 the heroes are always outmatched by stronger and larger enemies. Unless something amazing happens, the enemy will always get at least one successful attack.
Example: enemy 6, 5, 4 against your 6 and 4. The 6s rolled here would tie, neither combatant makes a DR. You can boost to beat/tie the enemy 5, otherwise it DRs against you. No matter that outcome, the enemy 4 will grant a DR against you... unless you go heroic! (see below)
Heroic Attack: In chapters 3 and 4 the heroes can spend 5 MP (or 3 MP if they have Giant Strength) to add a die to their AR before any attacks have been resolved.
In a team attack, a heroic attack allows that hero to add an extra die to combat, but not if that causes there to be more hero dice than enemy dice. Thus, in most team attacks, a heroic attack will cost more MP than simply boosting.
L3 Dice Battle - Team Attack - 4:1
The strongest dice are compared as usual. Since Blue's second die is higher than Purple's, Blue wins the tie. Optionally, players can determine the tie breaker.
In this scenario, even if Blue boosts their highest die, Yellow will win the tie against blue and send their 6 against the enemy's 6 and deal no damage. Blue doesn't do damage unless they boost. Purple and Green will both do a DR in that order.
If two heroes attack a level 3 enemy, they still only contribute one die each as usual. The enemy's remaining die will deal damage to one of the heroes. Decide if the remaining die hits the strongest or weakest attacker, or the player with the most or least health. Keep that decision throughout the game.
If either player did a heroic attack in this scenario, they would add their second highest die into the AR comparisons.
L4 Dice Battle - Team Attack - 4:1
In chapter 4, you're going to want some friends. Comparing the dice goes unchanged, there is simply more of them. With so many dice involved, things can get a little complex.
However, by the time you've reached chapter 4, you should be ready to go! If you find a situation that hasn't been addressed, choose the most thematic option!
Don't forget about heroic attacks! In the situation presented, both Blue and Yellow can use a heroic attack to add another die to this fight and potentially escape the damage, or even get to deal some themselves!
Play this combat system for two, three battles. You'll experience it is very intuitiv, straightforward and fast-paced.
Creature Tokens
For some Omens, we spawn several enemies - some of which have different levels by design. Whenever we ask you to "shuffle and place L2 and L3 creatures," take the specified number of creature tokens with the level indicated in the Omen setup.
When engaging with one of these creatures, you do two things: first, flip the token to reveal the level. Then, draw a random creature card from a face-down deck of creature cards of that level.
In other scenarios, we might prompt you to set up a specific type of creature (e.g., 3 Grolls) and still ask you to lay out creature tokens. This time, there's no need to flip the tokens when you engage enemies, as the specific creatures have already been pre-determined. The creature tokens simply serve as a visual representation of where the respective creatures are located on the board.
The generic tokens can also be used to distinguish between different enemies. Use these, along with your battle markers, to keep track of the positions of the various creatures. This can also be helpful if, for example, an omen instructs you to place "3 Grolls and 3 Varulvs." Mark the different creatures in whichever way feels most fitting to you. It is, after all, pretty intuitive.
Boss Combat
Boss scenarios are always compiled of two cards: The boss Omen card, in which the story and mission is explained, and the boss creature card, in which the stats and boss phases are visible. When encountering a boss, immediately put the boss creature card into three battle trackers. Divide the health tracking tokens among the boards so that the sum of all the boards equals the boss's total starting health.
Phases
Fighting against bosses is not that different from attacking non-boss creatures. However, bosses often have multiple phases in which they either move, attack or perform special powers. The "ability phase" is not how the boss reacts in attacks, but creates an additional layer of dread and hazard that the players are confronted with. It is stated clearly on the boss creature card if the respective ability can be dodged or countered in any way. The following phases don't have a chronological order, as each boss acts differently. The respective order of phases is clearly stated on the boss cards.
Ability Phase
The boss will perform this phase regardless of the regular attack. Each unique boss ability can result in multiple different effects, often determined by rolling a die. Whatever the outcome, the heroes need to deal with it as applicable, including dodging or countering as where stated.
Movement Phase
The boss moves in a default pattern based on the story and mission of the scenario. It is clearly stated on the boss cards how the boss moves. It is possible that the boss movement will introduce another effect that puts the heroes in a more vulnerable position.
Boss Stages
Some bosses change the way they interact with the heroes based on a criteria, usually their level of HP. These "stages" can create extra advantages or weaknesses for the boss. Feel free to use the generic tokens to track when the boss may enter these stages.
Attacking Bosses
In all boss scenarios players spend AP as usual. The different boss phases do not effect the players AP reserve (unless otherwise stated). Players are free to do their own choice of actions (such as shopping, looting, etc.) when not directly engaged with the boss battle.
Attacking a boss follows all normal rules of combat engagement, including spending AP and range requirements. The boss stats and attack strength (i.e. how many dice it is using) are stated on the boss creature card. Combat is resolved as usual, but make sure you understand any timing interactions that may arise from the boss phases (e.g. "Phase X is triggered after each attack").
Boss Stats
A boss creature card shows (left to right at the bottom): AR dice strength (incl. modifier - e.g. +1), DR dice strength (incl. modifier - e.g. +2), Boss armor, Boss HP. (The example shown is the Solveig boss card.)
Chapter 4 - The Underworld
Different environment, different challenges. To play Chapter 4 you must first disassemble the game board so that you may use the underside of the map and the base boards, both of which feature the dark Underworld. Assemble the base boards as before, now using their flip sides. Then replace the white and transparent obstacle layers around the center piece again. Finally, flip the map and align it so that the four quadrants line up with the colors of the base board corners.
Then distribute all Underworld locations as indicated on their back.
Distribute all Region Effects banners to the respective regions, by placing them onto the corners. The banners (hardcore side) read:
- The Great Mycelia - Hardcore: Entangling Vines: Roll a D4 before every movement. If you roll a 4, you can't move and the roll costs you 1AP. Or: Use a Torch charge to burn A path - move as normal for the entire turn.
- Mole Dwarf City - Hardcore: Pitch Black: You have -1AP for movement. Exception: You have a torch with charges.
- The Hive - Hardcore: Rusting Slime: Roll a D4 before every round. If you roll a 4, every gear item with charges loses 1 charge.
- The Frozen Sea - Hardcore: Chilling Breeze: You lose 1HP every turn. Exception: You are at a bonfire or have a Torch with charges.
Special Rules
General
Players cannot use the Barrow action as usual in the Underworld. The Mole Dwarf Ruins are the only place where you can perform that action, indicated by the artifact symbol. The River travel location is replaced by the Eternal Maze. It is always night, as indicated on the action point circle. Therefore, any effect that only happens "at night" will trigger here.
Locations Underworld
- Gloomy Waters: Once per round you can discard a loot token to regain 3 MP.
- Blood Bag: Reduce your maximum HP by 1, then regain 4 HP.
- Eternal Maze: Travel to the nearest Eternal Maze entrance for 2 MP, the second closest for 3 MP, or the farthest from you for 4 MP.
- Dwarven Clocktower: As Runehedge [sic], but the cost is discarding a Sun or Hope rune card, or 1 gold.
Places
Mole Dwarf Ruin
While in the Mole Dwarf Ruins you are not affected by the region effect banners. Crossing the bridges to different areas of the Ruins costs an additional 1 MP, for courage.
(The Mole Dwarf Ruin token, space 39, reads: "crossing abbys costs 1MP"; "safe from region effects"; two -1MP bridge markers.)
Well of Fortune
Spend 1 gold and make a wish, or 2 gold to beg. 1-5: You never hear the coin hit the floor. 6: Gain a random gear card. If you begged, gain a random L4 gear. If you made a simple wish, roll a D6 to determine the level of the random gear you gain. 1-2: L1, 3-4: L2, 5-6: L3.
Hidden Treasury
You need at least two heroes on this space to use the effect. As you step on a weirdly formed stone, the ground slightly trembles and you hear an ominous moaning through the walls. As the stones shift, they reveal a secret chamber! Perform the Barrow action.
Dwarven Smithy
It smells like cold smoke in here. You found a Dwarven Smithy! You can repair/recharge items here. It costs one torch charge to light the forge. Each full repair costs a further torch charge.
Ship Wreck
While in the Ship Wreck you are not affected by the region effect banners.
Permanent Camp
You can make a permanent campfire for the rest of the chapter with a torch. Restore your stats with normal campfire rules. (Gain 2 MP while on this space, once a round). Mark with a campfire token.
Ship Apothecary
You can spend AP to regain HP and MP. For every AP spent, you recover 2 HP and 1 MP.
Shipload Gear Hoard
Search the narrow and dark cabins for anything usable...but beware the dead.
Spend 5 MP to roll a D6:
- 1: What a pity! You only find rusted old gear that is unusable.
- 2-4: A shimmer between the rubble! Take a random L2 gear item from the face-down deck of L2 gear cards. If that card requires charges, discard it as empty/broken.
- 5: Just what we needed! As with the 2-4 die result, but the gear level is L4.
- 6: A sudden stench of death! Draw and fight a random L4 creature from the face-down deck of creature cards. If you flee, this location is unusable until the creature is defeated.
Darkness Vortices
Place a Vortex token on a random middle row location during setup, then place the other vortex token on the opposite side of the map. At the start of the round, roll two D6 and move one vortex clockwise or counter clockwise (the direction is listed on the token) around the middle row equal to the total value you rolled. Then do the same for the other. If a vortex ever moves through or lands on a space with a hero, it influences them (see below). Vortex tokens do not affect monsters, loot, obstacles, or anything other than the heroes.
Vortices move on the middle ring, one clockwise, the other counter clockwise.
Vortex Rules
If in contact with a vortex, the hero:
- instantly loses the rest of their AP for the round (0AP if at end of round already).
- instantly loses 1HP.
- marks their character card with a black token.
A hero with 3 black tokens must spend 1 MP to make a DR. Entering the Sacred Grove and spending an action to perform a ritual there will remove all of a hero's black tokens.
The upside - although it sucks (no pun intended): Players may enter into a vortex to be transported to the location of the other vortex. All costs above are applied.
Quick Start
Whether you've played Dark Omen multiple times already, just want to play an easy one-shot Omen, or have friends joining that want to participate in your already ongoing campaign - we've got you covered with a quick start.
Getting Started
Build the map Go to page 4 and 5 to setup the map.
Build a character Follow the instructions on page 6, or have a joining player take over the hero of the player being replaced. Each player chooses a primary weapon of the respective chapter (For a balanced game: See "Play the game" below). Now roll a D6:
- 1-4: Do not choose an amour or shield.
- 5-6: Choose one armour or shield.
If you're planning on starting a random Omen, we encourage you to have half of your party starting with gear one level lower than their starting level, while the other half starts with gear of the current level. This should imitate a normal group balance for the campaign. (Or go completely haywire and equip yourself with your dream setup, what do we care...)
Rune Throw Cast your Runes. Do as instructed on page 9. Or: Each player takes 4 random Rune cards from a face-down deck of cards. Everyone takes one card of each house. (Well, you asked for a quick start)
Play the game Set out the correct gear and creature cards for the chapter you have chosen to play (or are already playing). Make sure the guild cards are the proper level or give one to a player that just joined.
If you're playing a single session game, ignore the story cards. Choose random Omens for the difficulty level you set.
If the Omen setup indicates a starting point for your heroes, place them as instructed. However, if no specific starting point is mentioned, position your heroes randomly on the spaces around a Runehenge. (That is: 10, 46, 48, 84 Or: 28, 64, 66, 102) You are now ready to start by reading your Omen.