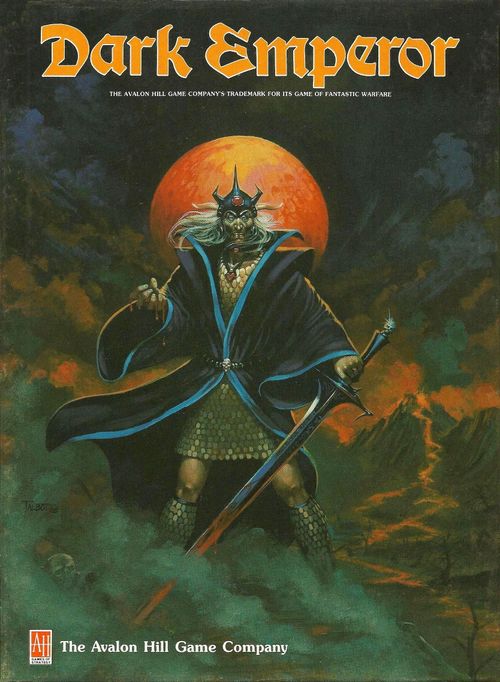
Dark Emperor
Dark Emperor Rulebook
Table of Contents
Table of Contents
- 2) The Powers of Loslon
- 3) Equipment
- 4) Sequence of Play
- 5) Setting-Up
- 6) Activation and Conquest
- 7) The Recruitment Phase
- 8) Movement and Attrition
- 9) Combat
- 10) Stacking (Optional)
- 11) Diplomacy
- 12) Magic
- 13) Elemental Runes
- 14) Other Runes
- 15) Magical Devices
- 16) The Necromancer and Tol Morn
- 17) Kelaron Oiret Elections
- 18) Magic Hex Markers
- 19) Mercenaries
- 20) Supply (Optional)
- 21) Regional Variants (Optional)
- 22) Victory Conditions
- Designer’s Notes
- Appendix I – Counter Color Key
- Appendix II – Leader Index
- Appendix III – Attrition Table
- Appendix IV – Important Tables and Charts
2) The Powers of Loslon
The following sections detail the major and minor nations, characters and magical items in this game. This section is provided as background information to help you to understand and enjoy the magical world of Loslon.
Zolahaureslor
In the Imperial tongue, Zolahaureslor means “Old High Empire”.
During the third age of magic, this empire ruled the entire game map, and some lands beyond. The power of the old empire was broken in defeating Padrech dar Choim in the Necromantic War that ended the third age of magic. Though Padrom III drove the Necromancer from the world of the living, the price that had to be paid exhausted the empire. The result was a series of revolts and barbarian incursions that reduced the size of the empire to its core province. The other provinces fell to other groups, barbarian and rebel, and evolved into the other nations portrayed on this map.
Zolahaureslor remains the single strongest power. Its court life is a labyrinthine web of deadly intrigue. Currently, the empire is content to maintain the balance of power among the other kingdoms, giving little thought to the possibility of expansion at their expense.
Ahautsieron
When the empire fell the east was conquered by the Marind Warriors, a group of nomadic tribesmen. Those in the south became the ruling elite of this nation, gradually intermarrying with the native population. During the height of the empire, and to this day, this area has been heavily-mined. It is renowned for the quality of its metals. Its economy is dependent on mining and metal-working.
Ferlarie
Despite its distance from Zolahaureslor, Ferlarie was heavily influenced by imperial culture and was a pillar of the empire. When the south was overrun by the Stavek barbarians, and it became clear that the empire could not aid them, Ferlarie declared its independence and built a sizable fleet to protect its far-flung dominions. Ferlarie speaks a corrupted form of the imperial tongue and maintains the largest fleet in the area.
Kelaron Oiret
The Kelaron peninsula, like Ahautsieron, was overrun by the Marind Warriors. Due to the low initial population of the area, its people are of essentially pure Marind descent. Their language is descended from the Marind tongue. In this land the tribal customs of the Marind evolved into republicanism. The governing body of the land is the Diet, divided into the Ahaubot (High House), the Moyenbot (Middle House) and Oibot (Low House). The Ahaubot is elected by the nobility, the Moyenbot is elected by the burghers and the Oibot is elected by free peasants. For its size, Kelaron is one of the world’s most productive nations, though it maintains a small military. (Oiret, in the tongue of Kelaron, means “low rule” which means “republic”.)
The Marechs
The two Marech kingdoms, Lammarech (Eastern Marech) and Loymarech (Western Marech), were conquered by the Mari, a civilized group driven south by a series of crop blights during the empire’s decline. Hundreds of years ago the Mari High King divided the realm between his two sons. They have remained divided ever since. Lammarech is noted for its formidable cavalry and excellent horses. They continue a Mari tradition of excellence in these areas.
Starkeep
Starkeep is located on the central ring of a great impact basin. It was one of the holy sites of the Old Empire and was given to the Star Believers (a cult of sky worshipers associated with the Serenity rune) nearly a millennia ago by the empire. Since that time the Believers have avoided invasion and resisted plague, famine and blight to remain independent. Starkeep is of great religious importance to the lands around it. Because of this it has never had to face a major invasion, but they maintain a small armed force just in case.
The Scythe
The Isle of Sanwestin has long been a rookery for rocs. When the empire retreated from the west, the imperial commander of the area was experimenting with training the rocs to fight and carry riders. The Scythe was mercifully left alone by barbarians for a century. During this time, the domestication of the roc continued. When the Pletroi finally reached the Scythe, its inhabitants drove them off with an army of roc riders. The Scythe has remained its independence ever since.
Stavror
The Stavek barbarians, in the deserts and mountains south of the empire, were long a thorn in the imperial side. They tended to mount a sizable invasion of the empire every century or so, which required substantial defensive efforts by the empire. Even imperial incursions into the south could not destroy the irrepressible Stavek. When the empire collapsed, the Stavek flocked north in great numbers and overran the empire’s southern provinces. Since that time, Stavror has become one of the most powerful, and prosperous, nations in Loslon. The throne of Stavror is often usurped by the military, creating continual distrust between the King and his generals. As a result, the military, though large, is under-trained, ill-equipped and poorly-funded.
Tal Pletor
Tal Pletor was settled by the Pletroi, a group, like the Mari, which was forced south by crop blights. They developed a feudal system similar to the Marech kingdoms. The House of Pletrech, the royal house of Tal Pletor for the last six hundred years, was overthrown twelve years ago by Stommarren (who served the king that he betrayed as a mercenary general). Stommarren usurped the throne, married the ex-king’s wife and killed the remainder of the royal family. Since the coup he has formed the King’s Guard who, unlike the regular army, are fanatically loyal to his person. These units are trained to suppress the local population and have little traditional military training, hence the lower combat strengths.
Lord Montoy
The lands between the cities of Montoy and the Gates were conquered ten years ago by Stavror. Lord Montoy was their ruler. When his army was broken at the Gates, he retreated to the interior with the survivors and began a guerrilla war. Eventually, it became clear to him that his position was hopeless. He gathered what was left of his rebel force and took up life as a mercenary, wandering from war to war hoping to win enough gold to hire a force to retake his kingdom.
Saar
Saar is an intelligent Great Eagle from the mountains of Ahautsieron. Unlike most of his race, his primary interest in humans is as food. To his delight, he has discovered that humans will pay him to fight other humans; the result being a battlefield covered with fresh corpses for the delectation of Saar and his followers (an elite eagle corps called the Saarlumen).
Fernan Conniver
Fernan was born in Kelaron Oiret. He was banished from this land when it was discovered that he bribed his way into the Ahaubot. He has become a mercenary leader of considerable ability since his disgrace. He is considered to be an unsavory character. While employed by Lammarech he attempted to copy Stommarren and topple his employer. He failed. He is only employed by those with a desperate need for his services.
The Hounds
The hounds are a race of canine sapients who live in the far north. Mor Farloi, a human, was abandoned in their land as a child. They adopted him and raised him to the pack. As a man, Mor has raised a unit of hound fighters and become a mercenary. His profits are sent back to his native land, the realm of the hounds. Mor is a lonely man who cares more for the hounds than for any human.
Cos dol Cos
Cos dol Cos is a member of the Cult of Unity, a religious cult who believe that magic has brought man nothing but misery. They seek to eliminate magic from Loslon and return to the ancient ways, practiced before the First Age of Magic. Cos dol Cos isn’t a true mercenary, he fights when and where he feels his cause is served. His Sons of the Morning are so named because they believe that the elimination of magic will bring a golden dawn to mankind.
Silwer Flagriel
Silwer is the founder of the Cult of Burning Inspiration. This cult is associated with the Fire Rune. It believes that evil must be burned out wherever it is found. It is an intolerant cult who perceive evil rampant in their world. Most kingdoms are a little tired with them. He is considered to be a renegade. He is very bitter about this rejection of “the true way”. He is likely to ally with Padrech dar Choim to destroy most of the world’s evil ways. A true fanatic, he is confident that when the other evils have been purged he can easily destroy the Great Necromancer with the fire of the true way.
The Sword Famir
Famir was forged by Felrik Terriel during the Third Age of Magic. It was created to destroy Ssstoth, the King of the Sea-monsters. It is an extremely powerful weapon, one of the few capable of permanently destroying a Lord of Death such as Tol Morn or Padrech dar Choim.
He-Sups-on-Prana
This sword was forged by a metal mage, enslaved by Padrech dar Choim, before he was driven from the land of the living. When it strikes an enemy, the sword drains his soul and destroys him.
The Silk Negator
This item was woven by the Cult of Unity. It is a cloth with the ability to negate any magic.
3) Equipment
DARK EMPEROR contains a rulebook, one counter sheet and a game map. The rulebook details the history of Loslon, the rules required to play and other important information. The counter sheet holds the units necessary to play. The game map depicts the world of Loslon. Each hex on this map is 100 imperial zotz from side to side. Next to the map, on the gameboard are the Game-Turn Record Track, the Treasury Track, Army Boxes and the Mercenary Holding Box. These boxes are used extensively during play.
3.1) Sample Units
This section shows black and white representations of some of the counters in Dark Emperor. In each column, the counter to the left is a representation of the counter’s front. The counter to the right shows its back.
On all counters with a single number, and no dashes, the number is its combat strength. Where three symbols are shown, the number to the left is the Hero Rating, the middle shows the magic rune (if any) and the number to the right is its magic strength. Where a dash appears, the value it represents (by its position on the counter) is not applicable.
4) Sequence of Play
DARK EMPEROR is played in Game-Turns. Each Game-Turn is divided into two Player-Turns, one for the Necromancer and the other for the Kingdoms. In all Game-Turns, the Necromancer has the first Player-Turn. During his own Player-Turn, each player recruits, moves and attacks with his units. Each of these activities occur in a separate Phase in the Player-Turn. These phases are shown in the Turn Sequence outline. In all cases, the player whose turn it is is referred to as the “phasing player” from this point on.
Turn Sequence Outline
A) Necromancer Player-Turn
- Recruitment Phase
- a) Vampire Recruitment Segment: Bring lesser and greater vampire units into play if the total number of such units in play is less than the current Vampire Army Maximum.
- b) Kingdom Taxation Segment: Kingdoms allied to the Necromancer collect taxes.
- c) Kingdom Recruitment Segment: Kingdoms allied to the Necromancer recruit units from their recruitment pools.
- Movement Phase
- a) Magic Segment: The Necromancer’s leaders can cast spells affecting movement.
- b) Movement Segment: The Necromancer moves his units and leaders.
- c) Attrition Segment: The Necromancer resolves attrition for units that moved.
- Combat Phase
- a) Magic Segment: The Necromancer’s leaders may cast spells affecting combat.
- b) Combat Resolution Segment: Resolve attacks by the Necromancer’s units.
- c) Undead Recruitment Segment: Units eliminated in 3b and “Battlefield units” may be recruited as undead units by Death rune leaders.
- d) Stacking Judgment Segment (Optional): If any Necromancer stack has more units than the stacking rules permit, he must eliminate excess units.
- Diplomacy Phase
- a) Magic Segment: The Necromancer’s leaders may cast spells affecting diplomacy.
- b) Diplomacy Resolution Segment: The Necromancer may attempt to sway neutral mercenaries and kingdoms to his cause.
B) Kingdom Player-Turn
- Recruitment Phase
- a) Taxation Segment: Activated Kingdoms may collect taxes.
- b) Recruitment Segment: The Kingdoms may recruit units from their recruitment pools.
- c) Kelaron Oiret Election Segment (Odd numbered turns only): The Kingdom’s player rolls on the Kelaron Oiret Election Table to determine the new Doge of Kelaron. 2, 3 and 4) As specified for the Necromancer Player-Turn except the Kingdom’s player performs all actions specified.
- Game-Turn Record Segment: After the Kingdoms player has completed segments 1-4, he moves the Game-Turn marker one box on the Game-Turn Record Track, showing the end of one game-turn and the beginning of the next.
At the end of fourteen turns, the game ends and the players determine the winner.
5) Setting-Up
Place the game-map on a table or other flat surface. When this is done, set-up the starting units as specified in the sections that follow.
5.1) Battlefield Units
Battlefield units are printed on one side with crossed spears. Each has a four digit number on it. Place each Battlefield unit on the game-map hex that bears that number.
5.2) Magic Hex Units
Place these units on the table with the PENTACLE side face up. Mix them thoroughly without looking at the reverse side. When this is done, place one unit in each game-map hex that contains a pentacle symbol. Do not look at them until they are revealed in the course of play.
5.3) Kingdom Units
Find and separate the units of the ten kingdoms. Place them as specified below:
5.31) Ahautsieron: Place one infantry unit in each of the five cities and one naval unit in each of the two ports. Place an additional infantry unit and Stilfaren in Sier-Lor, the capital (3519). Place Narmoren in the Forges (3325).
5.32) Ferlarie: Place one infantry and one naval unit in each of the four cities. Place Ferlor in Farnost (0224).
5.33) Kelaron Oiret: Place one infantry unit in each of the three cities and one naval unit in each of the two ports. Place Zelara do Fornoy, Padron Plety’y and the Torch of Liberty in Keep Kelar, the capital (3104). Place Grip Nud in Far Vergar (3602).
5.34) Lammarech: Place two cavalry units and Lordolam in Zolmarech, the capital (1610). Place one cavalry unit in the other city.
5.35) Loymarech: Place one infantry unit in each of the three cities. Place a cavalry unit, Paisach and the sword Loslom in Port Marech, the capital (2808).
5.36) The Scythe: Place one Rocrider unit in each of the three cities. Place an additional Rocrider unit, Skydor and the Scythe in Sanwestin, the capital (0304).
5.37) Starkeep: Place one infantry and one naval unit in each of the two cities. Put the Keeper and the Keeper’s Sceptre in Star’s End, the capital (3020).
5.38) Stavror: Place one infantry unit in each of the seven cities and a naval unit in each of the six ports. Put three infantry units, one cavalry unit, a siege train and the Staff of Waters in the Stav Farren leader box. Place Stav Farren in Stav, the capital (1820).
5.39) Tal Pletor: Place a 2 strength infantry unit, one naval unit and the siege train in the Stommarren leader box. Place Stommarren in The Confluence, the capital (1109). Place a King’s Guard unit, 1 strength infantry, in each of the other four cities. Place a naval unit in Pletrech (1204).
5.3.10) Zolahaureslor: Place a 1 strength infantry unit in each of the ten cities. Put a naval unit in each of the six ports. Place Nikon V in Sudrin-Lor, the capital (2414). Place the Imperial Heavy Horse (3 strength cavalry), a siege train, four Imperial Legions (3 strength infantry), the Staff of Empire, Kebir Whitehand and Farnon in the Nikon V leader box.
5.4) Regional Variant Chits (Optional)
Randomly select a Regional Variant Chit (counters numbered “120”) from a cup and place it on the map within the borders of any nation (EXC: Zolahaureslor) and read the explanation for it aloud (see section 21 below). Repeat until every nation has one chit in play.
5.5) Mercenaries
Place all of the mercenary units and leaders in the Mercenary Holding Box.
5.6) The Necromancer
The Necromancer starts with Padrech dar Choim, Tol Morn, Mezal, ten Greater Vampire units (3 strength) and a single siege train. He chooses ONE HEX on the game-map and enters his starting units in that hex, ignoring stacking limitations. None of these units pay attrition for this hex and it does not count against their first turn movement. (They enter the map through a trans-planar gate, the other end of which is in the Realm of the Dead. Stacking limitations will apply as normal when the Stacking Judgment Segment of the Necromancer’s first player-turn arrives.)
5.7) Miscellaneous Units
The Game-Turn marker is placed in the first box of the Game-Turn Record Track. All Lesser Vampire units and the remaining Kingdom units are part of the recruitment pool of the Necromancer or the owning Kingdom respectively. When all of these units are on the appropriate place, Game-Turn One begins.
6) Activation and Conquest
6.1) Activation
At the beginning of the game none of the Kingdoms are at war with the Necromancer. Consequently, the Kingdom player controls no units or leaders. He only gains control of a Kingdom if it is activated. In the course of play, the various kingdoms can come under the control of either player. When a Kingdom comes under the control of either player, it is said to be “activated”.
6.11) If any unit of either player enters, or moves through, any land hex of an inactive Kingdom the Kingdom is activated, immediately coming under the control of the other player. Movement by a naval or air unit into a coastal hex with land in it will activate a nation. Movement across a sea border, with no land in the hex, does not cause activation. Sea borders (solid red lines) are drawn to clarify the ownership of the land. They have no effect on play.
6.12) Recruiting a monster in a hex owned by an inactive kingdom (see 18.2), or using any non-diplomatic spell (see 14), activates that kingdom under the control of the opposing player.
6.13) Kingdoms can be activated in either player’s favor through diplomacy (see 11).
6.14) Zolahaureslor automatically activates in favor of the Kingdom player at the start of Game-Turn 10 if it has not already been activated. If any unit, leader or monster controlled by the Necromancer enters any Holy Place hex, Starkeep activates in favor of the Kingdom player. The Necromancer player may conduct diplomacy with Starkeep, providing he uses a leader other than Padrech dar Choim, Tol Morn, or Mezal.
6.15) Leaders and magical devices may move through inactive Kingdoms without activating them.
6.16) At any time, the Necromancer can announce that he is betraying one of the Kingdoms under his control. When this occurs the Kingdom immediately comes under the control of the Kingdoms player.
6.2) Effects of Activation
Prior to activation a Kingdom can do nothing. It is ignored in play until it is activated.
6.21) On activation a Kingdom comes under the control of one of the players. During his Player-Turn that player can take actions with the Kingdom’s units and leaders as delineated in these rules and the Turn Sequence Outline.
6.22) Kingdoms that are betrayed by the Necromancer may have two Player-Turns in the same Game-Turn, one while under the control of the Necromancer and another while controlled by the Kingdoms.
6.3) Conquest
A Kingdom is conquered if, at the end of any friendly Player-Turn, all of its cities are occupied by enemy units.
6.31) When a Kingdom is conquered it loses the ability to collect taxes and raise units. Half the gold in the national treasury at the time of conquest is lost and is added to the treasury (or treasuries) of the conquering player. The remainder is retained by the “government-in-exile” of the conquered country. Its units and leaders may continue to move, engage in combat, conduct diplomacy, etc.
6.32) A Kingdom that has NOT been conquered controls all hexes and cities within its boundaries except those occupied, or controlled, by enemy units. A conquered Kingdom only controls hexes that are occupied, or controlled by, friendly units.
6.33) When a Kingdom is conquered the conquering player must assign control of it to one of the Kingdoms under his control. If the Necromancer is the conquering player, he may assign control of it to the Necromancer. The assigned controller is assumed to control all hexes and cities within the conquered kingdom. Once assigned, this control may not be transferred to another kingdom except by reconquest of the area.
6.34) If all cities of a conquered Kingdom are occupied by friendly units at the end of an enemy Player-Turn, the Kingdom is reconquered. It may either be assigned to a friendly kingdom, or the Necromancer, or returned to the control of its original owner. In the latter case, the Kingdom regains the ability to collect taxes and raise units. In the prior case it does not.
6.4) Looting
6.41) Immediately upon the conquest of a Kingdom, the conquering player must either elect to Loot it or not. If he elects to loot it, in his next three Recruitment Phases he may gather in the loot. No Kingdom may be looted for more than three turns per game.
6.42) The loot for the first turn of looting is equal to the Kingdom’s Taxation Value. The loot for the second turn is equal to half the nation’s Taxation value (rounded down). The loot for the third and last turn of looting is equal to one-quarter of the nation’s Taxation Value (round down).
6.43) If a Kingdom has not undergone three phases of looting, a reconquest will allow the new controller to complete the cycle of looting. To do so, however, means that the nation cannot be restored to its original owner, and that any leaders or combat units belonging to the reconquered country must be removed from play (along with any magical devices in possession of the removed units at that time).
6.44) Loot may be added directly to the treasuries of the conquering (or reconquering) side.
6.45) Looting has no effect upon a Kingdom in regards to its value for Vampire Recruitment.
6.46) If a Regional Variant Chit reduces the Taxation Value for a Kingdom, the loot value is also reduced (However, the variants do not increase the loot).
7) The Recruitment Phase
7.1) Taxation
During the Taxation Segment activated Kingdoms controlled by the phasing player collect taxes. Each settled hex, river hex and city controlled by a Kingdom produces taxes for it.
7.11) Units exert a zone of control in the hex they are in and all six adjacent hexes. They do not exert a zone of control into hexes they cannot enter, i.e. a naval unit does not exert a zone of control into all-land, non-river hexes, but does control coastal and river hexes. Zones of Control have no effect on movement or combat. They only affect taxation. For taxation purposes, a Kingdom controls all hexes within the zone of control of its units AND all hexes in its kingdom not controlled by enemy units. A Kingdom’s units never control hexes belonging to allied or inactive kingdoms. (See 6.32)
7.12) A unit controls the hex it is in for taxation purposes. If both enemy and friendly zones of control extend into any other taxable hex, neither is allowed to tax it.
7.13) Each settled river hex produces two gold units per Taxation Segment. Non-river settled hexes produce one gold unit. Each city produces one gold unit per point of its City Value (the number printed next to the city on the map). Cities do not produce revenue unless they are occupied by friendly units.
7.14) The Taxation Value of each Kingdom is printed next to its name on the game-map. If the Kingdom’s cities are occupied by friendly units, and no enemy units control any hexes in it, the Kingdom produces this number of gold units in the Taxation Segment. If some hexes are enemy controlled, the Taxation Value can be determined by subtracting the value of enemy controlled and mutually controlled (hexes that both players exert a zone of control into) hexes from the gross Taxation Value.
7.15) In the Taxation Segment calculate the revenue received by EACH kingdom controlled by the phasing player. Keep a running total of expenses and revenue for each Kingdom on a piece of scrap paper.
7.16) Kingdoms controlled by the Necromancer, i.e. conquered and assigned to the control of the Necromancer, do not produce revenue. Instead, see 7.3.
7.2) Recruitment
During the Recruitment Segment Kingdoms controlled by the phasing player can recruit units. Each Kingdom’s starting recruitment pool consists of all of its units that do not begin play on the game-map. Units lost through combat, attrition or in other ways are added to this pool as the game progresses.
IMPORTANT – Under some circumstances eliminated units are permanently removed from the game. Units that are eliminated in combat, and then raised as undead units by a Death Rune leader, remain in play as undead units under the control of the raising player. If undead units are eliminated, they are removed from play. Units can also be permanently eliminated by a Banish Undead spell (14.21) and certain magical devices (15.1 and 15.2).
7.21) A Kingdom can recruit any or all of the units in its recruitment pool. The cost to recruit a unit is a set amount of gold, depending on its type (See the Recruitment Table). The phasing player determines which units he wants to recruit, calculates the cost to do so and subtracts that cost from the total of revenue and expenses for the recruiting Kingdom.
7.22) If a Kingdom cannot afford to recruit all of the units it wished to recruit, allied Kingdoms may, at the phasing player’s discretion, give gold to the recruiting Kingdom. To do so, costs the transferring Kingdom twice as much gold as the recruiting Kingdom receives, i.e. transferring 10 gold units to Kingdom A costs Kingdom B 20 gold.
7.23) Recruited units appear in any city in the recruiting Kingdom of the player’s choice. They cannot be recruited outside of the home kingdom, even in assigned conquered Kingdoms. Naval units may only be recruited in ports. No unit can be recruited in a city controlled by enemy units unless it is occupied by friendly units. Only as many units as the City Value may be recruited in a city in one Recruitment Phase, i.e. Sudrin-Lor has a City Value of 4. Four units can be recruited here each phase.
7.3) Vampire Recruitment
During this segment the Necromancer may recruit vampire units. Vampires live off of their prey, humans. Consequently, the Necromancer can only recruit new vampire units if he controls a large enough population to support them.
7.31) In the Taxation Segment the Necromancer Player determines the Taxation value of all hexes controlled by the Necromancer, vampire and undead units. This number is divided by five with all fractions dropped. The result is the maximum number of vampire units that can be in play. The Necromancer player should note this number on a piece of scrap paper.
To clarify, the Necromancer controls a conquered country and its Vampire Recruitment value if it has been assigned to his control. Otherwise, he controls territory for Vampire Recruitment to the degree that his vampire and undead units (and their uncontested zones of control) occupy it.
7.32) If the maximum vampire army size is LOWER than the number of vampire units in play, no vampire units are eliminated and none may be recruited. If the maximum vampire army size is greater than the number of vampire units in play, new vampire units can be recruited to bring the number of vampire units up to the maximum vampire army size.
7.33) Vampire units can only be recruited in city hexes occupied by an existing vampire unit. Each vampire unit in a city hex can recruit ONE new vampire unit, as long as the maximum vampire army size is not exceeded. Vampire units cannot be recruited in a city if there are enemy units in an adjacent hex.
7.34) Vampire units have a recruitment pool, as for Kingdoms. Initially this consists of the Lesser Vampire units. Eliminated vampires are returned to this pool and, when vampire units are recruited, can be raised by the Necromancer.
7.35) Greater Vampire units may be permanently eliminated. They are permanently eliminated if a Banish Undead spell is successfully cast against them or if they are eliminated in combat by a force whose leader bears the Sword Loslom, the Sword Famir or a Living Sword. Lesser Vampire units cannot be permanently eliminated.
7.36) The Necromancer begins play with a siege train. If it is eliminated, it cannot be rebuilt.
7.37) If a Kingdom has been conquered and assigned to the Necromancer, then is later reconquered and assigned to its original owner, the maximum Taxation Value for the nation is halved (rounded up). Being subject to a reign of vampires saps a country of its vitality. (If looted too, there is no additional penalty imposed.)
7.38) The Necromancer is considered to have betrayed an ally if he uses any hex of that ally’s home Kingdom towards his Vampire Recruitment. (Even if a human ruler were depraved enough to allow vampires to prey upon his subjects, a revolt would surely follow quickly enough.) For the effects of Betrayal, see 6.16.
7.4) Militia (Optional)
7.41) Infantry and cavalry units with a combat strength of “1” are considered low-quality but cheap militia units. Militia infantry cost 5 gold units to recruit from the force pool; militia cavalry costs 8 gold units. Note that some Kingdoms will have more available than others.
8) Movement and Attrition
During the Movement Phase the phasing player can move any or all of his units. As a stack of units moves, it accrues attrition points. During his Attrition Segment, the phasing player rolls for each stack he moved to determine how many units in that stack are lost to attrition.
8.1) For attrition purposes, a STACK is a group of units who begin their movement in the same hex and end it in the same hex. If units who begin their movement together move to different hexes, each group thus created is considered to be a separate stack for attrition purposes. Likewise, if units start different hexes and end in the same hex, each original group is a separate stack. Attrition is determined once for each moving stack.
8.11) There are five types of units – infantry, cavalry, air, siege train and naval (Refer to the Terrain Chart). When a stack of units enters a hex it accrues attrition points. The number of points accrued depends on the type of unit and the type of terrain it entered. Where a stack contains different types of units, it accrues the maximum number of attrition points possible for each hex it enters, i.e. a stack containing infantry and cavalry accrues two points for a settled hex and four for a mountain hex. The only exception to this rule is Naval Movement (see 8.2).
8.12) After moving each stack determine how many attrition points it accrued. Find this number at the side of the Attrition Table and cross-reference it with the number of combat units in the stack. The result is the subject of the Attrition die roll. See the Attrition Table for details on calculating Attrition loses. It is possible for an entire stack to be eliminated in this way. In all cases, the phasing player will determine which units to lose.
8.13) Units may enter, and move through, hexes containing enemy units. When a stack moves through such a hex it accrues attrition points equal to the total Combat Strength of the enemy units PLUS the attrition point cost of the terrain. If the stack enters the hex and stops, only the terrain point cost is accrued.
8.14) Land units, infantry, cavalry and siege train, may not move across all-sea hexsides. Naval units may not move across all-land hexsides that are not crossed by a river. Air units may cross any hexside. (Units may not move in contravention to the laws of common sense. For example, a land unit entering hex 0514 from the northwest could not leave that hex to the southeast.)
8.15) Leaders do not suffer attrition but still accrue attrition points at the rate of 1 point per hex, regardless of hex type. They can cross any hexside since they are assumed to be able to commandeer small craft to move across water. Effectively, a leader can move from any place on the map to any other place.
8.16) Leaders may not move through hexes containing enemy units unless they are accompanied by friendly units. They can move through hexes that contain inactive units. If, for any reason, a leader is alone in a hex with enemy units his fate is resolved as specified in 9.27. If he survives, the owning player moves him to any other hex that does not contain enemy units.
8.17) If a Leader enters a magic hex containing a face-down magic hex counter, he must immediately stop his movement and remain in that hex.
8.18) No Unit, either leader or combat unit, may travel more than 36 attrition points in any one Player-Turn.
8.19) If a combat unit is dropped off by a moving stack, it is still considered part of the original force for attrition purposes. However, in removing attrition casualties, the units eliminated first must be in descending order from those which accumulated the largest number of attrition points during the Movement Phase. Therefore, a unit that moved least is the last to be eliminated for attrition.
8.2) Naval Movement
Naval units can only enter all-sea, coastal and river hexes. They may only enter land hexes by moving along a river that is in that hex.
8.21) If a naval unit begins a move in a port city containing an infantry, cavalry or siege train unit, it may embark that unit. The land unit then moves with the naval unit and can cross all-sea hexsides. Each naval unit can carry one land unit, regardless of type. When attrition is determined, it is accrued as if only naval units were in the stack. Land units may only be embarked at the beginning of the Movement Segment.
8.22) Naval units may disembark a land unit at any time in any coastal hex. If the naval unit continues moving, the land units become a separate stack for attrition. If they end movement in the same hex, they remain a single stack for attrition. Disembarked land units may NOT move in the phase that they are disembarked by a naval unit.
8.23) Naval units may end their move in all-sea hexes.
8.24) If a river hex or coastal river hex is occupied by an enemy naval unit, friendly land units may move into the hex but may not move through it unless a friendly naval unit is also present. (The naval unit controls the river and can prevent the army from crossing it.) Land units must end their movement when they enter such a hex.
8.3) Air and Vampire Units
8.31) Air units may cross any hexside. They must end their movement in a land hex.
8.32) Vampire units may enter, but cannot move through, hexes containing rivers (Vampires cannot cross running water). It must stop movement on entering such a hex, but could continue moving in any direction on the next turn. Vampire units are not affected by sea hexes in any way. They must end their movement in a land hex.
8.4) Leader Boxes
Leader Boxes are located on the gameboard. Units that are stacked with a leader can be placed in his box, instead of on the map, to eliminate stacking problems. While this is the case, they are assumed to move with the leader (whose counter remains on the game-map), with the leader moving at their speed. The player may return them to the game-map, placing them in the leader’s hex, whenever he wishes to do so.
9) Combat
If, at the beginning of a Combat Resolution Segment, units of opposing players are in the same hex, combat MUST occur. All combat is resolved on a hex by hex basis. Combat in one hex is resolved before combat in the next hex, etc. The phasing player determines the order in which battles are resolved.
9.1) For combat, the phasing player is the attacker, the other player is the defender.
9.11) All units may engage in combat with all other units regardless of unit type. Fleets can engage land units, land units can engage air units, etc. Land units embarked on naval units DO lend their strength if those naval units are involved in combat even if combat occurs in an all-sea hex.
9.2) Combat Resolution
9.21) Compare the total Combat Strength of the Attacker with that of the Defender. Divide the greater number by the lesser. Round the result down if the attacker is stronger, round it up if the defender is stronger. Subtract ONE from the number.
9.22) Roll a die. If the attacker is stronger, add the number determined above to your roll. If the defender is stronger, subtract that number from the roll.
9.23) Each leader has a Hero Rating (the first number printed on his counter). If the attacker has a leader present, he adds the leader’s Hero Rating to the roll. If the defender has a leader, he subtracts his leader’s hero rating. Only one leader may use his Hero Rating in a given combat for each side. Extra leaders for either side are ignored in combat.
EXAMPLE – Player A attacks with a total combat strength of 26; Player B has a strength of 10. 26 divided by 10 is 2.6; since the attacker is stronger, this is rounded down to 2. 1 is subtracted from this number, so it becomes 1. The result is added to the die roll, by rule 9.22.
As it happens, Player A has a leader with a Hero Rating of 1, and B has a leader with a Rating of 3 in the hex. Player A’s Rating is added to the roll, and B’s is subtracted, by rule 9.23. Thus, the final modification is: +1 because the attacker has 2-1 in combat strength over the defender; +1 for the attacker’s leader; -3 for the defender’s leader; to produce a final die-roll modifier of -1. The attacker rolls the die and rolls a 4; this becomes a 3.
NOTE TO EXPERIENCED PLAYERS – In other words, calculate the combat ratio just as you would for a game with an odds-ratio Combat Results Table, rounding (as always) in favor of the defender. Add one to the die-roll if the ratio is 2-1; add two if it is 3-1; subtract one if it is 1-2; and so on.
9.24) If combat occurs in a mountain hex, subtract two from the die roll.
9.25) Refer to the Combat Results Table. Find the modified die-roll on the left hand side of the table. Read across to the columns labeled Attacker and Defender. Apply the result in the Attacker column to the attacker and in the Defender column to the defender. If the listed result is a dash (–) the player suffers no loss. If it is a number, that number of units, of the affected player’s choice, are lost. If he does not have enough units, he loses all of his units and ignores the excess loss.
9.26) Sometimes a combat result contains the letter “R” with a number. In this case, the force loses the number of units indicated and must retreat to an adjacent hex or hexes. Retreating units may not retreat into hexes that are impassable for them. They may not enter hexes that are occupied by enemy units. They may not retreat into hexes that enemy units entered the battle hex through unless they have no other option. In all cases, units that cannot retreat obeying these rules are eliminated.
9.27) If units are forced to retreat, friendly leaders and devices retreat with them. If friendly leaders are left without any friendly units, after combat is resolved, they can be eliminated if the hex contains any enemy units. Roll a die for each leader. If the roll is less than or equal to his Hero Rating, he escapes and can be placed in any hex on the game-map within thirty-six hexes that does not contain enemy units (taking any devices that he has with him). If the roll is higher than his Hero Rating, he is permanently removed from play. If devices are left alone in a hex with enemy units they are captured and can be used by the enemy player.
9.28) Taking part in a battle puts the safety of a leader at risk. The more active a leader has been, the more risk he runs.
9.281) After each battle, check each leader involved on both sides with a “Leader Fate Die Roll” to determine any casualties. The leader rolls against his (modified) Hero Rating (HR) as follows:
- a) If the leader has modified the combat resolution by means of his HR, to avoid being a casualty, the owning player must roll less than or equal to the leader’s HR+1.
- b) If the leader has not modified the combat resolution but has instead used a magic spell in the hex of combat that Player-Turn, to avoid being a casualty the owning player must roll less than or equal to the leader’s HR+2.
- c) If the leader has neither modified the combat resolution nor worked any spell in the hex, to avoid being a casualty the owning player must roll less than or equal to the leader’s HR+3.
9.282) Any leader may freely substitute his current Magic Strength value for his Hero Rating when making the “Leader Fate Die Roll”. (Remember, working spells or being injured in Heroic Combat using magic temporarily reduces Magic Strength; Heroic Combat itself does not reduce Hero Ratings for this roll, however.)
9.283) If the leader was in the non-retreating stack in a combat, the die roll is modified by -1.
9.284) If a leader ends a combat situation alone in a hex with enemy combat units, the escape roll is made for him (as per rule 9.27) only after the “Leader’s Fate” roll is resolved.
9.285) A leader who fails his “Leader’s Fate Die Roll” is a casualty of the combat. Roll a second die. A result of “1-5” indicates the number of complete game turns he is out of play. (Hence, a roll of “1” on Turn 3 means that the leader does not recover from his wounds until the end of the Recruitment Segment of Turn 5.) Place a wounded leader in any friendly city. If the casualty result roll is a “6”, the leader dies and is immediately removed from play.
9.286) If the injured (or killed) leader is the Necromancer or Tol Morn, the piece is never out of play for more than one complete turn, and they return as per rule 16. However, if an enemy leader was carrying the Sword Loslom or the Sword Famir, any injury to either of these two is handled as per 9.285. The leader possessing the sword, however, must have modified the combat by his own Heroic Rating, or have worked magic (successfully or not) in the hex of combat. (Leaders cowering in the rear are in no position to strike down anybody.)
9.287) To bring back a wounded leader earlier than the number of turns indicated, a friendly magician must go to the last hex the leader occupied (the hex of combat) and work a “Raise the Dead” spell. This acts as a healing spell, which immediately brings the leader back – in the caster’s hex (unless the wounded leader was the Necromancer or Tol Morn).
9.3) Cities and Siege Trains
9.31) All units defending in a city have their Combat Strength doubled.
9.32) Defenders of a city are not doubled against attacking units who have a siege train.
9.33) Siege train units may never be eliminated in combat. They can be lost to attrition and spells. If all other friendly units with a siege train are lost, or a hex that only contains a siege train is entered by enemy units, the siege train is captured and can be used by the enemy as if it was his own. If a captured siege train is eliminated it is returned to the recruitment pool of its original owner (unless it is the Necromancer’s original siege train). In all other ways, Siege Trains function as normal units.
10) Stacking (Optional)
Each hex has a stacking limit, as indicated on the Terrain Effects Chart. The limit for settled and all-sea hexes is four. For mountain hexes it is two. If a hex contains a city, the stacking limit is increased by the City Value of that city.
10.1) Stacking comes into play during the Stacking Judgment Segment of the friendly Combat Phase. At all other times during a turn, units can be overstacked. (This is important because it is often worthwhile to overstack for an attack.)
During the Stacking Judgment Segment the phasing player must examine his stacks. If a stack contains more units than the hex allows, the excess units are eliminated. The phasing player chooses which units to lose. Only the phasing player loses units during his Stacking Judgment Segment. The other player is unaffected until his turn comes around.
11) Diplomacy
11.1) Leaders may travel through any hex or hexes except those containing enemy units and magic hexes. If a player wants to conduct diplomacy with an inactive kingdom, he must move one of his leaders to that Kingdom’s capital during his Movement Phase.
11.2) During the Diplomacy Phase friendly leaders in the capital cities of inactive Kingdoms can conduct diplomacy. Only one diplomacy attempt can be made with a given Kingdom in a given phase, no matter how many friendly leaders are present.
11.3) Refer to the Diplomacy Table. Find the name of the Kingdom in the left hand column of the table. Read over to the column headed by the player making the attempt, i.e. Necromancer or Kingdom. You will find either a positive or a negative number in this column. This number, added to the roll of two dice, is the result of your diplomacy attempt. If the result is 10 or higher, the kingdom activates in the favor of the phasing player. If it is less, the Kingdom remains inactive.
NOTE – Diplomacy should be conducted with mercenaries and monsters using the basic procedure above.
11.4) Gifts
11.41) Gifts are items given to neutral Kingdoms or, in the case of Gold to Mercenaries. The giving of a gift will produce a modifier, which is added directly to the Diplomacy dice result. If a gift is made and an alliance follows immediately, the successful player must leave the gift in the possession of the Kingdom or leader who accepted it. This restriction is dropped immediately if the leader is killed or the enemy conquers the Kingdom in question, or the gift item is captured by the enemy. If a gift is not followed by an alliance, the gift will be controlled by the player who later gains the alliance with no restriction upon its use whatsoever.
11.412) A Living Sword or a Hero’s Sword may be given to the neutral leader as a gift. The Diplomacy dice roll is modified by the number rolled by the spell-caster when the sword was originally made; the higher the original roll, the finer the quality of the blade and, thus, its value. The sword must be physically brought to the capital city of the leader to whom it will be given.
11.413) For a fleet to be considered a gift, it must be moved to a port of the receiving Kingdom (this movement into the Kingdom for the sole purpose of Diplomacy will not cause the Kingdom to activate against the player). A fleet which was produced by a Wood Rune spell-caster increases the Diplomacy dice roll by +1. This is cumulative; thus, if the player has given the Kingdom two fleets, each subsequent Diplomacy attempt with that neutral Kingdom is modified by +2. Fleets may be given as gifts only to those Kingdoms which have at least one port.
11.414) Gifts of Gold aid Diplomacy, both for neutral Kingdoms and Mercenaries. Deduct the gift from the presenter’s treasuries. The amount of the bribe affects the likelihood of success; announce the size of the gift and roll on the following table:
| Die Roll | 10 Gold | 20 Gold | 30 Gold | 50 Gold | 75 Gold | 100 Gold |
|---|---|---|---|---|---|---|
| 1 | 0 | 0 | 0 | 0 | 0 | 0 |
| 2 | 0 | 0 | 0 | +1 | +1 | +2 |
| 3 | 0 | 0 | +1 | +1 | +2 | +2 |
| 4 | 0 | +1 | +1 |
The number found by cross-indexing the die roll with the amount of gold gifted is the Diplomacy dice roll modifier. If the gift does not lead to an immediate alliance, the gold is lost. If it leads to an alliance, half the gold is lost; the remainder is added to the treasury of the receiving Kingdom. Mercenaries given a gift of gold receive an additional +1 modifier to those listed above. However, all of the gold is lost regardless of the outcome of the Diplomacy dice roll.
11.5) Offers
11.51) Offers differ from Gifts in that ownership of the thing which is offered does not change unless the alliance is made at the time of the offer. Offers may not be made to Mercenaries.
11.52) A magic device may be offered to a neutral. It must be brought to the capital of the neutral Kingdom. The offer of such will modify the Diplomacy dice roll by a number equal to its Hero Rating or Magic Strength, whichever is higher. If an alliance results, the item is immediately placed with a leader of the new ally, under the same restrictions as a gift.
11.53) A conquered country may be offered to a neutral. If the conquered Kingdom has either been assigned to the Necromancer or to Zolahaureslor, ownership may be transferred. If the Necromancer has not used its Taxation Value for vampiric recruitment and if the conquered country has not been looted, such an offer modifies the Diplomacy dice roll by +3. If it has been looted or used for vampire recruitment, the roll is modified only by +1.
11.54) The same device or Kingdom may not be offered a second time to any neutral which has refused the first offer of alliance.
11.6) The Diplomatic value of offers and gifts are cumulative, up to a maximum of +6 modification to the Diplomatic dice roll.
11.7) Oftentimes, Regional Variants may also modify the Diplomacy dice roll (see section 21). These too are cumulative with modifiers from gifts or offers.
11.8) Modifications to the Diplomacy dice roll are in addition to those found on the Diplomacy Table.
11.9) The Kingdom of Zolahaureslor requires special Diplomacy to sway it. It may never become a Necromancer ally. The Kingdoms player may always conduct Diplomacy with Zolahaureslor, even if he currently has no leader/ambassador present at its capital. If no Kingdoms’ leader is present, however, the Diplomacy modifier for Zolahaureslor is “0”. This in turn is modified by +1 for every Kingdom allied or conquered by the Necromancer’s forces. If a Kingdoms’ leader is present, Diplomacy is conducted in the usual manner.
11.91) (FAN-MADE) Rather than having the roll modified by “0” when no Kingdom leader is present to conduct Diplomacy, the roll is modified by an amount based on the game turn. This is modified by the Necromancer’s allied or conquered Kingdoms as above.
| Turn # | 1 | 2 | 3 | 4 | 5 | 6 | 7 | 8 | 9 |
|---|---|---|---|---|---|---|---|---|---|
| Zolahaureslor Diplomacy Modifier | -6 | -5 | -4 | -3 | -2 | -1 | 0 | +1 | +2 |
11.10) If a leader is in a neutral capital when the neutral Kingdom joins the enemy alliance, the leader enjoys “diplomatic immunity”. The leader is expelled and moved to the nearest city friendly to his side.
12) Magic
Some leaders use magic. Those who do have a Magic Rune and a Magic Strength on their counters. The ten Magic Runes are:
- Death opposes Life
- Terror opposes Serenity
- Earth opposes Air
- Fire opposes Water
- Metal opposes Wood
The Magic Rune of a leader determines the type of magic that he can use, i.e. if his rune is Terror he may only cast the magic of Terror unless an artifact allows him to cast a second type as well.
12.1) When to Cast Magic
There are three magic segments in each Player-Turn. They are in the Movement, Combat and Diplomacy Phases. Each spell in this game is either a movement, combat or diplomacy spell. Spells may only be cast in the appropriate phase, i.e. movement in movement, etc. Combat spells can be cast by both the attacker and the defender. Movement and diplomacy spells may only be cast by the phasing player.
12.11) Counter-spells are a special category. They can be cast in any magic segment of the opposing player’s Player-Turn or in the friendly Combat Magic Segment.
12.2) Magic Strength
A Leader’s Magic Strength is the right-most number on his counter. When a Leader casts a spell, the player rolls a die. If the roll is less than or equal to the Leader’s Magic Strength, the spell takes effect. If not, it has no effect.
12.21) Leaders may cast more than one spell in a game-turn. The second time he casts, his Magic Strength is reduced one, the third time it is reduced two, etc. When his strength is reduced to zero, he may not cast any more spells in that game-turn. The Magic Strength of all Leaders returns to its full value at the start of each game-turn. (Player’s can track a Leader’s current Magic Strength on a sheet of paper.)
12.3) Rune Symbols
Certain hexes on the map contain Rune symbols. If a leader with the same Magic Rune begins the game-turn in such a hex his Magic Strength is increased by ONE for that game-turn.
12.31) Each Rune is opposed to one other Rune. In the table in 12, the Runes directly across from each other are opposed. Where opposition exists, Leaders may cast counter-spells for spells of the opposing rune, i.e. a Terror Rune leader can cast counter spells against Serenity spells. To cast a counter spell, a friendly leader with the opposite rune must be in the same hex as an enemy who is casting opposing magic.
12.32) For counter-spells, the enemy player must first roll to see if his spell succeeds. If it does, the friendly player can cast his counter spell. If the counter spell succeeds, the enemy spell is negated. If it fails, the enemy spell has its full effect. Counter spells may not be countered by any other spell.
12.4) If one attempt to cast a spell fails, the caster may immediately attempt to cast it again using his lowered Magic Strength. The same spell may be cast, in succession, in the same segment if so desired.
12.5) In the Combat Magic Segment Banish Undead spells take effect after all other spells. Kill spells take effect before Banish Undead but after all other spells. The effects of the spells are described in sections 13 and 14.
13) Elemental Runes
13.1) Fire
13.11) Wall of Flames (Movement): Any or all of the hexes adjacent to the caster become impassable until the caster’s next friendly Movement Magic Segment. Place a flames marker in each hex that you choose to affect. Any enemy units in these hexes are unable to move until the flames are removed.
13.12) Incinerate (Combat): The caster may choose one enemy unit in his hex and eliminate it. He may not choose enemy Leaders.
13.13) Counter Water
13.2) Water
13.21) Part Sea (Movement): The caster, and a number of units equal to up to twice the number rolled on the die when the spell was successfully cast, can move through all-sea hexes as if they were settled hexes. (Naval units may still move with the stack.)
13.22) Maelstrom (Combat): Any two naval units in the caster’s hex are eliminated by success. He may choose which to remove. If either is carrying land units, they are also eliminated. If only one enemy naval unit is present, only it is eliminated.
13.23) Counter Fire
13.3) Air
13.31) Call Wind (Movement): Attrition costs for naval units moving with the caster are reduced 50%, rounded down, for this game-turn.
13.32) Fly (Movement): A number of units moving with the caster equal to up to twice the number rolled on the die when the spell was successfully cast pay air attrition costs. The spell may not be used to make naval units fly. It will affect siege trains.
13.33) Counter Earth
13.4) Earth
13.41) Move Earth (Combat): One of three possible effects, of the Caster’s choice, occur:
-
- Create entrenchments in the caster’s hex giving that hex the defensive value of a city with a city value of zero. Place an entrenchment marker in this hex.
-
- Remove entrenchments. If there is an entrenchment marker in the hex it is removed.
-
- Create breaches. If the hex contains a city its defenders are not doubled for this game-turn due to the effects of the spell.
13.42) Open Chasm (Combat): An enemy land unit in the Caster’s hex, of the caster’s choice, is eliminated. It may not be a leader unit.
13.43) Counter Air
13.5) Metal
13.51) Forge Sword (Movement): Place either a Living Sword or a Hero’s Sword in the caster’s hex. The caster may choose which to create.
13.52) Hex Metal (Combat): The caster may render enemy arms rusty or brittle, allowing a more successful attack or defense. Give +1 (if the caster is an attacker) or -1 (if the caster is a defender) die roll modifier for an battle fought in the caster’s hex.
13.53) Counter Wood
13.6) Wood
13.61) Build Fleet (Movement): Success can create a number of fleets equal to the caster’s roll when rolling for spell success (If the caster rolls a TWO when the spell succeeds, he can create up to TWO fleets). Any fleets created appear in the caster’s hex. The caster may create fewer fleets if he desires. Place neutral (white) fleets to mark those that he creates.
13.62) Fruitation (Movement): This spell is cast out of sequence and cast at the end of moving the caster’s stack. If successful, it reduces the Attrition die roll by a number equal to the die rolled to successfully cast it (This causes trees and bushes to bring forth nourishing fruit to provision the marching army). To attempt the spell, the caster must have moved the entire distance with the stack.
13.63) Counter Metal
14) Other Runes
14.1) Death
14.11) Kill (Combat): One enemy leader in the caster’s hex is targeted. He is eliminated unless his player makes a successful roll against his Hero Rating or Magic Strength, whichever is higher. If the roll is less than or equal to the higher value, the leader lives. If not, he is dead.
14.12) Raise Undead (Undead Recruitment): This spell is cast in the Undead Recruitment Segment of either Combat Phase. It cannot be cast if the caster was forced to retreat in the immediately preceding Combat Resolution Segment. If the spell succeeds, all units eliminated during the Combat Resolution Segment are flipped to their undead side and returned to play under the control of the casting player. Vampire units and the units of Cos dol Cos are immune to this spell. Eliminated undead units are permanently removed from play and cannot be re-introduced with this spell.
This spell can be used to turn battlefield units into undead units. Battlefield units are those that begin face down on a battlefield hex. Success brings all of the units at the battlefield under the control of the caster as undead units.
14.13) Counter Life
14.2) Life
14.21) Banish Undead (Combat): The caster chooses one of the following effects:
-
- Eliminate all undead units in the caster’s hex.
-
- Eliminate all Lesser Vampire units in the caster’s hex.
-
- Permanently eliminate one Greater Vampire in the caster’s hex.
-
- Temporarily eliminate Tol Morn (see 16) if he fails to roll less than or equal to his Hero Rating. He must be in the caster’s hex to be affected.
14.22) Raise from the Dead (Movement): One dead leader may be returned to play in the caster’s hex. For the spell to work, the leader must have died in the current or previous game-turn and the caster must be in the hex in which he was killed. No leader can be raised more than once.
14.23) Counter Death
14.3) Terror
14.31) Fear (Combat): Any enemy unit of the caster’s choice must retreat from the hex. If it cannot, it is eliminated.
14.32) Intimidation (Diplomacy): Add one to the roll when the caster conducts diplomacy. If the spell is cast more than once in the same segment, the effect is additive.
14.33) Counter Serenity
14.4) Serenity
14.41) Peace (Combat): One enemy unit of the caster’s choice must retreat before combat. Greater Vampire units are not affected by this spell. They cannot be forced to retreat.
14.42) Sweet Reason (Diplomacy): Add two to the Diplomacy die roll. As with Intimidation, multiple successes in the same segment have an additive effect.
14.43) Counter Terror
15) Magical Devices
Magical Devices include items that being as Magic Hex counters (the Sword Famir, He-Sups-On-Prana, the Dawn Lantern and the Silk Negator), those that begin in the possession of various leaders (the Torch of Liberty, the Sword Loslom, the Keeper’s Sceptre, the Scythe, the Staff of Waters and the Staff of Empire) and those created by a Metal Rune leader (Living Swords and Hero’s Swords).
15.1) General Rules
15.11) Many devices have Hero Ratings, Magic Runes and/or Magic Strengths. A device with a Hero Rating adds its rating to the Hero Rating of any leader who carries it. If a leader carries a Magic Rune device, and he has the same Magic Rune himself, his Magic Strength is increased by the Magic Strength of the device, i.e. if a 4 strength Death Leader with a Hero Rating of 2 carries He-Sups-On-Prana (1 strength Death item) his effective Magic Strength when he uses it is FIVE and his Hero Rating is THREE. If he has a different rune, or no rune, he may cast the device’s magic at its magic strength. No leader may ever use a device of an opposing rune, i.e. if a Leader with a Death Rune finds a device with a Life Rune, he cannot use it.
NOTE – Where the ability to cast more than one type of magic is gained from items, Magic Strength is reduced independently when the powers are used, i.e. a leader has an item with a 2 strength Air rune and is a 3 strength Metal rune leader. If he casts flight, the Air power is reduced to 1 and his Metal power is unaffected, remaining at 3.
15.12) A leader can carry any number of devices. They stay with him wherever he travels. If he is killed, they are captured by his slayers. During movement he may transfer any of his devices to any friendly or neutral leader. A device transferred to a neutral leader cannot be retrieved until his kingdom is activated.
15.13) A given leader may only use two devices in a given game-turn. Using a device is defined as:
-
- Increasing the Hero Rating and/or
-
- Increasing Magic Strength or casting spells and/or
-
- Using any of the device’s special abilities.
Of the two devices used, only one can be a sword. Swords are Hero’s Swords, Living Swords, the Sword Famir, the Sword Loslom and He-Sups-On-Prana.
15.14) Devices can be left with a stack of friendly units though only leaders can use them. Such a device can be picked up by a leader during movement. If a stack guarding a device is eliminated, the device is captured.
15.15) The Magic Strength of a device is increased by one if it begins the owning player’s Movement Phase in a Rune hex of its Rune. If a device carrying Mage with the same rune is in such a hex, his strength is effectively increased by two.
15.16) Certain devices have special powers in addition to, or instead of, their ability to increase the Hero Rating of a leader or lend him magical strength. These items are described in the sections that follow.
15.2) Hero’s Swords, Living Swords, Loslom and Famir
If a leader uses a Living Sword, the Sword Loslom or the Sword Famir in combat any Greater Vampire unit killed by his side is permanently eliminated. They do not return to the Necromancer’s recruitment pool.
15.21) If Tol Morn and/or Padrech dar Choim are killed, and an enemy leader wielded the Sword Loslom or the Sword Famir in the battle, they are permanently killed (see 16).
15.22) The Sword Famir has additional powers (see 17).
15.23) A Hero’s Sword increases a leader’s Hero Rating +1 for Heroic Combat (as performed under both standard rules and the optional duels between leaders).
15.3) He-Sups-on-Prana
If a Death Rune Leader uses this blade any living units killed by units under his control are permanently eliminated unless they are raised as undead. This does not apply to vampire and undead units.
15.4) The Dawn Lantern
If a Leader using this item is present the combat strengths of all vampire units in the battle are reduced by one each.
15.5) The Silk Negator
When a leader carries this item the owning player must state, at the beginning of each magic segment, whether he is using it. If he does, no magic of any kind can be used by any leader in that hex. If it is used in the combat magic segment the Raise Undead spell cannot be used in the subsequent Undead Recruitment Segment. This item influences cast spells. It does NOT affect magical devices.
15.6) The Torch of Liberty
Every odd game-turn the Kingdom player rolls on the Kelaron Oiret Election Table to determine who the new Doge is. After this, the Torch of Liberty teleports to that leader’s hex. If the reigning Doge is killed, a new Doge is elected and the Torch teleports to him. If all Kelaron Leaders are slain, the Torch teleports off the map and is permanently removed from play.
15.7) The Staff of Empire
If the staff-wielder is present in a hex that contains undead Imperial Legion units, he can take command of those legions. The owning player of the wielder can use the undead legionnaires as his own as long as the staff-wielder stays with them. The Staff has full effect on the four battlefield units labeled as Imperial Legions III, V, X and XII.
16) The Necromancer and Tol Morn
These leaders, unlike all others, are not dead when they die. If either is killed, he returns to play two game-turns after his death during the Necromancer’s Recruitment Phase. These leaders are permanently killed if the fall in a battle where the Sword Loslom or the Sword Famir are used.
17) Kelaron Oiret Elections
During the Kelaron Oiret Election Segment of his Recruitment Phase (odd game-turns only) the Kingdoms player must roll on the Election Table to determine which Kelaron Oiret leader is the new Doge. (If one of the three is dead, roll 1D6. On an odd roll one is elected, on an even the other is. If only one of the leaders is alive he is automatically the Doge.) The only effect of the election is to move the Torch of Liberty to the new Doge. It may not be used by anyone except the Doge and may not be transferred.
18) Magic Hex Markers
Seven magic hexes, printed with pentacles, are on the game-map. At the beginning of the game, place a magic hex marker in each of these hexes, with its pentacle side showing. Neither player may look at the reverse side until he enters the hex.
18.1) General Rules
18.11) During the friendly Movement Segment the phasing player can move any of his leaders to a magic hex with an unrevealed magic hex marker. Any leader moved to such a hex must stop movement and remain there.
18.12) At the end of the Diplomacy Resolution Segment the magic hex marker in any hex that contains a leader is revealed. If it is a magical device, the leader picks it up and can use it (If the device is the Sword Famir see 18.3). If it is Ssstoth, the Dragon Sirax or the Slug, the leader must either conduct diplomacy with the monster or engage it in heroic combat, at his option.
18.13) The Diplomacy Table lists modifiers for each monster. Determine the modifier that applies for the leader’s player, roll two dice and apply the modifier. If the modified roll is greater than or equal to 10 the monster comes under the phasing player’s control. If not, the leader must engage the monster in Heroic Combat.
18.14) If the Diplomacy attempt succeeds see 18.2. If it fails see 18.15.
18.15) Heroic Combat
Refer to the Heroic Combat Table. Find the name of the monster at the top of the table and the modified Hero Rating of the attacking leader on the left hand side. Cross-Reference and roll one die. If the roll is less than or equal to the number the leader kills the monster. It is removed from play and the leader’s Hero Rating is permanently increased by ONE. If the roll is greater than the listed number the monster eats the leader. The leader is removed from play and the monster remains in the hex. In this case, either player can move a leader into the hex on later player-turns and try diplomacy. Whenever diplomacy fails, the leader must engage in Heroic Combat.
18.151) If more than one friendly leader occupies a monster’s hex, and diplomacy fails, the player must choose ONE to engage in Heroic Combat. If this leader dies, the next leader must also engage in Heroic Combat. This continues until the monster is killed or all friendly leaders in the hex are dead.
18.16) Duels Between Leaders (Optional)
After movement, but before casting battle-related magic or resolving combat between stacks, the phasing player may challenge opposing leaders to a Duel. Duels may occur only in a hex where a combat situation is possible between opposing stacks. The phasing player names his leader offering the challenge. If an enemy leader is present, the opposing player must immediately accept or decline the challenge (If an enemy leader is not present, the challenge has no effect). If the challenge is declined, the declining leader(s) are spurned by their troops and may not modify the subsequent combat resolution die roll with their Hero Ratings. If the phasing player offers no challenge, the right to do so passes immediately to the defending player. However, no more than one Duel may be fought per hex per turn.
18.161) A Duel may be fought either by arms or by magic; the challenged player chooses the means of combat. To conduct a duel, each player rolls a die. If the result is equal to or less than the appropriate rating (Hero or Magic) of that leader, a blow has been struck. If both players fail their die roll, or if both are successful, there is no effect. They may then either fight another round, or end the Duel by mutual consent. If ended by mutual consent play proceeds normally, taking into account any temporary damage received by either leader.
18.162) If one leader makes his roll and the other misses, the loser must take a blow. A blow reduces his appropriate rating (Hero or Magic) by one (1). If the relevant rating is reduced to “0” by the blow, the affected leader dies. A leader who is struck may yield in that or a later round (unless killed by the blow). A leader who yields may not use his Hero/Magic nor Magic-casting abilities, nor any Magical Device he holds, for the remainder of the Combat Phase. Other leaders of the side which yields are not affected in any manner.
18.163) Using Magic in a Duel is not the same as casting a spell. While being struck is a Magical combat reduces a leader’s Magic Rating, merely choosing to duel by Magic does not.
18.164) There is no limit to the number of rounds that may be fought in a Duel. It ends by mutual consent, by yielding, or by the death of one of the duelists. At the end of the game-turn, all damage from a Duel is removed from the leaders of both players.
18.165) Because they do not normally fear death, the leaders Padrech dar Choim and Tol Morn may not issue a challenge, unless the enemy stack contains the Sword Loslom or the Sword Famir. If either leader is slain by a foe using one of these swords in a Duel, he is permanently removed from play.
18.2) Monsters
18.21) Monsters do not suffer from attrition and may move as leaders do. If a monster enters an inactive Kingdom, the Kingdom is activated as if an enemy unit had entered it. If a leader gains control of a monster in an inactive Kingdom, the Kingdom is activated under the control of the opposing player.
18.22) The first number printed on a monster’s counter is its Combat Strength. Monsters do not have hero ratings. They are treated as units in combat. If a monster is eliminated in combat, it is removed from play. Monsters cannot be affected by spells of any kind. The controller of a monster may only eliminate it if all other friendly units in the hex have been eliminated.
18.23) The Dragon Sirax has a Fire Rune and Magical Strength. It can cast Fire spells as if it were a Fire Rune Leader.
18.24) Ssstoth can only enter all-sea, coastal and river hexes. It can never cross an all-land hexside. It moves as a naval unit, without attrition, in areas where it can move.
18.3) The Sword Famir
When this sword is revealed, the leader who finds it must pick it up. He cannot transfer it to any other leader or unit. It may only be transferred if the discovering leader is killed.
18.31) In the friendly Movement Segment the owning player must roll a die for the leader with Famir. If the roll is less than or equal to his unmodified hero rating, he moves normally. If it is greater, he is moved to Sssthoth’s hex, if he has been revealed, or to a magic hex containing an unrevealed counter.
18.32) If Ssstoth is an ally of the enemy, the leader must engage in a Heroic Combat during the friendly Diplomacy Resolution Segment. While waiting to do so he may not use magic, add anything to normal combat and be affected by any combat result, except to follow Ssstoth if Ssstoth is forced to retreat. If the leader kills Ssstoth, and the hex is occupied by enemy units, he rolls immediately to determine if he is killed by those units.
18.33) If Ssstoth is the owning player’s ally the leader with Famir must still attack, as above. If Ssstoth kills him it becomes neutral. Both sides may attempt to ally with it in future Diplomacy Resolution Segments.
18.34) If Ssstoth is neither player’s ally the leader with Famir must engage it in Heroic Combat in the next Diplomacy Resolution Segment.
18.35) If Ssstoth has yet to be revealed, the leader moves to an unrevealed Magic Hex counter. If it is Ssstoth, he attacks. If it is anything else, act as specified in 18.1.
18.36) At the start of each friendly Movement Segment the owning player must roll, as specified in 18.31). If the leader is killed in his quest for Ssstoth the Sword Famir stays in the hex where he died. If that hex is occupied by any leader, friend or foe, he must pick up the sword and continue the quest. If more than one leader is present, the last sword owner determines who picks it up. If only units are present, it stays in the hex until a leader enters it.
NOTE – If Ssstoth lives, leaders must pick up the sword. If he is dead, picking it up is optional.
19) Mercenaries
There are six groups of mercenaries, Lord Montoy, Cos dol Cos, Saar, Fernan Conniver, the Hounds and Silwer Flagriel. Each group consists of a leader with one or more combat units (except for Silwer Flagriel who has no units).
19.1) Diplomacy with Mercenaries
Mercenary leaders and units begin in the Mercenary Holding Box. During the Movement Segment of his player-turn the phasing player may move any of his leaders to this box (take the leader off the map and place him in the box). He may be returned to the game-map in the player’s next Movement segment. The leader must re-enter the map at the hex where he left it, at the hex where the mercenary he recruited enters, or at a friendly-controlled city of his home Kingdom. The Necromancer, Tol Morn and Mezal may return to any friendly city in a country currently assigned to the Necromancer’s side.
19.11) In the phasing player’s Diplomacy Phase each friendly leader in the Mercenary Holding Box can conduct diplomacy with one mercenary leader. Diplomacy is conducted as specified for neutral kingdoms, using the determined roll modifier, two dice, etc. If the net result is 10 or higher, the mercenaries come under the control of the phasing player.
19.12) When a mercenary group comes under a player’s control he immediately places its leader and units in any city hex under his control. (If he has no city hex, place the mercenaries in, or adjacent to, a hex containing the phasing player’s units.)
19.13) When a player recruits a mercenary group he must assign control of them to one of his kingdoms or the Necromancer. Hexes controlled by the mercenary units are considered to be controlled by their assigned controller.
19.2) Raising Mercenaries
Eliminated mercenary units are placed in the controlling player’s recruitment pool. The cost to recruit them must be paid by one of the controlling player’s kingdoms. They may only be recruited if their leader is still alive and is occupying a city hex during the Recruitment Phase. They are placed with that leader when they are recruited. In all other cases, obey the normal rules for recruitment. Units belonging to a dead leader may not be recruited unless he is raised from the dead.
19.3) Cos dol Cos
Cos dol Cos and the Sons of the Morning are immune to all forms of magic. No Magic of any kind can affect them.
20) Supply (Optional)
20.1) Combat units in an enemy Kingdom may have to forage to avoid attrition. If a unit in an enemy Kingdom moves during the friendly Movement Phase, it need not forage (it merely accumulates normal attrition). However, if a stack or unit does not move, it must forage locally.
20.11) Units located in a home, allied, or conquered Kingdom need not forage. Ships do not need to forage unless occupying a port of an unconquered enemy Kingdom.
20.2) In the “Stacking Judgment Segment”, an unmoved stack which requires forage accrues “Attrition Points” (AP) as follows:
- Each Infantry Unit: 1 AP
- Each Cavalry Unit: 2 AP
- Each Naval Unit: 2 AP
- Each Rocrider Unit: 2 AP
20.3) A foraging stack acquires forage equal to the Tax Value of the hex it occupies, plus the Tax Value of all hexes into which its uncontested zone of control extends. From the stack’s AP total, subtract this forage value. Any surplus is the Attrition Point total which remains to be cross-indexed on the Attrition Table.
20.4) A stack may supplement forage with external supply. If the phasing player is able to show a path 20 Attrition Points or less to a friendly city (in a friendly or conquered Kingdom) from the stack, the player may spend Tax points from his treasury to eliminate any surplus AP accrued by the foraging stack. One AP is eliminated for every two treasury points spent (by the Kingdom to which supply is traced). If the player wishes to originate supply from a Kingdom which has insufficient Tax Points in reserve, any other friendly Kingdom(s) may give gold to the supplying Kingdom (as per rule 7.22). If the supply source is a conquered Kingdom, the Kingdom to which it is assigned must pay for the supply.
20.5) External supply may travel in any combination of sea and land hexes. It accrues Attrition Points like a naval unit or an infantry unit, as required. The supply route must avoid enemy zones of control. Enemy land zones of control block supply traveling by land only, and naval zones of control block supply traveling by water only. Both naval and land units block supply passing through a river or port hex. A friendly unit in a hex negates the enemy zone of control for supply purposes through that hex.
20.6) External supply traveling by sea must pass through a port in a friendly or conquered Kingdom. Likewise, it may reach land via a similar port, or one physically occupied by friendly combat units.
20.7) External supply may not originate in a conquered Kingdom assigned to the Necromancer after he has used it for vampire recruitment. If the Kingdom is reconquered, or given to another Kingdom with a treasury, it may again be used as an external supply source.
21) Regional Variants (Optional)
21.1) Politics, economic cycles, personal idiosyncrasies of rulers, natural disaster and other factors often have a bearing on military affairs and foreign alliances. The following rules will add an element of unpredictability and individuality to the Kingdoms of Loslon.
21.2) Make twenty (20) counters and number them sequentially from “1” to “20”. Place these in a cup. This is the “Regional Variant Randomizer”.
21.21) Each chit represents one of 20 variations described below. When assigned to a Kingdom at the start of the game, the Regional Variant remains in effect for the duration of the game – or until its conditions are met. The vampires, Zolahaureslor, monsters and mercenaries do not receive a Regional Variant.
21.22) Usually the Regional Variant paragraphs below are self-explanatory. Often they provide modifications for the Diplomatic dice roll. Remember, these modifiers are cumulative with all other modifiers assigned each Kingdom on the Diplomacy Table.
21.3) Regional Variants
- Successive years of crop failure has reduced this Kingdom to famine and poverty. Reduce the Taxation Value by half (round up). If crossed by a stack, add +1 to the Attrition die roll.
- A recent plague has devastated this Kingdom. Any unit not deployed at the start must be considered a casualty of it, and may not enter play as a “living” unit. However, due to the great rate of death among men in their prime, each city has a well-stocked cemetery. If the city is friendly, a Death Rune spellcaster can raise one land unit in each city by means of the Raise Undead spell; randomly pick these Undead units from the Kingdom’s permanently eliminated stock. Additionally, the disruption has caused a 1/3 reduction (round up) of the Kingdom’s Taxation Value. Due to the population reduction, the Kingdom’s Vampire Recruitment value is also reduced by one-third.
- This Kingdom has lately lost a war with Zolahaureslor and now groans under a crushing tribute. When activated, one-third (round down) of its Taxation value is lost as a tribute to Zolahaureslor (see 7.22), provided it activates to the Kingdoms side. If allied with the Necromancer, no transfer of Taxation is made to Zolahaureslor. Diplomacy Modifiers: Necromancer +3; Kingdoms (if Zolahaureslor is not active) 0 or (if Zolahaureslor is active) -3.
- This Kingdom’s enterprising merchants have created an economic boom based on foreign trade. For each fleet unit the Kingdom has in play currently, its Taxation Value is increased by five gold. If it is a Kingdom without a naval unit in its counter mix, simply increase its Taxation Value by 10 gold until conquered. The gift of a fleet (see 11.413) modifies the Kingdom’s Diplomacy dice roll by +2.
- This Kingdom had modernized its armed forces extensively. If they should make up half or more of a force engaged in battle or siege, the combat die result is modified by +1 in their favor.
- The ruler of this Kingdom is pathologically afraid of old age and death. He will be grateful to any player who uses a Counter Death spell to rejuvenate him or a special Raise Undead spell to make him a vampire. The first player to cast the appropriate spell successfully will gain a permanent +4 Diplomacy dice roll modifier; the other a permanent -2 modifier.
- This is one of the most corrupt governments on Loslon. Its armed forces are poorly equipped and led. If combat units of this Kingdom make up half or more of a force engaged in battle or siege, the combat die result is modified by -1 in their favor. Further, stacks containing any units of this Kingdom have the Attrition die roll modified by +1.
| Additional die roll | 1 | 2 | 3 | 4 | 5 | 6 |
|---|---|---|---|---|---|---|
| Kingdoms | -2 | -1 | 0 | 0 | +1 | +2 |
| Necromancer | +2 | +1 | 0 | 0 | -1 | -2 |
- This Kingdom’s ruler is an avid collector of magical devices. Double the normal Diplomacy dice roll modification for any sword given him or Magical Device offered him.
- A recent plebeian revolt has culminated in the massacre of the ruling class. All the leader units of this Kingdom begin the game killed. The rebels are at odds with the aristocratic nations that surround it and are eager to gain a powerful ally, even if he is the notorious Necromancer. Diplomacy Modifications: Necromancer +2; Kingdoms 2.
- A palace revolution has driven one of the Kingdom’s leaders into exile. Place the leader with the lowest Hero Rating from this Kingdom next to the inactive mercenaries. He is considered a mercenary character with a Diplomacy dice roll modification of +2 for any player who is currently at war with his home country. The neutral Kingdom itself may ally normally.
- The ruler of this Kingdom is impressed by feats of arms. For each Kingdom a player controls by conquest or reconquest, the Diplomacy dice roll is modified by +2. If the player has no current conquest or reconquest to his credit, he receives a modifier of -1 if conducting Diplomacy here.
- This Kingdom is ruled by a timid tyrant. If the Kingdom is ever reduced to having only one unconquered city, the ruler will offer to join the invader as a full ally. This offer must be immediately rejected or accepted by the invading player. The offer may be made only once to each player each game. Diplomacy Modifiers: Necromancer +1; Kingdoms -1.
- The nervous ruler of this Kingdom is susceptible to Intimidation. A Terror Rune spellcaster may deduct one (-1) from his Intimidation die roll. If the spell is actually cast, it modifies Diplomacy by +3.
- A curse has been placed upon this Kingdom’s most powerful spellcaster to rob him of his power. An ambassador with the same rune may cast a counter-spell to end the curse. This is considered a Diplomatic spell. If successful, a permanent Diplomacy dice roll modifier of +2 is gained by the player; his opponent receives a -2 permanent modifier. If the Kingdom should join an alliance before the leader is cured of his curse, he will wander off in lonely exile. Place him with the mercenaries; a successful cure will bring him in as an ally.
- One leader of this Kingdom is a renowned champion of Heroic Combat. The leader with the greatest Hero Rating has that rating automatically increased by one for the purposes of Heroic Duels only.
- This Kingdom has the most sophisticated educational system for the training of sorcerers in all Loslon. All spellcasters of this nationality have their Magic Strength increased by one.
21.4) More Regional Variants (FAN-MADE)
-
This Kingdom has been conducting extensive diplomatic talks with another Kingdom and has established an embassy. The leader with the lowest Hero Rating and any magic devices they are carrying are moved to the capital of another randomly determined Kingdom, excluding Zolahaureslor. If their home Kingdom is activated, the leader immediately activates under that player’s control as well. If the Kingdom in which they are stationed is activated while their home Kingdom remains unactivated, the leader is immediately returned to their standard starting position.
-
The fearsome Behemoth has awoken and attacked this Kingdom, taking the capital as its lair. All units and leaders in the city are moved to the non-capital city with the highest City Value in the Kingdom (this being Pletrech for Tal Pletor and Tar Taloy for Loymarech). This city is counted as the capital of the Kingdom for the purpose of Diplomacy while the Behemoth lives and/or the Kingdom remains inactive. If the leader carries any magic devices, they must make a special escape roll as described in 9.27). If successful, the leader and the device are moved to the appropriate city. If failed, the leader manages to escape regardless, but the device is lost and must remain in the city hex with the monster until recovered. In the case of the Torch of Liberty, it will not move to a new owner until after it is recovered.
While the Behemoth remains in the capital, it is considered occupied by an enemy force and cannot be used for recruitment and neither it, nor any of its adjacent hexes may be counted for the purposes of Taxation. The Kingdom may be conquered and reconquered without having to control the capital so long as the monster remains alive and unallied.
Diplomacy may be attempted with the Behemoth following the normal rules in 18.13). The modifiers for the Diplomacy attempt are +1 for the Necromancer and -3 for the Kingdoms. Diplomacy may not be attempted with the monster if the negotiating player is allied with the Kingdom in which it resides. It may be engaged in Heroic Combat by either player. Any player who’s leader kills the Behemoth in Heroic Combat gains a +4 modifier on Diplomacy rolls with this Kingdom.
The Behemoth should be represented by a special monster counter with a Combat Strength of 4, Magic Strength of 3 and access to the Earth Rune. If allied with a player, it cannot enter all-sea hexes and cannot pass through all-sea hexsides.
-
The population of this Kingdom has been gripped with a holy religious fervor. They seek absolution through the expulsion of the evils residing among themselves and others. The Kingdom cannot become an ally of the Necromancer and its Diplomacy modifier towards the Kingdoms player gains a -1 modifier. In addition, this Kingdom’s negligence towards its markets and institutions has caused it to sink into a depression, reducing its Taxation Value (but not Vampire Recruitment) by one-quarter. However, this Kingdom will automatically activate and join the Kingdoms player as an ally on game turn 5 in the same manner as Zolahaureslor on game turn 10. If a leader from this Kingdom is used to conduct Diplomacy with Silwer Flagriel, the player gains a +5 modifier to the attempt.
-
The Necromancer has sent an agent to this Kingdom to bring false council and weaken it with subtle magics. The leader with the highest Hero Rating has their Rating halved, rounding down. The Necromancer will gain a modifier of +4 to Diplomacy rolls towards this Kingdom and the Kingdoms player will have a -6 modifier. If the Kingdoms player sends a leader with access to the Life or Serenity Rune, they may attempt to cast a special counter-spell as a Diplomatic spell. If successful, the affected leader’s senses are restored and his Hero Rating returns to normal. From then on, the Necromancer will have a modifier of -6 and the Kingdoms player will have a modifier of +6 on Diplomacy rolls with this Kingdom. If the Hidden Regional Variants rule (see below) is being used, this Variant is still revealed to the Necromancer and is not hidden.
-
The wise and powerful in what would eventually become this Kingdom feared the return of the Great Necromancer and took steps to ensure the defense of their home. A great work was enacted and a web of Life magic was enshrined around the capital city which lasts to this day. Any Greater Vampire units that are lost as casualties in the hex containing this Kingdom’s capital city are permanently eliminated, just as if a leader wielding a Living Sword had been present at the battle. Additionally, any leader casting Death magic in this hex counts a roll of 1 to cast the spell as a failure. A Death Rune leader with a Magic Strength of at least 5 (combined from their own Magic Strength and any bonuses granted by Magic Devices and Rune Symbols) can overwhelm and permanently destroy this ward with a successful Counter Life spell cast during the Movement or Combat phase, but only if the spell is successfully cast with a die roll of 5 or 6. Any lower result, even if successful, will have no effect. For those with the power to see, the mighty ward is an obvious thing, so if the Hidden Regional Variants rule (see below) is being used, this Variant is still revealed to the Necromancer and is not hidden.
21.5) Hidden Regional Variants (FAN-MADE)
In this variant setup all of the Regional Variant chits are drawn and recorded by the Kingdoms player and are not revealed to the Necromancer. The variant that a Kingdom is operating under is revealed when it is activated or when the Necromancer attempts to conduct Diplomacy with it. Any variants which would cause units or leaders to be moved or removed from the board or any other change to the state of the game board should be recorded by the Kingdoms player, but are not performed until the variant is revealed.
22) Victory Conditions
22.1) If the Necromancer is permanently killed the Kingdoms player wins a decisive victory.
22.2) If Zolahaureslor is conquered by the Necromancer, the Necromancer player wins a decisive victory.
22.3) If neither condition above occurs, players determine the winner after fourteen game-turns have been completed. To do so, calculate the total production value of hexes controlled by the Necromancer (By the Necromancer alone excluding areas controlled by his allies). When this is done, consult the table below to determine who won:
| Total Production | Victory Level |
|---|---|
| 0 – 50 | Decisive Kingdoms Victory |
| 51 – 80 | Substantive Kingdoms Victory |
| 81 – 115 | Marginal Kingdoms Victory |
| 116 – 135 | Draw |
| 136 – 160 | Marginal Necromancer Victory |
| 161 – 190 | Substantive Necromancer Victory |
| 191 + up | Decisive Necromancer Victory |
Designer’s Notes
The most embarrassing question a creative person can be asked is “Where do you get your ideas?” The question is fundamentally unanswerable. My favorite response is “From the Muses.” Alas, since game design did not exist in ancient Greece, it has no Muse.
In the case of DARK EMPEROR, many of the basic concepts were inspired by the game JIHAD (tm), written by Steve Newberg and published by Simulations Canada. From this start I created my own game, set in a fantasy environment haunted by a dread and evil necromancer who can raise slain legions to pursue his own ends.
After forming the basic concept, the next step was to create a believable fantasy world. One of the things that I wanted to do was to provide a possible and imaginative world geography. Many fantasy worlds are built with unimaginative and sometimes impossible geographies. This may seem a minor point but, as a geologist, it is a sore point with me. I hit upon the idea of placing the game in a world of impact-crater geography where the plate tectonics that has produced the geography of our own world does not operate. Impact craters occur more or less randomly, since an impacting body can strike from any direction. In addition, all but the smallest impact craters are essentially circular even when the impact body strikes at a large angle from the vertical. I proceeded, therefore, to produce a set of tables to generate random locations and sizes for impact craters and generated an impact crater geography on a hex grid map with a compass. The result is the world of Loslon.
With the world complete, it became necessary to create a history and cultures to fill it. This involved staring into space, making notes and drawing and re-drawing the map. Much of the result is included in the history although, for the sake of brevity, much has been omitted.
The last step was to develop the elements of a believable language, in order to produce consistent names. Another peeve I have with much fantasy and science fiction is inconsistent naming. Writers seem to delight in inventing outlandish names with no thought to the fact that a culture produces those names and certain rules must apply to them. (In English, for example, masculine names rarely end in “a” because much of our tongue derives from Latin and “a” is a feminine ending in that tongue.)
To illustrate how the language works, here are a few root words in Ahaureslorm (the High Imperial Tongue). All of the modern languages in Loslon, except Stavror and Kelaron Oiret, derive from this tongue.
| Word | Root Meaning | Word | Root Meaning |
|---|---|---|---|
| ahau | high | res | state |
| lor | king | reslor | kingdom or capital |
| oi | low | oiret* | low-state, republic |
| -on | masculine ending | -om | masculine ending |
| zol | old | lam | west |
| loy | east | sier | mountain |
| mar |
*Kelaron corruption of oires. **especially naval fort or military port.
All of this was done before a single game was played. Thereafter came the unglamorous work of development, the kind of work that is not noticed unless it hasn’t been done. Repeated playtesting, rewrites of the rules, elimination of needless or unworkable rules, introduction of new rules, inserts to cover the interaction of systems that arose during play (but were not previously considered), the introduction of graphic systems to ease play, it all comes under the aegis of development. What most people who do not design games fail to realize is that it is this work that constitutes the greater part of the time devoted to the production of a game. Game design, though it is the more creative and exciting part of the process, is a breeze in comparison.
Not, I suppose, that DARK EMPEROR may have a few rough edges, a few problems that might have been solved with more development. Part of the professionalism also consists of knowing when to leave well enough alone. A designer can, if he so desires, polish his work forever but, since the justification for his effort is to get the game in the hands of the public, this is pointless. Design and development are subject to the law of diminishing returns. After the game is played the first few times, the entire rulebook will have to be rewritten. The twentieth playtesting may result in a minor change in the wording of one rule. A designer must know when to leave well enough alone.
Well, enough…
Appendix I – Counter Color Key
| Nation/Force | Front Square | Front Circle |
|---|---|---|
| Necromancer | Grey | None |
| Battlefield | Grey | White |
| Tal Pletor | Grey | Yellow |
| Magic Hex | Black | None |
| Zolahaureslor | Purple | None |
| Stavror | Green | Orange |
| The Scythe | Green | White |
| Starkeep | Red | Green |
| Kelaron Oiret |
Appendix II – Leader Index
| Leader | Nation/Force | Leader | Nation/Force |
|---|---|---|---|
| Padrech dar Choim | Necromancer | Padron Plety’y | Kelaron Oiret |
| Tol Morn | Necromancer | Grip Nud | Kelaron Oiret |
| Mezal | Necromancer | Zelara do Fornoy | Kelaron Oiret |
| Stommarren | Tal Pletor | Ferlor | Ferlarie |
| Stav | Stavror | Silfaren | Ahautsieron |
| Skydor | The Scythe | Narmoren | Ahautsieron |
Appendix III – Attrition Table
If the roll is the given number or higher, the stack suffers attrition loss. If the number found by cross-indexing is followed by a number in parentheses, immediately remove that number of units from the stack. The letter “N” means that no attrition is possible; the word “All” means that every combat unit that was part of that stack is eliminated. The value “1/2” means that one-half of the counters (round up) are eliminated. Note that if the modified Attrition die result is ever less than “1”, no counters are lost.
| Attrition Points | 1 | 2-4 | 5-7 | 8-10 | 11-12 | 13-14 | 15-17 | 18+ |
|---|---|---|---|---|---|---|---|---|
| 1-3 | N | 6 (1) | 5 (1) | 5 (1) | 4 (1) | 3 (2) | 2 (2) | 1 (2) |
| 4-6 | N | 5 (1) | 4 (1) | 4 (1) | 3 (1) | 2 (2) | 2 (4) | 1 (5) |
| 7-12 | 6 (1) | 4 (1) | 4 (1) |
Modifiers (Optional): The Attrition die roll for land movement may be modified by the following:
- -2 = if all combat units in the moving stack belong to one Kingdom and the entire movement is confined to that Kingdom
- -1 = if all movement of the stack is confined to active, unconquered friendly Kingdoms
- -1 = if all movement of the stack is confined to river hexes (note: undead and vampire units do not benefit from this modifier)
- -1 = if the stack contains only undead units
- +1 = if the moving stack enters any hex of a Kingdom where looting has been conducted
- +1 = if the moving stack enters any hex of a conquered Kingdom assigned to the Necromancer
- +1 = if the stack ends movement in a mountain hex
Appendix IV – Important Tables and Charts
Terrain Effects Chart
Blank cells are blank on the printed chart.
| Terrain | Attrition Cost: Inf | Cav | Air | Siege | Nav | Production Value | Stacking Limit | Combat Effect |
|---|---|---|---|---|---|---|---|---|
| Settled | 2 | 1 | 1 | 2 | * | 1 | 4 | None |
| Mountain | 3 | 4 | 2 | 4 | * | 0 | 2 | (A) |
| All-Sea | * | * | 1 |
- * The unit may not move in this type of terrain.
- (A) – A -2 combat modifier applies against the attacker.
- (B) – If enemy naval units are present, friendly units may enter but not pass through unless they are accompanied by friendly naval units.
- (C) – This production is in addition to any other production value for the hex, i.e. settled river has a production value of 2.
- (D) – City Value, a number printed on the game-map for each city.
- (E) – Undead units can be raised in these hexes.
- (F) – Impassable to Death Rune and Terror Rune leaders, vampires and undead units.
- (G) – Leaders must immediately stop movement if an unrevealed magic hex marker is still in the hex.
- (H) – The Magic Strength of a leader with the same rune type, who begins a game-turn in a Rune hex, is increased by one for one game-turn.
Diplomacy Table
(Roll of 10 or higher yields an alliance)
| Target | Necromancer | Kingdoms |
|---|---|---|
| Ahautsieron | -2 | +2 |
| Ferlarie | -3 | +3 |
| Kelaron Oiret | -3 | +4 |
| Lammarech | -2 | +2 |
| Loymarech | -2 | +2 |
| The Scythe | -2 | +2 |
| Starkeep | -4 | +8 |
| Stavror | -1 | +1 |
| Tal Pletor | +1 |
Recruitment Table
| Unit Type | Cost |
|---|---|
| Infantry | 10 |
| Cavalry | 15 |
| Naval | 15 |
| Siege Train | 20 |
| Rocrider | 10 |
Kelaron Oiret Election Table
| Roll | New Doge | Elected Party |
|---|---|---|
| 1+2 | Padron Plety’y | Grand Republicans |
| 3+4 | Grip Nud | Low Republicans |
| 5+6 | Zelara do Fornoy | Freeman’s Party |
Combat Results Table
| Roll | Attacker | Defender |
|---|---|---|
| -4 or less | 6R | - |
| -3 | 5R | - |
| -2 | 4R | - |
| -1 | 3R | - |
| 0 | 3R | - |
| 1 | 2R | - |
| 2 | 2R | - |
| 3 | 2R | 2 |
| 4 | 1R | 1 |
Combat Modifiers
- +1 per attacking Hero’s Hero Rating
- -1 per defending Hero’s Hero Rating
- +1 per level of attacker’s combat ratio advantage, i.e. 3-1 is a +2 roll advantage
- -1 per level of defender’s combat ratio advantage, i.e. 1-4 is -3 on the attacker’s roll
- -2 if fighting in a mountain hex
Heroic Combat Table
| Hero Rating | Slug | Behemoth | Sirax | Ssstoth |
|---|---|---|---|---|
| 1 | 1 | 1 | 1 | 2 |
| 2 | 1 | 1 | 2 | 2 |
| 3 | 2 | 2 | 3 | 3 |
| 4 | 2 | 3 | 3 | 3 |
| 5 | 3 | 3 | 4 | 4 |
| 6 + up |