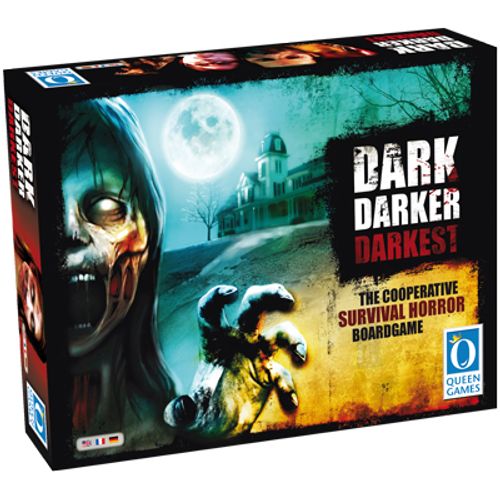
Dark Darker Darkest
Dark Darker Darkest Rulebook
Table of Contents
Table of Contents
Components
- 5 Survivor boards
- 5 Survivor miniatures
- 5 Entrap tokens
- 40 Ammo cubes
- 1 Multitracker board
- 4 Survivor dice
- 20 Skill tokens
- 35 Marker cubes (7 in each of the 5 colors)
- 48 Equipment cards
- 6 Creature dice
- 1 Security board
- 21 Code tokens
- 1 Terror die
- 23 Spawn tokens
- D6 and D4 dice
- 50 Cubes (gray)
- 7 Starting equipment cards
- 32 Zombie miniatures
- 2 Nemesis miniatures
- 11 Virus tokens
- 3 Creature and 2 Nemesis boards
- 1 Antidote token
- 41 Code chips
- 27 Room tiles
- 8 Camera tokens
- 1 Fire token
- 20 Burn markers
An Overview of the Game
Dark, Darker, Darkest is a cooperative survival-horror game. A team of 2 to 5 survivors must explore the heavily guarded house of Dr. Mortimer, find and unlock his laboratory in time, and get hold of the antidote. This is the only way to stop the zombie apocalypse.
To override the security system, the team must search the house for equipment and use it to unlock doors. The codes collected from the doors will allow the team to eventually unlock the lab … only to find that the raging hordes of zombies, rabid creatures and out of control fires that have been encountered so far are about to be joined by a nemesis who must be destroyed in a dramatic final showdown.
Each round is played over two phases. In the upkeep phase, new zombies enter play, fire possibly breaks out or spreads, and darkness (i.e. the game clock) may advance. In the action phase that follows, each group of heroes who share a room form a temporary team. In turn, each team performs all of its actions (in whatever order they like), and each team's turn is followed by nearby zombies and creatures closing in, as well as fire spreading. The round ends when all teams have completed their turns. Can you fight the darkness?
Set-up
Building the house
The game board is made from 20 tiles in a 4 x 5 grid. The room tiles are marked on their back side with symbols listed below, indicating the section of the house for which they can be used. First, select the four corner rooms and place them at the corners. Place the entrance hall at the center space of the bottom edge, and then choose and place nine outer rooms along the remaining edge spaces (i.e. between the corner rooms). Ensure that the windows of the outer rooms face outside. Fill the center of the house with six inner rooms.
When laying out the game board, no passage or doorway may be blocked by the wall of an adjoining room. Turn the tiles or exchange them, if necessary, until this requirement is met.
You may choose a set of tiles at random to create the house, or you may pick out a specific set of tiles. You decide how deadly the house will be to explore.
Room types:
- Laboratory – This key location needs to be unlocked by the team in order to get hold of the antidote and win the game.
- Corners – These rooms make up the 4 corners of the house.
- Outer rooms – These form the border of the house (except for the corners). When laid on the table, the windows should point outward.
- Inner rooms – These make up the heart of the house. There are always 6 in play.
- Entrance hall – This is the room were the team enters Mortimer's house.
Several rooms show a camera icon. Place a camera token inside these rooms directly on each icon and orientate each camera token in a way that it can see into as many rooms as possible. A camera sees only orthogonally and its view is blocked by walls and locked doors (that is, a door with a code chip positioned on the lock symbol). A camera always covers the room it is positioned in. In case there are two directions allowing a camera to see into the same maximum number of rooms, players may choose the direction that the camera faces.
In this example, the camera can see the tile it is in, and all the tiles to its left, until its view is blocked by the wall of the leftmost tile.
Terminology
Each room tile has two sides: a normal side depicting the room and its icon(s), and a destroyed side depicting a sea of flames. During the game, rooms can be destroyed by fires. As a result, the tile is turned to its destroyed side and stays this way for the remainder of the game. Such a room is referred to as a "destroyed room".
A "locked room" is a room with a code chip positioned on the lock symbol in each doorway of the room. A room with two doorways and only one code chip is not locked. Place code chips on the board face-down, that is, showing the number that indicates whether the chip has 2 or 3 icons.
Preparing the rest of the game
Place the virus tokens in a pile.
Remove the starting equipment card for each character, then shuffle the remaining equipment cards and place them as a face-down deck near the game board.
Shuffle the zombie spawn tokens face-down (zombie face visible), then stack them next to the game board.
Shuffle the creature boards and place them face-down in a pile next to the board.
Setting the security board
Set up the Security board, which has 3 difficulty modes, as listed below:
1) Dark mode
This mode is ideal for rookie players as it ensures that a perfect match exists amongst the code chips for the code sequence needed to unlock Mortimer's lab. Use the 7 code side of the security panel for this mode.
Draw 3 code chips: one 3-icon chip and two 2-icon chips. The 7 code icons found on the back of the chips will be used to form the security sequence for the lab. For each icon found on these code chips, find one matching code token. Then place these 7 code tokens on the 7 slots on the top of the security board, one per slot (the order doesn't matter).
Take a number of code chips equal to the number of lock symbols found on the board, less 3. Add the 3 code chips you used to form the sequence and mix the pool of chips face down (numbers showing) and place the chips on the lock symbols until every symbol is covered with a chip. The corner rooms should always have 3-icon chips (showing a "3").
2) Darker mode
Players who want a more challenging game can use the 8 code side of the security board. Pick the 8th code at random from the pool of code tokens.
3) Darkest mode
If players feel confident playing with uncertainty, they can opt for this set-up. There's no guarantee that the code will be solvable with a perfectly matching set of code chips found in the house. Instead of forming the code based on the information found on 3 code chips picked beforehand, players simply form a random code sequence by blindly picking code tokens and placing them on the Security board. For an optimal code, make sure no color appears in the sequence more than twice.
Note: In a 4- or 5-player game, make sure the number of 3-icon and 2-icon code chips is nearly identical. In a 2- or 3-player game, having a few more 2-icon chips than 3-icon code chips is advisable.
The Survivors
Each player chooses one survivor and takes that survivor board, the corresponding survivor figure and seven marker cubes of his color. Depending on the number of players, use the appropriate side of the survivor board for 2 or 3 players (4 action points on the energy track) or for 4 or 5 players (3 action points on the energy track).
Each player picks his specified weapon (as listed in the icon guide) from the starting equipment cards and places it to the right of his survivor board. Next, he takes the individual skill tokens of his survivor, matching those found on the survivor board, and placing them beside his survivor board.
Each player places one of his cubes on the leftmost space of the energy track. He places a second cube on space 0 of the experience track.
Each player puts another one of their cubes on the first space of the team section of the multitracker (see page 5). Additionally, the players place three (in a 4- or 5-player game) or four (in a 2- or 3-player game) cubes in the left slot of the action box of his survivor board.
Start the game with all player figures on the entrance hall tile.
The Survivor board in detail
Action box – These two slots at the top of the survivor board help players to track how many actions they have spent during a round. At the start of each round, a player positions a number of action point cubes in his player color equal to his current energy level in the left slot. With each action performed he moves the appropriate number of cubes to the right slot. When all the cubes are positioned in the right slot, the character cannot perform any more actions during the current round.
Energy Track – This track shows how many action points (AP) the character can spend each round.
Every time the character is wounded, move the marker 1 space further towards the skull. When wounds cause the marker to enter the green zone, the character will start the next round with only 3 AP, and so on.
When the marker reaches the skull, your character is dead.
Entrap rate icon – This icon shows the character's entrap rate. It represents the number of dice a character will contribute to a dice roll during attempts to free himself or a team member from entrapment (more on entrapment on pages 13 and 19).
Experience and skills track – Throughout the game, use the marker to keep track of Experience points (XP) your character earns for completing certain tasks. The character uses these points to activate skills that are listed at the bottom of the survivor board. These vary in cost, getting more powerful and expensive from left to right. When a player spends XP to activate a skill, he takes the appropriate skill token and places it on top of the matching symbol to mark it as activated. Once 10 Experience points are gained, the character cannot gain any additional points and must spend points on skills before gaining new points. Using an active skill does not cost any AP. These gained skills are considered to be permanent and the character can use these skills when performing actions. (See also 'Survivors' on page 16.)
This symbol represents the starting skill of the character. Unlike skills gained through the Experience points, it is active from the start and can never be lost.
The Multitracker
This board forms the heart of the game system, pushing the adventure forward and tracking all the various key elements ranging from the passing of time to the formation of small groups of characters within certain areas of the house. It also serves as a handy flowchart for a round of the game.
Team section – The top 5 boxes are used to show which characters are grouped together on the board each round. During game rounds, players who have finished their actions move their cubes down to the lower box to show that they are done. During the first turn of the game all the player cubes should be positioned in the leftmost box on the top row, since all characters start the game in the same location: the entrance hall.
Event track – Place a gray cube as the event marker at the bottom position of the event track (clock symbol). The marker moves once each upkeep phase to the next spot in the cycle, triggering that spot's event.
Darkness track – Place a gray cube as the darkness marker on the first spot of the darkness track. During the game, Darkness advances and the marker moves along the track.
If the team fails to unlock the lab by the end of the round in which the marker reaches 5, darkness falls, and the players lose the game as a team.
Playing the Game
Each game round consists of two phases: the upkeep phase comes first, followed by the action phase.
The Upkeep Phase
During the upkeep phase, perform the following steps in order (the multitracker lists them as a handy reference):
- Event resolution
- Survivors regroup
- Camera check
- Zombies spawn
- Zombification
1. Event resolution
First, move the event marker to its next position. This movement forms a cycle: If the gray marker is on the zombie space move it to the fire space; if it's on the fire space move it to the darkness grows space; if it is positioned on the darkness grows space, move it back to the zombie space, restarting the cycle. (This is what you will do on the first turn of the game.) Then, execute the event triggered by the event marker's position as follows.
Zombie spawning
Use the four-sided and the six-sided dice to determine a room in which a zombie spawn token will be placed. Roll both dice simultaneously: The 4-sided die corresponds to the rows (top row being 1, bottom row, which has the entrance hall, being 4); the 6-sided die indicates the column (1 is the leftmost column, 5 the rightmost column). Place a randomly drawn zombie spawn token face-down (zombie face visible) into the matching room.
The following situations are possible:
- If the room indicated by the roll is in line of sight (see page 6) of at least one survivor, place as many zombies into that room as indicated on the back of the token, then remove the token from the game.
- If the room indicated by the roll is not in line of sight, the spawn token stays face-down, unseen.
- If the chosen room is completely locked or destroyed, place the listed amount of zombies on the token in any non-burning room adjacent to a room holding at least one survivor, in line of sight of that survivor, then remove the token from the game. Players choose whichever eligible room they prefer. If there's no eligible room adjacent to a survivor (for example: all adjacent rooms are burning), choose any non-burning room to place the zombies.
- If the rolled die was a 6, follow the procedure outlined in point 3.
Line of sight
Line of sight determines whether a survivor can attack or see a specific element on the board. Without line of sight, interaction with elements in the house is impossible. Line of sight is crucial in combat and also determines whether a zombie spawn token must be converted to a horde or remain as a token.
To check whether line of sight is established between two elements:
- Line of sight can only exist on tiles in a straight, orthogonal line – not tiles, that are diagonally in line with one another.
- Line of sight is blocked by walls, destroyed rooms, and locked doors.
Example: Lucy (yellow) has line of sight only towards zombie spawn token 1. Token 2 is inside a locked room, so line of sight is blocked towards this token. Bruce (blue) cannot establish line of sight towards a zombie spawn token. The destroyed room blocks sight towards token 3, and token 4 is blocked by both the destroyed room and a wall. Token 1 is diagonally positioned towards Bruce so again no line of sight can be established. Leo (purple) has entered the hallway and can establish line of sight towards both token 3 and 4. He risks being surrounded by the undead.
This example shows the line of sight of a camera seeing into 4 tiles: the tile it is positioned on, the passageway on the tile to its left (the enclosed storage room is not in line of sight as it doesn't have an open door in its right hand wall), the next tile to the left, and the corner room (because it does have an open door in the camera's line of sight).
The Fire spreads
If there is fire in the house, it spreads. Determine the direction in which the fire spreads by rolling the 4-sided die and consulting the direction key on the entrance hall tile. Move the fire token from its current tile to the adjacent tile in the direction indicated. Place a burn marker on the tile the fire token lands on. The fire moves through walls and locked doors, but not into the lab, not into a destroyed room, and not outside the house. If the fire token is not able to move in the direction rolled, add a burn marker to the tile the fire token is in. A tile split into 2 separate rooms has no effect on a fire: the whole tile is considered burning, regardless of where the burn markers are positioned. When a third burn marker is added to a room, it is destroyed; remove the burn markers, turn the tile to its destroyed side, then place the fire token on this tile.
The Darkness grows
When the event marker reaches the bottom space of the track (the red clock), move the darkness marker one space to the right.
The Darkness track
This track indicates how much time remains for the heroes. When the marker reaches the final space, that signals that the game is about to end.
Outbreak of a fire – If the darkness marker lands on the space showing the fire icon and there's no fire token in the house, a fire breaks out immediately. Determine the room in which the fire starts by rolling the 4-sided and 6-sided dice. (Reroll the 6-sided die in the event of a 6.)
Darkness progressing – Before the final showdown starts, move the darkness marker forward one space each time a player is eliminated, a room is destroyed, or a code token is removed from the security panel without using a code chip.
The End – If the darkness marker reaches the final space on the darkness track, the final round starts. If the players fail to enter the lab during this round, the game ends and all players lose.
2. Survivors regroup
If needed, regroup the survivors on the team section of the multitracker to reflect the current situation in the house.
Place all the cubes of those survivors who are in the same room on one team space of the multitracker. Repeat this process for all groups of players or individual players in different rooms.
The players can place these groups of cubes and single cubes in any order they like.
Note: During the action phase all players with their cubes on team space 1 of the multitracker take their action first, thus the order of the cubes is very important. The players should discuss this thoroughly.
3. Camera check
For each room that contains at least one survivor in line of sight of a camera, roll a number of survivor dice equal to the number of survivors in that room (up to a maximum of 4 dice) together with the terror die. For each such room, if one or more failures (see page 10) were rolled, resolve the event shown on the terror die (see page 19). If a survivor or a group of survivors is in a room that is in line of sight of more than one camera, the camera check must be made for each of these cameras.
Note: Players fully resolve each room in turn, including resolving its event, before going on and rolling for the next room. The order in which the rooms are resolved can be freely chosen by the players.
4. Zombies spawn
Now zombies spawn in the house, regardless of whether zombies spawned previously this round due to an event. Determine the room in which the zombie spawn token appears as described earlier, replacing the token with the appropriate number of zombies, if needed (see page 5).
5. Zombification
During the final step of the upkeep phase, the decay of the survivors progresses. This step applies only to those survivors who have 2 virus tokens. If such a survivor already has a gray cube on his skill track, move it one slot to the left; otherwise, place one gray cube on the rightmost skill slot on his survivor board. If a skill being marked this way has been previously activated, remove the skill token as the survivor loses this skill.
Example: Lucy has gained the third skill of her skill track. As a result the appropriate skill token was placed on the inactive (blue) icon. However, due to two bites, Lucy has become infected. A gray cube is placed on the rightmost skill slot. In the next round, the gray cube will move one position to the left. When the cube lands on the activated skill it will be lost.
The survivor must locate and inject an antidote before the gray cube reaches the leftmost slot of the row of 4 skills. If he doesn't he is zombified. Remove the survivor's figure from the game board, and replace it with a zombie figure. This survivor takes no part in the remainder of this round, but he may re-enter the game at the start of the survivors regroup step in the next round, at which point he moves his survivor figure onto the entrance hall tile, taking any damage from fire there as a result. The survivor loses all his gained skills and equipment and enters the house again with only his starting equipment card, but with full energy and no virus tokens.
The injection of an antidote halts the zombification process but doesn't remove the virus from the bloodstream of the survivor. Thus, the survivor discards one virus token, while keeping one in position in his inventory.
If the survivor is bitten again, thereby gaining a second virus token once more, the zombification process picks up where it left off and the gray marker will again start moving towards the leftmost skill icon.
A player can never have more than 2 virus tokens at one time. Additional bites that cannot be allocated to another survivor in an attacked team are ignored.
The Action Phase
During the action phase the survivors perform their actions. Starting with the leftmost team space and progressing rightwards, for each team space that has player cubes in it, the following steps occur.
- All players whose cubes are on the current team space take their actions. These players may take their actions in any order of their choosing, alternating between players as desired. Once these players have finished their actions, move the player cubes to the lower team space to indicate that this team has finished.
- Zombies and creatures react, and fire spreads (see page 14).
This sequence continues until all the groups or single survivors positioned in separate team spaces have moved their cubes to the lower box and the reaction was resolved. The round ends after the last team space with player cubes in it has completed its two steps.
During each game round, each player has as many action points at his disposal as indicated by the marker on his energy track. At the start of the game each player has 3 or 4 action points at his disposal, depending on the number of survivors. The more energy he loses, the fewer actions he can perform.
Survivors may perform different actions or the same action more than once in any order they like.
Players are allowed to pass on spending an action.
These are the actions the players can perform:
Move
A survivor may spend one 1 action point to move orthogonally (never diagonally) to an adjacent room. If a tile has two separate rooms on it, moving from one room to the other counts as moving to an adjacent room.
Survivors cannot move out of a room containing creatures or zombies; in this situation, they may leave only during combat by using the retreat icon.
Walls and locked rooms naturally block movement.
If entering a room establishes line of sight towards a spawn token, convert it to a horde.
Survivors may enter burning rooms and destroyed rooms, but it comes at a cost (see page 16).
Search
A survivor may spend 1 action point to search a non-destroyed room if it hasn't been successfully searched before (i.e. marked by a gray cube). When searching a room, the player rolls as many survivor dice as the number of survivors in that room, up to a maximum of 4 dice, together with the terror die. For each success icon (see next page) rolled, the player takes the top equipment card from the deck. If the active player gains more than one card, the player selects one of those cards to keep, then gives the remaining cards to the other survivors in that room, giving each player at most one card; distributing cards costs no action points. If at least one equipment card was found, place a gray cube in this room. This room cannot be searched again. If any icon except the success icon, appears twice or more, the event on the terror die (see page 19) is triggered.
Note: Larger groups have a better chance of discovering equipment cards. On the other hand, the risk of triggering an unwelcome event increases.
Example: In this situation, 3 team members conduct a search: 3 survivor dice are rolled. One success icon (the first shown) results in the survivors finding 1 item. However, the double aim result triggers the event shown on the terror die: a special creature will be spawned.
Pass or receive equipment
A survivor may spend 1 action point to pass an equipment card to another survivor in the same room or to receive an equipment card from that survivor. A code chip can be passed like an equipment card at the cost of 1 action point.
Note: Survivors are allowed to drop equipment, but it's removed from the game. Each survivor can carry a maximum of 5 equipment / virus tokens.
Unlocking a door
When a survivor is positioned in a room with an adjoining door containing a code chip, he can flip the code chip to reveal the icons on it at no AP cost. If the player's equipment cards (without regard for the equipment held by others in the same room) show all the icons that are on the code chip, he may spend 1 action point to unlock this door. He removes the code chip from the board, placing it next to his survivor board. (He keeps his used equipment cards.) All players can now pass through this door.
A player can open a locked door even without having the matching equipment cards – but to do this, he must move the darkness marker one space to the right for each icon he can't match using his equipment cards.
Extinguish a fire
A survivor may spend 2 action points to remove one burn marker from the tile he occupies. If this tile holds the fire token, and the tile now has no burn markers on it, remove the fire token at no AP cost.
Use corner room function
In a round each corner room can be used only once for one of two functions. Survivors must spend 2 AP to use one of the functions of a corner room:
- Use a room-specific function (see page 21 for more information), or
- Enter a code chip into the security system.
In a round, the survivors are allowed to spend AP on a function once in each corner room (meaning there's a maximum of 4 corner room functions at a total possible cost of 8AP allowed per round).
Combat
A survivor may spend 1 action point to attack creatures and zombies in his room - and/or if he has ranged weapons, he can attack creatures and zombies up to several rooms away as long as he has line of sight to them.
When attacking, the player rolls as many survivor dice as indicated by the equipment card of the weapon used. Other equipment cards might modify the number of dice rolled, but that number can never exceed 4. If the player has no usable weapon, he rolls only 1 die, fighting with his bare fists.
For each attack, the player rolls the survivor dice first, then assigns any hits to the opponents. Multiple hits may be assigned to multiple opponents within range.
The Survivor Die in Combat
Each survivor die shows the following icons:
Success (x2) – Each success icon rolled during combat inflicts one hit with the weapon used. With non-combat actions (such as search or defend) this icon has different effects. Zombies are eliminated by a single hit, whereas creatures are tougher. Combat against creatures is explained in more detail on page 12.
Aim – For each aim icon allocated to a success icon, your weapon's range is increased by 1 when applying that success icon. Aims rolled in an attack that didn't use a ranged weapon can't be used. If more than one aim icon is combined with a single success icon, the range can be increased even further.
Knockback – This icon pushes an opponent away from the attacking survivor in a straight line, pushing it out of the survivor's room to an adjacent accessible room. If knocked back into or through a burning/destroyed room, a zombie is eliminated (and you gain XP) and a non-fire resistant creature takes damage immediately. If more than one knockback icon is applied to the same opponent, that opponent is knocked back that many rooms, provided the player can keep a line of sight to that opponent.
Note: An entrapped survivor (see page 19) is freed when the last zombie and creature is knocked back into another room.
Retreat – This icon may be used during combat by the survivor (or by some other survivor in that room) after the hits have been assigned. The survivor using this icon may move to an adjoining room. If more than one retreat icon has been rolled, they may be assigned to several survivors in that room. Outside combat, this icon is useless.
Note: It is not until the next round's "Survivors Regroup" step that any new groupings of separated survivor(s) will be represented on the multitracker. The new positioning of a separated survivor (be it by retreat or any other means) has no effect this round on the order in which groups and individual survivors perform actions. As such, any retreated survivor(s) are still considered part of the group they share a team space with on the multitracker.
An entrapped survivor (see Page 19) cannot leave the room by using the retreat icon.
Failure – During combat, each rolled failure icon cancels one other icon. It is up to the player which icon is cancelled. During a camera check, a failure icon triggers a bad event.
Combat roll examples
- A roll of 2 dice yields 1 hit and 1 fail. As a result, the attack fails.
- A roll of 3 dice produces 2 hits and 1 fail. Therefore 1 hit is scored, enough to kill a zombie.
- Here, the first failure is used to cancel the second failure, resulting in 1 hit.
- The player may choose to apply both aims to the same success (extending the range of that hit by 2 rooms), or apply each aim to a different success result.
Combat line of sight example
In this situation, 3 team members are battling it out with opponents in the same or adjacent rooms. Lucy (yellow) is standing in the hallway room of her tile and can see the undead bird to her right and the zombie below because of the open passages. Bruce (blue) can only target the zombies in his own room because these are the only opponents he can see. Leo (purple) can see the zombies to the left because the door is open, but he could not target the bird since the locked door blocks his line of sight.
Combat Against Creatures
When attacking creatures, the same rules apply as when attacking zombies. However, creatures are considerably stronger. Creatures must suffer more hits to be eliminated. Additionally, they can use a special attack, which is triggered by the "reinforcement" icon on a creature die.
Record any hits against a creature by placing gray markers on hit locations of your choice found on the creature board. Each creature board has different hit locations on it, and if covered by the indicated number of markers, that creature ability becomes less effective.
- With each orange hit location covered, the players can ignore one of the creature's rolled bite icons each combat.
- With each blue hit location covered, the creature loses one movement point.
- With each red hit location covered, the creature rolls one die less during combat (but never less than one die).
- With each white hit location covered, the players can ignore one of the creature's rolled reinforcement icons each combat.
Creature board in detail
A fire-immunity icon indicates that the monster is unaffected by fire: the monster may pass through burning tiles and destroyed rooms unharmed.
Hit locations – These target icons represent the monster's different body parts. Players place a gray hit cube for each success they roll during a combat roll on one of these hit locations in an attempt to modify the attached ability of the creature. The number inside the icon represents the number of successful hits/cubes needed to destroy the anatomical location of the creature, and thus modify its performance. When all the hit locations have received a sufficient amount of cubes equal to the listed number, the creature is eliminated and its miniature is put aside. Place the board at the bottom of the pile of creature boards.
Statistics – The blue value is the monster's movement rate, determining how far it moves during a reaction. The creature's attack power is shown in red, and indicates the number of creature dice it uses for attacks. The icons on the right indicate that the creature has a Power attack and can bite.
Power attack – The bottom of the board describes the unique power attack the monster carries out when the reinforcement icon is rolled during attacks performed by the creature. For a complete listing, look in the separate icon reference guide that contains explanations of all the iconography on the cards/boards.
Zombie and Creature Reactions
After all players of a group have moved their cube to the lower space of the team section of the multitracker, the zombies and creatures react and any active fire spreads. The reactions represent the creatures detecting the presence of the team members and moving towards the victims based on sound produced by the team members while performing their actions - and as time passes, the fire continues to spread across the house.
1. Zombies and creatures attack
Zombies and creatures in the same room with at least one survivor attack immediately. If there are several confrontations in different rooms, the players decide the order in which these take place. For such an attack the players use the creature dice.
Multiple zombies always attack in a group, which means that one die is rolled for each attacking zombie up to a maximum of 6 dice. The number of dice for a creature's attack is shown on that creature's board. Each creature die shows the following icons:
Damage – Each damage icon rolled means that one survivor in this room must reduce his energy by 1. If more than one survivor is in the room, the players can allocate the damage among those survivors as they choose.
Heavy damage – Each heavy damage icon rolled means that one survivor in this room must reduce his energy by 2. If more than one survivor is in the room, the players can allocate the heavy damage among those survivors as they choose. Any given heavy damage icon cannot have its damage split among two survivors.
Reinforcement – Each reinforcement icon rolled by a zombie attack alerts one horde of zombies in an orthogonally or diagonally adjacent room of the players' choice and moves them into the contested room. A zombie horde that is orthogonally adjacent can be chosen only if there's line of sight from their room into the contested room, and the contested room is not burning. Zombies that are diagonally adjacent can be chosen only if both the zombies' room and the contested room have line of sight into a room adjoining both, and neither of these rooms are burning. Any zombie spawn token chosen to move is first replaced with the indicated number of zombies. Ignore any rolled icons that cannot be allocated to an eligible zombie horde.
In an attack by a creature, each rolled icon triggers that creature's power attack (see page 12).
Entrap – Each entrap icon rolled causes a survivor to become entrapped. An entrap token is placed under the miniature base to mark this. Entrapped survivors cannot leave their room until all zombies and creatures inside this room are eliminated or until they can free themselves or are freed. Place an entrapped token under each affected survivor. It is up to the players to decide which survivor(s) will be affected. Entrapment is explained in more detail on page 19.
Bite – For each rolled bite icon, assign one virus token to one player in the room, who places it on the left side next to his player board. A player who has two virus tokens is infected. Infection is explained in more detail on page 19. It is up to the players to decide which survivor(s) will be affected.
Note: Players should use any means that they can to avoid an infection!
Fear – Each fear icon rolled forces one survivor to move to an adjoining, accessible room. The players decide which survivor(s) will be affected. Only one result may be allocated per survivor.
Note: If possible, the players should select a player who still has sufficient action points left in order to join the group again. Entrapped survivors cannot be selected.
Note: Remember, it is not until the next round's "Survivors Regroup" step that any new groupings of separated survivor(s) will be represented on the multitracker. As such, any survivor(s) affected by fear are still considered part of the group they share a team space with on the multitracker.
Defense rolls
After the zombies/creatures have rolled, the players get a chance to defend themselves before the effects of the creature attack are resolved.
Roll one survivor die for each survivor in the room, up to a maximum of 4 dice. Each rolled success icon cancels one creature die. (All other icons on the survivor dice have no effect.) Subsequently the players decide together which survivors will be affected by which icon. Of course, all affected survivors must be inside the contested room. The order in which the icons are assigned is up to the players.
2. Zombies and creatures move and attack
Any zombies lingering in a room that is orthogonally or diagonally adjacent to one of the active survivors try to reach the survivor's room. They have two movement points and cannot move through walls, burning/destroyed rooms, locked doors or walls. They always move in the direction of the target room, never away from it, and towards the closest survivor(s). If two locations with survivors should be at an equal distance, players choose the room that will be the target for the zombie(s).
In case they would have to move away because of dead ends, burning/destroyed rooms, locked doors or walls, they do not move. While moving, if they enter a room with at least one survivor inside, they stay in that room and attack the survivor(s) present in that room.
A Creature present in the house, unlike zombies, will be triggered regardless of its current position to the triggering survivors, but the route for the creature must be "open", meaning the route eventually leads to the survivors and not through walls or into dead ends due to locked rooms or walls. It will move through burning rooms if the creature is fire resistant (see page 12). The route must also bring it closer to the triggering tile (meaning it now takes fewer steps to get there), or it will not move.
Zombie reaction examples
In this example, a group of 2 characters has just ended its action phase in the same room, which now becomes the triggering tile. Players check for adjacent monsters and find several. Zombie 1 and the 2 zombies together (Zombies 2 and 3) react. Zombie 4 is outside of range, but if a creature were in this location, it also would have reacted and moved as creatures are triggered regardless of their distance from characters who just took actions.
In a second example we see a similar situation on the board with one crucial difference: the group consists of 3 characters, and while they share the same space in the team section of the multitracker, on the board Character 3 is positioned in a different room, as he moved away from the main group during the turn. As a result, the areas of activation for the reaction of the zombies has a wider reach. Zombies 2 and 3 will still choose Characters 1 and 2 as their victims, but Zombies 1, 4 and 5 will move towards Character 3 as this survivor is closest to the position of the zombies, taking only one step to reach the victim.
The players must keep in mind that moving away from a group can cause a very aggressive activation of surrounding zombies. Positioning is therefore a crucial part of the tactical decision tree of a group of survivors sharing a team space on the multitracker.
Creature reaction example
Bruce (blue) and Lucy (yellow) ended their activation together, so they are now on the triggering tile. A room in the house contains a zombie dog. The right-hand route is blocked by a wall, and the path downward is blocked by a locked door. The only open route is up and to the right.
However, the dog would ultimately get blocked by a locked door and would not be able to reach the team in the next reaction phase(s). Therefore it will not move. If the route were open – that is, if both code chips in the central tile were removed – the dog would move as far as it could (based on its movement rate) as it would end up closer to the targeted team members.
3. Fire spreads
After the reactions of the zombies and creatures are completed, players roll the 4-sided die and the active fire (if present) spreads in the indicated direction (see page 7 for more details).
If the fire token doesn't move in this situation, add a burn marker to the room with the fire token. Each time you move the fire token, add a burn marker to its new room.
More Rules…
The Survivors
The survivors start the game with certain skills and can develop even more skills during the course of the game by spending experience points (XPs) to obtain new skills. This can be done at any point during a round.
The survivors gain experience points for the following achievements:
- Eliminate 1 zombie in combat using success / knockback icons – 1 XP
- Open a locked door – 2 XPs
- Eliminate a creature in combat using success / knockback icons – 2 XPs (for each survivor)
Mark experience points on the experience track of the survivor boards. The skills of the different survivors are explained in the icon reference guide. There is no fixed order for obtaining further skills. The players decide for themselves which new skill they want to obtain. By spending the required number of XPs, a survivor develops that skill and places the skill token on top of the identical icon on the board. A player can gain up to 10 experience points. If he has 10, he must spend some of these experience points before he can gain more.
Fire
As soon as a fire breaks out (whether triggered by the terror die or the darkness track) the players roll both the 4-sided and the 6-sided dice to determine the room where the fire breaks out. (Reroll the 6-sided die in the event of a 6.) Place the fire token and a burn token in this room.
The fire token indicates the location from where the fire will spread to adjoining rooms. During fire checks in the event phase, move only the fire token. It moves through walls and locked doors, but not into the lab, not into a destroyed room, and not outside the house. If the fire token doesn't move in this situation, add a burn marker in the room with the fire token.
Each time you move the fire token to a new room, add a burn marker to this room. A room with three burn markers is destroyed: Move the darkness marker one space to the right. Remove any markers (camera, locks, zombie spawn tokens) inside the destroyed room from the game. Turn the tile face down to its destroyed side. The fire marker remains in this room and moves when the fire spreads again, but no burn markers are added to destroyed rooms.
After fire spreads, on each burning tile and each destroyed room:
- Remove a number of zombies equal to the number of burn markers on the tile (3 for a destroyed room), if able. Players don't earn XP for these eliminated zombies.
- Creatures that are not fire-resistant suffer one point of damage per burn marker on the tile (3 for a destroyed room). Players decide how these damage markers should be placed on the creature card.
- Each survivor must reduce his energy by 1 for each burn marker on the tile (3 for a destroyed room).
When a survivor moves onto a burning tile or a destroyed room, he must reduce his energy by the number of burn markers on the tile (3 for a destroyed room).
When a non-fire-resistant creature moves onto a burning tile or a destroyed room, allocate it one point of damage per burn marker on the tile (3 for a destroyed room). Players decide how these damage markers should be placed on the creature card. Fire resistant creatures receive no damage from fire.
Note: A zombie horde will never move into a burning room. There can be only one active fire in the house at any point in the game.
Equipment
The equipment cards have two functions: They provide players with better abilities and tools, and they can be used to open locked doors and get the lab's security code.
Each survivor can carry up to 5 items and can use up to 2 of these items simultaneously. Place these equipment cards to the right of the survivor board. This side of the board represents what the character is holding in his hands. This side of the board may hold a total of 2 hand symbols, as found at the top of equipment cards, and may never exceed this limit. Some heavier items that need two hands to use them list 2 of these icons and therefore the survivor can put only one such card on the right side of the board and nothing more.
Leave all other equipment cards next to the survivor board's left side. This side of the survivor board represents the equipment you are not currently using but carry with you.
Note: Any items improving the survivor's skills must be placed to the right of the player board in order to actually improve that skill. If such a card is placed to the left of the survivor board, it is not used and does not improve the skill.
If a survivor has the maximum allowed equipment cards and receives another one, he must remove a card from a position next to the survivor board without using it and return it to the game box. Some items (e.g., ammunition) can be used only once. Remove these equipment cards from the game after use.
Ammunition cards indicate the weapon for which this ammunition is suitable. When such a card is used, reload that weapon by placing ammo cubes on the weapon card. A weapon may have a maximum of 8 ammo cubes. Of course, the survivor with the ammunition must own this weapon in order to do this.
Each time a weapon is used during combat by performing an attack roll, remove one ammo cube from the weapon card. A weapon without ammo cubes cannot be used during combat as it's not loaded.
A player may switch equipment cards from the left to the right side of his survivor board at any point in a round.
Example: This example shows a typical inventory. Leo is equipped with his starting weapon - the fire axe - and a fire helmet. They are both positioned at the right side of his survivor board. Each of these items list one hand icon, so both are perfectly within the 2-hand limit. The left side holds 2 items Leo is carrying with him.
In an attempt to open a door, the code of the lock is revealed. Luckily for Leo the code sequence is present in his inventory, so he is able to unlock the door. The code chip is removed from the board and is placed next to the survivor board.
The number of hand symbols indicates whether a tool requires one or two hands to hold it. As a result, the right side of the character board may hold only two of these symbols and never exceed this limit.
Weapon Card in Detail
Range is the distance the weapon can shoot. In this example, the range of 2 means the automatic can hit targets up to 2 rooms away in a straight line.
Attack represents the number of attack dice rolled when the weapon is fired.
When an ammo card is used, discard the card and place the listed number of black ammo cubes on the appropriate weapon card. In this example 4 black ammo cubes. A weapon can be reloaded up to a maximum of 8 black ammo cubes, any excess cubes over 8 are lost.
Most weapons have a special function listed here. These are listed in the last pages of these rules.
Ammo card in detail
An icon shows players that the item can be used only once. As soon as the player has used the special function of the item, he must discard the card and remove it from the inventory, freeing up a slot.
A value on the ammo card represents the number of ammo rounds the weapon comes loaded with (see weapon card explanation). When an ammo card is used, the card is discarded and the listed amount of black ammo cubes are placed on the appropriate weapon card. Remember a weapon can only hold 8 ammo cubes. Any excess cubes are lost.
An icon on the ammo card is a visual representation of the weapon that uses this ammo.
Darkness Track Progression
The marker on the darkness track must be advanced 1 position each time any of the following events occur:
- A tile is destroyed before the final showdown.
- A survivor is eliminated before the final showdown.
- A code icon on the security panel is unlocked without using a code chip.
- One Icon of a code chip is unlocked without a matching equipment card.
Entrapment
An entrapped survivor cannot leave the room he is in until either the last zombie/creature has left the room, he manages to free himself, or other survivors free him.
An entrapped survivor has only 1 action point available for the round, and he must use this to attempt to rescue himself. Other survivors in the same room who are not entrapped may support the rescue effort. Each survivor who so chooses spends 1 action point and adds a number of dice equal to his entrap rate, as listed on his survivor board. A maximum of 4 dice can be used for each rescue effort. If at least one of the dice shows a retreat icon, the hero moves to an adjacent accessible room and the entrap token is removed from under the miniature. The freed survivor regains all of his AP for the round, less the 1 spent to free himself.
If the attempt to free the survivor fails, the team members sharing the room with the entrapped survivor can continue spending AP in an attempt to rescue the victim, or alternatively eliminate all zombies and a possible creature from the room to free the entrapped team member.
If several players are entrapped in the same room, a number of retreat icons must be rolled equal to the number of entrapped players in order for any of them to leave that room. If they manage to do this, they retreat together to the same room.
Infection and Zombification
A survivor who is bitten during combat receives one virus token. He must keep this token like an equipment card: either placed on the left or right side of the survivor board, taking up a potential space for an equipment card. If necessary, he must discard one of his equipment cards in order to make room for the virus token. Virus tokens can never be passed on to another survivor.
As soon as a survivor receives a second virus token, a process is started which will end with the survivor being mutated into a zombie and removed from the game for the remainder of the round.
This happens during the upkeep phase and slowly decays that survivor's skills. The decay of the survivor can only be halted; it cannot be revoked. In order to halt it, the survivor must use an "Antidote" equipment card or the Virus Cabinet in order to remove his second virus token. A survivor can never remove his first virus token.
Note: A survivor may never redevelop any skills lost due to zombification, that is, those skills underneath or to the right of the zombification gray cube.
A survivor can hold a maximum of 2 virus tokens next to his survivor board. Additional bites when holding this limit must be allocated to different survivors of the attacked team. If that's not possible, those bites are ignored.
Icons Found in Corner Rooms
The following room functions are found only in the corner rooms.
- Sprinkler Control – A character in this room may remove all burn markers in 1 room at the cost of 2AP. This function has no effect on destroyed rooms.
- Virus Cabinet – A character in this room may remove his second virus token at the cost of 2AP.
- Medic Bay – A character in this room may heal up to two wounds at the cost of 2AP by moving the marker on the energy track up to two positions towards the start of the track.
- Ammo Reserve – A character in this room may reload one of his weapons with 4 ammo rounds (4 black cubes) at the cost of 2AP. Remember that a weapon card can hold a maximum of 8 black ammo cubes.
- Terminals – A character in this room may place one code chip onto the lab security panel at the cost of 2AP. Note that the team can enter multiple code chips in a round if each player uses a separate terminal.
The Laboratory
Players can enter the laboratory in any round in which they can access it. If the darkness marker reaches the final space on that track, the players have the current round in which to breach the laboratory. Otherwise the team loses.
Players can enter the laboratory only if they manage to override its security system; to do this, they need to use the code chips they collect when opening locked doors. Players can place up to three code chips on the security system board, but only inside a room that contains a terminal. Terminals are located in the corner rooms of the house.
When a player places a chip onto the security board, he has two options:
- Remove 1 matching code token from the security panel for each color listed on the code chip.
- Remove one code token of the team's choice.
The players can remove one code token from the security panel that hasn't been removed by code chips by advancing the darkness track one position to the right. Players can advance the darkness marker as many times as they wish, but they can't move the marker past the final space on the darkness track.
Code chips can never be removed from or replaced on the security board, so choose carefully. Some chips will be more efficient than others. Remember, a code chip can be passed to another survivor at a cost of 1AP.
Example: A player has just entered the first chip on the panel by standing at a terminal location and spending 2AP. Now, the player can start breaking the code by removing matching code tokens on the security panel. Luckily, the player has chosen wisely, and all 3 colors on the chip can be found in and removed from the sequence. Only 4 remain!
When the last code token is removed from the security panel, the lab automatically opens. Now the team must choose one survivor who will enter the lab to get the antidote. This survivor is considered the keeper of this cure, and must survive the final showdown that now starts.
Final Showdown
The survivors have two goals during the final showdown: Eliminate the nemesis and survive.
The following incidents happen the instant a survivor enters the lab:
- The survivor who entered the lab takes the antidote token. He will keep it until the end of the game and must stay alive if the team wants to succeed in the mission. If this survivor is eliminated, the game ends and all players lose.
- Open all locked doors, removing the appropriate code chips from the game. Remove all camera markers and place them back in the box. No more camera checks take place for the remainder of the game.
- Replace all zombie spawn tokens with the corresponding number of zombies.
- If there is no active fire, make a location roll (re-roll if a destroyed room is chosen, or a 6 is rolled) and place the fire token and a burn marker in the chosen room. Survivors can no longer use actions to remove burn markers!
- One member of the Mortimer family has hidden himself in the lab and springs into action now. Take one random nemesis board, and reveal and place that figure inside the lab. Place a number of gray markers on the nemesis board equal to the sum of the number of action points available to each survivor currently in the game (according to their energy tracks) plus one extra for each survivor currently in the game; distribute these cubes on the different zones of the nemesis board as evenly as possible.
- Flip the multitracker to its reverse side and place a gray cube on the first space of the event track and another on the first space of the darkness track.
The players must try to eliminate the nemesis before the darkness marker has reached its final space. The nemesis is eliminated only after all markers have been removed from the nemesis board.
The survivors cannot search rooms anymore during the final showdown. All survivors who are removed from the game at any time after the final showdown begins, are permanently removed and do not return.
The sequence of play is changed now: Each survivor takes a number of markers of his player color equal to the number of his current action points. These markers are called action markers from now on.
Players can now take actions in the order of their choice, no matter where they are positioned inside the house. For each action a player performs, he places one of his action markers on the leftmost box of the multitracker. When a sixth marker is placed in this box (or possibly sooner) the cubes in all 3 boxes shift to the right. As a result, the markers in the first box will land in the center box, triggering a nemesis reaction. If the right space holds markers, return them to the appropriate players.
If a player loses one of his action points due to a loss of energy, he must remove one of his action markers from the game; he can remove an action marker from any space on the multitracker or from his hand. If a player gains an action point due to an increase in his energy track, he takes an action marker from the supply.
Note: The players can choose to shift the cube groups to the right and trigger a reaction from the nemesis even if fewer than six markers are on the left space of the multitracker. This might be helpful if the players can reclaim action markers from the right space by doing so.
Example: A survivor has just finished an action, resulting in an action cube being placed in the leftmost box. The box now holds 6 cubes, so a shift is automatically triggered, with all the cube groups shifting one position to the right. This releases the 3 yellow and 2 green cubes back to the players. However, since new cubes enter the center box, the four steps of the nemesis reaction are resolved.
Nemesis reaction
Perform the following steps in this order during the reaction of the nemesis:
- Move the event marker to the next space and trigger the indicated event.
- The fire spreads, applying the rules as explained on page 8.
- The decay and zombification of infected survivors progresses (see page 9).
- The nemesis, the zombies and the creatures move and attack, if applicable.
The nemesis wants to demolish the house by destroying the 3 corner rooms outside the lab. Thus the nemesis moves directly to the next corner room during phase 4, using the shortest path possible (players choose in case of a tie). The number of its movement points is indicated on the nemesis board.
If the nemesis enters a room with survivors inside, the nemesis attacks the survivors, then resumes its movement. When reaching a corner room, the nemesis ends its movement. During the next reaction phase, the nemesis destroys the room instead of moving. Any survivors and creatures inside this room suffer 3 damage each! Any zombies inside this room are eliminated. Survivors inside the room will also be attacked by the nemesis.
After the nemesis moves, all zombies and creatures move. They each move in the direction of the closest survivor, but not through burning rooms (unless they're a fire-resistant creature). When they enter a room with at least one survivor inside, they attack.
The survivors have a slight advantage: They know the ways inside Mortimer's house very well and can move up to two rooms for only 1 action point during the final showdown.
The players win the game if they manage to eliminate the nemesis before he is able to destroy 3 corner rooms. If he manages to complete his destructive mission, the team loses.
Good luck and... try not to die
Advanced Rules
Additional Room Elements
Some rooms show icons that are used only in a game for advanced players. Players should agree before they start playing whether they want to use these effects:
- Gas leak – The instant the fire token reaches a room with a gas leak, the gas ignites and the fire spreads to two adjoining non-destroyed rooms. The players decide which rooms are affected and place burn markers there.
- Defense room – Survivors may always roll 4 dice when defending in this room.
- Lurking Creature – If no creature is active in the house when a survivor enters the room, he rolls as many dice as the number of survivors in this room. If at least one "fail" result is rolled, a creature becomes active. Draw the top board from the creature pile and use the 4-sided and 6-sided dice to determine the room where the creature enters the game (re-rolling if a locked room or a 6 was rolled). If a non-fire-resistant creature appears in a burning or destroyed room, it takes damage from the fire as normal (see page 16). Remember that only one creature can be in the house at any point during the game.
Example: A group of 3 survivors attempts to sneak past a lurking creature. They roll 3 survivor dice. Sadly one of the faces shows a fail result, so the players are forced to take the top board from the creature pile and perform a spawn roll to place the creature in the location pointed out by the roll.
Tweaking the Challenge
On top of the 3 modes described in set-up, the following options can be used to adjust difficulty:
- Players can freely tweak the spawn pool containing the Zombie spawn tokens. By removing (partly) the extreme sides of its spectrum (values 1-2 and 5-6) players can respectively increase or decrease the challenge.
- In a 2-3 player game, players can opt to play with the 4-5 player side (only 3 actions per character) to increase the challenge.
- Players can opt to play without the special functions of the corner rooms (with the exception of the terminal function) to increase the difficulty.
- Too much time pressure for your rookie team? Allow players one extra turn on the darkness track so that they can unlock the lab in the round after position 5 was reached.
- Tweak the set of Code chips during set-up, adding more 3-icon chips for a harder challenge or more 2-icon chips for an easier challenge.
- The modular build-up of the house offers players a myriad possible configurations to work with. The positioning of the camera rooms are naturally crucial for determining the action radius of the security system. Adding lurking creature and gas leak rooms increases the challenge, as does adding closed areas which make travel more time-consuming for the team. Be creative and build a death trap for a harder challenge, or nice open routes for an easier challenge. The option is yours.
Survivor Characters
Leo Friedkin, Downtown Firefighter
Starting weapon: Fire axe
Special ability: Leo can move into burning non-destroyed rooms without taking damage.
- Sneak – If Leo is part of the group performing a camera check, he doesn't contribute a die to the roll.
- Protection – Leo takes only 1 damage (instead of 3) when entering a destroyed room.
- Medic – When Leo uses a healing item on himself or a team member, he heals an extra wound.
- Firefighter – Leo removes an extra burn token when spending APs to remove a burn marker.
Jack Fulci, Brooklyn Weapons Dealer
Starting weapon: Handgun
Special ability: Jack can attack once per round without spending 1AP.
- Backpacker – Jack has an extra inventory slot.
- Deadeye – Each aim Jack allocates to a success in an attack roll provides an extra hit (as well as providing extended range).
- Handgun expert – Jack rolls an extra die when attacking with a handgun.
- Ammo reserve – When Jack conducts a search and finds ammo, he may put 2 extra ammo cubes on the card. He can't exceed the 8-cube limit.
Nina Argento, Wisecracking Nurse
Starting weapon: Combat knife
Special ability: Nina can cure other character's wounds at a cost of 1AP per wound.
- Knife expert – Nina rolls an extra die when attacking with the knife.
- Eternal bandage – Nina can heal 1 of her own wounds at a cost of 2XP (limit once per round).
- Shotgun expert – Nina rolls an extra die when attacking with a shotgun.
- Virus Resistance – Nina is immune to the virus.
Bruce Romero, Retired Bodyguard
Starting Weapon: Handgun
Special ability: Bruce may give or take up to 3AP to or from another survivor in his multitracker team space (limit once per round).
- Coordinator – Bruce can pass items to other survivors in the same room at no AP cost.
- Handgun expert – Bruce rolls an extra die when attacking with a handgun.
- Searcher – When at least one success is rolled in a search in Bruce's room, add a success to the search roll.
- Sharpshooter – Bruce gains +1 range on all firearms.
Lucy Chang, Know-it-all College Geek
Starting Weapon: Baseball bat
Special ability: Lucy can replace an adjacent code chip with one that was removed at the start of the game at a cost of 4XP. Choose the new code chip randomly from those with the same number of icons, then place it face-up.
- Coordinator – Lucy can pass items to other survivors in the same room at no AP cost.
- Tech wizard – When performing the terminal function, Lucy can place as many code chips on the security board as desired at a total cost of 2AP.
- Searcher – When at least one success is rolled in a search in Lucy's room, add a success to the search roll.
- Mighty blow – Each knockback Lucy rolls in an attack can push an opponent 2 spaces instead of 1.
Creature Abilities
Undead Bird – One survivor in the creature's room (player's choice) is entrapped, if possible. This entrapped survivor can be freed only by destroying the creature.
Zombie Dog – One survivor in the creature's room (player's choice) must discard one equipment card. (A survivor with no equipment cards may be chosen.)
Security Guard – Knockbacks do not affect this creature. After it moves during creature reaction, it performs an attack against each survivor in its line of sight that's within a 2 room range.
Doctor Mortimer – Spawn a horde of zombies in a room adjacent to a survivor (player's choice).
Lisa Mortimer (Mortimer's pyrokinetic daughter) – Add a burn marker to each non-destroyed room orthogonally adjacent to Lisa's room.
Item Functions
Baseball Bat – A knockback with this weapon knocks 1 zombie down. (Place the figure on its side). If a player manages to score another knockback within the same turn (either in this attack or another, and with this weapon or another), then the zombie is killed. Otherwise it will rise again when it is activated during a creature reaction. The weapon does not work against creatures or nemesis. A success roll may still be applied to a downed zombie, resulting in a kill.
Fire Axe – The survivor can spend 1AP to remove 1 burn marker from his room.
Sniper Rifle – Each aim allocated to a success in an attack roll provides an extra hit (as well as providing extended range).
Automatic – Each hit automatically becomes 2 hits.
Energy Drink – The survivor receives 2 extra AP this turn.
Shotgun – Each aim provides an extra hit. (The regular range modification of an aim roll has no effect on the shotgun, but will provide extended range when using a shotgun scope.)
Fire Extinguisher / Helmet – When using the extinguisher, the survivor may remove 1 burn marker at a cost of 1AP. When using both the extinguisher and the helmet, the survivor may remove up to 2 burn markers at a cost of 1AP.
Antidote – When used, the survivor removes the second virus card from his inventory.
Flashlight – The survivor can reveal a code chip on a locked door that the survivor can reach using no more than 2AP.
Grenade / Dynamite – The survivor can generate 2 hits (for a grenade) or 4 hits (for dynamite) in an adjacent room in his line of sight at a cost of 1AP.
Armor – The survivor may reroll 1 defense roll.
Fire Alarm – The survivor may reroll the fire check direction die.
First Aid Spray / Kit – The survivor heals 1 wound (with the spray) or 2 wounds (with the kit).
Flare Gun – The survivor may reroll one or both zombie spawn dice.
Flashbang – The survivor can remove 1 entrapment token from a survivor in his room (including himself).
Gas Mask – When using the gas mask, the survivor can move through burning and destroyed rooms this turn without taking wounds.
Handgun Scope / Laser Sight – Increase the range of the listed weapon by one room.
Map – The survivor may reroll the terror die.
Night Vision – (Advanced Rules) When rolling to determine if a lurking creature activates, reroll (once) as many dice as desired.
Expansion: Radiation
This exciting expansion is ideal for experienced players who have a few plays of the base game under their belt and want to add another threat that will challenge their team to the limit.
By introducing this expansion, survivors will be facing a new deadly opponent: radiation, spreading across the rooms from a leaking reactor in the center of Mortimer's house.
Radiation will infect and mutate creatures and put the lives of the team members in serious danger.
Are you ready to enter a new level of darkness?
Components
- 1 Reactor room tile
- 27 Radiation markers
- 10 Equipment cards
- 30 red miniatures
Setup
During setup, one survivor is chosen by the players as the "Hazmat specialist" in charge of battling the radiation threat. This player receives an additional start equipment card, the "Decontamination kit". With the help of this kit the holder will be able to battle the radiation and have better protection against infection.
The remaining 9 cards of the expansion, easily recognized by their red color, will be mixed into the regular deck of equipment cards that will be used during searches.
Take one radiation marker from the reserve and place it on the darkness track. Players choose either position 2, 3, 4 or 5 for the placement of the marker. The position chosen represents the point in time when the central reactor will burst and start to leak radiation. The remaining radiation markers are placed next to the board in easy reach of the players.
The reactor tile will be used during the setup of the house. It will be placed before the other inner rooms are placed, based on a roll of the D6, with the upper left position represented by a roll of 1 and the bottom right position by a roll of 6. As soon as the reactor is placed, the rest of the inner rooms may be positioned to complete the configuration of the house.
Example: This example shows the placement of the reactor room after a roll that pointed out position 5 in the inner room configuration. Naturally, the rules for room placement need to be followed, so players need to make sure no doorways are blocked by the walls of the reactor room. To make sure this will not happen, it is best to place the reactor room first before placing the remaining inner rooms.
The red versions of the survivor and creature miniatures are set aside next to the board. They will come into play as soon as the radiation starts spreading and takes its first victims.
The Challenge
The game is played following the basic rules as listed in the original rulebook. However, when the marker cube on the darkness track reaches the position that holds the radiation marker, players will immediately place a radiation marker on the reactor tile to mark the leak. A second radiation marker is placed in a room adjacent from the reactor.
A tile that holds a radiation marker is considered infected. If the tile contains two rooms, both are considered infected.
During the Upkeep phase of each round, as a 6th step right after zombification, the radiation will spread. The players will place 2 radiation markers. These must be placed in separate rooms, but the chosen rooms need to be orthogonally adjacent to a room already holding a radiation marker and not yet contain a marker. At no point in the game may a room hold more than 1 marker.
Each survivor and creature that enters an irradiated location is under influence of this invisible danger and can become infected. A survivor entering an irradiated location rolls 3 dice to check if the radiation will infect him. Such a roll is called a "radiation check". If one of the dice shows at least 1 "fail" result, the survivor is considered infected by the radiation and his miniature is immediately replaced by a red version. On his survivor board a radiation marker is placed to visually mark the infection on his board. Even when a survivor is infected, he still needs to perform this check when he enters new locations with radiation. If at least 1 fail is rolled he must take an additional radiation token and place it on his survivor board. A survivor can have up to 3 radiation tokens, representing the highest radiation level. When he should enter new rooms with radiation after having reached this level, no additional checks are needed.
A survivor that is infected will slowly weaken: At the start of each new turn the player must adjust the energy level of his survivor a number of positions equal to the number of radiation markers on his survivor board.
Creatures and zombies that enter a room with radiation or appear in an infected room through a spawning or terror roll, automatically become infected. Its miniature is replaced by a red version to indicate the infection. However, unlike survivors, they will not be weakened by the radiation. Instead they will mutate into a more powerful version of their former selves.
Zombies will become tougher: they will need 2 hits to be eliminated. They will still avoid entering a room with fire, but they will not necessarily be eliminated when pushed into a burning room by a knockback result in combat. When they take their first point of damage, lie them on their side to indicate this. When the zombie takes its second point of damage that turn, it is killed and removed from the board.
If the zombie is not killed during that turn though, it will regenerate. Stand the zombie back up again during the reaction phase, and it will still require two hits in one turn to kill it.
Creatures will gain a regeneration ability: for each power attack triggered during combat, remove (if present) 1 hit cube from one of the targets on their board of the player's choice.
When a zombie or creature enters a room with another uninfected creature or zombie(s), these uninfected beings will become infected immediately. This makes infected creatures rather lethal, as they help to spread the radiation even faster!
Survivors entering a location with an infected zombie(s) or creature must perform a radiation check, rolling 2 dice. This makes it crucial for the team to avoid close combat when dealing with infected creatures, as this invisible enemy is merciless. Survivors need to roll 1 die for a radiation check when they enter a room with an infected survivor, as the radiation is less aggressive with humans. The maximum number of dice a player will ever roll for a radiation check is three, so even if a player enters a room with both a radiation marker and an infected creature, he will only roll three dice.
Fighting radiation
Radiation can be fought. The hazmat specialist, holding the decontamination kit, can enter an infected room. At the cost of 2AP this survivor can remove 1 radiation marker. The kit partly protects the survivor: only 1 die needs to be rolled to check for radiation.
One other survivor can work with this hazmat specialist to battle this invisible threat, but removing a marker costs 3AP and during radiation checks 2 dice need to be rolled, as this helper is not as efficiently protected by the kit.
Removing all radiation markers spread across the house doesn't stop the threat however. In order to put a definitive stop to the radiation, the team must attempt to enter the reactor room that is considered locked. This room can only be opened when the team (following the rules about "terminals" in the base game) enters 2 code chips when standing next to one of the two locked doors of the reactor room. Both code chips must hold 3 codes. Only by discarding 2 of these chips survivors can enter the room. Be aware that the room is still infected, so a radiation check needs to be performed.
A survivor can spend 3AP to close down the reactor and by doing so removes the radiation marker inside the reactor room. Areas in the house that hold radiation markers are still considered infected, but the radiation will not spread anymore in the upkeep phase.
As a reward for fixing the leak, each team member may activate one ability of their choice on their survivor board. However, infected survivors are still considered infected.
The only cure against infection comes from the "Radiation pills" found during searches. When this item is used by discarding the card, a survivor can remove all radiation markers from his board. The survivor is now considered clean.
Survivors that fail to find radiation pills and enter the final showdown infected will see their energy level drop at the start of each survivor action phase.
Amongst the equipment inside the house are also a series of radiation suits that can help the team protect themselves against the radiation; a survivor that equips himself with a suit by placing it to the right of his survivor board, will only have to roll 1 die during radiation checks.
Good luck, and try not to die…
Expansion: Zombie Types
Components
- 40 pions Foyer (4 séries de 10)
- 10 standard zombies
- 10 Guts zombies
- 10 Disco doll zombies
- 10 Chunk zombies
This expansion provides players with a set of mini modules, each adding a different species of zombie to the Dark Darker Darkest universe. Players can freely experiment with adding these new zombie types to the base game and determine the number of these special zombies they want to add to the spawn pool.
It is not advised to use all the modules at once. Ideally add one complete set of spawn tokens of one of the sets to the regular spawn pool, or mix a limited amount from several modules. As the zombies crank up the challenge for the team, use them in limited numbers, gradually building them up as players get more experienced at surviving in the hostile environment of Mortimer's house.
Each type of zombie comes with its own set of 10 spawn tokens. They are blindly mixed in the regular spawn pool during setup. When such a spawn token is revealed during play, place the revealed type in the room and roll the D4, placing the indicated number of regular zombies in the location of the special zombie.
These special species modify the entire horde they are part of inside a room. However, before these type of zombies can be defeated, all other zombies in the room must be eliminated, as the other zombies in its horde will protect this more powerful species. If there are two or more 'special' zombies remaining with no ordinary zombies, players may decide which order to kill them.
Let us take a look at the behavior of each type of special zombie:
Disco Doll Zombie – The Disco doll zombie is an extra agile version of the standard zombie. This zombie, along with its entire horde, can move three rooms rather than two.
Guts Zombie – A Guts zombie makes a horde more dangerous. One bite result as part of its (or its horde's) attack cannot be dodged by a defense roll.
Chunk Zombie – Chunk (soldier) zombies and the horde they are part of can only be defeated in close combat.