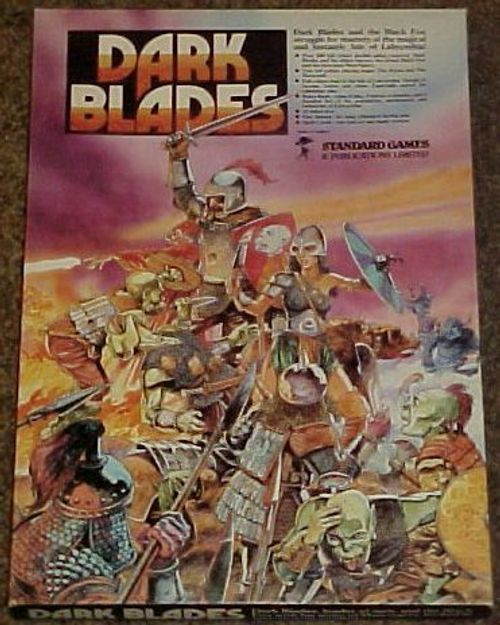
Dark Blades
Dark Blades Rulebook
Table of Contents
Table of Contents
- Introduction and Background
- Beginner's Guide
- Directory of the Map of Labrynthia
- Description and Use of the Playing Pieces
- Dark Blades Characters - Personalised
- Sequence of Play
- Terrain Types
- Cover
- Movement
- Combat
- Combat Results Tables
- Missile Attacks
- Magic
- Spell Card Reference
- Special Rules
- Optional Rules
- Scenarios
Introduction and Background
"Dark Blades" is an extension of the popular board game - "Cry Havoc". It introduces the fantasy element of mythical monsters and magic, without complicating or losing the thrill of man-to-man combat that has become the trade mark of this easy to play and enjoyable system.
The game is set on the isle of Labrynthia, a land steeped in mystery and history; a land that for centuries was the epitome of success; a land where men worked hard, lived fine, and enjoyed the pleasures that investment in the future bring. Creatures unlike man were left unpersecuted. Disfigured or crippled men were treated with the same respect as everyone else, everyone helped their fellow man. The land was idyllic .... then it happened!
Man, being man, and unable to leave perfection alone, began to want more. First it was the land that the non-human beings regarded as sacred, then it was the 'use' of these creatures for menial jobs, or the degradation of them, which over the years brought about the changes in their appearance. Finally it was the need for these creatures to be totally subservient to every possible, and often impossible, whim of the mighty creation - man!
Certainly, there were men who opposed this treatment of their "fellow beings", men who had always looked on the creatures as equals, but these were in the minority and could do nothing against the mob-rule. Some of them set up a sort of resistance movement and helped many of the creatures escape death or worse, but on the whole they could only watch as the death and degradation carried on.
Of course, the creatures, or monsters as they were now called, revolted. They took to attacking mans' home's or horse's, upsetting the farming communities by destroying ploughs or crippling horses, and eventually, the killing of a man. The patience of the mighty was lost at this last atrocity and war was declared on the monsters, a war that virtually wiped out the almost defenceless creatures and forced the remainder into the Asiera Desert and mountains, and the almost uninhabited wastes known as Zabooli.
Unbeknown to man though, their interference with the monsters had created a new and superior race. As the older generation of creatures died out, the younger ones were changing from birth, adapting to their new situation, being brought up on the tales of mans inhumanity toward them. This super monster became known as "Mon-Ogers" a creation from man and ogre, and it wasn't too long before they were turning the tables on the "mighty" man. Even those humans that had felt sad and sorry about the persecution of the monsters were forced to take arms against them, but victories for man were in short supply against the mon-ogers, who were now under the leadership of a being said to be the result of human co-habitation with a female mon-oger "The Black Fox".
"The Black Fox" was cunning and clever, a planner. The unco-ordinated random attacks became successful hit-and-run raids, striking at the supply stores and strategic points of mans dominance. Lines of communication between towns were cut, and as man was isolated, so he was destroyed. Great councils were held to find a leader who could rally the forces of man and take them from the brink of destruction and extinction, back to the life of splendour they once knew and enjoyed. Several knights applied and were tried, but most fell in battle or else ran away from the superior forces. Only one - Tristan de Rikard - from Iqui in the state of Honna remained continually victorious in his battles. He was appointed governor general of Labrynthia and ordered to create a state of law and order amongst man and monster. He tried to talk to the "Fox", but to no avail, for blood-lust now reigned deep in the heart of the demi-human and the need to kill all human life was embedded from birth into the mon-oger race. Tristan was lucky to leave the meeting with his life, for the wily "Fox" had him ambushed on the promised 'safe' passage back to Honna, and in the ensuing fight Tristan lost his left eye.
The loss was a spur for Tristan to take drastic and immediate action. He located many of the "Sons of Honna", knights who had left Honna to live in their own rural surroundings, and together they set about causing the downfall of the "Fox", to their dear cost for several of them died and many were severely wounded. They discovered that the dwarves who had lived peacefully in the Seria mountains throughout the troubled times had now joined forces with the "Fox", and that several other minority groups of non-humans had aligned themselves to the mon-ogers plight, joining battles as mercenaries, or just raiding unsuspecting humans at every opportunity.
After three hard years, Tristan had lost most of his friends, only three remained: Grast of Londaal, Hohmley of Colme, and Labern the Denitian. They could still call on a band of loyal mercenaries, but they had now come down to the hit and run raids that had originally been the trade mark of the "Black Fox". Such was their tenacity in a fight though, they could, and did, take on odds of five (or more, so it is said) to one and win easily. Tristan had taken to using a long sword of black steel and had also a dagger of the same metal. These weapons could cut through any known armour like a hot knife through butter, and as the word of his victories spread amongst the mon-oger forces he became known as .... Dark Blades.
Now you can ride as Dark Blades and his trusty companions - Zatan, his faithful war dog, Sunfire the adventuress, hard of mind and strong of body as any man, Quill the magician, Grast, Hohmley, Labern the bow, the greatest archer in Labrynthia, and Thrugg Lumpthew, the half-oger rescued from his own kind by Tristan who now devotes his life to the cause lead by the man known as "Dark Blades".
The scenarios in this booklet are designed as two player games, one controls the forces of the "Black Fox" and one those of "Dark Blades". They are reasonably evenly balanced, so it is up to you to decide whether good or evil rules Labrynthia. Although these adventure settings are for single game play, it is not too difficult to arrange your play into a campaign. Neither "Dark Blades" or the "Black Fox" need appear in every game, though they should appear if you are to stage a grand finale. If one or both of them die during a game, at the end of the battle a caster or magician can restore life to them if you wish, or else their place could be taken by an heir who has been kept secretly in hiding, training for such an eventuality.
Beginner's Guide
The Beginner's Guide on the quick reference sheet describes the game as follows.
Dark Blades is a simple game of man-to-man (or beast) combat, with each player leading a small force of men or mon-ogers. The game uses simple movement and combat mechanisms, with an easy to use magic system.
Each player takes it in turn to move his pieces, fire any missiles, cast magical spells, and engage in combat against his enemy. Each character has two pieces, representing that character as "healthy", wounded, stunned, or dead. Some characters have mounted pieces as well.
The first section of the rules gives a detailed list of the population, settlements, and industries of Labrynthia. This is for players wanting to create their own scenarios, or perhaps fight a campaign.
The second section is the rules proper. Read it through quickly to pick up the idea, then again more carefully before playing. Use a few counters on one of the maps to test out the rules, making sure you understand how they work.
The third section consists of four scenarios. These are ready made games for you to play. Each one gives a different layout on one or more maps, introducing you to the different rules in stages.
In "The Arena" only one side has a spellcaster. This scenario can be played solo to learn the rules.
"Trouble at t'Mill" introduces more troops, and the water crossing rules.
"Mon-Oger Mule Train" has groups entering the map during play as reinforcements.
Finally "The Raid" is a fast and furious dust-up. This last scenario uses the two maps from our earlier game "Cry Havoc", but can be played on the two maps supplied in this game.
Directory of the Map of Labrynthia
This directory describes the states of the isle and their settlements. It is provided for players creating their own scenarios or campaigns.
Asiera
Asiera is the largest state on the Isle of Labrynthia, taking up almost the entire mid-section of the country. Most of Asiera is desert wasteland, and that which is not desert is rough mountainous country. The Asiera mountains are the boundary between east and west Asiera.
- East Asiera: Wyly Castle, home of the "Black Fox" sits on the edge of the desert where the River Ecton supplies its water and staple fish diet. The desert is used as a training ground by the "Fox" for teaching his mon-ogers the basics of combat against mounted troops. Mon-Ogers rarely ride horses - they generally prefer to eat them - and have shown themselves to be hardy combatants against the power of the four-legged, armoured beasts.
- West Asiera: Borders on the stronghold states of Honna, Colme, and Cardwyn. Very few actual inhabitants, mainly nomadic elven mercenaries who are always ready for a fight - against anyone, and for anyone who will pay them in one way or another. The Cold mountains are the home of the Black dwarves, and are considered unsafe for lone travellers, or even small groups, to traverse with safety. One of the favourite areas for "Dark Blades" and the knights of Honna when they want to test their weapons edges.
- Asiera Mountains: Impassable to horses, these mountains have become a sanctuary for the wildlife - especially the wild birds of Labrynthia. Reportedly also the home of the Dragonworms, Labrynthias only known form of dragon life.
Cardwyn
- Capital city: Cardwyn. Population 1,100. Race(s): mostly humans and Labrynthian Elves. Industry: weapons, wood and metal products.
- Cardwyn Bay: Population 320.
- Myre: Population 158.
- Lymouth: Population 274.
- Castle Domor: Baron Dill. Forces: 20 soldiers. Levy from Cardwyn Bay.
- Cardwyn Castle: (Banks of River Cardwyn). Overseer: Sir Barney. Forces: 12 soldiers. Levy from Myre.
- Rootham Abbey: Ruins still held sacred by the natural population of Cardwyn State. Destroyed by Black Fox.
- Cardenia Mountains: Source of raw materials for industry. Patrolled regularly by groups of four to five soldiers on rota system from both castles.
- Langwyn Wood: Small wood populated by Cardwyns woodmen.
- Asiera: Population 106.
Coffe
- Capital city: Coffe. Population 1,548. Race(s): humans, Labrynthian Elves. Industry: finest bow makers in Labrynthia, wood products.
- Coffe Castle: Sir Evan Evans. Forces: 32 soldiers. Levy from Coffe. Loyal mercenaries from Amme, Arek El Salaam, and Simo.
- Friends of the sea: Small commune opposed to violence. Originally a favourite target for the "Fox" but he soon tired of killing without resistance. However, he still visits them on occasion to ensure that their 'courage' has not returned.
- Franwood Village: Upper Franwood: small community of woodmen. Despite their village being in Upper Franwood, they use the more supple trees of Lower Franwood for their bow making expertise.
- Lake Eysele: Large freshwater lake. Good stock of edible fish. River Village keeps it under stock control.
- Ammee: Population 95.
- Arek El Salaam: Population 111.
- Simo: Population 213.
Colme
- Capital city: Colme. Population 575. Race(s): humans, Labrynthian Elves, Dwarves. Industry: ship building, mostly small river going vessels.
- Colme Castle: Sir Leigh. Forces: 18 soldiers. Levy from Colme.
- Kaviir: Population 102.
- Cold Forest: Consuming an area of nearly half the entire state of Colme, this beautiful forest was a haven for young lovers. It has pretty flower-lined pathways and is noted for its small animal wildlife conservation. Since the Mon Oger situation, young lovers rarely go anywhere so intimate or romantically peaceful.
Denitia
- Capital city: Dengola. Population 793. Race(s): humans and Labrynthian Elves. Industry: fish.
- Lye Castle: Sir Davrich. Forces: 15 soldiers. Levy from Kasaar.
- Kasaar: Population 195.
Franmere
- Capital city: Franmere. Population 1,200. Race(s): Labrynthian Elves, humans. Industry: cloth making.
- Franmere Castle: Ruins.
- Faith: Population 250.
- Garre Delieu: Population 140.
- Arrowshot Castle: Sir Simon de Garre Delieu. Forces: 30 soldiers. Levy from Garre Delieu and Pierre St Avril.
- Idol Mountains: Named because the rock formation facing south appears to be great carvings of Elven/Human Faces. These faces were originally thought to be the faces of the Gods.
- Franwood Village: Although it lies within the boundaries of Franmere the villagers like to be thought of as Coffeites.
- Note: Franmere is the home state of Sunfire the Adventuress. She is the brother of Simon and is Princess of Franmere.
Honna
- Capital city: Iqui. Population 1,800. Race(s): humans predominantly, but a great mixture of all races allied to man. Industry: farming. Honna, and Iqui in particular, supplies most of the 'Free State' with their necessary basic foodstuffs.
- Castle Rikard: Home to Tristan de Rickard, better known as "Dark Blades". Forces: 20 soldiers. Levy from Iqui and Sharne.
- Holdearly Village: Guardians of the Shrine. This village of religious trustees look after the sacred Shrine to the One in One Wood.
- The Shrine to the One: No-one knows the true origin of this shrine, but it is said that Tristan was named here and that he came here to pray when the Mon-Ogers looked like defeating Mankind. And, so it is said, the weapons which changed his name and fortunes suddenly appeared by his knees as he prayed.
- Avlinton: Population 319. Avlinton is the main farming community of Labrynthia.
Hope
- Hope Monastery: Sits high on Hope Mountain. It is the religious focal point for all Labrynthians. It is written that all Labrynthians should visit Hope Monastery before they die.
Jizir
- Capital city: Jizir. Population 64. Race(s): complete mix. Industry: religion.
- Lolake: Population 23.
- Jiz La: Population 58.
- Octagon Temple: This amazingly shaped temple had stood for centuries, defying weather and war, until the "Black Fox" appeared and destroyed it. The population of Jizir State spread far and wide across Labrynthia swearing to one day return and rebuild the temple. They see "Dark Blades" as their best hope of achieving this dream.
Kitwyl
- Capital city: Saylom. Population 40. Race(s): pure bred Labrynthian. Industry: ceremonial robes for all occasions. The entire population make the ceremonial robes worn by religious and warrior factions alike.
Londaal
- Capital city: Daal. Population 450. Race(s): humans, pure bred and half-elven Labrynthians. Industry: ship and sail-makers.
- Bayshore: Population 125.
- Cathedral of the Vision of Peace: Twelve monks come each year from Monks Island to look after the Cathedral. The former keepers return to their prayers on the Island.
- Lonside: Population 80.
- Onborder: Population 60.
Zabooli
Zabooli is the refuge of the Mon-Ogers. The over population makes it impossible to give an accurate population figure for any of the towns. The forces of the "Fox" regularly patrol the border areas and well over the border lines in high numbers, allowing no-one entry. Zabooli therefore remains quite a mystery. It is thought that the Mon-Ogre, Troll, Goblin, and Dwarven populace is in the region of 12,000 creatures.
Notes to the Directory
- All the figures for population are approximates and include the areas of farmland and countryside around the named towns.
- The soldiers in the castles are only basic-trained men. They are not battle-hardened warriors. Their main employment is the maintaining of the castle, both inside and out.
- The industries shown are the major industries for the town or area. Smaller industries are working in most towns.
- The knights names as castle owners are members of the knights (sons) of Honna and will venture to do battle for "Dark Blades" whenever called.
- Although "Dark Blades" holds no actual power over these knights, or their holdings - other than his original appointment by the council as Governor - each and every one of them would be willing to die for him.
- The levy are the rank and file conscripted worker/soldiers that are called up if/when necessary. As "Dark Blades" prefers hit and run type attacks they have never been called out.
- Most of this Directory is aimed at giving you, the reader, an idea of the world in which "Dark Blades" lives. It should help you to develop your own scenarios for use within the game system.
Description and Use of the Playing Pieces
Playing Pieces for a Mounted Character
- Healthy mounted character: an unwounded, mounted character, hereafter referred to as "healthy".
- Horse without its rider: this piece represents the horse without its rider. If a character dismounts or falls from his horse as a result of combat or missile fire, flip the piece over and add to it the dismounted version of the character, appropriate to his condition (this may be "Healthy", "Wounded", "Stunned" or "Dead". See "Playing pieces for a foot character or dismounted rider" below).
- Wounded mounted character: this represents the character when wounded. Note that the character's attack and defence strengths are greatly reduced. If in doubt of a character's casualty status, a glance at the combat values will tell you at once if he is wounded or healthy. If a mounted character is wounded as a result of combat but does not fall from his horse, replace his piece with the reduced strength one.
- Dead horse: this represents a horse which has been killed as a result of combat or missile fire. If the horse was being ridden by a character at the time it was killed, he is replaced with his appropriate dismounted playing piece (see "Playing pieces for a foot character or dismounted rider", below).
- Movement value: printed in blue.
Playing Pieces for a Foot Character or Dismounted Rider
A foot character is represented by two playing pieces.
- Healthy foot character: this piece represents a healthy foot character.
- Stunned: this piece represents a character who has been stunned as a result of combat. If a healthy character is stunned, flip his piece over to represent his casualty status. A character who is stunned remains so for one complete game turn. During this time he may not move, fire or attack an opposing character. He has a low defence strength to simulate his dazed condition.
- Wounded: this represents a wounded character. If as a result of combat or missile fire, a healthy character is wounded, replace the playing piece with this one.
- Killed: this represents a character who has been killed. If he was healthy or stunned when killed, replace that piece with this one. If already wounded, merely flip over the wounded piece.
- Characters with missile weapons (shown on their playing piece) use the factors on the "missile attack strengths" table when firing missiles. The factors on the piece are for hand-to-hand combat only.
Playing Pieces for a Mule
The mule is represented by one playing piece. This piece represents a laden pack mule in a healthy state. This represents the mule when, as a result of combat or missile fire, it is killed. Simply flip the piece over in the normal manner.
N.B. Combat and movement values always follow the same colour-code. Attack Strength: black. Defence Strength: red. Movement Value: blue.
Obviously pieces without movement values may not move, e.g. a stunned character; and pieces without attack strengths may not attack. This system of flip-over and piece replacement is used for all characters.
Dark Blades Characters - Personalised
The personalised characters are listed with their printed details.
- DARK BLADES (Tristan de Rikard): Male. Age 37. Height 6ft 2in. Weight 152 lbs. Race: Human. Occupation: Knight of Honna/Lord of Iqui.
- Zatan: Male. Age 6. Height 3ft 4in. Weight 100 lbs. Race: Canine. Occupation: War-Dog/Hound of Honna/Protector of the Lord of Iqui.
- Sunfire: Female. Age 26. Height 5ft 11in. Weight 135 lbs. Race: Labrynthian Half Elf. Occupation: Adventuress/Princess of Franmere.
- Quill: Male. Age: unknown. Height: variable. Weight: variable. Race: unknown, believed to be Human/Elf crossbreed. Occupation: the greatest spellcaster in Labrynthia. Source of occupation information: Quill.
- Grast: Male. Age 43. Height 5ft 10in. Weight 176 lb. Race: Human. Occupation: Knight of Denitia.
- Hohmley: Male. Age 47. Height 6ft. Weight 129 lb. Race: Human. Occupation: Knight of Colme.
- Laberne: Male. Age 19. Height 6ft 4in. Weight 140 lb. Race: Labrynthian Elf. Occupation: Archer.
- Thrugg Lumpthew: Male (?). Age (?). Height 7ft 3in. Weight 262 lb. Race (?). Occupation: Thrugg Lumpthew.
- The Black Fox: Male. Age 42. Height 6ft 1in. Weight 167 lb. Race: Demi Human/Mon-Oger (?). Occupation: Usurper to Labrynthia.
- Shaman: Male. Age 75. Height 6ft 1in. Weight 135 lbs. Race: Mon-Oger. Occupation: Spellcaster.
- Dragon: Male. Height 5ft 6in at the shoulder. Weight up to 2,000 lb.
Knights of Honna
Ceebey of Londaal, Evans of Coffe, Dill of Cardwyn, Peterson of Monks Island, Matt of Jizir, Zed of Honna, Jon Barney of Cardwyn, Leigh of Colme, Arlon of Asiera, Roberts of Londaal, Davrich of Denitia, Simon of Franmere, Mackandy of Coffe, Rix of Jizir.
Sequence of Play
Each player's half of a game turn is divided into seven distinct steps. In each step the word "All" refers to the characters of the player whose half of the turn it is. The first player will be given in scenarios, otherwise throw dice, highest scorer going first.
First Player
- The first player's spellcaster may cast a spell if able.
- All missile armed troops may shoot if able.
- All characters may move. Exception: characters who are affected by magic may not be able to move. Bow armed troops who fired in Step 2 may be limited in their movement. (See Missile Rules.)
- Some missile armed troops may fire again. (See Missile Rules.)
- A spellcaster may cast a spell if he did not do so in the first step.
- All characters adjacent to enemy characters may engage in combat. Dead or stunned Trolls may be burnt after combat.
- All friendly characters stunned during opponent's last half turn are flipped back over. Unburnt trolls flip back to their next stage (see Troll Rules).
END OF FIRST PLAYER'S HALF.
Second Player
Follow the same sequence of steps as for first player.
After both players have completed their seven steps, one turn has been played.
Terrain Types
Each terrain type lists its hex type, movement point cost per hex, cover type, and terrain advantage.
| Hex Type | Movement Point Cost per Hex | Cover Type | Terrain Advantage |
|---|---|---|---|
| Slope | 2 | Medium | - |
| Tree | Impassable to horsemen; 2 - foot | Light | + |
| House Interior | Impassable to horses (except door hexes); 1 - foot | None | 0 |
| Window in Building Wall | Impassable to horses; 3 - foot | Medium | + (if defending through window, otherwise 0) |
| Door in Building Wall | 1 | Medium | + |
| Open Ground | 1 | None | 0 |
Note: the Bars row's advantage cell is blank in the printed table, transcribed as blank.
Cover
- Trees: Missiles may only be fired into the outside hexes of trees, which are facing the firer. Missiles may not be fired over or through tree hexes. Characters in tree hexes receive light cover.
- Slopes: Characters in slope hexes are in medium cover from missiles crossing the top lip of the slope. If the missile does not cross the top lip of the slope the target receives no cover.
- Example (printed diagram): Three crossbowmen, A, B, and C, wish to fire at the character on the slope. From the point of view of A, the target is in medium cover as the missile crosses the top lip of the slope. B cannot fire as the firer is adjacent to the target. From C, the target receives no cover as the missile does not cross the top lip of the slope.
- Horsemen in cover: A mounted character occupies two hexes. For cover classification he is considered to be totally in cover of the HEAVIER type.
- Walls: Characters behind walls receive infinite cover and may not be fired upon.
- Windows: Characters in window hexes receive medium cover from missiles passing through the window aperture.
- Exterior corners: If two crossbowmen (A and B) fire simultaneously (in one turn) at a target which is in an exterior corner hex, the target cannot receive medium cover from the corner if both are firing at once. The player controlling the target character should nominate from which crossbowman's point of view he is in cover.
Movement
Each character has a movement point value printed on his counter. As he moves through each hex he expends points depending on the amount that each hex costs to enter. Each turn a player may move all, some or none of his characters up to the maximum movement point value shown on the character counter. Unused movement points MAY NOT be accumulated and used in later turns.
Restrictions on Movement
- Characters may not pass through hexes containing live enemy characters.
- Walls are impassable; buildings, courtyards, etc., must be entered via the doors or windows.
- Horsemen may not enter the interior of buildings. They may, however, occupy door hexes, and may enter courtyards.
- Bridges must be crossed on foot and in single file; horses must be led. Any character in combat receiving a retreat result falls in. (See water rules.)
- Stepping stones may only be crossed by characters on foot and in single file. Any character in combat on stepping stones, and receiving a retreat result, falls in. (See water rules.) A stunned character drowns. A wounded character falls in on a die roll of 1-5; 6-10 he manages to stay on the stones. If a wounded character falls in he drowns.
- Horsemen may not enter tree hexes.
- Hexes containing a dead horse have their terrain movement cost doubled. Exception: bridge hexes containing a dead horse are impassable. One character can push a dead horse off the bridge in three complete turns, if he does nothing else at all in those turns.
- Hexes containing three or more dead men have their terrain movement cost doubled. Bridge hexes containing one or two dead men have their terrain cost doubled. Three dead men in a bridge hex makes it impassable. One character can push one dead man off the bridge in one complete turn, if he does nothing else at all in those turns.
- Hexes containing two dead horses or six dead men become impassable. Exception: bridge hexes containing one dead horse or three dead men are impassable.
N.B. Where a hex contains a mixture of dead men and horses, three dead men are considered to be of equal mass to one dead horse.
Mounting and Dismounting
To mount or dismount from a horse takes a character one complete turn. To mount, a character must be in a hex adjacent to the horse.
Only knights or other characters who started the game as mounted characters may remount horses acquired as a result of combat. If they do so, remove the dismounted horse counter from play and substitute that character's normal mounted character.
Unharmed riderless horses remain stationary until remounted.
Horses do not have independent movement; they may only move when attended by a human character.
Horses may be led by an infantryman at his appropriate movement allowance. To lead a horse move a character to a hex adjacent to the front of the horse and continue to move the character as normal, treating the horse as an extension of the character counter.
Wounded characters may not mount or remount horses.
Horse can only be mounted from the hex marked X (printed diagram).
Moving Through Windows
Only dismounted characters may move through windows. Characters may not move through a window if the hex adjacent to the other side of the window is occupied by a live unstunned enemy character.
N.B. Due to their low movement factor, wounded characters may only move through windows if their movement rate equals three or more movement points.
Water
Normally impassable to men and horses. Characters who fall, jump, or are pushed in roll during each of their movement steps.
Characters in hexes adjacent to the shore roll one die: 1, 2, 3, or 4, and they may crawl out and make a full move; 5 to 10 roll again using the table below. Wounded or stunned characters drown.
The Lake:
| Die | Result |
|---|---|
| 1, 2, 3 | Move two hexes downstream, and one hex towards nearest bank. |
| 4, 5, 6 | Move two hexes downstream and one hex towards farthest bank. |
| 6, 7, 8 | Move three hexes downstream. |
| 9, 0 | They drown. |
Source note: the printed lake table lists the die results 4-5-6 for the second row and 6-7-8 for the third, so the value 6 appears in both rows. It is transcribed as printed; the printed table does not say which row takes precedence.
The River:
Characters roll one die. 1 or 2 and they may take a full move to crawl out. 3-0 roll again on the table below.
| Die | Result |
|---|---|
| 1, 2, 3, 4 | Move 4 hexes downstream. |
| 5, 6, 7, 8 | Move 6 hexes downstream. |
| 9, 0 | They drown. |
Characters who go through the mill wheel are crushed to death. Characters who move into stepping stone hexes stop moving. On a die roll of 1-6 they hang on and may crawl out in their next movement step and make a full normal move.
If a character is swept off the map he is presumed lost, and may not return to play.
Stacking
Only one live character may occupy a hex at any one time. Characters may pass through hexes containing a friendly live character, but may not stop there. Characters may occupy a hex containing dead characters subject to movement limitations, i.e., if a character cannot move into a hex he obviously cannot stack on it.
Pack Mules
Pack mules are treated in the same manner as riderless horses, except that pack mules may never be mounted.
Pack mules may be strung together and led in file in the same manner as riderless horses. It takes one man one entire turn to attach or detach one mule to or from a string of mules, whether the animals are alive or dead.
Combat
When two or more characters are in adjacent hexes they may engage in combat. To resolve combat the attacking character divides his attack strength by the defending character's defence strength; this produces a "combat odds" which is then referred to the "combat results table". A die is thrown by the attacking player and a result is achieved. When computing "combat odds" attack strengths are always rounded down to the nearest divisible figure, e.g., an attack strength of 8 against a defence strength of 3 would give combat odds of 2-1.
"Combat odds" may be altered depending on the terrain over which the combat is being fought; see "Advantage of Terrain in Combat".
Multiple Combat
When a character enters a hex which is adjacent to 2 or more opponents he may elect to fight some, all or none of them. If a character elects to give combat to 2 or more opponents he must combine his opponents' defence strengths into 1 defensive factor.
If the defender or attacker sustain a casualty on the combat results table, the controlling player chooses which one of his characters is affected.
When 2 or more characters attack a single character they may make individual attacks, or if they all have the same advantage or disadvantage of terrain they may combine their attack strengths into one attack.
Advantage of Terrain in Combat
If two characters who are involved in combat are in different types of terrain, one may have an advantage which would modify the combat odds. For classification of advantageous terrain see the terrain table and check "Effect of Terrain on Combat".
N.B. Mounted characters are considered to be in the most disadvantageous terrain of the two hexes they occupy for combat purposes.
Effect of Terrain on Combat
Key: "-" = disadvantage; "0" = neutral; "+" = advantage.
| Attacker in | vs Defender in | Result |
|---|---|---|
| - | + | Move left 2 columns on CRT |
| - | 0 | Move left 1 column on CRT |
| 0 | + | Move left 1 column on CRT |
| 0 | - | Move right 1 column on CRT |
| + | 0 | Move right 1 column on CRT |
| + | - | Move right 2 columns on CRT |
If both sides are in terrain that places them at a mutual advantage/disadvantage this does not affect the CRT.
Horses in Combat
When a horseman is dismounted as a result of combat or missile attack the appropriate counter is placed in a hex adjacent to the now riderless horse at the discretion of the attacker.
Only characters who started the game as mounted characters may remount horses acquired as a result of combat. If they do so, remove the dismounted horse counter from play and substitute that character's normal mounted character.
Unharmed riderless horses remain stationary until remounted. Horses do not have independent movement; they may only move when attended by a character.
Horses may be led by an infantryman at his appropriate movement allowance. To lead a horse move a character to a hex adjacent to the horse and continue to move the character as normal, treating the horse as an extension of the character counter.
Wounded characters may not mount or remount horses.
Attacking Pack Mules
When a player wishes to attack a pack mule, resolve combat or missile attack in the normal manner, referring to the relevant results table. Use the table for a mounted target/opponent and when obtaining a result ignore RIDER casualties. If a pack mule is retreated, and is part of a string of mules, ALL mules will retreat; characters leading mules will not retreat in this instance.
Combat Results Tables
Columns are the combat odds; rows are the die result (0 is the die face 0). In the printed tables a star (★) marks cells with no letter entry; the printed key does not define the star, so it is transcribed as printed. Key letters apply to the table in which they are printed.
1. Infantry Against Infantry
| Die \ Odds | 1-2 | 1-1 | 2-1 | 3-1 | 4-1 | 5-1 | 6-1 | 7-1 | 8-1 | 9-1 | 10-1 | 11-1 | 12-1 |
|---|---|---|---|---|---|---|---|---|---|---|---|---|---|
| 1 | C | E | E | E | E | F | F | F | F | F | F | F | F |
| 2 | B | C | D |
Key: A - Attacker wounded. B - Attacker retreats 1 hex★. C - Defender retreats 1 hex★. D - Defender stunned. E - Defender wounded. F - Defender killed.
2. Infantry Against Mounted
| Die \ Odds | 1-2 | 1-1 | 2-1 | 3-1 | 4-1 | 5-1 | 6-1 | 7-1 | 8-1 | 9-1 | 10-1 | 11-1 | 12-1 |
|---|---|---|---|---|---|---|---|---|---|---|---|---|---|
| 1 | C | D | D | D | E | F | F | G | G | G | G | G | G |
| 2 | B | C | C |
Key: A - Attacker wounded. B - Attacker retreats 2 hexes★. C - Attacker retreats 1 hex★. D - Defender stunned and dismounted. E - Defender retreats 1 hex★. F - Defender wounded. G - Defender killed and dismounted.
3. Mounted Against Mounted
| Die \ Odds | 1-2 | 1-1 | 2-1 | 3-1 | 4-1 | 5-1 | 6-1 | 7-1 | 8-1 | 9-1 | 10-1 | 11-1 | 12-1 |
|---|---|---|---|---|---|---|---|---|---|---|---|---|---|
| 1 | E | F | G | H | H | H | H | H | I | I | J | J | J |
| 2 | C | E | E |
Key: A - Attacker's horse killed, rider dismounted and wounded. B - Attacker's horse unharmed, rider dismounted and stunned. C - Attacker wounded. D - Attacker retreats 4 hexes★. E - Defender retreats 4 hexes★. F - Defender wounded. G - Defender's horse unharmed, rider dismounted and stunned. H - Defender's horse killed, rider dismounted and wounded. I - Defender's horse unharmed, rider killed. J - Defender's horse and rider killed.
(A dash "–" is printed as a dash in the source table; the source key gives no entry for it.)
4. Mounted Against Infantry
| Die \ Odds | 1-2 | 1-1 | 2-1 | 3-1 | 4-1 | 5-1 | 6-1 | 7-1 | 8-1 | 9-1 | 10-1 | 11-1 | 12-1 |
|---|---|---|---|---|---|---|---|---|---|---|---|---|---|
| 1 | D | E | E | E | F | F | F | F | F | F | F | F | F |
| 2 | C | D | E |
Key: A - Attacker wounded. B - Attacker retreats 4 hexes★. C - Attacker's horse unharmed, rider dismounted unharmed. D - Defender retreats 2 hexes★. E - Defender wounded. F - Defender killed.
5. Missile Results Against Mounted Opponents
| Die \ Odds | 1-2 | 1-1 | 2-1 | 3-1 | 4-1 | 5-1 | 6-1 | 7-1 | 8-1 | 9-1 | 10-1 | 11-1 | 12-1 |
|---|---|---|---|---|---|---|---|---|---|---|---|---|---|
| 1 | A | B | B | B | C | C | D | D | E | E | F | F | F |
| 2 | ★ | A | A |
Key: A - Defender retreats 4 hexes★. B - Horse killed, rider dismounted and stunned. C - Horse unharmed, rider dismounted and wounded. D - Horse killed, rider dismounted and wounded. E - Horse unharmed, rider killed. F - Horse killed, rider killed.
Note: If a mounted opponent moved more than 7 hexes in his last movement step, odds are moved one column to the left. (Riding Fast = Harder Target.)
6. Missile Results Against Infantry
| Die \ Odds | 1-2 | 1-1 | 2-1 | 3-1 | 4-1 | 5-1 | 6-1 | 7-1 | 8-1 | 9-1 | 10-1 | 11-1 | 12-1 |
|---|---|---|---|---|---|---|---|---|---|---|---|---|---|
| 1 | A | B | B | B | C | C | C | C | C | C | C | C | C |
| 2 | ★ | A | A |
Key: A - Defender retreats 2 hexes★. B - Defender wounded. C - Defender killed.
★ A retreating character may not stack with other characters, nor may it move adjacent to an enemy character. Retreating characters may move through friendly characters. If unable to retreat, the character is wounded instead.
Special (Combat Results Tables): Stunned and wounded characters are considered dead if they receive further injury.
If as a result of combat the defender is killed, or forced to retreat, the attacker may advance into the defender's hex IMMEDIATELY. (This does not count as movement.) If the attacker is adjacent to any live enemy characters, he may not advance in this way.
Missile Attacks
Missile Attack Strengths
| Weapon | Short Range | Medium Range | Long Range |
|---|---|---|---|
| Shortbow - range (in hexes) | 1-15 | 16-25 | 26-40 |
| Shortbow - attack strength | 20 | 10 | 5 |
| Crossbow - range (in hexes) | 1-15 | 16-30 | 31-55 |
| Crossbow - attack strength | 30 | 20 | 10 |
Example: A crossbow firing at a target at a range of 28 hexes would have an attack strength of 20. If the target has a defence strength of 10 the "combat odds" would be 2-1, i.e., 20 ÷ 10.
Restrictions on Firing
Visibility. A character may only shoot at a target if he can see it. Measure a straight line from the centre of the shooter's hex to the centre of the target hex. This is the "line of sight". If the line of sight crosses characters, or terrain other than clear ground, it may be blocked.
A line of sight is blocked by buildings or trees - note, a character may see into a tree or building hex, but not through it.
Only shortbows may fire over intervening characters; they may fire over a maximum of 4 intervening characters providing:
- None of the intervening characters are adjacent to the target.
- The target is either in the open or in light cover only.
Firing on Targets in Cover
When a target is in cover calculate the "combat odds" in the normal manner, i.e., attack strength to defence strength.
If the target is in light cover move down 1 column on the missile result table, i.e., a 4-1 attack becomes a 3-1 attack. If the target is in medium cover move down 2 columns on the missile result table.
Targets in infinite cover may not be fired upon.
N.B. For clarification of cover types see "Cover".
Firing Through Windows
Characters may fire from a window hex at any angle provided that other characters and/or terrain do not intervene.
Characters firing into windows may only fire at targets occupying window hexes. If, however, the firer is directly adjacent to the window he may fire at any target inside the building subject to normal cover limitations.
A character may not fire through one window and then through another window or door.
Firing and Combat
Characters may not fire if they were engaged in combat in the last combat step, or if they are adjacent to an enemy character in the firing step.
Firing and Movement
Crossbows may not move and fire in the same player half. Thus a crossbow-armed character which fires in step 2 may not move in step 3. Crossbows may not fire in step 4.
Bowmen may move half their movement allowance (rounded down) and fire in step 4. If they move more than half their movement allowance in step 3 they may not fire in step 4.
Mounted Characters and Firing
Mounted characters may not fire missile weapons.
Firing Through Doorways
Characters may fire in or out of a door hex at any angle providing other characters and/or terrain do not intervene.
Characters wishing to fire into the interior of a building must be inside or in a doorway hex of the same building. They may then fire at anyone in the building subject to normal cover limitations. Characters firing in through doors in exterior walls (courtyards etc.) may fire at any target that is not in infinite cover and into door and window hexes subject to normal terrain and cover limitations.
Firing at Targets in Tree Hexes
Characters may not fire over or through tree hexes. (The printed diagram shows the red hexes the crossbowman may not fire into, as to do so he would have to fire over or through tree hexes.)
Infinite Cover
No character may fire over or through building walls which supply infinite cover. Only apertures such as doors and windows afford an opportunity for building walls to give less than infinite cover.
Note. Missile fire usually, but not always, takes place at short and medium range. Long range has been included to allow players to use maps from two games to form a larger playing area if they so wish. It is also hoped to produce add-on sets in the future with totally new terrain maps, characters and scenarios. With these possibilities in mind, long range fire might well feature quite strongly in a game where 4 or more maps were in use.
Magic
The magic system used in "Dark Blades" is very easy to understand, although it is advisable to read through this section completely at least once.
There are fourteen (14) different spells, and these are explained below. There are 24 spell cards.
1. Division of Magic "Spell" Cards
The dividing of these cards between the players is the first decision to be made. If you have twelve (12) cards each it will, after a couple of games, become obvious which spells the other player holds. We suggest that you shuffle the cards face down and then deal out eight (8) cards each, the remainder being placed face down to one side away from the play. There is no definite ruling on how much or how little magic is used; it is up to the players to decide.
2. Using the Cards
Only spellcasters may use spells. In the scenarios only Quill and the Shaman are spellcasters. Spell cards must be played during one of the correct "casting" phases in the sequence of play. It is suggested that each card be used only once per game, and then discarded. Both players may agree at the beginning of the game to make spells re-playable as many times as they wish. This is, of course, up to the individual players, but the printed text says "we have found that this takes away much of the planning and thought needed before a spell is chosen and cast. The flexibility of the 'Dark Blades' game allows you to choose how you wish to play. As long as it is equal on both sides it shouldn't affect the result of the scenario."
3. Spell Ranges
These are given under "Areas of Effect".
There are usually no dice throws for spell effects. If the spell is cast, its effect is immediate. The exceptions to this are a) magicians are unaffected by their own spells, and only have a 40% possibility of being affected by the spells of others (40% = a roll of 1, 2, 3, or 4 on a 10 sided dice); and b) the death spell - see spell card.
4. The Spells
(Note: Areas of effect are explained later.)
- Death: Effect as die roll. See card for possibilities.
- Shield: This stops all visible allies, i.e. those not out of the line of sight of the magician, from being hit by any missile fire during the turn in which it is cast. It does not affect those in buildings, bushes or trees, etc., that the caster is ruled not to be able to see.
- Wizard Whirl: This allows the caster to move to any hex on the map(s) immediately. It is an ideal spell to cast to get into position to cast a "touch" spell on anyone.
- Heal: This spell returns any injured or dead character to life. They become fully fit in the same hex as that in which they "died". Only one piece may be healed.
- Magic Carpet: Any character "touched" by the magician and told "magic move", for the one turn in which it is played, moves double rate (i.e., twice the rate of movement shown on the playing piece) whilst disregarding the extra costs for crossing any hazardous terrain hexes. He may also cross any body of water within his movement allowance. He must start and end his movement on land.
- Magic Arrow: Automatically hits the first character in the line of sight or the first character that it is aimed at (unless he/she is under a "shield" spell), and causes them to become injured or dead. The intended victim must be within the range of the spell, but need not be the nearest character to the spellcaster, although it must be the first character (opposition) along the chosen "arm" of effect.
- Zap: Automatically hits up to three (3) opposition characters that are within the line of the spell, and who are within five (5) hexes of each other.
- Move Freely: Negates the effects that terrain may have on allied movement when cast on those within the spell range. Effects last one turn of movement only. If no movement is made during turn of casting then spell effect is lost.
5. Spells: Areas of Effect
The following diagrams give the areas of effect for the various spell types. The spell type is shown clearly on the spell cards.
The areas of effect are general and do not make allowances for buildings or other forms of protection. Characters in buildings that are within the area of effect are not affected by the spell unless they are visible to the casting magician - i.e., in a window or doorway, or they have been firing at the magician either during the turn of casting or the last firing phase of the turn before.
The spells only affect those characters - on either side (remembering that some spells affect opposition and allies) that are within the spell range and the caster's line of sight. To determine whether or not the spellcaster can see the target hex, use the visibility rules in the missile fire section.
Exception - Fireburst. This spell affects everyone and everything within its area of effect. Wooden buildings, trees, bushes, scrub etc., will be burnt to ashes, while stone buildings will be gutted. Anyone within the area of effect will be either wounded or killed. (Note: the spellcaster is not affected by his own spell.)
Touch
The caster can "touch" any one of these hexes: A, B, C, D, E or F (printed diagram).
Note: The caster can only "touch" C if the recipient is actually in the doorway gap. The caster cannot "touch" through windows.
Gargoyle's Breath
The "Gargoyle's Breath" is not a spell. It is the weapon most used by this fearsome creature. The range of this weapon is "directional", though the Gargoyle has to use the "infantry against" foot or mounted (depending on target) combat results table.
It has a range of 1-10 hexes, but can only affect the first character (and his horse, if any) along the line of effect.
The Gargoyle has an attack strength of 20 when using its breath, and cannot be affected by an adverse combat result when attacking in this way.
Areas of Effect: Directional
The directional area of effect is any hex in a direct unbroken line from the spellcaster up to 20 hexes distance. A line will be broken by buildings, trees, bushes etc. - anything that blocks the spellcaster's line of sight. Water, i.e., stream, river, lake etc., will not break the spellcaster's line of sight.
The spell can be cast along any one of the "arms" of the area of effect line(s) of sight.
- "Zap" Example A: The spell could affect X, Y and Z as they are in line of sight and within 5 hexes of each other. (Printed diagram.)
- "Magic Arrow" Example A: The spell would only affect X as it is the first opposing character in line of sight. (Printed diagram.)
- "Zap" Example B: The spell could affect X and Y but not Z.
- "Magic Arrow" Example B: As Example A for the same spell.
Areas of Effect: Code A
The target hex may be up to 17 hexes from the caster. The spellcaster should choose a hex within this 17 hex range and cast his spell. There need not be anyone or anything in the target hex. The spell area of effect is a radius of 3 hexes from the target hex.
Place "target hex" marker on the target hex and count a 3 hex radius from the marker as the affected area. (Printed diagram.)
Areas of Effect: Code B
These spells will affect characters up to 8 hexes from the spellcaster. The printed diagrams show examples in play, with S for the spellcaster, X for opposition pieces, and Y for friendly pieces.
- Fireburst: All X and Y pieces inside the area of effect are either wounded (if healthy at time of spell casting) or killed - if already stunned or wounded. Those outside the area are okay.
- Fear: All X pieces within the area would have to move directly away from the opposition and the caster for one full move. Arrows are used to show the direction of retreat.
- Move Freely: All Y pieces can move across any terrain hexes (except water) without movement penalties, within the area of effect, up to normal full movement allowance.
Spell Card Reference
The spell cards (quick reference set) are printed as follows. Each card gives its area of effect (A, B, Any One Character within Line of Sight, Directional, Touch, or Spellcaster Only), its effect, its duration and any notes.
| Spell | Area of Effect | Effect | Duration and Notes |
|---|---|---|---|
| Death | Any one character within line of sight | As die roll: 1, 2, 3, 4, 5, 6 - victim dies; 7, 8, 9 - no effect; 0 - random member of own side dies. | Immediate as cast. Will not affect "Dark Blades" or "Black Fox". |
| Freeze | Any one character within line of sight | Target cannot perform any action in his next turn. If attacked, counts as stunned target. | Turn of casting only. Will not affect "Dark Blades" or "The Black Fox". |
| Magic Arrow | Directional | Automatic hit on any one character within 20 hexes of caster and in his line of sight. | Immediate at time of casting. Uninjured characters become wounded; injured characters die; stunned characters die. |
| Zap | Directional | Automatically hits 1, 2, or 3 opposition characters that are in line of sight, within the 20 hex range, and within 5 hexes of each other. | Immediate as cast. Uninjured characters become wounded; injured/stunned characters die. |
| Fear | B |
The set has 24 cards: one each of Death, Freeze, Magic Arrow and Zap, and two each of Fear, Fireburst, Heal, Help, Magic Carpet, Mire Feet, Move Freely, Shield, Temporary Blindness and Wizard Whirl. The card-set note states that the separate Dark Blades Expansion Set has 40 additional cards and is not covered here.
Special Rules
1. Dog Attacks: Mon-Oger War-Hounds and Zatan
War-dog attacks take place during the hand-to-hand combat phase. The war-dog counters show only "alive" and "dead" animals. Treat any "stun" or "wounded" result to the dog as "dead".
2. Trolls
Trolls are special creatures that regenerate if they are not burnt to ashes immediately after they have been "killed". All characters carry, about their person, a means to light a fire, whether it be a lantern with oil and flints, or some magical means. To burn the troll(s) the player only needs to place a "flames" counter on the dead troll counter(s) at the end of the combat step, and "flip" this to "ashes" at the end of the player's half. If, however, he/she forgets to do this within their combat (hand-to-hand) phase, and play has passed either to the other player or to the next step, then the troll will regenerate by "half strength" at the player's last step. A dead troll will become wounded; a wounded or stunned troll goes to full strength.
3. The Dragon
The dragon creature in "Dark Blades" is a large carnivorous worm with scaly skin and bat-like (small and leathery) wings. It cannot fly or breathe fire, but it can move quite fast and is strong and deadly in attack. The dragon attack takes place during the normal combat phase.
Optional Rules
1. The Magic Sword (Sons of Honna)
Holder's attack odds increase by two places to the right on the combat results table - hand-to-hand combat only. Note: "Dark Blades" cannot use the magic sword.
2. The Magic Ring (Mon-Oger Forces)
Holder's opponent's attack odds move one place to the left. The "Black Fox" will not wear this ring.
Creation. The magic items can be created by the spellcasters - the Ring by the Mon-Oger Shaman, and the Sword by Quill. To create one, the spellcaster must choose a recipient to give the item to, and then throw the die. If the result is 1, 2, or 3 the item is created on the finger/in the hand of the recipient.
The creation is made during the spellcaster's "casting phase". He cannot cast a spell and create an item in one turn, nor can he attempt to create an item, and if the attempt fails, then cast a spell, in the same turn. There is only one Ring and one Sword, but they can be transferred from one character to another.
3. Magic Cards
As suggested, each player should start the game by having cards dealt to them. The rest of the pack should be placed face down near the playing area. Then, instead of casting a spell - and during the first casting phase only - the player(s) could exchange one card from their hand for the top card of the deck (unseen). They could not then cast a spell during the next casting phase as it would take the spellcaster the remainder of the turn to "learn" the new spell.
Neither can he cast a spell in the first phase, and then exchange a card in the second casting phase. Cards may not under any circumstances be exchanged during the second spellcasting phase.
Scenarios
Scenario One: The Arena
Background. The arena is a natural hollow that the Mon-Ogers and their allies use for gladiatorial combat, sharpening their weapons skills for the war against man. Next to the arena they have built a stone building where they imprison their victims - those intended for slaughter in the arena.
"Dark Blades" has allowed himself to be captured by a band of goblins, and taken to the arena, in a daring plan to draw the "Black Fox" and his Mon-Oger elite into the open. Nearby, in the trees, hide Sunfire, Quill, and a group of trusted friends. They have been ordered to wait until the "Fox" appears and then to capture him, and release "Dark Blades".
Meanwhile, the goblins and their cronies, the black dwarves, have grown tired of waiting for the "Fox" to show, and have decided to have some fun at "Dark Blades" expense. Ushering him into the arena - fully armed but heavily guarded/surrounded - they intend to send in a variety of captured creatures to fight "Dark Blades" to the death.
Preparation. Place the allotted goblins and dwarves around the arena. Place "Dark Blades" on any hex in the arena and place the Dworc opposite him - 6 hexes away. Sunfire, Quill, and the rescue party should be placed in hexes on Map 2 - The Water Mill - on the mill side of the river.
Play. "Dark Blades" player moves first. As each opponent to "Dark Blades" is defeated/killed, replace it with another. The order of replacement is 1. Dworc, 2. Gargoyle, 3. Dragon. Each creature can be used more than once if necessary. The "Dark Blades" player can move "Dark Blades" in the arena but should not move the other characters until the first dragon is in the arena. They will then realise that the "Black Fox" is not going to appear.
If "Dark Blades" is in serious trouble before then they may move in to rescue him. The goblins and dwarves may not be moved until any member of the rescue party moves to within 5 hexes of a goblin or dwarf.
The Sides (both sides on foot).
- Dark Blades side: Dark Blades, Sunfire, Quill, Grast, Hohmley, Laberne, Thrugg, Arlon, Davrich, Mackandy.
- Opposition: 7 Goblins, 8 Black Dwarves; as necessary, Dworc, Gargoyle, Dragon.
Note: Only the "Dark Blades" player has a spellcaster.
Victory. Dark Blades wins by destroying the enemy force. The Bad Guys win by killing Dark Blades.
(Map: Mill map and Arena map, as printed with edge numbers 1-8.)
Scenario Two: Trouble at T'Mill
Background. Job and Sarah operate one of the busiest mills in Labrynthia. The "Black Fox" has sent a band of Mon-Ogers, led by Shaman, to capture it. "Dark Blades" has heard of this attack plan, and is rushing to prevent its success.
Preparation. Place Job and Sarah in the mill. Place the Mon-Oger force on the left hand side of the map. The "Dark Blades" side does not appear until turn two, thus giving the Mon-Ogers a full turn of movement before their arrival. "Dark Blades" and company will enter from the top right hand corner of the map. Dark Blades is first player.
The Sides (both sides on foot).
- Dark Blades: Dark Blades & Zatan, Sunfire, Quill, Grast, Hohmley, Laberne, Thrugg, Jon, Arlon, Davrich, Mackandy, Ceebey, Dill, Leigh.
- Job and Sarah (placed in the mill, per Preparation).
- Mon-Ogers: Shaman, all 21 Mon-Ogers.
(Map: Mill map; the printed diagram marks the Dark Blades entry point and the Mon-Oger set-up along the western edge.)
Victory. The winner is the player who holds the mill.
Scenario Three: Mon-Oger Mule Train
Background. "Dark Blades" and his friends have captured some Mon-Oger mules that were carrying supplies to Zabooli. They are now taking them to their own allies. "The Black Fox" is waiting to ambush them and claim back his goods.
Preparation. Lay out maps as shown. "Dark Blades" side, and the mules, enter at the bottom left hand corner of the "arena" map, and have to cross the river and escape off the board at the top right of the "watermill" map. Good scouting has made "Dark Blades" aware of the ambush, but he knows that his is the only route he can take. However, he has taken the precaution of splitting his party, and has Sunfire leading a small group behind the main party.
Place all the "Fox" characters on the mill side of the river, with the exception of two "snipers" who may be placed on the opposite side. The "Dark Blades" side enter on the bottom left hand side of the "arena" map. They must have two characters at least 6 hexes in front of the main party to begin with. Dark Blades side start on horseback, but may have to dismount to go through the woods (mill map) and cross the river. Sunfire and her group can enter anywhere on the left hand side of the "arena" map two turns later (turn 3). "Dark Blades" is the first player.
The Sides.
- Black Fox: Shaman, All Mon-Ogers, All Elven Mercenaries, All Trolls.
- Dark Blades (Mule Train): Zatan, Quill, Thrugg, Matt, Simon - Mule, Rix - Mule, Evans - Mule, Leigh - Mule, Dill, Zed, Barney, Roberts, Peterson.
- Dark Blades (Back-Up): Sunfire, Grast, Hohmley, Laberne, Davrich, Mackandy, Ceebey.
Victory. Dark Blades wins if they get two mules off the board at the exit points, or if they kill the "Black Fox". Black Fox wins by stopping at least 3 mules from exiting the map. The Black Fox player may not attempt to kill the mules, as he will need them to carry his supplies!
Scenario Four: The Raid
Note: This scenario uses the maps from "Cry Havoc" - The Crossroads and The Village.
Background. "Dark Blades" and his friends are resting in the village when they see the arrival of "The Black Fox" and a small band of his followers on the horizon. The resulting battle should be fast and furious.
The Sides.
- Dark Blades: Zatan, Sunfire, Quill, Grast, Hohmley, Laberne, Thrugg.
- Black Fox: Shaman, Mon-Oger Elite - Pole Arm, Mon-Oger Elite - Axe, Mon-Oger Elite - Pole Arm, Mon-Oger Elite - Axe, Mon-Oger Berserker, Mon-Oger - Sword (four).
- 2 War Dogs (as printed, below both lists; the source does not assign them to a side).
Set Up. Place the Dark Blades group dismounted in any of the buildings in the village. Place their horses in the courtyards or village streets. They can all be in one building or spread out in separate buildings. The "Fox" and Shaman are on horses, the Mon-Ogers on foot. They arrive at the bottom edge of the crossroads map. It may be possible for the "Dark Blades" band to mount their steeds and ride out to meet the greater Mon-Oger force.
Victory Conditions. Dark Blades wins if he forces the Mon-Oger band to retreat or he captures/kills the Black Fox. The Black Fox wins if he captures or kills Dark Blades.
The Maps Layout. The maps in "Dark Blades" can be used - end to end - but are not suited for the battle on horseback between "Dark Blades" and the "Fox" that could ensue. In the event of using these maps it is suggested that the "Dark Blades" group set up in the top section of the "Mill" map, and the "Fox" arrive in the bottom section of the "arena" map. On a mutual understanding between the players, terrain difficulties could also be ignored in this case.
"Black Fox" is the first player in this scenario. His side enters at the middle of side 5 between the scrub and the hillock.
Capture. To capture Dark Blades or the Black Fox, the character must be stunned, and adjacent to at least two enemy characters. They will tie him up. For the capture to count as a victory, the captured character must be escorted off the map (any map edge).