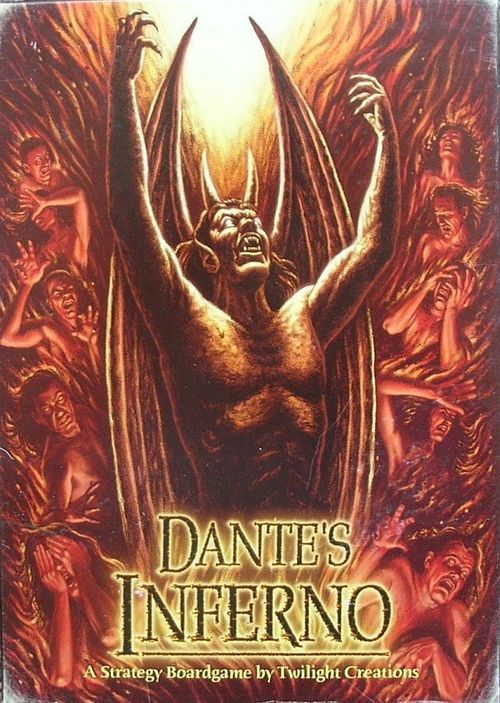
Dante's Inferno
Dante's Inferno Rulebook
Table of Contents
Table of Contents
Overview
The object of this game is to rescue enough sinners (resources) to gain entry to the 9th Circle of Hell and defeat Lucifer; all the while preventing the other players from doing so first.
Contents
- 81 game tiles
- 28 - 1st/2nd circle tiles (7 for each resource) + 4 1st/2nd circle corner tiles
- 20 - 3rd/4th circle tiles (5 for each resource) + 4 3rd/4th circle corner tiles
- 12 - 5th/6th circle tiles (3 for each resource) + 4 5th/6th circle corner tiles
- 4 - 7th/8th circle tiles (1 for each resource) + 4 7th/8th circle corner tiles
- 1 - 9th circle tile
- 6 resource tracking cards
- 24 tracking card counters
- 36 player figures (6 x 6 different colors)
- 20 demon figures
- 1 Lucifer figure
- 1 "good" token
- 1 "bad" token
- 2 dice
Board Description
There are nine circles of hell. Each tile contains a portion of two circles except for the center tile which is the 9th circle. Each tile, except for the 9th circle, also has two numbers and a color on it. When you have a token on one of the two spaces of a tile, you gain resources for both of the numbers, regardless of your current circle. You move from one circle to the next using the corner squares. These squares will also tell you how hard the demons in that circle are to fight.
The resources are designated by color:
- Lust: Yellow ( Y )
- Violence: Red ( R )
- Gluttony: Blue ( B )
- Hypocrisy: Green ( G )
Setup
When beginning the game, separate the tiles by circle according to their backs, i.e., all the 1st/2nd circle tiles are placed in a stack, 3rd/4th circle tiles are placed in another stack, etc. Shuffle each stack to thoroughly mix up the tiles from the same stack. Place these stacks aside, within easy reach of all players.
The 1st/2nd circle levels should be set up in the beginning of the game. Place the tiles randomly to form a 9 x 9 square including the corner tiles. The other corner tiles can be placed at the beginning of the game or as needed during the game as the players advance from one circle to the next. The Lucifer figure is placed on the 9th circle when it is played.
Next, each player places three player tokens as follows: Pick a player randomly to place first. They place one player token on the first circle of one of the tiles. Placement continues clockwise. The last player places two tokens. Placement then proceeds counter clockwise. A third token is placed by the player chosen to go first, and the placement continues on clockwise until all players have placed three player tokens.
- Only one player token can be present on any one space on a tile (there may be two player tokens present on the same tile if they are in different circles).
- The player tokens may be placed on any non-corner tile of the 1st circle when they come into play.
- When playing a 5-6 player game, players should only use 5 of their 6 player tokens.
Randomly choose a player to go first, and play continues clockwise.
The setup diagram in the rulebook is captioned "When you set up the board it should look similar this."
Turn Sequence
- Fight a demon if on the same square as one of your player tokens. If there is more than one combat, they all must be fought but may be done so in any order.
- Roll to see which resources are collected.
- Take action(s).
- Move one of your player tokens one square (no cost).
- Move one demon one square (no cost).
- Trade resources.
#1 and 2 must be done in order. #3, 4, 5 and 6 may be done (or skipped) in any order.
1. Fighting Demons
At the beginning of your turn, before taking any other actions, you must fight each demon that occupies the same square as any of your player tokens. The target number to get rid of the demon is determined by the circle, as noted in the corner squares of each circle. For example: To get rid of a demon in the 1st/2nd circle, you must roll a 6 or better on two dice. When in the 5th or 6th circle you must roll an 8 or better.
If you are unable to defeat a demon, your token is moved back one circle, i.e. if you are in the 3rd circle, you would have to move back to the 2nd circle. Tokens are moved to the closest corner square of the previous circle which is not occupied by another player. If you are in the 1st circle and fail to defeat a demon, you move to the closest corner square of the 1st circle.
If all squares of the previous circle are occupied, you must go to the circle before that, i.e. you lose a combat on the 5th circle and all 4th circle corner squares are occupied, you move to the closest 3rd circle corner square that is not occupied. If all corner squares are occupied in the 1st circle and you lose a combat with a demon, your token is removed from play.
You only fight demons at the beginning of your turn. If one is moved to your square, or you are moved to a square containing a demon, you don't have to fight them until next turn (unless of course they are no longer there).
Lucifer resides in the 9th circle and is represented by the figure seen in the rulebook. When a player enters the 9th circle, he must defeat Lucifer to win the game. The target number is a 10 or above. Good luck!
The figure caption in the rulebook reads "This is a demon. Actually, it's Lucifer himself!"
2. Rolling the Dice
Roll 2d6 to see which resources are collected. All players gain resources when they occupy a tile containing the number rolled (either the number in the circle they occupy or the number in the other circle on that tile).
Players gain 1 resource for tiles occupied on the 1st/2nd circles, 2 resources for tiles occupied on the 3rd/4th circles, 3 resources for tiles occupied on the 5th/6th circles and 4 resources for tiles occupied on the 7th/8th circles.
When doubles are rolled, you gain resources as usual but also get to collect one resource of your choice. Example: You roll an 8 (two 4s), you gain resources for any #8 tiles you occupy plus any one resource of your choice.
When a 7 is rolled, nobody gains resources, and one demon is placed on any corner square (either circle). It can be placed on a corner square that is occupied by another player but not one that is occupied by another demon. There can only be ONE demon per square at any time.
If you roll a 2 or 12, you get to place the "good" token or the "bad" token on any space. The "good" token doubles resources for a player on that tile when the numbers on that tile are rolled. The "bad" token causes no resources to be collected on that tile. These tokens can only be moved by rolling a 2 or 12 for resource collection (not when rolling the dice to fight a demon). You may freely move on or off a square with one of these tokens.
The dice picture in the rulebook is captioned "These are the dice."
3. Take Action(s)
During your turn, you can do any or all of the following, one or more times, in any order:
- Place a new tile.
- Flip a tile.
- Place a new player token.
- Move to an adjacent tile in the same circle.
- Move another player to one adjacent tile in the same circle.
- Move one of your player tokens to the next circle.
Action Costs (also listed on tracker cards)
These actions can be taken any number of times per turn in any order as long as you can pay for them.
(Y=Yellow, B=Blue, R=Red, G=Green)
- Place a tile: Y + G
- Flip a tile: B + R + G
- Place a new player token: Y + B + R
- Move to an adjacent tile in the same circle: After your one free move, per turn it costs any one resource.
- Move another player to one adjacent tile in the same circle: B
- Move one of your player tokens to the next circle: Y + R + G
- Re-roll one die: Y + B + R + G
Place a New Tile
After paying the resource cost, pick a tile from any stack and place anywhere on the board in such a way that it is adjacent to another tile on the left or right. It may also be placed so that it is adjacent to a corner square on the left or right. Placed tiles must correlate to the correct circle - you can't place a 7th/8th circle tile in the 3rd/4th circle.
The rulebook's tile diagram is captioned "The tiles look similar to this." It marks Square A as considered one circle (in this case circle 1) and Square B as considered the next circle (circle 2 for this tile).
Flip a Tile
After paying the resource cost, you may flip any non-corner tile face up or face down. You may not flip tiles occupied by a demon or a player. This is the only way the tiles can flip. Face down tiles may not be occupied or crossed by players or demons.
Place a New Player Token
After paying the resource cost, you may place a player token anywhere in the 1st circle that is not occupied by another player, excluding the corner squares. You can have a maximum of 6 player tokens in play.
Move to an Adjacent Tile in the Same Circle
After paying the resource cost, you may move one of your player tokens one square per resource cost paid. You may only move to squares within the same circle in this manner. You may move through spaces occupied by another player or demon, but you may not stop on the same space as another player. You may end up on the same square as a demon though (don't know why you would want to…).
Move Another Player to an Adjacent Space in the Same Circle
After paying the resource cost, you may move another player's token one space. They may not be moved to a space that is occupied by another player. You may only move any one token one space in this manner.
Move One of Your Player Tokens to the Next Circle
After paying the resource cost, move one of your tokens to the next circle. You must be in the corner square to move to the next circle. You may move more than one circle per turn if the resources can be paid.
When you enter the 9th circle, you must fight Lucifer in order to win the game (see Fighting Demons).
Re-roll One Die
After paying the resource cost, you may re-roll one die. This may be done any number of times per turn.
4. Move One of Your Player Tokens One Square (No Cost)
Each turn you get one free movement for one of your player tokens. You may never occupy the same square as another player, but you may use your movement (free, plus additional paid movement) to move through a square occupied by another player.
5. Move a Demon One Square (No Cost)
During your turn, you may move one demon one square in the same circle, or you may move a demon in a corner square from one circle to the next. Example: If a demon occupies the 4th circle corner square, they may move to the 3rd or 5th circle corner square. There may not be any more than one demon per square. Lucifer never "moves" from the 9th circle.
6. Trading Resources
During your turn, you may trade resources or bargain with other players. As long as both parties agree to the trade or bargain, there are no limitations. For example, you may give a player a resource to not move a demon on to your square. Or, trade two blues in exchange for a yellow. Of course, you are playing in hell and there are NO guarantees. In other words, it is perfectly acceptable to renege on any deal, although players have a tendency to remember that sort of thing.
Winning the Game
The first player to make it to the 9th circle and defeat Lucifer wins.