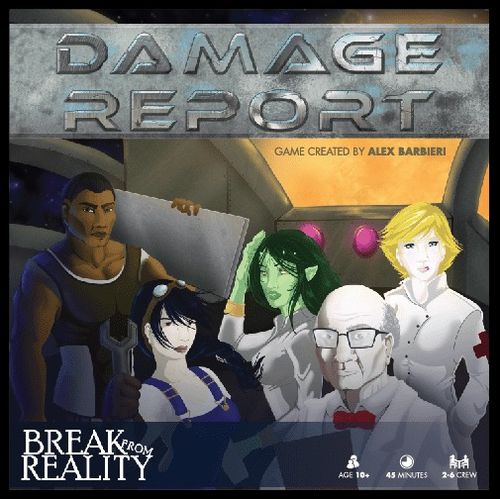
Damage Report
Damage Report Rulebook
Table of Contents
Table of Contents
Game Summary
Damage Report is a real-time, cooperative game in which you and your friends play a starship crew in the midst of catastrophe. Players act simultaneously, and your survival depends on each player's ingenuity and resourcefulness. By using a modular starship design, Damage Report offers limitless play experience. Design your own crises after playing through official Damage Report scenarios.
Game Objective
The objectives of each individual game you play in Damage Report will vary based on the current scenario. Each scenario may have a variety of different game winning conditions, as well as varying game losing conditions. The Scenario Rulebook explains the details on these end-game conditions for each individual scenario.
Game Components
12 Large Modules (Shields, Lasers, Teleport, Hyper Drive, Life Support, Infirmary, Cargo Bay, Hangar Deck and Flight Path, Galley, Energy Core and Science Lab)
9 Small Modules (Airlock, Airlock Controls, Tool supply and 6 Corridor cards labeled A3, B9, C4, D8, E6 and F1)
4 Supply Modules (Circuit supply, Energy supply, Crystal supply, Metal supply)
1 Ship Hull card
2 Crisis Tracker cards
24 Module cards
100 Repair cards in 5 decks: 20 Torque Relay (gray), 20 Flux Generator (orange), 20 Sonic Modulator (blue), 20 Plasma Capacitor (green), 20 Photonic Emitter (purple)
40 Damage Report cards
12 Event cards
30 Circuit Tokens
30 Energy Tokens
20 Metal Tokens
30 Crystal Tokens
8 Tools (2 each of Wrench, Laser, Blowtorch and Duct Tape)
6 Character tokens with stands
6 Character dashboards
8 Damage indicator tokens
30 Injury/Fire tokens
15 Cargo/Passenger tokens
4 Runabouts (small ships)
6 Sand timers
4 "No Teleport" symbol tokens
1 Electronic Damage Report timer
1 Rulebook (you're reading it now!)
1 Damage Report Coin
NOTE: Some Modules are printed double-sided for use in future expansions.
ATTENTION: In addition to these written rules, please watch the How to Play video online at www.bfrgames.com/damagereport/
Game Setup
To begin the game, each player selects a character and collects the corresponding Character dashboard, Character token with a stand, and a sand timer. The sand timers begin on the yellow clocks on the Character dashboards. Lay out the ship's Modules as depicted in your selected scenario from the Scenario rulebook (beginning on page 20). Corridors depicted in setup diagrams are unlabeled and may be placed at random in the designated spots. Shuffle each repair deck individually and place them on the appropriate Modules according to the Scenario Rulebook. (Note: If any of the setup rules in the Scenario Rulebook contradict the rules here, the scenario rules take priority.) Sort through the Modules deck and remove any Module cards that are not used in the scenario you are playing. Then, shuffle the remaining Module cards and have all players draw 1. Players place their Character tokens in the Modules they drew. Return the drawn cards to the sorted Module deck of cards being used in this scenario, reshuffle it, and set it aside.
How to set up the Damage Report Deck
Set aside the Game Over card. Shuffle the remaining 39 cards, then count out 14 of them. Return the other 25 cards to the box. Now put the Game Over card at the bottom of the deck, placing the deck face-down on the table.
Setup Instructions for Specific Modules
IF YOU ARE PLAYING WITH THE…
HANGAR DECK MODULE: place 2 of the Runabouts in the Ready Area and the other 2 off to the side.
CARGO BAY MODULE: place the 15 Cargo/Passenger tokens on the floor of that module.
INFIRMARY MODULE: place the pile of Injury tokens on the table next to the Infirmary.
BOTH HYPER DRIVE AND TELEPORT MODULES IN THE SAME SHIP: place "No Teleport" tokens on the Hyper Drive Module and all Modules adjacent to it.
GALLEY MODULE: place all Character tokens in the Galley Module rather than using the Modules deck to determine starting locations.
Place the Circuits, Energies, Metal, Crystals and Tools on the corresponding supply Modules. Place 1 Damage indicator on the bold number of each system status bar (outlined in white). Set out the Ship Hull card and place a Damage indicator on its 100% placeholder.
Remove the "Game Over" card from the Damage Report deck. Shuffle the remaining Damage Report cards and count out 14 cards. Then, place the "Game Over" card on the bottom of this 14-card deck. Be sure to check the scenario rules for any changes to constructing the Damage Report deck. Choose a player to be responsible for drawing the Damage Reports. Place the Damage Report deck and the Electronic Damage Report timer within easy reach of this player.
Gameplay
Once the game is setup and all players are familiar with the rules, start the Damage Report timer. After the Damage Report timer has begun, all players may flip their sand timers onto their green clocks and immediately start their first turns simultaneously.
Your turn begins whenever you flip your sand timer onto your green clock. After flipping the sand timer, you choose one action as described under the Turn Options section, and carry it out as the sand falls. When the sand timer expires on the green clock, you must flip it again and move it backwards (to the left) onto the clock matching the color of the current Life Support system status. For example, if the Life Support system is at 40%, after your sand timer expires on the green clock, you would flip it onto the red clock. When the timer expires on a non-green clock, flip and move the timer to the next clock forward (to the right). Only when you move your timer onto the green clock, do you take a turn and repeat this process. If Life Support is at 90-100% (in the green), you can take a turn every time you flip your timer!
Each player may take a turn as soon as they are eligible to do so. You do not have to wait for other players to finish their turns before beginning yours. However, you are allowed to keep your sand timer on the yellow clock once it expires and wait to move it to the green clock. This may be beneficial, for example, if the turn option you would like to choose depends on another player going before you do.
When flipping your sand timer, wait until the timer has completely expired, then flip the timer and place it on the next clock to the right. Only start a turn when you flip ONTO the green clock. Green means GO! After the timer expires on the green clock, the timer must be reset. Flip the timer and place it on the appropriate color coded clock in accordance with the Life Support system.
Order of Events
Each time the Damage Report Timer goes off, the top card from the Damage Report deck is drawn and resolved (see Resolving Damage Reports). The rest of the game is not put on hold when resolving Damage Reports; players may still continue taking their turns. This may cause some confusion as to the order of when things happened. In this case, use the instant the Damage Report Timer went off and the instant players flipped their sand timer as reference points. If the Damage Report Timer went off before the player's sand timer was flipped, then the Damage Report effects happened first. Otherwise, the player action happened first. If this order is uncertain, assume the Damage Report happened first.
Being Injured
Sometimes, accidents happen. If any circumstances arise that indicate you've become injured, you must place the specified amount of Injury tokens in your Inventory. If you do not have room for these Injury tokens currently, you must immediately drop (to the floor of your current module) items from your Inventory —of your choice— until there is room for all the required Injury tokens. Injury tokens take up valuable space in your Inventory that can no longer be used to hold other items. Injury tokens can never be dropped during a Relay action (explained in the following section). The only way to remove Injuries from your Inventory is to visit the Infirmary and Heal yourself. More information on how the Infirmary (and all other Modules) work is described under the Modules section.
Turn Options
WHEN YOU ARE ELIGIBLE TO TAKE A TURN, YOU MAY SELECT ANY ONE OF THE FOLLOWING OPTIONS: Relay // Inspect // Repair // Special
Each of these options will now be described in detail.
Relay
This turn option is all about hauling supplies around the ship and getting things where they need to be. Selecting this turn option allows you to do any or all of the following actions, in the following order:
GRAB & DROP (optional): You may Grab any items off of the floor of the Module in which you are standing and place them in your Inventory. You may also Drop any items from your Inventory onto the floor of the Module. You may repeat these 2 options as much as you like so long as you never exceed the maximum capacity of your Inventory. Note: Circuits, Energies and Crystals take up 1 Inventory space, while Metal and Tools take up 2 spaces.
MOVE (optional): You may move your character token from the current module you are occupying to any adjacent module. Modules that share any portion of an edge are considered to be adjacent. If the Modules only touch at a corner, they are not adjacent. Once a move has been completed, you may no longer Grab & Drop from the Module from which you exited.
GRAB & DROP (optional): You may complete the exact same actions as described above in the Module you just moved into.
Let's take a look at 2 different examples of how to do a Relay turn option. In both examples, you are Dr. Monica Boyd, and you're working on repairing the Hyper Drive:
Example 1: "This Is All I Need"
SITUATION: Lobo is nearby and said she would bring over a circuit and help with this repair. So Monica will Relay to the Crystal supply Module while Lobo is on her way.
FIRST RELAY TURN: Monica Moves and Grabs 2 Crystals because that's all she really needs.
SECOND RELAY TURN: Monica is back with the supplies needed to fix the Hyperdrive. In the meantime Lobo has arrived!
In the same situation, Monica could use her 2 Relay moves just a bit differently for future benefit:
Example 2: "Thinking Ahead"
FIRST RELAY TURN: Rather than bring the Wrench with her, Monica leaves it in the Hyper Drive where she can Grab it again later, and then picks up 3 Crystals in the Crystal supply Module.
SECOND RELAY TURN: Monica is back with the supplies needed to fix the Hyperdrive, plus more for later! She drops the extra Crystals she brought on the floor of the Hyper Drive. She then picks the wrench back up and is ready to make some Repairs.
Inspect
This turn option may only be selected if your Character token is currently in a Module with a Damage indicator that is not at 100% AND there is not a face-up card in the Repair spot. If these requirements are met, you may take the top Repair card off the Draw pile in that Module and place it face up on top of the Repairs spot. The Repair card indicates which items you need to increase the Module's system status and how effective the repairs will be. Remember, you may not Inspect a Module that has its systems operating at 100%. As they used to say back on Earth, "If it ain't broke, don't fix it!" If the Draw pile for any Module is depleted, reshuffle the used Repair deck from that Module to create a new draw pile.
Example: "I Know What the Problem Is"
INSPECT TURN: Professor Frank is already in the Shields Module and since it's at only 20%, he decides to Inspect. He draws the top card from the Inspect deck and places it face up in the Module.
Repair
If you are in a Module where there is already a Repair card flipped up on the Repair spot, you may place 1 matching item from your Inventory to the corresponding space on the Repair card. You must have the item in your Inventory on your Character dashboard in order to make the Repair. Once an item is placed on a Repair card, it cannot be removed until the Repair card is discarded.
When the last item on the Repair card is placed, the Repairs have been completed. Discard the Circuits, Crystals, Energies and Metal to their supply modules. Leave Tools on the floor in the Module in which the Repairs were just made. Adjust the Damage indicator for the Module by the percentage indicated on the completed Repair card. Finally, discard the completed Repair card. (You will want to keep each repair deck's discard pile separate in the event you need to re-shuffle.)
PLEASE KEEP IN MIND THE FOLLOWING IMPORTANT POINTS ABOUT USING THE REPAIR TURN OPTION:
- If you do not have the necessary equipment in your Inventory, you must first Grab it using a separate Relay action – even if it is already in the same module as you – and wait until your next turn to Repair.
- You may NOT place an item on a Repair card immediately upon entering the Module, as in this case you have already used the Relay action for your turn. You must wait until your next turn to use the Repair turn option.
- The Repair turn option is not equivalent to the Drop option included with the Relay turn option. When you Drop an item, it is placed on the floor of the Module, NOT on the Repair card.
- Do NOT draw a new Repair card as part of the clean-up process. This requires an Inspect action.
Example: "Nothing Fixes Life Support Quite Like Duct Tape"
FIRST REPAIR TURN: Mark places one Energy from his Inventory onto the Repair card.
SECOND REPAIR TURN: Mark places the duct tape from his Inventory onto the Repair card.
CLEAN-UP: Any players help out now by discarding the consumed Energy back to its supply Module, dropping the duct tape on the floor, moving the system indicator in Life Support up by 20%, and discarding the used Repair card off to the side.
Special
Some Modules, character abilities and scenario rules have Special turn options available. Details on using these Special turn options are described under the Modules and Character Abilities sections and in the Scenario Rulebook.
Resolving Damage Reports
When the electronic timer goes off (once every 3 minutes), draw a Damage Report and apply its effects. All players are encouraged to shout, "DAMAGE REPORT!" when this happens. Then, everyone should help adjust the game board to speed up the Damage Report resolution. When a Damage Report is drawn, check the Shields Damage indicator. If the percentage in the Shields is GREATER THAN OR EQUAL TO the shield percentage listed on the top-right of the Damage Report, adjust the affected Modules' systems by the damage percentage indicated on the right side of the Damage Report (under the shield icon). If damage percentage in the Shields is LESS THAN the shield percentage listed on the top of the Damage Report, adjust the affected Modules' systems by the damage percentage indicated on the left side of the Damage Report. If any Damage Report would reduce a Module's systems damage to below 0%, just leave it at 0%. If the Shields Damage indicator is at 0% when a Damage Report is drawn, adjust the Damage indicator on the Ship Hull card by -25%.
Example: Resolving a Damage Report
DAMAGE REPORT!: Since Shields are at or above 20%, use the right column of damage numbers to reduce Life Support by 20%, Teleport by 30% and Shields by 30%.
Corridor Breaches
Some Damage Reports state that one of the ship's corridor Modules has been breached. (Be sure to check the correct column of the Damage Report as described above. Sometimes a corridor will not be breached due to your Shields strength. This is indicated by the word "Safe". If the corridor is safe, do not take the special actions described below.) When a Damage Report instructs you to "Breach" a corridor, locate the corresponding corridor Module and flip it over to the breached side. If a corridor is already breached when it would be breached again, leave it as is and take 25% hull damage instead. If a Damage Report lists a corridor Module (or repair card symbol) that is not used in the current ship layout, disregard that line on the Damage Report.
Any characters in that corridor Module at the time of the breach are now severely injured. See the Being Injured paragraph under the Gameplay section for more details on this. Empty any players' Inventories that were in the corridor Module at the time of the breach onto the floor of the corridor. Then, completely fill these players' Inventories with Injury tokens. Finally, put all non-Tool items on that corridor's floor back in their respective supply modules. Only Tools can be dropped on the floor in a breached corridor… other items would only vent out into space! Just consider yourselves lucky that those valuable tools have all been equipped with magnets that activate in just this kind of emergency!
Breached corridors are still accessible to players. However, after stepping inside, and on any subsequent turns in which you remain in the breached corridor, you must ignore the ship's Life Support status and always use the black clock when flipping your sand timer backward. Life Support inside breached corridors is always a deadly 10%. On the turn you exit a breached corridor, use the ship's overall Life Support status to determine your sand timer placement again.
The good news: corridor breaches can be repaired! Breached corridors include Repair specifications automatically; there is no need for an Inspect action. If you make the Repairs pictured on the breached corridor, you may return it to its normal state by un-flipping it. Remember to discard any non-Tool items used for Repairs back into their supply Modules, and leave the Tools used on the floor in the corridor Module.
Example: Resolving a Corridor Breach
CORRIDOR BREACH!: Since Shields are below 80%, use the left column of damage numbers to reduce Lasers by 30% and Shields by 30%. Additionally, corridor C4 is breached! Flip the corridor Module over to the breached side. Send all non-tool items back to their supply modules. Since Kelley was in the corridor at the time of the breach, her Inventory is completely filled with Injury tokens.
REMEMBER, PLAY BY THE RULES AND BE HONEST. HERE'S SOME UNFORTUNATE SITUATIONS THAT MAY OCCUR DUE TO HUMAN (OR ALIEN, OR ROBOT) ERROR:
- You do not get to skip a clock if you've forgotten about your timer. If you did not place your timer on the next clock as soon as you are eligible, that missed time is lost!
- You are not a time traveller! If you have carried something the wrong way, or made a mistake of some kind there is no "undo" option. You have to use new turns to go back and fix what you did wrong.
Modules
Your ship will contain different Modules based on which scenario you have chosen to play. Each ship can have a variety of Modules, making each scenario unique and bringing its own strategies and challenges to the game. Below, you will find details on how each Module functions, regardless of the scenario in which it is included. If any of the rules in the Scenario Rulebook contradict the rules here, those in the Scenario Rulebook take precedence.
Life Support
This Module circulates the breathable atmosphere in the ship. The better Life Support is functioning, the easier it is to breathe, and the faster people can act within the ship. This is represented by the sand timers. Whenever Life Support is damaged or repaired, players use different starting locations for their sand timers. See the Gameplay section of this rulebook for details on how to place and flip your sand timers.
Shields
The Shields Module houses the generator that powers the external shields around the ship. First and foremost, your Shields protect the hull of your ship. If the Shields Damage indicator is at 0% when a Damage Report is drawn, adjust the Damage indicator on your ship hull by -25%. If Shields are not at 0% but the Damage Report would move it below 0%, just reduce Shields to 0% and do not take any hull damage…you got lucky!
Additionally, by maximizing your Shields strength, your other Module's systems will be damaged less severely since Shields absorbs some of that damage (see Resolving Damage Reports for more details).
Hyperdrive
If you can repair the Hyperdrive to 100%, you can activate your engines. In most scenarios that include the Hyperdrive module, it is one way to escape the threat of imminent doom and win the game! Due to dangerous high-level energy fluctuations within this Module, items can never be Teleported into or out of this module.
YOU CAN PLAY NOW! These 3 Modules are the only ones you need to know about to try the first Damage Report scenario: The Icarus Problem. If you'd like, you can skip the rest of the rules from this point, and jump directly to The Icarus Problem in the Scenario Rulebook on page 20. (For your very first playthrough, you may want to try The Icarus Problem's Tutorial Variant — a 15-minute sample game to ease you into the Damage Report experience!) If you would like to play your first game with more than 3 players, choose a scenario with the appropriate amount in the "Recommended crew" section. Then, be sure to read up on the Modules needed for that scenario on the following pages.
Teleport
The Teleport Module is a laboratory that has integrated new technology into a device that can transport items from one place to another…instantaneously! Once the system capacity is high enough and the device's power reserves have a sufficient supply, items can be Teleported from one Module in the ship to another. The Teleport Module offers 2 Special turn options: Charge and Teleport. To select either of these Special turn options, your character must be present in the Teleport module. Here's how these Special turn options work:
CHARGE: Fill the Teleport Module's power reserves with as many Energies as you'd like (up to its maximum of 5) from your Inventory. No more than 5 Energies can fit in the reserves at any one time.
TELEPORT: When choosing this turn option, you can Teleport items from one specific Module (we'll call it the Source) to exactly one other module (we'll call it the Destination). You may not Teleport any items from the Destination to the Source – it only goes one way. When you Teleport an item, simply move it from the floor of the Source to the floor of the Destination. Each item you Teleport requires spending one of the Energies in the power reserves of the Teleport Module. You are eligible to Teleport as many items as there are Energies in the power reserves, but you are not required to use all of them. You cannot Teleport any items if the power reserves are empty. Discard spent Energies back into the Energy supply Module.
Required percentage in the Teleport Module needed to Teleport each object type: Circuits and Energies and Crystals require 40%+; Metal and Tools require 70%+; Characters require 100%.
Example: Teleporting
TELEPORT SPECIAL TURN: Lobo needs help in the Shields! Since Baxter is in the Teleport, he uses the Special Turn Option, Teleport, to send the Laser, 1 Energy and 1 Circuit from Life Support to Shields. After doing so, he discards 3 Energies from the Teleport power reserves back to the Energy supply Module.
Additionally, there is one more requirement that must be met in order to Teleport an object. The Damage indicator in the Teleport Module must be greater than or equal to the required percentage to Teleport the object based on its size. These percentages are indicated with icons on the Teleport Module's status bar, and in the table above.
If you choose to Teleport a character, any items in that Character's Inventory remain in place and are Teleported with the Character for free.
Lasers
The Lasers Module is home to the ship's advanced laser systems. They're your best option if you want to take down a big nasty threat out there. Lasers are fired automatically when the system reaches 100%. Because of the rush you're in to get Lasers online, you haven't had time to test and calibrate them as much as you'd like. The quick, makeshift repairs being made to the Lasers result in 50% damage being taken by the system each time the Lasers are fired. On the bright side, the sophisticated targeting system built into the Lasers guarantees a hit against the target every time.
Infirmary
The Infirmary Module does not have a system built in, it is merely a large Module dedicated for medical treatment of the crew. When in the Infirmary you may use the Special turn option: HEAL. When you Heal, remove all Injury tokens from your Inventory and discard them near the Infirmary, off of the playing area.
Cargo Bay
The Cargo Bay holds valuable materials that your ship needs. Maybe it's treasure, maybe it's food, maybe it's some top secret technology or research materials. What is stored in the cargo bay depends on the scenario you have selected. In any case, you don't want to lose too much of your precious cargo! If you are playing with the Cargo Bay Module, each time a Damage Report is drawn you may need to resolve an additional cargo effect. Before resolving the other effects of the Damage Report, check to see if the Cargo Bay will be hit. If it will, you must also discard Cargo tokens depending on the position of the Cargo Bay Damage indicator - before applying the effects of the new Damage Report - according to the table below:
Cargo Bay damage percentage and Cargo tokens to discard: 90-100% → 0; 60-80% → 1; 30-50% → 2; 0-20% → 3.
These values are also reflected by the Cargo Bay's status bar. After losing cargo, continue to resolve the rest of the Damage Report as you normally would. Be warned, losing too much of your valuable cargo could cost you the game!
Many scenarios utilizing the Cargo Bay involve players carrying the cargo out of the Cargo Bay to other Modules. When Relaying cargo, each piece takes up 4 Inventory spaces.
Hangar Deck
The Hangar Deck is where you and the rest of the crew can Repair and board Runabouts to fly outside the ship and attack impending threats.
This Module is in 2 pieces. One represents the actual room that is connected to the rest of the ship, and the adjoining one is the Flight Path for the Hangar Deck's Runabouts. When setting up the Hangar Deck place 2 Runabout tokens in the Ready Area. Runabouts in this area are ready to fly.
When completing a Repair in this Module, ignore the printed effect on the card…there is no Damage indicator token to advance in this Module. Instead, discard the Repair card and add a new Runabout to the Ready Area. Runabouts may not be removed from game, when one is damaged, it is simply discarded until repaired. The Runabouts in the Hangar Deck offer 2 Special turn options. Your Character token must be present in the Hangar Deck Module to select either of these Special turn options. The options are: Fuel and Flight.
FUEL: Discard 2 Energies from your Inventory to the Energy supply module. Then, move 1 Runabout from the Ready Area to the Launch Zone (on the Flight Path). Only 1 Runabout may be in the Launch Zone at any given time.
FLIGHT: You may only select Flight once a Runabout is in the Launch Zone. Place your Character token on the Runabout in the Launch Zone. Runabouts always have 100% Life Support. Be sure to use the green clock as you flip your sand timer. On your next turn, you must continue using another Flight action (at 100% Life Support) to move your character and Runabout to the next clockwise space along the Flight Path. Continue to move clockwise along the Flight Path in this way until your Runabout returns to the Launch Zone. Only 1 Runabout may be on a flight space or the Launch Zone at any given time. On the turn that you reach the Target space, you automatically hit the Target once (what this Target is, and what happens when you hit it depends on the scenario you have selected). When you return, the Runabout you just used is immediately placed back in the Ready Area – it must be refueled to fly again. Place your Character back on the floor of the Hangar Deck. On your next turn, be sure to reference the ship's Life Support Damage indicator when flipping your sand timer.
All this Flight is certainly fun and exciting, but it is also fraught with danger! If the Hangar Deck Module is the target of a Damage Report, ignore the percentage listed. One of the Runabouts will be damaged instead. If there are no Runabouts in the Launch Zone or the Flight Path, discard 1 of the Runabouts in the Ready Area. If there are no Runabouts anywhere, the Damage Report had no effect on the Hangar Deck. If there are any Runabouts in the Launch Zone or Flight path, one of them will be damaged. To determine which Runabout that is, check the numbers next to each space on the Flight Path.
Example: Hangar Deck
HANGAR DECK: Mark and Monica are working on flying the Runabouts when a Damage Report is drawn. One of the Modules hit is the Torque Relay (gray), indicating that the Hangar Deck will be affected. Instead of adjusting a system status bar, Mark's Runabout is hit! This particular Runabout was hit because Mark's shuttle was on the lowest numerical space on the flight track. He will have to continue to use his next 3 turns to return to the Hangar Deck. Upon arrival, he takes 7 Injury tokens and discards the Runabout. Good thing Monica is nearby to give him medical attention!
If nothing changes before the next Damage Report targeting the Hangar Deck is drawn, the Runabout in the Launch Zone would be discarded, and after that the Runabout in the Ready Area would be discarded. Any further Damage Reports after this would have no effect until another runabout has been repaired.
The Runabout that is on the lowest numbered space of the Flight Path is hit. If you are currently on board this Runabout, you must still fly back to the Launch Zone along the Flight Path as normal. However, if you have not yet reached the Target space at this time, the target will not be hit when you reach it. (You were too busy flying your damaged Runabout to fire!) Upon your arrival back to the Hangar Deck, the Runabout you were in crash lands and is discarded. While you did manage to get back on the ship with your life intact, the crash landing has unfortunately severely injured you. Fill your Inventory with Injury tokens. Check the rules for Being Injured in the Gameplay section for more details on that.
Science Lab
The Science Lab can be used to research items on the ship. Instead of a "Repair" deck spot on this Module card, there are 2 Scanning stations. When present in this Module, you may use the Special turn option: Scan.
SCAN: Place an item to be scanned from your Inventory onto one of the Scan stations. (The items that must be Scanned will be described in the Scenario Rulebook.) Then, draw a card from the Inspect pile in the Science Lab, and place the card with the item to be Scanned (so that you can still see all of the repair items). You may not Scan if both Scanning stations are currently occupied.
Repair actions in the Science Lab represent calibrating the scanning equipment for the item in question. When the Repair card is completed, the Scan is finished. Flip a coin to determine the result of the scan. In any case, heads represents a positive find of whatever you were scanning for, and tails represents no findings. What this means in the context of your selected scenario will be described in the Scenario Rulebook.
NOTE: Just as Lobo must be present in the Module in question to use her Precognitive ability, she likewise cannot foresee what the configuration needed for an item will be in the Science Lab before it arrives. Therefore, Lobo cannot use her Special ability in the Science Lab.
Energy Core
The Energy Core provides vast amounts of energy that is used to power your entire ship. It can only be charged when docked at a space station. Energy can never be recovered while in flight. This Module takes 10% damage during every Damage Report and can never be repaired. Running completely out of energy in mid-flight is not advisable as it will almost certainly lead to the death of all of the ship's crew.
Airlock
The Airlock comes in 2 separate Module pieces: the Airlock itself and also the Airlock Controls. Items dropped in the Airlock can be vented out into space and off of the ship. Players can move their characters using Relay actions as normal to drop items into the Airlock. As a Special turn option, players can choose to Release the contents of the Airlock while in the Airlock Controls Module. RELEASE: Move all non-tool items in the Airlock Module onto the table. Any Circuits, Metals, Crystals and Energies are discarded to their supply Modules. Other items remain on the table (in space) around the ship. If the Airlock is Released while a player is inside it, that player fills his Inventory with Injury tokens just as if he were in a breached corridor. In future expansions to Damage Report, players will be able to use the EXIT special action to move between Airlock Modules.
Character Abilities
Each Character in Damage Report is unique and brings a special ability of his, her or its own to the ship. Each ability is summarized on the corresponding Character dashboard. However, each of these abilities is also explained in more detail below.
Lieutenant Mark Andrews
A military man with exceptional strength and endurance. He adds 2 to his Inventory spaces for a total of 7.
"If anything happens to the good people of this ship, it's my duty to put things right. As long as I'm breathing, this ship will keep flying!"
Professor Frank A. Barber
A scientific genius. He may substitute 1 of the necessary non-Tool items on a Repair card with a different non-Tool item of his choice when making a repair. (Non-Tool items include Circuits, Energies, Crystals and Metal.) He may only use this ability once per Repair card.
"This ship's systems are in perfect balance. Our technology is state of the art. There's no safer place in the universe than within the hull of this ship…trust me."
Lobo
A genetically altered human (or so she claims) with psychic powers. Lobo can choose to reveal the next Repair card in a Module that either already has one in play or that is already at 100% functionality. (Place the card face up on top of the Inspect pile.) As soon as this Module needs to be Repaired, the "foreseen" Repair card is moved immediately onto the Repair pile for free. Lobo must be present in the Module to use this action. This ability does not work in the Science Lab.
"I see many hardships ahead. These humans – er, people – need my help or they will fall to despair. I will do what I can to stop these visions from becoming a reality."
Kelley Nichols
An experienced mechanic. When choosing the Repair turn option, she may place up to 2 items on the Repair card instead of 1.
"If it's broke, I'm gonna fix it. And in half the time you'd expected. Just try not to get in my way, ok?"
Doctor Monica Boyd
A medical professional. If Monica begins her turn in a Module with an injured Character (this includes herself), she can use a Special turn option to Heal the injured Character to full health. (The player does not need to go to the Infirmary.) All Injury tokens are removed from that Character's Inventory and returned next to the Infirmary. Monica may also move and carry passengers through Quarantines freely (see Outbreak on the Edge of Space).
"Nothing is more valuable than a life. It's dangerous out here in the vastness of space, but someone's got to keep these people alive and well…that's why I volunteered."
Baxter
A titanium robot. Baxter ignores all effects that would require gaining Injury tokens.
Baxter is unaffected by Life Support. Instead, Baxter always uses the yellow clock when flipping its sand timer backward. This even applies when using the Flight option in the Hangar Deck or walking in breached corridor modules. Baxter also may move freely through Quarantines (see Outbreak on the Edge of Space). However if carrying a passenger, normal Quarantine rules must be observed.
"Beep bleep Zzzzoooommm. I am a robot."
Adjusting Difficulty
The rules up until this point are considered "Normal" difficulty. If you find your adventures to be too easy or too difficult, apply your desired selection(s) of the following rules. In this way, you can customize your game experience to maximize your fun! If you would like to try a scenario using more than the recommended crew, make use of some of the "Increases Difficulty" option to have the extra players join in while maintaining the challenge!
Increases Difficulty
Back to the Drawing Board — If a Damage Report directs you to adjust the damage on a Module that is currently undergoing Repairs, the current Repair card is immediately discarded without being resolved in addition to taking the damage indicated on the Damage Report. If a Tool was on the repair card, it is placed on the floor in the module; other items that were on the Repair card are discarded to their respective supply Modules.
Watch Your Head — If you are in a Module during a Damage Report in which that Module takes damage, add 1 Injury token to your Inventory. (Only use this rule in scenarios using the Infirmary Module.)
Unfortunate Events — Include a random set of 3 Event cards in the Damage Report deck, shuffle them in with the 14 regular Damage Reports at the start of the game before placing the "Game Over" card on the bottom of the stack. When choosing this option, be sure to remove the Live Wire and Micro-Organism Attack cards from the Event deck if you are playing a scenario without an Infirmary.
Short on Time — Start the game with 3 fewer cards in the Damage Report deck when setting up the game. The "Game Over" card must still go on the bottom of the deck.
Weak Shields — Increase Shields damage each time a Damage Report is drawn by 10%. (Only use this rule when playing with the Shields Module.)
Rough Start — Begin the game with each system at 20% lower than the normal starting setup.
Decreases Difficulty
Time to Spare — Start the game with 3 extra cards in the Damage Report deck when setting up the game. The "Game Over" card must still go on the bottom of the deck.
Strong Shields — Decrease Shields damage each time a Damage Report is drawn by 10%. (Only use this rule when playing with the Shields Module.)
Smooth Start — Begin the game with each system at 20% higher than the normal starting setup.
Scenario Rulebook
The Neutrino had been en route with a cargo load, when an explosion dropped them out of Hyperspace…. There's been an explosion in Wing 1! AAH! That's not the only problem. Our Hyperdrive is completely offline! We've got a problem here! Think you can fix it?! Yes, but I'll need more supplies and fast! Sun of Apollo... We're way too close...
The Icarus Problem
The Neutrino is returning from a scouting mission when suddenly a cascading systems malfunction causes the Hyper Drive to go offline. No big deal, plenty of repair parts to fix the system, just a short delay. The crisis presents itself when you realize that you came out of hyperspace in the outer corona of a star! Shields are failing... and all systems are being affected by the heat and radiation from the star. Get those engines back online before the ship is burned to a crisp!
RECOMMENDED CREW: 2-3 players. Top performers: Kelley Nichols, Lieutenant Mark Andrews, Professor Frank A. Barber
Objective
The sole objective in this scenario is to get the Hyper Drive back online to escape the nearby star. You must do this within 33 minutes before the solar radiation and gravitational pull rip your ship apart, and it's game over for you.
Game End Conditions
You will win this scenario if:
- You repair the Hyper Drive to 100%
You will lose this scenario if:
- Life Support ever reaches 0%
- Your Ship Hull integrity reaches 0%
- The "Game Over" card is drawn from the Damage Report deck
Setup
Set up the ship according to the diagram on the next page. Place the Repair decks in the Modules according to this table: Hyper Drive → Flux Generator; Shields → Sonic Modulator; Life Support → Plasma Capacitor.
When building the Damage Report deck for this scenario, shuffle cards DR01-DR10 and place the Game Over card on the bottom. This means you will have only 33 minutes to complete this scenario! Use only 1 set of Tools (1 of each type) in the Tool supply Module in this scenario. Follow the remaining setup instructions under Game Setup from the General Rulebook.
SPECIAL RULES: There are no scenario specific rules for The Icarus Problem.
Tutorial Variant
For a simpler first game, set up the board as described above, but only include 1 card in Life Support, and 1 card in Shields. Once completed, these cards are removed from the game. The Hyper Drive will still use a full deck of repair cards. Also, don't use the Damage Reports. Instead, every 3 minutes, lose 10% in shields. In this variant, you will only lose if your shields reach 0%.
Once you've got the basics from this tutorial, try again with the rules above for the full game. Good luck!
Scaling Options
To make The Icarus Problem less difficult:
- Follow the rules for the Tutorial Variant above.
- Add the second set of tools during setup.
- Select more top performers from the Recommended crew section.
- Use the optional rules under Adjusting the Difficulty Level in the Rulebook that decrease difficulty.
To make The Icarus Problem more difficult:
- Select fewer top performers from the Recommended crew section.
- Add a loss condition that if Shields reach 0% at any time, the crew loses.
- Use the optional rules under Adjusting the Difficulty Level in the Rulebook that increase difficulty.
First Contact
While on a routine exploration mission, the Pulsar unknowingly wanders into alien territory. The aliens refuse to respond to communications, and they open fire immediately upon your inadvertent trespassing. The initial attack leaves many of your systems damaged. You and the other survivors have 45 minutes to either get the Hyper Drive back online so you can jump away, or to get Lasers functional and blow away the alien aggressor.
RECOMMENDED CREW: 4-6 players. Top Performers: Lobo, Kelley Nichols, Lieutenant Mark Andrews, Professor Frank A. Barber
Objectives
Players must either fire Lasers 4 times on the alien ship OR repair the Hyper Drive to 100% to win this scenario. It is up to the group to decide whether to go for one or the other, or if it is best to work on both simultaneously. Keeping the Teleport functional may provide valuable benefits, but maintaining this system is completely optional in this scenario. You must do all of this within 45 minutes, before the aliens charge up their omega cannons and it's game over for you.
Game End Conditions
You will win this scenario if:
- You fire on the Alien ship 4 times using your Lasers
- You repair the Hyper Drive to 100%
You will lose this scenario if:
- Life Support ever reaches 0%
- Your Ship Hull integrity reaches 0%
- The "Game Over" card is drawn from the Damage Report deck
Setup
Set up the ship according to the diagram on the next page. Place the repair decks in the Modules according to this table: Lasers → Torque Relay; Hyper Drive → Flux Generator; Shields → Sonic Modulator; Teleport → Photonic Emitter; Life Support → Plasma Capacitor.
Set out the Crisis Tracker % card on the Alpha side with a Damage indicator at the 100% placeholder. This card will be used to track the 4 possible hits from the Lasers Module. Each time you hit the aliens with your Lasers, adjust the Damage indicator by -25%.
Follow the remaining setup instructions under Game Setup from the General Rulebook.
SPECIAL RULES: There are no scenario specific rules for First Contact.
Scaling Options
To make First Contact less difficult:
- Start with 3 Energies in the Teleport power reserves.
- Remove the "No Teleport" tokens from the game.
- Select more top performers from the Recommended crew section.
- Use the optional rules under Adjusting the Difficulty Level in the Rulebook that decrease difficulty.
To make First Contact more difficult:
- Select fewer top performers from the Recommended crew section.
- Use the optional rules under Adjusting the Difficulty Level in the Rulebook that increase difficulty.
A Miner Spot of Trouble
The Binary Star is returning from mining essential ice water when alerts sound throughout the ship. An asteroid has impacted the ship, knocking out shields and putting the cargo that the crew has spent days collecting at risk. This challenging mission requires first clearing a path out of the asteroid field, and then restoring the Hyper Drive to escape. Don't lose the cargo, or else the mission was for naught!
RECOMMENDED CREW: 5-6 players. Top performers: Lobo, Lieutenant Mark Andrews, Kelley Nichols
Objectives
Throughout this scenario, you must work on protecting and securing your cargo in the Cargo Bay while asteroids are pummeling the ship. Additionally, to get out of the asteroid field, you must shoot 5 large asteroids out of your flight path using the Hangar Deck. Finally, you must power the Hyper Drive to 100% and fly out of the path you cleared before more asteroids fill in the gaps. You also can't leave any of your crew members behind in Runabouts when you power up the Hyper Drive. You must do all of this within 45 minutes before the giant asteroid you see drifting toward the starboard side of your ship collides with your hull and it's game over for you.
Game End Conditions
You will win this scenario if:
- The Hyper Drive is at 100% after shooting 5 asteroids out of your path from the Hangar Deck AND all players are on board the main ship (not in a Runabout).
You will lose this scenario if:
- Life Support ever reaches 0%.
- Your Ship Hull integrity reaches 0%.
- The "Game Over" card is drawn from the Damage Report deck.
- You lose all 15 of your Cargo tokens.
Setup
Set out the Crisis Tracker # card on the Alpha side with a Damage indicator not on any numbered space.
Set up the ship according to the diagram on the next page. Place the repair decks in the Modules according to this table: Hangar Deck → Torque Relay; Hyper Drive → Flux Generator; Shields → Sonic Modulator; Cargo Bay → Photonic Emitter; Life Support → Plasma Capacitor.
Follow the remaining setup instructions under Game Setup from the General Rulebook.
SPECIAL RULES: To clear asteroids from your path, successfully navigate a runabout reaching the space with target symbol on the flight path. Once the undamaged runabout reaches the target space, adjust the indicator on the Crisis tracker up one. When the crew has successfully reached 5 on the crisis tracker, enough asteroids have been cleared to allow the ship to use the Hyperdrive and escape.
Scaling Options
To make A Miner Spot of Trouble less difficult:
- Start with the Cargo Bay at 100%
- Start on the 1 space of the Crisis Tracker card (and only shoot 4 asteroids)
- Select more top performers from the Recommended crew section
- Use the optional rules under Adjusting the Difficulty Level in the Rulebook that decrease difficulty.
To make A Miner Spot of Trouble more difficult:
- Select fewer top performers from the Recommended crew section
- Use the optional rules under Adjusting the Difficulty Level in the Rulebook that increase difficulty.
Outbreak on the Edge of Space
While executives and dignitaries visit Science Station Eclipse for the unveiling of new Terraforming technology, an unknown illness sweeps the station. Will the crew be able to stop the spread of the disease before this turns into a crisis? The crew must stay healthy, or else lose control of the station - but can you just let your people die?
RECOMMENDED CREW: 3-4 players. Top performers: Dr. Monica Boyd, Baxter
Objectives
In Outbreak on the Edge of Space, players must escort 5 sick dignitaries from their temporary guest quarters setup in the Cargo Bay into the Science Lab and scan them. The scanners will require some calibrating using the tools and supplies on the station. Once all 5 patients have been scanned, a cure will be found and the remaining dignitaries (and crew members) can be saved! You must find the cure, however, within 45 minutes before the virus completely overtakes your fresh air supply and it's game over for you.
Game End Conditions
You will win this scenario if:
- You successfully Scan 5 living dignitaries to find a cure
You will lose this scenario if:
- Life Support ever reaches 0%
- The "Game Over" card is drawn from the Quarantine deck (see below)
- All dignitaries are dead
Setup
In this scenario, instead of a Damage Report deck, a Quarantine Deck will be used. Sort out all of the Module cards corresponding to the Modules used in the setup diagram on the next page. Then shuffle them and place the "Game Over" card on the bottom.
Set out the Crisis Tracker # card on the Alpha side with a Damage indicator not on any numbered space. This card will be used to track the 5 dignitaries that must be scanned. When you first scan a dignitary, place the Damage indicator on the 1 space on the Crisis Tracker card. Each additional time you scan a dignitary, move the Damage indicator up by 1.
Set up the ship according to the diagram on the next page. Place the 15 Cargo/Passenger tokens, passenger side up in the Cargo Bay.
Place the repair decks in the Modules according to this table: Science Lab → Flux Generator; Cargo Bay → Torque Relay; Life Support → Plasma Capacitor.
Follow the remaining setup instructions under Game Setup from the General Rulebook.
Special Rules
When the Damage Report timer goes off, the virus mutates and affects the ship's Life Support and the dignitaries in the Cargo Bay. Reduce both of these systems by 20%. Additionally, draw a card from the Quarantine deck and place it on top of the Module it corresponds to. This Module is now under quarantine. When moving in to a quarantined Module, move your sand timer to the black clock (after it expires from the Relay action you took). Continue to use normal Life Support for any future actions you take while inside the Module. When the next mutation occurs, the quarantine is lifted (discarded) and a new quarantine is set where the new Module card from the Quarantine deck indicates.
The "cargo" in this scenario represent the sick dignitaries. A dignitary, like any other cargo token, takes up 4 Inventory spaces to carry.
If you are supposed to lose any dignitaries due to a virus mutation, you must first lose them from the Science Lab. If there are multiple dignitaries in the Science Lab, you may choose which one dies – this includes dignitaries that have already been successfully scanned. If the deceased dignitary was one currently being scanned, the dignitary and the repair card are discarded together. The repair card was not completed and does not count toward one of your 5 required Scans, but clean up the items on the card as you normally would when resolving a Repair. If there are no dignitaries in the Science Lab and you must lose one, lose the dignitary from the Module closest to the Science Lab. If there is a tie between 2 or more dignitaries' distances from the Science Lab, you may choose which dignitary to lose.
NOTE: since Cargo Bay is hit every time the timer goes off you must lose your cargo (a.k.a. dignitaries) each time the Damage Report Timer goes off.
Also, in this scenario, after completing a Scan in the Science Lab, do not flip a coin. Each Scan results in new information learned about the virus, so you can consider each Scan as successful and increase the marker on the Crisis Tracker card.
Scaling Options
To make Outbreak on the Edge of Space less difficult:
- Reduce Life Support and Cargo Bay by 10% instead of 20% during Damage Reports
- Select more top performers from the Recommended crew section
- Use the optional rules under Adjusting the Difficulty Level in the Rulebook that decrease difficulty.
To make Outbreak on the Edge of Space more difficult:
- Flip a coin to determine if each Scan is successful
- Start with only 12 cargo tokens in the Cargo Bay instead of 15.
- Select fewer top performers from the Recommended crew section
- Use the optional rules under Adjusting the Difficulty Level in the Rulebook that increase difficulty.
Stranded!
The Solar Wind is returning to a resource-starved colony carrying containers filled with much needed raw material. Suddenly — an energy spike in the ship's computers! The AI automatically brings the ship out of hyperspace, and the crew finds itself in a tense situation: the ship is losing energy — and fast. If the crew can't stop the Energy Core from depleting and get the ship moving, it's going to get quite cold and airless inside the ship. It must be that new cargo from that strange planet where the crew stopped earlier. Some of the boxes are corrupted with strange properties that cause the Energy Core to malfunction, but which ones?
RECOMMENDED CREW: 5-6 players. Top performers: Professor Frank A. Barber, Lieutenant Mark Andrews, Kelley Nichols
Objectives
In Stranded!, players must locate all corrupted cargo from the Cargo Bay by scanning each individual piece of cargo inside the Science Lab. Once scanned, corrupted cargo must be taken to the Airlock and Released out into space. Finally, the players must fire the Lasers at each individual corrupted cargo token floating in space to eliminate the interference from around the ship. All of the corrupted cargo must be eliminated within 30 minutes before the Energy Core is completely depleted and it's game over for you.
Game End Conditions
You will win this scenario if:
- You successfully scan all 12 pieces of cargo, release all corrupted cargo out the Airlock, AND fire the Lasers on each piece of corrupted cargo
You will lose this scenario if:
- Life Support ever reaches 0%
- The "Game Over" card is drawn from the Damage Report deck
- The Energy Core is completely depleted
- Your Ship Hull integrity reaches 0%
Setup
In this scenario, the Damage Report will consist of 9 Damage Reports and 3 random Event cards, shuffled and placed on top of the Game Over card. Before selecting the event cards, be sure to remove the Live Wire and Micro-Organism Attack cards from the deck as they are not applicable in this scenario. Also, place only 12 of the 15 pieces of cargo in the Cargo Bay.
Set up the ship according to the diagram on the next page.
Place the repair decks in the Modules according to this table: Lasers → Photonic Emitter; Hyper Drive → Plasma Capacitor; Science Lab → Sonic Modulator; Cargo Bay → None; Life Support → Torque Relay.
Follow the remaining setup instructions under Game Setup from the General Rulebook.
Special Rules
In this scenario, the Cargo Bay has no repair deck and does not take any damage. The Energy Core's fluctuations do not affect the Cargo Bay module at all. You will never lose cargo in this scenario. Therefore, you must scan all 12 pieces. You also are not allowed to Release unscanned cargo out of the Airlock…it's too valuable to waste potentially good cargo.
After Scanning in the Science Lab, flip a coin: heads indicates that the cargo was corrupted, and tails indicates it is safe. You can place safe cargo in the empty space between the Science Lab and Hyper Drive to denote that it does not need to be carried to the Airlock. It is recommended to designate one corner of the Science Lab as the corrupted cargo to avoid confusing it with cargo that has been dropped off in the Science Lab but has not yet been scanned.
Scaling Options
To make Stranded! less difficult:
- Don't use Event cards in the Damage Report deck.
- Select more top performers from the Recommended crew section
- Use the optional rules under Adjusting the Difficulty Level in the Rulebook that decrease difficulty.
- Start with only 10 Cargo tokens instead of 12.
To make Stranded! more difficult:
- Add an additional objective: bring the Hyper Drive online by repairing it to 100% before the game ends.
- Select fewer top performers from the Recommended crew section
- Use the optional rules under Adjusting the Difficulty Level in the Rulebook that increase difficulty.
- Start with 14 Cargo tokens instead of 12.