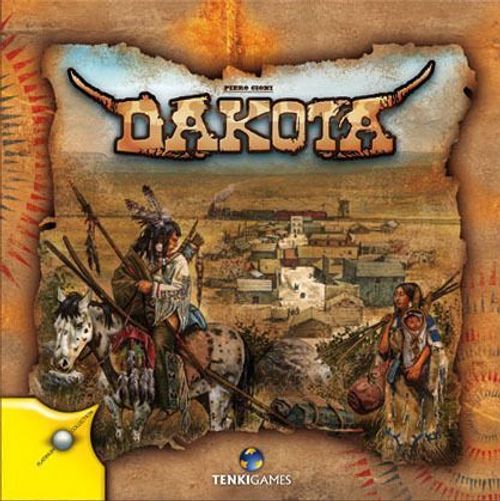
Dakota
Dakota Rulebook
Table of Contents
Table of Contents
Objective of the Game
The objective of the game is to reach the highest victory point (VP) score at the end of a set number of rounds.
Both settlers and natives win VPs by utilizing available resources to achieve their objectives.
Settlers collect resources to build their settlements and colonize unexplored territories, whereas natives must maintain a balance with their environment although being also in need of resources.
Each player belongs to one of the two factions, and tries to achieve his objectives by making alliances from time to time with other players, either settlers or natives.
Components
- 1 rulebook
- 1 game board
- 5 player screens
- 5 reference cards
- 4 punchboards
- 1 round counter
- 5 score counters (1 per color in 5 different colors)
- 30 explorer pawns (6 per color in 5 different colors)
- 10 horseman pawns (2 per color in 5 different colors)
- 26 neutral explorer pawns (13 per color in 2 different colors)
- 49 plastic bases
Game Components
- Game Board: see "The Game Board" below for a detailed description.
- Player Screen: The player screen helps hiding the collected resources.
- Reference Card: The double-faced reference card (settler or native) provides the player with all the necessary information to manage his resources, describing how to use them to ask for reinforcements and build settlements. There is also a designated area where the player can place the reinforcements and settlements he has brought into the game.
- Score Counters: Score counters are moved along the score track to show each player's VP position.
- Explorer Pawns: The players place their explorer pawns on the territories, to collect resources.
- Horseman Pawns: The players place their horseman pawns on the territories, to collect resources.
- Round Counter: The round counter, placed on the round track, indicates the present round.
- Neutral Settler Explorer Pawns / Neutral Native Explorer Pawns: The players place neutral settler (or native) explorer pawns on the territories, to support or hinder a conflict to collect resources.
- First player marker: The first player marker indicates who is the first player in a given round.
- Faction Tokens (5): At the beginning of the game, each player must choose his faction (settler or native) using the faction token.
- Territory and Frontier Tokens (5): The territory tokens (Mountain, Forest, Plain, Prairie, and Frontier on the back) are used to randomly choose which additional territories are active at the beginning of the game.
The Game Board
The game board is composed of various elements.
The Territories
The territories, horizontally aligned per type, represent the core of the game. They are divided in five different types (from top to bottom): mountain, forest, plain, river, prairie.
Each type of territory gives the players the possibility of collecting different resources. Regardless of their type, territories share the same structure:
- two spaces used to place respectively native and settler pawns;
- two rows of resources, the upper one and the lower one, on which are placed the resource tokens that will be collected later on by the players. Altogether, these rows show the two possible status of a territory: unexplored (upper row) and colonized (lower row).
Unexplored Territory: When unexplored, the territory is rich in natural resources. This status is most favorable to native tribes, as it provides them with the key resources they need to build settlements and ask for reinforcements. At the beginning of the game, all territories are unexplored, their upper row filled with resources. It is in the native players' interest to maintain this status as long as possible, if the use of resources allows it.
Colonized Territory: When a territory is colonized, its natural resources are collected, as human activities make great use of them. This status is most favorable to settlers, as the lower rows provide them with the key resources they need to build settlements and ask for reinforcements. Therefore, it is in the settler players' interest to deplete as soon as possible the resources located on the upper rows, since this is the only way to make the lower row resources available.
Other Elements
Other important elements of the game are located on the left side of the board:
- the market area on which players can place explorers in order to buy resources;
- the score track;
- two areas where to stock neutral pawns before they get placed on territories, one for native pawns and the other for settler pawns;
- the round track.
Setup
-
After placing the game board at the center of the table, each player picks his color and takes the corresponding components: 6 explorer pawns, 2 horseman pawns, 1 screen, 1 reference card, 1 score counter and 1 faction token.
-
All players put their score counter at "0" on the score track, while the round counter is put on the round track, at "1".
-
The first player is chosen randomly. He then takes the first player marker and places it in front of him.
-
The territories that are active at the beginning of the game are determined. The rightmost territory in each row is always active. Moreover, the first player chooses a certain number of additional territories, by randomly drawing territory tokens. The number of additional territories to draw depends on the number of players:
- 3 players: 1 additional territory (game starts with a total of 6 territories)
- 4 players: 3 additional territories (game starts with a total of 8 territories)
- 5 players: 5 additional territories (game starts with a total of 10 territories)
Once the initial territories have been determined, the appropriate resource tokens are placed on their respective symbol, on the upper row of these territories.
Then, for each territory type, a frontier token is placed on the first territory that is not active yet (the first to the left of an initial territory) to indicate the frontier.
-
Each player chooses secretly which faction he wants to play (native or settler), using the faction token. With one hand, the players cover their token and then reveal it simultaneously.
Note: There must always be at least one native player and one settler player. If all players choose the same faction, they must repeat this step.
-
The faction token is placed beside each player's screen. The reference card is turned to the appropriate side, according to chosen faction.
Game Rules
Duration
When playing Dakota, the duration of a game depends on the number of players involved.
- a 3-player game lasts 9 rounds.
- a 4-player game lasts 8 rounds.
- a 5-player game lasts 10 rounds.
Round and Game Phases
A round is divided in seven phases following this order:
- Activation Phase
- First Placement Phase
- Second Placement Phase
- Collection Phase
- Market Phase
- Development Phase
- End of Round
Activation Phase
During this phase, all players activate the special effect of settlements and reinforcements that are already in play, as specified by their game text (see Native and Settler Settlements and Reinforcements).
The activation starts from the first player, going clockwise, until the last player.
First Placement Phase
Starting from the first player and going clockwise, each player places 3 of his explorers. The explorers are taken from the reference card and placed on active territories and/or on the market area.
When a player places an explorer on a territory, he must place it on the area corresponding to his faction: a native player places his explorers on the area marked with a native symbol, and a settler player on the area marked with a settler symbol.
If a player has horsemen in play, he may place a horseman instead of an explorer.
Example: First Placement Phase. In a 3-player game, a territory of each type and one additional plain are in play. Red player (native) is the first player. He places his 3 explorers on a plain, on the native area. It is now Blue player's turn (settler). He places 2 explorers on a mountain and 1 on a forest. The phase ends with Green player (native) placing his 3 explorers on the other plain.
Second Placement Phase
Once all players have placed 3 explorers, the second placement phase begins.
As detailed in Setup, there is a certain number of neutral explorers for each faction: the lower the number of players in a faction, the higher the number of neutral explorers for that faction.
Starting from the player who placed his explorers last in the previous phase, and going counter-clockwise, each player places 3 neutral explorer pawns of his choice, taking them from their area and placing them on active territories.
A player can choose the neutral explorer pawns from either faction (native or settler) and place them where he prefers to. Each neutral explorer pawn must be placed in the area marked with the corresponding symbol.
Example: The settler player could place 3 neutral native pawns in 3 different territories, or place 2 neutral settlers in the same territory and 1 neutral native in another one, or place 3 neutral settlers in the same territory.
During the game, players can acquire new explorer or horseman pawns.
These additional pawns must be placed during the second placement phase, instead of the neutral explorer pawns. These additional explorer or horseman pawns can also be placed on the market area.
Example: During the game, if a player has acquired a new explorer, he will place, during this second phase, his explorer plus 2 neutral pawns of his choice.
In any case, taking into account both his own pawns and neutral pawns, each player will place a total of exactly 6 explorer/horseman pawns: 3 during the first phase and 3 during the second phase.
Example: Second Placement Phase. Given that there are two native players and one settler player, 4 neutral native pawns and 7 neutral settler pawns are in play and available during the second placement phase. Green player (native) is the first to play in this phase. He chooses to place 1 neutral native pawn on the forest and 2 neutral native pawns on the mountain, to stand in Blue player's way (settler). The second player is the Blue one (settler). He decides to place 1 neutral settler pawn on the forest and 2 neutral settler pawns on the mountain, to regain control of this territory. The last player is the Red one (native) who has only 1 neutral native pawn left (given that the other three have been used). He decides to place it on the forest. Then, he places 2 neutral settler pawns on the plain.
Collection Phase
When the second round of placement is over, it is time to determine whether or not the players are collecting resources, looking at the territories on which they have placed their pawns.
The collection phase is divided in two consecutive actions:
- Comparing factions
- Collection
Comparing Factions
Comparing factions is necessary to determine which faction (natives or settlers) will collect resources, and how these will be allocated between players of the winning faction.
-
Determining the strength of a faction. The strength value of a faction is determined by adding up the strength of the (player or neutral) pawns belonging to that faction: one point per explorer and two points per horseman.
-
Determining the winning faction. The winning faction is the one with the highest strength; only that faction will collect resources (see Collection, below). In case of a tie, nobody collects resources. If, in a territory, only one faction is present, that faction wins.
-
Removing explorer pawns. The players of the defeated faction (or all the players in case of a tie) remove their pawns from the territory, and put them back on their reference card.
All neutral pawns belonging to both factions are put back in their respective areas.
At this point, it is necessary to determine how players from the winning faction collect resources in that territory.
Collection
Resources are collected from a territory only by players of the winning faction.
Each pawn (explorer or horseman) allows to collect only one resource from those present on the territory at the beginning of the collection phase.
Winning faction with one player. When only one player represents the winning faction, he collects from the territory a number of available resources of his choice equal to the number of pawns he placed.
Winning faction with more players. When more players represent the winning faction, it is necessary to determine who is the strongest.
The strength value of each player is determined by adding up the strength of the pawn he owns: one point per explorer and two points per horseman.
The player with the highest strength collects first one resource of his choice and hides it behind his screen. He also removes one of his pawns from the territory, placing it back on his reference card.
Then, the strength of each player is calculated again, and the player with the highest strength collects another resource, and so on.
In case that two or more players have the same strength, the player who is first according to round order collects a resource first, followed by the other players with the same strength, again in round order.
Note: Resource collection continues until either all pawns are removed or no resources are left on the territory (see Row Depletion).
Example of Collection Phase. Continuing the previous examples, during the collection phase, factions are compared in each territory, starting from the mountain.
On this territory, there are 2 native explorers and 4 settler explorers. Settlers are the winning faction. Blue player is the only settler player. He owns 2 explorers. He takes 2 timber tokens from the upper row and hides them behind his screen. Then he removes his 2 explorers from the territory and places them back on his reference card.
The winning faction for the next territory (forest) must now be determined. On this territory, there are 2 native explorers and 2 settler explorers. Therefore, there is a tie and no resources are collected. All explorers are removed.
At this point, there are 2 plains left to be resolved. On the first plain, Red player (native) has 3 explorers with no opponents from the other faction. He automatically wins and takes 3 horse tokens, placing them behind his screen. Then, he takes back his explorers. On the second plain, Green player (native) has 3 explorers facing 2 neutral settler explorers. The native faction wins, and Green player takes 3 horse tokens. He places them behind his screen and removes his explorers from the plain.
In each of the previous cases, once the issue is resolved, all neutral explorers from both factions are removed and put back in their respective area, waiting to enter the game on the next turn, without collecting resources.
Row Depletion
If a row gets depleted during the collection phase, players from the winning faction who have not collected their resources yet will be unable to do so during this round.
All players remove their own explorer or horseman pawns.
Resources from a depleted row are never replenished, neither due to the Replenishing Resources rule (below) or to the effect of a native settlement (see Eagle Totem Pole, Buffalo Totem Pole, Horse Totem Pole).
Upper row: When the upper row is depleted, the lower row is filled with resource tokens. The new resources placed in the lower row can only be collected during the collection phase of the next round.
Lower row: When all the resources of the lower row have been collected, the territory is depleted. A new territory of the same type must be activated, if available. The resources placed in the new territory can only be collected during the collection phase of the next round.
Example of Upper Row Depletion. On a plain, Red player (native) and Green player (native), with 2 explorers each, are facing 3 neutral settler explorers played by Blue player to stand in their way. The natives are the winning faction. The neutral pawns are removed. Since both players have 2 explorers, the first one to collect a resource is Red player, given that he is the first to play in this round. Red player picks the last horse token from the upper row, and removes one of his explorers. Green player, who should collect a resource, is unable to do so since the upper row is depleted. Green player removes his 2 explorers and places them back on his reference card. Red player also removes his second explorer. Afterwards, the lower row is filled with resource tokens, which will be collected during the next round if an explorer or horseman is placed on this territory.
Example of Lower Row Depletion. Green player (native) has a horseman on the river, and Red player (native) has an explorer. They are facing 2 settler explorers belonging to Blue player. Thanks to the horseman value of 2, the natives are the winning faction, since their strength is 3 whereas settler's strength is 2. Blue player takes back his explorers. Only one gold token is left on the territory's lower row. Green player has a strength of 2, thanks to his horseman, while Red player has a strength of 1, thanks to his explorer. Green player wins the confrontation, collects the gold token and takes back his horseman. Since the river's lower row is depleted, Red player can't collect any resource. So, Red player removes his explorer and places it back on his reference card.
Activating a New Territory
When a territory is depleted, a new territory of the same type must be activated.
The territory located on the left of the depleted territory is activated by moving the frontier token to the next territory of the same type and by filling its upper row with the appropriate resources.
Note: If there are no territories of this type still available, there is no territory activation.
Example of a new territory activation. As a territory has been depleted, the river territory on its left is activated, and the frontier is moved to the left. Its upper row is filled with the appropriate resources that will be collected only during the next round.
Replenishing Resources
Resources are replenished when in a territory:
- there is at least one resource token left in a row, and
- in a given round no pawns (either player or neutral) are placed on that territory.
In this case, a resource is added, at the end of the collection phase, on an empty space of that row.
The first player, according to round order, decides which resource is added, if different types are available. If the row is already full of resources, no resource will be added.
Example of Replenishing Resources. On a forest, no pawns have been placed. Therefore, a resource token is added to an empty space of the upper row. The first player can choose either a timber or a game token; he decides to add a game token.
Market Phase
During this phase each player can perform the following action:
- Buying resources
Buying Resources
Players who have placed pawns on the market area can use them to buy resources, if they want to.
The first player, according to round order, is the first one to buy resources during this phase, followed by the other players, going clockwise.
Each player may only buy one resource per each pawn he has in the market. The player chooses a resource among the ones which are available in the stockpile and pays its cost in wealth points.
The cost of each resource is indicated on the players' reference card. Note that resources have a different cost for each faction.
When the buying action is completed, the player removes his pawns from the market area. The next player can then start buying.
Development Phase
Following round order, each player can, in this phase, do one or more of the following actions:
- ask for reinforcements or build a settlement;
- selling resources;
- recruiting new explorers and acquiring VPs.
Asking For Reinforcements or Building Settlements
Players cannot perform this action more than once during each development phase.
When a player asks for reinforcements or builds a settlement, he must discard the resources or wealth points corresponding to the cost indicated on his reference card. Then, he places the reinforcement or settlement on his reference card.
If a settlement (which has a VP value) is built, the player moves his counter up the score track.
Both reinforcements and settlements have an effect on the game (see Native and Settler Settlements and Reinforcements). If the player builds a settlement with an effect influencing the development phase, the effect is immediately applied.
Note: Each reinforcement and settlement can only be played once by each player during the game.
Note: For some native settlements (Horse Totem Pole, Buffalo Totem Pole), a part of the building cost is represented by a four-color resource token. This means that this part of the cost can be paid by any one of the following resources: fish, horse, game, or buffalo.
Selling Resources
A player can sell his own resources for wealth points. To do so, he discards the resources he wants to sell, and takes the corresponding value in wealth points, as indicated on his reference card.
Note: Each resource has the same value, in wealth points, whether on purchase or on sale.
Recruiting New Explorers and Acquiring VPs
A player who gained wealth points can use them either during the same phase or in a subsequent rounds to acquire VPs or recruit new explorers, at the rate of 12 wealth points for 1 VP or 1 explorer.
The VPs are immediately added to the player's score, while new explorers will enter the game in the next round.
When a new explorer is recruited, a neutral explorer pawn from the same faction must be removed from the game: it is removed from its area and placed back in the box.
Examples of Development Phase
Blue player (settler) has accumulated 3 timber tokens. He decides to build a settlement, a Saloon, that costs 3 timbers. Once payment has been done by discarding the resources, he places 1 Saloon token on his reference card. Blue player moves his score counter two spaces up the score track, given that he scores 2 VPs for the settlement he has just built. The effect of the Saloon is activated in the next round.
Red player (native) has accumulated the necessary resource tokens to build a Buffalo Totem Pole. Once payment has been done, he places the Buffalo Totem Pole token on his reference card. Then, he moves his score counter four spaces up the score track, given that he scores 4 VPs for this settlement. The effect of the Buffalo Totem Pole is activated in the next round.
Green player (native) wants to build the Eagle Totem Pole, but he misses a game token and a fish token. He decides to sell a buffalo token to increase his number of wealth points. On the next round, he will place 1 or 2 explorers on the market area, in order to buy the resources (one or both) he needs to build the totem. By selling his buffalo token, he earns 5 wealth points, which will be enough to buy both resources he needs (their respective cost is 3 and 2 wealth points).
End of Round
During the end of round phase, all native players take back their Ghost Dance marker if it was in play in this round.
The round counter is advanced one space on the round track. The first player marker goes to the next player, clockwise. A new round begins.
If the round which just ended is the last one, VPs are calculated for each player.
Victory Conditions
After the end of the last round, the player with the most VPs wins the game.
In case of a tie, the player with the most wealth points (after converting all remaining resources in wealth points) is the winner.
Native Settlements
Each settlement has a specific effect on the game as well as a VP value that is added to the player's score when that settlement is built.
The settlements available to native players are three different totems: Eagle Totem Pole, Buffalo Totem Pole, and Horse Totem Pole.
Totems are part of the Native American religious beliefs; in the game, they give strength to the land and make resources more abundant.
Note: The four-color symbol represents any resource among the following four: fish, horse, game, buffalo.
Eagle Totem Pole
Cost: 1 timber, 1 buffalo, 1 horse, 1 game, 1 fish
VP Value: 5
Effect on the game: At the beginning of the round, during the activation phase, the player places 1 fish token or 1 game token on an active territory of his choice where the chosen resource is available, in a row that is not depleted. If there is no vacant space in any active territory matching the chosen resource, then this action is not performed.
Buffalo Totem Pole
Cost: 1 timber, 2 buffalo, 2 any one of fish/horse/game/buffalo
VP Value: 4
Effect on the game: At the beginning of the round, during the activation phase, the player places 1 buffalo token on an active territory of his choice where this resource is available, in a row that is not depleted. If there is no vacant space in any active territory matching the buffalo resource, then this action is not performed.
Horse Totem Pole
Cost: 1 timber, 2 horse, 2 any one of fish/horse/game/buffalo
VP Value: 4
Effect on the game: At the beginning of the round, during the activation phase, the player places 1 horse token on an active territory of his choice where this resource is available, in a row that is not depleted. If there is no vacant space in any active territory matching the horse resource, then this action is not performed.
Native Reinforcements
Each reinforcement has a specific effect on the game, but no VP value.
There are three different reinforcements available to native players: Horse Herd, Ghost Dance, and Rifles.
These reinforcements help players by increasing their strength or defending them from their enemies.
Horse Herd
Cost: 3 horse
VP Value: 0
Effect on the game: The player can replace one of his explorers with a horseman. A horseman has a strength of 2 when determining who will collect the resources on a given territory. However, each horseman collects only 1 resource during the collection phase. A horseman can be placed instead of an explorer either during the first phase of placement, or during the second phase if the player has more than 3 explorer/horseman pawns.
Ghost Dance
Cost: 6 wealth points (one 5-point and one 1-point wealth token)
VP Value: 0
Effect on the game: At the beginning of the round, during the activation phase, the player places 1 Ghost Dance token on an active territory of his choice. No neutral settler explorer can be placed on that territory during this round.
Rifles
Cost: 1 metal, 1 gold
VP Value: 0
Effect on the game: The player can replace one of his explorers with a horseman. A horseman has a strength of 2 when determining who will collect the resources on a given territory. However, each horseman collects only 1 resource during the collection phase. A horseman can be placed instead of an explorer either during the first phase of placement, or during the second phase if the player has more than 3 explorer/horseman pawns.
Settler Settlements
Each settlement has a specific effect on the game as well as a VP value that is added to the player's score when that settlement is built.
There are four settlements available to settler players: Bank, Blacksmith, Saloon, Train.
These settlements represent developments which help settlers to live a better life. Their effect in the game is to allow the settler players to grow faster their wealth and population.
Bank
Cost: 3 timber, 1 metal
VP Value: 4
Effect on the game: Explorers and VPs now cost 10, instead of 12, wealth points for the player.
Blacksmith
Cost: 2 timber, 1 metal
VP Value: 1
Effect on the game: During the development phase, whenever the player sells 1 metal, he gets 2 additional wealth points.
Saloon
Cost: 3 timber
VP Value: 2
Effect on the game: At the beginning of the turn, during the activation phase, the player gets 1 wealth point.
Train
Cost: 2 timber, 3 metal
VP Value: 6
Effect on the game: During the development phase in which the player wants to build a train, there must be, on the board, at least one plain or prairie with a depleted upper row, and resources available on its lower row. Once the train has been built, whenever the player sells 1 grain, 1 metal or 1 gold, he gets 1 additional wealth point.
Settler Reinforcements
Each reinforcement has a specific effect on the game, but no VP value.
There are two reinforcements available to settler players: Fort and Army.
These reinforcements help players by increasing their strength when facing their enemies.
Fort
Cost: 2 horse, 2 timber
VP Value: 0
Effect on the game: The player can replace one of his explorers with a horseman. A horseman has a strength of 2 when determining who will collect the resources on a given territory. However, each horseman collects only 1 resource during the collection phase. A horseman can be placed instead of an explorer either during the first phase of placement, or during the second phase if the player has more than 3 explorer/horseman pawns.
Army
Cost: 8 wealth points (one 5-point and three 1-point wealth tokens)
VP Value: 0
Effect on the game: The player can replace one of his explorers with a horseman. A horseman has a strength of 2 when determining who will collect the resources on a given territory. However, each horseman collects only 1 resource during the collection phase. A horseman can be placed instead of an explorer either during the first phase of placement, or during the second phase if the player has more than 3 explorer/horseman pawns.
Summary of a Round
A round is divided in seven phases, following this order:
-
Activation Phase. In this phase, the native settlements (the three Totem poles), a settler settlement (Saloon) and a native reinforcement (Ghost Dance) are activated.
-
First Placement Phase. Clockwise, each player places 3 explorer/horseman pawns on the territories or the market area.
-
Second Placement Phase. Counterclockwise, each player places 3 neutral explorer pawns on the active territories. When the players have additional explorer/horseman pawns in play, they replace the neutral pawns with their own pawns (player's pawns may also be placed on the market).
-
Collection Phase. Players collect resources in territories where explorers/horsemen are placed.
Strength is calculated for each player and faction, by adding 1 point per explorer and 2 points per horseman.
When both factions are occupying the territory, only the players from the winning faction (highest strength) collect resources.
If many players are part of the winning faction, the player with the highest strength collects first.
One resource is collected for each explorer or horseman.
-
Market Phase. Each explorer in the market area can buy one resource, paying its cost with wealth points.
-
Development Phase. In this phase, following round order, each player can ask for reinforcements, build a settlement, sell resources for wealth points, use wealth points to recruit a new explorer, use wealth points to acquire VPs.
-
If the round is the last one, players count their VPs; if not, a new round begins and the first player token is passed clockwise around the table.