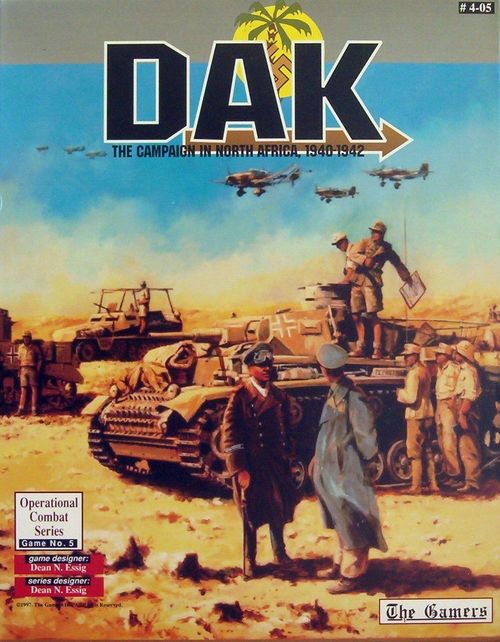
DAK: The Campaign in North Africa, 1940-1942
DAK: The Campaign in North Africa, 1940-1942 Rulebook
Table of Contents
Table of Contents
- Introduction
- 2.0 Variations to the Series Rules
- 3.0 General Special Rules
- 4.0 Axis Special Rules
- 5.0 Allied Special Rules
- 6.0 Optional Rules
- 7.0 Scenarios
- Campaign Victory Conditions
- 7.1 Operation Compass—Training Scenario #1
- 7.2 Italian Offensive Sept 1940 to Dec 1940
- 7.3 The Battle of Sidi Barrani—Training Scenario #2
- 7.4 Operation Compass Campaign Start, 8 Dec 40
- 7.5 The Race to the Wire—German Intervention Campaign Start, 29 March 41
- 7.6 Operation Brevity, 15 May 41
- 7.7 Operation Brevity Campaign Start
- 7.8 Operation Battleaxe, 15 June 1941—Two Map, Short Scenario
- 7.9 Operation Battleaxe Campaign Start
- A Complete Copy of DAK Includes
- OCS Optionals and Series Errata
- Counter Manifest and Order of Battle
- Historical Notes
- The Malta Invasion Plan
- The Grand Mufti
- Units Around the Mufti—"Centro A" and "Reparto Wanda"
- Brigade Groups—The Commonwealth Organizational Shuffle
- The Italian Libyan Colony
- The Yugoslavian Units
- The Egyptian Army
- Italian Raggruppamentos
- British Dummy Tank Units
- Those Strange Little Garrison Units...
- The Libyan Armored Division
- From All Tank to All Arms: The Evolution of British Armored Doctrine
- Annotated Bibliography
- Designer's Notes
- Abbreviations
- Arabic for Desert Foxes...
- Random Events Tables
- Allied Order of Arrival
- Allied Historical Order of Withdrawal and Return
- Axis Order of Arrival
- Allied Variable Withdrawal and Return Table
- Volume III: Weather, Terrain, and Reference Charts
Introduction
1.1 Multiple counters for the same unit
Take great care in selecting units to use, as a number of units are represented by different counters as those units develop throughout the campaign (new weapons, organizations, etc.). Be sure to select the counter with the correct ratings and symbols as listed in the set up or order of arrival. More detail is provided for those units which frequently change than for those which never do.
1.2 Too Much Map Area, Not Enough Table Space...
Some players might find the complete layout of DAK beyond their ability to set up due to limited table space and such. These players will be happy to find that the game comes with multiple smaller scenarios and is even arrayed such that the campaign games themselves are not out of reach. Play can easily be done by leaving Map E aside until absolutely necessary (i.e. the war has moved to eastern Egypt). Even this space savings can be done in two ways: First, Map E can be dispensed with entirely and the Commonwealth can run its war from Alexandria. Second, an Abstract of Map E has been provided as a player's aid which can be used in the place of the real Map E. Either method can be easily used.
To save even more space yet still play the campaign scenarios, it is possible (although it is far more clumsy than doing away with Map E!) to play with Map A on a separate table. Given Map A's importance to both the game and especially the Axis logistical effort, one should only attempt this if space is absolutely at a premium.
DAK is an excellent game for those who have gotten into "vertical gaming" (playing the game while mounted on a wall, or ceiling, using magnets or sticky putty materials). Due to its reasonably low counter density, this method of play will work quite well.
1.3 "Simulcast" Turns
Players will find periods in the game where the major activity is logistical build up on both sides. These periods can run much faster by both players declaring the turn to be a "simulcast" turn and following these rules:
a) Both players execute the turn sequence at the same time.
b) No combat or barrages (land or air) are allowed.
c) Neither player executes anything which could be construed as an offensive, raid, or other such activities on land or air. If a Random Event comes up that forces activity, the turn immediately stops being a simulcast turn and is instead executed in the normal manner.
d) The goal of the simulcast turn is to speed up the down periods...don't screw up that goal by attempting anything to gain some sort of silly advantage. If you have some real operations in mind, don't agree to the simulcast turn in the first place; play a real turn. However, don't force your opponent to play real turns for gimmicks and microscopic reasons—it wastes your time and delays getting to the "good" stuff.
1.4 OCS Standard Marker Sheets
This game contains the standard OCS Marker sheets (actually, two of them). On them you will find the counters you need in abundant numbers—you'll also find some (Level 4 Hedgehogs come to mind) you'll never need here. This is an advantage of standardized parts; use these "extra" counters in other OCS games.
The standard Green Repl counters should be used for both Allied and Italian Repl units. The Germans have their own Repl counters on the unit countersheets.
1.5 "Campaign" Rules
Each scenario lists whether or not it uses the "Campaign Rules". These rules are marked with "c" before their case number (as in c 1.10). If a scenario does not require the Campaign Rules, ignore all rules so marked. Furthermore, some optional rules are also marked as Campaign Rules. These cannot be applied to the scenarios which do not use the Campaign Rules.
1.6 Set Up Notations
In addition to the usual OCS notations, scenarios identify Axis unit nationality by typeface:
- Normal typeface Axis units are Italian
- Italic typeface units are German, e.g. 21.Pz Div.
1.7 Pre-Game Decisions
In addition to the usual things players must decide before playing any game (who gets which side, where to put the pretzels, when to order the pizza...), the following must be determined before beginning any DAK game (some of these are Campaign Rules and can be ignored in scenarios not using them):
- Arrival and Departure of the German Flieger Korps by Random Event or Historical schedule?
- Allied withdrawals by Variable Withdrawal and Return Table or by Historical schedule?
- Historical Tiger Convoy or Player Demanded one?
- Determine the Options to be used in Play, if any (see section 6.0)
2.0 Variations to the Series Rules
2.1 Hedgehogs
2.1a Map Printed Hedgehogs. Hedgehogs printed on the map cannot be destroyed, reduced, or improved. EXCEPTION: Tobruk's Hedgehogs (printed as Level 3) start the campaign (September, 1940) as Level 1 and only attain their full printed value on 1 Apr 41. This upgrade occurs regardless of which side owns the Tobruk position (all the hedgehog hexes making up the fortress boundary) at that time—if complete ownership is in doubt on 1 April, delay the upgrade until the end of the first turn in which one player (or the other) clearly owns all of the Tobruk Hedgehog hexes.
Map printed Hedgehogs (and the improvements to the Tobruk fortifications) do not count against the player's Hedgehog limitations below.
Design Note. The Italian Army allowed the pre-war Tobruk fortifications to go to seed. Additionally, they had neither the time or the equipment to improve them after Compass began. The Commonwealth troops occupying these forts began a crash program of improvements only after German intervention in the theater (in late March, 1941). For the sake of simplicity, the improvement of these Hedgehogs occurs regardless of which side currently owns them—if the Axis has already regained control of the fortress, one can assume they would be as interested as the Allies in improving the works. In the rare event the Italians don't lose Tobruk in the first place (a pretty impressive performance on their part, if playtesting is any indication!), one can assume they would have swept the cobwebs out of the various bunkers they had captured.
2.2 Fuel Costs
The usual "pay 1 SP for the HQ and all the independents are fueled" rule (series rule 11.5c part B) does not apply in this game. All non-divisional units must be paid for separately. Divisional units are handled normally.
2.3 Optional Rule Usage
The following are the optional rules recommended for use with DAK.
2.3a From the v2.0i Optionals. I would list Opt.1 and Opt.6 as required for DAK (some of the neat unit effects included will be lost if Opt.1a isn't used). Players miss out if they do not use Opt.6 and those rules will become standard for the series before too long. The rest of the optionals listed on pages series rule 34-36 can be used if desired, but of them, I feel only Opt.2 is worth the bother. If Opt 2.c is used, count the Hurri IId as a Heavy Tank Buster. If Opt.9 is used and the scenario is a month long or more, give each player 5 Initiative Points at the start of each calendar month (and on the first game turn, if not at the start of the month).
2.3b DAK Game Specific Optionals. Use these as desired to salt the game to taste. The game can easily be played without any of them, but some might add facets of the campaign players might want to look into or which players feel they cannot play without. For the most part, these are minor historical variants (units that were not there or which have different organizations available), or are minor tactical tweaks which I feel are not worth their weight in rules (hence they are not standard), but feel some players may want to use anyway.
2.3c New OCS Optionals. These are rules which have been developed since the OCS v2.0i rules came out which address some of the play styles I've seen in action which do not conform to real life and I want to discourage players from doing. All of these should be used.
c 2.4 Tobruk Unit Rebuilds
This rule allows Pax Repls (not Eq Repls, which must be handled normally) to rebuild units in the Tobruk Hedgehogs, even if adjacent to an enemy unit and not adjacent to a friendly HQ. This can be applied to either Axis or Allied units provided the Pax Repl(s) is adjacent to the unit absorbing it and is inside the line of the Tobruk Hedgehogs.
Design Note: This rule allows the player occupying the Tobruk entrenchments to feed replacement men into the front lines without having to pull the entire unit out of line to do so. This can be critical during a long siege of the fortress, as happened historically.
c 2.5 Use of Shipping Calculations (series Optional rule 13.0d)
This game was designed applying the standard rates of RE to SP exchange (1 RE equals 1 SP, regardless of unit type). Players wishing to use this optional rule for a more precise relationship must invert its effect. In other words, a 1/2 RE armored unit would cost 1 SP of shipping. This effect is caused by the unloading difficulties involved in heavy equipment units in this theater of operations—a lack of heavy port equipment, especially for the Axis. So, rather than making non-mech units cost x1/2, in this game those units are normal and mech units are x2 instead.
Design Note: The game works best with the standard exchange rate. Players are certainly free to use the fancier method if they like, but I did need to make sure they applied it in a way that would not upset the rather precise calculations involved regarding supply in-flow.
3.0 General Special Rules
3.1 Map and Turn Handling Notes
3.1a Turn Labeling System. DAK uses a two-tiered method of turn recording (identical to that used in Tunisia). A Month Marker is used to designate the current month. Each month contains a number of "Half-Week" turns based on the normal calendar. Each Half-Week represents one game turn and is recorded using the Turn Marker on the Half-Week Record Track. Place the marker in the first Half-Week of play in the scenario and advance that marker around the track until you play the last turn of the month. Then advance the month marker accordingly.
Half-Weeks are labeled using the date of the first day of the Half-Week. Note that the Feb 29 turn is not used in DAK.
3.1b Multiple Terrain Hexes. There are numerous hexes on the map which contain more than one area fill terrain type (low hills, rough, sand desert, whatever). In all such cases, use the terrain in the hex which is the best for the defender for combat and barrage purposes and the worst MP cost for movement purposes. This effect occurs regardless of the amount of symbol in the hex. Note that units moving along roads (to include, railroads and tracks...) can still use the MP cost of the road, even though there are "worse" features present (the units are considered to be moving on the roads).
3.1c Road Distance Chart. This chart (printed in this rulebook) gives the best distances between an assortment of commonly used points on the map. This distance is given in Truck MPs (so the value might vary when other movement types are attempted and the coastal road is involved). Only the one quickest route is given, so if you have any doubts about your route being the shortest, count the MPs to make sure yourself. The distances given are for periods after the Italians complete the coastal road to Sidi Barrani from Sollum. Add 1 MP if the Tobruk By-Pass road is used (after becoming a Primary Road) rather than the direct route through Tobruk due to the extra length of the By-Pass.
3.1d Mile Markers. The little Mile Marker symbols along the coastal road show up every 5 Truck MPs (15 hexes) to facilitate the movement of truck convoys. Where other friendly units might obscure these handy little symbols, I suggest orienting the units 90 degrees off the usual way you set up your troops to identify where these hexes are without having to look under the counters to find them.
3.1e Holding Boxes. There are three Off-Map Holding Boxes in the game (Tripoli, Sicily and Crete). There are also numerous boxes related to a number of potential congestion points on the map (such as Tobruk and Alexandria). These latter boxes are not Holding Boxes, but merely blown-up versions of the hex listed allowing units more room to be laid out—the units in those boxes are in the listed hex and all other effects are normal. The Holding Boxes, on the other hand, have the following rules:
a) Tripoli lists a port capacity (6), while the other two have an unlimited port capacity.
b) Crete and Sicily have infinite nominal dumps from which the player can ship (air or sea) SPs; Tripoli is limited to the SPs the player sends there from elsewhere.
IMPORTANT: Only German transport aircraft can fly SPs out of Crete's nominal dump to the map—Italian transports cannot. Both German and Italian transport aircraft can fly SPs out of Sicily's nominal dump.
c) Each Holding Box has the airbase capacity and refit capacity listed.
d) No Combat is ever allowed in a Holding Box (air or ground). No enemy units can ever enter a friendly Holding Box.
e) The Axis Player controls Tripoli and Sicily at the start of every scenario and these two boxes are always under his control.
f) The Axis Player also controls the Crete Holding Box the instant the Greek Campaign Status Track Marker enters the "Termination" Box.
g) The Commonwealth Player can never use any of these three Holding Boxes, not even Crete before it falls.
h) The Holding Boxes always have good weather.
c 3.1f Tripoli to Map Movement. All of the Holding Boxes are connected to the map via Air Entry Points and shipping. In addition, Tripoli has a land-based connection the others do not have. Units can move from the map (hex A19.35) to Tripoli and vice versa using the Tripoli Movement Boxes. Only the Axis Player can use this track. As is the case with Holding Boxes, no combat, barrages, or enemy movement can ever occur within these boxes. The following rules control movement along these boxes.
a) All units must make the trip through these boxes in Move Mode. Strat Move Mode is already accounted for in the calculations making up these boxes. No unit can "walk to the war" in Combat Mode (in an effort to save on fuel). The units must be in Move Mode, if they have modes at all.
b) No unit can enter or move along these Boxes in any Phase other than the regular Movement Phase, nor can they take advantage of Reserve Mode to squeeze out extra movement.
c) If the moving unit has 20 MPs or less in Move Mode, place the unit in the Box corresponding to its Movement Allowance. For instance, a unit with a Move Mode MA of 8 would be placed in the 3 Box.
d) If a unit has more than 20 MPs as a Movement Allowance (such as trucks), treat each box of the track as a big hex with a terrain cost of 4 MPs.
e) If the unit (any MA in this case) wishes to move directly from the map to the track using a portion of its MA, apply this 4 MP per box cost to determine where the unit ends up.
f) Important: Once on the track, the unit automatically moves one box per turn in the direction of the arrows on the chosen track (exception: see d) above). No unit can stop along the track or turn around to go back until either the Tripoli Box or the map is reached.
g) There are no weather effects on this movement.
h) For units starting in Box 5 (the last one before the map), place these units into hex A19.35 at the beginning of the Axis Movement Phase and the units can move their full MA on the map that turn (as well as change mode and so on). There is no additional MP cost for this transition, although the units may need to be fueled if they are to move on the map that turn. The instant the player places the units in A19.35, they become regular on-map units which no longer have the fuel status they had while on the track.
i) Units on the track are always supplied. SPs expended to fuel units moving onto the track keeps them fueled until they exit the track's far end.
3.1g Tobruk AT Ditch. The Tobruk AT Ditch follows the entire perimeter of the Fortress. It exists from the very beginning of the game and affects all units attacking across it as per the Terrain Effects Chart. At both ends, the AT Ditch follows just inside a Wadi hexside—for attacks and movement across those hexsides, use the combined "Wadi and Tobruk AT Ditch" terrain type (do not simply add them together).
c 3.1h Railroads. There are but a few railroads in DAK as opposed to earlier games in this series. Certainly the Axis player can readily skip any concern over his limited railnet (if indeed the term can be used), unless certain special random events occur. He has a Rail Cap he can use on the railway around Benghazi, but its usefulness is strictly limited.
For both Axis and Allied sides, Points of Interest constitute detrainable hexes.
The Allied player has the relatively extensive railnet of the Nile Delta in addition to the small Western Desert Railway extending toward Tobruk. The Allied player has two separate Rail Caps—one for the Delta and one for the Western Desert Railroad (WDR).
a) Either Allied Rail Cap can be used in hexes containing the RR Boundary on Map D just west of Alexandria.
b) The WDR Cap can be used on either side of the boundary and is the only Allied Rail Cap capable of carrying SPs.
c) The Delta Rail Cap can only be used on or east of the boundary and cannot be used to transport SPs.
d) Using both rail caps in a single phase to move a load constitutes Leap Frogging.
c 3.1i The Unbuilt British Railroad. During the campaign, the WDR was extended from Mersa Matruh almost to Tobruk. Only the Commonwealth Player can build this railroad and it can only be built following the Unbuilt Railroad printed on the map. Before it is built, the Unbuilt Railroad does not exist in any form—it does not even constitute a Track (there is nothing there at all). The Commonwealth Player need not build this railroad extension at all if he does not want to do so.
To build the railroad extension, the Commonwealth Player has (or will obtain by reinforcement) two New Zealand Railway Construction Companies. These are the only units in the game capable of building this railroad (the Egyptian National RR units cannot do this). There is no SP cost for building this railroad extension. At most one hex can be built per turn (even when both RR Companies are present). Place the RR Company (or Companies) in the current Railhead hex and execute the following:
If one company is present, roll one die and on a 6 move the Railhead forward one hex with the RR Company. Otherwise no effect.
If both companies are present, the Railhead and RR Companies automatically move forward one hex each turn.
Rail construction cannot occur adjacent to enemy units, into enemy occupied hexes, or if the RR Companies are DG or have moved in the current turn.
c 3.1j The Tobruk By-Pass Road. During the Summer of 1941, Italian engineers and construction troops built a hard surface by-pass road around the Tobruk Fortress following existing desert tracks. Rommel praised them for their impressive work under difficult conditions. The Italians made use of specialized equipment which ground the available rock into a form more suitable for concrete. It was quite an engineering achievement.
The Tobruk By-Pass Road automatically becomes active on or after the 1 Oct 41 turn if the Axis Player occupies or was the last to move through each of these hexes. Before being built as a Primary Road, this road is a regular Road.
3.1k Finishing the Coastal Road. Prior to the September, 1940 invasion of Egypt, the hard surface coastal road from Sollum to Sidi Barrani fell into disrepair and the heavy military traffic from the beginning of the war in June had caused its original surface to be destroyed. One of the first tasks the invading Italian 10th Army faced after crossing the border and capturing Sidi Barrani was the resurfacing of this road and the building of a water pipeline to their forward camps. This operation was looked upon as a logistical prerequisite to the next stage of their invasion: the advance on Mersa Matruh. As it turned out, the road was barely finished before the Allied counteroffensive began and was never used for its intended purpose.
Before it is activated as a Primary Road, the Coastal Road is a regular Road. The road activates on or after 1 Dec 40 if the Axis Player occupies or was the last to move through each of its hexes.
Design Note. Both of these "Road Building" rules existed in much more detailed form in early versions of the game. They have been stripped down to this "activation only" level as playtesting progressed. If this abstraction rubs you the wrong way (or you just like complicated road construction rules), feel free to embellish these however you like. For play purposes, we found that these abstractions did the job quite well and eliminated much of the fuss and bother of the earlier rules.
c 3.1L The Suez Canal. Almost all Allied shipping into the eastern Mediterranean has to come through the Suez Canal. A few critical convoys were sent directly through the Straits of Gibraltar, but for the most part all tonnage delivered to the theater, even if unloaded in Alexandria or Port Said, had to come up the Red Sea and through the Canal first. Axis units blocking the Canal would be a strategic matter which would threaten the entire Middle Eastern Theater of Operations.
The Commonwealth cannot use any Mediterranean Port if a supplied Axis Combat unit with a combat strength of 2 or more (or a combination of units with a combined strength of 2 or more) occupies any hex adjacent to the Canal at the end of any Commonwealth turn (it takes effect on the next turn). If this occurs, the infinite dumps in Port Said and Alexandria immediately disappear and no port inside the Mediterranean can be used for trace supply. Coastal shipping can be used normally but cannot transit the Canal. When the Canal is reopened (i.e. cleared of enemy units closing it above), the infinite dumps return automatically.
3.1m Bridges. All roads and railroads are assumed to have bridges over any river or wadi feature they might cross.
3.1n "In Hex" Wadis. Certain key locations (around Tobruk and Bardia, for example), have numerous coastal wadis. As these wadis cannot be made to conform to hexsides (except in a few special points where I've done exactly that), they are shown as Low Hills within the hexes. Given the washboard nature of the terrain at those points, "Low Hills" is not all that far off as a terrain effect.
3.2 Minefields
Mines became a major feature of the Desert Campaign as it went on. Enormous "Devil's Gardens" of literally millions of mines were sown in an effort to generate terrain obstacles where there were none naturally.
c 3.2a Minefield Limits and Restrictions. Minefields cannot be built prior to 1 Jan 42 and cannot be built by the Axis Player in any event. The Allied Player can build no more than 25 Minefields during the course of the campaign (scenarios list the number still available at each starting point). The Axis Player can make use of 3.2e and 3.2f to emplace his own Minefields—he just cannot make ones from scratch. If either side has some removed Minefields on hand which can be resown, the scenario will list the number. No more than one Minefield can ever be built in a single hex.
c 3.2b Building Minefields. Building a Minefield from scratch (not from a Removed Minefield), costs 1 SP per hex and requires any infantry, engineer, or HQ unit in Combat Mode (can't be DG or Out of Supply) to accomplish. Building is accomplished within the unit's hex. It takes two turns to complete and can be done adjacent to enemy units. At the end of the first player turn of construction, place the Minefield Marker in the hex with its Uncompleted (Pick and Shovel) side up. At the end of the second player turn of construction, flip the marker to its finished side. It would be wise then to get the friendly unit or units out of the minefield. The unit attempting to build or complete a Minefield cannot move during any turn in which such construction is done.
3.2c Finished Minefield Effects. A finished Minefield has the following effects:
- -2 to Action Ratings of units in such hexes (attack or defense)
- +4 to MP cost of the hex to Leg MA units, +10 to MP cost of Track/Truck movers
- Units can use series rule 6.1c (units can always move one hex) to enter a Minefield.
- Shift one column right on the Barrage Table for units in such hexes
- No overruns into or out of such hexes
- Units in minefield hexes cannot conduct recons
- No loss effect; units are free to enter (given the above) and exit minefield hexes
3.2d Uncompleted Minefield Effects. An uncompleted Minefield has the same effects as a finished one except:
- -1 to Action Ratings of units in such hexes (attack or defense)
- +2 to MP cost of the hex to Leg MA units, +5 to MP cost of Track/Truck movers
- Units can use series rule 6.1c (units can always move one hex) to enter a Minefield.
If the one player abandons an Uncompleted Minefield, the other player can either finish it (as per 3.2b) or pull it up for reuse (3.2e), as desired.
c 3.2e Removing Minefields. To remove a Minefield, follow the exact process and requirements of installation, except that when you are done you have a removed Minefield to reuse (the 1 SP is gone forever). The removing unit must be in the Minefield's hex. Uncompleted Minefields can be removed—but the process is done from that point (one turn to undo)—the uncompleted Minefield counts as one that can be reused.
c 3.2f Reusing Minefields. Removed Minefields can be re-installed by the player who removed them using 3.2e by following the procedure for initial installation. There is no SP cost when installing a "pre-owned" minefield. Simply expend the time and use the Minefield marker that was removed earlier. There is no "time delay" between when a Minefield is removed and when it can be reused.
3.2g Scorpions. The Commonwealth player gets two Scorpion Companies toward the end of the game. These can be identified by the letter S inside their Armor symbol. He can use them to help reduce the effects of Minefields he must cross. If a Scorpion is in a Minefield hex, apply the following:
- Reduce the Action Rating effect of the Minefield by 1 (finished Minefields become -1 AR, Uncompleted ones have no effect).
- Halve the additional Movement cost of the Minefield (rounding normally).
All other Minefield effects remain normal despite the presence of the Scorpion unit.
c 3.3 City Captures
Whenever one side captures any of the following (marked on the map with a star in either the hex or holding box—if there is one), the capturing side automatically gets the items listed in addition to anything that might be captured there normally. Everything captured appears in the captured city hex. EXCEPTION: 0 MA units brought into play via Tobruk's capture can be placed in any hex at or within 2 hexes of Tobruk itself, provided the chosen hex is not adjacent to an enemy attack-capable unit. The list below is reproduced on the map near the city listed (except Helwan and Cairo which are by necessity listed in the "sea" north of their locations).
Important: In all cases, the enemy must have owned the feature in question for the preceding two months to "charge up" the award (in other words, the enemy player must have held the city for two months at a minimum for it to develop award value).
"Two months" expires on the game turn exactly two months after the city is taken. Players must make a note to themselves to keep track of this as these locations change hands. If a player captures a city below before the enemy has held it for two months, there is no award.
Unless stated otherwise, awards are made at the instant of capture. If the award requires two turns before appearance and the city is lost before the award appears, the award is not given.
Alexandria (per Hex): Axis Only: 5 SPs, 1T Truck Point
Bardia: First Time Commonwealth (appears two turns after capture): 1x Cap It Arm Bn, 3 SPs
Benghazi: First Time Commonwealth (appears two turns after capture): 1x Cap It Arm Bn, 3 SPs
Buq Buq: First Time Commonwealth recapture after two months of Axis control: 2 SPs
Cairo (per Hex): Axis Only: 5 SPs, 1T Truck Point
Helwan: Axis Only: 1 SP, 1T Truck Point
Mersa Matruh: Either side: 1 SP, 1T Truck Point
Port Said: Axis Only: 5 SPs, 1T Truck Point
Sidi Barrani: First Time Commonwealth recapture after two months of Axis control: 2 SPs
Suez: Axis Only: 5 SPs, 1T Truck Point
Tobruk: Either side: 1 SP, 1T Truck Point. First Time Commonwealth (appears two turns after capture): Tobruk Command HQ, 1 Lib, 2 Lib, 4 Lib Arab Bn, X, 202, 206 Coastal Arty Battery, 1x Cap It Arm Bn, 3 SPs (in addition to the 1 SP above). Upon First entry into Tobruk of an Australian Unit (turn after entry): Bush Arty Bn.
3.4 Aircraft
3.4a Air Strips. These are minor airfields which are permanently marked on the map with a little runway and windsock. Air Strips are in addition to the regular series Air Bases. New Air Strips cannot be built. An Air Strip can be upgraded into a regular Level 1 Air Base for 1T (no die roll). In Air Strip hexes, as an exception to series rule 15.0e, Level 1 Air Bases can be reduced to Air Strip status. Air Strips themselves can never be reduced or destroyed.
Air Strips are the same as Level 1 Airbases except:
- Air Strips provide no Protected Air Units
- Air Strips generate no flak points.
- Air Strips can only refit one air unit per turn.
3.4b Air Entry Points (AEPs). Along the coast there are numerous Air Entry Points (AEPs). These are hexes where air units can enter the map from the various Holding Boxes as well as re-enter the play area after "ducking" out to sea to avoid enemy air cover. Each AEP lists the range to the assorted Holding Boxes which can be accessed from that AEP while the Air Distance Chart in the rules lists the distance from each AEP to any other AEP. To move from a given Holding Box to an AEP hex use the listed amount of range (if that range is too great, apply 3.4f or the trip cannot be made). The player can only use an AEP to travel to a Holding Box his own side controls. Upon exiting an AEP (or interpolated AEP, see 3.4e), straight line flight requirements are in effect with the AEP as the start point. Straight line flight is violated while the air unit moves in the AEP connection—but what goes on there is out of his control anyway.
Following the coast and connecting the 16 AEPs is the AEP line. This line is used for interpolating additional AEPs according to 3.4e.
3.4c Air Unit Stationing and the AEP Line. Air units (of either side) can never take up station anywhere on or seaward of the AEP Line. Air units can traverse the line freely provided they do not end their flight on or seaward of this line.
3.4d Air Distance Chart. These rules contain an Air Distance Chart. It gives the out-at-sea distance from each AEP to every other AEP. Air units must use straight line flight from their origin hex to the exit AEP and then straight line flight from the entry AEP to the final hex of movement. The Distance Chart gives the additional distance between the two desired AEPs based on the flight paths required to remain at sea and avoid interception zones from land hexes—overland flights in some instances may be far shorter. No air to air combat occurs while any air unit is flying from one AEP to another. Weather does not affect air units moving from AEP to AEP provided the entry and exit maps allow flight.
3.4e Interpolating Additional AEPs. The player can use any hex along the AEP line as an exit AEP (the hex used to enter this process must be a real, printed AEP or Holding Box). To do this, decide on the exact hex to be used as the exit AEP and pick any printed AEP as a reference point. Determine the distance from the entry (printed) AEP (or Holding Box) to the reference AEP (also printed). Add to that distance the number of hexes from the reference AEP to the actual chosen exit AEP counting along the AEP line itself. The result is the total distance of the transfer.
Interpolated AEPs are intentionally less efficient than real ones—use real ones whenever possible. No interception is allowed in the "movement" of the air units along the AEP Line from the reference AEP to the exit hex. (This movement is actually done out at sea and not right along the coast as it would appear.)
EXAMPLE of Interpolation. A player wants to fly an aircraft from AEP 6 to D33.15 (and then inland for some reason). He chooses AEP 12 as a reference. The Air Distance Chart gives a distance of 73 hexes from AEP 6 to 12. D33.15 is 7 hexes along the AEP line from AEP 12, so the total range consumed by this part of the trip is 80 hexes (which would be in addition to that required to get to an AEP in the first place plus whatever is needed to get to the final destination).
3.4f Out of Range Air Unit Transfers. Air units can transfer from one base (to include air strips) to another outside their printed range given that all of the following are true:
a) The range traversed is no greater than 2x the air unit's printed range and the air unit begins at one base and ends at another base,
b) the air unit does not engage in any barrage or air to air combat while doing so,
c) the air unit immediately becomes inactive at the destination base, and
d) both the beginning and ending bases are friendly.
e) Regardless of the above, Axis air units can fly between Sicily and Crete even if well out of range. The aircraft are assumed to refuel in Greece, Italy, and Albania as needed to make the trip.
Transport type air units can carry a load over this distance.
3.5 Weather
Weather is determined each game turn by rolling two dice on the Weather Table. Use the line appropriate to the month being played. Read the dice as an 11..66 roll with the red die as the first digit and the white die as the second. Read across the table to find the column with the range containing the result and read up to determine the result. The full effects of each Weather Type result are given on the Weather Effects Chart.
Once a result is determined, randomly determine which maps are affected. If the weather is clear, all maps are clear. If a Sandstorm occurs, roll one die to determine the number of affected maps and then randomly determine which maps have a Sandstorm. Rainstorms always affect two maps; randomly determine which two are affected.
3.5a Map Based Weather. Weather never affects Holding Boxes, or AEP to AEP air movement (provided both end points allow flight). Regular air movement (hex by hex) cannot enter a map where flight is not allowed, even if the intention is to land at a further map where flight is allowed (in such cases, use the AEP to AEP method). In every case where a hex is split between two maps, one having Clear Weather and the other a storm of either type, the hex is considered the storm type. The effects of Sandstorms and Rainstorms do not affect supply draw or throw ranges.
3.5b Sandstorms. On a Sandstorm map, apply the following:
a) Green units and Repls can't move under their own power—they can use rail or sea movement.
b) No Barrage or Combat allowed into or out of Sandstorm hexes.
c) If a Random Event cannot be conducted due to weather (such as a required combat on a Sandstorm map), delay implementing the event until the weather allows it.
d) All air units on the affected maps become inactive on the affected map (they become stranded at their air base or air strip); if they are on station they must become inactive at any air base or air strip on that map or any Holding Box in range, and cannot refit until the Sandstorm is over.
e) Terrain costs for movement are x2.
3.5c Rainstorms. On a Rainstorm map, apply the following:
a) Wadis become impassable except where primary roads cross and attacks are only allowed at those points.
b) All air units on the affected maps become inactive at any friendly airbase or air strip. No air unit on the affected map can refit until the Rainstorm is over.
c) Terrain costs for movement are x2.
d) Other than the above, attacks and barrages are handled normally.
3.6 Shipping
Shipping allows players to move units and supplies from the outside world into the Theater of Operations. Beyond that, "Coastal Shipping" allows players to move units and SPs from port to port within the theater.
The Commonwealth Player does not have a regular shipping allowance as the Axis Player does and is only limited on the in-flow of reinforcements by the available Nile Delta Port capacities. Allied withdrawals do not count against port capacity (or shipping allowance if they had one). Axis units and SPs count against both port capacity and their shipping allowance.
Shipping of units which do not have a Move Mode side is done in Combat Mode. Single unit counters larger than a port's port capacity or the player's shipping allowance can be shipped at the expenditure of the entire shipping allowance or port capacity involved (depending on which is being exceeded).
Unused Shipping allowance or that in excess of a player's current port capacity total is lost and cannot be saved for future turns.
3.6a Port Damage Tracks. Those ports which can be damaged are provided with a Port Damage Track on the map. Ports without such a track cannot be damaged. Mark each port's current status (number of hits, if any) using the marker for that port. Use the track to show damage from the GS vs. Facilities Table. The track gives the port capacity applicable to the amount of damage. All ports start with no hits (zero damage) unless specified differently in the scenario.
c 3.6b Coastal Shipping. Both sides have a limited amount of Coastal Shipping available to use each turn. The Axis Coastal Shipping allowance is given (according to the turn's month) on the Axis Logistics Charts and Values Table on Map A along with the Cross-Med Shipping allowances. The Allied value is given on the Allied tables on Map D.
Coastal Shipping is the only way to ship SPs and units to ports other than Tripoli (Axis) or the Nile Delta ports (Commonwealth). Commonwealth Coastal Shipping can be used to ship SPs out of the enormous (nominal) Nile Delta dumps to points on the map. Axis Coastal Shipping can never use the Suez Canal or make use of the Port of Suez, even if the Axis captures it.
c 3.6c Benghazi and Coastal Shipping (Axis Only). For several reasons, Benghazi was the most favored destination for Axis coastal shipping (the shorter distance to Benghazi from Tripoli allowed more frequent trips and it is the only port in Cyrenaica to have adequate off-loading facilities and equipment). This rule only applies to the Axis player.
Coastal shipping costs are x1/2 for shipping going from Tripoli to Benghazi (or vice versa), round normally. For example, Benghazi's maximum port capacity is 1+2T or 6T. To ship the maximum to Benghazi from Tripoli would cost the Axis player 3T of his Coastal Shipping allowance.
3.6d Reinforcement Entry. Commonwealth reinforcements must enter a Nile Delta Port first (any port on Map E or Alexandria). The Axis must ship to Tripoli first. Once they arrive at the required first stop, they can then move via Coastal Shipping, by land, or rail to a location the player desires, but they cannot do this until the next game turn. Air reinforcements arrive normally (at any air base or air strip) and do so inactive (as per the new optional rules).
Designer's Note: Shipping from Italy to Benghazi. Players might ask why no cross-Med shipping is allowed to go directly to Benghazi. I fully acknowledge that some shipping did do exactly that, but on the basis of exact ship by ship figures provided by Mauro De Vita from Italian records, I can safely say that the amount shipped direct was very minor (about 9%). Rather than include a bunch of rules to implement the limited (and very situation dependent) direct shipping, I have chosen instead to bump the coastal shipping to include the direct shipments. On those months, the player will be sending freight to Tripoli which was actually sent directly to Benghazi, but I gave him the extra coastal capacity to ship it out again (given the weak coastal capacities it might not look like it, but I did). Yes, this means the freight might get cross-shipped to a port other than Benghazi, but given the limited port capacities involved and the benefit of using Benghazi, Benghazi will be the most likely shipping location anyway.
3.7 Supply
3.7a Supply Sources. Any friendly port can be used as a trace supply source provided no enemy unit is adjacent to it. Damage to a port does not matter for trace purposes. Neither player can use a port on the "other" side of Tobruk as a supply source if the enemy holds Tobruk ("other" side being east of it for the Axis and west of it for the Allies). No Axis trace is allowed to any port east of Sollum (exclusive) before Crete falls (this restriction does not apply to the use of the port for coastal shipping, only to the port's use as a trace source). No Axis trace to Suez even if owned by the Axis player.
On and after 1 March 41, hex A19.35 becomes an Axis Trace source. Before then it is not.
3.7b Roads for Trace Purposes. With the restrictions below, Primary Roads and Roads (not Tracks) can be used for trace supply exactly like the normal use of Railroads in series rule 11.6. Like the railways, this trace is blocked if an enemy attack capable unit is adjacent to the road being used, but unlike them, this effect is negated by the presence of friendly units. There are no "damaged" or "interdiction" effects on this trace and there is no need for "de-roadable" (or whatever) hexes—any road hex will do as a connection point. A connection between road trace and a later Railroad must be at a detrainable hex, however. Rail Cap cannot be used on roads.
Important: Italians can only trace using Primary Roads or Railroads until 1 March 41 when they begin to use regular Roads like everyone else.
Important: Units which must trace together must do so here as well (as per series rule 11.6h). German and Italian multi-unit divisions must trace together (unless they are within a Kampfgruppe, see 3.10). Allied units have no such requirement and elements of multi-unit divisions can be scattered all over the map without ill-effect.
3.7c Oasis. Oasis hexes can provide a trace supply source for up to 3 REs. Units of either side can trace to an unoccupied Oasis (even on the same turn) as there is no "control" restriction on the use of Oasis provided they are unoccupied. At Giarabub, the Giarabub Senussi do not count against the 3 REs; they are free.
3.7b British Supply Centers. Alexandria, Port Said and Suez are infinite nominal dumps if their port damage is no greater than 2 hits and the port is operational (no enemy unit adjacent to it and (in the case of Port Said and Alexandria) the Suez Canal is open). If the number of hits is 3 or more or the port is otherwise not operational, the nominal dump ceases to be and can no longer have SPs drawn from it. These hexes always get 1 flak point for a dump even if no actual SPs are in the hex (even if the nominal dump no longer technically exists). The British Player can have all the SPs he wants by using available Trucks, Coastal Shipping, and the WDR Rail Capacity from these hexes. Simply use the capacity (or capacities) desired and move real SPs on to the map from the nominal dump.
If units or HQs draw off these nominal dumps for Combat or Barrage purposes, the nominal dump is limited to its current port capacity in the amount of SPs it can generate in one turn. This restriction does not apply to SPs used for fuel or air refit purposes. The nominal dump cannot generate unlimited SPs in its hex (so as to make one huge real dump)—it is limited to what can be "carted" from the hex using the available transportation.
(Note: the source booklet numbers both of these British Supply Center rules and the preceding Oasis rule as "3.7b"—reproduced here exactly as printed.)
3.8 Trucks
3.8a Organic Trucks. The Organic Trucks for this game are printed with an "F" on one side to indicate fully loaded. There is no need to carry about a 1 SP marker with the truck. Once the load is something other than full, flip the counter over and deploy the appropriate number of Token markers as its current load. Special Thanks to Mark Milke for this suggestion!
Organic trucks always arrive "Full" as new reinforcements and they set up "Full" or "Empty" as indicated in the scenarios (their load is in addition to any SPs they might be stacked with).
Organic trucks can never break down into Token-sized trucks as per 3.8b.
3.8b Token Truck Breakdowns. Because of the limited numbers of trucks available to do the numerous jobs the player must perform, this game breaks truck points down into 1T Truck Points (which also use the "F" notation from the above). Other than the strange sizes, these truck points are handled normally. Regular trucks are never loaded for "free" like the Organic, they must be filled.
Regular Truck Point losses are handled on a token basis—50% of 1 Truck Point is 2T. Organic Truck Points do not break down in this manner when they take loss from a Barrage (50% in that case kills the entire truck). Use the Token Truck breakdowns to figure the capture and loss of Truck Points in either the regular or organic case.
3.9 Units
3.9a Counter Colors and Ownership. The Axis Player controls:
- All Italian units (Bluish-green)
- All German Wehrmacht units (Light Tan)
- All German Luftwaffe Ground units (Blue-grey)
- Released Flieger Korps Air Units (Luftwaffe Blue with a large white X)
- Luftwaffe (Blue) and Italian (Deeper Bluish-Green) Air Units.
The Commonwealth (Allied or British) Player controls:
- All British units (Brown)
- All Australian units (Dark Tan)
- All South African units (Orange)
- All New Zealand units (Mauve)
- All Indian units (Dark Brown)
- All Senussi and Arab units (Yellow)
- All Polish units (Red)
- All Captured Italian Tank units (Candy Striped Green)
- All French units (Bright Blue)
- The Sudanese (Grey), Czech (Grey-Green), Yugoslav (Purple) and Trans-Jordan (Yellow-Tan) units
- All American units (Green)
- All Egyptian Port and ENRR Engineers, and the Egyptian Air Unit (Pale Green)
- All RAF (Rust-Orange) and USAAF (Grey) Air Units
Neither, both, or one player (depending on how things go) controls:
- All remaining Egyptian units (Pale Green)
3.9b Effects of Nationalities. All units controlled by a player can stack and fight together without further restrictions (see 3.10 about KG requirements). USAAF and RAF air units of the same type can be freely interchanged to make full strength air units. Keep German and Italian repl units separate by color and only Italian repls can be used to rebuild Italian units; only German repls can be used to rebuild German units. Commonwealth repls can be used to rebuild any rebuildable Commonwealth unit.
Egyptian National Army: Ignore these units entirely unless using the optional rule. See 6.1a. EXCEPTION: The Egyptian RR Battalions and Port Engineer Battalion are regular Allied units, except that they cannot leave Egypt.
3.9c Weird Color Combinations. In order to make full use of the combinations available when using Opt.1a, a number of units have what will at first look like weird color combinations. For example, many of the British RHA units (artillery) are a red (mech) symbol color. This means (correctly) that they are able to negate light armor from being doubled in the open. (They are not hard targets for purposes of Opt.2a, though). Also, some RHA units later become yellow and able to negate real tanks—these are the RHA units which for a time were reinforced with additional AT assets in order to make them better able to fight tanks.
3.9d Two-Step Brigades. All Brigade-sized units in this game (including artillery) have two steps. Even though they have two steps, they are 1 RE when at full strength (1/2 RE after losing a step). Their Combat and Barrage strengths are halved after losing a step. Count both steps for Attrition Table Modifier purposes should that become an issue (or any other time when number of steps, rather than RE size, is important). Each step has a flak value, so a full strength brigade has a flak strength of 2.
3.9e Battery- and Company-Sized Units. These small units are handled exactly as battalions except for their rebuild costs: 1/2 RE, 1T for fuel and so on.
3.9f Engineer Capabilities. All HQs, Engineer, Pioneer, and Assault Engineer units have engineer capabilities as per series rule 12.8. However, no Axis unit has the bridging capabilities of 12.8a.
Egyptian RR Battalions and the NZ RR Companies are the only units in the game capable of repairing rail lines. The only capability the Egyptian Port Engineer Bn has is to repair port damage.
3.9g Attack Capable Units. For purposes of this game, the few units with a printed combat strength of 1/2 (not those which get DG to being 1/2, or whatever) are counted as Attack Capable for purposes of series rule 4.1.
3.9h AA vs. AT Units. For historical purposes, some units are marked as Anti-Aircraft rather than Anti-Tank (German 88's are a perfect example). In the game, there is no difference. The AA units have the same abilities as the AT units (especially for those applying the optional combined arms rules). AA units do not get any sort of extra flak benefit when resolving Flak attacks on aircraft.
3.9i Removing or Disbanding of Units. Some units are called on to be "Removed" by the Orders of Arrival. Such units are literally removed directly from play from whatever situation they might be in (on-map, holding box, destroyed) and placed back in the countertray. Just find the correct unit and remove it from play. Once removed, units cannot be rebuilt.
Other units can be "disbanded" to allow another unit to be built. This is a decision the player can make in any of his turns. Remove the unit from play voluntarily just as you would the mandatory removals above. Disbandments do not produce repls and the units themselves cannot be rebuilt.
3.9j Rebuilding Units.
a) Non-Rebuildable Units. Some units cannot be rebuilt at all (for a variety of reasons). Once destroyed they permanently leave the game. These units are coded with a yellow circle with a red border around their Action Rating. Step losses in such units cannot be replaced.
b) 50% Rebuild Cost Units. One repl can rebuild two of these. If only one needs to be rebuilt, roll one die. On a 4-6 the unit is rebuilt for free, on a 1-3 the unit rebuilds but the repl must be expended. In any case the repl must be present in case the roll does not go your way.
c) Tobruk Defenses. See the special rebuild rule for the Tobruk Defenses, 2.4.
3.9k Replacing and Exchanging Units. Numerous unit exchanges occur during the course of the game. These might be for organizational changes, equipment changes, or even simple nomenclature changes. Whatever the reason, exchanges are always handled the same way. Simply pull out the old unit (from whatever its situation) and replace it with the new one. If the unit is in the dead pile, the replacement goes into the dead pile. If the unit is Out of Supply, Exhausted Internals and in Strat Move Mode (what a combination!), the new one acquires just those same traits. Apply this exactly regardless of the precise circumstances of the unit—the replacement assumes whatever traits the old unit had.
Exception: Air unit upgrades always enter alive and at full strength (though Inactive), even if the air unit being upgraded is in the dead pile or reduced. (Equipped with new machines, the old unit can re-enter the battle as it was probably not short of pilots or ground personnel, but in aircraft.)
3.10 Leaders & Kampfgruppe Markers
This game is the first OCS game to contain both leaders and Kampfgruppen markers. Certainly in the case of leaders (not so much with KGs), the theater itself is responsible for their appearance. The limited numbers of units and free-for-all form of combat lead to a premium on a few special leaders who were able to seize the initiative and exploit limited opportunities. The freedom to be "the man on the spot" is much less pronounced in the more intense theaters of the war.
Kampfgruppen, and the Italian Raggruppamentos (here considered to be the same thing and all referred to as "KGs"), represent the impressive tactical flexibility in the Axis armies (especially in direct contrast to the Allied arms). Just so it is clear, KGs and Raggs are the same thing, both referred to in the rules as KGs and the rules regarding to KGs apply equally to both.
3.10a Rules Applying to Both Leaders and KGs (Only). Both can make "Reactive Rolls" (see 3.10b). They can never be DG and DG has no effect on them (other than an inability to make Reactive Rolls for DG units). They are unaffected by supply concerns, never need fuel for themselves, and never suffer attrition. They have no step or RE size and cannot be used to take step losses. Players can always look under a Leader or KG marker to see the top on-map unit in their stack (if the marker is on top). They can be lost according to the rules below, but can never be "rebuilt". They incur no shipping cost or port capacity use for themselves when shipped—either cross Med or Coastal. They do not use up Rail Capacity when transported by rail. Provided all restrictions are met, they can be transported by air transport units as well.
3.10b Reserve Effects and Reactive Rolls. The stack containing a Leader or KG at the beginning of a phase requiring Reserve Mode for activation (Exploitation or Reaction) can make a Reactive Roll to see if they can function in that phase even if adjacent to the enemy and/or not in Reserve Mode. Success at the roll gives the stack (all units and Organic Trucks) full capabilities as if they were in Reserve and were just released (1/2 move in Reaction, full in Exploitation). If the roll isn't successful, nothing happens. The roll has no effect on regular Trucks or anything else incapable of being placed into Reserve Mode.
To make a Reactive Roll, roll one die for each stack being checked. If the roll is greater than or equal to the Reaction Rating printed on the Leader or KG counter, the roll is successful.
The units being rolled for cannot be DG or Exploit marked (the player can pass on an Exploit result in order to try for a Reactive roll later in the turn). In the case of a mixed stack, the presence of some ineligible units in a hex does not interfere with the ability of eligible units in the hex to take advantage of the roll.
Only one roll per stack per phase, even if multiple Leaders or KGs in the hex. Owning player picks the marker he wants to roll against if there is more than one. The roll can be made at any point in the phase—the player can arrange activities to coordinate what happens with what units he wants to roll for, or actions based on units whose roll is successful.
The player can choose to ignore an Exploitation combat result in order to try for the full movement potential of the Reactive Roll—but he cannot later reclaim his Exploit result if the roll fails.
Once a successful Reactive Roll is made for a stack, the stack need not stay together as it moves during the phase (just like Reserves)—but players are forewarned that if they want the units in a KG to retain their KG's fuel status (that is, the fuel status of the units making up the KG) after a Reaction Phase movement for the next friendly Movement Phase, the KG will need to stay together.
Players can make a Reactive Roll for a Leader or KG stack to attack a unit that has recon'd them using series rule 6.5d.
3.10c Rules for Leaders (Only). Leaders can help their stack's Action Rating. If the player chooses to use the Leader's Action Rating effect (which can be done in any instance where a stack's Action Rating is called for), then the stack gets a +1 modification. Each time this modifier is used, a Leader Loss check (3.10d) is required; if the modifier is not used, there is no Leader Loss check (the Leader can tag along on overruns, attacks, or defenses, and avoid the roll by not using the mod). The Leader need only be stacked with the units needing the modifier to modify them; there is no requirement to be stacked with them at the beginning of a phase. (EXCEPTION: the Leader must start the phase stacked with units the player wants to use the Leader modification in an overrun.) Leaders (themselves) can move in any friendly phase (even if they fail their Reactive Roll), but must end every friendly phase stacked with some friendly unit (of any sort). They can move any number of hexes in any weather (as if by air—but no interception is possible) in any of these phases. If all the units in a Leader's hex are destroyed and enemy units enter the Leader's hex, roll for loss below, and displace the Leader to any other friendly stack if he survives. If no enemy unit enters the Leader's hex, do not make the roll, simply displace the Leader.
3.10d Leader Losses. Each time a Leader's Action Rating modifier is used, roll two dice and compare the result to the following:
- 2-3 Killed
- 4 Captured
- 5 Wounded
- 6-12 Leader Unharmed
- +1 if leader is Rommel
If a wounded result occurs, roll one die. The result is the number of months out of action. Regardless of when in the month the Leader is wounded, he comes back on the first turn of the month, that number of months later. For example, if Rommel is wounded on the last turn of April, and a six is rolled, he will return on the first turn of October. The same would be true if he were wounded and made the same roll on any turn of April.
3.10e Captured Leaders and Parole Exchanges. Place captured Leaders in the Captured Leaders Box on the map. Players can cut any deal they like with the enemy to get a captured Leader back (the Leader returns as a reinforcement the turn after the deal is made). While no escapes are possible using the standard rules, players can feel free to embellish this Parole Exchange business any way they like. "Let's make a deal..."
3.10f Rommel. Rommel gets a number of special rules. He gets the +1 modifier on the Leader Loss Table due to his impressive luck. When Rommel is lost from play (in any manner—including trips out of the theater), he is replaced by the generic "DAK Leader" counter (which represents one of the following: Crüwell, Nehring, or Bayerlein as appropriate). This Leader instantly disappears should Rommel return to play. If the DAK Leader is killed, captured, or otherwise removed from play, there is no replacement for Rommel should he leave the game in the future.
Rommel's health and numerous trips to visit superiors and his wife are integrated into the Random Events Table.
3.10g Rules for KGs (Only). KGs can be used like regular Divisional Markers and can be used to represent units that have been removed from the map in the same way (units off-map, KG marker on-map representing them). KGs can only move by "riding" parasite fashion with any unit they happen to stack with (given the below requirements). KGs are destroyed the instant they "run out of units" and no longer have any unit to stack with of the appropriate type. This is the only way they can be destroyed. They can never exist in a hex without at least one other unit. KGs retreat with the units of their hex and are not destroyed if the retreat kills those units and the KG retreats to a location where it does indeed stack properly—only the end of the retreat matters in this case. If at the end of the retreat the KG is not stacked properly, it is destroyed.
KGs are not limited by nationality. Italian Raggs can have Germans in them and German KGs can have Italians. Any mix is allowed, except for the following:
- A KG must have at least one unit (any type with an Action Rating) in it of the same nationality as the KG at all times (or the KG is destroyed), and
- The Action Rating chosen from a hex containing a KG must be from the same nationality as the KG.
Players can freely assign units into and out of a KG (by moving units into or out of the KG's hex), but only those units in the KG's hex are part of the KG at any one time. All units in the KG's hex are considered part of the KG—although such "membership" is only an administrative concern.
Units in a KG are considered to all be part of a single drawing group for trace supply. This means that if units in the hex belong to some multi-unit division somewhere, they are not penalized for being separate from their parent division—the KG is their parent "division" for the time they spend belonging to the KG (i.e. in its hex). Important: Organic Trucks can be attached to a KG as desired; however they retain their original divisional assignment. So, even if in a KG, Organic Trucks can only supply units of their original printed division (whether either or both belong to a KG or several KGs).
Units in a KG hex at the instant the hex's fuel costs are paid and which remain in the KG until the next friendly Clean Up Phase retain their fueled status (just as if they were multi-unit division units which had their division paid for). Units under such special status can be marked by being the only ones under the KG Marker in the hex or by being held off-map in the KG. This applies to all units remaining with the KG during that period regardless of the divisional attachment (if any) of the KG's units.
c 3.11 Random Events, Greece and the Malta Invasion
c 3.11a Random Events Table. Roll on the Random Event Table at the very beginning of each turn, right after determining the Weather. Begin by rolling on the Common Events Table and follow the table's instructions from there. If a random event cannot be conducted due to weather, delay implementing the event until the weather allows it (do not roll again). Some of the Random Events occurred historically, others did not (some are pretty far-fetched and have probabilities to match). Players interested in a Historical game should play with only those Random Events that come up with the "Hist" designation (meaning they really happened during the campaign). If some other result occurs, ignore the result.
c 3.11b The Greek Campaign. Ignore this section if you are using the Historical Commonwealth Withdrawals. The Greek Campaign will happen in the Spring of 1941; what is in doubt is the exact timing of its beginning and end as well as duration—all of which indirectly influence the conduct of the North African Campaign.
The Greek Campaign Status Track records the progress of the Greek Campaign. Roll two dice as called for by the Commonwealth Order of Arrival at the beginning of each turn where a roll is listed. Advance the marker if the roll is greater than or equal to the value given. Do not advance the marker again until the first successful roll after the roll is automatic.
The Greek Deployment Progress Track is used to follow the deployment schedule of Commonwealth troops to Greece. Place the marker on the track when the Greek Campaign Prep Period (as per the Status Track) begins. Advance the marker one box per turn until the Greek Campaign Execution begins. As the marker advances, the required troops must be withdrawn (the player has four turns to get them to a port and move them to the Greece Box (simply pick them up and put them there—no shipping cost). If the called for units (as listed on the Deployment Progress Track) are unavailable (due to loss or earlier withdrawal), substitute any unit of the same type, value, and training status. Units can be full or reduced strength when withdrawn.
When the Greek Campaign Execution begins, execute that turn's withdrawals (if any) and remove the marker from the Greek Deployment Progress Track. No additional withdrawals are made to Greece (any units "dragging their heels" on their way off the map must still exit no more than four turns after being called for). If further withdrawals remain on the Deployment Progress Track, they never occur. (This did happen to the Polish Bde and all 7 Aus Div troops in real life.)
When the Greek Campaign Status Track marker reaches the Termination Box, roll for each counter sent to Greece separately on the Greek Return Table and execute the result. Any units "dragging their heels" at this point no longer need to withdraw. This includes any units sent via regular Variable Withdrawals before the Greek Campaign Prep Period. From the turn the marker enters the Termination Box, the Axis player owns and can use the Crete Box.
c 3.11c The Malta Invasion. The Malta invasion "green light" may come up via a random event. Should the event occur, the Axis player must immediately decide to either execute the invasion or to pass. Should he decline the invasion, he cannot later change his mind and do it. The event itself can only happen once.
If the player chooses to perform the invasion, do the following:
a) The Flieger Korps, if active, becomes inactive.
b) Remove all Ju-52 air units, KG Buhse, all 22 LL Division units, all Ramcke Brigade units, and the Folgore Airborne Division from play (if any have not yet arrived, they never do). None of these units ever return.
c) At the end of nine turns (one month), the Malta invasion is successful and the Malta Table base modifier is permanently +3. (During the nine turns that the invasion is in progress, the base modifier is -1.) Once Malta is captured, cross-Med shipping can go to either Tripoli or Benghazi (it is freed from the Tripoli only requirement).
Design Note. One may question the guaranteed success of the Malta invasion. For our purposes here, it was best to (if the matter came up at all) allow the thing to proceed to conclusion with a minimal amount of fuss. Once the Axis decided to take out Malta (in a serious effort), I suspect the forces allocated to the job would be enough to ensure success. It might be a blood bath like Crete (which is why none of the units return to play), but the end result isn't really in doubt. I think players will find that rather than the game winning event some might expect, this result really only allows the already wasteful dumps in the Axis rear (too far back to help) to get even bigger, while being just as useless. But finding this out is half the fun, right?
c 3.12 Desert Raiders—"The Rat Patrol"
"Desert Raiders" refers to any commando-type unit smaller than a regiment. In other words, while specialized troops, the 288 and 287 Sonderverband Commandos are not Desert Raiders and the below does not apply to them. The following applies to Desert Raiders:
a) They cannot use their Action Rating as attacker or defender unless they are alone on their side in the combat. EXCEPTION: Two Raiders can participate in a single combat using one of their Action Ratings.
b) A Desert Raider can be out of Trace Supply for SIX turns (three weeks) without becoming Out of Supply or checking for Attrition.
c) Desert Raiders have Leg Movement allowances on both sides of their counter (so they do not require fuel). The unit can use either Leg or Truck MP costs (whichever is better) for each hex entered.
4.0 Axis Special Rules
4.1 Hip Shoots
German air units can conduct Hip Shoots (given that the spotting unit is also German). Italian air units cannot do so (even with a German spotter).
4.2 Reserve Markers
The Axis player has two sets of Reserve Markers (one German color, the other Italian color). He can exchange these markers however he likes to keep the color of any Reserve Marker consistent with the units (to keep the enemy guessing), provided he ensures that the total in play at any one time is limited to the number currently available.
4.3 Reinforcement Entry and Axis Supply
c 4.3a Nominal HQs. Sicily's "Old Box", Tripoli, and Crete can be used as nominal HQs for rebuilding purposes.
c 4.3b Reinforcements and Shipping. The Axis Shipping allowance is provided on the Axis Logistical Tables and Figures provided on Map A. The actual Shipping Allowance the player can use is determined by taking this raw allowance and subtracting any losses from the Malta Table from it. This is done each turn before starting the Axis Movement Phase. Determine the current Malta Table Modifier using the list shown and mark it using the provided track. Roll two dice on the Malta Table and add the current modifier. This will determine any loss to shipping. The remaining shipping can be used in the turn to either ship units as outlined below or SPs from the nominal infinite dumps in Sicily to Tripoli. Repeat this process each turn. Weather has no effect on shipping.
Unless stated otherwise, reinforcements first appear in Sicily in the "Old" and "New" Boxes. They are first placed in the "New" Box. If the "Old" Box is empty, instantly shift the units in the New Box into the Old Box—however, no units can move from the New Box to the Old Box if any non-Repl unit remains in the Old Box. Only units in the Old Box can be shipped to the map. Repls are automatically placed in the Repl Box within the Old Box and can be shipped to the map whenever the shipping allowance allows and it is desired (or they can rebuild units right there). Repls do not interfere with the movement of units from the New Box to the Old Box. Units are always in supply in either box. Air units do not go through this cycle.
c 4.3c Tripoli Dump Rot. The ability of the Axis administration to maintain enormous stocks of supplies in Tripoli is limited by the use of these stocks by the various garrisons in Tripolitania as well as inefficiency, waste, and simple shelf life of some items.
Destroy 25% of the total (round to nearest Token if you like...) SPs in the Tripoli Box at the beginning of the first Axis Player turn each month. Count all SPs in the Box, but ignore those loaded on trucks (organic or otherwise).
4.4 Higher Command Requirements
c 4.4a Mussolini Requirements. The Italian commanders had no option to refuse to invade Egypt in late 1940. Neither do you (unless you play with the "Italians Turn Turtle" option). In any campaign scenario beginning 12 Sept 40, the Italians must perform the following or they lose the game (sudden death):
- They must capture Sidi Barrani before 15 Oct 40
- They must have the following in Egypt (east of the border) on and after the 15 Sept 40 turn and east of the Mussolini Line (on Map C) on and after the 15 Oct 40 turn: 1x Corps HQ, 3x Inf Divs, 1x Artillery Rgt or Bde and 5 other units
- In addition to the above, the following must be in Egypt (east of the border, but they need not be beyond the Mussolini Line) on and after 15 Sept 40: 1x Corps HQ, 4x Inf Div, 5x MG Bn, 2x Artillery Rgt or Bdes.
Note: A unit cannot be used to fulfill both requirements above; also, units which die while fulfilling their portion of a requirement, then fulfills that portion of that requirement for the rest of the game (even if later rebuilt).
The unit requirements above are enforced at the end of each Axis Player Turn. Once a unit crosses the Border or Mussolini Line it cannot recross it (units attempting or forced to do so are destroyed) if such crossing would reduce the force on the correct side of the line below the minimum required. Once destroyed, a unit still counts for these requirements (essentially, dead units reduce the minimum by one unit of their type). Units killed fulfilling these requirements (leaving a "ghost" to take their place) can later be rebuilt without penalty and used normally.
Units can cross these lines in excess of the minimums. Such Axis units are free to advance or retreat as they please. As long as the required total in each group is met, the actual units making up that total at the end of each Axis turn can vary freely.
Units used to fulfill the "in Egypt but not necessarily across the Mussolini Line" requirement can retreat into Libya (the requirement ends) if:
a) The Allies recapture Sidi Barrani, or
b) Any Allied land unit crosses the border into Libya. (Yes, this includes the LRDG raiding to Giarabub to take out the garrison...)
c 4.4b Italian Sudden Death Win. The Italian Player wins a sudden death victory if he captures Mersa Matruh before 1 Jan 41. And good luck in doing so, I might add!
c 4.4c No Running Away. No Axis ground unit, KG, or Leader can move into hex A19.35 from the rest of Map A, or ship back to Tripoli prior to 1 March 41. Axis units in Tripoli can move to the map area, but once there they fall under the restriction above. This rule does not affect trucks, air units, or SPs.
c 4.4d Protecting Italian Private Property. The Axis player cannot damage any port or barrage Benghazi, Tobruk or Bardia until 12 Feb 41—even if occupied by Allied troops.
4.5 Limited Axis Engineer Capabilities
4.5a No Axis Bridging Equipment. Axis HQs and other engineers cannot exercise their bridging capability as per series rule 12.8a...no engineer unit bridges over the Nile, even if you get there. Allied bridging capability is intact, for what its worth. Bridging cannot be used to cross wadis (no water to support the pontoons) even if rain swollen (then too much current).
c 4.5b Limited Port Repair Capabilities. In addition to the requirements of series rule 19.0b, the Axis can only repair hits on turns 1 and 15 each month. This slows the speed of port repair reflecting the lack of available heavy equipment and specialized engineers.
4.6 Italian Special Rules
4.6a Italian Infantry Divisions. There are numerous single-counter Italian Infantry Divisions in the game, especially at the start of the campaign. These units cannot form Breakdown Regiments.
c 4.6b Pistoia Restrictions. When Pistoia was sent to Rommel in 1942, it was with explicit instructions that it not cross the border into Egypt, but that it must remain in Libya. Your Pistoia has the same requirement.
4.6c The San Giorgio. This cruiser is sitting on the bottom in the Tobruk harbor as the campaign began. It cannot move, is destroyed when any Allied unit enters Tobruk, does not add to the defense strength of the Tobruk hex, can't be used as a step loss in a combat or barrage result, and can't be sunk. Other than all that, it is just another zero movement artillery unit.
c 4.6d Littorio Armored Division. Littorio was still in the process of forming when shipped to Africa. As such its units suffer a -1 to their Action Rating until August 42. Units transferred out of Littorio according to the Axis Order of Arrival are freed from this rule. As an option, Littorio can retain the various units transferred out of it, but should the player do this they retain the -1 modifier. Also, as an option, the player can choose to replace the little 133 Artillery Regiment with the 10-point one. Decide on this option when you get to it in the Axis Order of Arrival—it is free.
c 4.6e Pasta Rule. Go eat some. A trip to Fazoli's Italian Restaurant (or better yet, The Olive Garden) is required after playing each 1940 month of DAK...No, there really is no such rule here, but everyone asked me if there was going to be one, so I included one. Buon Appetito! No effect—but you'll miss out on some good food if you leave this rule out!
4.6f Camels. The Sahariano Camel Battalion is cavalry for purposes of Series Optional rule 3. Historically, this unit had 160 camels. While this is not enough to mount every Libyan in the battalion, it is enough to warrant its treatment as 'fast' infantry.
c 4.6f Death from Above—Italian Paratroops. All Italian and Libyan Parachute and Commando units are all para-drop capable. However, an additional +1 modifier must be made to the Air Drop Table when these units attempt to air drop prior to March 41.
Design Note. The pre-war Italian Parachute design was very poor. It is a testament to the bravery of these Italian paratroopers that they were willing to jump with such an undependable rag. Suffice it to say, jumping with one of these strapped to one's back was hazardous to the jumper's health. In March 1941, these "parachutes" were replaced with a more effective German model.
c 4.6g The Virtual CR.42. Astute players will note that the Axis Order of Arrival calls for one more CR.42 air unit than exists in the countermix. This was intentional as I cannot imagine a player who does not lose even one CR.42 through the course of over a year of active campaigning. If you get to the point of this reinforcement and you have not lost any CR.42's, then you don't get the reinforcement as you don't need it!
(Note: the source booklet numbers both the Italian Paratroops rule and this Virtual CR.42 rule "c 4.6f" and "c 4.6g" respectively, following directly after 4.6f Camels—reproduced here exactly as printed.)
4.7 German Special Rules
4.7a Acclimation to the Desert. From the German entry until Oct 41, all German units have a -1 Modifier to their Action Ratings for all purposes. On 1 Oct 41, begin using the printed value for their units.
Design Note. The German intervention into Africa was an ad hoc affair from the very beginning. Contrary to stories circulated in England of blond-haired youth being marched through greenhouses to prepare them for the heat, the Germans were ill-prepared (at best) for the conditions facing them in the desert. Too arrogant to seek any advice from their more desert-wise allies (the Italians), the Germans showed up with the wrong diet (too heavy on fats), incorrect tire inflation (too full), strange weapon mixes (very heavy on AT guns, little or no artillery), and other mistakes (in a whole array of matters, large and small). Unhappy with the training levels of his forces, Rommel worked in extensive training operations during the summer of 1941 and it wasn't until the fall before the bugs were worked out of his organization and the tough desert-capable Afrika Korps emerged. This rule simulates the difficulties the German troops had in becoming adjusted to their environment and their hard-willed commander.
c 4.7b The Flieger Korps. The Flieger Korps (FK) operates around the fringes of the play area representing either the 2nd or 10th Flieger Korps at different times. The FK is either active or inactive (referring to the FK, not the air units in it) in its basic duties of suppressing Malta and protecting Axis shipping. It activates and deactivates according to Random Events (or the Historical Order of Arrival, choose which before starting play). EXCEPTION: The first FK activation always occurs on 1 Jan 41.
When the FK is active, its air units can be detached for direct use in Africa (i.e. on the game map) based on the selection of air units listed on the Malta Table Modifier Base listing on Map A. The groupings of air units listed are those that can be chosen. FK units released to the map are shown by those marked with the large white X's. FK units can switch back and forth to Africa only on the first turn of each month (weather is not a concern). The air units being transferred from the FK enter as reinforcements on the first turn of the month of transfer under the usual rules for air unit reinforcements.
FK air units cannot be detached the same month the FK activates. At the earliest, the player can detach air units the month after the FK becomes active.
If a detached FK unit is reduced or destroyed, it must immediately be brought back up to full strength in the next Axis Air Refit Phase by exchanging non-FK air units of the same type for it (or the player can expend any German Eq Repl to rebuild it). Exchange steps by reducing the air unit in question and adding that number of steps to the FK unit of the same type. If this does not occur, the dead or reduced FK unit is considered to be permanently detached with whatever Malta Modifier ramifications this might bring.
If the FK becomes inactive, any detached FK air units are immediately removed from play.
c 4.7c Parachute Assaults. All German parachute units are para-drop capable (without the nasty +1 due to Italian parachutes). No German Commando unit is para-drop capable.
5.0 Allied Special Rules
5.1 Hip Shoots and the Development of the Desert Air Force
No Allied air unit has Hip Shoot Capability from the beginning of the campaign until the end of September, 1941. On 1 Oct 41, all Commonwealth air units get Hip Shoot capability and retain it until the end of the game. Note: US air units never get Hip Shoot capability during this period.
Design Note. The Desert Air Force matured into an excellent and responsive fighting machine in the fall of 1941. During Crusader, it proved its worth, while the British Armored Corps still attempted to come to grips with even rudimentary combined arms techniques. In a precursor to the supremely effective Allied airpower of 1944-45, the Desert Air Force was instrumental in stopping Rommel's advance after Gazala during the late summer of 42. Later, in Tunisia, after a disappointing start, American air commanders revamped their tactical air control doctrine based on methods proven in the Western Desert by the Desert Air Force. These methods would serve the Allies well until the end of the war, although each additional theater (first Tunisia, Italy, and then France) required a new batch of air leaders to set aside their preconceptions and learn the lessons the Desert Air Force had learned years earlier. This was one area where the Allied forces "got it right" early on.
5.2 Allied Movement Restrictions
5.2a Hex A19.35. No Allied ground unit can enter hex A19.35. Any unit forced to do so is destroyed. Allied units can freely attack and barrage this hex, they just cannot physically occupy it or overrun into it. The restriction does not affect air units.
5.2b 6 Aus Division. In scenarios starting 12 Sept 40, the 6 Aus Division is confined to the hex of Helwan (E19.21). They cannot leave this hex until released on 22 Oct 40. At that point it moves to and is restricted within the Restriction Zone described in 5.2d (it must move as rapidly as possible to that area).
5.2c 4 Indian and 2 NZ Divisions. In scenarios starting 12 Sept 40, these units are retained in the area around Mersa Matruh (the 4 Ind w/i 5 hexes of it, and the New Zealanders at or east of it) until released by the Allied Order of Arrival (5.2d has no effect on these units). Once released they function normally.
5.2d The Restriction Zone. The Restriction Zone is marked on the map and contains the hexes at or within 3 hexes of D36.06. Initially, the Polish Carpathian Brigade is restricted here. Later the 6 Aus Division and Polish Lancers are similarly confined. These units cannot exit the Zone until they are released as per the Allied Order of Arrival. These units are also automatically released if an Axis unit moves adjacent to Mersa Matruh (C39.03) or an Axis unit enters Map E at all. Once released all these units function normally.
5.3 Reinforcement Entry and Supply Sources
c 5.3a Nominal HQs. All friendly city and village hexes can be used by the Allied player as nominal HQs to rebuild units (provided the Repls are located in the hex and the hex is not adjacent to an enemy attack capable unit, etc.).
c 5.3b The Tiger Convoy. Players can elect to either receive the Tiger Convoy historically or on demand, but they must decide which to use before play begins. In the former case, the convoy (as listed below) arrives the turn it did historically (12 May 41). If the players elect to have it on demand, the Allied player can demand it once and that demand can occur any time after April 1941, but must occur before Crete falls. (On the odd chance the player fails to demand it before Crete falls, the chance to get it is lost. The convoy arrives the turn after the demand is made (if Crete falls that turn, the convoy turns back never to arrive).
The Tiger Convoy contains 5x Eq Repls and 1x Hurri I as reinforcements. Historical losses have already been deducted. Place the Hurri I at any Allied air base the turn after the main body of the convoy arrives.
Design Note. Historically, the "Tiger Cubs" needed relatively extensive refitting to be ready for the desert and the Hurricanes (especially) came crated and had to be assembled. I chose to allow the Eqs to be used right away (probably to refit after some silly Churchill-ordered attacks) and delay the Hurricanes one turn to reflect their more extensive preparation work.
c 5.3c The World Box. Units and Repls arriving as reinforcements can be stored here as desired. This can be done when remaining port capacity does not allow arrival on the turn given on the Order of Arrival, or because the player wants to delay their arrival for reasons I'm not sure I can imagine. At any rate, this is a good place to put next turn's reinforcements while waiting for the enemy to figure out that they are done with their turn. Units and Repls can remain in this box any length of time and can arrive at a Delta port on their scheduled turn or any turn thereafter.
5.4 Withdrawals
c 5.4a General Rules about Withdrawals. Before play begins, the Allied player must choose to use either Historical Withdrawals or Variable Withdrawals. For most campaign play, I suggest using Variable Withdrawals, as these will keep both sides guessing as to what will happen in the "outside world"—a condition that better reflects what the real commanders had to face. In either case, units return (if they do) with the same Internal Stocks status, step losses, and loaded/unloaded (for Organic Trucks) condition as they left with—they lose all mode and DG information they might have had.
c 5.4b Variable Withdrawals. Roll an 11..66 roll on the Allied Variable Withdrawal and Return Table each game turn (right after rolling for Variable Reinforcements each turn). If a result comes up, the player has four turns to get the required unit to any friendly port and move it to the appropriate Deployment Box on Map D. This removal has no effect on Allied Coastal Shipping or port capacity. The instant the unit reaches the port, simply move it to the Deployment Box and place it in one of the "slots" provided (see below). Fuel must be expended normally to move the unit to the port. The chosen unit can come from any formation, provided it is of the type required and follows the notes at the bottom of the Table regarding the kinds of substitutions allowed.
Each Deployment Box has one or more brown slots in it. Each slot shows the unit type or types that can be placed in that slot. If all the slots in a box of a particular unit type are filled and another withdrawal of that unit type is called for, the box is said to have reached its limit for that unit type and the withdrawal is ignored. No further withdrawals of that type can occur until unit returns empty one or more slots. Note that units within their four turn grace period which have not left a port for the Deployment Box do not count as filling slots, so an extra withdrawal or more might occur while the unit is moving—all the more reason not to dawdle. Should such an event occur, Deployment Boxes can "overfill" and have more units in them than they have slots. Also note that the Greek Deployment Box only has a slot for one Variable Brigade. This slot has nothing to do with the Greek Deployment system nor does it remove any Greek Deployment requirements because it might be filled.
In every case where a Deployment Box becomes empty leaving nothing but one or more Organic Trucks and no combat units, the Organic Trucks automatically return with the last departing combat unit. The trucks are never left behind in a box by themselves—even if other combat units are on their way to the box but have not yet made it there. If the first withdrawal from a formation is its Organic Truck, withdraw the Truck normally and it returns (if ever) with the last combat unit of that formation to return from the Box.
c 5.4c Historical Withdrawals. Historical withdrawals rigorously follow the Allied Historical Withdrawal Schedule in this rulebook. If a withdrawal is called for on a given turn, simply yank the unit out of whatever situation it might be in on the map and set it aside. This removal does not cost fuel, port capacity, or shipping. If the unit called for has been destroyed, immediately rebuild it if possible out of existing repls and remove the rebuilt unit from play. If rebuilding is not possible, exchange a like unit (living) for the one in the dead pile and remove the resurrected unit. Ignore Organic Truck withdrawals if the Organic Truck in question has been captured or destroyed.
5.5 Other Allied Special Rules
5.5a Divisional Integrity. Series rule 11.6h (multi-unit division trace requirement) does not apply to any Allied unit.
Design Note. In the Western Desert Force and later 8th Army, the Division was an administrative beast, while the Brigade was the tactical element of maneuver. While the Division was supposedly in the chain of command of the Brigade (and was for administrative dealings, maintenance, and such), in practice Army and Corps commanders directed the activities of the Brigades, by-passing the Divisional echelon. The net result was that Brigades were sent willy-nilly all over the theater and, indeed, all over the Middle Eastern Command (at one point, the 7 Australian Division had troops in Cyprus, Syria, and Cyrenaica all at the same time!). Naturally, I wanted the player to be able to indulge in all the chaos his stomach could handle, hence this rule.
5.5b The 7th Arm Division: The Early Model and the Later One. Aside from the usual organizational changes inflicted on the British player, the 7th Arm Division offers a special case entirely. It begins the campaign with its armor and support elements broken down into battalions. Until these are destroyed (or disbanded), the player cannot rebuild their parent brigades (4 Arm, 7 Arm, and 7 Support). Once the little units are destroyed, or pulled from play by the player (by "disbanding" see 3.9i), these larger units can be built using Repls, but not until then.
Design Note. Exceptionally trained and proud, the original 'Desert Rats' were molded by General Hobart into an elite desert mobile force. This finely honed organization acquired additional experience during the period between June 1940 and the Italian invasion in September—the 11 Hussars was particularly active in cross border operations. By the opening of Operation Compass in December it had reached a level of training and independent leadership that the British army would not see again until late in the war—if it did at all.
In spite of shoddy pre-war equipment (and serious shortages of it as well), this division was able to spearhead the advance all the way across Cyrenaica. Its tattered remnants defeated the retreating Italian Army at Beda Fomm after having left much of its strength along the tracks leading to the coast. The exhausted formation then retired to Cairo to refit, leaving the front to the newly deployed 2nd Arm Division (and some guy named Rommel...). The rebuilt division was still among the best British formations, but it was not able to recapture the independent drive it showed in the early days.
One might say that the earlier performance was due to the disdain the British felt for their Italian adversaries, but I do not feel this attitude was reflected by the troops at the time (more an invention of later historians) and such a statement is a disservice to the troops and their skills. One thing that can be said is that in those early days the lack of effective Italian Anti-tank weapons allowed the British to "get away with" a lack of a combined arms doctrine in a way that was no longer possible once effective AT guns (Italian as well as German) arrived on the scene.
5.5c Brigade and Support Groups. A number of organizational changes are reflected in the Allied Order of Arrival—the development and later abandonment of Brigade and Support Groups being the most important. These are the effects of the different organizations:
- While in Brigade Groups, all Commonwealth Infantry Brigades have an Intrinsic Artillery barrage strength of 5 and a range of 1 while at full strength (3 barrage points after losing a step). With the exceptions below, Brigade Groups are in effect from 12 Sept 40 until 26 Aug 42 (with Armor Brigade Groups added 8 Feb 42). There are two exceptions to this standard rule:
a) Green units do not fall under Brigade Groups (they become so when they finally become Normal) and do not get the intrinsic artillery.
b) Until 1 Jan 41, the 4th Indian Division is not organized into Brigade Groups and its brigades have no intrinsic artillery. Until that date, this division does have (unlike the Green units above) its Divarty Brigade. On 1 Jan 41, as per the Allied Order of Arrival, the division's brigades reform into Brigade Groups, get their intrinsic artillery, and lose the Divarty Brigade.
- Support Group units have their intrinsic artillery strength printed on their counters and such units have a range of 3, not 1.
- Armor Brigades form into Brigade Groups on 8 Feb 42 and have the same intrinsic artillery as infantry Brigade Groups at that point. They also become "Red" Armor at that point rather than "Yellow" armor (one brigade, 2 Arm Bde/1 Arm Div, is always like that, so its counter has been printed red). The color change is the result of the assignment of organic infantry to the brigades at that point. These conditions (Red coloring) last until the end of the campaign, although, on 26 Aug 42, the intrinsic artillery vanishes.
On 26 Aug 42, when Brigade Groups end, all of the above ceases to be and the Commonwealth Divisions get their Divarty Brigades. All of these changes are noted with reminders on the Allied Order of Arrival.
c) Each 5 Barrage points available to a unit intrinsically represents one battalion firing (for those paying SPs for artillery Barrages the 'old-fashioned' way).
d) Intrinsic artillery is in Reserve (or not) as per the entire Brigade. The intrinsic fire strength of a Brigade in Move Mode (other than Support Groups) is 3 at full strength.
c 5.5d Unit Training. Some Commonwealth units arrive or set up with "Training" Markers. These markers indicate that the division is not fully trained at that point and that additional time is needed before the division's units are ready to operate at their normal performance levels. Units which do not have such markers and those whose markers are in the "Normal" Box on the Training Track function normally at all times. This system only tracks divisional formations; there is no such system for independent units (which always function normally).
Once trained (meaning the marker is in the Normal Box), the unit remains that way for the rest of the game. Leave this marker in the Normal Box even if the unit is withdrawn, as its normal status remains should it later return.
a) Green Units. A Green unit is any unit which has a Divisional Training Marker and that marker is in any Training Track Box other than Normal (even in the two boxes between the one labeled "Green" and the Normal Box). Green units suffer three effects—all of which disappear instantly when the unit becomes Normal:
- Green units have their Action Rating reduced by 1.
- Green units do not have intrinsic artillery even during the period of Brigade Groups.
- Green units cannot move during a Sandstorm.
b) Training Upgrades. Unlocked Training Markers (see below for Locked ones), advance one box up the Training Track at the start of the first game turn of each calendar month (regardless of when the marker arrived as a reinforcement, how many units of the division are in play, if the division has been withdrawn, etc.). Once the marker reaches the Normal Box, it remains there for the rest of the game.
The player is free to use the "division in training" (given that no special restrictions apply) in any manner he likes. Given the Green unit effects above, there are no further restrictions because a unit is not fully trained. Furthermore, nothing the unit might do (or have happen to it) on the map affects the steady advance of the training marker—even if isolated in a pocket and starving to death, the marker still advances each month. There is no requirement to sit in the Delta (or wherever) to train—these divisions are free to OJT (On-the-Job-Training) all they like.
c) Locked Training Markers. Some training markers enter play as "Green & Locked". This means they are placed into the Locked Box within the Green Box. Locked markers do not advance with the others on the track each month. When the Order of Arrival announces that the marker is "Unlocked", slide it out of the Locked Box into the regular Green Box. Once unlocked, the marker advances normally.
Design Note. Originally the training system was much more elaborate and involved more units, more conditions, and more effects. As playtesting wore on, it became painfully clear that the system needed some serious simplifications if it was going to pass muster and become a useful addition to the game. The above is the cleaned up version after things like acclimatization and multiple levels of "greenness" were removed. I believe it captures the feel and spirit of the original rules without the degree of complication they entailed.
Training was a necessary feature to be included in this game as the immense theater (both in time and space) meant the appearance of numerous units that were not quite ready for the "big leagues" upon arrival. Part of this was the simple fact that the Delta itself was a support and training base of immense proportions—something never before seen in an OCS game (and unlikely to be seen again). On top of that, the extended time period involved meant units could perform at one level for a time (while they learned the ropes), but would later perform at a higher level. Rather than generate duplicate counters for all these units as they gained experience (as if there wasn't enough unit exchanging going on already!), I chose the above system.
Units which have their training markers locked are in that status for the simple reason that the bulk of the division has yet to arrive. In a number of cases, a lone brigade (or whatever) shows up literally months before the rest of its division. Rather than let that brigade spend that time acquiring the training for the entire division (guys still waiting for their enlistment records to be checked in Australia or wherever), I chose to refuse to allow a division to start serious training until the majority of the division shows up and the marker is unlocked.
c 5.5e Captured Italian Tanks. Numerous Italian vehicles were found in workshops in Bardia, Tobruk, and Benghazi in various states of disrepair. As the Commonwealth found its own vehicles falling by the wayside due to overuse, some of these were pressed into the service of the Crown. These were used to remount the 6 RTR as well as other units, including elements of the 6 Aus Div. These units are awarded to the Commonwealth player via the City Capture awards (3.3). While they cannot be rebuilt, they otherwise function exactly like any other Allied unit.
c 5.5f The Delta Base Repair Operations. The British player has four Delta Base Engineer units. These are the three Egyptian National Railway Rail Repair Battalions and the single Egyptian Port Engineer Battalion (whose only function is to repair port hits). Unlike other Egyptian units, these can be rebuilt, and in all ways behave as regular Commonwealth units. The special rules pertaining to the Egyptian National Army do not apply to these, nor are these units optional as are the ENA troops. These units are restricted in that they cannot enter Libya or any Libyan Border hex.
c 5.5g The Trans-Jordan Arab Mechanized Legion. This unit is restricted to the area east of the Suez Canal (meaning it can be safely ignored unless the Axis is doing quite well). It has a box around its movement allowance so that it is clear that this unit is tracked (it has no other significance). This unit draws supply via the railway leading off the east edge of Map E (and is the only unit allowed to do so).
Design Note. This unit was originally a police force which grew in equipment and training until (in late 1941) it became the equivalent of a mechanized brigade. It participated in the operations in Iraq, but generally the unit was involved in garrison and security duties. With Rommel's advance in the summer of 1942, this unit briefly concentrated in the Sinai, but was again dispersed when that threat ended.
c 5.5h Parachute Assaults. No Commonwealth unit is paradrop-capable. The SAS technically is, but functions here truck mounted.
c 5.5i Senussi Tribesmen. The Senussi Libyans were openly hostile to the Italian colonial troops and welcomed the British invasion of Libya in early 1941. Four battalions of troops formed in their home villages to help the British effort. These units collectively make up the "Libyan Arab Force" (not to be confused with the Arab Refugee Pioneer Battalions formed in Tobruk).
One Senussi Battalion forms the instant any Commonwealth attack capable unit enters the following hexes for the first time: Tobruk, Giarabub, Msus, and Mechili. Place the Senussi Battalion with the location's designation on it in the location's hex. These units are automatically in Trace Supply if they can draw (5 MPs) from their home location—which does not count against the limit of units which can draw off an Oasis, if applicable. If they move away from their home location, they must trace as any other Commonwealth unit. If they need combat supply, the Commonwealth player must provide it in the usual fashion (it is not free).
The Senussi location hexes are marked on the map. Each hex can only generate one such unit during the course of the game.
Design Note. My outstanding British researcher (Steve Rothwell) identified what appears to be a fifth Senussi battalion of the Libyan Arab Force which only made its appearance in the drive into Cyrenaica after Crusader. At the same time, there exists the Tobruk Senussi Battalion which was evacuated from Fortress Tobruk (along with the Arab Refugee Labor Battalions) during the summer of 1941 (too many mouths to feed). At the same time as this phantom battalion shows up, the Tobruk one disappears from the radar screen. I might be wrong, but I decided that this fifth battalion was actually the Tobruk guys and that there was only four such battalions formed. Feel free to disagree.
c 5.5j The Egyptian Air Unit. There is one Egyptian Royal Airforce air unit (a Gladiator). This air unit is effectively "just another Commonwealth air unit" in that the Commonwealth player can use it as desired. The only restriction on this air unit is that it cannot be based (or fly out) more than 25 hexes from the Suez Canal.
6.0 Optional Rules
6.1 General Optional Rules
Players can handle the optional rules in this game in one of three ways. They can select specific optionals to try (just to see what the game is like with change X to history), they can ignore the optionals that do not come up as part of the Random Events Table, or they can choose to not apply any of them. Some of the optionals, especially those here in 6.1, are optional in that, while historically correct (the Egyptian Army was there...) they add significantly to the workload of the player without a great deal of return. Several of the options presented in 6.2 and 6.3 also fall under this same blanket. I have marked them as "Historical" if they really happened. So, a player seeking a strictly historical game would use the Historical Allied Withdrawal Schedule, apply only those Random Events which historically occurred, and some of these options (depending on the amount of extra work he is willing to do for the extra detail). Players less interested in strictly following history, more interested in having a good time, might choose Variable Withdrawal and Return, Random Events, and the options below that suit the desired workload. I would recommend the latter as the "standard" way to play DAK.
For the first few games: I recommend playing DAK with Variable Withdrawals and Returns as well as Random Events, but none of the options listed below. That way you'll be involved in playing quicker and won't have to spend time deciding on which options to try before having a feel for what effect (if any) they might have.
Some of these options do come up as part of the Random Event Table. Should an option come up via that table that you have already ruled out, ignore it and its result and continue on. Do not re-roll, effectively a no result occurred.
Most of these can be considered campaign rules, but players can integrate some of them into smaller scenarios if they like—there are an enormous number of combinations that can be attempted. Players should reason through which they would like to try—some combinations work, others do not (based on the units involved, time period of the scenario and so on).
6.1a The Egyptian National Army. Egypt is neutral unless a random event announces that it joins the war on one side or the other. Until then, its units cannot move (see exception below), attack, or barrage unless an Axis attack-capable ground unit moves adjacent to them or the Axis units enter any hex east of the Nile River. Neutral Egyptian units are ignored for supply purposes (they are considered to be supplied "behind the scenes").
In the case of the former, the unit or units which had an Axis attack-capable ground unit adjacent must check to see which side they choose to join. Roll one die per Egyptian unit; if greater than the unit's action rating, the unit joins the Axis, otherwise, it becomes a regular Allied combat unit (yes, some will be automatic).
If a supplied Axis unit crosses the Nile River, and it is a Panzer Battalion or Italian Tank Battalion which is in Trace Supply in the next Axis Supply Phase, roll one die. On a 4-6, Egypt chooses to join the Axis, on a 2-3, it joins the Allies, on a 1 it remains neutral. Only one such roll can be made per game and it is not made if Egypt has already joined the war. Also, the Random Events regarding Egypt can no longer occur if this roll has taken place and Egypt is no longer neutral.
In any of the above cases, should an Egyptian unit choose to join to a side and it is currently stacked with units belonging to the enemy, the Egyptians must leave that hex in the next Friendly Movement Phase (should the unit require fuel to move, it is assumed they expended enough Egyptian National Army Supply (nominal and only for this purpose) to be fueled). There are no other effects—and the new "bad" guys are happy to see them go.
Should a random event or the Nile Crossing cause Egypt to join the war, any units which have already chosen sides, remain with the sides chosen even if different than the direction Egypt itself went. Once Egypt joins the war, stop making checks for individual units choosing sides. Individual checks continue until either Egypt is no longer neutral, or all units have chosen sides.
Once an Egyptian unit joins one side or the other, it becomes a permanent part of that side's army and acts just like any other of the side's units. It can be used in combat, barrage, movement, be put into any mode, supplied by any friendly HQ, and so on just like any other friendly unit. It no longer has any particular ties to Egypt in that it must draw supply from its new host nation.
a) Neutral Movement Exception. At the beginning of any Commonwealth Player Turn (before Egypt joins the war), the Commonwealth player can announce that he is evacuating Egyptian troops from the war zone. This can only be done once in the game. Simply pick up all neutral Egyptian National Army units (regardless of location or situation, ignoring any that have joined the war) and move them to any hex of Map D or Map E (including half hexes and those potentially overlapped by Map C). All Egyptian units must leave Map C, the player cannot pick and choose. Once the units have been moved, they cannot be "relocated" again.
b) The Egyptian National Army Organic Truck. This truck does nothing until it (or the Egyptian Army as a whole) joins one side or the other. For check purposes, the truck has an Action Rating of 3. In that case, the truck can be used by only Egyptian units belonging to the same side as the truck. The truck is reloaded from the stocks of the new host nation.
c) The 287 Sonderverband Regiment. If an Egyptian unit must check to choose sides and it is adjacent to the 287.Snd Commando Rgt, then it automatically joins the Axis (no die roll required). This unit included Arab Nationalists and had the skills needed to persuade the Egyptians to cast off the yoke of British Imperialism and join the advance of the Fascist nations into Islam—which, they believed, would be better for them in the long run—Ahem...
6.1b Escarpments. These features have a number of special effects:
- ZOCs do not extend up escarpment hexsides even where they are passable for movement because of a road or track.
- ZOCs extend down off an escarpment regardless of the passability of the hexside.
- Units adjacent to the "high escarpment" (see below) can spot for artillery and air barrages out to three hexes into the coastal plain in clear weather. Furthermore, such spotters get an additional shift to the right (one column) on the Barrage Table for targets they spot on the plain which are two hexes away and an additional shift of two columns right should the target be adjacent to them on the plain.
Positions on the High Escarpment for which this spotting rule would apply are the following hexes: C43.29, C42.29, C41.29, C40.28, C39.27.
The "plain" referred to above is the zone between these escarpments and the sea and does not include any hexes separated from those hexes along the sea by some other escarpment.
Note that appearances to the contrary, C40.28 can "see" C39.26. While the escarpment seems to bulge out there (at C39.27), this is a property of the hex grid alone—in real life the escarpment is mostly linear.
6.1c Stripping Units of Trucks. I only suggest this one for experimental purposes. In early testing it was found that this truck stripping was easily abused and generally far more pain than it was worth. In the campaign units did have their trucks stripped away from them for special purposes, but unlike game players, historically they got their trucks back relatively quickly and the idea of stealing all the trucks from restricted or green units didn't seem to be a viable plan for them. So forewarned and forearmed, use this rule amongst only the most reasonable of players.
Each side can strip multi-unit motorized or semi-motorized infantry divisions of their trucks. The stripped divisions must remain in Tripoli (Axis) or anywhere on Map E (stacked in one hex) (Allied). Stripped divisions cannot move—if forced to retreat, it is destroyed. It can fight and barrage normally from its hex. A Stripped division is never released from any restriction it might be under and its training marker (if any) never advances.
A fully motorized division generates 2T of regular trucks, a semi-motorized division generates 1T of trucks. The generated truck cannot move on the turn it is created and the Organic Trucks of the division cannot move or be stripped. Divisions become unstripped by starting a turn stacked with the appropriate amount of trucks.
6.1d Armored Cars, Truck MPs, and Recons. Armored Car units are exempt from the restriction in series rule 6.5c stating that truck MP units can only make one recon before stopping or overrunning. These units can conduct a recon and continue moving (and do additional recons).
6.1e Advanced Trace Supply. Allow only ports with 1 SP or more capacity to provide full trace capability. Smaller ports can provide trace supply for 2 REs per token of port capability.
6.2 Axis Options
6.2a Italian AT Units. A number of fairly good Italian AT units were in or shipped to Tripoli early on. Many of these were in fact AA guns (90mm) and were not released to active ground campaigning until much later in the campaign, if at all. If this option is chosen, allow them to arrive when first listed in the Axis order of Arrival.
6.2b Pistoia is Free! The Italian High Command sends Pistoia without strings attached—ignore 4.6b.
6.2c 220 PJ Bn (164.Le Div): Heavy or Light? Historically, the 220 PJ Bn was shipped to Africa without part of its weapons (a company of 50mm guns). If this option is chosen, allow the (5) strength battalion to arrive instead of the (4) strength one. Not a big difference, but we are going for accuracy here...
6.2d Lehr Para Bn: Weak or Strong? The Lehr Parachute Battalion was to be seriously beefed up for its role in the proposed invasion of Malta. Here you can opt to get it that way anyway. Allow the 4 strength battalion to show up instead of the 2 strength one.
6.2e Case Blue and the 287 Sonderverband Regiment. As part of the grandiose (and completely unreasonable) plan that Case Blue (in Russia) was supposed to turn into according to Adolf "Hey! Its easy to draw lines on maps!" Hitler, the Afrika Korps was supposed to link arms with German forces advancing south of the Caucasus Mountains in preparation for an eventual advance into India. Regardless of what happens (or doesn't happen) in Russia, this option presupposes that the 287 Sonderverband (which was preparing to spearhead the advance into the Middle East) was in fact deployed for use by the Afrika Korps. Allow it to show up when called for.
6.2f Balbo Lives! Marshal Balbo was to be placed in charge of the invading Italian army rather than Graziani. Unlike Graziani, Balbo was a real leader and would have led from the front. If this option is used, place the Balbo Leader counter with the Italian army. It is presumed that the AA guns of the San Giorgio did not blow him out of the air over Tobruk harbor on 29 June 40.
6.2g Free use of German Organics. Allow German Organic Trucks to be used as if they were regular trucks. All Organic Truck restrictions (and the couple of benefits they get) are removed. This can dramatically increase the supply flow to the Axis army and will dramatically tilt the balance of the game (try it if you want to see Rommel cross the Suez in style...).
6.2h Early German Intervention. As early as 3 Nov 40, Hitler offered German assistance to Mussolini's stalled offensive in North Africa. Il Duce declined as he did not want to share the credit (and spoils) with the bully to the north (probably as a result of the limited attention and rewards given Italy for its part in the fall of France). In this option, he decides to take the offer. All German reinforcements from February 41 and March 41 arrive early. Those for Feb 41 arrive in Dec 40, the March 41 group shows up in Jan 41. No effect to later arrivals or the activation of the Flieger Korps or the limited reinforcements arriving in Jan 41 historically.
6.2i No German Intervention. Ignore all German units and Flieger Korps. Hitler declares hands off and doesn't become involved at all. (A good one to mix with the Italians Turn Turtle Option in 6.2m).
6.2j Pyramid and Sphinx Desecration. (Historically Occurred, Watch Raiders of the Lost Arc! Just kidding!). The first time a German unit enters the Sphinx hex, roll on the Pyramid and Sphinx Desecration Table on Map E. One time only. Apply the result (or just check it, laugh, and resume play...)
6.2k Battaglione Speciale Arditi. This unit was formed on 15 May 42 in Italy as an SAS-style commando unit. It consists of three companies each with its own special function. These are: 101st Parachute Company, 102nd Swimmer Company, 103rd Scout Car Company. Each company was designed for specific functions in specific environments. The Battalion was later renamed the Regiment Arditi and later the 10th Regiment Arditi. When formed as a regiment it consisted of two such battalions—later a third (1 March 43) and fourth (1 July 43) battalions were added. The 1st Battalion was used in Tunisia to destroy Allied rail bridges (making raids in Algeria on 16 Jan 43, 2 and 12 Feb 43). The 2nd Battalion fought in Sicily.
If this option is used, the original battalion is considered to have been rushed into service as rapidly as possible—allow it to arrive when called for by the Axis Order of Arrival.
6.2L The Italian Truck Shuffle. (Historically Occurred). The Italian army worked out an elaborate system of rotating truck use which would (in theory) allow them to fully motorize each of their infantry divisions for at least some of the time. This concept was tried in both Russia and Africa. It didn't work as planned in either case. Allow any two non-motorized infantry divisions (per turn) to move with a Move Mode MA of 14 Truck Movement Points. The player can pick any two divisions to do this with, but if a division was not picked for this treatment the turn before, it must not move this turn (while the trucks get organized). If picked again next turn (and succeeding turns), it gets the bonus MA. The one turn delay occurs any time the chosen divisions change (and no division can have the trucks for more than three turns in a row (two usable, one turn expended in preparation)...the corps commander must be fair about this!). Good Luck!
6.2m Italians Turn Turtle. A common game play technique in our little game Afrika was to hide in Libya with the Italians and wait for the Germans to arrive. I ruled that technique out here (by the Higher command restrictions in 4.4a). Using this option, you can free yourself from such distractions as listening to the head of your nation who is ordering you to advance. Do whatever you like instead.
6.2n Motorized Trento. Non-motorized version assumed in all set ups unless this option is chosen before play. If so, replace the non-motorized version with the motorized one.
6.2o Fully Motorizing the Light Divisions. (Historically Occurred—attempted, anyway, if never finished). Both the 90 Light and 164 Light were planned to become fully motorized as the campaign wore on. Some progress was made on the 90 Light, the 164 Light lost what trucks it did have to the Afrika Korps upon arrival (in terms of motorization, it regressed). This option allows you to upgrade these divisions using your scarce truck assets. The 90 Light can be converted on any turn July 42 and after, the 164 Light can only be converted in Oct and Nov 42. Remove 1 Truck Point (4T, that is...) per division to motorize it. Increase the Move Mode MA of all the division's units by 4 MPs. This can only be done once and cannot be later revoked.
6.2p Panzer Supply Columns. (Historically Occurred). The German supply system (already ad hoc) was flexible enough to strip armored vehicles (halftracks and so on) from formations to allow the resupply of isolated units. If this option is used, allow German units to draw supply directly up to 5 MPs (as always), but allow these MPs to be tracked as opposed to truck MPs. This will allow a freer draw of supply to partially cut off units. These tracked MPs do not apply in any way to HQs or SPs thrown from HQs.
6.2q KG Hecker. (Historically Occurred). In April, 1942, the Axis player has the option of exchanging several units in order to form the single Hecker Amphibious Battalion. The player need not make the choice to do this option until that time. If the exchange is made, he gets the Hecker unit to use and the following special rules apply to it:
- It can make one amphibious landing during the game. This landing can be on any coastal hex no more than 30 hexes traced along the coast from the port from which the operation is launched (Hecker must begin this movement from a port).
- The amphibious operation places Hecker in Combat Mode in any desired coastal hex (given the above) that is not occupied or adjacent to an enemy unit. Hecker cannot move the turn the amphibious operation occurs and cannot attack, but defends normally. The operation is carried out during the regular Axis Movement Phase during a turn in which all the maps involved (if more than one) have Clear Weather.
- Up to 2 SPs (which must be stacked with Hecker at the port of origin when the operation starts) can arrive with Hecker when the landing occurs. No further shipping to the beach is allowed. This entire operation does not use any Axis Shipping Allowance; it is free.
- On any future turn, the player can split KG Hecker back up into the units that formed it in the first place.
6.2r 300 zvb Oasis Battalion. (Historically Occurred). Each Oasis company within the draw range of a group needing to subsist off the map (i.e. which cannot trace), reduces the SP requirement of the group by 1T. More than one company can combine to give additional effects. No draw requirement is ever reduced to zero in this manner, regardless of the group's size or number of Oasis companies involved, each such group must expend at least 1T of real supply. Additionally, these units never need to be in Trace Supply themselves (they are automatically in supply of their own accord) and do not count toward the total number of REs in the group they are helping supply (in addition to making cute little units to have in cut-off locations).
6.2s The Bordello. (Historically Occurred). The 10 Armata Mobile Bordello (24 women) was a 'unit' captured at Beda Fomm. It appears here only to show the luxury with which Italian officers lived in during the initial campaign. Use any desired Mobile Bordello Rule. :-)
6.2t Battlefield Vehicle Recovery. (Historically Occurred). Due to their excellent record at battlefield recovery and repair, the Germans can use this special rule. Allied and Italian recovery operations are integrated into the Variable Reinforcements they get. Each time a German Panzer Battalion is destroyed, roll a die for it: on a 1-4 nothing happens, on a 5-6 the dead unit returns the next turn as a reinforcement in the DAK HQ's hex. If the DAK HQ is not in play, the roll is not made and the battalion dies normally. The conditions regarding the loss (ZOCs, terrain, supply status, location) are not a concern. This roll occurs for any combat or barrage result requiring loss, but does not occur if the loss is due to attrition.
If the KstA Pz Company (or its exchanged battalion if later brought into play) is currently dead, it returns with the first successful recovery roll (along with the unit being rolled for).
6.2u 2nd Libyan Parachute Infantry Battalion. Before 1 June 1940, the initial Italian OOB includes both a 1st Libyan Para Bn and the 2nd Libyan Para Bn (in addition to the Italian National Para Bn formed in January, 1940). The 2nd Libyan Para Bn was merged with the 1st Libyan Para Bn to bring the latter up to strength (600 men). In reality it was never reformed and the Italian and 1st Lib Para Battalions later fought together as the Tonini Parachute Regiment.
This option supposes that rather than merging the two Libyan Para Battalions, the Italians aggressively recruited more Libyan Nationals to fill out the 2nd Lib Para Bn. Allow this unit to set up or enter play with the 1st Lib Para Bn if that unit is in play.
6.3 Allied Options
6.3a Strafer Gott Lives! Historically, Strafer Gott died after a plane crash on 7 August 42 on his way to take command of the 8th Army. Sadly, he was killed when the German fighters that shot his transport down, returned to strafe the wreck. Gott was on the ground attempting to save the others in the wrecked aircraft when this occurred and was killed. Had he lived, the history of the 8th Army in the fall of 1942 would have been different (one cannot say better or worse). If this option is used, set up Gott in any scenario with a start date after his plane crash as another leader to use.
6.3b Vyvyan Pope Lives! Pope, one of the original minds behind the British armored force, was slated to take over 30 Corps before Crusader. He, too, died in a plane wreck on his way to take command. If this option is chosen, allow him to enter when called for on the Allied Order of Arrival.
6.3c No Brigade Groups. In this case, the option frees the Commonwealth player from ever having to mess with Brigade Groups or their intrinsic artillery. Set the Divarty Brigades up with the divisions in play and allow reinforcements to bring their Divarty along when they get their Organic Trucks. Support Group use remains the same and armor units never get their "Red" designation—except for the 2 Arm Bde which always has it.
6.3d Greater Freedom of Action. The Axis has a much greater freedom of action in DAK than the Allies—not only do they have more reserve markers, but they have a plethora of KG markers and the best (most reactive, anyway) leader on the map (Rommel). This option evens the score somewhat, but must be used with care given that the Allies do have an advantage in combat and logistical power. Apply this if you like, but realize game balancing was done without it during the design process. If this option is used, double the number of Reserve Markers given the Allied player both at start and when any additional markers are given. Given the limited number of reserve markers available in the countermix (I gave the number the standard game needs), markers will need to be made or borrowed from another game to use this particular option.
6.3e Ignoring Greece. The Allied player can choose to ignore Greece. This is a big change and must be used with care. To do this, ignore any Variable Withdrawals slated for Greece and follow the Greek Campaign Progress Track procedure with the following changes:
- Do not use the Greek Deployment Track and send no troops to Greece.
- When the Greek Campaign Execution begins, immediately move the marker to Termination and the Axis can begin using Crete. The Allies didn't provide anything to the Greeks and the Axis juggernaut ripped right through them. Crete fell without much of a whimper.
6.3f The 8th Arm Division (Dummy). (Historically Occurred). The Commonwealth player has one Dummy Divisional Marker (8 Arm Div). It was formed as a phony division by Montgomery as part of the Commonwealth deception plan in the fall of 1942. If this option is chosen, the player is free to use this marker, the following rules pertain to its use:
- This marker can be placed on the map without any units at all in it (unlike normal divisional markers).
- The marker can be moved on map however the Allied player wants (it is up to him how to best fool the Axis player).
- The player can put up to 4 REs of units into the marker if desired (and take the units off the map). He need not do this at all, but it will greatly assist his deception if the Axis player knows he can. The units can be from any division or independents, or any desired mix.
6.3g British Amphibious Operation. (Historically Occurred). The British were planning and actually began to implement a plan to land the 4 RTR tank battalion (infantry tanks, at the time Valentines) near Derna to disrupt Axis rear areas. The historical operation was canceled when Rommel began his Gazala Offensive. If this option is used, the Allied player can launch one amphibious raid on any clear weather (on the map of landing) turn of May or June 1942. The landing can be in any coastal hex of Maps B or C. Execute the landing in the Allied Movement Phase and the landing units cannot move further on the turn of landing (place them into the desired coastal hex and then they stop for the turn). Units must land in Combat Mode, cannot "attack from the sea", and cannot attack during the turn of landing (they defend normally).
The Commonwealth can execute this operation with both or one of the following: 4 RTR Arm Bn and/or 11 Royal Marines Bn. The invasion units land with 2 SPs of supply.
No evacuation by sea is possible, once landed, the units are on their own.
7.0 Scenarios
Campaign Victory Conditions
If it isn't obvious, it is a draw. If you are still eyeballing each other over the Libya-Egypt Border at the end of 1942 waiting for the other side to make the first move, try again. Your goals are the same as those of the historical commanders (you are running a theater of operations, remember?). While Rommel wasn't ordered to go and conquer the Nile Delta and the Suez Canal—he chose those objectives for himself. The Allies, meanwhile, must protect the Nile and Canal, but must also force the Axis back to the west edge of Map A in order to clear Africa. In either case, if you don't conquer the ground, you must clean the other player's clock to "win" the game (it is safe to say if you have an army at the end of the game and he doesn't, you've won). Don't think you can 'win' the campaign by counting points for border settlements captured near Bardia. Come back with your shield or on it. Good luck!
Note on the scenarios below: each of the 20 DAK scenarios is reproduced with its full General Information, Timed Rules, Special Rules/Restrictions, Victory Conditions, and hex-by-hex Set-Up. Set-Up entries list a hex coordinate followed by the units placed there; "w/i N" before a hex means "within N hexes of" that hex (the owning player's choice of exact hex).
7.1 Operation Compass—Training Scenario #1
General Information:
- Set Up Order: Axis, Commonwealth
- First Player: Commonwealth
- First Turn: 8 Dec 40
- Last Turn: 26 Dec 40
- Game Length: 6 Turns
- Maps in Play: Map C only
- Use Campaign Rules?: No
- Port Damage: None
One-Time Random Events which have occurred: None
Timed Rules in Effect:
- Brigade Groups
- Italians Can't use non-Primary Roads for Trace (3.7b)
General Special Rules:
-
No Rebuilding of units allowed.
-
For more variation, play the scenario without the Mussolini Line restrictions on the Italians.
Commonwealth Information:
- City Ownership: Two Months (+): Mersa Matruh
- Reserve Markers Available: 3
- Hedgehogs Remaining: NA
- Minefields Remaining: NA
- Senussi Hexes remaining: NA
- Training Marker Positions: 6 Aus (Training #1 Box), 2 NZ (Green, Locked)
- Greek Campaign Status Track Marker: No Operations Yet
- Greek Deployment Progress Track Marker: NA
- Dead Units: NA
Set Up:
- C40.10: 3 SPs
- C38.02: Railhead Marker. Railline west of and including C38.02 does not exist.
- C39.03: 2 NZ Div (6-4-3 Inf Bde (4 NZ, 6 NZ)); 4 Ind Div (6-4-3 Inf Bde (7 Ind)); 2-4-3 Inf Bn (3 Cldst); 5-2-3 Arty Bn (Red) (8 Fld); 3-2-3 Arty Bn (no color) (107 RHA); 1T Truck Point; Level 2 Airbase; 11 SP
- C34.14: 3 SPs
- C41.15: 4-4-3 Inf Bde (Selby)
- C38.20: 4 Ind Div (1-3-6 Cav Bn (CIH))
- C38.20: 4 Ind Div (6-4-3 Inf Bde (5 Ind))
- C38.19: 4 Ind Div (6-4-3 Inf Bde (11 Ind)); 4 Ind Div (18-2-3 Arty Bde (Divarty)); 6-5-3 Arm Bn (7 RTR); 9-2-3 Arty Bn (7 Med)
- C37.20: Strafer Gott Leader; 7 Arm Div (3-5-8 Arm Car Bn (11 Hus)); 7 Arm Div (4-5-8 Arm Bn (6 RTR)); 7 Arm Div (3-4-10 Arm Bn (2 RTR)); 7 Arm Div (2-4-10 Lt Arm Bn (7 Hus)); 5-2-3 Arty Bn (Red) (1 RHA)
- C36.20: Jock Campbell Leader; 7 Arm Div (2-4-3 Inf Bn (1 KRRC, 2 Rifle)); 5-2-3 Arty Bn (Red) (4 RHA); 2-0-3 French Marine Bn (BIM)
- w/i 1 C35.18: O'Connor Leader; 8-0 Corps HQ (W.Desrt); (2)-2-3 AT Bn (3 RHA, 106 RHA); 6-4-3 Inf Bde (16); 1-3-8 Arm Car Co (2 RAF); 4 Ind Div Organic Truck (Full); 7 Arm Div Organic Truck (Full); 7 Arm Div (2-4-10 Lt Arm Bn (1 RTR, 3 Hus)); 7 Arm Div (4-5-8 Arm Bn (8 Hus))
- Anywhere East of the Italians: 3x Reserve Markers; 1x Blen IV; 1x Gladiator; 1x Hurri 1
Special Rules or Restrictions:
-
4 Ind Div Infantry Bdes are not formed as Brigade Groups when the campaign begins and do not have the intrinsic artillery ability.
-
Withdrawals as per the Historical Withdrawal Chart.
-
2 SPs per turn at C39.03.
-
The following cannot move further West than Mersa Matruh: 2 NZ Inf Div.
-
Reinforcements: 15 Dec 40 at C37.01: 6 Aus Div (6-4-3 Inf Bde (16 Aus, 17 Aus, 19 Aus)); 6 Aus Div (3-3-8 Arm Recon Bn (6 Aus)); 6 Aus Div Organic Truck (Full).
-
One 12 Barrage Point Naval Bombardment on any coastal hex on the 8 Dec 40 and 12 Dec 40 turns.
Axis Information:
- City Ownership: Two Months (+): Buq Buq, Sidi Barrani, Bardia
- Reserve Markers Available: 2
- Hedgehogs Remaining: NA
- Minefields Available for Reuse: NA
- Dead Units: NA
Set Up: All are Italian
- w/i 1 C48.34: Raggruppamento Brigata Corazzata Speciale (Babini) Marker; 2-1-6 Lt Arm Bn (21 Lt, 60 Lt); 4-3-6 Arm Bn (3 Med)
- w/i 2 C45.29: 9-1-3 Blackshirt Inf Div (23 Mar); 3-1-2 GAF Rgt (30); 26-2-2 Arty Bde (30 GAF); 9-3-2 Arty Bn (23 Corps); 2-1-2 Blackshirt MG Bn (201); 2-0-0 Coastal Arty Bn (5); 2x 1T Truck Points; 2+3T SPs
- C42.28: 8-0 Corps HQ (23 It); 9-1-3 Blackshirt Inf Div (28 Oct); 2-1-2 Blackshirt MG Bn (202); 10-3-2 Arty Rgt (22 Corps)
- C39.31: 2-2-3 MG Bn (62)
- C40.29: 12-2-3 Inf Div (Marm); 2-0-6 Lt Arm Bn (62 Lt)
- C41.23: 12-1-3 Inf Div (Ctnzro); 2-1-6 Lt Arm Bn (63 Lt); 1 SP
- C36.24: Level 1 Hedgehog; 2-2-3 MG Bn (63)
- C36.23: Level 1 Hedgehog; 3-3-3 MG Bn (VEC)
- C37.23: Level 1 Hedgehog; 8-0 Corps HQ (21 It); 12-2-3 Inf Div (Cirene); 2-1-6 Lt Arm Bn (20 Lt)
- C42.20: 2-3-3 MG Bn (64)
- C43.19: 8-0 Corps HQ (LibOp); 9-1-3 Blackshirt Div (3 Jan); 2-1-2 Blackshirt MG Bn (204); 11-3-2 Arty Rgt (21 Corps); 3 SPs
- C42.17: Level 1 Hedgehog; 8-1-3 Inf Div (1 Lib)
- C41.18: Level 1 Hedgehog; 8-2-3 Inf Div (2 Lib); 2-0-6 Lt Arm Bn (9 Lt)
- C41.19: Level 1 Hedgehog; 3-2-3 Inf Rgt (5 Lib)
- C40.19: Level 1 Hedgehog; Maletti Leader; 3-4-5 Camel Bn (Sahariano); 3-3-6 Arm Bn (2 Med); 4-3-3 Inf Rgt (1 Lib); 7-2-3 Arty Rgt (Maletti)
- Anywhere in Libya OR in Egypt (stacked with any Italian unit): 2x Reserve Markers; 1x CR.42; 1x SM.79; 1x Ca309
Special Rules or Restrictions:
-
Mussolini Line requirements in force or not in force as desired.
-
No Reinforcements.
-
2 SPs per turn arrive in Bardia.
Victory: Commonwealth player wins if he destroys the Italian Army in Egypt such that no Italian units remain within Egypt at the end of play. Commonwealth player wins a "Smashing" victory if he takes Bardia as well. The Axis player wins if he avoids the Commonwealth conditions.
7.2 Italian Offensive Sept 1940 to Dec 1940
General Information:
- Set Up Order: Commonwealth, Axis
- First Player: Axis
- First Turn: 12 Sept 40
- Last Turn: 29 Dec 40
- Game Length: 33
- Maps in Play: Maps B, C. Map A needed for its Off-map Boxes and shipping data.
- Use Campaign Rules?: Yes
- Port Damage: None
One-Time Random Events which have occurred: None
Timed Rules in Effect:
- Brigade Groups
- Mines not allowed (c3.2a)
- Protecting Italian Private Property (c4.4d)
- No Running Away (c4.4c)
- Italians Can't use non-Primary Roads for Trace (3.7b)
- Italian Parachute Design Modifier in Effect (c4.6f)
- Mussolini Requirements (c4.4a)
General Special Rules:
-
No Rebuilding of units allowed.
-
For more variation, play the scenario without the Mussolini Line restrictions on the Italians.
Commonwealth Information:
- City Ownership: Two Months (+): Buq Buq, Sidi Barrani, Mersa Matruh, Alexandria (all), Cairo (all), Helwan, Port Said, Suez
- Reserve Markers Available: 3
- Hedgehogs Remaining: NA
- Minefields Remaining: NA
- Senussi Hexes remaining: NA
- Training Marker Positions: 6 Aus (Green, Locked), 2 NZ (Green, Locked)
- Greek Campaign Status Track Marker: No Operations Yet
- Greek Deployment Progress Track Marker: NA
- Dead Units: NA
Set Up:
- Anywhere in Egypt West of Cxx.15, inclusive: Strafer Gott Leader; Jock Campbell Leader; 7 Arm Div (3-5-8 Arm Car Bn (11 Hus)); 7 Arm Div (2-4-3 Inf Bn (1 KRRC, 2 Rifle)); 7 Arm Div (2-4-10 Lt Arm Bn (1 RTR)); 2-4-3 Inf Bn (3 Cldst); 5-2-3 Arty Bn (Red) (4 RHA); (2)-2-3 AT Bn (3 RHA); 2-0-3 French Marine Bn (BIM); 2 SPs
- C4.22: 1-2-8 Egyptian Ford Co (s-FDA); 2-3-5 Egyptian Camel Bn (Siwa)
- C37.05: 7 Arm Div (4-5-8 Arm Bn (8 Hus, 6 RTR)); 7 Arm Div (2-4-10 Lt Arm Bn (7 Hus)); 7 Arm Div Organic Truck (Full)
- C38.02: Railhead Marker. Railline west of and including C38.02 does not exist.
- C39.03: (4)-3-1 Fort Bde (Matruh); 9-2-3 Arty Bn (7 Med); 5-2-3 Arty Bn (Red) (8 Fld); 3-2-3 Arty Bn (no color) (107 RHA); (2)-2-3 AT Bn (106 RHA); Level 2 Airbase; 1 SP
- C37.01: O'Connor Leader; 8-0 Corps HQ (W.Desrt); 4 Ind Div (6-4-3 Inf Bde (5 Ind, 11 Ind)); 4 Ind Div (1-3-6 Cav Bn (CIH)); 4 Ind Div Organic Truck (Full); 2 NZ Div (6-4-3 Inf Bde (4 NZ)); 3-2-3 Arty Bn (no color) (104 RHA); 3T SP
- Anywhere in Egypt: 3x Reserve Markers; 1x Blen IV; 1x Wellington; 1x Gladiator; 1x Hurri 1
Special Rules or Restrictions:
-
This Division cannot move further West than Mersa Matruh: 2 NZ Inf Div.
-
This Division cannot move further than 5 hexes from Mersa Matruh until released: 4 Ind Inf Div.
-
4 Ind Div Infantry Bdes are not formed as Brigade Groups when the campaign begins and do not have the intrinsic artillery ability.
-
Additional Reinforcements (apply the regular Order of Arrival plus the following. Regular OOA units are delayed two turns before reaching C37.01.) (all arrive at C37.01): 1 Dec 40: 6-4-3 Inf Bde (16); 4 Ind Div (18-2-3 Arty Bde (Divarty)). 15 Dec 40: 6 Aus Div (6-4-3 Inf Bde (16 Aus, 17 Aus)); 6 Aus Div (3-3-8 Arm Recon Bn (6 Aus)).
-
1 SP per turn at C39.03 until 1 Nov 40, 2 SPs thereafter.
Axis Information:
- City Ownership: Two Months (+): Tobruk, Bardia
- Reserve Markers Available: 2
- Hedgehogs Remaining: 7
- Minefields Available for Reuse: NA
- Dead Units: NA
Set Up: All are Italian
- Tripoli Box: 8-0 Corps HQ (20 It); 2-3-3 MG Bn (17, 25); 2-1-6 Lt Arm Bn (60 Lt); 7 SPs
- B60.24: 3-0-3 Territorial Rgt (54)
- B49.09: 17-0-0 Arty Rgt (R.Mar); Level 2 Airbase
- B46.08: 9-1-3 Blackshirt Inf Div (3 Jan); 2-1-2 Blackshirt MG Bn (204); Level 2 Airbase
- B48.05: 12-1-3 Inf Div (Ctnzro); 2-3-3 MG Bn (64)
- w/i 2 B50.08: 12-2-3 Inf Div (Sirte); 2-2-3 MG Bn (61); 1-3-12 Motorcycle Co (22 Brs, 61 Brs); 3-1-2 GAF Rgt (31, 32); 2-0-3 Coastal Defense Bn (31 Lib); 8-2-2 Arty Rgt (31 GAF); 4-2-2 Arty Rgt (32 GAF); 2x Pax Repls; 3 SPs
- B50.08: 8-0 Corps HQ (22 It); 8-0-0 Stranded Cruiser (San Giorgio); 0-0-0 Mobile Bordello (10 Armata)
- B12.01: 2-1-1 MG Bn (3 Lib Frt)
- C19.34: 1-2-2 GAF Co (E.GuG)
- C31.30: 1-2-2 GAF Co (B.Scegga)
- C39.32: Maletti Leader; 3-3-6 Arm Bn (2 Med); 3-4-5 Camel Bn (Sahariano); 4-3-3 Inf Rgt (1 Lib); 3-2-3 Inf Rgt (5 Lib); 7-3-2 Arty Rgt (Maletti)
- C44.31: 9-1-3 Blackshirt Inf Div (23 Mar); 2-1-2 Blackshirt MG Bn (201)
- C42.31: 1 Raggruppamento Carri Leggeri (Aresca) Marker; 3-3-6 Arm Bn (1 Med); 2-1-6 Lt Arm Bn (21 Lt)
- C42.30: 12-2-3 Inf Div (Marm); 2-2-3 MG Bn (62); 2-0-6 Lt Arm Bn (62 Lt)
- C42.29: 8-0 Corps HQ (LibOp); 8-1-3 Inf Div (1 Lib)
- C41.31: 8-2-3 Inf Div (2 Lib); 2-0-6 Lt Arm Bn (9 Lt)
- C43.30: 8-0 Corps HQ (23 It); 12-2-3 Inf Div (Cirene); 2-2-3 MG Bn (63); 2-1-6 Lt Arm Bn (63 Lt); 11-3-2 Arty Rgt (21 Corps); 10-3-2 Arty Rgt (22 Corps)
- w/i 1 C45.29: 8-0 Corps HQ (21 It); 2 Raggruppamento Carri Leggeri (Trivoli) Marker; 9-1-3 Blackshirt Inf Div (28 Oct); 2-1-6 Lt Arm Bn (20 Lt); 2-0-6 Lt Arm Bn (61 Lt); 3-3-3 MG Bn (VEC); 2-1-2 Blackshirt MG Bn (202); 3-1-2 GAF Rgt (30); 26-2-2 Arty Bde (30 GAF); 9-3-2 Arty Bn (23 Corps); 2-0-0 Coastal Arty Bn (5); 7 SPs
Special Rules or Restrictions:
-
Handle incoming units, SPs, and shipping normally (nothing "drives" from Tripoli...everything must be shipped to Tripoli and then use Coastal Shipping to arrive at the on-map ports).
-
Normal reinforcements plus the following (arriving at B57.35): 15 Oct 40: 10-3-2 Arty Rgt (10 Corps); 3-3-3 Para Bn (It); 2-4-3 Para Bn (1 Lib).
Victory: The Axis player wins if he takes Mersa Matruh before the end of the game. The Commonwealth player wins if he avoids the Axis conditions and there are no Italian units in Egypt at the end of play. Any other result is a draw.
7.3 The Battle of Sidi Barrani—Training Scenario #2
General Information:
- Set Up Order: Axis, Commonwealth
- First Player: Commonwealth
- First Turn: 8 Dec 40
- Last Turn: 12 Dec 40
- Game Length: 2 Turns
- Maps in Play: Map C only
- Port Damage: None
- Use Campaign Rules?: No
One-Time Random Events which have occurred: None
Timed Rules in Effect:
- Brigade Groups
- Italians Can't use non-Primary Roads for Trace (3.7b)
General Special Rules (7.3):
-
No Rebuilding of units allowed.
-
For more variation, play the scenario without the Mussolini Line restrictions on the Italians.
Commonwealth Information:
- City Ownership: Two Months (+): Mersa Matruh
- Reserve Markers Available: 3
- Hedgehogs Remaining: NA
- Minefields Remaining: NA
- Senussi Hexes remaining: NA
- Training Marker Positions: 2 NZ (Green, Locked)
- Greek Campaign Status Track Marker: No Operations Yet
- Greek Deployment Progress Track Marker: NA
- Dead Units: NA
Set Up: Identical to the Commonwealth Set-Up given for Scenario 7.1 above (C40.10 through the "Anywhere East of the Italians" reinforcement pool).
Special Rules or Restrictions:
-
4 Ind Div Infantry Bdes are not formed as Brigade Groups when the campaign begins and do not have the intrinsic artillery ability.
-
2 SPs per turn at C39.03, No reinforcements.
-
One 12 Barrage Point Naval Bombardment per turn on any coastal hex.
-
The following cannot move further West than Mersa Matruh: 2 NZ Inf Div.
Axis Information:
- City Ownership: Two Months (+): Buq Buq, Sidi Barrani, Bardia
- Reserve Markers Available: 2
- Hedgehogs Remaining: NA
- Minefields Available for Reuse: NA
- Dead Units: NA
Set Up: Identical to the Axis Set-Up given for Scenario 7.1 above (w/i 1 C48.34 through the "Anywhere in Libya OR in Egypt" reinforcement pool).
Special Rules or Restrictions:
-
Mussolini Line requirements in force or not in force as desired.
-
No Reinforcements.
-
2 SPs per turn arrive in Bardia.
Victory: The Commonwealth player wins if he destroys at least three Italian Infantry Divisions, captures Sidi Barrani and Buq Buq, and Sollum by the end of the game. The Axis player wins if he avoids the Commonwealth conditions.
7.4 Operation Compass Campaign Start, 8 Dec 40
General Information:
- Set Up Order: Axis, Commonwealth
- First Player: Commonwealth
- First Turn: 8 Dec 40
- Last Turn: 29 Nov 42
- Game Length: 213
- Maps in Play: All
- Use Campaign Rules?: Yes
- Port Damage: None
One-Time Random Events which have occurred: None
Timed Rules in Effect:
- Brigade Groups
- Mines not allowed (c3.2a)
- Protecting Italian Private Property (c4.4d)
- No Running Away (c4.4c)
- German Acclimation to the Desert (4.7a)
- Italians Can't use non-Primary Roads for Trace (3.7b)
- Italian Parachute Design Modifier in Effect (c4.6f)
Commonwealth Information:
- City Ownership: Two Months (+): Mersa Matruh, Alexandria (all), Cairo (all), Helwan, Port Said, Suez
- Reserve Markers Available: 3
- Hedgehogs Remaining: 20
- Minefields Remaining: 25
- Senussi Hexes remaining: All
- Training Marker Positions: 6 Aus (Training #1 Box), 2 NZ (Green, Locked)
- Greek Campaign Status Track Marker: No Operations Yet
- Greek Deployment Progress Track Marker: na
- Units in Deployment Boxes: 14 Inf Bde in Greece
- Dead Units: To be rebuilt when the listed units are destroyed or disbanded. (To "disband" simply remove the unit from play when desired.) 7-4-8 Arm Bde (7 (7 Arm))—3 Hus, 8 Hus; 5-4-8 Arm Bde (4 (7 Arm))—2 RTR, 6 RTR, 7 Hus; 5-4-3 Support Bde (7 Support (7 Arm))—1 KRRC, 2 Rifle, 4 RHA; 6-2-3 Arm Bn (7 RTR)—7 RTR (no rebuild); 3-2-8 Arm Bn (1 RTR)—1 RTR (7 Arm Div, no rebuild)
Set Up:
- C40.10: 3 SPs
- C38.02: Railhead Marker. Railline west of and including C38.02 does not exist.
- C39.03: 2 NZ Div (6-4-3 Inf Bde (4 NZ, 6 NZ)); 4 Ind Div (6-4-3 Inf Bde (7 Ind)); 2-4-3 Inf Bn (3 Cldst); 5-2-3 Arty Bn (Red) (8 Fld); 3-2-3 Arty Bn (no color) (107 RHA); 2-3-6 Egyptian Cav Bn (Mob F); 1-2-8 Egyptian Ford Co (n-FDA); 3-3-8 Egyptian Ford Bn (FDA); 1T Truck Point; Level 2 Airbase; 11 SP
- C34.14: 3 SPs
- C41.15: 4-4-3 Inf Bde (Selby)
- C38.20: 4 Ind Div (1-3-6 Cav Bn (CIH))
- C38.20: 4 Ind Div (6-4-3 Inf Bde (5 Ind))
- C38.19: 4 Ind Div (6-4-3 Inf Bde (11 Ind)); 4 Ind Div (18-2-3 Arty Bde (Divarty)); 6-5-3 Arm Bn (7 RTR); 9-2-3 Arty Bn (7 Med)
- C37.20: Strafer Gott Leader; 7 Arm Div (3-5-8 Arm Car Bn (11 Hus)); 7 Arm Div (4-5-8 Arm Bn (6 RTR)); 7 Arm Div (3-4-10 Arm Bn (2 RTR)); 7 Arm Div (2-4-10 Lt Arm Bn (7 Hus)); 5-2-3 Arty Bn (Red) (1 RHA)
- C36.20: Jock Campbell Leader; 7 Arm Div (2-4-3 Inf Bn (1 KRRC, 2 Rifle)); 5-2-3 Arty Bn (Red) (4 RHA); 2-0-3 French Marine Bn (BIM)
- w/i 1 C35.18: O'Connor Leader; 8-0 Corps HQ (W.Desrt); (2)-2-3 AT Bn (3 RHA, 106 RHA); 6-4-3 Inf Bde (16); 1-3-8 Arm Car Co (2 RAF); 4 Ind Div Organic Truck (Full); 7 Arm Div Organic Truck (Full); 7 Arm Div (2-4-10 Lt Arm Bn (1 RTR, 3 Hus)); 7 Arm Div (4-5-8 Arm Bn (8 Hus))
- C4.22: 1-2-8 Egyptian Ford Co (s-FDA); 2-3-5 Egyptian Camel Bn (Siwa)
- D35.23: 3-2-3 Egyptian MG Bde (1 MG)
- D34.19: 4-0-3 Egyptian Arty Bn (Egypt)
- D36.06: Level 2 Airbase
- w/i 3 D36.06: 6-4-3 Polish Inf Bde (Carp); 2-4-3 Polish Cav Bn (Lancer); 6 Aus Div (6-4-3 Inf Bde (16 Aus, 17 Aus, 19 Aus)); 6 Aus Div (3-3-8 Arm Recon Bn (6 Aus)); 6 Aus Div Organic Truck (Full)
- D38.06: Level 2 Airbase
- w/i 1 D39.05: (4)-3-1 Fort Bde (Alex A, Alex B); 2-1-3 Egyptian Inf Bde (2); 1x Eq Repl; Two 1T Truck Points; 6-2-0 Coastal Arty Battery (204); Level 3 Airbase
Special Rules or Restrictions:
-
The following cannot move further West than Mersa Matruh until released: 2 NZ Inf Div.
-
These cannot move outside the "Restriction Zone" Boundary until released: 6 Aus Inf Div, Carp Polish Inf Bde, Polish Lancer Cav Bn.
-
4 Ind Div Infantry Bdes are not formed as Brigade Groups when the campaign begins and do not have the intrinsic artillery ability, but the division does have a Divarty Bde.
Axis Information:
- City Ownership: Two Months (+): Buq Buq, Sidi Barrani, Benghazi, Tobruk, Bardia
- Reserve Markers Available: 2
- Hedgehogs Remaining: 13
- Minefields Available for Reuse: 0
- Fliegerkorps Active: No
- Dead Units: 3-3-6 Arm Bn (1 Med); 2-0-6 Lt Arm Bn (61 Lt)
Set Up: All are Italian
- Tripoli Box: 8-0 Corps HQ (10 It); 12-3-3 Inf Div (each less 2 steps) (Pavia, Sabrtha, Savona); 12-3-3 Inf Div (less 1 step) (Brescia); 12-2-3 Inf Div (each less 2 steps) (Bologna); 1-2-3 Inf Bn (18 Lib, 36 Lib); 3-3-3 MG Bn (Aosta, Genova); 2-3-3 MG Bn (17, 25, 60); 1-1-2 GAF Bn (35); 10-3-3 Arty Rgt (10, 26); 22-3-2 Arty Bde (5 Army); 10-2-2 Arty Rgt (340 GAF); 4-2-2 Arty Bn (332 GAF); 3-2-2 Arty Bn (291 GAF); 3x Pax Repls; 12 SPs
- A1.05: 1-1-1 MG Bn (Gialo)
- A48.18: Level 2 Airbase
- A48.20: 2-0-3 Territorial Bn (226); 2-3-12 Motorcycle Bn (ProvBrs); 14-3-2 Arty Bde (20 Corps); 3-0-0 Coastal Arty Bn (4); 3+2T SPs
- A41.18: 15-3-2 Arty Rgt (di Mnvra)
- A55.15: 2-0-3 Territorial Bn (225)
- A55.05: Level 2 Airbase
- B60.24: 8-0 Corps HQ (20 It); 3-0-3 Territorial Rgt (54); 3-3-3 Para Bn (It); 2-4-3 Para Bn (1 Lib)
- B49.09: 17-0-0 Arty Rgt (R.Mar); Level 2 Airbase
- B46.08: Level 2 Airbase
- B46.02: 12-2-3 Inf Div (Sirte); 2-2-3 MG Bn (61)
- w/i 2 B50.08: 1-3-12 Motorcycle Co (22 Brs, 61 Brs); 22-3-2 Arty Rgt (25 Corps); 2-0-3 Coastal Defense Bn (31 Lib); 3-1-2 GAF Rgt (31, 32); 8-2-2 Arty Rgt (31 GAF); 4-2-2 Arty Rgt (32 GAF); 10-3-2 Arty Rgt (10 Corps); 2x 1T Truck Points; 2x Pax Repls; 3 SPs
- B50.08: 8-0 Corps HQ (22 It); 8-0-0 Stranded Cruiser (San Giorgio); 0-0-0 Mobile Bordello (10 Armata)
- B12.01: 2-1-1 MG Bn (3 Lib Frt)
- C19.34: 1-2-2 GAF Co (E.GuG)
- C31.30: 1-2-2 GAF Co (B.Scegga)
- w/i 1 C48.34: Raggruppamento Brigata Corazzata Speciale (Babini) Marker; 2-1-6 Lt Arm Bn (21 Lt, 60 Lt); 4-3-6 Arm Bn (3 Med)
- w/i 2 C45.29: 9-1-3 Blackshirt Inf Div (23 Mar); 3-1-2 GAF Rgt (30); 26-2-2 Arty Bde (30 GAF); 9-3-2 Arty Bn (23 Corps); 2-1-2 Blackshirt MG Bn (201); 2-0-0 Coastal Arty Bn (5); 2x 1T Truck Points; 2+3T SPs
Special Rules or Restrictions: Mussolini Line requirements in force.
Victory: Campaign Victory Conditions (see 7.0 above).
7.5 The Race to the Wire—German Intervention Campaign Start, 29 March 41
General Information:
- Set Up Order: Commonwealth, Axis
- First Player: Axis
- First Turn: 29 March 41
- Last Turn: 29 Nov 42
- Game Length: 180
- Maps in Play: All
- Use Campaign Rules?: Yes
- Port Damage: 4 Hits on Benghazi
- Airfield Status: Except for the airstrip at El Aghelia, the Commonwealth player controls all air bases and air strips within the hex play area.
One-Time Random Events which have occurred: Allies Crack Luftwaffe Codes; German Signal-Intercept Genius At Work
Timed Rules in Effect:
- Brigade Groups
- Mines not allowed (c3.2a)
- German Acclimation to the Desert (4.7a)
- A19.35 as an Axis Supply Source (3.7a)
Commonwealth Information:
- City Ownership: Two Months (+): Buq Buq, Sidi Barrani, Mersa Matruh, Alexandria (all), Cairo (all), Helwan, Port Said, Suez, Tobruk, Bardia. Since 5 Feb 41: Benghazi
- Reserve Markers Available: 3
- Hedgehogs Remaining: 20
- Minefields Remaining: 25
- Senussi Hexes remaining: None
- Training Marker Positions: 6 Aus Div (Normal), 2 Arm Div (Training #2), 2 NZ Div (Green), 9 Aus Div (Green), 7 Aus Div (Green and Locked)
- Greek Campaign Status Track Marker: Prep Period Box
- Greek Deployment Progress Track Marker: Box 8
- Dead Units: To be rebuilt when the listed units are destroyed or disbanded. (To "disband" simply remove the unit from play when desired.) 7 Arm Div (5-4-3 Support Bde (7 Support))—1 KRRC, 2 Rifle, 4 RHA; 6-2-3 Arm Bn (4 RTR)—6-4-3 Arm Bn (4 RTR)
- Available for Rebuilding: 7 Arm Div (7-4-8 Arm Bde (7)); 7 Arm Div (5-4-8 Arm Bde (4)); 3-2-8 Arm Bn (1 RTR)
Set Up:
- Sudan Box: 4 Ind Div (6-4-3 Inf Bde (5 Ind, 7 Ind, 11 Ind)); 4 Ind Div (2-4-6 Arm Car Bn (CIH)); 4 Ind Div (Organic Truck (Full))
- Greece Box: Variable Slot: 6-4-3 Inf Bde (14)
- Greek Campaign Prep Deployments: 2 Arm Div (7-3-8 Arm Bde (1)); 6 Aus Div (6-4-3 Inf Bde (16 Aus)); 2 NZ Div (6-4-3 Inf Bde (4 NZ, 5 NZ, 6 NZ)); 2 NZ Div (2-5-3 Inf Bn (28 Maori)); 2 NZ Div (2-5-8 Arm Recon Bn (2 NZ)); 2 NZ Div (Organic Truck (Full))
- w/i 4 A20.25: 2 Arm Div (2-4-6 Arm Car (KDG)); 2 Arm Div (5-3-3 Support Bde (2 Support)); 5-2-3 Arty Bn (Red) (104 RHA); 3 SPs
- w/i 5 A19.21: 2-3-10 Lt Arm Bn (3 Hus); 3-2-8 Arm Bn (5 RTR); 5-2-3 Arty Bn (Red) (1 RHA); 1 SP
- A33.17: 2-3-5 Arm Bn (Cap It); 2 SPs
- A40.09: 2-0-3 French Marine Bn (BIM); 1-2-3 Senussi Bn (Msus); 2 SPs
- A48.18: Level 2 Airbase
- A49.16: 9 Aus Div (6-5-3 Inf Bde (20 Aus)); 5-2-3 Arty Bn (Red) (51 Fld)
- A55.11: 9 Aus Div (6-5-3 Inf Bde (26 Aus)); 1-5-8 Commando Bn (LRDG); 2 SPs
- A55.05: Level 2 Airbase
- B50.28: 1-2-3 Senussi Bn (Mechili); 3 SPs
- B49.09: Level 2 Airbase
- B46.08: 6-4-3 Ind Inf Bde (3 Ind); 2-4-3 Ind Cav Bn (18 Ind); Level 2 Airbase
- w/i 2 B50.08: 4-0 Command HQ (Tobruk); (1)-1-3 Arab Refugee Bn (1 Lib, 2 Lib, 4 Lib); 1-2-3 Senussi Bn (Tobruk); 6-2-0 Coastal Arty Battery (X, 202, 206); 9 Aus Div (6-4-3 Inf Bde (24 Aus)); 9 Aus Div (Organic Truck (Full)); 2-3-5 Arm Bn (Cap It); 8-3-0 Arty Bn (Bush); 2x 1T Truck Points; 13 SPs
- B12.01: 1-2-3 Senussi Bn (Giarabub)
- C4.22: 1-2-8 Egyptian Ford Bn (s-FDA); 2-3-5 Egyptian Camel Bn (Siwa)
- C38.02: Railhead Marker. Railline west of and including C38.02 does not exist.
Special Rules or Restrictions: The following cannot move outside the "Restriction Zone" Boundary until released: Carp Polish Inf Bde, Polish Lancer Cav Bn.
Axis Information:
- City Ownership: None
- Reserve Markers Available: 5
- Hedgehogs Remaining: 13
- Flieger Korps Active: Yes
- Minefields Available for Reuse: 0
- Dead Units: Italian: 8-0 Corps HQ (LibOp, 21 It, 22 It, 23 It); 9-1-3 Blackshirt Inf Div (3 Jan, 23 Mar, 28 Oct); 12-2-3 Inf Div (Cirene, Marm, Sirte); 12-1-3 Inf Div (Ctnzro); 8-1-3 Inf Div (1 Lib); 8-2-3 Inf Div (2 Lib); 4-3-3 Inf Rgt (1 Lib); 3-2-3 Inf Rgt (5 Lib); 2-3-3 Inf Bn (34 Lib); 5-3-3 Inf Rgt (10 Brs); 2-3-3 Blackshirt Inf Bn (Vd.Lib); 3-1-2 GAF Rgt (30, 31, 32); 1-2-2 GAF Co (B.Scegga, E.GuG); 3-0-3 Territorial Rgt (54); 2-0-3 Territorial Bn (225, 226); 2-0-3 Coastal Defense Bn (31 Lib); 2-0-6 Lt Arm Bn (61 Lt, 62 Lt); 2-1-6 Lt Arm Bn (20 Lt, 60 Lt, 63 Lt); 4-3-6 Arm Bn (3 Med); 4-2-6 Arm Bn (5 Med, 6 Med, 21 Med); 3-3-6 Arm Bn (1 Med, 2 Med); 3-3-3 MG Bn (VEC); 2-1-1 MG Bn (3 Lib Frt); 1-1-1 MG Bn (Gialo); 2-1-2 Blackshirt MG Bn (201, 202, 204); 2-3-3 MG Bn (17, 25, 55, 64); 2-2-3 MG Bn (27, 61, 62, 63); 2-3-12 Motorcycle Bn (ProvBrs); 1-3-12 Motorcycle Co (22 Brs, 61 Brs, 201 Brs, 202 Brs); 10-3-3 Arty Rgt (10, 12, 26); 10-3-2 Arty Rgt (10 Corps, 22 Corps); 26-2-2 Arty Bde (30 GAF); 22-3-2 Arty Rgt (25 Corps); 15-3-2 Arty Rgt (di Mnvra); 14-3-2 Arty Bde (20 Corps); 13-3-3 Arty Bde (Mtrizzato); 11-3-2 Arty Rgt (21 Corps); 9-3-2 Arty Bn (23 Corps); 8-2-2 Arty Rgt (31 GAF); 7-3-2 Arty Rgt (Maletti); 4-2-2 Arty Rgt (32 GAF); 17-0-0 Coastal Arty Rgt (R. Mar); 3-0-0 Coastal Arty Bn (4); 2-0-0 Coastal Arty Bn (5); 2x SM.79; 2x CR.42; 1x Ba.65. German: 3-5-8 Pz Co (KStA).
Set Up:
- Sicily Box: 1x Ju.88; 1x Ju.52
- Tripoli Box: Italians: 8-0 Corps HQ (10 It, 20 It); 12-3-3 Inf Div (Pavia); 12-3-3 Inf Div Less 2 steps (Sabratha); 12-3-3 Inf Div Less 1 step (Savona); 12-2-3 Inf Div Less 2 steps (Bologna); Trento Inf Div (5-3-3 Inf Rgt (61, 62)); 5-4-3 Inf Rgt (7 Brs); 2-3-3 MG Bn (60, 551); 3-3-3 MG Bn (Aosta, Genova); 1-2-3 Inf Bn (18 Lib); 1-1-2 GAF Bn (35); 3-4-3 Assault Engineer Bn (32); (6)-4-5 AT Bn (1 Mil); (4)-4-5 AT Bn (2 Mil); 2-1-6 Lt Arm Bn (4 Lt); 2-0-6 Lt Arm Bn (5 Lt); 22-3-2 Arty Bde (5 Army); 11-3-2 Arty Rgt (16 Corps, 24 Corps); 10-2-2 Arty Rgt (340 GAF); 8-3-3 Arty Rgt (3 Cel); 7-3-3 Arty Rgt (2 Cel); 4-2-2 Arty Bn (332 GAF); 3-2-2 Arty Bn (291 GAF); 1x CR.42; 1x SM.79; 1x G.50; 1x Ca.309; 1x SM.82. Germans: (3)-3-3 Korück Bn (556); (7)-5-3 Luftwaffe Flak Bn (1-18); 4-3-2 Coastal Arty Battery (4-772); 1x Bf.110; 1x Ju.87b. Axis General: 28 SPs; 5x 1T Truck Points
- Tripoli to Map Track, Box 3: 1-2-3 It Inf Bn (36 Lib)
- Tripoli to Map Track, Box 2: 5 Le Div (5-5-8 Pz Bn (1-5, 2-5)); 5 Le Div (Organic Truck (Full)); Ariete Arm Div (2-3-6 Lt Arm Bn (1 Lt, 2 Lt, 3 Lt)); Ariete Arm Div (5-4-7 Arm Bn (7 Med)); Ariete Arm Div (5-4-3 Inf Rgt (8 Brs)); Ariete Arm Div (10-3-3 Arty Rgt (132)); Ariete Arm Div (Organic Truck (Full))
- A19.35: KG Marcks Marker; 5 Le Div (5-5-3 MG Bn (2)); 5 Le Div (3-5-3 Pioneer Bn (200)); 5 Le Div (4-3-3 Arty Bn (1-75))
- A18.34: 14-0 Corps HQ (DAK); 3-5-8 PJ Bn (605); 2 SPs
- A18.33: 12-3-3 Inf Div (Brescia); 7-3-3 Arty Rgt (1 Cel)
- w/i 1 A18.30: Rommel Leader; KG 3 Aufk Marker; 3-4-3 It MG Bn (S.Maria); 5 Le Div (4-5-8 Pz Recon Bn (3)); 5 Le Div (5-5-3 MG Bn (8)); 5 Le Div ((3)-4-3 PJ Bn (39 PJ)); (7)-5-3 Luftwaffe Flak Bn (1-33)
Victory: Campaign Victory Conditions (see 7.0 above).
7.6 Operation Brevity, 15 May 41
General Information:
- Set Up Order: Axis, Commonwealth
- First Player: Commonwealth
- First Turn: 15 May 41
- Last Turn: 26 May 41
- Game Length: 4 turns
- Maps in Play: Map C only
- Use Campaign Rules?: No
- Port Damage: None (7.6)
- Airfield Ownership: The Axis controls all airbases and air strips in Libya. It also controls Sollum. All other on-map airbases and air strips are controlled by the Commonwealth.
One-Time Random Events which have occurred: Allies Crack Luftwaffe Codes; German Signal-Intercept Genius At Work
Timed Rules in Effect:
- Brigade Groups
- German Acclimation to the Desert (4.7a)
Commonwealth Information:
- City Ownership: NA
- Reserve Markers Available: 3
- Hedgehogs Remaining: NA
- Minefields Remaining: NA
- Senussi Hexes remaining: NA
- Training Marker Positions: 7 Aus Division is still Green.
- Greek Campaign Status Track Marker: NA
- Greek Deployment Progress Track Marker: NA
- Dead Units: NA (no rebuilds allowed)
Set Up:
- C40.26: 7 Arm Div (2-4-3 Inf Bn (2 Rifle)); 5-2-3 Arty Bn (Red) (8 Fld)
- C39.27: 6-2-3 Arm Bn (4 RTR); 6-4-3 Inf Bde (22 Gd); 2 SPs
- w/i 1 C37.28: Strafer Gott Leader; Jock Campbell Leader; 7 Arm Div (2 RTR Arm Bn, 2-4-3 Inf Bn (1 KRRC), 3-5-8 Arm Car Bn (11 Hus), Organic Truck (Full)); 5-2-3 Arty Bn (Red) (4 RHA); 2 SPs
- C4.22: 1-2-8 Egyptian Ford Bn (s-FDA); 2-3-5 Egyptian Camel Bn (Siwa); 1-5-8 Commando Bn (LRDG)
- C38.02: Railhead Marker. Railline west of and including C38.02 does not exist.
- C39.03: 2-3-6 Egyptian Cav Bn (Mob F); 1-2-8 Egyptian Ford Co (n-FDA); 3-3-8 Egyptian Ford Bn (FDA); 7 Aus Inf Div (21 Aus, 25 Aus Inf Bde, Organic Truck (Full)); 0-2-1 RR Co (10 NZ); Level 2 Airbase; 4T Truck Points; 18 SPs
- At any Allied controlled Airbase or Airstrip: 2x Hurri I; 2x Blen IV; 1x Gladiator
Special Rules or Restrictions:
-
The Tiger Convoy has arrived. 1x Hurri I (from the Convoy) comes in as a reinforcement on the 15 May 41 turn.
-
Reinforcements: a) 1 SP per turn in Matruh (by rail) also 1 SP of coastal shipping exists per turn which can bring in an additional 1 SP per turn depending on port ownership. b) No units arrive as reinforcements.
Axis Information:
- City Ownership: NA
- Reserve Markers Available: 3
- Hedgehogs Remaining: NA
- Flieger Korps Active: NA
- Minefields Available for Reuse: NA
- Dead Units: No rebuilds allowed.
Set Up:
- C44.31: 15 Pz Div (4-5-8 Arm Recon Bn (33))
- C45.29: 5.Le Div (5-5-8 Pz Bn (2-5)); 2-3-3 MG Bn (551); Trento Div (62 Inf Rgt); 3 SPs
- C42.28: 15 Pz Div ((3)-4-3 PJ Bn (33 PJ))
- C42.29: Ariete Arm Div (8 Brs Inf Rgt)
- C42.30: 15 Pz Div (4-5-3 Pio Bn (33)); (7)-5-3 Luftwaffe Flak Bn (1-18)
- With any other Axis unit or in C45.35 and/or C47.35: DAK HQ; 5.Le Div ((3)-4-3 PJ Bn (39 PJ))
- With any other Axis unit: KG Markers (Linau, 3 Aufk)
- At Any Axis controlled Airbase or Air Strip: Italian: 1x CR.42; 2x SM.79. German: 1x Bf.109e; 1x Ju.87b; 1x Bf.110
Special Rules or Restrictions:
-
Reinforcements: a) 2T per turn in Bardia (representing coastal shipping). 1 SP per turn in the DAK HQ hex provided the HQ can trace via road a path to the west map edge without passing through any Allied unit. b) 15 May 41 at C45.35 or C47.35: 15 Pz Div (5-5-8 Pz Bn (1-8)).
-
Off-Map Airbases. The Axis player can place all or some of his air units at a nominal base that is 20 hexes northwest of C45.35 (center of mass of the airstrips west of Tobruk). These airstrips have a free refit capability of 4 air units per turn. It costs the air units 20 of their range to be placed into C45.35 or any west map edge hex at or within 5 hexes of that hex.
Victory: The player controlling (last to move through) Ft. Capuzzo, Sollum, and both hexes adjoining Halfaya Pass wins. If neither player controls all these hexes, the game is a draw.
7.7 Operation Brevity Campaign Start
General Information:
- Set Up Order: Axis, Commonwealth
- First Player: Commonwealth
- First Turn: 15 May 41
- Last Turn: 29 Nov 42
- Game Length: 166
- Maps in Play: All
- Use Campaign Rules?: Yes
- Port Damage: 2 Hits on Benghazi
- Airfield Ownership: The Axis controls all airbases and air strips in Libya except Giarabub. It also controls Sollum. All other on-map airbases and air strips are controlled by the Commonwealth.
One-Time Random Events which have occurred: Allies Crack Luftwaffe Codes; German Signal-Intercept Genius At Work
Timed Rules in Effect:
- Brigade Groups
- Mines not allowed (c3.2a)
- German Acclimation to the Desert (4.7a)
- A19.35 as an Axis Supply Source (3.7a)
Commonwealth Information:
- City Ownership: Two Months (+): Buq Buq, Sidi Barrani, Mersa Matruh, Alexandria (all), Cairo (all), Helwan, Port Said, Suez, Tobruk
- Reserve Markers Available: 3
- Hedgehogs Remaining: 20
- Minefields Remaining: 25
- Senussi Hexes remaining: None remain to be activated.
- Training Marker Positions: 6 Aus Div (Normal), 2 Arm Div (Normal), 9 Aus Div (Training #2), 2 NZ Div (Training #2), 7 Aus Div (Training #1), 1 SA Div (Green and Locked)
- Greek Campaign Status Track Marker: Campaign Execution Box
- Greek Deployment Progress Track Marker: No longer in use.
- Dead Units: To be rebuilt when the listed units are destroyed or disbanded. (To "disband" simply remove the unit from play when desired.) 7 Arm Div (5-4-3 Support Bde (7 Support))—1 KRRC, 2 Rifle
- Available for Rebuilding: 7 Arm Div (7-4-8 Arm Bde (7)); 7 Arm Div (5-4-8 Arm Bde (4)); 6-4-3 Ind Inf Bde (3 Ind); 2-3-10 Lt Arm Bn (3 Hus); 3-4-8 Arm Car Bn (KDG); 5-2-3 Arty Bn (Yellow) (2 RHA); O'Connor Leader: Captured
Set Up:
- Near East Box: 4 Ind Div (5 Ind Inf Bde)
- Greece Box: Variable Slot: 6-4-3 Inf Bde (14)
- Greek Campaign Prep Deployments: 6 Aus Div (16 Aus, 17 Aus, 19 Aus, Organic Truck (Full)); 2 NZ Div (4 NZ, 5 NZ Inf Bde); 2 NZ Div (28 Maori Inf Bn); 2 NZ Div (2-5-8 Arm Recon Bn (2 NZ)); 2 NZ Div (Organic Truck (Full))
- B49.09: Level 2 Airbase
- w/i 2 B50.08: 4-0 Command HQ (Tobruk); 9 Aus Inf Div (20 Aus, 24 Aus, 26 Aus Inf Bde, Organic Truck (Full)); 7 Aus Inf Div (18 Aus Inf Bde); 2-4-3 Ind Cav Bn (18 Ind); 1-2-3 Senussi Bn (Tobruk); (1)-1-3 Arab Refugee Bn (1 Lib, 2 Lib, 4 Lib); 3-2-8 Arm Bn (1 RTR); 6-2-3 Arm Bn (7 RTR); 2-3-5 Arm Bn (Cap It); 6-2-0 Coastal Arty Battery (X, 202, 206); 5-2-3 Arty Bn (Red) (1 RHA, 104 RHA, 107 RHA, 51 Fld); 8-3-0 Aus Arty Bn (Bush); 1x Pax Repl; 18 SPs
- C40.26: 7 Arm Div (2-4-3 Inf Bn (2 Rifle)); 5-2-3 Arty Bn (Red) (8 Fld)
- C39.27: 6-2-3 Arm Bn (4 RTR); 6-4-3 Inf Bde (22 Gd); 2 SPs
- w/i 1 C37.28: Strafer Gott Leader; Jock Campbell Leader; 7 Arm Div (2 RTR Arm Bn, 2-4-3 Inf Bn (1 KRRC), 3-5-8 Arm Car Bn (11 Hus), Organic Truck (Full)); 5-2-3 Arty Bn (Red) (4 RHA); 2 SPs
- B12.01: 1-2-3 Senussi Bn (Giarabub)
- C4.22: 1-2-8 Egyptian Ford Bn (s-FDA); 2-3-5 Egyptian Camel Bn (Siwa); 1-5-8 Commando Bn (LRDG)
- C38.02: Railhead Marker. Railline west of and including C38.02 does not exist.
- C39.03: 2-3-6 Egyptian Cav Bn (Mob F); 1-2-8 Egyptian Ford Co (n-FDA); 3-3-8 Egyptian Ford Bn (FDA); 7 Aus Inf Div (21 Aus, 25 Aus Inf Bde, Organic Truck (Full)); 0-2-1 RR Co (10 NZ); Level 2 Airbase; 4T Truck Points; 18 SPs
- D37.32: 8-0 Corps HQ (W.Desrt); 4 Ind Inf Div (7 Ind, 11 Ind Inf Bde, 2-4-6 Arm Car Bn (CIH), Organic Truck (Full)); 9-2-3 Arty Bn (68 Med)
- D35.23: 3-2-3 Egyptian MG Bde (1 MG)
- D34.19: 4-0-3 Egyptian Arty Bn (Egypt)
- E10.26: 2-3-5 Egyptian Camel Bn (Hauwasa)
Special Rules or Restrictions:
-
The Tiger Convoy has arrived. 1x Hurri I (from the Convoy) comes in as a reinforcement on the 15 May 41 turn.
-
The following cannot move outside the "Restriction Zone" Boundary until released: Carp Polish Inf Bde, Polish Lancer Cav Bn.
Axis Information:
- City Ownership: Two Months (+): Benghazi, (Bardia was captured on 12 April 41)
- Reserve Markers Available: 5
- Hedgehogs Remaining: 13
- Flieger Korps Active: Yes
- Minefields Available for Reuse: 0
- Dead Units: Italian: 8-0 Corps HQ (LibOp, 21 It, 22 It, 23 It); 9-1-3 Blackshirt Inf Div (3 Jan, 23 Mar, 28 Oct); 12-2-3 Inf Div (Cirene, Marm, Sirte); 12-1-3 Inf Div (Ctnzro); 8-1-3 Inf Div (1 Lib); 8-2-3 Inf Div (2 Lib); 4-3-3 Inf Rgt (1 Lib); 3-2-3 Inf Rgt (5 Lib); 2-3-3 Inf Bn (34 Lib); 5-3-3 Inf Rgt (10 Brs); 2-3-3 Blackshirt Inf Bn (Vd.Lib); 3-1-2 GAF Rgt (30, 31, 32); 1-2-2 GAF Co (B.Scegga, E.GuG); 3-0-3 Territorial Rgt (54); 2-0-3 Territorial Bn (225, 226); 2-0-3 Coastal Defense Bn (31 Lib); 2-0-6 Lt Arm Bn (61 Lt, 62 Lt); 2-1-6 Lt Arm Bn (20 Lt, 60 Lt, 63 Lt); 5-4-7 Arm Bn (8 Med (Ariete)); 4-3-6 Arm Bn (3 Med); 4-2-6 Arm Bn (5 Med, 6 Med, 21 Med); 3-3-6 Arm Bn (1 Med, 2 Med); 3-3-3 MG Bn (VEC); 2-1-1 MG Bn (3 Lib Frt); 1-1-1 MG Bn (Gialo); 2-1-2 Blackshirt MG Bn (201, 202, 204); 2-3-3 MG Bn (17, 25, 55, 64); 2-2-3 MG Bn (27, 61, 62, 63); 2-3-12 Motorcycle Bn (ProvBrs); 1-3-12 Motorcycle Co (22 Brs, 61 Brs, 201 Brs, 202 Brs); 10-3-3 Arty Rgt (10, 12, 26); 10-3-2 Arty Rgt (10 Corps, 22 Corps); 26-2-2 Arty Bde (30 GAF); 22-3-2 Arty Rgt (25 Corps); 15-3-2 Arty Rgt (di Mnvra); 14-3-2 Arty Bde (20 Corps); 13-3-3 Arty Bde (Mtrizzato); 11-3-2 Arty Rgt (21 Corps); 9-3-2 Arty Bn (23 Corps); 8-2-2 Arty Rgt (31 GAF); 7-3-2 Arty Rgt (Maletti); 4-2-2 Arty Rgt (32 GAF); 17-0-0 Coastal Arty Rgt (R. Mar); 3-0-0 Coastal Arty Bn (4); 2-0-0 Coastal Arty Bn (5); 2x SM.79; 2x CR.42; 1x Ba.65. German: 3-5-8 Pz Co (KStA); 15 Pz Div (5-5-5 Pz Bn (2-8)); 15 Pz Div (3-5-3 Motorcycle Bn (15 Krd)); 5.Le Div (5-5-5 Pz Bn (1-5)); 5.Le Div (5-5-3 MG Bn (8))
Set Up:
- Sicily Box: 1x Ju.88; 1x Ju.52; 1x It SM.82
- Old Shipping Box: Afrika Div (155 Inf Rgt); 3-3-3 Arty Bn (408)
- Tripoli Box: 18 SPs; 5T Truck Points; 1x It Pax Repl; 1x It Eq Repl; 8-0 Corps HQ (20 It); 12-3-3 Inf Div (Pavia, Savona (less one step), Sabrtha (less two steps)); 3-3-3 MG Bn (Aosta, Genova); 2-3-3 MG Bn (60); (4)-4-5 AT Bn (2 Mil); 1-2-3 Inf Bn (18 Lib); 1-1-2 GAF Bn (35); 8-3-3 Arty Rgt (3 Cel); 22-3-2 Arty Bde (5 Army); 10-2-2 Arty Rgt (340 GAF); 4-2-2 Arty Bn (332 GAF); 3-2-2 Arty Bn (291 GAF)
- A41.21: 1-2-3 Inf Bn (36 Lib)
- A48.20: 8-0 Corps HQ (10 It); (6)-4-5 AT Bn (1 Mil); 4T Truck Points; 4 SPs
- A48.18: Level 2 Airbase
- A55.11: 12-2-3 Inf Div (Bologna); 2-1-6 Lt Arm Bn (4 Lt)
- A55.05: Level 2 Airbase
- w/i 1 B60.24: (3)-3-3 Korück Bn (556); 5.Le Div (Organic Truck (Full)); Ariete Arm Div (5-4-7 Arm Bn (7 Med)); 2-0-6 Lt Arm Bn (5 Lt); 5 SPs
- B50.15: Rommel Leader; 14-0 Corps HQ (DAK); 3-5-8 PJ Bn (605); 15 Pz Div (Organic Truck (Full)); 2 SPs
- B50.12: 12-3-3 Inf Div (Brescia); 3-4-3 Assault Engineer Bn (32)
- B50.13: 7-3-3 Arty Rgt (1 Cel); 11-3-2 Arty Rgt (16 Corps)
- B49.12: 15 Pz Div (6-5-3 Inf Rgt (104, 115))
- B48.11: 5.Le Div (5-5-3 MG Bn (2)); (7)-5-3 Luftwaffe Flak Bn (1-33)
- B48.12: 15 Pz Div (17-3-3 Arty Rgt (33)); 11-3-2 Arty Rgt (24 Corps)
- B47.12: 5.Le Div (3-5-3 Pio Bn (200)); 3-3-3 Flak Bn (606); 7-3-3 Arty Rgt (2 Cel)
- B46.12: 5.Le Div (4-3-3 Arty Bn (1-75))
- B46.11: Ariete Arm Div (2-3-6 Lt Arm Bn (3 Lt))
- B46.10: Ariete Arm Div (2-3-6 Lt Arm Bn (2 Lt), 10-3-3 Arty Rgt (132), Organic Truck (Full))
Victory: Use Campaign Victory conditions (see 7.0 above).
7.8 Operation Battleaxe, 15 June 1941—Two Map, Short Scenario
General Information:
- Set Up Order: Axis, Commonwealth
- First Player: Commonwealth
- First Turn: 15 June 41
- Last Turn: 19 June 41
- Game Length: 2
- Maps in Play: Maps B and C only
- Use Campaign Rules?: No
- Port Damage: None
- Airfield Ownership: The Axis controls all airbases and air strips in Libya except Giarabub. It also controls Sollum. All other on-map airbases and air strips are controlled by the Commonwealth.
One-Time Random Events which have occurred: Allies Crack Luftwaffe Codes; German Signal-Intercept Genius At Work
Timed Rules in Effect:
- Brigade Groups
- German Acclimation to the Desert (4.7a)
Commonwealth Information:
- City Ownership: NA
- Reserve Markers Available: 4
- Hedgehogs Remaining: NA
- Minefields Remaining: NA
- Senussi Hexes remaining: NA
- Training Marker Positions: 7 Aus and 1 SA Divisions are still Green.
- Greek Campaign Status Track Marker: NA
- Greek Deployment Progress Track Marker: NA
- Dead Units: NA (no rebuilds allowed)
Set Up:
- B49.09: Level 2 Airbase
- w/i 2 B50.08: 4-0 Command HQ (Tobruk); 9 Aus Inf Div (20 Aus, 24 Aus, 26 Aus Inf Bde, Organic Truck (Full)); 7 Aus Inf Div (18 Aus Inf Bde); 2-4-3 Ind Cav Bn (18 Ind); 3-2-8 Arm Bn (1 RTR); 6-2-3 Arm Bn (7 RTR); 6-2-0 Coastal Arty Battery (X, 202, 206); 5-2-3 Arty Bn (Red) (1 RHA, 104 RHA, 107 RHA, 51 Fld); 8-3-0 Aus Arty Bn (Bush); 20 SPs
- C37.29: Jock Campbell Leader; 7 Arm Div (7 Support Bde); 5-2-3 Arty Bn (Red) (4 RHA)
- C38.28: 2-4-8 Arm Car Bn (Royals); 7 Arm Div (11 Hus Arm Car Bn, 7-4-8 Arm Bde (7))
- C39.27: Strafer Gott Leader; 7 Arm Div (5-4-8 Arm Bde (4)); 6-2-3 Arm Bn (4 RTR); 9-2-3 Arty Bn (7 Med); 5-2-3 Arty Bn (Red) (8 Fld); 2 SPs
- C39.25: 4 Ind Div (11 Ind Inf Bde)
- C40.24: 4 Ind Div (CIH Arm Car Bn)
- C37.23: 6-4-3 Inf Bde (22 Gd); 4 Ind Div (Organic Truck (Full)); 7 Arm Div (Organic Truck (Full)); 5 SPs
- C43.19: 8-0 Corps HQ (W.Desrt); 4 SPs
- B12.01: 1-2-3 Senussi Bn (Giarabub)
- C4.22: 1-2-8 Egyptian Ford Bn (s-FDA); 2-3-5 Egyptian Camel Bn (Siwa); 1-5-8 Commando Bn (LRDG)
- C38.02: Railhead Marker. Railline west of and including C38.02 does not exist.
- C39.03: 2-4-8 Arm Car Bn (4 SA); 2-4-3 Inf Bn (11 Czech); 6-4-3 Inf Bde (23); 1 SA Div (2 SA, 5 SA Inf Bde); Level 2 Airbase; 6T Truck Points; 16 SPs
- At any Allied controlled Airbase or Airstrip: 3x Hurri I; 2x Blen IV; 1x Beaufgtr
Special Rules or Restrictions:
-
Reinforcements: None.
-
Incoming Supply: 1 SP per turn at Mersa Matruh, 1 SP per turn at Tobruk.
Axis Information:
- City Ownership: NA
- Reserve Markers Available: 5
- Hedgehogs Remaining: NA
- Flieger Korps Active: NA
- Minefields Available for Reuse: NA
- Dead Units: No Rebuilds Allowed.
Set Up:
- w/i 1 B60.24: (3)-3-3 Korück Bn (556); 5.Le Div (Organic Truck (Full)); Ariete Arm Div (5-4-7 Arm Bn (7 Med)); 2-0-6 Lt Arm Bn (5 Lt); 6 SPs
- B50.15: Rommel Leader; 14-0 Corps HQ (DAK); 3-5-8 PJ Bn (605); 15 Pz Div (Organic Truck (Full)); 4 SPs
- B49.15: Ariete Arm Div (2-3-6 Lt Arm Bn (1 Lt, 2 Lt, 3 Lt), 10-3-3 Arty Rgt (132))
- B47.12: 5.Le Div (5-5-8 Pz Bn (2-5))
- B50.11: 12-3-3 Inf Div (Brescia); 7-3-3 Arty Rgt (1 Cel)
- B49.11: 3-4-3 Assault Engineer Bn (32)
- B49.12: 11-3-2 Arty Rgt (16 Corps)
- B48.10: 5.Le Div (5-5-3 MG Bn (2)); 3-3-3 Flak Bn (606)
- B47.10: 5.Le Div (3-5-3 Pio Bn (200)); 5.Le Div ((3)-4-3 PJ Bn (39 PJ))
- B47.09: 12-3-3 Inf Div (Pavia); 3-3-3 MG Bn (Aosta)
- B46.08: 8-3-3 Arty Rgt (3 Cel); 11-3-2 Arty Rgt (24 Corps); Level 2 Airbase
- B46.07: Ariete Arm Div (5-4-7 Arm Bn (8 Med), 8 Brs Inf Rgt, Organic Truck (Full))
- B47.08: 3-4-3 MG Bn (S.Maria); (3)-3-3 AT Bn (551)
- B47.07: 5-4-3 Inf Rgt (7 Brs); Trento Div (61 Inf Rgt)
- B48.06: Trento Div (46 Arty Rgt); 2-3-3 MG Bn (551)
- B45.02: 5.Le Div (4-5-8 Arm Rec Bn (3), 5-5-8 Pz Bn (1-5), 4-3-3 Arty Bn (1-75))
- C45.29: Trento Div (62 Inf Rgt)
- C39.31: 15 Pz Div (4-5-8 Arm Rec Bn (33)); 7-3-3 Arty Rgt (2 Cel)
- C40.28: Level 1 Hedgehog; KG Marker (Bach); 15 Pz Div (6-5-3 Inf Rgt (104))
- C41.30: Level 1 Hedgehog; 15 Pz Div (6-5-3 Inf Rgt (115)); (7)-5-3 Luftwaffe Flak Bn (1-18)
- C42.28: 15 Pz Div ((3)-4-3 PJ Bn (33 PJ))
Special Rules or Restrictions:
- Reinforcements: a) 2 SP per turn in Derna (representing coastal shipping as well as overland SP movement). b) No unit reinforcements.
Victory: The player controlling (last to move through) Ft. Capuzzo, Sollum, and both hexes adjoining Halfaya Pass wins. If neither player controls all these hexes, the game is a draw.
7.9 Operation Battleaxe Campaign Start
General Information:
- Set Up Order: Axis, Commonwealth
- First Player: Commonwealth
- First Turn: 15 June 41
- Last Turn: 29 Nov 42
- Game Length: 157
- Maps in Play: All
- Use Campaign Rules?: Yes
- Port Damage: 1 Hit on Benghazi
- Airfield Ownership: The Axis controls all airbases and air strips in Libya except Giarabub. It also controls Sollum. All other on-map airbases and air strips are controlled by the Commonwealth.
One-Time Random Events which have occurred: Allies Crack Luftwaffe Codes; German Signal-Intercept Genius At Work
Timed Rules in Effect:
- Brigade Groups
- Mines not allowed (c3.2a)
- German Acclimation to the Desert (4.7a)
- A19.35 as an Axis Supply Source (3.7a)
Commonwealth Information:
- City Ownership: Two Months (+): Buq Buq, Sidi Barrani, Mersa Matruh, Alexandria (all), Cairo (all), Helwan, Port Said, Suez, Tobruk
- Reserve Markers Available: 4
- Hedgehogs Remaining: 20
- Minefields Remaining: 25
- Senussi Hexes remaining: None remain to be activated.
- Training Marker Positions: 6 Aus Div (Normal), 2 Arm Div (Normal), 9 Aus Div (Normal), 2 NZ Div (Normal), 7 Aus Div (Training #2), 1 SA Div (Green)
- Greek Campaign Status Track Marker: Campaign Termination Box
- Greek Deployment Progress Track Marker: No longer in use.
- Dead Units: 6-4-3 Ind Inf Bde (3 Ind); 2-3-10 Lt Arm Bn (3 Hus); 3-4-8 Arm Car Bn (KDG); 2 NZ Div (2-5-8 Arm Rec Bn (2 NZ)); 2 NZ Div (6-4-3 Inf Bde (4 NZ, 5 NZ)); 5-2-3 Arty Bn (Yellow) (2 RHA); O'Connor Leader: Captured
Set Up:
- Near East Box: 4 Ind Div (5 Ind Inf Bde); 7 Aus Div (21 Aus, 25 Aus Inf Bde, Organic Truck (Full)); 9 Aus Div (9 Aus Recon Bn)
- B49.09: Level 2 Airbase
- w/i 2 B50.08: 4-0 Command HQ (Tobruk); 9 Aus Inf Div (20 Aus, 24 Aus, 26 Aus Inf Bde, Organic Truck (Full)); 7 Aus Inf Div (18 Aus Inf Bde); 2-4-3 Ind Cav Bn (18 Ind); 3-2-8 Arm Bn (1 RTR); 6-2-3 Arm Bn (7 RTR); 6-2-0 Coastal Arty Battery (X, 202, 206); 5-2-3 Arty Bn (Red) (1 RHA, 104 RHA, 107 RHA, 51 Fld); 8-3-0 Aus Arty Bn (Bush); 1x Pax Repl; 20 SPs
- C37.29: Jock Campbell Leader; 7 Arm Div (7 Support Bde); 5-2-3 Arty Bn (Red) (4 RHA)
- C38.28: 2-4-8 Arm Car Bn (Royals); 7 Arm Div (11 Hus Arm Car Bn, 7-4-8 Arm Bde (7))
- C39.27: Strafer Gott Leader; 7 Arm Div (5-4-8 Arm Bde (4)); 6-2-3 Arm Bn (4 RTR); 9-2-3 Arty Bn (7 Med); 5-2-3 Arty Bn (Red) (8 Fld); 2 SPs
- C39.25: 4 Ind Div (11 Ind Inf Bde)
- C40.24: 4 Ind Div (CIH Arm Car Bn)
- C37.23: 6-4-3 Inf Bde (22 Gd); 4 Ind Div (Organic Truck (Full)); 7 Arm Div (Organic Truck (Full)); 5 SPs
- C43.19: 8-0 Corps HQ (W.Desrt); 4 SPs
- B12.01: 1-2-3 Senussi Bn (Giarabub)
- C4.22: 1-2-8 Egyptian Ford Bn (s-FDA); 2-3-5 Egyptian Camel Bn (Siwa); 1-5-8 Commando Bn (LRDG)
- C38.02: Railhead Marker. Railline west of and including C38.02 does not exist.
- C39.03: 2-4-8 Arm Car Bn (4 SA); 2-4-3 Inf Bn (11 Czech); 6-4-3 Inf Bde (23); 1 SA Div (2 SA, 5 SA Inf Bde); 2-3-6 Egyptian Cav Bn (Mob F); 1-2-8 Egyptian Ford Co (n-FDA); 3-3-8 Egyptian Ford Bn (FDA); 0-2-1 RR Co (10 NZ); Level 2 Airbase; 6T Truck Points; 16 SPs
- D37.32: 4 Ind Inf Div (7 Ind Inf Bde); 9-2-3 Arty Bn (64 Med, 68 Med)
- D35.23: 3-2-3 Egyptian MG Bde (1 MG)
- D34.19: 4-0-3 Egyptian Arty Bn (Egypt)
- E10.26: 2-3-5 Egyptian Camel Bn (Hauwasa)
Special Rules or Restrictions: The following cannot move outside the "Restriction Zone" Boundary until released: Carp Polish Inf Bde, Polish Lancer Cav Bn.
Axis Information:
- City Ownership: Two Months (+): Benghazi, Bardia
- Reserve Markers Available: 5
- Hedgehogs Remaining: 10
- Flieger Korps Active: Yes
- Minefields Available for Reuse: 0
- Dead Units: Italian: 8-0 Corps HQ (LibOp, 21 It, 22 It, 23 It); 9-1-3 Blackshirt Inf Div (3 Jan, 23 Mar, 28 Oct); 12-2-3 Inf Div (Cirene, Marm, Sirte); 12-1-3 Inf Div (Ctnzro); 8-1-3 Inf Div (1 Lib); 8-2-3 Inf Div (2 Lib); 4-3-3 Inf Rgt (1 Lib); 3-2-3 Inf Rgt (5 Lib); 2-3-3 Inf Bn (34 Lib); 5-3-3 Inf Rgt (10 Brs); 2-3-3 Blackshirt Inf Bn (Vd.Lib); 3-1-2 GAF Rgt (30, 31, 32); 1-2-2 GAF Co (B.Scegga, E.GuG); 3-0-3 Territorial Rgt (54); 2-0-3 Territorial Bn (225, 226); 2-0-3 Coastal Defense Bn (31 Lib); 2-0-6 Lt Arm Bn (61 Lt, 62 Lt); 2-1-6 Lt Arm Bn (20 Lt, 60 Lt, 63 Lt); 4-3-6 Arm Bn (3 Med); 4-2-6 Arm Bn (5 Med, 6 Med, 21 Med); 3-3-6 Arm Bn (1 Med, 2 Med); 3-3-3 MG Bn (VEC); 2-1-1 MG Bn (3 Lib Frt); 1-1-1 MG Bn (Gialo); 2-1-2 Blackshirt MG Bn (201, 202, 204); 2-3-3 MG Bn (17, 25, 55, 64); 2-2-3 MG Bn (27, 61, 62, 63); 2-3-12 Motorcycle Bn (ProvBrs); 1-3-12 Motorcycle Co (22 Brs, 61 Brs, 201 Brs, 202 Brs); 8-0-0 Stranded Cruiser (San Giorgio); 10-3-3 Arty Rgt (10, 12, 26); 10-3-2 Arty Rgt (10 Corps, 22 Corps); 26-2-2 Arty Bde (30 GAF); 22-3-2 Arty Rgt (25 Corps); 15-3-2 Arty Rgt (di Mnvra); 14-3-2 Arty Bde (20 Corps); 13-3-3 Arty Bde (Mtrizzato); 11-3-2 Arty Rgt (21 Corps); 9-3-2 Arty Bn (23 Corps); 8-2-2 Arty Rgt (31 GAF); 7-3-2 Arty Rgt (Maletti); 4-2-2 Arty Rgt (32 GAF); 17-0-0 Coastal Arty Rgt (R. Mar); 3-0-0 Coastal Arty Bn (4); 2-0-0 Coastal Arty Bn (5); 2x SM.79; 2x CR.42; 1x Ba.65. German: 3-5-8 Pz Co (KStA); 5.Le Div (5-5-3 MG Bn (8))
Set Up:
- Old Shipping Box: 4-3-3 Arty Bn (864); 2-3-3 Inf Bn (3-255, 3-347); 1-3-2 Mtn Arty Battery (362, 363, 364)
- Tripoli Box: 10 SPs; 6T Truck Points; 3x It Pax Repl; 8-0 Corps HQ (20 It); 12-3-3 Inf Div (Savona (less one step), Sabrtha (less two steps)); 3-3-3 MG Bn (Genova); 2-3-3 MG Bn (60); (4)-4-5 AT Bn (2 Mil); 1-1-2 GAF Bn (35); 22-3-2 Arty Bde (5 Army); 10-2-2 Arty Rgt (340 GAF); 4-2-2 Arty Bn (332 GAF); 3-2-2 Arty Bn (291 GAF); 3-3-3 Arty Bn (408)
- A18.30: 1-2-3 Inf Bn (18 Lib)
- A41.21: 1-2-3 Inf Bn (36 Lib)
- A48.20: 8-0 Corps HQ (10 It); (6)-4-5 AT Bn (1 Mil); 5T Truck Points; 8 SPs
- A48.18: Level 2 Airbase
- A55.11: 12-2-3 Inf Div (Bologna); 2-1-6 Lt Arm Bn (4 Lt)
- A55.05: Level 2 Airbase
- w/i 1 B60.24: (3)-3-3 Korück Bn (556); 5.Le Div (Organic Truck (Full)); Ariete Arm Div (5-4-7 Arm Bn (7 Med)); 2-0-6 Lt Arm Bn (5 Lt); 6 SPs
- B50.15: Rommel Leader; 14-0 Corps HQ (DAK); 3-5-8 PJ Bn (605); 15 Pz Div (Organic Truck (Full)); 4 SPs
- B49.15: Ariete Arm Div (2-3-6 Lt Arm Bn (1 Lt, 2 Lt, 3 Lt), 10-3-3 Arty Rgt (132))
- B47.12: 5.Le Div (5-5-8 Pz Bn (2-5))
- B50.11: 12-3-3 Inf Div (Brescia); 7-3-3 Arty Rgt (1 Cel)
- B49.11: 3-4-3 Assault Engineer Bn (32)
- B49.12: 11-3-2 Arty Rgt (16 Corps)
- B48.10: 5.Le Div (5-5-3 MG Bn (2)); 3-3-3 Flak Bn (606)
- B47.10: 5.Le Div (3-5-3 Pio Bn (200)); 5.Le Div ((3)-4-3 PJ Bn (39 PJ))
- B47.09: 12-3-3 Inf Div (Pavia); 3-3-3 MG Bn (Aosta)
- B46.08: 8-3-3 Arty Rgt (3 Cel); 11-3-2 Arty Rgt (24 Corps); Level 2 Airbase
- B46.07: Ariete Arm Div (5-4-7 Arm Bn (8 Med), 8 Brs Inf Rgt, Organic Truck (Full))
Victory: Use Campaign Victory conditions (see 7.0 above).
7.10 Operation Crusader—Smaller Scenario
General Information:
- Set Up Order: Axis, Commonwealth
- First Player: Commonwealth
- First Turn: 19 Nov 41
- Last Turn: 15 Dec 41
- Game Length: 9
- Maps in Play: Maps B and C only
- Use Campaign Rules?: No
- Port Damage: None
- Airfield Ownership: The Axis controls all airbases and air strips in Libya except Giarabub, Es Scegga (C31.31), Gseien (C27.33). It also controls Sollum. All other on-map airbases and air strips are controlled by the Commonwealth.
One-Time Random Events which have occurred: Allies Crack Luftwaffe Codes; German Signal-Intercept Genius At Work
Timed Rules in Effect:
- Brigade Groups
- Allied Hipshoots Allowed (5.1)
Special Rules:
-
Weather: There was a Rainstorm on map B on the 15 Nov 41 turn. All air units that set up on either of those two maps must set up inactive.
-
Surprise: Rommel steadfastly refused to believe that a major Allied offensive was underway (concentrating on his own plan to take Tobruk). This results in the following: a) The first turn of the game is 19 Nov 41, even though the battle technically began on the 18th and the Commonwealth has already begun its movement into Axis territory. b) The Commonwealth is the first player. c) (Important) There is no Axis Reaction Phase in the Commonwealth 19 Nov 41 turn.
Commonwealth Information:
- City Ownership: Two Months (+): Buq Buq, Sidi Barrani, Mersa Matruh, Tobruk
- Reserve Markers Available: 6
- Hedgehogs Remaining: NA
- Minefields Remaining: NA
- Senussi Hexes remaining: None remain to be activated.
- Training Marker Positions: 6 Aus Div (Normal), 2 Arm Div (Normal), 9 Aus Div (Normal), 2 NZ Div (Normal), 7 Aus Div (Normal), 1 SA Div (Normal), 2 SA Div (Normal), 1 Arm Div (Green & Locked)
- Greek Campaign Status Track Marker: Campaign Termination Box
- Greek Deployment Progress Track Marker: No longer in use.
- Dead Units: No rebuilds allowed.
Set Up:
- B49.09: Level 2 Airbase
- w/i 2 B50.08: 4-0 Command HQ (Tobruk); 6-4-3 Inf Bde (14, 16, 23); 6-4-3 Polish Inf Bde (Carp); 2-4-3 Polish Cav Bn (Lancer); 2-4-3 Czech Inf Bn (11 Czech); 3-2-8 Arm Bn (1 RTR); 6-2-3 Arm Bn (4 RTR, 7 RTR); 6-2-0 Coastal Arty Battery (X, 202, 206); 5-2-3 Arty Bn (Red) (1 RHA, 104 RHA, 107 RHA, 144 Fld); 8-3-0 Aus Arty Bn (Bush); (2)-2-3 AT Bn (Red) (149 AT); 19 SPs
- B12.01: 1-2-3 Senussi Bn (Giarabub); 2-4-8 Arm Car Bn (6 SA, 7 SA); 1-5-8 Commando Bn (1 SAS, LRDG); 5 Ind Div (29 Ind Inf Bde)
- B30.04: 1 SA Div (5 SA Inf Bde)
- B34.05: 1 SA Div (1 SA Inf Bde, Organic Truck (Full)); 2-4-8 Arm Car Bn (3 SA)
- B35.02: 12-0 Corps HQ (30); 6-4-3 Inf Bde (22 Gd); 4T Truck Points; 5 SPs
- B38.06: 1 Arm Div (7-4-8 Arm Bde (22), Organic Truck (Full))
- B38.03: 7 Arm Div (7 Support Bde, Organic Truck (Full)); 5-2-3 Arty Bn (Red) (60 Fld)
- B40.05: 2-4-8 Arm Car Bn (4 SA)
- B39.02: Strafer Gott Leader; 7 Arm Div (5-4-8 Arm Bde (4)); (2)-2-3 AT Bn (Red) (102 AT); 5-2-3 Arty Bn (Yellow) (2 RHA)
- B41.04: Jock Campbell Leader; 7 Arm Div (7-4-8 Arm Bde (7)); 5-2-3 Arty Bn (Red) (4 RHA)
- B42.04: 7 Arm Div (11 Hus Arm Car Bn)
- B42.02: 3-4-8 Arm Car Bn (KDG)
- w/i 1 C37.32: 2 NZ Div (2-5-8 Arm Recon Bn (2 NZ), 28 Maori Inf Bn, 4 NZ, 5 NZ, 6 NZ Inf Bde, Organic Truck (Full))
- C37.31: 12-0 Corps HQ (13); 6-2-3 Arm Bn (8 RTR, 42 RTR, 44 RTR)
- C38.31: 4 Ind Div (7 Ind Inf Bde); (2)-2-3 AT Bn (Red) (65 AT)
- C39.29: 4 Ind Div (CIH Arm Car Bn)
- C37.26: 4 Ind Div (5 Ind Inf Bde, Organic Truck (Full))
- C36.23: 5 SPs
Axis Information:
- City Ownership: Two Months (+): Bardia
- Reserve Markers Available: 5
- Hedgehogs Remaining: NA
- Flieger Korps Active: NA
- Minefields Available for Reuse: NA
- Dead Units: No Rebuilds allowed.
Set Up:
- B60.30: 3-4-3 Para Bn (1 Cara)
- B60.29: RECAM Ragg Marker; 4-2-3 MG Bn (R.Gessi); 2-3-12 Motorcycle Bn (PAI); Ariete Arm Div (2-3-6 Lt Arm Bn (3 Lt)); 3-3-7 Lt Arm Bn (52 Mx); 3-4-3 Inf Rgt (GGFF); 1 SP
- w/i 1 B50.16: 2T Truck Points; (3)-3-3 Korück Bn (556); 1-5-8 Commando Co (v.Könen); 9-3-2 Coastal Arty Bn (523, 528); 2x German Pax Repl; 2x German Eq Repl; 8 SPs
- w/i 1 B42.13: 8-0 Corps HQ (CAM); Trieste Div (65 Inf Rgt, 21 Arty Rgt, Organic Truck (Full)); 3-2-3 MG Bn (101); 2 SPs
- B45.15: Trieste Div (66 Inf Rgt)
- B44.13: 5-4-3 Inf Rgt (9 Brs) (Semi-Motorized)
- B50.11: 12-3-3 Inf Div (Brescia); 7-3-3 Arty Rgt (1 Cel)
- B49.11: 2-3-3 MG Bn (551); 2-1-6 Lt Arm Bn (4 Lt); 11-3-2 Arty Rgt (24 Corps); 10-2-2 Arty Rgt (340 GAF)
- B49.12: 9-3-2 Coastal Arty Bn (529, 532)
- B48.10: Trento Div (61 Inf Rgt); 10-3-5 Arty Rgt (Volanti)
- B48.11: 3-4-3 Assault Engineer Bn (31); 22-3-2 Arty Bde (5 Army); 2 SPs
- B47.10: 5-4-3 Inf Rgt (7 Brs); Trento Div (46 Arty Rgt)
- B47.09: Trento Div (62 Inf Rgt); 3-3-3 MG Bn (Aosta)
- B47.08: 12-3-3 Inf Div (Pavia)
- B47.07: Afrika Div (155, 361 Inf Rgt)
- B48.06: 12-2-3 Inf Div (Bologna); (3)-3-3 AT Bn (551)
- B46.09: 30-3-2 Arty Bde (8 Ragg); 11-3-2 Arty Rgt (16 Corps)
- B46.08: 8-0 Corps HQ (21 It); 2-0-6 Lt Arm Bn (5 Lt); 8-3-3 Arty Rgt (3 Cel); 2 SPs; Level 2 Airbase
- B46.07: Afrika Div (900 Pio Bn); 7-3-3 Arty Bn (2-115); 3-3-3 Arty Bn (408); 2-3-3 Arty Battery (902); 4-3-2 Coastal Arty Battery (4-772)
- B46.06: 6-5-3 Commando Rgt (288.Snd); 4-3-2 Coastal Arty Battery (4, 4-149)
Reinforcements: Each turn place 2 SPs in hex B50.16 or B60.24.
Victory: The Commonwealth player wins by destroying three of the four German Panzer Division Panzer Battalions and by opening a route by which Truck points can move from Mersa Matruh to Tobruk without passing adjacent to any enemy unit (even if the hex is occupied by a friendly unit). If the Commonwealth opens the corridor to the fortress but doesn't kill the Panzer Battalions, it is a draw. Any other result is an Axis win.
7.11 Operation Crusader Campaign Start
General Information:
- Set Up Order: Axis, Commonwealth
- First Player: Commonwealth
- First Turn: 19 Nov 41
- Last Turn: 29 Nov 42
- Game Length: 112
- Maps in Play: All
- Use Campaign Rules?: Yes
- Port Damage: None
- Airfield Ownership: The Axis controls all airbases and air strips in Libya except Giarabub, Es Scegga (C31.31), Gseien (C27.33). It also controls Sollum. All other on-map airbases and air strips are controlled by the Commonwealth.
One-Time Random Events which have occurred: Allies Crack Luftwaffe Codes; German Signal-Intercept Genius At Work
Timed Rules in Effect:
- Brigade Groups
- Mines not allowed (c3.2a)
- Allied Hipshoots Allowed (5.1)
- A19.35 as an Axis Supply Source (3.7a)
Special Rules:
-
Weather: There was a Rainstorm on maps A and B on the 15 Nov 41 turn. All air units that set up on either of those two maps must set up inactive.
-
Surprise: Rommel steadfastly refused to believe that a major Allied offensive was underway (concentrating on his own plan to take Tobruk). This results in the following: a) The first turn of the game is 19 Nov 41, even though the battle technically began on the 18th and the Commonwealth has already begun its movement into Axis territory. b) The Commonwealth is the first player. c) (Important) There is no Axis Reaction Phase in the Commonwealth 19 Nov 41 turn.
Commonwealth Information:
- City Ownership: Two Months (+): Buq Buq, Sidi Barrani, Mersa Matruh, Alexandria (all), Cairo (all), Helwan, Port Said, Suez, Tobruk
- Reserve Markers Available: 6
- Hedgehogs Remaining: 20
- Minefields Remaining: 25
- Senussi Hexes remaining: None remain to be activated.
- Training Marker Positions: 6 Aus Div (Normal), 2 Arm Div (Normal), 9 Aus Div (Normal), 2 NZ Div (Normal), 7 Aus Div (Normal), 1 SA Div (Normal), 2 SA Div (Normal), 1 Arm Div (Green & Locked)
- Greek Campaign Status Track Marker: Campaign Termination Box
- Greek Deployment Progress Track Marker: No longer in use.
- Dead Units: 6-4-3 Ind Inf Bde (3 Ind); 2-3-10 Lt Arm Bn (3 Hus); O'Connor Leader: Captured
Set Up:
- Near East Box: 5 Ind Div (9 Ind, 10 Ind Inf Bde, Organic Truck (Full)); 7 Aus Div (18 Aus, 21 Aus, 25 Aus Inf Bde, Organic Truck (Full)); 9 Aus Div (9 Aus Recon Bn, 20 Aus, 24 Aus, 26 Aus Inf Bde, Organic Truck (Full)); 50 Inf Div (69, 150, 151 Inf Bde, Organic Truck (Full)); 6-3-3 Inf Bde (161 British)
- B49.09: Level 2 Airbase
- w/i 2 B50.08: 4-0 Command HQ (Tobruk); 6-4-3 Inf Bde (14, 16, 23); 6-4-3 Polish Inf Bde (Carp); 2-4-3 Polish Cav Bn (Lancer); 2-4-3 Czech Inf Bn (11 Czech); 3-2-8 Arm Bn (1 RTR); 6-2-3 Arm Bn (4 RTR, 7 RTR); 6-2-0 Coastal Arty Battery (X, 202, 206); 5-2-3 Arty Bn (Red) (1 RHA, 104 RHA, 107 RHA, 144 Fld); 8-3-0 Aus Arty Bn (Bush); (2)-2-3 AT Bn (Red) (149 AT); 19 SPs
- B12.01: 1-2-3 Senussi Bn (Giarabub); 2-4-8 Arm Car Bn (6 SA, 7 SA); 1-5-8 Commando Bn (1 SAS, LRDG); 5 Ind Div (29 Ind Inf Bde)
- B30.04: 1 SA Div (5 SA Inf Bde)
- B34.05: 1 SA Div (1 SA Inf Bde, Organic Truck (Full)); 2-4-8 Arm Car Bn (3 SA)
- B35.02: 12-0 Corps HQ (30); 6-4-3 Inf Bde (22 Gd); 4T Truck Points; 5 SPs
- B38.06: 1 Arm Div (7-4-8 Arm Bde (22), Organic Truck (Full))
- B38.03: 7 Arm Div (7 Support Bde, Organic Truck (Full)); 5-2-3 Arty Bn (Red) (60 Fld)
- B40.05: 2-4-8 Arm Car Bn (4 SA)
- B39.02: Strafer Gott Leader; 7 Arm Div (5-4-8 Arm Bde (4)); (2)-2-3 AT Bn (Red) (102 AT); 5-2-3 Arty Bn (Yellow) (2 RHA)
- B41.04: Jock Campbell Leader; 7 Arm Div (7-4-8 Arm Bde (7)); 5-2-3 Arty Bn (Red) (4 RHA)
- B42.04: 7 Arm Div (11 Hus Arm Car Bn)
- B42.02: 3-4-8 Arm Car Bn (KDG)
- w/i 1 C37.32: 2 NZ Div (2-5-8 Arm Recon Bn (2 NZ), 28 Maori Inf Bn, 4 NZ, 5 NZ, 6 NZ Inf Bde, Organic Truck (Full))
- C37.31: 12-0 Corps HQ (13); 6-2-3 Arm Bn (8 RTR, 42 RTR, 44 RTR)
- C38.31: 4 Ind Div (7 Ind Inf Bde); (2)-2-3 AT Bn (Red) (65 AT)
Axis Information:
- City Ownership: Two Months (+): Benghazi, Bardia
- Reserve Markers Available: 5
- Hedgehogs Remaining: 8
- Flieger Korps Active: No
- Minefields Available for Reuse: 0
- Dead Units: Italian: 8-0 Corps HQ (LibOp, 22 It, 23 It); 9-1-3 Blackshirt Inf Div (3 Jan, 23 Mar, 28 Oct); 12-2-3 Inf Div (Cirene, Marm, Sirte); 12-1-3 Inf Div (Ctnzro); 8-1-3 Inf Div (1 Lib); 8-2-3 Inf Div (2 Lib); 4-3-3 Inf Rgt (1 Lib); 3-2-3 Inf Rgt (5 Lib); 2-3-3 Inf Bn (34 Lib); 5-3-3 Inf Rgt (10 Brs); 2-3-3 Blackshirt Inf Bn (Vd.Lib); 3-1-2 GAF Rgt (30, 31, 32); 1-2-2 GAF Co (B.Scegga, E.GuG); 3-0-3 Territorial Rgt (54); 2-0-3 Territorial Bn (225, 226); 2-0-3 Coastal Defense Bn (31 Lib); 2-0-6 Lt Arm Bn (61 Lt, 62 Lt); 2-1-6 Lt Arm Bn (20 Lt, 60 Lt, 63 Lt); 4-3-6 Arm Bn (3 Med); 4-2-6 Arm Bn (5 Med, 6 Med, 21 Med); 3-3-6 Arm Bn (1 Med, 2 Med); 3-3-3 MG Bn (VEC); 2-1-1 MG Bn (3 Lib Frt); 1-1-1 MG Bn (Gialo); 2-1-2 Blackshirt MG Bn (201, 202, 204); 2-3-3 MG Bn (17, 25, 55, 64); 2-2-3 MG Bn (27, 61, 62, 63); 2-3-12 Motorcycle Bn (ProvBrs); 1-3-12 Motorcycle Co (22 Brs, 61 Brs, 201 Brs, 202 Brs); 10-3-3 Arty Rgt (10, 12, 26); 10-3-2 Arty Rgt (10 Corps, 22 Corps); 26-2-2 Arty Bde (30 GAF); 22-3-2 Arty Rgt (25 Corps); 15-3-2 Arty Rgt (di Mnvra); 14-3-2 Arty Bde (20 Corps); 13-3-3 Arty Bde (Mtrizzato); 11-3-2 Arty Rgt (21 Corps); 9-3-2 Arty Bn (23 Corps); 8-2-2 Arty Rgt (31 GAF); 7-3-2 Arty Rgt (Maletti); 4-2-2 Arty Rgt (32 GAF); 17-0-0 Coastal Arty Rgt (R. Mar); 3-0-0 Coastal Arty Bn (4); 2-0-0 Coastal Arty Bn (5); 2x SM.79; 4x CR.42; 1x Ba.65; 2x G.50; 1x MC.200. German: 21.Pz Div (5-5-3 MG Bn (8)); 1x Bf.109e
Set Up:
- Tripoli Box: 12 SPs; 9T Truck Points; 3x It Pax Repl; 3x It Eq Repl; 8-0 Corps HQ (20 It); 12-3-3 Inf Div (Sabrtha (less two steps)); 3-4-3 Marine Bn (4-SM); 2-3-3 MG Bn (60); (4)-4-5 AT Bn (2 Mil); 1-1-2 GAF Bn (35); 4-2-2 Arty Bn (332 GAF); 3-2-2 Arty Bn (291 GAF); 1-3-2 Mtn Arty Battery (362, 363, 364)
- A1.05: 1-2-3 Inf Bn (18 Lib)
- A41.21: 1-2-3 Inf Bn (36 Lib)
- A48.20: 8-0 Corps HQ (10 It); 5T Truck Points; 10 SPs
- A48.18: Level 2 Airbase
- A55.05: Level 2 Airbase
- The remaining Axis Set-Up (B60.30 through B46.02) is identical to Scenario 7.10's Axis Set-Up above.
Victory: Use Campaign Victory conditions (see 7.0 above).
- C42.29: Level 1 Hedgehog; 21 Pz Div ((3)-4-3 PJ Bn (39 PJ), 4-5-3 Pio Bn (200))
- C39.32: Level 1 Hedgehog; 3-4-3 Assault Engineer Bn (32)
- C40.28: Level 1 Hedgehog; 21 Pz Div (6-5-3 Inf Rgt (104)); 1 SP
- C41.30: Level 1 Hedgehog; 12-3-3 Inf Div (Savona)
- w/i 1 C45.29: 2-3-3 Inf Bn (3-255, 3-347); 3-3-3 MG Bn (Genova); 3-3-3 AA Bn (617); 7-3-3 Arty Rgt (2 Cel); 2 SPs
- C44.31: 21 Pz Div (3 Arm Recon Bn)
- C43.30: 3-5-8 PJ Bn (605)
- C43.34: 15 Pz Div (33 Arm Recon Bn, (3)-4-3 PJ Bn (33 PJ))
- w/i 1 B41.08: (6)-4-5 AT Bn (1 Mil); Ariete Arm Div (5-4-7 Arm Bn (7 Med, 8 Med), 4-3-6 Arm Bn (9 Med), 2-3-6 Lt Arm Bn (1 Lt, 2 Lt), 8 Brs Inf Rgt, (2)-3-3 AT Bn (Red) (AT), 132 Arty Rgt, Organic Truck (Full)); 1 SP
- w/i 1 C45.34: 1-4-4 Inf Gun Co (708); (7)-5-3 Luftwaffe Flak Bn (1-18); 21 Pz Div (5-5-8 Pz Bn (1-5, 2-5), 3-5-3 Motorcycle Bn (15 Krd), 155 Arty Rgt, Organic Truck (Full)); 2 SPs
- w/i 1 B48.03: (7)-5-3 Luftwaffe Flak Bn (1-33); 1-4-4 Inf Gun Co (707); 15 Pz Div (5-5-8 Pz Bn (1-8, 2-8), 6-5-3 Inf Rgt (115), 5-5-3 MG Bn (2), 4-5-3 Pio Bn (33), 33 Arty Rgt, Organic Truck (Full)); 2 SPs
- With any other Axis unit: KG Markers (Marcks, Linau, 3 Aufk, Bach, Schütte, Wechmar, Voss); (1)-4-3 Oasis Co (2-300, 6-300, 10-300, 12-300, 13-300)
- At Any Axis controlled Airbase or Air Strip: Italian: 1x Ju.87b (reduced); 2x CR.42; 2x SM.79; 1x Ca.309; 1x G.50; 1x SM.82; 1x MC.200; 1x Br.20; 1x MC.202. German: 2x Bf.109e; 2x Bf.109f; 2x Ju.87b; 2x Bf.110; 2x Ju.88; 2x Ju.52; 1x He.111h
Victory: Use Campaign Victory conditions (see 7.0 above).
7.12 The 2nd Italo-German Offensive, 22 Jan 42, Campaign Start
General Information:
- Set Up Order: Commonwealth, Axis
- First Player: Axis
- First Turn: 22 Jan 42
- Last Turn: 29 Nov 42
- Game Length: 93
- Maps in Play: All
- Use Campaign Rules?: Yes
- Port Damage: Benghazi has four hits.
- Airfield Ownership: The Axis controls all air strips occupied by or west of their units. All other on-map airbases and air strips are controlled by the Commonwealth.
One-Time Random Events which have occurred: Pearl Harbor Occurs; Allies Crack Luftwaffe Codes; German Signal-Intercept Genius At Work; German Signal Unit Disaster
Timed Rules in Effect:
- Brigade Groups
- Mines allowed (c3.2a)
- Allied Hipshoots Allowed (5.1)
- A19.35 as an Axis Supply Source (3.7a)
Commonwealth Information:
- City Ownership: Two Months (+): Buq Buq, Sidi Barrani, Mersa Matruh, Alexandria (all), Cairo (all), Helwan, Port Said, Suez, Tobruk. Not yet held for Two Months: Benghazi (captured 26 Dec 41), Bardia (captured 5 Jan 42)
- Reserve Markers Available: 6
- Hedgehogs Remaining: 19
- Minefields Remaining: 25
- Senussi Hexes remaining: None remain to be activated.
- Training Marker Positions: 6 Aus Div (Normal), 2 Arm Div (Normal), 9 Aus Div (Normal), 2 NZ Div (Normal), 7 Aus Div (Normal), 1 SA Div (Normal), 2 SA Div (Normal), 1 Arm Div (Training #2)
- Greek Campaign Status Track Marker: Campaign Termination Box
- Greek Deployment Progress Track Marker: No longer in use.
- Dead Units: 4-0 Command HQ (Tobruk); 6-4-3 Ind Inf Bde (3 Ind); 2-3-10 Lt Arm Bn (3 Hus); 3-2-8 Arm Bn (1 RTR); 2-4-8 Arm Car Bn (Royals); 1 Arm Div (2-5-8 Arm Car Bn (12 Lcr), 7-4-8 Arm Bde (22)); 2 NZ Div (4 NZ, 6 NZ Inf Bde); 2x Hurri I; 1x Blen IV; O'Connor Leader: Captured
Set Up:
- Near East Box: 5 Ind Div (9 Ind, 10 Ind Inf Bde, Organic Truck (Full)); 7 Aus Div (18 Aus, 21 Aus, 25 Aus Inf Bde, Organic Truck (Full)); 9 Aus Div (9 Aus Recon Bn, 20 Aus, 24 Aus, 26 Aus Inf Bde, Organic Truck (Full)); 50 Inf Div (69, 151 Inf Bde, Organic Truck (Full)); 6-3-3 Inf Bde (161 Ind)
- A1.05: 1-5-8 Commando Bn (LRDG, 1 SAS); 1 SP
- A21.23: 6-4-3 Inf Bde (200 Gd); 5-2-3 Arty Bn (Red) (51 Fld); 1 SP
- w/i 2 A19.20: 1 Arm Div (1 Support Bde); 1 SP
- A20.14: 2-4-8 SA Arm Car Bn (6 SA); 1T SP
- A26.11: 2-4-8 SA Arm Car Bn (7 SA); 1T SP
- A31.12: (2)-2-3 AT Bn (Red) (102 AT); 2 SPs
- w/i 2 A33.14: 12-0 Corps HQ (13); 1-3-8 Arm Car Co (1 RAF, 2 RAF); 1 Arm Div (7-3-8 Arm Bde (2), Organic Truck (Full)); 5-2-3 Arty Bn (Red) (8 Fld); 5-2-3 Arty Bn (Yellow) (2 RHA); 5 SPs; Level 2 Airbase
- A40.09: 7 Arm Div (3-5-8 Arm Car Bn (11 Hus)); 6-2-3 Arm Bn (8 RTR); 3-4-8 Arm Car Bn (KDG); 2x Eq Repl; 1 SP
- A48.20: 1-2-3 Senussi Bn (Tobruk); 4 Ind Div (2-4-6 Arm Car Bn (CIH), 7 Ind Inf Bde, Organic Truck (Full)); (2)-2-3 AT Bn (Red) (65 AT); 9-2-3 Arty Bn (7 Med); 2 SPs. Benghazi Port Damage: 4 Hits.
- A48.18: Level 2 Airbase
- A55.05: Level 2 Airbase
- B42.27: 2-4-8 SA Arm Car Bn (4 SA); 1T SP
- B60.24: 4 Ind Div (5 Ind Inf Bde); 6-4-3 Polish Inf Bde (Carp); 2-4-3 Polish Cav Bn (Lancer); 2 SPs
- B46.08: Level 2 Airbase; 1 FF Inf Bde; 1 Leg French Inf Bn
- B46.02: Level 2 Airbase
- B49.09: Level 2 Airbase
- w/i 2 B50.08: 2-4-3 Czech Inf Bn (11 Czech); 6-2-0 Coastal Arty Battery (X, 202, 206); 4 Ind Div (11 Ind Bde); 5 Ind Div (29 Ind Bde); 6-2-3 Arm Bn (42 RTR, 44 RTR); (2)-2-3 AT Bn (Red) (149 AT); 5-2-3 Arty Bn (Red) (144 Fld); 4T Truck Points; 5 SPs
Axis Information:
- City Ownership: Two Months (+): None
- Reserve Markers Available: 5
- Hedgehogs Remaining: 8
- Flieger Korps Active: Yes
- Minefields Available for Reuse: 0
- Dead Units: Italian: 8-0 Corps HQ (LibOp, 22 It, 23 It); Ariete Arm Div (1 Lt, 2 Lt, 3 Lt Arm Bn, 7 Med Arm Bn, (2)-3-3 AT Bn (AT)); 9-1-3 Blackshirt Inf Div (3 Jan, 23 Mar, 28 Oct); 12-3-3 Inf Div (Savona); 12-2-3 Inf Div (Cirene, Marm, Sirte); 12-1-3 Inf Div (Ctnzro); 8-1-3 Inf Div (1 Lib); 8-2-3 Inf Div (2 Lib); 4-3-3 Inf Rgt (1 Lib); 3-2-3 Inf Rgt (5 Lib); 2-3-3 Inf Bn (34 Lib); 5-3-3 Inf Rgt (10 Brs); 2-3-3 Blackshirt Inf Bn (Vd.Lib); 3-1-2 GAF Rgt (30, 31, 32); 1-2-2 GAF Co (B.Scegga, E.GuG); 3-0-3 Territorial Rgt (54); 2-0-3 Territorial Bn (225, 226); 2-0-3 Coastal Defense Bn (31 Lib); 2-0-6 Lt Arm Bn (5 Lt, 61 Lt, 62 Lt); 2-1-6 Lt Arm Bn (4 Lt, 20 Lt, 60 Lt, 63 Lt); 3-3-7 Lt Arm Bn (52 Mx); 4-3-6 Arm Bn (3 Med); 4-2-6 Arm Bn (5 Med, 6 Med, 21 Med); 3-3-6 Arm Bn (1 Med, 2 Med); 4-2-3 MG Bn (R.Gessi); 3-2-3 MG Bn (101); 3-3-3 MG Bn (VEC, Genova); 2-1-1 MG Bn (3 Lib Frt); 1-1-1 MG Bn (Gialo); 2-1-2 Blackshirt MG Bn (201, 202, 204); 2-3-3 MG Bn (17, 25, 55, 64, 551); 2-2-3 MG Bn (27, 61, 62, 63); 2-3-12 Motorcycle Bn (ProvBrs, PAI); 1-3-12 Motorcycle Co (22 Brs, 61 Brs, 201 Brs, 202 Brs); 10-3-3 Arty Rgt (10, 12, 26); 10-3-2 Arty Rgt (10 Corps, 22 Corps); 26-2-2 Arty Bde (30 GAF); 22-3-2 Arty Rgt (25 Corps); 15-3-2 Arty Rgt (di Mnvra); 14-3-2 Arty Bde (20 Corps); 13-3-3 Arty Bde (Mtrizzato); 11-3-2 Arty Rgt (16 Corps, 21 Corps); 10-3-5 Arty Rgt (Volanti); 10-2-2 Arty Rgt (340 GAF); 9-3-2 Arty Bn (23 Corps); 8-2-2 Arty Rgt (31 GAF); 7-3-2 Arty Rgt (Maletti); 4-2-2 Arty Rgt (32 GAF); 17-0-0 Coastal Arty Rgt (R. Mar); 3-0-0 Coastal Arty Bn (4); 2-0-0 Coastal Arty Bn (5); 2x SM.79; 5x CR.42; 1x Ba.65; 2x G.50; 2x MC.200; 1x MC.202. German: 2-3-3 Inf Bn (3-255, 3-347); 3-5-8 PJ Bn (605); 4-3-2 Coastal Arty Co (4); 21.Pz Div (5-5-3 MG Bn (8)); 1x Bf.109e; 1x Bf.109f; 1x Bf.110; 1x Ju.87b; 1x Ju.52
Set Up:
- Tripoli Box: 1-3-2 Mountain Arty Battery (362, 363, 364); 1-5-3 Amphibious Co (778 Ldg); (7)-4-3 Luftwaffe Flak Bn (1-43, 1-53); 8-0 Corps HQ (20 It); 1-2-3 Inf Bn (18 Lib, 36 Lib); 3-4-3 Para Inf Bn (1 Cara); 3-1-3 Engineer Rgt (1 Spc); 1-1-2 GAF Bn (35); 3-3-3 MG Bn (Aosta); 3-4-3 Assault Engineer Bn (31); (4)-4-5 AT Bn (2 Mil); 8-3-3 Arty Rgt (3 Cel); 4-2-2 Arty Bn (332 GAF); 3-2-2 Arty Bn (291 GAF); 12T Truck Points (3 "full" Truck Points); 26 SPs
- A19.27: 12-3-3 Inf Div (Sabratha); 3-4-3 Inf Rgt (GGFF)
- A18.27: 2-3-3 MG Bn (60); 3-4-3 Marine Bn (4-SM)
- A17.27: Trento Div (61 Inf Rgt)
- A16.26: 5-4-3 Inf Rgt (7 Brs); Trento Div (46 Arty Rgt)
- A16.27: 22-3-2 Arty Bde (5 Army)
- A15.26: Trento Div (62 Inf Rgt)
- A14.26: 12-3-3 Inf Div (Pavia, less one step)
- A3.31: 1-5-8 Commando Co (v.Könen)
- A12.29: 12-2-3 Inf Div (Bologna, less one step)
- A18.28: 8-0 Corps HQ (21 It); 30-3-2 Arty Bde (8 Ragg); 3 SPs
- A18.29: KG Marcks Marker; 90.Le Div (5-5-3 Inf Rgt (361), 10-3-3 Arty Bn (361)); 21.Pz Div (6-5-3 Inf Rgt (104)); 7-3-3 Arty Rgt (2 Cel)
- A14.29: 8-0 Corps HQ (10 It); 12-3-3 Inf Div (Brescia); 7-3-3 Arty Rgt (1 Cel)
- w/i 1 A15.30: (7)-5-3 Luftwaffe Flak Bn (1-33); 15.Pz Div (4-5-8 Arm Recon Bn (33), 5-5-8 Pz Bn (1-8, 2-8), 5-5-3 MG Bn (2), 6-5-3 Inf Rgt (115), (3)-4-3 PJ Bn (33 PJ), 4-5-3 Pio Bn (33), 17-3-3 Arty Rgt (33), Organic Truck (Full))
- w/i 1 A16.30: (7)-5-3 Luftwaffe Flak Bn (1-18); 21.Pz Div (4-5-8 Arm Recon Bn (3), 5-5-8 Pz Bn (1-5, 2-5), 3-5-3 Motorcycle Bn (15 Krd), (4)-4-3 PJ Bn (39 PJ), 4-5-3 Pio Bn (200), 17-3-3 Arty Rgt (155), Organic Truck (Full))
- w/i 1 A17.30: 8-0 Corps HQ (CAM); 5-4-3 Inf Rgt (Fully Motorized) (9 Brs); 3-4-3 Assault Engineer Bn (32); Trieste Div (65, 66 Inf Rgt, 21 Arty Rgt, Organic Truck (Full)); 11-3-2 Arty Rgt (24 Corps)
Victory: Use Campaign Victory conditions (see 7.0 above).
7.13 Gazala—Smaller Scenario, 26 May to 29 June 42
General Information:
- Set Up Order: Commonwealth, Axis
- First Player: Axis
- First Turn: 26 May 42
- Last Turn: 29 June 42
- Game Length: 11
- Maps in Play: Maps B and C only
- Use Campaign Rules?: No
- Port Damage: None
- Airfield Ownership: The Axis controls all air strips occupied by or west of their units. All other on-map airbases and air strips are controlled by the Commonwealth.
One-Time Random Events which have occurred: Pearl Harbor Occurs; Allies Crack Luftwaffe Codes; German Signal-Intercept Genius At Work; German Signal Unit Disaster
Timed Rules in Effect:
- Brigade Groups
- Armor Brigade Groups
- Allied Hipshoots Allowed (5.1)
Commonwealth Information:
- City Ownership: Two Months (+): Buq Buq, Sidi Barrani, Mersa Matruh, Tobruk, Bardia
- Reserve Markers Available: 6
- Hedgehogs Remaining: NA
- Minefields Remaining: NA
- Senussi Hexes remaining: None remain to be activated.
- Training Marker Positions: All units are Normal
- Greek Campaign Status Track Marker: NA
- Greek Deployment Progress Track Marker: NA
- Dead Units: NA (No rebuilds allowed)
Set Up:
- B50.16: Level 1 Hedgehog; 2 SA Div (3 SA Inf Bde)
- B50.14: 2-4-8 SA Arm Car Bn (6 SA, 7 SA)
- B49.16: Level 1 Hedgehog; 1 SA Div (2 SA Inf Bde); 2 SPs
- B49.14: 6-2-3 Arm Bn (7 RTR)
- B48.16: Minefield
- B48.17: Minefield
- B47.14: 6-2-3 Arm Bn (42 RTR)
- B47.15: Level 1 Hedgehog; 50 Inf Div (69 Inf Bde)
- B47.16: Level 1 Hedgehog; 50 Inf Div (151 Inf Bde); (2)-2-3 AT Bn (Red) (65 AT); 2 SPs
- B47.17: Level 1 Hedgehog; 1 SA Div (1 SA Inf Bde)
- B47.18: Minefield
- B46.16: Minefield
- B46.17: Minefield
- B45.15: Level 1 Hedgehog; 50 Inf Div (150 Inf Bde); 6-2-3 Arm Bn (44 RTR); 9-2-3 Arty Bn (7 Med); 2 SPs
- B45.16: Minefield
- B44.15: Minefield
- B44.13: Minefield
- B43.15: Minefield
- B43.13: Minefield
- B42.16: 2-4-8 SA Arm Car Bn (3 SA); 1T SP
- B42.14: Minefield
- B42.13: Level 1 Hedgehog; 7-5-3 FF Inf Bde (1 FF); 2-4-3 FF Inf Bn (1 Leg); 6-3-3 FF Arty Bn (1 Bn FF); 3 SPs
- B40.16: 3-4-8 Arm Car Bn (KDG); 1T SP
- B38.17: 2-4-8 SA Arm Car Bn (4 SA); 1T SP
- B41.14: Minefield
Special Rules and Restrictions: a) Reinforcements: 1 SP at any point along the railline each turn. 1 SP via coastal shipping (total) to any port or combination of ports per turn. 1 SP at Mersa Matruh per turn (via trucking from Alexandria). No unit reinforcements.
Axis Information:
- City Ownership: Two Months (+): None
- Reserve Markers Available: 5
- Hedgehogs Remaining: NA
- Flieger Korps Active: NA
- Minefields Available for Reuse: NA
- Dead Units: NA (No Rebuilds allowed)
Set Up:
- B60.24: (3)-3-3 Korück Bn (556); 2x German Eq Repls; 3x German Pax Repls; 6T Truck Points; 20 SPs
- B57.23: 2-5-3 Luftwaffe Para Inf Bn (Lehr)
- B55.19: 5-5-3 Amphibious Bn (Hecker); 1 SP
- B51.21: 8-0 Corps HQ (21 It); 3-4-3 Assault Engineer Bn (32)
- B52.17: 90.Le Div (6-5-3 Inf Rgt (361), 10-3-3 Arty Bn (361))
- B51.18: 90.Le Div (6-4-3 Inf Rgt (200)); 4-3-3 AA Bn (612)
- B50.18: 12-3-3 Inf Div (Sabrtha); 8-3-3 Arty Rgt (3 Cel)
- B49.19: 5-4-3 Inf Rgt (7 Brs); Trento Div (46 Arty Rgt)
- B48.19: Trento Div (61, 62 Inf Rgt)
- B47.20: 12-3-3 Inf Div (Brescia); 7-3-3 Arty Rgt (1 Cel)
- B47.21: 8-0 Corps HQ (10 It); 5-4-3 Inf Rgt (Fully Motorized) (9 Brs); 3-4-3 Assault Engineer Bn (31); 11-3-2 Arty Rgt (16 Corps)
- B46.19: 12-3-3 Inf Div (Pavia)
- w/i 1 B46.20: Ariete Arm Div (Nizza Arm Car Bn, 5-5-8 Arm Bn (8 Med), 5-4-7 Arm Bn (9 Med), 4-3-6 Arm Bn (10 Med), 8 Brs Inf Rgt, 3-3-6 Lt Arm Bn (Novara), 5-3-6 AG Bn (551, 552), (6)-4-3 AT Bn (AT), 132 Arty Rgt, Organic Truck (Full)); (6)-4-5 AT Bn (501); (7)-4-3 AT Bn (6)
- B46.21: 8-0 Corps HQ (20 It); 30-3-2 Arty Bde (8 Ragg)
- B45.22: Trieste Div (11 Med Arm Bn, 8 Brs Arm Car Bn, 65, 66 Inf Rgt, 21 Arty Rgt, Organic Truck (Full))
- w/i 2 B45.24: Rommel Leader; 14-0 Corps HQ (DAK); 3-5-8 Pz Co (KStA); 3-3-3 AA Bn (617); 15 SPs
- w/i 1 B45.23: 21.Pz Div (3 Arm Recon Bn, 6-5-8 Pz Bn (1-5, 2-5), 10-5-8 PG Rgt (104), (4)-4-3 PJ Bn (39 PJ), 4-5-3 Pioneer Bn (200), 155 Arty Rgt, Organic Truck (Full)); (7)-5-3 Luftwaffe Flak Bn (1-18)
- w/i 1 B44.23: 15.Pz Div (33 Arm Recon Bn, 6-5-8 Pz Bn (1-8, 2-8), 10-5-8 PG Rgt (115), 4-5-8 PJ Bn (Yellow) (33 PJ), 4-5-3 Pioneer Bn (33), 33 Arty Rgt, Organic Truck (Full)); (7)-5-3 Luftwaffe Flak Bn (1-33)
Special Rules and Restrictions: a) Reinforcements: 2 SPs per turn at B60.24 (Derna).
Victory: The Axis Player wins if he takes Tobruk and/or Mersa Matruh. The Allied Player wins if he avoids the Axis conditions and can still trace off the east map edge for the supply of the units holding Tobruk (i.e. the siege has not started again). Any other result is a draw.
7.14 The Battle of Gazala, 26 May 42, Campaign Start
General Information:
- Set Up Order: Commonwealth, Axis
- First Player: Axis
- First Turn: 26 May 42
- Last Turn: 29 Nov 42
- Game Length: 57
- Maps in Play: All
- Use Campaign Rules?: Yes
- Port Damage: None
- Airfield Ownership: The Axis controls all air strips occupied by or west of their units (except Jalo). All other on-map airbases and air strips are controlled by the Commonwealth.
One-Time Random Events which have occurred: Pearl Harbor Occurs; Allies Crack Luftwaffe Codes; German Signal-Intercept Genius At Work; German Signal Unit Disaster
Timed Rules in Effect:
- Brigade Groups
- Armor Brigade Groups
- Mines allowed (c3.2a)
- Allied Hipshoots Allowed (5.1)
- A19.35 as an Axis Supply Source (3.7a)
Commonwealth Information:
- City Ownership: Two Months (+): Buq Buq, Sidi Barrani, Mersa Matruh, Alexandria (all), Cairo (all), Helwan, Port Said, Suez, Tobruk, Bardia
- Reserve Markers Available: 6
- Hedgehogs Remaining: 8
- Minefields Remaining: 9
- Senussi Hexes remaining: None remain to be activated.
- Training Marker Positions: 6 Aus Div (Normal), 2 Arm Div (Normal), 9 Aus Div (Normal), 2 NZ Div (Normal), 7 Aus Div (Normal), 1 SA Div (Normal), 2 SA Div (Normal), 1 Arm Div (Normal)
- Greek Campaign Status Track Marker: Campaign Termination Box
- Greek Deployment Progress Track Marker: No longer in use.
- Dead Units: 2-3-10 Lt Arm Bn (3 Hus); 4-0 Command HQ (Tobruk); 2x Hurri I; 2x Blen IV; O'Connor Leader: Captured
Set Up:
- Near East Box: 2 NZ Div (4-5-8 Arm Recon Bn (2 NZ), 4 NZ, 5 NZ, 6 NZ Inf Bde, Organic Truck (Full)); 9 Aus Div (9 Aus Arm Recon Bn, 20 Aus, 24 Aus, 26 Aus Inf Bde, Organic Truck (Full)); 7 Aus Div (18 Aus, 21 Aus, 25 Aus Inf Bde, Organic Truck (Full)); 4 Ind Div (5 Ind, 7 Ind Inf Bde); 6-4-3 Inf Bde (14); 6-3-3 Ind Inf Bde (161 Ind)
- Far East Box: 6-4-3 Inf Bde (16, 23); 7 Arm Div (7-4-8 Arm Bde (7))
- A1.05: 1-5-8 Commando Bn (LRDG, 1 SAS)
- The rest of the Commonwealth Set-Up (B50.16 through B46.02) is identical to Scenario 7.13's Set-Up above.
- C4.22: 1-2-8 Egyptian Ford Bn (s-FDA); 2-3-5 Egyptian Camel Bn (Siwa)
- C49.34: 1 Arm Div (12 Lcr Arm Car Bn)
- C45.29: 5-3-3 FF Inf Bde (2 FF); (4)-4-3 FF AT Bn (CAC); 3-4-3 FF Marine Bn (BFM)
- C44.31: 6-2-3 Arm Bn (4 RTR)
- C42.29: Level 1 Hedgehog
- C42.28: Level 1 Hedgehog; 4 Ind Div (11 Ind Inf Bde, Organic Truck (Full)); 2-3-3 Yugoslav Inf Bn (Yugo Gd); 5 SPs
- C40.28: Level 1 Hedgehog
- C39.03: 0-2-1 NZ RR Co (10 NZ, 13 NZ); 3-5-3 Marine Bn (11 RM); 11T Truck Points; 2-3-6 Egyptian Cav Bn (Mob F); 1-2-8 Egyptian Ford Co (n-FDA); 3-3-8 Egyptian Ford Bn (FDA); Level 2 Airbase; 10 SPs; 2x Eq Repl; 2x Pax Repl
- D35.23: 3-2-3 Egyptian MG Bde (1 MG)
- D34.19: 4-0-3 Egyptian Arty Bn (Egypt)
- E10.26: 2-3-5 Egyptian Camel Bn (Hauwasa)
- w/i 1 D39.05: 1-5-8 Commando Bn (Layforce); (1)-1-3 Arab Refugee Bn (1 Lib, 2 Lib, 4 Lib); 2-4-3 Inf Bn (11 Czech); Level 3 Airbase; 6-2-0 Coastal Arty Battery (204); (4)-3-1 Fort Bde (Alex A, Alex B); 2-1-3 Egyptian Inf Bde (2); 6x Pax Repl; 5x Eq Repl
- D36.06: Level 2 Airbase
- D38.06: Level 2 Airbase
Axis Information:
- City Ownership: Two Months (+): Benghazi
- Reserve Markers Available: 5
- Hedgehogs Remaining: 8
- Flieger Korps Active: Yes
- Minefields Available for Reuse: 0
- Dead Units: Italian: 8-0 Corps HQ (CAM, LibOp, 22 It, 23 It); Ariete Arm Div (1 Lt, 2 Lt, 3 Lt Arm Bn, 7 Med Arm Bn); Littorio Arm Div (12 Med Arm Bn); 9-1-3 Blackshirt Inf Div (3 Jan, 23 Mar, 28 Oct); 12-3-3 Inf Div (Savona); 12-2-3 Inf Div (Cirene, Marm, Sirte); 12-1-3 Inf Div (Ctnzro); 8-1-3 Inf Div (1 Lib); 8-2-3 Inf Div (2 Lib); 4-3-3 Inf Rgt (1 Lib); 3-2-3 Inf Rgt (5 Lib); 2-3-3 Inf Bn (34 Lib); 5-3-3 Inf Rgt (10 Brs); 2-3-3 Blackshirt Inf Bn (Vd.Lib); 3-1-2 GAF Rgt (30, 31, 32); 1-2-2 GAF Co (B.Scegga, E.GuG); 3-0-3 Territorial Rgt (54); 2-0-3 Territorial Bn (225, 226); 2-0-3 Coastal Defense Bn (31 Lib); 2-0-6 Lt Arm Bn (5 Lt, 61 Lt, 62 Lt); 2-1-6 Lt Arm Bn (4 Lt, 20 Lt, 60 Lt, 63 Lt); 3-3-7 Lt Arm Bn (52 Mx); 4-3-6 Arm Bn (3 Med); 4-2-6 Arm Bn (5 Med, 6 Med, 21 Med); 3-3-6 Arm Bn (1 Med, 2 Med); 2-3-12 Motorcycle Bn (ProvBrs, PAI); 1-3-12 Motorcycle Co (22 Brs, 61 Brs, 201 Brs, 202 Brs); 10-3-3 Arty Rgt (10, 12, 26); 10-3-2 Arty Rgt (10 Corps, 22 Corps); 26-2-2 Arty Bde (30 GAF); 22-3-2 Arty Rgt (25 Corps); 15-3-2 Arty Rgt (di Mnvra); 14-3-2 Arty Bde (20 Corps); 13-3-3 Arty Bde (Mtrizzato); 11-3-2 Arty Rgt (21 Corps, 24 Corps); 10-2-2 Arty Rgt (340 GAF); 9-3-2 Arty Bn (23 Corps); 8-2-2 Arty Rgt (31 GAF); 7-3-3 Arty Rgt (2 Cel); 7-3-2 Arty Rgt (Maletti); 4-2-2 Arty Rgt (32 GAF); 17-0-0 Coastal Arty Rgt (R. Mar); 3-0-0 Coastal Arty Bn (4); 2-0-0 Coastal Arty Bn (5); (6)-4-5 AT Bn (1 Milmart); 2x SM.79; 5x CR.42; 1x Ba.65; 2x G.50; 2x MC.200; 1x MC.202. German: 2-3-3 Inf Bn (3-255); 3-5-8 PJ Bn (605); 4-3-2 Coastal Arty Co (4); 2x Bf.109f; 1x Bf.110; 1x Ju.87b; 1x Ju.52
Set Up:
- Tripoli Box: 3-1-3 Engineer Rgt (1 Spc, 7 Spc); Littorio Arm Div (5-3-6 Arm Bn (51 Med), 12 Brs Inf Rgt, 3-3-3 Arty Rgt (133), Organic Truck (Full)); (4)-4-5 AT Bn (2 Mil); 3-0-3 Inf Rgt (350); 1-1-2 GAF Bn (35); 4x Italian Eq Repls; 5x Italian Pax Repls; 22 SPs
- w/i 10 of the Via Balbia A19.35 through A48.20: 4-2-2 Arty Bn (332 GAF); 3-2-2 Arty Bn (291 GAF); GGFF Div (9 Inf Bn, 4 Lib Inf Bn, GGFF Inf Rgt, 136 Arty Rgt); 12-2-3 Inf Div (Bologna, less one step); 1-2-3 Inf Bn (18 Lib, 36 Lib); 22-3-2 Arty Bde (5 Army)
- A48.20: 8T Truck Points; 2 SPs
- A33.14: Level 2 Airbase
- A48.18: Level 2 Airbase
- A55.05: Level 2 Airbase
- The rest of the Axis Set-Up (B60.24 through w/i 1 B42.23) is identical to Scenario 7.13's Axis Set-Up above.
- Anywhere west of the main Axis Line: (7)-4-3 Luftwaffe Flak Bn (1-53, 1-43, 2-25)
- With any other Axis unit: KG Markers (Crüwell, Linau, 3 Aufk, Schütte, Wechmar, Voss, Marcks); 9-3-2 Coastal Arty Bn (523, 528, 532, 529); 4-3-2 Coastal Arty Battery (4-149, 4-772); 7-3-3 Arty Bn (2-115); 3-3-3 Arty Bn (408); 2-3-5 Arm Arty Battery (902); 1-3-2 Mountain Arty Battery (362, 363, 364)
- At Any Axis controlled Airbase or Air Strip: Italian: 1x Ju.87b (reduced); 3x CR.42; 4x SM.79; 1x Ca.309; 1x G.50; 1x SM.82; 2x MC.200; 2x Br.20; 3x MC.202; 1x Z.1007. German: 1x Bf.109g; 3x Bf.109f; 1x Ju.87d; 2x Bf.110; 2x Ju.88; 2x Ju.52; 1x He.111h
Victory: Use Campaign Victory conditions (see 7.0 above).
7.15 1st Alamein, 1 July 42, Campaign Start
General Information:
- Set Up Order: Commonwealth, Axis
- First Player: Axis
- First Turn: 1 July 42
- Last Turn: 29 Nov 42
- Game Length: 46
- Maps in Play: All
- Use Campaign Rules?: Yes
- Port Damage: None
- Airfield Ownership: The Axis controls all air strips occupied by or west of their units (except Giarabub and Siwa). All other on-map airbases and air strips are controlled by the Commonwealth.
- Special Note on Airfield use and set up: Due to the rapid Axis advance, no Axis air units can set up or use airbases or air strips east of Cxx.15 until 15 July 42. On the 15 July 42 turn, the Axis player can begin to use these bases normally.
One-Time Random Events which have occurred: Pearl Harbor Occurs; Allies Crack Luftwaffe Codes; German Signal-Intercept Genius At Work; German Signal Unit Disaster
Timed Rules in Effect:
- Brigade Groups
- Armor Brigade Groups
- Mines allowed (c3.2a)
- Allied Hipshoots Allowed (5.1)
- A19.35 as an Axis Supply Source (3.7a)
Commonwealth Information:
- City Ownership: Two Months (+): Alexandria (all), Cairo (all), Helwan, Port Said, Suez
- Reserve Markers Available: 6
- Hedgehogs Remaining: 6
- Minefields Remaining: 9
- Senussi Hexes remaining: None remain to be activated.
- Training Marker Positions: 6 Aus Div (Normal), 2 Arm Div (Normal), 9 Aus Div (Normal), 2 NZ Div (Normal), 7 Aus Div (Normal), 1 SA Div (Normal), 2 SA Div (Normal), 1 Arm Div (Normal)
- Greek Campaign Status Track Marker: Campaign Termination Box
- Greek Deployment Progress Track Marker: No longer in use.
- Dead Units: 2-3-10 Lt Arm Bn (3 Hus); 4-0 Command HQ (Tobruk); 6-2-3 Arm Bn (4 RTR, 7 RTR); 1 Arm Div (9-3-5 Arm Bde (2)); 10 Arm Div (9-3-5 Arm Bde (8, 9)); 6-4-3 Inf Bde (201 Gd); 50 Inf Div (150 Inf Bde); 4 Ind Div (11 Ind Inf Bde); 5 Ind Div (10 Ind, 29 Ind Inf Bde); 10 Ind Div (20 Ind, 21 Ind Inf Bde); 6-4-3 Ind Inf Bde (3 Ind); 7-5-3 FF Inf Bde (1 FF); 9-2-3 Arty Bn (68 Med); 5-2-3 Arty Bn (Red) (107 Fld); 2x Hurri I; 1x Blen IV; O'Connor Leader: Captured
Set Up:
- Near East Box: 7 Aus Div (18 Aus, 21 Aus, 25 Aus Inf Bde, Organic Truck (Full)); 4 Ind Div (7 Ind Inf Bde, Organic Truck (Full)); 6-4-3 Inf Bde (14); 6-3-3 Ind Inf Bde (161 Ind)
- Far East Box: 6-4-3 Inf Bde (16, 23); 7 Arm Div (7-4-8 Arm Bde (7))
- B12.01: 1-2-3 Senussi Bn (Giarabub)
- C4.22: 1-5-8 Commando Bn (LRDG, 1 SAS)
- E10.26: 2-3-5 Egyptian Camel Bn (Hauwasa)
- D26.19: 5 Ind Div (9 Ind Inf Bde (less one step), Organic Truck (Full))
- D28.19: 7 Arm Div (7 Motor Inf Bde, Organic Truck (Full)); 2-4-8 SA Arm Car Bn (4 SA); 5-2-3 Arty Bn (Red) (4 RHA)
- D29.19: Level 1 Hedgehog; 2 NZ Div (6 NZ Inf Bde); 4 SPs
- w/i 1 D26.16: Strafer Gott Leader; 2 NZ Div (4-5-8 Arm Recon Bn (2 NZ), 28 Maori Inf Bn, 4 NZ, 5 NZ Inf Bde (each Bde less one step)); 12-0 Corps HQ (13); 4 SPs
- D30.17: 10 Ind Div (Guides Arm Car Bn); 6-2-3 Ind Inf Bde (18 Ind); 5-2-3 Arty Bn (Yellow) (11 RHA)
- D30.16: 1 SA Div (1 SA Bde)
- D31.16: 7 Arm Div (9-4-6 Arm Bde (4)); 1 SA Div (2 SA Inf Bde); 6-2-3 Arm Bn (8 RTR); 5-2-3 Arty Bn (Yellow) (1 RHA)
Historical Note: The 4 Arm Bde spent the night of 30 June-1 July caught in the soft sand around D32.20. It left that hex (with the Afrikakorps slowly following) at first light only to get stranded again in the above hex. Rather than let the Brigade get clobbered out in front, or heavily modify the sequence of play for this one unit to get away, I chose to push them forward and out of the way to the place they ended up on 1 July. Even with that, I feel the unit should function normally for the remaining 2.5 days of the turn.
- D32.16: Level 1 Hedgehog; 2-4-8 SA Arm Car Bn (6 SA); 2 SA Div (3 SA Inf Bde); 9-2-3 Arty Bn (7 Med); 4 SPs
- D28.14: 1 Arm Div (12 Lcr Arm Car Bn)
- D30.14: 3-4-8 Arm Car Bn (KDG); 2-4-8 Arm Car Bn (Royals); 1 Arm Div (9-4-5 Arm Bde (22)); 5-2-3 Arty Bn (Yellow) (2 RHA)
- D30.12: 12-0 Corps HQ (30); (2)-2-3 AT Bn (Red) (95 AT); 1 Arm Div (Organic Truck (Full)); 5 SPs
- D33.11: 4 Ind Div (5 Ind Inf Bde); 10 Ind Div (25 Ind Inf Bde, Organic Truck (Full))
- D34.09: 12-0 Corps HQ (10); 50 Inf Div (69, 151 Inf Bde (each less one step), Organic Truck (Full)); 10 SPs
- w/i 1 D39.05: 6-2-3 Arm Bn (42 RTR, 44 RTR); 5-3-3 FF Inf Bde (2 FF); (4)-4-3 FF AT Bn (CAC); 3-4-3 FF Marine Bn (BFM); 3-5-3 Marine Bn (11 RM); 1-5-8 Commando Bn (Layforce); 8T Truck Points; 2-3-3 Yugoslav Inf Bn (Yugo Gd); 2 NZ Div (Organic Truck (Full)); 1 SA Div (Organic Truck (Full)); (1)-1-3 Arab Refugee Bn (1 Lib, 2 Lib, 4 Lib); Level 3 Airbase; 6-2-0 Coastal Arty Battery (204); (4)-3-1 Fort Bde (Alex A, Alex B); 2-1-3 Egyptian Inf Bde (2)
- D36.06: Level 2 Airbase
- w/i 1 D36.06: 2-4-3 Czech Inf Bn (11 Czech); 1-3-8 Arm Car Co (1 RAF, 2 RAF); 9 Aus Div (24 Aus, 26 Aus Inf Bde, Organic Truck (Full)); 2-4-8 SA Arm Car Bn (3 SA)
- D38.06: Level 2 Airbase
- D41.03: Level 2 Airbase
- w/i 1 any hex of Cairo: Level 2 Airbase; Level 3 Airbase; 9 Aus Div (9 Aus Arm Recon Bn, 20 Aus Inf Bde); 0-2-1 NZ RR Co (10 NZ, 13 NZ); 2-4-8 Arm Car Bn (Greys); 2-4-6 Ind Arm Car Bn (Skinner); (5)-3-3 AT Bn (65 AT); (2)-2-3 AT Bn (102 AT); 5-2-3 Arty Bn (Red) (12 Fld, 121 Fld, 104 RHA); (4)-3-1 Fort Bde (Cairo A, Cairo B, Cairo C); 2-3-6 Egyptian Cav Bn (Mob F); 3-3-8 Egyptian Ford Bn (FDA); 1-2-8 Egyptian Ford Bn (n-FDA, s-FDA); 3-2-3 Egyptian MG Bde (1 MG); 2-3-5 Egyptian Camel Bn (Siwa); 4-2-3 Egyptian Inf Bde (1); 4-0-3 Egyptian Arty Bn (Egypt); 3-0-5 Egyptian Arty Bn (1 Lt Mule); Egyptian National Army Organic Truck (Full); 4x Eq Repls; 4x Pax Repls
- E19.21: Level 3 Airbase
- E22.06: Level 2 Airbase; 5-2-3 Arty Bn (Red) (149 Fld)
Axis Information:
- City Ownership: Two Months (+): Benghazi. City Ownership, Less than 2 Months: Buq Buq (26 June 42), Sidi Barrani (26 June 42), Mersa Matruh (29 June 42), Tobruk (22 June 42), Bardia (26 June 42)
- Reserve Markers Available: 5
- Hedgehogs Remaining: 8
- Flieger Korps Active: Yes, but air units have been detached
- Minefields Available for Reuse: 0 (Those left from Gazala have not yet been pulled up, but are available after being removed.)
- Dead Units: Italian: 8-0 Corps HQ (CAM, LibOp, 22 It, 23 It); Ariete Arm Div (1 Lt, 2 Lt, 3 Lt Arm Bn, 5-5-8 Arm Bn (7 Med, 8 Med), 5-4-7 Arm Bn (9 Med), Nizza Arm Car Bn, 132 Arty Rgt, 551 AG Bn, Novara Lt Arm Bn); Littorio Arm Div (12 Med Arm Bn, 51 Med Arm Bn, 133 Arty Rgt (3-3-3), Organic Truck); Trieste Div (8 Brs Arm Car Bn, 66 Inf Rgt); 9-1-3 Blackshirt Inf Div (3 Jan, 23 Mar, 28 Oct); 12-3-3 Inf Div (Savona); 12-2-3 Inf Div (Cirene, Marm, Sirte); 12-1-3 Inf Div (Ctnzro); 8-1-3 Inf Div (1 Lib); 8-2-3 Inf Div (2 Lib); 4-3-3 Inf Rgt (1 Lib); 3-2-3 Inf Rgt (5 Lib); 2-3-3 Inf Bn (34 Lib); 5-3-3 Inf Rgt (10 Brs); 2-3-3 Blackshirt Inf Bn (Vd.Lib); 3-1-2 GAF Rgt (30, 31, 32); 1-2-2 GAF Co (B.Scegga, E.GuG); 3-0-3 Territorial Rgt (54); 2-0-3 Territorial Bn (225, 226); 2-0-3 Coastal Defense Bn (31 Lib); 2-0-6 Lt Arm Bn (5 Lt, 61 Lt, 62 Lt); 2-1-6 Lt Arm Bn (4 Lt, 20 Lt, 60 Lt, 63 Lt); 3-3-7 Lt Arm Bn (52 Mx); 4-3-6 Arm Bn (3 Med); 4-2-6 Arm Bn (5 Med, 6 Med, 21 Med); 3-3-6 Arm Bn (1 Med, 2 Med); 2-3-12 Motorcycle Bn (ProvBrs, PAI); 1-3-12 Motorcycle Co (22 Brs, 61 Brs, 201 Brs, 202 Brs); 10-3-3 Arty Rgt (10, 12, 26); 10-3-2 Arty Rgt (10 Corps, 22 Corps); 26-2-2 Arty Bde (30 GAF); 22-3-2 Arty Rgt (25 Corps); 15-3-2 Arty Rgt (di Mnvra); 14-3-2 Arty Bde (20 Corps); 13-3-3 Arty Bde (Mtrizzato); 11-3-2 Arty Rgt (21 Corps, 24 Corps); 10-2-2 Arty Rgt (340 GAF); 9-3-2 Arty Bn (23 Corps); 8-2-2 Arty Rgt (31 GAF); 7-3-3 Arty Rgt (2 Cel); 7-3-2 Arty Rgt (Maletti); 4-2-2 Arty Rgt (32 GAF); 17-0-0 Coastal Arty Rgt (R. Mar); 3-0-0 Coastal Arty Bn (4); 2-0-0 Coastal Arty Bn (5); (6)-4-5 AT Bn (1 Milmart); 2x SM.79; 5x CR.42; 1x Ba.65; 2x G.50; 2x MC.200; 1x MC.202. German: 21.Pz Div (6-5-8 Pz Bn (2-5)); 15.Pz Div (6-5-8 Pz Bn (2-8), 10-5-8 PG Rgt (115)); 90.Le Div (6-4-3 Inf Rgt (200)); 6-5-3 Inf Rgt (288.Snd); 2-3-3 Inf Bn (3-255); 4-3-2 Coastal Arty Co (4); 2x Bf.109f; 1x Bf.110; 1x Ju.52
Set Up:
- Tripoli Box: (4)-4-5 AT Bn (2 Mil); 1-1-2 GAF Bn (35); 3-0-3 Inf Rgt (350); 3-1-3 Engineer Rgt (1 Spc, 7 Spc); 5x Italian Pax Repls; 4x Italian Eq Repls; 15 SPs
- A26.18: 12-2-3 Inf Div (Bologna, less one step); 4-2-2 Arty Bn (332 GAF); 3-2-2 Arty Bn (291 GAF)
- A33.14: Level 2 Airbase
- A48.18: Level 2 Airbase
- A48.20: 1-2-3 Inf Bn (18 Lib); 22-3-2 Arty Bde (5 Army); 8T Truck Points; 2 SPs
- A55.05: Level 2 Airbase
- B60.24: 1-2-3 Inf Bn (36 Lib)
- B46.08: Level 2 Airbase
- B46.02: Level 2 Airbase
- B47.06: Railhead Marker (Railline is complete)
- B49.09: Level 2 Airbase
- w/i 2 B50.08: 2-5-3 Luftwaffe Para Bn (Lehr); (3)-3-3 Korück Bn (556); 90.Le Div (Organic Truck (Empty)); 1x German Eq Repl; 1x German Pax Repl; 3-4-3 Marine Bn (4-SM); Ariete Arm Div (Organic Truck (Empty)); Trieste Div (Organic Truck (Empty)); GGFF Div (4 Lib Inf Bn, 9 Inf Bn, GGFF Inf Rgt, 136 Arty Rgt); 8T Truck Points; 5 SPs
- B50.16: Level 1 Hedgehog
- B49.16: Level 1 Hedgehog
- B48.16: Minefield
- B48.17: Minefield
- B47.15: Level 1 Hedgehog
- B47.16: Level 1 Hedgehog
- B47.17: Level 1 Hedgehog
- B47.18: Minefield
- B46.16: Minefield
- B46.17: Minefield
- B45.15: Level 1 Hedgehog
Historical Note: During the night march of 30 June 42, the columns of the 15th and 21st Panzer Divisions became intermixed. Several 21st Pz units fell in and followed behind other formations. In this manner, the odd locations of the 104 PG Rgt, the Pioneers, and the division's AT attachments resulted.
- D29.23: 90.Le Div (4-5-8 Arm Recon Bn (580)); Littorio Arm Div (12 Brs Inf Rgt)
- D33.21: Rommel Leader; 21.Pz Div (3 Arm Recon Bn, 6-5-8 Pz Bn (1-5), 155 Arty Rgt, Organic Truck (Full))
- D32.21: 21.Pz Div (10-5-8 PG Rgt (104)); (7)-5-3 Luftwaffe Flak Bn (1-33); 15.Pz Div (33 Arm Recon Bn, 6-5-8 Pz Bn (1-8), 4-5-8 PJ Bn (33 PJ), 4-5-3 Pioneer Bn (33), 33 Arty Rgt, Organic Truck (Full))
- D34.19: 8-0 Corps HQ (21 It); Trento Div (46 Arty Rgt)
- D33.19: 90.Le Div (6-4-3 Inf Rgt (155), 6-5-3 Inf Rgt (361), 5-5-3 Pioneer Bn (900), 361 Arty Bn, 190 Arty Rgt); 4-3-3 AA Bn (612); 3-3-3 AA Bn (606)
- D33.18: Trento Div (62 Inf Rgt)
- D33.17: 5-4-3 Inf Rgt (7 Brs); 8-3-3 Arty Rgt (3 Cel)
- Anywhere west of Cxx.01: (7)-4-3 Luftwaffe Flak Bn (2-25, 1-53, 1-43); 9-3-2 Coastal Arty Bn (523, 528, 532, 529); 4-3-2 Coastal Arty Battery (4-149, 4-772); 7-3-3 Arty Bn (2-115); 3-3-3 Arty Bn (408); 2-3-5 Arm Arty Battery (902); 1-3-2 Mountain Arty Battery (362, 363, 364)
- With any other Axis unit: KG Markers (Crüwell, Linau, 3 Aufk, Schütte, Wechmar, Voss, Marcks, Gräf)
- At Any Axis controlled Airbase or Air Strip: Italian: 1x Ju.87b (reduced); 3x CR.42; 4x SM.79; 1x Ca.309; 1x G.50; 1x SM.82; 2x MC.200; 2x Br.20; 3x MC.202; 1x Z.1007. German: 1x Bf.109g; 3x Bf.109f; 2x Ju.87d; 2x Bf.110; 2x Ju.88; 3x Ju.52; 1x He.111h
- Flieger Korps Detached (All German): 1x Bf.110; 1x Ju.87b; 1x Ju.87d; 1x Ju.88
Victory: Use Campaign Victory conditions (see 7.0 above).
7.16 El Alamein—The First Battle, 1 July 1942—One-Map Version
General Information:
- Set Up Order: Commonwealth, Axis
- First Player: Axis
- First Turn: 1 July 42
- Last Turn: 26 July 42
- Game Length: 9
- Maps in Play: Map D Only
- Use Campaign Rules?: No
- Port Damage: None
- Airfield Ownership: The Axis controls all air strips occupied by or west of their units (except Giarabub and Siwa). All other on-map airbases and air strips are controlled by the Commonwealth.
- Special Note on Airfield use and set up: Due to the rapid Axis advance, no Axis air units can set up or use airbases or air strips on the game map. His air units are all stationed at nominal air bases 25 hexes west of the map edge with a refit capacity of 4 per turn. The Axis Player can also base air units in Crete.
Timed Rules in Effect:
- Brigade Groups
- Armor Brigade Groups
- Allied Hipshoots Allowed (5.1)
Commonwealth Information:
- City Ownership: NA
- Reserve Markers Available: 6
- Hedgehogs Remaining: NA
- Minefields Remaining: NA
- Senussi Hexes remaining: None remain to be activated.
- Training Marker Positions: All are Normal
- Greek Campaign Status Track Marker: Campaign Termination Box
- Greek Deployment Progress Track Marker: No longer in use.
- Dead Units: No rebuilds allowed.
Set Up: Identical to the Commonwealth Set-Up given for Scenario 7.15 above, from D26.19 through D34.09.
- w/i 1 D39.05: 6-2-3 Arm Bn (42 RTR, 44 RTR); 5-3-3 FF Inf Bde (2 FF); (4)-4-3 FF AT Bn (CAC); 3-4-3 FF Marine Bn (BFM); 3-5-3 Marine Bn (11 RM); 1-5-8 Commando Bn (Layforce); 8T Truck Points; 2-3-3 Yugoslav Inf Bn (Yugo Gd); 2 NZ Div (Organic Truck (Full)); 1 SA Div (Organic Truck (Full)); (1)-1-3 Arab Refugee Bn (1 Lib, 2 Lib, 4 Lib); Level 3 Airbase; 6-2-0 Coastal Arty Battery (204); (4)-3-1 Fort Bde (Alex A, Alex B)
- D36.06: Level 2 Airbase
- w/i 1 D36.06: 2-4-3 Czech Inf Bn (11 Czech); 1-3-8 Arm Car Co (1 RAF, 2 RAF); 9 Aus Div (24 Aus, 26 Aus Inf Bde, Organic Truck (Full)); 2-4-8 SA Arm Car Bn (3 SA)
- D38.06: Level 2 Airbase
- D41.03: Level 2 Airbase
- Any Allied Controlled Airbase or Air Strip: 3x Hurri I; 3x Hurri IIa; 4x Blen IV; 3x Beaufgtr; 3x Wellington; 6x Ktyhk; 2x Baltimore
Special Rules: a) Reinforcements: None. Alexandria functions normally to provide SPs. b) Players can use the Map E Abstract to provide the Commonwealth Player with additional Airbases.
Axis Information:
- City Ownership: NA
- Reserve Markers Available: 5
- Hedgehogs Remaining: NA
- Flieger Korps Active: NA
- Minefields Available for Reuse: NA
- Dead Units: No rebuilds allowed.
Set Up: Identical to the Axis Set-Up given for Scenario 7.15 above, from D37.32 through D33.17.
- With any other Axis unit: KG Markers (Crüwell, Linau, 3 Aufk, Schütte, Wechmar, Voss, Marcks, Gräf)
- Based off-map as per the special rule above: Italian: 1x CR.42; 3x SM.79; 1x G.50; 1x MC.200; 2x MC.202. German: 2x Bf.109f; 2x Ju.87d; 2x Bf.110; 2x Ju.88; 1x He.111h
Special Rules: a) Reinforcements: 2 SPs per turn at D37.35. Also, on 1 July 42, at D37.35 the Organic Trucks from 90.Le, Ariete and Trieste arrive fully loaded.
Victory: a) The Axis player wins if he captures D30.16, D30.17, D29.15, D29.14, and D32.16. b) The Allied player wins if he avoids the Axis conditions and retains control of D29.19, D28.15, and D26.19 as well. c) Any other result is a draw.
7.17 Alam Halfa—29 Aug 42, Campaign Start
General Information:
- Set Up Order: Commonwealth, Axis
- First Player: Axis
- First Turn: 29 Aug 42
- Last Turn: 29 Nov 42
- Game Length: 29
- Maps in Play: All
- Use Campaign Rules?: Yes
- Port Damage: None
- Airfield Ownership: The Axis controls all air strips occupied by or west of their units (except Siwa). All other on-map airbases and air strips are controlled by the Commonwealth.
One-Time Random Events which have occurred: Pearl Harbor Occurs; Allies Crack Luftwaffe Codes; German Signal-Intercept Genius At Work; German Signal Unit Disaster; Allies Crack Wehrmacht Code; Offer of US Assistance
Timed Rules in Effect:
- No Brigade Groups
- Mines allowed (c3.2a)
- Allied Hipshoots Allowed (5.1)
- A19.35 as an Axis Supply Source (3.7a)
Commonwealth Information:
- City Ownership: Two Months (+): Alexandria (all), Cairo (all), Helwan, Port Said, Suez
- Reserve Markers Available: 6
- Hedgehogs Remaining: 0
- Minefields Remaining: 3
- Senussi Hexes remaining: None remain to be activated.
- Training Marker Positions: 6 Aus Div (Normal), 2 Arm Div (Normal), 9 Aus Div (Normal), 2 NZ Div (Normal), 7 Aus Div (Normal), 1 SA Div (Normal), 2 SA Div (Normal), 1 Arm Div (Normal)
- Greek Campaign Status Track Marker: Campaign Termination Box
- Greek Deployment Progress Track Marker: No longer in use.
- Dead Units: 2-3-10 Lt Arm Bn (3 Hus); 4-0 Command HQ (Tobruk); 6-2-3 Arm Bn (4 RTR, 7 RTR); 50 Inf Div (150 Inf Bde); 4 Ind Div (11 Ind Inf Bde, Divarty Bde); 5 Ind Div (29 Ind Inf Bde); 10 Ind Div (20 Ind Inf Bde); 6-2-3 Ind Inf Bde (18 Ind); 9-2-3 Arty Bn (68 Med); 5-2-3 Arty Bn (Red) (107 Fld); 3x Hurri I; 1x Hurri IIc; 3x Blen IV; 2x Ktyhk; 1x Beaufgtr; 1x Wellington; O'Connor Leader: Captured; Strafer Gott: Killed
Set Up:
- Near East Box: 7 Aus Div (18 Aus, 21 Aus, 25 Aus Inf Bde, Divarty Arty Bde, Organic Truck (Full)); 6-4-3 Inf Bde (14); 5 Ind Div (10 Ind Inf Bde); 10 Ind Inf Div (25 Ind Inf Bde, Organic Truck (Full)); 6-4-3 Ind Inf Bde (3 Ind)
- Far East Box: 6-4-3 Inf Bde (16, 23); 7 Arm Div (7-4-8 Arm Bde (7))
- C4.22: 1-5-8 Commando Bn (LRDG, 1 SAS)
- E10.26: 2-3-5 Egyptian Camel Bn (Hauwasa)
- D25.17: 7 Arm Div (11 Hus Arm Car Bn, 9-4-6 Arm Bde (4))
- D26.16: 2-4-8 SA Arm Car Bn (4 SA); 1 Arm Div (12 Lcr Arm Car Bn)
- D26.15: 7 Arm Div (Divarty Bde); 3-4-8 Arm Car Bn (KDG)
- D27.17: 7 Arm Div (7 Motor Inf Bde)
- D27.15: Minefield
- D27.13: (5)-3-3 AT Bn (65 AT); 10 Arm Div (9-3-5 Arm Bde (8))
- D28.17: Level 1 Hedgehog; 2 NZ Div (5 NZ, 6 NZ Inf Bde, Organic Truck (Full))
- D28.16: 2-4-8 Arm Car Bn (Greys); 1 Arm Div (9-4-5 Arm Bde (22)); 2 NZ Div (4-5-8 Arm Recon Bn (2 NZ))
- D28.15: Level 1 Hedgehog; 44 Div (133 Inf Bde)
- D28.14: Minefield
- D28.13: Minefield
- D29.18: Level 1 Hedgehog; 44 Div (132 Inf Bde); 2 NZ Div (28 Maori Inf Bn)
- D29.17: 6-3-4 Arm Bn (40 RTR, 46 RTR, 50 RTR); 5-2-3 Arty Bn (Red) (5 RHA)
- D29.16: 2 NZ Div (Divarty Bde); 10 Arm Div (Divarty Bde); 4 SPs
- D29.15: 12-0 Corps HQ (13); 44 Div (Divarty Bde, Organic Truck (Full)); 10 SPs
- D29.14: 44 Div (131 Inf Bde)
- D30.17: Level 1 Hedgehog; 5 Ind Div (9 Ind Inf Bde); 6-3-3 Ind Inf Bde (161 Ind)
Axis Information:
- City Ownership: Two Months (+): Benghazi, Buq Buq, Sidi Barrani, Mersa Matruh, Tobruk, Bardia
- Reserve Markers Available: 5
- Hedgehogs Remaining: 8
- Flieger Korps Active: Yes, but air units have been detached
- Minefields Available for Reuse: 6 (More remain near the Gazala lines which can be pulled up for use.)
- Dead Units: Italian: 8-0 Corps HQ (CAM, LibOp, 22 It, 23 It); Ariete Arm Div (1 Lt, 2 Lt, 3 Lt Arm Bn, 5-5-8 Arm Bn (7 Med, 8 Med), 551 AG Bn, Novara Lt Arm Bn); Littorio Arm Div (51 Med Arm Bn, 133 Arty Rgt (3-3-3), Organic Truck); Trieste Div (66 Inf Rgt); 9-1-3 Blackshirt Inf Div (3 Jan, 23 Mar, 28 Oct); 12-3-3 Inf Div (Savona); 12-2-3 Inf Div (Cirene, Marm, Sirte); 12-1-3 Inf Div (Ctnzro); 8-1-3 Inf Div (1 Lib); 8-2-3 Inf Div (2 Lib); 4-3-3 Inf Rgt (1 Lib); 3-2-3 Inf Rgt (5 Lib); 2-3-3 Inf Bn (34 Lib); 5-3-3 Inf Rgt (10 Brs); 2-3-3 Blackshirt Inf Bn (Vd.Lib); 3-1-2 GAF Rgt (30, 31, 32); 1-2-2 GAF Co (B.Scegga, E.GuG); 3-0-3 Territorial Rgt (54); 2-0-3 Territorial Bn (225, 226); 2-0-3 Coastal Defense Bn (31 Lib); 2-0-6 Lt Arm Bn (5 Lt, 61 Lt, 62 Lt); 2-1-6 Lt Arm Bn (4 Lt, 20 Lt, 60 Lt, 63 Lt); 3-3-7 Lt Arm Bn (52 Mx); 4-3-6 Arm Bn (3 Med); 4-2-6 Arm Bn (5 Med, 6 Med, 21 Med); 3-3-6 Arm Bn (1 Med, 2 Med); 2-3-12 Motorcycle Bn (ProvBrs, PAI); 1-3-12 Motorcycle Co (22 Brs, 61 Brs, 201 Brs, 202 Brs); 10-3-3 Arty Rgt (10, 12, 26); 10-3-2 Arty Rgt (10 Corps, 22 Corps); 26-2-2 Arty Bde (30 GAF); 22-3-2 Arty Rgt (25 Corps); 15-3-2 Arty Rgt (di Mnvra); 14-3-2 Arty Bde (20 Corps); 13-3-3 Arty Bde (Mtrizzato); 11-3-2 Arty Rgt (21 Corps, 24 Corps); 10-2-2 Arty Rgt (340 GAF); 9-3-2 Arty Bn (23 Corps); 8-2-2 Arty Rgt (31 GAF); 7-3-3 Arty Rgt (2 Cel); 7-3-2 Arty Rgt (Maletti); 4-2-2 Arty Rgt (32 GAF); 17-0-0 Coastal Arty Rgt (R. Mar); 3-0-0 Coastal Arty Bn (4); 2-0-0 Coastal Arty Bn (5); (6)-4-5 AT Bn (1 Milmart); 2x SM.79; 5x CR.42; 1x Ba.65; 2x G.50; 2x MC.200; 1x MC.202. German: 90.Le Div (6-4-3 Inf Rgt (200)); 2-3-3 Inf Bn (3-255); 4-3-2 Coastal Arty Co (4); 2x Bf.109f; 1x Bf.110; 1x Ju.52
Set Up:
- Tripoli Box: 2x Italian Pax Repls; 2x Italian Eq Repls; 10 SPs
- A26.18: 4-2-2 Arty Bn (332 GAF); 3-2-2 Arty Bn (291 GAF)
- A33.14: Level 2 Airbase
- A48.18: Level 2 Airbase
- A48.20: 1-2-3 Inf Bn (18 Lib); 3-3-3 Inf Bn (57 Brs); 22-3-2 Arty Bde (5 Army); 8T Truck Points; 2 SPs
- A55.05: Level 2 Airbase
- B60.24: 1-2-3 Inf Bn (36 Lib)
- B46.08: Level 2 Airbase
- B46.02: Level 2 Airbase
- B47.06: Railhead Marker (Railline is complete)
- B49.09: Level 2 Airbase
- w/i 2 B50.08: 2-5-3 Luftwaffe Para Bn (Lehr); (3)-3-3 Korück Bn (556); 3-4-3 Marine Bn (4-SM); 12-3-3 Inf Div (Pistoia); 8T Truck Points; 10 SPs
- B47.15: Level 1 Hedgehog
- B47.16: Level 1 Hedgehog
- B47.17: Level 1 Hedgehog
- B46.16: Minefield
- B46.17: Minefield
- B45.15: Level 1 Hedgehog
- B45.16: Minefield
- B44.15: Minefield
- B44.13: Minefield
- B43.15: Minefield
- B43.13: Minefield
- B42.14: Minefield
- B42.13: Level 1 Hedgehog
- B41.14: Minefield
Victory: Use Campaign Victory conditions (see 7.0 above).
Scenarios continue in Volume II: 3rd Alamein Campaign Start (7.18), 3rd Alamein Small Scenario (7.19), and The Desert Campaign Sept 40-Nov 42 ("the whole Super Burrito", 7.20) — see below.
A Complete Copy of DAK Includes
1x Box; 1x OCS Series Rulebook (v2.0i); 2x OCS v2.0i Charts & Tables Booklets; 3x Game Specific Rulebooks (Volumes I, II, & III); 2x Dice (one red, one white); 5x 22x34" Maps; 1x Map E Abstract; 4x 280-counter countersheet (incl. two identical Marker Sheets); 1x 140-counter countersheet; 3x Countertrays; 1x Registration Card; 1x Current Price List; Assorted Advertising Flyers (which our collaters love to hate...).
If you are missing something, contact us. If you have something extra, Merry Christmas!
OCS Optionals and Series Errata
8) Spotters and Artillery Barrages
In addition to the Modifier #4 (no spotter shift) to the Barrage Table, add the following:
-
If there is one or more friendly units adjacent to the target but all of these units are in Reserve Mode, shift 2 columns left.
-
If there is one or more friendly units adjacent to the target but all of these units are DG, shift 1 column left.
-
If there is one or more friendly units adjacent to the target but none of these units are Attack-Capable, shift 1 column left.
Note that in all cases, trucks and wagons do not qualify as units and can never count as the spotter for a barrage.
9) All Known, Series Errata
Make special note of 9 below.
OCS Series (ver 2.0i) (10 April 97)
-
RR Repair units can use rail movement through hexes repaired/converted in that phase, but such units cannot then be used to repair/convert rail hexes beyond that section of track. Such movement and repair constitutes leapfrogging.
-
An airbase can be repaired (to eliminate damage) one level at a time until the base is back to the highest actually built level it ever held (it cannot be improved beyond that limit in this way) by any 1 RE unit with the expenditure of 2T. There is no die roll for this method of repair—regardless of terrain. The repairing unit need not be engineer or attack capable—but it must be classed as a unit according to 3.1.
-
DG units cannot do recons.
-
If a breakdown regiment is stacked with a division capable of absorbing breakdowns (but not this one, due to action ratings, etc.), then the breakdown does not add to the combat strength of the hex. The breakdown becomes a 1-step, zero strength, zero action rating unit while it remains in the hex.
-
In situations where units must "eat off the map" (i.e. they cannot trace) pay 1T per 2 REs or fraction thereof. This is a change to 11.6d. 11.6d is dropped entirely and replaced with "Pay 1T per 2 REs (or fraction thereof)." In effect, the player is now paying as if 4 REs equaled a division under the old rule (eliminating the anomaly when multiple non-divisionals are present). It is also simpler to deal with. Change references to 11.6d and its effects in 11.6f and 11.6h.
-
HQs cannot use their draw and throw abilities while in Strategic Move or Reserve Mode.
-
When optional rule #4 Destroying Hedgehogs is used, no more than one level can be destroyed in a hex per turn, even if more than one "unit" is available (two if an engineer capable unit is in the hex).
-
Future reinforcements, and breakdown regiments which have not yet entered play in the normal manner cannot be "rebuilt" using Pax and Eq Repls before they do so.
-
The following require an attack capable unit to perform (and—just so it is clear—units in Strategic Move Mode are not attack capable, regardless of the counter's strength): capture of an enemy Dump, Truck, Wagon, or airfield OR entry into an enemy controlled Hedgehog, Port, Village, Minor or Major City hex. "Control" is defined here as belonging to the last player to pass a friendly attack capable unit through the hex—apply common sense to those areas obviously behind friendly lines and so on.
New OCS Optional Rules
1) Combat Density & Coordination Modifications
a) Small Unit Screening defenses: Should the defender have only one step, is not DG or Strat Move, and the owning player rolls one die getting a result of the unit's Action Rating or less, execute the following: Convert one L1 result into one o1. (DL2o1 becomes DL1o2, etc.)
Note: The small unit screen defense rule cannot be applied to a unit in a hedgehog hex.
Multi-Step Units: Multi-step units (such as infantry divisions) cannot take advantage of this rule when they have only one step remaining—even though they only have one step.
b) Complex Attack Coordination and Flexibility Issues... If a hex is attacked from any two non-adjacent hexsides OR three or more hexsides, all Exploit results from the combat are negated and no Exploit awards are made.
2) Revised Barrage Table Density Mods
| REs in Hex (don't round) | Shifts |
|---|---|
| 1 or less | left 1 |
| Greater than 1, up to 3 | none |
| Greater than 3, up to 4 | right 1 |
| Greater than 4, up to 5 | right 2 |
| Greater than 5, up to 6 | right 3 |
| Greater than 6 | right 4 |
3) Hedgehogs
A) Hogs negate the armor effects as if they add a nominal anti-tank unit to the stack (as per OCS Opt 1a.)...but at a price:
B) Each level of Hedgehog built costs 2 SPs, not 1 SP.
C) If any defender option results must be taken, half (rounded up) of all option combat results must be taken as step losses, remaining Option results are normal. If the attacker takes his option, ignore all defender options as you would normally—if the defender decides to apply his options anyway, he must take these losses.
D) Only Artillery-type units can be in Reserve in a hedgehog hex. Other unit types cannot be inside such a hex and be in Reserve at the same time.
4) Artillery Barrage Supply
Determine the initial (before shifts) table Column to be used in the barrage (by totaling the firing barrage points available). Pay according to that table column. Payment is made based on the column used before any shifts are made. All supply needed to fire a consolidated barrage must come from either the same Corps HQ or same direct draw point (if no HQ is used). Note that now that aircraft must make separate barrages, there is no reason to worry about air points mixed with artillery points—aircraft barrages are free (except for refit, below). Mark the Charts and Tables with the following:
Barrage Table: 1 or Less, 2, 3-4, 5-7, 8-11: 1T. 12-16: 2T. 17-24: 3T. 25-40: 4T. 41-68: 6T. 69-116: 8T. 117+: 12T.
GS & Barrage vs Facility Table: 1-4, 5-10: 1T. 11-20: 2T. 21-40: 4T. 41-80: 6T. 81+: 8T.
GS & Barrage vs. Dump/Truck Table: 1, 2-4, 5-8: 1T. 9-12: 2T. 13-24: 3T. 25-48: 4T. 49-62: 6T. 63+: 8T.
Notes:
-
DG Units fire 1/2 their fire strength and yes, they might end up on a lower, cheaper, table than usual because of it. In effect, the unit spent a lot more time than usual not firing.
-
No unit can "split" its fires or fire less than the full strength it has available. A unit either fires or it doesn't.
-
Do not double the cost of Rocket Artillery as was done before...it is already taken care of by the new rates.
5) Air Unit Refit
Dispense with the current die roll system of refit. Pay to refit air units (per the schedule below), each air base can refit up to 2x its level in air units (6 at a level 3) per turn. An air unit is an air unit for this purpose—no distinction is made between Full Strength or Reduced air units for refit purposes.
Pay 1T per two air units (any type) via either a corps throw or direct draw.
If two air units for a token is unavailable (or the final total at an air base is odd), then use the following (in each case 1T must be available to expend should the roll go the "wrong" way...no rolling to see if you can get it for free when no token is available):
- For one air unit, expend 1T on a roll of 1-3, refit is free on 4-6.
Backfit to Games before DAK (this rule is standard for DAK and beyond): Use this rule directly, no additional SPs or transportation becomes available.
Air Base Supply: Because of this rule, ignore 15.0f regarding the supply of air bases. If the tokens are there to pay for refits, then the base is supplied, otherwise, it is not. For purpose of 14.5 (air units exempt from Return requirements), the air base is supplied (allowing active air units to remain active) if a token (or more) is available which would allow refit.
6) Arrival of Reinforcing Air Units
New air units show up at any air base (as they always have), but they do so Inactive, not active.
7) Coordination of Air and Artillery Barrages
Artillery and air are not allowed to Barrage together in one attack. They can hit the same target in succession (different phases), but they cannot add their points together to make a single larger barrage attack.
7.18 El Alamein: The Third Battle—22 Oct 42, Campaign Start
General Information:
- Set Up Order: Axis, Commonwealth
- First Player: Commonwealth
- First Turn: 22 Oct 42
- Last Turn: 29 Nov 42
- Game Length: 14
- Maps in Play: All
- Use Campaign Rules?: Yes
- Port Damage: None
- Airfield Ownership: The Axis controls all air strips occupied by or west of their units. All other on-map airbases and air strips are controlled by the Commonwealth.
One-Time Random Events which have occurred: Pearl Harbor Occurs; Allies Crack Luftwaffe Codes; German Signal-Intercept Genius At Work; German Signal Unit Disaster; Allies Crack Wehrmacht Code; Offer of US Assistance
Timed Rules in Effect:
- No Brigade Groups
- Mines allowed (c3.2a)
- Allied Hipshoots Allowed (5.1)
- A19.35 as an Axis Supply Source (3.7a)
Commonwealth Information:
- City Ownership: Two Months (+): Alexandria (all), Cairo (all), Helwan, Port Said, Suez
- Reserve Markers Available: 8
- Hedgehogs Remaining: 0
- Minefields Remaining: 3
- Senussi Hexes remaining: None remain to be activated.
- Training Marker Positions: 6 Aus Div (Normal), 2 Arm Div (Normal), 9 Aus Div (Normal), 2 NZ Div (Normal), 7 Aus Div (Normal), 1 SA Div (Normal), 2 SA Div (Normal), 1 Arm Div (Normal)
- Greek Campaign Status Track Marker: Campaign Termination Box
- Greek Deployment Progress Track Marker: No longer in use.
- Dead Units: 2-3-10 Lt Arm Bn (3 Hus); 4-0 Command HQ (Tobruk); 6-2-3 Arm Bn (4 RTR, 7 RTR); 50 Inf Div (150 Inf Bde); 4 Ind Div (11 Ind Inf Bde); 5 Ind Div (29 Ind Inf Bde, Divarty Bde); 10 Ind Div (20 Ind Inf Bde); 6-2-3 Ind Inf Bde (18 Ind); 9-2-3 Arty Bn (68 Med); 5-2-3 Arty Bn (Red) (107 Fld); 3x Hurri I; 1x Hurri IIc; 3x Blen IV; 2x Ktyhk; 1x Beaufgtr; 1x Wellington; O'Connor Leader: Captured; Strafer Gott: Killed
Set Up:
- Near East Box: 7 Aus Div (18 Aus, 21 Aus, 25 Aus Inf Bde, Organic Truck (Full)); 6-4-3 Inf Bde (14, 201 Gd); 5 Ind Div (9 Ind, 10 Ind Inf Bde, Organic Truck (Full)); 10 Ind Inf Div (25 Ind Inf Bde, Organic Truck (Full)); 6-4-3 Ind Inf Bde (3 Ind)
- Far East Box: 6-4-3 Inf Bde (16, 23); 7 Arm Div (8-4-7 Arm Bde (7))
- E10.26: 2-3-5 Egyptian Camel Bn (Hauwasa)
- D25.17: 7-5-3 FF Inf Bde (1 FF); 3-4-8 FF Arm Car Bn (1 Spahis); 3-4-3 FF Marine Bn (BFM); (4)-4-3 FF AT Bn (CAC)
- D26.16: 44 Div (132 Inf Bde, Divarty Bde)
- D26.15: 12-0 Corps HQ (13); 0-2-2 Scorpion Co (44 RTR); 6-2-3 Arm Bn (44 RTR); 4-4-8 Arm Recon Bn (Yellow) (Greys); (5)-3-3 AT Bn (65 AT); 3-5-8 Arm Car Bn (1 HCR); 3-4-8 Arm Car Bn (2 Derby); 1 Arm Div (9-4-5 Arm Bde (22)); 7 Arm Div (9-4-6 Arm Bde (4), 11 Hus Arm Car Bn, Divarty Bde); 10 SPs
- D27.17: 44 Div (131 Inf Bde); 5-2-3 Arty Bn (Red) (53 Fld)
- D27.16: 7 Arm Div (Organic Truck (Full)); 44 Div (Organic Truck (Full))
- D27.15: Minefield
- D28.17: Level 1 Hedgehog; 50 Div (69, 151 Inf Bde)
- D28.16: (5)-3-3 AT Bn (102 AT); 50 Div (Divarty Bde, Organic Truck (Full))
- D28.15: Level 1 Hedgehog
- D28.14: Minefield
- D28.13: Minefield
- D29.18: Level 1 Hedgehog; 6-1-3 Greek Inf Bde (1 Greek); 5-3-3 FF Inf Bde (2 FF)
- D30.17: Level 1 Hedgehog; 6-3-3 Ind Inf Bde (161 Ind); 4 Ind Div (7 Ind Bde)
- D30.16: (5)-3-3 AT Bn (149 AT); 4 Ind Div (5 Ind Bde, Divarty Bde, Organic Truck (Full)); 1 SA Div (Divarty Bde); 5-2-3 Arty Bn (Red) (5 RHA); 9-2-3 Arty Bn (7 Med)
- D30.13: 2-4-8 Arm Car Bn (Royals); 8-3-6 Arm Bde (24); 10 Arm Div (9-3-5 Arm Bde (8), 133 Fully Motorized Inf Bde, Divarty Bde)
Axis Information:
- City Ownership: Two Months (+): Benghazi, Buq Buq, Sidi Barrani, CAM
- Reserve Markers Available: 5
- Hedgehogs Remaining: 0
- Flieger Korps Active: Yes, but air units have been detached
- Minefields Available for Reuse: 2
- Special Reinforcement: Rommel was in Germany ill when the Alamein offensive began. Ordered directly to the front, he arrives as a reinforcement 26 Oct 42.
- Dead Units: Italian: 8-0 Corps HQ (CAM, LibOp, 22 It, 23 It); Ariete Arm Div (1 Lt, 2 Lt, 3 Lt Arm Bn, 5-5-8 Arm Bn (7 Med, 8 Med), 551 AG Bn, Novara Lt Arm Bn, (6)-4-3 AT Bn (AT)); Littorio Arm Div (4 Med, 51 Med Arm Bn, 133 Arty Rgt (3-3-3), Organic Truck); Trieste Div (66 Inf Rgt, 4-3-6 Arm Bn (11 Med), 8 Brs Arm Car Bn); 9-1-3 Blackshirt Inf Div (3 Jan, 23 Mar, 28 Oct); 12-3-3 Inf Div (Savona); 12-2-3 Inf Div (Cirene, Marm, Sirte); 12-1-3 Inf Div (Ctnzro); 8-1-3 Inf Div (1 Lib); 8-2-3 Inf Div (2 Lib); 5-4-3 Inf Rgt (9 Brs); 4-3-3 Inf Rgt (1 Lib); 3-2-3 Inf Rgt (5 Lib); 2-3-3 Inf Bn (34 Lib); 5-3-3 Inf Rgt (10 Brs); 2-3-3 Blackshirt Inf Bn (Vd.Lib); 3-1-2 GAF Rgt (30, 31, 32); 1-2-2 GAF Co (B.Scegga, E.GuG); 3-0-3 Territorial Rgt (54); 2-0-3 Territorial Bn (225, 226); 2-0-3 Coastal Defense Bn (31 Lib); 2-0-6 Lt Arm Bn (5 Lt, 61 Lt, 62 Lt); 2-1-6 Lt Arm Bn (4 Lt, 20 Lt, 60 Lt, 63 Lt); 3-3-7 Lt Arm Bn (52 Mx); 4-3-6 Arm Bn (3 Med); 4-2-6 Arm Bn (5 Med, 6 Med, 21 Med); 3-3-6 Arm Bn (1 Med, 2 Med); 2-3-12 Motorcycle Bn (ProvBrs, PAI); 1-3-12 Motorcycle Co (22 Brs, 61 Brs, 201 Brs, 202 Brs); 10-3-3 Arty Rgt (10, 12, 26); 10-3-2 Arty Rgt (10 Corps, 22 Corps); 26-2-2 Arty Bde (30 GAF); 22-3-2 Arty Rgt (25 Corps); 15-3-2 Arty Rgt (di Mnvra); 14-3-2 Arty Bde (20 Corps); 13-3-3 Arty Bde (Mtrizzato); 11-3-2 Arty Rgt (21 Corps, 24 Corps); 10-2-2 Arty Rgt (340 GAF); 9-3-2 Arty Bn (23 Corps); 8-2-2 Arty Rgt (31 GAF); 7-3-3 Arty Rgt (2 Cel); 7-3-2 Arty Rgt (Maletti); 4-2-2 Arty Rgt (32 GAF); 17-0-0 Coastal Arty Rgt (R. Mar); 3-0-0 Coastal Arty Bn (4); 2-0-0 Coastal Arty Bn (5); (6)-4-5 AT Bn (1 Milmart, 503); 2x SM.79; 4x CR.42; 1x Ba.65; 2x G.50; 2x MC.200; 1x MC.202. German: 90.Le Div (4-5-8 Arm Recon Bn (580), 5-5-3 Pioneer Bn (900), 10-3-3 Arty Bn (361)); 21.Pz Div (4-5-3 Pioneer Bn (200)); 4-3-3 AA Bn (612); 6-5-3 Commando Rgt (288.Snd); 4-5-8 PJ Bn (605); 4-3-2 Coastal Arty Co (4); 2x Bf.109f; 1x Bf.110; 1x Ju.52
Set Up:
- Tripoli Box: 8 SPs
- A33.14: Level 2 Airbase
- A48.18: Level 2 Airbase
- A48.20: 1-2-3 Inf Bn (18 Lib); 3-3-3 Inf Bn (57 Brs); 22-3-2 Arty Bde (5 Army); 8T Truck Points; 2 SPs
- A55.05: Level 2 Airbase
- B60.24: 1-2-3 Inf Bn (36 Lib)
- B46.08: Level 2 Airbase
- B46.02: Level 2 Airbase
- B47.06: Railhead Marker (Railline is complete)
- B49.09: Level 2 Airbase
- w/i 2 B50.08: (3)-3-3 Korück Bn (556); 90.Le Div (Organic Truck (Full)); 3-4-3 Marine Bn (4-SM); 12-3-3 Inf Div (Pistoia); 8T Truck Points; 5 SPs
- C45.29: 12-3-3 Inf Div (Sabrtha)
- C4.22: GGFF Div (4 Lib Inf Bn, 9 Inf Bn, GGFF Inf Rgt, 136 Arty Rgt)
- C39.03: Level 2 Airbase; 3-3-3 AA Bn (617); 2T Truck Points; 9 SPs
- D37.32: 3-4-3 Assault Engineer Bn (31, 32)
- D35.29: 7-5-3 Inf Rgt (Buhse)
- D35.27: Trieste Div (65 Inf Rgt)
- D35.26: Trieste Div (21 Arty Rgt, Organic Truck (Full))
- D35.24: 90.Le Div (6-4-3 Inf Rgt (200))
- D35.23: 90.Le Div ((6)-4-3 PJ Bn (190)); 4 SPs
- D35.22: 90.Le Div (6-4-3 Inf Rgt (155), 14-3-3 Arty Rgt (190))
- D35.21: 90.Le Div (6-5-3 Inf Rgt (361)); (7)-4-3 Luftwaffe Flak Bn (1-43, 1-53)
- D34.19: 164.Le Div (2-5-8 Arm Recon Bn (220)); 15.Pz Div (33 Arty Rgt, Organic Truck (Full)); (7)-5-3 Luftwaffe Flak Bn (1-33); Littorio Arm Div (12 Med Arm Bn, 554 AG Bn); 4 SPs
Victory: Use Campaign Victory conditions (see 7.0 above).
7.19 Third Alamein—October 23-31, 1942—Smaller Scenario
General Information:
- Set Up Order: Commonwealth, Axis
- First Player: Axis
- First Turn: 22 Oct 42
- Last Turn: 5 Nov 42
- Game Length: 5
- Maps in Play: Map D Only
- Use Campaign Rules?: No
- Port Damage: None
- Airfield Ownership: The Axis controls all air strips occupied by or west of their units. All other on-map airbases and air strips are controlled by the Commonwealth.
- Special Note on Airfield use and set up: The Axis player can base air units at nominal air bases 25 hexes west of the map edge with a refit capacity of 4 per turn. He can also base air units in Crete.
One-Time Random Events which have occurred: Pearl Harbor Occurs; Allies Crack Luftwaffe Codes; German Signal-Intercept Genius At Work; German Signal Unit Disaster; Allies Crack Wehrmacht Code; Offer of US Assistance
Timed Rules in Effect:
- No Brigade Groups
- Mines allowed (c3.2a)
- Allied Hipshoots Allowed (5.1)
- A19.35 as an Axis Supply Source (3.7a)
Commonwealth Information:
- City Ownership: NA
- Reserve Markers Available: 8
- Hedgehogs Remaining: NA
- Minefields Remaining: NA
- Senussi Hexes remaining: None remain to be activated.
- Training Marker Positions: All are Normal
- Greek Campaign Status Track Marker: Campaign Termination Box
- Greek Deployment Progress Track Marker: No longer in use.
- Dead Units: No rebuilds allowed.
Set Up: Identical to the Commonwealth Set-Up given for Scenario 7.18 above, from D25.17 through D30.17.
- The rest of the Commonwealth Set-Up (D30.16 through D41.03) is identical to Scenario 7.18's Set-Up above.
- Any Allied Controlled Airbase or Air Strip: 3x Spit Vb; 3x Hurri I; 7x Hurri IIa; 1x Hurri IId; 9x Blen IV; 5x Beaufgtr; 1x Gladiator; 5x Wellington; 2x Maryld; 7x Ktyhk; 3x Hurri IIc; 1x Boston; 5x Baltimore; 1x B-25; 1x B-26; 2x US B-24; 2x US P-40; 1x US B-25
- Anywhere in Egypt, east of the Axis: 8 Arm Div Divisional Marker
Special Rules: a) Reinforcements: None. Alexandria functions normally to provide SPs. b) Players can use the Map E Abstract to provide the Commonwealth Player with additional Airbases.
Axis Information:
- City Ownership: NA
- Reserve Markers Available: 5
- Hedgehogs Remaining: NA
- Flieger Korps Active: NA
- Minefields Available for Reuse: NA
- Dead Units: No rebuilds allowed.
Set Up: Identical to the Axis Set-Up given for Scenario 7.18 above, from D37.32 through D25.18.
- Anywhere west of the Axis Frontline (inclusive): (7)-4-3 Luftwaffe Flak Bn (1-6, 2-25, 1-46); 4-2-2 Arty Bn (332 GAF); 3-2-2 Arty Bn (291 GAF)
- With any other Axis unit: KG Markers (Crüwell, Linau, 3 Aufk, Schütte, Wechmar, Voss, Marcks, Gräf)
- At Any Axis controlled Airbase or Air Strip: Italian: 1x Ju.87b (reduced); 2x CR.42; 3x SM.79; 1x Ca.309; 1x G.50; 2x MC.200; 2x Br.20; 2x MC.202. German: 2x Bf.109g; 3x Bf.109f; 2x Ju.87d; 1x Bf.110; 2x Ju.88; 1x He.111h
Special Rules: a) Reinforcements: 2 SPs per turn at D37.35. b) Special Reinforcement: Rommel was in Germany ill when the Alamein offensive began. Ordered directly to the front, he arrives as a reinforcement 26 Oct 42.
Victory: a) The Allied Player wins if he captures D35.29 and forces the Axis to abandon its Alamein Line. b) The Axis Player wins if he (somehow) avoids the inevitable.
7.20 The Desert Campaign, Sept 1940 through Nov 15, 1942 ("The Whole Super Burrito")
General Information:
- Set Up Order: Commonwealth, Axis
- First Player: Axis
- First Turn: 12 Sept 40
- Last Turn: 29 Nov 42
- Game Length: 239
- Maps in Play: All
- Use Campaign Rules?: Yes
- Port Damage: None
One-Time Random Events which have occurred: None
Timed Rules in Effect:
- Brigade Groups
- Mines not allowed (c3.2a)
- Protecting Italian Private Property (c4.4d)
- No Running Away (c4.4c)
- German Acclimation to the Desert (4.7a)
- Italians Can't use non-Primary Roads for Trace (3.7b)
- Italian Parachute Design Modifier in Effect (c4.6f)
- Mussolini Requirements (c4.4a)
Commonwealth Information:
- City Ownership: Two Months (+): Buq Buq, Sidi Barrani, Mersa Matruh, Alexandria (all), Cairo (all), Helwan, Port Said, Suez
- Reserve Markers Available: 3
- Hedgehogs Remaining: 20
- Minefields Remaining: 25
- Senussi Hexes remaining: All
- Training Marker Positions: 6 Aus (Green, Locked), 2 NZ (Green, Locked)
- Greek Campaign Status Track Marker: No Operations Yet
- Greek Deployment Progress Track Marker: na
- Dead Units: To be rebuilt when the listed units are destroyed or disbanded. (To "disband" simply remove the unit from play when desired.) 7 Arm Div (7-4-8 Arm Bde (7))—3 Hus, 8 Hus; 7 Arm Div (5-4-8 Arm Bde (4))—2 RTR, 6 RTR, 7 Hus; 7 Arm Div (5-4-3 Support Bde (7 Support))—1 KRRC, 2 Rifle, 4 RHA; 6-2-3 Arm Bn (7 RTR)—7 RTR (no rebuild); 3-2-8 Arm Bn (1 RTR)—1 RTR (7 Arm Div, no rebuild)
Set Up:
- Anywhere in Egypt West of Cxx.15, inclusive: Strafer Gott Leader; Jock Campbell Leader; 7 Arm Div (3-5-8 Arm Car Bn (11 Hus)); 7 Arm Div (2-4-3 Inf Bn (1 KRRC, 2 Rifle)); 7 Arm Div (2-4-10 Lt Arm Bn (1 RTR)); 2-4-3 Inf Bn (3 Cldst); 5-2-3 Arty Bn (Red) (4 RHA); (2)-2-3 AT Bn (3 RHA); 2-0-3 French Marine Bn (BIM); 2 SPs
- C4.22: 1-2-8 Egyptian Ford Co (s-FDA); 2-3-5 Egyptian Camel Bn (Siwa)
- C37.05: 7 Arm Div (4-5-8 Arm Bn (8 Hus, 6 RTR)); 7 Arm Div (2-4-10 Lt Arm Bn (7 Hus)); 7 Arm Div Organic Truck (Full)
- C38.02: Railhead Marker. Railline west of and including C38.02 does not exist.
- C39.03: (4)-3-1 Fort Bde (Matruh); 9-2-3 Arty Bn (7 Med); 5-2-3 Arty Bn (Red) (8 Fld); 3-2-3 Arty Bn (no color) (107 RHA); (2)-2-3 AT Bn (106 RHA); 2-3-6 Egyptian Cav Bn (Mob F); 1-2-8 Egyptian Ford Co (n-FDA); 3-3-8 Egyptian Ford Bn (FDA); Level 2 Airbase; 1 SP
- D37.32: O'Connor Leader; 8-0 Corps HQ (W.Desrt); 4 Ind Div (6-4-3 Inf Bde (5 Ind, 11 Ind)); 4 Ind Div (1-3-6 Cav Bn (CIH)); 4 Ind Div Organic Truck (Full); 2 NZ Div (6-4-3 Inf Bde (4 NZ)); 3-2-3 Arty Bn (no color) (104 RHA); 3T SP
- D35.23: 3-2-3 Egyptian MG Bde (1 MG)
- D34.19: 4-0-3 Egyptian Arty Bn (Egypt)
- D36.06: Level 2 Airbase
- w/i 3 D36.06: 6-4-3 Polish Inf Bde (Carp); 2-4-3 Polish Cav Bn (Lancer)
- D38.06: Level 2 Airbase
- w/i 1 D39.05: 6-4-3 Inf Bde (16); (4)-3-1 Fort Bde (Alex A, Alex B); 1x Eq Repl; 2-1-3 Egyptian Inf Bde (2); Level 3 Airbase
- D41.03: Level 2 Airbase
- In or adjacent to any hex of Cairo: (4)-3-1 Fort Bde (Cairo A, Cairo B, Cairo C); 1-5-8 Commando Bn (LRDG); 4-2-3 Egyptian Inf Bde (1); 3-0-5 Egyptian Arty Bn (1 Lt Mule); Egyptian National Army Organic Truck (Full); Level 2 Airbase; Level 3 Airbase
- E20.22: 4 Ind Div (18-2-3 Arty Bde (Divarty))
- E19.21: 6 Aus Div (6-4-3 Inf Bde (16 Aus, 17 Aus)); 6 Aus Div (3-3-8 Arm Recon Bn (6 Aus)); Level 3 Airbase
Special Rules or Restrictions:
-
The following cannot move further West than Mersa Matruh until released: 2 NZ Inf Div.
-
These units cannot move outside the "Restriction Zone" Boundary until released: Carp Polish Inf Bde, Polish Lancer Cav Bn.
-
This Division cannot move further than 5 hexes from Mersa Matruh until released: 4 Ind Inf Div (the 4 Ind Artillery Bde (Divarty) cannot move from its starting hex until noted).
-
4 Ind Div Infantry Bdes are not formed as Brigade Groups when the campaign begins and do not have the intrinsic artillery ability—but the division does have a Divarty Bde.
-
This division is restricted to Helwan until released: 6 Aus Inf Div.
Axis Information:
- City Ownership: Two Months (+): Benghazi, Tobruk, Bardia
- Reserve Markers Available: 2
- Hedgehogs Remaining: 20
- Minefields Available for Reuse: 0
- Flieger Korps Active: No
- Dead Units: None
Set Up: All are Italian
- Tripoli Box: 8-0 Corps HQ (10 It, 20 It); 12-3-3 Inf Div (each less 2 steps) (Pavia, Sabrtha, Savona); 12-3-3 Inf Div (less 1 step) (Brescia); 12-2-3 Inf Div (each less 2 steps) (Bologna); 3-3-3 MG Bn (Aosta, Genova); 2-3-3 MG Bn (17, 25); 2-1-6 Lt Arm Bn (60 Lt); 1-1-2 GAF Bn (35); 1-2-3 Inf Bn (18 Lib, 36 Lib); 10-2-2 Arty Rgt (340 GAF); 10-3-3 Arty Rgt (10, 26); 22-3-2 Arty Bde (5 Army); 4-2-2 Arty Bn (332 GAF); 3-2-2 Arty Bn (291 GAF); 3x Pax Repls; 7 SPs
- A1.05: 1-1-1 MG Bn (Gialo)
- A48.18: Level 2 Airbase
- A48.20: 2-0-3 Territorial Bn (226); 14-3-2 Arty Bde (20 Corps); 3-0-0 Coastal Arty Bn (4); 3 SPs
- A41.18: 10-3-2 Arty Rgt (10 Corps); 15-3-2 Arty Rgt (di Mnvra)
- A55.15: 2-0-3 Territorial Bn (225)
- A55.11: 3-3-3 Para Bn (It); 2-4-3 Para Bn (1 Lib); 1 SP
- A55.05: Level 2 Airbase
- B60.24: 3-0-3 Territorial Rgt (54)
- B49.09: 17-0-0 Arty Rgt (R.Mar); Level 2 Airbase
- B46.08: 9-1-3 Blackshirt Inf Div (3 Jan); 2-1-2 Blackshirt MG Bn (204); Level 2 Airbase
- B48.05: 12-1-3 Inf Div (Ctnzro); 2-3-3 MG Bn (64)
- w/i 2 B50.08: 12-2-3 Inf Div (Sirte); 2-2-3 MG Bn (61); 1-3-12 Motorcycle Co (22 Brs, 61 Brs); 3-1-2 GAF Rgt (31, 32); 2-0-3 Coastal Defense Bn (31 Lib); 8-2-2 Arty Rgt (31 GAF); 4-2-2 Arty Rgt (32 GAF); 2x Pax Repls; 3 SPs
- B50.08: 8-0 Corps HQ (22 It); 8-0-0 Stranded Cruiser (San Giorgio); 0-0-0 Mobile Bordello (10 Armata)
- B12.01: 2-1-1 MG Bn (3 Lib Frt)
- C19.34: 1-2-2 GAF Co (E.GuG)
- C31.30: 1-2-2 GAF Co (B.Scegga)
- C39.32: Maletti Leader; 3-3-6 Arm Bn (2 Med); 3-4-5 Camel Bn (Sahariano); 4-3-3 Inf Rgt (1 Lib); 3-2-3 Inf Rgt (5 Lib); 7-3-2 Arty Rgt (Maletti)
Victory: Campaign Victory Conditions (see 7.0 above).
Counter Manifest and Order of Battle
Where units have more than one set of strength and other unit values, those values are listed. If only the unit ID appears, the unit has but one set of values.
Italian Forces
Command and Unusual Units: Balbo Leader; Maletti Leader; 1 Ragg Marker; 2 Ragg Marker; Brg. Cor. Ragg Marker; Bergonzoli Ragg Marker; Bignami Ragg Marker; RECAM Ragg Marker; CAM Corps HQ; LibOp Corps HQ; 10 It Corps HQ; 20 It Corps HQ; 21 It Corps HQ; 22 It Corps HQ; 23 It Corps HQ; 10 Armata Mobile Bordello Section; San Giorgio Stranded Cruiser; Sahariano Camel Bn; 4-SM Marine Bn; CMA Commando Bn; CMI Commando Bn; RW Commando Bn; Arditi Commando Bn.
Infantry Divisions: 1 Lib Inf Div; 2 Lib Inf Div; Bologna Inf Div; Brescia Inf Div; Ctnzro Inf Div; Cirene Inf Div; L.Spez Inf Div; Marm Inf Div; Pavia Inf Div; Pistoia Inf Div; Sabrtha Inf Div; Savona Inf Div; Sirte Inf Div.
Blackshirt Units: 3 Jan Inf Div; 23 Mar Inf Div; 28 Oct Inf Div; Vd.Lib Inf Bn; 201 MG Bn; 202 MG Bn; 204 MG Bn.
Smaller Infantry Units: 1 Cara Para Bn; It Para Bn; 1 Lib Para Bn; 2 Lib Para Bn; 7 Brs Inf Rgt; 9 Brs Inf Rgt (Semi-Motorized Version, Fully-Motorized Version); 10 Brs Inf Rgt; 57 Brs Inf Bn; 2-87 Inf Bn; 336 Inf Rgt; 350 Inf Rgt; GGFF Inf Rgt (Independent); 1 Lib Inf Rgt; 5 Lib Inf Rgt; 18 Lib Inf Bn; 34 Lib Inf Bn; 36 Lib Inf Bn.
Engineers: 1 Spc Engineer Rgt; 7 Spc Engineer Rgt; 30 Assault Engineer Bn; 31 Assault Engineer Bn; 32 Assault Engineer Bn.
Motorcycle Units: PAI Motorcycle Bn; ProvBrs Motorcycle Bn; 22 Brs Motorcycle Co; 61 Brs Motorcycle Co; 201 Brs Motorcycle Co; 202 Brs Motorcycle Co.
MG Units (see also Blackshirt Units): Aosta MG Bn; Genova MG Bn; Gialo MG Bn; R.Gessi MG Bn; S.Maria MG Bn; VEC MG Bn; 3 Lib Frt MG Bn; 17 MG Bn; 25 MG Bn; 27 MG Bn; 55 MG Bn; 60 MG Bn; 61 MG Bn; 62 MG Bn; 63 MG Bn; 64 MG Bn; 101 MG Bn; 551 MG Bn.
Artillery Units: di Mnrva Arty Rgt; Maletti Arty Rgt; Mtrizzato Arty Bde; R.Mar Coastal Arty Rgt; Volanti Arty Rgt; 1 Cel Arty Rgt; 2 Cel Arty Rgt; 3 Cel Arty Rgt; 5 Army Arty Bde; 8 Ragg Arty Bde; 10 Corps Arty Rgt; 16 Corps Arty Rgt; 20 Corps Arty Rgt; 21 Corps Arty Rgt; 22 Corps Arty Rgt; 23 Corps Arty Rgt; 24 Corps Arty Rgt; 25 Corps Arty Rgt; 4 Coastal Arty Bn; 5 Coastal Arty Bn; 30 GAF Arty Bde; 31 GAF Arty Rgt; 32 GAF Arty Rgt; 291 GAF Arty Bn; 332 GAF Arty Bn; 340 GAF Arty Rgt; 10 Arty Rgt; 12 Arty Rgt; 26 Arty Rgt.
Border Guards, Territorials and other such units: 54 Ter Rgt; 225 Ter Bn; 226 Ter Bn; B.Scegga GAF Co; E.GuG GAF Co; 30 GAF Rgt; 31 GAF Rgt; 32 GAF Rgt; 35 GAF Bn; 31 Lib CD Bn. Anti-Tank Units: 1 Mil AT Bn; 2 Mil AT Bn; 3 AT Bn; 5 AT Bn; 6 AT Bn; 501 AT Bn; 503 AT Bn; 551 AT Bn.
Armor Units: 4 Lt Arm Bn; 5 Lt Arm Bn; 9 Lt Arm Bn; 20 Lt Arm Bn; 21 Lt Arm Bn; 52 Mx Lt Arm Bn; 60 Lt Arm Bn; 61 Lt Arm Bn; 62 Lt Arm Bn; 63 Lt Arm Bn; 1 Med Arm Bn; 2 Med Arm Bn; 3 Med Arm Bn; 5 Med Arm Bn; 6 Med Arm Bn; 13 Med Arm Bn; 21 Med Arm Bn.
Ariete Arm Division: Divisional Marker; 1 Lt Arm Bn; 2 Lt Arm Bn; 3 Lt Arm Bn; Novara Lt Arm Bn; 7 Med Arm Bn (5-4-7 Version, 5-5-8 Version); 8 Med Arm Bn (5-4-7 Version, 5-5-8 Version); 9 Med Arm Bn (4-3-6 Version, 5-4-7 Version); 10 Med Arm Bn; Nizza Arm Car Bn; AT Bn ((2)-3-3 (Red) Version, (6)-4-5 Version); 551 AG Bn; 552 AG Bn; 8 Brs Inf Rgt; 132 Arty Rgt; Organic Truck.
Centauro Arm Division: Divisional Marker; Lodi Arm Car Bn; 14 Med Arm Bn; 17 Med Arm Bn; 555 AG Bn; 5 Brs Inf Rgt; 131 Arty Rgt.
Littorio Arm Division: Divisional Marker; 4 Med Arm Bn; 10 Med Arm Bn; 11 Med Arm Bn; 12 Med Arm Bn; 51 Med Arm Bn; 554 AG Bn; 556 AG Bn; 12 Brs Inf Rgt; 133 Arty Rgt (3-3-3 Arty Bn Version, 10-3-3 Arty Rgt Version); Organic Truck.
Folgore Airborne Division: Divisional Marker; 186 Para Inf Rgt; 187 Para Inf Rgt; 8 Para Assault Engineer Bn; 185 Para Arty Bn.
GGFF Inf Division: Divisional Marker; Mnfrto Arm Car Bn; GGFF Inf Rgt; 4 Lib Inf Bn; 9 Inf Bn; 136 Arty Rgt.
Trento Inf Division: Divisional Marker; 61 Inf Rgt (Non-Motorized Version, Motorized Version); 62 Inf Rgt (Non-Motorized Version, Motorized Version); 46 Arty Rgt (Non-Motorized Version, Motorized Version).
Trieste Inf Division: Divisional Marker; 8 Brs Arm Car Bn; 11 Med Arm Bn; 65 Inf Rgt; 66 Inf Rgt; 21 Arty Rgt; Organic Truck.
German Forces
Command and Unusual Units: Rommel Leader; DAK Leader; DAK Corps HQ; KG Bach Marker; KG Crüwell Marker; KG Gräf Marker; KG Marcks Marker; KG Schütte Marker; KG Wechmar Marker; KG 3 Aufk Marker; KG Linau Marker; KG Voss Marker; KStA Pz Bn (3-5-8 Pz Co Version, 7-5-8 Pz Bn Version); 556 Korück Bn; 2-300 Oasis Co; 6-300 Oasis Co; 10-300 Oasis Co; 12-300 Oasis Co; 13-300 Oasis Co; Hecker Amphibious Bn; 778 Ldg Amphibious Co; 707 IG Co; 708 IG Co; 287.Snd Commando Rgt; 288.Snd Commando Rgt; v.Könen Commando Co.
Artillery Units: Afrika Arty Rgt; 9 Werfer Bn; 2-115 Arty Bn; 408 Arty Bn; 864 Arty Bn; 911 Arty Bn; 902 Arty Battery (2-3-3 Version, 2-3-5 Arm Arty Version); 362 Mountain Arty Battery; 363 Mountain Arty Battery; 364 Mountain Arty Battery; 4 Coastal Arty Battery; 4-149 Coastal Arty Battery; 523 Coastal Arty Bn; 528 Coastal Arty Bn; 529 Coastal Arty Bn; 532 Coastal Arty Bn; 4-772 Coastal Arty Battery.
Infantry Units: Afrika PG Rgt; Buhse Inf Rgt; 3-255 Inf Bn; 3-347 Inf Bn.
PJ and Army Flak Units: 605 PJ Bn (3-5-8 Version, 4-5-8 Version); 606 AA Bn; 612 AA Bn; 617 AA Bn.
Non-Attached Luftwaffe Ground Units: 1-6 Flak Bn; 1-18 Flak Bn; 2-25 Flak Bn; 1-33 Flak Bn; 1-43 Flak Bn; 1-46 Flak Bn; 1-53 Flak Bn; Lehr FJ Bn (2-5-3 Version, 4-5-3 Version).
5 Light Division: Divisional Marker; 3 Arm Recon Bn; 15 Krd Motorcycle Bn; 1-5 Pz Bn; 2-5 Pz Bn; 2 MG Bn; 8 MG Bn; 200 Pioneer Bn; 39 PJ Bn; 1-75 Arty Bn; 155 Arty Rgt; Organic Truck.
15 Panzer Division: Divisional Marker; 33 Arm Recon Bn; 15 Krd Motorcycle Bn; 1-8 Pz Bn (5-5-8 Version, 6-5-8 Version, 7-5-8 Version); 2-8 Pz Bn (5-5-8 Version, 6-5-8 Version, 7-5-8 Version); 2 MG Bn; 104 Inf Rgt; 115 Inf Rgt (6-5-3 Version, 8-5-3 Version, 10-5-8 PG Version); 33 Pioneer Bn; 33 PJ Bn ((3)-4-3 Version, 4-5-8 Version); 33 Arty Rgt; Organic Truck.
21 Panzer Division: Divisional Marker; 3 Arm Recon Bn; 15 Krd Motorcycle Bn; 1-5 Pz Bn (5-5-8 Version, 6-5-8 Version, 7-5-8 Version); 2-5 Pz Bn (5-5-8 Version, 6-5-8 Version, 7-5-8 Version); 8 MG Bn; 104 Inf Rgt (6-5-3 Version, 8-5-3 Version, 10-5-8 PG Version); 39 PJ Bn ((3)-4-3 Version, (4)-4-3 Version); 305 AA Bn; 200 Pioneer Bn; 155 Arty Rgt; Organic Truck.
zvB Afrika Division: Divisional Marker; 580 Exploration Co; 155 Inf Rgt; 361 Inf Rgt; 900 Pioneer Bn; 361 Arty Bn; Organic Truck.
90 Light Division: Divisional Marker; 580 Arm Recon Bn (3-5-8 Version, 4-5-8 Version); 190 Pz Bn; 155 Inf Rgt (6-4-3 Version, 7-4-3 Version, 9-4-6 PG Version); 200 Inf Rgt (6-4-3 Version, 9-4-6 PG Version); 361 Inf Rgt (5-5-3 Version, 6-5-3 Version, 9-5-6 PG Version); 900 Pioneer Bn; 190 PJ Bn; 361 Arty Bn; 190 Arty Rgt; Organic Truck.
164 Light Division: Divisional Marker; 220 Arm Recon Bn; 125 Inf Rgt (6-3-3 Version, 7-4-6 PG Version); 382 Inf Rgt (6-3-3 Version, 7-4-6 PG Version); 433 Inf Rgt (6-3-3 Version, 7-4-6 PG Version); 220 PJ Bn ((4)-3-3 Version, (5)-3-3 Version); 220 Pioneer Bn; 220 Arty Rgt (5-2-3 Bn Version, 15-3-3 Rgt Version).
22 Air Landing Division: Divisional Marker; 13 Krd Motorcycle Bn; 16 Air Landing Rgt; 47 Air Landing Rgt; 65 Air Landing Rgt; 22 Pioneer Bn; 22 PJ Bn; 22 Arty Rgt.
Ramcke FJ Bde: Divisional Marker; Hüber FJ Bn; Kroh FJ Bn; vdH FJ Bn; 2-7 Para Arty Bn.
Commonwealth Forces
Command and Unusual Units: O'Connor Leader; Strafer Gott Leader; Jock Campbell Leader; Vyvyan Pope Leader; Tobruk Command HQ; W.Desrt Corps HQ; 1 Australian Corps HQ; 10 Corps HQ; 13 Corps HQ; 30 Corps HQ; LRDG Commando Bn; Layforce Commando Bn; 1 SAS Commando Bn; 11 RM Marine Bn; Alex A Fort Bde; Alex B Fort Bde; Cairo A Fort Bde; Cairo B Fort Bde; Cairo C Fort Bde; Matruh Fort Bde; 10 NZ RR Co; 13 NZ RR Co; BFM French Marine Bn; BIM French Marine Bn.
Infantry Units: Selby Inf Bde; 3 Cldst Inf Bn; 14 Inf Bde; 16 Inf Bde; 22 Inf Bde; 22 Gd Bde; 23 Inf Bde; 161 Inf Bde; 200 Gd Inf Bde; 201 Gd Inf Bde; 1 Greek Inf Bde; 2 Greek Inf Bde; Yugo Gd Inf Bn; 1 Free French Inf Bde; 2 Free French Inf Bde; 1 Leg French Inf Bn; 11 Czech Inf Bn; 1 Sudanese Inf Bde; Carp Polish Inf Bde; 3 Ind Inf Bde; 18 Ind Inf Bde; 26 Ind Inf Bde; 161 Ind Inf Bde. Arm Car, or Cavalry Units: Greys Arm Car Bn (2-4-8 Version, 4-4-8 Arm Recon Version); KDG Arm Car Bn; Royals Arm Car Bn; 1 HCR Arm Car Bn; 1 RAF Arm Car Co; 2 RAF Arm Car Co; 2 Derby Arm Car Bn; 1 Spahis French Arm Car Bn; 3 SA Arm Car Bn; 4 SA Arm Car Bn; 6 SA Arm Car Bn; 7 SA Arm Car Bn; 18 Ind Cavalry Bn; Lancer Polish Cavalry Bn; Skinner Indian Arm Car Bn.
Anti-Tank Units: 3 RHA AT Bn; 65 AT Bn ((2)-2-3 Version, (5)-3-3 Version); 95 AT Bn ((2)-2-3 Version, (5)-3-3 Version); 102 AT Bn ((2)-2-3 Version, (5)-3-3 Version); 106 RHA AT Bn; 149 AT Bn ((2)-2-3 Version, (5)-3-3 Version); CAC French AT Bn.
Armor Units: 3x Cap It Arm Bn; 3 Hus Lt Arm Bn; 24 Arm Bde; 1 RTR Arm Bn; 3 RTR Arm Bn; 4 RTR Arm Bn (6-4-3 Non-Rebuildable Version, 6-2-3 Version); 5 RTR Arm Bn; 7 RTR Arm Bn (6-5-3 Non-Rebuildable Version, 6-2-3 Version); 8 RTR Arm Bn; 40 RTR Arm Bn; 42 RTR Arm Bn; 42 RTR Scorpion Co; 44 RTR Arm Bn; 44 RTR Scorpion Co; 46 RTR Arm Bn; 50 RTR Arm Bn.
Artillery Units: F Coastal Arty Battery; X Coastal Arty Battery; 19 Hvy Coastal Arty Battery; 202 Coastal Arty Battery; 204 Coastal Arty Battery; 206 Coastal Arty Battery; 8 Fld Arty Bn; 12 Fld Arty Bn; 51 Fld Arty Bn; 52 Fld Arty Bn; 53 Fld Arty Bn; 60 Fld Arty Bn; 98 Fld Arty Bn; 107 Fld Arty Bn; 121 Fld Bn (5-2-3 Version, 5-3-5 Arm Arty Version); 144 Fld Bn; 146 Fld Bn; 149 Fld Bn; 7 Med Arty Bn; 64 Med Arty Bn; 68 Med Arty Bn; 69 Med Arty Bn; 1 RHA Arty Bn (Red Version, Yellow Version); 2 RHA Arty Bn (Red Version, Yellow Version); 4 RHA Arty Bn; 5 RHA Arty Bn; 11 RHA Arty Bn (Red Version, Yellow Version, 6-3-5 Arm Arty Version); 104 RHA Arty Bn (3-2-3 No-Color Version, 5-2-3 Red Version); 107 RHA Arty Bn (3-2-3 No-Color Version, 5-2-3 Red Version); Bush Aus Arty Bn; 1 Bn FF Arty Bn.
1 Arm Division: Divisional Marker; Training Marker; 12 Lcr Arm Car Bn; 2 Arm Bde (7-3-8 Version, 9-3-5 Version); 22 Arm Bde (7-4-8 Version, 9-4-5 Version); 1 Support Bde; Divarty Arty Bde; Organic Truck.
2 Arm Division: Divisional Marker; Training Marker; KDG Arm Car Bn; 1 Arm Bde; 2 Support Bde.
7 Arm Division: Divisional Marker; 11 Hus Arm Car Bn; 3 Hus Lt Arm Bn; 7 Hus Lt Arm Bn; 8 Hus Arm Bn; 1 RTR Lt Arm Bn; 2 RTR Arm Bn; 6 RTR Arm Bn; 4 Arm Bde (5-4-8 Version, 9-4-6 Version); 7 Arm Bde (7-4-8 Version, 8-4-7 Version); 1 KRRC Inf Bn; 7 Motor Inf Bde; 2 Rifle Inf Bn; 7 Support Bde; Divarty Arty Bde; Organic Truck.
8 Arm Division: Divisional Marker.
10 Arm Division: Divisional Marker; 8 Arm Bde; 9 Arm Bde; 133 Inf Bde (Semi-Motorized Version, Fully Motorized Version); Divarty Arty Bde.
44 Inf Division: Divisional Marker; 131 Inf Bde; 132 Inf Bde; 133 Inf Bde; Divarty Arty Bde; Organic Truck.
50 Inf Division: Divisional Marker; 69 Inf Bde; 150 Inf Bde; 151 Inf Bde; Divarty Arty Bde; Organic Truck.
51 Inf Division: Divisional Marker; 152 Inf Bde; 153 Inf Bde; 154 Inf Bde; Divarty Arty Bde; Organic Truck.
2 NZ Inf Division: Divisional Marker; Training Marker; 2 NZ Arm Recon Bn (2-5-8 Red Version, 4-5-8 Yellow Version); 4 NZ Inf Bde (Inf Bde Version, Armor Bde Version); 5 NZ Inf Bde; 6 NZ Inf Bde; 28 Maori Inf Bn; Divarty Arty Bde; Organic Truck.
6 Aus Inf Division: Divisional Marker; Training Marker; 6 Aus Arm Car Bn; 16 Aus Inf Bde; 17 Aus Inf Bde; 19 Aus Inf Bde; Divarty Arty Bde; Organic Truck.
7 Aus Inf Division: Divisional Marker; Training Marker; 18 Aus Inf Bde; 21 Aus Inf Bde; 25 Aus Inf Bde; Divarty Arty Bde; Organic Truck.
9 Aus Inf Division: Divisional Marker; Training Marker; 9 Aus Arm Recon Bn (3-4-8 Arm Recon Version, 4-4-8 Arm Version); 20 Aus Inf Bde; 24 Aus Inf Bde; 26 Aus Inf Bde; Divarty Arty Bde; Organic Truck.
1 SA Inf Division: Divisional Marker; Training Marker; 1 SA Inf Bde; 2 SA Inf Bde; 5 SA Inf Bde; Divarty Arty Bde; Organic Truck.
2 SA Inf Division: Divisional Marker; Training Marker; 3 SA Inf Bde; 4 SA Inf Bde; 6 SA Inf Bde; Divarty Arty Bde; Organic Truck.
4 Ind Inf Division: Divisional Marker; CIH Arm Car Bn (1-3-6 Cavalry Version, 2-4-6 Arm Car Bn); 5 Ind Inf Bde; 7 Ind Inf Bde; 11 Ind Inf Bde; Divarty Arty Bde; Organic Truck.
5 Ind Inf Division: Divisional Marker; 9 Ind Inf Bde; 10 Ind Inf Bde; 29 Ind Inf Bde; Divarty Arty Bde; Organic Truck.
10 Ind Inf Division: Divisional Marker; Guides Arm Car Bn; 20 Ind Inf Bde; 21 Ind Inf Bde; 25 Ind Inf Bde; Divarty Arty Bde; Organic Truck.
US Units: Patton Leader. 2 Arm Division: Divisional Marker; 82 Arm Recon Bn; 1-66 Arm Bn; 2-66 Arm Bn; 3-66 Arm Bn; 1-67 Arm Bn; 2-67 Arm Bn; 3-67 Arm Bn; 41 Mech Inf Rgt; 14 Arm Arty Bn; 78 Arm Arty Bn; 92 Arm Arty Bn.
Egyptian Units: Siwa Camel Bn; Hauwasa Camel Bn; n-FDA Ford Co; s-FDA Ford Co; FDA Ford Bn; Mob F Cavalry Bn; 1 MG Bde; 1 Inf Bde; 2 Inf Bde; 3x ENRR RR Bn; Port Engineer Bn; Egypt Arty Bn; 1 Lt Mule Arty Bn; Organic Truck.
Arab Units: TAML Mech Inf Bde; Giarabub Senussi Bn; Mechili Senussi Bn; Msus Senussi Bn; Tobruk Senussi Bn; 1 Lib Arab Refugee Bn; 2 Lib Arab Refugee Bn; 4 Lib Arab Refugee Bn.
Historical Notes
This section brings out information that came to light during the research for this project. I wanted to present this information so those wanting more detail could find it. I am indebted to the contributions of Steve Rothwell, Dirk Blennemann, Mauro De Vita and Alessandro Massignani. Enjoy!
The Malta Invasion Plan
The following plan was submitted by Marshal Cavallero to Marshal Kesselring on 22 May 42 (as dug up by Mauro De Vita).
The plan involved some 100,000 Italian and German soldiers and the following Italian Naval participation: 2 Littorio class BB from Naples; 2 Duilio class BB, 4 Heavy Cruisers and 4 DD from Messina; 4 DD from Reggio Calabria; 5 Light Cruisers and 5 DD from Augusta; 3 Light Cruisers and 3 DD from Cagliari.
To escort the convoys, Sicilian ports would provide 20 Torpedo Boats, 9 MAS, 3 Patrol Boats, 1 German DD, some German Torpedo Boats and Fast Minesweepers.
The convoys would be drawn from 300 boats among which were 10 transport ships (1,200 man capacity), 12 minesweepers, and 10 tugboats.
The Regia Aeronautica would provide 150 bombers, 160 assault planes and 200 transports from Sicily, 60 torpedo bombers from Pantelleria, 150 bombers and 40 fighters from Puglia-Calabria.
The following was published as "Operazione C3: Malta" by the Historical Office of the Italian Army in 1990.
Phase I
-
Intensification of the Blockade
-
Massive air attacks against the Commonwealth Airforce, Anti-Air and Anti-Ship Batteries, Water Facilities, HQs and Strongpoints.
Phase II
-
Still more massive attacks on the above objectives.
-
Airborne operations with the FolgoreDivision in the Dingli-Zurriek area.
-
Reinforcement of the bridgehead with the arrival of further ground forces in Mersa Sirocco Bay by sea.
-
Occupation of Gozo Island by an Infantry Division.
-
Diversions: a) Glider attack on Ft. Benghaisa reinforced with commandos, light infantry and tanks from the sea. b) Heavy bombardment and occupation of the Delimara Peninsula. c) Continuous ground support from the Luftwaffe and Regia Aeronautica. d) Demonstrations in Mellieha, Maddalena and Tuffieha Bays. e) Dropping of false paratroopers near Gargur and Zeitun.
Invasion Forces:
Marsa Sirocco: Glider assault on Ft. Benghaisa: 300 men. Night by Sea: 1,900 men, 18 motorcycles. By Sea against the Delimara Peninsula: 80 men.
Dingli-Zurriek: By Air: Folgore and 7th FJ Division in three groups. By Sea: Friuli Division: 10,000 men, 150 motorcycles, 30 light trucks, 24 tractors, 16x 20mm, 24x 47/32, 24x 75mm, 8x 65/17, 54x 81mm mortars. Livorno Division: 9,850 men, 170 motorcycles, 24 light trucks, 24 tractors, 24x 20mm, 24x 47/32, 24x 75mm, 19x 47mm Assault Guns, 63x 81mm mortars. 30th Army Corps HQ: 1,100 men, 60 motorcycles. San Marco Marine Regiment (less one Bn): 2,000 men. 10th Raggruppamento Corazzato Co: 675 men, 230 motorcycles and 8x 75/18 Assault Guns.
Gozo Island: By Sea: Superga Division: 9,200 men, 150 motorcycles, 8 light trucks, 8 tractors, 16x 20mm, 44x 47/32, 8x 75mm, 63x 81mm mortars. One Bn from San Marco Marine Regiment. One Bn of CCNN troops.
Landing after X Day as appropriate: Assietta Division: 9,000 men, 26 motorcycles, 62 light trucks, 12 tractors, 16x 20mm, 24x 47/32, 20x 75mm, 45x 81mm mortars. Napoli Division: 8,900 men, 26 motorcycles, 76 light trucks, 20 tractors, 8x 20mm, 24x 47/32, 20x 75mm, 45x 81mm mortars. 16 Army Corps HQ and Corps Artillery: 3,200 men, 90 motorcycles, 4 cars, 50 trucks, 36 tractors, 24x 105/28, 12x 149mm. Remaining Livorno and Friuli troops: 800 men, 20 motorcycles, 10 light trucks, 15 tractors, 19x 47/32, 12x 100/17. Remaining 10th Ragg. Cor. Co. and Comando Tattico Superiore troops: 3,800 men, 71 motorcycles, 122 light trucks, 21 light tractors, 60 special trucks, 12 tractors, 12x 75mm, 6x 90/53.
In reserve: La Spezia Division.
Of the Island's terrain and landing potentials, Thomas Scheben writes:
"I know the islands like my own pocket [Dr. Scheben represents a German foundation in both Egypt and Malta] and I do not know of any strips of land where gliders could land without crashing into a stone wall. The extremely rough surface would have caused jump losses of 30-40% without resistance. The airfields of Luqa and Ta' Qala, of course, were heavily defended by flak.
Seaborne attack would be equally hazardous, since most of the coast consists of steep cliffs of several 100m elevations. Only a few sand beaches are available and most of them are only 50-70m across before a steep cliff.
I think an invasion could have been successful as a surprise attack right after Italy declared war. Once Cunningham and Churchill decided to defend the island as a fortress, it could only have succeeded if the Axis strategy to deny supply (especially AA ammo) by constant air attack would have worked. In that case, other supplies (especially fuel for aircraft, ships, and power plants) would have been depleted. In that case, the island would have surrendered. In the summer of 1941, the Axis was closer than they knew—had the convoy "Pedestal" not made it to Grand Harbor, the end would have come some weeks later. The Luftwaffe sank many of the convoy's ships, but ironically missed the tanker "Ohio" and the ammo made it."
The Grand Mufti
Listed in the Random Events is the expedition to take the Grand Mufti to Jerusalem. As a little known historical figure (in the West anyway), I asked the research group to compile some detail on him. Thomas Scheben was able to provide the following narrative.
Grand Mufti Hdj Amin Al-Hussaini (1895-1974) was a member of one of the most powerful clans in Palestine. Yassir Arafat is one of his distant relatives, other Hussainis (e.g. Faisal Al-Hussaini) still play a role in Palestinian and Jordanian politics. After serving as an Ottoman officer in World War I, he became a scholar in Islamic law and theology. The dissolution of the Ottoman Empire and the abolishment of all old religious authorities made it necessary to establish the institutions to provide religious guidance and legal authorities on Islamic Law (Sharia) in the successor states, colonies, and territories.
The British Colonial Office made Amin Al-Hussaini Grand Mufti of Jerusalem in their Palestine-Jordan Mandate of 1921; his predecessor was also an Al-Hussaini. He struggled for the leadership of the Palestinian Arabs and put himself at the top of the resistance to Jewish immigration and was increasingly opposed to the British as well. He was the driving force behind the rising violence in the 1920's and 1930's, slaughtering probably more Arab political opponents than Jews. When he stirred up the big rebellion in 1936-39, the British arrested him, but he escaped and fled to Beirut.
It is a telling example of British-French rivalry in the Middle East, that he (by now one of the major political figures in Arab Nationalism) was allowed to continue his activities from French controlled territory. The outbreak of World War II, however, brought the Allies closer together and the Mufti had to flee again—this time to Baghdad. Here he played a central role in the coup d'état of nationalist officers against the British. When the short war against the British was lost, he fled to Berlin.
The Mufti was well received by Hitler and he supported German efforts to raise SS-Legions from the Islamic populations of the Balkans and USSR. He was instrumental in the anti-British German propaganda aimed at the Arab Middle East. What he did not know was that the Germans had already promised Egypt to the Italians and certainly had no intentions of establishing the Mufti's dream of an independent pan-Arab Empire. They might have tried to re-install him in Jerusalem—but they probably would not have been stupid enough to empower the most charismatic figure of the contemporary Arab national movement. This would be akin to making Joseph Stalin the governor of a Nazi occupied Russia. One thing, however, is certain: Not one Jew would have escaped the claws of the Mufti.
He escaped the doom of the Third Reich and reached Palestine with French support. He tried to regain the leadership of the Palestinian national movement. The disastrous war of 1948 drove him to exile again and deprived the clans of their traditional political legitimacy. Amin gradually lost all influence except in pan-Islamic circles. He spent the last 15 years of his long life in Beirut—he visited East Jerusalem for the last time a few weeks before the 1967 War.
Units Around the Mufti—"Centro A" and "Reparto Wanda"
On 1 May 42, Centro "A" (Arab) was formed as a mixed Italo-Arab commando unit. It originally consisted of 14 men from the Italian Army, 7 from the Italian Carabinieri, and 6 Cadres of mixed Italian and Arab origin coming from Arab counties. By the end of August, 1942, it had 15 officers, 12 NCOs, 80 Italian soldiers and 68 Arab volunteers. Centro "I" (Italian) was the sister unit of the Arab group composed of native Italians.
On 18 August 42, the Grand Mufti visited Centro A. He wanted to choose soldiers from this unit who would accompany him into Egypt and Palestine in the wake of the expected Italo-German victory and form the cadre of an Arab Army.
On 5 Sept 42, the Reparto Missione Speciale formed under Captain Tellini. This unit was charged with the task of escorting the Mufti in Egypt. On 23 Oct 42, Centro A was renamed Gruppo Formazioni A with 25 officers, 39 NCOs, 271 Italian soldiers and 100 Arab volunteers. It was organized into:
- 1st Reparto "Wanda" (5 platoons of Arabs)
- Reparto Guide—Esploratori (3 platoons of Italians, one of which was actually sent to Africa)
- Reparto Missione Speciale (the Mufti's escort)
These units deployed to Naples to prepare for the Mufti's escort mission, but this became impossible after El Alamein. On 15 Aug 43, Gruppo Formazioni A (less one company) became the Battaglione d'Assalto Motorizzato (Motorized Assault Battalion). This battalion was located near Rome and after 8 Sept 43 it joined in the fighting against the Germans.
Brigade Groups—The Commonwealth Organizational Shuffle
Certainly a key to the difficult time the 8th Army had in dealing with the Italo-German army in North Africa involved the incomprehensible organizational mess the army perpetrated during this period. Not only was the pattern of development different between the infantry and armored divisions (perhaps not surprisingly), but, among the armored divisions, no two were alike. The infantry is rather simple. They were organized in Brigade Groups from the start (well, except for the 4th Indian which consolidated its artillery for the first campaign) until Montgomery put an end to them in August 1942.
In the armor divisions, we even have a different case for each division. The generalized format, subject to much variation is: A) Armor Brigades without artillery units and a Support Group, B) Armor Bdes with artillery and an Infantry Motor Brigade Group, C) Consolidated artillery Brigade and Armor/Inf Bdes without artillery. The 7th Arm Division starts with no brigade group formation in the armor, but with a support group. Later, we add infantry and artillery to the armor brigades (forming Brigade Groups), strip the Support Group of some of its artillery (making it the 7th Motor Brigade) and then finally consolidate the artillery under Monty's orders when Brigade Groups are eliminated. The 2nd Arm Division arrives with the Support Brigade in place, performs abysmally in the spring of 1941 and is disbanded before the changes are made which affected the 7th Armored Div. The 1st Arm Division begins with the Support Group structure, adopts the Brigade Groups for the Armored Brigades, but in the process does not get a Motor Brigade as does the 7th. Lastly, the 10th Arm Division shows up after all these metamorphic changes, but does not have its own infantry component. As time went on, the 200/201 Gds Motor Bde was the 1st Arm Division's infantry by association, if not formal attachment. Later, the 133 Lorried Infantry Brigade was reassigned (stolen?) from the 44th Inf Division to make up for this lack on a more permanent footing.
In February, 1942, the Commonwealth reorganized its armor brigades into Brigade Groups by adding RHA and infantry battalions to their usual organization. This is reflected in the optional transfer of the Commonwealth Armored Brigades from "Yellow" Armor to "Red" Armor (no Russian connotations, thank you). Even this rather simple process is not without exception—among these changes is the 2nd Arm Bde and the 9th Arm Bde. The 2nd Arm Bde had attached infantry since October 1940 (hence the counter for this unit is printed as "Red" Armor and never exists as "Yellow" Armor). The 9th Arm Bde, on the other hand, never did get an infantry battalion. While this one brigade's oddity is ignored in the optional transfer, purists are free to remember that all their armor brigades are now considered "Red" armor, except the 9th which is forever "Yellow" armor.
Montgomery put an end to all this nonsense in August 1942 by consolidating divisional artillery into brigades of their own (the armored brigades kept their organic infantry). This consolidation led to divisional artillery brigades of some 96 25 ldr guns all under the direct control of the divisional HQ—firepower which was welcomed in the World War I style offensive Monty had planned for El Alamein.
The Italian Libyan Colony
During WWI, the Italian presence in Libya was reduced to the principal cities along the coast. The conquest of the interior took place over the course of many years and only ended with the defeat of the Cyrenaican tribes in 1931. The Senussi were the toughest adversaries, in part because of the assistance they received from Egypt. To stop this flow of support lead Italian authorities to build the 270 kilometer wire "wall" along the Egyptian-Libyan border.
In 1931 with the definitive pacification of the Cyrenaican population, the Fascist government established the "Ente per la Colonizzazione della Cirenaica" (Cyrenaican Colonization Agency). They built four rural villages in 1933 for a total of 1,050 people.
Marshal Balbo arrived as governor in 1934. While he was sent there by Mussolini because he was becoming "too popular" in Italy (in other words, he was exiled), Balbo took his post seriously and began a real and very intelligent modernization of his colony and its people. Tripolitania and Cyrenaica, until then separate administrative entities, were united. Graziani, the "conqueror" of Cyrenaica, was sent home to Italy as he was too unpopular with the Arabs. The prison camps were closed and the political prisoners released. The annual trips to Mecca allowed, many mosques were builtor rebuilt (using money previously taken from the Senussi) and Islam, in general, was supported.
Numerous schools were built for the Arabs and in 1940 there were 971 schools serving almost 50,000 Arab students. Balbo instituted the High School for Islamic Culture to train Arab teachers and functionaries for the public administration. He also established the School for Arab Nurses (resolving the thorny issue of caring for ill Muslim women), the GAL (Gioventù Araba del Littorio), and Islamic tribunals for Muslims and Hebraic tribunals for Jews (the Jews warmly supported Balbo because of his well known aversion to the Nazi anti-Jew laws in Germany). Balbo encouraged the return to Libya of many thousands exiled in Tunisia and Egypt. This process of caring pacification was generally well received by the Arabs and was the basis for the planned mass emigration of Italian colonists to Libya.
In 1935 the "Regio Corpo delle Truppe Coloniali" (Royal Corps of Colonial Troops) was formed. This consisted of five infantry regiments, seven Saharan battalions, two Saharan motorized battalions, two artillery regiments, and two parachute battalions (later combined into one). Construction began on the 1,900 Km long Via Balbia (named after Balbo's death in 1940). Another 641 Km long road was built connecting Tripoli to Gadames.
In 1936, Tripolitania was hit with a devastating drought. Balbo organized a colossal transfer of 300,000 animals to Cyrenaica using 50 transport ships. The saved animals returned to a grateful Tripolitania in 1937 via a land route where many water and supply points had been organized along the way. All of this was done for the Arabs for free. After this episode, Balbo's popularity in the Arab world was at an all-time high.
In 1938, 20,000 Italian colonists arrived in Libya with another 10,000 in 1939. By June 1940, some 4,000 Italian families were living in Tripolitania with a further 2,200 in Cyrenaica for a total of 39,000 Italian nationals.
The reasonable politics of Balbo (one of the very few bright minds in the Fascist Regime) made the Libyans (except a large part of the roughly treated Senussi) very loyal to Italy. This explains why Libyan troops fought well under Italian banners, even when the Fascist cause was clearly losing. The last Libyan troops, still amazingly loyal, were sent home with many thanks when the remains of the Italo-German Army crossed the border from Libya into Tunisia.
The roots of the contemporary Libyan army can be traced to the Libyan Arab Force (popularly known as the Senussi Army) of World War II. Shortly after Italy entered the war, a number of Libyan leaders living in exile in Egypt called upon their compatriots to organize themselves into military units and join the British in the fight against the Axis powers. Four battalions were eventually formed and were initially designed for guerrilla warfare in the mountains of Cyrenaica. Because of the high mobility needed in desert warfare, these units were normally used to garrison military installations and prisoners. One battalion, however, participated in the fighting near Tobruk.
After Britain succeeded in occupying the Libyan territories, the need for the British trained and equipped Senussi battalions appeared to be over. The Senussi, however, were reluctant to disband and the majority of its members arranged transfers to the local police forces in Cyrenaica under British military administration. When Libya gained independence in 1951, veterans of the original Senussi army formed the nucleus of the Royal Libyan Army.
The Yugoslavian Units
After the fall of Yugoslavia, the British were able to evacuate around 1,000 men. These men were formed (in Amman, Trans-Jordan) into the "King's Guard" or Royal Yugoslav Guard Infantry Battalion. This was not an elite unit of any sort. Another 2 officers and 14 men were sent to the 10th Inter-Allied unit for special operations within German occupied Yugoslavia.
About 700 men from the Yugoslavian Air Force also made it to Amman. During 1944, the RAF formed two Yugoslavian Fighter Squadrons (Number 352 on 22 April 44 and Number 351 on 1 July 44). From bases in Italy, these two squadrons fought over Yugoslavia to assist the partisan effort.
The Egyptian Army
Before WWII, military service was compulsory for men between the ages of 19 and 27, but because of the limited size of the Egyptian Army—23,000 in 1939—few were actually conscripted. During World War II, Egypt's Army grew to about 100,000 troops. Britain maintained a strong influence in the military and provided it with equipment, instruction, and technical support. Under the terms of the 1936 treaty, British troops remained in Egypt to defend the Suez Canal.
Egypt severed relations with the Axis powers soon after the outbreak of World War II, but remained technically neutral until nearly the end of the war. Some Egyptians flew patrol duty in British aircraft with British pilots during the war and the Egyptian navy participated with a few British-supplied patrol boats. Egyptians were used primarily for guard duty and logistical tasks, rather than for combat. Some Egyptian officers favored Germany as a means to end British influence in their country. For example, the British imprisoned Anwar Sadat because of his pro-German activities. Aware of such sentiments, the British were reluctant to use Egyptian units in any active combat role—even after King Farouk declared war against the Axis in February, 1945.
Rommel did not take the Egyptian Army into consideration as a factor when he planned his invasion into Egypt. Veteran Egyptian officers interviewed agree their army was no match whatsoever for a contemporary western force. They were not able to conduct mobile operations on any scale and would not have survived any encounter with a mobile force. They could have been put to some useful purpose if well entrenched, supported by artillery, and in a static defense. In any offensive mission, they probably would have failed.
The main reason for this was the lack of training given to officers concerning such missions. The Sudanese troops used in the Frontier District Administration (the border guards) were effective and fierce fighters. One of the FDA's former officers reports that their equipment was not up to the task of fighting regular armies of the day.
Egyptian Army composition as discovered by Steve Rothwell in the RAC Museum archives in a box of 7th Arm Div records untouched since the war...
Mobile Force Brigade: one Light Tank Company; one 3.7 Howitzer Battery; one MG Company.
Frontier District Administration North Detachment: one Light Infantry Company mounted in Ford Pickups.
Frontier District Administration South Detachment: one Light Infantry Company mounted in Ford Pickups.
Frontier District Administration Main Detachment: three Light Infantry Companies mounted in Ford Pickups.
1st MG Bde: two MG Battalions.
Egyptian Artillery Bn: two 25 ldr Batteries; one 105mm Battery.
1st Infantry Bde: two Infantry Battalions; one MG Battalion.
2nd Infantry Bde: two Infantry Battalions.
1st Egyptian Light Artillery Battalion: one 3.7 inch Howitzer Battalion transported by Mules.
Egyptian Camel Corps (detachment battalions spread all over southern Egypt and into Sudan, two on-map): Siwa Camel Battalion (guarding Siwa oasis); Hauwasa Camel Battalion (guarding Hausawa Pyramid and cultivated area).
For the Royal Egyptian Air Force, we have from the History of the Armed Forces of Egypt, 1914-1945 (Translated from the Arabic by Thomas Scheben) the following:
May 1940: 1st Squadron (Ground Support): 15 Lysanders. 2nd Squadron (Fighter): 18 Gladiators. 4th Squadron (Bomber): 6 Audax. 5th Squadron (Fighter): 18 Gladiators.
May 1941: 1st Squadron (Ground Support): 17 Lysanders. 2nd Squadron (Fighter): 16 Gladiators. 3rd Squadron (Target Towing): 1 Tiger Moth, 1 Anson Avro 652. 4th Squadron (Bomber): 10 Audax. 5th Squadron (Fighter): 17 Gladiators. Flying School: Several types.
What were these troops worth? A few quotes bring out the contemporary appraisal.
Major A.W. Sansom (Head of the Cairo Branch of the British Secret Service, 1940) reports to the British command:
"The morale of the Egyptian troops is at the lowest possible ebb. It is unlikely to rise unless we are defeated in battle, in which event they would almost certainly go over to the enemy. If Mersa Matruh is attacked, they will not resist, but will probably help the attackers. Our position would be stronger without them, even if no replacements are available."
The Egyptian point of view is reflected in the leading national daily newspaper (Al-Ahram) of 19 Sept 1940 in a quote from former Egyptian Prime Minister Ismail Sidqi:
"The Italian offensive is not an aggression against Egypt, but against another belligerent on the territory of a third and occupied power."
Again from Major Sansom, this time from his memoirs:
"Most British observers, including myself, thought the Egyptian Army's value as a fighting force was negligible. The officers, over whom Prince Daoud (the army Commander-in-Chief) had little control, spent most of their time with their wives in the Cecil Hotel in Alexandria, and were full of resentment against their hard life in the desert. The troops, who lived on an appalling diet of dried beans and lentil soup (Designer's Note: they still do today), with an occasional bit of meat, regarded the officers with envious hatred and were ready to fire the first shots in their backs. As the officers were all well aware of this, there was a tradition of leading from behind. Officers and men alike panicked in air raids and it was a standing joke among British troops, that the Egyptian encampments moved further from the coast road after each heavy raid."
It is one of the heroic myths circulated in Nasser's Egypt that when ordered away from the frontier by Churchill, the younger officers were deeply humiliated and actually considered starting a revolution. The truth is the whole force was delighted to get away from the fighting and the desert. All these younger officers could talk about was getting back to comfortable quarters and bright lights.
What was the value of the Egyptian Army in World War II? Answer: Not much, regardless of which side it chose to fight on. This assessment was verified in the Egyptian Army's abysmal performance in 1948 and 1956.
Italian Raggruppamentos
A number of short lived formations existed in the Italian army after the collapse of the Italian invasion army in Egypt in late 1940/early 1941. Here are some particulars regarding them.
- Bergonzoli Group. Formed after the fall of Bardia with II/86 Sabratha, 18 Libyan Battalion, 1st Libyan Parachute Battalion, a scratch battalion of rear area troops, the 60th Brs Motorcycle Company, an M-11 tank platoon and two armored cars (5,000 men). In the first days of February, Bergonzoli was put into command of the 3rd and 4th Medium Tank Battalions, the 60th Light Tank Battalion, an armored car
British Dummy Tank Units
The following were established as dummy tank battalions as part of the Commonwealth's deception plans.
| Unit | Controlling HQ | Dates | Locations |
|---|---|---|---|
| 37 RTR | GHQ MEF | Jul 41-Oct 42 | Egypt/Libya |
| 38 RTR | GHQ MEF | Jul 41-Aug 41 | Palestine |
| 38 RTR | GHQ MEF | Sept 41-Nov 41 | Egypt/Libya |
| 38 RTR | 8 Army | Dec 41-Oct 42 | Egypt/Libya |
| 39 RTR | GHQ MEF | Jul 41-Jul 42 | Palestine |
| 39 RTR | 74 Arm Bde | Aug 42-May 43 | Egypt/Libya/Tunisia |
The 74 Arm Bde was a dummy Bde featuring the 39 and 101 RTR dummy battalions. It was formed on 5 July 42.
While not a Dummy Tank Brigade, it should be noted that the 1st Arm Bde returned from Greece without any tanks and spent the rest of the campaign as an inspection/training reception unit for armored units and their vehicles. It does show up in some OOBs later in the campaign and was a unit (of sorts) then, but was never a real combat unit again. The closest it came was at Gazala (fully organized and equipped with three armor battalions), but during the fighting it was decided to cannibalize the brigade to keep other units up to strength rather than to use the 1st Arm Bde as a combat unit of its own right. platoon, a Motorcycle company from Savona, one 105/28 Battery and one 75mm AT Battery (2,500 men).
-
Bignami Group. A Mobile group formed on 22 Jan 41 using the 25th and 27th MG Battalions, a battalion of the 10th Artillery Regiment (Bologna), the 6th and 21st Medium Tank Battalions.
-
Moech Group. A column formed on 2 Feb 41 with the 3rd and 4th Artillery Battalions of the 20th Artillery Regiment, I/86 Infantry Battalion, one MG Company, one 65/17 company, one 47/32 AT company, and four 20mm AA sections.
-
Piana Group. One 75/27 battalion, one 105/28 battalion, one mixed artillery battalion (1,800 men).
Each of these groups was destroyed in the defense from Tobruk back to and including Beda Fomm.
Those Strange Little Garrison Units...
Just so the OOBs of these little guys are no secret, here they are for the little garrisons of the 30A Settore (HQ in Giarabub):
Giarabub: one Infantry Company; one Auto-MG Company; 3rd Libyan Fortress MG Battalion (four companies of fixed MGs); one reinforced AT Platoon (6x 47/32 AT guns); one reinforced AA Platoon (6x 20mm AA guns); one Infantry Gun Platoon (2x 65/17 guns).
El Garn ul Grein: one Infantry Company; one MG Platoon; one AT Platoon (4x 47/32 AT guns); one AA Section (2x 20mm AA guns).
Bir Scegga (Ft. Maddalena): one Infantry Company; one MG Company; one Field Artillery Battery (4x 75/27 guns); one AT Platoon (4x 47/32 AT guns); one AA Platoon (4x 20mm AA guns).
Further west, and not part of 30A Settore, is the Jalo oasis garrison:
Gialo (Italian spelling of Jalo): one MG Battalion; one Libyan Replacement Battalion; one AT Company (12x 47/32 AT guns); one AA Platoon (4x 20mm AA guns); one Saharan Company.
The Libyan Armored Division
Never quite formed, the 1st Libyan Armored Division was in the process of assembly during the Winter of 1940 and early months of 1941. It was to be based on the Babini Armored Brigade (1 Med Arm Bn, 3 Med Arm Bn, 21st Light Arm Bn, 60 Light Arm Bn), 10 Brs Infantry Rgt, 12 Artillery Regiment (reassigned from Savona), and the Provisional Motorcycle Battalion. Since the 10 Brs Infantry was ambushed in its trucks as it attempted to link up with the Babini Brigade, the formation was never completed. If, however, you manage to get them all together in one place, feel free to give yourself a pat on the back for generating the hypothetical 1st Libyan Armored Division.
General Pietro Maletti
General Pietro Maletti was an officer of considerable colonial experience, much of it serving under Marshal Graziani, the Italian Army Chief of Staff. Graziani took over Balbo's governorship in Libya.
In November 1935, Maletti commanded a motorized column of Graziani's army during the invasion of Ethiopia. While pursuing a retreating enemy, he ran into a dug-in force of Ethiopians and was counterattacked. Maletti beat a hasty retreat, losing three L3 light tanks (two of them bogged down in a river bank). The Ethiopians also fell back after their commander was wounded. Graziani attempted to claim this action as a victory.
In May 1937, Maletti became infamous as the man who massacred the monks at the Debra Libanos monastery. This was part of an Italian retribution for an assassination attempt on Graziani in February 1937. Two Eritrean assassins hurled hand grenades into Graziani's party at a public function. Graziani was wounded by a large number of grenade fragments. The head of the Ethiopian Coptic Christian Church (Abuna Cyrillos) was also wounded and his umbrella-bearer was killed. Twenty others were wounded, including General Liotta (the Regia Aeronautica's commander in Ethiopia) who lost a leg.
In retaliation, 449 monks and others were shot at Ethiopia's holiest monastery. Maletti was accused of other war crimes as well, such as refusing medical attention to wounded prisoners (on those rare occasions when his men bothered to take living prisoners at all).
Maletti's Raggruppamento was formed on 8 July 1940 out of the following: Seven Libyan Infantry Battalions (1, 3, 4, 5, 17, 18, 19) (consolidated into two Libyan regiments 1st and 5th); One Saharan Battalion; one 65/17 Group (12 guns); one 75/27 Group (8 guns); one M11/39 Company; one CV35 Company; two 47/32 AT Companies; one 81mm Mortar Company; two 20mm AA Batteries; two Engineer Companies; 160 Camels; 500 Vehicles.
At that point (July, 1940), about half the Libyan Battalions were poorly trained with bad morale.
During the Italian invasion of Egypt, Maletti's Group was intended to make a flanking movement through the desert. However, his staff failed to procure the proper maps and navigation equipment needed to work deeply in the desert. Moving to its jump-off point, the group got lost and the 23rd Corps HQ had to send aircraft out to lead his units into position.
On the morning of 13 Sept 1940, Maletti started with the advance of the Italian Army into Egypt under the command of 23rd Corps. The Raggruppamento formed the spearhead of Bergonzoli's advance to Sidi Barrani along with the other motorized formations: 23 March Division and Aresca's Armored Regiment (reinforced by armor detached from Maletti). Maletti was toward the rear of the advancing formations until 15 Sept 40—by the 17th, the group was consolidated near Sidi Barrani. The group sustained light losses during the advance (12 men).
In the next two months, the group changed organization by gaining and losing formations as well as fighting small actions between truck mounted Italian columns and raiding British armored cars and light tanks. When Compass began, the Raggruppamento had the 1st, 5th and 19th Libyan Battalions, the Saharan Bn 2nd Medium Tank Bn, and artillery in the Nibeiwa Camp. The 17th Libyan Battalion was at Alam el Iktufa.
When Compass began, the attack on the Nibeiwa Camp was led by a group of Matilda tanks. These proved impervious to even direct hits by Italian artillery—the 30 pound shells of the 100mm guns (the heaviest present) did no more than jam the turrets on two vehicles, despite the fact that the gunners valiantly remained at their posts until literally crushed to death. At 9:00 am on 9 Dec 40, Maletti, dressed in his pajamas, was killed directing the fire of some 47mm AT guns. At Nibeiwa, the artillery and Saharan Battalion were killed fighting almost to the last man, but after the death of Maletti, the Libyan battalions lost heart and by 11:00 am the fighting had ended.
The survivors of Maletti's Raggruppamento formed the 34th Libyan Motorized Battalion in Derna on 24 Dec 1940.
The French Units
From the very beginning of the campaign, there were Free French units participating. The first was the Free French Motor Marine Battalion (also known as the French Motor Battalion). This unit should not be confused with the later (and much better quality) unit, the Battalion of Marine Infantry (le Bataillon D'Infanterie de Marine, BIM). The French Motor Marine Battalion worked with the 7th Arm Division's support group during Compass, refused to attack Bardia (where the Italian defenders promptly surrendered to the British armored officers attacking with a handful of tanks who decided to go with or without the French infantry). Later, this same unit torched the supply depot at Msus when they saw dust clouds in the distance (an approaching column of the LRDG). These guys went out of their way to acquire their "0" rating. Oddly, the unit performed aggressively and well when sent to fight other Frenchmen in Syria during Operation Exporter.
The two Free French Infantry Brigades were organized as follows:
1 Free French Brigade Group: 2 Bn 13 Demi-Brigade de Legion Etrangere; 3 Bn 13 Demi-Brigade de Legion Etrangere; 2 Bn de Marche (de l'Oubanghi) (arrived Suez at the end of April, 1941); Bataillon D'Infanterie de Marine (consolidated with Pacific Bn after Gazala); Bataillon du Pacifique; 22 Compagnie Nord-Africaine; Compagnie Antichars (AT Company); Bataillon de Fusiliers Marins (AA Battalion); 1 Regiment D'Artillerie (24x 75mm organized into four batteries, arrived 19 Dec 41).
2 Free French Brigade Group: 1 Bn 13 Demi-Brigade de Legion Etrangere; 3 Bn de Marche (until June 42); 4 Bn de Marche; 11 Bn de Marche; 5 Bn de Marche (after June 42) (arrived in Cairo 17 July 42); 21 Compagnie Nord-Africaine; 23 Compagnie Nord-Africaine.
1 Regiment de Marche de Spahis Marocains: Formed in two Groupe de Reconnaissance, GR1 and GR2; Armed with Marmon-Herrington armored cars modified to carry French 25mm cannon (July 42); 3rd Squadron equipped with "Conus Gun" Ford-made truck Chassis with a 75mm French gun mounted in a turret taken off an Italian M13 tank!
The Czech Battalion
The Czech 11th Infantry Battalion was organized on 1 Nov 1940 in Palestine. After garrisoning Egypt, the battalion moved into the Western Desert with the British 23rd Infantry Brigade (with which it served from 30 May 1941 until 6 October 1941) on May 31, 1941. It was held in reserve during Battleaxe (near Matruh) and was sent to Syria with the 23rd Bde for Operation Exporter. On 20 October, the battalion was shipped to Tobruk where it served under the Polish Brigade until 7 April 1942. It then departed for Palestine to be converted into the 200th Light AA Regiment. Eventually, these troops served with the Czech 1st Arm Bde in France.
Captured Allied Equipment
While the game explicitly replicates the instances of Axis equipment being used by the Allies (the captured Italian Tank units), some mention of the Allied equipment used by the Axis is in order.
About 30 Morris Commercial trucks and 30 Ford F.5 trucks were captured and modified by the Italian 12th Autoraggruppamento. On the first trucks were installed 65/17 guns and on the second 20/65 MGs. These then formed the Volanti Artillery Regiment which served with RECAM.
Ramcke's Parachute Brigade motorized itself by capturing an Allied supply column during the retreat from El Alamein. This was ignored in game terms as this event essentially happened after the game ends—while not in time, definitely in situation.
And, of course, this section cannot end without mentioning Rommel's captured command truck, Mammoth.
Armor Upgrades
Numerous unit exchanges occur during this game due to equipment upgrades. Here is a listing of the more notable ones.
- Germans: The German Panzer Battalions go through three phases. While the Pz Ib was phased out by Sept 1941 and the Pz II was in use for various functions throughout the campaign, the following periods are characterized by the dominant main battle tank: 1) Feb 41 to Dec 41: Pz III. 2) Jan 42 to Aug 42: Pz III Long. 3) Sept 42 to the end: Pz IV Long.
At any point, regardless of overall period, a mix of vehicles existed in each battalion (for example, on 28 March 41, Pz Rgt 5 had 25x Pz Ib, 45x Pz II, and 71x Pz III). Generally, the available vehicles were distributed to make all four Panzer Abteilungen comparable. Note that at the time of Operation Brevity, these battalions have been consolidated into two, one from each regiment. The 5th Panzer Regiment had been reduced by the spring's fighting and mechanical losses, the 8th Panzer Regiment due to mechanical and shipping losses. In this case, rather than spreading the remaining vehicles thinly to keep all four battalions operational, Rommel chose to keep two full strength battalions and disband the other two until repaired vehicles became available.
- Italians: The Italians (fighting their poor man's war) were unable to physically upgrade existing units with new vehicles. Instead, new unit arrivals show a progression of vehicle types. At first you have a plethora of light tanks with pathetic models such as the CV33 and CV35. Only a few medium tanks are available in 1940, and these are equipped with M11 and M12's. Later units arrive with increasing numbers of M12's, then M13's and finally a few with M14's. The shipping of light tanks ceases altogether.
The one major armored exchange in the Italian armored force during the campaign is the exchange of Ariete's Medium battalions for ones with higher action ratings. This is not an equipment upgrade at all, but rather the result of an intensive training effort in the spring of 1942.
- Commonwealth: The Commonwealth goes through a sweeping series of vehicle upgrades through the campaign.Starting with some pathetic pre-war light and modest medium tanks (not particularly any better than their Italian adversaries) and ended with quite modern (especially by 1942 standards) Sherman, Grant (Lee), and Stuart (Honey) tanks. Here is a run down of the changes, although not all of them warranted replacement counters:
2nd Arm Bde: Cruisers to Grants/Crusaders to Shermans/Grants/Crusaders. 4th Arm Bde: Lt Tanks/Cruisers to Grants/Stuarts/Arm Cars. 7th Arm Bde: Lt Tanks/Cruisers to Cruisers to Shermans. 8th Arm Bde: Grants/Crusaders to Grants/Crusaders/Shermans. 9th Arm Bde: Grants/Crusaders to Grants/Crusaders/Shermans. 22nd Arm Bde: Cruisers to Grants/Crusaders.
The infantry tank battalions show a progression from Matildas to Valentines (with the few Scorpion Anti-Mine tanks thrown in) but rather than re-equipping old units with the newer vehicles, new units arrived which used the new equipment from the start (in the same manner the Italians did their upgrades).
German SP Anti-Tank Guns
There are numerous myths surrounding the use of SP AT guns by the Germans—especially regarding field conversions, improvised and ad hoc designs. Much of this has been exaggerated. The following were used in addition to standard designs such as the PzJg I, Marder and so on.
-
37mm PaK: Platoon Leader halftracks had this AT from the very beginning.
-
50mm PaK: In the spring of 1942, the PzJg Company of each Pz Grenadier Regiment converted one platoon of their towed AT guns into SP by mounting these guns on halftracks.
-
76.2 PaK: In April of 1942, the PzJg Company of the Sonderverband zbV 288 converted nine of these captured Russian towed guns in SP models using halftracks. The design was called "Diana" and was unsuccessful.
-
88mm FlaK/PaK: In preparation for the campaign in France, a handful of these guns were mounted on halftracks in the spring of 1940. The project was stopped and the weapons system was reconverted to normal use because the weapon was too heavy and large for the prime mover to handle. No definitive data is available about the use of such weapons in North Africa, but it was most unlikely.
Combat Organization of German 88mm FlaK Units
Each FlaK Battalion consisted of three batteries (numbered 1, 2, 3, designated schwere (heavy)) of 88mm AA guns with four guns each and two batteries of 20mm AA with 12 guns each (numbered 4 and 5, designated leichte (light)). This was the administrative organization only. In practice, each FlaK battalion formed three FlaK Kampfstaffels each consisting of one heavy battery (sFlakBt) of 4x 88mm AA and two light platoons (lFlaKZ) of a total of 8x 20mm AA. For example, the 5th Light Division on 31 March 41 was supported by 1-33 FlaK Abt with the first FlaKKS attached to PzRgt 5, the second to RgtStab zbV 200, and the third was held in reserve.
Royal Navy Shore Bombardments
Beginning on 17 Sept 1940 with the shelling of the coastal road above Sollum, the Royal Navy's Inshore Squadron undertook bombardments of the Italian communications throughout the rest of the year. This squadron consisted of: The monitor Terror with 2x 15 inch and 8x 4 inch guns; The gunboats Aphis, Ladybird, and Gnat which had "smaller armaments".
These actions were occasionally reinforced by the Mediterranean Fleet. Destroyers attacked the area around Sidi Barrani on 17 September and the big guns were in action on 3 Jan 41 in support of the ground attack on Bardia. In addition to the gunboats, the Italian defenders were bombarded by the 15 inch guns of the battleships Valiant, Barham, and Warspite, in addition to seven destroyers. The carrier Illustrious provided spotting aircraft.
In the spring of 1941, Aphis and Gnat were temporarily diverted to Suez in response to the Italian naval threat from East Africa. They rejoined the Inshore Squadron at the beginning of April when the squadron was further reinforced by the Australian gunboats Vendetta and Waterhen. Gnat and two destroyers shelled Sollum on 13 April 41 and two days later the cruiser Gloucester (6 inch guns) and the destroyer Hasty attacked Capuzzo and Bardia, by now back in Axis hands. Gloucester was in action again on 18 April and sporadically during May (together with Ladybird and Aphis) conducting attacks on the transport along the coastal road. Other actions included a seaborne raid by a unit from Layforce on Bardia on the night of 19/20 April and a bombardment of Tripoli by the battleships on 21 April, this time supported by the carrier Formidable.
May 1941 saw two attacks by destroyers on Benghazi aimed at the port facilities and the ships in the harbor. Similar targets were also hit between 19 and 20 July by cruisers and destroyers.
From that date on, shore bombardment, as either direct or indirect support of the army, ceased to be a feature of the campaign. No such support was planned for Operation Battleaxe—as air cover for the fleet in such a case could only come at the expense of the support granted the troops. Similar reasoning decided against the use of naval gun support during the Alamein battles.
Jock Columns
These columns were a feature of British tactics, but were purely ad hoc and only put together based on the needs of the moment. A typical column formed around support group units might consist of an infantry company, an artillery battery, AT and AA guns. They might also be reinforced by some armored cars or possibly heavy MG sections or companies. The 7th Arm Div can be seen using these columns from the time the Italians invaded Egypt, in Sept 1940.
Later, Motor or Motorized Infantry Brigades often fought in a similar dispersed manner. Where a large stretch of desert was assigned to a brigade, the ground would be covered by a number of columns. At Gazala, a brigade would form a defensive box from which it would send out columns for security, recon, and harassment missions.
Regular Infantry Brigades also sometimes formed columns from time to time for specific roles and these were often named for their commanders (for instance Gleecol and Leathercol). Again this would be driven by the need to cover a large amount of desert when on the defensive.
While the forming of such minor task forces is common to all armies of the period, what separates the British method from other nations was that it was wholly separate from the armored units, being a feature of the infantry and support brigades without armored units or support.
Scorpions
A handful of Scorpion mine clearing tanks (and an even smaller number of actual Flails) were available for El Alamein. Of the very limited numbers of vehicles actually involved, fewer still made any contribution to the breaching of Axis "Devil's Gardens". In fact, all of the Flails broke down before clearing any mines. The two Scorpion units in the game represent the meager detachments which attempted to assist the Allied breaching effort.
The German Oasis Companies
A much misunderstood set of units, the German Oasis Companies and their theoretically controlling Battalion Staff (BtlStab zbV 300), has been represented in North African games in a number of unusual ways. In my own game Afrika I showed the 300 Oasis Bn as a consolidated unit—and a motorized weapons battalion at that. Here are the facts which will put some myths to rest.
In April, 1941, each German Wehrkreis formed one Oasis Company for a total of 13 companies. These were to be built around a core of soldiers who had either lived or worked for some time in Africa. The main task of these companies was to be static occupation duty of isolated places such as road junctions, oasis, and wells. Controlled by BtlStab zvB 300, the companies were specially equipped and trained (for example, they could capture water vapor from the air to generate drinkable water). In the summer and early fall of 1941, each German infantry regiment in Africa received one Oasis Company. The remaining five companies (2, 6, 10, 12, 13) were put under direct DAK HQ control.
The 300 Battalion Staff was just that, a staff of under 10 officers and men (no troops of its own) and it was absorbed by the DAK HQ staff in the fall of 1941. This staff was officially disbanded in mid-1942.
All the Oasis Companies had limited motorization and no heavy weapons.
The 52 Medium Tank Battalion
This unit fought with RECAM in November, 41 and was destroyed in the Crusader Battle. In the game, I have labeled this unit as "52 Mx" for 52 Mixed Tank Battalion. The actual 52 Medium suffered losses as it transited the Mediterranean and straggled its way onto Africa. Once there, it was reformed as an experimental unit consisting of one company of Medium Tanks from the original 52nd Medium plus additional L-6 Light Tanks and Armored Cars. This strange little unit was never reformed after its destruction in battle.
From All Tank to All Arms: The Evolution of British Armored Doctrine
by Steve Rothwell
(This article may be printed in a future issue of Command Magazine. Printed here with the author's permission.)
Of the feelings of British and Commonwealth troops who took part in Operation 'Crusader', launched on 18 November 1941 to push Rommel out of Libya, an officer of the British Royal Armored Corps wrote—
"...a bitter taste remained; those who fought in tanks cursed those who sent them into battle, inferior in armor and equipment and in tanks that broke down endlessly. The infantry, with a sprinkling of useless antitank guns, looked to the tanks to protect them against enemy tanks, and were bitter at their failure to do so. The armored commanders, hurrying from one spot to another to protect infantry from the threat of enemy tanks which did not always materialize, blamed the infantry for wearing out their tanks and crews by such a misuse of the decisive arm in Desert warfare..."
The tanks had become a spent force early on in the operation and, like many others, the unknown author blames this on poor British tanks and antitank guns. What the British lacked was a doctrine, or way of fighting, which successfully integrated tanks with infantry and artillery.
That this was so is perhaps surprising given that it was Britain which fielded the world's first armored formation in 1927. Although only in being for little over a year, this Experimental Mechanized Force showed, to those willing to look, how warfare might be conducted in the machine age. However, despite further experiments during the 1930s, the early British lead was effectively discarded. Pre-war research into tank design and doctrine was severely limited because of financial stringency, assumptions that there would be no major war, and conservatism & institutional infighting between the different arms of the Army. There were many who were hostile to mechanization in general, and to the tank in particular, the most vociferous being the cavalry, anxious to preserve their traditional role.
What discussions there were as to the use of tanks proceeded slowly and inconclusively. There were two extremes—those who saw the tank as a means of helping the infantry secure their objectives, and those who believed that the tank would win battles unaided by the other arms. By the outbreak of the Second World War, a compromise of sorts had been reached. Heavy or 'infantry' tanks would be used in support of the standard infantry division but the main offensive formation would be the 'mobile', later 'armored', division, equipped with fast cavalry or 'cruiser' tanks. These divisions were to dash deep into the enemy's rear, defeat his armor and paralyze his command, unfettered by the slower artillery and infantry. The infantry divisions, with infantry tanks in support, were to follow in the wake of the armor, capture by-passed strong points and mop-up the confused and demoralized enemy.
The need for several types of tank caused a dilution of effort in tank design and production which together with the inadequacies of British industry left the Army without an effective fighting tank until the war's end. More seriously it polarized the development of doctrine. The infantry, and to a large extent, the artillery, remained concerned with their own tactics. The idea of dashing armored operations was seized upon by the cavalry when, late in the day, they were forced to accept mechanization and the primarily 'all tank' armored formations formed in Britain trained for their own battle. In North Africa, where much of the infantry came from the Commonwealth and the armor was almost entirely British, the diversion of doctrine was made worse by Australian, New Zealand and South African antipathy towards the old British class-based society. By these means the principle of intelligent combination of all arms was largely cast aside, a situation compounded by lack of direction from higher command, and it was not until 1942 that the high levels of artillery-infantry-tank cooperation achieved in 1918 were re-instituted, by Montgomery, at El Alamein.
With the exception of 1 Army Tank Brigade, an infantry support formation, initial combat experience in France in 1940 was dismal and little was learned. Over the next eighteen months the expansion and equipping of Britain's armored force continued. Unfortunately it was not matched by significant improvements in doctrine and organization and the divisions raised at thistime consisted of large numbers of tanks, organized into two armored brigades supported by too few infantry and artillery. The premier British armored formation in the desert was 7 Armored Division, immortalized as the Desert Rats. Formed in Egypt in 1938, by the time of the Italian invasion in September it had two armored brigades and a small infantry-artillery support group. The high levels of training and motivation it enjoyed allowed the division to overcome the appalling state of its equipment and superior Italian numbers.
Unfortunately early success against the Italians, in addition to reinforcing the beliefs of the 'all tank' school, led to the establishment of the 'Jock Column' as an important feature of British tactics. The prevailing feeling in the desert at this time was that the losses of the First War could be avoided by mobility, dispersion and tactics amounting to little more than raiding. Encouraged by the romantic aura of the desert, independent task forces and 'patrol groups' of armored cars, lorried infantry and artillery were raised, becoming known after the commander of the most successful, Brigadier Jock Campbell, later to win the Victoria Cross. Drawn mainly from the armored divisions' support groups, the main effect of the columns was to disperse what little infantry and artillery support there was for the tanks. At the time, the tank men did not seem to mind.
Weakened by withdrawals to meet the needs of other theaters, by the spring of 1941 the British garrison in Libya was untrained, ill equipped and dangling at the end of a tenuous supply line, and Rommel's first drive encircled Tobruk with ease. Inadequate training and poor equipment characterized successive British attempts to raise the siege but more significant was the British failure to grasp just how different the German concept of operations was from their own. German defense rested upon the cooperation of tanks, minefields, artillery and antitank guns, and avoiding wherever possible the tank-to-tank actions so eagerly sought by the British. Instead British tanks were lured onto the panzers when hull-down or, more often, onto the waiting antitank guns. With only the enemy tanks visible British crews believed their losses were being inflicted by superior German tanks, hence the 'tank gun—armor' debate.
In June 1941, the British Operation 'Battleaxe', launched with inadequate forces at the insistence of Prime Minister Churchill, foundered on such a German defense in just three days. The British were forced to withdraw, which they did successfully, covered with great skill and courage by the surviving tank crews. Wavell, the commander in the Middle East since 1940, lost his job and was replaced by Auchinleck. There followed another offensive, 'Crusader', in November 1941. A simple plan was devised whereby the infantry supported by infantry tanks would fix the Germans in place, leaving 7 Armored Division, with three armored brigades under command, to drive around the southern flank and take the Axis armor from behind. It was a good plan but poorly executed. The attack began in pouring rain on 18 November but the British failed to concentrate their armor and the three armored brigades advanced independently. The Axis troops, their main force concentrated into a single entity and waiting behind a screen of 50mm antitank and 88mm dual purpose guns, destroyed each brigade in turn. By the evening of 22 November, two thirds of the British tanks had been knocked out. The infantry did better and when Auchinleck stepped in to command the battle personally (sacking 8th Army Commander Cunningham in the process) a renewed attack carried the day.
Back in Britain, the lessons of 'Battleaxe' and 'Crusader' were considered by Gen Martel, Director of the Royal Armored Corps, who believed that the 'all tank' school had been proved wrong. The separation of infantry and artillery from the tanks, each under separate command, presented too many opportunities for confusion. Exercise 'Bumper', in September 1941, had demonstrated some idea of how things should be done and that a new organization was needed for the armored division, one which gave the armored commander sufficient infantry, artillery and antitank guns to help the tanks achieve their objectives and to form a firm base for the next stage of the operation. In May 1942 the basic organization was changed and one armored brigade was replaced by a motorized infantry brigade.
Auchinleck authorized similar changes, together with the formation of 'brigade groups'. 'Crusader' had shown the need to concentrate the artillery in order to defeat the German antitank screen, to protect it with tanks during the advance and with infantry and antitank guns in defense. Within the armored division, the armored brigade was grouped with its own, permanently attached motor infantry battalion and a field/antitank gun regiment, one of which was permanently attached to the motorized infantry brigade also. Auchinleck also made permanent the infantry divisions' practice of reinforcing their brigades temporarily with artillery, antitank guns and engineers from divisional troops, the idea being to create self-sufficient, self-protecting infantry formations that would satisfy the infantry commanders' demands for protection from Axis armor.
Auchinleck's new armored division organization was not implemented until August 1942, but the 'brigade group' concept was ready in time for Gazala. Unfortunately it did not bring about the high level of all arms cooperation intended. The armored brigades continued to fight their own battle as before, leaving their motor brigades and the infantry divisions to find their own role. The cultural leap that would see mixed battle groups concentrated to a single objective did not occur. Commanders were limited by pre-war training and experience which left them ill-prepared to command anything larger than a brigade. The brigade was seen as the major fighting formation and the 'brigade group' concept, with its permanent attachments, only served to reinforce this view and problems with the system of command persisted.
It was also common for brigades to be detached and reattached from division to division, often in the midst of battle. During Gazala for instance, 5 Indian Division had no less than 23 changes of brigade. Commanders had little time to familiarize themselves with each other or to work out how to coordinate their actions. When dispersed across the desert, the distances involved precluded any but the shortest of meetings and radio communications were not good enough to fill the gap. Rommel often succeeded in keeping his mobile troops concentrated and it was these contrasting methods which helped him overrun or roughly handle four brigades and a divisional HQ on the first day at Gazala. Whatever faults there may have been with his preference for leading from the front, Rommel's intentions were clearly understood by subordinates well able and willing to act on them intelligently. For the British, command was not always exercised so clearly or assertively, their difficulties being compounded by the coalition nature of their forces, and it became common for commanders to debate orders.
The conflict of roles between infantry and armor continued to pervade the campaign, with relations between the two reaching their lowest point during the defense of Egypt in July 1942. By now infantry commanders insisted on tank support for any action. In defense, infantry positions relied on the armor to keep supply routes open and to effect their relief. In attack, armor was needed to secure the objective against counterattack until the infantry's antitank guns could be brought forward. Following a successful night attack on Ruweisat Ridge on 21/22 July 1942, the 6 New Zealand Brigade was destroyed when the promised support from 2 and 22 Armored brigades failed to arrive. Responsibility for the disaster lay with all involved, arising from 'a mixture of misunderstanding, reluctance, indifference and, it may be supposed, war weariness' to which list can be added poor communications, staff work and training. To be fair to the armor, morale amongst the tank crews was low because of high casualties and the disruption caused by the methods used to rebuild shattered units. Squadrons, troops, even single tanks and crews had been moved from one unit to another and the six regiments of 2 and 22 Armored Brigades contained elements from nine different regiments.
That it took over two years to correct the failings of British doctrine is explained by a lack of overall direction from higher command, made worse by the continuous exchange of formations, units and commanders. The most experienced troops were withdrawn to other theaters, first Greece and Crete, then Iraq, Syria and the Far East. Those that remained were often rotated back to Egypt for rest, reorganization and rebuilding, their place at the front taken by green troops. In August 1942, with their fortunes in the desert at their lowest ebb, the British changed commanders again, Auchinleck was replaced by Alexander and Montgomery took over the 'brave but baffled' 8th Army.
Monty made sweeping changes, re-imposing disciplined command and sacking many senior officers, especially those who would debate his orders. Communication, training and staff work improved dramatically (though the British were never to match German standards—as the traffic jams during Alamein, Goodwood and Market Garden were to prove). Above all Monty was determined that British strength would not be frittered away. 'Jock Columns' were scrapped, officers being forbidden even to utter the words. Divisions were to fight as divisions using their artillery in its proper role, concentrated under the command of the divisional commander, and the brigade group organization was abolished. Brigades were not to be detached from their parent division, although in practice this continued for specific assignments. Significantly, Monty took to wearing a black beret with the badges of the Royal Tank Regiment and the General Staff. The author Barrie Pitt wrote that this possibly subconscious combination held out 'the promise of coordination between infantry and armor under a command knowledgeable of both'.
Monty's first test came at Alam Halfa at the end of August 1942 when the British 22 Armored Brigade demonstrated a discipline and tactical know-how rarely seen up to that time. The advancing panzers ran onto a British antitank screen and were then counterattacked by waiting Grants. Withdrawing behind their own antitank screen, the Germans fully expected the British tanks to be destroyed in the usual way. But it was not to be so, the British, under strict orders not to pursue, stopped in defensive positions, out of range of the German 88s, and began pounding the German positions with concentrated artillery fire that continued all night. The pattern was repeated the next day and the next night Rommel, desperately short of fuel, withdrew. Although insignificant in terms of material losses to either side, the British success had a huge effect on morale and showed the benefits of concentration and close coordination of all arms. Significantly, Gen Freyberg, CO of 2 New Zealand Division, attributed German failure at Alam Halfa to their inability to switch tactics and to carry out a proper infantry attack supported by artillery, he accused them of having become 'tank followers'.
Rommel had been defeated in a defensive battle, now the British had to attack, and Monty, still unsure of the 8th Army's ability, subsequently fought a far from mobile battle at El Alamein and the Afrika Korps was able to elude the leisurely pursuit which followed. However Monty's reforms marked a turning point for the British Army and its Commonwealth allies. The later campaigns in Italy and North West Europe were fought with increasing tactical efficiency, though there were few opportunities for the kind of mobile warfare experienced in the desert. The British soon discovered that the positional warfare forced by the Italian terrain left the armored divisions short of infantry and a second infantry brigade was improvised for each. By the autumn of 1944, all arms integration within the armored division was excellent and it was common practice for the brigades to exchange troops and tanks to form semi-permanent mixed battle groups. In North-West Europe, the ad hoc arrangements devised during the Normandy campaign became the norm and for the remainder of the campaign in NW Europe, British armored divisions fielded four battle groups, formed by pairing the division's four infantry battalions with the four armored and armored reconnaissance regiments. Command of a group would fall to either the infantry or the armor CO depending on the needs of the task in hand. Each group was assigned an artillery battery, with forward observers permanently attached and heavy weapons and ancillary arms attached from divisional troops as needed. Paired infantry companies and tank squadrons learned to work together and with new-found understanding of each others capabilities were able to evolve new, combined tactics in the field.
After the disasters which typified the period up until 1943, the British evolved a way of fighting that carried them successfully to victory in May 1945. As General Sir David Fraser wrote of the army—
"...It was sometimes ponderous, lacking in élan. It rarely showed the 'handiness' in mobile battle which was the hallmark of the Afrika Korps. It is difficult to imagine that a Rommel or a Patton on the Waal on 19th September 1944 could not have reached the Arnhem Bridge—somehow—but it came to know its business. And, without histrionics, it did it..."
There was little room for complacency and while there may have been little public discussion of the desert failings, since the end of the war there has been a determination within the British Army that they are not repeated. Only too aware of German operational and tactical superiority for much of the war, a doctrine was developed embodying the lessons learned. The all arms battle group and the balanced armored division were confirmed as the tactical and operational formations with which the British Army of the Rhine would help defend Europe against the Warsaw Pact. Fortunately this much-prepared for war never came and the British Army had to wait nearly fifty years for an opportunity toprove its mastery of mobile warfare, coincidentally in a desert campaign. In the Gulf War, admittedly against only weak opposition, a British armored division drove through an American-made breach in the Iraqi line. In an extended series of 'one-two' punches, the two British brigades made short work of the static Iraqi infantry formations and the Iraqi 52 Armored Division. Accompanied by unprecedented levels of artillery support and in a continuous 'round-the-clock' operation, the British advanced over 290 kilometers in less than three days when it had been expected that they would need ten. The British grasp of all arms, mobile warfare was clearly demonstrated.
Sources: Bates, P. The Dance of War, The Story of the Battle of Egypt, Leo Cooper (1992). Carver, M. El Alamein, Batsford (1962). Crow, D. British and Commonwealth Armored Formations (1919-46), Profile (1971). Fletcher, D. The Great Tank Scandal, British Armor in the Second World War, Part 1, HMSO (1989). Griffith, PG. 'British Armored Warfare in the Western Desert 1940-43', Armored Warfare, ed Harris and Toase, Batsford (1990). Joslen, HF. Orders of Battle, Second World War 1939-1945, reprinted by the London Stamp Exchange (1990). Pitt, B. The Crucible of War, vols I-III, Macmillan (1986). Playfair, ISO. The Mediterranean and the Middle East, vols I-IV, HMSO (1954-60). Smithers, AJ. Rude Mechanicals, Leo Cooper (1987). Verney, GL. The Desert Rats, reprinted by Greenhill (1990).
Annotated Bibliography
Here I intend to lead the reader to some of the volumes I found during this project that were particularly interesting reads and away from the occasional tome not quite worth the time. This is in no way an attempt to record even a fraction of the sources used to research this game (I fail to see the usefulness of generating a padded academic style source listing of all the rare text sources used...even if I did list the Arabic sources used to generate the Egyptian OOB, I can't imagine that many players jumping at the chance to read them.)
Australia in the War of 1939-45, series I, volumes I, II, & III. Gavin Long & Barton Maughan, Australian War Memorial 1961 reprint. The very best of the English-language Official records. The Australian works are well worth tracking down. In detail and excellent narrative, they are without equal. Unfortunately, they are also hard to find.
The Battle for North Africa. W.G.F Jackson, Mason/Charter, 1975. Jackson's work is the best single volume on the campaign. An excellent read, good detail and some fairly nice maps, make for the best short work I have found on these operations. Highly recommended.
The Campaign for North Africa. Jack Coggins, Doubleday, 1980. By no means a definitive volume, Coggins gives a good overview of the campaign, paying special attention to Torch and Tunisia. The numerous maps of the actions prior to the Tunisian campaign are worth a look. The Tunisian sections are a must see for players of OCS Tunisia.
Checkmate at Ruweisat: Auchinleck's Finest Hour. Donald Brownlow, The Christopher Publishing House, 1977. While the title suggests an in-depth look at the summer of 1942, this volume actually covers the entire desert career of Auchinleck. I am not so sure I am convinced by the author's argument that Auck was a great general who is underappreciated. The author's stated aim is obvious and he is refreshingly open about this being an attempt to enlarge the stature of this general—something other apologist texts in this list could learn from. A great look at the campaign? No, but you might want to check it out to see if you agree with the author's assessment of Auchinleck—but if you do, be sure to also read Carver's Dilemmas of the Desert War to balance the images made of Ritchie.
The Crucible of War. Barrie Pitt, Macmillan, 1986, 3 Volumes. Pitt's work is one of the two best general sources I ran into during this effort. I found these easy to read and follow. The first volume, covering the early parts of the campaign, was the best as Pitt began painting with a broader brush as the campaign grew in scope (such that some of the earlier excellent feel was lost in descriptions of entire divisional movements, etc.) I greatly enjoyed the early sections dealing with the Italian invasion, Compass, and Rommel's entry into the theater. The sections on the campaigns in East Africa are very good as well.
Crusader. Richard Humble, Leo Cooper Ltd, 1987. A decent, if not outstanding, work on the Battle of Crusader. The maps are drawn directly from the British Official history (i.e. no new material) and the text is ok on detail, but not a great read. The narrative is workman-like, not inspired, and is reasonably difficult to follow. However, if you want a single volume on this one major battle, this is all that is available.
Dance of War. Peter Bates, Leo Cooper, 1992. An in-depth look at the critical battles in Egypt, July 42. While this work does little to cover the earlier periods, it fills in much detail glossed out of the usual overview volumes on what occurred in July, 42. Specifically, it examines the actions that delayed Rommel and kept the army intact. That the British Army was able to withdraw without a major panic is one of the show cases of the 8th Army's war experiences. That its attacks here failed are the subject of much analysis and show what Montgomery needed to do in order to make the "hard luck" 8th Army a machine that could win.
Dilemmas of the Desert War. Michael Carver, Indiana University Press, 1986. This thin volume is a good one to read after you have a good grounding in the campaign by reading several other accounts. It is important to keep in mind Carver's stated objective in writing this book—namely to remove the blame from Ritchie for the disasters which befell the 8th Army during his time in command and place them upon Auchinleck and other commanders who he feels used Ritchie as a scapegoat. However one ends up feeling about this issue, the book is a good read and gives a nice overview of the campaign and is especially good from Crusader on. His look at the problems faced by the 8th Army and its "hard luck" is well worth reading—especially the feeling that the victory of Crusader was commonly interpreted as a defeat.
The Desert Rats. G.L. Verney, Greenhill Books, 1990 reprint. A nice (if dated) history of the 7th Armored Division in World War II. Its weakness is its rather weak maps of which there are but a few and the limited amount of space devoted to the war in the Desert. Less than 100 pages deal with the pre-Alamein part of the North African campaign. This makes for a nicely written overview of what was going on, but not for the kind of detailed unit history one would expect. An OK read, but not great.
Desert Warfare: German Experiences in World War II. Major General Alfred Toppe, Combat Studies Institute, USC&GS College, Excerpt from 1952 study. This little volume gives some fairly interesting information on the problems associated with desert warfare that the Germans had to learn the hard way. It also gives a short summary of the history of the campaign which is hardly sufficient as an overview for any student of the campaign serious enough to play this game...something of the high school book report version of what happened. The examination of terrain and weather effects is very good.
The Forgotten Victor. John Baynes, Brassey's, 1989. An excellent bio of Richard O'Connor and the only book devoted to this remarkable man I know of. The look at the initial campaigns in the desert is good, but even better is the extensive quotes from O'Connor's report on the campaign written while he was a prisoner. The sections relating to his time as a prisoner, escape attempts, and career after his return are quite interesting. This is a good one to read.
Hellfire Tonight. Albert Martin, The Book Guild, 1996. While I generally shy away from diaries and reminiscences, I recommend this one. Martin was a ranker in the 2nd Bn Rifle Brigade from the very beginning of the desert war (pity he got sick and missed the entire initial offensive). His account of what went on and what it was like to be a "snuffy" in the African campaign is the best I've read. It is also one of the few accounts that gives an appropriate impression of the vast base complex that existed in the Delta. Not a long book, this is a quick read. Check it out.
Italian Army Order of Battle: 1940-44. Edited by Victor Madeja, Valor Publishing, 1990. A reprint of OOB data produced by the Allies during the war. As such it is not entirely accurate and is sometimes accurate but for some unknown date. At points the reproduction is bad and difficult to make out. It is a good general source on the Italian Army, but should be questioned in the minor details—for example, a number of the OOBs ascribed to the divisions include units that never served with the division (projected units that never linked up) and numerous typographical and other simple errors. In other words, if you follow the general history of the division, you'll probably get the right story—just don't trust it when it claims the 345th Grenadier Regiment was part of the division.
The Italian Navy in World War II. James J. Sadkovich, Greenwood, 1994. In my opinion, the opening sections of this book (dealing with the attitude in many historical works regarding the Italians in World War II) is a must read for all wargamers. Sadkovich chronicles his own exposure to the almost racist beliefs shown in many texts regarding the Italians and his examination of the attitude held by these same sources regarding the Germans. It is a good look at the poor man's war the Italians had to fight. Specifically relating this to the Italian Navy, the author goes on to show quite convincingly that the Italian Navy did quite well at the tasks asked of it and does not deserve the scornful reputation heaped on it by the likes of Erwin Rommel. The price of the volume is a bit stiff, but if you can find a library copy give it a read.
Knight's Cross. David Fraser, Harper Collins, 1993. A much more balanced look at Rommel than Young's work. While only a portion of this volume deals with the Desert War (a large section is devoted to determining what Rommel knew about the 20 July bombing), I recommend this work as the book to read on Rommel's life for those who want to learn a little about this talented (but not perfect) man. At least Fraser does not try to point out that Rommel wasn't really a Nazi as Young seems to do. (For those who are wondering, yes, he was a Nazi...all German claims to the contrary about their officers aside. Just look at the man's rise to power and the units he commanded—one does not become the commander of the Führer Begleit (Hitler's HQ Guard) with serious qualms about National Socialism.)
The Life and Death of the Afrika Korps. Ronald Lewin, Quadrangle, 1977. A better military look at the campaign than Lewin's Rommel bio, and good as overviews go (not the best, that is). A little light in the detail and decidedly Germanophile in approach, this work should not be the basis for one's understanding of the desert war, but makes for an interesting read after some background has been developed.
Mare Nostrum. Greene, Massignani, & Blennemann, Jack Greene, 1990. Greene et al give us a short work filled with interesting OOB information and a few topic articles. This is not a history of the campaign. The volume does try to point out that the Italians were not as bad as they are presented in English histories and that they did the best they could in fighting a poor man's war. The sections on the air and naval war are also very interesting.
The 9th Australian Division Versus the Africa Corps. Colonel Ward A. Miller, Combat Studies Institute, USC&GS College, 1986. A technical examination of light infantry confronted by tanks, Col. Ward's study is a good quick read concentrating on the early attacks Rommel made on Tobruk and how the Australians defended against them. If you can find a copy, read it.
Orders of Battle: Second World War, 1939-1945. LTC H.F. Joslen, Reprinted by The London Stamp Exchange, 1990. Joslen is the definitive source for British (not Commonwealth) Brigade and Divisional units during the war. While following the movements of smaller units is nearly impossible and numerous independent units and corps/army assets are not listed, this volume brings out detail about the brigades and divisions that just won't stop. If you want to know which day the 151 Inf Bde got on the boat in England to go to Egypt, this is the place to look.
Panzer Army Africa. James Lucas, Presidio Press, 1978. War in the Desert. James Lucas, Beaufort Books, 1982. These two volumes fit fully into the Lucas style—interesting narrative, popularly written, filled with anecdotes, but rather light on serious analysis. For pleasant reads, these are good enough, but those serious about their study of thecampaign can do better. For light reading when depth isn't an issue, they are good enough and bring out a nice feel for the campaign and the occasional useful tidbit of information.
Rommel's Army in Africa. Dal McGuirk, Motorbooks International, 1993. A decent picture book of the campaign. Overview text (don't expect to become an expert after reading this). Lots of color photos and uniform information for those into such things.
Rommel: The Desert Fox. Desmond Young, Quill, 1950. Frequently looked upon as "the" classic biography of Rommel, I was so disappointed by this work I actually put it down before finishing it. The degree of hero worship and stereotyping shown in these pages has to be seen to be believed...then again, maybe you don't want to see it. I don't recommend this one to anybody who does not fall into one of the following two categories: A) Those who already feel Rommel walks on water (and don't ever want to hear otherwise) and B) those with cast iron stomachs who can swallow anything.
Rommel's Desert War. Samuel W. Mitcham, Jr. Stein and Day, 1982. This volume covers the 1942 campaign in more detail than the usual overview. Beware of the author's fascination with Rommel (which might explain why 1941—the year the Fox made many mistakes—was omitted from the topics covered by the book). Otherwise, a good read and a nice source on the 1942 campaign.
Rommel—in his own words. Edited by Dr. John Pimlott, Greenhill Books, 1994. A bevy of quotes from Rommel's letters, diaries, and orders. While that in itself is nothing special, these are nicely arrayed by date so that one can read them in context with important events. For that reason, it is useful for determining what Rommel knew when and what his perception was of the things he did know.
Rommel in the Desert. Volkmar Kühn, Schiffer, 1991. A down in the trenches overview of the campaign from the German perspective. The author uses the "you are almost there" approach which applies numerous anecdotes to tell the story (much as does Paul Carrell). The problem with such an approach is that if Private Schmidt's truck doesn't go to the portion of the battle on the other side of the wadi, you don't really find out about it. OK in the parts it covers, the text is amazing in what it doesn't. The maps given are very weak as well. Not the best read, but there are worse.
Rommel as Military Commander. Ronald Lewin, Natraj Publishers (Indian Edition), 1981. A decent overview of Rommel's career and life. As expected in such volumes, a bit of hero worship is present. This sort of book can be a good read if you have an amount of interest in the man and his background, but is of lesser interest if you want to learn about the campaign. As with any biography, if you didn't know better, the book makes it sound as if the fate of nations was determined our main character alone—the man on horseback theory of history and not something serious students of the subject need to waste their time on.
Rommel's War in Africa. Wolf Heckmann, Doubleday, 1976. A reasonably entertaining narrative of the entire campaign. Not a serious study, but filled with enough anecdotes to give a nice feel for what was going on. A good book to read to add to an already established base of knowledge.
Tobruk: The Great Siege Reassessed. Frank Harrison, Arms and Armor Press, 1996. A new work covering the siege of Tobruk, this detailed book is a good read of the defense of the fortress. Harrison also has an axe to grind—he is miffed that the British 70th Division's defense of Tobruk is not regarded in the same esteem as the earlier Australian effort. This portion of the campaign is covered in great detail in this volume and his analysis of Rommel (man and myth) is very good. This is a must read after the general works on the campaign have been studied.
Uniforms, Organization, and History of the Afrika Korps. Roger Bender and Richard Law, Bender Publishing, 1973. An amazing little book. This source gives some great detail in the things it covers, if it was more inclusive it could be the definitive source on the campaign—as it is, the information is pretty hit or miss. Lots of detail on commanders, unit histories (by division, anyway), some neat OOB information, and (of course) lots of data on uniforms and what not. This is a must have for the serious student of the campaign. It is also the only listing of the many Kampfgruppen formed in the desert and their composition I know of.
Wavell in the Middle East, 1939-1941. Harold Raugh, Jr., Brassey's, 1993. An excellent (if expensive) look at the difficulties faced by Wavell as he tried to control his obscenely large command in the face of one disaster after another. Before one is too quick to condemn the British high command for letting slip away the gains of the Compass offensive, one should carefully look at the demands being imposed on Wavell both from above and from outside. Taking the North African events and decisions out of context is a common and dangerous tendency, read this to get a more balanced view as to all that was going on.
Designer's Notes
After working so hard, and so long, on this project, it is difficult to think of things that need to be said, but haven't already...here goes:
This project lies completed in your hands due to the enormous (and generally volunteer efforts) of a very large number of people. I cannot even imagine the number of hours expended on this project by the playtesters and researchers. I know how much time I spent on it, and the total amount of time spent playtesting, proofing, checking long-forgotten sources, and arguing one point or another (if it could be calculated in man-hours) would stagger the imagination.
Fortunately, from where you sit, the game is here to be played and you will not have to sweat the issues that came up during the design process, unless you choose to tinker. If you do 'twist the knobs', please let me know how things turn out. Quite a few versions were indeed tried during testing and in many cases we discovered that they did not match history well—but the number of combinations is endless.
For those who might want to tinker (and those simply curious) here are some of the issues that came up and how I ended up handling them the way I did.
German Intervention
A number of players expressed concern that the design deal with the possibility of no German intervention at all. Their point being that if the Italians did well (or at least didn't get destroyed) in late 1940-early 1941, there should be no German entry into the theater. To give them their due, this certainly would be the case if Mussolini had his way—this was supposed to be his theater and he didn't want any Teutonic interference or attempt to share the spoils.
As a practical matter, these players were concerned about what happens in numerous North Africa games (including my own Afrika) where the Italian player refuses to enter Egypt and sits in Tobruk and waits for the Germans to show up. As you can see by the rules, I chose to force the Italians to advance (they didn't have a choice in the matter historically).
That avoids the direct issue, though, of what if the Italians are doing very well and the Germans show up anyway? Well, from our testing, disaster in western Egypt is pretty much guaranteed (we've not yet had a game where it didn't happen...which is why some players might choose to skip this phase altogether and start at the end of March 41 instead). Better than that, should the Axis player do exceptionally well (or the Commonwealth player just plain blow it...), Axis sudden death victory will occur long before any German combat troops arrive in Africa. Effectively, the Germans won't intervene because the game will end before they might theoretically arrive.
I also had a problem interjecting a set of rules that would encourage players to do poorly (play bad and you get Germans, play well and you won't). I have seen guys do very strange things to get what they want in games and can easily imagine the kinds of things the player would do (or force the British to avoid...as he suddenly wants his opponent to do well, for a while anyway). Also, it would give players the false idea that the Italian Offensive stalled where it did because the Italian commanders didn't want to 'screw up' their chance of getting the Germans to intervene. That is not the case at all.
Personally, I'm going to keep playing that September invasion campaign so I figure out a good way to advance quickly enough to win a sudden death. While I haven't done it yet, the tough puzzle is fun. I encourage you to give it a shot before jumping straight to the March 41 stuff. I think taking Matruh can be done and want to figure out how.
The Road Trace System
In a deviation from the series rules, DAK allows players to use roads for trace supply purposes. Early testing used a version where the armies had to be supplied off the map (there was no trace as there was no effective railway outside the Delta). That system rapidly showed itself full of holes. It was dependent on the forces in play being equal the number available historically at every instant—or wildly variable results would result. It greatly restricted the map area players could use (much more than history indicated). Strangely, the shipping amounts seemed to indicate that while the initial Italian army was almost starving to death, the German mobile forces would be flush with more supply than they could ever use. Frankly, it didn't work, not even poorly, and no fix we came up with could make it work.
With some initial trepidation, I moved to the road trace system for this project. The results were so good from the very start, I never looked back. Not only did it greatly reduce the player's workload (the original was a lot like playing GB under the v1.0 rules!), but the historical results were readily apparent. Furthermore, conditions were stable enough that I could tweak supply and transport amounts on the basis of testing with some assurance of getting the results I was after. For both mechanical ease of play, and decent historical modeling, I am extremely happy with the result—the best of both worlds!
OCS New Optionals
In the three years since OCS v2.0 came out, I have observed a large number of games, received countless phone calls and e-mails, and have played a game or two myself. In doing so, I noticed a number of things about the system I did not feel were performing up to specs. The greatest of these (in the Air System) was addressed when v2.0i came out in 1995 in its optional rules. Also thrown out for discussion was a number of other rules I always play with which will eventually become standard (such as the Combined Arms material) and a few others guys suggested that I don't (the Barrage resurrection rule and the fancy Recon stuff, for example).
As work proceeded on DAK, I noticed a number of things that were either exaggerated in DAK play or just didn't look right (either in this game or other OCS titles). So, I decided to introduce the Optionals here (effectively standard for DAK play) to address them. These rules, in conjunction with the suggested ones listed early in the rules from the v2.0i rulebook are what will eventually become the standard v3.0 rules.
As one player conferred to me, the term "optional" might confuse what I mean. If the terminology is a problem, perhaps thinking of them as "prototypes" would help. They are "optional" in that a player can certainly avoid using them if they don't want to (actually, that is true of any rule—even standard ones, but whatever). But, these rules are special in that they form the basis (in my mind) of what OCS v3.0 will be when they become standard. If you choose to use the rules or not, I need to know what you think as I am attempting to tweak the system into a position that satisfies the majority of players. Those rules which lose the popularity contest will not make the cut and remain optional for the minority who do like them. In a way, you get to decide the future shape of the OCS series rules.
All of these rules have been extensively tested and do, indeed, work—the remaining question is if players like the way they work and the resulting game model. They must pass that test if they are to be adopted as standard.
Garrison Troops
Both sides in the early versions of the game had numerous units which actually served as garrisons in their respective rear areas. Both in Tripolitania and the Delta large groups of forces could be found which the player instantly released from their current duties and marched directly to the front. Without a mass of restrictions, he certainly had no reason to do otherwise. This required two different solutions, one for each side.
In the Italian case, a large number of units west of the map were omitted as they never entered the play area. Others were retained if they did (eventually) move to the map...regardless of how long that final movement took. I decided not to restrict the few remaining ones as at that point it will be up to the player to run his own war.
For the British, the numerous small units were melded together into the assortment of 'Fortress Brigades' the player gets. These units represent a number of smaller independent units which move in and out of the theater during the entire campaign (in other words, their composition isn't constant any more than other (real)Commonwealth Brigades). At start, these brigades represent the following: Matruh is the 1 Cheshire MG Bn, and the 1 Welch Infantry Bn; Alexandria is the 1 Durham Light Infantry Bn, 1 South Staffordshire Bn, and the 1 Royal Notts Foresters MG Bn; Cairo is the 2 Black Watch Bn, 2 Scots Guards Bn, 1 Royal Sussex Bn, 1 Hampshire Bn, and the 3 Libyan Refugee Bn.
Tunis?
In an effort to increase the port capacity of the North African coast, the Axis attempted to get permission to unload cargo at Tunis (Vichy French territory). In this they failed, but personally I don't see the point. Tunis is another 500 miles down the coast from Tripoli and the Axis didn't have the transport they needed to move the tonnage being unloaded at that closer location to the front. I feel adding these ports would increase the tonnage being unloaded in Africa, but would not increase the amount being delivered forward one bit. The argument could be made that the use of Tunis will reduce the amount of supply making it to the sharp end—because trucking that could be used elsewhere will need to be dedicated to moving supply from Tunis to Tripoli.
British Supply
The use of the Nile port cities as infinite dumps (limited only by the ability to pull 'stuff' out of them), was generated to keep the player from going through the labor of bringing on SPs until those hexes turning into infinite dumps anyway. Cairo isn't such a dump as it is not a an off-loading major port like the others. If anything, Cairo is a 'negative' dump (because of its huge population). Provided the couple of needed safety values (barring free direct draw for some purposes), the infinite dumps proved a readily playable alternative.
One might note the relative 'smallness' of the Delta ports in capacity. This is the result of taking the shipping needs of the Egyptian population "off the top." There is an enormous amount of cargo being unloaded in these ports which has no military significance—which also includes tonnage destined to Palestine as well.
Out of Theater Campaigns
I originally had an elaborate system in mind to handle the out of theater campaigns. The beginning of such campaigns would happen randomly and the player would choose what he wanted to send (based on certain minimums). The player could send the absolute minimum (with the prospect of the campaign dragging on forever, and always needing more men in a Vietnam-like manner) or he could send a great deal more (so as to end the affair rapidly). In this way, the player could 'control' the events outside of his direct influence on the map. If a revolt started in Syria for example, the player could send the minimum number of units (if his on map situation warranted it) recognizing that "Syria" would be back looking for more in a while. Alternatively, the player could 'overkill' the Syrian revolt and have his troops back quickly.
In concept, it sounded cool (still does). In practice, it was a disaster. While I spent a lot of time on it, I never could get the system to function as intended. The ability of wargamers to "break the code" (no matter what code I came up with) was so great that eventually the entire concept went into the trash. It was replaced with the Random-but-based-on-history system you see here. The final system works very smoothly, but does not have the game-within-a-game feel I was searching for with the original version. I still have hopes that someday, a solution can be found that can make the originally intended system work as I conceived it (without being hideously overblown with rules, mind you), but for the present I acknowledge defeat on this one—I haven't been able to make it work. I like the way the current system works—smoothly and in the background—don't get me wrong, but I never let that keep me from chasing windmills in the past.
The Little Things...
North Africa is blessed (cursed?) with an abundance of information. While at times this allows the researcher to track even minor units with incredible detail and accuracy, it also brings out lots of detail which actually clouds the picture. The sheer detail can be overwhelming and has to be seen to be believed.
For example, the Commonwealth Army is a teeming mass of battalions which, seemingly at random, form brigade affiliations. To keep this chaos out of the player's control or concern (as well as to leave his sanity intact), I chose to track the brigades instead. This also gives the side benefit of showing the relative lack of tactical flexibility in the British Army.
For quite a while, I thought about a set of rules that would show the effect of the 4 gallon gas tins the British used before they adopted the 'Jerry Can' from their enemy. This involved a number of contortions that are, thankfully I see now, left out of the final product.
A number of rules which were standard for a time in testing were moved into the optional rules sections as they proved too much bother for their value. Certainly players who want to strip their units of trucks (and so on) are not worried about what they perceive as "just a little" extra work. For everyone else, I made the rules optional, but to our truck stripping friend, it is there for his use.
I chose to track a slew of minor organizational and equipment changes in the units through the campaign. This is the reason for the number of unit exchanges and so on. Certainly some players will say "so what? I don't care that they got an extra infantry battalion" (or whatever), but I feel the greater number will welcome the added detail. I certainly believe this information is portrayed painlessly (it just happens during the campaign) and allows players access to an incredible wealth of minor unit facts as the game proceeds.
A Summing Up
I started wanting this game in 1976 (or so) when SPI began floating rumors and feedback items for what would eventually become Richard Berg's Campaign in North Africa. Sitting with my bi-monthly S&T's in hand, I awaited the final delivery of the "game I had always wanted". The delays dragged on for two years, yet I hung on every report, every setback, and every hint that progress was actually being made. I built my own image of what the game would be like and so on. My expectations could not have been higher.
When offered for sale, I sent in an order immediately and held my breath.
Then the game came...
In the years since, I've run into a number of players who claimed to have played that game—one claimed 30 turns. But, I am not one of them. I made a number of head-long attempts to break through its crust and 'understand' but was never able make it function. Trying to do it solitaire didn't help either!
What you see here is the most accurate, painstaking product I have ever devised. It is the culmination of that dream, and a damn fine game at that (yes, I know I'm biased...but I have played this one—even solitaire!). I hope you enjoy many hours of playing this game and I welcome you in the sharing of this dream of mine. I hope you like what I've done.
WHEW!!!!!
Enjoy! Have Fun! & Good Dice!
Dean
Abbreviations
AA— Anti-Aircraft. AG— Assault Gun. Alex— Alexandria. Arm— Armor. Armata— Army. AT— Anti-Tank. Aufk— Aufklärung (Recon or Advanced Detachment). Aus— Australian. Bde— Brigade. BFM— Bataillon Français Marine (French Marine Battalion). BIM— Bataillon D'Infanterie de Marine (Marine Infantry Battalion). Bn— Battalion. Brg. Cor.— Brigata Corazzato (Armored Brigade). Brs— Bersaglieri (Motorized Elite Infantry). B.Scegga— Bir es Scegga (Ft. Maddelena). CAC— Compagnie Antichars (Anti-Tank Companies). CAM— Corpo d'armate di manovra (Corps of Maneuver). Cara— Carabinieri (Police). Cap It— Captured Italian. Carp— Carpathian. Cav— Cavalry. CCNN— Camicie Nere (Black Shirt). CD— Coastal Defense. Cel— Celere (Fast). Centro— Centauro. CIH— Central India Horse. Cldst— Coldstream. CMA— Centro Militaire Arab. CMI— Centro Militaire Italiano. Ctnzro— Catanzaro. Czech— Czechoslovakian. DAK— Deutsches Afrika Korps. di Mnrva— di Manovra (Maneuver). Div— Division. Divarty— Divisional Artillery. E.GuG— El Garn ul Grien. ENRR— Egyptian National Railroad. Exp— Exploration. FDA (n-FDA, s-FDA)— Frontier District Administration (north and south detachments and no). FF— Free French. FJ— Fallschirmjäger (Paratrooper). FK— Flieger Korps. Fld— Field Artillery Regiment. Frt— Fortress. GAF— Guardia Alla Frontiera (Border Guard, Colonial Troops). Gd— Guard. GGFF— Giovani Fascisti (Young Fascists). HCR— Household Cavalry Regiment. Hus— Hussars. Hvy— Heavy. IG— Infantry Gun. Ind— Indian. Inf— Infantry. It— Italian. KDG— King's Dragoon Guards. KG— Kampfgruppe (Battlegroup or Task Force). Kor— Korück (Rear Area Command). Krd— Kradschützen (Motorcycle). KRRC— King's Royal Rifle Corps. KStA— Kampfstaffel Afrika (Combat HQ). Lcr— Lancers. Ldg— Landing. Le— Leichte (Light). Leg— Legion. Lib— Libyan. LibOp— Libyan Operations Group. LL— Luftlande (Air Landing). LRDG— Long Range Desert Group. L. Spez— La Spezia. Lt— Light. Marm— Marmarica. Mech— Mechanized. Med— Medium (also Mediterranean). MG— Machine Gun. Mil— Milmart. Mnfrto— Monferrato. Mob F— Mobile Force. Mtrizzato— Motorizzato (Motorized). Mx— Mixed. NZ— New Zealand. PAI— Polizia Africa Italiana (Italian Police in Africa). Para— Parachute. PG— Panzergrenadier (Mechanized Infantry). Pio— Pioneer. PJ— Panzerjäger (Anti-Tank). Prov— Provisional. Pz— Panzer (Armor). RAF— Royal Air Force. Ragg— Raggruppamento (Task Force). RECAM— Raggruppamento Explorante (Exploration Group). Rgt— Regiment. RHA— Royal Horse Artillery Regiment. RM— Royal Marines. R. Mar— Regia Marina (The Italian Navy). RR— Railroad. RTR— Royal Tank Regiment. RW— Reparto Wanda. SA— South African. SAS— Special Air Service. SM— San Marco. Snd— Sonderverband (Special Formation). Spc— Special. Sud— Sudanese. TAML— Trans-Jordan Arab Mechanized Legion. Ter— Territorial. TF— Task Force. vdH— von der Heydte. Vd.Lib— Volontari della Libia (Libyan Volunteers). VEC— Vittorio Emanuelle Cavalleria (King Emmanuel Cavalry). W. Desrt— Western Desert. Yugo— Yugoslavian.
Arabic for Desert Foxes...
Alam— A landmark or roadsign (An incorrect transliteration has changed the meaning of the word. It should be 'Alaam' (long A), which means mountain.) Example: El Alamein means "The Two Roadsigns".
Bab— Literally meaning door or entrance (such as into a house), but often the name of a narrows at sea or a pass.
Bir— Well.
Deir— Depression.
Gabr— Grave (from the word Maqbara which means graveyard).
Ghizira— Island.
Ghot— Area cultivated after rain.
Minqar— A promontory on land, the word literally means 'Bird's Beak' or 'Chisel'.
Naqb— Pass or Tunnel.
Qaret— Low hill (a North African dialect corruption of the original 'Ghurd' which means dune).
Ras— Headland.
Sabakha (Sabkha)— Dry salt marsh.
Sidi— Tomb, possibly of a Saint (in better Arabic it would be Sayyidi, which means 'mylord' a title of respect given to a Holy Man. More common in North Africa than in the Middle East).
Tell— Hill.
Trigh— Track or Way (In classical Arabic 'Tarik'. In North Africa the usual word for road or track).
Random Events Tables
Each event has a requirement in brackets listed just after the event title. If all of the requirements are not met, then the result becomes "No Event" instead. Do not reroll to get another result. EXCEPTION: If a player is rolling on the Ultra Rare Table, continue to reroll until you get an event that applies.
The player who rolls for Random Events can be of either side and the results of these rolls should be known to both players. For complete fairness, alternate rolling for these...one roll per turn immediately after determining the turn's weather.
Numerous Rommel events have a "Rommel in Play" requirement. Rommel is in "play" if he is on any game map or holding box, he is not in play if he is off on a trip, has not entered the game yet, is wounded, captured or dead, or is arriving back to the game in the current turn.
(Hist) indicates the event occurred historically.
Common Events
11..12 No Event [none]
13..16 (Hist) Rommel Trains his Panzers. [June 41 through Sept 41] The DAK conducts desert training exercises. Expend 2 SP from the DAK HQ. If 2 SP is unavailable, expend the amount present. If the DAK HQ is not in play, expend 1 SP from any Italian HQ not in Tripoli. (If even an Italian HQ is not available outside of Tripoli, then expend 3 SPs from Tripoli as your troops really need the extra training!)
21 (Hist) Major Convoy Raid. [Jan 41 or later, Malta not under Axis Control] Double any Shipping Loss due to the Malta Table.
22 (Hist) Major Italian Shipping Success. [Jan 41 or later] This turn's Shipping losses due to the Malta Table are halved (no rounding).
23..25 (Hist) Royal Navy Bombards Coast. [Anywhere: Sept 40-Jan 41, no result after Jan 41] The Allied Player has one 12 Barrage Point free Barrage he can use on a coastal hex this turn. This barrage cannot be combined with regular artillery (or air) fires. Do not apply the "no friendly unit adjacent" shift to these barrages.
26 (Hist) Rommel Goes to Rome. [Rommel in play] Rommel is pulled out of play for this turn, arrives as a reinforcement next turn.
31 (Hist) Rommel Out of Contact. [Rommel in play] Rommel cannot use his reactive roll or his Action Rating mod this turn. In all other respects he is normal.
32 (Hist) Pearl Harbor Occurs. [Nov 41 and after, one time only] The Pacific War begins, note for future reference.
33..34 (Hist) Churchill Demands Action! [May 41 through July 41, maximum of once per calendar month] The Commonwealth Player must make at least two attacks (regular or overrun) during the coming turn OR capture any port or airfield he did not control when the turn began (the latter condition has no attack requirement). An attempt at an attack (should the defender run away) is OK and can be counted as one of the attacks.
35..43 (Hist) Russian Campaign Begins. [May 41 and after, Greek campaign terminated, one time only] Barbarossa begins, the world holds its breath, and the Fliegerkorps becomes inactive.
44..45 (Hist) Winter in Russia. [Dec 41 through Feb 42, one time only] Due to adverse weather in Russia, the Fliegerkorps becomes active as it has returned to a warmer clime.
46 (Hist) Axis Finds Abandoned Dump. [none] Place 2T with any friendly unit.
51 (Hist) Commonwealth Finds Abandoned Dump. [none] Place 2T with any friendly unit.
52 (Hist) Allies Crack Luftwaffe Codes [Nov 40 and after, one time only] The first level of Ultra codes have been broken. All Axis Malta Table rolls and results must be made in public so that both sides can see the results.
53 (Hist) German Signal-Intercept Genius At Work [Feb 41 and after, one time only] Rommel was graced with an amazingly effective signal intercept unit. No Allied Divisional Markers allowed in play to hide units off map until this effect is revoked.
...OR...(depending on the date)
53 (Hist) German Signal Unit Disaster. [Nov 41 or after, one time only, above result must have occurred earlier] The 200 specialists and communications equipment of Nachrichten-Kompanie 200 is destroyed at DAK HQ. (How this happens could be anything...air attack, vehicle smash-up, severe gastro-intestinal distress, whatever.) Void the effects of the earlier German Signal-Intercept Genius at Work event.
54 (Hist) Allies Crack Wehrmacht Code [June 42 and after, one time only] The second tier of Nazi codes have been broken by Ultra. Cancel the effect of German Signal-Intercept event above (the markers come back) and allow Allied player to always know what units and SP amounts are shipping and to what destination from Sicily or via Coastal Shipping. No Divisional Markers or KG Markers can hide Axis units off map. In effect until the end of the game.
55..66 Roll on Less Common Events Table
Less Common Events
11 (Hist) Massive Convoy Raid. [Jan 41 or after, Malta not under Axis control] No Axis shipping capacity for this turn.
12..13 (Hist) Coastal Transport Interdiction. [Jan 41 or later, at least one active Commonwealth air unit (any type) must be on station on or west of Tobruk] No Axis Coastal Shipping for this turn.
14 (Hist) Hitler Orders No Unit Shipping for One Turn. [Feb 41 and after, No active Fliegerkorps] Hitler has bad dream about drowning. Axis shipping capacity cannot be used to ship any sort of unit counter (or truck) this turn. It can only ship SPs.
15 (Hist) Axis Rail Stock shipped to Africa. [Aug 42 and after, one time only] The Axis shipped three diesel locomotives and some rolling stock to open the railway east of Tobruk. Historically, these were destroyed by British aircraft in a few weeks. If this event occurs the railway to Matruh (those parts under Axis control anyway) can become operative on 1 Sept 42 with a rail cap of 2T. Also, this affects the rail cap available on the Tripoli Railway if that is built by its random event.
16..22 (Hist) Rommel Goes Off Half-Cocked. [Oct 41 or earlier, Rommel in play, Rommel at or within 12 hexes of any enemy unit] Part of the price paid for the extra initiative Rommel provides is that sometimes he does things that are not well thought out. This effect was most pronounced in the early stages of the campaign, before Rommel developed his "desert sense" fully. Any stack stacked with Rommel right now must make at least one Overrun attack this turn with their Action Rating reduced by 1 (Rommel's normal Action Rating effect is inverted). Rommel does not roll for his own loss as a result of this attack (you didn't think he'd go with them, did you?). An announced attempt at an attack is fine—if the defender retreats due to the recon screen rule, the combat still counts even though the actual combat never occurred.
23..24 (Hist) Rommel Goes to Berlin. [Oct 41 or earlier, Rommel in play] Rommel goes to see Hitler and OKW. Roll one die for number of turns he is off on this trip, counting the current turn as one. When the rolled number of turns have passed, Rommel returns as a reinforcement.
25..26 (Hist) Massive Italian Shipping Success. [Jan 41 or after] The Italians manage to sneak through a huge convoy. No shipping losses this turn (regardless of the Malta mods in effect) and the Shipping Capacity for the turn is x2. Vino for everyone!
31..34 Suez Canal Mined. [Active Axis air units stationed in Crete (any type) and weather on Map E allows flight] No reinforcements can off-load in Alexandria or Port Said this turn. Neither location can "generate" any SPs this turn.
35..42 (Hist) Royal Navy Bombards Coast. [Anywhere: Sept 40-Jan 41, Maps B-E: Feb 41-Apr 41, Maps C-E After Apr 41] The Allied Player has one 12 Barrage Point free Barrage he can use on a coastal hex this turn. This barrage cannot be combined with regular artillery (or air) fires. Do not apply the "no friendly unit adjacent" shift to these barrages. The maps on which this barrage can happen are restricted according to the time frames given in the event restrictions.
43..44 (Hist) Rommel Goes to Berlin. [Rommel in play] Rommel goes to see Hitler and OKW. Roll one die for number of turns he is off on this trip, counting the current turn as one. When the rolled number of turns have passed, Rommel returns as a reinforcement.
45..46 (Hist) Summer Campaign in Russia. [June 42 through July 42, one time only, Fliegerkorps is active, Russian Campaign ongoing] Due to a new summer offensive in Russia, the Luftwaffe shifts assets to Russia to support the German effort. The Fliegerkorps becomes inactive.
51..52 (Hist) Allies Crack Wehrmacht Code. [Jan 42 through May 42, one time only] The second tier of Nazi codes have been broken by Ultra. Cancel the effect of German Signal-Intercept event above (the markers come back) and allow Allied player to always know what units and SP amounts are shipping and to what destination from Sicily or via Coastal Shipping. No Divisional Markers or KG Markers can hide Axis units off map. In effect until the end of the game.
53 (Hist) LRDG Raid on Airfields. [Jan 41 and after] Remove LRDG unit from play for one turn (it comes back as a reinforcement next turn). The Commonwealth player identifies one Axis airfield to be raided. The airfield must be on the map and not in any holding box. Garrisons do not matter, nor does precise location. Roll one die for each air unit at the base, reduce on a 4-6. Active or inactive status does not matter.
54 (Hist) Italians Discover "Lost" Supplies. [Jan 42 or later] The Italians stumble upon a supply cache they had overlooked near Tripoli due to administrative incompetence. Historically, they found 3,000 tons of fuel desperately needed at the front! Place 2 SPs in Tripoli.
55 (Hist) Rommel Gets Sick. [July 42 or later, Rommel in play] Months of desert warfare take their toll on Rommel's health. No longer able to keep pushing on, Rommel takes the advice of his doctors and reports back to Germany for a cure. Rommel leaves the game for two calendar months and returns as a reinforcement.
56 (Hist) Force K suffers Minefield Disaster. [July 41 or after, one time only] Force K stumbles into a coastal minefield. +1 to the Malta Table roll for this turn.
61..66 Roll on Rare Events Table
Rare Events
11..13 Malta Invasion Ok'd. [Jan 42 or after, one time only] Hitler gives permission to launch the Malta invasion. The Axis player decides if he wants to do this invasion or not. Execute the invasion as desired according to the Malta Invasion rules.
14 Force K Pull out. [May 41 or after, Active Fliegerkorps, one time only] Force K leaves Malta permanently due to incessant air raids. +1 to all remaining Malta Table rolls in addition to any other applicable mods.
15..16 (Hist) Human Torpedo Raid. [none] Italian frogmen attack Alexandria creating some damage and distracting dock operations. Alexandria cannot accept any shipping this turn (no reinforcements can unload there) and the Alexandria infinite dump does not exist for the turn (no SPs can be "manufactured" there).
21..22 Germans Reveal Shipboard Radar to Astounded Italians. [Feb 41 or after, one time only] The Germans explain shipboard radar to the Regia Marina. The Germans had this technology and knew the British had it as well, but historically did not inform the Italians of its existence. Apply an additional +1 to Axis Malta Table rolls for the next two calendar months.
23..24 Allied Amphib Operation OK'd. [June 41 or later, Royal Marine Battalion in play, one time only] On this or any future turn (once only), the Allied player can move the RM Marine Battalion from any port hex to any unoccupied coastal hex in Combat Mode with 2T of supplies. On the turn it lands it cannot fight or move. After that, it is on its own. No return trip by sea is possible.
25..26 (Hist) Rommel Brags to Mussolini. [June 42 or after, one time only, Rommel in play] Rommel proclaims to Il Duce that he will be in Cairo in a week (regardless of actual situation). Mussolini rubs his hands with glee and boards an Italian Transport with his white charger for the impending triumphal entry into Cairo. After a look at Westphal's situation map, Rommel realizes the nonsense in his bombast and decides to put on a good show to save face. The Axis must make a minimum of three attacks (regular or overrun) this turn. Each attack must have at least one German unit in it. Attempted attacks which do not occur because the enemy ran away (etc.) count as attacks made.
31 Captured Leader Escapes. [One or both players have at least one leader in a cage] If both players are holding an enemy leader prisoner, roll one die to determine which side's guy escapes. If more than one leader is held in a prison having an escape, randomly determine which leader escapes. The escaping leader is welcomed back as a hero and enters play as a reinforcement one turn from now.
32..34 Aussies Go Home. [After Pearl Harbor, one time only] Threatened by Japan, the Australian government finds it ever more difficult to convince its citizens that the bulk of Australian troops should be in the Middle East rather than defending interests far closer to home. Remove all Australian troops except one Division (player's choice) from the game. The Commonwealth player has four turns to move all these units to any friendly port or ports and remove them from play. Roll one die for each non-Australian troops currently in the Far East Box, on a 3-6 return the unit to Africa, otherwise the unit is gone for good. No further Far East withdrawals are to be made.
35..36 South Africans Go Home. [Jan 42 or after, one time only] A growing rift between the British and South African governments leads Field Marshal Smuts to demand the return of South African troops from North Africa. Remove all SA troops. The Commonwealth player has four turns to move all these units to any friendly port or ports and remove them from play.
41..44 (Hist) Offer of US Assistance. [May 42 or after, one time only] After yet another British fiasco, Roosevelt offers Churchill the fledgling 2nd US Armored Division or a rather large cache of American tanks. Churchill chose the tanks. Here, you can choose which to get: either 5 Eq Repls or US 2nd Arm Div plus Patton. These reinforcements appear this turn. If the player chooses the US troops, the following restrictions are imposed on US ground units: Patton can only stack with US units or affect them, US units can only attack using their own Action Ratings. US units can only be rebuilt in Alexandria or Suez and only when all US ground units are at or within three hexes of the given city. US Units are rebuilt using British Repls.
45..46 New Zealanders Free to Fight. [Before March 41, one time only] Freyberg and the New Zealand government required that the NZ Division not fight until all units had arrived and it could fight as a complete formation. If this event occurs, either Wavell has demanded their use in no uncertain terms or the Kiwis were less adamant about their conditions. Release the 2 NZ Div from its Matruh Restriction.
51..52 (Hist) LRDG Raid on Dumps. [Jan 41 or after] Remove LRDG unit from play for one turn (it comes back as a reinforcement next turn). The Commonwealth player identifies one hex on the map (not the Tripoli Box...). The Axis player destroys 25% of all dumps at or within 5 hexes of that hex.
53 The Grand Mufti is taken to Jerusalem. [July 42 or after, one time only] Having successfully delivered the Grand Mufti to Jerusalem (paving the way for decades of strife after the war), the Italian RW commando unit (his escort) becomes available and appears when called for by the Axis Order of Arrival (July 42). If this event occurs after then, it arrives this turn. If not already in the war, Egypt joins the Axis as Islam throws in with the Fascist powers.
54..55 Troops released to Axis Use. [One time only] Allow the 22 LL Division and 287 Sonderverband Rgt to arrive in August 42 as per the Order of Arrival. If this result is rolled after August 42, bring the troops on this turn. If the Malta invasion is occurring or has occurred, ignore the 22 LL Division and bring on only the 287 Sonderverband Commando Rgt.
56..61 Hitler Lives up to his Promises. [One time only] Allow the 190 Pz Bn to arrive in Nov. 42 and the 9 Werfer Bn to arrive in Sept 42. If rolled after one or both of these dates, bring on the unit having past its date this turn.
62..63 Luftwaffe Transport Concentration. [May 41 or later] Allow the extra five (5) Ju-52 air units to become available for play the turn after Crete falls until the end of the game (or the Malta invasion, whichever happens first). This represents the dedication of the Luftwaffe's transport fleet to the Africa Theater of Operations.
64 Severe Hoof-n-Mouth Outbreak. [none] Remove all three camel units (one Italian, two Egyptian) from the game due to a Dromedary disease epidemic.
65..66 Roll on Ultra Rare Events Table
Ultra Rare Events
(reroll until a result which can be applied occurs)
11..14 Royal Navy Trashes Tripoli. [June 41 or beyond, one time only] Churchill orders the Royal Navy to take out the port of Tripoli using the old battleship the Centurion. The Admiralty decides the old ship is too slow to make the scheme work and sends the Barham and a cruiser. These run themselves a-ground in Tripoli Harbor and fight all-comers until destroyed in place. Tripoli's port does not function at all this turn and next—no incoming shipping or outgoing coastal shipping allowed from Tripoli at all.
15..16 Free French Quit. [One time only] The Free-French army dissolves as Pétain's Vichy government does "something" right. Whatever it is, it makes the Free-French decide that the Boche is not all that bad and they leave to go home. Tears in his eyes, de Gaulle follows them back to France to live out his remaining days as an obscure retired army officer. Remove all Free French units from game. This includes all in play and any future arrivals.
21..22 No Greek Campaign. [Before Greek Campaign Execution Begins, One time only] The Greeks count the divisions arrayed against them and determine that resistance is futile. They decide to collaborate instead. No Allied troops are sent to Greece, if any already have been sent, return them to Africa. Crete becomes usable by the Axis player. Ignore any future Greek campaign events.
23..24 Oil Cut Off at Haifa. [One time only, No Allied Troops in the Near East Box] An additional +2 to Axis Malta Table rolls until troops do appear in the Near East box.
25..31 Franco Pulls Spain into the War. [April 41 or later, one time only] Franco manages to convince his people that German victory is inevitable and throws in on the side of the Axis. Apply an additional +1 to Axis Malta Table rolls for the rest of the game.
32..34 Gibraltar Falls. [Spain is in the war, one time only] Spanish troops with German assistance conquer "The Rock" and close the entry to the Mediterranean from the west. Apply an additional +1 to Axis Malta Table rolls for the rest of the game on top of the Spain in the War mod.
35..42 Victory in Russia. [Nov 41 or later, one time only] Stalin's government collapses when Moscow falls. The Soviet Government tries to reform in the Urals but fails. The War in Russia devolves into guerrilla warfare with no end in sight. The German army ceases full-scale warfare and reorganizes itself for frontier patrolling. Rommel was promised some 5,400 tons of trucking should Barbarossa be successful. This would be 4 truck points which would become available 1 Mar 1942 (they arrive this turn if it is already past 1 Mar 42). Double any results from the German Variable Reinforcement Table rolls for the rest of the game. The Fliegerkorps becomes active for the rest of the game and ignore any later results calling for the Fliegerkorps to move back to Russia.
43..44 Proposed Railroad finished—Phase I. [Aug 41 or later, one time only] A railroad is built Tripoli to Benghazi given that all points west of it along the coastal road are free of enemy units or their ZOCs. A Railroad exists now along the path of the coastal road and the Axis has a rail cap of 1 SP to use it (Increase this to 2 SP if the "Axis Rail Stock shipped to Africa" event occurs.)
45 Proposed Railroad finished—Phase II. [Aug 41 or later, one time only, and Phase I above has already happened] An extension of the Benghazi Railroad is finished to either Tobruk, or Bardia given that all points west of the city along the coastal road to Benghazi are free of enemy units or their ZOCs. A Railroad exists now along the path of the coastal road.
46..51 LRDG Raid on Rommel Succeeds. [Nov 41 or later, one time only, LRDG unit in play] The LRDG launches a successful raid on Rommel. Rommel is killed in his night clothes and taken back to Cairo as proof. The LRDG unit is removed from play permanently.
52..54 (Hist) SAS Raid on Crete airfields. [Crete in Axis hands, SAS unit in play, one time only] Remove SAS unit from play permanently, Roll one die for each air unit in Crete (active or inactive), on a 4-6 reduce it.
55..56 Texas Tea! [one time only] The Italians discover the rich oil reserves in Libya before the war. When this event is rolled, one Oil Refinery opens for business in Tripoli. Place 2 SPs per turn in the Tripoli Box to represent the output of the refinery. The refinery can never be damaged or destroyed.
61..62 The Egyptians Join the War on the Axis Side. [One time only, Egyptians not in the war yet] All Egyptian land and air units fall under the command of the Axis player. They can only exist on captured supplies or SPs given to them from the Axis. It would be a really good idea for them to take over a major Egyptian port on the Med (Alexandria or Port Said) so they can trace supply and open the way for other Axis troops and SPs to arrive via coastal shipping. Other than that, their insurrection is sans portfolio.
63..66 The Egyptians Join the War on the Allied Side. [One time only, Egyptians not in the war yet] The Egyptians become just that many more Allied troops.
Allied Order of Arrival
If a date has no entry, there are no regular reinforcements that turn.
1940
Restrictions in Force:
The following cannot move further West than Mersa Matruh until released: 2 NZ Inf Div.
These units cannot move outside the "Restriction Zone" Boundary until released: Carp Polish Inf Bde; Polish Lancer Cav Bn.
This Division cannot leave its at-start Hex: 6 Aus Inf Div.
This Division cannot move further than 5 hexes from Mersa Matruh until released: 4 Ind Inf Div (the 4 Ind Artillery Bde (Divarty) cannot move from its starting hex until noted.)
NOTE: 4 Ind Div Infantry Bdes are not formed as Divisional Groups when the campaign begins and does not have the intrinsic artillery ability.
September 40: 12: —. 15: Required Italian units must be in Egypt. 19: —. 22: 7 RTR Arm Bn (6-5-3). 26: —. 29: 2 NZ Inf Div (6 NZ Inf Bde).
October 40: 1: —. 5: 204 Coastal Arty Battery. 8: 2 RAF Arm Car Co. 12: 4 Ind Inf Div (7 Ind Inf Bde), 7 Arm Div (3 Hus Lt Arm Bn, 2 RTR Arm Bn). Note: 7 Ind Inf Bde (4 Ind Inf Div) must move to join the rest of the 4 Ind Div within its restriction area (w/i 5 of Mersa Matruh) so that it can fall under that restriction with the rest of the division on or before 1 Nov 40. Release the 4 Ind Divarty Bde from its single hex restriction, it must fall under the general 4 Ind Div Matruh restriction by 1 Nov 40 as well. 15: Italians must capture Sidi Barrani by now or lose, Apply Mussolini Line restrictions. 19: 1T Truck Point. 22: Release: The 6 Aus Inf Div is released from Helwan and must immediately move to the Restriction Zone. 26: 1 RHA Arty Bn (red), 51 Fld Arty Bn. 29: 14 Inf Bde. Exchange: 3-2-3 104 RHA Arty Bn (no color) with 5-2-3 104 RHA Arty Bn (Red).
November 40: 1: Remove: 1x Blen IV. Note: The 4 Ind Inf Div restriction now applies to the 7 Ind Inf Bde (4 Ind) and Divarty Arty Bde (4 Ind) as well. 5: —. 8: —. 12: 6 Aus Inf Div (19 Aus Inf Bde, 1x Organic Truck), Unlock 6 Aus Training Marker. 15: 68 Med Arty Bn, 1T Truck Point. 19: —. 22: 1x Blen IV. 26: —. 29: —.
December 40: 1: 64 Med Arty Bn, Road to Sidi Barrani becomes Primary. 5: Exchange: Matruh Fort Bde with Selby Inf Bde. Release: 4 Ind Inf Div released from its w/i 5 of Matruh restriction. 8: —. 12: 1x Hurri I. Release: 6 Aus Inf Div released from the Restriction Zone. 15: Remove: 1x Gladiator. 19: —. 22: —. 26: —. 29: 2 RHA Arty Bn (Red).
1941
January 41: 1: 2 Arm Div (KDG Arm Car Bn, 1 Arm Bde, 2 Support Bde), 3 RTR, 5 RTR Arm Bn. Exchange: W.Desrt Corps HQ with 13 Corps HQ, 2 Arm Training Marker (Green, not locked). Remove: 68 Med Arty Bn, Divarty Bde (4 Ind Div). NOTES: 4 Ind Div Infantry Bdes are again formed as Divisional Groups and again have the intrinsic artillery ability (apply even if the Divarty Bde has been destroyed). 5: —. 8: Remove: 1x Blen IV, 1x Hurri I. 12: —. 15: —. 19: Remove: 7 Arm Div (6 RTR, 8Hus Arm Bns) if 7 Arm Div (2 RTR Arm Bn) is dead, then replace one of the two being removed with it, otherwise there is no replacement for these two. 22: Exchange: 1-3-6 Cav Bn (CIH (4 Ind)) with 2-4-6 Arm Car Bn (CIH (4 Ind)). 26: Exchange: 3-2-3 107 RHA Arty Bn with 5-2-3 107 RHA Arty Bn. 29: —.
February 41: 1: Remove: Selby Inf Bde. 5: 4 RTR Arm Bn (6-4-3). Add to Dead Pile (can only be rebuilt when 4 RTR (non-rebuildable) is killed): 4 RTR Arm Bn (6-2-3 rebuildable). Released: 2 NZ Inf Div released from its Matruh restriction. Greek Campaign Status Change Roll: 2 (Roll two dice, if the roll equals or is less than the listed value, the Greek Campaign Prep Period Begins, otherwise no effect and no effect if the Prep Period has already begun.) 8: 22 Inf Bde, 3 Ind Inf Bde, 18 Ind Cav Bn. Greek Campaign Status Change Roll: 2. 12: The restriction on Italian Private Property Damage ends. Greek Campaign Status Change Roll: 3. 15: 1x Blen IV, 1x Hurri I. Exchange: 13 Corps HQ with 1 Aus Corps HQ. Greek Campaign Status Change Roll: 4. 19: —. Greek Campaign Status Change Roll: 5. 22: Remove: 3 RHA AT Bn. Greek Campaign Status Change Roll: 6. 26: 9 Aus Inf Div (20 Aus Inf Bde), 9 Aus Training Marker (Green, Locked). Replace: 7 Arm Div (3 Hus Lt Arm Bn, 2-4-10 non-rebuildable) with 3 Hus Lt Arm Bn (2-3-10 rebuildable). Remove: 1 Aus Corps HQ. Greek Campaign Status Change Roll: 7.
March 41: 1: Axis No Running Away Restriction ends. Hex A19.35 becomes an Axis Trace Source. Italians can begin to use secondary roads for trace purposes. Remove: 2 RHA Arty Bn (Red). Greek Campaign Status Change Roll: 8. 5: 7 Aus Inf Div (18 Aus Inf Bde), 7 Aus Training Marker (Green, locked). Greek Campaign Status Change Roll: 9. 8: 9 Aus Inf Div (24 Aus Inf Bde), 2 NZ Inf Div (5 NZ Inf Bde, 28 Maori Inf Bn, 2-5-8 Arm Recon Bn (2 NZ), 1x Organic Truck). Unlock 2 NZ Training Marker. Greek Campaign Status Change Roll: 10. 12: Remove: 3 Cldst Inf Bn. Greek Campaign Status Change Roll: Automatic. 15: 9 Aus Inf Div (26 Aus Inf Bde, 1x Organic Truck). Unlock 9 Aus Training Marker. Remove: 7 Med, 64 Med Arty Bn. 19: Exchange: 22 Inf Bde with 22 Gds Inf Bde. 22: — . Greek Campaign Status Change Roll: 2 (Roll two dice, if the roll equals or is less than the listed value, the Greek Campaign Execution Begins, otherwise no effect and no effect if the Execution phase has already begun.) 26: Remove: 3 RTR Arm Bn, 106 RHA AT Bn. Greek Campaign Status Change Roll: 2. 29: Place in Abbassia (E23.20): Royals Arm Car Bn. Greek Campaign Status Change Roll: 3.
April 41: 1: Tobruk's Hedgehogs become Level 3. Greek Campaign Status Change Roll: 4. 5: 7 Aus Inf Div (21 Aus, 25 Aus Inf Bde, 1x Organic Truck). Unlock 7 Aus Training Marker. Greek Campaign Status Change Roll: 5. 8: 149 Fld Arty Bn. Place in Maaten Baggush (D37.32): W.Desrt Corps HQ. Greek Campaign Status Change Roll: 6. 12: Remove: 2 RAF Arm Car Co, 5 RTR Arm Bn. Greek Campaign Status Change Roll: 7. 15: —. Greek Campaign Status Change Roll: 8. 19: —. Greek Campaign Status Change Roll: 9. 22: 10 NZ RR Co. Greek Campaign Status Change Roll: 10. 26: —. Greek Campaign Status Change Roll: Automatic. 29: 68 Med Arty Bn. Place in Dead Pile: 2 RHA Arty Bn (Red).
May 41: 1: 1 SA Inf Div (5 SA Inf Bde), 7 SA Arm Car Bn, 1 SA Training Marker (Green, Locked), 2x Blen IV, 1x Hurri I, 1x Gladiator. 5: 23 Inf Bde, 1x Beaufgtr. 8: Exchange: KDG Arm Car Bn (2 Arm) with KDG Arm Car Bn (Independent). Remove: All living 2 Arm Div units and replace with equivalent Eq and Pax Repls. 2 Arm units cannot be rebuilt. Place the Repls at any British held point of interest, village, city, or HQ. 12: Tiger Convoy (Historical). Greek Campaign Status Change Roll: 2 (Roll two dice, if the roll equals or is less than the listed value, the Greek Campaign Terminates, otherwise no effect and no effect if the Termination has already occurred.) 15: 2T Truck Point. Place in Dead Pile: 9 Aus Div (3-4-8 Arm Recon Bn (9 Aus)). Greek Campaign Status Change Roll: 2. 19: —. Greek Campaign Status Change Roll: 3. 22: —. Greek Campaign Status Change Roll: 4. 26: —. Greek Campaign Status Change Roll: 5. 29: 7 Med Arty Bn, 2-4-3 Inf Bn (11 Czech). Greek Campaign Status Change Roll: 6.
June 41: 1: 64 Med Arty Bn. Greek Campaign Status Change Roll: 7. 5: 1x Blen IV, 4 SA Arm Car Bn, 1x Reserve Marker.Greek Campaign Status Change Roll: 8. 8: 1 SA Inf Div (2 SA Inf Bde), 1 SA Training Marker unlocked. Greek Campaign Status Change Roll: 9. 12: 50 Inf Div (150 Inf Bde), 6 SA Arm Car Bn. Greek Campaign Status Change Roll: 10. 15: 8 RTR, 42 RTR, 44 RTR Arm Bn, 1 SA Inf Div (1 SA Inf Bde, 1x Organic Truck). Greek Campaign Status Change Roll: Automatic. 19: 2 SA Inf Div (6 SA Inf Bde), 3 SA Arm Car Bn, 2 SA Training Marker (Green, not locked). Exchange: 149 Fld Arty Bn with 149 AT Bn (Red). 22: 2 SA Inf Div (3 SA Inf Bde). 26: 144 Fld Arty Bn, 5 Ind Inf Div (9 Ind Inf Bde). Remove: 2-4-3 Inf Bn (11 Czech). 29: —.
July 41: 1: 11 RM Marine Bn, Layforce Commando Bn. 5: 1x Wellington, 1x Maryld. 8: 50 Inf Div (151 Inf Bde), 1 SAS Commando Bn. Remove: Royals Arm Car Bn. 12: —. 15: 5 Ind Div (10 Ind Inf Bde). 19: 50 Inf Div (69 Inf Bde, 1x Organic Truck). 22: 102 AT Bn (Red), 5 Ind Inf Div (29 Ind Inf Bde, 1x Organic Truck). 26: 161 Inf Bde (British). 29: 1x Ktyhk. Remove: 64 Med Arty Bn.
August 41: 1: —. 5: —. 8: 2 SA Inf Div (4 SA Inf Bde, 1x Organic Truck). 12: —. 15: 2T Truck Point. 19: —. 22: Release: Carp Polish Inf Bde, Polish Lancer Cav Bn released from the Restriction Zone. 26: —. 29: Remove: 18 Ind Cav Bn.
September 41: 1: —. 5: 60 Fld Arty Bn. 8: —. 12: —. 15: 13 NZ RR Co. 19: —. 22: 1x Blen IV, 2x Hurri I, 1x Maryld. 26: Exchange: W.Desrt Corps HQ with 13 Corps HQ. 29: —.
October 41: 1: 30 Corps HQ, 7-4-8 Arm Bde (22 (1 Arm)), 1x 1 Arm Organic Truck, 1 Arm Training Marker (Green, Locked). A) Tobruk By-Pass Road becomes a Primary Road. B) Germans are now acclimated to the desert, they are no longer modified. C) Commonwealth gets Hip Shoot Capability. Optional: Vyvyan Pope Leader. 5: —. 8: 65 AT Bn (Red). 12: F Coastal Arty Battery anywhere w/i 3 of the Suez Canal. 15: —. 19: 2x Hurri I, 2-4-3 Inf Bn (11 Czech). 22: —. 26: —. 29: —.
November 41: 1: 2x Reserve Markers. 5: 1T Truck Point. 8: —. 12: —. 15: —. 19: 1x Blen IV. 22: —. 26: 1 Arm Div (12 Lcr Arm Car Bn), 64 Med Arty Bn. Exchange: 161 Inf Bde (British) with 161 Ind Inf Bde. 29: 7-3-8 Arm Bde (2 (1 Arm Div)), Royals Arm Car Bn, Unlock 1 Arm Training Marker.
December 41: 1: —. 5: 1 Arm Div (1 Support Bde), 1 FF Inf Bde, 1 FF Leg Inf Bn. 8: 95 AT Bn (Red), 1x Hurri I. 12: —. 15: 1x Beaufgtr. 19: Exchange: 1x Hurri 1 with 1x Hurri IIa. 22: —. 26: —. 29: 2x Ktyhk. Place in any hex adjacent to the Suez Canal: Greys Arm Car Bn.
1942
January 42: 1: Mines can now be laid by the Commonwealth player and reused by the Axis player. 5: 1 RAF, 2 RAF Arm Car Co. 8: 2T Truck Point. 12: Exchange: 22 Gds Inf Bde with 200 Gds Inf Bde. 15: 1 Bn FF Arty Bn, BFM FF Marine Bn. 19: —. 22: Exchange: 1x Hurri 1 with 1x Hurri IIa. 26: 1x Blen IV, 1x Hurri I, 2x Ktyhk. 29: Appears in 1 Support Bde (1 Arm Div) Hex (or dead with it): 11 RHA Arty Bn (Red).
February 42: 1: —. 5: Remove: 1 RTR Arm Bn. 8: Brigade Groups now in effect for Armor brigades as well as Infantry, Consider all Commonwealth Armored Brigades to be "Red" Armor, not "Yellow" Armor. Remove: 1 Arm Div (1 Support Bde) and replace with equivalent Eq and Pax Repls at any Allied HQ. Exchange: 7 Support Bde (7 Arm) with 7 Motor Inf Bde (7 Arm). Exchange: 5-4-8 Arm Bde (4 (7 Arm)) with 9-4-6 Arm Bde (4 (7 Arm)). 12: Exchange: 7-3-8 Arm Bde (2 (1 Arm)) with 9-3-5 Arm Bde (2 (1 Arm)). Exchange: 7-4-8 Arm Bde (22 (1 Arm)) with 9-4-5 Arm Bde (22 (1 Arm)). 15: 1x Ktyhk. 19: 8 Arm Bde (10 Arm Div). 22: —. 26: —. 29: —.
March 42: 1: Remove: Carp Polish Inf Bde, Lancer Polish Cav Bn. 5: Exchange: 11 RHA Arty Bn (Red) with 11 RHA Arty Bn (Yellow). 8: 12 Fld Arty Bn. Remove: 8 Fld Arty Bn, 51 Fld Arty Bn. 12: Remove: 60 Fld Arty Bn. 15: 2T Truck Point, 2-4-6 Arm Car Bn (Skinner). 19: 1x Boston. Remove: 4 Ind Div (2-4-6 Arm Car Bn (CIH)). 22: 2-3-3 Yugoslavian Inf Bn (Yugo Gd). 26: 1x Baltimore. 29: —.
April 42: 1: —. 5: —. 8: —. 12: 1x Hurri IIa. Remove: 64 Med Arty Bn. 15: Exchange: 107 RHA Arty Bn with 107 Fld Arty Bn. 19: CAC FF AT Bn, 1x Ktyhk, 1x Wellington, 1x Baltimore. 22: Exchange: 2-5-8 Arm Recon Bn (2 NZ (2 NZ)) with 4-5-8 Arm Recon Bn (2 NZ (2 NZ)). 26: 1x Hurri IIc. Remove: 11 Hus Arm Car Bn (7 Arm Div). 29: 2 FF Inf Bde.
May 42: 1: —. 5: —. 8: 9 Arm Bde (10 Arm Div). 12: —. 15: 1x Blen IV. 19: Remove: 144 Fld Arty Bn. 22: Exchange: 200 Gds Inf Bde with 201 Gds Inf Bde. 26: 10 Ind Inf Div (21 Ind Inf Bde). 29: 1x Wellington, 1x Beaufgtr, 1x Baltimore. Exchange: 149 AT Bn (Red) with 5-2-3 Arty Bn (Red) (149 AT).
June 42: 1: 10 Corps HQ, 10 Ind Inf Div (20 Ind, 25 Ind Inf Bde, Guides Arm Car Bn, 1x Organic Truck). 5: 5-2-3 Arty Bn (Red) (121 Fld), 1 Sud Inf Bde. 8: Exchange: 65 AT Bn (Red) with (5)-3-3 AT Bn (65 AT). 12: Exchange: 1 RHA Arty Bn (Red) with 1 RHA Arty Bn (Yellow). 15: 18 Ind Inf Bde, 1x Ktyhk, 1x Beaufgtr. 19: 1x Hurri IIa. 22: 1T Truck Point. 26: —. 29: —.
July 42: 1: —. 5: 40 RTR, 46 RTR, 50 RTR Arm Bn, 3x Blen IV, 1x Hurri IIc. Exchange: 149 Fld Arty Bn with (5)-3-3 AT Bn (149 AT). 8: 24 Arm Bde, 11 Hus Arm Car Bn (7 Arm Div), 1x Hurri IId. 12: 26 Ind Inf Bde, 2T Truck Point. 15: Exchange: 95 AT Bn (Red) with (5)-3-3 AT Bn (95 AT). 19: 44 Inf Div (131 Inf Bde), 5 RHA Arty Bn. 22: 44 Inf Div (133 Semi-Motorized Inf Bde), 1x Baltimore. 26: 1x B-24, 44 Inf Div (132 Inf Bde, 1x Organic Truck), 2 Greek Inf Bde. 29: Remove: 2-4-3 Czech Inf Bn (11 Czech).
August 42: 1: —. 5: —. 8: —. 12: 51 Inf Div (152, 153, 154 Inf Bde, 1x Organic Truck). 15: 1 Greek Inf Bde, 1x Blen IV, 1x Spit Vb, 1x Hurri IIc. 19: 53 Fld Arty Bn, 1x Wellington, 1x Beaufgtr. 22: Remove: 5-2-3 Arty Bn (Red) (4 RHA, 104 RHA), 5-2-3 Arty Bn (Yellow) (1 RHA, 2 RHA). 26: Exchange: 102 AT Bn (Red) with (5)-3-3 AT Bn (102 AT). End Brigade Groups for all units, add Divarty to 44 Inf Div, 50 Inf Div, 51 Inf Div, 1 Arm Div, 7 Arm Div, 10 Arm Div, 2 NZ Div, 1 SA Div, 2 SA Div, 6 Aus Div, 7 Aus Div, 9 Aus Div, 4 Ind Div, 5 Ind Div, 10 Ind Div as appropriate. Only Divisions with two brigades or more in play at the moment this turn begins get their Divarty Bde. This occurs even to units which have all or some of their Brigades in a Deployment Box. Divarty Belonging to Divisions which do not qualify are put into the dead pile and must be rebuilt to be brought into play. Armor remains "Red". 29: 1x P-40, 1x B-24, 2x B-25. Exchange: 133 Semi-Motorized Inf Bde (44 Inf Div) with 133 Semi-Motorized Inf Bde (10 Arm Div).
September 42: 1: 2x Reserve Markers. 5: Remove: 2-4-6 Arm Car Bn (Skinner). 8: 1x Blen IV, 1x Spit Vb, 2x Hurri IIa, 1 HCR Arm Car Bn. 12: 2 Derby Arm Car Bn, 1x P-40, 1x Beaufgtr. 15: 1 Spahis FF Arm Car Bn, 8 Arm Dummy Divisional Marker. 19: 98 Fld, 146 Fld Arty Bn, 1x Baltimore, 1x B-26. Exchange: 7-4-8 Arm Bde (7 (7 Arm)) with 8-4-7 Arm Bde (7 (7 Arm)). 22: Exchange: 3-4-8 Arm Recon Bn (9 Aus (9 Aus)) with 4-4-8 Arm Bn (9 Aus (9 Aus)). 26: 1x B-25. Exchange: 121 Fld Arty Bn with 121 Fld Arm Arty Bn. 29: Exchange: 11 RHA Arty Bn (Yellow) with 11 RHA Arm Arty Bn.
October 42: 1: TAML Arab Mech Inf Bde (enter w/ 1T SP from east edge of Map E). Exchange: 133 Semi-Motorized Inf Bde (10 Arm) with 133 Motorized Inf Bde (10 Arm). Exchange: 4 NZ Inf Bde (2 NZ) with 4 NZ Arm Bde (2 NZ). 5: 52 Fld, 69 Med Arty Bn, 42 RTR Scorpion Co, 44 RTR Scorpion Co. Remove: 5-2-3 Arty Bn (Red) (98 Fld). 8: Exchange: Greys Arm Car Bn with Greys Arm Recon Bn. 12: 1x Spit Vb, 1x Hurri IIc, 1x Hurri IIa. 15: 1x Ktyhk, 1x Wellington. 19: —. 22: —. 26: —. 29: —.
November 42: 1: —. 5: 1x Spit Vb, 1x Hurri IId. 8: —. 12: 1x Hurri IIa. 15: —. 19: —. 22: —. 26: —. 29: —.
Allied Historical Order of Withdrawal and Return
(To be used in conjunction with the Allied Order of Arrival)
W/D means withdraw. If no special notation exists, the unit listed is a return. If the date is blank, there is no withdrawal or return.
1940
September 40: (none). October 40: (none).
November 40: 1: —. 5: W/D: 14 Inf Bde. 8: —. 12: —. 15: —. 19: —. 22: —. 26: —. 29: —.
December 40: 1: —. 5: —. 8: —. 12: —. 15: —. 19: —. 22: W/D: 7 Ind Inf Bde (4 Ind), 5 Ind Inf Bde (4 Ind). 26: —. 29: —.
1941
January 41: 1: W/D: 11 Ind Inf Bde (4 Ind), CIH Cav Bn (4 Ind), 1x Organic Truck (4 Ind). 5: —. 8: —. 12: —. 15: —. 19: —. 22: —. 26: —. 29: —.
February 41: (none).
March 41: 1: W/D: 1 Arm Bde (2 Arm Div). 5: —. 8: W/D: 2 NZ Inf Div (4 NZ Inf Bde, 28 Maori Inf Bn), 16 Aus Inf Bde (6 Aus). 12: —. 15: W/D: 6 NZ Inf Bde (2 NZ). 19: —. 22: W/D: 2 NZ Inf Div (5 NZ Inf Bde, 2 NZ Arm Cav Bn, 1x Organic Truck). 26: —. 29: —.
April 41: 1: W/D: 6 Aus Inf Div (19 Aus Inf Bde, 6 Aus Arm Recon Bn, 1x Organic Truck). 5: —. 8: W/D: 17 Aus Inf Bde (6 Aus). 12: 5 Ind Inf Bde (4 Ind). 15: —. 19: 11 Ind Inf Bde (4 Ind). 22: —. 26: —. 29: 6 NZ Inf Bde (2 NZ), 7 Ind Inf Bde (4 Ind), CIH Arm Car (4 Ind).
May 41: 1: —. 5: —. 8: —. 12: W/D: 5 Ind Inf Bde (4 Ind). 15: —. 19: —. 22: W/D: 16 Inf Bde. 26: —. 29: 2 NZ Inf Div (28 Maori Inf Bn, 1x Organic Truck), 16 Inf Bde.
June 41: 1: 14 Inf Bde, Return Dead: 2 NZ Inf Div (4 NZ, 5 NZ Inf Bde, 2 NZ Arm Recon Bn), W/D: 7 Aus Inf Div (21 Aus, 25 Aus Inf Bde, 1x Organic Truck). 5: W/D: 9 Aus Div (3-4-8 Arm Recon Bn (9 Aus)). 8: —. 12: —. 15: W/D: 16 Inf Bde. 19: —. 22: —. 26: W/D: 23 Inf Bde. 29: —.
July 41: 1: —. 5: W/D: 14 Inf Bde. 8: —. 12: —. 15: —. 19: —. 22: W/D: 151 Inf Bde (50 Inf). 26: —. 29: —.
August 41: 1: —. 5: W/D: 50 Inf Div (69 Inf Bde, 1x Organic Truck). 8: —. 12: W/D: 150 Inf Bde (50 Inf). 15: —. 19: —. 22: W/D: 10 Ind Inf Bde (5 Ind). 26: —. 29: W/D: 9 Ind Inf Bde (5 Ind), 1x Organic Truck (5 Ind), 18 Aus Inf Bde (7 Aus).
September 41: 1: —. 5: —. 8: —. 12: —. 15: —. 19: 16 Inf Bde. 22: 5 Ind Inf Bde (4 Ind). 26: W/D: 24 Aus Inf Bde (9 Aus). 29: —.
October 41: 1: —. 5: —. 8: —. 12: 23 Inf Bde. 15: 9 Ind Inf Bde (5 Ind), 10 Ind Inf Bde (5 Ind), 1x Organic Truck (5 Ind). 19: —. 22: 14 Inf Bde. 26: W/D: 9 Aus Inf Div (20 Aus, 26 Aus Inf Bde, 1x Organic Truck). 29: —.
November 41: 1: W/D: 9 Ind Inf Bde (5 Ind), 10 Ind Inf Bde (5 Ind). 5: W/D: 161 Inf Bde (British). 8: —. 12: —. 15: —. 19: —. 22: —. 26: —. 29: 150 Inf Bde (50 Inf).
December 41: (none).
1942
January 42: (none).
February 42: 1: W/D: 7 Arm Bde (7 Arm). 5: W/D: 14 Inf Bde. 8: W/D: 16 Inf Bde. 12: —. 15: W/D: 5 NZ Inf Bde (2 NZ). 19: 69 Inf Bde (50 Inf). 22: 16 Inf Bde, 50 Inf Div (151 Inf Bde, 1x Organic Truck). W/D: 23 Inf Bde. 26: W/D: 2 NZ Inf Div (4 NZ, 6 NZ Inf Bde, 28 Maori Inf Bn, 2 NZ Arm Recon Bn, 1x Organic Truck). 29: —.
March 42: 1: —. 5: W/D: 16 Inf Bde. 8: —. 12: 10 Ind Inf Bde (5 Ind). 15: —. 19: —. 22: —. 26: —. 29: W/D: 7 Ind Inf Bde (4 Ind).
April 42: 1: —. 5: 9 Ind Inf Bde (5 Ind), 5 Ind Div (Organic Truck (Full)). W/D: 5 Ind Inf Bde (4 Ind). 8: —. 12: —. 15: —. 19: —. 22: —. 26: —. 29: —.
May 42: (none).
June 42: 1: —. 5: —. 8: 5 Ind Inf Bde (4 Ind). 12: —. 15: 4 NZ Inf Bde (2 NZ). 19: —. 22: 2 NZ Inf Div (2 NZ Arm Recon Bn (Yellow), 5 NZ, 6 NZ Inf Bde, 28 Maori Inf Bn, 1x Organic Truck). 26: 9 Aus Inf Div (24 Aus, 26 Aus Inf Bde, 1x Organic Truck). 29: 9 Aus Div (20 Aus Inf Bde, 9 Aus Arm Recon Bn).
July 42: 1: 161 Ind Inf Bde. 5: —. 8: —. 12: —. 15: W/D: 10 Ind Inf Bde (5 Ind). 19: —. 22: —. 26: —. 29: —.
August 42: 1: —. 5: —. 8: —. 12: —. 15: W/D: 25 Ind Inf Bde (10 Ind), 1x Organic Truck (10 Ind). 19: —. 22: 7 Ind Inf Bde (4 Ind), 1x Organic Truck (4 Ind). 26: —. 29: W/D: 3 Ind Inf Bde.
September 42: 1: —. 5: —. 8: W/D: 9 Ind Inf Bde (5 Ind), 1x Organic Truck (5 Ind). 12: —. 15: W/D: 201 Gds Inf Bde. 19: —. 22: —. 26: —. 29: —.
October 42: (none). November 42: (none).
Axis Order of Arrival
1940
September: 12 Sept 40: Inferior Italian Parachute design modifier in play. 15 Sept 40: Required units must be in Egypt. No reinforcements.
October 40: 15 Oct 40: Italians must capture Sidi Barrani by now or lose. Apply Mussolini Line restrictions.
Italians: Optional: (7)-4-3 AT Bn (5). Move to Dead Pile: 3-3-6 Arm Bn (1 Med). Move to Dead Pile: 2-0-6 Lt Arm Bn (61 Lt).
Note: These battalions had their running tanks removed and replaced with deadlined vehicles from the other Italian armored forces (holding HQs for the down tanks). The deadlined vehicles were "generated" during the Italian September advance. November 40: Italians: 4-3-6 Arm Bn (3 Med); 22-3-2 Arty Rgt (25 Corps). 19 Nov 40: Formed in Benghazi: 2-3-12 Motorcycle Bn (ProvBrs) (ignore if the Italians no longer hold (!) Benghazi). 26 Nov 40: Exchange: Remove both 1 Ragg (Aresca) and 2 Ragg (Trivoli) Markers, replace one of them with Brigata Corazzata Speciale (Babini) Marker (player's choice which).
December 40: 1 Dec 40: Road to Sidi Barrani becomes Primary.
Italians: 3-4-3 MG Bn (S.Maria); 4-2-6 Arm Bn (5 Med); 5-3-3 Brs Inf Rgt (10 Brs); 2-3-3 MG Bn (55, 60); 2-2-3 MG Bn (27); 10-3-3 Arty Rgt (12); 1x CR.42; 1x G.50; 1x SM.79.
If Sidi Barrani is under Commonwealth Control, the following appears in Tobruk (B50.08): 2-3-3 Blackshirt Inf Bn (Vd.Lib). If Sidi Barrani is still under Italian Control, the unit appears the turn it falls.
19 Dec 40: Form in Tripoli: 13-3-3 Arty Bde (Mtrizzato). 26 Dec 40: Place in any Italian HQ's Hex: 2-3-3 Motorized Inf Bn (34 Lib). Place in Benghazi: 1-3-12 Motorcycle Cos (201 Brs, 202 Brs) (ignore these units if the Italians no longer hold Benghazi). Optional: (7)-4-3 AT Bn (3).
1941
January 41: Italians: 7-3-3 Arty Rgt (2 Cel); 2-0-6 Lt Arm Bn (5 Lt); 4-2-6 Arm Bn (6 Med); Ariete Armored Division (8 Brs Inf Rgt, 132 Arty Rgt, 1x Organic Truck); 3-4-3 Assault Eng Bn (32). Exchange: 2-1-6 Lt Arm Bn (21 Lt) with 4-2-6 Arm Bn (21 Med). 5 Jan 41: Place in any Italian HQ's Hex: Bergonzoli Ragg Marker. 22 Jan 41: Place in any Italian HQ's Hex: Bignami Ragg Marker.
Germans: 1x Ju.52. The Flieger Korps becomes Active 1 Jan 41.
February 41: Axis General: 2T Truck Points (ignore if motorized Trento is used).
Italians: Ariete Armored Division (1 Lt, 2 Lt, 3 Lt Arm Bn); 2-1-6 Lt Arm Bn (4 Lt); Trento Inf Division (61, 62 Inf Rgt) (all non-motorized) (see also Optional entry July 41, ignore this entry if optional motorized Trento used); 5-4-3 Brs Inf Rgt (7 Brs); 2-3-3 MG Bn (551); (6)-4-5 AT Bn (1 Mil); (4)-4-5 AT Bn (2 Mil); 7-3-3 Arty Rgt (1 Cel); 8-3-3 Arty Rgt (3 Cel); 11-3-2 Arty Rgt (16 Corps, 24 Corps). Remove: 2-0-6 Lt Arm Bn (9 Lt). Remove: Brigata Corazzata Speciale (Babini) Marker.
Available 12 Feb 41 and after (move to the "Old" Box....even if some of the above Italian units remain there.)
12 Feb 41: The restriction on Italian Private Property Damage ends.
Axis General: 3x Reserve Markers.
Germans: Rommel; 14-0 Corps HQ (DAK); KG Marker (3 Aufk); 3-5-3 Pioneer Bn (200 (5.Le)); 5-5-3 MG Bn (8 (5.Le)); 4-5-8 Recon Bn (3 (5.Le)); 3-5-8 PJ Bn (605); (3)-4-3 PJ Bn (39 PJ (5.Le)); (7)-5-3 Flak Bn (1-33); (3)-3-3 Korück Bn (556); 1x Organic Truck (5.Le); 1x Bf.110; 1x Ju.88; 1x Ju.87b. Add to Dead Pile: 3-5-8 Pz Co (KStA).
March 41: 1 March 41: Hex A19.35 becomes an Axis Trace Source. Italians can begin to use secondary roads for trace purposes. No Running Away restriction ends. Inferior Italian Parachute design modifier ends.
Axis General: 1T Truck Point.
Italians: 5-4-7 Arm Bn (7 Med (Ariete)); 1x G.50.
Germans: 5-5-3 MG Bn (2 (5.Le)); 4-3-3 Arty Bn (1-75 (5.Le)); (7)-5-3 Flak Bn (1-18).
Available 12 March 41 and after
Germans: KG Marker (Marcks); 5-5-8 Pz Bn (1-5 (5.Le), 2-5 (5.Le)). April 41: 1 April 41: Tobruk's Hedgehogs become Level 3.
Axis General: 2T Truck Point.
Italians: Trento Inf Division (46 Artillery Rgt) (non-motorized) (see also Optional entry July 41, ignore this entry if optional motorized Trento used).
Germans: KG Marker (Linau); 4-5-8 Recon Bn (33 (15.Pz)); 3-5-3 Motorcycle Bn (15 Krd (15.Pz)); 4-5-3 Pioneer Bn (33 (15.Pz)); 6-5-3 Inf Rgt (104 (15.Pz), 115 (15.Pz)); (3)-4-3 PJ Bn (33 PJ (15.Pz)); 1x Organic Truck (15.Pz); 3-3-3 AA Bn (606); 1x Bf.109e.
May 41: Axis General: 2T Truck Point.
Italians: (3)-3-3 AT Bn (551); 1x G.50; 1x SM.79; 1x Ju.87b (reduced). Add to Dead Pile: Ariete Armored Division (5-4-7 Arm Bn 8 Med Arm Bn).
Germans: KG Marker (Bach); 5-5-8 Pz Bn (1-8 (15.Pz)); 17-3-3 Arty Rgt (33 (15.Pz)); 3-3-3 Arty Bn (408). Add to Dead Pile: 5-5-8 Pz Bn (2-8 (15.Pz)). 29 May 41, Place at the DAK HQ: 2x German Eq Repls.
Note: 2-8 Pz Abt is in the dead pile to reflect mechanical breakdowns and shipping losses in both Panzer Regiments. DAK Ordered the depleted Panzer Battalions (1-5 and 2-8, 1-5 down due to battle losses) to be brought up to strength using vehicles under repair and available replacements—this process was finished at the end of May (reflected in the 2x German Eq Repls available above).
June 41: Historically, Crete becomes a usable Axis Base, Greek Campaign ends 1 June 41.
Axis General: 2T Truck Point.
Italians: 1x G.50.
Germans: 2-3-3 Inf Bn (3-347, 3-255); 4-3-3 Arty Bn (864); 1-3-2 Mountain Arty Battery (362, 363, 364); (1)-4-3 Oasis Co (2-300); 1x Ju.88; 1x Ju.87b.
July 41: Italians: 3-4-3 Para Inf Bn (1 Cara); (optional) Trento Motorized Inf Division (61, 62 Motorized Inf Rgt, 46 Motorized Artillery Rgt) (Ignore if Trento brought on earlier as a non-motorized division); 1x CR.42; 1x MC.200. Remove: 3-4-3 MG Bn (S.Maria). Form in Tripoli: 8-0 Corps HQ (CAM, 21 It) (ignore 21 It Corps HQ, if the original was never destroyed).
Germans: 6-5-3 Commando Rgt (288.Snd); 7-3-3 Arty Bn (2-115); 2-3-3 Arty Battery (902); 9-3-3 Arty Bn (911); (1)-4-3 Oasis Co (6-300, 10-300); 1x Bf.109e. Historically, the Flieger Korps becomes Inactive.
August 41: Italians: 4-3-6 Arm Bn (9 Med (Ariete)); 3-4-3 Inf Rgt (GGFF (Independent)); 3-4-3 Assault Eng Bn (31); (2)-3-3 AT Bn (AT (Ariete)); Raggruppamento Marker (RECAM); 1x Br.20; 1x CR.42. Place with any Italian Corps HQ: 10-3-5 Arty Rgt (Volanti).
Germans: 17-3-3 Arty Rgt (155 (5.Le)) Built in any Axis HQ hex; 1-5-3 Exploration Co (580 (Afrika)); 3-5-3 Pioneer Bn (900 (Afrika)); 1-4-4 IG Co (707, 708); (1)-4-3 Oasis Co (12-300); 1x Bf.109e. Formed in Tripoli (requipped Coastal Artillery shipped earlier): 4-3-2 Coastal Arty Battery (4-772). Exchange: 3-5-3 Motorcycle Bn (15 Krd (15.Pz)) with 3-5-3 Motorcycle Bn (15 Krd (5.Le)). Remove: 4-3-3 Arty Bn (1-75 (5.Le)). Remove: 4-3-3 Arty Bn (864). Remove: 9-3-3 Arty Bn (911).
September 41: Italians: 3-2-3 MG Bn (101); 2-3-12 Motorcycle Bn (PAI).
Germans: KG Marker (Schütte); 3-3-3 AA Bn (617); 7-4-3 Inf Rgt (155 (Afrika)); (1)-4-3 Oasis Co (13-300); 1x Bf.110. Formed in Tripoli (requipped Coastal Artillery shipped earlier): 9-3-2 Coastal Arty Bn (523, 528); 4-3-2 Coastal Arty Battery (4-149). Exchange: 5-5-3 MG Bn (2 (5.Le)) with 5-5-3 MG Bn (2 (15.Pz)). Exchange: 1x Bf.109e with 1x Bf.109f. October 41: 1 Oct 41: A) Tobruk By-Pass Road becomes a Primary Road. B) Germans are now acclimated to the desert, they are no longer modified. C) Commonwealth gets Hip Shoot Capability.
Italians: 30-3-2 Arty Bde (8 Ragg); 1x CR.42.
Germans: 1-5-8 Commando Co (v.Könen); 5-5-3 Inf Rgt (361 (Afrika)); 4-3-3 Arty Bn (361 (Afrika)); 1x Organic Truck (Afrika); 1x Bf.109e; 1x Ju.52. Formed in Tripoli (requipped Coastal Artillery shipped earlier): 9-3-2 Coastal Arty Bn (529, 532); 4-3-2 Coastal Arty Battery (4). Exchange: 5-5-8 Pz Bn (1-5 (5.Le), 2-5 (5.Le)) with 5-5-8 Pz Bn (1-5 (21.Pz), 2-5 (21.Pz)). Exchange: 3-5-3 Pioneer Bn (200 (5.Le)) with 4-5-3 Pioneer Bn (200 (21.Pz)). Exchange: 5-5-3 MG Bn (8 (5.Le)) with 5-5-3 MG Bn (8 (21.Pz)). Exchange: 4-5-8 Recon Bn (3 (5.Le)) with 4-5-8 Recon Bn (3 (21.Pz)). Exchange: (3)-4-3 PJ Bn (39 PJ (5.Le)) with (3)-4-3 PJ Bn (39 PJ (21.Pz)). Exchange: 6-5-3 Inf Rgt (104 (15.Pz)) with 6-5-3 Inf Rgt (104 (21.Pz)). Exchange: 3-5-3 Motorcycle Bn (15 Krd (5.Le)) with 3-5-3 Motorcycle Bn (15 Krd (21.Pz)). Exchange: 17-3-3 Arty Rgt (155 (5.Le)) with 17-3-3 Arty Rgt (155 (21.Pz)). Exchange: 1x Organic Truck (5.Le) with 1x Organic Truck (21.Pz).
November 41: Axis General: 3T Truck Points.
Italians: Trieste Inf Division (65, 66 Inf Rgt, 21 Arty Rgt, 1x Organic Truck); 5-4-3 Brs Semi-Motorized Inf Rgt (9 Brs); 3-3-7 Lt Arm Bn (52 Mx); 3-4-3 Marine Bn (4-SM); 4-2-3 MG Bn (R.Gessi); 1x MC.200; 1x MC.202.
Germans: KG Marker (Wechmar, Voss); 1x Bf.109e; 1x He.111. Exchange: 1x Bf.109e with 1x Bf.109f.
29 Nov 41: Exchange: 1-5-3 Exploration Co (580 (Afrika)) with 3-5-8 Recon Bn (580 (90.Le)). Exchange: 3-5-3 Pioneer Bn (900 (Afrika)) with 5-5-3 Pioneer Bn (900 (90.Le)). Exchange: 7-4-3 Inf Rgt (155 (Afrika)) with 7-4-3 Inf Rgt (155 (90.Le)). Exchange: 5-5-3 Inf Rgt (361 (Afrika)) with 5-5-3 Inf Rgt (361 (90.Le)). Exchange: 4-3-3 Arty Bn (361 (Afrika)) with 10-3-3 Arty Bn (361 (90.Le)). Exchange: 1x Organic Truck (Afrika) with 1x Organic Truck (90.Le).
December 41: Italians: 3-1-3 Engineer Rgt (1 Spc); 1x MC.200; 1x MC.202; 1x Br.20.
Germans: (7)-4-3 Flak Bn (1-43); 1x Ju.52. Exchange: 1x Ju.87b with 1x Ju.87d.
1942
January 42: 1 Jan 41 [sic]: Mines can now be laid by the Commonwealth player and reused by the Axis player.
Italians: 5-3-6 AG Bn (551 (Ariete), 552 (Ariete)); 1x CR.42; 1x MC.200; 1x MC.202; 1x SM.79. Exchange: 5-4-3 Brs Semi-Motorized Inf Rgt (9 Brs) with 5-4-3 Brs Fully Motorized Inf Rgt (9 Brs). Remove: (3)-3-3 AT Bn (551).
Germans: (7)-4-3 Flak Bn (1-53); 1-5-3 Landing Co (778 Ldg). Exchange: (3)-4-3 PJ Bn (39 PJ (21.Pz)) with (4)-4-3 PJ Bn (39 PJ (21.Pz)). Exchange: 1x Bf.109e with 1x Bf.109f. Historically, the Flieger Korps becomes Active.
February 42: Italians: Littorio Armored Division (12 Brs Inf Rgt, 11 Med Arm Bn, 133 Arty Bn (3-3-3), 1x Organic Truck) (See Special Rules regarding Littorio, 4.6d); (6)-4-5 AT Bn (501); 3-0-3 Inf Rgt (350) Formed in Tripoli.
Germans: 4-3-3 AA Bn (612); 1x Bf.109e. Exchange: 5-5-8 Pz Bn (1-5 (21.Pz)) with 6-5-8 Pz Bn (1-5 (21.Pz)). Exchange: 5-5-8 Pz Bn (1-8 (15.Pz)) with 6-5-8 Pz Bn (1-8 (15.Pz)). March 42: Italians: Littorio Armored Division (10 Med Arm Bn); 3-1-3 Engineer Rgt (7 Spc). 12 March 42: Exchange: 8-0 Corps HQ (CAM) with 8-0 Corps HQ (20 It) (Ignore if 20 It Corps never was destroyed or has been rebuilt). Exchange: Ariete Arm Div (5-4-7 Arm Bn (7 Med, 8 Med)) with 5-5-8 Arm Bn (7 Med, 8 Med). Exchange: Ariete Arm Div (4-3-6 Arm Bn (9 Med)) with 5-4-7 Arm Bn (9 Med). Exchange (see Optional Rule): 4-3-6 Arm Bn (11 Med (Littorio)) with 4-3-6 Arm Bn (11 Med (Trieste)). Exchange (see Optional Rule): 4-3-6 Arm Bn (10 Med (Littorio)) with 4-3-6 Arm Bn (10 Med (Ariete)). Add to Dead Pile: Littorio Armored Division (12 Med Arm Bn). Optional: 1-5-3 Commando (CMI).
Germans: (7)-4-3 Flak Bn (2-25). Exchange: 5-5-8 Pz Bn (2-5 (21.Pz)) with 6-5-8 Pz Bn (2-5 (21.Pz)). Exchange: 5-5-8 Pz Bn (2-8 (15.Pz)) with 6-5-8 Pz Bn (2-8 (15.Pz)). Exchange: (3)-4-3 PJ Bn (33 PJ (15.Pz)) with 4-5-8 PJ Bn (33 PJ (15.Pz)). Exchange: 1x Bf.109e with 1x Bf.109f. Exchange: 1x Flieger Korps Ju.87b with 1x Flieger Korps Ju.87d.
April 42: Italians: Ariete Armored Division (Nizza Arm Car Bn); 3-4-8 Arm Car Bn (8 Brs (Trieste)). Exchange: (2)-3-3 AT Bn (AT (Ariete)) with (6)-4-3 AT Bn (AT (Ariete)). Remove: All remaining Italian MG Bns.
Germans: 6-4-3 Inf Rgt (200 (90.Le)) Built in any Axis HQ hex; 1x Bf.110. Remove: 2 MG Bn (15.Pz) and 8 MG Bn (21.Pz). Remove: 3-5-3 Motorcycle Bn (15 Krd (21.Pz)). Remove: 2-3-3 Inf Bn (3-347). Exchange: 6-5-3 Inf Rgt (104 (21.Pz), 115 (15.Pz)) with 8-5-3 Inf Rgt (104 (21.Pz), 115 (15.Pz)). Exchange: 7-4-3 Inf Rgt (155 (90.Le)) with 6-4-3 Inf Rgt (155 (90.Le)). Exchange: 5-5-3 Inf Rgt (361 (90.Le)) with 6-5-3 Inf Rgt (361 (90.Le)). Exchange: 2-3-3 Arty Battery (902) with 2-3-5 Arm Arty Battery (902). Exchange (Optional): Remove 1-5-8 Commando Co (v.Könen), 2-5-3 Landing Co (778 Ldg), and 3-4-3 It Marine Bn (4-SM) and replace with 5-5-3 Commando Bn (Hecker) at any Axis HQ.
May 42: Axis General: 2T Truck Point.
Italians: 5-3-6 Arm Bn (51 Med (Littorio)); Ariete Armored Division (Novara Lt Arm Bn); GGFF Inf Division (4 Lib, 9 Inf Bn); (7)-4-3 AT Bn (6); 1x CR.42; 1x MC.202; 1x Z.1007; 1x SM.79. Exchange: GGFF Inf Rgt (Independent) with GGFF Inf Rgt (GGFF). Exchange: Volanti Arty Rgt with 136 Arty Rgt (GGFF). Remove: Raggruppamento Marker (RECAM).
Germans: KG Marker (Crüwell); 14-3-3 Arty Rgt (190 (90.Le)); 2-5-3 Para Inf Bn (Lehr) OR (Optional) 4-5-3 Para Inf Bn (Lehr). Exchange: 3-5-8 Recon Bn (580 (90.Le)) with 4-5-8 Recon Bn (580 (90.Le)). Expend One Eq to Convert (now or later): 8-5-3 Inf Rgt (104 (21.Pz)) to 10-5-8 PG Rgt (104 (21.Pz)). Expend One Eq to Convert (now or later): 8-5-3 Inf Rgt (115 (15.Pz)) to 10-5-8 PG Rgt (115 (15.Pz)). Exchange: 1x Bf.109e with 1x Bf.109f. Exchange: 1x Bf.109e with 1x Bf.109g. Remove: (1)-4-3 Oasis Co (2-300, 6-300, 10-300, 12-300, 13-300).
June 42: Italians: (6)-4-5 AT Bn (503).
Germans: KG Marker (Gräf); 1x Ju.52. Exchange: 3-5-8 PJ Bn (605) with 4-5-8 PJ Bn (605). Exchange: 1x Ju.87b with 1x Ju.87d. Historically, Rommel transferred the Flieger Korps air units to the map. They remained there until the end of the campaign.
July 42: Italians: 4-3-6 Arm Bn (4 Med (Littorio)); 5-3-6 AG Bn (554 (Littorio), 556 (Littorio)); 1x MC.200; 1x MC.202. Random Event Driven: 1-5-3 Commando Bn (RW). Optional Exchange: 3-3-3 Arty Bn (133 (Littorio)) with 10-3-3 Arty Rgt (133 (Littorio)). Optional: 1-5-8 Commando Bn (Arditi).
Germans: 6-3-3 Inf Rgt (125 (164.Le)); 1x Bf.109f; 1x Bf.109g. Apply Optional 90.Le FullyMotorized Rule (now or later). Expend One Eq to Convert (now or later): 6-4-3 Inf Rgt (155 (90.Le)) to 9-4-6 PG Rgt (155 (90.Le)). Expend One Eq to Convert (now or later): 6-5-3 Inf Rgt (361 (90.Le)) to 9-5-6 PG Rgt (361 (90.Le)). Expend One Eq to Convert (now or later): 6-4-3 Inf Rgt (200 (90.Le)) to 9-4-6 PG Rgt (200 (90.Le)).
August 42: Littorio Action Rating Modifier ends.
Italians: 12-3-3 Inf Div (Pistoia) Restricted to Libya; Folgore Para Inf Division (186, 187 Para Inf Rgt, 185 Para Arty Bn, 8 Para Assault Engineer Bn); 5-3-6 Arm Bn (13 Med); 3-3-3 Brs Inf Bn (57 Brs).
Germans: 2-5-8 Recon Bn (220 (164.Le)); 3-4-3 Pioneer Bn (220 (164.Le)); (4)-3-3 PJ Bn (220 (164.Le)) OR (5)-3-3 PJ Bn (220 (164.Le)) (optional); 3-3-3 AA Bn (305 (21.Pz)); 6-3-3 Inf Rgt (382 (164.Le), 433 (164.Le)); 5-2-3 Arty Bn (220 (164.Le)); 3-5-5 Para Inf Bn (Kroh (Ramcke), vdH (Ramcke), Hüber (Ramcke)); 5-3-3 Para Arty Bn (2-7 (Ramcke)); (7)-4-3 Flak Bn (1-6, 1-46). Exchange: 1x Flieger Korps Ju.87b with 1x Flieger Korps Ju.87d. Optional: 22.LL Air Landing Division (16, 47, 65 Air Landing Rgts, 22 Pioneer Bn, 13 Krd Motorcycle Bn, 22 PJ Bn, 22 Arty Rgt). If used, KG Buhse does not arrive in Oct 42. Random Event Driven or Option: 6-5-3 Commando Rgt (287.Snd).
September 42: Italians: (7)-4-3 AT Bn (3, 5) (if options not used); 1x MC.200; 1x CR.42.
Germans: (6)-4-3 PJ Bn (190 (90.Le)); 1x Bf.109g. Random Event Driven: 19-3-3 Werfer Bn (9). Exchange: 6-5-8 Pz Bn (1-5 (21.Pz)) with 7-5-8 Pz Bn (1-5 (21.Pz)). Exchange: 6-5-8 Pz Bn (1-8 (15.Pz)) with 7-5-8 Pz Bn (1-8 (15.Pz)).
October 42: Italians: 2-0-3 Inf Bn (2-87); 3-0-3 Inf Rgt (336).
Germans: 7-5-3 Inf Rgt (Buhse) Only if 22.LL Random Event does not occur; 17-3-3 Arty Rgt (Afrika) Built at any Axis HQ; 1x Bf.109g. Remove: 2-3-3 Inf Bn (3-255). Remove: 7-3-3 Arty Bn (2-115). Remove: 9-3-2 Coastal Arty Bn (532). Remove: 3-3-3 Arty Bn (408). Exchange: 6-5-8 Pz Bn (2-5 (21.Pz)) with 7-5-8 Pz Bn (2-5 (21.Pz)). Exchange: 6-5-8 Pz Bn (2-8 (15.Pz)) with 7-5-8 Pz Bn (2-8 (15.Pz)). Exchange: 5-2-3 Arty Bn (220 (164.Le)) with 15-3-3 Arty Rgt (220 (164.Le)). Apply Optional 164.Le Fully Motorized Rule (now or later). Expend One Eq to Convert (now or later): 3-5-8 Pz Co (KStA) with 7-5-8 Pz Bn (KStA). Expend One Eq to Convert (now or later): 6-3-3 Inf Rgt (125 (164.Le)) to 7-4-6 PG Rgt (125 (164.Le)). Expend One Eq to Convert (now or later): 6-3-3 Inf Rgt (382 (164.Le)) to 7-4-6 PG Rgt (382 (164.Le)). Expend One Eq to Convert (now or later): 6-3-3 Inf Rgt (433 (164.Le)) to 7-4-6 PG Rgt (433 (164.Le)). Expend One Eq to Convert (now or later): 6-5-3 Inf Rgt (288.Snd) to 8-5-8 PG Rgt (Afrika).
November 42: Italians: 12-3-3 Inf Div (L.Spez); Centro Arm Division (5 Brs Inf Rgt, 14 Med, 17 Med Arm Bn, 131 Arty Rgt, Lodi Arm Car Bn); GGFF Inf Division (Mnfrto Arm Car Bn); 3-5-3 Assault Eng Bn (30); 5-3-6 AG Bn (555 (Centro)).
Germans: Random Event Driven: 6-5-8 Pz Bn (190 (90.Le)).
Allied Variable Withdrawal and Return Table
Roll 11..66 each turn and compare to the below.
This chart is used together with rule c 5.4b (Variable Withdrawals). It is organized as a grid: down the side, the possible results (units withdrawn to, or returned from, the Greece, Sudan, Near East, Far East, and Mid-East deployment boxes, plus "No Result"); across the top, thirteen calendar-period columns running from September 1940 through November 1942, each marked "Make Roll? Y/N" — no roll is made in the periods marked N (Sept-Oct 40, Feb-Mar 41, Dec 41-Jan 42, Oct-Nov 42). For each period where a roll is called for, the chart gives the 11..66 die-roll range that produces each result; ranges not covered by any listed result count as "No Result."
Results tracked (row headings, as printed):
- To Greece...* ..Inf Bde
- To Sudan... ..Inf Bde, ..Arm Car Bn**, ...Organic Truck
- To Near East... ..Inf Bde, ..Arm Car Bn**, ...Organic Truck
- To Far East... ..Inf Bde, ..Armored Bde, ...Organic Truck
- To Mid-East... Inf Bde, Organic Truck
- No Result
- Return...*** ..from Sudan, ..from Near East, ..from Far East
Confirmed entries include: To Greece, Inf Bde — 11..14 (Nov 40 only). To Sudan — Inf Bde: 11..16, Arm Car Bn: 21..22, Organic Truck: 23..24 (all in the Dec 40 to Jan '41 period).
Notes (as printed):
* Not part of the full Greek deployments, but returns with them after Greek Campaign.
** Arm Car Bn, Cav Bn, or Arm Recon Bn as player wishes can be used for this requirement.
*** Return one counter of the player's choice from the Box indicated. The counter can be any type or organizational size.
- First choice is always a trained unit of the type given. Units which are in some sort of Green status cannot be sent unless there are no units remaining which are already normal (i.e. trained).
- If no unit of the correct type is available, substitutions are OK. An Inf Bde can be substituted first by a Support Brigade and (if no Support Bde is available) with an Arm Car Bn or Arm Recon Bn as available, if neither are available then Armored Battalions with Action Ratings of 3 or more can be used. Organic Trucks can be replaced by 2T of real Trucks should their be no Organic Truck in play.
- Returns only affect those units already in the Box giving up a return. Example: a brigade is on its way to the box, but has not yet made it their (the player is dragging his heels to use it its full four turns allowed) and a roll is made which brings back a unit from that type or organizational size. Sorry, the return result is ignored, the brigade must continue on until it gets to the box. Perhaps next time the player won't dawdle so much, if he hadn't this time he'd have that brigade back in play.
- If all of the combat units return from a box leaving one or more Organic Trucks left behind, have the Organic Trucks return with the last combat unit leaving the box. In other words, Organic Trucks are never left behind in a box on their own.
Volume III: Weather, Terrain, and Reference Charts
(This section reproduces the reference charts printed in Volume III of the exclusive rules booklet: the Weather Table, the DAK Terrain Effects charts, and the Common Rebuild Chart. The Random Events Tables printed a second time in Volume III for ease of reference are identical to the copy already given above under "Random Events Tables" and are not repeated. The Volume III Air and Land Distance Charts are numeric hex-distance reference tables tied to the printed map grid and are not reproduced here.)
Weather Table
Roll two dice, read as an 11..66 roll (red die first digit, white die second digit), on the line for the current month, to find which range contains the result: Clear, Sandstorm, or Rainstorm.
| Month | Clear | Sandstorm | Rainstorm |
|---|---|---|---|
| January | 11..61 | 63 | 62..66 |
| February | 11..62 | 63..64 | 64..66 |
| March | 11..62 | 62..65 | 65..66 |
| April | 11..61 | 62..65 | 66 |
| May | 11..61 | 63..66 | 66 |
| June | 11..62 | 61..66 | 66 |
| July | 11..56 |
Roll one die to determine the number of Sandstorm maps when a Sandstorm result occurs, then randomly determine which maps are affected. No flight on, into, or out of a map with a sandstorm...hexes split between sandstorm map and non-sandstorm map are considered sandstorm.
The same goes for Rainstorm except that Rainstorm always affects only two maps. Randomly determine which ones they are.
In either Sandstorm or Rainstorm, air units can return from station to bases in these maps.
Weather Effects:
- Clear — Flight: Yes. Effects: Normal.
- Sandstorm — Flight: No. Effects: Terrain costs x2 (Green units & Repls cannot move under their own power). Combat and barrage cannot be conducted into or out of Sandstorm hexes. All on-map air units on affected maps become inactive and no refitting allowed on a Sandstorm Map.
- Rainstorm — Flight: No. Effects: Terrain costs x2, Wadis become impassable at all points except where crossed by Primary Roads. All on-map air units on affected maps become inactive and no refitting allowed on a Rainstorm Map.
Sandstorm and Rainstorm have no effect on Draw or Throw ranges.
DAK Terrain Effects on Combat (Special Modifiers)
Combat Line column gives the terrain's Combat Line classification (Open, Very Close, Close, or "ot" = use other terrain type present, "P" = Prohibited). The four right-hand columns give the combat multiplier for Open and Close range, and for Armor, Mech, and Other unit types where different from the series standard; "[#]" affects attackers only (defenders are x1); "" applies only when the hex also contains a Primary Road, Road, or Track.*
| Type | Combat Line | Close | Open | Armor | Mech | Other |
|---|---|---|---|---|---|---|
| Open | Open | x1/2* | x1/2 | [x2] | [x2] | x1 |
| Rocky | Open | [x1/2]* | x1/2 | [x2] | [x2] | x1 |
| Delta | Open | x1 | x1 | x1 | x1 | x1 |
| Swamp | Very Close | ot |
Design note printed on the chart for Pyramids: "Destroy any infidel units entering these hexes...just kidding, no effect."
DAK Terrain Effects on Movement
Costs are given per movement type: Track, Wadi, Sand Desert, Truck, Leg. "p" = prohibited/impassable, "+n" = add n MPs to the base cost, "ne" = no effect, "all" = costs all remaining MPs.
| Type | Notes |
|---|---|
| Open | 1 MP (Track); 1 (Wadi movement); no additional notes |
| Rocky | Similar to Open, slightly higher for Truck movement |
| Delta | Significantly higher cost for all movement types (Track 4, Truck 5, Leg 2) |
| Swamp | Prohibited (p) to vehicular movement |
| City | Low fixed cost, negated if using a road |
| Wadi / Wadi and Tobruk AT Ditch | Add +3 to +6 MPs depending on mover type; can't overrun into these hexes |
| Sand Desert | +2 to +3 MPs depending on mover type |
| Railroad | Only usable by rail movement |
| Primary Road | 1/2 MP |
| Road | 1/2 MP |
| Track |
Note: the printed movement chart is a dense multi-column data table (Track / Wadi / Sand Desert / Truck / Leg movement types against seventeen terrain types); the values above summarize its content faithfully in prose rather than reproduce the exact numeric grid, which the scanned source page did not allow to be read with full confidence for every cell.
Common Rebuild Chart
Ignore Mountain and Motorized Designations.
Infantry-type Units: Air Landing Inf Rgt: 2x Pax. Assault Engineer Bn: 2x Pax. Coastal Defense Bn: 1x Pax. Commando Rgt: 3x Pax. Engineer Rgt: 2x Pax. Engineer Bn: 1x Pax. Fort Bde (one step): 1x Pax. Infantry or GAF Bn: 1x Pax. Infantry Bde (one step): 2x Pax, 1x Eq. 1st Step of Inf Div: 2x Pax. Infantry or GAF Rgt or Div Step: 2x Pax. Marine Bn: 1x Pax, 1x Eq. Mech Inf Bde (one step): 2x Pax, 1x Eq. Mech Inf or PG Rgt: 1x Pax. MG Bn: 1x Pax. Para Assault Engineer Bn: 2x Pax. Para Inf Bn: 3x Pax. Para Inf Rgt: 1x Pax. Pioneer Bn: 1x Pax, 1x Eq. 1st Step of Support Bde: 1x Pax. Support Bde (not first step): 1x Pax. Territorial Bn: 2x Pax. Territorial Rgt: 2x Pax.
Armor, Cavalry, Anti-Aircraft, Anti-Armor-type Units: AA Bn: 1x Eq. Exploration Co: 50% x Pax. Armor Bde (one step): 1x Eq. Arm Car Bn: 1x Eq. Arm Car Co: 50% x Eq. Armored Recon Bn: 1x Eq. Assault Gun Bn: 1x Eq. AT or PJ Bn: 1x Eq. Lt Arm Bn: 1x Eq. Motorcycle Bn: 1x Pax. Tank or Pz Bn: 1x Eq. Tank or Pz Co: 50% x Eq.
Artillery-type Units: Arm Artillery Battery: 50% x Eq. Arm Artillery Bn: 1x Eq. Artillery Battery: 50% x Eq. Artillery Bn: 1x Eq. Artillery Bde (one step): 1x Pax, 1x Eq. Artillery Rgt: 2x Pax, 1x Eq. Coastal Artillery Battery: 50% x Eq. Coastal Artillery Bn: 1x Eq. Coastal Artillery Rgt: 2x Pax, 1x Eq. Para Artillery Bn: 1x Eq. Werfer Bn: 1x Eq.
Rear Area, Support-type Units: HQ: 3x Pax, 2x Eq. Koruck Bn: 1x Pax. RR Bn: 1x Pax. RR Co: 50% x Pax.