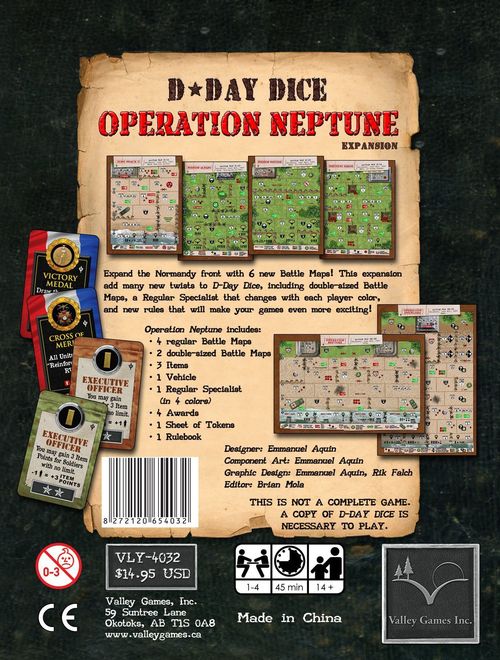
D-Day Dice: Operation Neptune
D-Day Dice: Operation Neptune Rulebook
Table of Contents
Table of Contents
Components
- 3 Battle Maps, double-sided (2 standard and 1 double-size).
- 4 Decoration Cards.
- 3 Object Cards (1 normal and 2 special).
- 1 Vehicle Card.
- 4 Normal Specialist Cards (in 4 different colours, 1 for each player).
Additional Cards
- Message Book: add it to the rest of the Object cards in the supply.
- Top Secret Documents and Leather Gloves: used on certain maps in this expansion. Leather Gloves may replace the Grapnel in any game if desired.
- Scout Car: add it to the rest of the Vehicles in the supply, and use it on the Juno Beach II map.
- Executive Officer: each player must use their personalised version.
- Decorations: add them to the rest of the base game deck.
Sectors
Together with the new components, the following new attributes for sectors are described below.
Random Starting Sector: At the start of the game, each unit must roll 1d6 to determine its starting sector (observing the number indicated on the symbol). Read the rules of the corresponding map for the details.
Add 1 Skull to the Final Result: The Skull is of a colour of your choice (decide when you have your Final Result). As with "virtual" results, this Skull cannot be swapped with the Lieutenant.
Command Post: In war, armies need to create command posts to better organise their attacks. When you see this symbol in a sector, it means that the first unit to enter will automatically "establish" a Command Post in that sector. In a game, entering for the first time a sector with the Command Post symbol "activates" some properties on the map, such as new Objects or Specialists available (or other attributes). When a unit enters a Command Post, the properties are activated for all units (see the description of each Battle Map to know the properties that are activated). A Command Post cannot be "deactivated". When a Command Post activates new Objects or Specialists, it is advisable to place them in a special deck as a reminder.
Parachute Drop: When you move to a sector with this symbol, each unit must roll its Unit Marker to see what it receives (adding the result to its resources). Once this is done, place its marker as usual, with the "1 gallon" face up. The "Parachute Drop" is performed only once for each unit.
The Parachute Drop symbols give the following results:
- 1, 2 or 3 Gallons = 1, 2 or 3 Soldiers.
- 1 or 2 Arrows = 1 or 2 Stars.
- Shield = Nothing.
When a unit starts the game in a sector with "Parachute Drop", it starts with 1 Soldier + the result of the symbol obtained after rolling the dice of its Unit Marker. See the optional rule "Blind Start" in the base game. If another unit later enters this starting sector, it rolls its Unit Marker according to the usual "Parachute Drop" rules.
"Fight Once" Sector: These sectors have two different DEF values. The first (and the higher) is used for the first combat of the first unit that enters the sector. Once this combat is resolved, the DEF value becomes the one shown greyed out (in most cases this is 0). If two or more units enter the sector at the same time, they must decide among themselves which of them "fights" first. The other units "fight" against the second DEF value.
Special Rules
Few Good Men
When this special rule is in play (specified on some maps), Soldiers are harder to obtain: only 1 Soldier is obtained for every 2 obtained (rounding down). The calculation is made at the end of Phase 2 (Maintenance), so the RBA bonuses are obtained after dividing the total by 2 (rounding down). For example, if you obtain 7 Soldiers in your Final Result, you only add +3 to your unit during Phase 2. This rule only affects soldiers obtained during Phases 1 and 2. Soldiers obtained with Objects during Phases 3, 4 and 5 are not divided by 2.
Note: Casualties are not divided by 2, which makes minefields and the FdA even more devastating! Remember that Decorations played at the end of Phase 1, if they grant soldiers, are also divided by 2.
Exercise Tiger: To make this map more challenging for veteran players, apply the "Few Good Men" rule.
Battle Map N-11: Juno Beach II
This map is dedicated to Lieutenant James "Scotty" Doohan and his comrades of the 13th Field Regiment, Royal Canadian Artillery, who landed at Juno Beach as part of the 3rd Canadian Infantry Division.
- Sector 4: The Executive Officer joins your unit at no cost when you move here. The minefield located on the right is only used when playing the "The Canucks Are Landing!" mode, a scenario described on page 12.
- Sector 5: The Scout Car can be found in this sector, but you must pay its cost in Object Points. Remember that vehicles cannot cross minefields.
- Sector 8: Units cannot leave this sector until their Unit Marker shows "3 Gallons". Remember that the special damage "-1 Courage" affects your Final Result.
- Sector 12: Units cannot gain RBA Replacement Troops in this sector (neither by dice roll nor by any other method). However, each result showing two soldiers (the icon) still grants 2 Soldiers to the unit.
- Sector 13: If the General is in play, units ignore the attribute of this sector.
- Bunker: Units must survive 3 TURNS in the Bunker to win the game.
The Specialists and Objects available for Juno Beach II are:
Normal Specialists: Corporal; Executive Officer (in Sector 4); Medic; Minesweeper; Scout; Sharpshooter; Veteran.
Exclusive Specialists: Captain; Engineer; Grenadier; Lieutenant; Messenger.
Special Objects: Bazooka; Briefcase; Bulletproof Vest; Grapnel; Mortar; Top Secret Documents.
Vehicles: Scout Car.
Battle Map N-12: Mission Albany
Random Starting Sectors: A unit cannot start in the same sector as another unit; if that happens, roll the 1d6 again. In a 4-player game, simply roll the 1d6 once, and the result determines the sector where nobody starts (then the units choose their starting sector, 1 unit per sector). Once the game has started, there is no limit to units sharing positions in the starting sectors.
- Sector 9: Units cannot leave this sector until their Unit Marker shows "3 Gallons".
- Sector 10: Normal and Special Objects can be obtained in this sector at half their value (rounding down). Modifiers such as that of the Quartermaster Officer are applied after the cost reduction.
- Sectors 9 and 10: The special damage from FdA is "-1 Specialist", in addition to the 6 casualties. If you have no specialist in your unit, ignore this loss.
- Sector 11: Remember that the loss "-1 Tool" affects only the Final Result.
- Sector 12: The first unit to enter this sector gains one Decoration at random. Only 1 Decoration per game can be gained in this way.
- Sector 17: If the General is in play, ignore the attribute of this sector.
The Specialists and Objects available for Mission Albany are:
Normal Specialists: Corporal; Hero; Chaplain; Minesweeper; Paratrooper; Explorer; Scout.
Exclusive Specialists: Captain; Grenadier; Lieutenant; Messenger; War Correspondent.
Special Objects: Amphetamines; Bulletproof Vest; Lucky Charm; Mortar; Pocket Bible; Signal Lamp.
This map is dedicated to Chaplain Francis L. Sampson, who bravely jumped into enemy territory armed only with his faith and his chaplain's kit, and to the men of the 101st Airborne Division.
Battle Map N-13: Mission Boston
Special Rule "Few Good Men": This rule is in effect from the start of the game, but it is cancelled when a unit reaches the Command Post (Sector 15).
- Sector 2: You start with 3 Soldiers and 1 Courage.
- Sector 10: If the General is in play, units ignore the attribute of this sector.
- Sector 11: The special damage from FdA appears on the 3rd turn, as if the Germans were shrinking the units.
- Sector 12: There can never be more than 1 unit here. Any unit present must leave the sector before another can enter.
- Sector 13: No Object can be found here. Objects already found previously may be used.
- Sector 15 (Command Post): When a unit enters this sector, the "Few Good Men" rule is cancelled (units can now gain Soldiers normally). Entering this sector is not mandatory (but it greatly helps to win the game).
- Bunker: Each unit that enters the Bunker must sacrifice two Specialists of its choice. Units that have only one cannot enter. The only way to avoid this sacrifice is to enter with the RBA War Cry.
The Specialists and Objects available for Mission Boston are:
Normal Specialists: Corporal; Hero; Medic; Minesweeper; Paratrooper; Explorer; Sharpshooter.
Exclusive Specialists: Captain; Lieutenant; Messenger; Quartermaster Officer; War Photographer.
Special Objects: Briefcase; Bulletproof Vest; Gammon Grenade; Lucky Charm; Telemetry; Signal Lamp.
This map is dedicated to Private Charles DeGlopper, who sacrificed his life to save his comrades on D-Day, for which he received the posthumous Medal of Honor, and to the men of the 82nd Airborne Division.
Battle Map N-14: Brecourt Manor
Special Rule "Few Good Men": This map uses the "Few Good Men" special rule described in the Special Rules section above.
- Sectors 4, 6, 9 and 13: "THE FOUR GUNS". Each of these sectors contains a camouflaged gun firing at the beaches. All of these sectors must be visited by at least one unit or the game is lost.
- Sectors 10 and 11: Remember that these penalties only count towards the Final Result (you do not lose 1 Courage and 1 Star per turn; you only subtract them from your Final Result).
- Sectors 12 and 15: The special damage from FdA is "-1 Specialist". This Specialist is lost in addition to the 6 casualties. If you have none in your unit, ignore this loss.
- Sector 15: The first unit to enter this sector gains one Decoration at random. Only one Decoration can be gained in this way per game.
- Sector 16: Each unit that enters this sector must sacrifice two Objects of its choice (whatever their value). Units that have only 1 Object cannot enter. The only way to avoid this restriction is to enter with the RBA War Cry.
- Bunker: FdA damage cannot be prevented in any way when entering the Bunker, but units may use game effects or Objects such as the Bulletproof Vest to reduce or cancel FdA casualties.
The Specialists and Objects available for Brecourt Manor are:
Normal Specialists: Corporal; Hero; Medic; Minesweeper; Paratrooper; Sharpshooter; Veteran.
Exclusive Specialists: Grenadier; Lieutenant; Sniper; Messenger; Quartermaster Officer.
Special Objects: Ammunition Crate; Bulletproof Vest; Grapnel; Mortar; Signal Lamp; Tool Kit.
This map is dedicated to Lieutenant Richard Winters and the men of Easy Company, 2nd Battalion, 506th Parachute Infantry Regiment ("Band of Brothers"), who neutralised a German battery at Brecourt Manor with only a handful of men, in an assault that went into the textbooks.
Battle Map NX-01: Operation Overlord
On this map, both Bunkers must be fought by all units. Fighting and surviving the first Bunker does not give victory; only doing so at both Bunkers will.
- Sector 1: You start with 5 Soldiers and 5 Object Points.
- Sector 2: You start with 4 Soldiers and 1 Star.
- Sector 3: You start with 4 Soldiers and 1 Courage.
- Sector 4: Roll 1d6 at the start of the game. The result is the number of Soldiers you start with. Once the 1d6 is rolled you cannot decide to start in another sector.
- Sectors 8 and 22: If the General is in play, units may ignore the attribute of these sectors.
Sectors 5, 9, 16, 20, 23, 33 and 34: RANDOM SECTORS. The first time a unit enters these sectors, roll 1d6 and follow the corresponding attributes below (the Binoculars may be used to change these results). The corresponding attributes in each sector are kept for the whole game. To keep track of this, place a numeric marker.
Translator's note: the printed sheet shows attribute sets A through G, but does not state which sector uses which set. The sets are transcribed in the order printed, and the map's sector list above is kept as printed.
Random Attributes (A)
- Artillery bombardment: You cannot be here.
- Dead soldiers: -1 Courage per turn.
- Vehicle on fire: Costs +1 Star to recruit specialists here.
- Shelter: +1 Courage per turn.
- Enemy depot: +1 Tool per turn.
- Broken jeep: You may find 1 Jeep here by paying its cost.
Random Attributes (B)
- Artillery bombardment: You cannot be here.
- Machine gun fire: Add one FdA to this sector each turn.
- Flanking fire: Roll 1d6 fewer during Phase 1.
- Ditch: +1 Star per turn.
- Raised ground: No die is set.
- Stuck bulldozer: You may find 1 Bulldozer here at half its usual cost.
Random Attributes (C)
- Trenches: -1 Star per turn.
- Dead soldiers: -1 Courage per turn.
- Land mines: If you do not have the Minesweeper, lose 1d6 Soldiers when you leave this sector.
- Artillery bombardment: You cannot be here.
- Breakwaters: +1 Soldier per turn.
- Stranded platoon: Recruit 1 Normal Specialist at no cost.
Random Attributes (D)
- Explosive traps: If you do not have the Minesweeper, lose an additional 1d6 Soldiers each Phase 5.
- Unstable ground: If you obtain 4 matching results (or more) in your Final Result, lose 1d6 Soldiers.
- Ambush: For each Star in your Final Result, -1 Soldier.
- Rally point: Gain 1 Soldier for each RBA obtained.
- Enemy depot: +1 Tool per turn.
- Fields of glory: The first unit to enter this sector gains 1 Decoration at random. Only 1 Decoration can be gained this way.
Random Attributes (E)
- Mortar fire: Lose 1d6 Soldiers every Phase 5.
- Flooded zone: No RBA bonuses are obtained here.
- Bomb craters: You cannot find Objects here (you may still use them, if you have them).
- Artillery bombardment: You cannot be here.
- Mission objective: +1 Courage for each RBA bonus obtained here.
- Tank: You find a Tank at no cost.
Random Attributes (F)
- Snipers: Each unit loses 1 Specialist when moving here.
- Flanking fire: Roll 1d6 fewer during Phase 1.
- Barbed wire: For each Courage in your Final Result, -1 Soldier.
- No cover: +1 Skull of any colour to your Final Result.
- Rally point: Gain 1 Soldier for each RBA obtained.
- Fields of glory: The first unit to enter this sector gains 1 Decoration at random. Only 1 Decoration can be gained this way.
Random Attributes (G)
- Minefield: Skulls cannot be re-rolled here.
- Fortification: The DEF of the sector cannot be reduced.
- Ambush: For each Star in your Final Result, -1 Soldier.
- Swamp: -1 Tool per turn.
- Vantage point: RBA Replacement Troops give you 2 additional Soldiers.
- Fields of glory: The first unit to enter this sector gains 1 Decoration at random. Only 1 Decoration can be gained this way.
Further Sector Rules
- Sector 12: The first unit to enter here gains 1 Decoration at random. Only 1 Decoration per game and per sector can be gained this way.
- Sectors 12 and Bunker 1: The special FdA damage is "-1 SPECIALIST". This Specialist is lost in addition to the 6 casualties. If you have none in your unit, ignore this loss.
- Sectors 15, 26 and 33: No Object or Specialist can reduce the DEF here. This includes the Bangalore Torpedo, the Gammon Grenade, the Bazooka and the Tank.
- Sector 19 (Command Post): While a unit occupies this sector, the DEF of sectors 14, 17 and 20 is halved.
Escalation Rules
Sectors 24, 25, 27, 28, 29, 30, 31 and 32 use the following rules.
ESCALATION RULES: To successfully advance from this sector, you must "Scale" it, and the RBA War Cry does not help. To do so, you must obtain 4 Skulls in your Final Result. To make this easier, no dice are set in this sector. You have 3 turns to achieve it. If you fail the "climb", you must move laterally and try again from another sector (if you have not already been there). Skulls obtained while "scaling" count as normal (they cancel other dice), and may give you the RBA Dead Man's Gift. A vehicle can never enter an "escalation" sector.
Bunkers
Bunker 1: Treat it as another sector, except for cards that affect the Bunker (the Flamethrower or the Engineer). To advance from this Bunker (to sectors 20 or 21), units must spend 5 Courage.
Bunker 2: Units must survive 3 turns in this Bunker to win the game. Keep in mind that 1 FdA is present on the 2nd turn and 2 FdA are present on the 3rd turn.
The Specialists and Objects available for Operation Overlord are:
Normal Specialists: Beach Master; Chaplain; Corporal; Hero; Medic; Minesweeper; Platoon Leader; Scout; Veteran.
Exclusive Specialists: Captain; Combat Photographer; Grenadier; Lieutenant; Sniper; Quartermaster Officer; War Correspondent.
Special Objects: Bazooka; Bulletproof Vest; Gammon Grenade; Grapnel; Leather Gloves; Mortar; Pocket Bible; Telemetry; Rope Ladder; Top Secret Documents (printed as "To Secret" in the source).
This map is dedicated to Navy Leader Peter Wheeldon, killed at Omaha Beach among the American troops, and to all the sailors of the Royal Navy.
Battle Map NX-02: Operation Neptune
On this map, both Bunkers must be conquered by at least one unit. When a unit enters either of the two Bunkers, it is removed from the game in the usual way (leaving its Specialists in place to reduce the DEF of the Bunker).
- Starting Sectors: Only 1 unit per starting sector.
- Sector 2: You start with 0 Soldiers and 1 Courage.
- Sector 4: You start with 2 Soldiers and 2 Courage.
- Sectors 5 and 9: The Ambulance and the Jeep can be found here, but you must pay their cost. Remember that vehicles cannot cross minefields, and 1 unit can only use 1 vehicle at a time (although two vehicles may be present in the same sector). Units may exchange vehicles while in the same sector.
- Sectors 10 and 18: The special FdA damage is "-1 SPECIALIST", in addition to the 6 casualties. If you have none, ignore this loss.
- Sector 16 (Command Post): When this sector is occupied, the following Specialists and Objects are available to all units.
Normal Specialists: Chaplain; Executive Officer.
Exclusive Specialists: Engineer; General; Grenadier.
Special Objects: Amphetamines; Bazooka; Gammon Grenade; Mortar; Top Secret Documents.
- Visiting the Command Post is mandatory: No Bunker may be occupied unless the Command Post has been visited.
- Sectors 14 and 26: The first unit to enter these sectors gains 1 Decoration at random. Only 1 Decoration per game and per sector can be gained this way.
- Sector 23: Units may stay for an unlimited number of turns in this sector. Do not adjust the Unit Marker in Phase 2 while you are here.
- Bunkers: Remember that the Command Post must be visited before you can enter the Bunkers.
- Solo mode: In solo mode, only 1 Bunker must be conquered.
The Specialists and Objects available for Operation Neptune are:
Normal Specialists: Beach Master; Corporal; Medic; Minesweeper; Platoon Leader; Scout; Veteran.
Exclusive Specialists: Captain; Combat Photographer; Lieutenant; Messenger; War Correspondent.
Special Objects: Briefcase; Lucky Charm; Pocket Bible; Telemetry; Signal Lamp; Wire Cutters.
This map is dedicated to Seaman First Class Robert G. Ward and to the landing crews of the United States Coast Guard, who pressed on against impregnable defences.
Scenario: The Canucks Are Landing!
Place the 2 Juno Beach maps side by side (Juno Beach II on the left). Players choose which map they will start on (at least 1 player per map), which determines their available Normal Specialists. All Special Objects and Exclusive Specialists are placed in a common reserve.
In this scenario, players may move from one map to another, as if it were one giant beach. The Mortar can be used on the edge of one map to affect an adjacent sector on the other. Note that there is a minefield to move from one Sector 4 to the other.
The Carrier Pigeon allows players to exchange Objects even while on different maps (the Lieutenant also allows the exchange of dice in the usual way). All cards that affect "All units" do so regardless of the map they are on (including the Scout Car).
If one of the maps gives a unit a Specialist (as in the two Sector 4s), that Specialist must be available to the unit; if it is not, the unit gains its cost in Stars.
The Flamethrower can only be found in Sector 13 of Juno Beach. Both Bunkers must be conquered by at least 1 unit. When a unit enters a Bunker, it is removed from the game in the usual way (using the basic winning rules).
This scenario is not recommended in Solo mode.